Quanta Computer CT7688 GSM PHONE WITH GPRS AND BLUETOOTH User Manual 768 Accessories
Quanta Computer Inc GSM PHONE WITH GPRS AND BLUETOOTH 768 Accessories
UserManual.wiki
>
Quanta Computer
>
CT7688 User Manual
USERS MANUAL
Navigation menu
Upload a User Manual
Namespaces
Wiki Guide
HTML
PDF
Info
Views
User Manual
Discussion / Help
Navigation
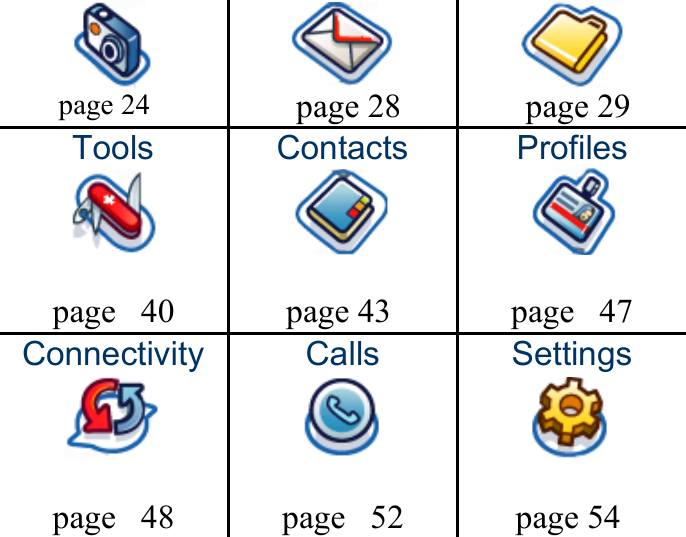


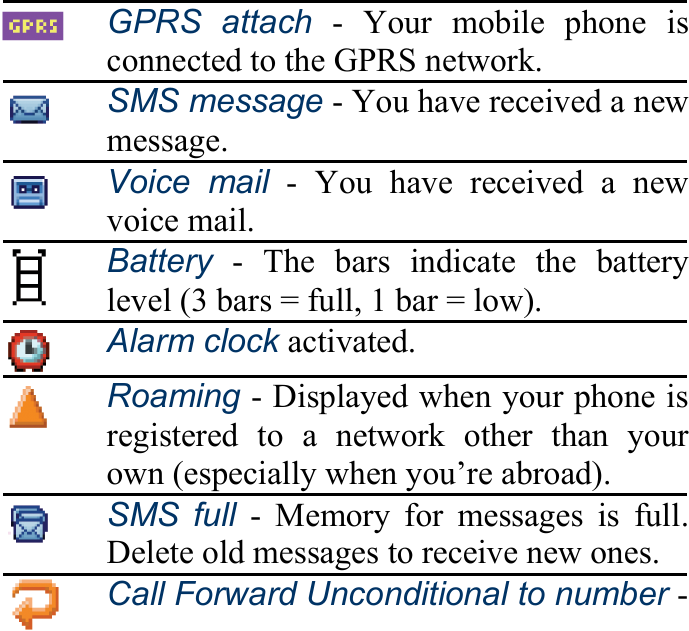
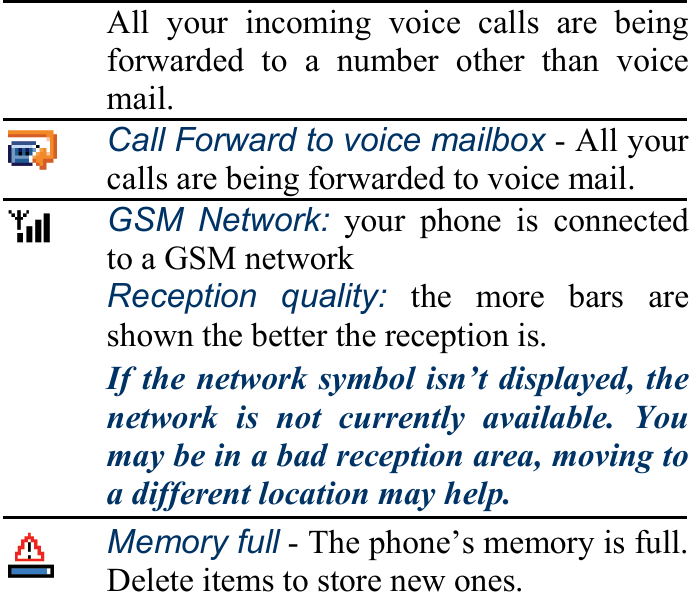
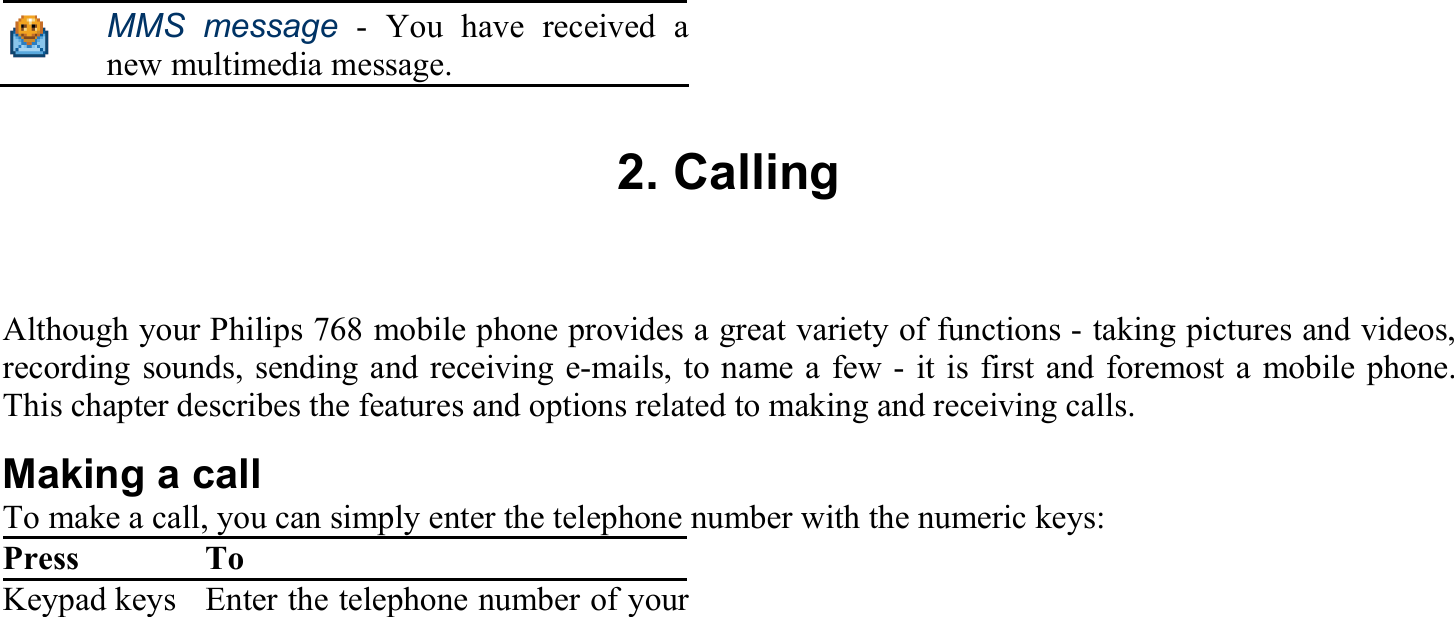
![• Homepage • Meeting • Calendar • My Files • Shortcuts • Camera • Contacts • Music • Voice recognition • [Empty] • Quick call Icons & Symbols In idle mode, several symbols can be displayed simultaneously on the screen. Silent - Your phone will not ring when receiving a call. Vibra - Your phone will vibrate when receiving a call.](https://usermanual.wiki/Quanta-Computer/CT7688/User-Guide-586703-Page-32.png)