Quanta Computer GLE 3G PCI MODULE User Manual GLE QSG EN0120 2
Quanta Computer Inc 3G PCI MODULE GLE QSG EN0120 2
Users Manual
3.5 G HSPA Data Card
Quick Start Guide
Contents
1. Overview 1
2. First time connection 1
3. Specifications 5
EN-1
1. Overview
Thank you for purchasing the 3.5 G HSPA Data Card. This Data
Card is designed to be used to connect a computer to a cellular
phone network.
2. First time connection
1. Make sure you have Inserted SIM card into SIM slot .
2. Turn the 3G module switch on.
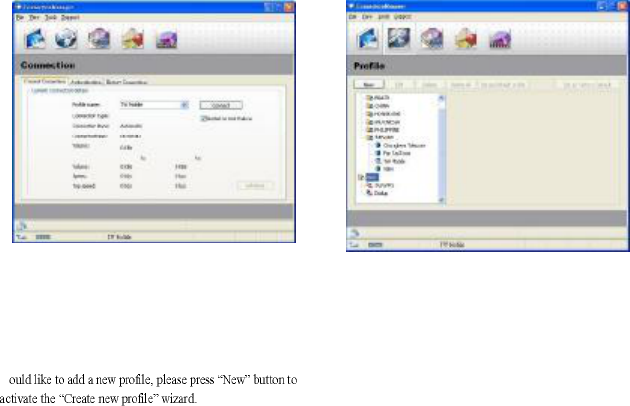
3. Launch Connection Manager application.
4. When you see the network name displayed on the message
bar at the button of the program window, press connect
button (first button from left) to connect to a
HSDPA/3G/EDGE network..
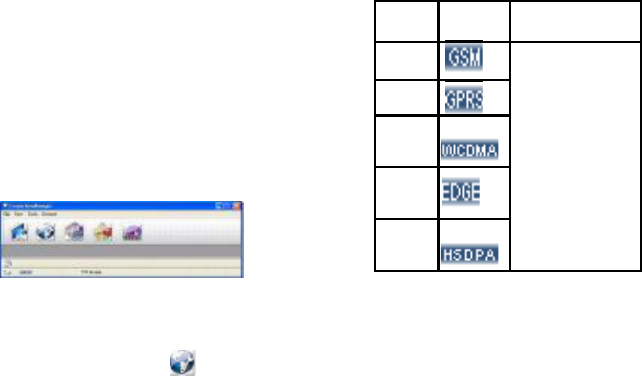
PS: Icon list:
Name
Graphic
Description
GSM
Displayed when the
service is available
GPRS
WCDMA
EDGE
HSDPA
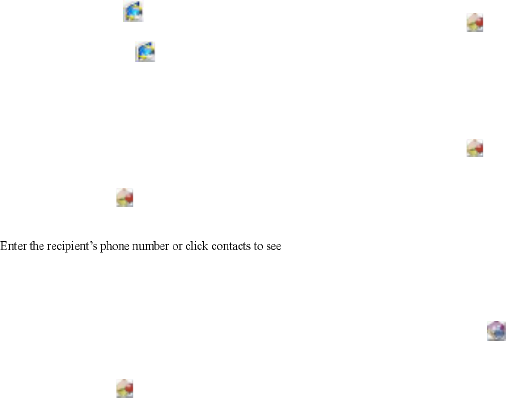
5. The screen will show below if successfully connected,
and you can start your internet browsing. To end the
connection, press the Connect button again to
disconnect.
EN-2
Create a Profile
The program has already built in the connection profiles. If you
w
1. Select Profile Type and click Next.
2. Insert required basic setting and click Finish
You can connect to internet using the new profile by pressing
the Set as Default profile button and then press the Connect
button.
To end the connection, press the Connect button again to
disconnect.
(After you have press the Set as Default button, the program will
suspend to automatically detect network and choose connection
profile. To reactivate the automatic detect and connect function,
please press the Factory default button.)
(Auto Network detection and connection function is only
applicable t
o
built
-
in
mobile networks.)
EN-3
Establishing and Ending a connection
1. Tap the Connect button to connect to the network
using the new profile.
2. Tap the Disconnect button to end the connection.
Text messaging (SMS)
The Data Card can be used to perform all the text messaging
functions that can be done on a mobile phone, ex: sending,
receiving, replying, forwarding and deleting.
Writing/Sending a text
3. Click the SMS button.
4. Click New.
5.
the SIM cards contacts. In the contacts window, click the
box next to the recipients name and click Add to return to
the New SMS window.
6. Enter the message to send.
7. Click Send to send the message.
Replying to a text
1. Click the SMS button.
2. Click Reply.
3. Enter the message to send.
4. Click Send to send the message.
Forwarding a text
1. Click the SMS button.
2. Select the message to forward.
3. Click Forward.
4. Select the contact to forward to.
5. Click Send to send the message.
Deleting texts
1. Click the SMS button.
2. Select the message to delete.
3. Click Delete.
4. Click Yes to delete the message.
Contacts
The Data Card contacts manager displays all the contacts on the
SIM Card. Contacts can be added, edited, deleted and imported.
Adding Contacts
1. Click the Contacts button.
2. Click the Add button.
3. In the Add contact window enter the contact name and
telephone number.
4. Click OK to add the contact.

EN-4
Editing Contacts
1. Click the Contacts button.
2. Select the contact to edit.
3. Click the Edit button.
4. Modify the contacts details.
5. Click OK to save the changes.
Deleting individual Contacts
1. Click the Contacts button.
2. Select the contact to delete.
3. Click the Delete button.
4. Click Yes to confirm the deletion.
Deleting All Contacts
1. Click the Contacts button .
2. Click Select All.
3. Click the Delete button.
4. Click Yes to confirm the deletion.
Importing vCards to Contacts
1. Click the Contacts button .
2. Click the Import button.
3. Select the source of the vCard(s).
4. Click Open to import the card(s).
5. After the import, a message will display the import
information. Click OK to close.
Exporting vCards from Contacts
1. Click the Contacts button .
2. Click the Export button.
3. Select the destination to save the vCard(s).
4. Click OK to export the card(s).
5. After the export, a message will be displayed. Click OK
to close.
Usage Management
Limits can be set on how long a connection is made for. These
limits can either be made by either Usage (3G/GPRS) or Time
(Dialup).
EN-5
Usage (3G/GPRS)
1. Select View > Preference.
2. Select the Usage tab.
3. Check the Limit by Data checkbox.
4. Enter the desired value between 100MB and 10000MB.
5. Click Apply to save the settings.
Time (Dialup)
1. Select View > Preference.
2. Select the Usage tab.
3. Check the Limit by Time checkbox.
4. Enter the desired hours and minutes.
5. Click Apply to save the settings.
Call Settings
1. Select Tools > Call Settings.
2. You can have None/Send Busy tone/Call forward
settings when you are using Data Card.
3. If the setting is None or Send Busy tone, there will be a
missed call record in View->Missed Calls.
Redial on Link Failure
1. Select View > Connection > Current Connection.
2. Check the Redial on Link Failure checkbox.
3. Please note this function needs your confirmation to
redial on Windows Vista.
3. Specifications
Bands UMTS/ GPRS Dual Mode
(UMTS triple bands &
GPRS 850/900/1800/1900 MHz)
Transmission Speed
Up to 3.6 Mbps HSDPA
Dimension 50.95 * 30 * 4.5mm
FCC Regulations:
lThis device complies with part 15 of the FCC Rules. Operation is subject to the following two conditions: (1)
This device may not cause harmful interference, and (2) this device must accept any interference received,
including interference that may cause undesired operation.
lThis device has been tested and found to comply with the limits for a Class B digital device, pursuant to Part 15
of the FCC Rules. These limits are designed to provide reasonable protection against harmful interference in a
residential installation. This equipment generates, uses and can radiated radio frequency energy and, if not installed
and used in accordance with the instructions, may cause harmful interference to radio communications. However,
there is no guarantee that interference will not occur in a particular installation If this equipment does cause harmful
interference to radio or television reception, which can be determined by turning the equipment off and on, the user
is encouraged to try to correct the interference by one or more of the following measures:
-Reorient or relocate the receiving antenna.
-Increase the separation between the equipment and receiver.
-Connect the equipment into an outlet on a circuit different from that to which the receiver is connected.
-Consult the nearest dealer for help.

4RF Exposure Information (SAR)
This device meets the government’s requirements for exposure to radio waves.
This device is designed and manufactured not to exceed the emission limits for exposure to radio frequency (RF)
energy set by the Federal Communications Commission of the U.S. Government.
The exposure standard employs a unit of measurement known as the Specific Absorption Rate, or SAR. The SAR
limit set by the FCC is 1.6W/kg. Tests for SAR are conducted using standard operating positions accepted by the
FCC with the EUT transmitting at the specified power level in different channels. In this case EMF method were
used for 3G data card model.
The FCC has granted an Equipment Authorization for this device with all reported SAR levels evaluated as in
compliance with the FCC RF exposure guidelines. SAR information on this device is on file with the FCC and
can be found under the Display Grant section of http://www.fcc.gov/oet/fccid after searching on FCC ID: HFS-GLE