Quanta Computer K7 MID User Manual
Quanta Computer Inc MID Users Manual
Users Manual
Quanta Computer Inc.
Quanta K71 Quick Guide
Model No: K71
Quick Guide release version: 01
Quick Guide release date: 20130801
Quanta K71 device Quick Guide
Package contents
The K71 device have included below items when opened the carton packing. Please make sure that you have
received all of contents before device installing.
K71 unit x 1
Power cord x 1
Clean cloth x 1
Quick guide paper x 1
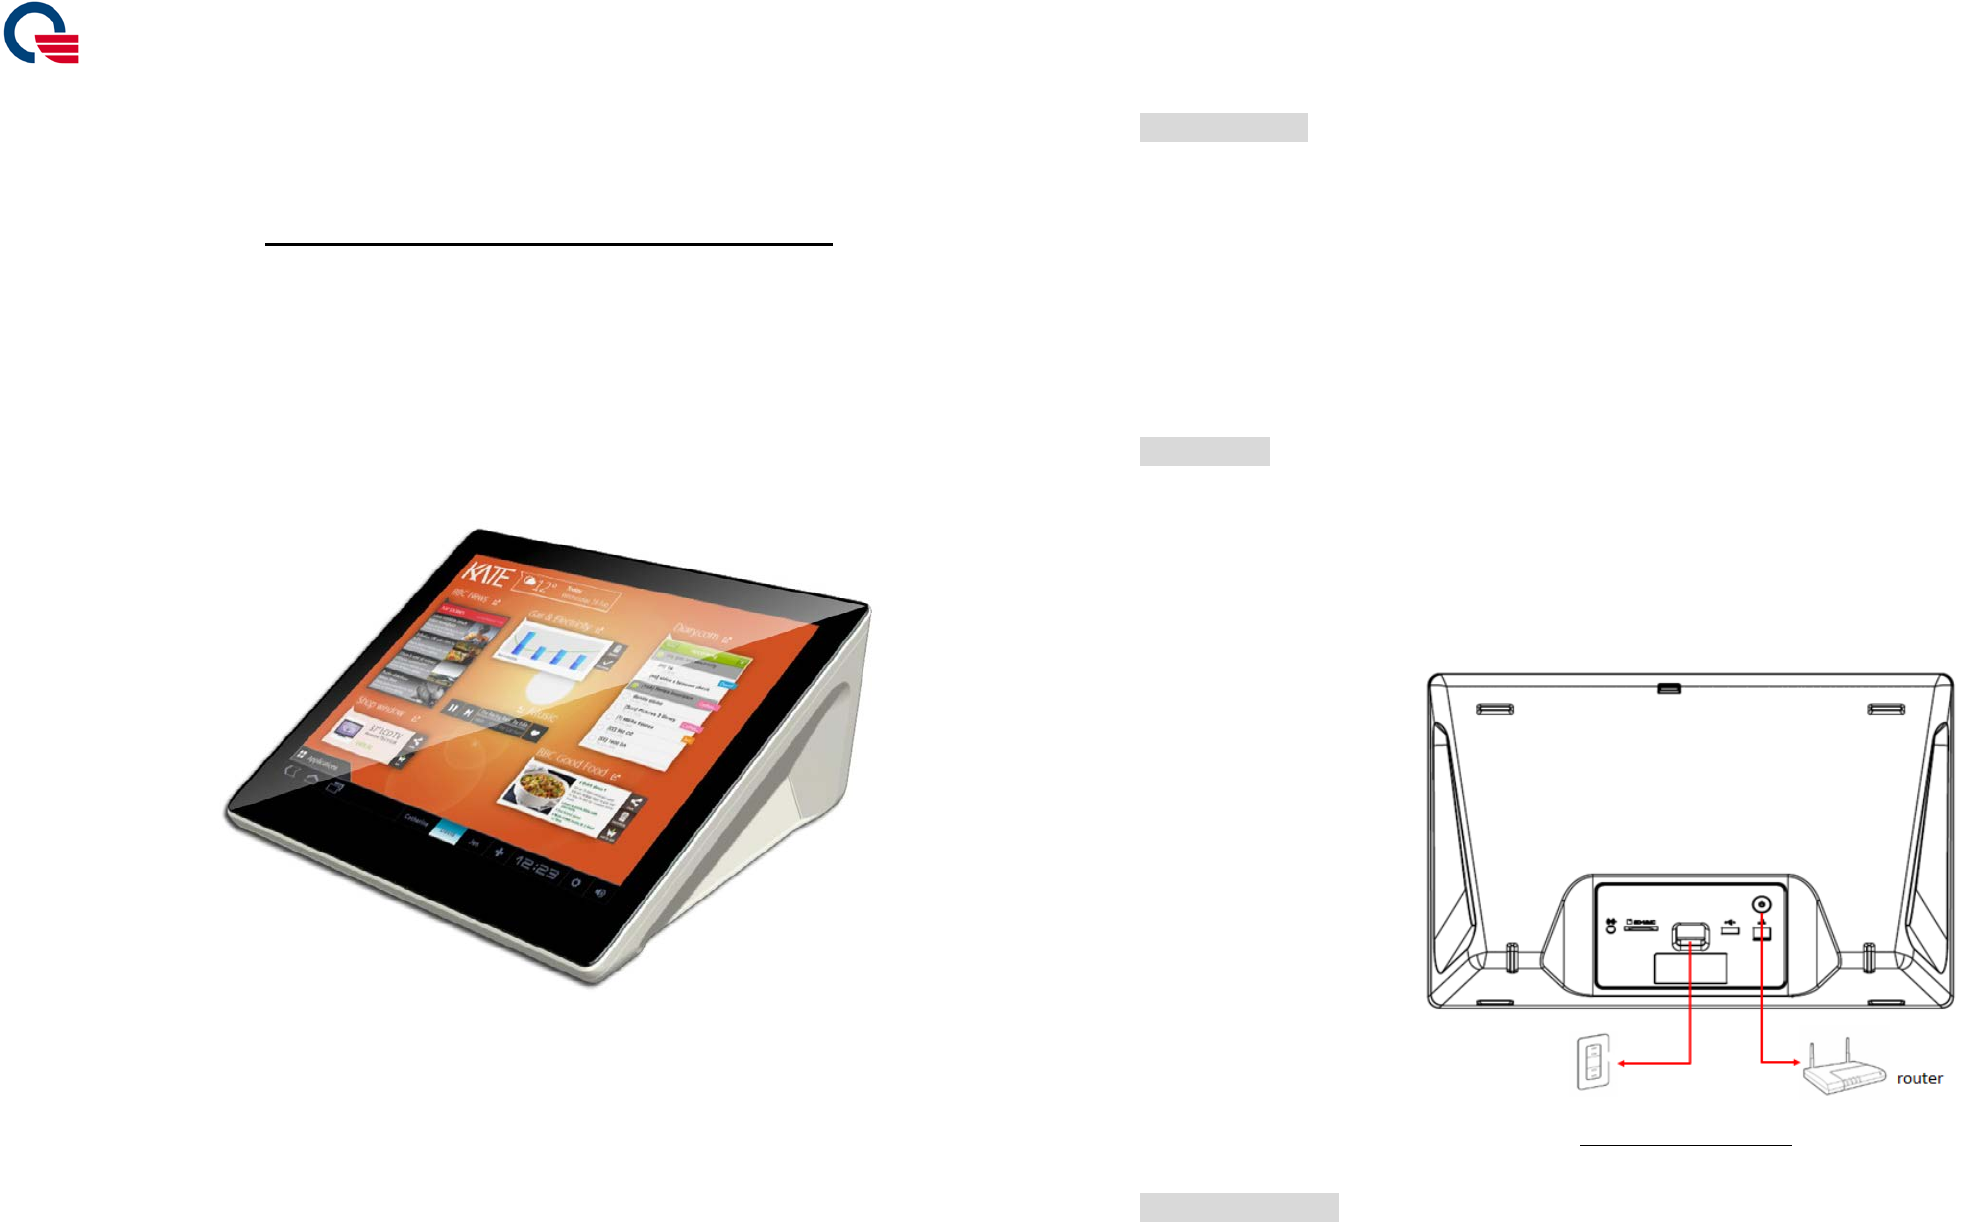
Installing K71
1. Connect power cord and LAN cable to K71 as illustrated below. Press power button to power on K71.
When powered on, the power LED on power button will turn blue light.
2. Please make sure the LAN cable is connected and works well. When powered on, you can see the requests
of Google register setting on the screen. Before device operation, you need to finish the Setup installing.
Figure1 K71 unit back side
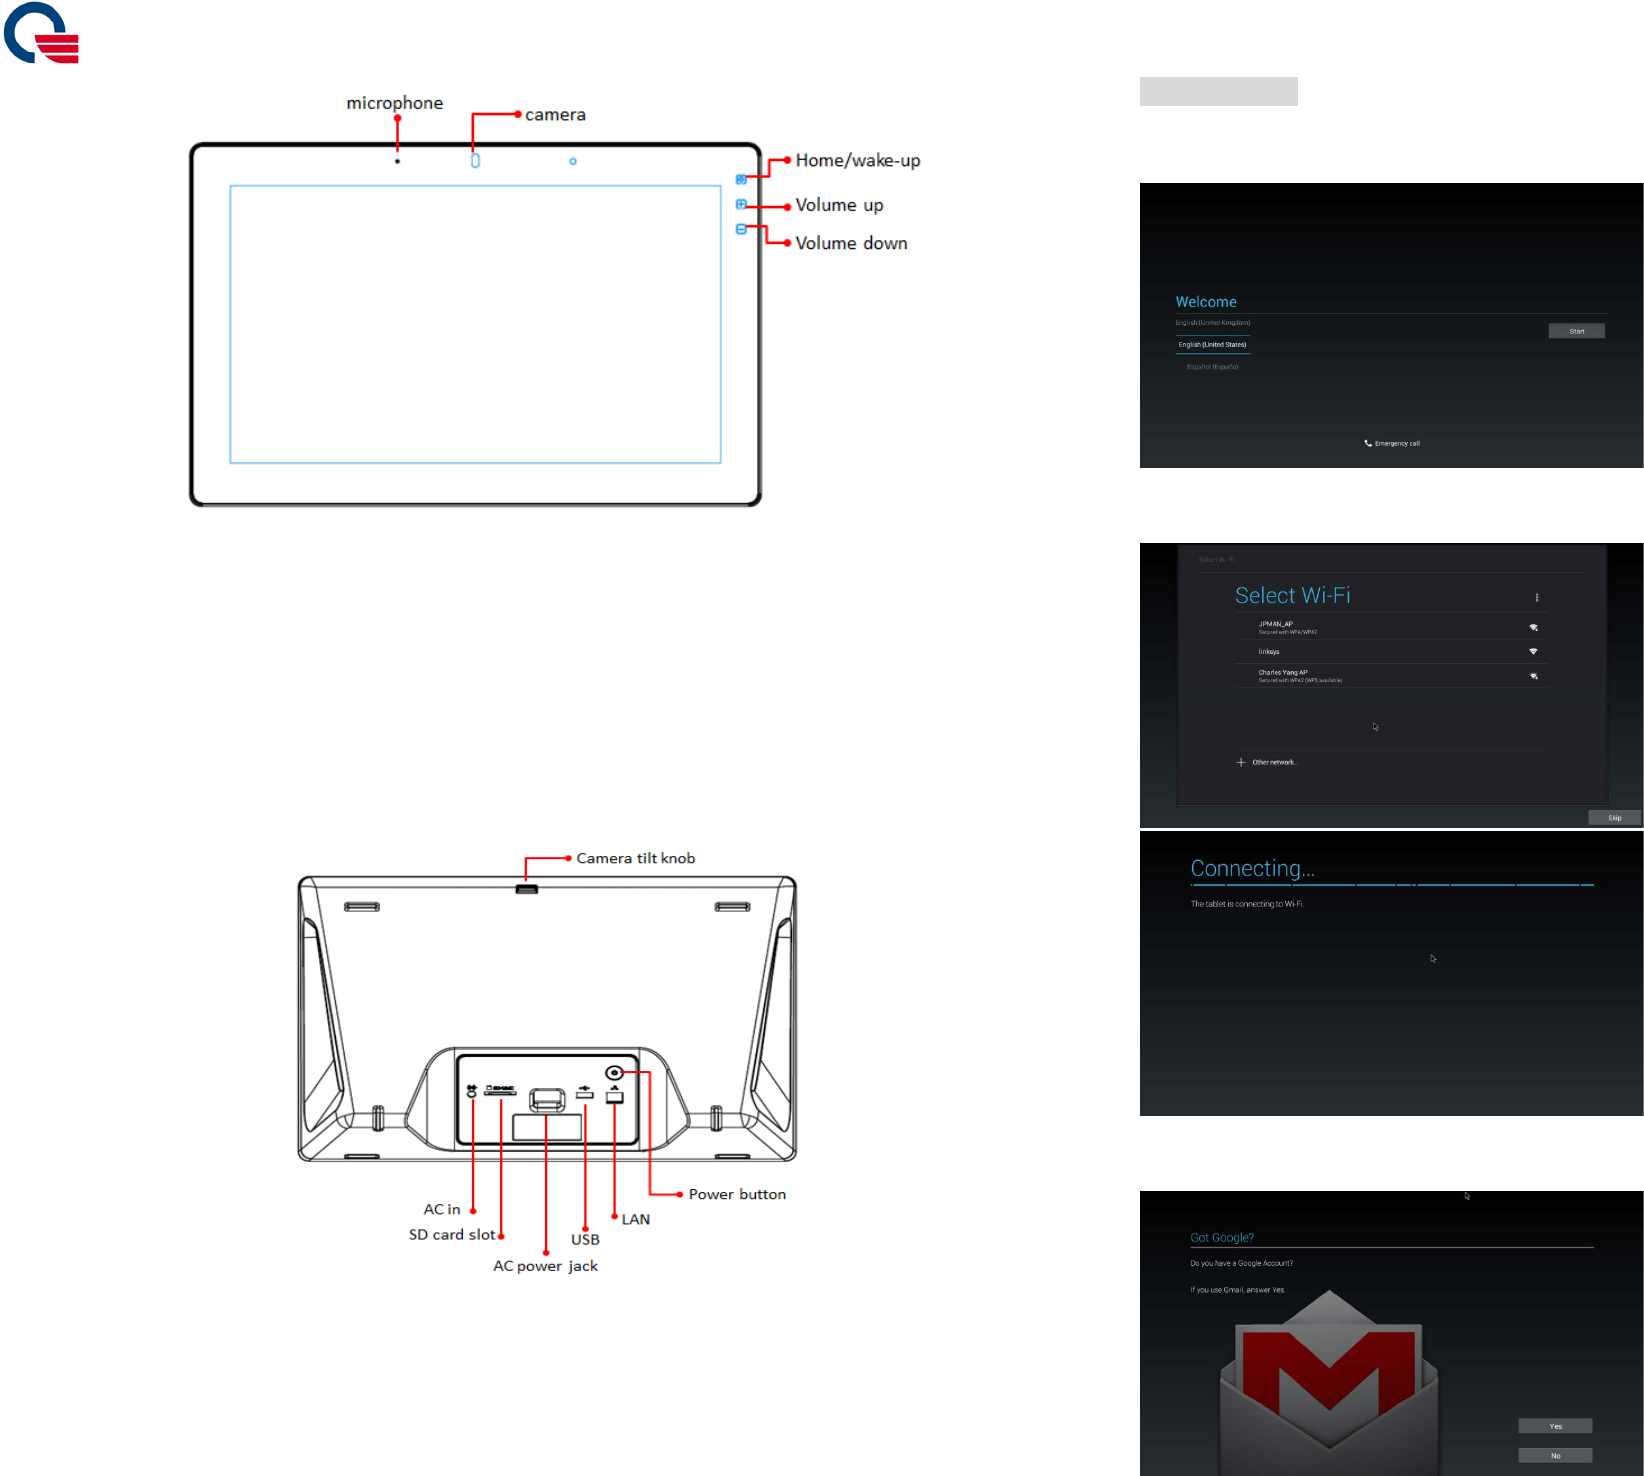
Getting to know K71
Front side introduction
1. On the top of panel area, there is a hole for microphone function.
2. There is a camera module in the middle of Top panel area.
3. Volume keys
Use volume up and down keys to adjust the volume.
4. Home/wake-up key
Press the home key to wake up K71 from standby mode and go back to K71 home page.
Quanta Computer Inc.
Figure 2
Back side introduction
1. Camera tilt knob
K71 camera only support tilt function. Adjust view angle upward or downward with the adjust knob on
the back of the camera.
2. AC in/SD card slot/AC power jack/USB/LAN/Power button were displayed at I/O plate on the back of device.
Figure 3
Initial Setup K71
1. When the device is powered on, you will enter the initial set-up screen in the beginning. Choose your
language and then press “Start” key for next step.
2. Select your “Wi-Fi” item or you can skip it and set up in the future.
3. If you have Google account, you can fill in data at this step. Or you can choose “NO” item for next step.
Quanta Computer Inc.
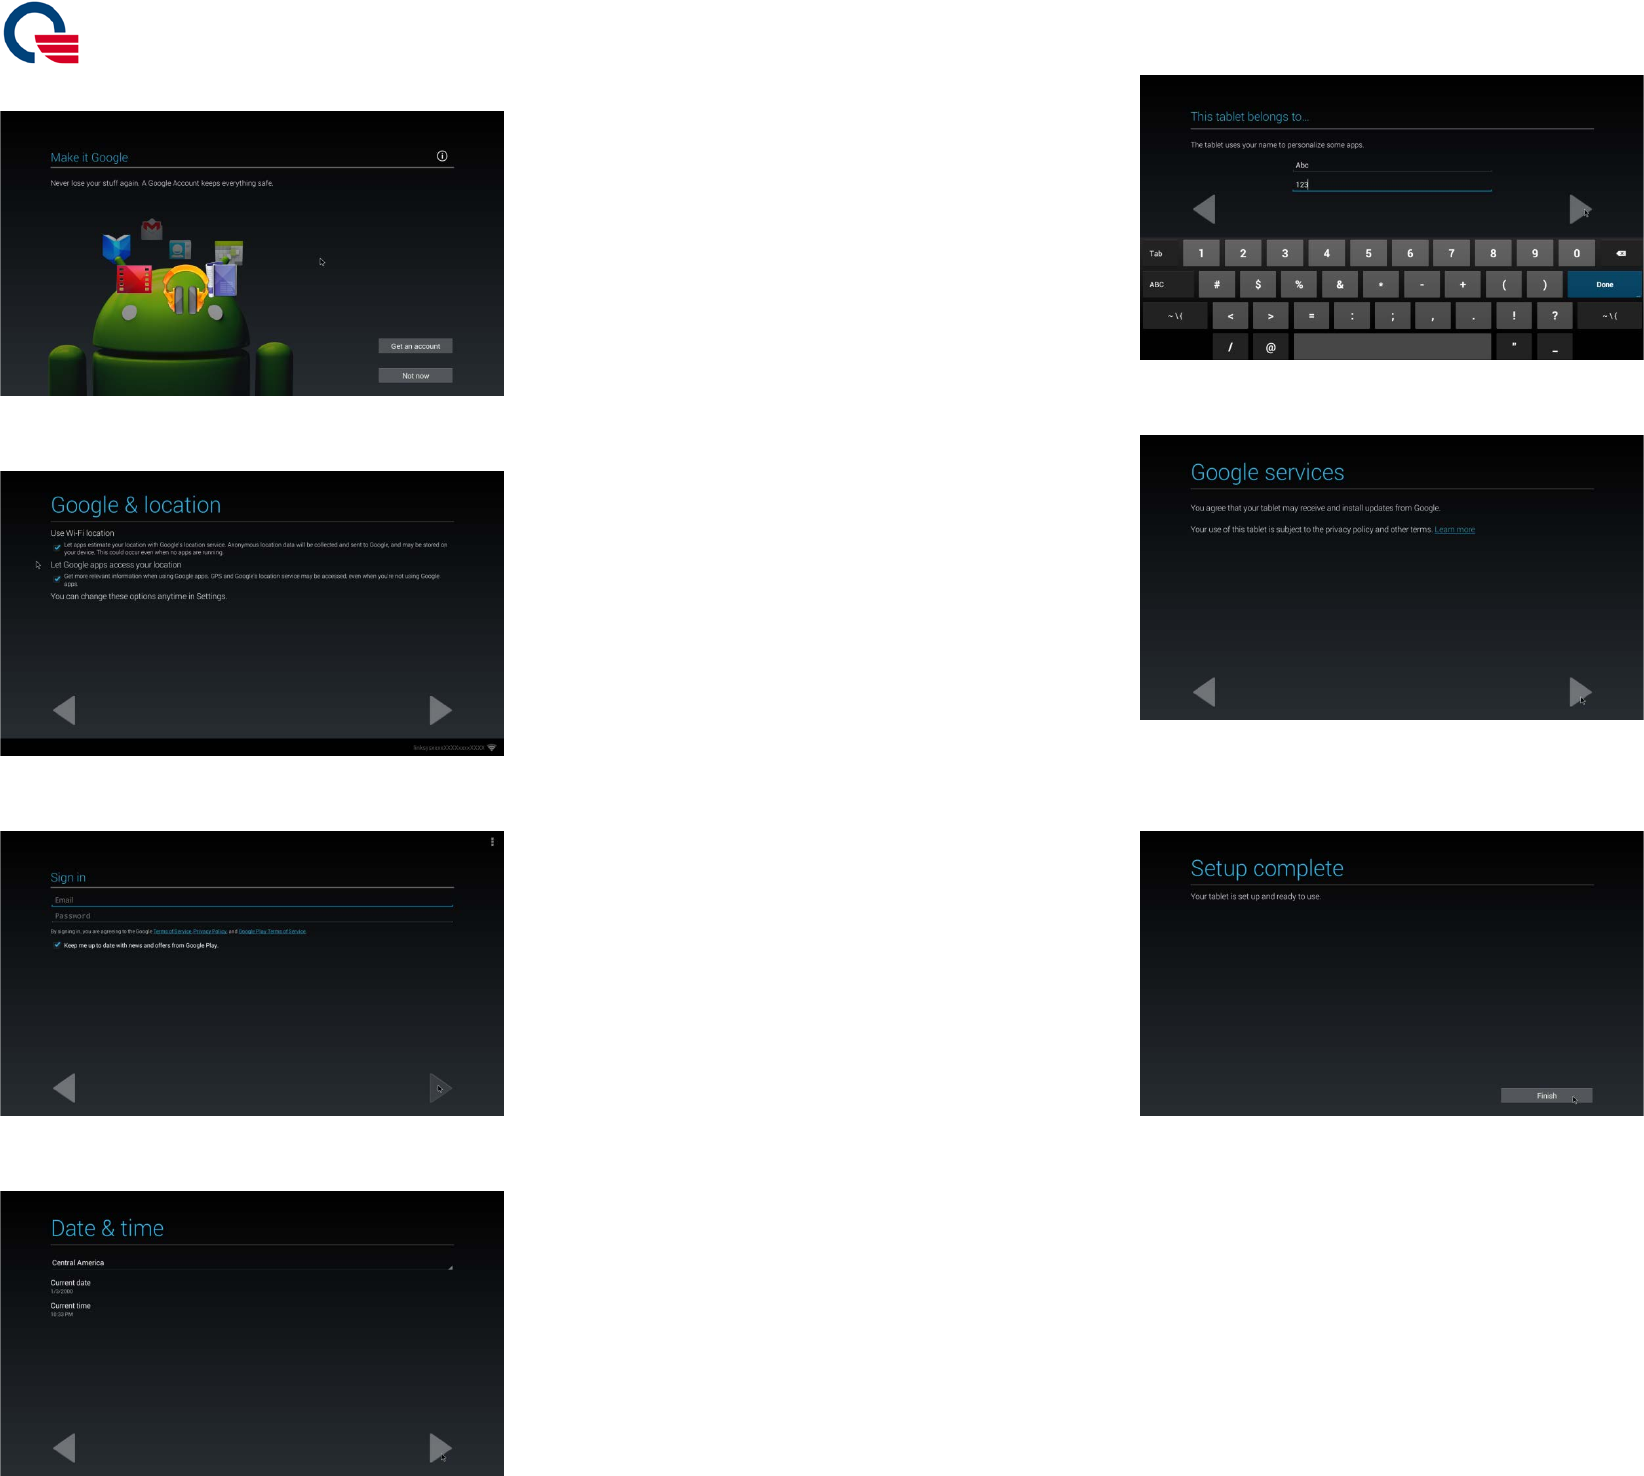
4. If you do not have Google account, you can get an account now. Or you can choose “Not now” to skip.
5. Please finish “Google & location” settings at this step.
6. You can finish “Sign in” settings at this step.
7. Please set up you Date & time.
8. Type in your name or keep empty for next step.
9. Press next step for confirming “Google services”
10. Press “Finish” to complete device initial Setup process. Congratulation, you have just finished K71 device
initial Setup process. Now, you can start to enjoy the entertainments which were brought from K71 device.
Quanta Computer Inc.
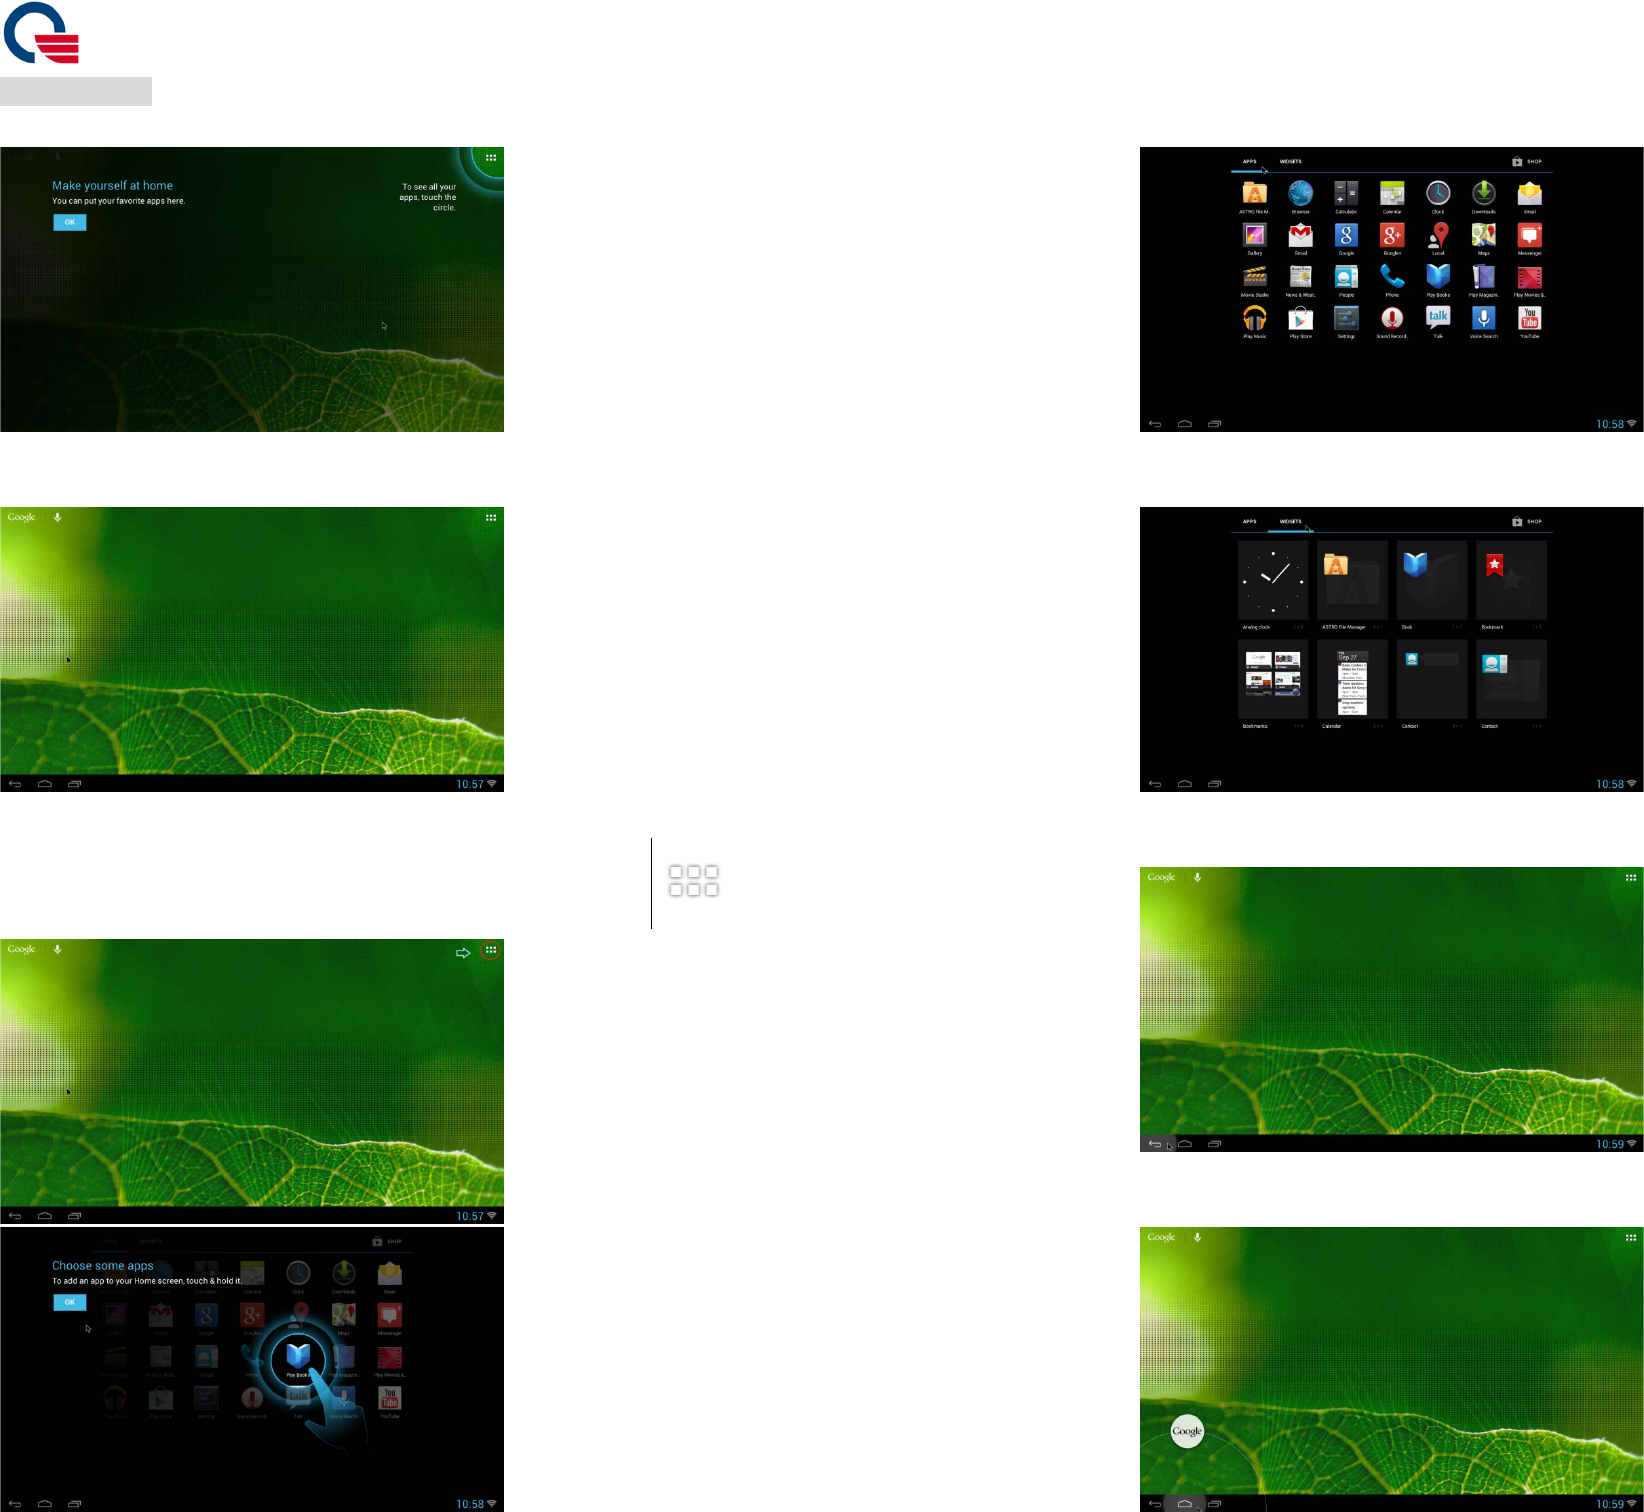
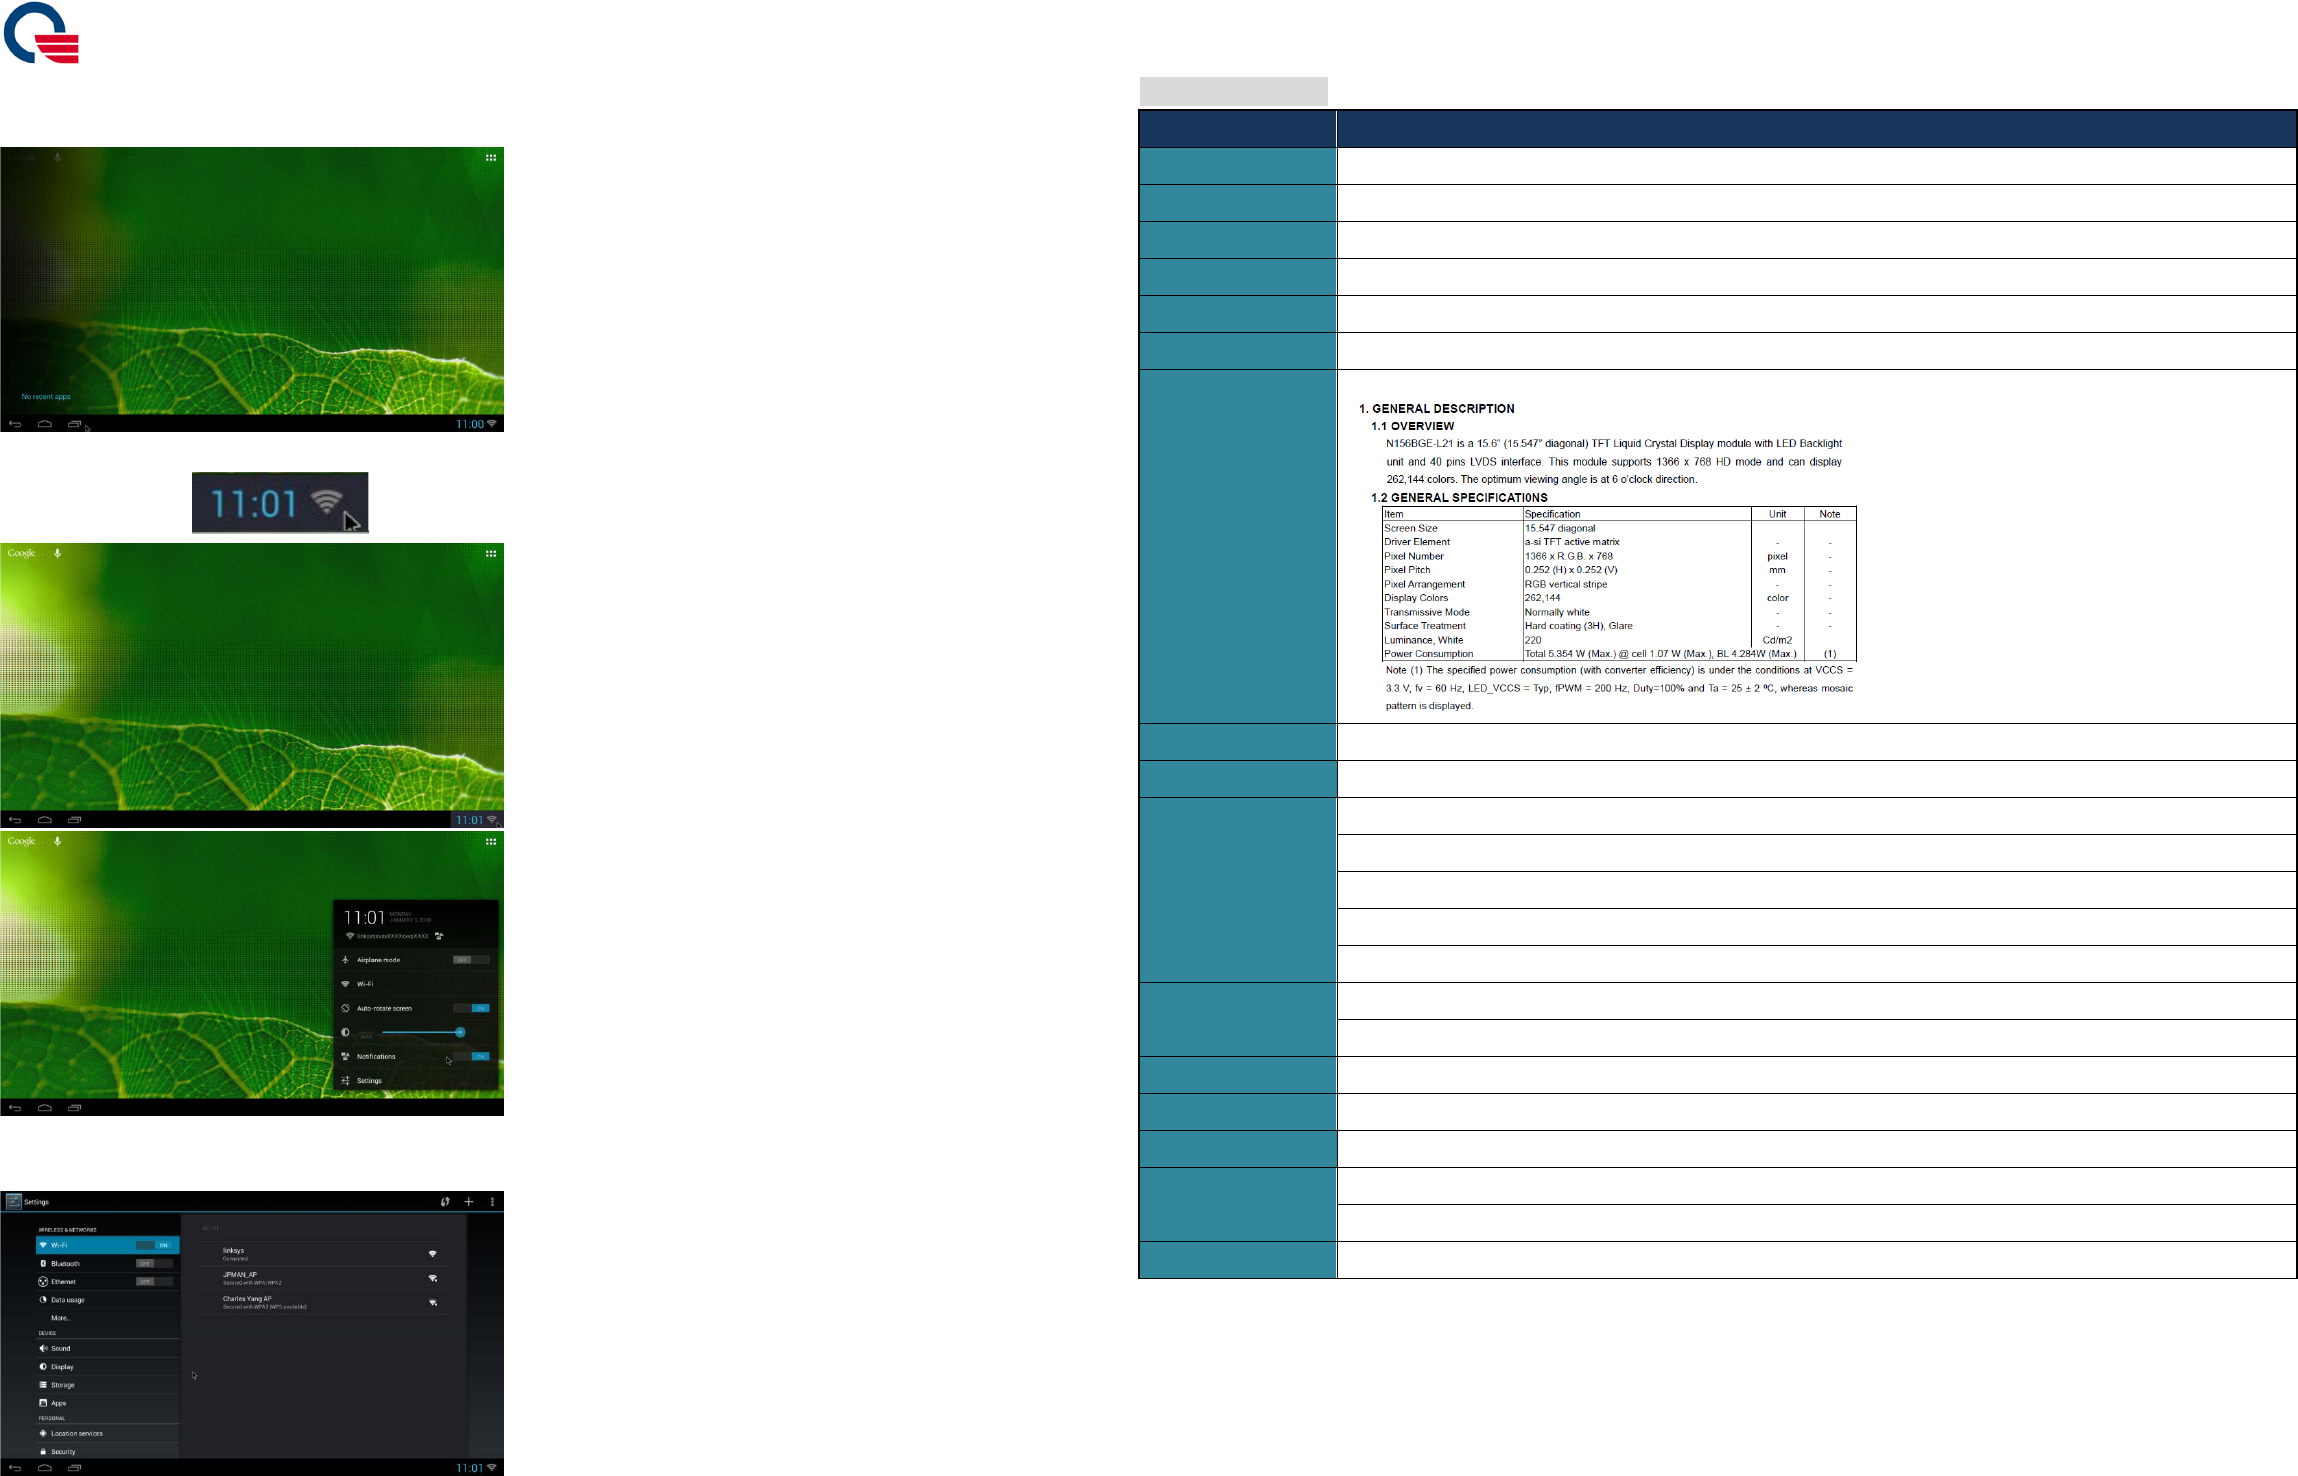
How to use K71
1. When you see this screen picture, press “OK” to enter home screen for further operations.
2. This is the default home screen figure
3. When you want to find other installed apps, you can press the apps icon to enter APPS screen.
4. This is APPS screen. You can search for all Apps items in this screen.
5. WIDGETS screen
6. You can press “Back” Key to return last action during the operations.
7. When you are in other operations screen, you can also press “Home” Key to return Home screen.
Quanta Computer Inc.
8. When you want to find the recent apps which visited before, you can press “Recent” Key.
9. You can press this icon to enter more settings.
10. You can find “WIRELESS & NETWROKS/DEVICE/PERSONAL” settings on the screen and adjust your settings.
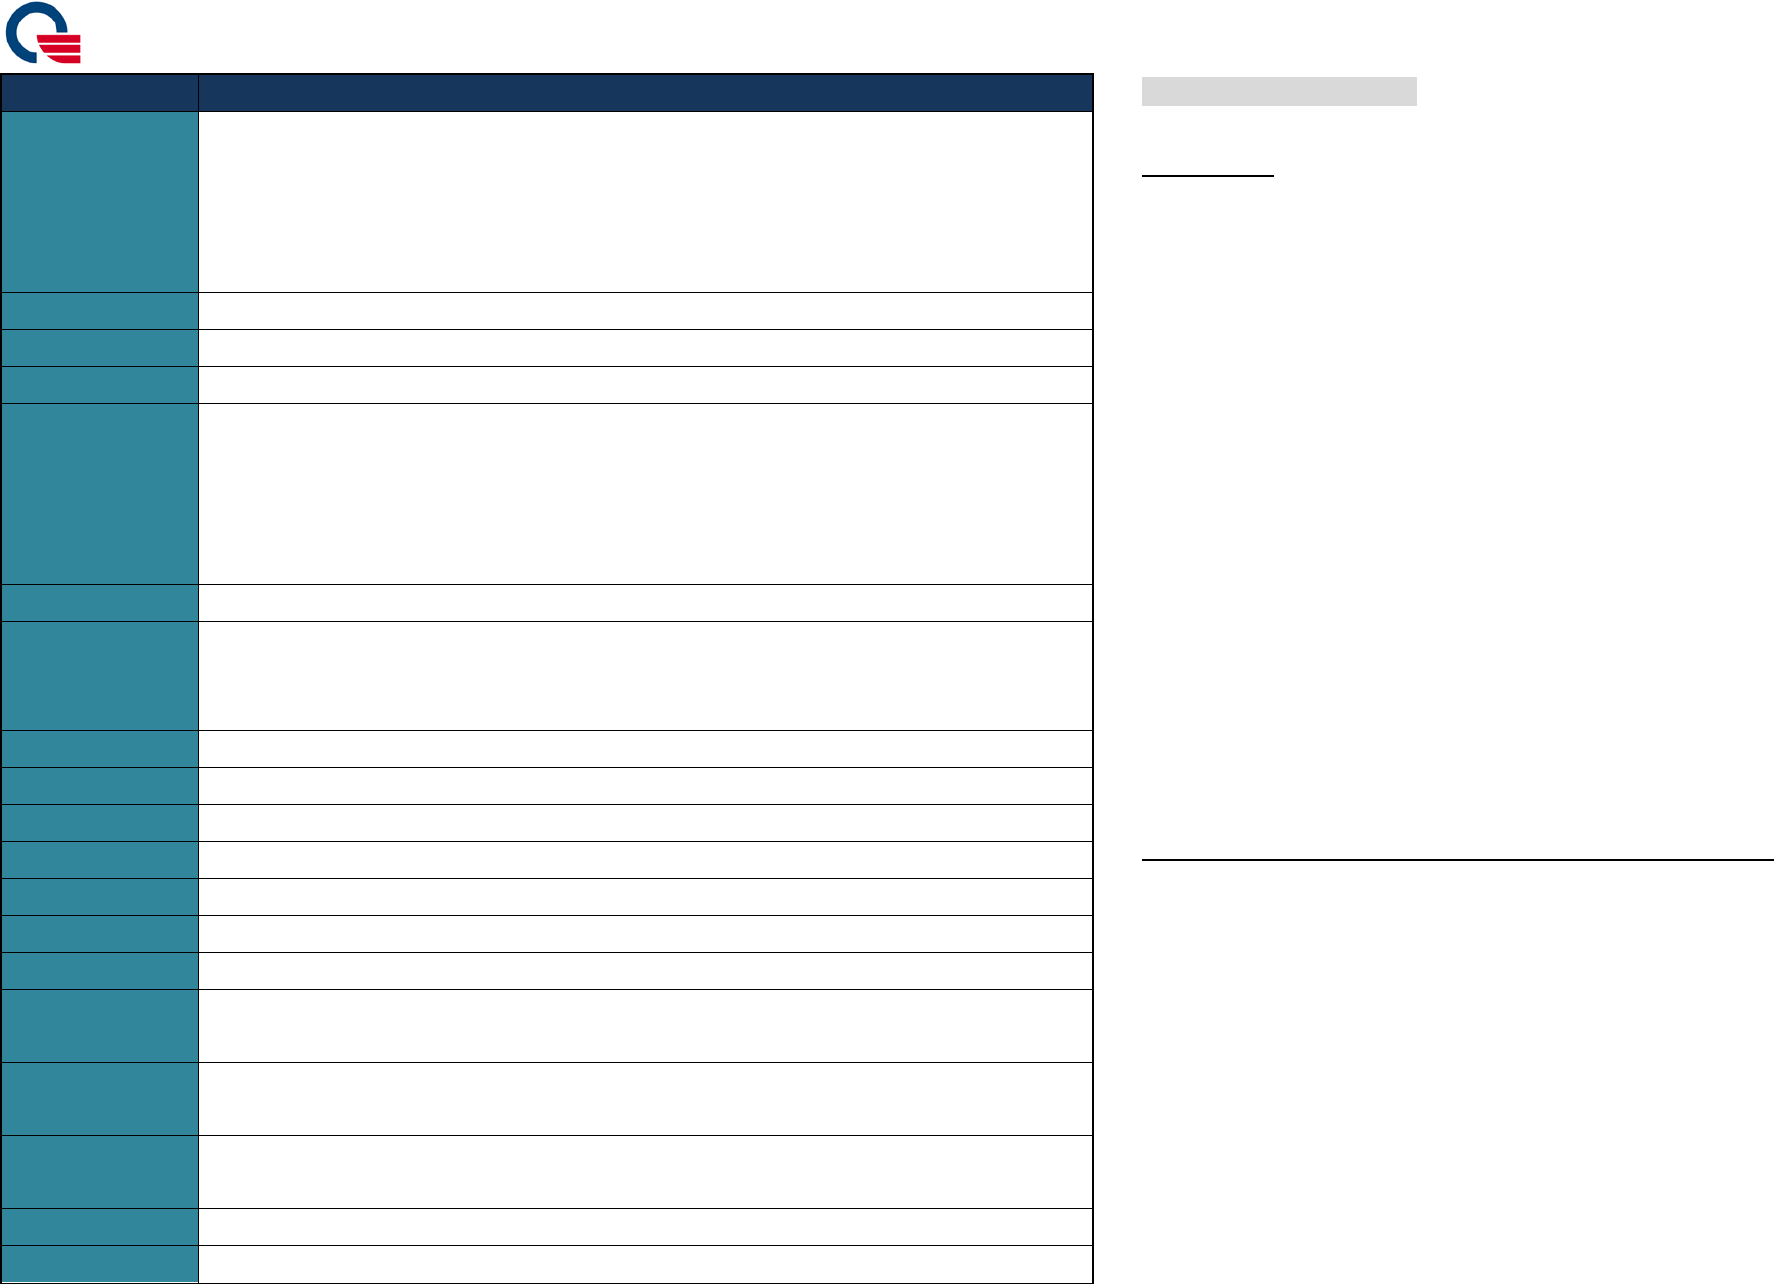
K71 device spec list
Model
K71
Dimension
15.6": 401.38mm x 242.15mm x 102.8mm (L x W x T) (with rubber feet)
Total Weight
3.5kg N.W/3.9kg G.W
Packing Weight
0.75kg
CPU
TI OMAP 4430 1GHz
System Memory
LPDDR2, 8Gbits
Embedded Storage
e-MMC 16G Bytes
LCD
LCD Gerneral spec
Touchscreen
CAP Type; Full-screen Multipoint Touch Panel(10 points)
VoIP Support
Optional
I/O ports
USB x1 (2.0)
Ethernet RJ45 x1
PWR Keyx1
3.5mm Stereo Audio In Jack x1
Connector on board
OTG USB x1
HDMI-out x1
Wireless LAN
Yes (802.11b/g/n)
Bluetooth
Yes (v4.0)
ZigBee
N/A
Sensor
G-sensor x1
Light Sensor x1
Card Reader
1 for SD and MMC type
Quanta Computer Inc.
Model
K71
Web Camera
CMOS Sensor
5M, auto-focused
CQEx+ Up-Down Tilt
Output image format: H.264, MJPG, YUV
Frame rate: 30fps
Audio
TI AIC3262
Speaker
Stereo Loudspeakers: 5W/5W (Left/Right)
Internal Mic
Analog x1
Main Battery
ML Lithium Rechargeable Battery
Nominal Capacity:335 mAh
Nominal Voltage:3.7V
Watt-hour:1.23 W/hr
Chemical System:Lithium Cobalt Dioxide / Chain Carbonate
Power cord
Embedded; 19V/1.58A
Button/Switch
Power Switch x1 with blue LED on rear I/O
Wake-up key with capacitive switch on front panel
Volume key (up/down) with capacitive switch on front panel
Operating System
Android 4.1.1 (Jelly Bean)
In-box Accessory
Cleaning cloth x1, Size: 170x145mm, Black color
Power cord x1, Size: 1.8m, White color
Operating temp
0℃~40℃
Storage temp
-20℃~70℃
Regulation
RoHS, WEEE
Safety
CE/FCC/UL
Sleep mode power
consumption
TBD(0.5W)
Full mode power
consumption
TBD(30W)
Power off mode
power consumption
0.5W
Max power
TBD
K71 device Safety statement
CE Marking
This device has been tested to and conforms to the regulatory requirements of the European Union and
has attained CE Marking. The CE Mark is a conformity marking consisting of the letters “CE”. The CE
Mark applies to products regulated by certain European health, safety and environmental protection
legislation. The CE Mark is obligatory for products it applies to: the manufacturer affixes the marking in
order to be allowed to sell his product in the European market.
This product conforms to the essential requirements of the R&TTE directive 1999/5/EC in order to attain
CE Marking.
The CE Marking is not a quality mark. Foremost, it refers to the safety rather than to the quality of a
product. Secondly, CE Marking is mandatory for the product it applies to, whereas most quality markings
are voluntary.
Marking: The product shall bear the CE mark.
Federal Communications Commission (FCC) Statement
15.21
You are cautioned that changes or modifications not expressly approved by the part responsible for
compliance could void the user’s authority to operate the equipment.
15.105(b)
This equipment has been tested and found to comply with the limits for a Class B digital device,
pursuant to part 15 of the FCC rules. These limits are designed to provide reasonable protection against
harmful interference in a residential installation. This equipment generates, uses and can radiate radio
frequency energy and, if not installed and used in accordance with the instructions, may cause harmful
interference to radio communications. However, there is no guarantee that interference will not occur in
a particular installation. If this equipment does cause harmful interference to radio or television reception,
which can be determined by turning the equipment off and on, the user is encouraged to try to correct
the interference by one or more of the following measures:
-Reorient or relocate the receiving antenna.
-Increase the separation between the equipment and receiver.
-Connect the equipment into an outlet on a circuit different from that to which the receiver is connected.

Quanta Computer Inc.
-Consult the dealer or an experienced radio/TV technician for help.
This device complies with Part 15 of the FCC Rules. Operation is subject to the following two
conditions:
1) this device may not cause harmful interference and
2) this device must accept any interference received, including interference that may cause undesired
operation of the device.
FCC RF Radiation Exposure Statement:
1. This Transmitter must not be co-located or operating in conjunction with any other antenna or transmitter.
2. This equipment complies with FCC RF radiation exposure limits set forth for an uncontrolled environment.
This equipment should be installed and operated with a minimum distance of 20 centimeters between the
radiator and your body.