Quanta Computer ZW1LWM3B2100 Notebook Computer W/802.11b WLAN Module User Manual Z500 Manual 01 18E p65
Quanta Computer Inc Notebook Computer W/802.11b WLAN Module Z500 Manual 01 18E p65
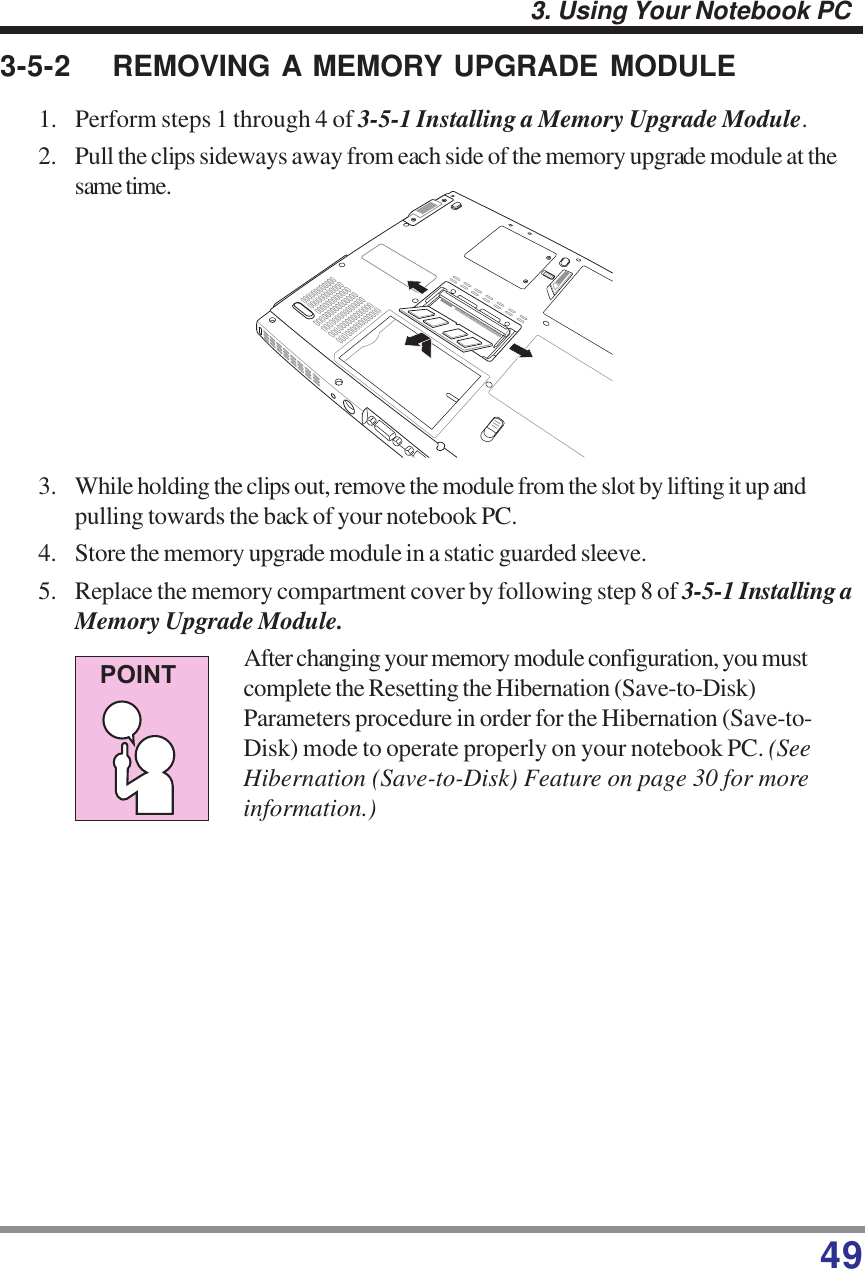
UserManual.wiki
>
Quanta Computer
>
ZW1LWM3B2100 User Manual
User Manual
Navigation menu
Upload a User Manual
Namespaces
Wiki Guide
HTML
PDF
Info
Views
User Manual
Discussion / Help
Navigation


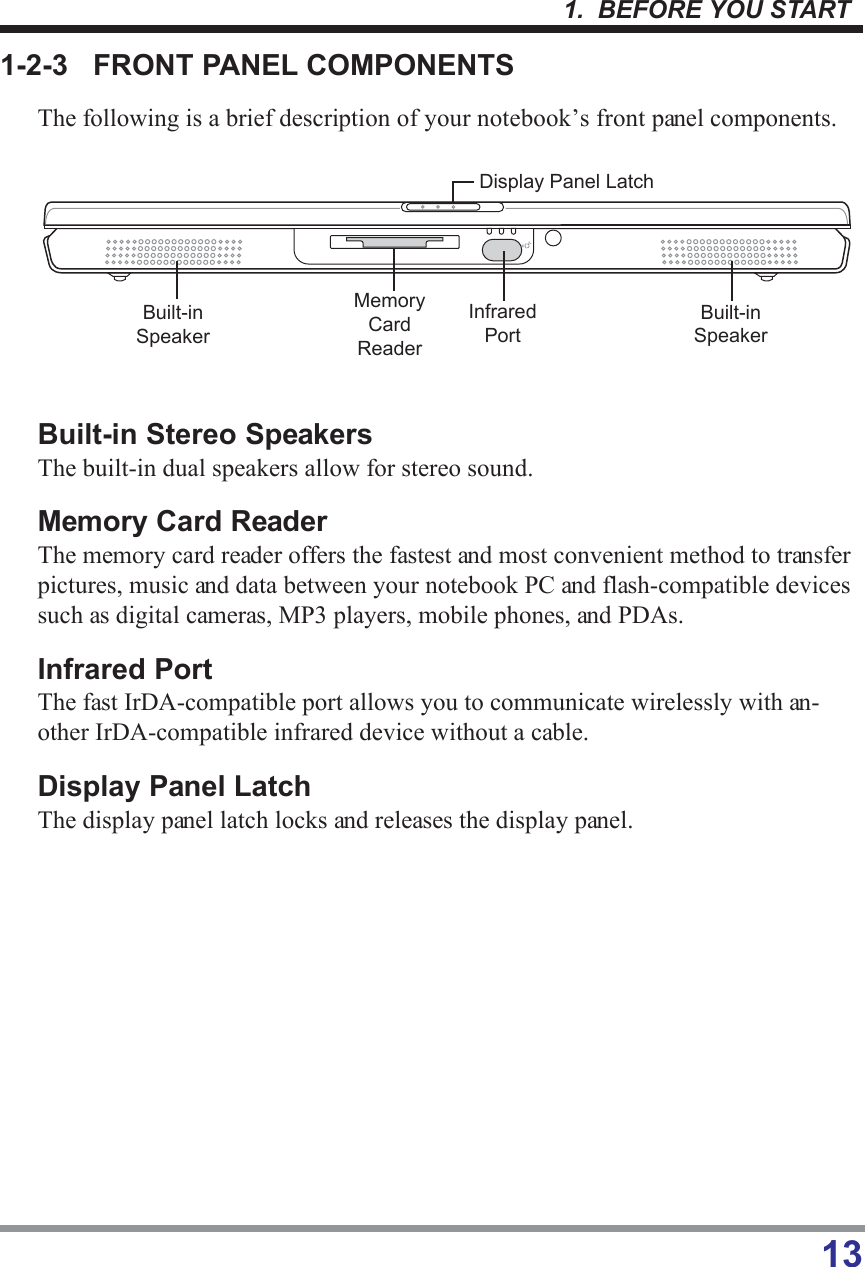
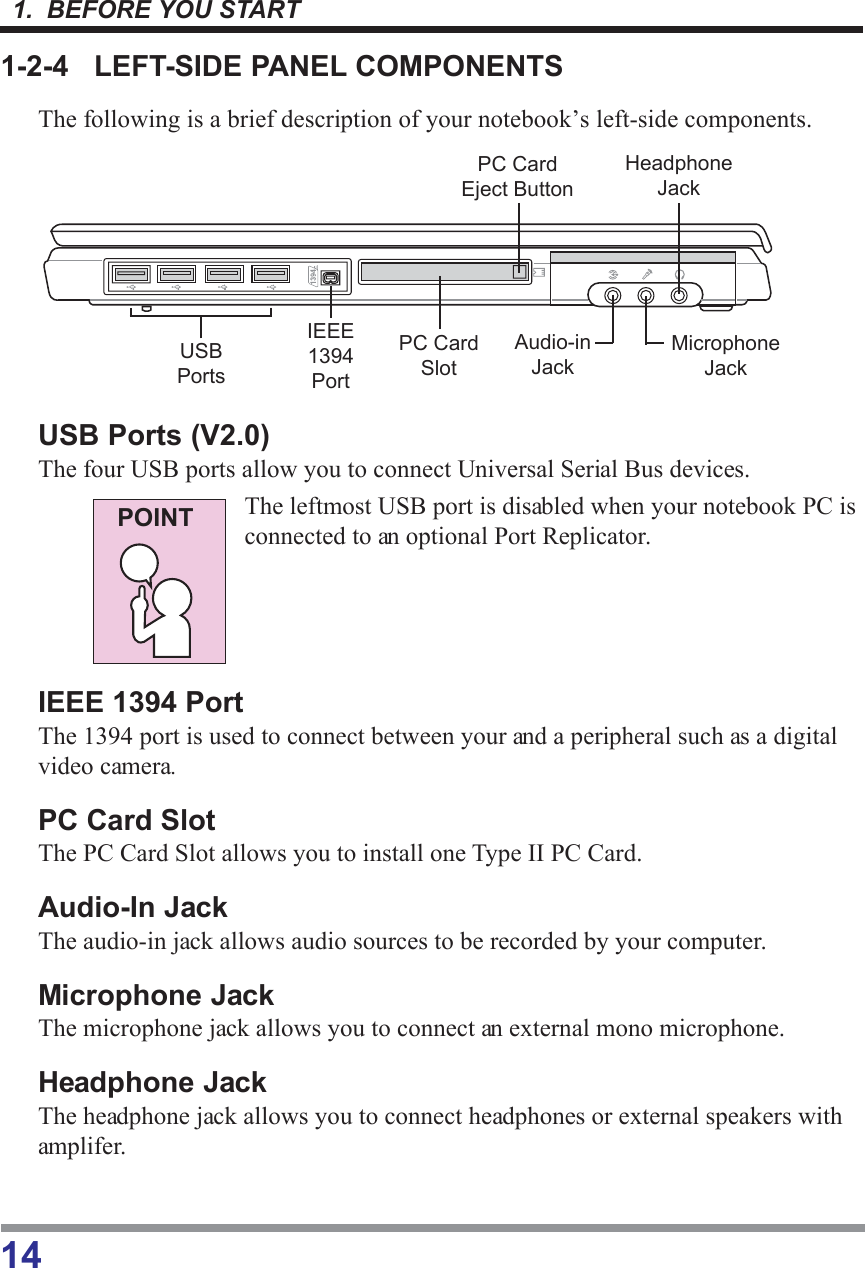
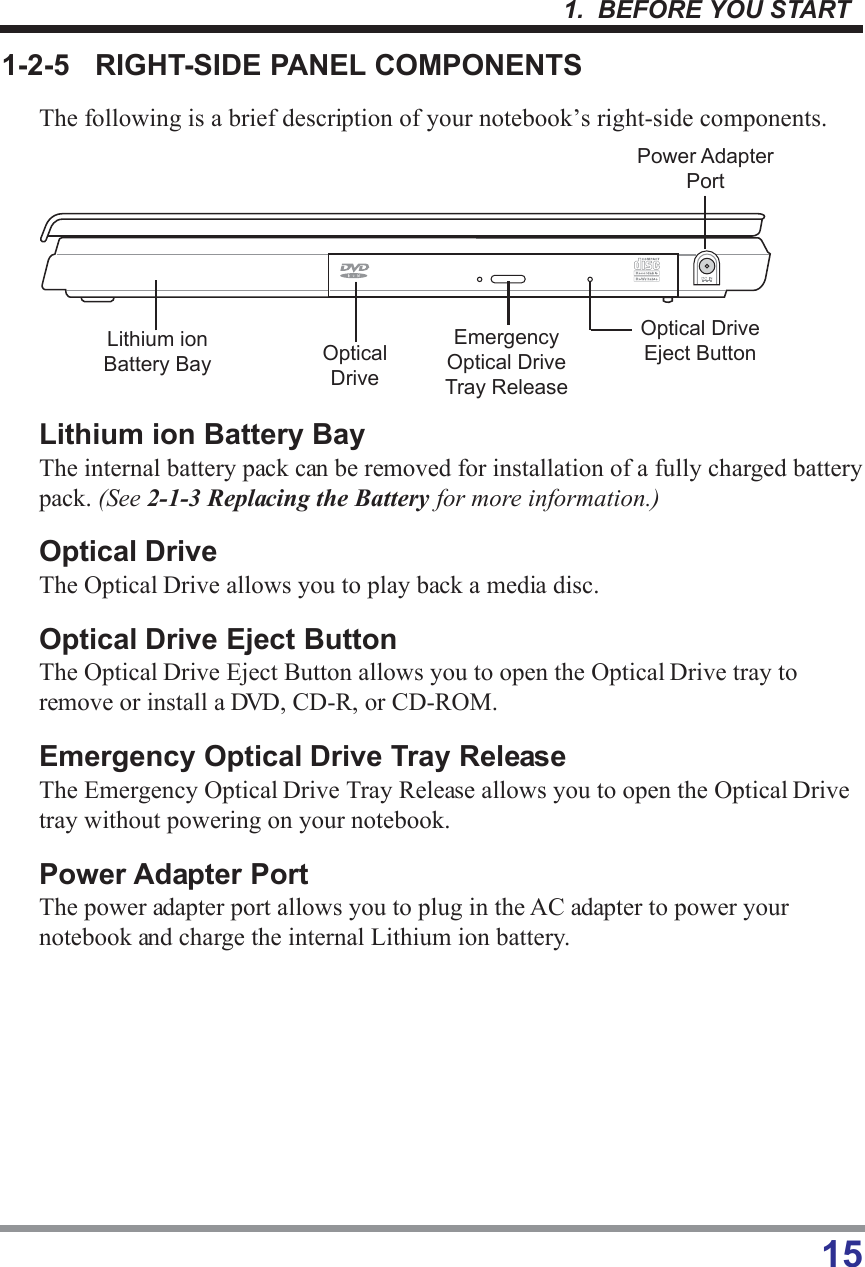
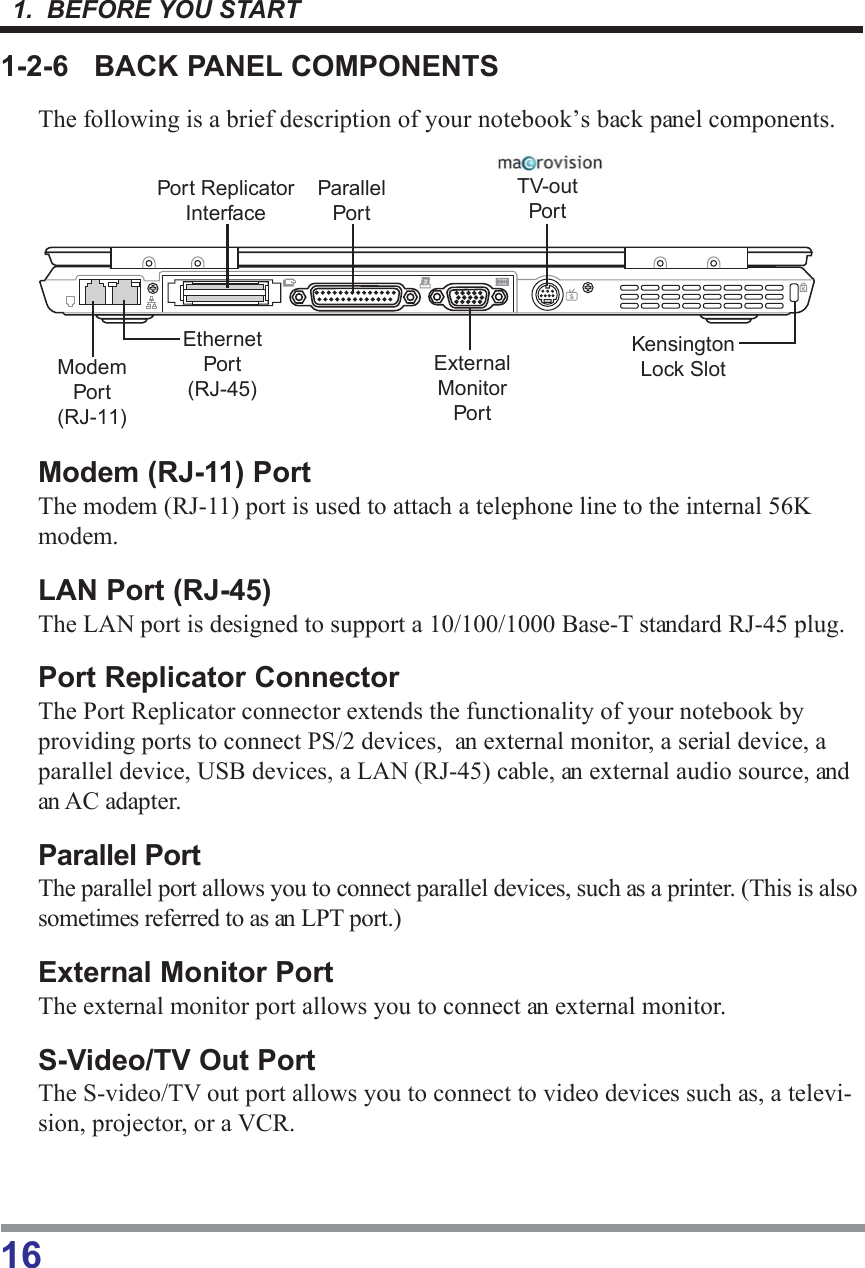
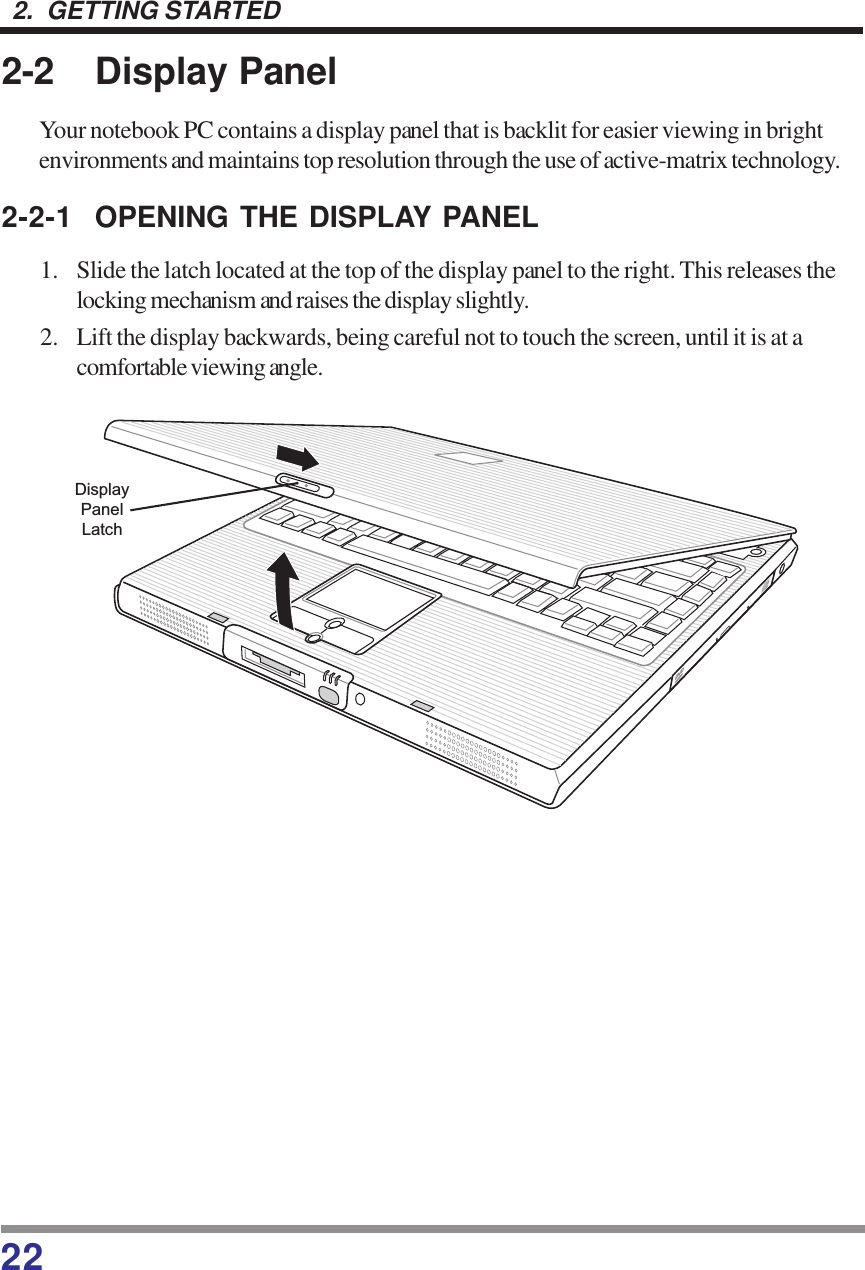
![212. GETTING STARTED2-1-3 REPLACING THE BATTERYThis notebook PC features a rechargeable bridge battery that allows for fast warmswapping of batteries. All you need is an additional battery and you can have a fullycharged spare to swap with one that is not charged without having to close all yourapplications and powering down your computer.1. Have a charged battery ready to install.2. Press [F1] while holding down [FN] to place your notebook PC in suspend modeand disconnect the AC adapter.The bridge battery maintains memory in suspend mode for up to 5minutes, more than enough time for you to swap batteries.Charge your notebook PC for at least 24 hours before using it forthe first time. Doing so insures that the bridge battery is fullycharged so that no data is lost during a warm swap.3. Slide the battery release latch while pulling the battery from the bay.4. Remove the battery from the bay.5. Slide the new battery into the bay. The pins will automatically align with the connec-tor.6. Press the battery in until the battery release latch snaps into place.7. Plug in the AC adapter and press the resume/suspend/power on button.If the Lithium ion battery connector is not fully seated, you maynot be able to use your notebook PC or charge your battery.CAUTIONPOINT](https://usermanual.wiki/Quanta-Computer/ZW1LWM3B2100/User-Guide-334895-Page-20.png)
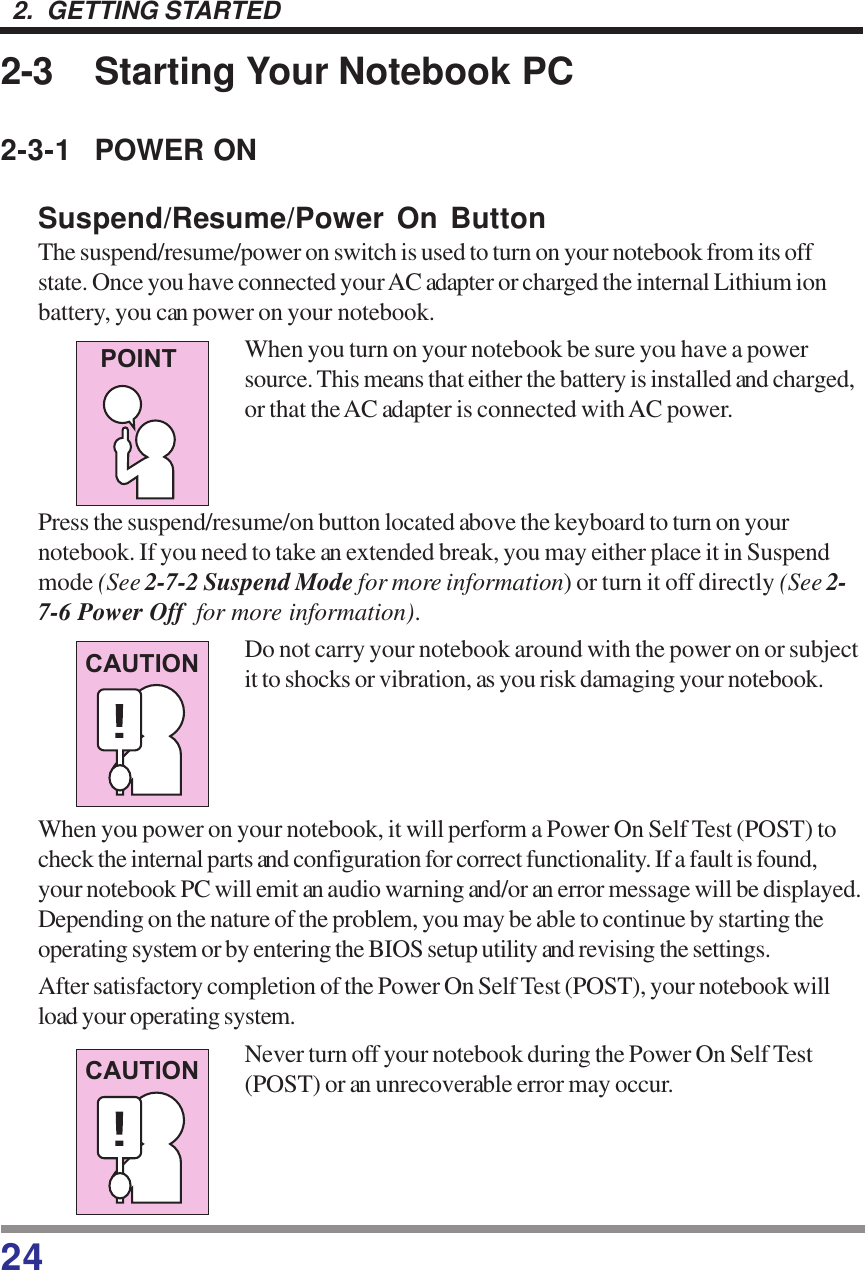
![232. GETTING STARTED2-2-2 ADJUSTING DISPLAY PANEL BRIGHTNESSOnce you have turned on your notebook PC, you may want to adjust the brightnesslevel of the screen to a more comfortable viewing level. There are two ways to adjustthe brightness, keyboard and power management utility.The higher the brightness level, the more power the notebook PCwill consume and the faster your batteries will discharge. Formaximum battery life, set the brightness to as low a level aspossible.KeyboardAdjusting the brightness using the keyboard changes the setting only temporarily.• [FN+F4]: Pressing repeatedly will lower the brightness of your display.• [FN+F5]: Pressing repeatedly will increase the brightness of the display.If using AC power, your brightness setting is set to its highest levelby default. If using battery power, your brightness settings is set toapproximately mid-level by default.2-2-3 CLOSING THE DISPLAY PANEL1. Holding the edge of your display panel, pull it forward until it is flush with the bodyof your notebook.2. Push down until you hear a click. This will engage the locking mechanism andprevent your display panel from opening unexpectedly.POINTPOINT](https://usermanual.wiki/Quanta-Computer/ZW1LWM3B2100/User-Guide-334895-Page-22.png)
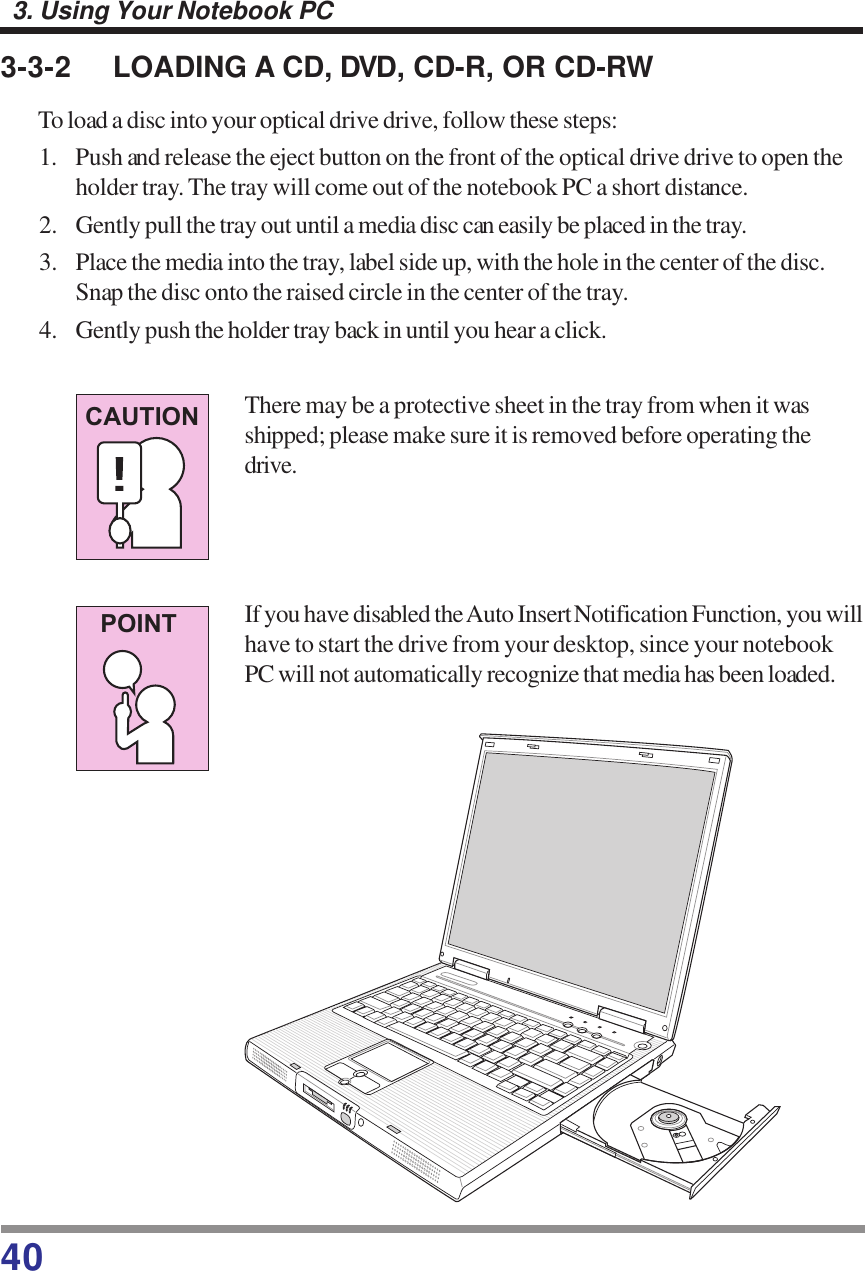
![252. GETTING STARTED2-3-2 BOOT SEQUENCEThe procedure for starting-up your notebook is termed the Bootup sequence andinvolves your notebook’s BIOS. When your notebook is turned on the for the firsttime, the main system memory is empty, and it needs to find instructions to start up yournotebook. This information is stored in the BIOS program. Each time you power on orrestart your notebook, it goes through a boot sequence which displays a flash screenuntil your operating system is loaded. During booting, your notebook is performing astandard boot sequence including a Power On Self Test (POST). When the bootsequence is completed without a failure and without a request for the BIOS SetupUtility, the system displays the operating system’s opening screen.The boot sequence is executed when:• You turn on the power to your notebook.• You restart your notebook from the Windows Shut Down dialog box.• The software initiates a system restart. Example: When you install a new application.2-3-3 BIOS SETUP UTILITYThe BIOS Setup Utility is a program that sets up the operating environment for yournotebook. Your BIOS is set at the factory for normal operating conditions, thereforethere is no need to set or change the BIOS environment to operate your notebook.The BIOS Setup Utility configures:• Device control feature parameters, such as changing I/O addresses and boot de-vices.• System Data Security feature parameters, such as passwords.Entering the BIOS Setup UtilityTo enter the BIOS Setup Utility, do the following:1. Turn on or restart your notebook.2. Press the [F2] key once the flash screen appears on the screen. This will open themain menu of the BIOS Setup Utility with the current settings displayed.3. Press the [RIGHT ARROW] or [LEFT ARROW] key to scroll through the othersetup menus to review or alter the current settings.](https://usermanual.wiki/Quanta-Computer/ZW1LWM3B2100/User-Guide-334895-Page-24.png)
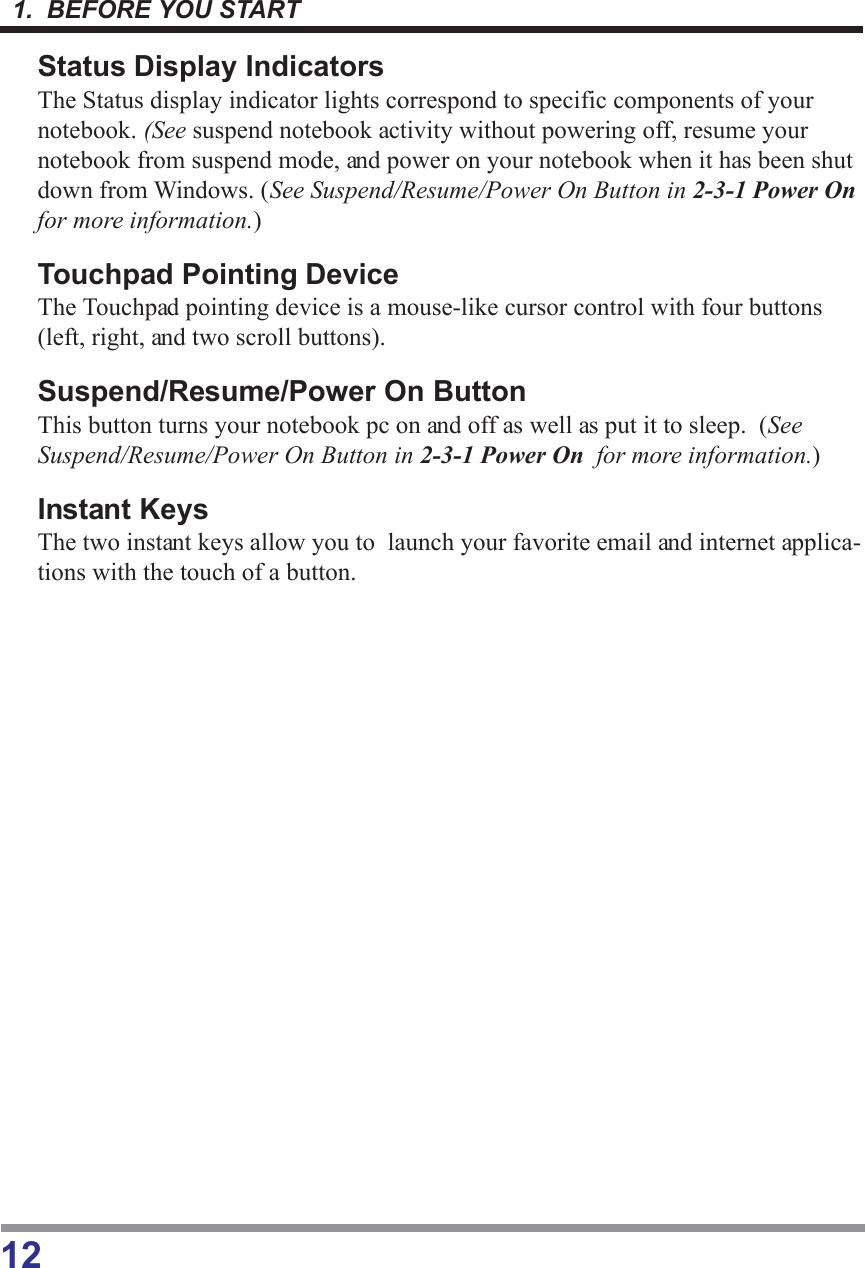
![272. GETTING STARTED2-4-2 BATTERY INDICATORThe Battery indicator tells you whether the primary Lithium ion battery is charging orfully charged.If there is no battery activity, the power adapters are notconnected, or the power switch is Off, the Battery indicator willalso be off.Batteries subjected to shocks, vibration or extreme temperaturescan be permanently damaged.2-4-3 WIRELESS CONNECTION INDICATORThe Wireless Connection indicator states whether your notebook PC is connected to awireless network.2-4-4 CAPSLOCK INDICATORThe CapsLock indicator states that your keyboard is set to type in all capital letters.2-4-5 NUMLK INDICATORThe NumLk indicator states that the internal keyboard is set in ten-key numeric keypadmode.If you are using the optional external numerical keypad, pressingthe [NumLk] key will activate the external keypad. The indicatorwill come on, however it will not change any of the functionality ofyour keyboard keys.POINTCAUTIONPOINT](https://usermanual.wiki/Quanta-Computer/ZW1LWM3B2100/User-Guide-334895-Page-26.png)
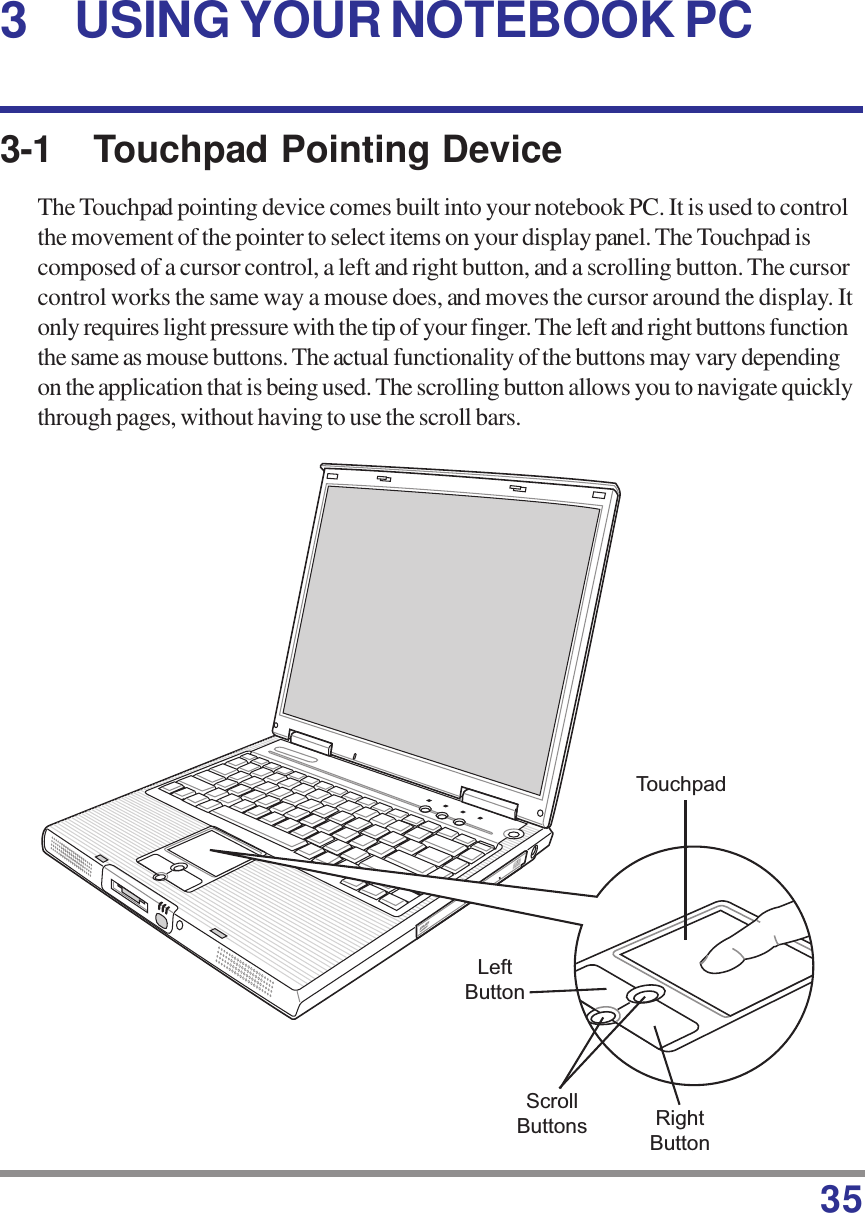
![292. GETTING STARTED2-5 Using the KeyboardYour notebook has an integral 87-key keyboard. The keys perform all the standardfunctions of a 101-key keyboard, including the Windows keys and other special functionkeys. This section describes the following keys.• Numeric keypad• Cursor keys• Function keys• Windows keys2-5-1 NUMERIC KEYPADCertain keys on the keyboard perform dual functions as both standard character keysand numeric keypad keys. NumLk can be activated by pressing the [NumLk] keys.Turning off the NumLk feature is done the same way. Once this feature is activated youcan enter numerals 0 through 9, perform addition ( + ), subtraction ( - ), multiplication (* ), or division ( / ), and enter decimal points ( . ) using the keys designated as ten-keyfunction keys. The keys in the numeric keypad are marked on the front edge of the keyto indicate their secondary functions. If you are using the optional external numerical keypad, pressingthe [NumLk] key will activate the external keypad. The indicatorwill come on, however it will not change any of the functionality ofyour keyboard keys.FnKey CursorKeysApplicationKeysNumericKeypadFunction KeysStartKeyPOINT](https://usermanual.wiki/Quanta-Computer/ZW1LWM3B2100/User-Guide-334895-Page-28.png)
![302. GETTING STARTED2-5-2 WINDOWS KEYSYour notebook has three Windows keys, consisting of two Start keys and an Applica-tion key. The two Start keys display the Start menu. This button functions the same asyour on-screen Start menu button. The Application key functions the same as your rightmouse button and displays shortcut menus for the selected item. (Please refer to yourWindows documentation for additional information regarding the Windows keys.)2-5-3 CURSOR KEYSThe cursor keys are the four arrow keys on the keyboard which allow you to move thecursor up, down, left and right in applications. In programs such as Windows Explorer, itmoves the “focus” (selects the next item up, down, left, or right).2-5-4 FUNCTION KEYSYour notebook PC has 12 function keys, F1 through F12. The functions assigned tothese keys differ for each application. You should refer to your software documentationto find out how these keys are used.The [FN] key provides extended functions for the notebook and is always used inconjunction with another key.• [FN+F1]: Pressing [F1] while holding [FN] will toggle the notebook betweensuspend mode and active mode• [FN+F2]: Pressing [F2] while holding down [FN] allows you to toggle betweenenabling and disabling wireless network connection.• [FN+F3]: Pressing [F3] while holding [FN] allows you to change your selection ofwhere to send your display video. Each time you press the combination of keys youwill step to the next choice. The choices, in order, are: built-in display panel only,both built-in display panel and external monitor, or external monitor only.• [FN+F4]: Pressing [F4] repeatedly while holding [FN] will lower the brightness ofyour display.• [FN+F5]: Pressing [F5] repeatedly while holding [FN] will increase the brightnessof the display.• [FN+F6]: Pressing [F6] while holding [FN] will toggle the Audio Mute on and off.• [FN+F7]: Pressing [F7] repeatedly while holding [FN] will decrease the volume ofyour notebook PC.](https://usermanual.wiki/Quanta-Computer/ZW1LWM3B2100/User-Guide-334895-Page-29.png)
![312. GETTING STARTED2-6 Volume ControlYour notebook has multiple volumecontrols which interact with each other.Any software that contains audio files will also contain a volumecontrol of its own. If you install an external audio device that hasan independent volume control, the hardware volume control andthe software volume control will interact with each other. It shouldbe noted that if you set your software volume to Off, you willoverride the external volume control setting.2-6-1 CONTROLLING THE VOLUME• The volume can be controlled in several different ways:• Volume can be set from within the Volume Control on the Taskbar.• Volume can be controlled with the [F7] and [F8] functions keys. Pressing [F7]repeatedly while holding [Fn] will decrease the volume of your notebook. Pressing[F8] repeatedly while holding [Fn] will increase the volume of your notebook.• Volume can be controlled by many volume controls that are set within individualapplications.• Certain external audio devices you might connect to your system may have hard-ware volume controls. Each source discussed above puts an upper limit on thevolume level that must then be followed by the other sources.We recommend that you experiment with the various volume controls to discover theoptimal sound level.POINT• [FN+F8]: Pressing [F8] repeatedly while holding [FN] will increase the volume ofyour notebook PC.• [FN+F9]: Pressing [F9] while holding down [FN] allows you to toggle betweenplaying and pausing your optical drive.• [FN+F10]: Pressing [F10] while holding [FN] stops your optical drive.• [FN+F11]: Pressing [F11] while holding [FN] to go back to the previous file.• [FN+F12]: Pressing [F12] while holding [FN] to go to the next file.](https://usermanual.wiki/Quanta-Computer/ZW1LWM3B2100/User-Guide-334895-Page-30.png)

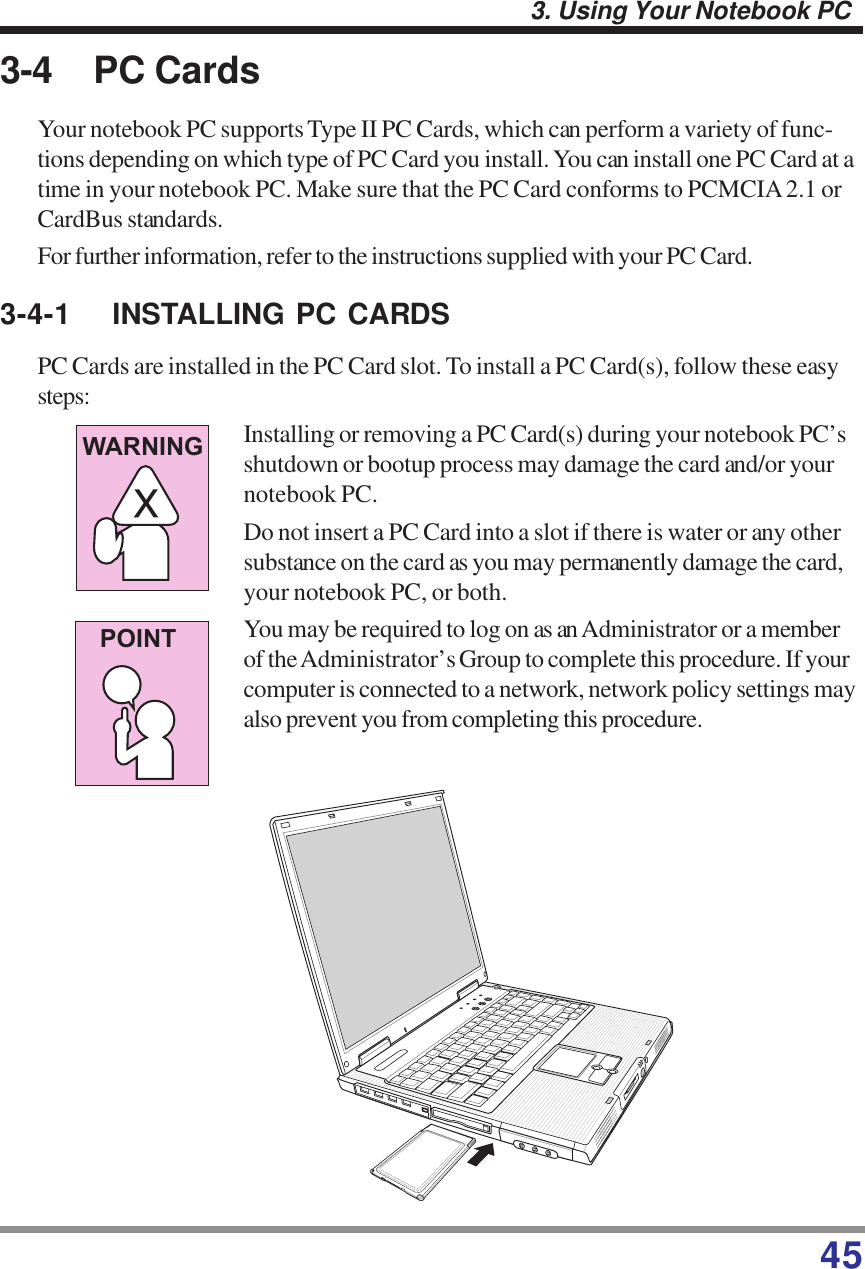
![503. Using Your Notebook PCPOINT3-5-3 CHECKING NEW MEMORY CAPACITYOnce you have changed the system memory capacity by either adding or removing amemory upgrade module, be sure to check that your notebook PC has recognized thechange.You can check the memory capacity by looking at the main menu of the BIOS setup:1. Turn on the power to your notebook PC using the power switch.2. Allow the system to start booting and press the [F2] key once the flash screenappears on the screen. This will open the main menu of the BIOS setup with thecurrent settings displayed. (See 2-3-3 BIOS Setup Utility for more information)Use the right arrow key to select Info in the BIOS Setup menu.The System Memory and the Extended Memory capacity, as detected by your note-book PC during the Power On Self Test (POST), are displayed at the bottom of theInfo menu screen.If the total memory displayed is incorrect, check that yourmemory upgrade module is properly installed.](https://usermanual.wiki/Quanta-Computer/ZW1LWM3B2100/User-Guide-334895-Page-49.png)
![513. Using Your Notebook PC3-6 Device Ports on Optional Port ReplicatorYour notebook PC and the optional Port Replicator come equipped with multiple portsto which you can connect external devices including: disk drives, keyboards, USBdevices, printers, etc.3-6-1 PS/2 PORTThe PS/2 port allows you to connect an external keyboard, and/or numeric keypad andmouse. In order to connect a PS/2 interface device follow these easy steps:1. Align the connector with the port opening.2. Push the connector into the port until it is seated.A mouse, keyboard, or keypad may be installed and automaticallyrecognized by your notebook without restarting or changingsetups.3-6-2 EXTERNAL MONITOR PORTThe external monitor port allows you to connect an external monitor. In order to con-nect an external monitor follow these easy steps:1. Align the connector with the port opening.2. Push the connector into the port until it is seated.3. Tighten the two hold-down screws, located on each end of the connector.Pressing the [FN] + [F10] keys allows you to change yourselection of where to send your display video. Each time youpress the key combination, you will step to the next choice,starting with the built-in display panel only, moving to the externalmonitor only, finally moving to both the built-in display panel andan external monitor.Is there a stereo line-in jack? If not, remove from above.POINTPOINT](https://usermanual.wiki/Quanta-Computer/ZW1LWM3B2100/User-Guide-334895-Page-50.png)