RCA Direct View Digital 27 To 40 TV Manual L0070008
User Manual: RCA RCA Direct View Digital 27 to 40 TV Manual RCA Direct View Digital 27 to 40 TV Owner's Manual, RCA Direct View Digital 27 to 40 TV installation guides
Open the PDF directly: View PDF ![]() .
.
Page Count: 98
Dhighdefinitiontel_,visiot_hig
nitiontelevisio_hi_._:d_fi_,io_:_
evision high (_ eft _ itior_t-(_!_vi_io _ h
sionhighdefi nitiontelevisio_high
definitiontelevisionhighdefinitio
ntelevisionhighdefinitiontelevisi
onhighdefinitiontelevisionhighd
efinitiontelevisionhighdefinition
televisionhighdefinitiontelevisio
nhighdefinitiorztelevisionhighdef
initiontelevision highdefi nitiont(:_
levisionhighdefinitiontelevisionh
ighdefinitiontelevisionhighdefini
tiontelevisionhighdefinitiontelev
isionhighdefinitiontelevisionhigh
definitiontelevisionhighdefinitio
ntelevisionhighdefi nitiontelevisi
on highdefinitiontelevisionhighd
eft nitiontelevision highdefi nition
televisionhighdefinitiontelevisio
nhighdefini
sionhig
ontele
hdefl
ontele
sionhigh
efinitio
levisio
levi
tiontelevi
hdefiniti
visionhig
niti
d
nte
rite
si
h
WARNING
To reduce the risk of fire or
electric hazard, do not
expose this product to rain
or moisture.
To reduce the risk of electric shock, do not remove
cover (or back). No user-serviceable parts inside.
Refer servicing to qualified service personnel.
This symbol indicates "dangerous
voltage" inside the product that
presents a risk of electric shock or
personal injury.
This symbol indicates
important instructions
accompanying the product.
Refer to the identification/rating label located on the back panel of your
product for its proper operating voltage.
This device complies with part 15 of the FCC rules. Operation is subject to the
condition that this device does not cause harmful interference. FCC
Regulations state that unauthorized changes or modifications to this
equipment may void the user's authority to operate it. Use of this device
without the supplied power cord may cause this set to be non-compliant with
FCC part 15 regulations.
If fixed (non-moving) images are left on the screen for long periods,
they may be permanently imprinted on the screen. Such images
include network Iogos, phone numbers, and video games. This
damage is not covered by your warranty. Extended viewing of
channels displaying these images should be avoided.
Cable TV Installer: This reminder is provided to call your attention to Article
820-40 of the National Electrical Code (Section 54 of the Canadian Electrical
Code, Part 1) which provides guidelines for proper grounding and, in
particular, specifies that the cable ground shall be connected to the
grounding system of the building as close to the point of cable entry as
practical.
PRODUCT REGISTRATION
Please fill out the product registration card and return it immediately. Returning the card allows us to contact
you if needed.
Keep your sales receipt to obtain warranty parts and service and for proof of purchase. Attach it here and recorc
the serial and model numbers in case you need them. The numbers are located on the back of the product.
Model No.
Serial No.
Purchase Date:
Dealer/Address/Phone:
SETUP AND CONNECTIONS ....................................... 5
Step 1: Unpack the System .............................................................. 6
Step 2: Connect Your TV to Other Components ............................. 6
Jacks and Cables ........................................................ =................ 7
Front Buttons .......................................... _.................................. 8
Back of the TV .......................................................................... 10
The Basic Connection ............................................................... 12
The Advanced Connection ............................... _...................... 13
Connecting Speakers to the TV ............................................... 14
Connecting a Stereo Amplifier ............................................... 15
Step 3: Place Batteries in the Remote Control ............................. 16
Step 4: Plug in and Turn on the System ........................................ 16
Step 5: Complete the Interactive Setup ........................................ 16
Step 6: Order Programming .......................................................... 16
USING THE REMOTE ................................................... 17
Remote Control Buttons ................................................................ 18
Programming the Remote Control ............................................... 20
Using the Remote to Control a Component ................................. 21
Remote Controi Codes ................................................................... 22
BASIC TV OPERATION ............................................... 23
About the Channel Banner ............................................................ 24
Changing Between DIRECTV and TV Mode .................................. 26
Changing Channels ........................................................................ 27
PIP (Picture-in-Picture) Operation ................................................. 28
PIP Buttons ............................................................................... 28
Using the PIP Feature .............................................................. 28
PIP Problems? ........................................................................... 29
Using the INPUT Button ................................................................. 30
USING THE PROGRAM GUIDES ................................ 31
Bringing Up the Program Guides .................................................. 32
Anatomy of the TV Program Guide .............................................. 33
Anatomy of the DIRECTV® Programming Guide ......................... 34
Tuning to a Program ...................................................................... 35
Getting Around in the Guides ....................................................... 35
Using the GUIDE Button ................................................................ 36
The Other Guides Icon ................................................................... 36
Exiting A Program Guide ............................................................... 37
1
Sorting the DIRECTV® Programming Guide ................................. 38
The Other Icons .............................................................................. 42
ADJUSTING TV CONTROLS ....................................... 43
Picture Quality Controls ................................................................. 44
Picture Settings ........................................................................ 44
Corot Warmth .......................................................................... 44
Noise Filter ................................................ _.............................. 45
Convergence ............................................................................ 45
Picture Tilt ................................................................................ 45
Picture Presets .......................................................................... 45
Reset Controls .......................................................................... 45
Audio Controls ............................................................................... 46
Mute ......................................................................................... 46
Tone Controls ........................................................................... 46
Audio Processor .................................................................... 46
Speakers ................................................................................ 47
Sound Logic .......................................................................... 47
SAP ............................................................................................ 47
Optical Output ..................................................................... 4-/
Audio Language ...................................................................... 47
USING THE PROFILES ................................................ 49
About Profiles ................................................................................. 50
The DIRECTV Setup ........................................................................ 50
Editing Channels in aDIRECTV List ......................................... 50
Selecting or Deleting All DIRECTV Channels .......................... 51
Setting the DIRECTV Spending Limit ...................................... 51
Setting the TV Rating ..................................................................... 54
Choosing Your Profile .................................................................... 60
Locking and Unlocking a User Profile ........................................... 61
Locking the System ........................................................................ 62
Unlocking the System .............................................................. 62
2
OPTIONS AND PREFERENCES .................................. 63
Changing the Signal Source .......................................................... 64
Changing the Signal Type .............................................................. 64
Auto Tuning .................................................................................... 65
Channel Search ............................................................................... 66
Mailbox ........................................................................................... 66
Purchases: Pay Per View Programs ................................................ 67
Setting the Time and Date ............................................................. 71
Using the Preferences Menu ......................................................... 71
Color Scheme ........................................................................... 71
Translucency ............................................................................. 72
Default Guide ........................................................................... 72
Screen Format .......................................................................... 72
Caption Display ........................................................................ 73
Caption Mode. ......................................................................... 73
Using Fetch ..................................................................................... 74
GE'n'ING ASSISTANCE ................................................ 75
Running the Interactive Setup ...................................................... 76
Getting Antenna Information ....................................................... 76
Dish Pointing .................................................................................. 77
Your New Access Card .................................................................... 79
Running the System Test ................................................................ 79
Off-Air Guides ................................................................................. 80
Upgrades ......................................................................................... 80
REFERENCE .................................................................. 81
Troubleshooting ............................................................................. 82
Care and Cleaning .......................................................................... 83
RCA HDTV Limited Warranty ......................................................... 84
FCC Registration Information ........................................................ 85
Accessory Information ................................................................... 86
Index ............................................................................................... 91
3
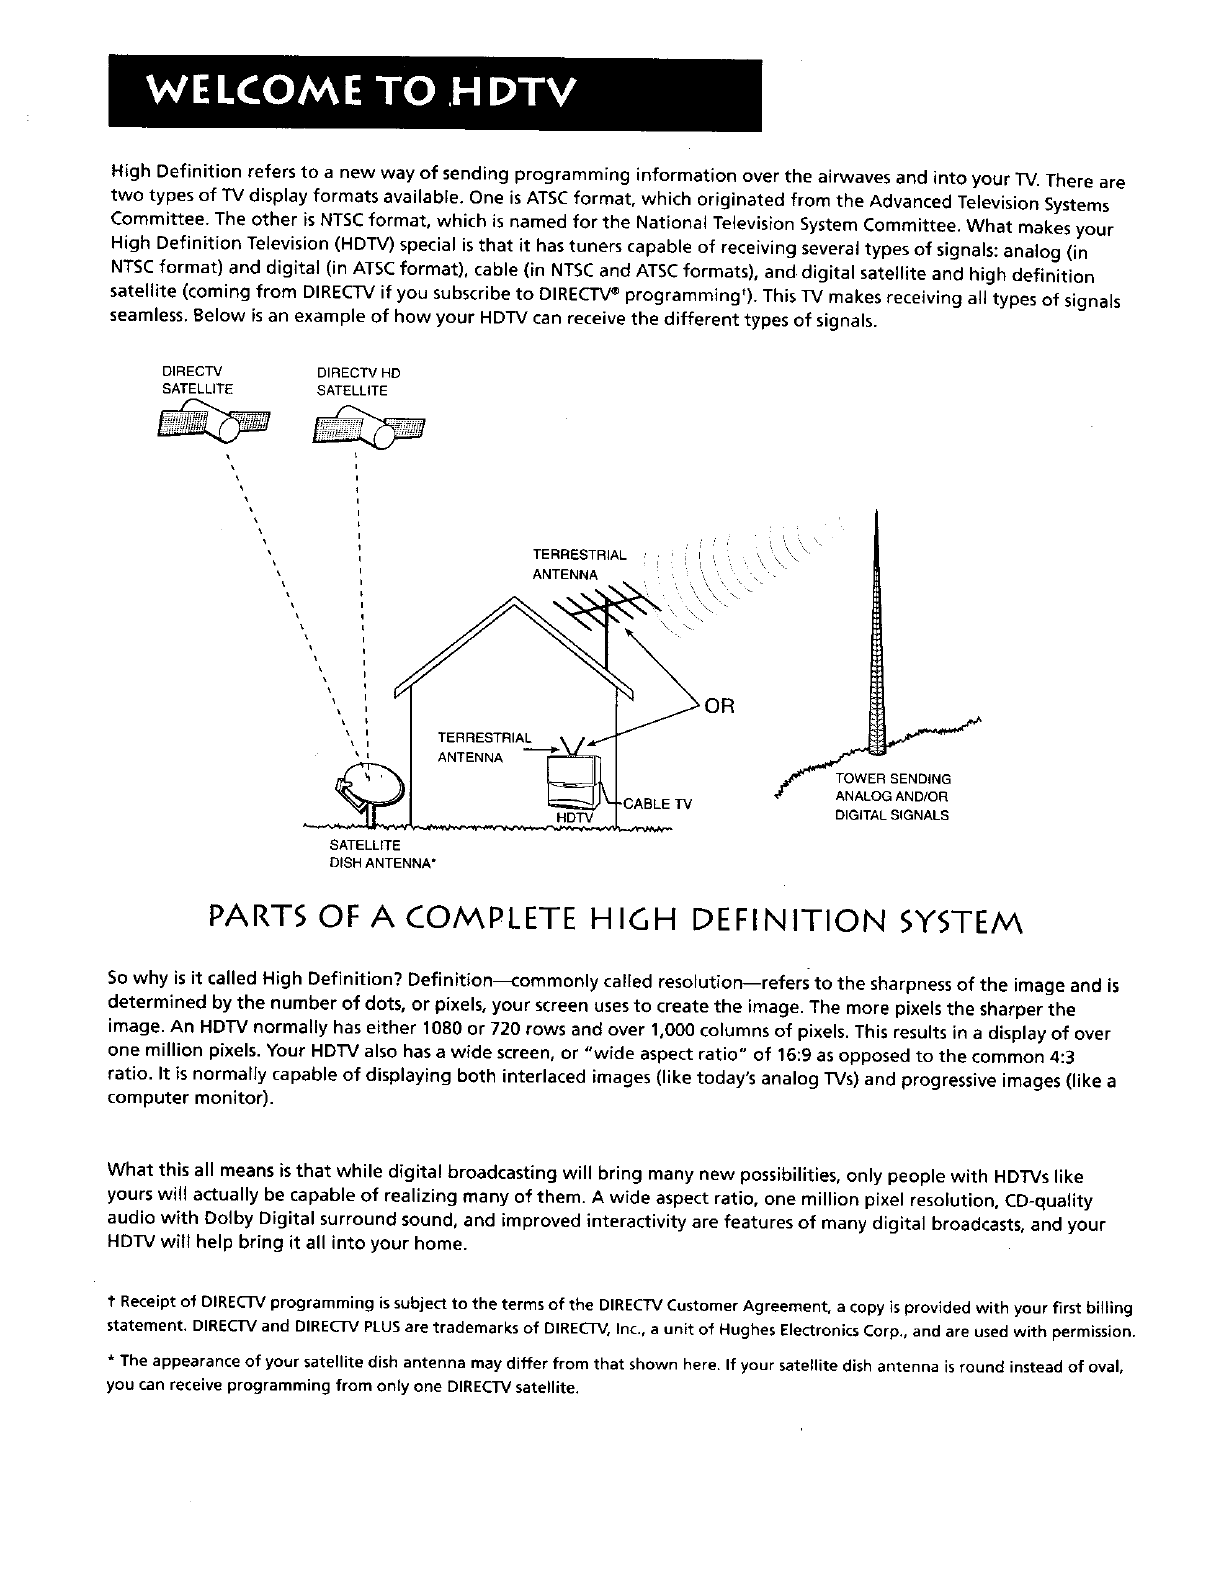
High Definition refers to a new way of sending programming information over the airwaves and into your TV. There are
two types of TV display formats available. One is ATSC format, which originated from the Advanced Television Systems
Committee. The other is NTSC format, which is named for the National Television System Committee. What makes your
High Definition Television (HDTV) special is that it has tuners capable of receiving several types of signals: ana{og (in
NTSCformat) and digital (in ATSC format), cable (in NTSC and ATSC formats), and digital satellite and high definition
satellite (coming from DIRECTV if you subscribe to DIRECTV®programmingt). This TV makes receiving all types of signals
seamless. Below is an example of how your HDTV can receive the different types of signals.
DIRECTV DIRECTV HD
SATELLITE SATELLITE
\\
\
\
\ i
TERRESTRIAL
ANTENNA
H
DIGITAL SIGNALS
SATELLITE
DISH ANTENNA*
PARTS OF A COMPLETE HIGH DEFINITION SYSTEM
So why is it called High Definition? Definition---commonly called resolution--refers to the sharpness of the image and is
determined by the number of dots, or pixels, your screen uses to create the image. The more pixels the sharper the
image. An HDTV normally has either 1080 or 720 rows and over 1,000 columns of pixels. This results in a display of over
one million pixels. Your HDTV also has a wide screen, or "wide aspect ratio" of 16:9 as opposed to the common 4:3
ratio. It is normally capable of displaying both interlaced images (like today's analog TVs) and progressive images (like a
computer monitor).
What this all means is that while digital broadcasting will bring many new possibilities, only people with HDTVs like
yours will actually be capable of realizing many of them. A wide aspect ratio, one million pixel resolution, CD-quality
audio with Dolby Digital surround sound, and improved interactivity are features of many digital broadcasts, and your
HDTV will help bring it all into your home.
t Receipt of DIRECTV programming is subject to the terms of the DIRECTV Customer Agreement, a copy is provided with your first billing
statement. DIRECTV and DIRECTV PLUS are trademarks of DIRECTV, Inc., aunit of Hughes Electronics Corp., and are used with permission.
*The appearance of your satellite dish antenna may differ from that shown here. If your satellite dish antenna is round instead of oval,
you can receive programming from only one DIRECTV satellite.
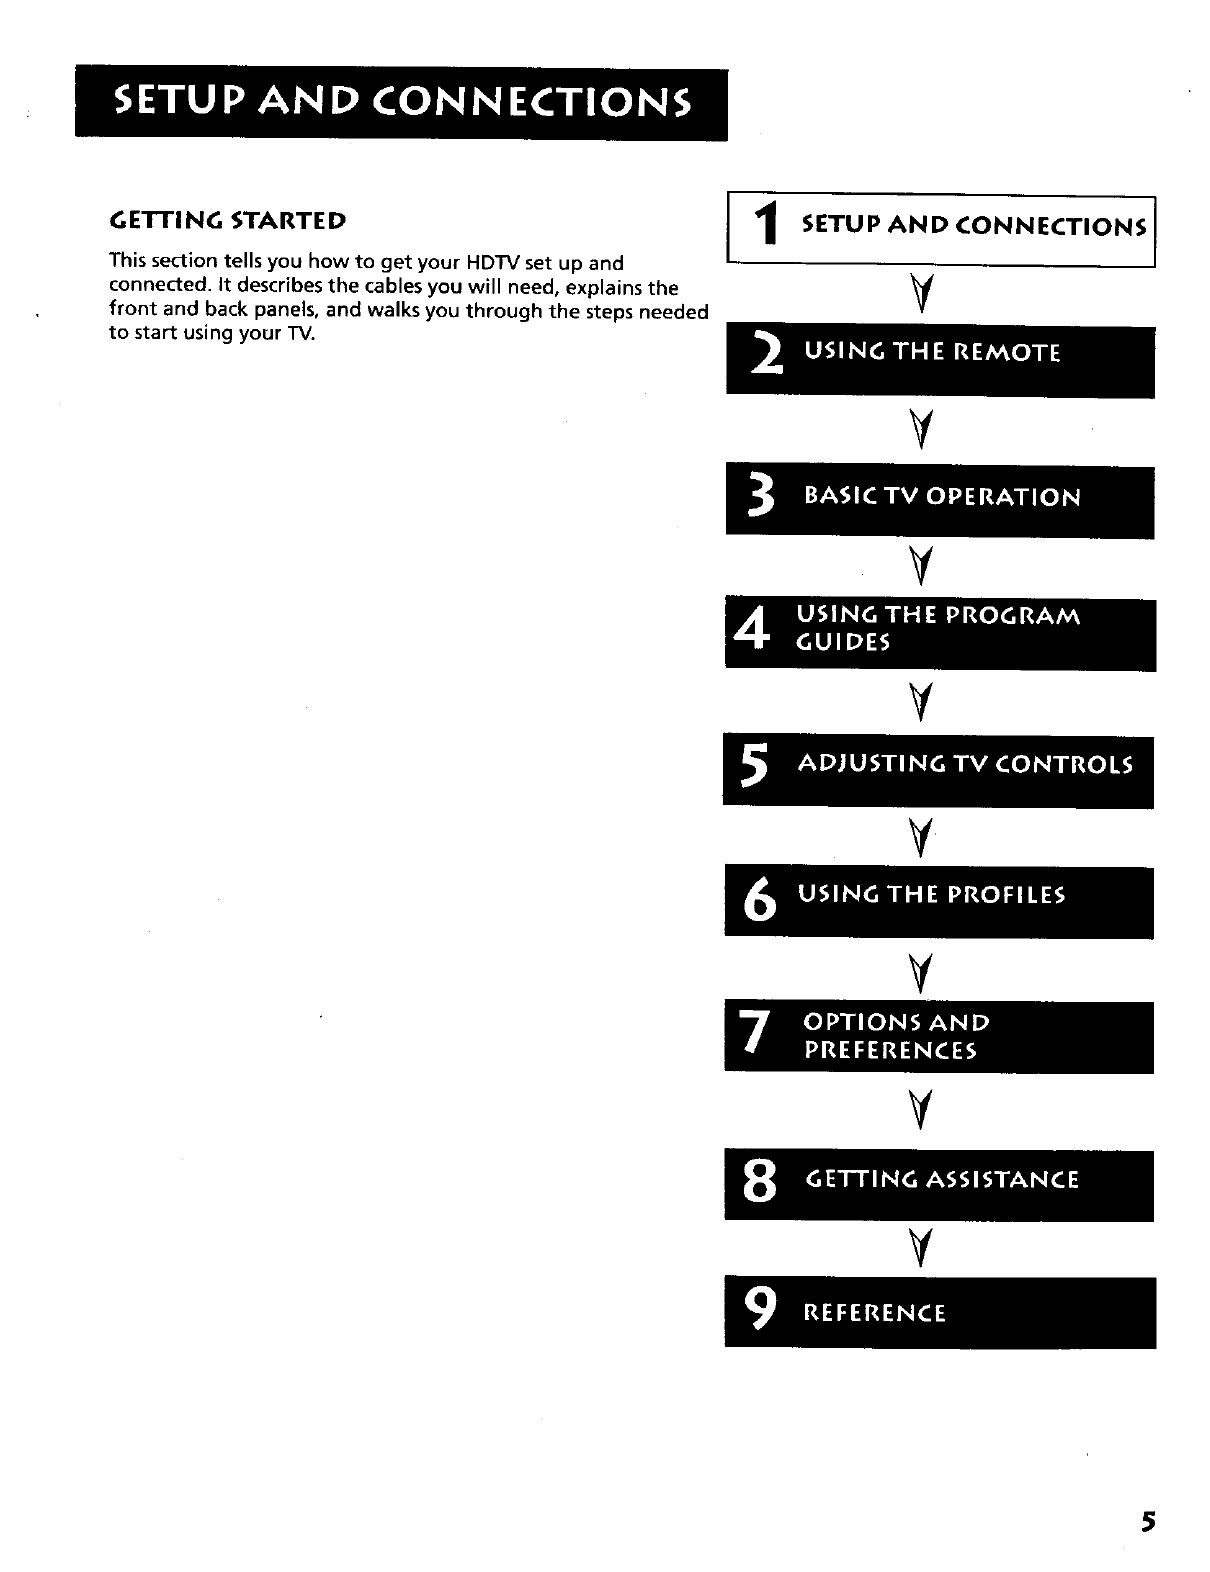
G ETI'I NG STARTE D
This section tells you how to get your HDTV set up and
connected. It describes the cables you will need, explains the
front and back panels, and walks you through the steps needed
to start using your TV.
SETUP AND CONNECTIONS
¥
V
V
V
V
V
V
5
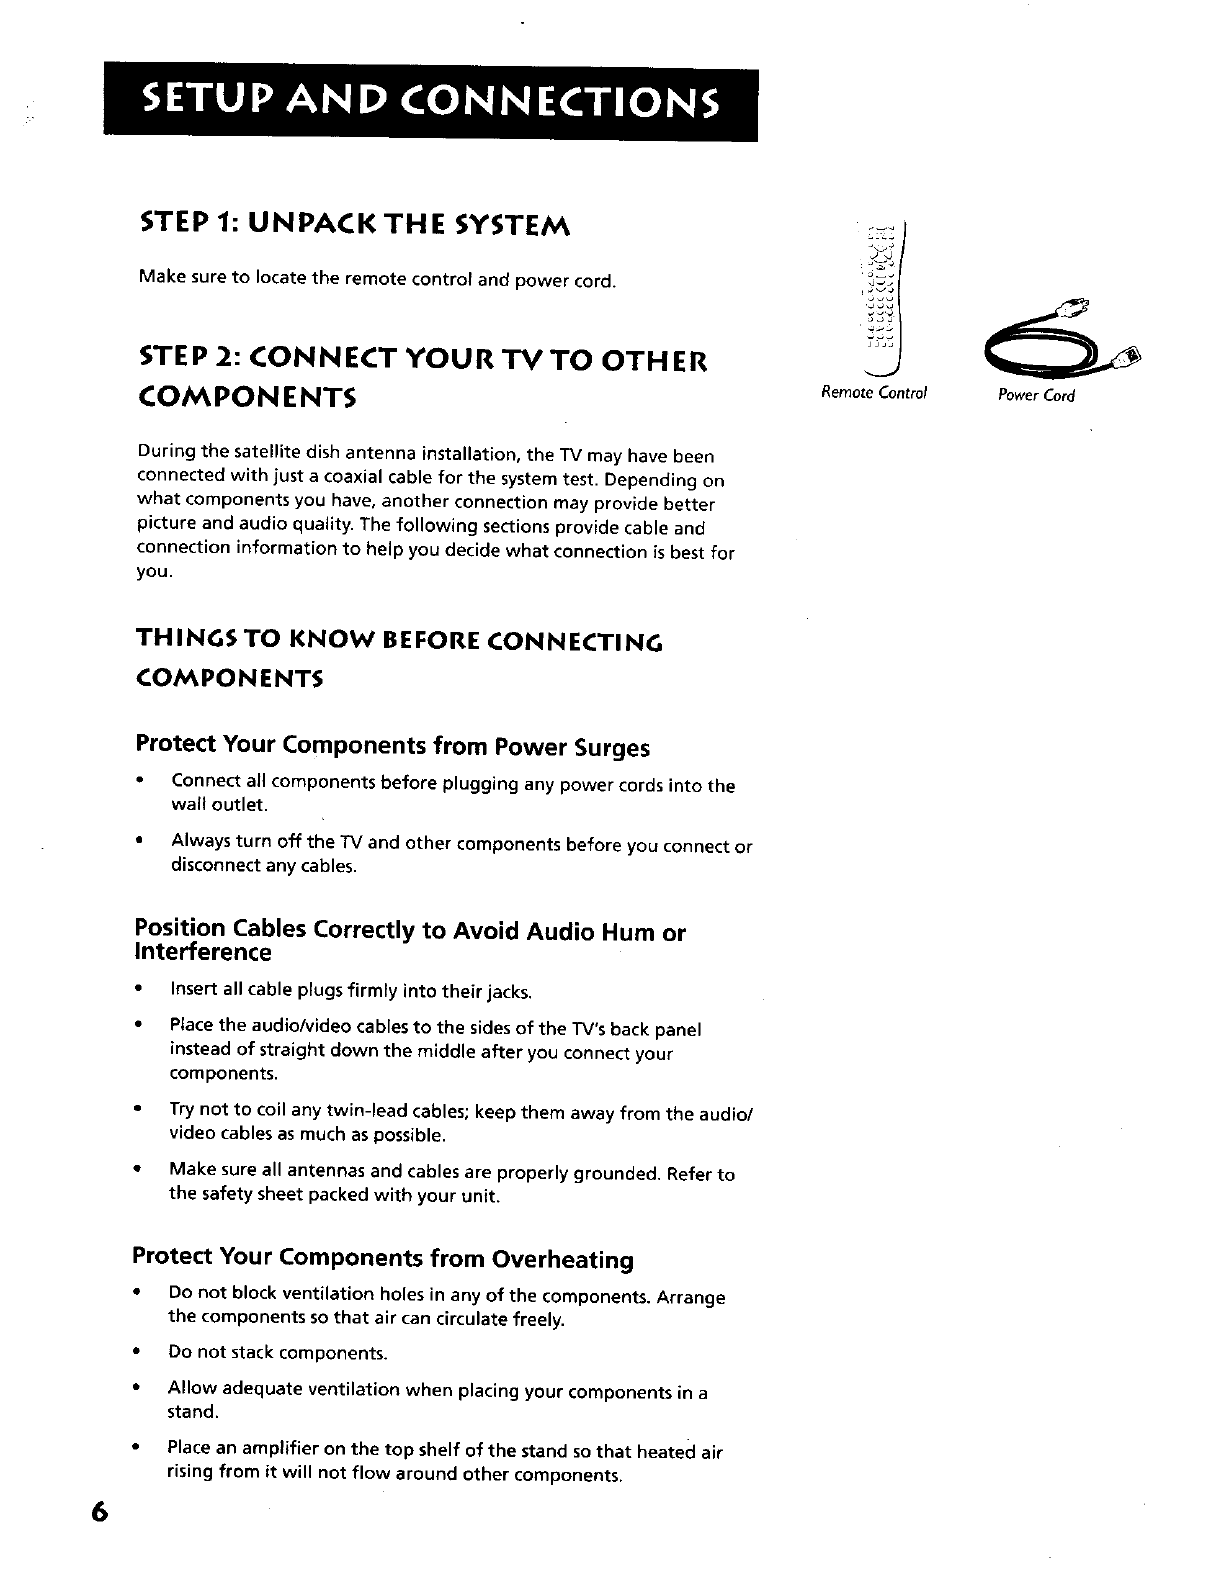
STEP 1: UNPACK THE SYSTEM
Make sure to locate the remote control and power cord.
STEP 2: CONNECT YOUR TV TO OTH ER
COMPON ENTS
During the satellite dish antenna installation, the TV may have been
connected with just a coaxial cable for the system test. Depending on
what components you have, another connection may provide better
picture and audio quality. The following sections provide cable and
connection information to help you decide what connection is best for
you.
J_J_
Remote Control PowerCord
THINGS TO KNOW BEFORE CONNECTING
COMPONENTS
Protect Your Components from Power Surges
•Connect all components before plugging any power cords into the
wall outtet.
• Always turn off the TV and other components before you connect or
disconnect any cables.
Position Cables Correctly to Avoid Audio Hum or
Interference
•Insert all cable plugs firmly into their jacks.
•Place the audioAfideo cables to the sides of the TV's back panel
instead of straight down the middle after you connect your
components.
• Try not to coil any twin-lead cables; keep them away from the audio/
video cables as much as possible.
• Make sure all antennas and cables are properly grounded. Refer to
the safety sheet packed with your unit,
6
Protect Your Components from Overheating
• Do not block ventilation holes in any of the components. Arrange
the components so that air can circulate freely,
• Do not stack components,
• Allow adequate ventilation when placing your components in a
stand.
• Place an amplifier on the top shelf of the stand so that heated air
rising from it will not flow around other components.
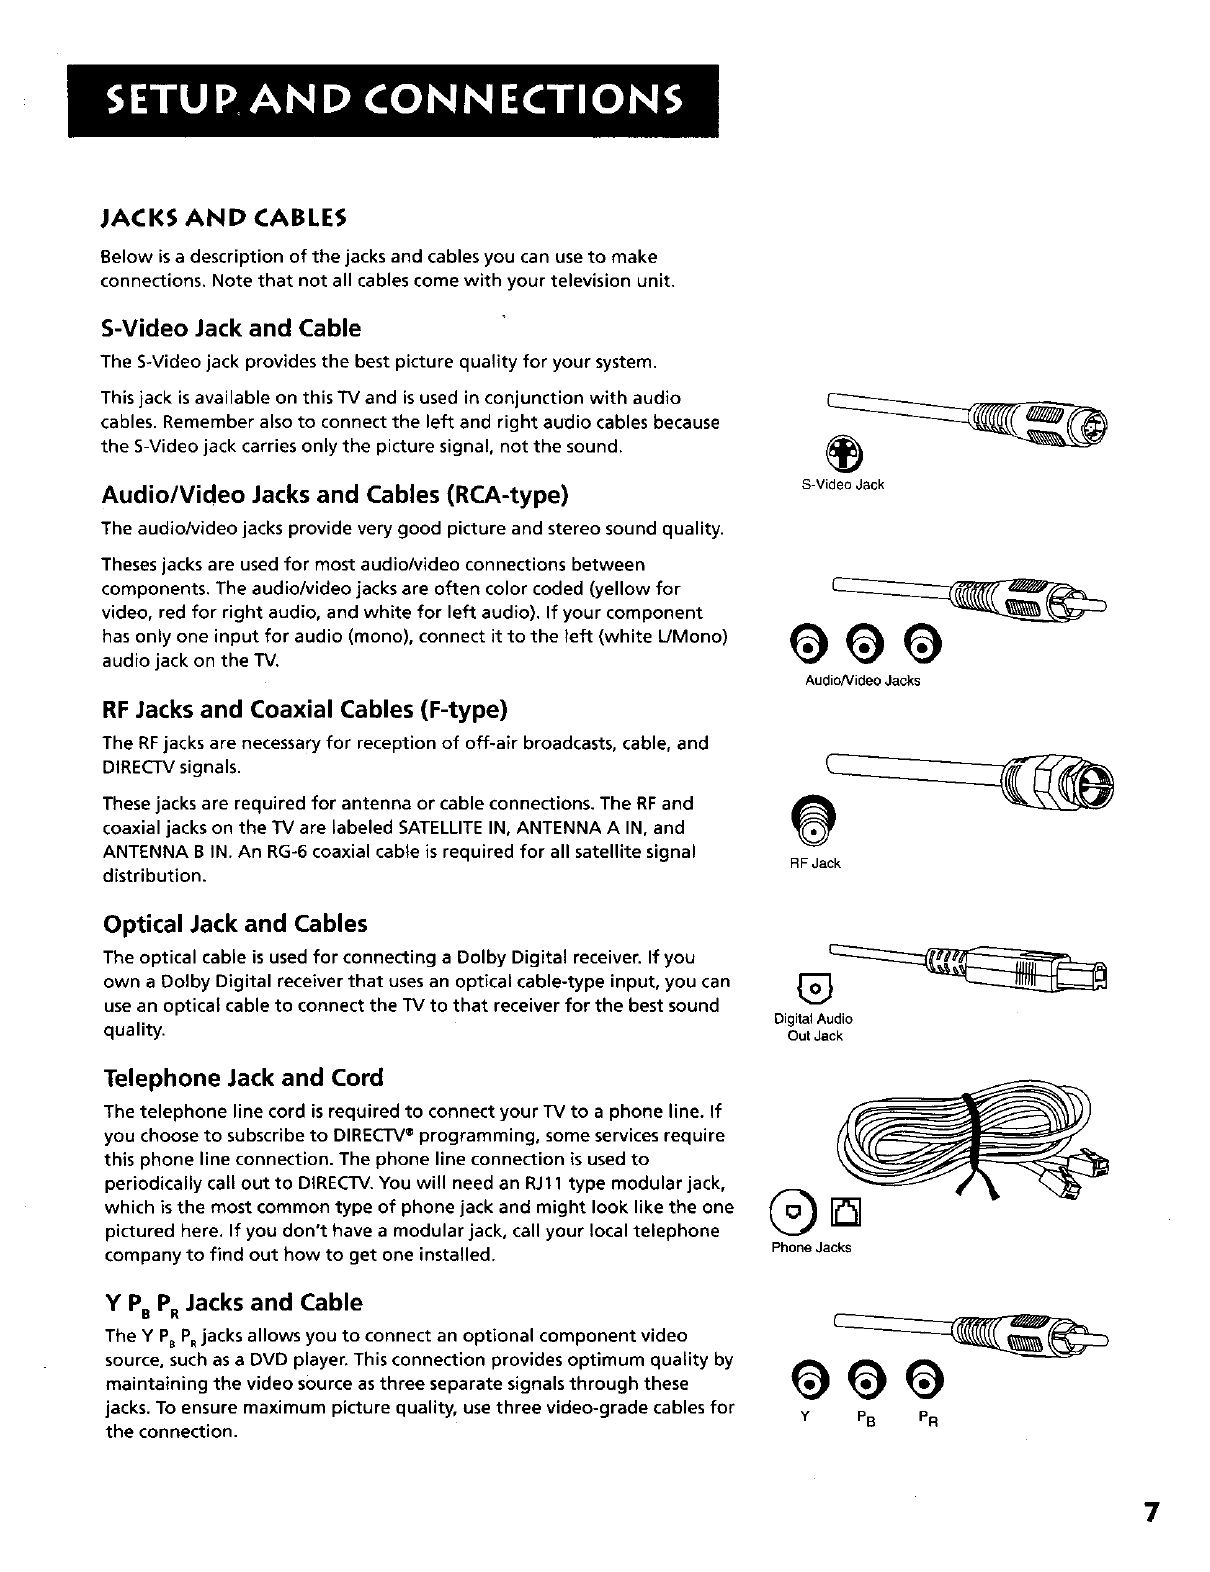
JACKS AND CABLES
Below is a description of the jacks and cables you can use to make
connections. Note that not all cables come with your television unit.
S-Video Jack and Cable
The S-Video jack provides the best picture quality for your system.
This jack is available on this TV and is used in conjunction with audio
cables. Remember also to connect the left and right audio cables because
the S-Video jack carries only the picture signal, not the sound.
Audio/Video Jacks and Cables (RCA-type)
The audio/video jacks provide very good picture and stereo sound quality.
Theses jacks are used for most audio/video connections between
components. The audio/video jacks are often color coded (yellow for
video, red for right audio, and white for left audio). If your component
has only one input for audio (mono), connect it to the left (white L/Mono)
audio jack on the TV.
RF Jacks and Coaxial Cables (F-type)
The RF jacks are necessary for reception of off-air broadcasts, cable, and
DIRECTV signals.
These jacks are required for antenna or cable connections. The RF and
coaxial jacks on the TV are labeled SATELLITE IN, ANTENNA A IN, and
ANTENNA B IN. An RG-6 coaxial cable is required for all satellite signal
distribution.
Optical Jack and Cables
The optical cable is used for connecting a Dolby Digital receiver. If you
own a Dolby Digital receiver that uses an optical cable-type input, you can
use an optical cable to connect the TV to that receiver for the best sound
quality.
Telephone Jack and Cord
The telephone line cord is required to connect your TV to a phone line. If
you choose to subscribe to DIRECTV®programming, some services require
this phone line connection. The phone line connection is used to
periodically call out to DIRECTV. You will need an RJ11 type modular jack,
which is the most common type of phone jack and might look like the one
pictured here. If you don't have a modular jack, call your local telephone
company to find out how to get one installed.
Y PBP. Jacks and Cable
The Y PBPRjacks allows you to connect an optional component video
source, such as a DVD player. This connection provides optimum quality by
maintaining the video source as three separate signals through these
jacks. To ensure maximum picture quality, use three video-grade cables for
the connection.
S-Video Jack
AudioNideo Jacks
RF Jack
Digital Audio
Out Jack
Phone Jacks
Y PB PR
7
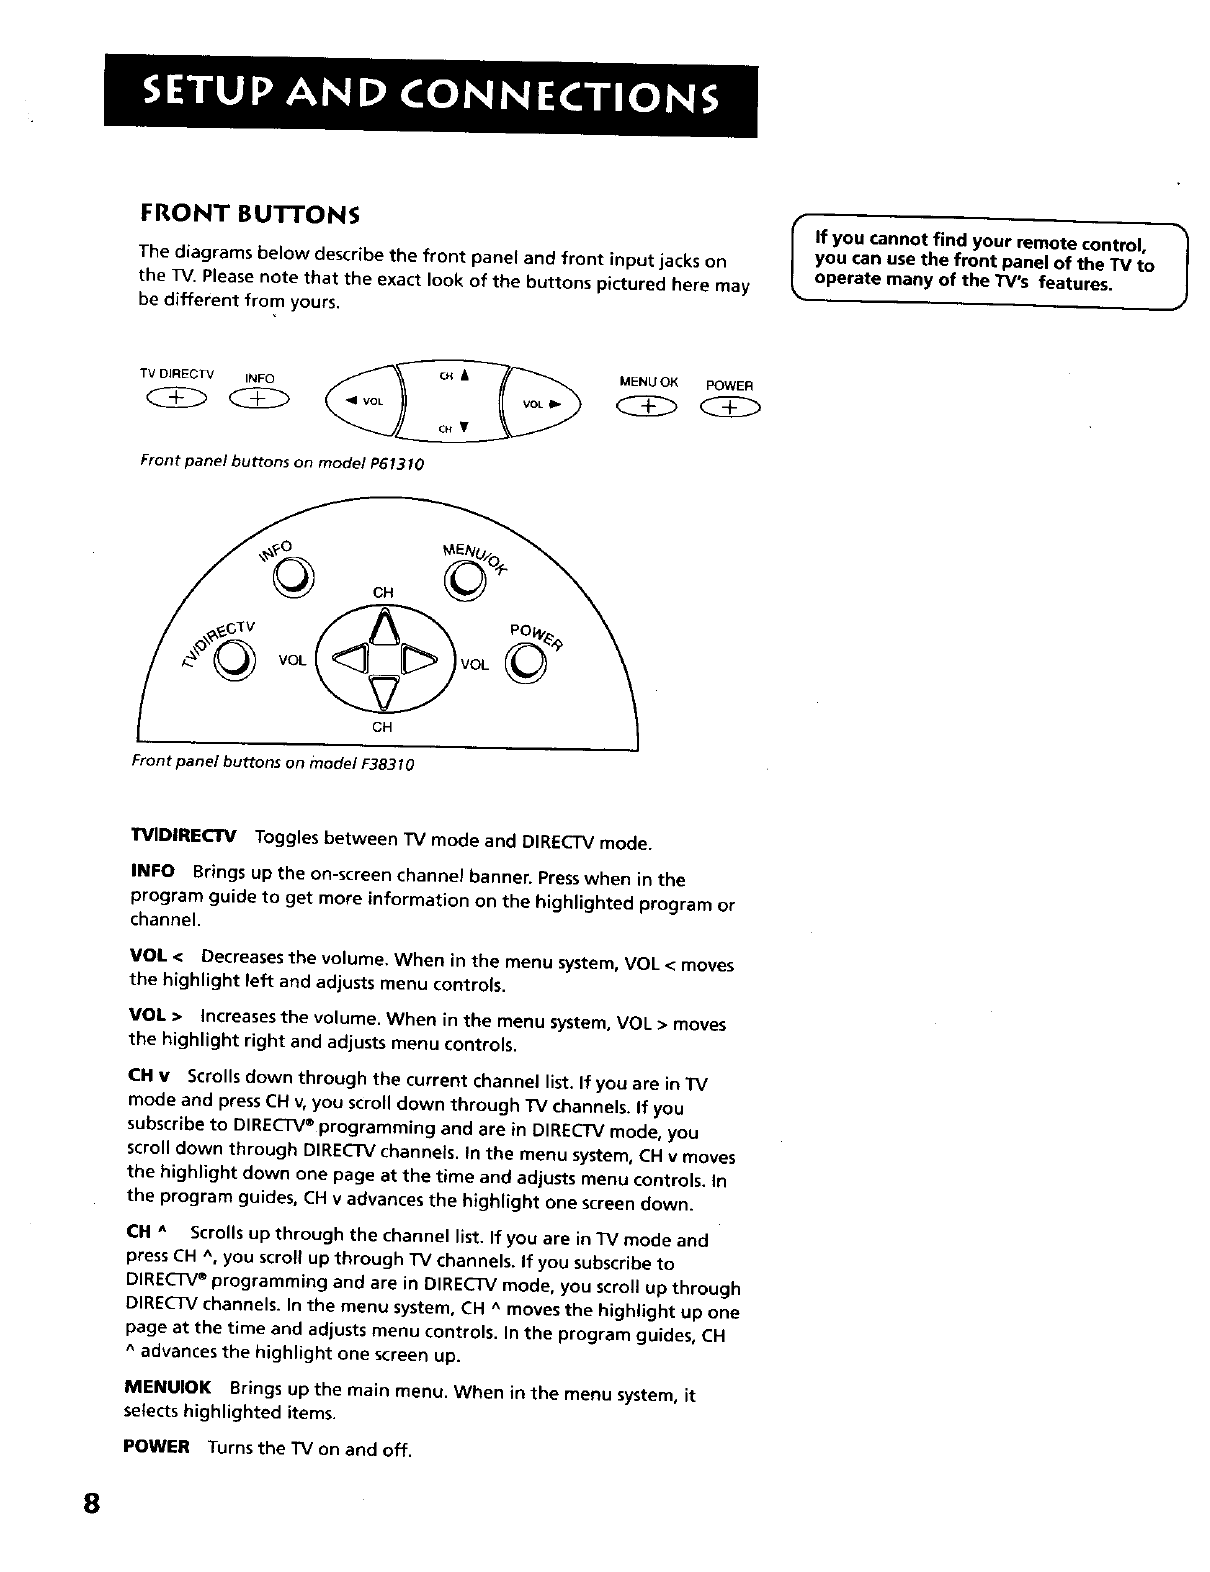
FRONT BUTTONS
The diagrams below describe the front panel and front input jacks on
the TV. Please note that the exact look of the buttons pictured here may
be different from yours,
IIf you cannot find your remote control, |
you can use the front panel of the TV to J
operate many of the TV's features.
TV DIRECTV INFO /\_ cxa_ MENU OK POWER
Front panel buttons on model P61310
Front panel buttons on model F38310
TVlDIREClrV Toggles between TV mode and DIRECTV mode.
INFO Brings up the on-screen channel banner. Press when in the
program guide to get more information on the highlighted program or
channel.
VOL < Decreases the volume. When in the menu system, VOL <moves
the highlight left and adjusts menu controls.
VOI. • Increases the volume. When in the menu system, VOL > moves
the highlight right and adjusts menu controls.
CH v Scrolls down through the current channel list. If you are in TV
mode and press CH v, you scroll down through I"V channels, If you
subscribe to DIRECTV®programming and are in DIRECTV mode, you
scroll down through DIRECTV channels. In the menu system, CH v moves
the highlight down one page at the time and adjusts menu controls. |n
the program guides, CH v advances the highlight one screen down.
CH ^ Scrolls up through the channel list. If you are in TV mode and
press CH ^, you scroll up through I"V channels. If you subscribe to
DIRECTV®programming and are in DIRECTV mode, you scroll up through
DIRECTV channels. In the menu system, CH ^moves the highlight up one
page at the time and adjusts menu controls. In the program guides, CH
^advances the highlight one screen up.
MENUIOI( Brings up the main menu. When in the menu system, it
selects highlighted items.
POWER Turns the TV on and off.
8
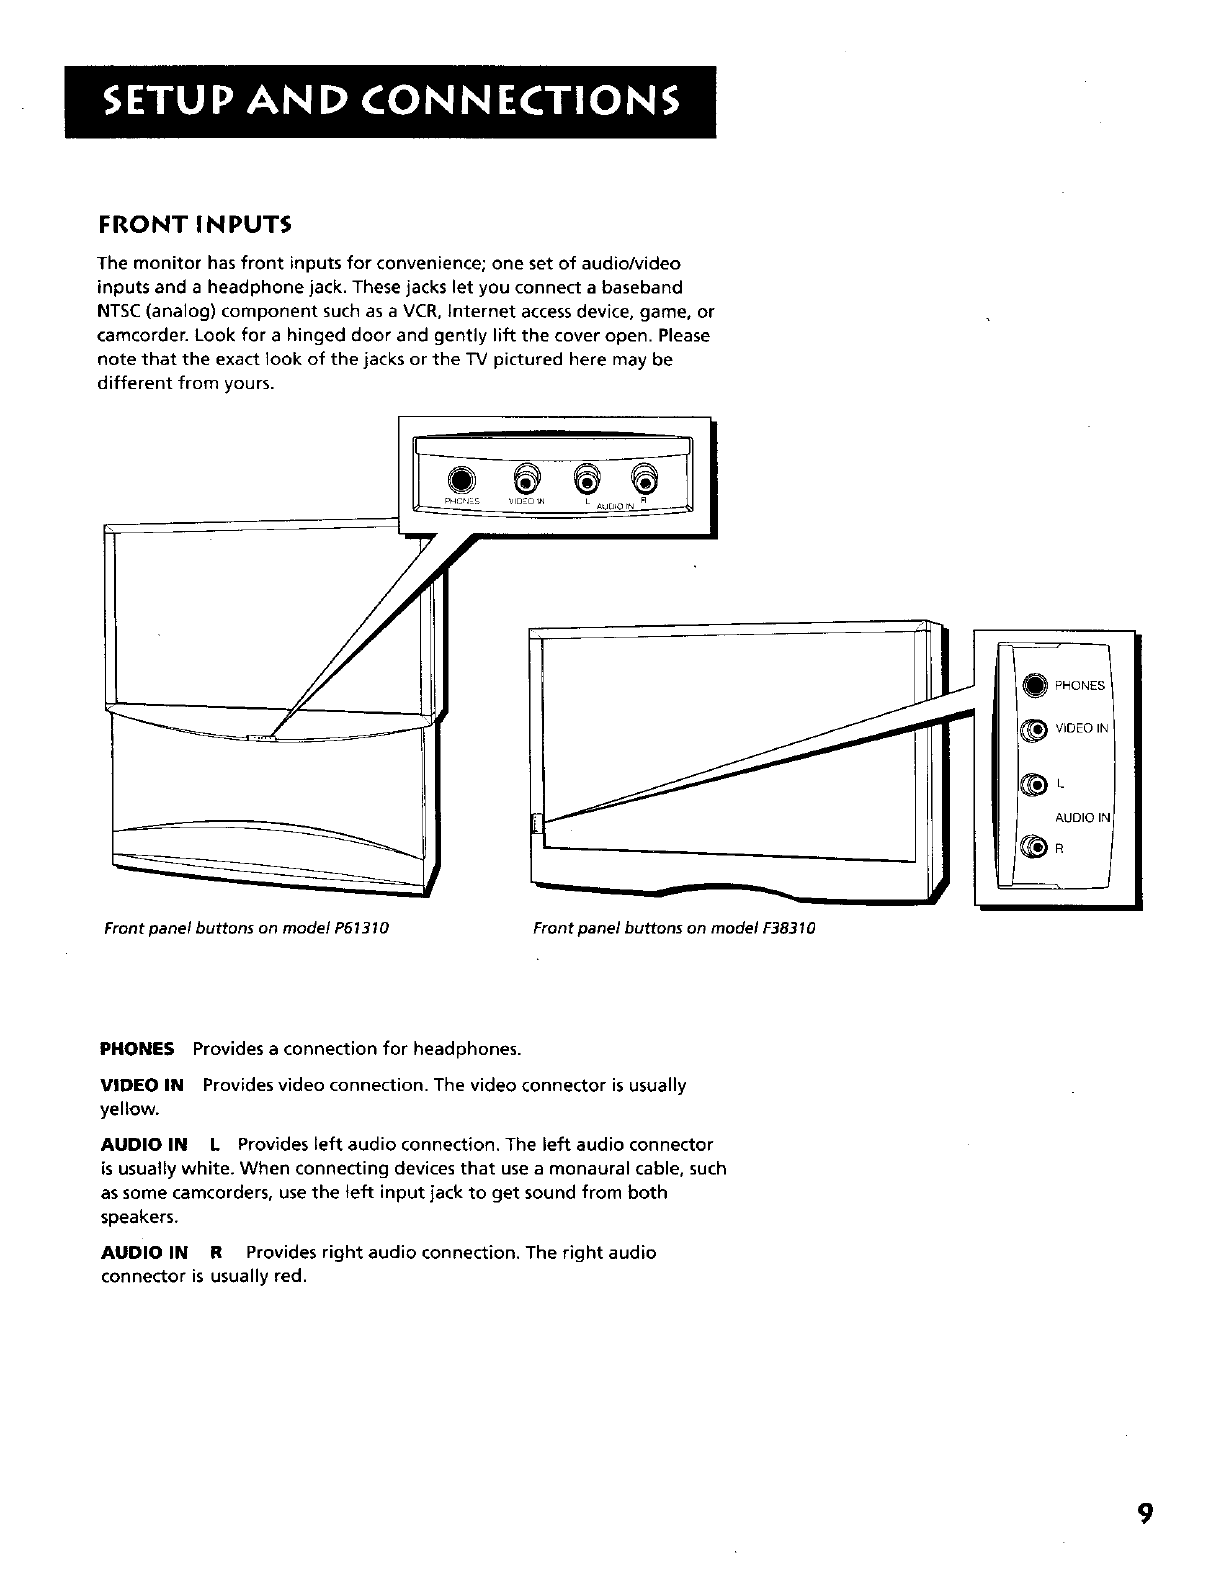
FRONT INPUTS
The monitor has front inputs for convenience; one set of audio/video
inputs and a headphone jack. These jacks let you connect a baseband
NTSC (analog) component such as a VCR, Internet access device, game, or
camcorder. Look for a hinged door and gently lift the cover open. Please
note that the exact look of the jacks or the TV pictured here may be
different from yours.
Front panel buttons on model P61310 Front panel buttons on model F38310
PHONES Provides a connection for headphones.
VIDEO IN Provides video connection. The video connector is usually
yellow.
AUDIO IN L Provides left audio connection. The left audio connector
is usually white. When connecting devices that use a monaural cable, such
as some camcorders, use the left input jack to get sound from both
speakers.
AUDIO IN R Provides right audio connection. The right audio
connector is usually red.
9

BACK OF THE TV
The diagram below describes each of the back panel jacks found on the TV, When connecting A/V cables, be sure to connect
corresponding outputs and inputs (video to video, right audio to right audio, etc.).
SaTEUUTE
IN
_CC_SS 1
caao
ÙIGITAL
pHONE AUD,O _T
_N_ENNAB
4N
ANTENNAA
LAUOIOa ¢O#PONENT VIDEOIN_J_ 1
VlO_O S.VI_O AUOIO yPp
J
(IN'UT2e e e _)
Auc_o OUTPUT_
66
SATELLITE IN Use to connect the satellite dish antenna to the TV using
an RG6 cable.
ACCESS CARD Insert the access card into the slot so your program
provider can identify you. Make sure the contacts on the access card are
facing left and the top of the card is facing right while inserting. (Refer
to "New Access Card" in this manual's "Assistance" section for details.)
The DIRECTV PLUSTM System requires a valid card.
PHONE JACK Use to connect a phone line to the TV. The DIRECTV PLUS
System requires a continuous phone line connection to periodically call
out tO program providers.
DIGITAL AUDIO OUT Use adigital optical cable (or SPDIF cable) to
connect your TV to a compatible Dolby Digital receiver or decoder. Dolby
Digital offers theatre-quality sound (six audio channels).
ANTENNA B IN Use to connect an off-air or terrestrial antenna or
cable TV signal to the TV.
ANTENNA A IN Use to connect a second off-air or terrestrial antenna
or cable TV signal to the TV.
SATELLITE
ACCESS
CARD
PHONE DIGITAL
JACK AUDrO OUT
ANTENNA B
iN
ANTENNA A
IN
You can also use the ANT B IN (or ANT A IN) for video games and switch between the two inputs using the ANTENNA |
button on the remote control. When using "IV games, computers, and similar products with your TV, keep the contrast at a J
low setting. If a fixed (non-moving) pattern is left on the screen for long periods of time at a high contrast setting, the
image can be permanently imprinted onto the picture tubes. These types of imprints are not covered by your warranty
because they are the result of misuse.
10
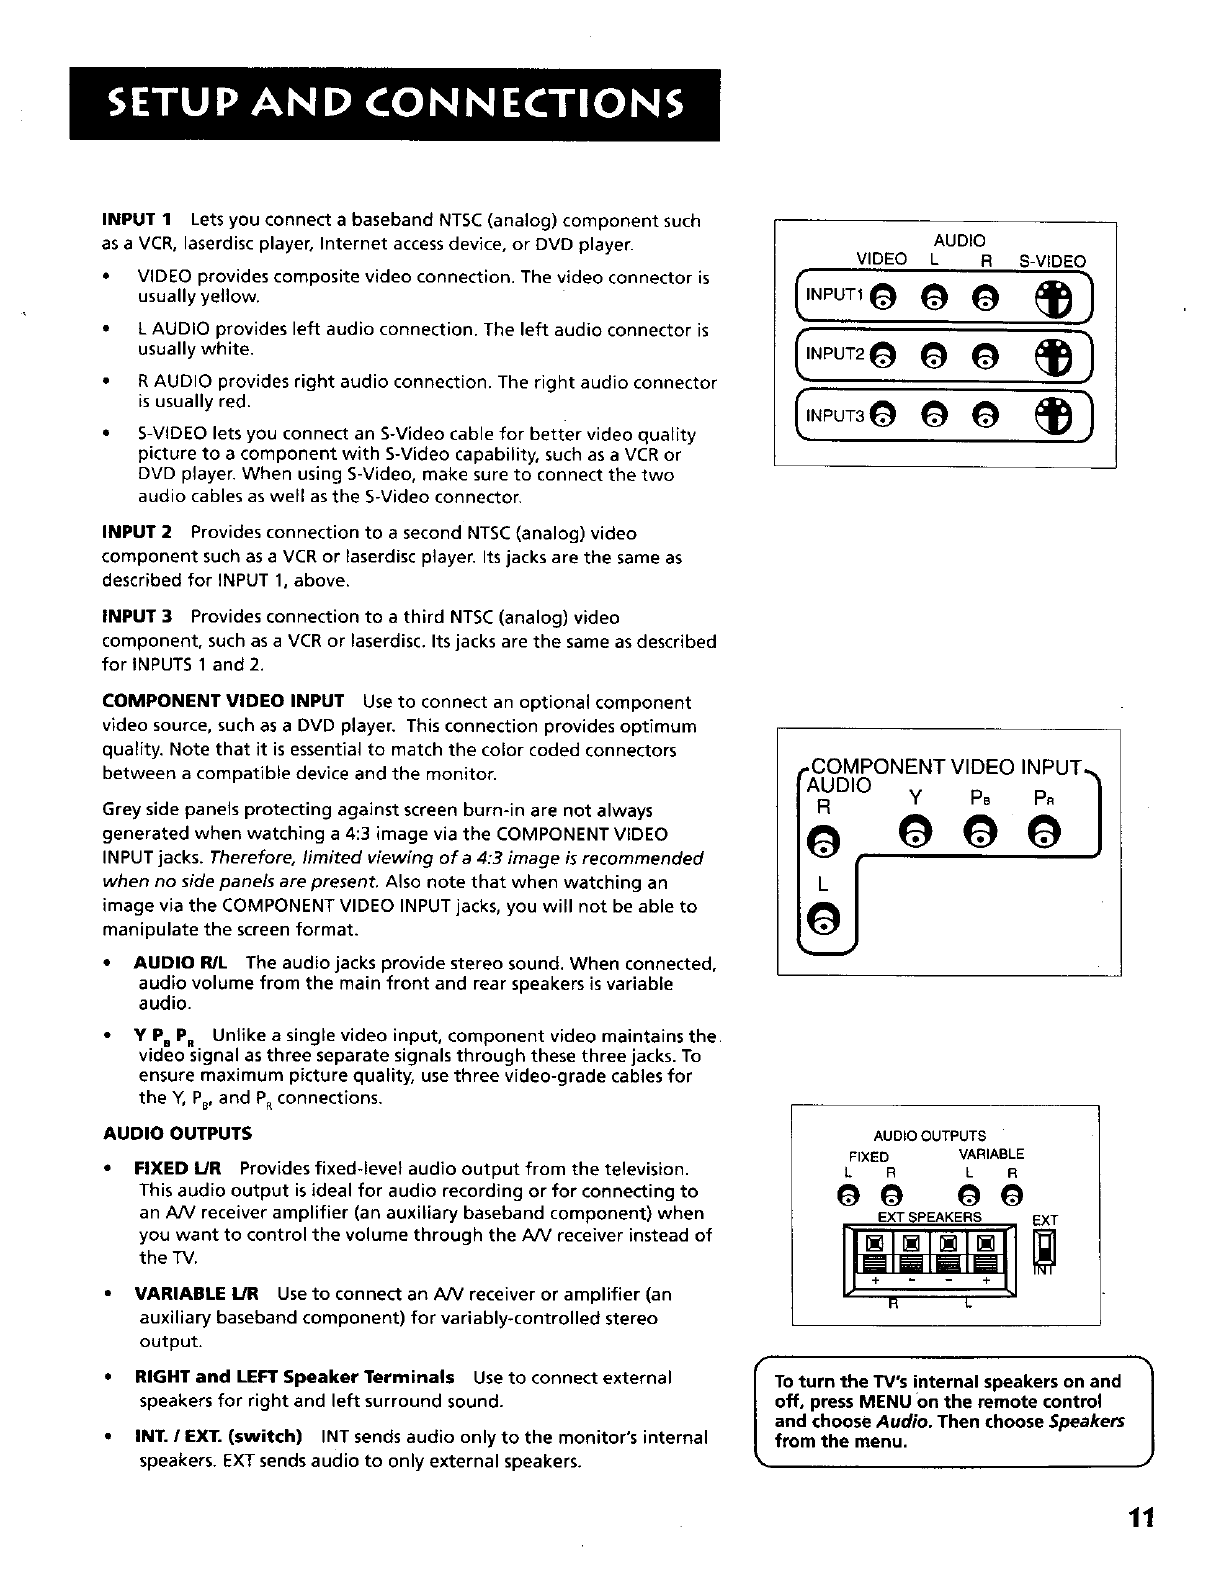
INPUT 1 Lets you connect a baseband NTSC (analog) component such
as a VCR, laserdisc player, Internet access device, or DVD player.
• VIDEO provides composite video connection. The video connector is
usually yellow.
• L AUDIO provides left audio connection. The left audio connector is
usually white.
R AUDIO provides right audio connection. The right audio connector
is usually red.
S-VIDEO lets you connect an S-Video cable for better video quality
picture to a component with S-Video capability, such as a VCR or
DVD player. When using S-Video, make sure to connect the two
audio cables as well as the S-Video connector.
INPUT 2 Provides connection to a second NTSC (analog) video
component such as a VCR or laserdisc player. Its jacks are the same as
described for INPUT 1, above.
INPUT 3 Provides connection to a third NTSC (analog) video
component, such as a VCR or laserdisc. Its jacks are the same as described
for INPUTS 1 and 2.
COMPONENT VIDEO INPUT Use to connect an optional component
video source, such as aDVD player. This connection provides optimum
quality. Note that it is essential to match the color coded connectors
between a compatible device and the monitor.
Grey side panels protecting against screen burn-in are not always
generated when watching a 4:3 image via the COMPONENT VIDEO
INPUT jacks. Therefore, limited viewing of a 4:3 image is recommended
when no side panels are present. Also note that when watching an
image via the COMPONENT VIDEO INPUT jacks, you will not be able to
manipulate the screen format.
•AUDIO R/L The audio jacks provide stereo sound. When connected,
audio volume from the main front and rear speakers is variable
audio.
Y Pe P. Unlike a single video input, component video maintains the
video signal as three separate signals through these three jacks. To
ensure maximum picture quality, use three video-grade cables for
the Y, PB,and PRconnections.
AUDIO OUTPUTS
FIXED IJR Provides fixed-level audio output from the television.
This audio output is ideal for audio recording or for connecting to
an A/V receiver amplifier (an auxiliary baseband component) when
you want to control the volume through the AIV receiver instead of
the "IV.
VARIABLE L/R Use to connect an A/V receiver or amplifier (an
auxiliary baseband component) for variably-controlled stereo
output.
RIGHT and LEFT Speaker Terminals Use to connect external
speakers for right and left surround sound.
INT. IEXT. (switch) INT sends audio only to the monitor's internal
speakers. EXT sends audio to only external speakers.
I v,oEo sv,oEoI
VIDEO
PB
AUDIO OUTPUTS
FIXED VARIABLE
L R L R
80
R L
Toturn the TV's !nternal speakers on and
off, press MENU on the remote control
and choose Audio. Then choose Speakers
from the menu.
11
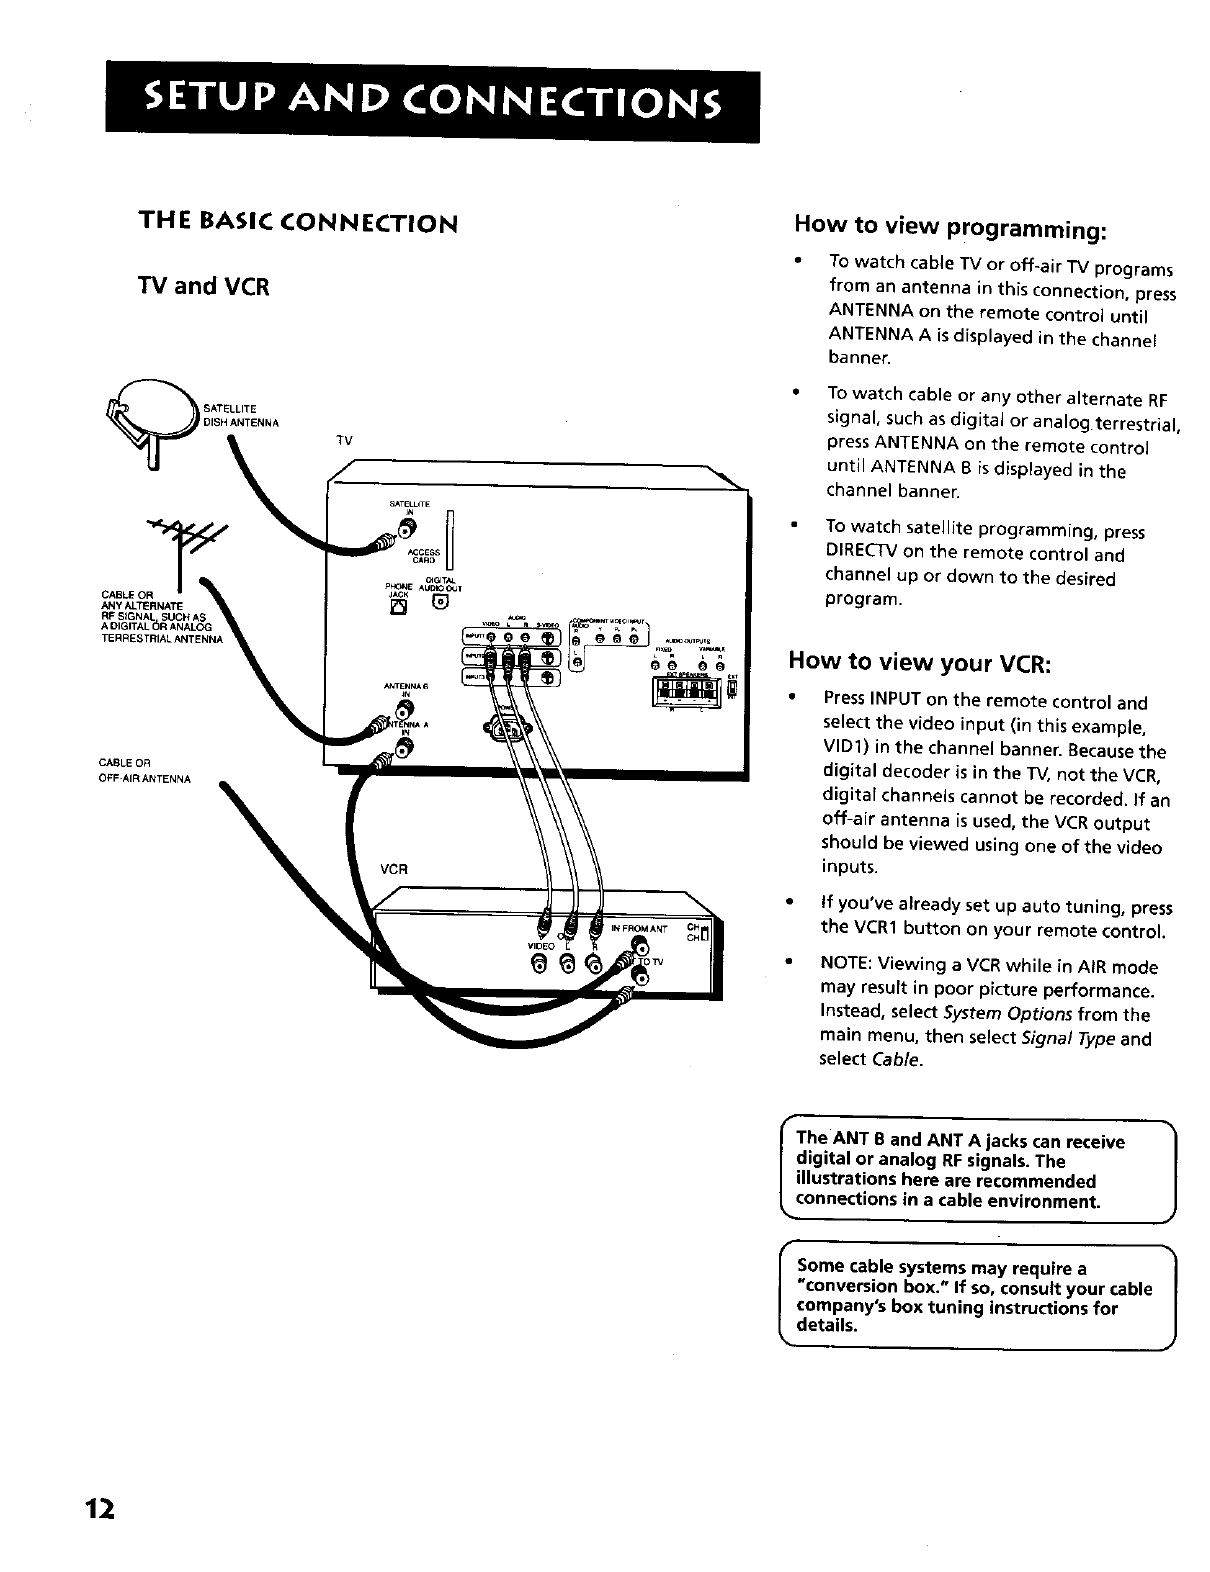
THE BASIC CONNECTION
TV and VCR
_ SATELLITE
DISH ANTENNA
CABLE OR
AN y ALTE RNATI_
RF SIGNAL SUCH AS
A DIGITAL _)R ANALOG
TERRESTRIAL ANTENNA
TV
VCR
IN FROMANT
VIDEO
O0
How to view programming:
To watch cable TV or off-air TV programs
from an antenna inthisconnection,press
ANTENNA on the remote controluntil
ANTENNA A isdisplayedinthe channel
banner.
TOwatch cable or any other alternate RF
signal, such as digital or analog terrestrial,
press ANTENNA on the remote contro_
until ANTENNA B is displayed in the
channel banner.
To watch satellite programming, press
DIRECTV on the remote control and
channel up or clown to the desired
program.
How to view your VCR:
•PressINPUT on the remote control and
select the video input (in this example,
VID1) in the channel banner. Because the
digital decoder is in the TV, not the VCR,
digital channels cannot be recorded, if an
off-air antenna is used, the VCR output
should be viewed using one of the video
inputs.
• If you've already set up auto tuning, press
the VCR1 button on your remote control.
NOTE: Viewing aVCR while in AIR mode
may result in poor picture performance.
Instead, select System Options from the
main menu, then select Signal Type and
select Cable.
The ANT B and ANT A jacks can receive |
digital or analog RF signals. The J
illustrations here are recommended
connections in a cable environment.
-L
_Some cable systems may require a 1
| "conversion box." If so, consult your cable
| company's box tuning instructions for
_details.
12
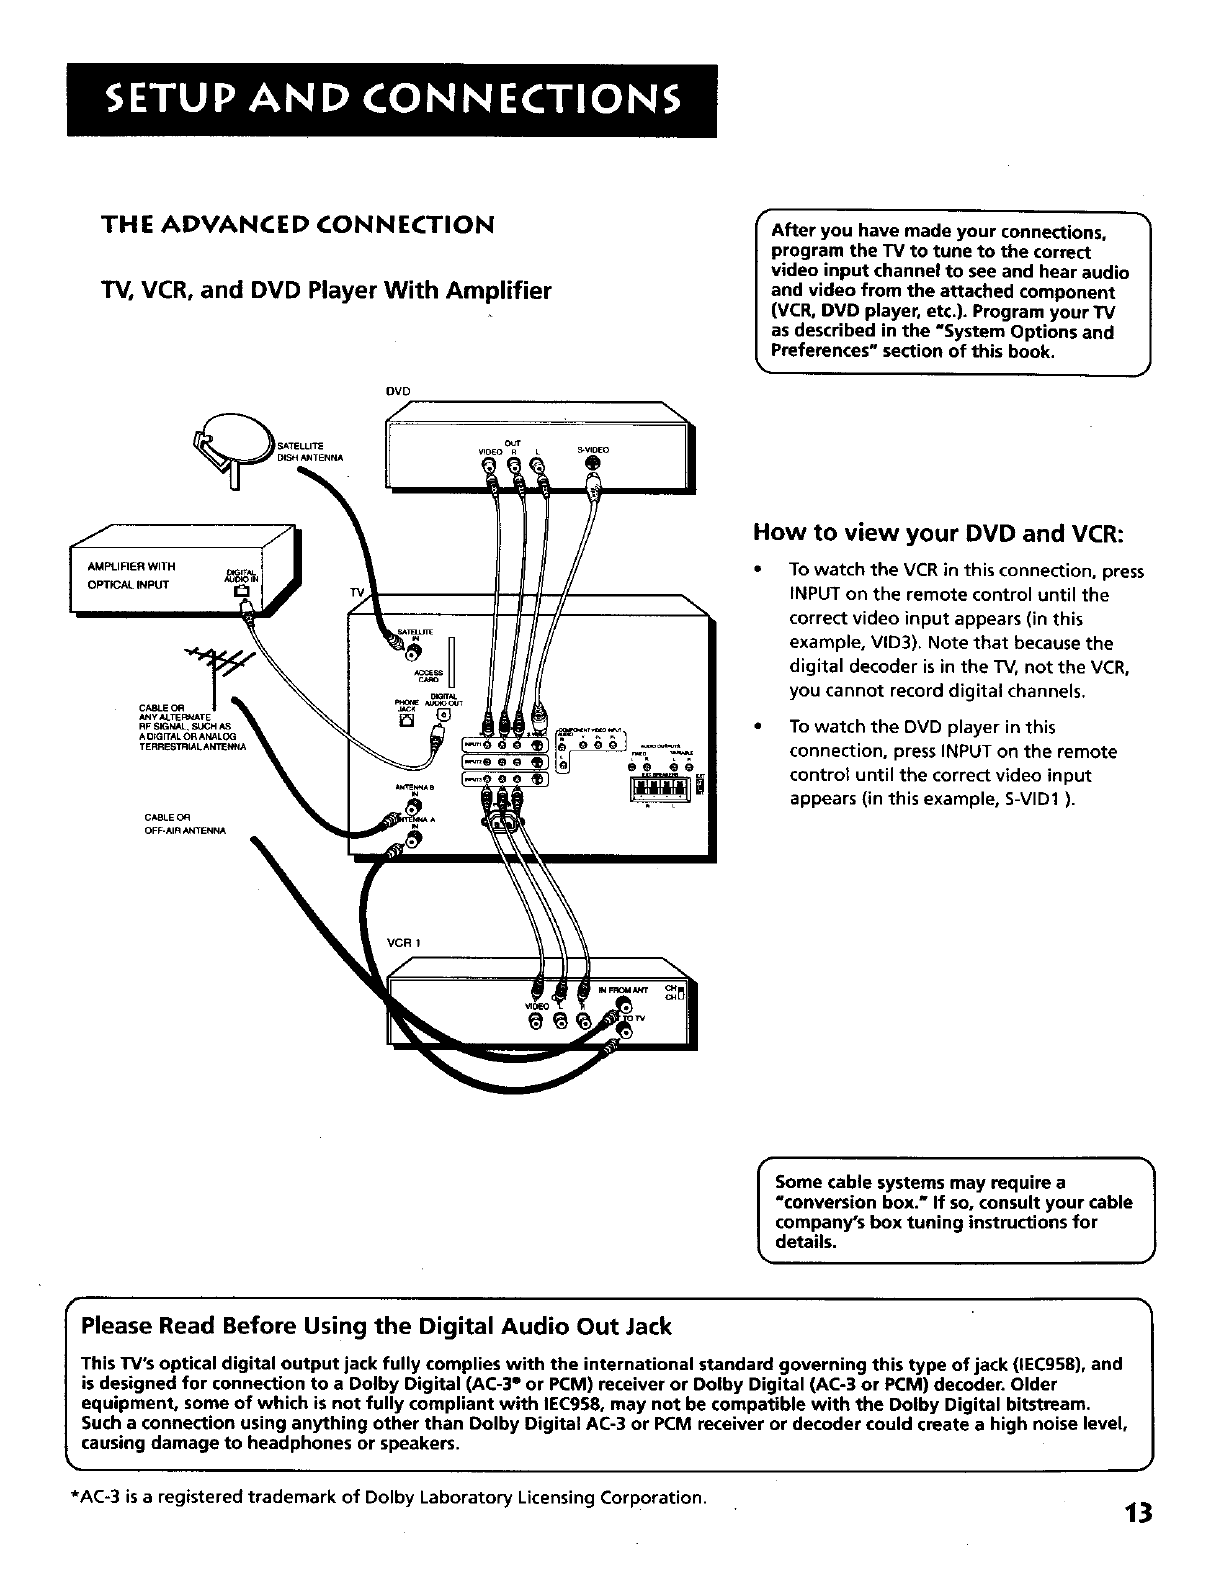
THE ADVANCED CONNECTION
TV, VCR, and DVD Player With Amplifier
AMPLIRER WITH
OPTICAL INPUT
OVD
VCR !
rAfter you have made your connections,
program the TV to tune to the correct
video input channel to see and hear audio
and video from the attached component
(VCR, DVD player, etc.). Program your "IV
as described in the "System Options and
Preferences" section of this book.
How to view your DVD and VCR:
• To watch the VCR in this connection, press
INPUT on the remote control until the
correct video input appears (in this
example, VID3). Note that because the
digital decoder is in the TV, not the VCR,
you cannot record digital channels.
To watch the DVD player in this
connection, press INPUT on the remote
control until the correct video input
appears (in this example, S-VID1 ).
Some cable systems may require a
"conversion box." If so, consult your cable
company's box tuning instructions for
details.
Please Read Before Using the Digital Audio Out Jack
This TV's optical digital output jack fully complies with the international standard governing this type of jack (IEC958), and
is designed for connection to a Dolby Digital (AC-3 °or PCM) receiver or Dolby Digital (AC-3 or PCM) decoder. Older
equipment, some of which is not fully compliant with IEC958, may not be compatible with the Dolby Digital bitstream.
Such aconnection using anything other than Dolby Digital AC-3 or PCM receiver or decoder could create a high noise level,
causing damage to headphones or speakers.
*AC-3 is a registered trademark of Dolby Laboratory Licensing Corporation. 13
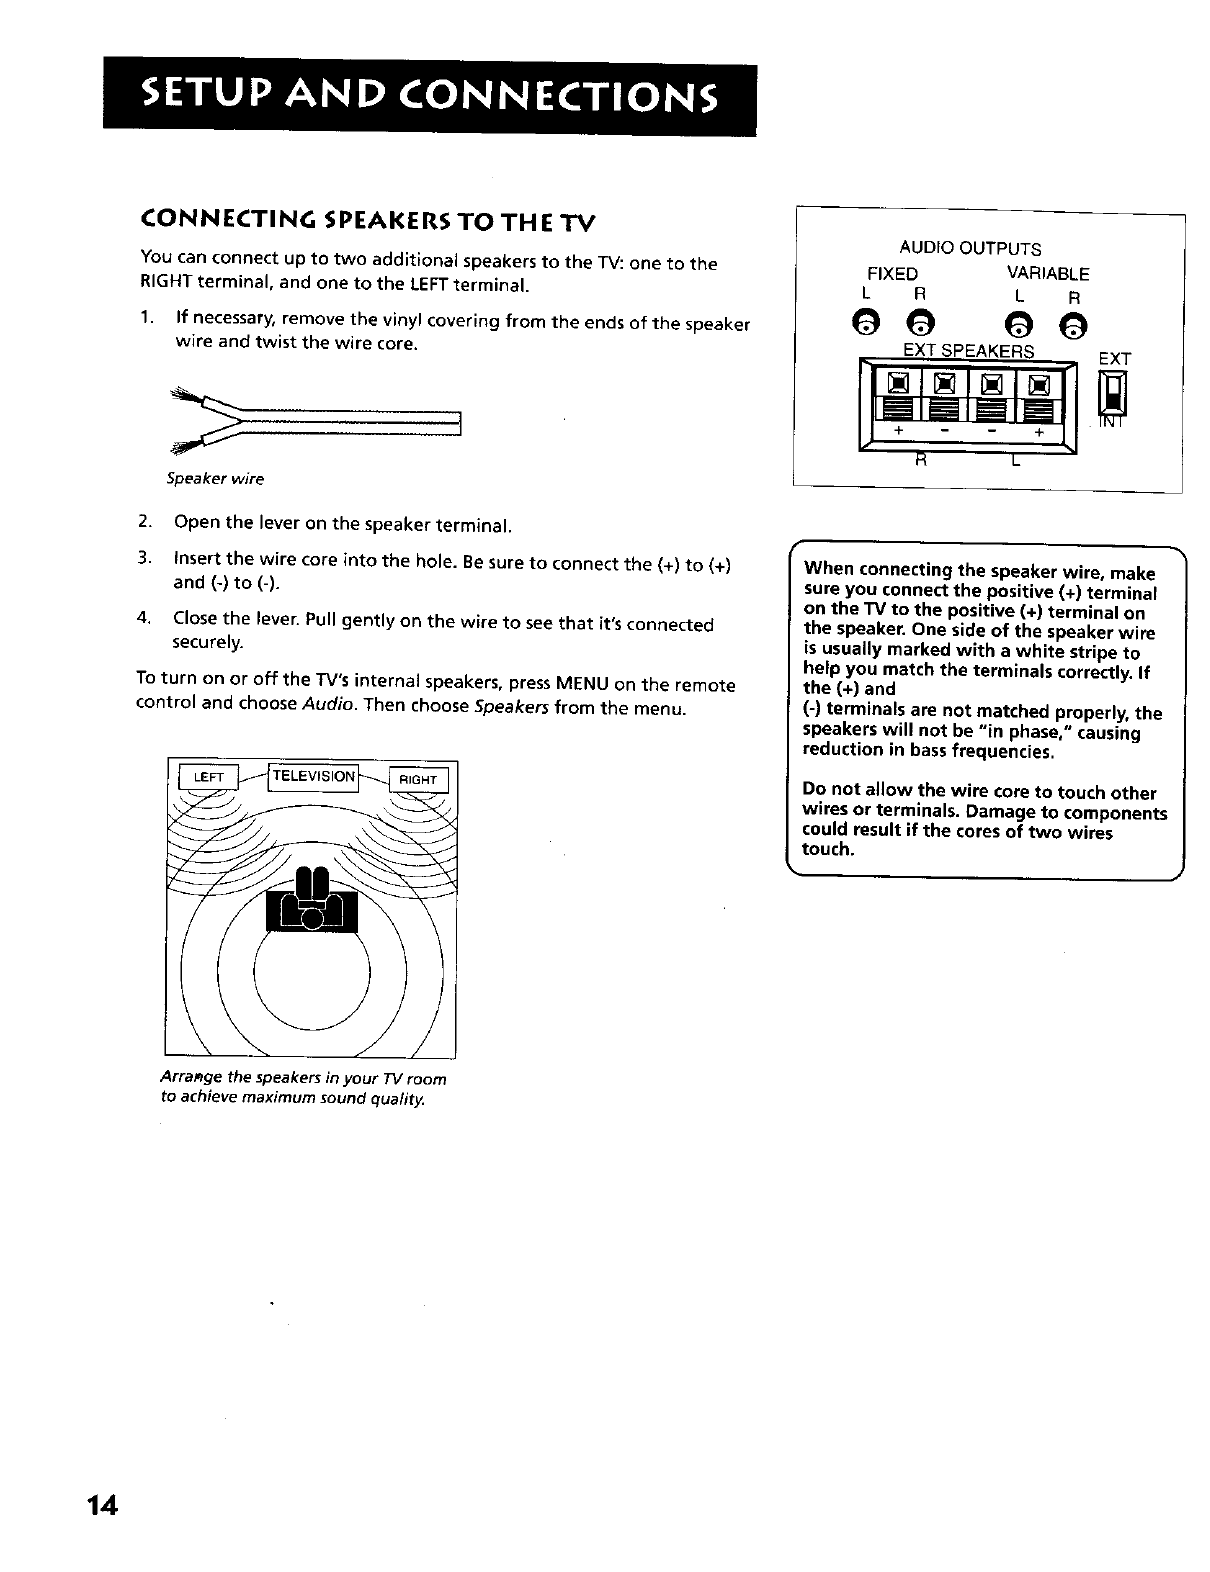
CONNECTING SPEAKERS TO THE TV
You can connect up to two additional speakers to the TV: one to the
RIGHT terminal, and one to the LEFT terminal.
1. If necessary, remove the vinyl covering from the ends of the speaker
wire and twist the wire core.
t
Speaker wire
2. Open the lever on the speaker terminal.
3. Insert the wire core into the hole. Be sure to connect the (+) to (+)
and (-) to (-).
4. Close the lever. Pull gently on the wire to see that it's connected
securely.
To turn on or off the TV's internal speakers, press MENU on the remote
control and choose Audio. Then choose Speakers from the menu.
TELEVISION
AUDIO OUTPUTS
FIXED VARIABLE
L R L R
EXT SPEAKERS EXT
R L
f
When connecting the speaker wire, make
sure you connect the positive (+) terminal
on the TV to the positive (+) terminal on
the speaker. One side of the speaker wire
is usually marked with a white stripe to
help you match the terminals correctly. If
the (+) and
(-) terminals are not matched properly, the
speakers will not be "in phase," causing
reduction in bass frequencies.
Do not allow the wire core to touch other
wires or terminals. Damage to components
could result if the cores of two wires
_touch.
Arrange the speakers in your TV room
to achieve maximum sound quality.
14
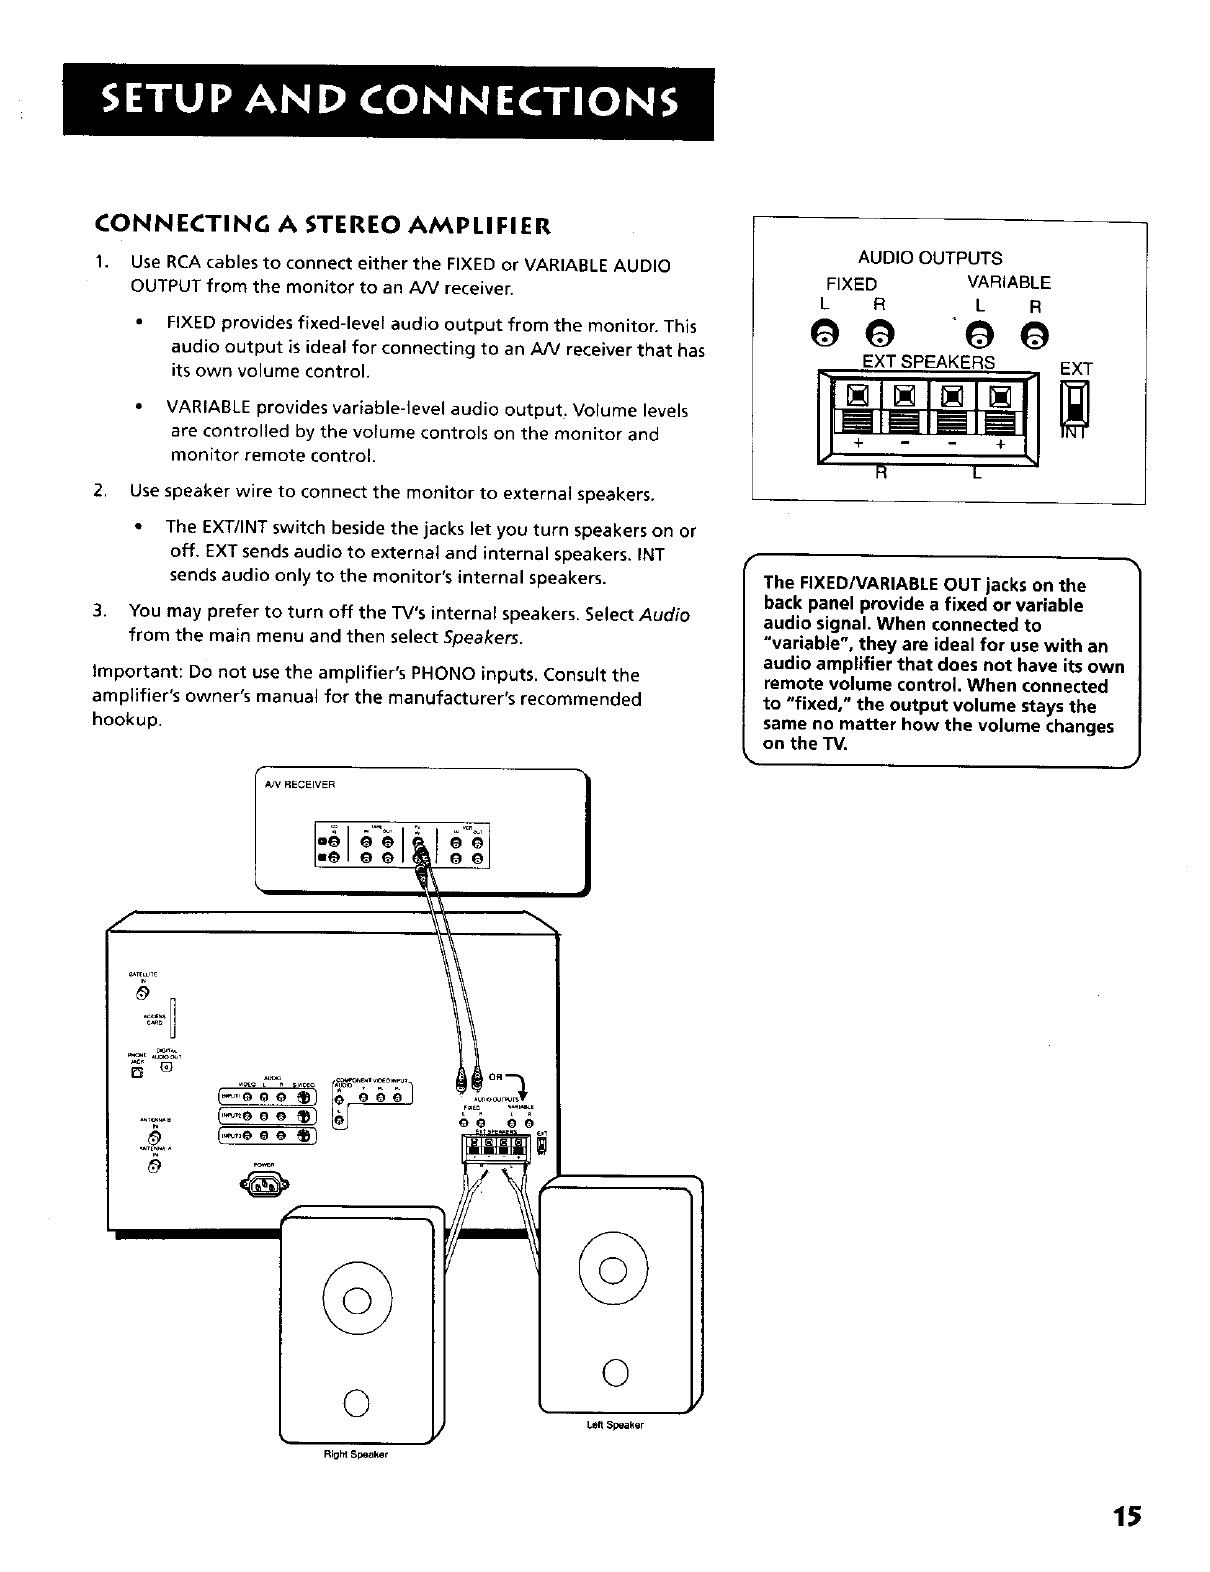
CONNECTING A STEREO AMPLIFIER
1. Use RCA cables to connect either the FIXED or VARIABLE AUDIO
OUTPUT from the monitor to an A/V receiver.
• FIXED provides fixed-level audio output from the monitor. This
audio output is ideal for connecting to an AN receiver that has
its own volume control.
•VARIABLE provides variable-level audio output. Volume levels
are controlled by the volume controls on the monitor and
monitor remote control.
2. Use speaker wire to connect the monitor to external speakers.
3.
• The EXT/INT switch beside the jacks let you turn speakers on or
off, EXT sends audio to external and internal speakers. INT
sends audio only to the monitor's internal speakers.
You may prefer to turn off the TV's internal speakers. Select Audio
from the main menu and then select Speakers.
_mportant: Do not use the amplifier's PHONO inputs. Consult the
amplifier's owner's manual for the manufacturer's recommended
hookup.
RECEIVER
f
I
©
Right Speaker
©
Left Speaker
1
AUDIO OUTPUTS
FIXED VARIABLE
L R L R
EXT SPEAKERS
+
R L
EXT
The FIXED/VARIABLE OUT jacks on the
back panel provide a fixed or variable
audio signal. When connected to
"variable", they are ideal for use with an
audio amplifier that does not have its own
remote volume control When connected
to "fixed," the output volume stays the
same no matter how the volume changes
on the TV.
15

STEP 3: PLACE BA'I-FERIES IN THE
REMOTE CONTROL
Follow these steps whenever you need to install or change the batte_'ies
in your TV's remote control.
1. Remove the cover from the battery compartment.
2. Insert batteries into the battery compartment, matching
the + and - end of each battery.
3. Replace the cover.
STEP 4: PLUG IN AND TURN ON THE
SYSTEM
Plug one end of the power cord into the back of the television as shown
on right. Plug the other end into a wall outlet. Be sure to insert the
plugs completely.
To turn on the TV, press the TV or ONoOFF button on the remote control
or the POWER button on the front panel. It may take several seconds for
the "IV to turn on.
STEP 5: COMPLETE THE INTERACTIVE
SETU P
Interactive setup appears when you turn on your TV for the first time.
Follow the steps to configure the basics of your system, such as setting
up the time and day, searching for available channels, and setting up
speakers. To run it again, select Assistance from the main menu, then
select Interactive Setup. For more details, see the section "Getting
Assistance" in this book.
STEP 6: ORDER PROGRAMMING
You should decide if you would like to receive DIRECTV® programming*.
To receive DIRECTV programming, your satellite dish antenna must be
installed and pointed correctly. You must also contact your service
provider, DIRECTV.
Programming with DIRECTV: Call 1-800-347-3288
*Receipt of DIRECTV programming is subject to the terms of the DIRECTV
Customer Agreement, a copy is provided with your first billing statement.
DIRECTV and DIRECTV PLUS are trademarks of DIRECTV, Inc., a unit of Hughes
Electronics Corp., and are used with permission.
When you order programming, you need
to know your access card number. To get
the number, select Assistance from the
main menu and then select System Test.
Wait for the system to run all of its tests.
The access card number is displayed at the
end of the system test.
Write the access card number in the space
below for easy reference:
16
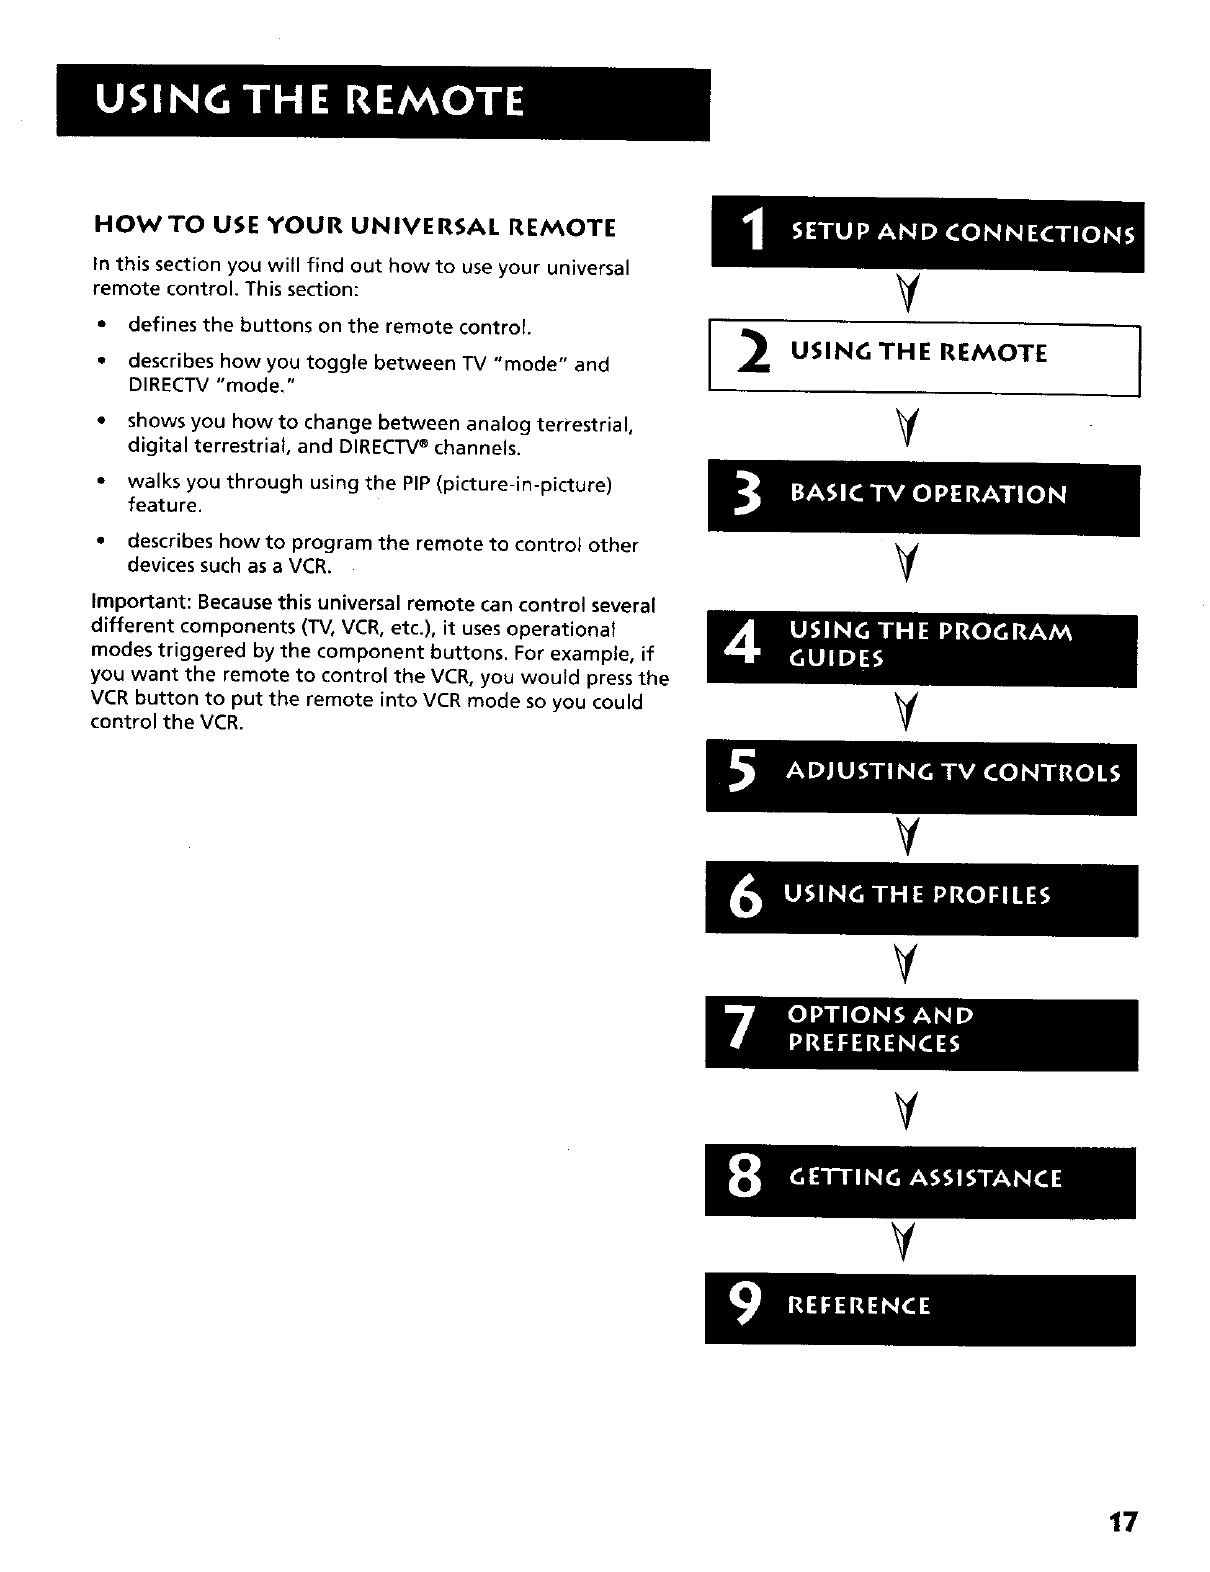
HOW TO USE YOUR UNIVERSAL REMOTE
In this section you will find out how to use your universal
remote control. This section:
•defines the buttons on the remote control.
• describes how you toggle between TV "mode" and
DIRECTV "mode,"
• shows you how to change between analog terrestrial,
digital terrestrial, and DIRECTV®channels.
• walks you through using the PIP (picture-in-picture)
feature.
• describes how to program the remote to control other
devices such as a VCR.
Important: Because this universal remote can control several
different components (TV, VCR, etc.), it uses operational
modes triggered by the component buttons. For example, if
you want the remote to control the VCR, you would press the
VCR button to put the remote into VCR mode so you could
control the VCR.
2USING THE REMOTE
¥
V
V
¥
17

REMOTE CONTROL BUTTONS
ON,OFF When the remote control is in TV or DIRECTV mode, ON.OFF
turns the TV on or off. If in another component mode, (VCR, DVD, etc.)
and programmed, the remote will turn the component on and off.
When pressed twice within two seconds, all components that are on will
be turned off (this feature only works with most RCA, GE, and PROSCAN
products).
VCR1 Places the remote control in VCR mode and if auto tuning is
enabled, it will turn on the TV and tune to the correct video input
channel for viewing VCR1.
TV Turns on the TV and tunes to the last-viewed TV channel. Also
places the remote control in TV mode. Placing the remote in TV mode
enables you to access the TV's menu system as well as tune to analog,
digital, or cable TV channels.
DVD Places the remote control in DVD mode and if auto tuning is
enabled, it will turn on the TV and tune to the correct video input
channel for viewing your RCA, GE, or PROSCAN DVD player.
VCR2 Places the remote control in VCR2 mode and if auto tuning is
enabled, it will turn on the TV and tune to the correct video input
channel for viewing VCR2.
(LED) Light that indicates you're in programming mode when
programming the remote control. Also displays when a valid remote
control button is pressed.
AUX Places the remote in auxiliary mode in order to control the
component (such as a laserdisc player) that you have programmed it to
control Acts as a "wildcard" button, as it can be programmed to control
another VCR, cable box, satellite receiver, or an RCA, GE, or PROSCAN
audio component.
DIRECTV Places the remote control in DIRECTV mode, turns on the TV,
and tunes to the last-viewed DIRECTV® channel. If you subscribe to
DIRECTV®programming, you must be in DIRECTV mode to view
DIRECTV®channels. Placing the remote in DIRECTV mode enab]es you to
access the TV's menu system as well as tune to DIRECTV® channels.
MUTE Reduces the TV's volume to its minimum level. Press again to
restore volume.
SKIP Press once before changing channels and the TV will return to the
original channel after 30 seconds. Press repeatedly to add more time. If
no other displays are present, pressing CLEAR will cancel the commercial
skip timer.
CH +1- Scrolls up or down through the current channel list. Press once
to change the channel up or down; press and hold to continue changing
channels. If you are in TV mode and press CH+/-, you scroll through TV
channels. If you subscribe to DIRECTV® programming and are in DIRECTV
mode, you scroll through DIRECTV® channels. In DVD mode, CH +/- will
skip chapters on a disc played by RCA, GE, or PROSCAN DVD players.
VOL UPIDOWN Adjusts the TV's audio volume.
FETCH Brings up the Fetch menu, which is a list of most commonly
accessed menu items.
LED
18
GO BACK Moves you back and forth between the last two channels
selected in either DIRECTV mode or TV mode. For example, if you have
been viewing both DIRECTV®and TV channels (and thus using both the
DIRECTV and TV "modes"), pressing GO BACK while watching a
DIRECTV®channel moves you back to the last DIRECTV®channel you
viewed. Pressing it while watching a TV channel moves you to the last
TV channel you viewed. In the menu system, pressing GO BACK returns
you to the previous menu screen,
(Light Bulb Button) Press to illuminate some of the remote control's
buttons. To conserve battery power, the light turns off after several
seconds.
GUIDE When in TV mode, brings up the TV program guide. In DiRECTV
mode, brings up the DIRECTM® programming guide. Subsequent presses
of the GUIDE button scroll through the different types of guides. Press
GUIDE after pressing INPUT to get a guide-like list of available video
input channels.
INFO Brings up channel and viewing information via the channel
banner. Quickly press again to bring up an extended channel banner
and press a third time to remove the banner. Press when in the program
guides to get more information on the highlighted program or channel.
ARROWS Used to point to different items in the menu system and
adjust the menu controls. Also move the PIP window when no menus
are on the screen.
OK When in the menu system and other on-screen displays, selects
highlighted items.
MENU Brings up the main menu and selects highlighted items. When
in using an RCA, GE, or PROSCAN VCR and in VCR mode, it functions as a
PROGRAM button.
CLEAR Removes on screen displays and returns to normal viewing. If
no displays are present and the skip timer is set, CLEAR will cancel the
commercial timer.
DIGIT BU'I'FONS (0 - 9) Enters channel numbers and time settings
directly though the remote control. For more information on entering
digits to change channels, see the section "Basic TV Operation." When in
the menus, the digit buttons can be used to directly select items without
using the arrows. 0 can be used to return to the previous menu screen.
INPUT Toggles through the available external input sources.
ANTENNA Switches the source of the off-air signalbetween the
HDTV's ANTENNA A and B. When in VCR mode, the ANTENNA button
also functions as a TVNCR button.
REVERSE, PLAY, FORWARD, RECORD, STOP, PAUSE If programmed,
provides transport control for some remote-controllable VCRs, DVD
players, laserdisc players, tape decks, and CD players when the remote is
in that mode, When in TV or DIRECTV mode, FORWARD will toggle
through screen formats.
PIP (Picture-in-Picture) When viewing an analog signal, brings up the
small PIP window. Press again to hide PIR
SWAP Exchanges the main analog picture with the analog PiP window.
CH CTRL (Channel Control) Selects the picture window (either the
main or PIP window) that will change when you press the CH +, CN -,
INPUT, or digit buttons on the remote control.
WHO Toggles through user profiles.
Don't worry about getting stuck inside a
menu. Pressing the CLEAR button on the
remote control takes you out of the menu
system.
19
PROG RAMMI NG TH E REMOTE CONTROL
The universal remote can be programmed to control most brands of
remote controllable components, such as VCRs. The remote is already
programmed to control most RCA, GE and PROSCAN TVs, VCRs, DVD
players, and laserdisc players.
TESTI NG TH E REMOTE CONTROL
To determine whether the universal remote control requires
programming, turn on a component, such as a MCR, point the remote
control at the VCR, and press the VCRt button. Then press ON,OFF or
CH + (channel up) or CH - (channel down) to see if the VCR responds to
the remote control commands. If not, the remote control requires
programming.
PROGRAMMING TH E REMOTE CONTROL
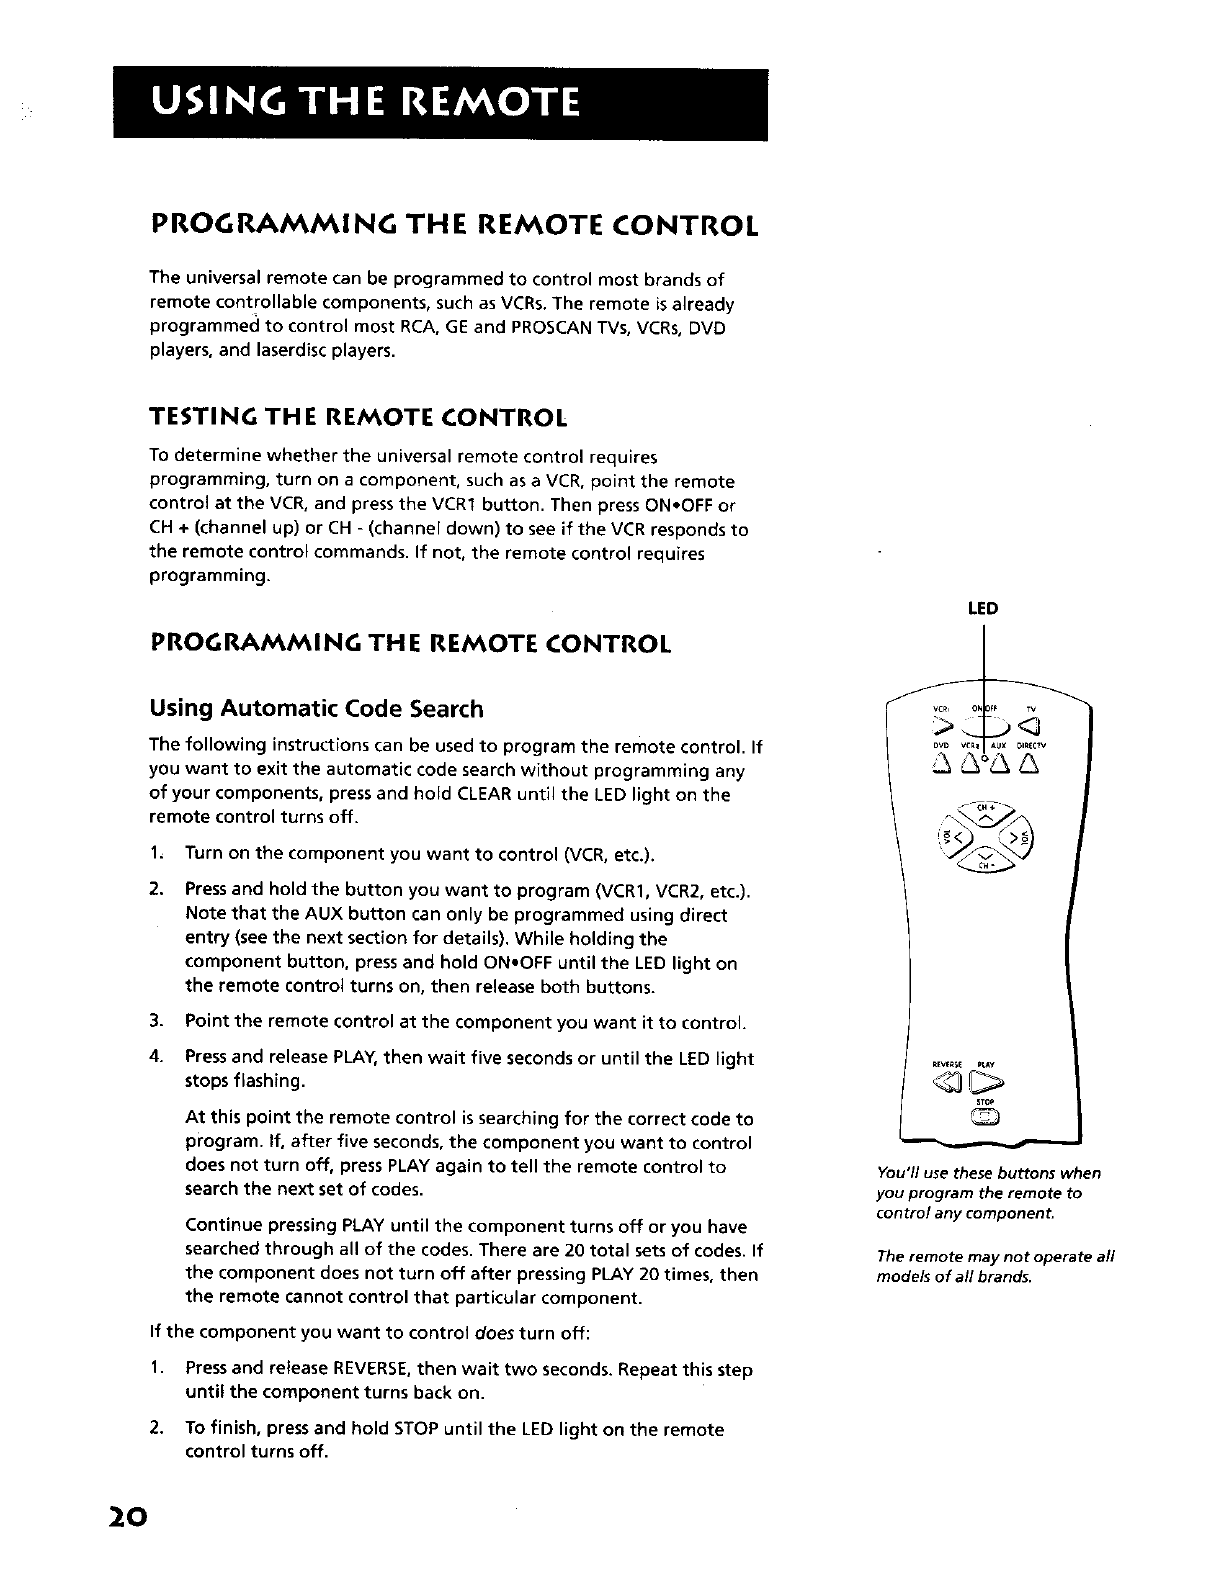
Using Automatic Code Search
The following instructions can be used to program the remote control. If
you want to exit the automatic code search without programming any
of your components, press and hold CLEAR until the LED light on the
remote control turns off.
1, Turn on the component you want to control (VCR, etc.).
2. Press and hold the button you want to program (VCR1, VCR2, etc.).
Note that the AUX button can only be programmed using direct
entry (see the next section for details). While holding the
component button, press and hold ON.OFF until the LED light on
the remote control turns on, then release both buttons.
3. Point the remote control at the component you want it to control.
4. Press and release PLAY, then wait five seconds or until the LED light
stops flashing.
At this point the remote control is searching for the correct code to
program. If, after five seconds, the component you want to control
does not turn off, press PLAY again to tell the remote control to
search the next set of codes.
Continue pressing PLAY until the component turns off or you have
searched through all of the codes. There are 20 total sets of codes. If
the component does not turn off after pressing PLAY 20 times, then
the remote cannot control that particular component.
If the component you want to control does turn off:
1. Press and re!ease REVERSE,then wait two seconds. Repeat this step
unti! the component turns back on.
2. To finish, press and hold STOP until the LED light on the remote
control turns off.
LED
vCm _F TV
AUxDIREOV
You'll use these buttons when
you program the remote to
control any component.
The remote may not operate all
models of all brands.
20
Using Direct Entry
1. Turn on the component to be programmed.
2. Look up the brand and code number(s) for the component on the
code list in the section "Remote Control Codes" on the following
page,
3. Pressand hold the remote control button you want to program.
4. Enter the code from the code list.
5. Release the button, and then press ON-OFF to see if the component
responds to the remote control commands. If it doesn't, try pressing
the component button and then ON,OFF again.
6. If you get no response, repeat these steps using the next code listed
for your brand until the component responds to the remote control
commands.
This remote control may not operate all
models of the brands that are shown. Use
the codes shown in this manual, or on the
sheet packed with your remote control.
Use the AUX button to control a separate
satellite receiver, if necessary. Do not
reprogram the DIRECTV button.
USING THE REMOTE TO CONTROL A
COMPONENT
Once the remote has been programmed successfully, you are ready to
use it to control your components, such as aVCR, DVD player, or
laserdisc player.
To operate the component:
I. Press the component button (VCRI, VCR2, DVD, or AUX) to set the
remote to control the component.
2. Press ON.OFF to turn the component on or off.
3..Use the remote control buttons that apply to that component.
21
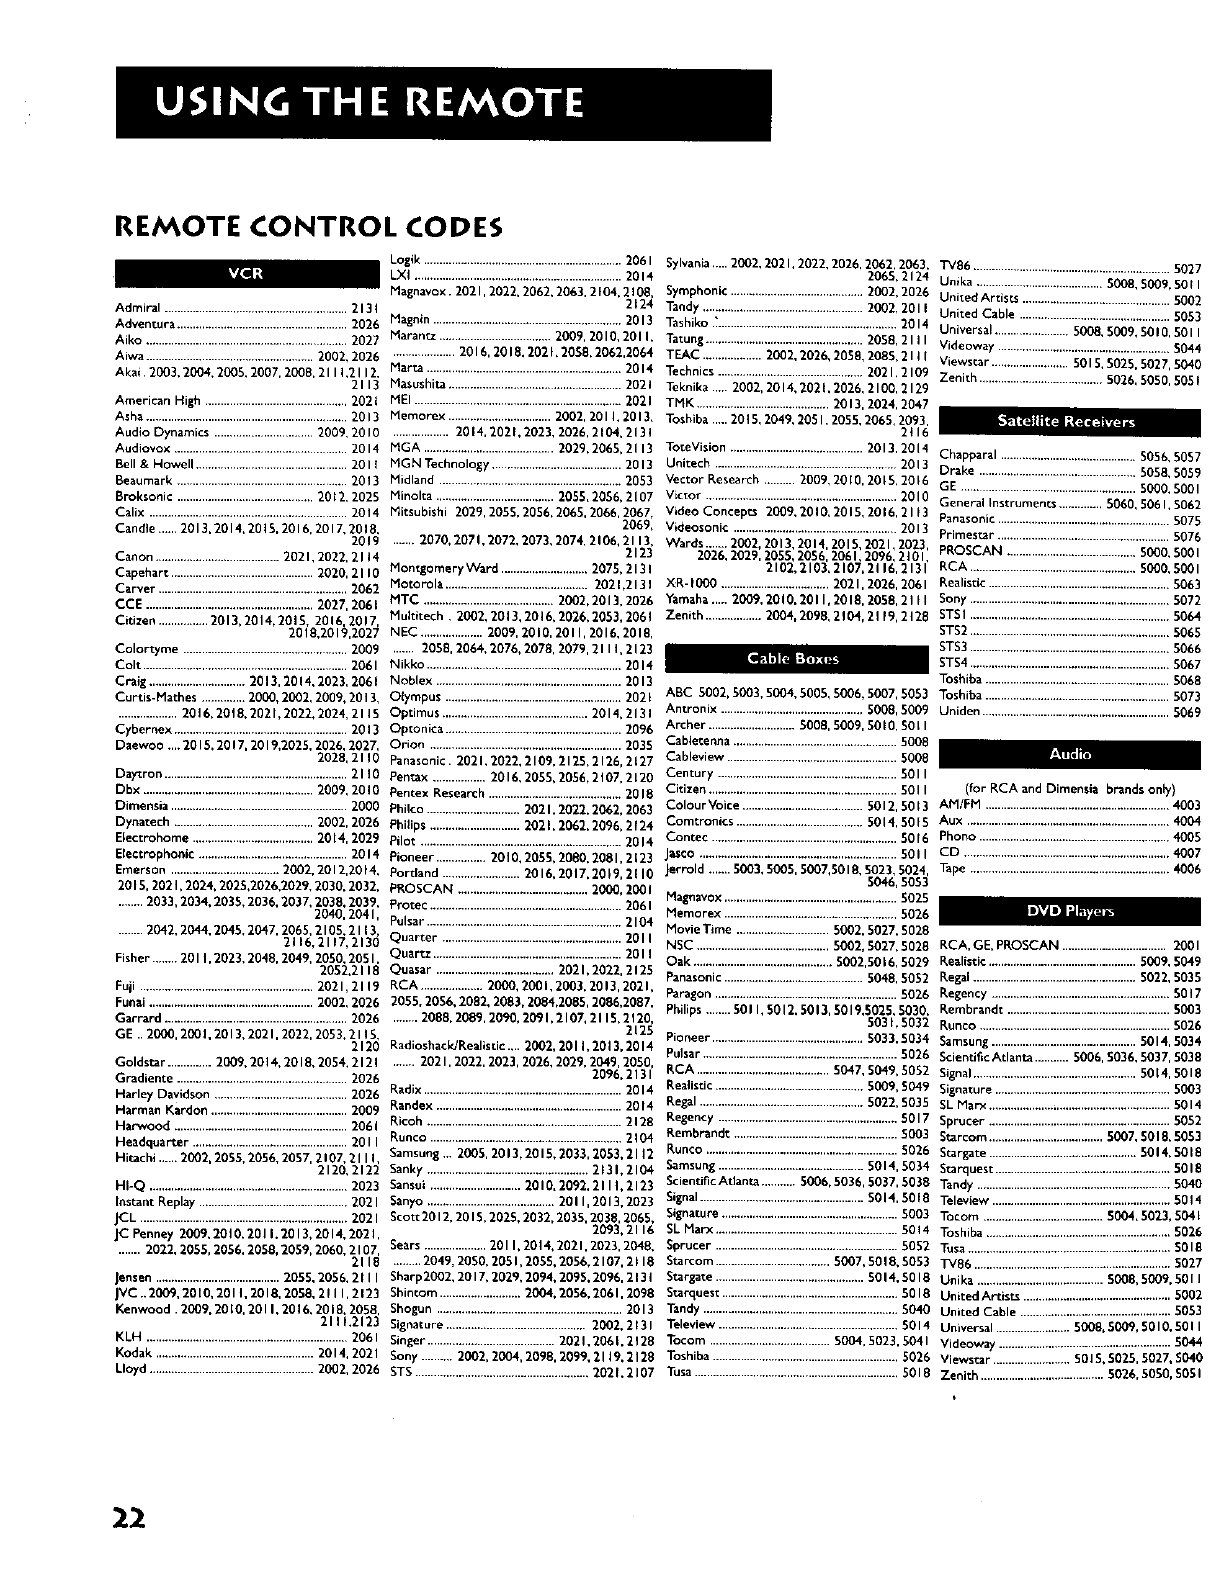
REMOTE CONTROL CODES
Logik ................................................................2061
LXI ...................................................................2014
Magnavox. 202 I, 2022, 2062, 2063.2 F04,2 _08,
Admiral ...........................................................2131 2_24
Adventura .......................................................2026 Magnin .............................................................2013
Aiko ................................................................2027 Marantz ....................................2009, 2010, 201 I,
Aiwa ......................................................2002, 2026 ....................2016, 2018. 202 I, 2058, 2062,2064
Akai. 2003, 2004, 2005, 2007, 2008, 21 I 1,2112. Marta ...............................................................2014
2113 Masushita .......................................................2021
American High ..............................................202_ MEI ...................................................................2021
Asha ...............................................................2013 Memorex .................................2002,2011,2013,
Audio Dynamics ................................2009, 2010 .................. 2014, 202F, 2023, 2026, 2104, 2131
Audiovox ........................................................2014
Bell & Howell .................................................2011
Beaumark ....................................................2013
Broksonic ...........................................2012, 2025
Calix ................................................................2014
Candle.....2013,2014,2015,2016,2017,2018,2019
Canon ........................................202 I, 2022, 2114
Capehart ..............................................2020, 21 I 0
Carver .............................................................2062
CC8 ......................................................2027, 2061
Citizen ................2013, 2014, 2015, 2016, 2017
20 0,2019,2027
Colortyme .....................................................2009
Colt ..................................................................2061
Craig ...............................2018, 2014, 2023, 206 t
Curtis-Mathes .............. 2000, 2002, 2009, 2013,
...................2016, 2018. 2021,2022, 2024, 2115
Cybernex ........................................................2013
Daewoo .... 2015.2017, 2019,2025, 2026, 2027,
2028,2110
Day_ron ...........................................................21 l0
Dbx .......................................................2009, 2010
Dimensia .........................................................2000
Dynatech .............................................2002, 2026
E_ectrohome .......................................2014, 2029
Electrophonic ................................................2014
Emerson ...................................2002, 2012,20 i4,
2015, 202 I, 2024, 2025,2026,2029, 2030, 2032.
........2033, 2034,2035, 2036, 2037, 2038, 2039,
2040, 2041,
........2042, 2044,2045.2047, 2065, 2105, 2113
2 6,2 7,2 30
Fisher ..,,..,.201 I, 2023, 2048, 2049, 2050, 205 I.
2052,2118
Fuji ........................................................2021,2119
Funai .....................................................2002, 2026
Garrard ...........................................................2026
GE .. 2000, 2001,2013,202 I, 2022, 2053, 2115,
2120
Goldstar .............. 2009,2014,2010,2054,2121
Gradiente .......................................................2026
Harley Davidson ...........................................2026
Harman Kardon ............................................2009
Harwood ........................................................2061
Headquarter ..................................................2011
Hitachi ..... 2002, 2055, 2056, 2057, 2107, 21 I I,
2120,2122
Hi-Q ................................................................2023
Instant Replay ................................................2021
JCL ...................................................................2021
JC Panney 2009,20_0,2011.2013,2014,2021,
....... 2022, 2055, 2056, 2050, 2059, 2060, 2107,
2118
Jensen........................................2055, 2056, 2t I I
JVC ..2009, 2010, 201 I, 201g, 2050, 21 I I, 2123
Kenwood .2009.2010,2011.2016.2018,2058,
211_,2123
KLH .................................................................2061
Kodak ...................................................2014, 2021
Lloyd .....................................................2002, 2026
MGA ..........................................2029,2065,2113
MGNTeehnology ..........................................2013
Midland ...........................................................2053
Minolta ......................................2055,2056,2107
Mitsubishi 2029,2055,2056,2065,2066,2067,
2069,
....... 2070,2071,2072,2073,2074,2106,2113,
2123
Montgomery Ward ............................2075, 213 I
Motorola ..............................................2021,2131
MTC ..........................................2002.2013, 2026
Multitech ,2002, 2013,2016, 2026, 2053, 206
NEC ....................2009,2010,2011,2016,2018,
....... 2058,2064,2076,2078,2079,21H,2123
Nikko ...............................................................2014
Noblex ............................................................2013
Olympus .........................................................202t
Optimus ...............................................2014,2131
Optoniea .........................................................2096
Orion ..............................................................2035
Panasonic. 2021,2022,2109,2125,2126,2_27
Pentax .................2016,2055,2056,2107,2120
Pentex Research ...........................................2010
Philco ..............................2021,2022.2062, 2063
Philips .............................2021. 2062.2096, 2124
Pilot .................................................................2014
Pioneer ................2010, 2055, 2080.2081, 2123
Portland .........................2016,2017.2019,2110
PROSCAN ..........................................2000,2001
Protec ..............................................................20fil
Pulsar ...............................................................2104
Quarter ..........................................................2011
Quartz .............................................................2011
Quasar ......................................2021,2022,2125
RCA ....................2000,2001,2003.2013,2021,
2055.2056,2082,2083,2084.2085,2086,2087,
........2088.2089,2090,2091,2107,2115,2120,
2125
RadioshacldRealistic.... 2002,2011,2013.2014
....... 2021,2022,2023,2026,2029,2049,2050,
209fi.2131
Radix ................................................................2014
Randex ............................................................2014
Rieoh ...............................................................212fi
Runco ..............................................................2104
Samsung,.. 2005.2013,2015,2033,2053,2112
Sanky ....................................................2131,2104
Sansul .............................2010,2092, 2111,2123
5anyo .........................................2011,2013,2023
Scott2012,2015,2025,2032.2035,2038,2065,
2093,2116
Sears ....................2011,2014,2021,2023, 2040,
.........2049,2050,2051,2055,2056,2107,2H8
Sharp2002,2017,2029,2094,2095,2096,2131
Shin¢om..........................2004,2056,2061,2098
Shogun ............................................................2013
Signature .............................................2002. 2131
Singer.........................................2021,2061.212fi
Sony .......... 2002,2004,2098,2099,21J9.2128
STS........................................................2021.2107
SylvanEa.....2002, 2021, 2022, 2fi26, 20fi2. 2063,
2065,2124
Symphonic ...........................................2002,2026
Tandy ....................................................2002,2011
Tashiko._..........................................................2014
Tatung ...................................................2058,2111
TEAC ...................2002,2026,2050,2085,2111
Technics ...............................................2021,2109
Teknika.,.. 2002,2014,202k2026,2100,2129
TMK ...........................................2013,2024,2047
Toshiba ... 2015, 2049,2051,2055, 2065, 2093.
2tl6
ToteVision ...........................................2013.2014
Unitech ..........................................................2013
Vector Research .......... 2009, 2010, 2015, 20;6
Victor ..............................................................2010
Video Concepts 2009,2010,2015,2016,2113
Videosonic .....................................................2013
Wards....-,2002,2013,2014,201S,2021,2023,
2026,2029,2055,2056,20fil,2096,2101
202,2 03,2 07.2116,2131
XR-1000 ...................................2021,2026,2061
Yamaha.,... 2009,2010.2011,2018.2058,2111
Zenith ..................2004.2098,2104,2119,2128
TV8fi ................................................................5027
Umka .........................................5008, 5009, 50t I
United Artis_ ................................................5002
United Cable .................................................5053
Universa! ........................5008, 5009. 5010, 501 I
Videoway ........................................................5044
Viewsrar .........................501S,5025.5027, 5040
Zenith ........................................5026, 5050, 5051
Chapparal ............................................5056, 5057
Drake ...................................................5058, 5059
GE ........................................................5000, S001
General Instruments ..............5060, 506 I, 5062
Panasonic ........................................................5075
Primestar ........................................................5076
PROSCAN ..........................................5000, 500 I
RCA ......................................................5000,5001
Realistic ...........................................................5063
Sony .................................................................5072
STSI.................................................................5064
STS2.................................................................5065
!!!iii iiiii!i!!i!!iiiiiiiiiiiiiiiiiii!i!!!!!!!!iiiiiiiiiiiiiiiii!!5068
ABC 5002,5003,5004,5005,500fi,5007,5053 Toshiba ............................................................5073
Antronix ..............................................5008,5009
Archer ............................5008,5009,50t0,50LI
Cabletenna .....................................................5008
Cableview .......................................................5008
Century ..........................................................5011
Citizen .............................................................5011
ColourVoice .......................................5012,50_3
Comtronics .........................................5014,50F5
Contee ............................................................50F6
Jasco ................................................................5011
Jerrold .....5003,5005,5007,5010,5023,5024,
504fi, 5053
Uniden .............................................................5069
(for RCA and Dimensia brands onty)
AM/FM ............................................................4003
Aux ..................................................................4004
Phono ..............................................................4005
CD ...................................................................4007
Tape .................................................................4006
Mag_avox ........................................................5025
Memorex ........................................................5026 _nl •
Movie Time ..............................5002, 5027, 5020
NSC ...........................................5002, 5027, 5028
Oak .............................................5002,5016, 5029
Panasonic .............................................5048, 5052
Paragon ...........................................................5026
Philips ,,..,...501 I, 5012. 5013, 5019,5025, 5030.
503 t, 5032
Pioneer .................................................5033, 5034
Pulsar ...............................................................5026
RCA ...........................................5047, 5049, 5052
Realistic ................................................5009, 5049
Regal.....................................................5022, 5035
Regency ..........................................................5017
Rembrandt .....................................................5003
Run¢o ..............................................................5026
Samsung...............................................5014, 5034
Scientific Adanta ...........5006. 5036, 5037, 503g
Signal.....................................................5014, 5018
Signature .........................................................5003
5L Marx ...........................................................5014
Sprucer ...........................................................5052
Starcom .....................................5007. 5018, 5053
5targate ................................................5014, 5018
Starquest .........................................................5018
Tandy ...............................................................5040
Teleview ..........................................................5014
Tocom .......................................5004, 5023, 504 I
Toshiba ............................................................5026
Tusa..................................................................5018
RCA, GE,PRO5CAN ..................................2001
Realistic ................................................5009, 5049
Regal .....................................................5022, $035
Regency ..........................................................5017
Rembrandt .....................................................5003
Runco ..............................................................5026
5amsung ...............................................5014, 5034
Scientific Atlant_ ...........5006, 5036, 5037, 5038
Signal.....................................................50t4, 5018
Signature .........................................................5003
5L Marx ....................._.....................................5014
Sprucer ...........................................................5052
Starcom .....................................500Y,S018, 5053
Stargate ................................................5014, 5018
Starquest.........................................................5018
"randy...............................................................5040
Teleview ..........................................................5014
Tocom .......................................5004, 5023, 504 L
Toshiba ............................................................5026
Tusa..................................................................5018
TV86 ................................................................$027
Unika .........................................5008, 5009. 501 I
United Artists ................................................5002
United Cable .................................................5053
Universal ........................5008. 5009, 50 n0, 501 n
Videoway ........................................................5044
Viewstar .........................5015,5025, 5027, 5040
Zenith ........................................5026. 5050, 5051
22
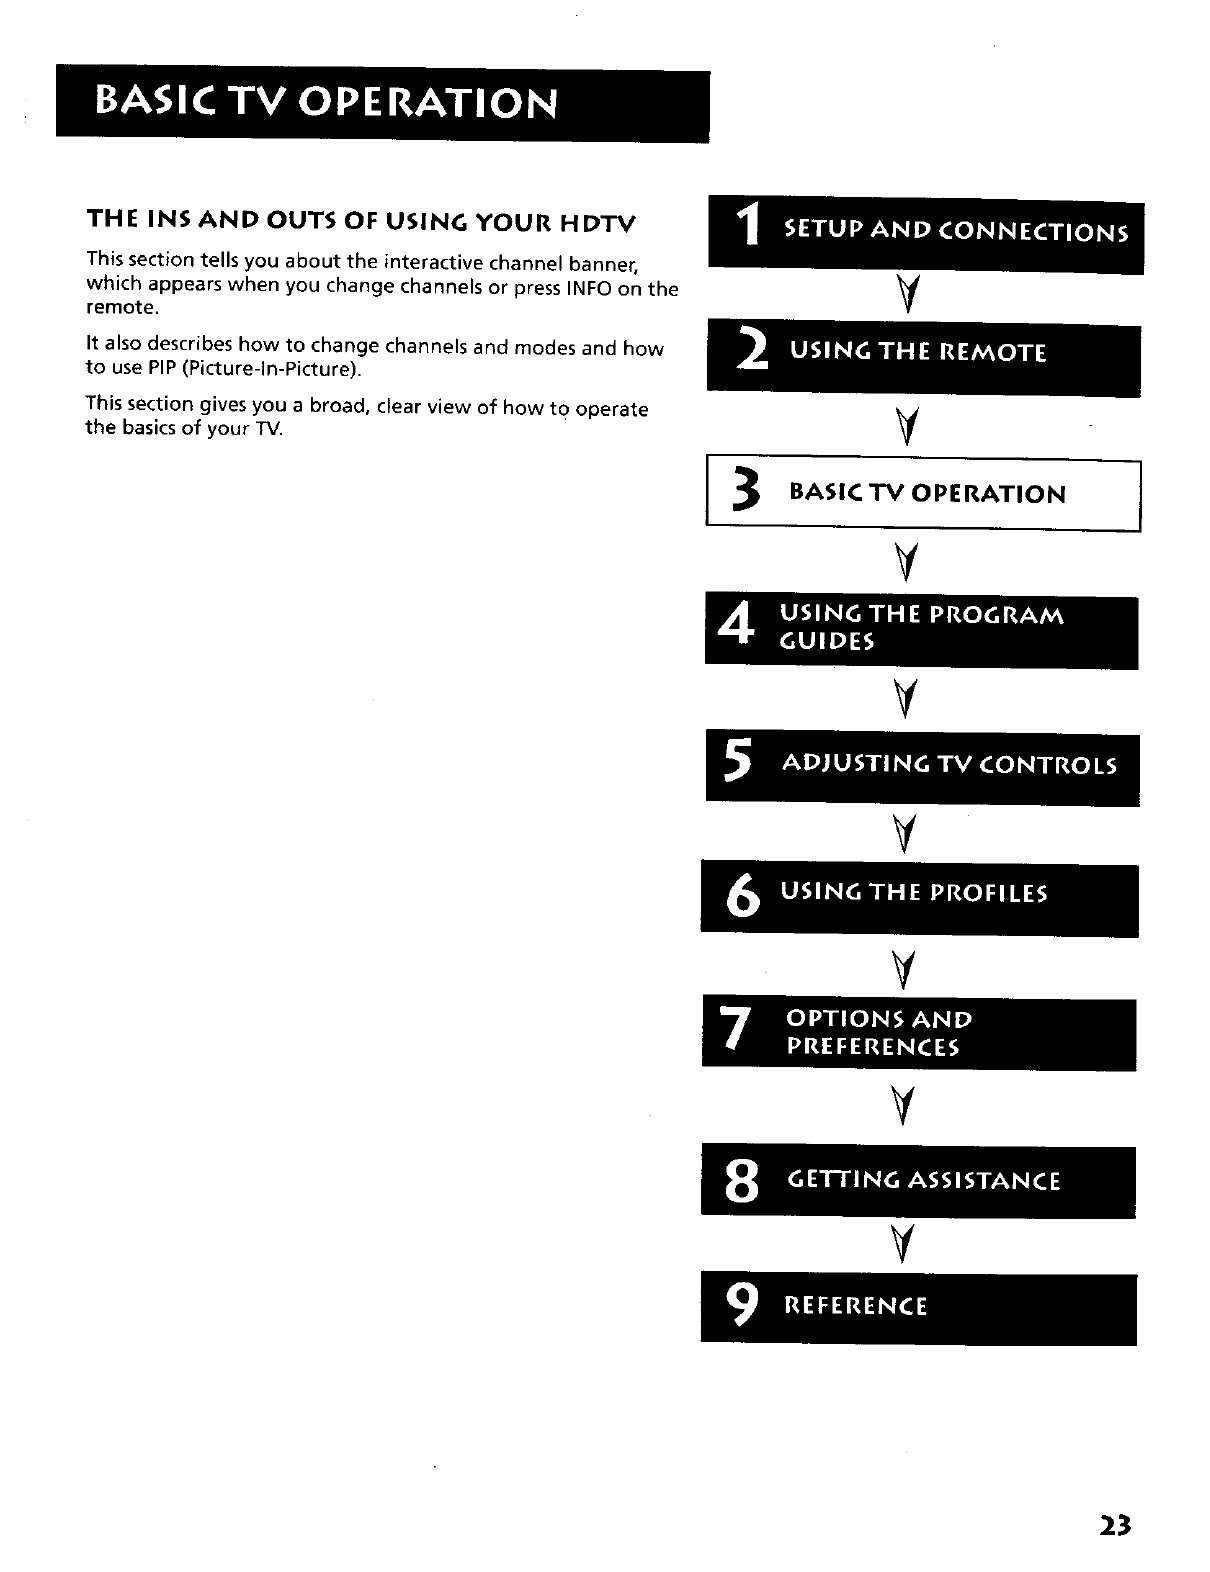
THE INS AND OUTS OF USING YOUR HDTV
This section tells you about the interactive channel banner,
which appears when you change channels or press INFO on the
remote.
It also describes how to change channels and modes and how
to use PIP (Picture-In-Picture).
This section gives you a broad, clear view o{ how t O operate
the basics of your TV.
V
V
BASICTVOPERATION
V
V
V
V
V
23
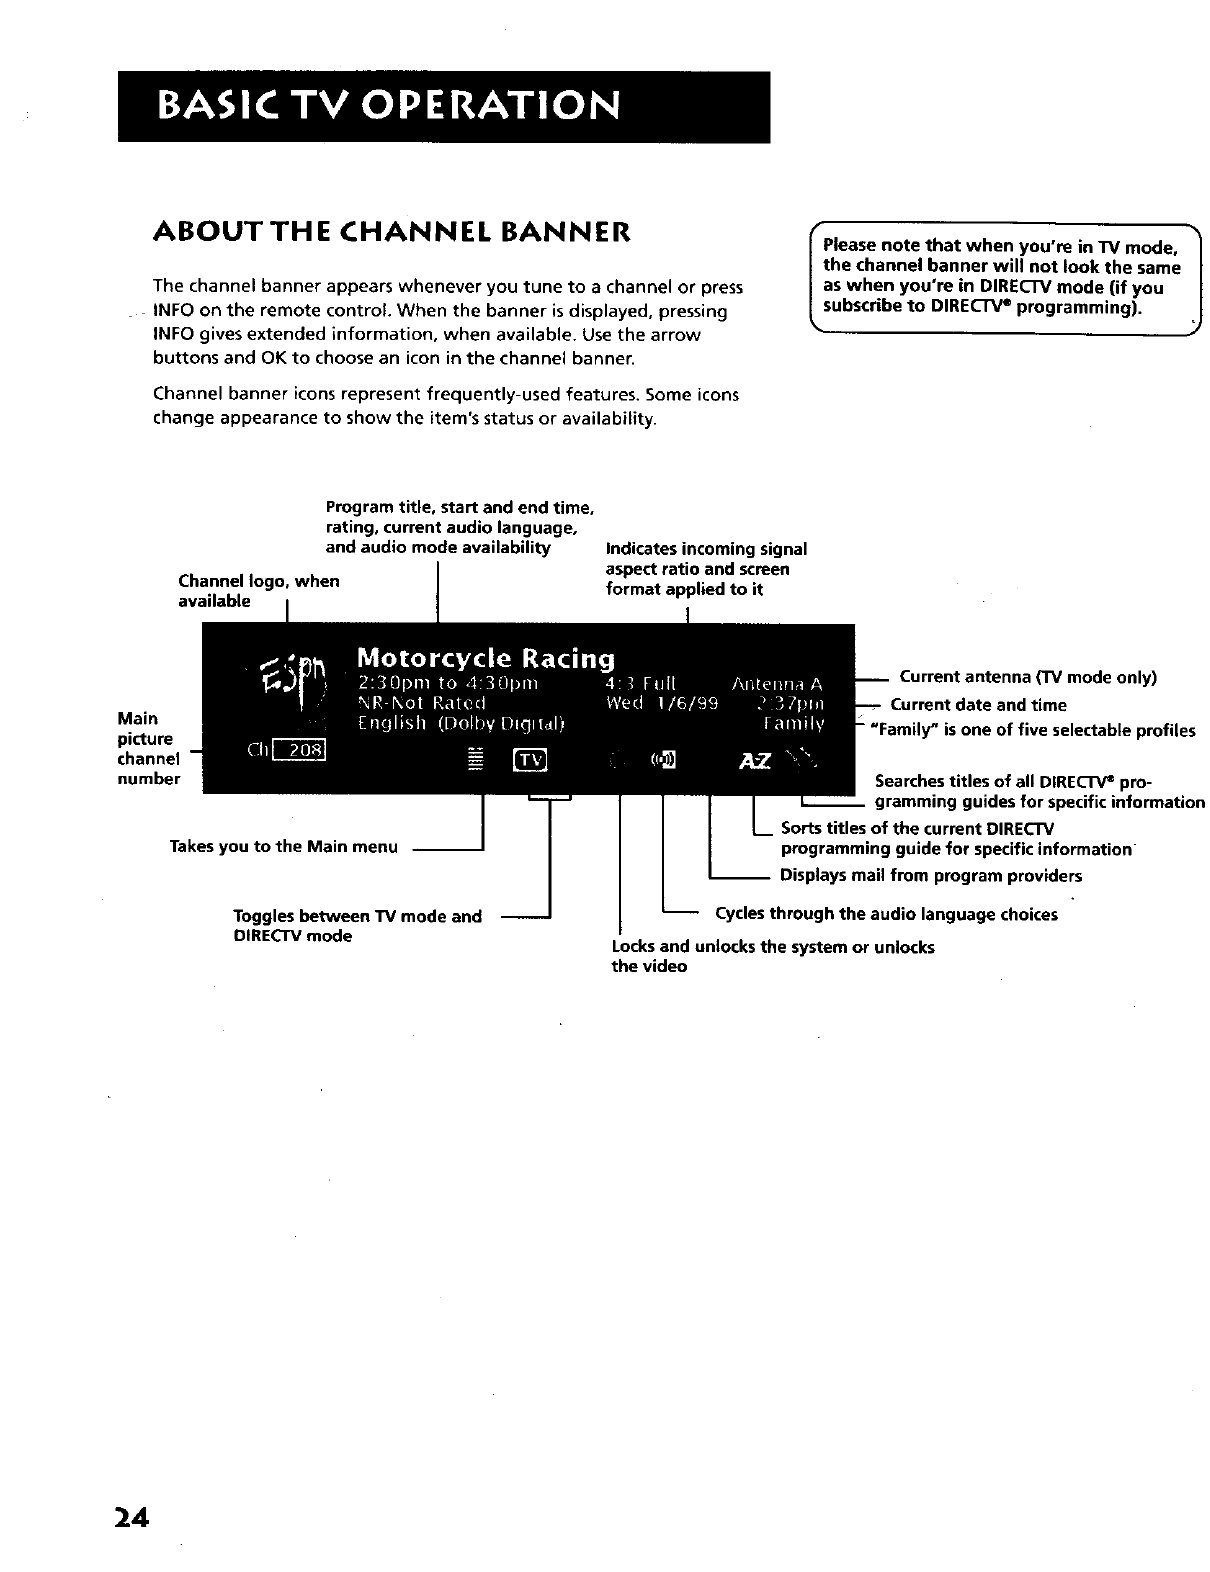
ABOUTTHE CHANNEL BANNER
The channel banner appears whenever you tune to a channel or press
- INFO on the remote control. When the banner is displayed, pressing
INFO gives extended information, when available. Use the arrow
buttons and OK to choose an icon in the channel banner•
Channel banner icons represent frequently-used features. Some icons
change appearance to show the item's status or availability.
Please note that when you're in TV mode, |
the channel banner will not look the same J
as when you're in DIRECTV mode (if you
subscribe to DIRECTV ®programming).
Program title, start and end time,
rating, current audio language,
and audio mode availability
Channel logo. when
available
Indicates incoming signal
aspect ratio and screen
format applied to it
Main
picture
channel
number
Takes you to the Main menu --
Toggles between TV mode and --
DIRECTV mode
Current antenna (TV mode only)
Current date and time
"Family" is one of five selectable profiles
Searches titles of all DIRECTV epro-
__ gramming guides for specific information
Sorts titles of the current DIRECTV
programming guide for specific information
-- Displays mail from program providers
Cycles through the audio language choices
Locks and unlocks the system or unlocks
the video
24
CHANNEL BANNER ICONS
Main menu icon When selected, takes you to the main menu.
TVIDIRECTV logo When selected, toggles between "iV and DIRECTV
viewing. The highlighted icon indicates the current viewing state.
Green unlock icon Indicates that the system is unlocked. Spending,
viewing and other limits can be accessed and changed. When selected,
locks the system.
Yellow unlock icon Indicates that a password has been entered to
override profile limits. No limits can be accessed or changed. When
selected, locks the system.
Red lock icon Indicates that no limits can be accessed or changed. A
password is required to override limits or accessthe system.
Audio language icon If the icon is highlighted while watching a
digital (ATSC) or DIRECTV®channel, two or more audio languages are
available. Selecting the icon repeatedly scrolls through and plays the
options.
If the icon is highlighted when watching an analog (NTSC) TV channel, a
Second Audio Program (SAP) is available. Selecting the icon will play the
SAP for the current channel until the channel is changed.
Highlighted mail icon Indicates that you have a message in your
mailbox from your DIRECTV®programming provider. Select this icon to
access the mailbox and read your mail.
AlphaSort" (A-Z) icon When selected, allows you to sort currently-
listed program titles alphabetically.
Highlighted Scout" (binoculars) icon When highlighted, indicates a
Scout has found a program. If selected when highlighted, you view the
Scout's results, If you select the icon when it is not highlighted, you can
set up a Scout to find a program for you.
Press INFO on the remote control twice to I
view an expanded channel banner that J
shows a program description (when
available).
25
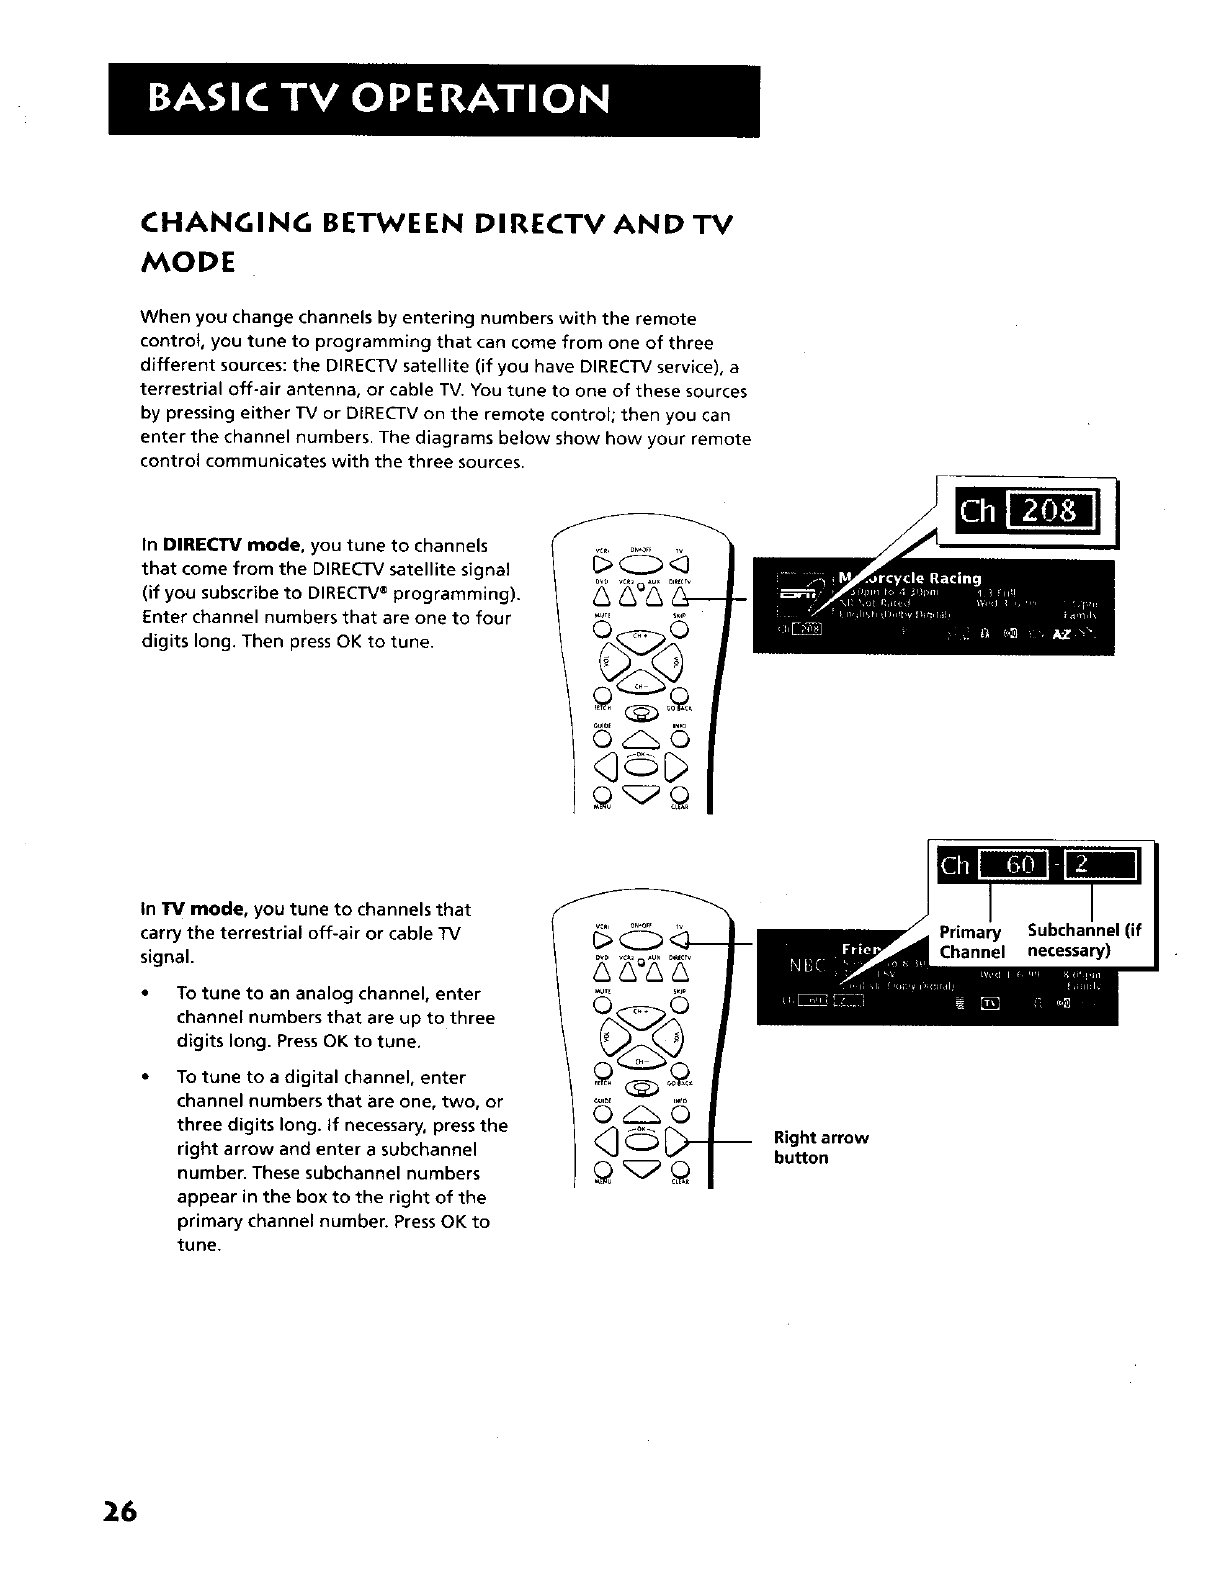
CHANGING BETWEEN DIRECTVAND TV
MODE
When you change channels by entering numbers with the remote
controt, you tune to programming that can come from one of three
different sources: the DIRECTV satellite (if you have DIRECTV service), a
terrestrial off-air antenna, or cable TV. You tune to one of these sources
by pressing either TV or DIRECTV on the remote control; then you can
enter the channel numbers. The diagrams below show how your remote
control communicates with the three sources.
In DIRECTV mode, you tune to channels
that come from the DIRECTV satellite signal
(if you subscribe to DIRECTV®programming).
Enter channel numbers that are one to four
digits long. Then press OK to tune.
in _mode, you tune to channels that
carry the terrestrial off-air or cable TV
signal.
• To tune to an analog channel, enter
channel numbers that are up to three
digits long. Press OK to tune.
To tune to a digital channel, enter
channel numbers that are one, two, or
three digits long. If necessary, press the
right arrow and enter a subchannel
number. These subchannel numbers
appear in the box to the right of the
primary channel number. Press OK to
tune.
Right arrow
button
Primary
Channel
Subchannel (if
necessary)
26
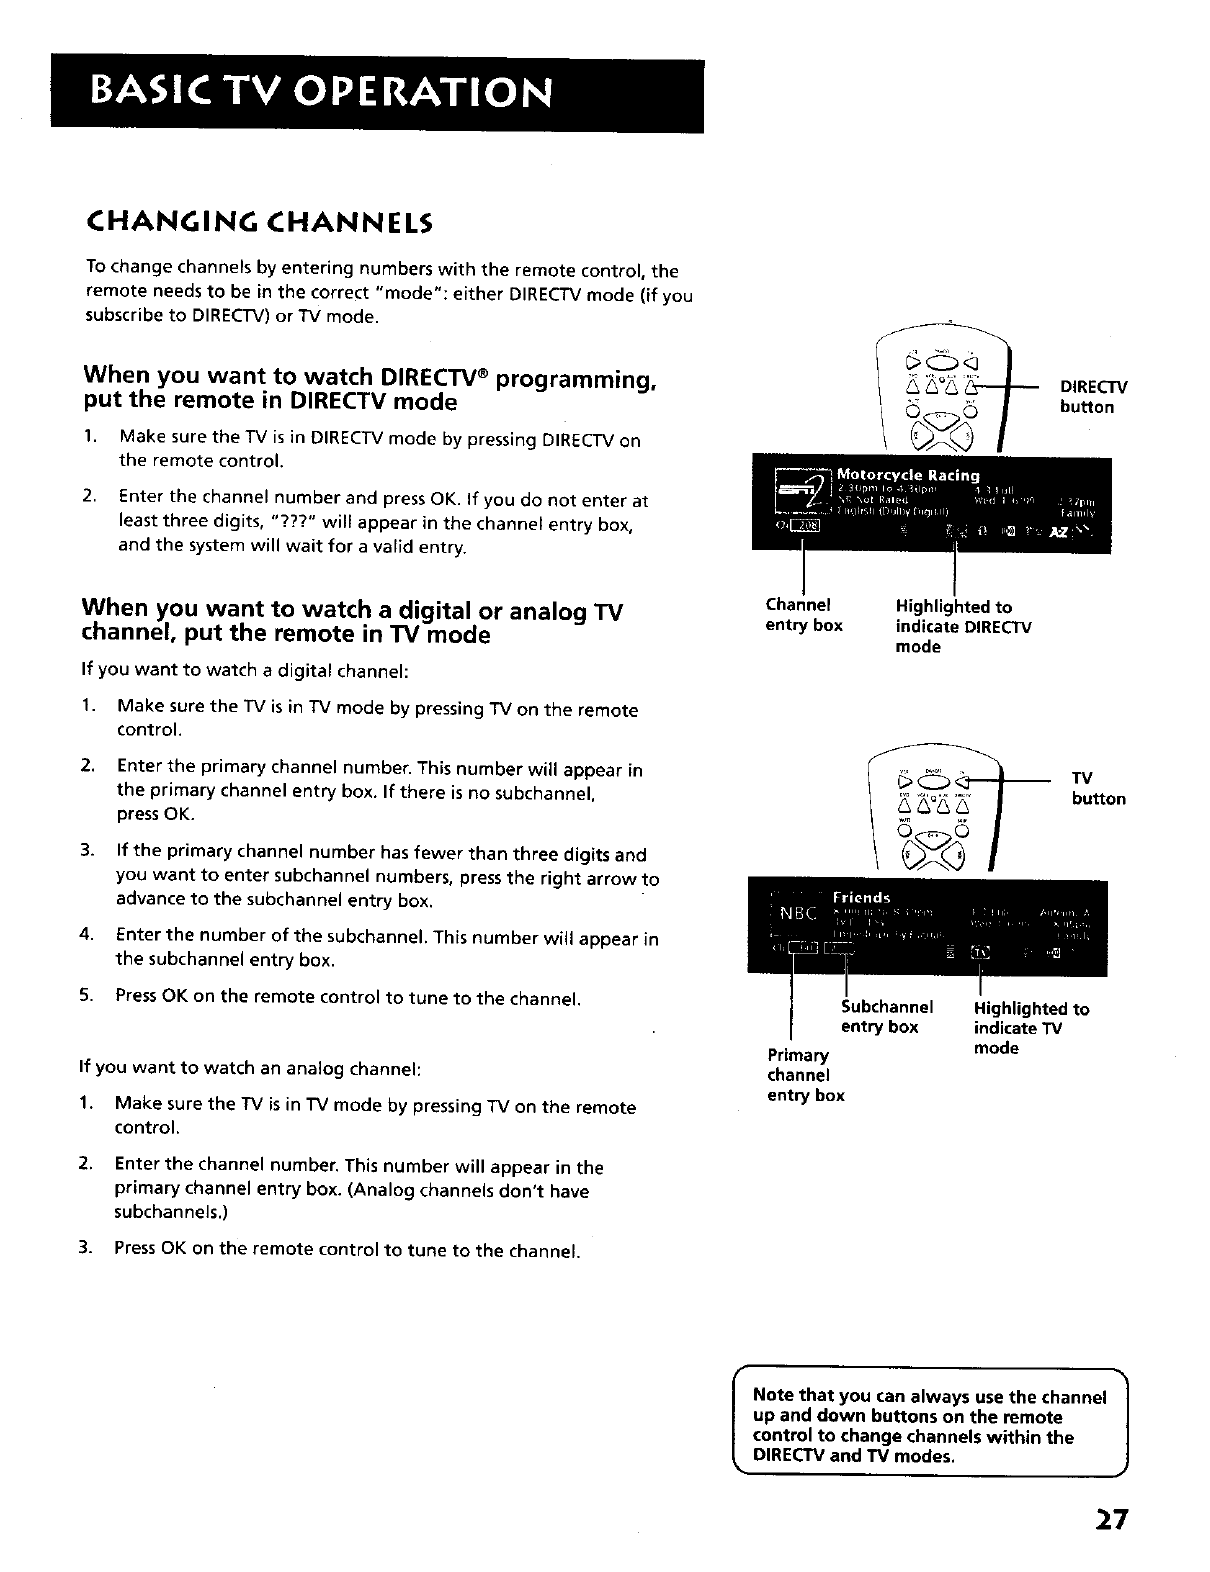
CHANGING CHANNELS
To change channels by entering numbers with the remote control, the
remote needs to be in the correct "mode": either DIRECTV mode (if you
subscribe to DIRECTV) or "iV mode.
When you want to watch DIRECTV ®programming,
put the remote in DIRECTV mode
1. Make sure the TV is in DIRECTV mode by pressing DIRECTV on
the remote control
2. Enter the channel number and press OK. If you do not enter at
least three digits, "???" will appear in the channel entry box,
and the system will wait for a valid entry.
DIRECTV
button
When you want to watch a digital or analog TV
channel, put the remote in TV mode
If you want to watch adigital channel:
1. Make sure the TV is in "IV mode by pressing TV on the remote
control.
2. Enter the primary channel number. This number will appear in
the primary channel entry box. If there is no subchannel,
press OK.
3. If the primary channel number has fewer than three digits and
you want to enter subchannel numbers, press the right arrow to
advance to the subchannel entry box.
4. Enter the number of the subchannel. This number will appear in
the subchannel entry box.
5. Press OK on the remote control to tune to the channel,
If you want to watch an analog channel:
1. Make sure the TV is in TV mode by pressing TV on the remote
control.
2. Enter the channel number. This number will appear in the
primary channel entry box. (Analog channels don't have
subchannels.)
3. Press OK on the remote control to tune to the channel.
Channel Highlighted to
entry box indicate DIRECTV
mode
TV
bu_on
Subchannel Highlighted to
entry box indicate TV
mode
Primary
channel
entry box
Note that you can always use the channel
up and down buttons on the remote
control to change channels within the
DIRECTV and TV modes.
27
PIP (PICTURE-IN-PICTURE) OPERATION
The PIP (Picture-In-Picture) feature lets you display a second, smaller
analog (NTSC format) picture on top of the main analog picture.
Your TV is equipped with a dual NTSC tuner that tunes to cable or off-air
television signals. You will only be able to use the PIP window and main
picture with analog channels.
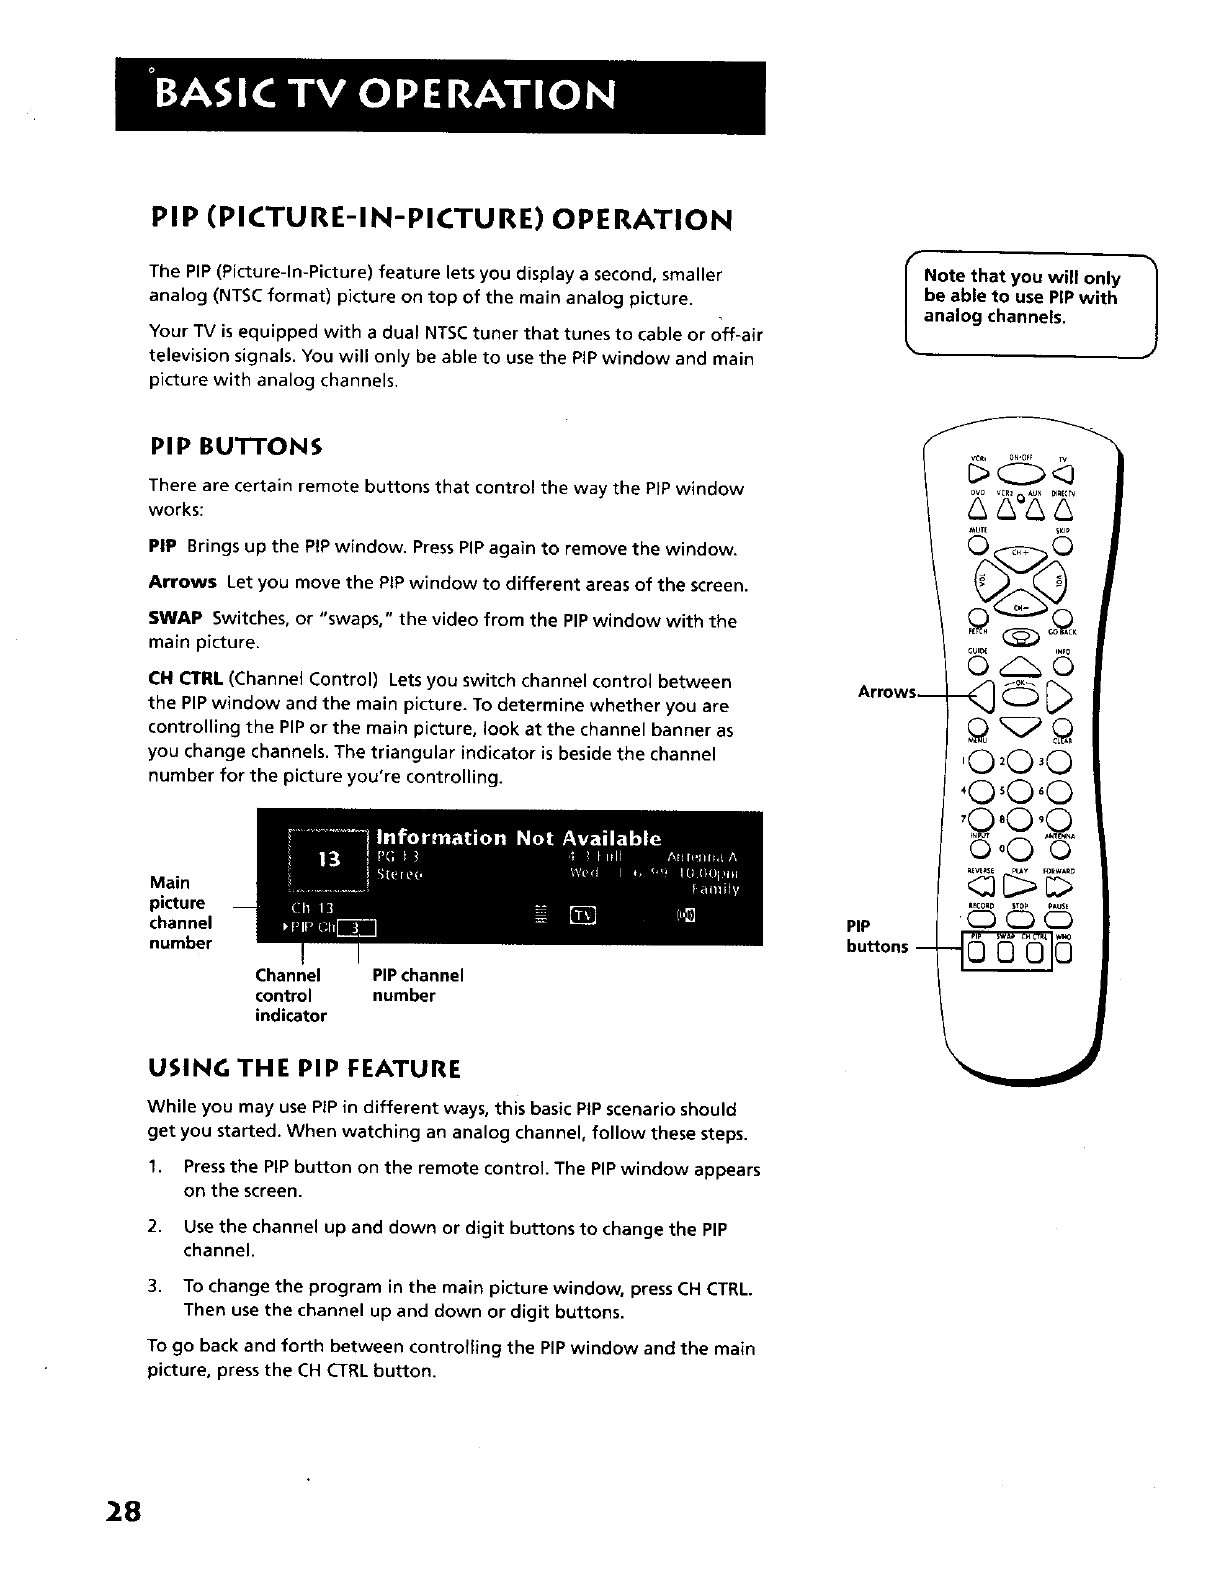
PIP BUTTONS
There are certain remote buttons that control the way the PIP window
works:
PIP Brings up the PiP window. Press PIP again to remove the window.
Arrows Let you move the PIP window to different areas of the screen.
SWAP Switches, or "swaps," the video from the PIP window with the
main picture.
CH CTRL (Channel Control) Lets you switch channel control between
the PIPwindow and the main picture. To determine whether you are
controlling the PIPor the main picture, look at the channel banner as
you change channels. The triangular indicator is beside the channel
number for the picture you're controlling.
Main
picture
channel
number
Channel PIP channel
control number
indicator
USING THE PIP FEATURE
While you may use PiP in different ways, this basic PIP scenario should
get you started. When watching an analog channel, follow these steps.
1. Pressthe PIP button on the remote control. The PIP window appears
on the screen.
2. Use the channel up and down or digit buttons to change the PIP
channel.
3. To change the program in the main picture window, press CH CTRL.
Then use the channel up and down or digit buttons.
To go back and forth between controlling the PIP window and the main
picture, press the CH CTRL button.
Arrows__
PIP
buttons --
INote that you will only 1
be able to use PiPwith
analog channels.
MUT_ SKIp
°©
'O'O,O
'O'O'O
,O,O,O
©©©
28
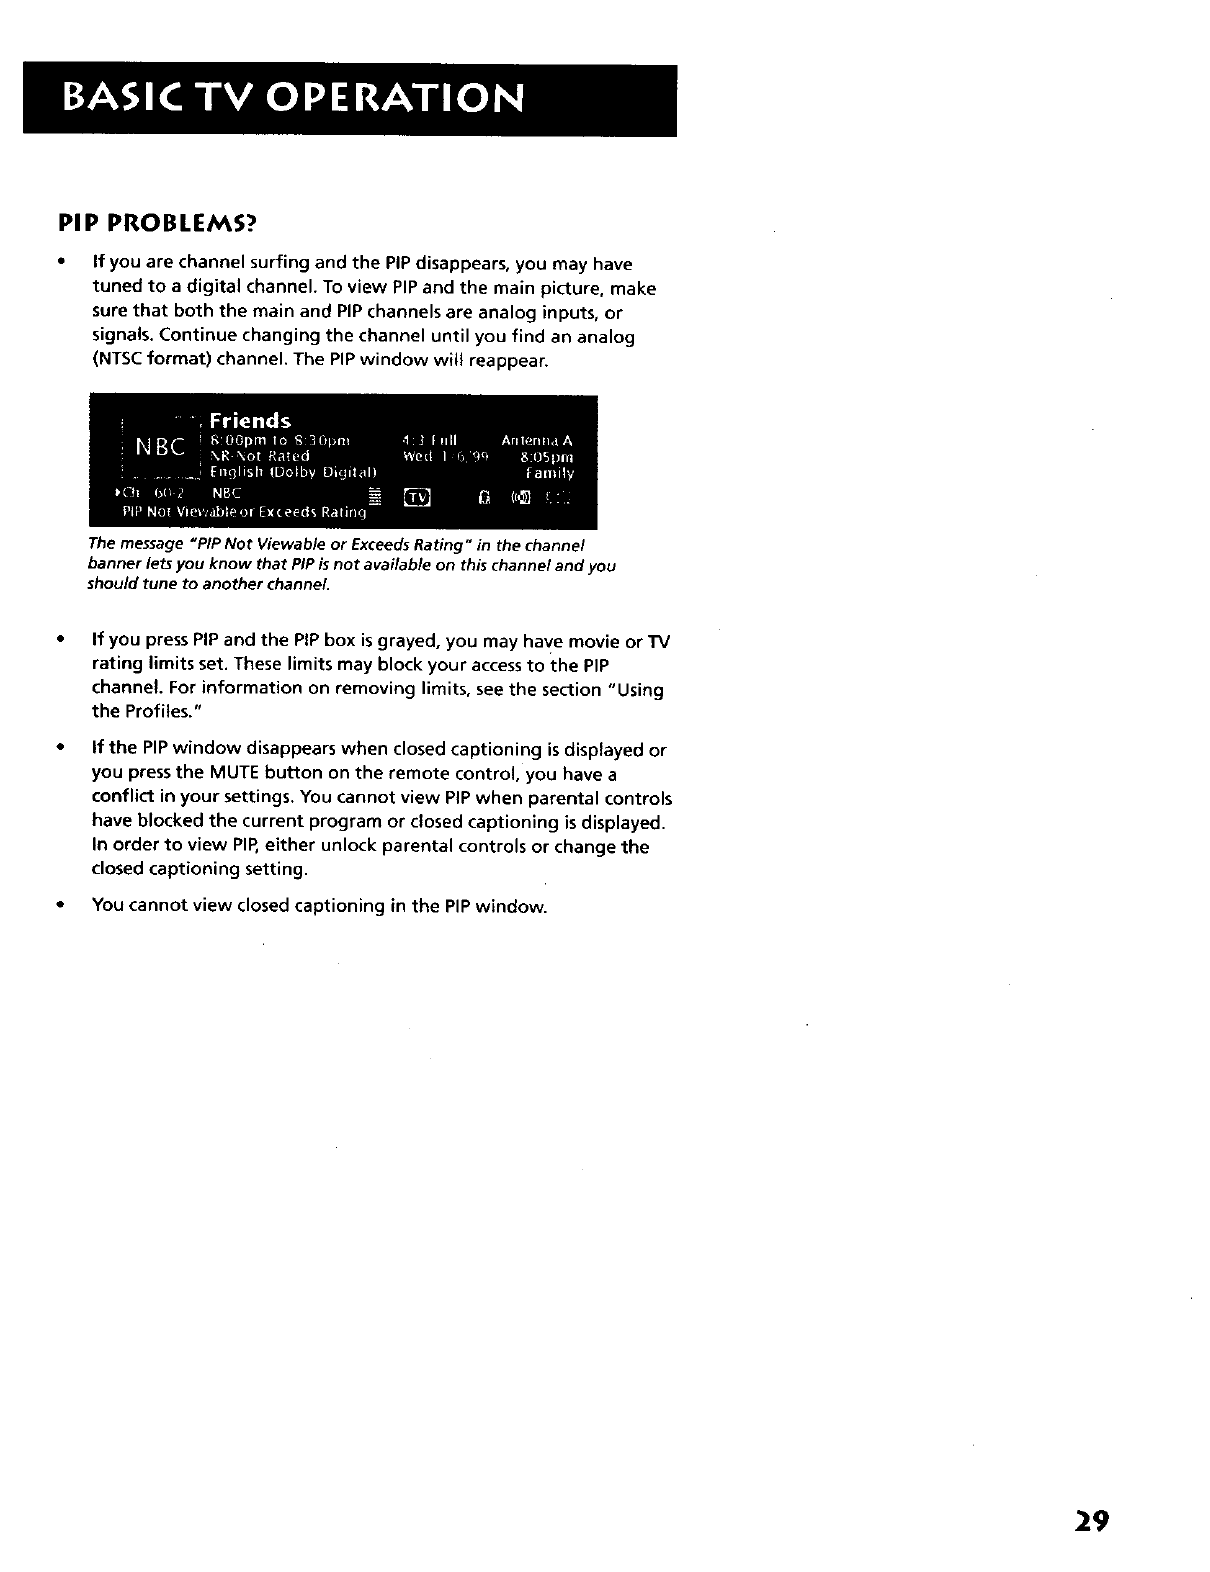
PiP PROBLEMS?
If you are channel surfing and the PIP disappears, you may have
tuned to a digital channel. To view PIP and the main picture, make
sure that both the main and PIP channels are analog inputs, or
signals. Continue changing the channel until you find an analog
(NTSC format) channel. The PIP window will reappear.
|
i
The message "PIP Not Viewable or Exceeds Rating" in the channel
banner lets you know that PIP is not available on this channel and you
should tune to another channel.
If you press PIP and the PIP box is grayed, you may have movie or TV
rating limits set. These limits may block your access to the PIP
channel. For information on removing limits, see the section "Using
the Profiles."
if the PIP window disappears when closed captioning is displayed or
you press the MUTE button on the remote control, you have a
conflict in your settings. You cannot view PiP when parental controls
have blocked the current program or closed captioning is displayed.
In order to view PIP,either unlock parental controls or change the
closed captioning setting.
You cannot view closed captioning in the PIP window.
29
4
USING THE INPUT BUTTON
1.
2.
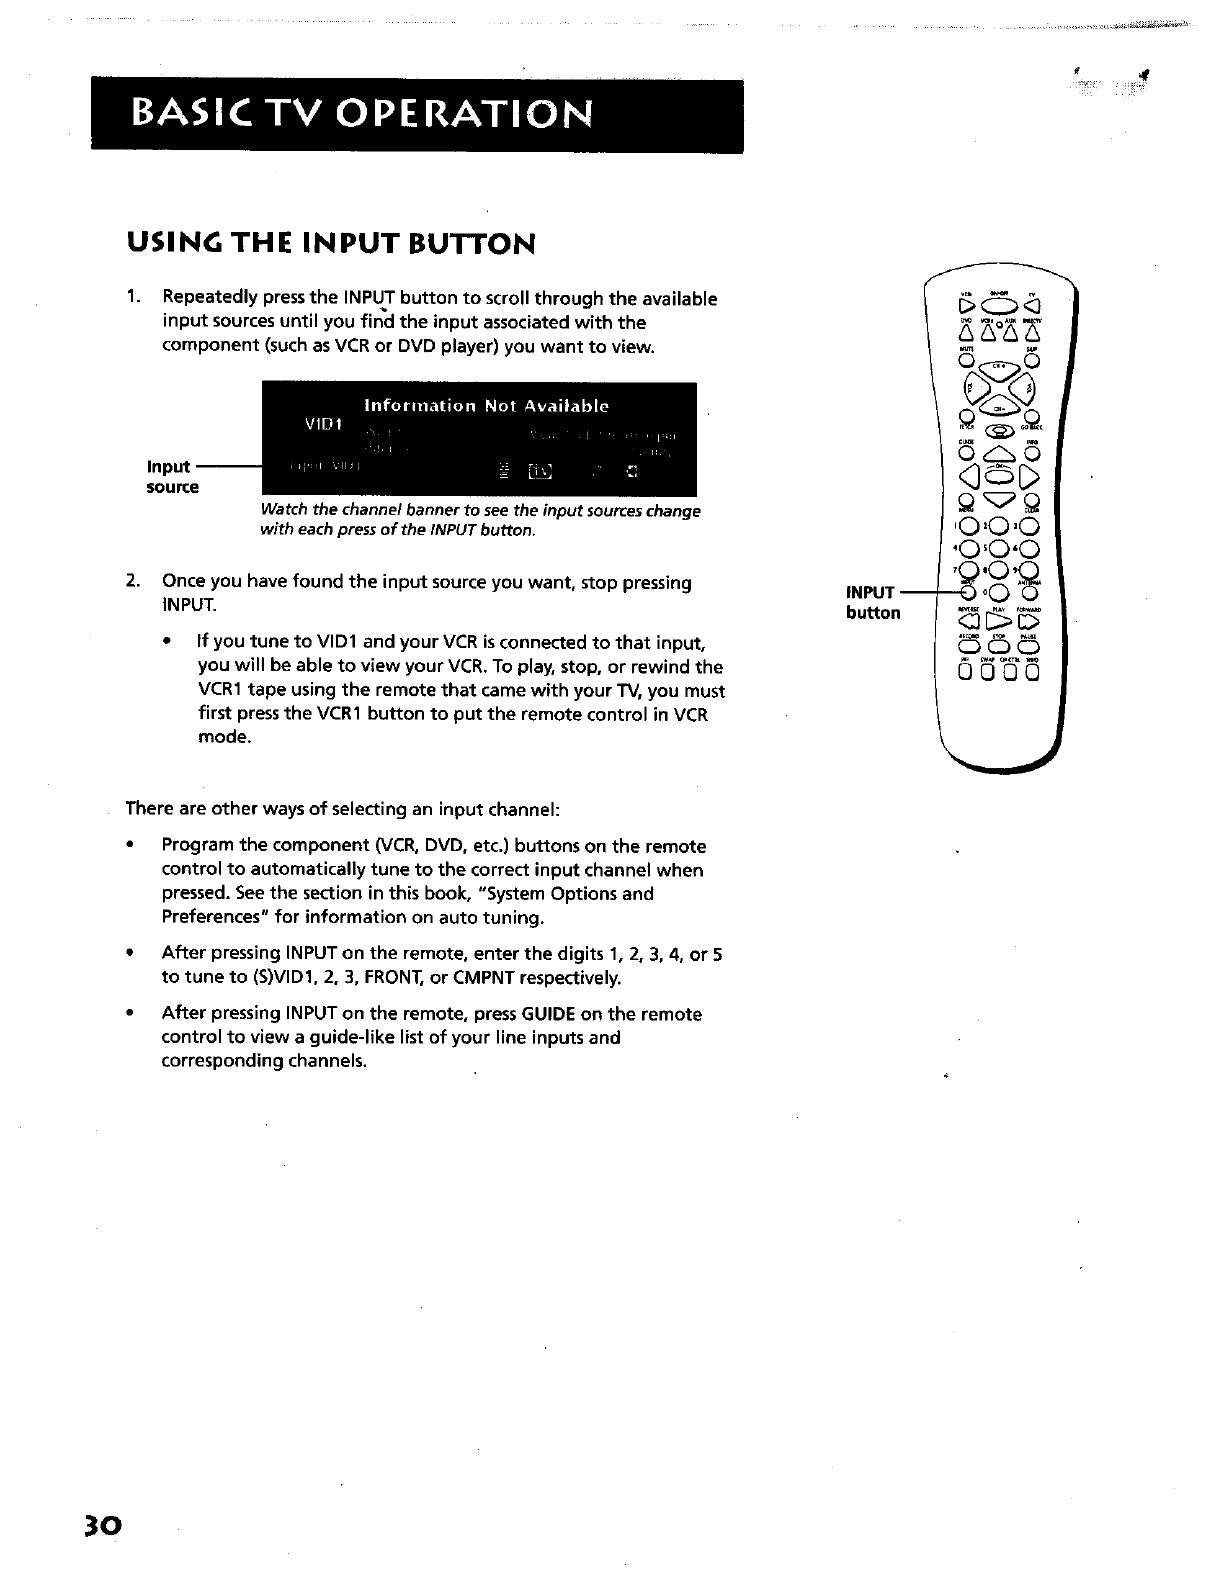
Repeatedly press the INPUT button to scroll through the available
input sources until you find the input associated with the
component (such as VCR or DVD player) you want to view.
Input --
source
Watch the channel banner to see the input sources change
with each press of the INPUT button.
Once you have found the input source you want, stop pressing
INPUT.
If you tune to VlD1 and your VCR is connected to that input,
you will be able to view your VCR. To play, stop, or rewind the
VCR1 tape using the remote that came with your TV, you must
first press the VCR1 button to put the remote control in VCR
mode.
INPUT I
button
There are other ways of selecting an input channel:
Program the component (VCR, DVD, etc.) buttons on the remote
control to automatically tune to the correct input channel when
pressed. See the section in this book, "System Options and
Preferences" for information on auto tuning.
After pressing INPUT on the remote, enter the digits 1, 2, 3, 4, or 5
to tune to (S)VlD1, 2, 3, FRONT, or CMPNT respectively.
•After pressing INPUT on the remote, press GUIDE on the remote
control to view a guide-like list of your line inputs and
corresponding channels.
30
WHAT IS A PROGRAM GUIDE?
A program guide is an on-screen programming schedule. It is
a list of the current and future programs. There are separate
guides for TV programs and DIRECTVe programming
(available if you subscribe to DIRECTV® programming),
Both of these guides can be viewed in different formats.
Using the program guides is easy as long as you remember to
highlight items on the screen by pressing the arrow buttons
on the remote control. Then, press OK to tune to that
channel.
¥
V
¥
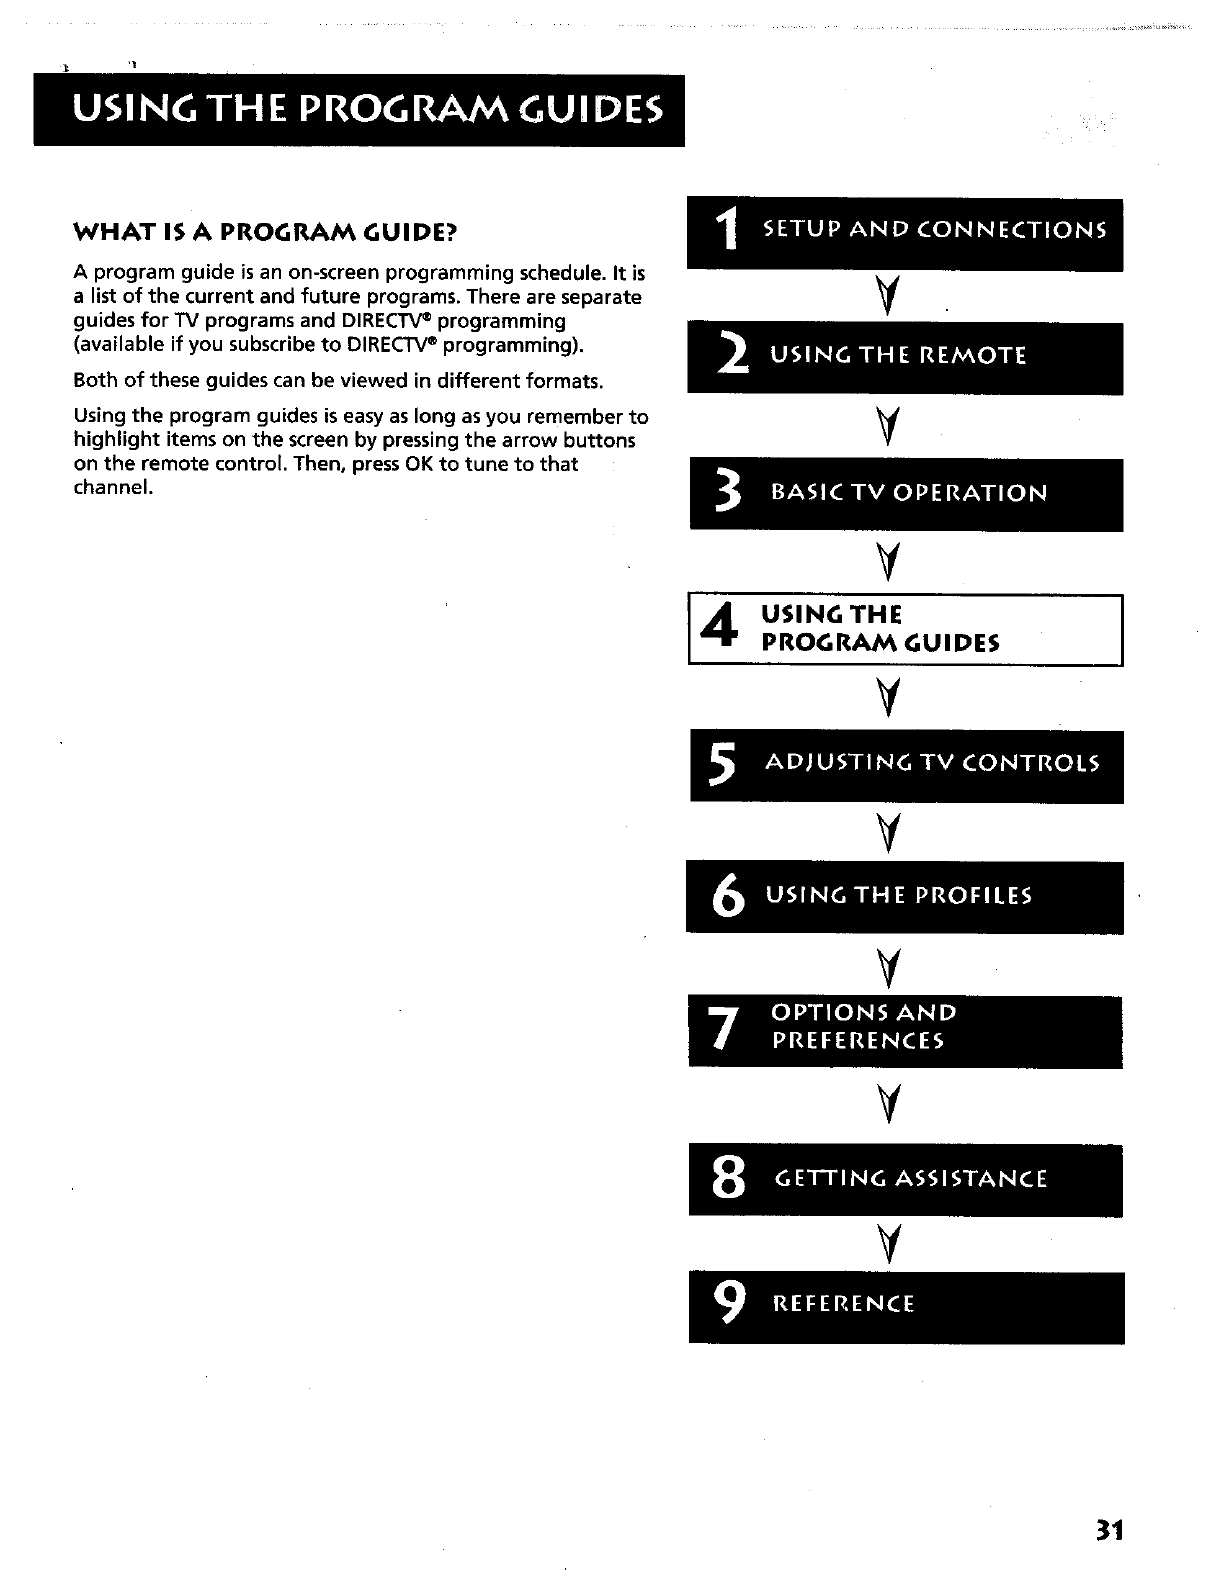
USING THE
PROGRAM GUIDES
¥
V
V
¥
31
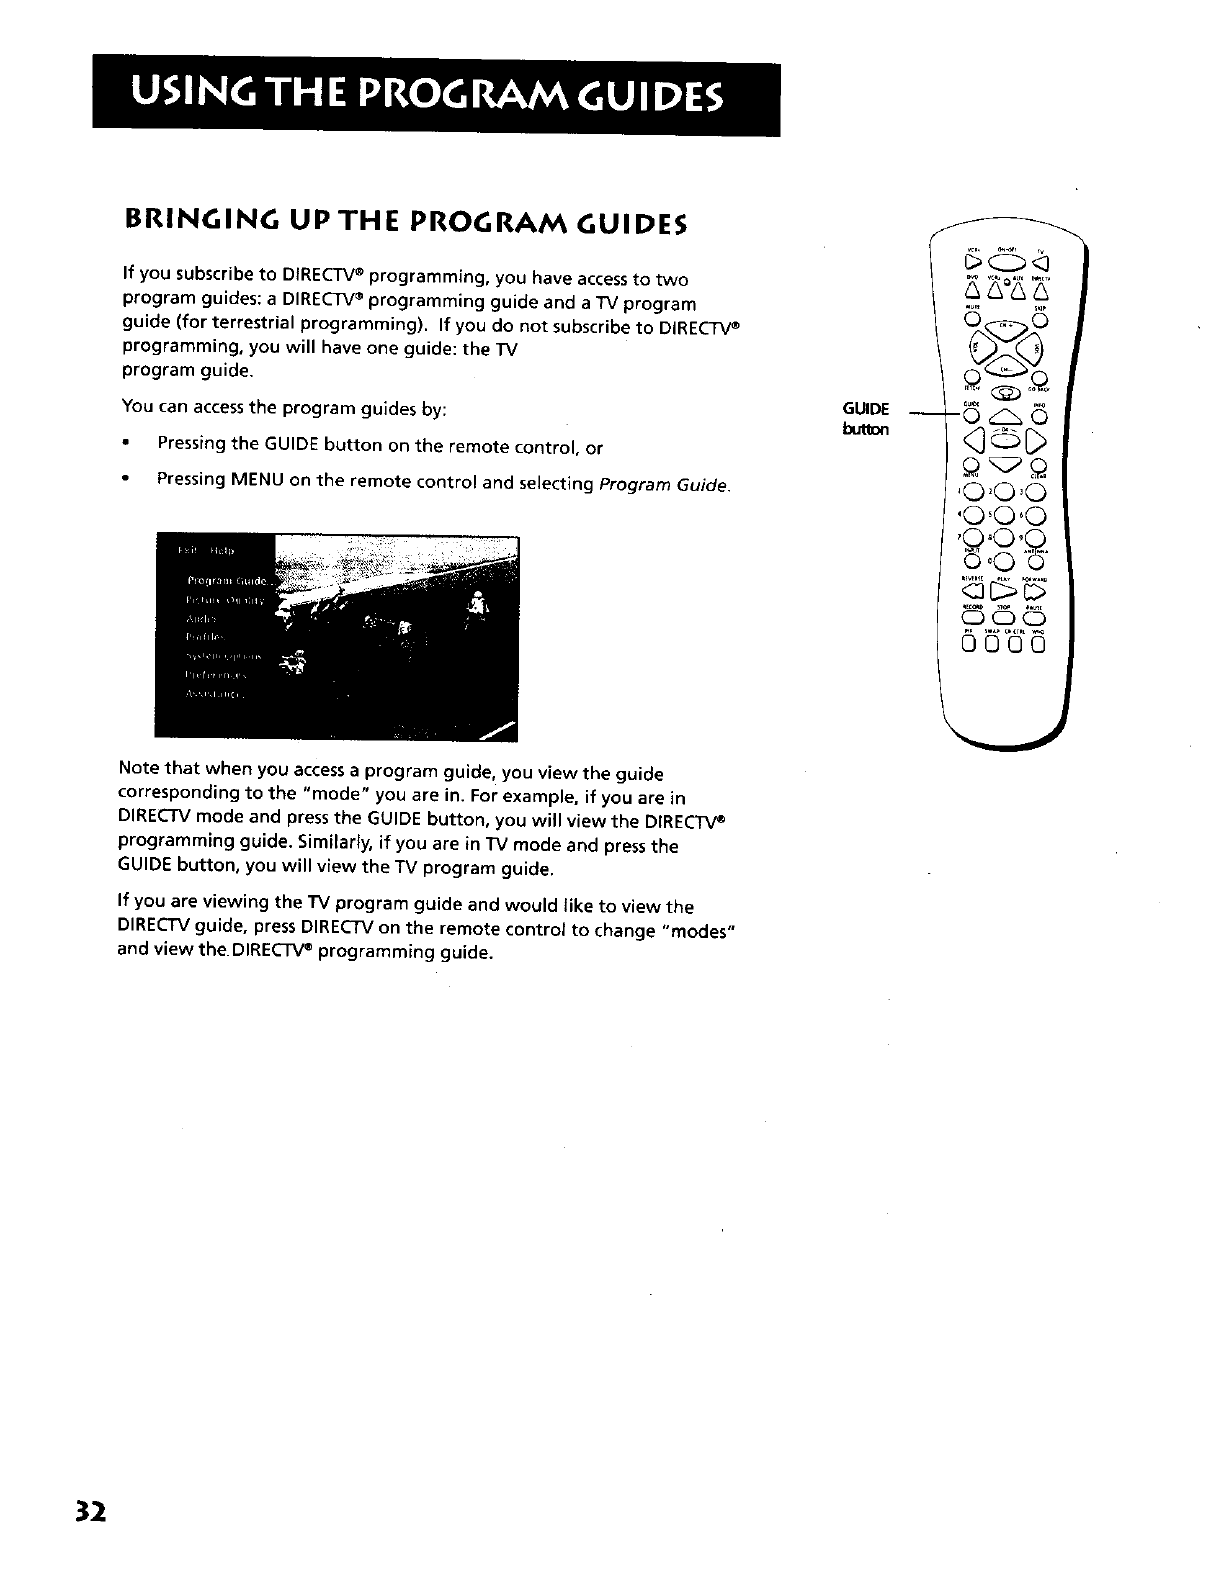
BRINGING UP THE PROGRAM GUIDES
If you subscribe to DIRECTV®programming, you have access to two
program guides: a DIRECTV®programming guide and a TV program
guide (for terrestrial programming). If you do not subscribe to DIRECTV®
programming, you will have one guide: the TV
program guide.
You can access the program guides by:
•Pressing the GUIDE button on the remote control, or
Pressing MENU on the remote control and selecting Program Guide.
GU4_E__ -_ _ 6
,O_O,O
'O'O'O
'0 °O,O
c500 '_'
©©©
OOOO
Note that when you access a program guide, you view the guide
corresponding to the "mode" you are in. For example, if you are in
DIRECTV mode and press the GUIDE button, you will view the DIRECTV®
programming guide. Similarly, if you are in TV mode and press the
GUIDE button, you will view the TV program guide.
If you are viewing the TV program guide and would like to view the
DIRECTV guide, press DIRECTV on the remote control to change "modes"
and view the DIREC-rV®programming guide.
32
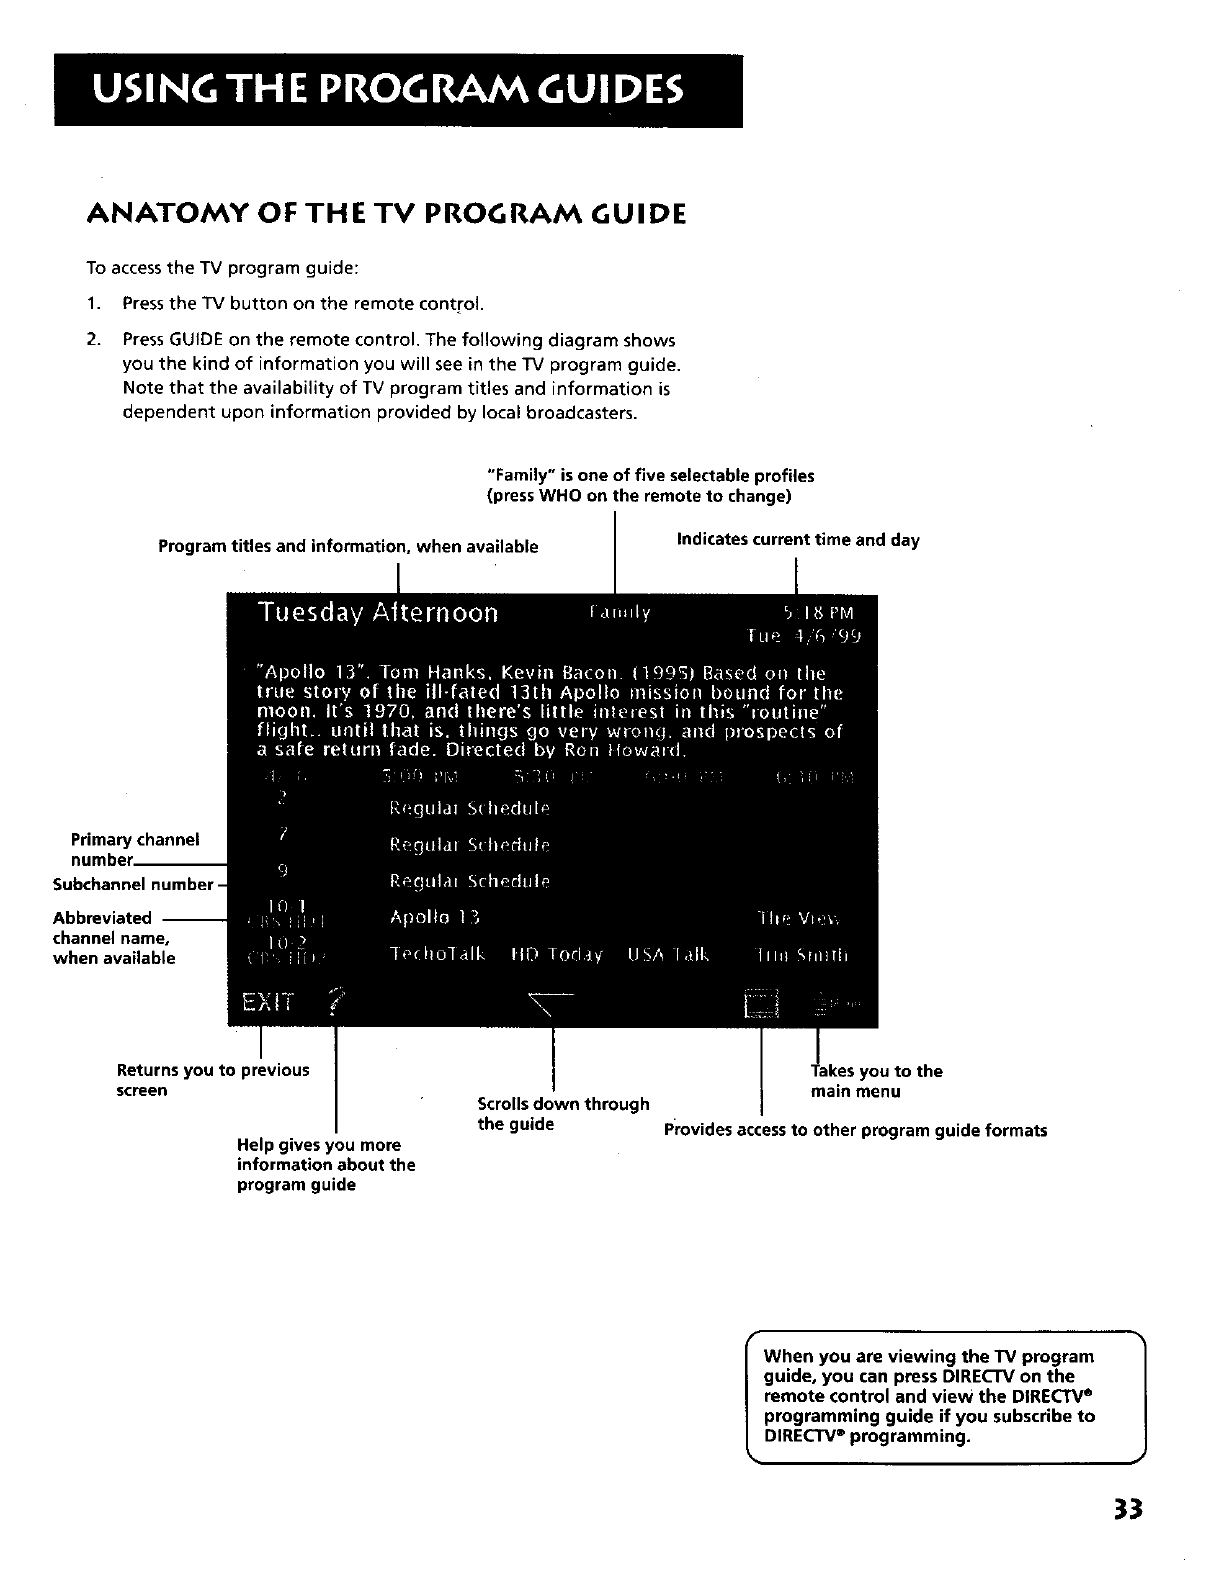
ANATOMY O F TH E TV P ROG RAM G U I D E
To access the TV program guide:
1. Press the TV button on the remote control.
2. Press GUIDE on the remote control, The following diagram shows
you the kind of information you will see in the "IV program guide,
Note that the availability of TV program titles and information is
dependent upon information provided by local broadcasters.
"Family" is one of five selectable profiles
(press WHO on the remote to change)
Program titles and information, when available Indicates current time and day
Primary channel
number__
Subchannel number-
Abbreviated --
channel name,
when available
Returns you to previous
screen
Help gives you more
information about the
program guide
Scrolls down through
the guide
you to the
main menu
Provides access to other program guide formats
Ihen you are viewing the TV program
guide, you can press DIRECTV on the
remote control and view the DIRECTV®
programming guide if you subscribe to
DIRECTV®programming.
33
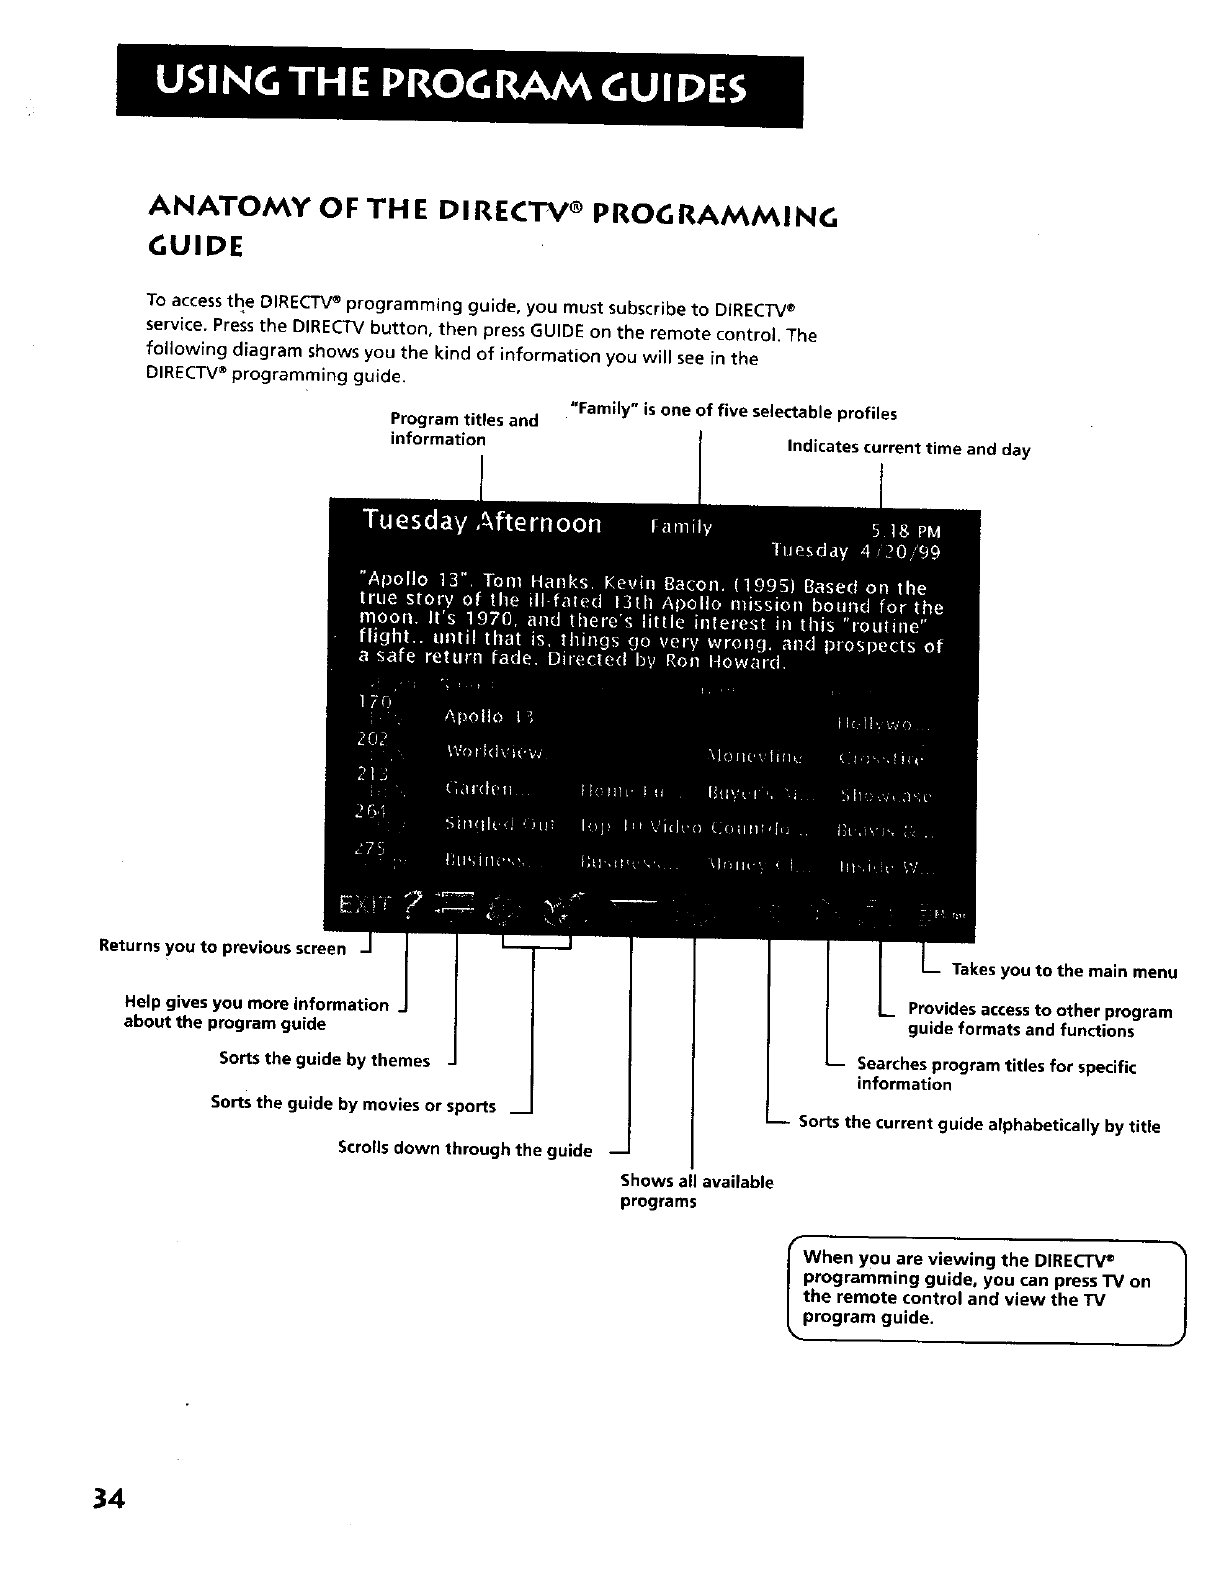
ANATOMY OF THE DIRECTV ® PROGRAMMING
GUIDE
To access the DIRECTV®programming guide, you must subscribe to DIRECTV®
service. Press the DIRECTV button, then press GUIDE on the remote control. The
following diagram shows you the kind of information you will see in the
DIRECTV®programming guide.
"Family" is one of five selectable profiles
Program titles and
information Indicates current time and day
Returns you to previous screen
Help gives you more information
about the program guide
Sorts the guide by themes
Sorts the guide by movies or sports
Scrolls down through the guide
Shows all available
programs
Takes you to the main menu
Provides accessto other program
guide formats and functions
Searches program titles for specific
information
Sorts the current guide alphabetically by title
When you are viewing the DIRECTV°
programming guide, you can press TV on
the remote control and view the TV
program guide.
34
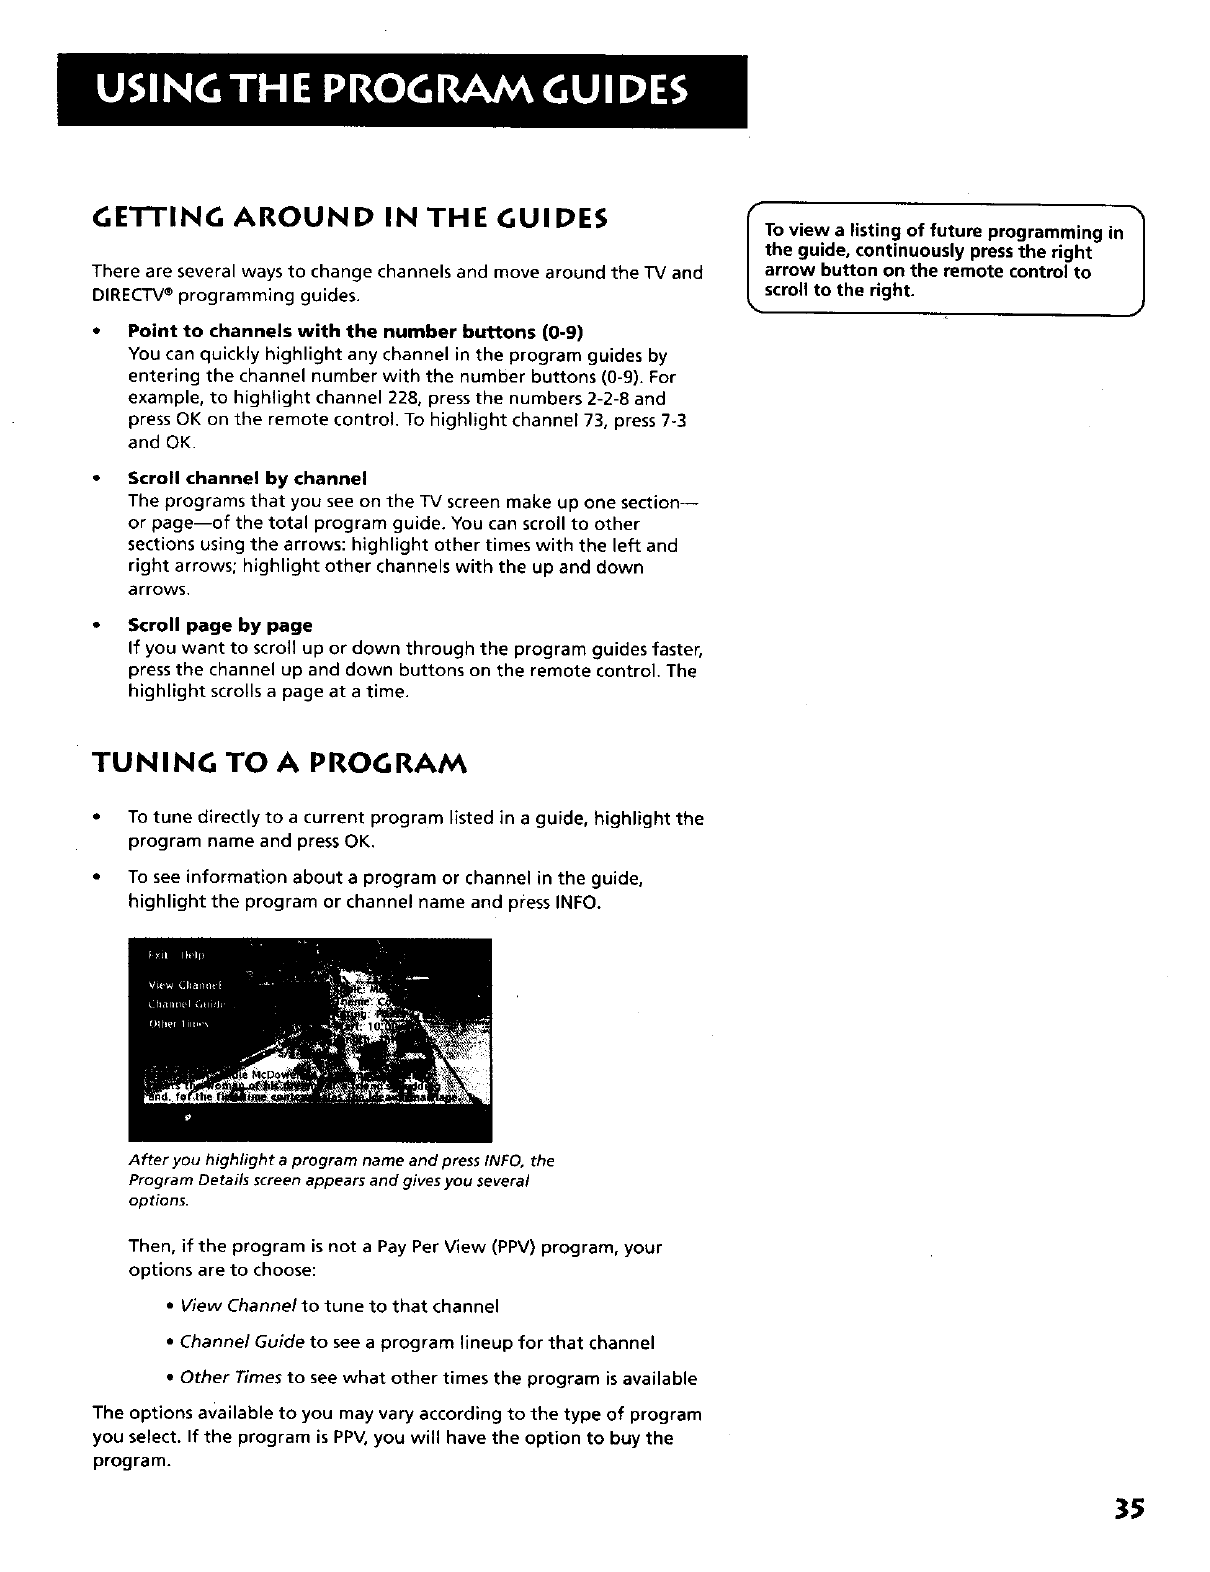
GETTING AROUND IN THE GUIDES
There are several ways to change channels and move around the TV and
DIRECTV®programming guides.
Point to channels with the number buttons (0-9)
You can quickly highlight any channel in the program guides by
entering the channel number with the number buttons (0-9). For
example, to highlight channel 228, press the numbers 2-2-8 and
press OK on the remote control. To highlight channel 73, press 7-3
and OK.
Scroll channel by channel
The programs that you see on the TV screen make up one section--
or page--of the total program guide. You can scroll to other
sections using the arrows: highlight other times with the left and
right arrows; highlight other channels with the up and down
arrows.
Scroll page by page
If you want to scroll up or down through the program guides faster,
press the channel up and down buttons on the remote control. The
highlight scrolls a page at a time.
ITo view a listing of future programming in |
the guide, continuously press the right J
arrow button on the remote control to
scroll to the right.
TUNING TO A PROGRAM
To tune directly to a current program listed in a guide, highlight the
program name and press OK.
To see information about a program or channel in the guide,
highlight the program or channel name and press INFO.
After you highlight aprogram name and press INFO, the
Program Details screen appears and gives you several
options•
Then, if the program is not a Pay Per View (PPV) program, your
options are to choose:
•View Channel to tune to that channel
•Channel Guide to see a program lineup for that channel
•Other Times to see what other times the program is available
The options available to you may vary according to the type of program
you select. If the program is PPV,you will have the option to buy the
program.
35
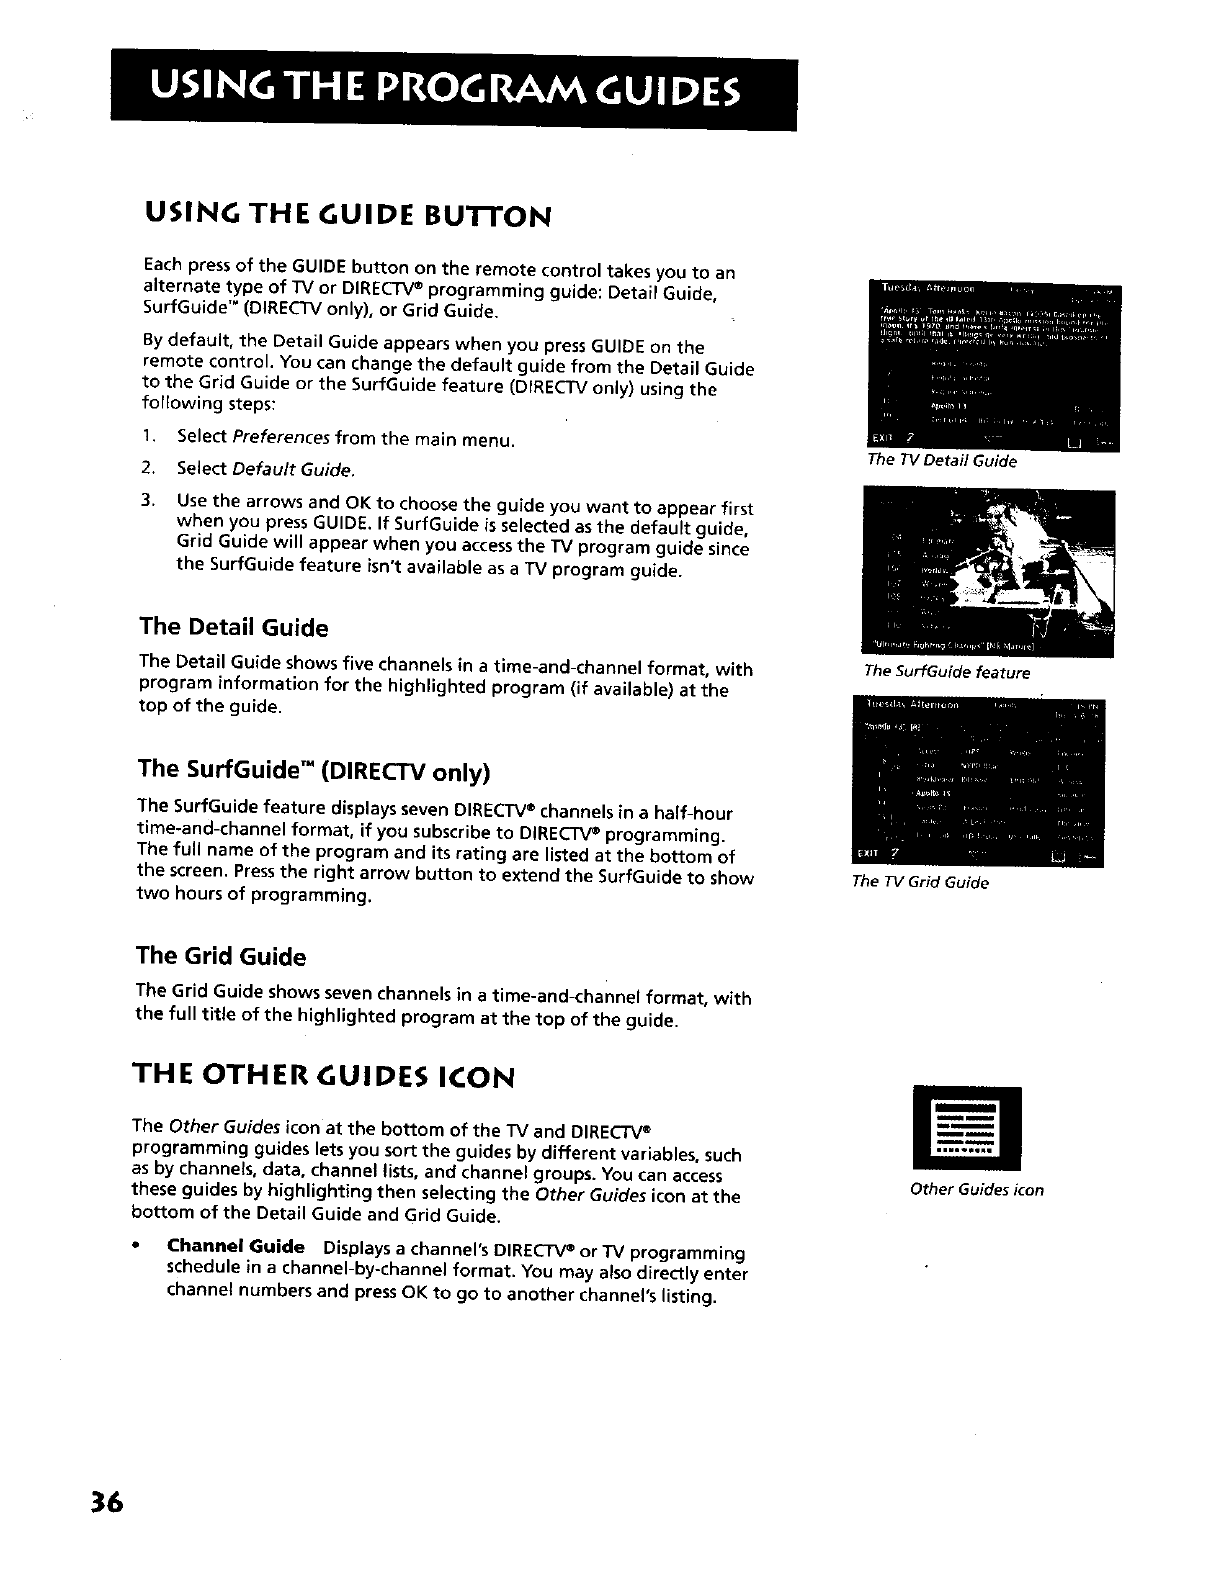
USING THE GUIDE BU'I-I'ON
Each press of the GUIDE button on the remote control takes you to an
alternate type of TV or DIRECTV®programming guide: Detail Guide,
SurfGuide TM (DIRECTV only), or Grid Guide.
By default, the Detail Guide appears when you press GUIDE on the
remote control. You can change the default guide from the Detail Guide
to the Grid Guide or the SurfGuide feature (DIRECTV only) using the
following steps:
1, Select Preferences from the main menu.
2. Select Default Guide.
3. Use the arrows and OK to choose the guide you want to appear first
when you press GUIDE. If SurfGuide is selected as the default guide,
Grid Guide will appear when you access the TV program guide since
the SurfGuide feature isn't available as a TV program guide.
The Detail Guide
The Detail Guide shows five channels in a time-and-channel format, with
program information for the highlighted program (if available) at the
top of the guide.
The SurfGuide TM (DIRECTV only)
The SurfGuide feature displays seven DIRECTV®channels in a half-hour
time-and-channel format, if you subscribe to DIRECTV®programming.
The full name of the program and its rating are listed at the bottom of
the screen. Press the right arrow button to extend the SurfGuide to show
two hours of programming.
The Grid Guide
The Grid Guide shows seven channels in a time-and-channel format, with
the full title of the highlighted program at the top of the guide.
THE OTHER GUIDES ICON
The Other Guides icon at the bottom of the TV and DIRECTV_
programming guides lets you sort the guides by different variables, such
as by channels, data, channel lists, and channel groups. You can access
these guides by highlighting then selecting the Other Guides icon at the
bottom of the Detail Guide and Grid Guide.
• Channel Guide Displays achannel's DIRECTVe or TV programming
schedule in a channel-by-channel format. You may also directly enter
channel numbers and press OK to go to another channel's listing.
The TV Detail Guide
The SurfGuide feature
The TV Grid Guide
Other Guides icon
36
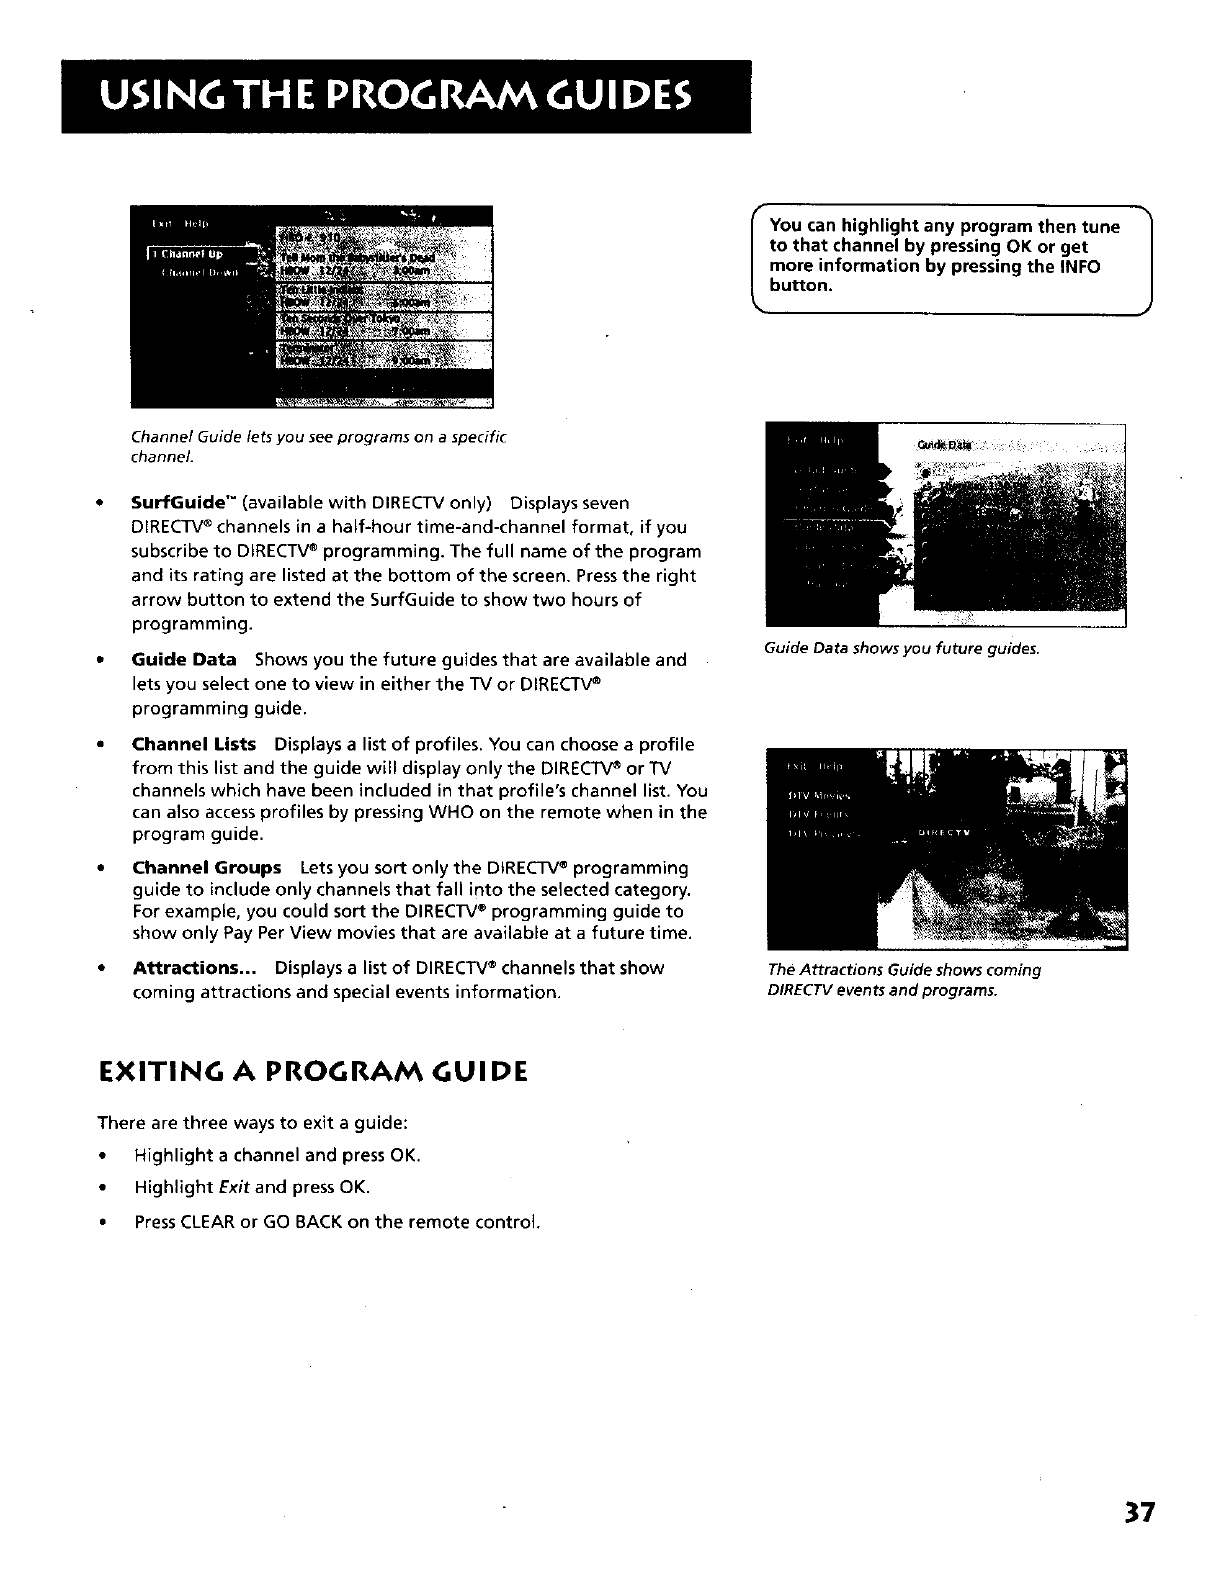
IYou can highlight any program then tune i
to that channel by pressing OK or get J
more information by pressing the INFO
button.
Channel Guide lets you see programs on a specific
channel.
SurfGuide" (available with DIRECTV only) Displays seven
DIRECTV®channels in a half-hour time-and-channel format, if you
subscribe to DIRECTV®programming. The full name of the program
and its rating are listed at the bottom of the screen. Pressthe right
arrow button to extend the SurfGuide to show two hours of
programming.
Guide Data Shows you the future guides that are available and
lets you select one to view in either the TV or DIRECTV®
programming guide.
Channel Lists Displays a list of profiles. You can choose a profile
from this list and the guide will display only the DIRECTV_or TV
channels which have been included in that profile's channel list. You
can also access profiles by pressing WHO on the remote when in the
program guide.
Channel Groups Lets you sort only the DIRECTV®programming
guide to include only channels that fall into the selected category.
For example, you could sort the DIRECTV® programming guide to
show only Pay Per View movies that are available at a future time.
Attractions... Displays a list of DIRECTV®channels that show
coming attractions and special events information.
EXITING A PROGRAM GUIDE
There are three ways to exit a guide:
• Highlight a channel and press OK.
• Highlight Exit and press OK.
• Press CLEAR or GO BACK on the remote control.
Guide Data shows you future guides.
The Attractions Guide shows coming
DIRECTV events and programs.
37
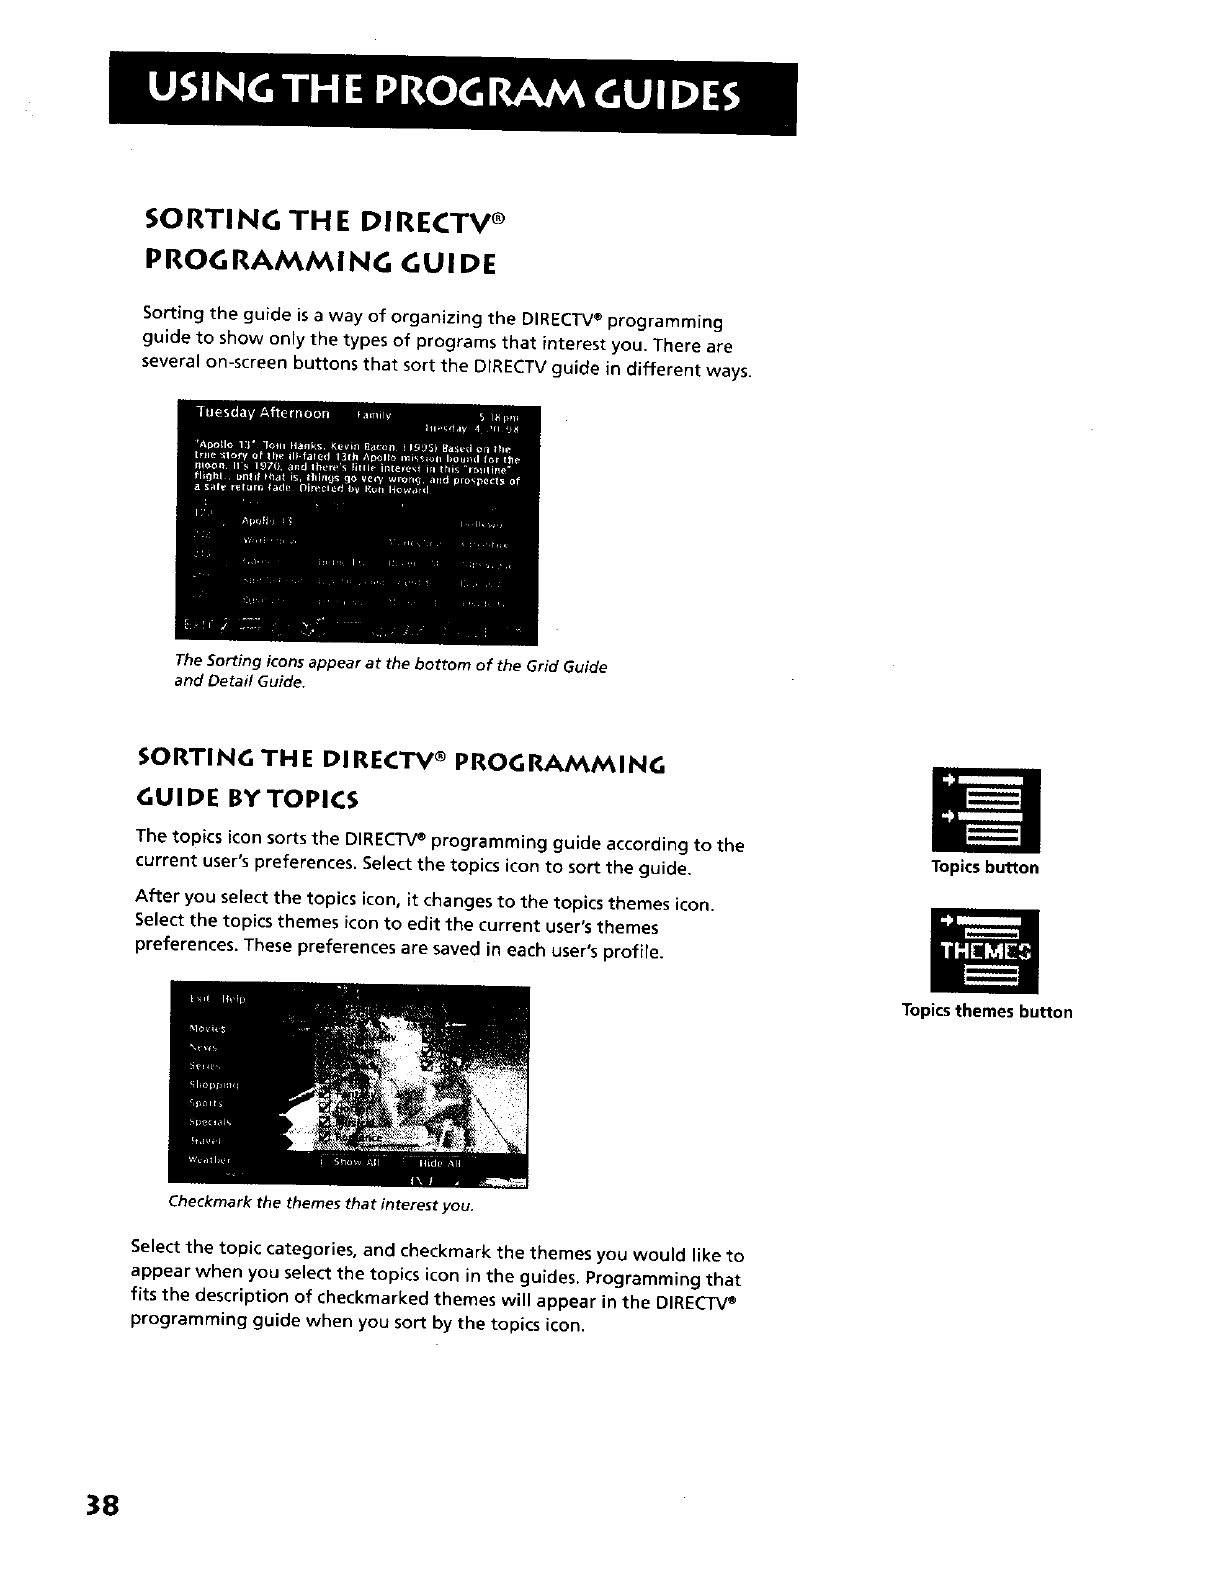
SORTING THE DIRECTV e
PROGRAMMING GUIDE
Sorting the guide is away of organizing the DIRECTV® programming
guide to show only the types of programs that interest you. There are
several on-screen buttons that sort the DIRECTV guide in different ways.
The Sorting icons appear at the bottom of the Grid Guide
and Detail Guide.
SORTING TH E DI RECTV ®PROG RAMMI NG
GUIDE BY TOPICS
The topics icon sorts the DIRECTV_ programming guide according to the
current user's preferences. Select the topics icon to sort the guide.
After you select the topics icon, it changes to the topics themes icon.
Select the topics themes icon to edit the current user's themes
preferences. These preferences are saved in each user's profile.
Checkmark the themes that interest you.
Topics button
Topics themes button
Select the topic categories, and checkmark the themes you would like to
appear when you select the topics icon in the guides. Programming that
fits the description of checkmarked themes will appear in the DIRECTV_
programming guide when you sort by the topics icon.
38
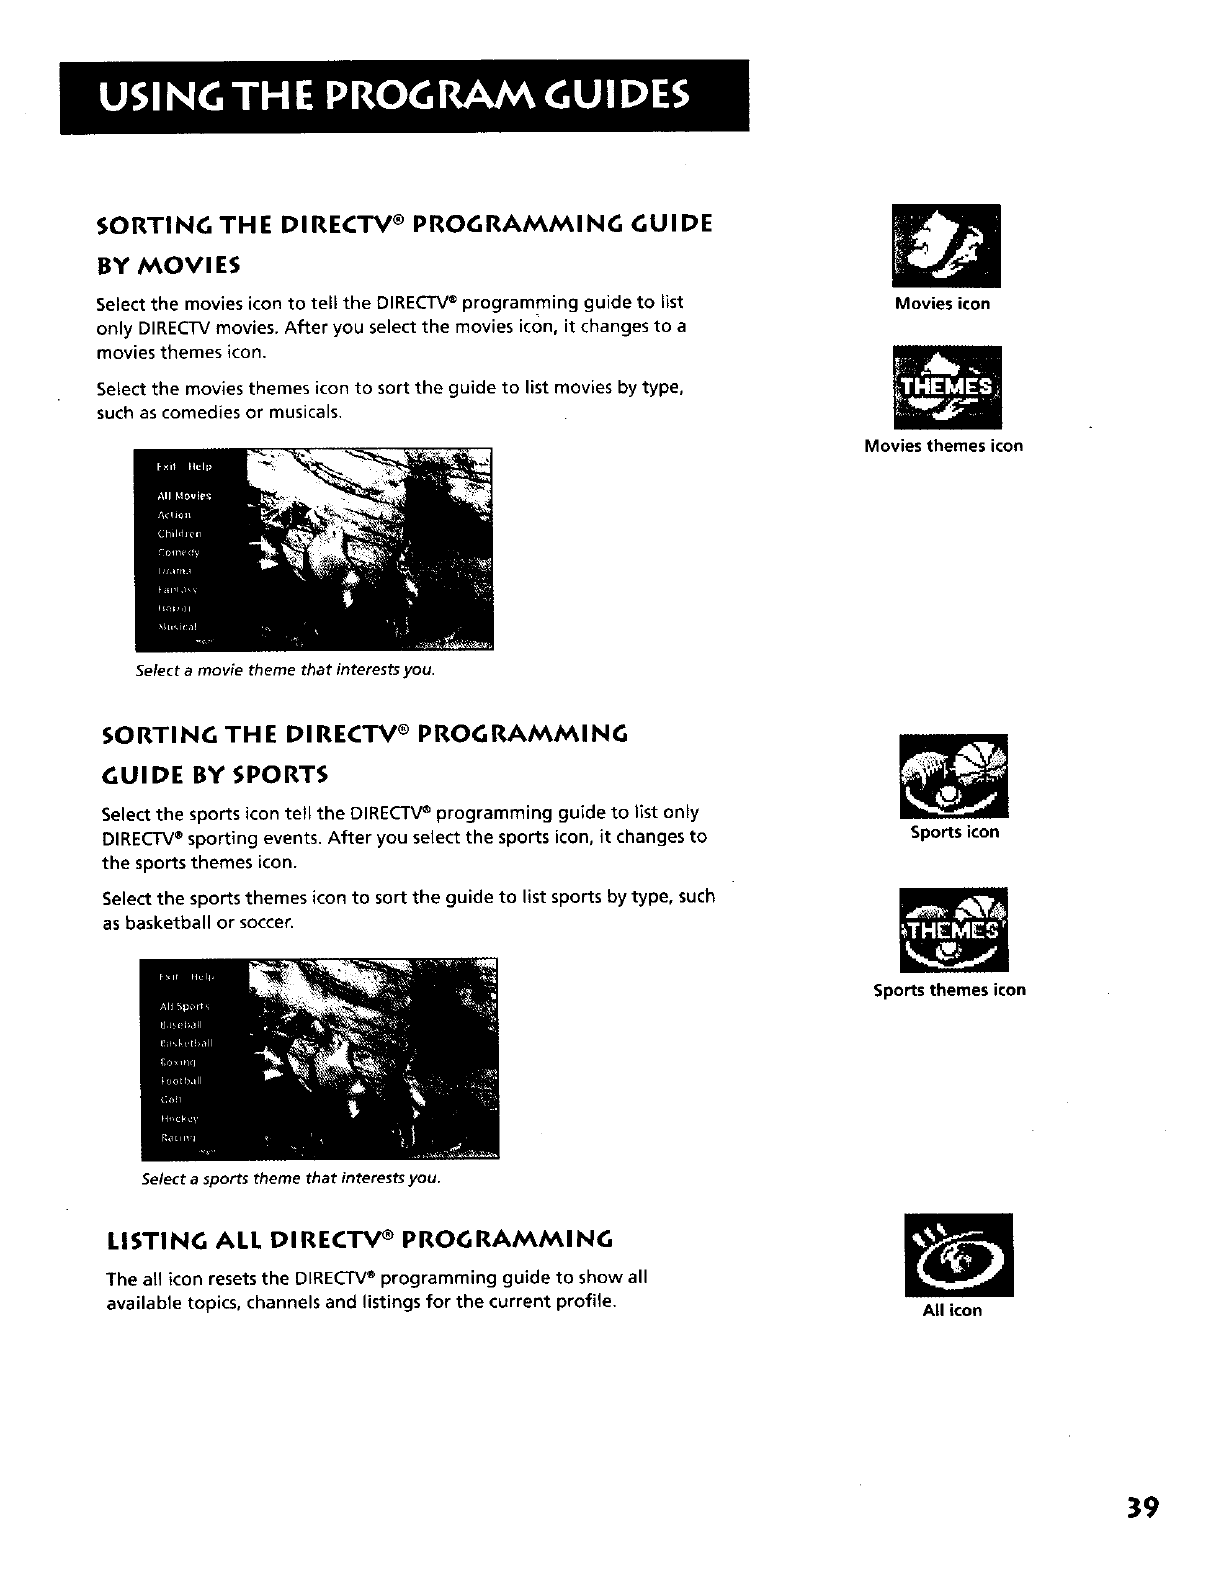
SORTING THE DIRECTV ®PROGRAMMING GUIDE
BY MOVI ES
Select the movies icon to tell the DIRECTV® programming guide to list
only DIRECTV movies. After you select the movies icon, it changes to a
movies themes icon.
Select the movies themes icon to sort the guide to list movies by type,
such as comedies or musicals.
Select a movie theme that interests you.
Movies icon
Movies themes icon
SORTING THE DIRECTV ®PROGRAMMING
GUIDE BY SPORTS
Select the sports icon tell the DIRECTV® programming guide to list only
DIRECTV®sporting events. After you select the sports icon, it changes to
the sports themes icon.
Select the sports themes icon to sort the guide to list sports by type, such
as basketball or soccer.
Select a sports theme that interests you.
Sports icon
Sports themes icon
LISTING ALL DIRECTV _PROGRAMMING
The all icon resets the DIRECTV_ programming guide to show all
available topics, channels and listings for the current profile. All icon
39

SORTING THE CURRENT DIRECTV ®
PROGRAMMING GUIDE ALPHABETICALLY
The AlphaSort'= feature lists all the program titles in the current
DIRECTV_ programming guide in alphabetical order. You can also find
this icon in the channel banner. Select the AlphaSort icon to search for
specific program titles that are in the current guide, After listing
programs whose first _etter or number match your entry, AlphaSort lists
programs in the current DIRECTV® programming guide that have your
entry anywhere in the title.
In the AIphaSort menu, use the arrow buttons on your remote control
to highlight a character, then press OK.
AlphaSort icon
For example, to search for the program Auto Racing, the first letter you
should highlight and select is "A." (Words like "The", "A", and "An"
appear at the end of a title.) All titles that begin with "A" appear in the
AIphaSort list. Next, enter the letter "U". All titles beginning with "AU"
appear in the list. Programs that contain "AU" anywhere in their titles
will appear at the end of the list.
FINDING DIRECTV PROGRAMS USING SCOUT _
The Scout icon at the bottom of the DIRECTV®programming guide lets
st w, ®
you assign Scouts to search all DIRECTV programming guides (both
current and future) for very specific program title information.
To use the Scout feature:
1. Highlight the Scout icon in the program guide and select it.
Highlight one of the Scout 1-8 menu items from the next screen and
press OK. If you're setting up a new Scout, make sure to select a
Scout menu item without a check beside it, since the check means
you have already set up that Scout.
Select a Scout menu item without a check to set up a
new Scout.
40
Scouticon
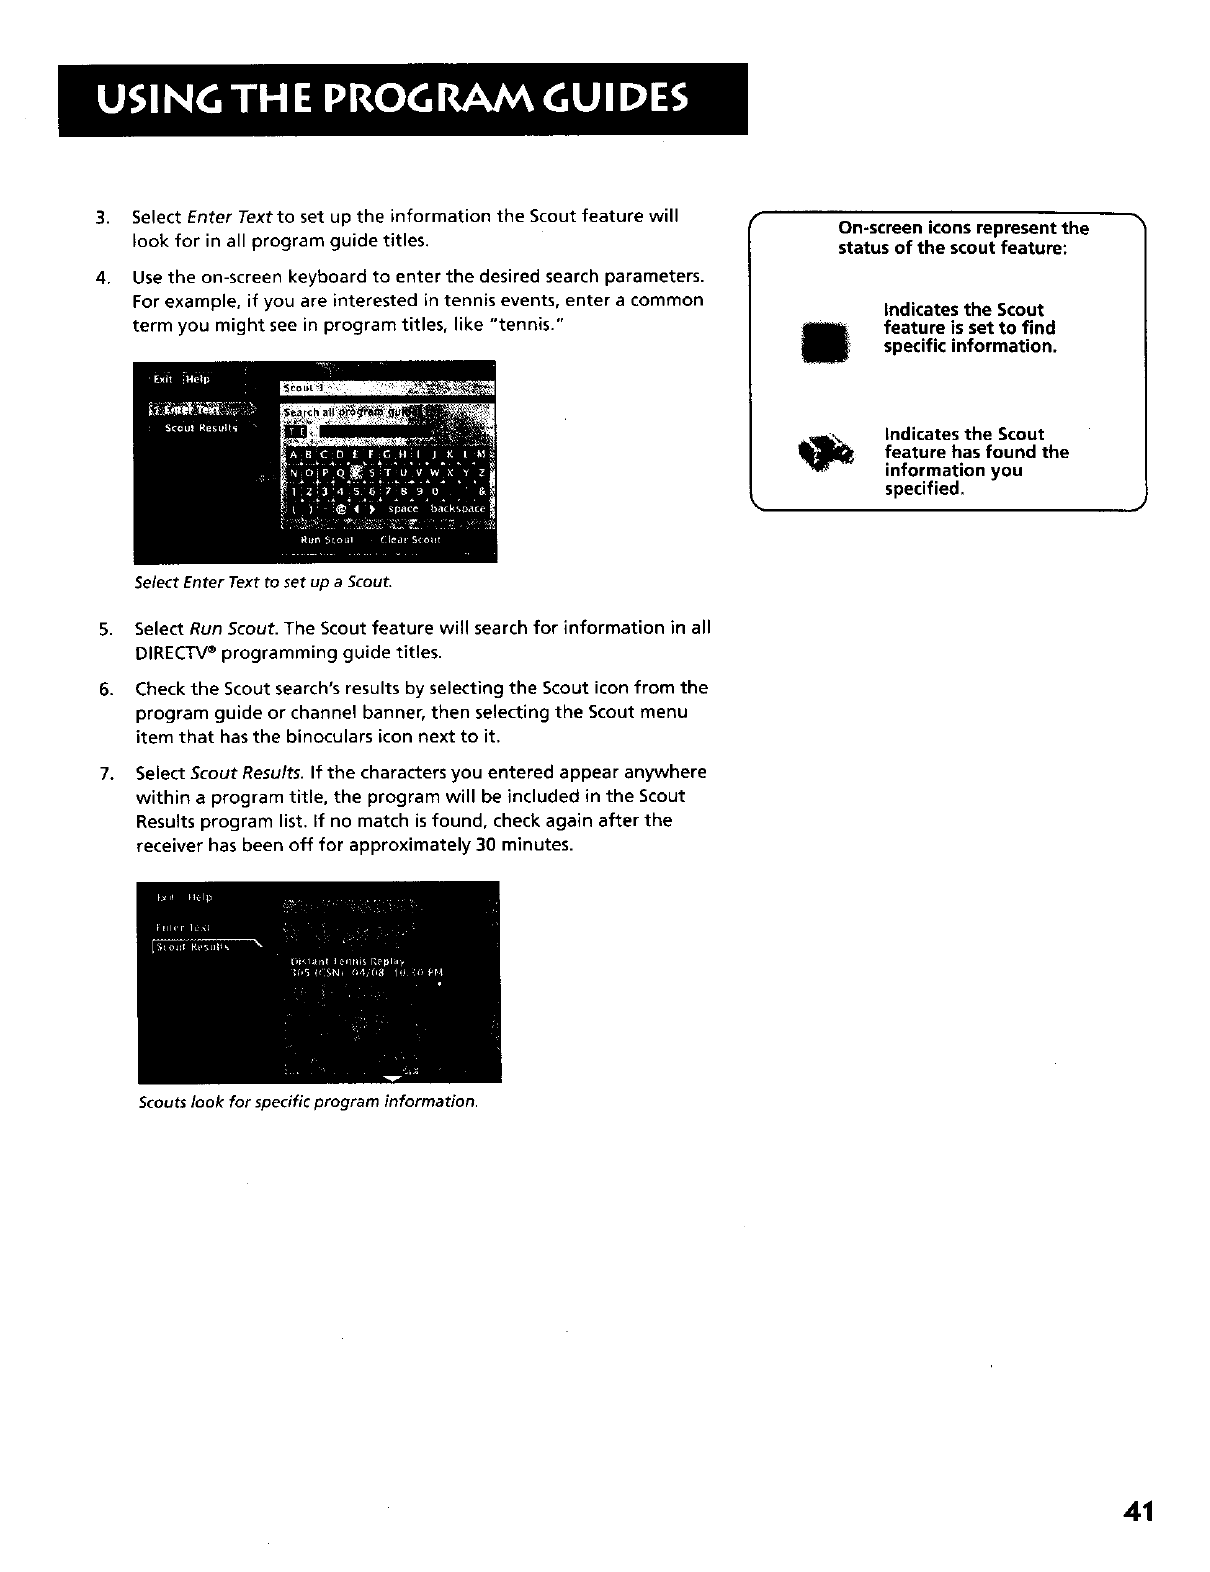
3,
4.
Select Enter Text to set up the information the Scout feature will
look for in all program guide titles.
Use the on-screen keyboard to enter the desired search parameters.
For example, if you are interested in tennis events, enter a common
term you might see in program titles, like "tennis."
Select Enter Text to set up aScout.
On-screen icons represent the
status of the scout feature:
indicates the Scout
feature is set to find
specific information.
indicates the Scout
feature has found the
information you
specified.
5,
6.
7,
Select Run Scout. The Scout feature will search for information in all
DIRECTV®programming guide titles.
Check the Scout search's results by selecting the Scout icon from the
program guide or channel banner, then selecting the Scout menu
item that has the binoculars icon next to it.
Select Scout Results. If the characters you entered appear anywhere
within a program title, the program will be included in the Scout
Results program list. if no match is found, check again after the
receiver has been off for approximately 30 minutes.
Scouts look for specific program information.
41

THE OTHER ICONS
These icons are located on both the DIRECTV and TV program guides.
Exit
Exits the guide and returns you back to where you were before entering
the program guides.
Help
Brings up additional information about the guide. Press OK to continue.
Down Arrow
The arrow icon allows you to scroll down through other channels in the
guide. Highlight the down arrow, and then press either OK or the down
arrow on the remote to scroll down through the program guide.
The Main Menu
Brings up the main menu, PressOK to continue,
Exit icon
Help icon
Arrow icon
Main menu icon
42
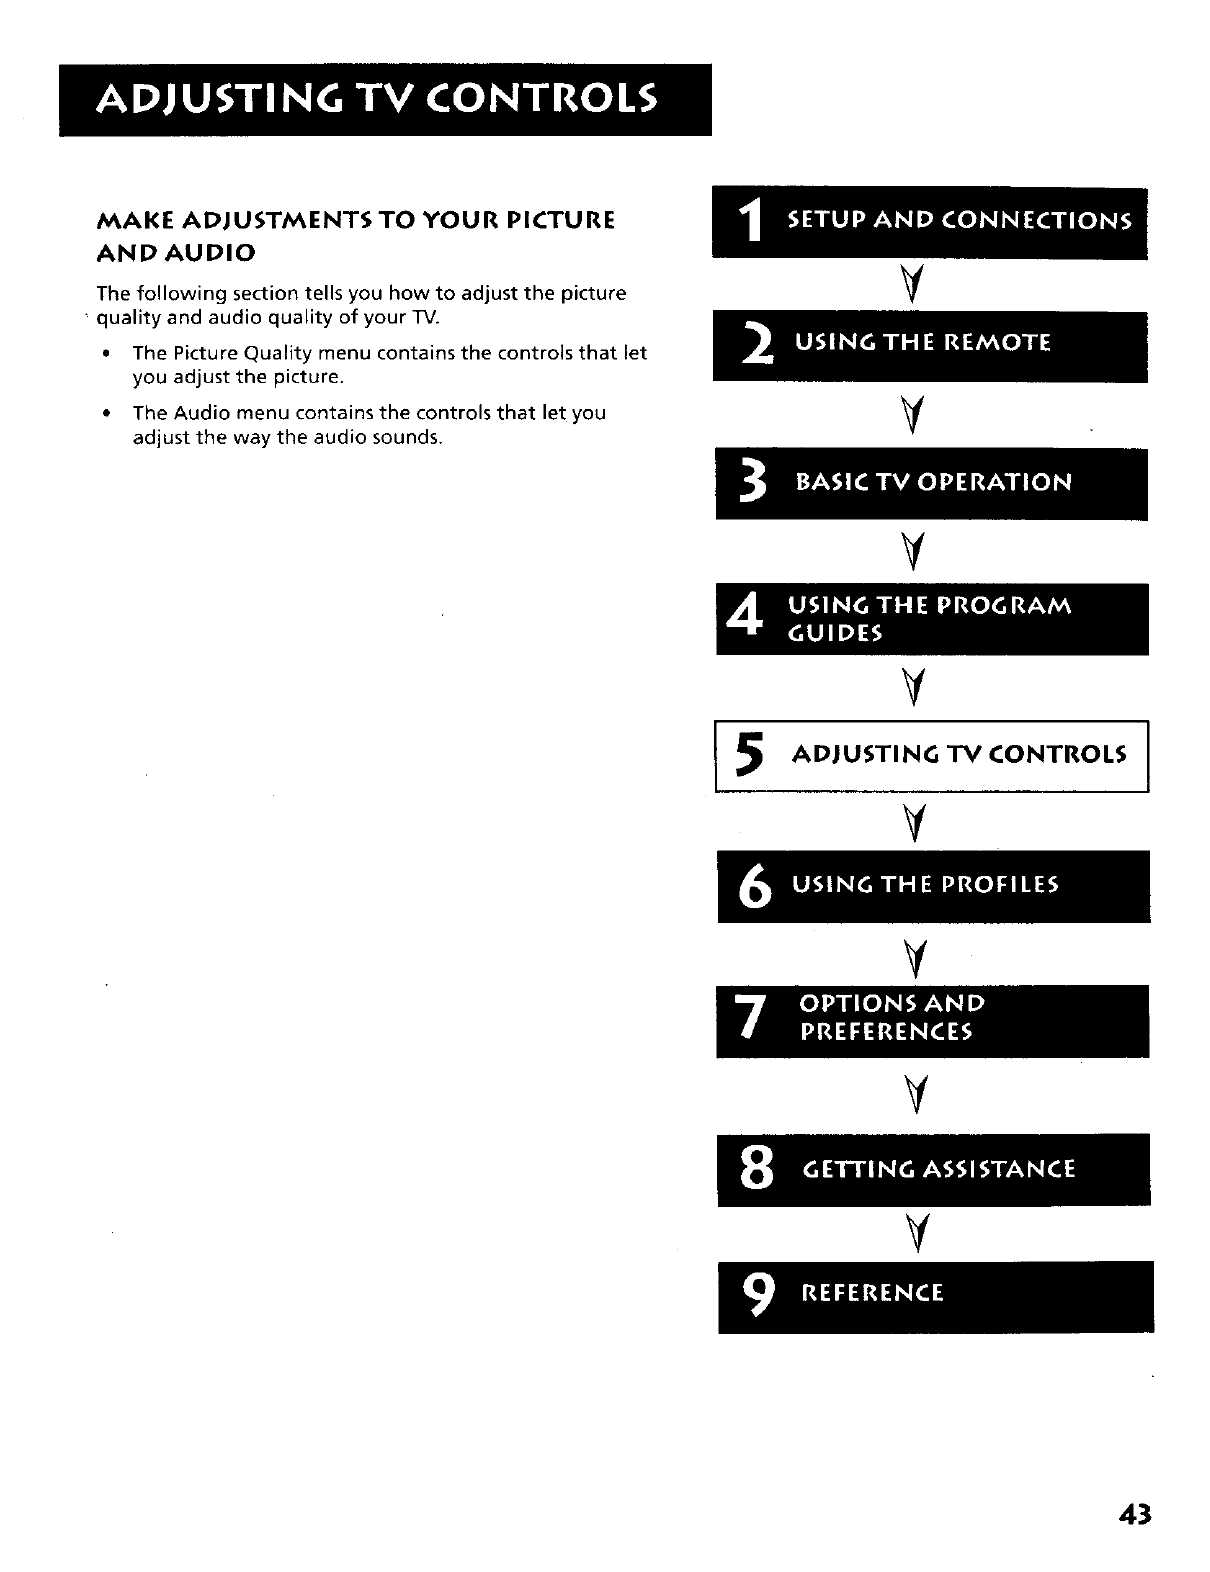
MAKE ADJUSTMENTS TO YOUR PICTURE
AND AUDIO
The following section tells you how to adjust the picture
quality and audio quality of your TV.
•The Picture Quality menu contains the controls that let
you adjust the picture.
•The Audio menu contains the controls that let you
adjust the way the audio sounds.
Y
Y
Y
15
Y
ADJUSTING TV CONTROLS
YI
Y
Y
Y
43
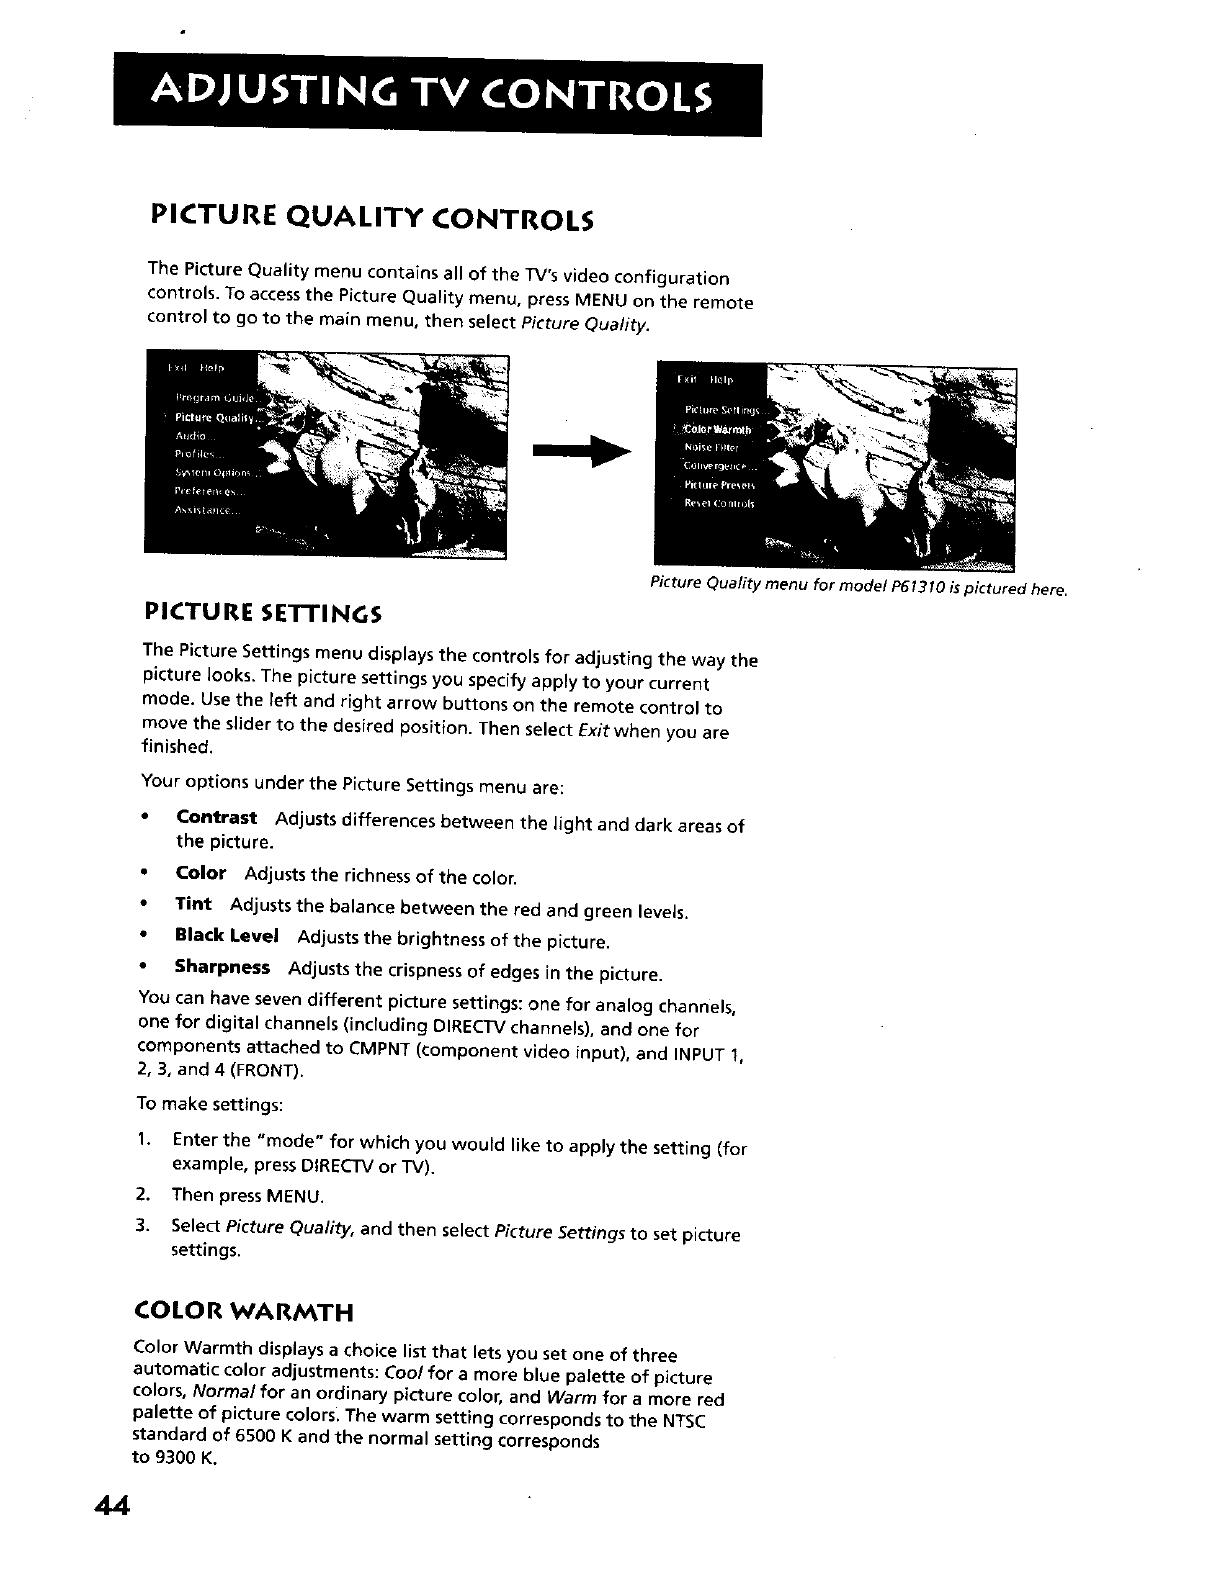
PICTURE QUALITY CONTROLS
The Picture Quality menu contains all of the TV's video configuration
controls. To access the Picture Quality menu, press MENU on the remote
control to go to the main menu, then select Picture Quality.
Picture Quality menu for model P61310 is pictured here.
PICTURE SE'rFINGS
The Picture Settings menu displays the controls for adjusting the way the
picture looks. The picture settings you specify apply to your current
mode. Use the left and right arrow buttons on the remote control to
move the slider to the desired position. Then select Exit when you are
finished.
Your options under the Picture Settingsmenu are:
•Contrast Adjusts differences between the light and dark areas of
the picture.
•Color Adjusts the richness of the color.
•Tint Adjusts the balance between the red and green levels.
•Black level Adjusts the brightness of the picture.
•Sharpness Adjusts the crispness of edges in the picture.
You can have seven different picture settings: one for analog channels,
one for digital channels (including DIRECTV channels), and one for
components attached to CMPNT (component video input), and INPUT 1,
2, 3, and 4 (FRONT).
To make settings:
1. Enter the "mode" for which you would like to apply the setting (for
example, press DIRECTV or TV).
2. Then press MENU.
3. Select Picture Quality, and then select Picture Settings to set picture
settings.
COLOR WARMTH
Color Warmth displays a choice list that lets you set one of three
automatic color adjustments: Cool for a more blue palette of picture
colors, Normal for an ordinary picture color, and Warm for a more red
palette of picture colors. The warm setting corresponds to the NTSC
standard of 6500 K and the normal setting corresponds
to 9300 K.
44

NOISE FILTER
Noise filter displays a list that lets you set one of three automatic
settings that allows you to reduce picture "static" or any type of
interference. You can set Noise Filter to Off, Low, or High.
Off When set to Off, no noise reduction occurs:
Low When set to Low, the television produces a softer, smoother
picture and retains picture sharpness and detail. This is especially useful
for providing a cleaner picture in weak analog signal conditions.
High When set to High, the television produces an even softer,
smoother picture. This is especially useful for providing a cleaner picture
in weak analog signal conditions. However, when Noise Filter is on High,
picture detail is somewhat decreased.
CONVERGENCE
Convergence is available in model P61310 only. Selecting Convergence
lets you adjust the TV's tubes. When the TV tubes' images are precisely
aligned, they create the color images you see on the screen. Over time,
the picture can drift out of alignment. If your picture seems fuzzy or has
a yellow tint, using Convergence could correct this misalignment.
Once you are in the Convergence menu, selecting Auto Converge will
cause the monitor to self-correct color images. For best results, leave the
TV turned on for 30 minutes before running Auto Convergence.
Selecting Blue Centering or Red Centering begins a process that lets you
align the red and blue picture tubes to produce the best picture quality.
Use the arrows on the remote control to adjust the red and blue
projection tubes until the test patterns on the TV screen appear white.
PICTURE TILT
Picture Tilt is available in model F383190 only. Your TV has an extra-large
picture tube, which makes it vulnerable to the effects of the Earth's
magnetic field. You may need to adjust picture tilt. Use the left and
right arrows to adjust the picture tilt.
PICTURE PRESETS
Picture Presets displays a choice list that lets you select one of three
preset picture settings: Bright Lighting, Normal Lighting, Soft Lighting,
or Personal Picture Preset. Based on the degree of lighting in your room,
you should choose Bright, Normal, or Soft Lighting. After you select one,
the contrast, color tint, black level, and sharpness settings found under
the Picture Settings menu are automatically adjusted according to your
selection.
RESET CONTROLS
AHows you to reset all picture quality controls to their original defaults.
If you choose Personal Picture Preset, you
can customize color, tint, black level, and
sharpness to your desired level, and the
television _saves" those settings. After
you've done this, it allows you to go back
into the menu and select Bright, Normal,
or Soft Lighting when you need to
without losing your customized settings.
For example, if you normally use Personal
Picture Preset but wanted to watch a
show in Bright Lighting today, you can
choose Bright Lighting now, watch the
show, and then afterwards return to your
customized settings by choosing Personal
Picture Presets again.
45
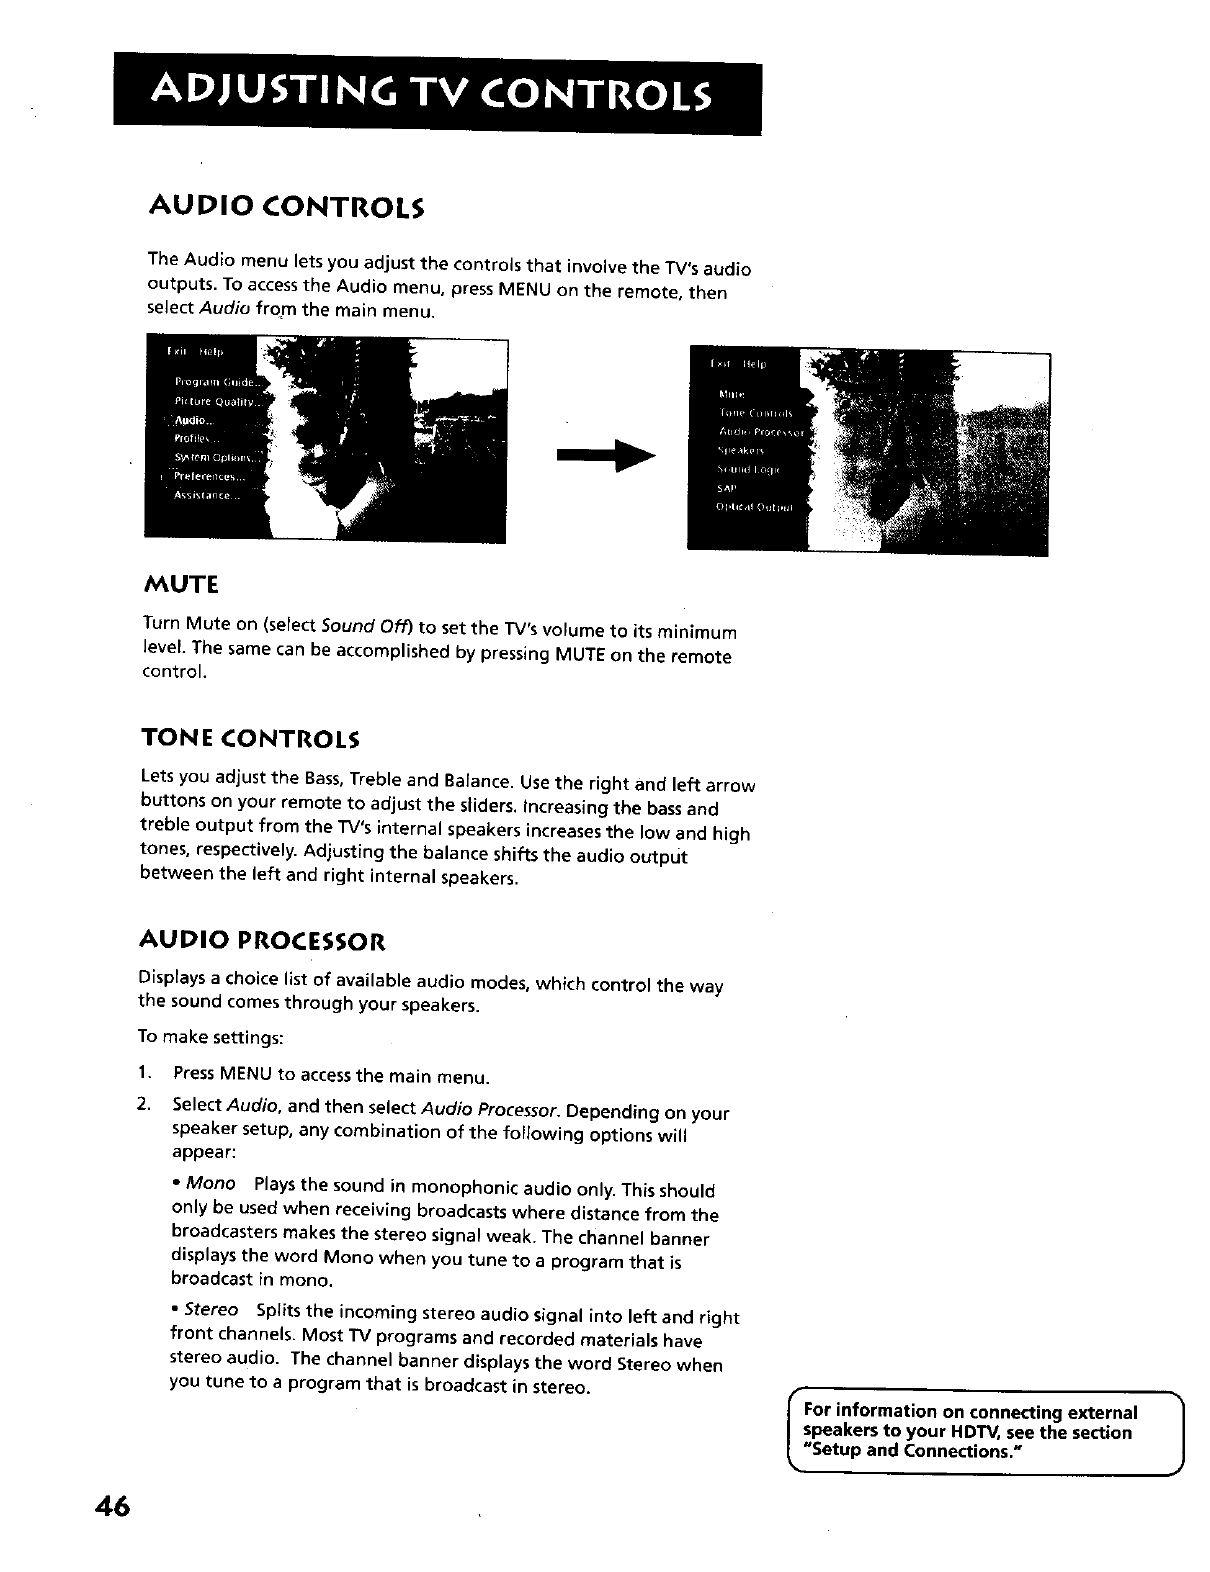
AUDIO CONTROLS
The Audio menu letsyou adjustthe controlsthat involvethe TV'saudio
outputs.To accessthe Audio menu, pressMENU on the remote, then
select Audio from the main menu,
MUTE
Turn Mute on (select Sound Off) to set the TV's volume to its minimum
level. The same can be accomplished by pressing MUTE on the remote
control.
TONE CONTROLS
Lets you adjust the Bass, Treble and Balance. Use the right and left arrow
buttons on your remote to adjust the sliders. Increasing the bass and
treble output from the TV's internal speakers increases the low and high
tones, respectively. Adjusting the balance shifts the audio output
between the left and right internal speakers.
AUDIO PROCESSOR
Displays a choice list of available audio modes, which control the way
the sound comes through your speakers.
To make settings:
1. Press MENU to access the main menu.
2, Select Audio, and then select Audio Processor. Depending on your
speaker setup, any combination of the following options will
appear:
•Mono Plays the sound in monophonic audio only. This should
only be used when receiving broadcasts where distance from the
broadcasters makes the stereo signal weak. The channel banner
displays the word Mono when you tune to a program that is
broadcast in mono.
•Stereo Splits the incoming stereo audio signal into left and right
front channels. Most "FVprograms and recorded materials have
stereo audio. The channel banner displays the word Stereo when
you tune to a program that is broadcast in stereo. rFor information on connecting external
speakers to your HDTV, see the section J
"Setup and Connections."
46
• *SRS Stereo (o) Is an audio processing technology that adds
greater depth and stereo separation to stereo audio signals.
•*SRS FOCUS(.) Focuses audio signals by adding treble and making
dialog more understandable.
SPEAKERS
Allows you to turn on or off internal speakers.
SOUND LOGIC
Monitors aprogram's audio track and limits volume excursions to a
minimum and maximum volume range from the current volume setting.
Acting like adynamic range limiter, it compresses the dynamic range to
limit sudden volume increases, like when a commercial begins.
SAP
When turned on, Second Audio Program (SAP) plays the program's audio
in a second language, if one is available. SAP is also used to broadcast a
program's audio with descriptions of the video for the visually impaired.
SAP is broadcast in mono and is not available for digital programs.
For more information on the variable and l
fixed audio jacks, see the section "Setup J
and Connections" under "Back of the TV"
and Connecting a Stereo Amplifier."
f
When the TV is connected to an optional,
compatible six-channel amplifier/receiver
and speakers via the DIGITAL AUDIO OUT
jack on the back panel, you receive Dolby
Digital Surround Sound, if transmitted.
Use the Optical Output menu to specify
Auto Select, PCM, Dolby Digital, or Off.
%
OPTICAL OUTPUT
Select Auto Select if your TV is connected to a Dolby DigitaF and PCM
decoder. Your television will automatically choose Dolby Digital or PCM
based on the signal source. Select Dolby Digital if the TV is connected to
a Dolby Digital only decoder; it will provide six independent soundtrack
channels through the optical output jack (labeled DIGITAL AUDIO OUT).
Select PCM if connected to a PCM only decoder; it will then provide two
independent soundtrack channels. Select Off if you want no audio
output provided.
AUDIO LANGUAGE
The Audio Language menu lets you choose the default audio language
you want to hear when it is available. The system will automatically set
the audio program to the selected audio language when the channel
you are viewing is either a DIRECTV or a digital channel and the
specified language is available.
In the Audio Language menu, highlight the audio language you want
using the up and down arrows, then press OK to select.
* SRS,SRS-Focus, Sound Retrieval System, and the SRS logo are registered trademarks of SRS Labs, Inc.
t Manufactured under license from Dolby Laboratories. "Dolby", "Pro Logic" and the double-D symbol are trademarks of Dolby
Laboratories. Confidential Unpublished Works. ©1992-1997 Dolby Laboratories, Inc. All rights reserved.
47
Icon in the Channel Banner
You will find an audio language icon in the channel banner.
Audio language icon
If the icon is highlighted while watching a digital (ATSC) or DIRECTV
channel, two or more audio languages are available. Selecting the
icon repeatedly scrolls through and plays the options.
If the icon is highlighted when watching an analog (NTSC) TV
channel, a Second Audio Program (SAP) is available. Selecting the
icon will play the SAP for the current channel until the channel is
changed.
48
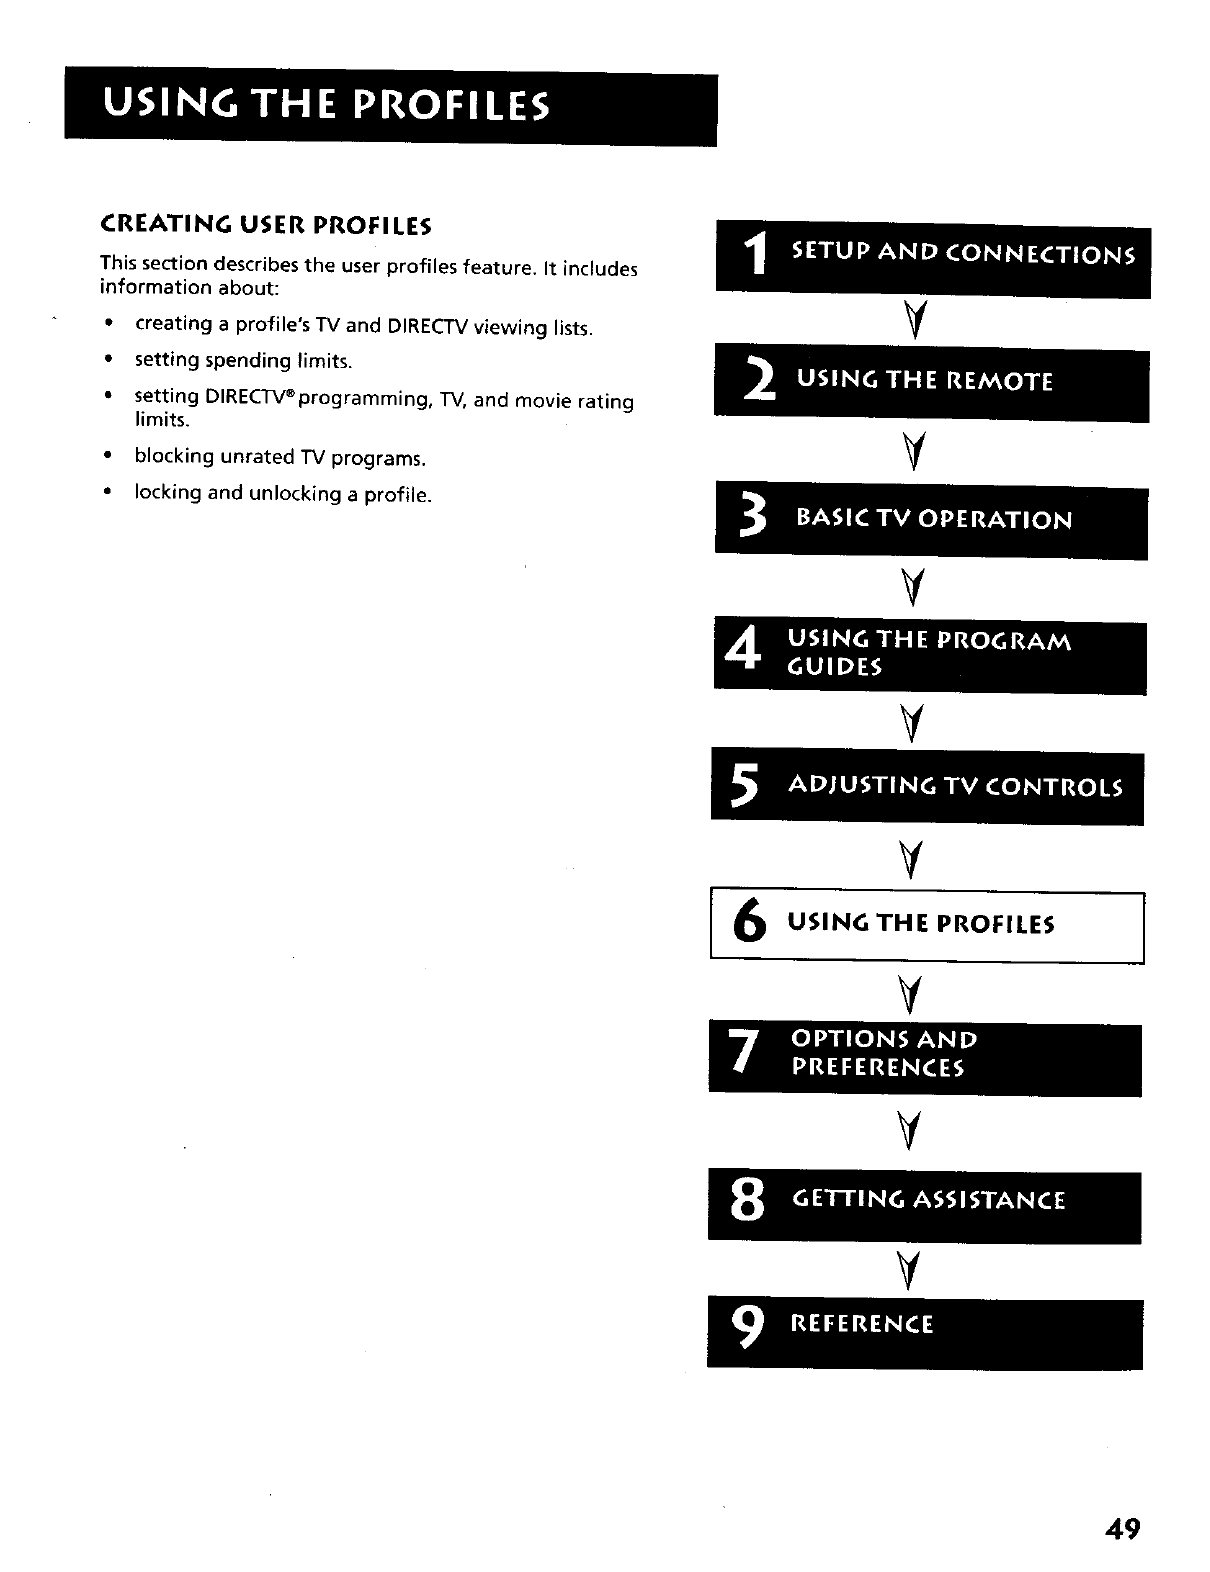
CREATING USER PROFILES
This section describes the user profiles feature. It includes
information about:
• creating a profile's TV and DIRECTV viewing lists.
• setting spending limits.
• setting DlRECTV®programming, TV, and movie rating
limits.
• blocking unrated TV programs.
• locking and unlocking a profile.
¥
V
V
USING THE PROFILES
VI
¥
V
49
ABOUT PROFILES
When you select Profiles from the main menu, you can create four
different profiles in addition to the default "Family" profile. You can set
up specific channels, rating limits, and spending limits for each profile.
After you've set up these profiles, exit the menu system. Then, press the
WHO button on the remote control to scroll through your profiles and
press OK to access a certain one.
But first, personalize a profile by entering a name.
1. Select Profiles from the main menu.
2. Select a profile to edit: User 1, User 2, User 3, or User 4.
3. Select Edit User Name from the next menu.
4. Use the up, down, and right arrows on the remote control to find
and select a letter.
5. Press OK.
You can personalize each profile.
Use the MENU button on the remote
control to bring up the main menui use
the arrows to highlight an option, and
press OK to select it.
If the main menu does not appear, the
remote control might not be in TV or
DIRECTV mode. Try pressing the TV or
DIRECTV button and then MENU.
%]
To continue editing the profile, select DIRECTV Setup (if you have
ordered DIRECTV®programming} or TV Setup. The following sections
describe how to set up these features.
THE DIRECTV SETUP
The DIRECTV Setup menu item is only accessible if you subscribe to
DIRECTV®programming. Through this menu you can establish DIRECTV
channel lists, set spending limits, and set rating limits for DIRECTV®
programs.
EDITING CHANNELS IN A DIRECTV LIST
You should create a DIRECTV channel list to establish which DIRECTV
channels the selected profile can access. To create the DIRECTV channel
list:
1. Highlight and select a user name, then select DIRECTVSetup.
2. Highlight Edit Channels and press OK.
You can also set up profiles as categories
instead of as users. For example, name a
profile "Sports" and include only sports
channels in the profile. Or, name it
HMovies," include only movie channels,
and set a rating and spending limit for
yourself or your family.
50
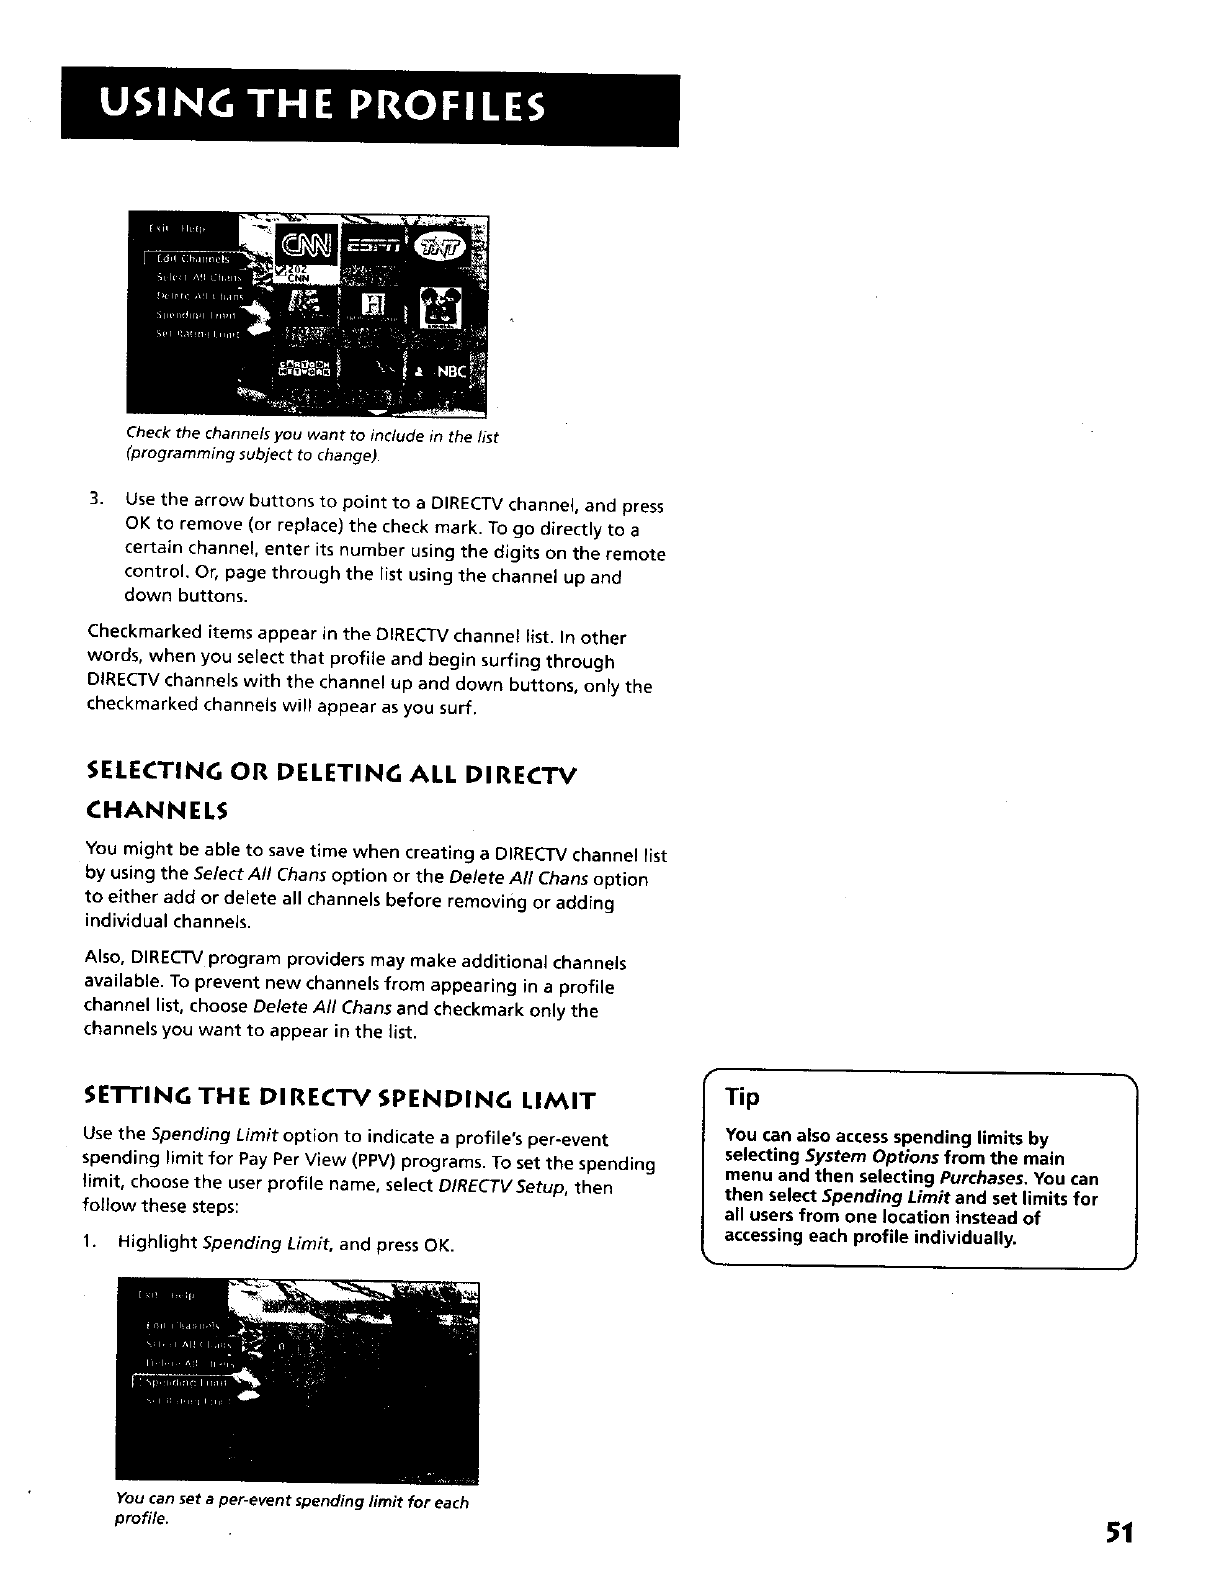
Check the channels you want to include in the list
(programming subject to change).
3, Use the arrow buttons to point to a DIRECTV channel, and press
OK to remove (or replace) the check mark. To go directly to a
certain channel, enter its number using the digits on the remote
control. Or, page through the list using the channel up and
down buttons.
Checkmarked items appear inthe DIRECTV channel _ist. In other
words, when you select that profile and begin surfing through
DIRECTV channels with the channel up and down buttons, only the
checkmarked channels will appear as you surf.
SELECTING OR DELETING ALL DIRECTV
CHANNELS
You might be able to save time when creating a DIRECTM channel list
by using the Select All Chans option or the Delete All Chans option
to either add or delete all channels before removing or adding
individual channels.
Also, DIRECTV program providers may make additional channels
available. To prevent new channels from appearing in a profile
channel list, choose Delete All Chans and checkmark only the
channels you want to appear in the list.
SE'n'ING THE DIRECTV SPENDING LIMIT
Use the Spending Limit option to indicate a profile's per-event
spending limit for Pay Per View (PPV) programs. To set the spending
limit, choose the user profile name, select DIRECTVSetup, then
follow these steps:
1. Highlight Spending Limit, and press OK.
Tip
You can also access spending limits by
selecting System Options from the main
menu and then selecting Purchases, You can
then select Spending Limit and set limits for
all users from one location instead of
accessing each profile individually.
Youcan set a per-event spending limit for each
profile. 51
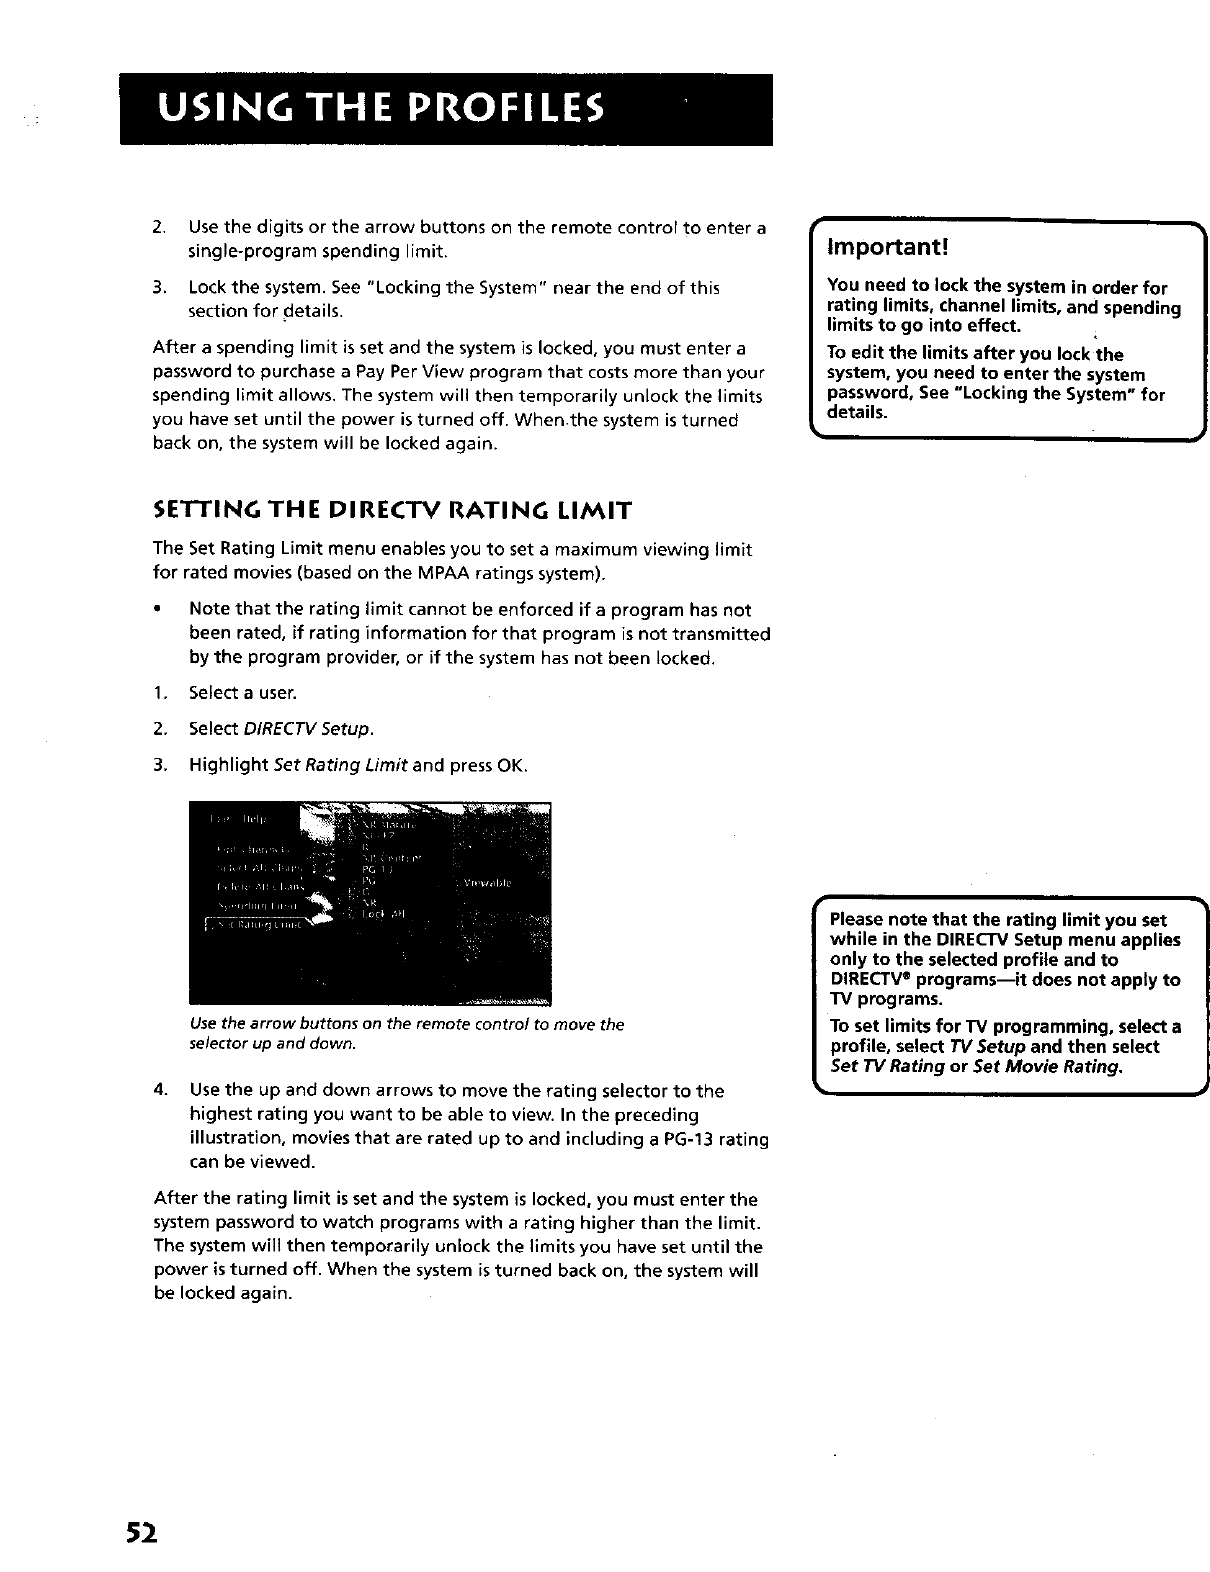
2. Use the digits or the arrow buttons on the remote control to enter a
single-program spending limit.
3. Lock the system. See "Locking the System" near the end of this
section for details.
After a spending limit is set and the system is locked, you must enter a
password to purchase a Pay Per View program that costs more than your
spending limit allows. The system will then temporarily unlock the limits
you have set until the power is turned off. When.the system is turned
back on, the system will be locked again.
Important!
You need to lock the system in order for
rating limits, channel limits, and spending
limits to go into effect.
To edit the limits after you Iockthe
system, you need to enter the system
password, See "Locking the System" for
details.
SETTING THE DIRECTV RATING LIMIT
The Set Rating Limit menu enables you to set a maximum viewing limit
for rated movies (based on the MPAA ratings system).
• Note that the rating limit cannot be enforced if a program has not
been rated, if rating information for that program is not transmitted
by the program provider, or if the system has not been locked.
1. Select a user.
2. Select DIRECTVSetup.
3. Highlight Set Rating Limit and press OK.
Use the arrow buttons on the remote control to move the
selector up and down.
4. Use the up and down arrows to move the rating selector to the
highest rating you want to be able to view. In the preceding
illustration, movies that are rated up to and including a PG-13 rating
can be viewed.
After the rating limit is set and the system is locked, you must enter the
system password to watch programs with a rating higher than the limit.
The system will then temporarily unlock the limits you have set until the
power is turned off. When the system is turned back on, the system will
be locked again.
Please note that the rating limit you set
while in the DIRECTV Setup menu applies
only to the selected profile and to
DIRECTVeprograms--it does not apply to
TV programs.
To set limits for TV programming, select a
profile, select TV Setup and then select
Set TV Rating or Set Movie Rating.
52
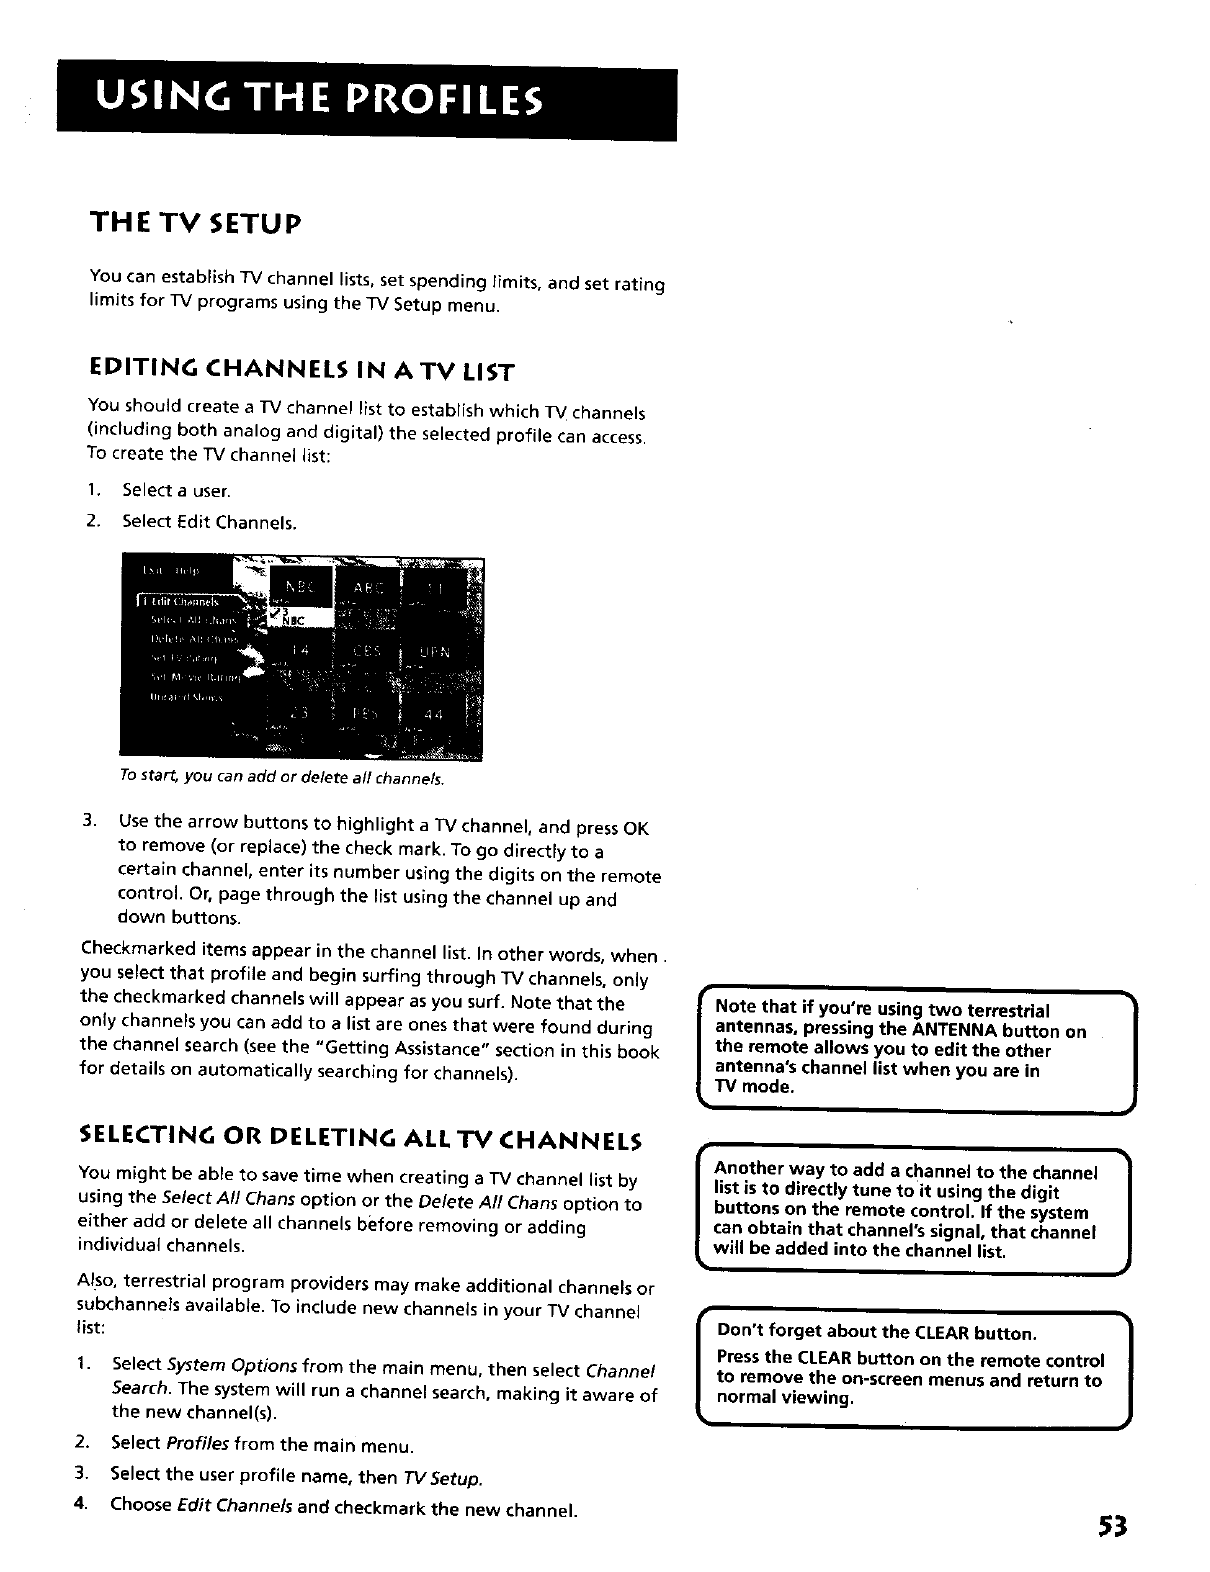
THE TV SETUP
You can establish TV channel lists, set spending limits, and set rating
limits for TV programs using the TV Setup menu.
EDITING CHANNELS IN ATV LIST
You should create a TV channel list to establish which TV channels
(including both analog and digital) the selected profile can access.
To create the TV channel list:
1. Select a user.
2. Select Edit Channels.
3,
To start, you can add or delete all channels.
Use the arrow buttons to highlight a TV channel, and press OK
to remove (or replace) the check mark. To go directly to a
certain channel, enter its number using the digits on the remote
control. Or, page through the list using the channel up and
down buttons.
Checkmarked items appear in the channel list. In other words, when.
you select that profile and begin surfing through TV channels, only
the checkmarked channels will appear as you surf. Note that the
only channe)s you can add to a list are ones that were found during
the channel search (see the "Getting Assistance" section in this book
for details on automatically searching for channels).
SELECTING OR DELETING ALL TV CHANNELS
You might be able to save time when creating a TV channel list by
using the Select All Chans option or the Delete All Chans option to
either add or delete all channels before removing or adding
individual channels.
Also, terrestrial program providers may make additional channels or
subchannels available. To include new channels in your TV channel
list:
I.
2,
3.
4.
Select System Options from the main menu, then select Channel
Search. The system will run a channel search, making it aware of
the new channel(s).
Select Profiles from the main menu.
Select the user profile name, then TV Setup.
Choose Edit Channels and checkmark the new channel.
INote that if you're using two terrestrial |
-i
antennas, pressing the ANTENNA button on J
the remote allows you to edit the other
antenna's channel list when you are in
TV mode.
IAnother way to add achannel to the channel I
list is to directly tune to it using the digit J
buttons on the remote control. If the system
can obtain that channel's signal, that channel
will be added into the channel list.
i
IDon't forget about the CLEAR button. 1
Press the CLEAR button on the remote control
to remove the on-screen menus and return to
normal viewing.
53

SE'n'ING THE TV RATING
The Set TV Rating menu enables you to program your TV so children cannot see certain programs or channels.
The last three choices in the TV Setup menu involve software inside your TV (often called V-Chip) which allows you
to "block" TV programs and movies based on violence, sex, or other content you may believe children should not
view. In other words, it lets you program your TV so it will not display certain programs. Once you block programs,
you or other adults are not limited to only parent-approved programs; you can "unblock" programs by entering
the system password.
The V-Chip software inside your TV is initially turned "off," so if you choose not to implement it, you can just
ignore it.
When turned "on," the V-chip software reads a code that most broadcasters send with programs. That code tells
the V-Chip software the program's age-based rating (TV-MA, TV-14, etc.) and content themes (Violence (V), Adult
Language (L), etc.). If you have blocked the rating or content themes that the program contains, you will receive
the message, "Program exceeds the TV rating limit you set," when you turn to that particular channel.
Broadcasters are not required to provide ratings. However, you can block out programs that have been given a
rating of "Not Rated," and programs that are considered "unrated" because no code has been sent by the
broadcaster.
The TV age-based ratings and content themes you can block are listed in the table below.
Age-Based Description and Content Themes for Age-Based Ratings
Rating
Mature Audience Only. Specifically designed to be viewed by adults and may be unsuitable for
TV-MA children under 17. It contains one or more of the following content themes: crude indecent
language (L), explicit sexual activity (S), or graphic violence (V).
Parents Strongly Cautioned. Contains some material that many parents would find unsuitable for
children under 14. Parents are strongly urged to exercise greater care in monitoring this program and
TV-14 are cautioned against letting children under the age of 14 watch unattended. This program contains
one or more of the following content themes: intensely suggestive dialogue (D), strong coarse
language (L), intense sexual situations (S), or intense violence (V).
Parental Guidance Suggested. Contains material that parents may find unsuitable for younger
children. Many parents may want to watch it with their younger children. The program contains one
TV-PG or more of the following content themes: some suggestive dialogue (D), infrequent coarse
language (L), some sexual situations (S), or moderate violence (V).
General Audience. Most parents would find this program suitable for all ages. It contains little or no
TV-G sexual dialogue (D), no strong language (L) or situations (S), and little or no violence (V).
Directed to Children 7 years and older. Designed for children ages 7 and above. It may be more
appropriate for children who have acquired the developmental skills needed to distinguish between
TV-Y7 make-believe and reality. Themes and elements in this program may include mild fantasy violence
(FV) or comedic violence, or may frighten children under the age of 7.
All Children. Themes and elements in this program are designed for a young audience, including
TV-Y children from ages 2-6. It is not expected to frighten younger children.
54
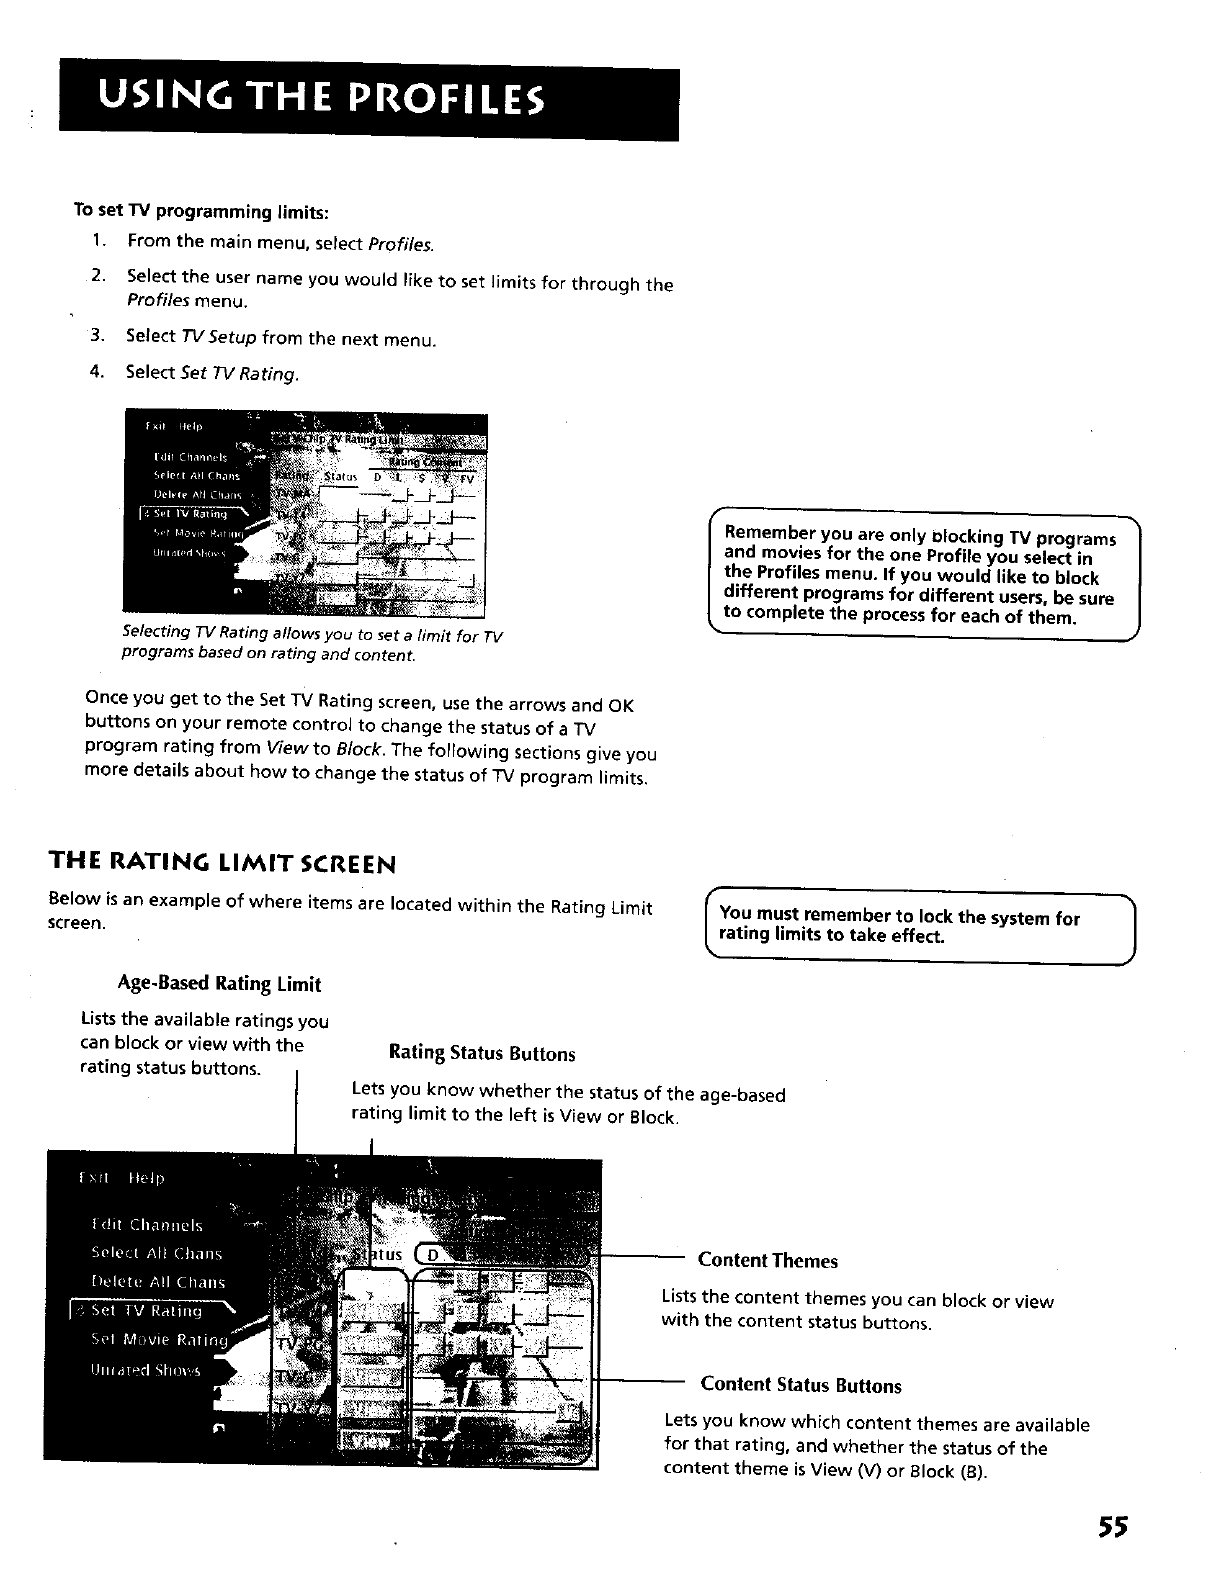
To set TV programming limits:
1. From the main menu, select Profiles.
2. Select the user name you would like to set limits for through the
Profiles menu.
3. Select TVSetup from the next menu.
4. Select Set TV Rating.
Selecting TV Rating allows you to set a limit for TV
programs based on rating and content.
Once you get to the Set 3-V Rating screen, use the arrows and OK
buttons on your remote control to change the status of a TV
program rating from View to Block. The following sections give you
more details about how to change the status of TV program limits.
Remember you are only olocking TV programs
and movies for the one Profile you select in
the Profiles menu. If you would like to block
different programs for different users, be sure
to complete the process for each of them.
%
THE RATING LIMIT SCREEN
Below is an example of where items are located within the Rating Limit
screen. You must remember to lock the system for
rating limits to take effect. J
J
Age-Based Rating Limit
Lists the available ratings you
can b_ock or view with the
rating status buttons. Rating Status Buttons
Lets you know whether the status of the age-based
rating limit to the left is View or Block.
Content Themes
Lists the content themes you can block or view
with the content status buttons.
Content Status Buttons
Lets you know which content themes are available
for that rating, and whether the status of the
content theme is View (V) or Block (B).
55
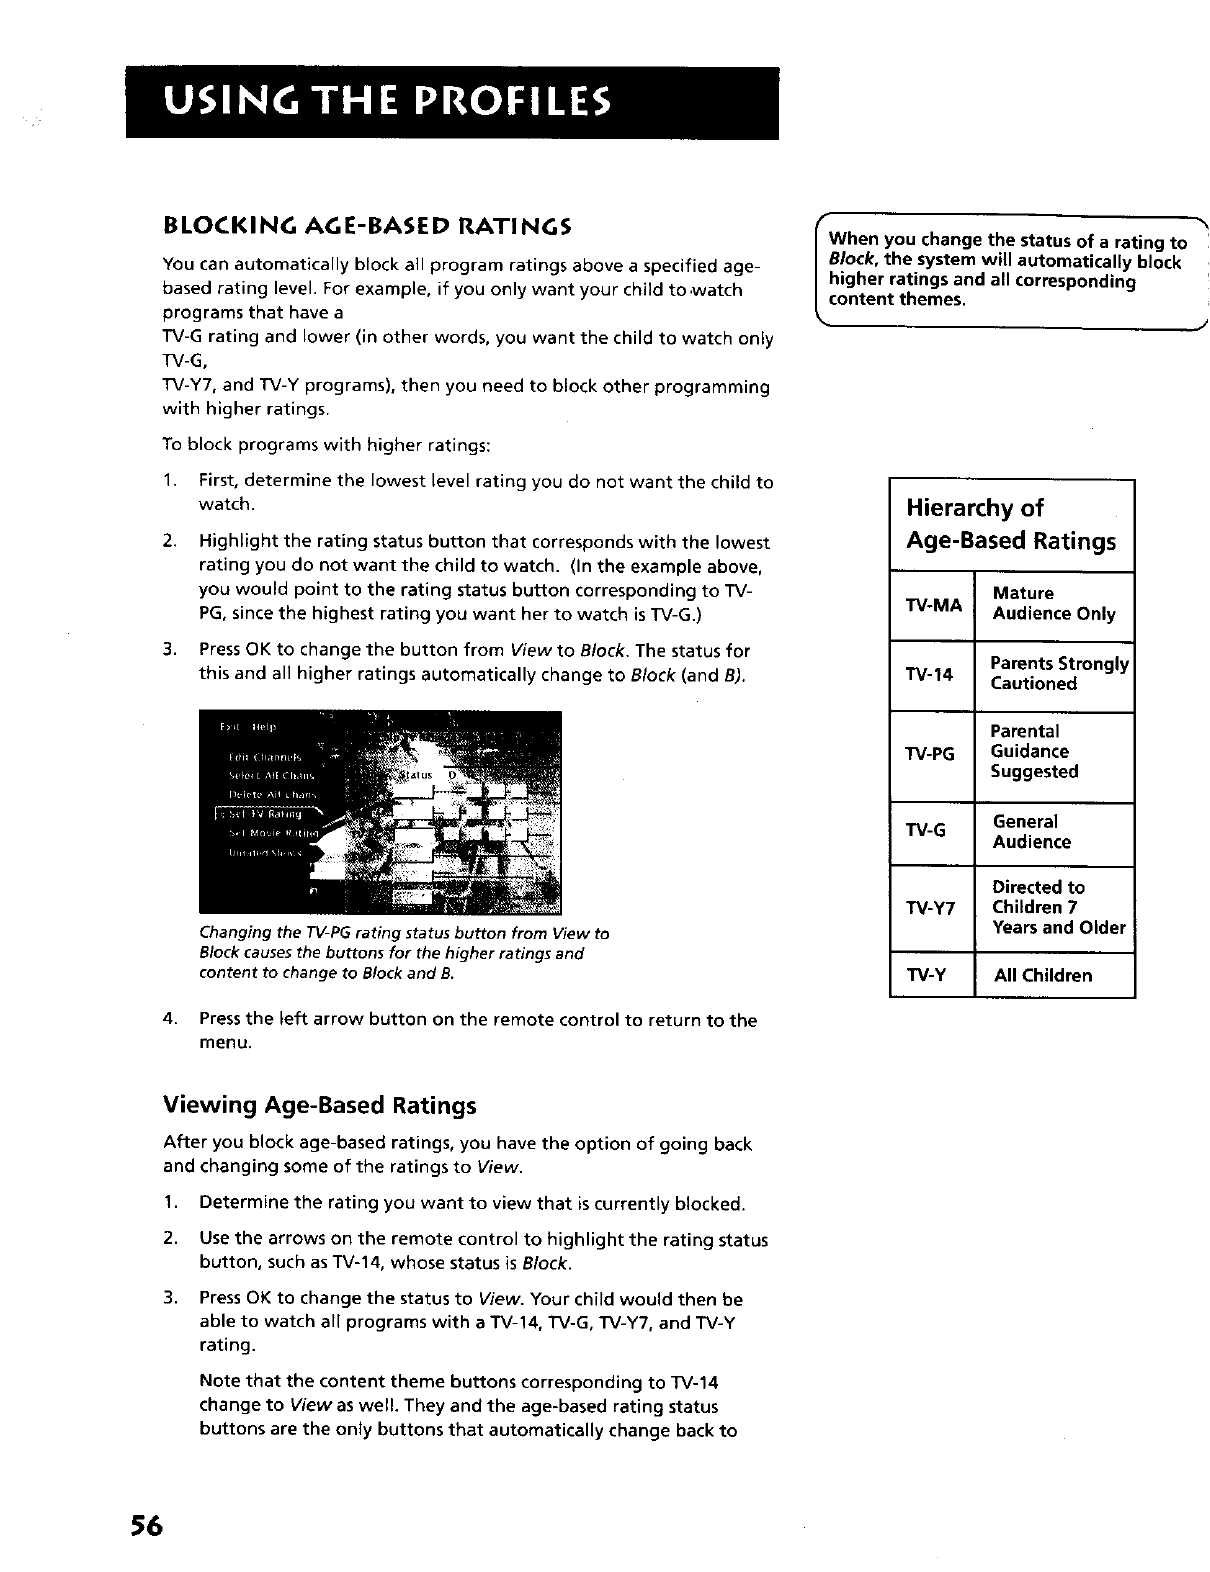
BLOCKING AGEIBASED RATINGS
You can automatically block all program ratings above a specified age-
based rating level. For example, if you only want your child to .watch
programs that have a
TV-G rating and lower (in other words, you want the child to watch only
TV-G,
TV-Y7, and TV-Y programs), then you need to block other programming
with higher ratings.
To block programs with higher ratings:
1. First, determine the lowest level rating you do not want the child to
watch.
2.
3,
Highlight the rating status button that corresponds with the lowest
rating you do not want the child to watch. (In the example above,
you would point to the rating status button corresponding to TV-
PG, since the highest rating you want her to watch is TV-G.)
Press OK to change the button from View to Block. The status for
this and all higher ratings automatically change to Block (and B).
4.
Changing the TVIpG rating status button from View to
Block causes the buttons for the higher ratings and
content to change to Block and B.
Press the left arrow button on the remote control to return to the
menu.
f
When you change the status of arating to
Block, the system will automatically block
higher ratings and all corresponding
content themes.
Hierarchy of
Age-Based Ratings
Mature
TV-MA Audience Only
TV-14 Parents Strongly
Cautioned
Parental
TV-PG Guidance
Suggested
TVIG General
Audience
Directed to
TV-Y7 Children 7
Years and Older
TVIy All Children
Viewing Age-Based Ratings
After you block age-based ratings, you have the option of going back
and changing some of the ratings to View.
1. Determine the rating you want to view that is currently blocked.
2. Use the arrows on the remote control to highlight the rating status
button, such as TV-14, whose status is Block.
3. Press OK to change the status to View. Your child would then be
able to watch all programs with a TV-14, TV-G, TV-Y7, and TV-Y
rating.
Note that the content theme buttons corresponding to TV-14
change to View as well. They and the age-based rating status
buttons are the only buttons that automatically change back to
56
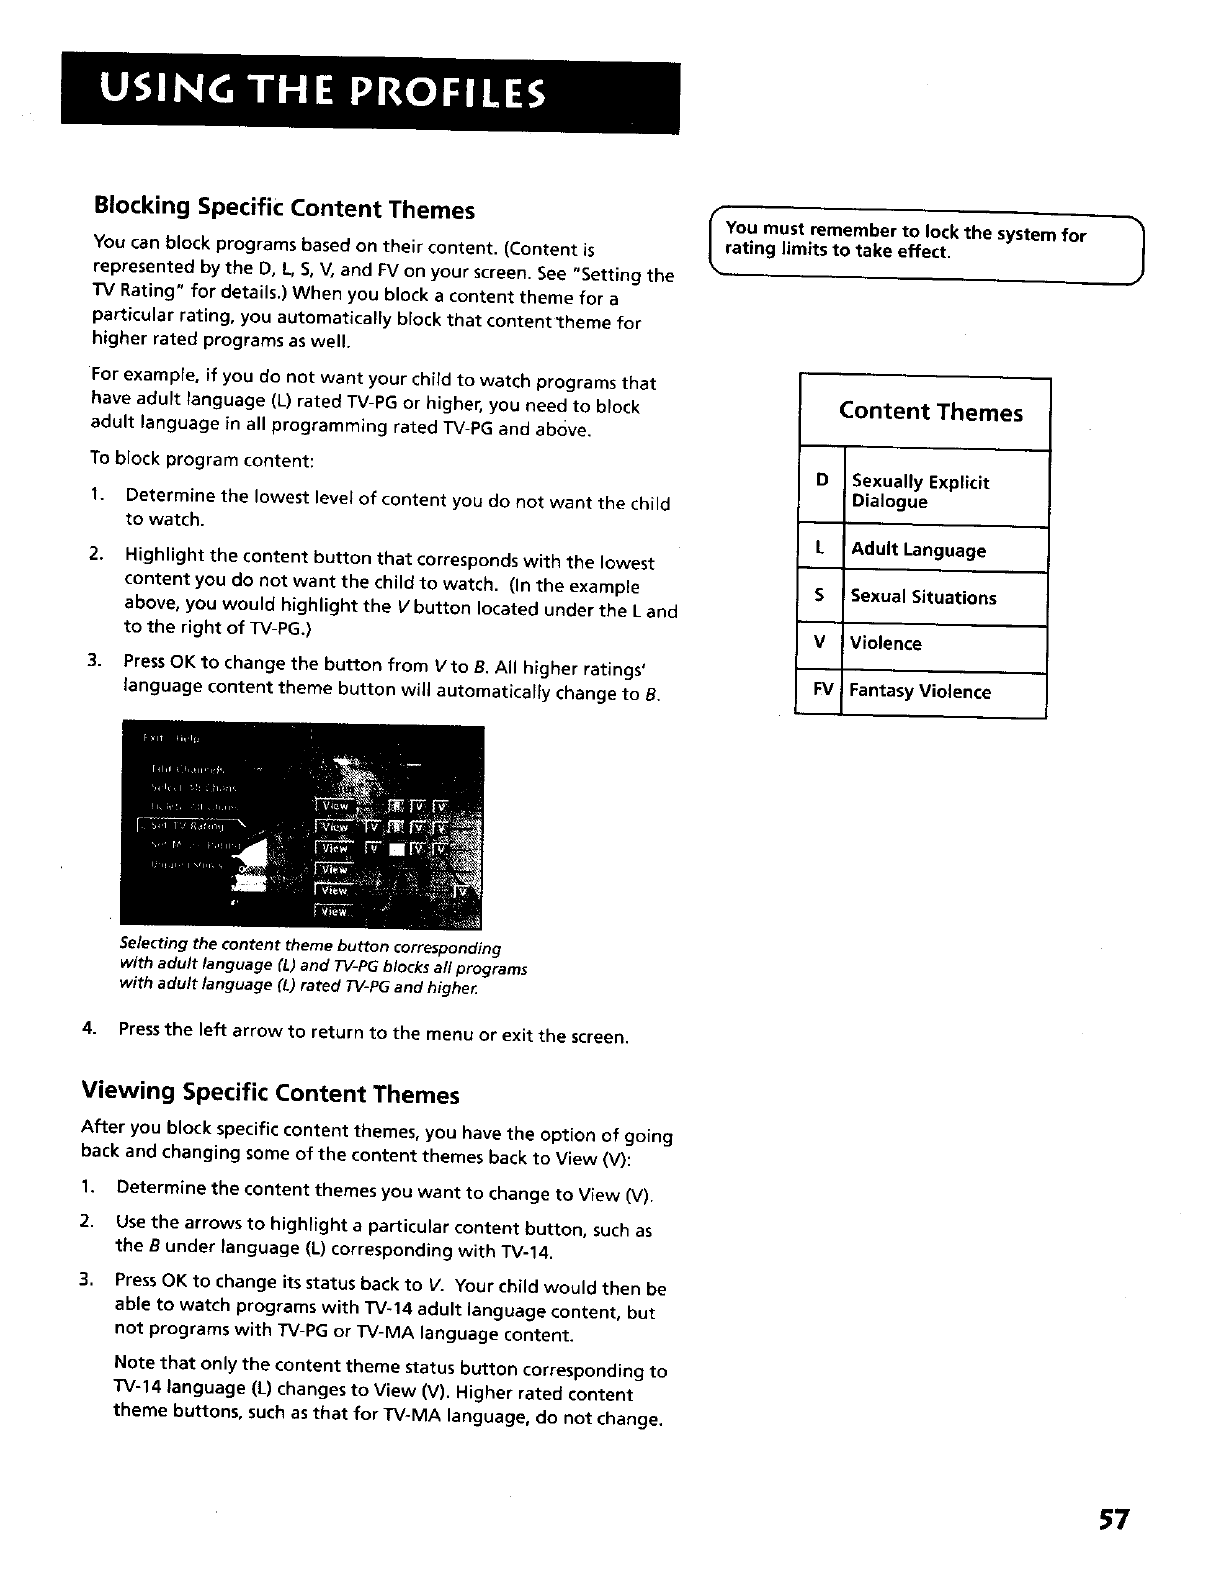
Blocking Specific Content Themes
You can block programs based on their content. (Content is
represented by the D, L, S, V, and FV on your screen. See "Setting the
I"V Rating" for details.) When you block a content theme for a
particular rating, you automatically block that content theme for
higher rated programs as well.
For example, if you do not want your child to watch programs that
have adult language (L) rated TV-PG or higher, you need to block
adult language in all programming rated TV-PG and above.
To block program content:
1. Determine the lowest level of content you do not want the child
to watch.
2. Highlight the content button that corresponds with the lowest
content you do not want the child to watch. (In the example
above, you would highlight the Vbutton located under the L and
to the right of TV-PG.)
3. Press OK to change the button from Vto B. All higher ratings'
language content theme button will automatically change to B.
You must remember to lock the system for
,rating limits to take effect. J
Content Themes
D Sexually Explicit
Dialogue
L Adult Language
S Sexual Situations
V Violence
FV Fantasy Violence
Selecting the content theme button corresponding
with adult language (L) and TV-PG blocks all programs
with adult language (L) rated TV-pG and highe_
4. Press the left arrow to return to the menu or exit the screen.
Viewing Specific Content Themes
After you block specific content themes, you have the option of going
back and changing some of the content themes back to View (V):
1. Determine the content themes you want to change to View (V).
2.
3.
Use the arrows to highlight a particular content button, such as
the Bunder language (L) corresponding with TV-14.
Press OK to change its status back to V. Your child would then be
able to watch programs with TV-14 adult language content, but
not programs with TV-PG or TV-MA language content.
Note that only the content theme status button corresponding to
TV-14 language (L) changes to View (V). Higher rated content
theme buttons, such as that for TV-MA language, do not change.
57
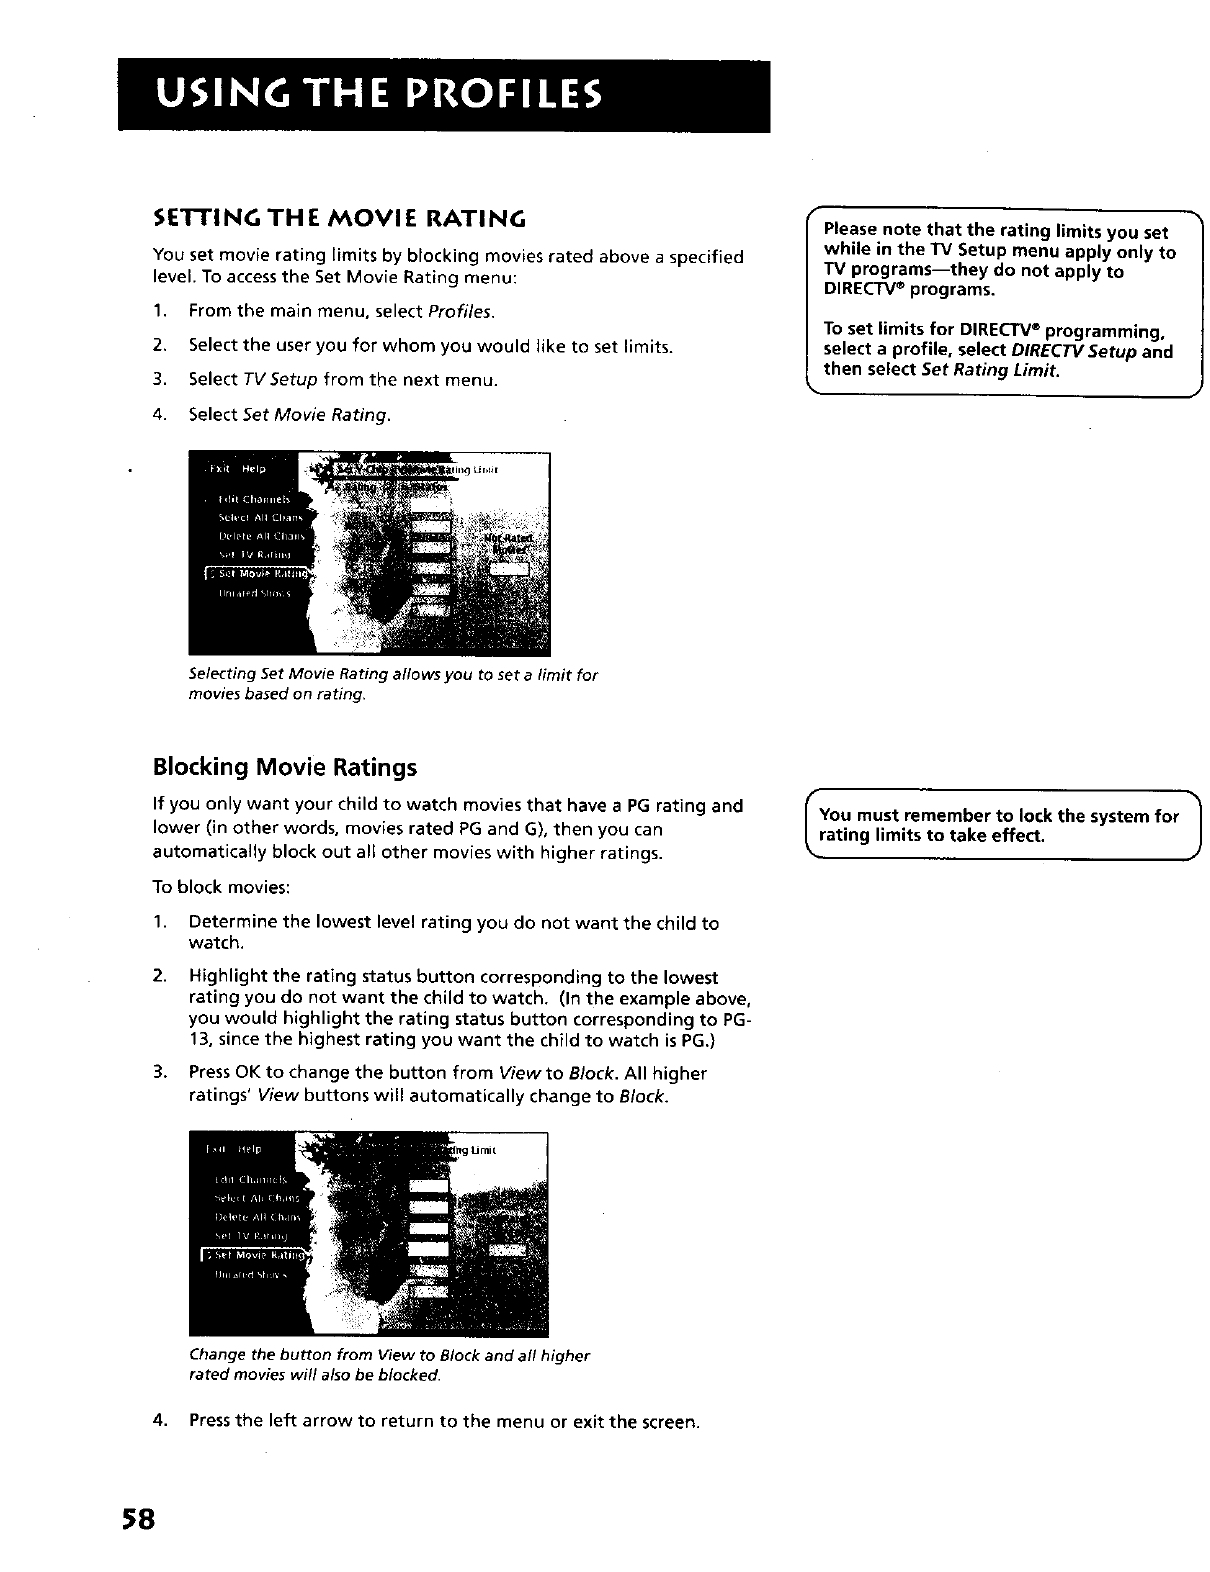
SEI_'ING THE MOVIE RATING
You set movie rating limits by blocking movies rated above aspecified
level. To access the Set Movie Rating menu:
1. From the main menu, select Profiles,
2. Select the user you for whom you would like to set limits.
3. Select TVSetup from the next menu.
4. Select Set Movie Rating.
Please note that the rating limits you set
while in the TV Setup menu apply only to
TV programs--they do not apply to
DIRECTV ®programs.
To set limits for DIRECTV®programming,
select aprofile, select DIRECTV Setup and
then select Set Rating Limit.
Selecting Set Movie Rating allows you to set a limit for
movies based on rating.
Blocking Movie Ratings
If you only want your child to watch movies that have aPG rating and
lower (in other words, movies rated PG and G), then you can
automatically block out all other movies with higher ratings.
To block movies:
1. Determine the lowest level rating you do not want the child to
watch.
2,
3.
Highlight the rating status button corresponding to the lowest
rating you do not want the child to watch. (In the example above,
you would highlight the rating status button corresponding to PG-
13, since the highest rating you want the child to watch is PG.)
Press OK to change the button from View to Block. All higher
ratings' View buttons will automatically change to Block.
You must remember to lock the system for
rating limits to take effect, /
)
Change the button from View to Block and all higher
rated movies will also be blocked.
4. Press the left arrow to return to the menu or exit the screen.
58
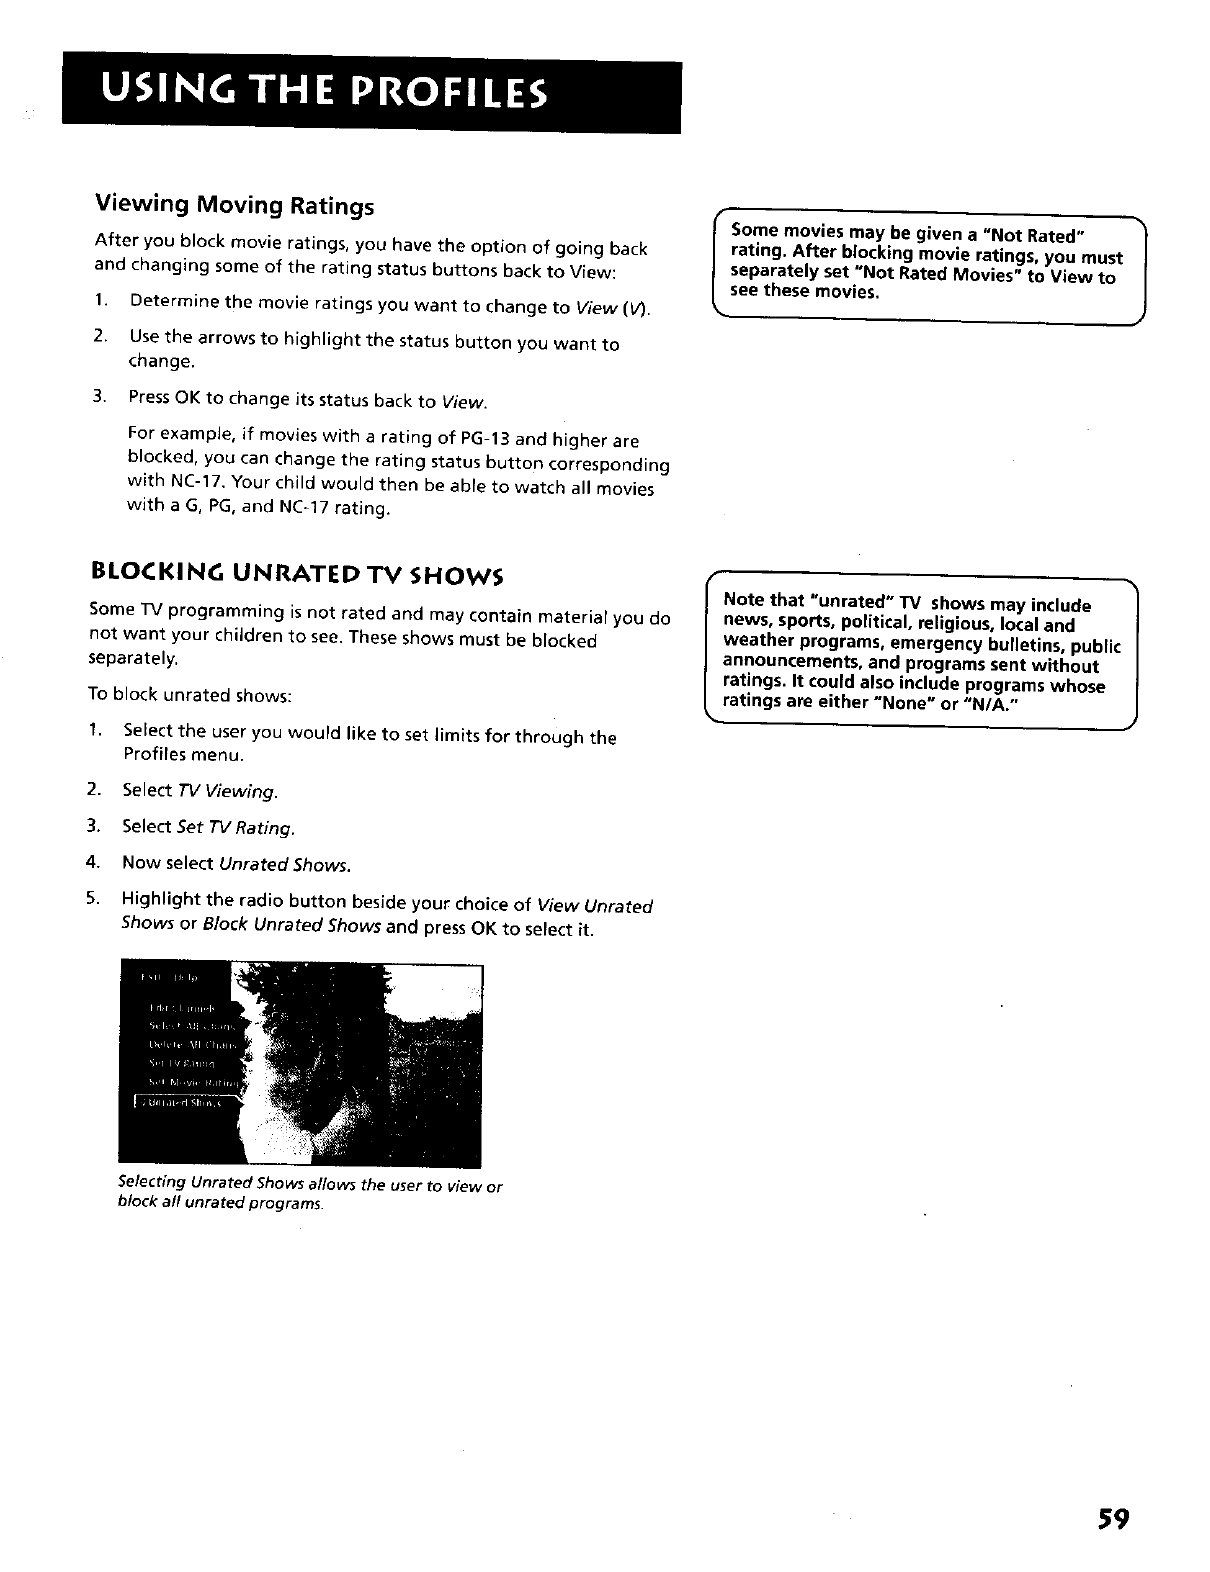
Viewing Moving Ratings
After you block movie ratings, you have the option of going back
and changing some of the rating status buttons back to View:
1. Determine the movie ratings you want to change to View (V).
2. Use the arrows to highlight the status button you want to
change.
3. Press OK to change its status back to View.
For example, if movies with a rating of PG-13 and higher are
blocked, you can change the rating status button corresponding
with NC-17. Your child would then be able to watch all movies
with a G, PG, and NC-17 rating.
r ]
Some movies may be given a "Not Rated"
rating. After blocking movie ratings, you must
separately set "Not Rated Movies" to View to
see these movies.
BLOCKING UNRATED TV SHOWS
Some TV programming is not rated and may contain material you do
not want your children to see. These shows must be blocked
separately,
To block unrated shows:
1. Select the user you would like to set limits for through the
Profiles menu.
2. Select TV Viewing.
3. Select Set TV Rating.
4. Now select UnratedShows.
5. Highlight the radio button beside your choice of View Unrated
Shows or Block Unrated Shows and press OK to select it.
f
Note that "unrated n TV shows may include
news, sports, political, religious, local and
weather programs, emergency bulletins, public
announcements, and programs sent without
ratings. It could also include programs whose
ratings are either "None" or "N/A."
Selecting Unrated Shows allows the user to view or
block all unrated programs.
59
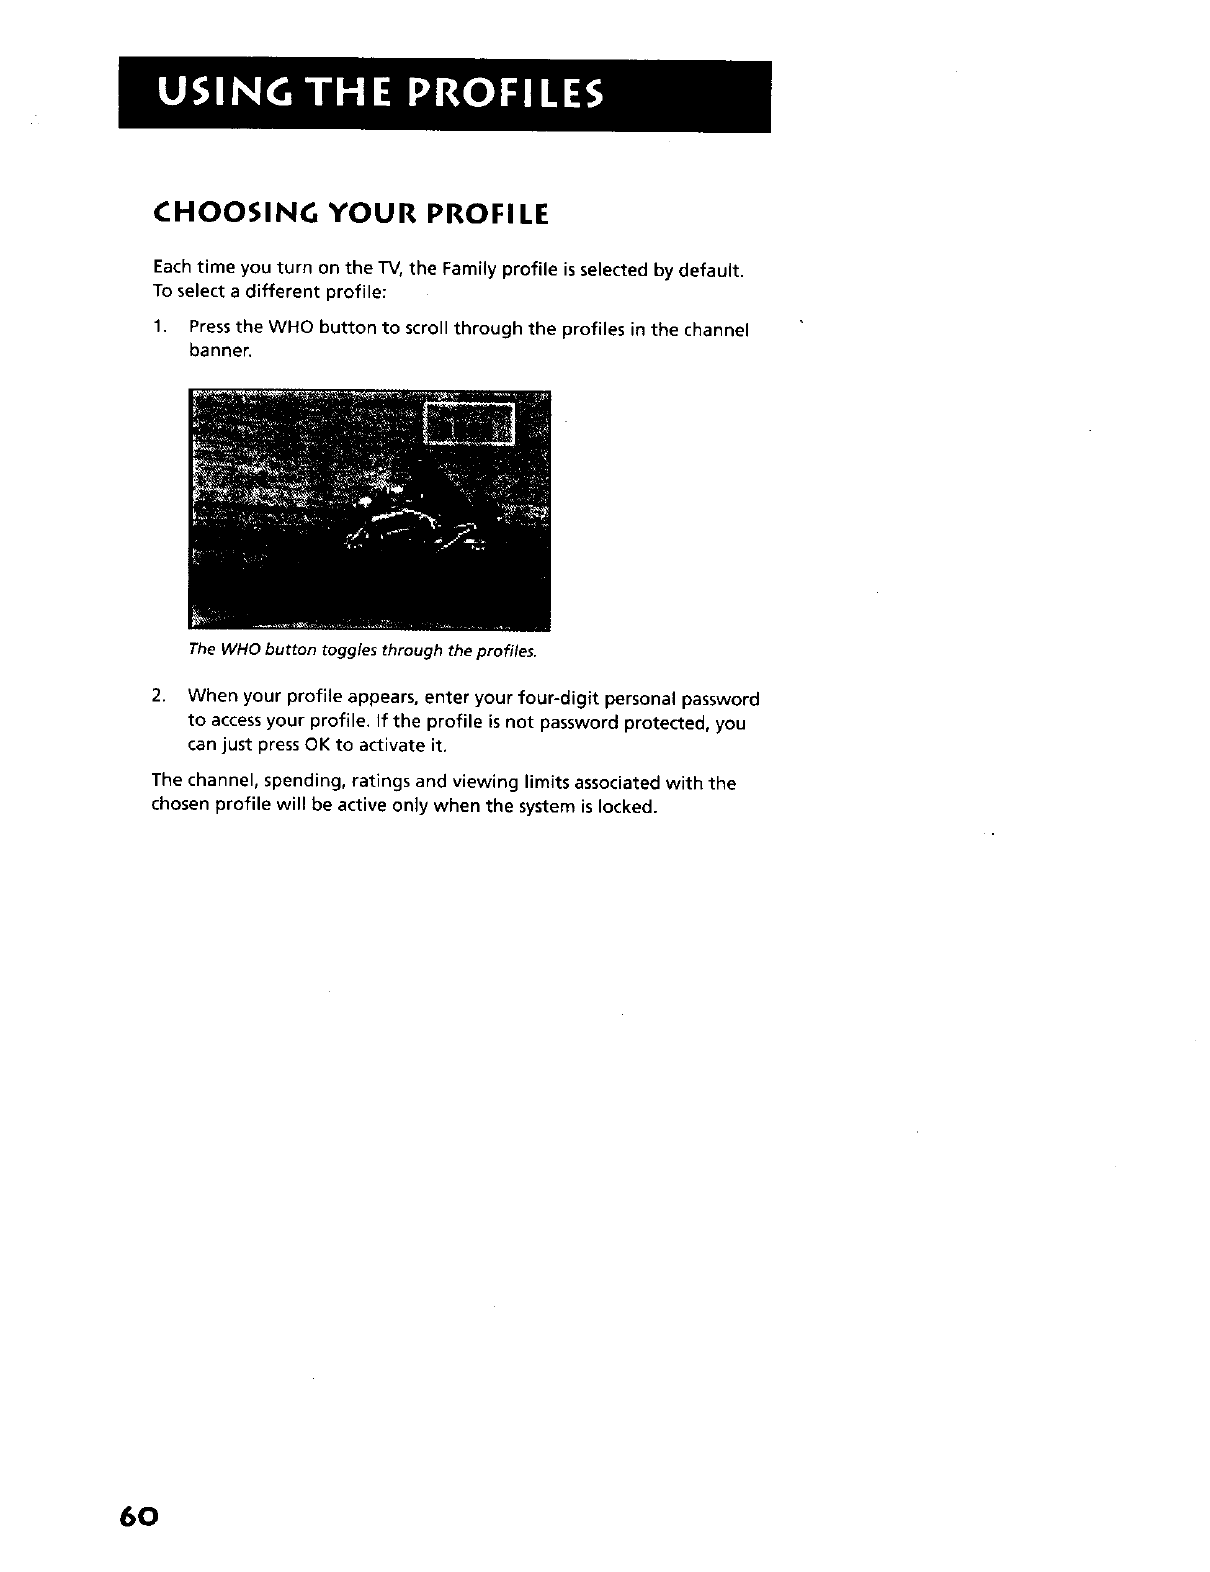
CHOOSING YOUR PROFILE
Each time you turn on the TV, the Family profile is selected by default.
To select a different profile:
1. Press the WHO button to scroll through the profiles in the channel
banner.
The WHO button toggles through the profiles.
2. When your profile appears, enter your four-digit personal password
to access your profile. If the profile is not password protected, you
can just press OK to activate it.
The channel, spending, ratings and viewing limits associated with the
chosen profile will be active only when the system is locked.
6O
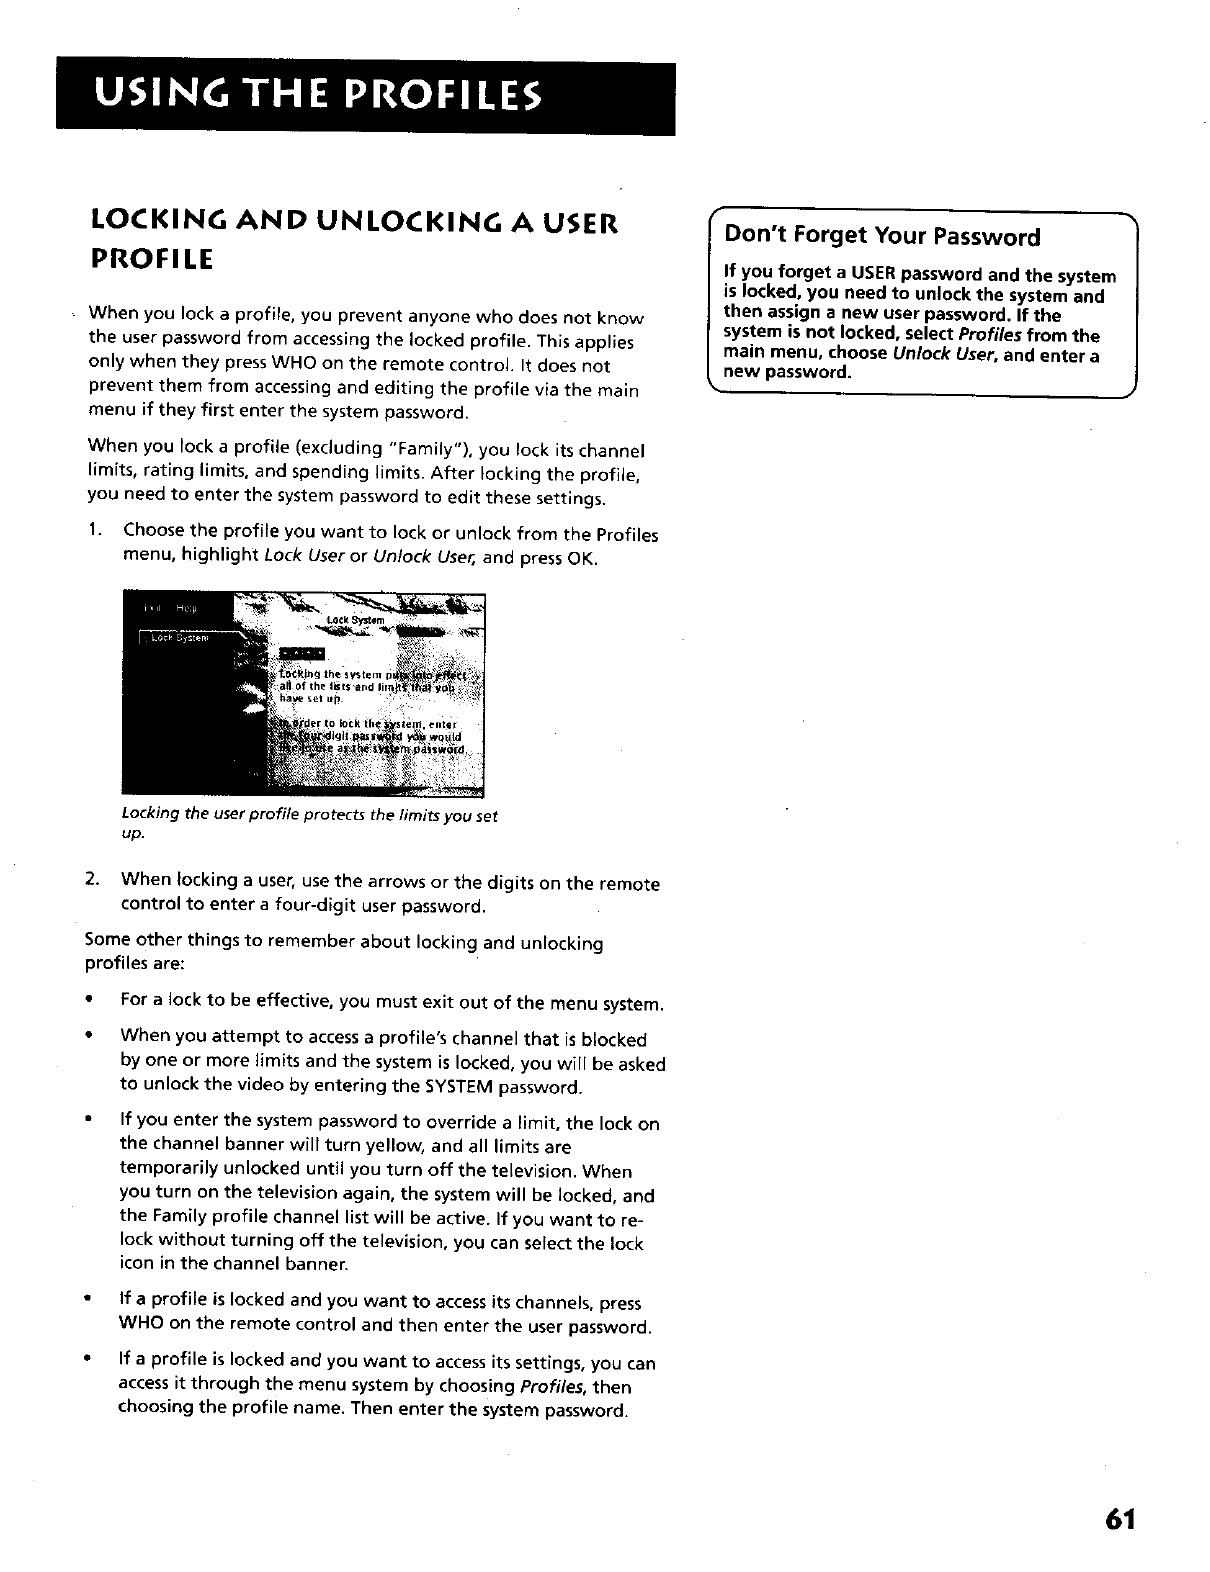
LOCKING AND UNLOCKING A USER
PROFILE
-When you lock a profile, you prevent anyone who does not know
the user password from accessing the locked profile. This applies
only when they press WHO on the remote control. It does not
prevent them from accessing and editing the profile via the main
menu if they first enter the system password.
When you lock a profile (excluding "Family"), you took its channet
limits, rating limits, and spending limits. After locking the profile,
you need to enter the system password to edit these settings.
1. Choose the profile you want to lock or unlock from the Profiles
menu, highlight Lock Useror Unlock User, and press OK.
Don't Forget Your Password
If you forget a USER password and the system
is locked, you need to unlock the system and
then assign a new user password. If the
system is not locked, select Profiles from the
main menu, choose Unlock User, and enter a
new password.
Locking the user profile protects the limits you set
up.
2. When locking a user, use the arrows or the digits on the remote
control to enter a four-digit user password.
Some other things to remember about locking and unlocking
profites are:
•For a lock to be effective, you must exit out of the menu system.
• When you attempt to access a profile's channel that is blocked
by one or more limits and the system is locked, you will be asked
to unlock the video by entering the SYSTEM password.
If you enter the system password to override a limit, the lock on
the channel banner will turn yellow, and all limits are
temporarily unlocked until you turn off the television. When
you turn on the television again, the system will be locked, and
the Family profile channel list will be active. If you want to re-
lock without turning off the television, you can select the lock
icon in the channel banner.
• If aprofile is locked and you want to access its channels, press
WHO on the remote control and then enter the user password.
• If a profile is locked and you want to access its settings, you can
access it through the menu system by choosing Profiles, then
choosing the profile name. Then enter the system password.
61

LOCKING THE SYSTEM
When you lock the system, all limits set up for all profiles are put into
effect, regardless of whether the profile is locked or unlocked. Unlocked
profiles require no user password to access their channel list if the
system is locked.
When the system is locked, you can still access a profile and watch a
channel in its channel list (if the profile is locked, however, you must
have the user password). Locking the system activates all rating,
spending, viewing, and channel limits for all profiles. When you lock the
system, no one can modify any of these settings without first entering
the four-digit system password.
1. Select Profiles from the main menu. Then select Lock System and
press OK. Or, press INFO on the remote control and select the green
unlock icon from the channel banner.
aa
The Lock/Unlock icons in the channel
banner are an easy way to lock or unlock
the system. Press INFO and select the icon
to change the lock status.
Green Unlock icon The system is
unlocked. Spending, viewing and
other limits can be accessed and
changed.
Yellow Unlock icon
Apassword has been entered to
override limits. No limits can be
accessed or changed in the menu
without asystem password.
•RedLock icon Limits cannot be
accessed or changed without the
system password and all limits are
in effect.
You can lock the system via the channel banner by
entering a password.
2. Use the arrows or the digits to enter a four-digit system password.
3. Enter the password a second time to confirm it.
For the changes to be effective, you must exit out of the menu system.
UNLOCKING THE SYSTEM
When the system is unlocked, the channel, spending, viewing, and
ratings limits that you set are no longer in effect. To unlock:
1. Highlight Unlock System in the Profiles menu and press OK.
2. Highlight Yes and press OK to confirm that you want to unlock the
system.
When you attempt to access a channel that is blocked by one or more
limits and the system is locked, you will be asked to temporarily unlock
the system by entering the four-digit system password.
If you enter the system password to override a limit, all limits are
unlocked until you turn off the TV. When you turn on the TV again, the
system will be locked, and the Family profile channel list will be
selected. If you want to re-lock the system without turning off the TV,
you can select the lock icon in the channel banner.
If you subscribe to DIRECTV®programming
and forget the SYSTEM password, contact
your satellite program provider's
authorization center.
If you forget the system password and do
not have DIRECTV®programming, remove
the access card from the TV's back panel
(store it in a safe place, or reinsert it
upside down to store it in the TV). Press
and hold the INFO button on the front
panel; simultaneously press and hold the
WHO button on the remote control.
Continue to hold for three seconds. All
passwords will be cleared.
62
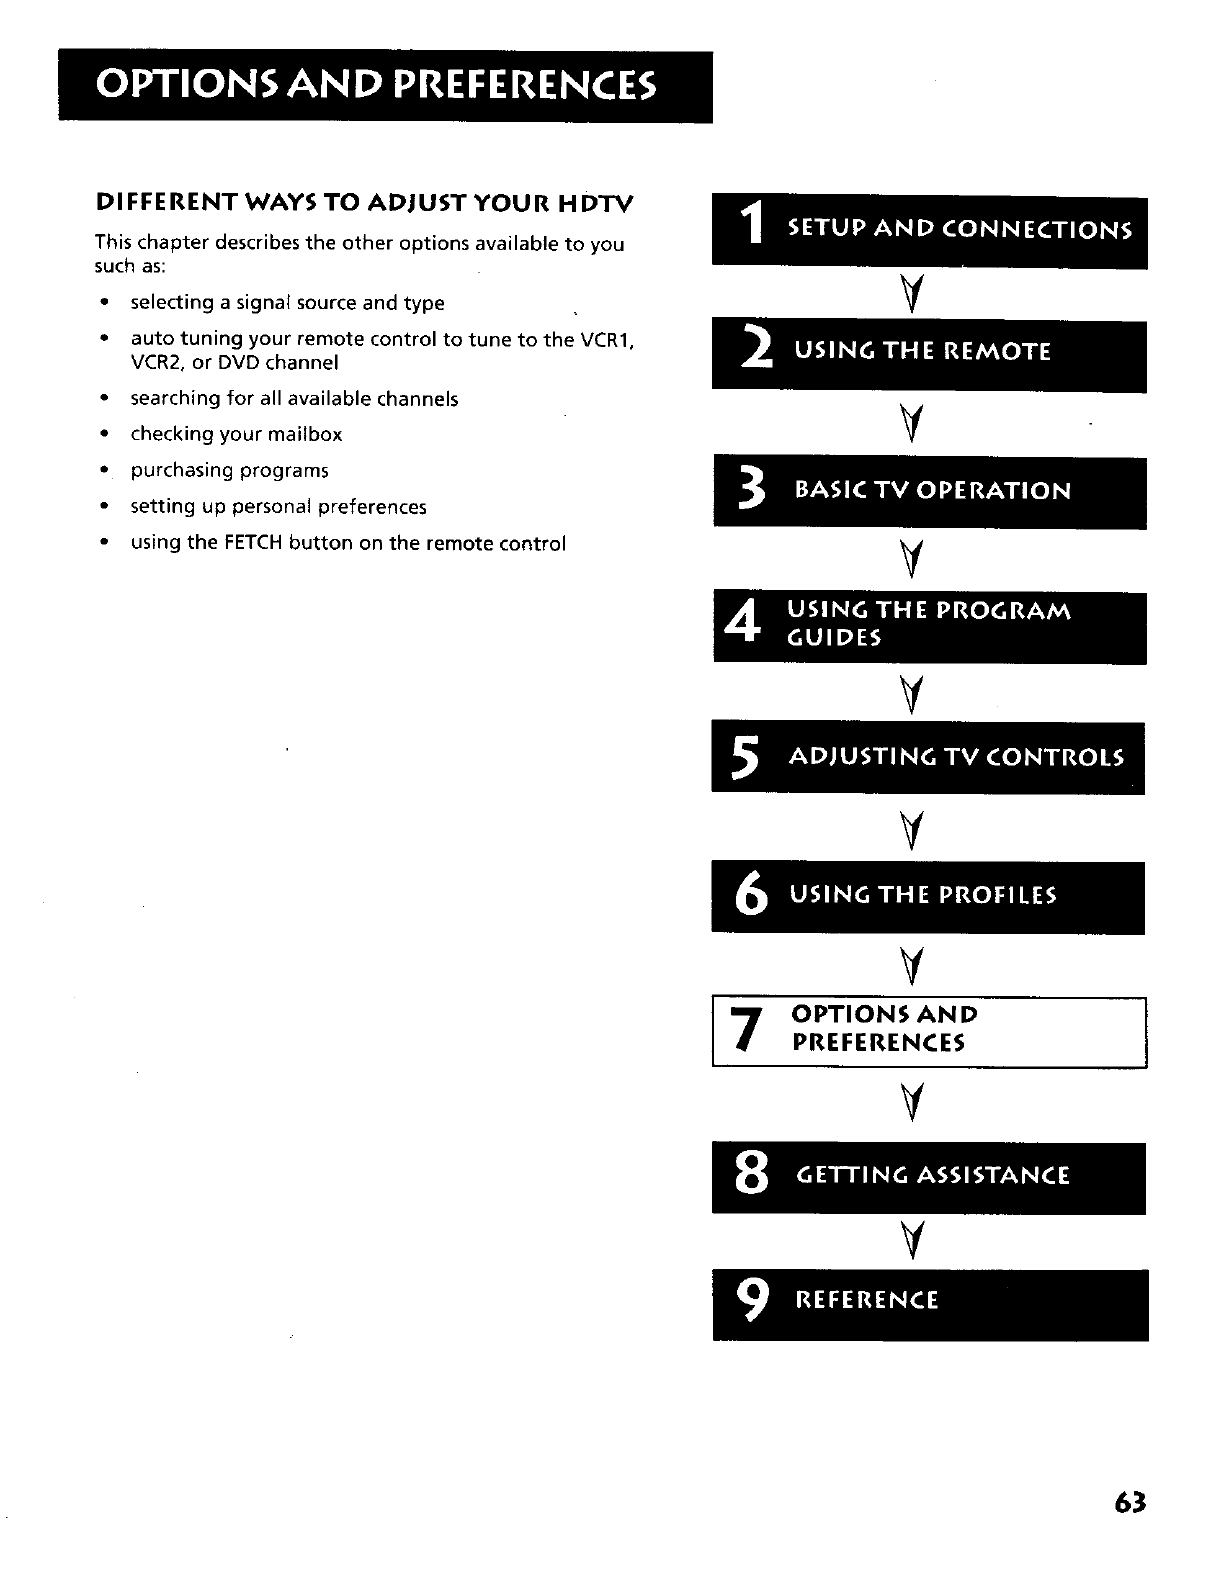
DI FF ERENT WAYS TO ADJ UST YOU R H DTV
This chapter describes the other options available to you
such as:
• selecting a signal source and type
• auto tuning your remote control to tune to the VCR1.
VCR2, or DVD channel
• searching for all available channels
• checking your mailbox
• purchasing programs
• setting up personal preferences
• using the FETCH button on the remote control
V
V
V
V
V
¥
OPTIONS AND
PREFERENCES
VI
¥
63
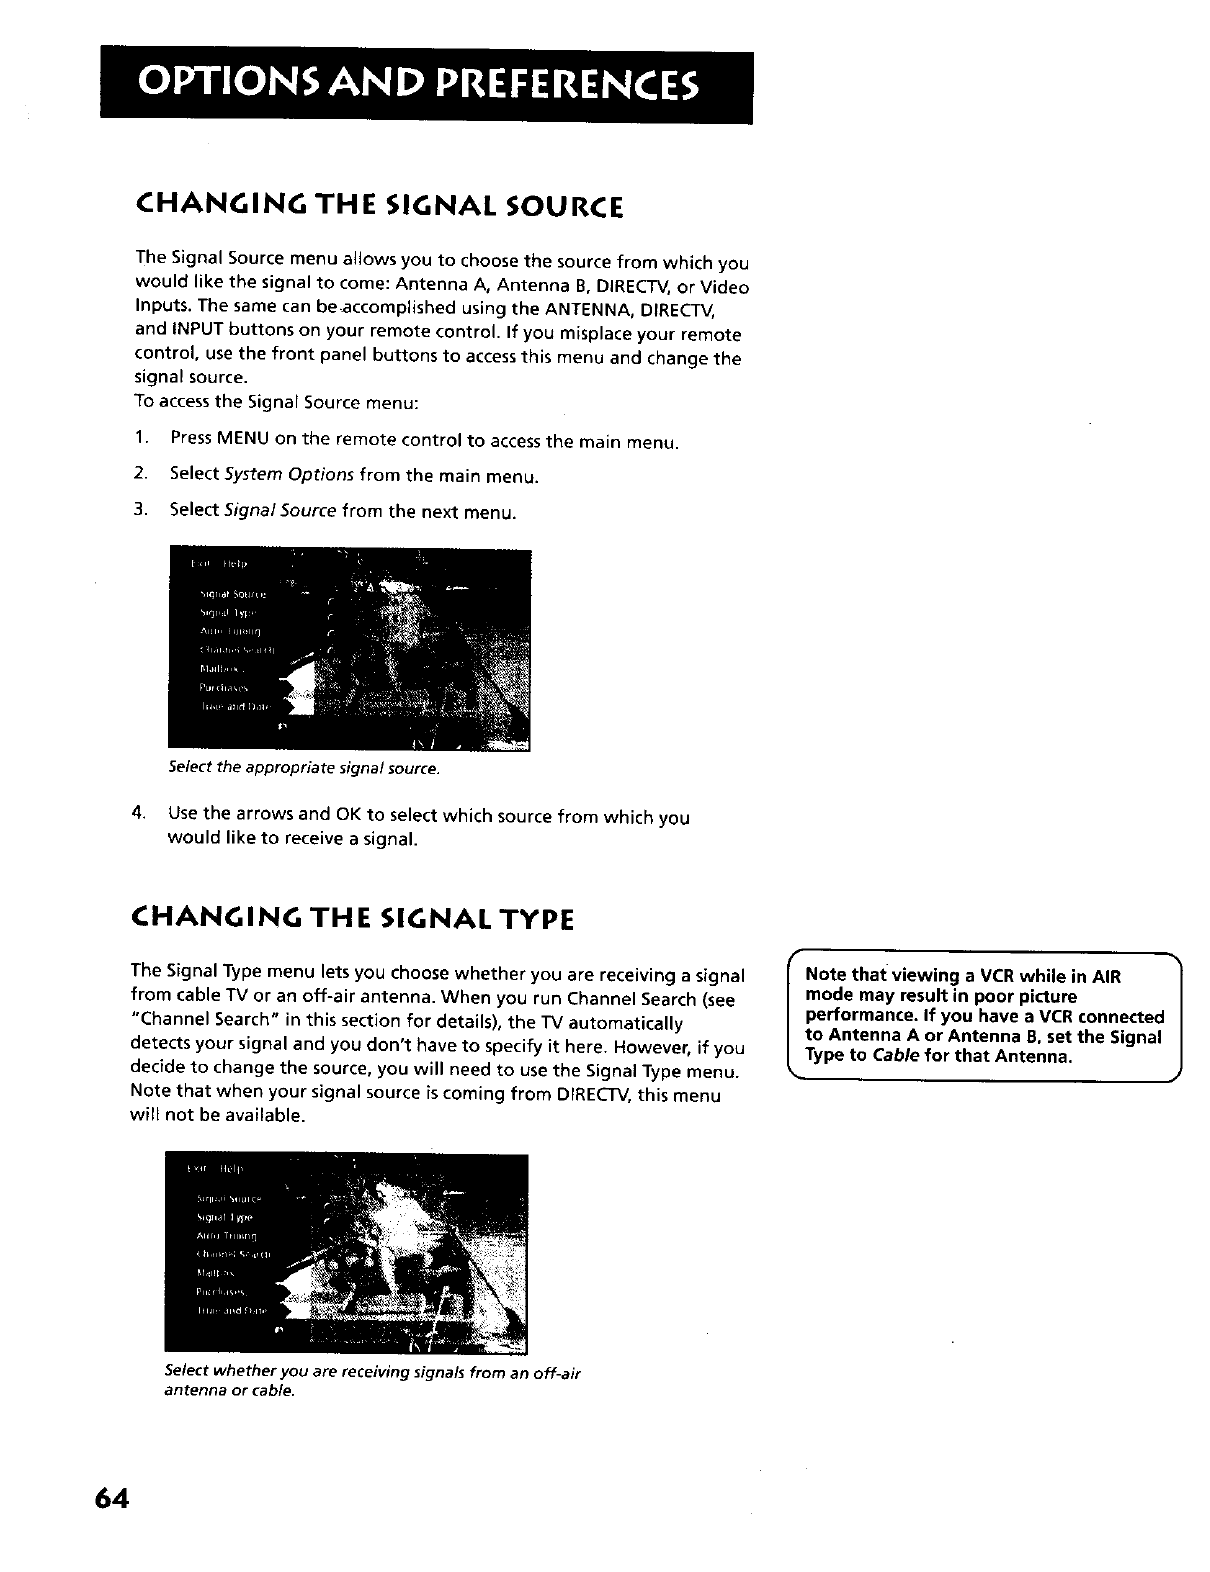
CHANGING THE SIGNAL SOURCE
The Signal Source menu allows you to choose the source from which you
would like the signal to come: Antenna A, Antenna B, DIRECTV, or Video
Inputs. The same can be+accomplished using the ANTENNA, DIRECTV,
and INPUT buttons on your remote control. If you misplace your remote
control, use the front panel buttons to access this menu and change the
signal source.
To access the Signat Source menu:
1. Press MENU on the remote control to access the main menu.
2. Select System Options from the main menu.
3. Select Signal Source from the next menu.
Select the appropriate signal source.
4. Use the arrows and OK to select which source from which you
would like to receive a signal.
CHANGING THE SIGNAL TYPE
The Signal Type menu lets you choose whether you are receiving a signal
from cable TV or an off-air antenna. When you run Channel Search (see
"Channel Search" in this section for details), the TV automatically
detects your signal and you don't have to specify it here. However, if you
decide to change the source, you will need to use the Signal Type menu.
Note that when your signal source is coming from DIRECTV, this menu
will not be available.
r
Note that viewing a VCR while in AIR
mode may result in poor picture
performance. If you have a VCR connected
to Antenna A or Antenna B, set the Signal
_Jpe to Cable for that Antenna.
Select whether you are receiving signals from an off-air
antenna or cable.
64
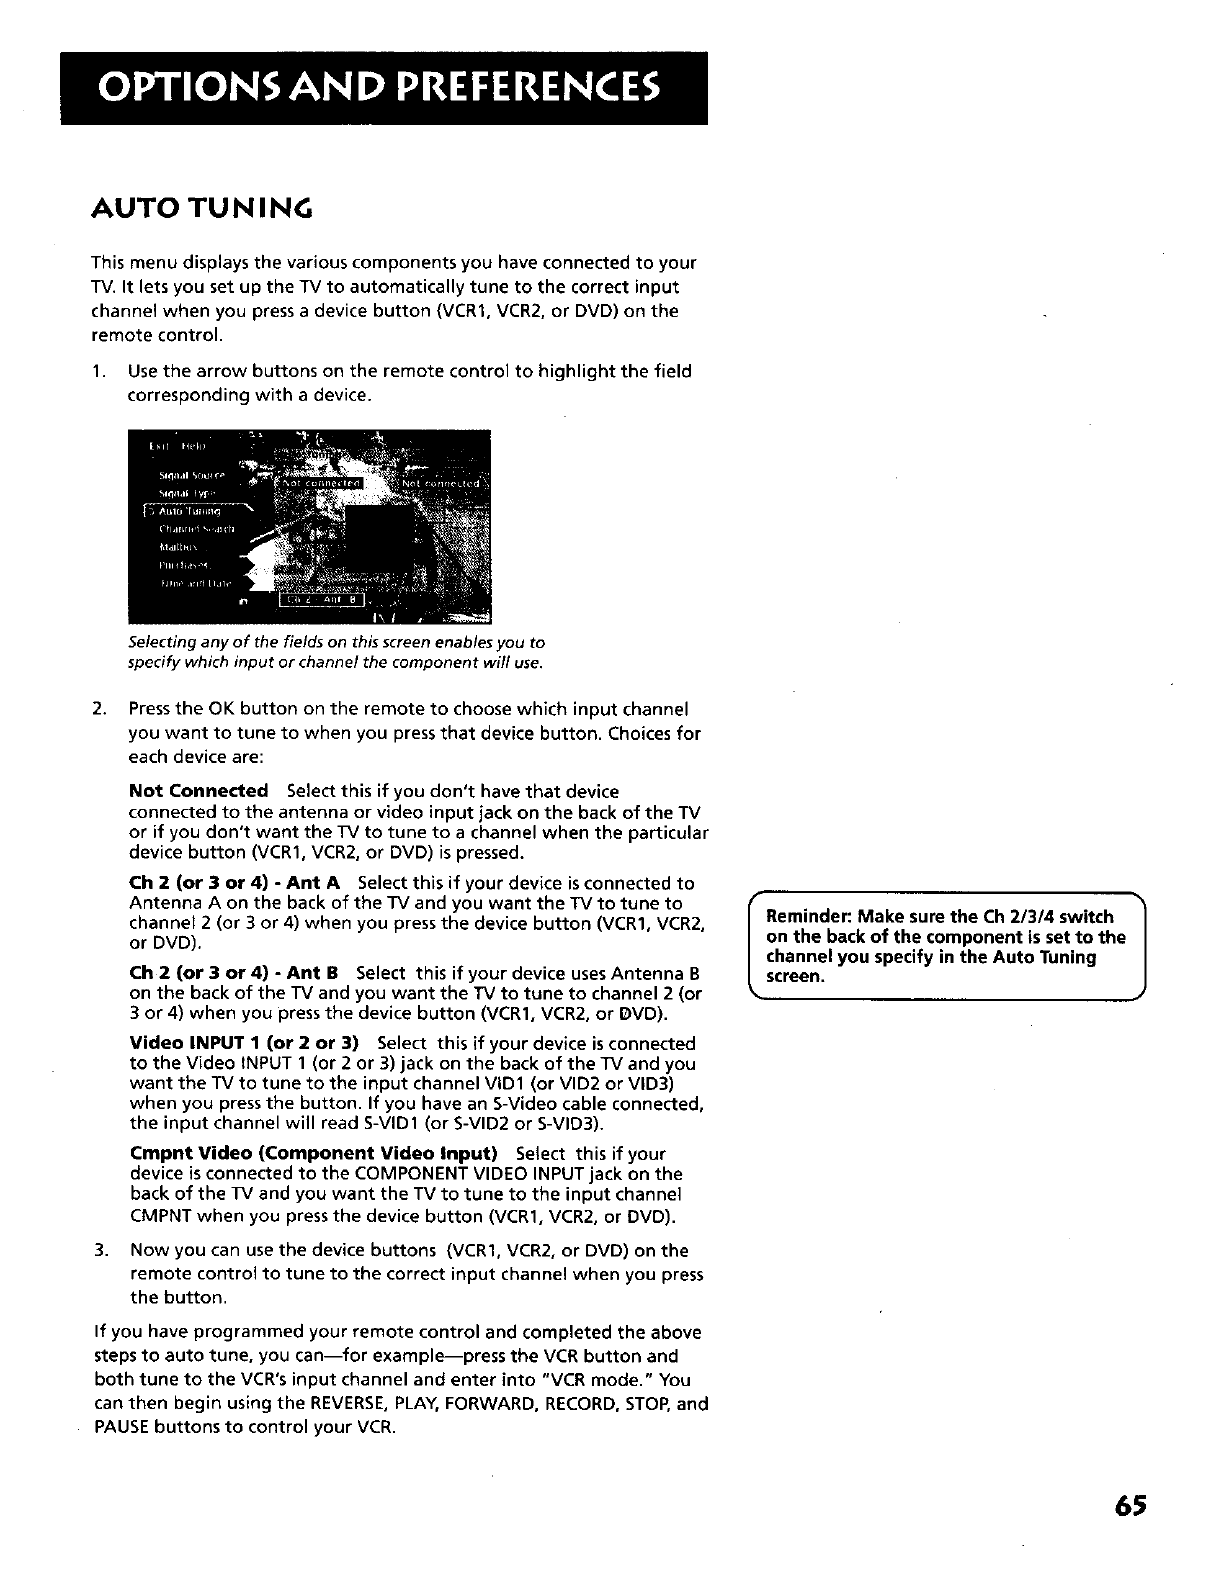
AUTO TUNING
This menu displays the various components you have connected to your
TV. It lets you set up the TV to automatically tune to the correct input
channel when you press a device button (VCR1, VCR2, or DVD) on the
remote control.
1. Use the arrow buttons on the remote control to highlight the field
corresponding with a device.
Selecting any of the fields on this screen enables you to
specify which input or channel the component will use.
2. Press the OK button on the remote to choose which input channel
you want to tune to when you press that device button. Choices for
each device are:
Not Connected Select this if you don't have that device
connected to the antenna or video input jack on the back of the TV
or if you don't want the TV to tune to a channel when the particular
device button (VCR1, VCR2, or DVD) is pressed.
Ch 2 (or 3 or 4) - Ant A Select this if your device is connected to
Antenna A on the back of the TV and you want the TV to tune to
channel 2 (or 3 or 4) when you press the device button (VCR1, VCR2,
or DVD).
Ch 2 (or 3 or 4) - Ant B Select this if your device uses Antenna B
on the back of the TV and you want the "IV to tune to channel 2 (or
3 or 4) when you press the device button (VCRlo VCR2, or DVD).
Video INPUT 1 (or 2 or 3) Select this if your device is connected
to the Video tNPUT 1 (or 2or 3) jack on the back of the TV and you
want the TV to tune to the input channel VID1 (or VID2 or VID3)
when you press the button. If you have an S-Video cable connected,
the input channel will read S-VID1 (or S-VID2 or S-VID3).
Cmpnt Video (Component Video Input) Select this if your
device is connected to the COMPONENT VIDEO INPUT jack on the
back of the TV and you want the TV to tune to the input channel
CMPNT when you press the device button (VCR1, VCR2, or DVD).
3. Now you can use the device buttons {VCR1, VCR2, or DVD) on the
remote control to tune to the correct input channel when you press
the button.
If you have programmed your remote control and completed the above
steps to auto tune, you can_for example_press the VCR button and
both tune to the VCR's input channel and enter into "VCR mode." You
can then begin using the REVERSE, PLAY, FORWARD, RECORD, STOP, and
PAUSE buttons to control your VCR.
IReminder: Make sure the Ch 2/3/4 switch |
on the back of the component is set to the J
channel you specify in the Auto Tuning
screen.
65
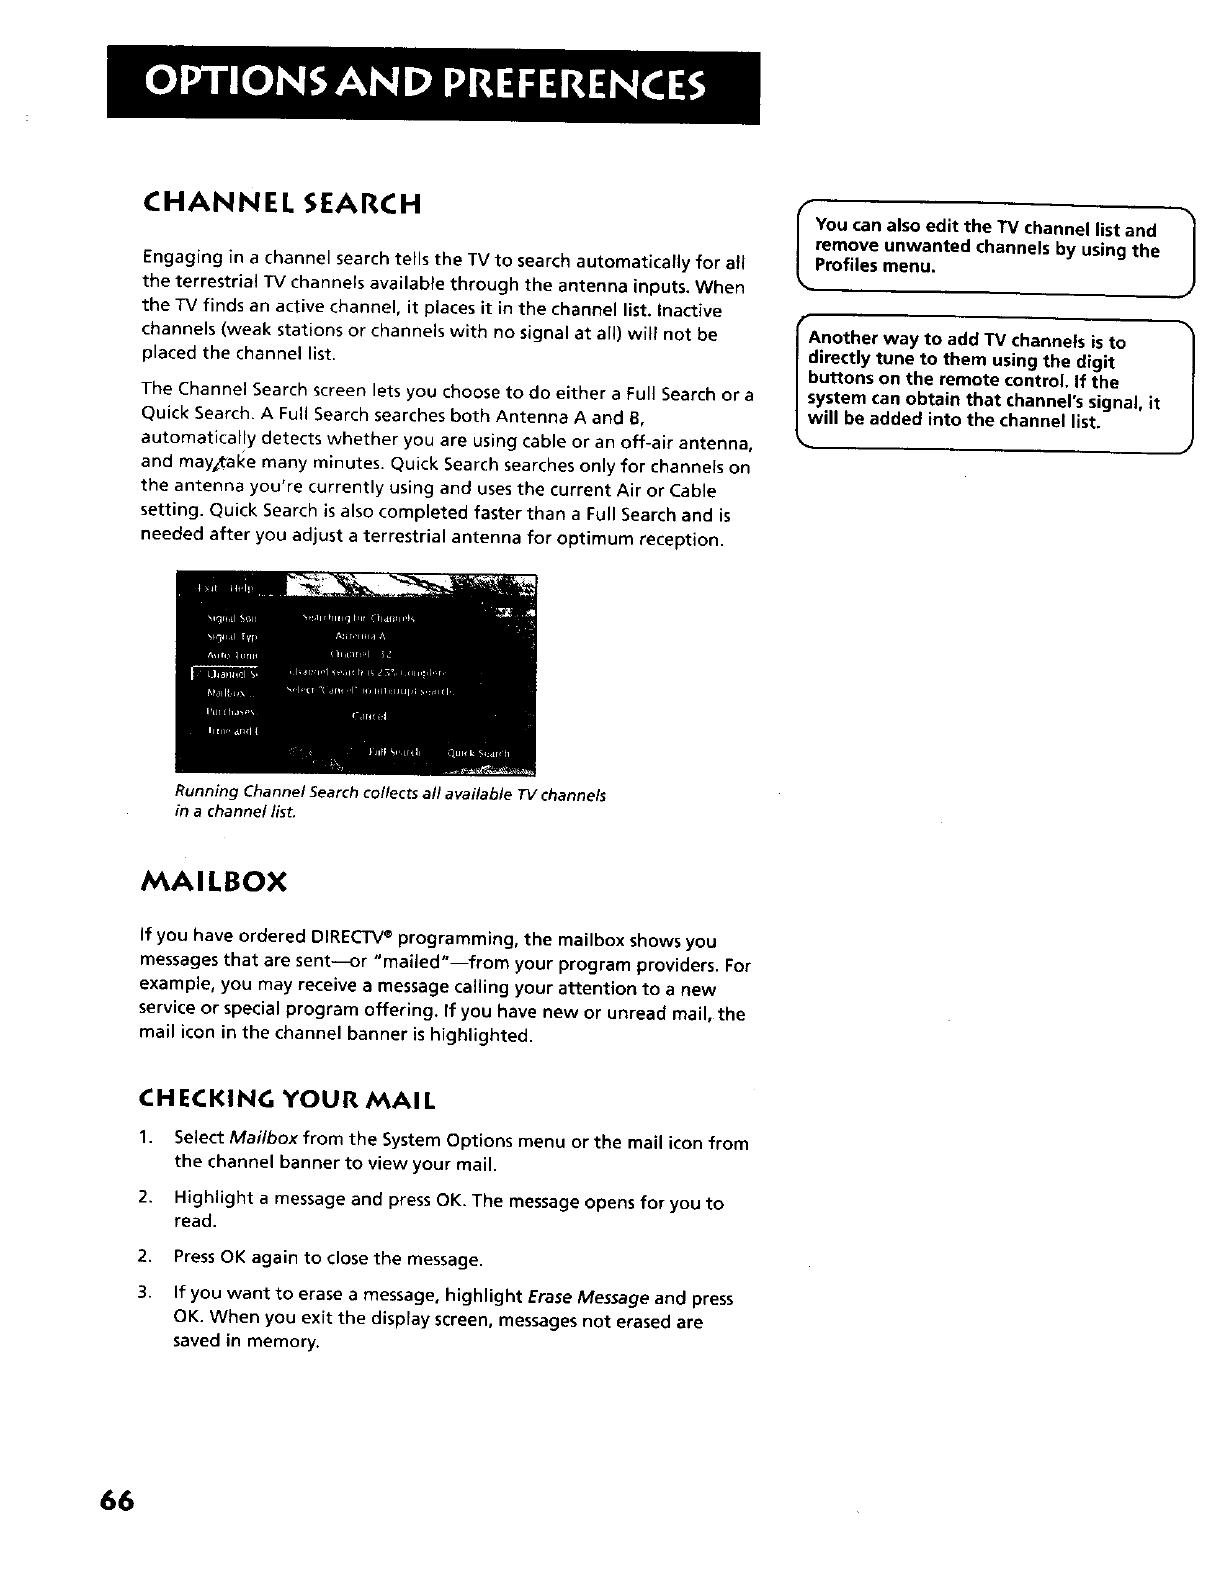
CHANNEL SEARCH
Engaging in a channel search tells the TV to search automatically for all
the terrestrial TV channels available through the antenna inputs. When
the TV finds an active channel, it places it in the channel list. Inactive
channels (weak stations or channels with no signal at all) will not be
placed the channel list.
The Channel Search screen lets you choose to do either a Full Search or a
Quick Search. A Full Search searches both Antenna A and B,
automatically detects whether you are using cable or an off-air antenna,
and mawtake many minutes. Quick Search searches only for channels on
the antenna you're currently using and uses the current Air or Cable
setting. Quick Search is also completed faster than a Full Search and is
needed after you adjust a terrestrial antenna for optimum reception.
You can also edit the TV channel list and
remove unwanted channels by using the
Profiles menu.
Another way to add TV channels is to
directly tune to them using the digit
buttons on the remote control If the
system can obtain that channel's signal, it
will be added into the channel list.
Running Channel Search collects all available TV channels
in a channel list.
MAILBOX
If you have ordered DIRECTV®programming, the mailbox shows you
messages that are sent---or "mailed"--from your program providers. For
example, you may receive a message calling your attention to a new
service or special program offering. If you have new or unread mail, the
mail icon in the channel banner is highlighted.
CHECKING YOUR MAIL
1. Select Mailbox from the System Options menu or the mail icon from
the channel banner to view your mail.
2. Highlight a message and press OK. The message opens for you to
read.
2. Press OK again to close the message.
3. if you want to erase a message, highlight Erase Message and press
OK. When you exit the display screen, messages not erased are
saved in memory.
66
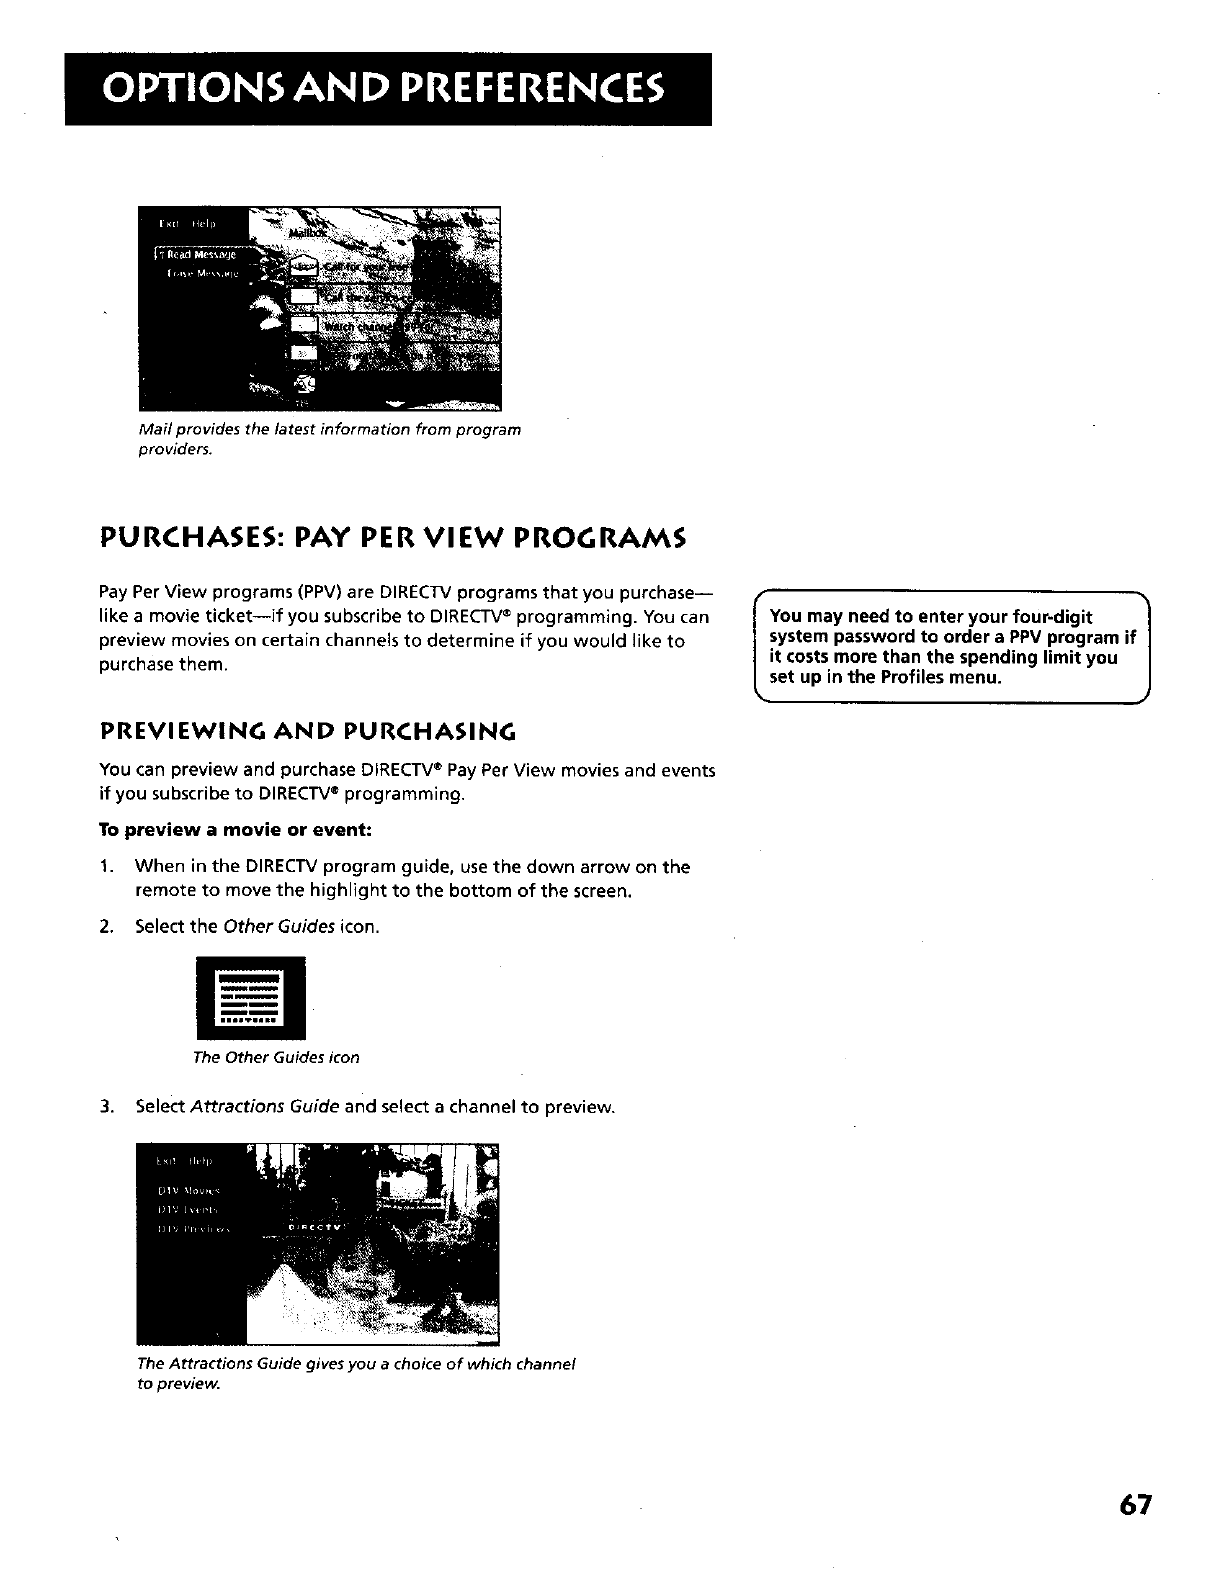
Mail provides the latest information from program
providers.
PURCHASES: PAY PER VIEW PROGRAMS
Pay Per View programs (PPV) are DIRECTV programs that you purchase--
like a movie ticket--if you subscribe to DIRECTV®programming. You can
preview movies on certain channels to determine if you would like to
purchase them.
PREVIEWING AND PURCHASING
You can preview and purchase DIRECTV®Pay Per View movies and events
if you subscribe to DIRECTV®programming.
To preview a movie or event:
1. When in the DIRECTV program guide, use the down arrow on the
remote to move the highlight to the bottom of the screen.
2. Select the Other Guides icon.
You may need to enter your four-digit |
system password to order a PPV program ifJ
it costs more than the spending limit you
set up in the Profiles menu.
The Other Guides icon
3. Select Attractions Guide and select a channel to preview.
The Attractions Guide gives you a choice of which channel
to preview.
67
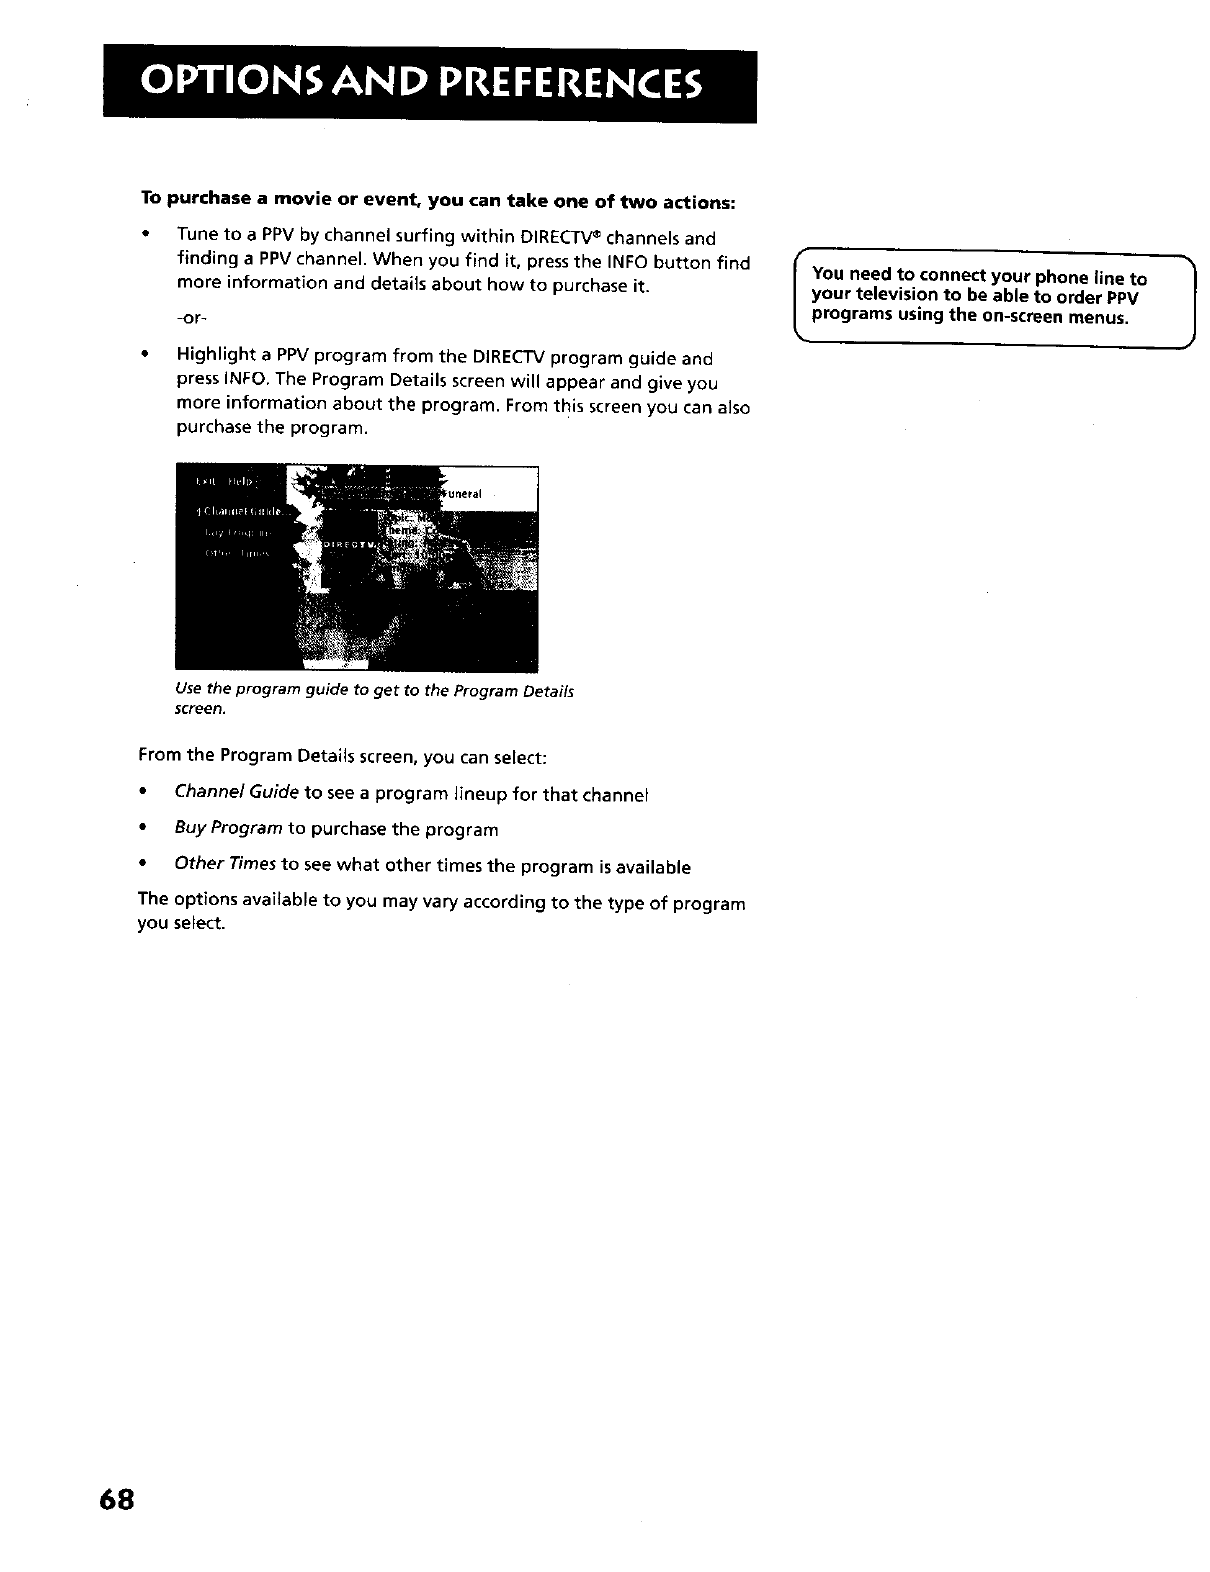
To purchase a movie or event, you can take one of two actions:
• Tune to a PPV by channel surfing within DIRECTV®channels and
finding a PPV channel. When you find it, press the INFO button find
more information and details about how to purchase it.
-Or-
Highlight a PPV program from the DIRECTV program guide and
press INFO, The Program Details screen will appear and give you
more information about the program. From this screen you can also
purchase the program.
IYou need to connect your phone line to |
-X
your television to be able to order PPV
programs using the on-screen menus.
Use the program guide to get to the Program Details
5creeD.
From the Program Details screen, you can select:
•Channel Guide to see a program lineup for that channel
•Buy Program to purchase the program
•Other Times to see what other times the program is available
The options available to you may vary according to the type of program
you select.
68
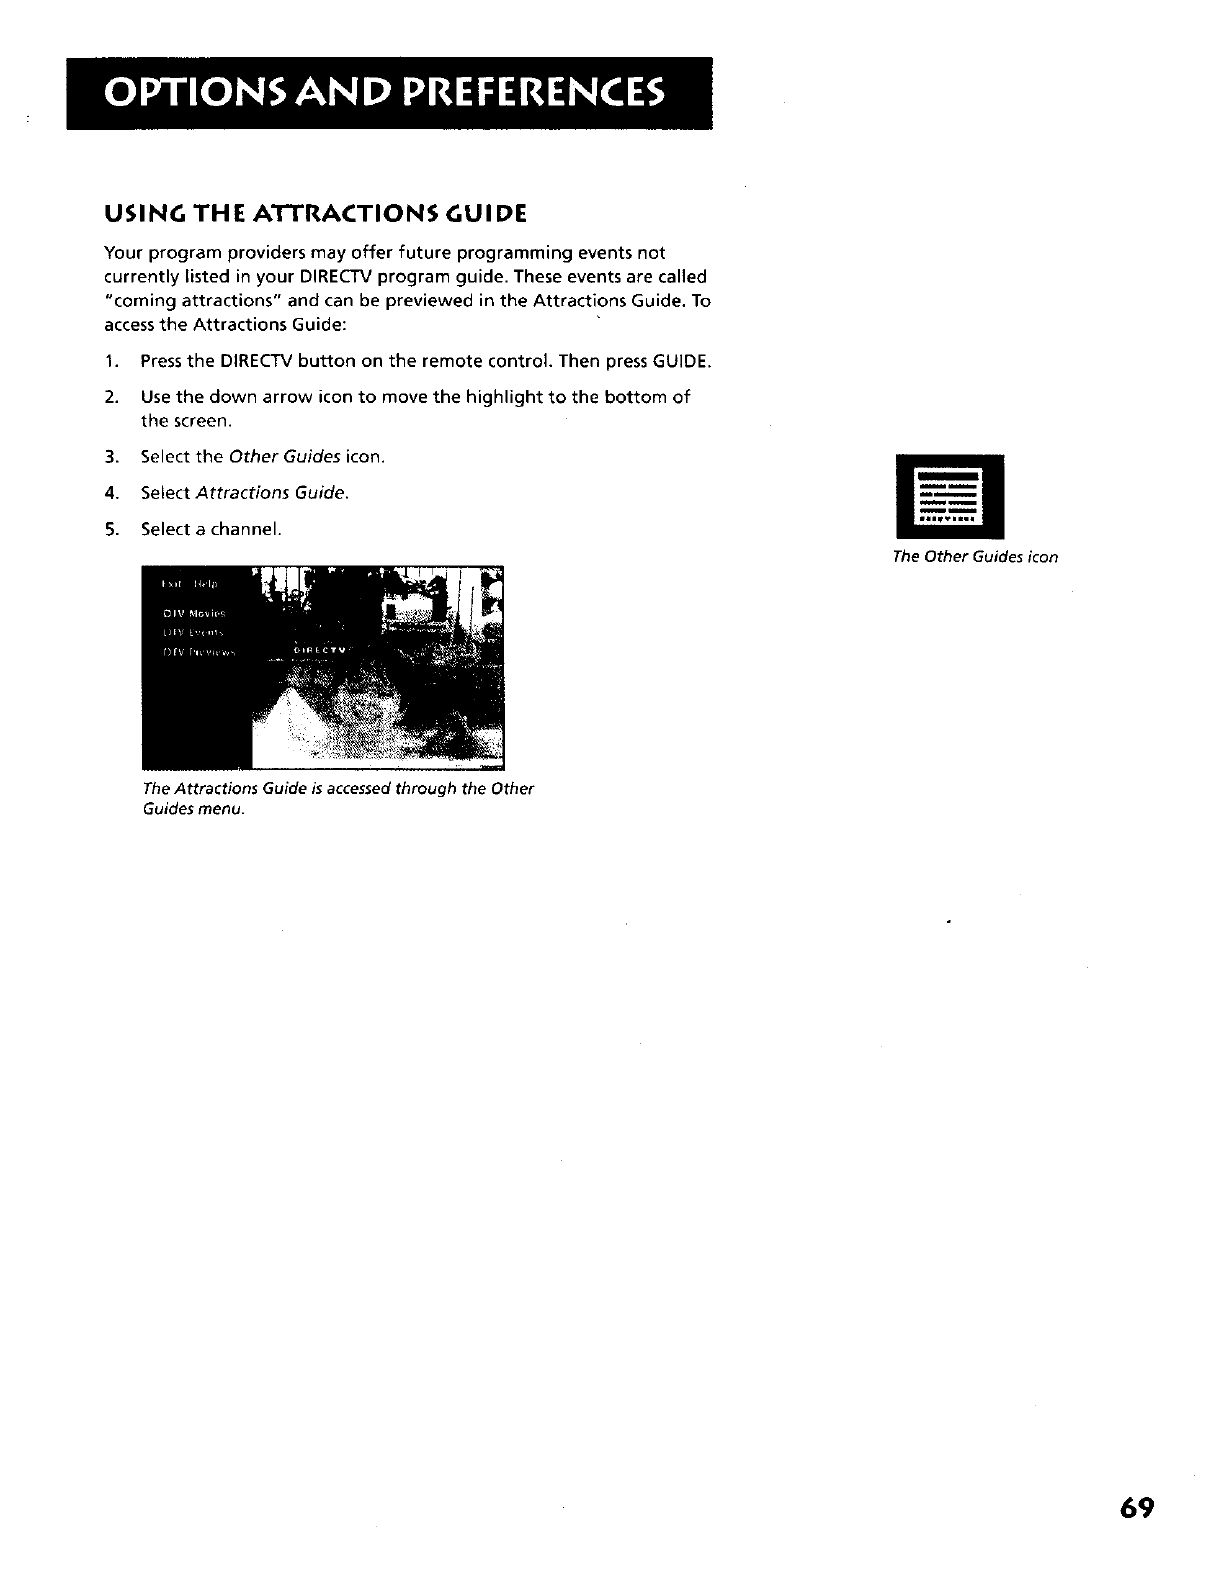
USING THE ATTRACTIONS GUIDE
Your program providers may offer future programming events not
currently listed in your DIRECTV program guide. These events are called
"coming attractions" and can be previewed in the Attractions Guide. To
access the Attractions Guide:
1. Press the DIRECTV button on the remote control. Then press GUIDE,
2. Use the down arrow icon to move the highlight to the bottom of
the screen.
3. Select the Other Guides icon.
4. Select Attractions Guide.
5. Select a channel.
The Other Guides icon
The Attractions Guide is accessed through the Other
Guides menu.
69
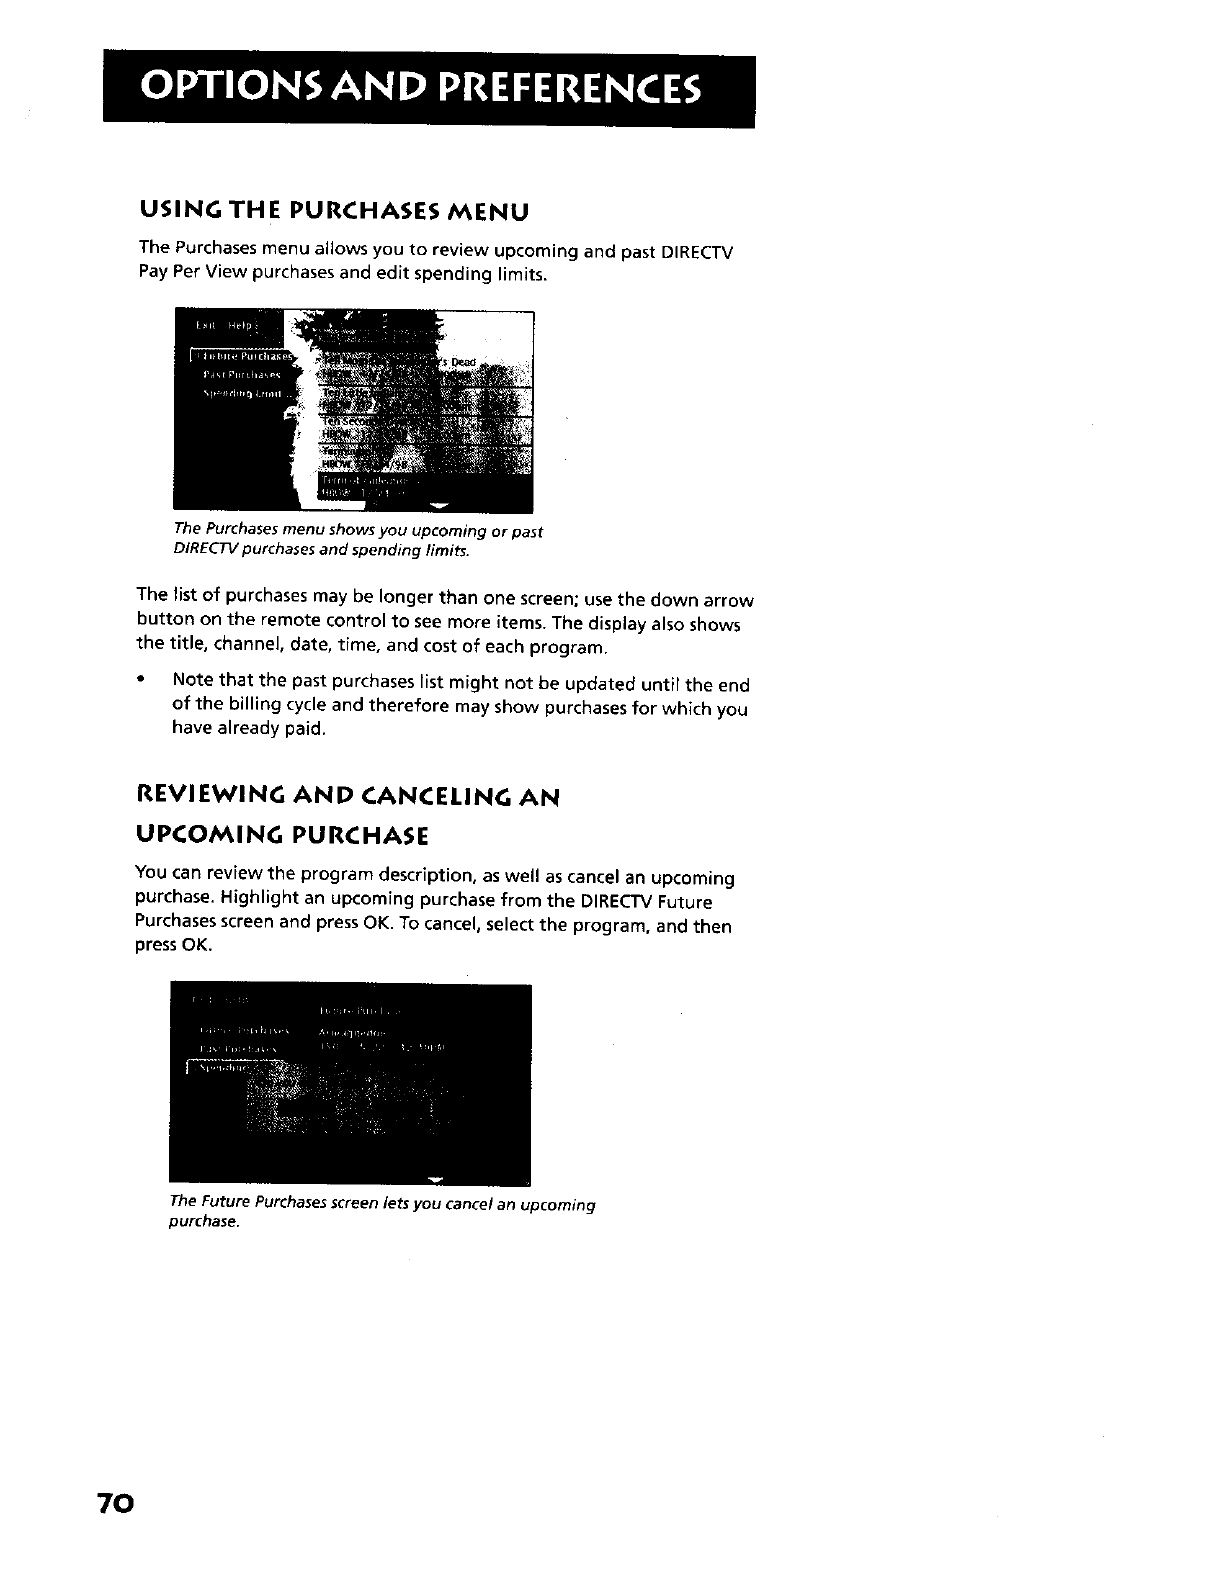
USING THE PURCHASES MENU
The Purchases menu allows you to review upcoming and past DIRECTV
Pay Per View purchases and edit spending limits.
The Purchases menu shows you upcoming or past
DIRECTV purchases and spending limits.
The list of purchases may be longer than one screen; use the down arrow
button on the remote control to see more items. The display also shows
the title, channel, date, time, and cost of each program.
•Note that the past purchases list might not be updated until the end
of the billing cycle and therefore may show purchases for which you
have already paid.
REVIEWING AND CANCELING AN
UPCOMING PURCHASE
You can review the program description, as well as cancel an upcoming
purchase. Highlight an upcoming purchase from the DIRECTV Future
Purchases screen and press OK. To cancel, select the program, and then
press OK.
The Future Purchases screen lets you cancel an upcoming
purchase.
7O
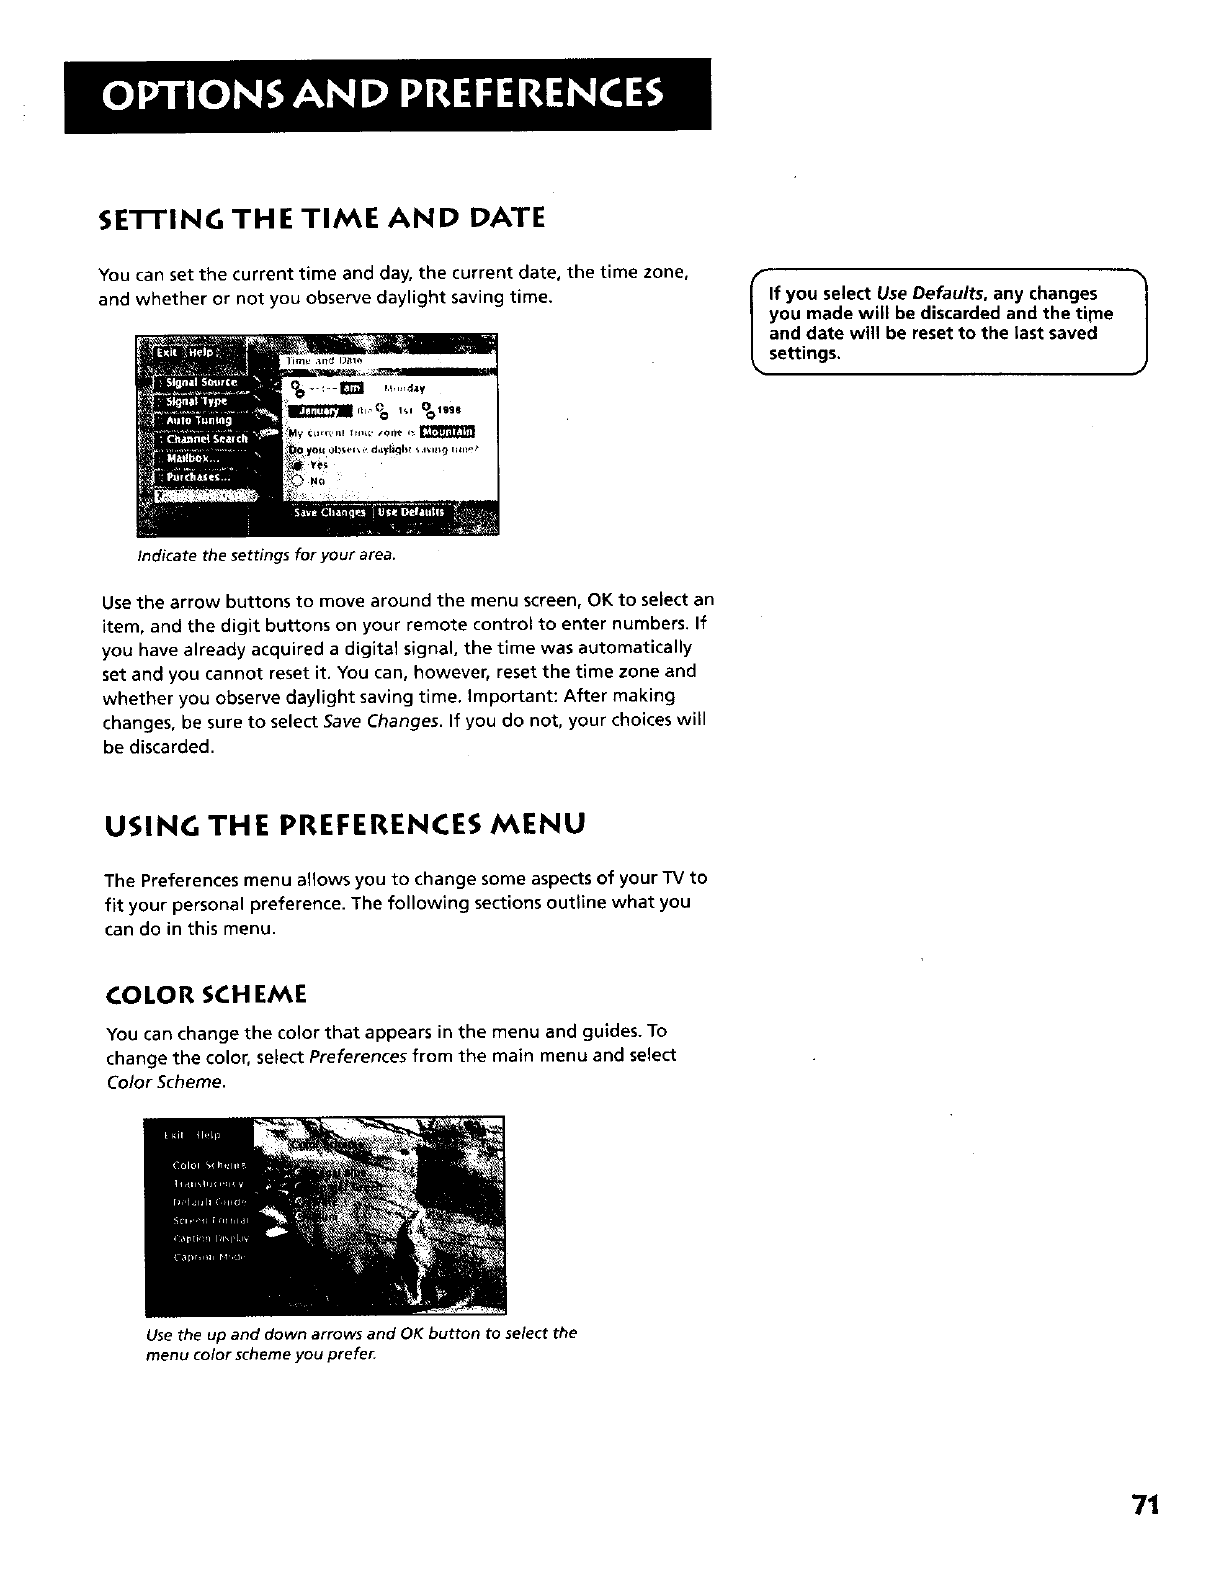
SE'I-I'ING THE TIME AND DATE
You can set the current time and day, the current date, the time zone,
and whether or not you observe daylight saving time.
IIf you select Use Defaults, any changes |
you made will be discarded and the time J
and date will be reset to the last saved
settings.
Indicate the settings for your area,
Use the arrow buttons to move around the menu screen, OK to select an
item, and the digit buttons on your remote control to enter numbers. If
you have already acquired a digital signal, the time was automatically
set and you cannot reset it. You can, however, reset the time zone and
whether you observe daylight saving time. Important: After making
changes, be sure to select Save Changes. If you do not, your choices will
be discarded.
USING THE PREFERENCES MENU
The Preferences menu allows you to change some aspects of your TV to
fit your personal preference. The following sections outline what you
can do in this menu.
COLOR SCH EME
You can change the color that appears in the menu and guides. To
change the color, select Preferences from the main menu and select
Color Scheme.
Use the up and down arrows and OK button to select the
menu color scheme you prefe_
71

TRANSLUCENCY
You can adjust the level of translucency that the menu screens and
program guides possess. Adjust the slider up for more translucency (the
video behind the menu and guides will be more visible) or down for less
translucency (less video will be shown behind the menu or guides).
DEFAULT GUIDE
By default, the Detail Guide appears when you press GUIDE on the
remote control, no matter if you access the DIRECTV®programming
guide or the TV program guide. You can change the default guide from
the Detail Guide to the Grid Guide or SurfGuide (DIRECTV only).
1. Select Preferences from the main menu, then select Default Guide.
2. Use the arrows and OK to choose which guide you want to appear
first when you press the GUIDE button on the remote control.
If you choose SurfGuide as the default, the Grid Guide will appear when
you access the TV program guide, since the SurfGuide isn't available as a
TV program guide.
Note that when tuned to the device |
connected to the component video input
jacks, translucency is set to opaque and
cannot be changed. Once you return to
watching another device, the original
setting is restored.
IFor more information about the three 1
types of guides, see the section, "Using
the Program Guides."
SCREEN FORMAT
If you receive an image with a4:3 aspect ratio, the image wilt be
displayed at that ratio on your HDTV unless you specify otherwise. Note
that when watching an image via the COMPONENT VIDEO INPUT jacks,
you will not be able to manipulate the screen format or view the screen
format in the channel banner.
The Screen Format menu allows you to adjust the image through the
following options:
Normal Choose this when receiving a 4:3 image and you want the on-
screen appearance of the video to be a centered picture with gray side
panels (blank areas) on the right and left sides.
Full Choose this when you want the television to adjust the 4:3 image
horizontally so it fills your 16:9 screen. No gray side panels will be
added, and the image is vertically unaltered. This setting is especially
useful for viewing 16:9 formatted DVDs.
Fill Choose this when receiving a 4:3 image and you do not want gray
side panels on the right and left sides of the screen. The television will
adjust the image both horizontally and vertically so it fills the height
and width of your 16:9 screen with no gray side panels added. It will also
maintain the correct image proportion. Use with material such as
"letterboxed" laserdiscs or VCR tapes.
Also note that when in -IV or DIREC'TV mode, pressing the FORWARD
button on the remote will toggle through screen formats.
I 4:3 ratio I I
16:9 ratio
Some digital (ATSC format) stations may
transmit 4:3 images in a way that will not
allow expansion. You will be unable to
adjust the screen format.
72
CAPTION DISPLAY
The Caption Display menu displays a choice list that lets you choose
when closed captioning information is shown on the screen.
Closed Captioning On Captioning information is shown always,
when available.
Closed Captioning Off No captioning information is displayed.
On When Muted Captioning information is only shown when the TV's
sound is muted, when available. (To mute the sound, press the MUTE
button on the remote control.)
ANALOG CAPTIONS
You can select a closed caption mode, which is the mode, or source, used
for displaying captioning information for all types of channels except
digital terrestrial. The content of CC and Text are different; you can
select which one you want to see on the screen.
• CC displays information at any position on the screen. It overlays the
text on top of the picture as it is received.
•Text displays information at one particular position (such as the
bottom third) of the screen. You cannot see the picture underneath
the text.
You can choose between eight closed caption modes, or sources:
•CCl and Text 1 are the primary caption and text services. The
captioning or text is displayed in the same language as the
program's dialog.
•CC3 and Text 3 serve as the preferred data channels. The
captioning or text is often a secondary language translation,
simplified English, or displayed at a slower rate.
•CC2 and CC4 and Text 2 and Text 4 are rarely available and
broadcasters use them only in special conditions, such as when CC1
and CC3 are not available, or Text1 and Text3 are not available.
73
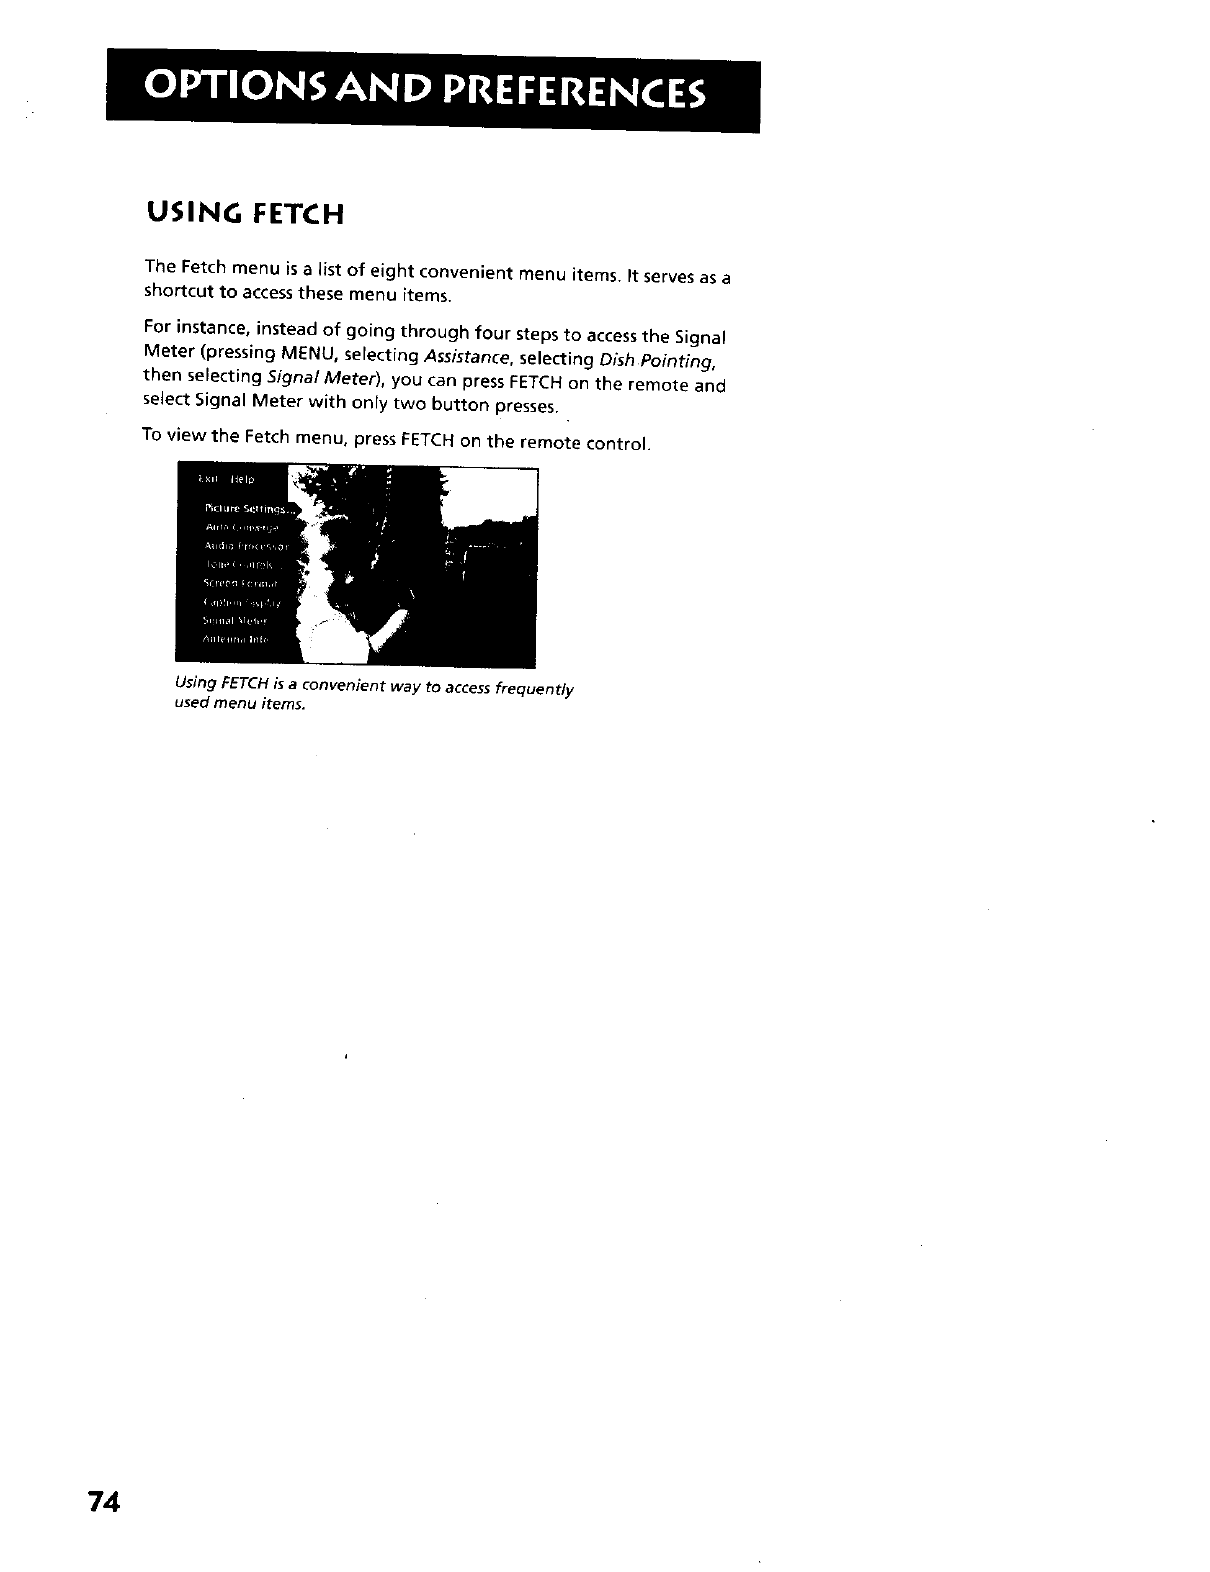
USING FETCH
The Fetch menu is a list of eight convenient menu items. It serves as a
shortcut to access these menu items.
For instance, instead of going through four steps to access the Signal
Meter (pressing MENU, selecting Assistance, selecting Dish Pointing,
then selecting Signal Meter), you can press FETCH on the remote and
select Signal Meter with only two button presses.
To view the Fetch menu, press FETCH on the remote control.
Using FETCH is a convenient way to access frequently
used menu items.
74
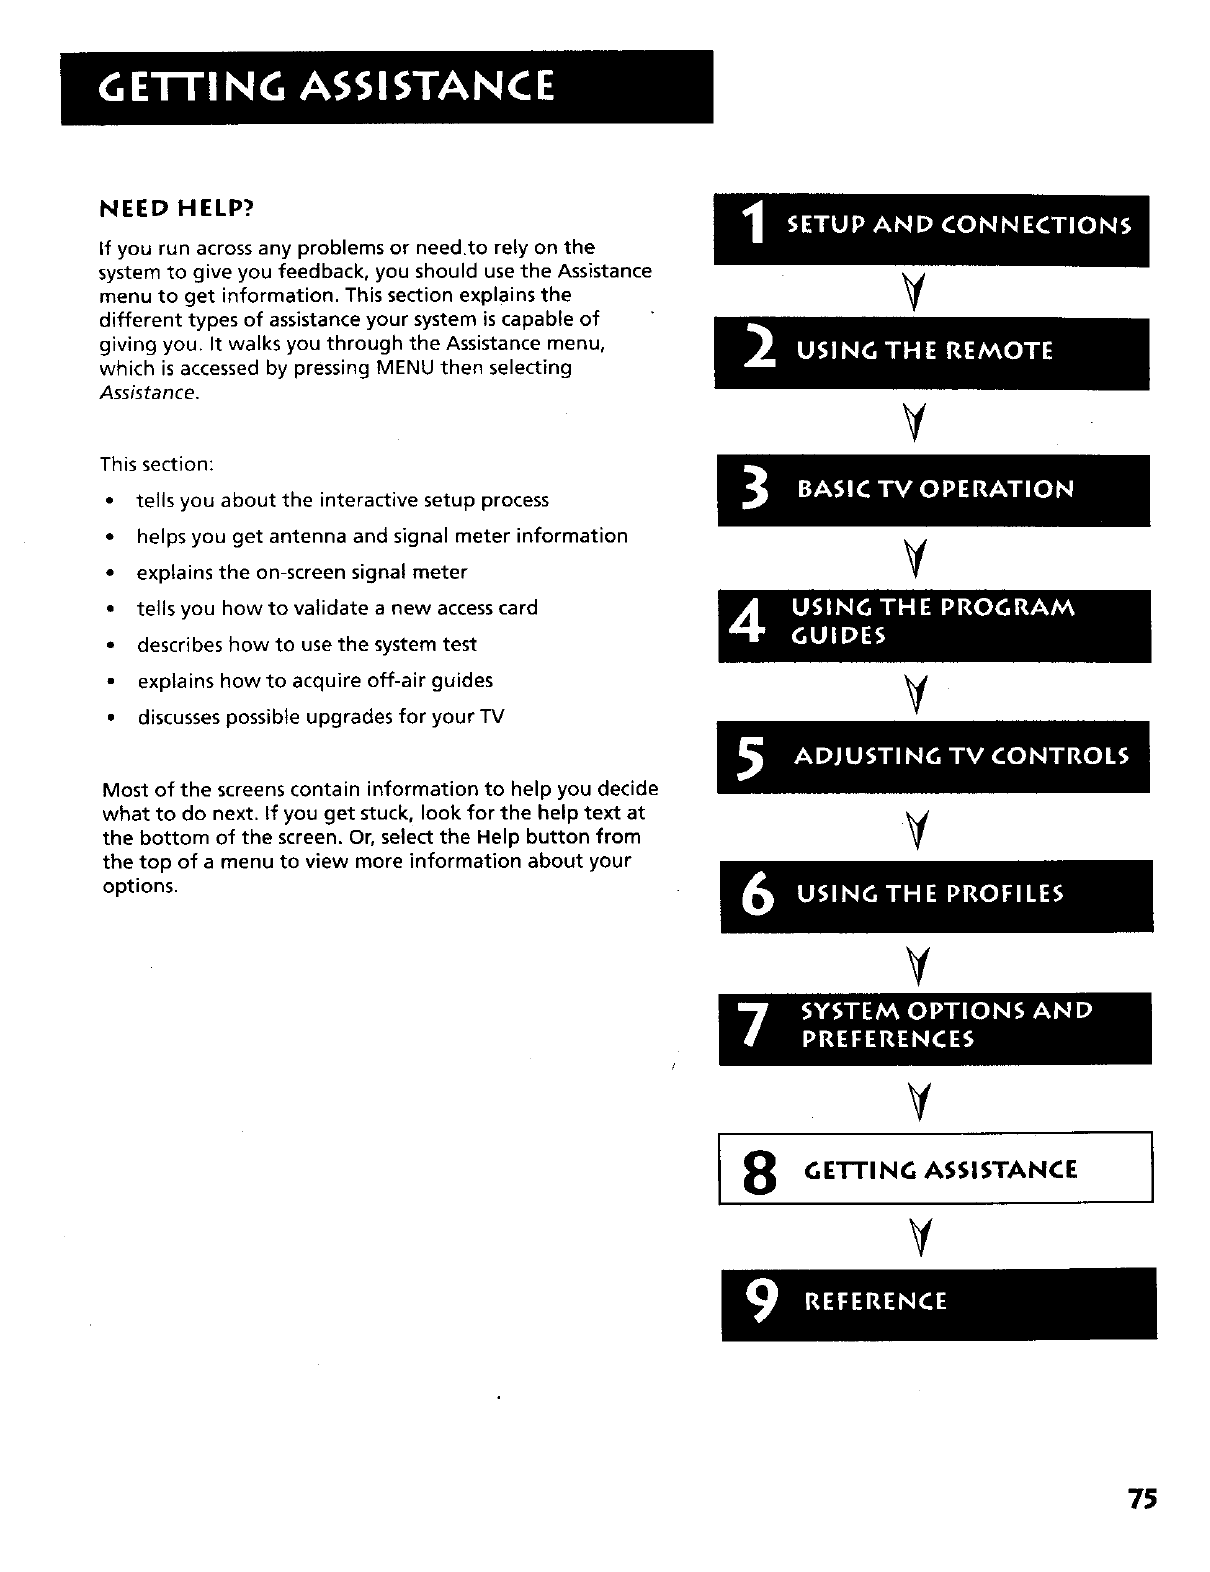
NEED HELP?
If you run across any problems or need,to rely on the
system to give you feedback, you should use the Assistance
menu to get information. This section explains the
different types of assistance your system is capable of
giving you. It walks you through the Assistance menu,
which is accessed by pressing MENU then selecting
Assistance,
This section:
• tells you about the interactive setup process
• helps you get antenna and signal meter information
• explains the on-screen signal meter
• tells you how to validate a new access card
• describes how to use the system test
• explains how to acquire off-air guides
• discusses possible upgrades for your TV
V
V
¥
V
Most of the screens contain information to help you decide
what to do next. If you get stuck, look for the help text at
the bottom of the screen. Or, select the Help button from
the top of a menu to view more information about your
options.
V
V
8
V
GETTING ASSISTANCE
VI
75
RUNNING THE INTERACTIVE SETUP
You should have completed the interactive setup the first time you
plugged in your TV. However, if you need to access the interactive setup
again, you can-access it through the Assistance menu.
1. Press MENU on the remote control to access the main menu.
2. Select Assistance from the main menu.
3. Select Interactive Setup and follow the on-screen directions.
The steps involved in the interactive setup include:
•Setting the time and date
• Searching for channels
• Setting up speakers
• Selecting an audio processor
Specifying your satellite dish antenna type and finding coordinates
• Viewing the signal meter and running the system test
Note that if you do not subscribe to DIRECTV®programming, you can
select "Skip this step" for specifying satellite dish antenna type and
running the system test.
The interactive setup process allows
you to complete all steps or selectiveJy
skip steps.
GETTING ANTENNA INFORMATION
The Antenna Info menu helps you assess the availability of available TV
channels. It is useful for checking the strength of digital channels,
obtaining all channels possible, and adjusting any terrestrial TV
antennas.
• PressMENU to bring up the main menu, select Assistance, then
Antenna Info.
The Antenna Info screen reports the status of the signal search and lists
channels that are being received or have been received from all
terrestrial antennas. To switch between antennas, highlight a channel
and then press ANTENNA on the remote control.
When getting antenna information, the screen lists:
• the channel number,
• the station name, if available,
• whether the channel is digital or analog,
• which antenna is receiving the signal, and
• if a digital channel, the current signal strength.
Note that if you highlight a channel in the /
Antenna Info menu, you tune to the J
channel and, if digital, get a real-time
update of the signal strength.
76
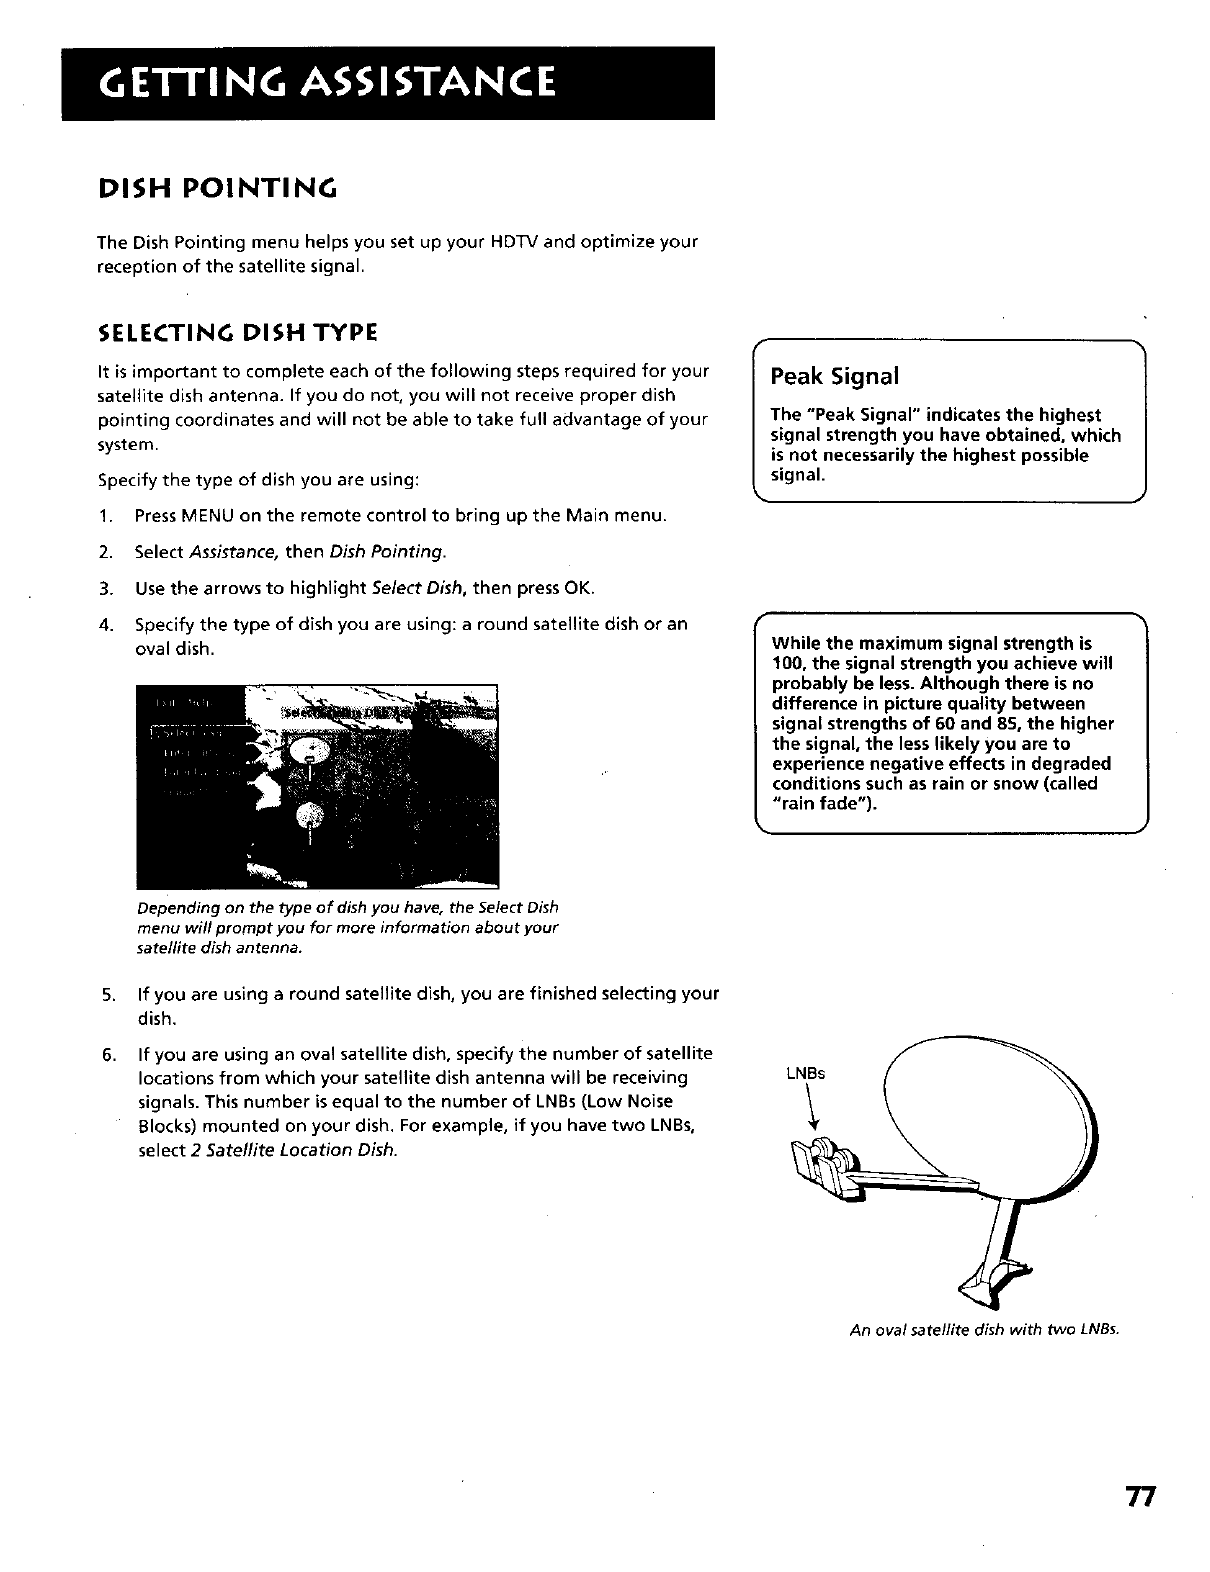
DISH POINTING
The Dish Pointing menu helps you set up your HDTV and optimize your
reception of the satellite signal.
SELECTING DISH TYPE
It is important to complete each of the following steps required for your
satellite dish antenna. If you do not, you will not receive proper dish
pointing coordinates and will not be able to take full advantage of your
system.
Specify the type of dish you are using:
1. Press MENU on the remote control to bring up the Main menu.
2. Select Assistance, then Dish Pointing.
3. Use the arrows to highlight Select Dish, then press OK.
4. Specify the type of dish you are using: a round satellite dish or an
oval dish.
f
Peak Signal
The "Peak Signal" indicates the highest
signal strength you have obtained, which
is not necessarily the highest possible
signal.
While the maximum signal strength is
100, the signal strength you achieve will
probably be less. Although there is no
difference in picture quality between
signal strengths of 60 and 85, the higher
the signal, the less likely you are to
experience negative effects in degraded
conditions such as rain or snow (called
"rain fade").
5,
6.
Depending on the type of dish you have, the Select Dish
menu will prompt you for more information about your
satellite dish antenna.
If you are using a round satellite dish, you are finished selecting your
dish.
If you are using an oval satellite dish, specify the number of satellite
locations from which your satellite dish antenna will be receiving
signals. This number is equal to the number of LNBs (Low Noise
Blocks) mounted on your dish. For example, if you have two LNBs,
select 2 Satellite Location Dish.
LNBs
An oval satellite dish with two LNBs.
77
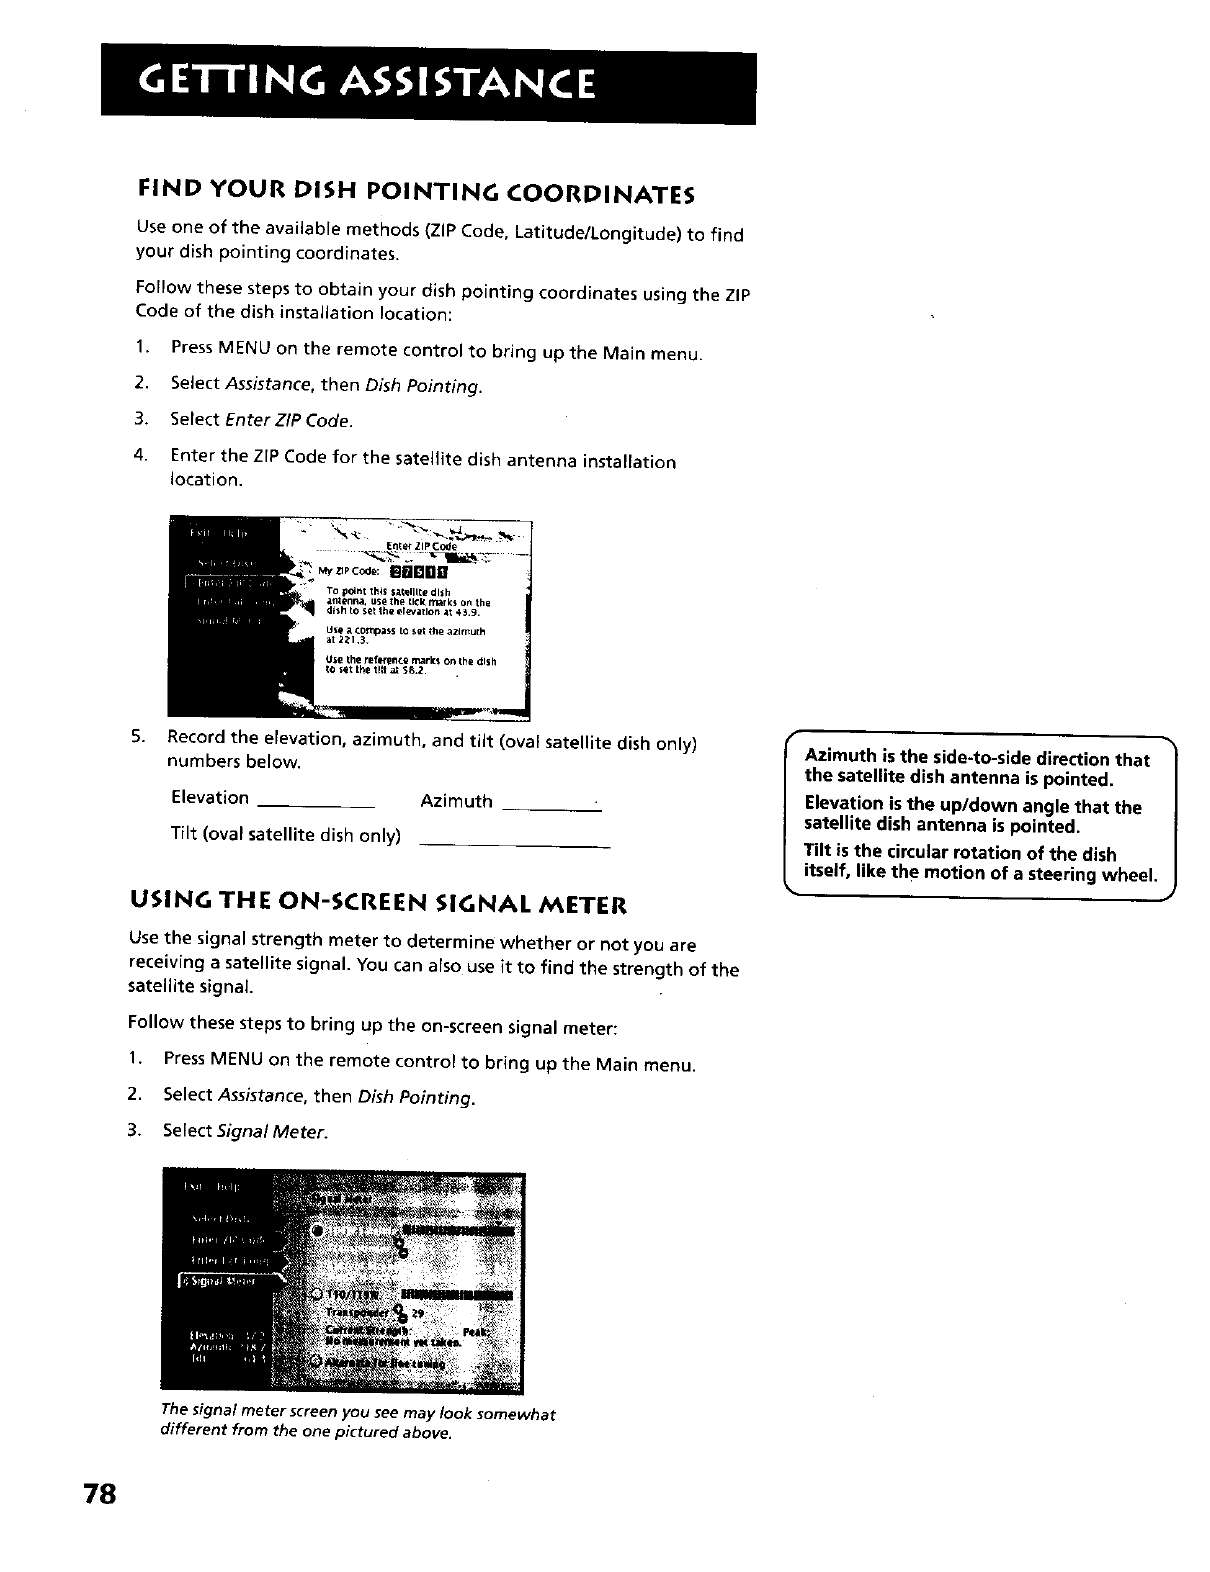
FIND YOUR DISH POINTING COORDINATES
Use one of the available methods {ZIP Code, Latitude/Longitude) to find
your dish pointing coordinates.
Follow these steps to obtain your dish pointing coordinates using the ZIP
Code of the dish installation location:
1. Press MENU on the remote control to bring up the Main menu.
2. Select Assistance, then Dish Pointing.
3. Select Enter ZIP Code.
4. Enter the ZIP Code for the satellite dish antenna installation
location.
Enler ZIP code
Record the elevation, azimuth, and tilt (oval satellite dish only)
numbers below.
Elevation Azimuth
Tilt (oval satellite dish only)
USING THE ON-SCREEN SIGNAL METER
Use the signal strength meter to determine whether or not you are
receiving a satellite signal. You can also use it to find the strength of the
satellite signal.
Follow these steps to bring up the on-screen signal meter:
1. Press MENU on the remote control to bring up the Main menu.
2. Select Assistance, then Dish Pointing.
3. Select Signal Meter.
Azimuth is the side-to-side direction that
the satellite dish antenna is pointed.
Elevation is the up/down angle that the
satellite dish antenna is pointed.
Tilt is the circular rotation of the dish
itself, like the motion of a steering wheel.
The signal meter screen you see may look somewhat
different from the one pictured above.
78

4. Select a satellite location (such as 101W). If the satellite dish
antenna is pointed correctly, the signal meter will show you the
current signal strength and you should hear a continuous tone.
5. If you are using an oval satellite dish, select the second satellite
group and obtain a signal.
Once you have a signal locked for both satellite locations (this may
require some tweaking), you can select Alternate for fine tuning to
improve your reception of both signals. When this button is
selected, the signal meter alternates between the two signals every
four seconds. Make small adjustments to your dish's position until
both signals are satisfactory.
If you are not receiving a signal and you have entered all Select Dish
information correctly, please see your satellite dish antenna Installer's
Guide for detailed instructions.
To change transponders, press the right arrow button on the remote,
then use either the digit buttons on the remote or the on-screen + and -
buttons to enter the transponder number.
YOUR NEW ACCESS CARD
Periodically, your program provider may issue you a replacement access
card if you subscribe to DIRECTV®programming. The New Access Card
Setup screen allows you to transfer the information from the old card
onto the new one. The access card fits into the TV through the back
panel.
Iee the section _Setup and Connections" 1
for details about where to insert your
access card.
To replace the card:
1. Select Assistance from the main menu.
2. Select New Access Card.
3. Follow the on-screen directions to validate the new card.
RUNNING THE SYSTEM TEST
The System Test display screen is accessed through the Assistance menu
and allows you to initiate diagnostic procedures on the DIRECTV System,
if you subscribe to DIRECTV_ programming. You should use this feature
to get your access card number or when your television doesn't seem to
be receiving satellite signals correctly.
A message screen appears when you
select System Test from the Assistance
menu. This screen tells you whether the
system passed each test. If your system
fails the test, run the system test several
times before concluding that there is a
problem. Occasional fluctuations in the
phone line or satellite signal can give
temporary false readings. Note that if
you do not subscribe to DIRECTV®
programming or do not have your
satellite dish antenna installed, the test
will fail.
79
OFF-AIR GUIDES
If you are certain your antenna is properly set up and receiving a strong
signal, but you are receiving invalid program guide information or are
having trouble tuning to a channel, you can disable your system's ability
to acquire off-air TV program guides. If you subscribe to DIRECTV®
programming, you will still receive DIRECTV® programming guides if you
do not receive TV program guides,
To disable the TV program guide:
1. Select Assistance from the main menu.
2. Select Off-Air Guides from the Assistance menu.
3.
4.
Select Off-Air Guides from the Assistance menu,
Use the arrows on the remote to highlight Do NotAcquire Off-Air
Guides and press OK to select it. Then exit from the menu.
You should now rebuild the channel list by selecting System Options
from the main menu and selecting Channel Search.
UPGRADES
Your HDTV is able to receive upgrades or modifications to some of its
features and functions. These modifications will occur automatically,
usually at times when your TV would likely be turned off. If your TV is on
when an upgrade or modification is sent, you may experience a
disruption in reception for a minute or two. Your reception should return
to normal after the modification is complete. Please consult the
Upgrades Menu to find a schedule of upgrades or modifications planned
by DIRECTV, The Upgrades feature is enhanced by *RSATM Secure.
The "RSA Secure" logo ensures that only
authorized upgrades or modifications are
delivered to your HDTV
Future Upgrades lets you review upcoming upgrades. Past
Upgrades shows you the current software version numbe_ *RSA TM Secure and the RSATM Secure logo are
trademarks of RSA Data Security, Inc.
80
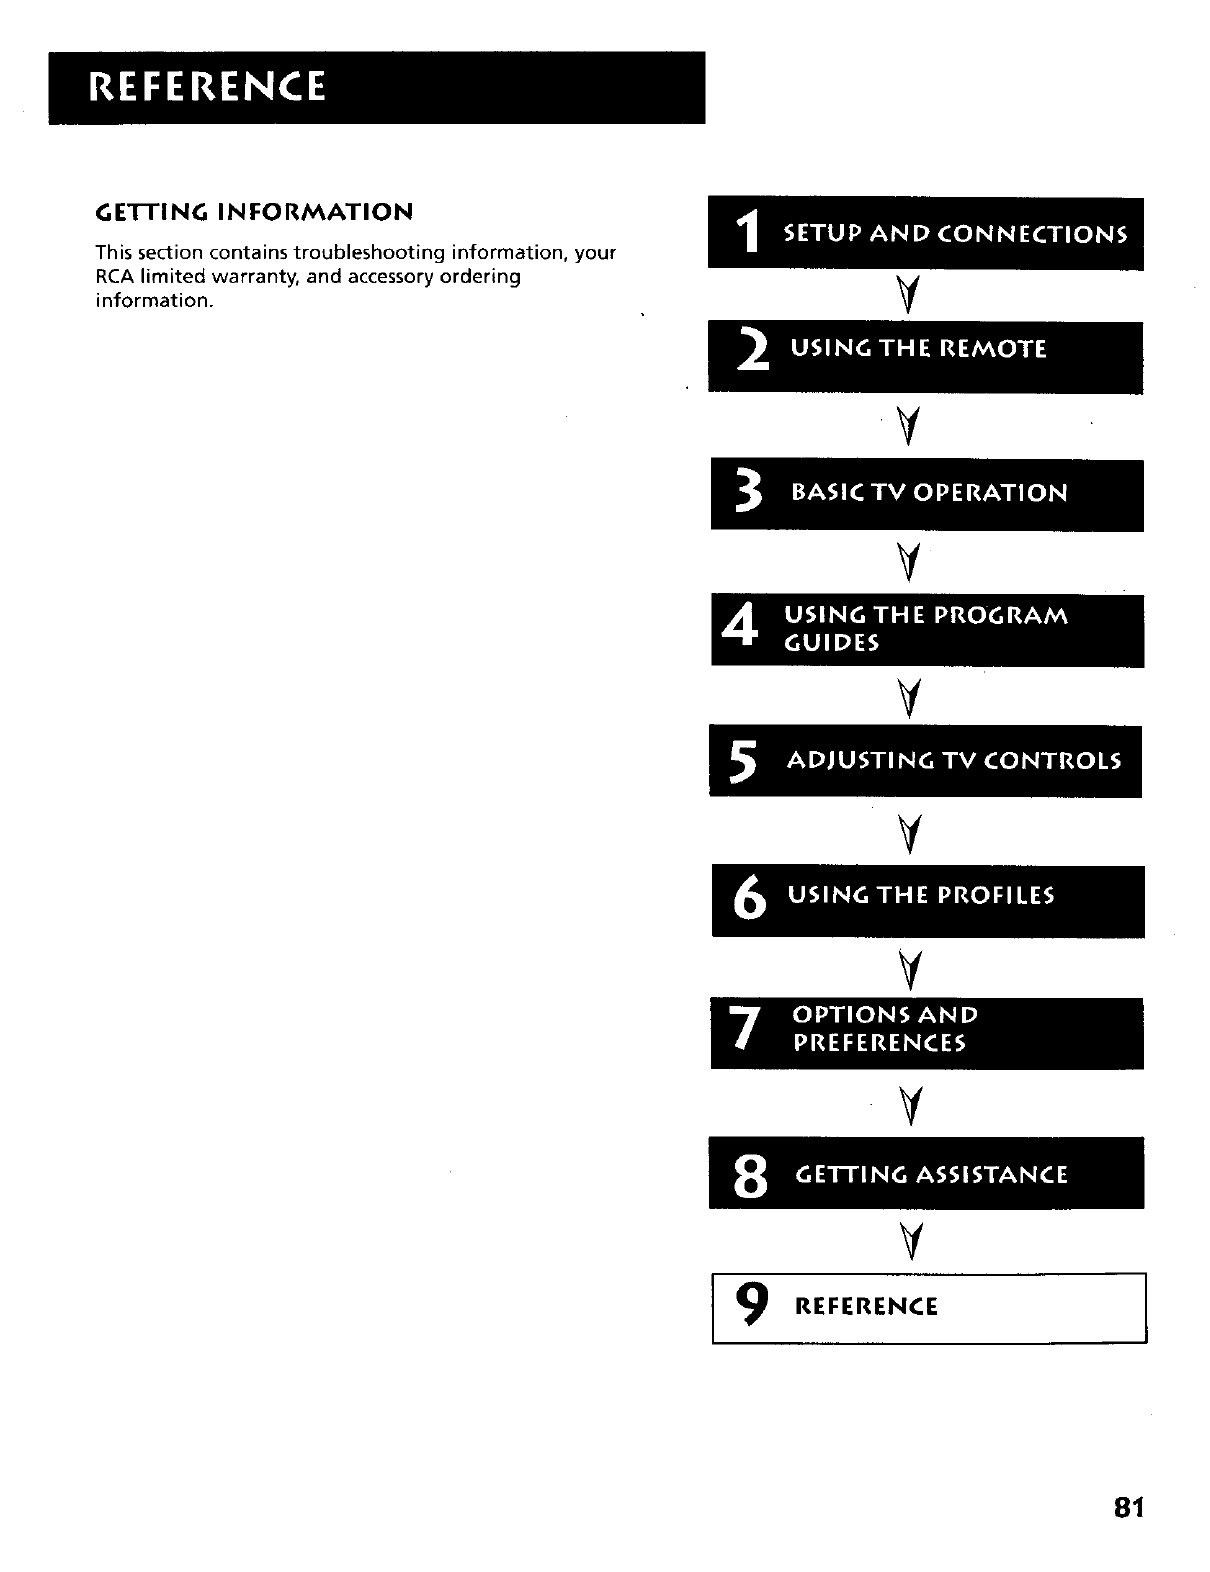
G E'IIFING INFORMATION
This section contains troubleshooting information, your
RCA limited warranty, and accessory ordering
information. V
V
V
V
¥
V
V
¥
REFERENCE
81
TROUBLESHOOTING
Can't select certain channel
•Channel may be blocked or not approved in the Profiles menu.
If using aVCR, check to make sure the TV/VCR button on the VCR is in the correct "mode."
Noisy stereo reception
May be a weak station. Change to mono mode instead of stereo in the Audio menu under Special Audio.
No picture, no sound but TV is on
Maybe a vacant channel or input istuned.
•If watching VCR (connected only through antenna input), make sure TV is tuned to channel 3 or 4 - same as CH3/4
switch on VCR. Also check to make sure the TVNCR button on the VCR is in the correct "mode."
Simultaneously press the POWER and CHANNEL DOWN buttons on the front panel to reset the TV.
Sound okay, picture poor
•Check antenna connections and pointing and also check for interfering sources.
• Try adjusting the picture quality, especially sharpness, to improve weak signals.
• Viewing aVCR while in AIR mode may result in poor picture performance. To exit AIR mode, select System Options
from the main menu, then select Signal Type and select Cable.
Black box appears on the screen
•Captioning may be turned on and in text mode. Check the Caption Display in the Options menu.
Wrong picture
The "IV and most VCRs let you toggle between pictures: one can be the picture from DIRECTV signal or aterrestrial
antenna (or cable) and one can be from the VCR. If you don't see the picture you think you should be seeing, try using
these buttons to toggle between the pictures:
• Press the TVNCR button on the VCR remote or on the VCR's front panel.
• Press the ANTENNA button on the remote control.
Taking either of these actions lets you switch the source of the video signal from DIRECTV to the off-air antenna or
cable, and vice versa.
Problems with the remote control
Maybe something is between the remote control and the remote sensor on the front of the TV.
• Maybe the remote control is not in the correct mode. Press the DIRECTV button so the remote will be in DIRECTV
mode or press the TV button so the remote will be in TV mode.
• Maybe the batteries in the remote control are weak, dead or installed incorrectly. Try replacing batteries. (Note, if
you remove the batteries, you may have reprogram the remote to control other components.)
• Remove the batteries and hold the number 1 button for at least 60 seconds to drain the microprocessor inside the
remote control. Release the button, replace the batteries, and (if necessary) reprogram the remote control.
82
Blank screen
Maybe the component (VCR, DVD, etc.) connected to the input jacks is not on.
• Try another channel, because there may just not be any programming on at that time.
• Cables in back may be disconnected.
TV will not turn on
•Check to make sure it is plugged in, and try the front panel POWER button.
•Check the wall receptacle (and extension cord, if applicable) to make sure it is "live" by plugging in something else.
•Maybe remote control is not aimed at remote sensor.
•Unplug. Wait five minutes. Plug in again.
TV turns off while playing
•Electronic protection circuit may have been activated because of a power surge. Wait 30 seconds and then turn on
again. If this happens frequently, the voltage in your house may be abnormally high or low.
Problems with your system password
If you forget your system password and subscribe to DIRECTV®programming, you should call DIRECTV to obtain a
new one.
Invalid program guide information
• Make sure your antenna is properly set up and receiving a strong signal. If this still does not correct the problem,
disable your system's ability to acquire off-air TV program guides by selecting Assistance from the main menu and
then selecting Off-Air Guides.
CARE AND CLEANING
CAUTION: Turn OFF your TV before cleaning,
You can clean the TV as required, using a soft lint-free cloth. Be sure to occasionally dust the ventilation slots in the
cabinet to help assure adequate ventilation.
The lrV's screen may be cleaned with a soft, lint-free cloth as well. Take care not to scratch or mar the
screen. If necessary, you may use a cloth dampened with warm water.
Never use strong cleaning agents, such as ammonia-based cleaners, or abrasive powder. These types of
cleaners will damage the TV.
While cleaning do not spray liquid directly on the screen, or allow liquid to run down the screen and inside the TV. Also,
avoid placing drinks, vases, or potted plants with water on top of the TV. This could increase the risk of fire or shock
hazard or damage to the "IV.
Caution: If fixed (non-moving) images are left on the screen for long periods, they may be permanently imprinted on
the screen. Such images include network Iogos, phone numbers, and video games. This damage is not covered by your
warranty. Extended viewing of channels displaying these images should be avoided.
83
RCA HIGH DEFINITION TELEVISION (HDTV) LIMITED WARRANTY
What your warranty covers:
• Any defect in materials or workmanship.
For how long after your purchase:
• One year for labor charges.
• One year for parts.
• Two years for the picture tube.
The warranty period for rental units begins with the first rental or 45 days from date of shipment to the rental firm,
whichever comes first.
What we will do:
•Pay any Authorized RCA Digital Television Service Center the labor charges to repair your HDTV.
• Pay any Authorized RCA Digital Television Service Center for the new or, at our option, refurbished replacement parts
and picture tube required to repair your HDTV.
How you get service:
• Call 1-877-RCA-HDTV and have your unit's date of purchase and model number ready.
• A representative will troubleshoot your problem over the phone.
• If the representative determines that you should receive service they will provide you with name(s) of the closest RCA
Digital Television Authorized Service Center(s).
• Contact the Service Center and arrange for home service.
• Show the Authorized Service Center Representative your sales receipt or other evidence of purchase date or first rental.
What your warranty _cover:
• Customer instruction. (Your Owner's Manual clearly describes how to install, adjust, and operate your HDTV. Any
additional information should be obtained from your dealer.)
• Installation and related adjustments.
• Signal reception problems not caused by your HDTV.
• Damage from misuse or neglect.
• Batteries.
• Images burned onto the screen.
• Units purchased, serviced, or operated outside the continental U.S.A. and Alaska.
• For units intended for use in Alaska, this warranty does not cover installation or the dish antenna. If only covers the HDTV.
• An HDTV that has been modified or incorporated into other products or used for institutional or other commercial
purposes.
• Acts of God, such as but not limited to lightning damage.
Product Registration:
• Please complete and mail the Product Registration card packed with your HDTV. It will make it easier to contact you
should it ever be necessary. The return of the card is not required for warranty coverage.
How state law relates to this warranty:
• This warranty gives you specific legal rights, and you also may have other rights that vary from state to state.
If you purchased your HDTV outside the United States:
This warranty does not apply. Contact your dealer for warranty information.
Service calls that do not involve defective materials or workmanship are not covered by this warranty. Costs of such service
calls are the sole responsibility of the purchaser.
84
FCC REGISTRATION INFORMATION
Your HDTV is registered with the Federal Communications Commission and is in compliance with parts 15B and 68, FCC
Rules and Regulations.
1. Notification to the Local Telephone Company.
On the back of this equipment is alabel indicating among other information, the FCC Registration number and Ringer
Equivalence Number (REN) for the equipment. You must, upon request, provide this information to your telephone
company.
The REN is useful to determine the number of devices you may connect to your telephone line and still have all these
devices ring when your telephone number is called. In most (but not all) areas, the sum of the RENsof all devices connected
to one line should not exceed 5. To be certain of the number of devices you may connect to your line as determined by the
REN, you should contact your local telephone company.
Note: This equipment may not be used on coin service provided by the telephone company. Party lines are subject to state
tariffs, and therefore you may not be able to use your own telephone equipment if you are on aparty line. Check with
your local telephone company. Notice must be given to the telephone company upon permanent disconnection of your
equipment from your line.
2. Rights of the Telephone Company.
Should your equipment cause trouble on your line which may harm the telephone network, the telephone company shall,
where practicable, notify you that temporary discontinuance of service may be required. Where prior notice is not
practicable and the circumstances warrant such action, the telephone company may temporarily discontinue service
immediately. In case of such temporary discontinuance, the telephone company must: (1) promptly notify you of such
temporary discontinuance (2) afford you the opportunity to correct the situation and (3) inform you of your right to bring
a complaint to the Commission pursuant to procedures set forth in Subpart E of Part 68, FCC Rules and Regulations.
The telephone company may make changes in its communications facilities, equipment, operations of procedures where
such action is required in the operation of its business and not inconsistent with FCC Rules and Regulations. If these
changes are expected to affect the use or performance of your telephone equipment, the telephone company must give
you adequate notice, in writing, to allow you to maintain uninterrupted service.
85
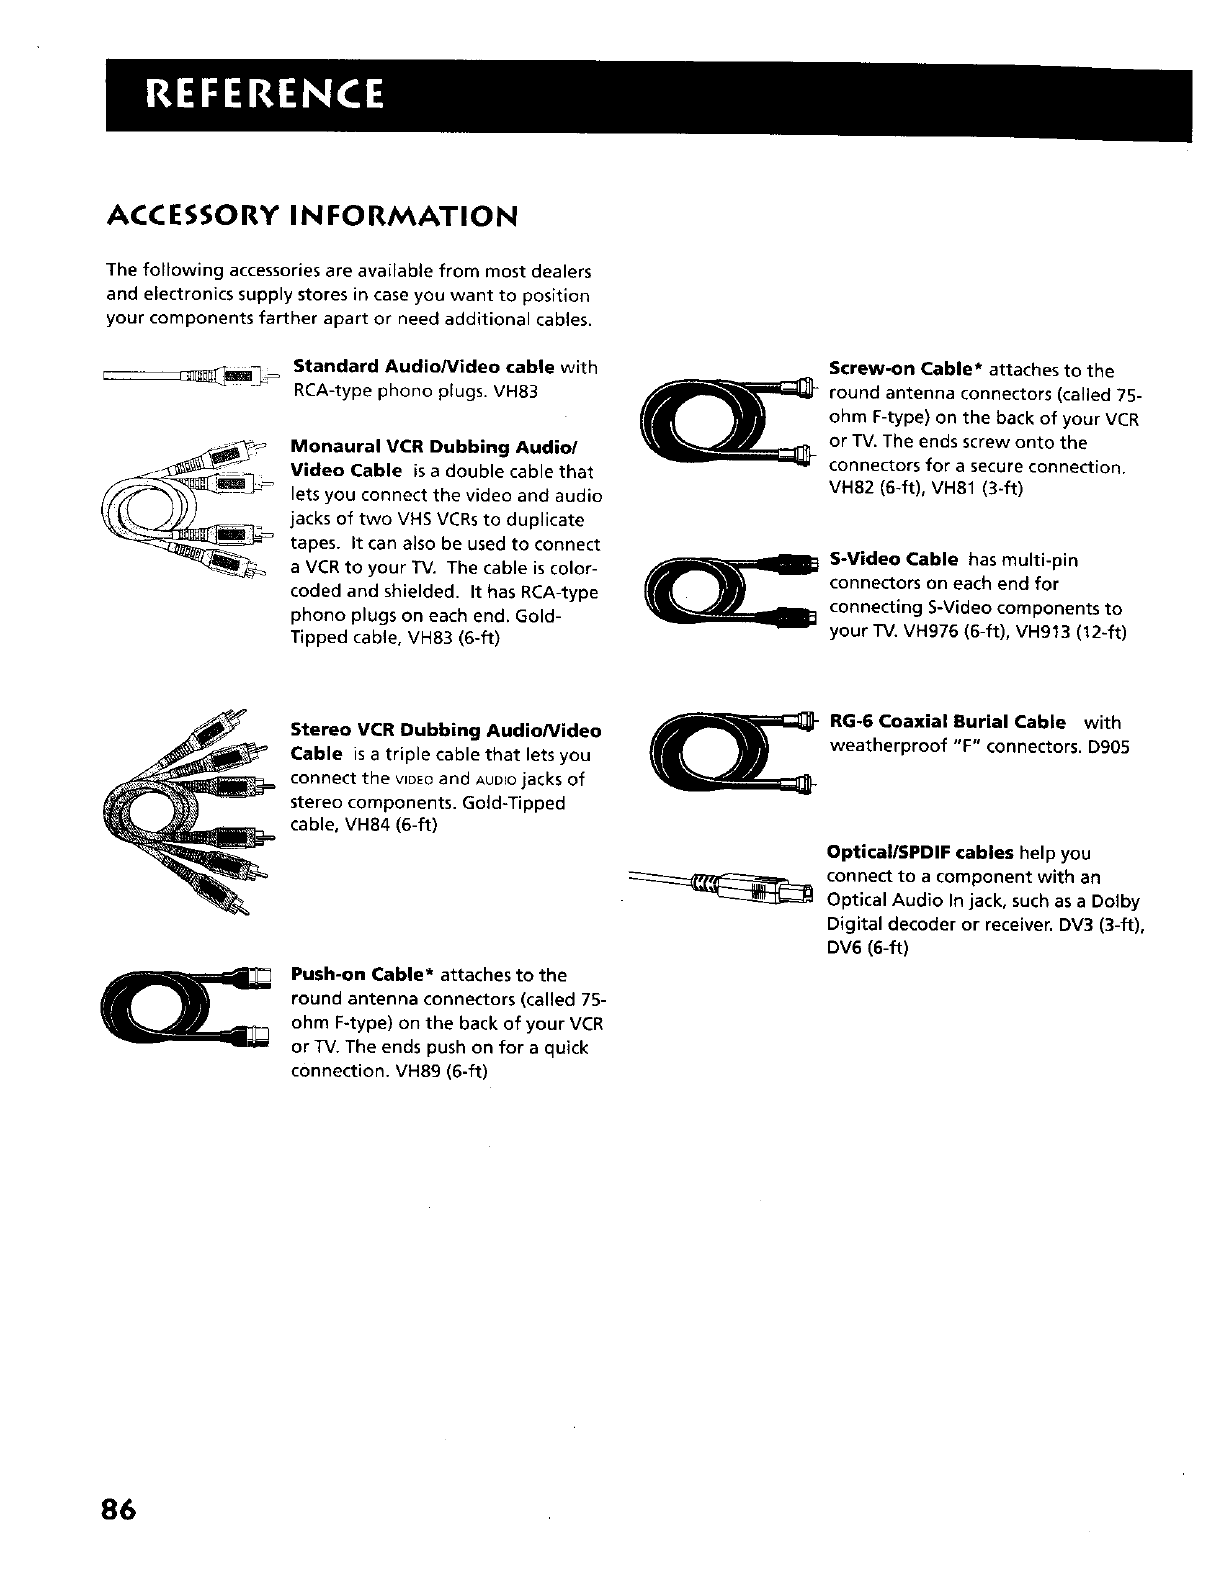
ACCESSORY INFORMATION
The following accessories are available from most dealers
and electronics supply stores in case you want to position
your components farther apart or need additional cables.
_::_lmi_ Standard Audio/Video cable with
RCA-type phono plugs. VH83
Monaural VCR Dubbing Audio/
Video Cable is a double cable that
lets you connect the video and audio
jacks of two VHS VCRs to duplicate
tapes. It can also be used to connect
a VCR to your TV. The cable is color-
coded and shielded. It has RCA-type
phono plugs on each end. Gold-
Tipped cable, VH83 (6-ft)
Screw-on Cable* attaches to the
round antenna connectors (called 75-
ohm F-type) on the back of your VCR
or TV. The ends screw onto the
connectors for a secure connection.
VH82 (6-ft), VH81 (3-ft)
S-Video Cable has multi-pin
connectors on each end for
connecting S-Video components to
your TV. VH976 (6-ft), VH913 (12-ft)
Stereo VCR Dubbing Audio/video
Cable is a triple cable that lets you
connect the VIDEOand AUDEOjacks of
stereo components. Gold-Tipped
cable, VH84 (6-ft)
Push-on Cable* attaches to the
round antenna connectors (called 75-
ohm F-type) on the back of your VCR
orTV. The ends push on for a quick
connection. VH89 (6-ft)
C_ RG-6 Coaxial Burial Cable with
weatherproof "F" connectors. D905
OpticallSPDIF cables help you
connect to a component with an
Optical Audio In jack, such as a Dolby
Digital decoder or receiver. DV3 (3-ft),
DV6 (6-ft)
86
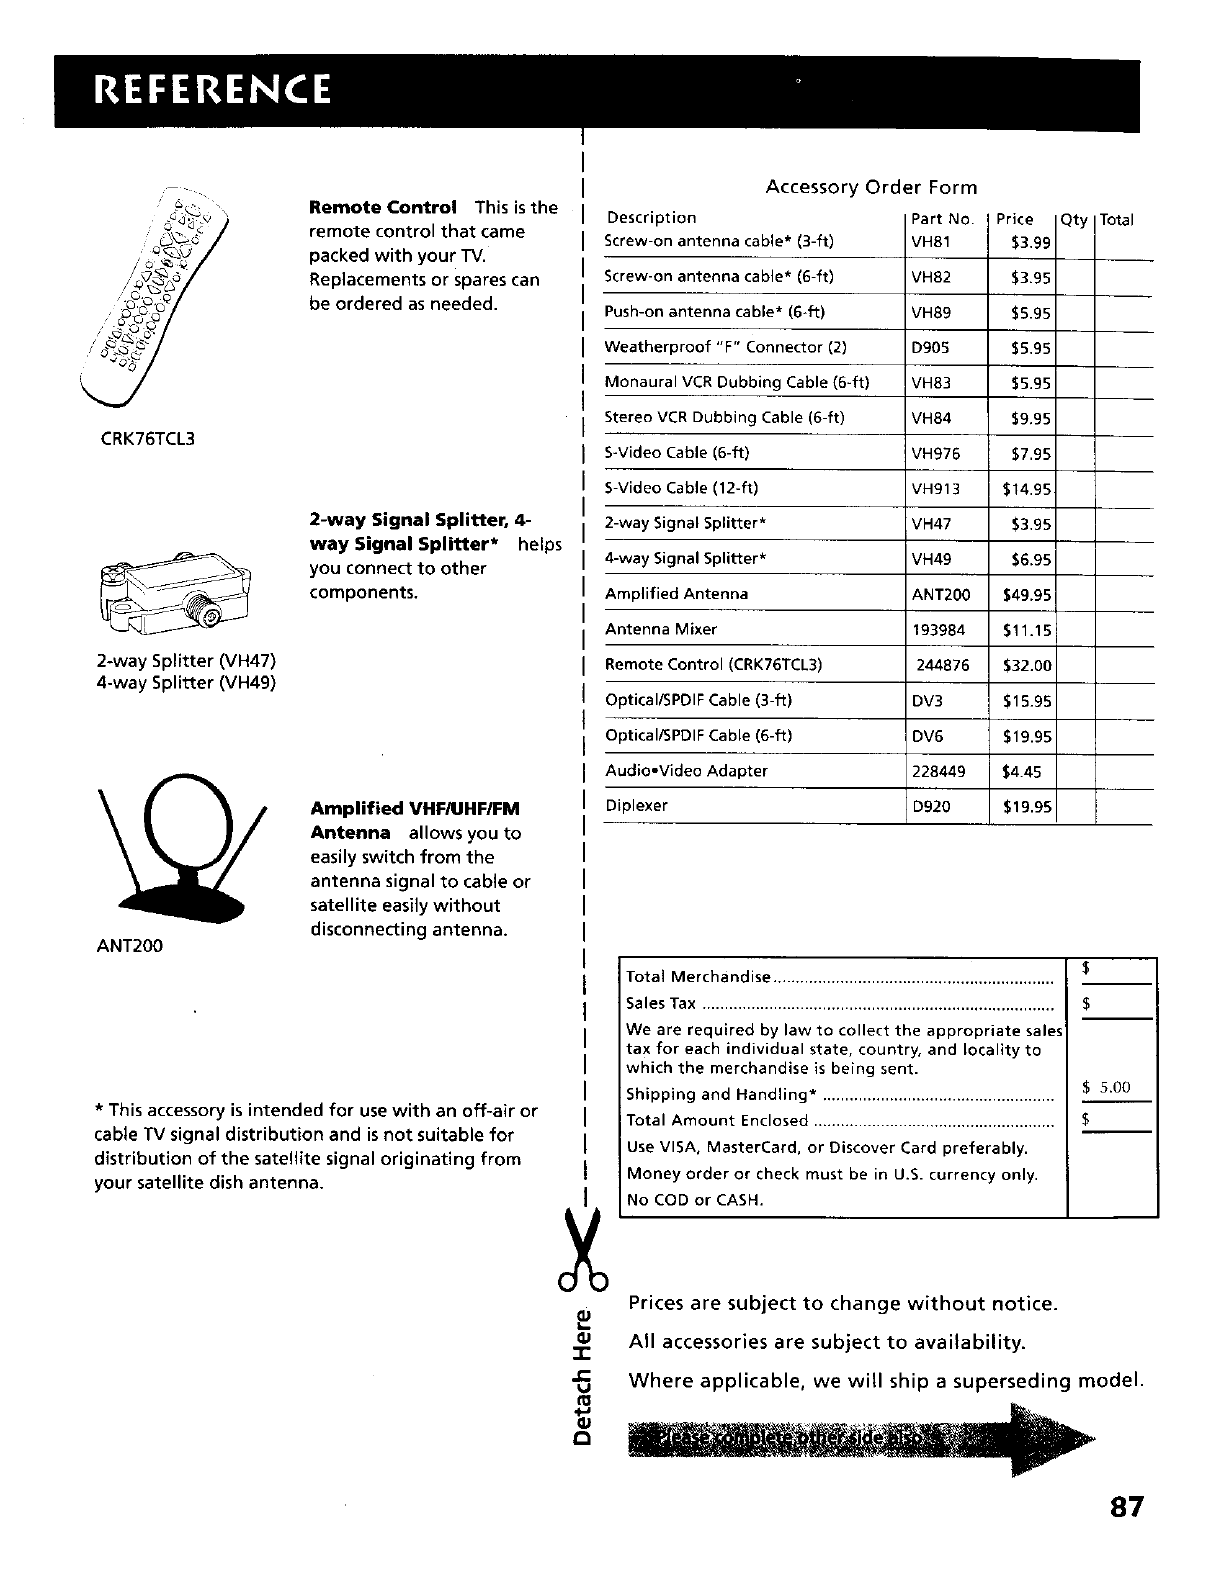
I
Remote Control This is the I
remote control that came
packed with your TV.
Replacements or spares can
be ordered as needed•
CRK76TCL3
2-way Splitter (VH47)
4-way Splitter (VH49)
2-way Signal Splitter, 4-
way Signal Splitter* helps
you connect to other
components.
ANT200
Amplified VHF/UHFIFM
Antenna allows you to
easily switch from the
antenna signal to cable or
satellite easily without
disconnecting antenna.
*This accessory is intended for use with an off-air or
cabte TV signal distribution and is not suitable for
distribution of the satellite signal originating from
your satellite dish antenna.
Accessory Order Form
Description
Screw-on antenna cable* (3-ft)
Screw-on antenna cable* (6-ft) VH82 $3•95
Push-on antenna cable* (6+ft) VH89 $5.95
Weatherproof "F" Connector (2) D905 $5•95
Monaural VCR Dubbing Cable (6-ft} VH83 $5•95
Stereo VCR Dubbing Cable (6-ft) VH84 $9•95
S-Video Cable (6-ft) VH976 $7.95
S-Video Cable (12-ft) VH913 $14.95
2-way Signal Splitter* VH47 $3.95
4-way Signal Splitter* VH49 $6•95
Amplified Antenna ANT200 $49•95
Antenna Mixer 193984 $11•15
Remote Control (CRK76TCL3) 244876 $32•00
Optical/SPDIF Cable (3-if) DV3 $15.95
Optical/SPDIF Cable (6-ft) DV6 $19.95
Audio-Video Adapter 228449 $4.45
Diplexer D920 $19.95
Total
$
Total Merchandise .................................................................
Sales Tax ............................................................................... $
We are required by law to collect the appropriate sales
tax for each individual state, country, and locality to
which the merchandise is being sent.
• • • . $5.00
Shipping and Handling ......................................................
Total Amount Enclosed ...................................................... $
Use VISA, MasterCard, or Discover Card preferably•
Money order or check must be in U•S. currency only.
No COD or CASH.
Prices are subject to change without notice.
All accessories are subject to availability.
-r
_: Where applicable, we will ship a superseding model•
u
r0
87
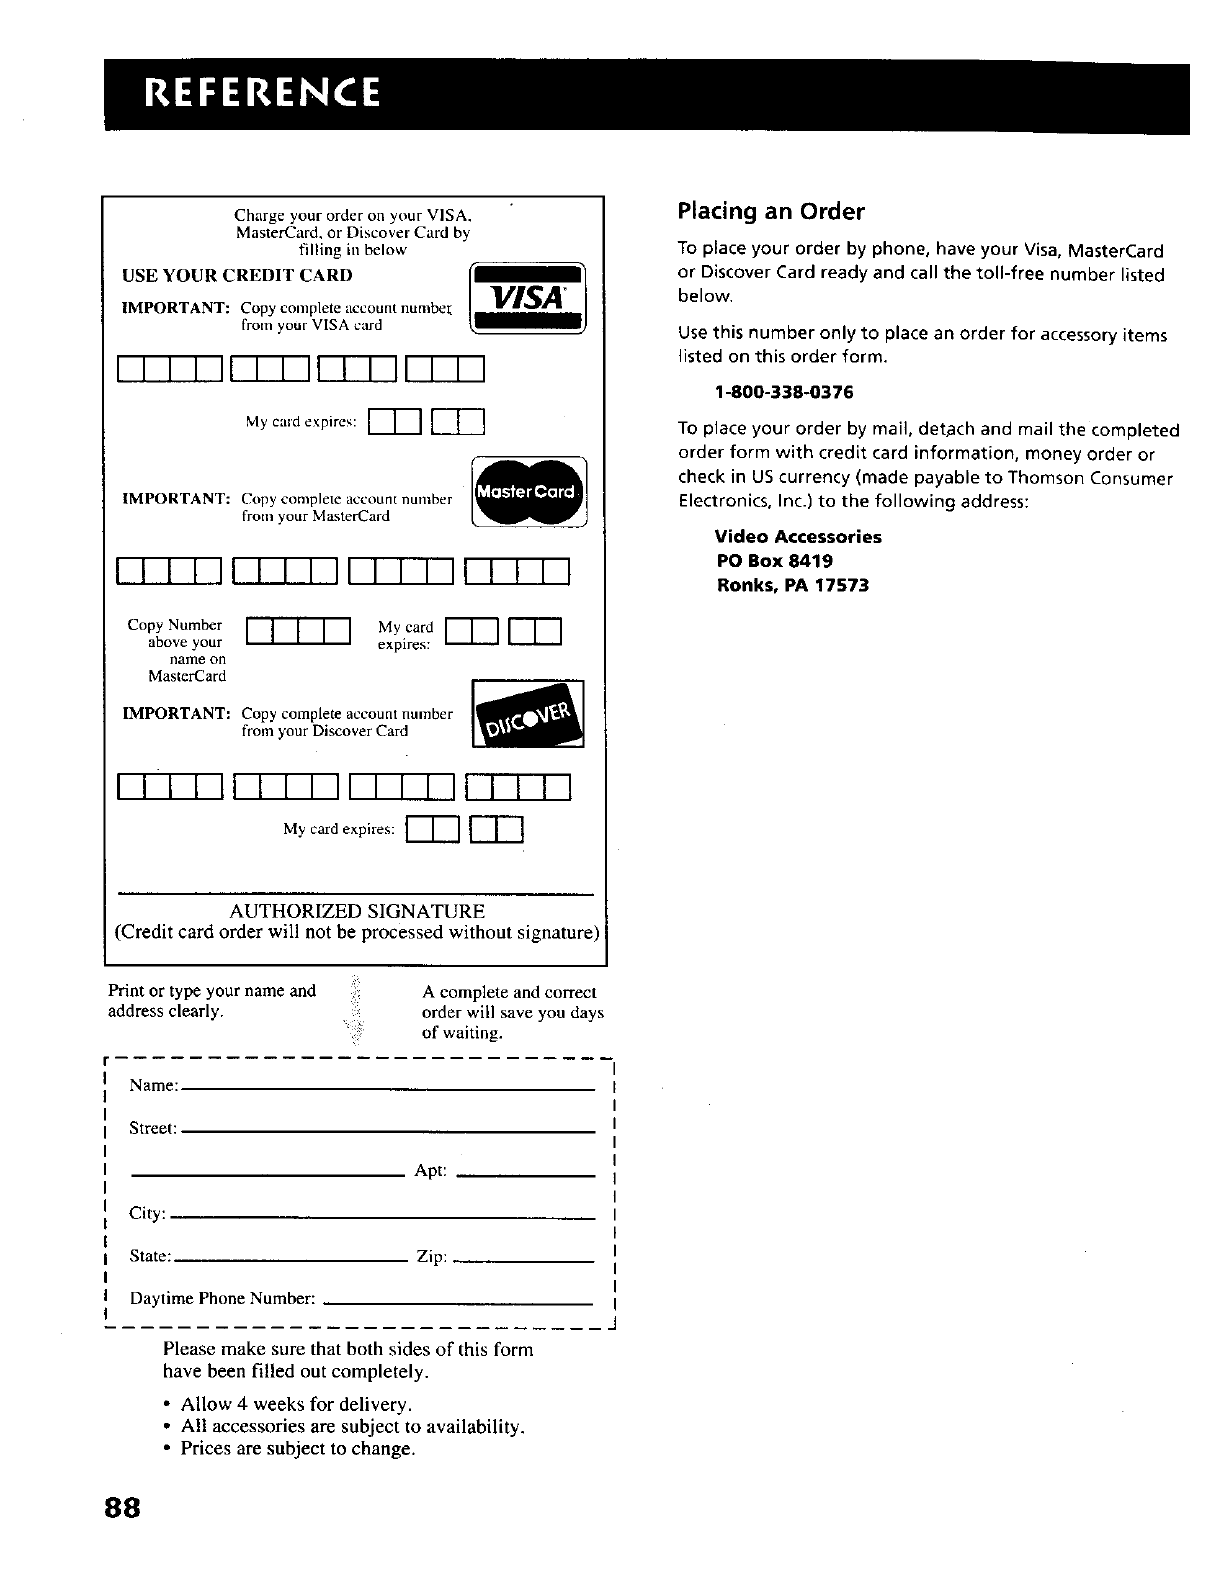
Charge your order on your VISA,
MasterCard, or Discover Card by
filling in below
USE YOUR CREDIT CARD
IMPORTANT: Copy complete account number _'_--IVl'_'_"
from your VISA card
v-v-v-vqF-r-rq F-F-r-qFT-F-q
My cald expires: _ F'_
IMPORTANT: Copy complete account number
from your MasterCard
F-F-VI-qF-V-V- F-r-r- r-c-c-r-q
Copy Number
above your
name on
MasterCard
My.card F"'_ F'_
expires:
IMPORTANT: Copy complete account number
from your Discover Card
VI-F-FqVF-V-MF-F-V- FT-F-
My card expires: _
AUTHORIZED SIGNATURE
(Credit card order will not be processed without signature)
Print or type your name and A complete and correct
address clearly, order will save you days
of waiting.
Name:
Street:
Apt:
City:
State: Zip:
Daytime Phone Number:
Please make sure that both sides of this form
have been filled out completely.
• Allow 4 weeks for delivery.
• All accessories are subject to availability.
• Prices are subject to change.
88
Placing an Order
To place your order by phone, have your Visa, MasterCard
or Discover Card ready and call the toll-free number listed
below.
Use this number only to place an order for accessory items
listed on this order form.
1-800-338-0376
To place your order by mail, det_lch and mail the completed
order form with credit card information, money order or
check in US currency (made payable to Thomson Consumer
Electronics, Inc.) to the following address:
Video Accessories
PO Box8419
Ronks, PA 17573

(This page intentionally left blank)

(This page intentionally left blank)
INDEX
A
A-Z icon 34, 40,
Access card 10, 79
Number 16
Accessories 86
Age-based ratings 54
Blocking 56
Viewing 56
AIR mode 12, 64
All icon 39
AlphaSort icon 34
Amplifier
Connecting 15
Analog captions 73
Analog terrestrial 26
Anatomy Of the TV program
guide 33
Antenna
A 64, 65
ANTENNA IN jacks 10
B 64, 65
Button on the remote 19
Information 76
Receiving signals 76
AphaSort 40
Arrows on remote 19
Assistance menu 75
Attractions guide 69
Audio
AUDIO jacks 9
AudiolVideo jacks, cable 7
Processor 46
Quality controls 46
Audio language icon 25
Auto
Converge 45
Tuning 65
AUX button 18
Available channels 66
Azimuth 78
B
Back of the TV 10
Batteries 16, 82
Binocular icon 25
Black level 44
Blocking
Age-based ratings 56
Content themes 57
Bright lighting 45
Buy programs 68
C
Cables 10
Jacks 7
Canceling purchases 70
Caption
Display 73
Care and cleaning 83
Changing
Channels 26, 27
From the "iV guide to the
DIRECTV guide 32
Channel
Banner
Icons 24
Control button on the remote
19
Groups 37
Lists 37
Delete channels 51
Retrieving channel number 76
Search 66
Up and down 8, 18
CLEAR button 19
Closed captioning 73, 82
Codes
remote 22
Color 44
Scheme 71
Warmth 44
Colors
Of icons 62
Connections
To the back panel 6
Content themes 54
Viewing 57
Contrast 44
Convergence 45
D
Date and time 71
Default guide 36, 72
Detail guide 36
DIGITAL AUDIO OUT jack
10, 47
Digital terrestrial 26
DIRECTV
Button 16, 18, 82
Channel list 50
Rating limit 52
Setup S0
Spending limit 51
Dish Pointing 77
coordinates 78
Dish type 77
Dolby
Digital 47
Receiver 7
DVD button 18
Editing
Channels 50
Profiles 50
Elevation 78
Exit icon 42
Exiting
Program guides 37
F
FCC information 85
Fetch
Button 18
Using 74
Fill screen format 72
Fine tuning the dish 79
Fixed
Images 83
Variable out jack 11
Fixed Output 15
FORWARD
Button on the remote 19
Front
And rear speaker jacks 11
Input jacks 8
Of the TV 8
Panel B
Speaker INT.I EXT. switch 11
Front inputs 9
Full screen format 72
91
G
Getting around in the guides
35
GO BACK
Button on the remote 19
GO BACK button 19
Grid guide 36
Guide
Button on the remote
19, 33, 34, 36
Data 36, 37
H
Headphone jack 9
Help 42
I
Icons 25, 34, 40, 62
Lock, Unlock 62
INFO
Button on front panel 8
Button on the remote 19, 35
INPUT
1 jacks 11
2 jacks 11
3 jacks 11
Button on the remote 19
Interactive setup 16, 76
J
Jacks 10
And cables 7
/
Latitude and longitude 78
LED button on the remote 18
Listing all DIRECTV programs
39
LNB (Low Noise Block) 77
Lock icon 62
Locking
The system 25, 58, 62
M
Mail icon 66
Mailbox
Checking your mail 66
Deleting mail 66
Icon 25
Main menu 42
Maximum signal strength 77
MENU button 8, 19
Menus
Icons 62
Profiles 50
Modes 8
Of operation 26
SAT and TV 26
Mono sound 46
Movie
Icon in the program guide 39
Ratings 58
Blocking 58
Viewing 59
Themes icon 39
Mute 18, 46
N
Naming profiles 50
New access card 79
Noise filter 45
Normal lighting 45
Normal screen format 72
Not rated
Movies 59
Programs 54
Number buttons on the remote
35
O
Off-Air Guides 79
OK button 19
ONeOFF button 18
Optical
Jacks and cables 7
Output menu 47
Other guides
Attractions guide 69
Icon 36
Overheated components 6
P
Password
System 61
User 61
Pay Per View program 52
PCM
Decoder 47
Personal picture preset 45
Phone
Jack 7, 10
Line 7
PHONES jack 9
Picture 44
Controls 44
Presets 45
Quality 44, 77
Settings 44
Picture tilt 45
PIP (Picture in Picture)
Button 19
Buttons 28
Problems 29
Positioning cables 6
POWER button 8
Preferences menu 71
Profiles
Choosing 60
Locking
Unlocking 61
Menu 50
Unlocking 60
Program guides
Anatomy 34
Default guide 72
Detail guide 36, 72
DIRECTV 32
Down arrow 42
Exiting 37
Grid guide 36, 72
Help 42
Scrolling 35
SurfGuide 36, 37, 72
Tuning to a program 35
TV 32
Programming the remote tO
control components 20
Purchases
Cancelling 70
Menu 70
Pay Per View programs 67
Previewing 67
Reviewing 70
Q
Quality controls 44
92
R
Rain fade 77
Rating limit 52
Ratio (16:9 and 4:3) 72
RCA-type cables 7
Remote control 82
Buttons 18
codes 22
Programming 20
Reset picture controls 45
Reviewing purchases 70
RFjacks
Cables 7
S-VIDEO jack 7
Satellite 26
In jack 10
Satellite dish type 77
Scout 25
Icon 40
Screen format 72
Scrolling 35
Search for channels 66
Second Audio Program (SAP) 47
Set
Movie ratings 58
Rating limit 52
Time and date 71
Sharpness 44
Signal
Meter
Peak Signal 77
Source
Changing 64
Strength
Of a digital signal 76
Type
Changing 64
Signal meter 78
SKIP button 18
Soft lighting 45
Sorting
The DIRECTV guide
By movies 39
By sports 39
By title 34
By topics 38
Using movies icon 39
Using sports icon 39
Using topics icon 38
Sorting by
Scout button 40
Sound
Logic 47
Speaker
Connecting 14
Setup 14
Speakers 47
Spending limit 51
Sports
Icon 39
Themes icon 39
SRSStereo 47
Station name
Retrieving 76
Stereo sound 46
Subchannel number 33
SurfGuide 36, 37
SWAP
Button on the remote 19
System
Lock 58, 62
Password 62
Test 79
Unlock 62
T
Telephone jack and cord 7
Terrestrial antennas 76
Text
Closed caption 73
Tilt 78
Time and date 71
Tint 44
Tone controls 46
Translucency 72
Troubleshooting 82
Tuning to a program 35
1-V
And DIRECTV button on remote 8
Button 18
Mode 27
Rating limit 54
U
Unlocking
Profiles 60
The system 25, 62
Unrated
Movies 59
Programs and shows 54
Shows 59
Upgrades 80
V
V-Chip
Age-based ratings 54
Content themes 54
Variable Output 15
VCR
VCR1 button 18
VCR2 button 18
Video
Configuration 44
Games 10
Jack 9
Viewing
Age-based ratings 56
Content themes 57
Volume
Button 8, 18
W
Weak reception 82
WHO button on the remote 19, 60
Z
ZIP code 78
93

(This page intentionally left blank)

(./_
-CT
Please do not send any products to the Indianapolis address listed in this manual or on the carton. This will only
add delays in service for your product.
_THOMSON CONSUMER ELECTRONICS
10330 North Meridian Street .
Indianapolis, IN 46290
©2000 Thomson Consumer Electronics, Inc.
Trademark(s)® Registered
Marca(s) Registrada(s)
DIRECTV and DIRECTV PLUS are trademarks of DIRECTV, Inc., a
unit of Hughes Electronics Corp., and are used with permission.
DIRECTV®programming is sold separately and independently of
DIRECTV System hardware. A valid programming subscription is
required to operate DIRECTV System hardware. Please contact
DIRECTV directly at 1-800-DIRECTV to order programming.
Printed in USA
TOCOM 15508520
MODEL #:
F38310
P61310
15508520
