RCA Home Theatre Manual L0306242
User Manual: RCA RCA Home Theatre Manual RCA Home Theatre Owner's Manual, RCA Home Theatre installation guides
Open the PDF directly: View PDF ![]() .
.
Page Count: 52
RTDI01-EN receiver 11/25/02 10:08 AM Page 1
This device complies with Part 15 of the FCC Rules.
Ooeration is subject to the following two
conditions: (1) This device may not cause harmful
interference, and (2) this device must accept any
interference received, including interference that
may cause undesired operation.
This equipment has been tested and found to
comply with the limits for a Class B d igital device,
pursuant to Part 15 of the FCC Rules. These limits
are designed to provide reasonable protection
against harmful interference in a residential
installation. This equipment generates, uses and
radiates radio frequency energy and, if not installed
and used in accordance with the instruction, may
cause harmful interference to radio communica-
tions. However, there is no guarantee that interfer-
ence will not occur in a particular installation.
one. Do not attempt to bypass this safety feature.
CAUTION: TO PREVENT ELEC-
TRIC SHOCK, MATCH WIDE
BLADE OF PLUG TO WIDE
SLOT, FULLY INSERT.
For Your Records
in the event that service should
be required, you may need
both the model number and the serial number. In
the space below, record the date and place of pur-
chase, and the serial number:
Model No.
Remote Control No. CRK76AJ1
Date of Purchase
Place of Purchase
Serial No.
In accordance with FCC requirements, changes or
modifications not expressly approved by Thomson
multimedia Inc. could void the user's authority to
operate this product.
This device generates and uses radio frequency (RF)
energy, and if not installed and used properly, this
equipment may cause interference to radio and
television reception. Product
If this equipment does cause interference to radio Dolby Digital DVD Audio video receiver
or television reception (which you can determine by Brand: RCA
unplugging the unit), try to correct the interference Model: RTD101
by one or more of the following measures:
• Re-orient the receiving antenna (that is, the
antenna for the radio or television that is
"receiving" the interference).
• Move the unit away from the equipment that is
receiving interference.
• Plug the unit into a different wall outlet so that
the unit and the equipment receiving interference
are on different branch circuits.
if these measures do not eliminate the interference,
please consult your dealer or an experienced
radio/television technician for additional
suggestions.
ServiceInformation
This product should be serviced only by those spe-
cially trained in appropriate servicing technic ues.
For instructions on how to obtain service, refer to
the warranty included in this Guide.
Electrical current consumption
120v
60Hz
100Wa_s
IMPORTER
Comercializadora Thomson de Mexico, S.A. de CV.
Miguel de Cervantes Saavedra No. 57
Col. Ampliaci6n Granada
CR 11529 Mexico D.E
Telefono: (55)25 81 53 20
Also, the Federal Communications Commission has
prepared a helpful booklet, "How To Identify and
Resolve Radio TV interference Problems." This
booklet is available from the U.S. Government
Printing Office, Washington, DC 20402. Please speci-
fy stock number 004-000-00345-4 when ordering
copies.
This Droduct complies with DHHS Rules 21 CFR
Subchapter J. Applicable at the date of
manufacture.
ForYourSafety
The AC power plug is polarized (one blade is wider
than the other) and only fits into AC power outlets
one way. if the plug won't go into the outlet com-
pletely, turn the plug over and try to insert it the
other way. If it still won't fit, contact aqualified
RFC:CTM-980723-KS5
A
THE LIGHTNING
FLASHAND ARROW-
HEAD WITHIN THE
TRIANGLE tS A
WARNING SIGN
ALERTING YOU OF
"DANGEROUS
VOLTAGE" INSIDE
THE PRODUCT,
CAUTION: TO REDUCE THE
RISK OF ELECTRIC SHOCK,
DO NOT REMOVE COVER
(ON BACK). NO USER-
SERVICEABLE PARTS IN-
;IDE. REFER SERVICING
TO QUALIFIED SERVICE
PERSONNEL.
THE EXCLAMATION
POINT WITHIN THE
TRIANGLE tS A
WANNING SIGN
ALERTING YOU OF
MPONTANT
INSTRUCTIONS
ACCOMPANYING
THE PRODUCT.
SEEMARKINGONBOTTOM/BACKOF PRODUCT
electrician to chancle the outlet, or use a different
WARNING: TO PREVENT FIRE OR ELECTRICAL
SHOCK HAZARD, DO NOT EXPOSETHIS PRODUCT
- TO RAIN OR MOISTURE.

RTDI01-EN receiver 11/25/02 10:08 AM Page 4
RCAis among the first Consumer Electronics companies to have adopted the MP3 format, starting with the release of its MP3 player,
Lyra_ intothemarket (www.rca.c_mandwww._yraz_ne.c_m).RCAispr_ud_fitsinitia_successandhasdeve__pedthec_mpetenciest_
enlarge its offering to other products like Discma n and this System. RCA thanks you for your purchase of this System which aims at giving
you tremendous pleasure while listening to your favorite music. In addition to this great System, RCA isproud to offer you the Music
Match CD-ROM, which will assist you in managing your MP3 music library!
The MusicMatch Jukebox
This music management software, to be installed on your PC,allows you to compress music files recorded from you audio CDs into MP3
format and stores them on your PC.
• It makes the search and download of Internet music easier,
• It allows for the management of compressed music and the creation of your own playlist
• The Jukebox is a true audio _layer installed on your PC,
• It gives accessto thousands of net radios available on the web today.
You can download music files encoded in MP3 from several Internet sites like www.mp3.com, www.thomson-music.com.
PLAYING MP3
• Use .rap3 as the extension when converting audio files into MP3 for saving onto CD-R(W) or CD-ROM, e.g. Rocky08.mp3. Do not use
any other extension e.g..doe, .pdf.
• Do not use the .rap3 extension for other text or non-audio data files asthis may _esult in serious malfunction and harmful noise inter-
ference.
RTDI01-EN receiver 11/25/02 10:08 AM Page 5
FCC Information
Thomson Multimedia Pack
Getting Started
Unpacking the DVD Receiver ......... 2
Unpacking the Speakers ............. 2
Inserting Batteries into Remote Control .3
Set Up and Maintenance of the
Receiver .......................... 3
Protect your Components from
Overheating ....................... 3
Disc Information ................... 3
Connecting to Audio-Visual
Components ...................... 4
Digital Connection ................. 5
Connecting Antennas ............... 5
Connecting the Speakers ............. 6
Connecting the Subwoofer ........... 6
Positioning your Speaker ............. 7
Front Speaker Placement ............. 7
Preferred Surround Placement ........ 8
Advanced Surround Setting .......... 8
Test Tone /Channel Balance .......... 9
Using Headphones .................. 9
Factory Setting ..................... 9
Operating your Receiver
Receiver Controls .................. 10
Remote Control ................... 11
Display .......................... 12
Switching On/Off .................. 13
Selection of Audio/Video Source ...... 13
Using the Remote to Control Additional
Components ...................... 14
Advanced Sound Control
Sound Enhancement Systems ........ 15
Fine Setting of Components ......... 16
Fine Setting of the Speakers ......... 17
Advanced Setting ................. 17
DVD Player
Basic Playback Features ............. 19
Quick Search ..................... 19
Freeze Frame and Frame Advance .... 19
Slow Motion Playback (DVD only) ..... 20
Progressive Scan ................... 20
On-Screen Banner Display ........... 20
Setup Menu ...................... 25
CD/MP3 Player
MP3 Recommendations ............. 30
Loading and Playing an Audio CD .... 30
On-Screen Banner Display for CD
Playback ......................... 32
On-Screen Display for MP3 playback ...35
Radio
Operating the Radio ............... 37
Troubleshooting Tips .......... 39
Care and Maintenance ......... 41
Remote Codes
Cable Codes ...................... 42
VCR Codes ....................... 42
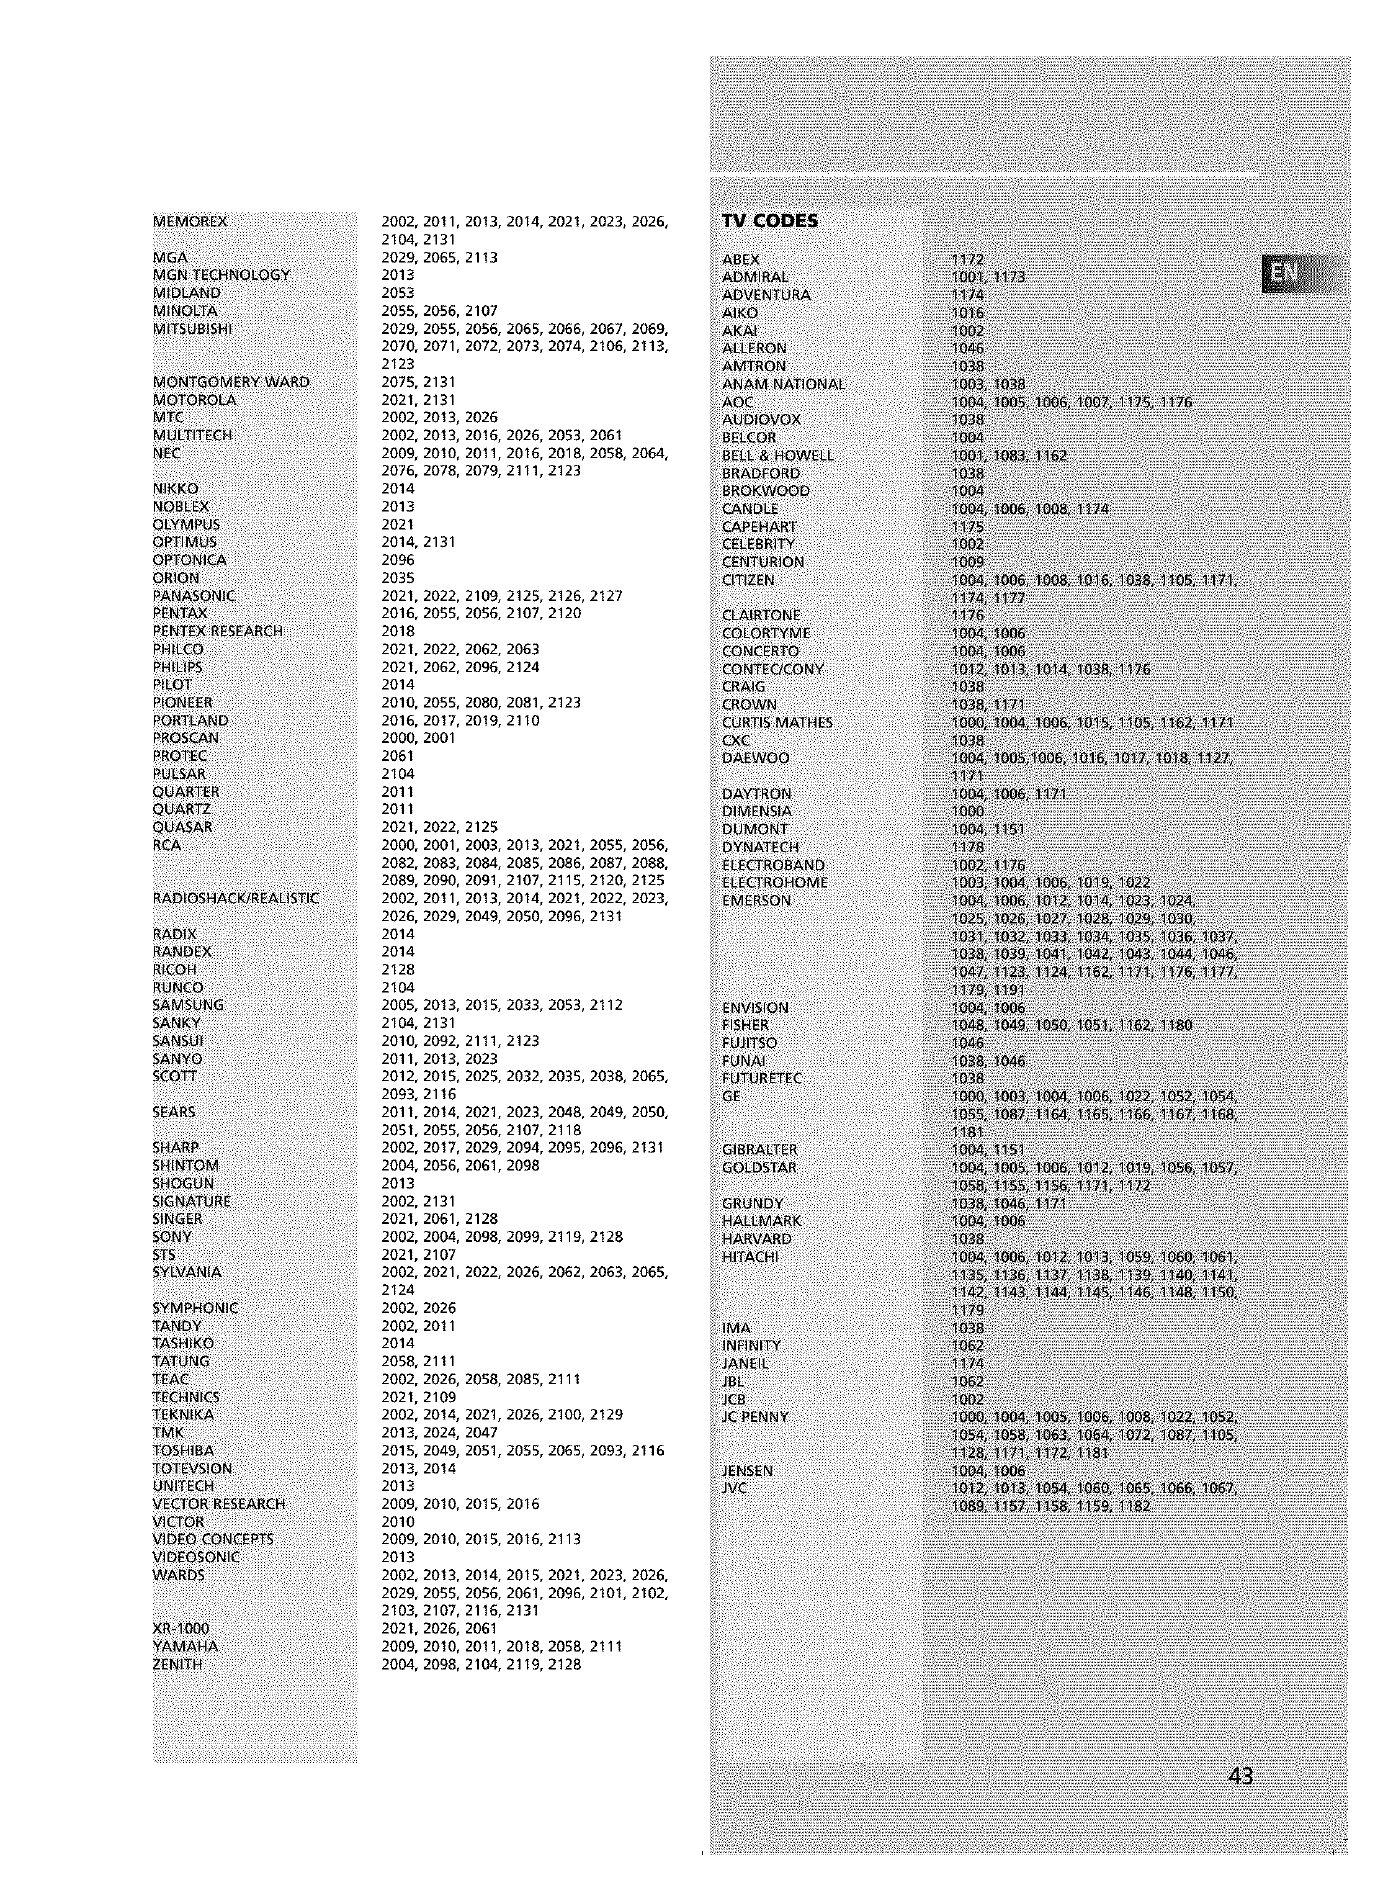
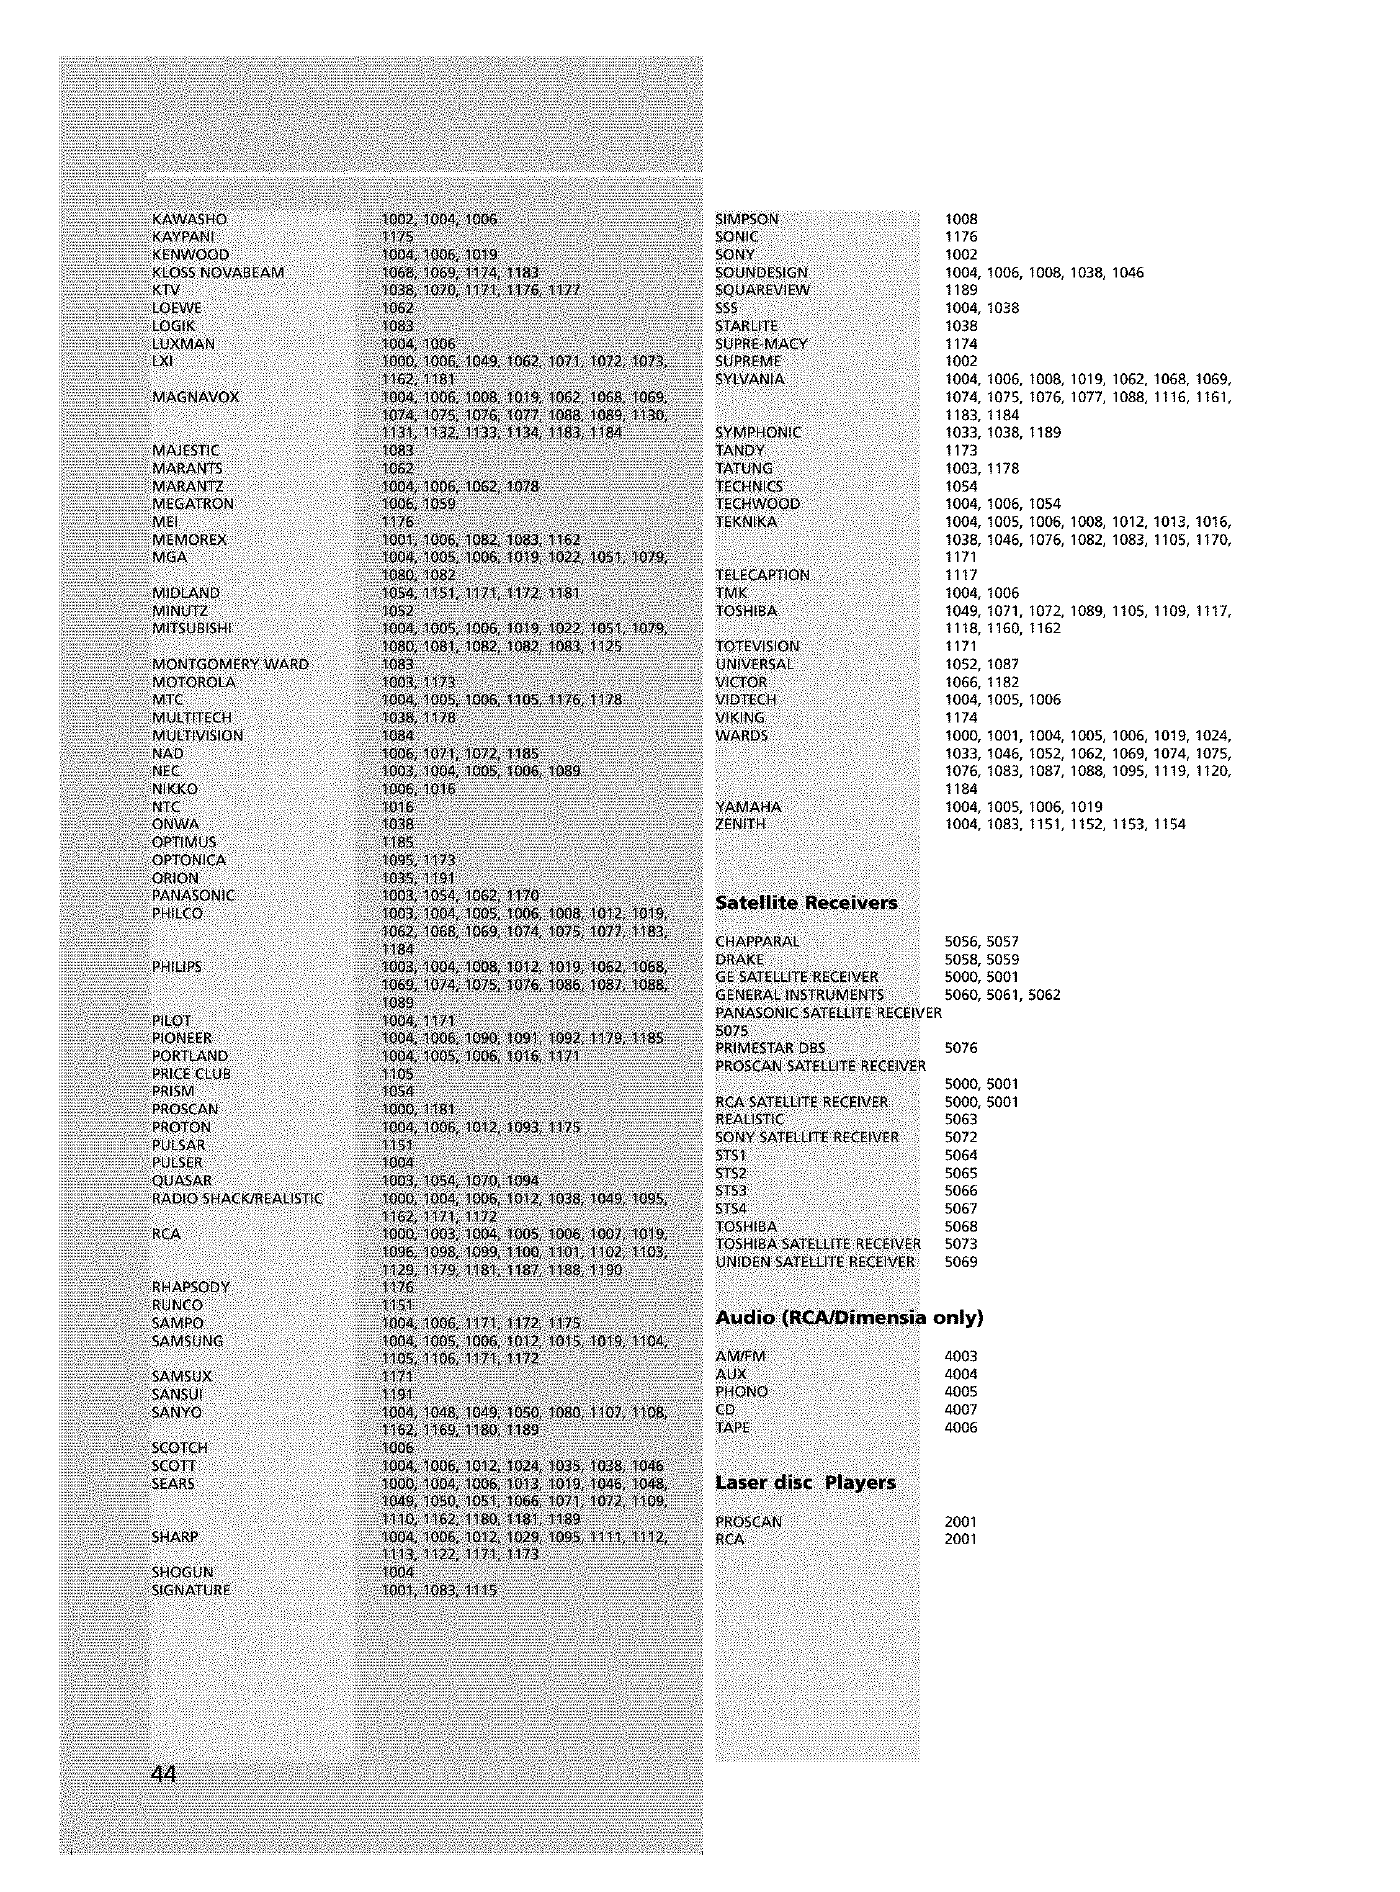
TV Codes ........................ 43
Satellite Receivers ................. 44
Audio (RCA only) .................. 44
Laser disc Players .................. 44
Language Codes .............. 45
Limited Warranty
1
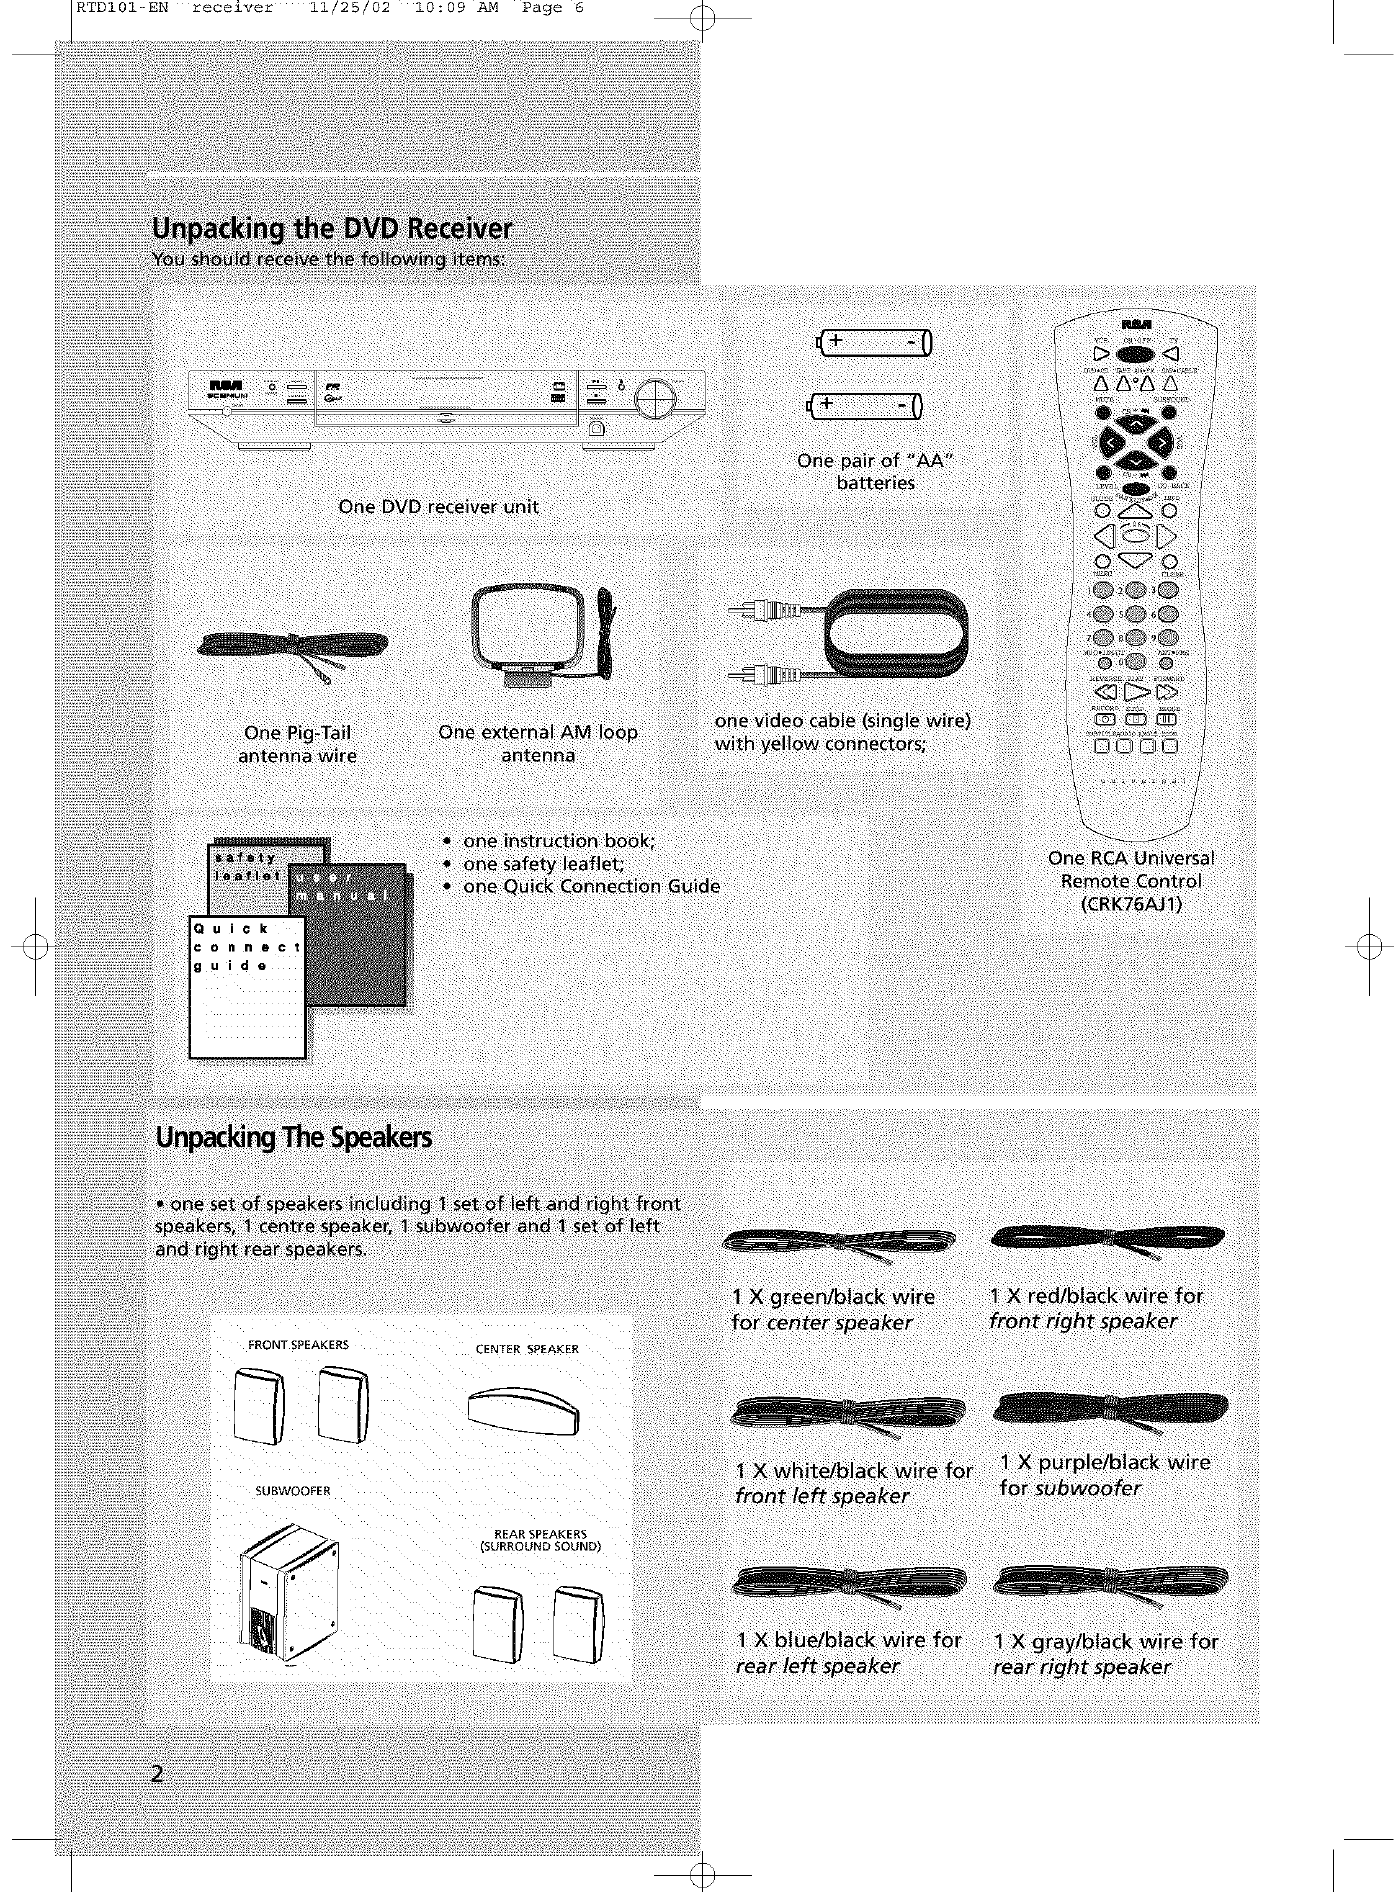
RTDI01-EN receiver 11/25/02 10:09 AM Page 6
FRONT SPEAKER-_ :ENTER SP£AKER
SUBWOOFER
REARSP£AKERS
SURROUNDSOUND)
RTDI01-EN receiver 11/25/02 10:09 AM Page 7
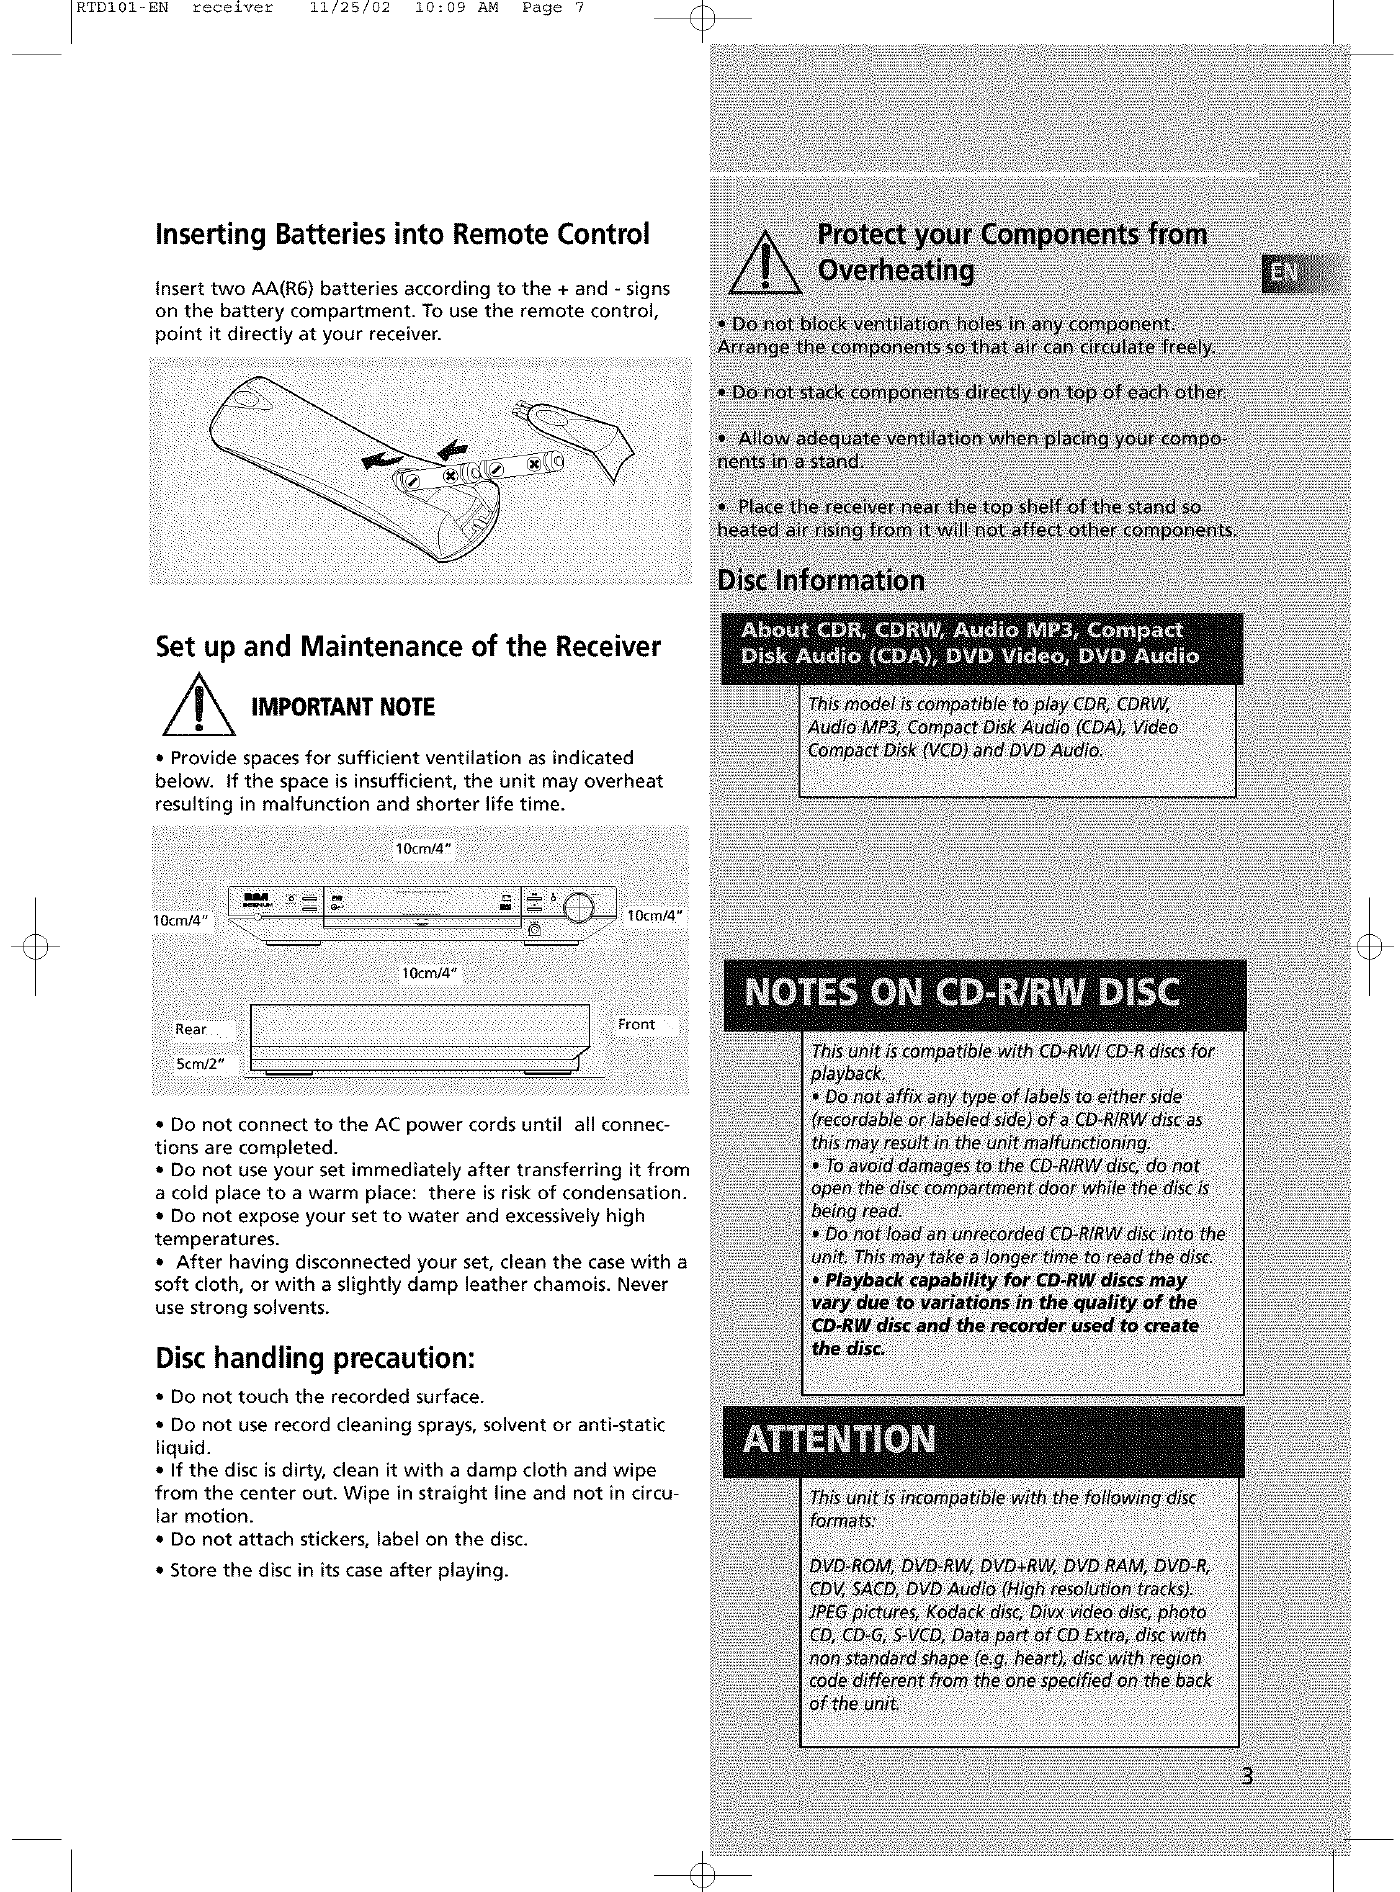
Inserting Batteries into Remote Control
insert two AA(R6) batteries according to the + and - signs
on the battery compartment. To use the remote control,
point it directly at your receiver.
Set up and Maintenance of the Receiver
//_ IMPORTANT NOTE
•Provide spaces for sufficient ventilation as indicated
below. If the space is insufficient, the unit may overheat
resulting in malfunction and shorter life time.
I Ocm/4" 10cm/4"
Front
•Do not connect to the AC power cords until all connec-
tions are completed.
• Do not use your set immediately after transferring it from
a cold place to a warm place: there is risk of condensation.
• Do not expose your set to water and excessively high
temperatures.
• After having disconnected your set, clean the case with a
soft cloth, or with a slightly damp leather chamois. Never
use strong solvents.
Dischandling precaution:
• Do not touch the recorded surface.
•Do not use record cleaning sprays, solvent or anti-static
liquid.
• If the disc is dirty, clean it with a damp cloth and wipe
from the center out. Wipe in straight line and not in circu-
lar motion.
• Do not attach stickers, label on the disc.
• Store the disc in its case after playing.
RTDI01-EN receiver 11/25/02 10:09 AM Page 8
RTDI01-ENreceiver 11/25/02 10:09AM Page9
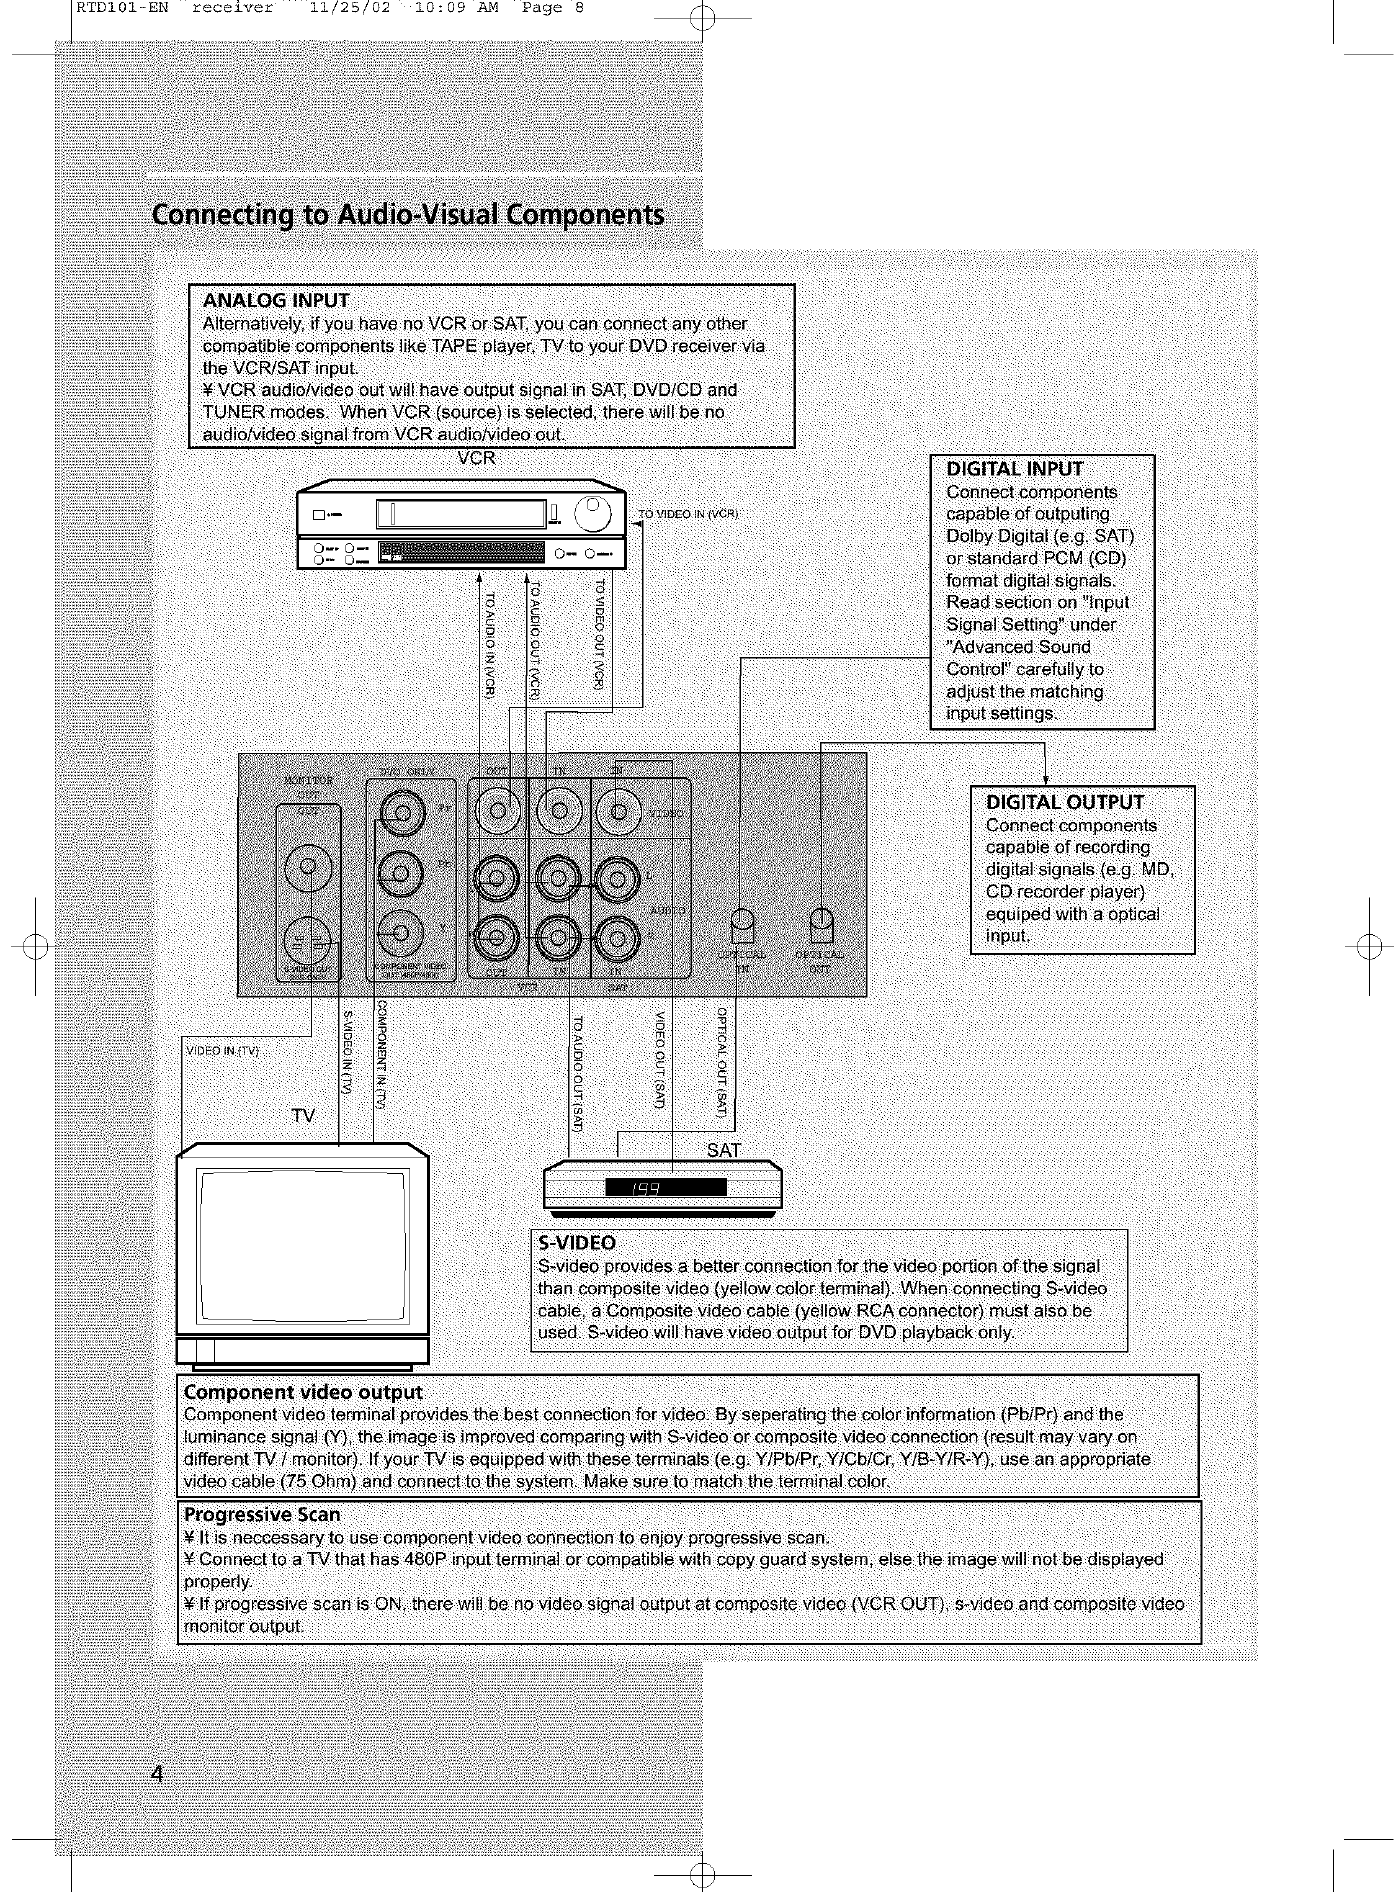
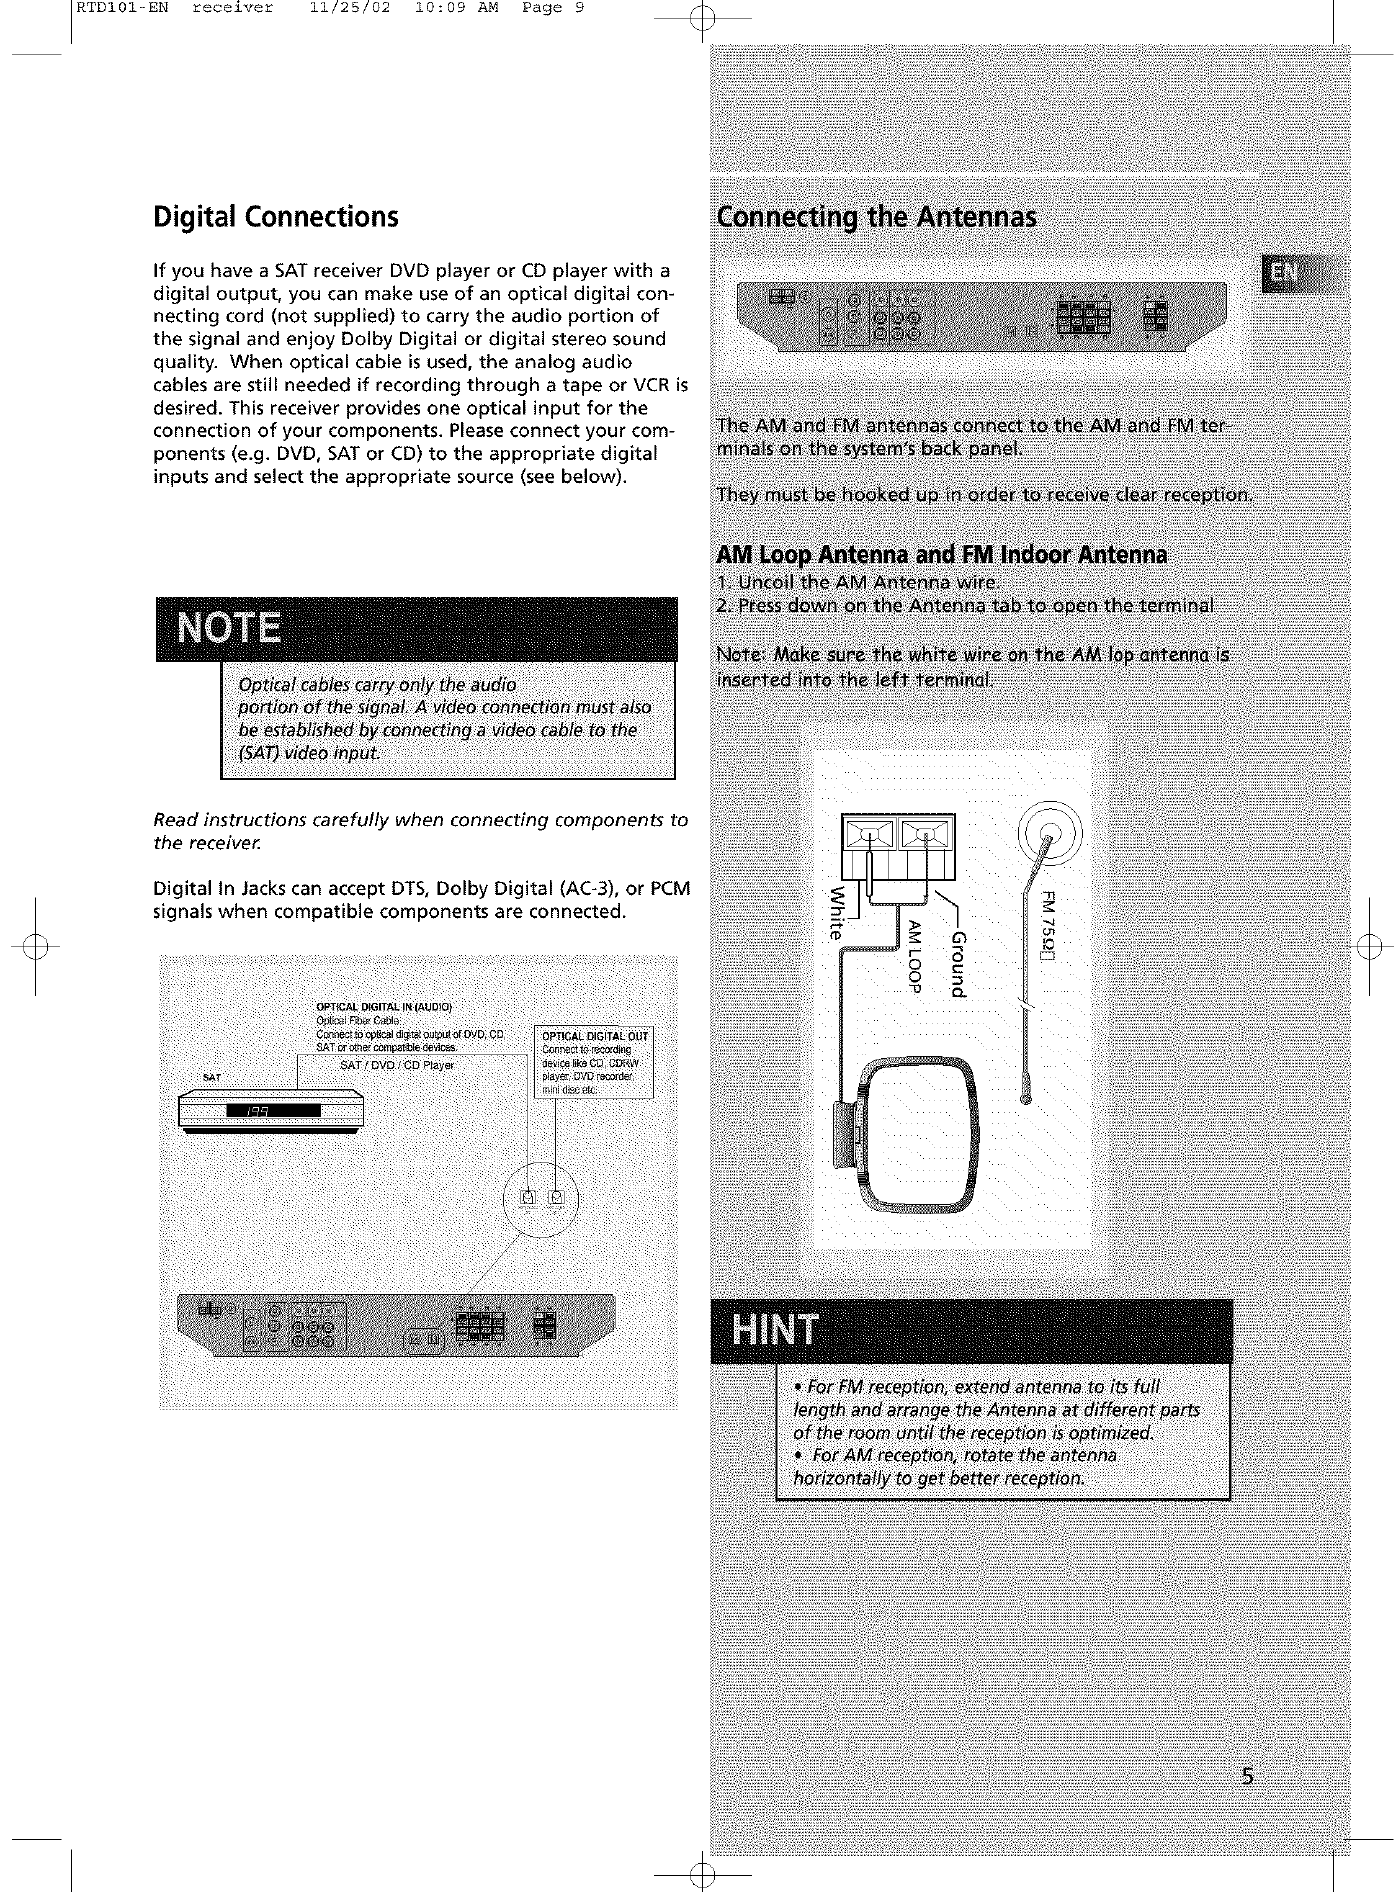
Digital Connections
If you have a SAT receiver DVD player or CD player with a
digital output, you can make use of an optical digital con-
necting cord (not supplied) to carry the audio portion of
the signal and enjoy Dolby Digital or digital stereo sound
quality. When optical cable is used, the analog audio
cables are still needed if recording through a tape or VCR is
desired. This receiver provides one optical input for the
connection of your components. Please connect your com-
ponents (e.g. DVD, SAT or CD) to the appropriate digital
inputs and select the appropriate source (see below).
Read instructions carefully when connecting components to
the receiver:
Digital in Jacks can accept DTS, Dolby Digital (AC-3), or PCM
signals when compatible components are connected.
RTDI01-EN receiver 11/25/02 10:09 AM Page i0
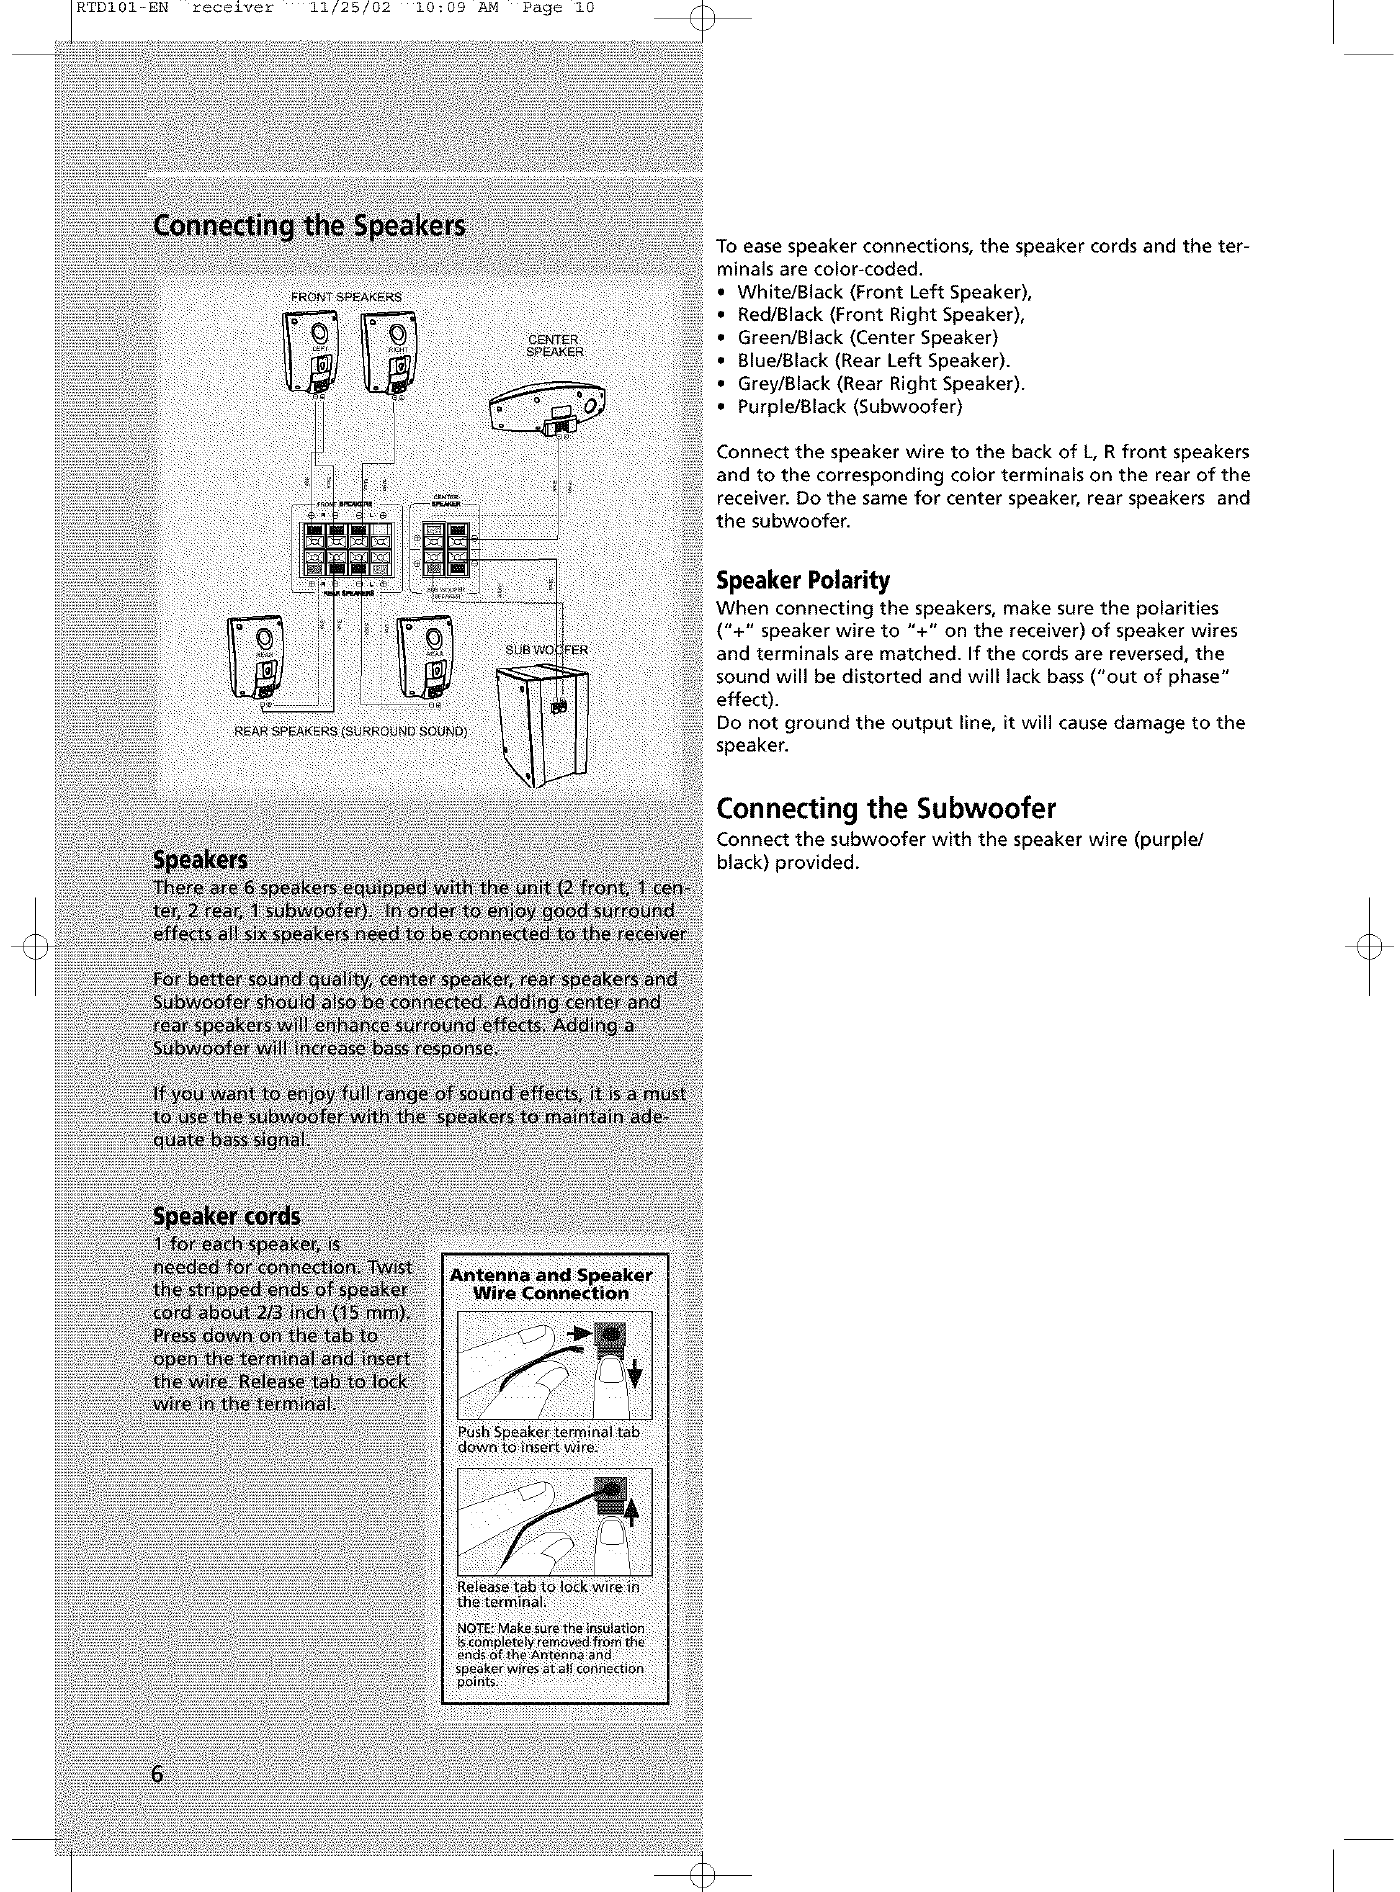
To ease speaker connections, the speaker cords and the ter-
minals are color-coded.
• WhitelBlack (Front Left Speaker),
•Red/Black (Front Right Speaker),
•Green/Black (Center Speaker)
•Blue/Black (Rear Left Speaker).
•Grey/Black (Rear Right Speaker).
•Purple/Black (Subwoofer)
Connect the speaker wire to the back of L, R front speakers
and to the corresponding color terminals on the rear of the
receiver. Do the same for center speaker, rear speakers and
the subwoofer.
Speaker Polarity
When connecting the speakers, make sure the polarities
("+" speaker wire to "+" on the receiver) of speaker wires
and terminals are matched. If the cords are reversed, the
sound will be distorted and will lack bass ("out of phase"
effect).
Do not ground the output line, it will cause damage to the
speaker.
Connecting the Subwoofer
Connect the subwoofer with the speaker wire (purple/
black) provided.
RTDI01-EN receiver 11/25/02 10:09 AM Page II
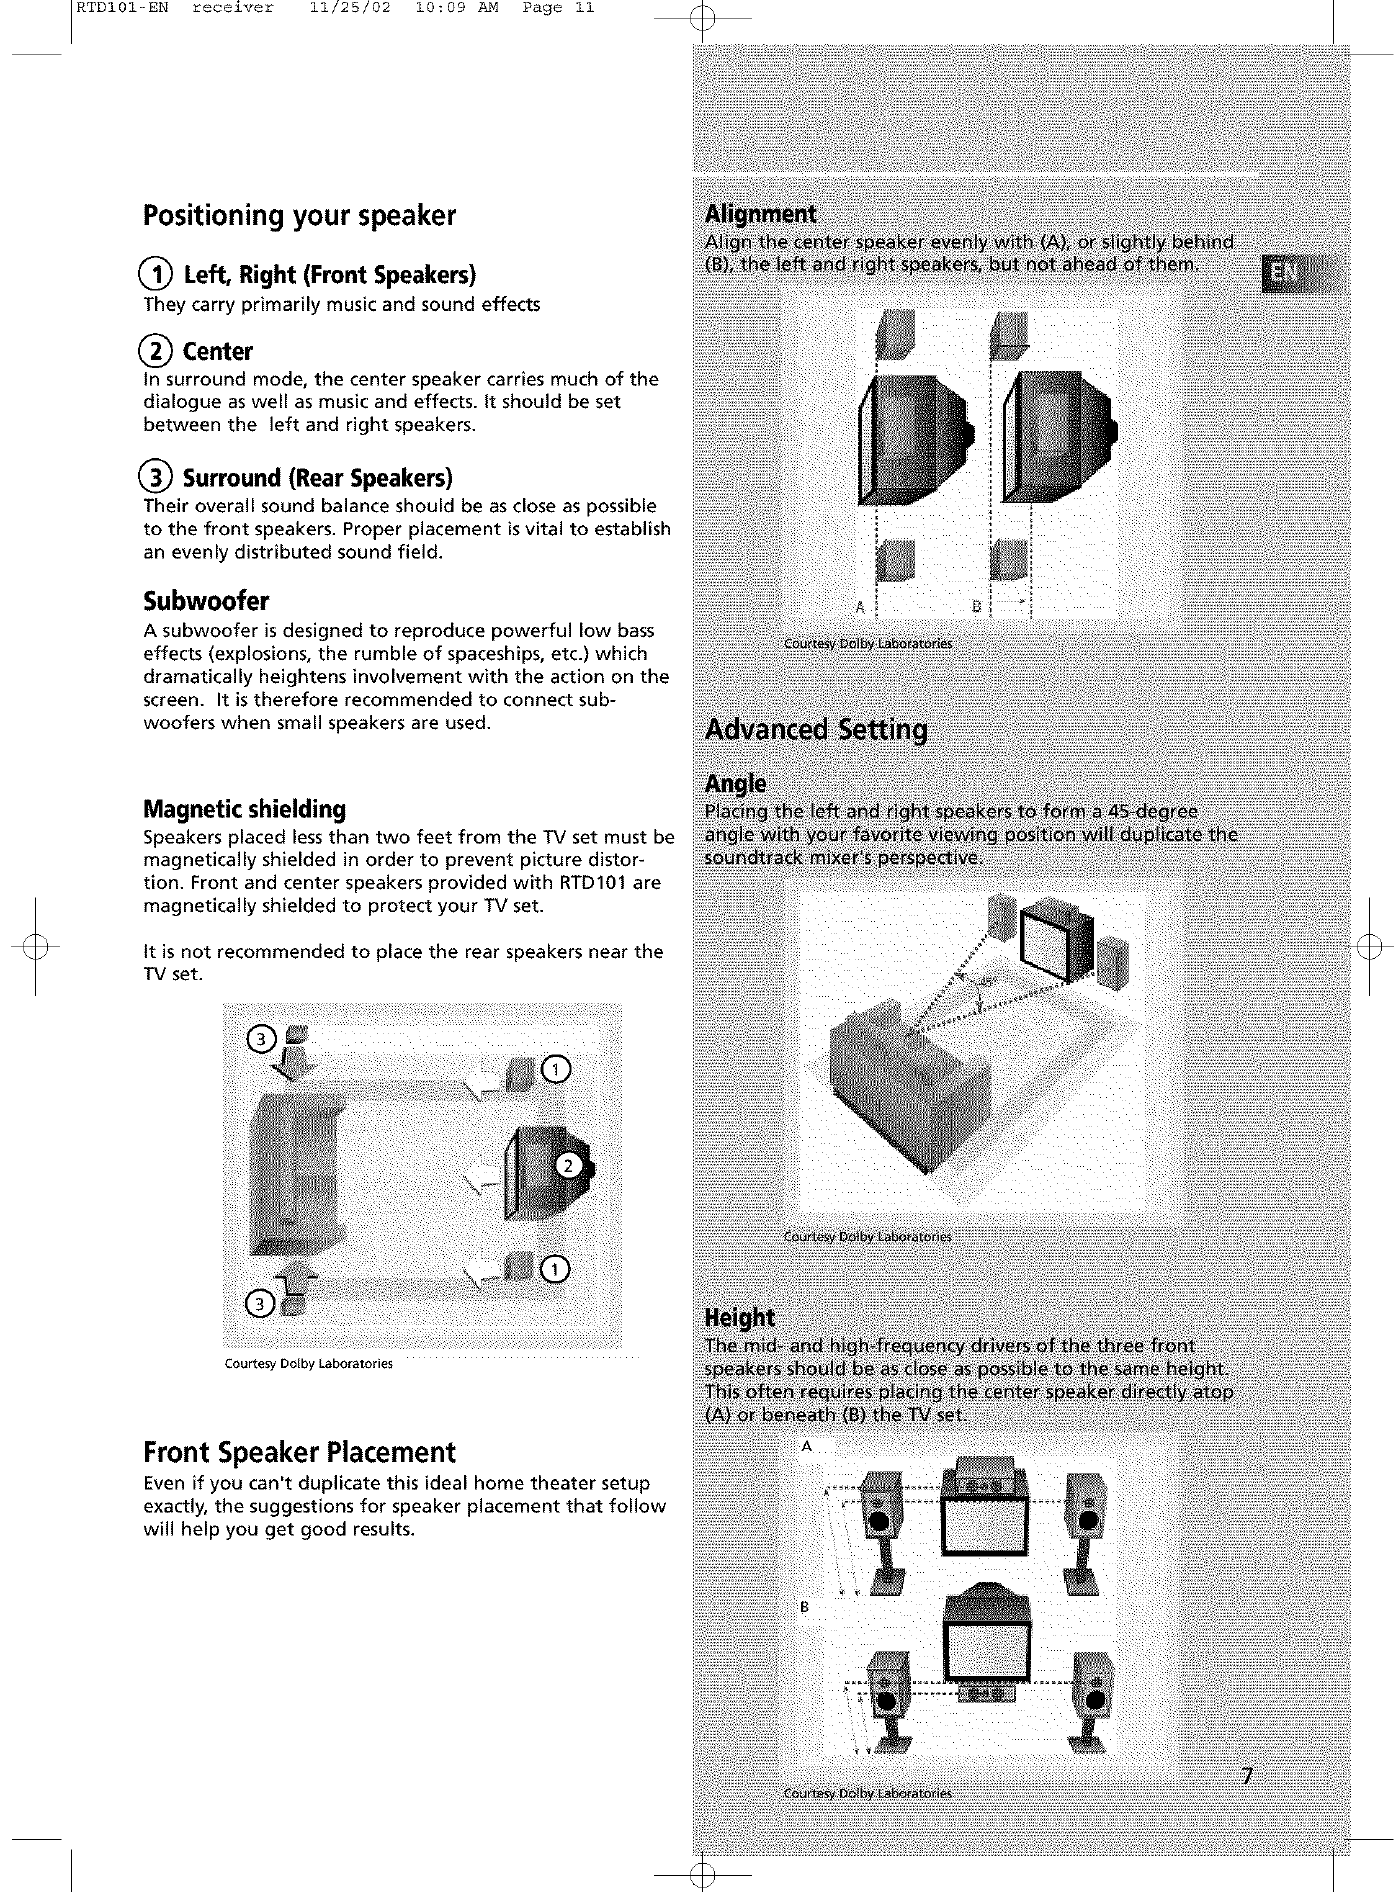
Positioning your speaker
(_ Left, Right (Front Speakers)
They carry primarily music and sound effects
(_ Center
in surround mode, the center speaker carries much of the
dialogue as well as music and effects, it should be set
between the left and right speakers.
(_ Surround (Rear Speakers)
Their overall sound balance should be as close as possible
to the front speakers. Proper placement is vital to establish
an evenly distributed sound field.
Subwoofer
A subwoofer is designed to reproduce powerful low bass
effects (explosions, the rumble of spaceships, etc.) which
dramatically heightens involvement with the action on the
screen. It is therefore recommended to connect sub-
woofers when small speakers are used.
Magnetic shielding
Speakers placed less than two feet from the TV set must be
magnetically shielded in order to prevent picture distor-
tion. Front and center speakers provided with RTD101 are
magnetically shielded to protect your TV set.
it is not recommended to place the rear speakers near the
TV set.
Courtesy Dolby laboratories
Front Speaker Placement
Even if you can't duplicate this ideal home theater setup
exactly, the suggestions for speaker placement that follow
will help you get good results.
RTDI01-EN receiver 11/25/02 10:09 AM Page 12
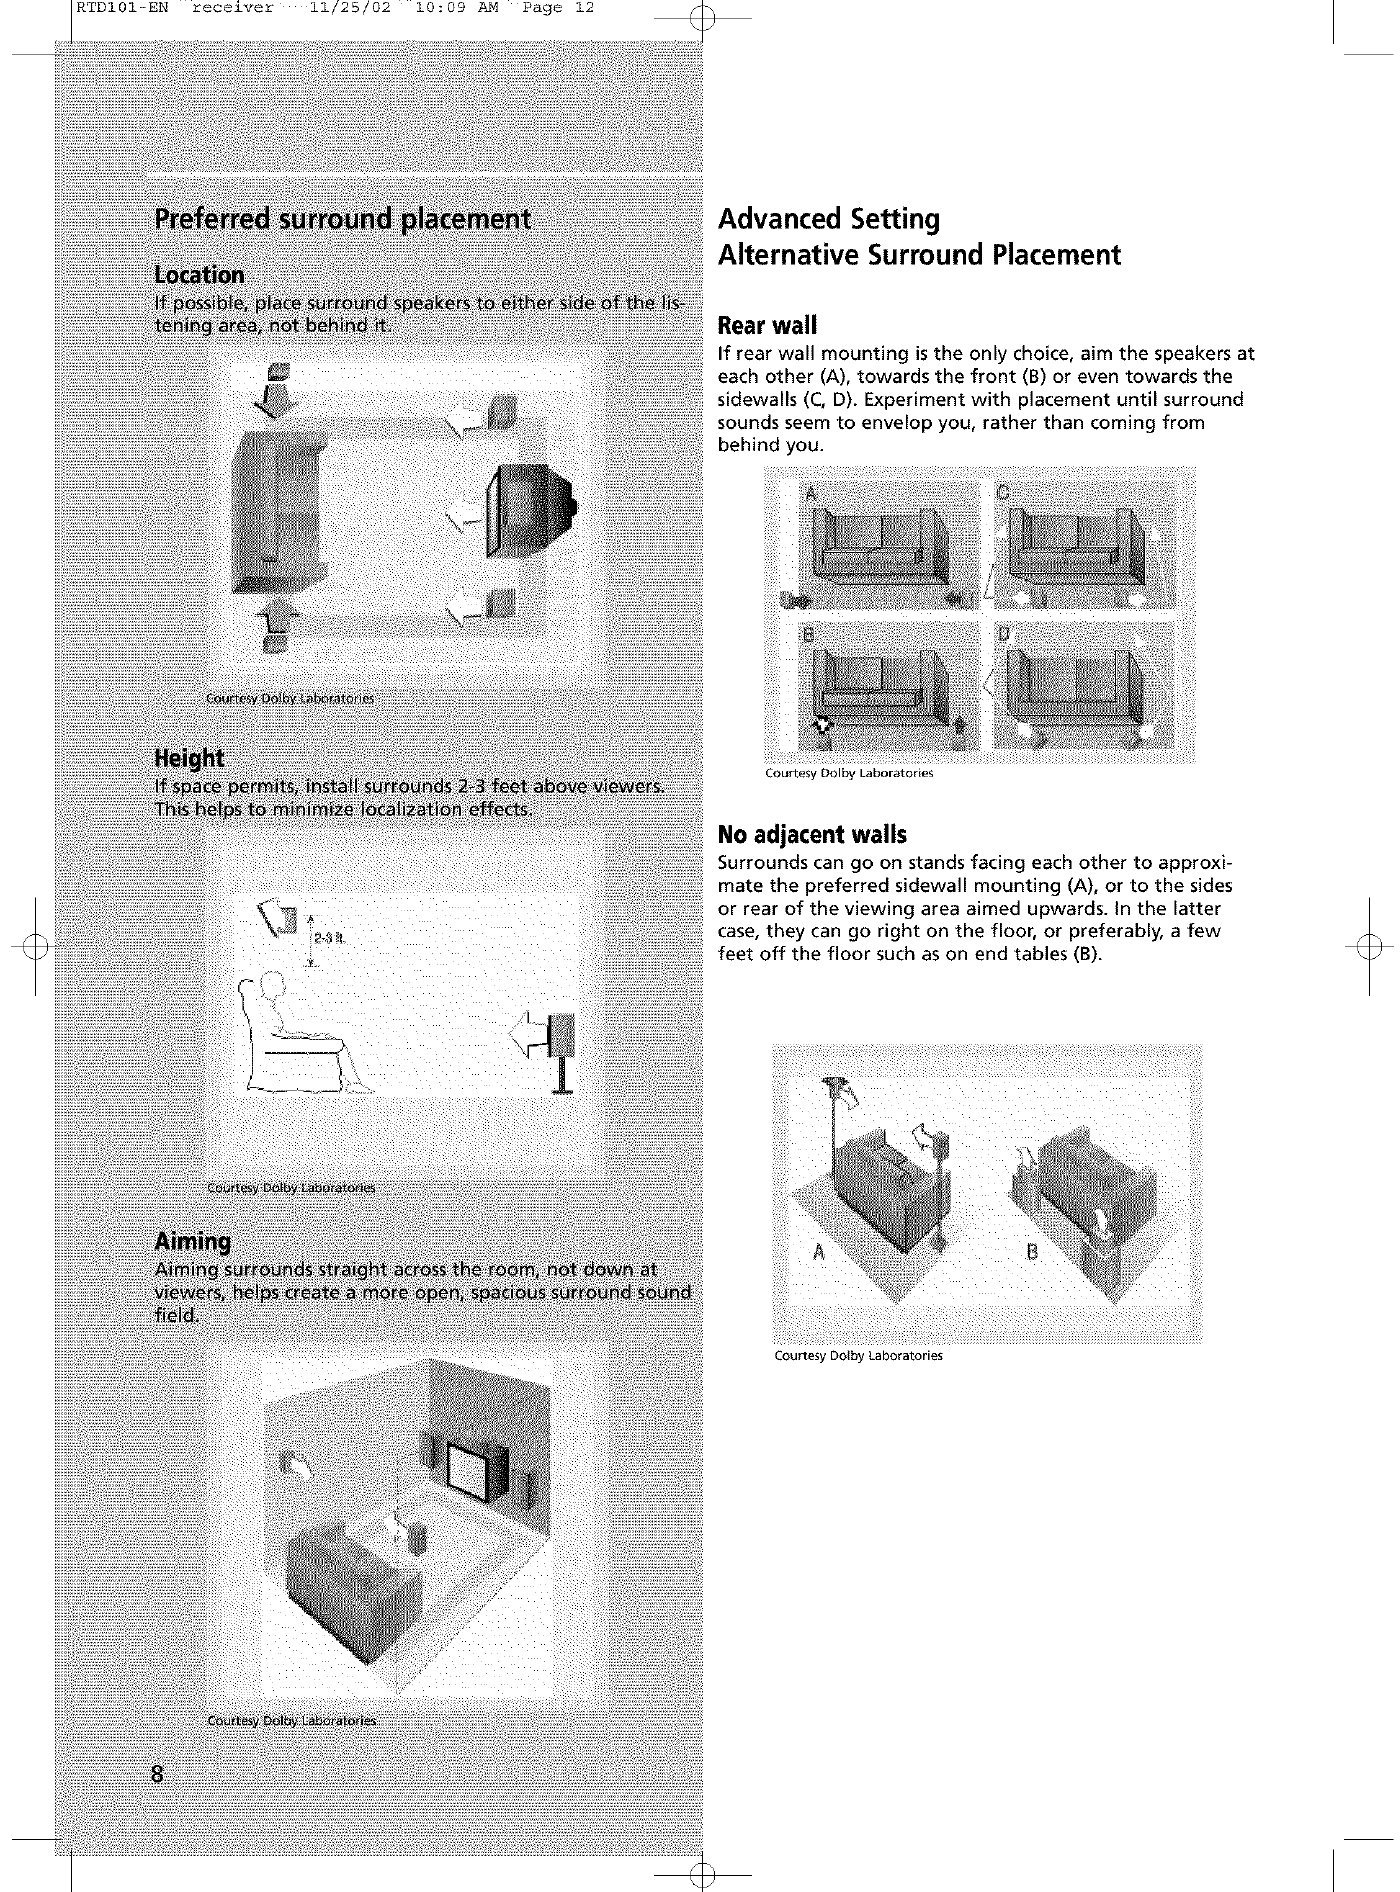
Advanced Setting
Alternative Surround Placement
Rear wall
If rear wall mounting is the only choice, aim the speakers at
each other (A), towards the front (B) or even towards the
sidewalls (C, D). Experiment with placement until surround
sounds seem to envelop you, rather than coming from
behind you.
Courtesy Dolby Laboratories
No adjacent walls
Surrounds can go on stands facing each other to approxi-
mate the preferred sidewall mounting (A), or to the sides
or rear of the viewing area aimed upwards, in the latter
case, they can go right on the floor, or preferably, a few
feet off the floor such as on end tables (B).
!ii_i!_i!!!iiii
Courtesy Dolby Laboratories
RTDI01-EN receiver 11/25/02 10:09 AM Page 13
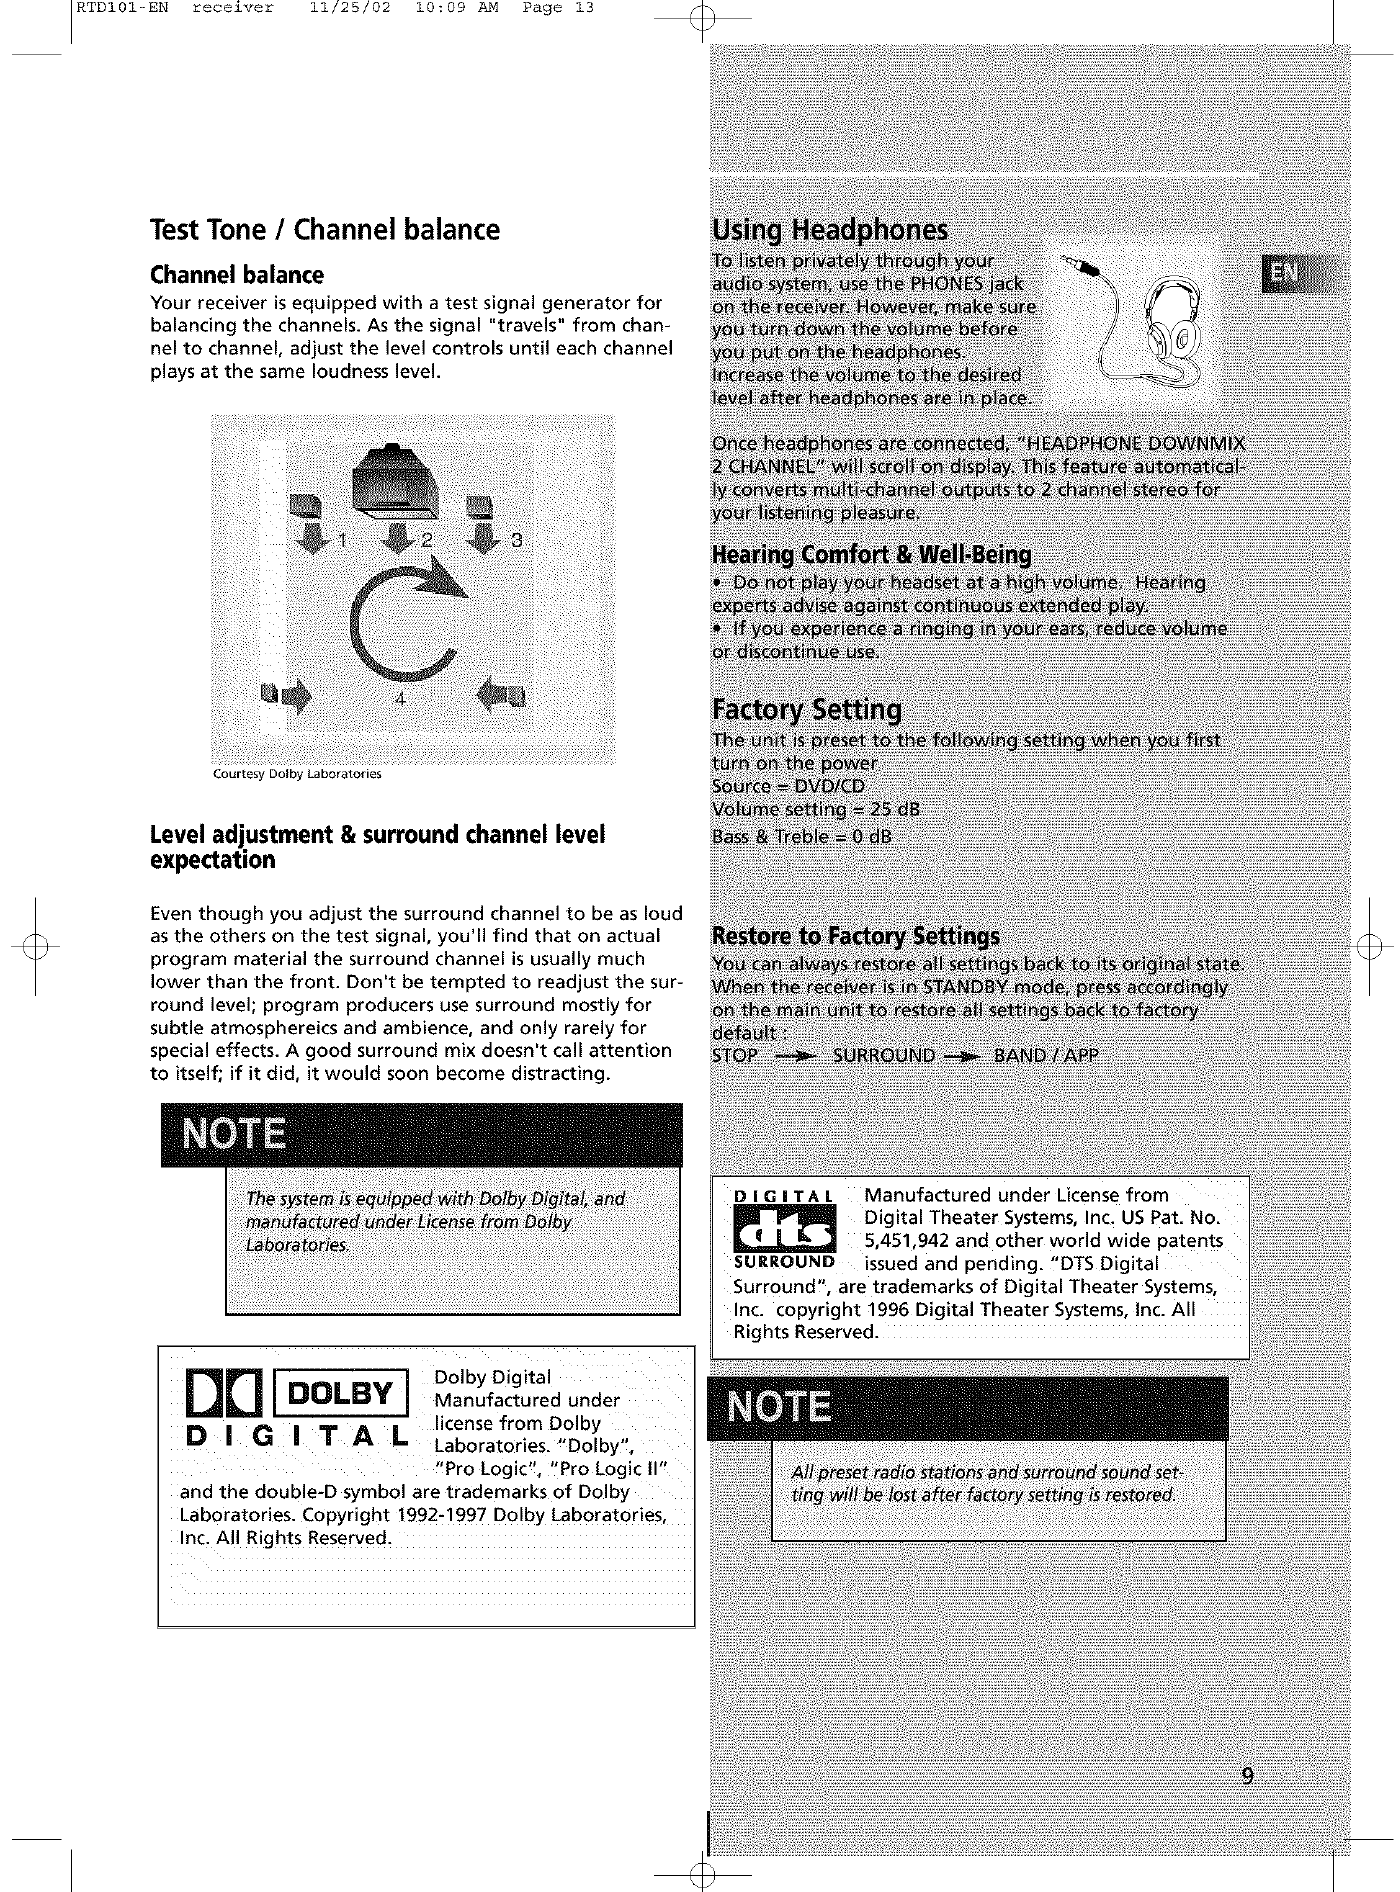
Test Tone /Channel balance
Channel balance
Your receiver is equipped with a test signal generator for
balancing the channels. As the signal "travels" from chan-
nel to channel, adjust the level controls until each channel
plays at the same loudness level.
Courtesy Dolby Laboratories
Level adjustment & surround channel level
expectation
Even though you adjust the surround channel to be as loud
as the others on the test signal, you'll find that on actual
program material the surround channel is usually much
lower than the front. Don't be tempted to readjust the sur-
round level; program producers use surround mostly for
subtle atmosphereics and ambience, and only rarely for
special effects. A good surround mix doesn't call attention
to itself; if it did, it would soon become distracting.
ODI NOII _ ] DM°/byDic_ita/d under
license from Dolby
DIG_T A a Laboratories. "Dolby",
"Pro Logic", "Pro Logic I1"
and the double-D symbol are trademarks of Dolby
Laboratories. Copyright 1992-1997 Dolby Laboratories,
Inc. All Rights Reserved.
RTDI01-EN receiver 11/25/02 10:09 AM Page 14
[]
LI
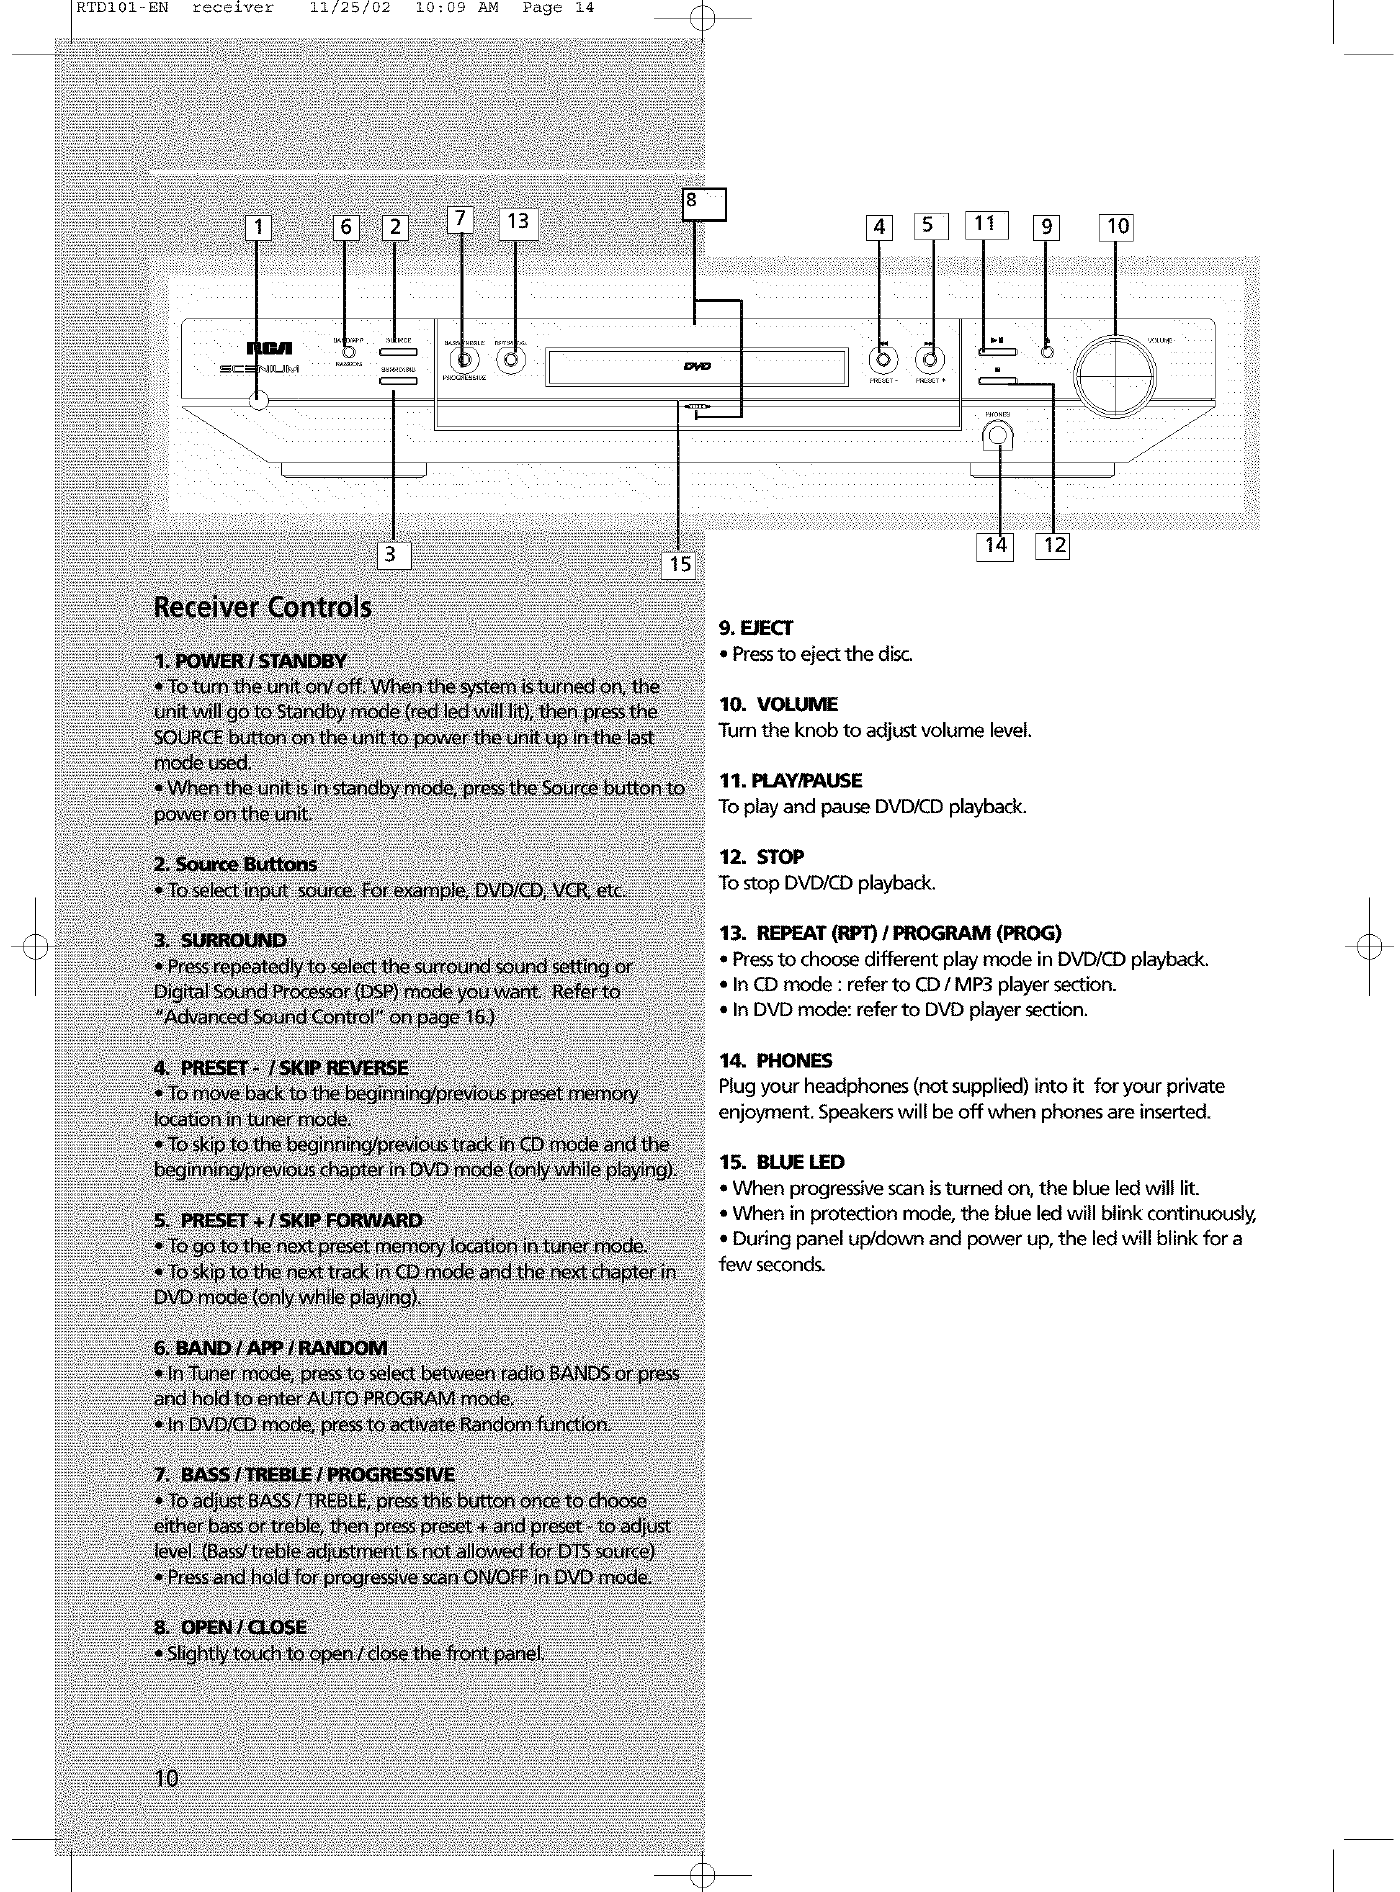
9. EJECT
• Pressto eject the disc.
10. VOLUME
Turn the knob to adjust volume level.
11. PLAY/PAUSE
To play and pause DVDICD playback.
12. STOP
To stop DVD/CD playback.
13. REPEAT(RPT)IPROGRAM (PROG)
• Pressto choose different play mode in DVDICD playback.
• In CD mode : refer to CDI MP3 player section.
• In DVD mode: refer to DVD player section.
14. PHONES
Plug your headphones (not supplied) into it for your private
enjoyment. Speakerswill be off when phones are inserted.
15. BLUE LED
• When progressive scan isturned on, the blue led will lit.
• When in protection mode, the blue led will blink continuously,
• During panel up/down and power up, the led will blink for a
few seconds,

RTDI01-EN receiver 11/25/02 10:09 AM Page 15
Remote Control
Please be sure you have inserted the batteries into the remote
control (see relevant section on page 3.) You can test it by
pressing any button. If it works, the red LED will light.
1. ON/OFF
TO turn on or off the receiver and other auxiliary components (see page 14
"Using the Remote to Control Additional Components").
2. Source Buttons
To turn on and select various audio/video sources.
3. OH+, OH- (Channel Buttons)
To select programmed stations in TUNER mode.
To skip to the next or previous chapter or track in DVD, CD & MP3 mode

RTDI01-EN receiver 11/25/02 10:09 AM Page 16
CHAP
•Chapter location at which DVD is currently at.
PROG.
• Program mode is activated.
TUNED
• _nerstationdetected.
ST
• Tuner stereo signal detected.
REPEAT /REPEAT TRACK /REPEAT CHAP /
REPEAT A.B. /REPEAT FOLDER (MP3 only)
• CD, MP3 and DVD in repeat mode.
KHz /MHz
•Tuner frequency unit.
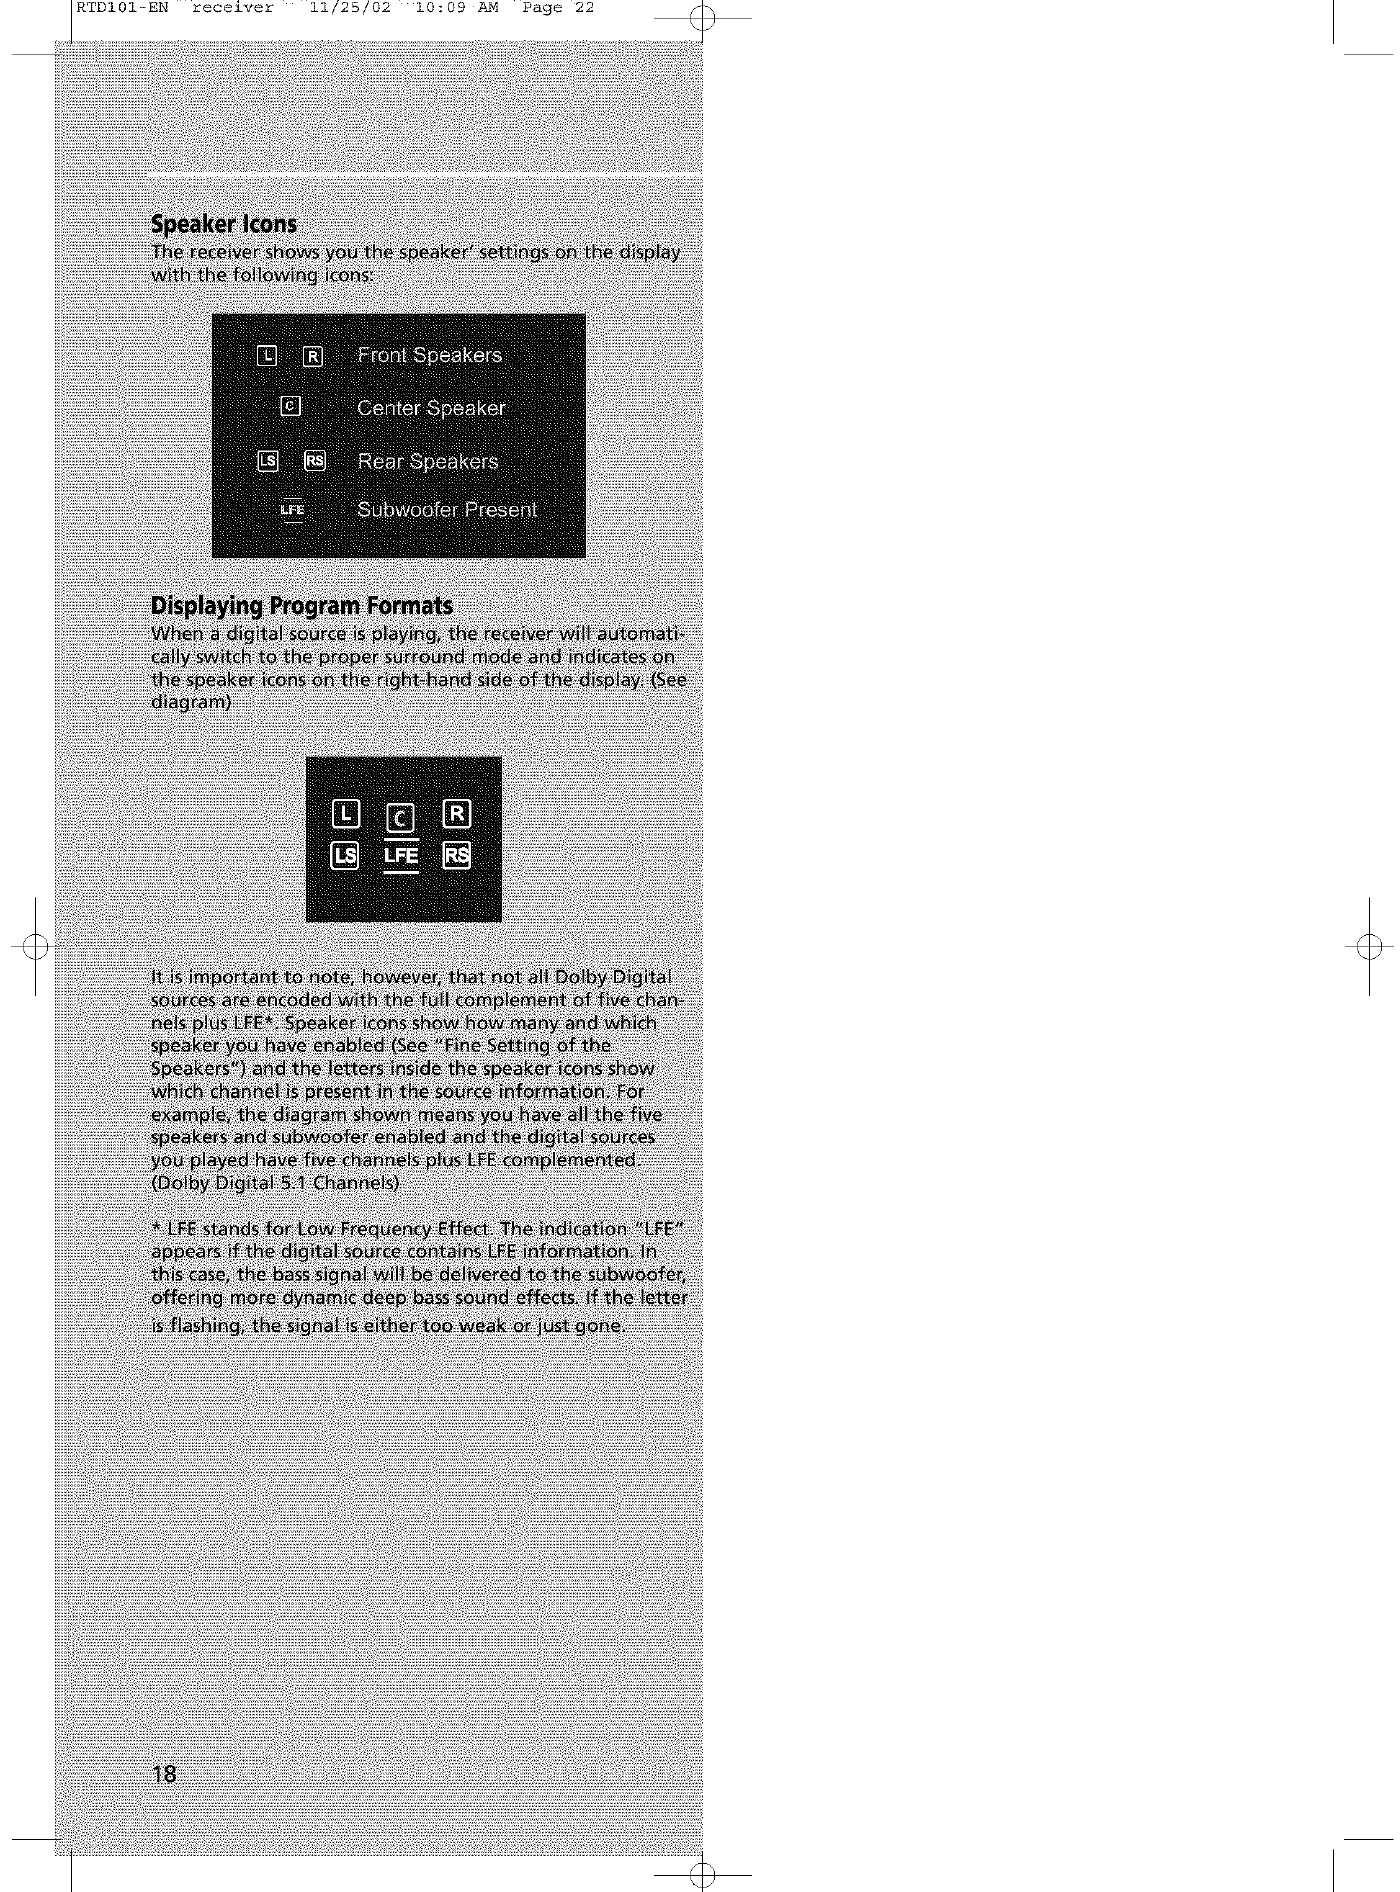
• Speakerlcons.
SLEEP
• Sleep modeisactivated.
RTDI01-EN receiver 11/25/02 10:09 AM Page 17
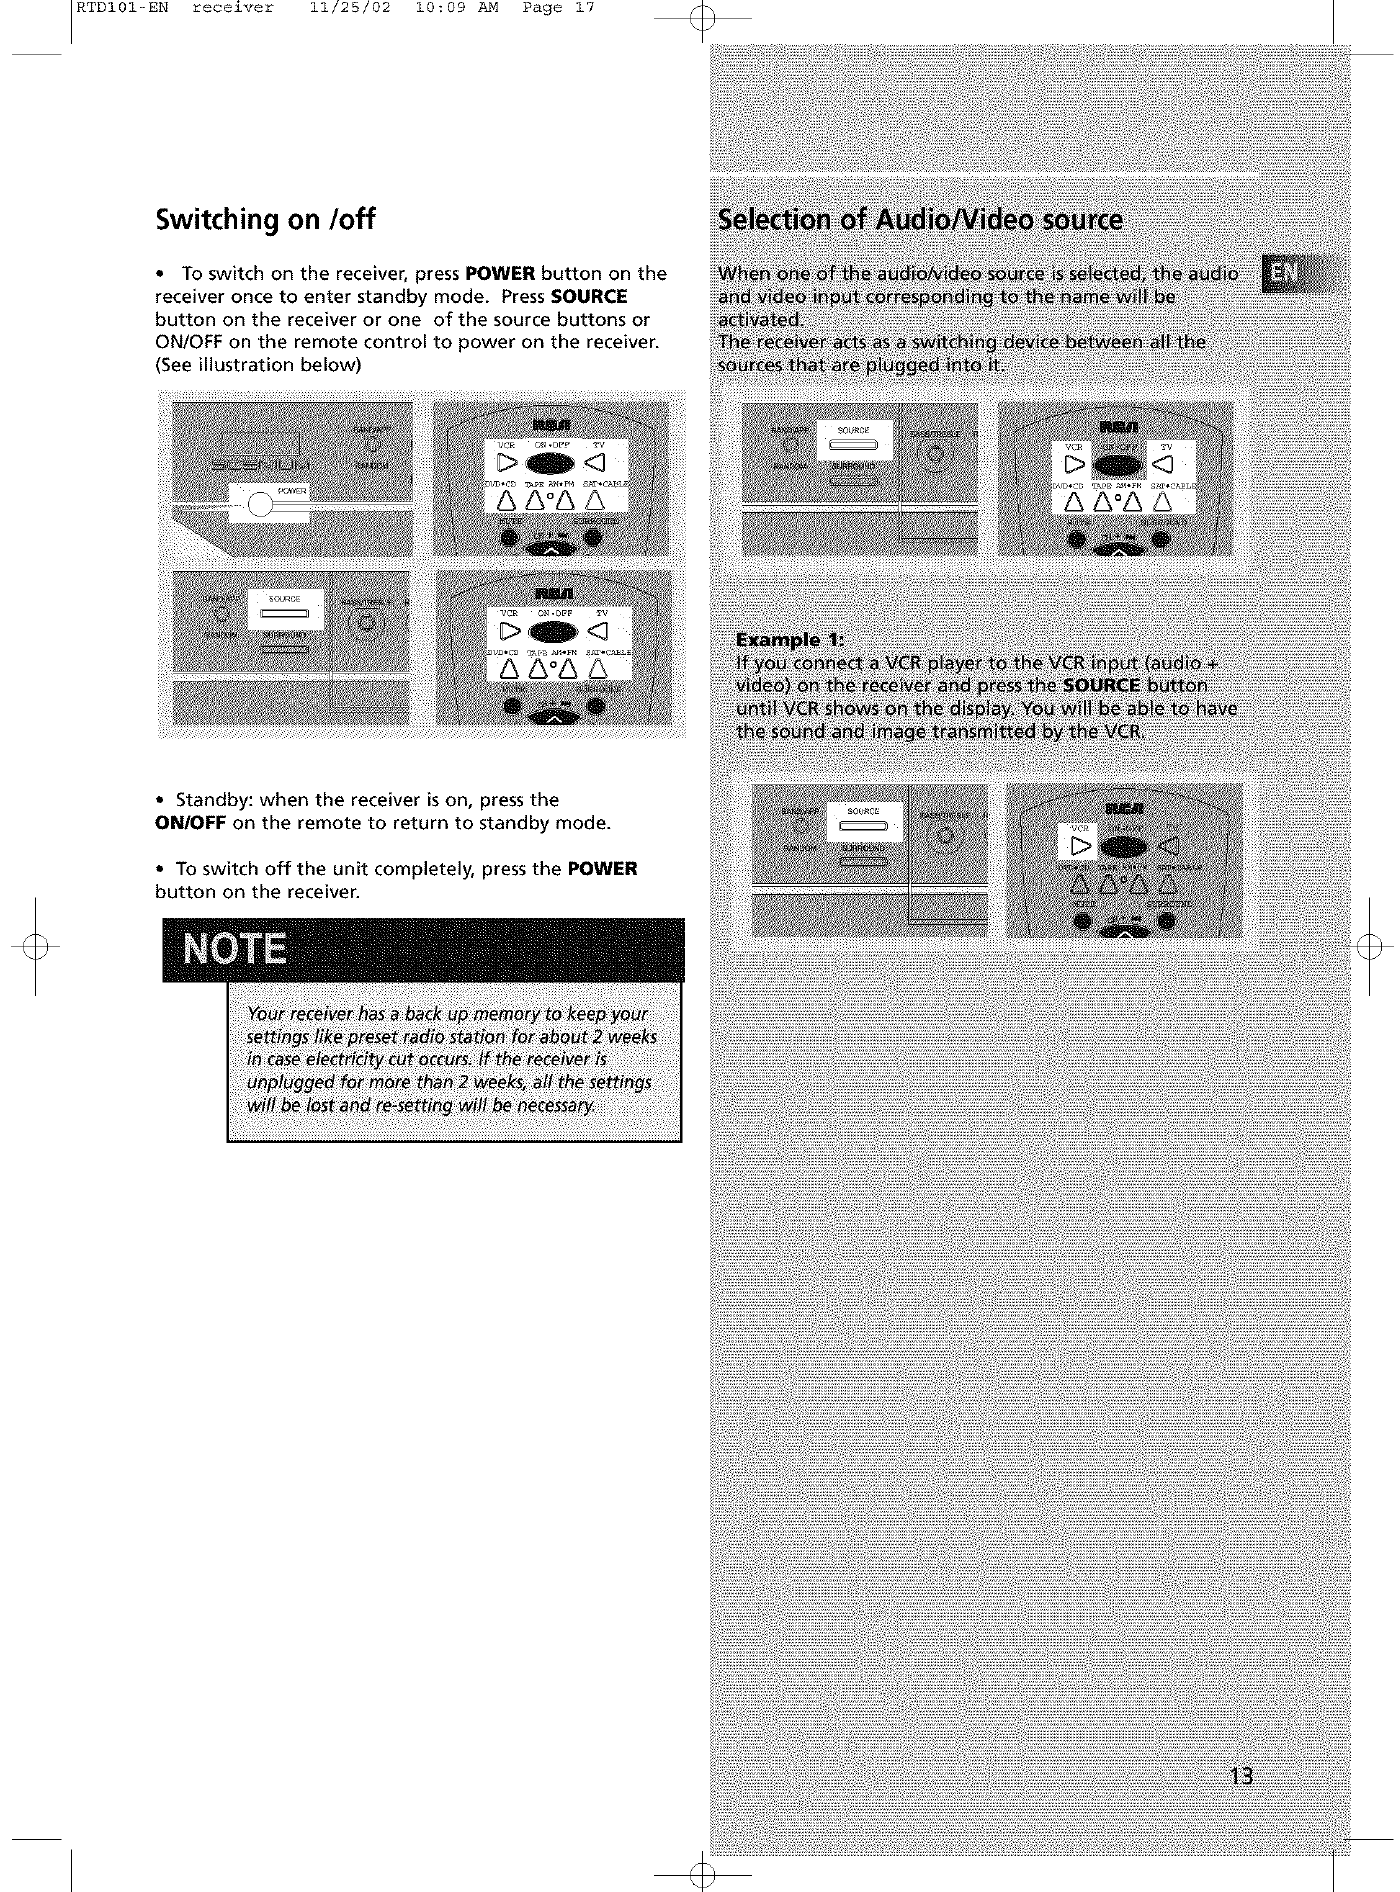
Switching on/off
• To switch on the receiver, press POWER button on the
receiver once to enter standby mode. Press SOURCE
button on the receiver or one of the source buttons or
ON/OFF on the remote control to power on the receiver.
(See illustration below)
• Standby: when the receiver is on, press the
ON/OFF on the remote to return to standby mode.
• To switch off the unit completely, press the POWER
button on the receiver.
RTDI01-EN receiver 11/25/02 10:09 AM Page 18
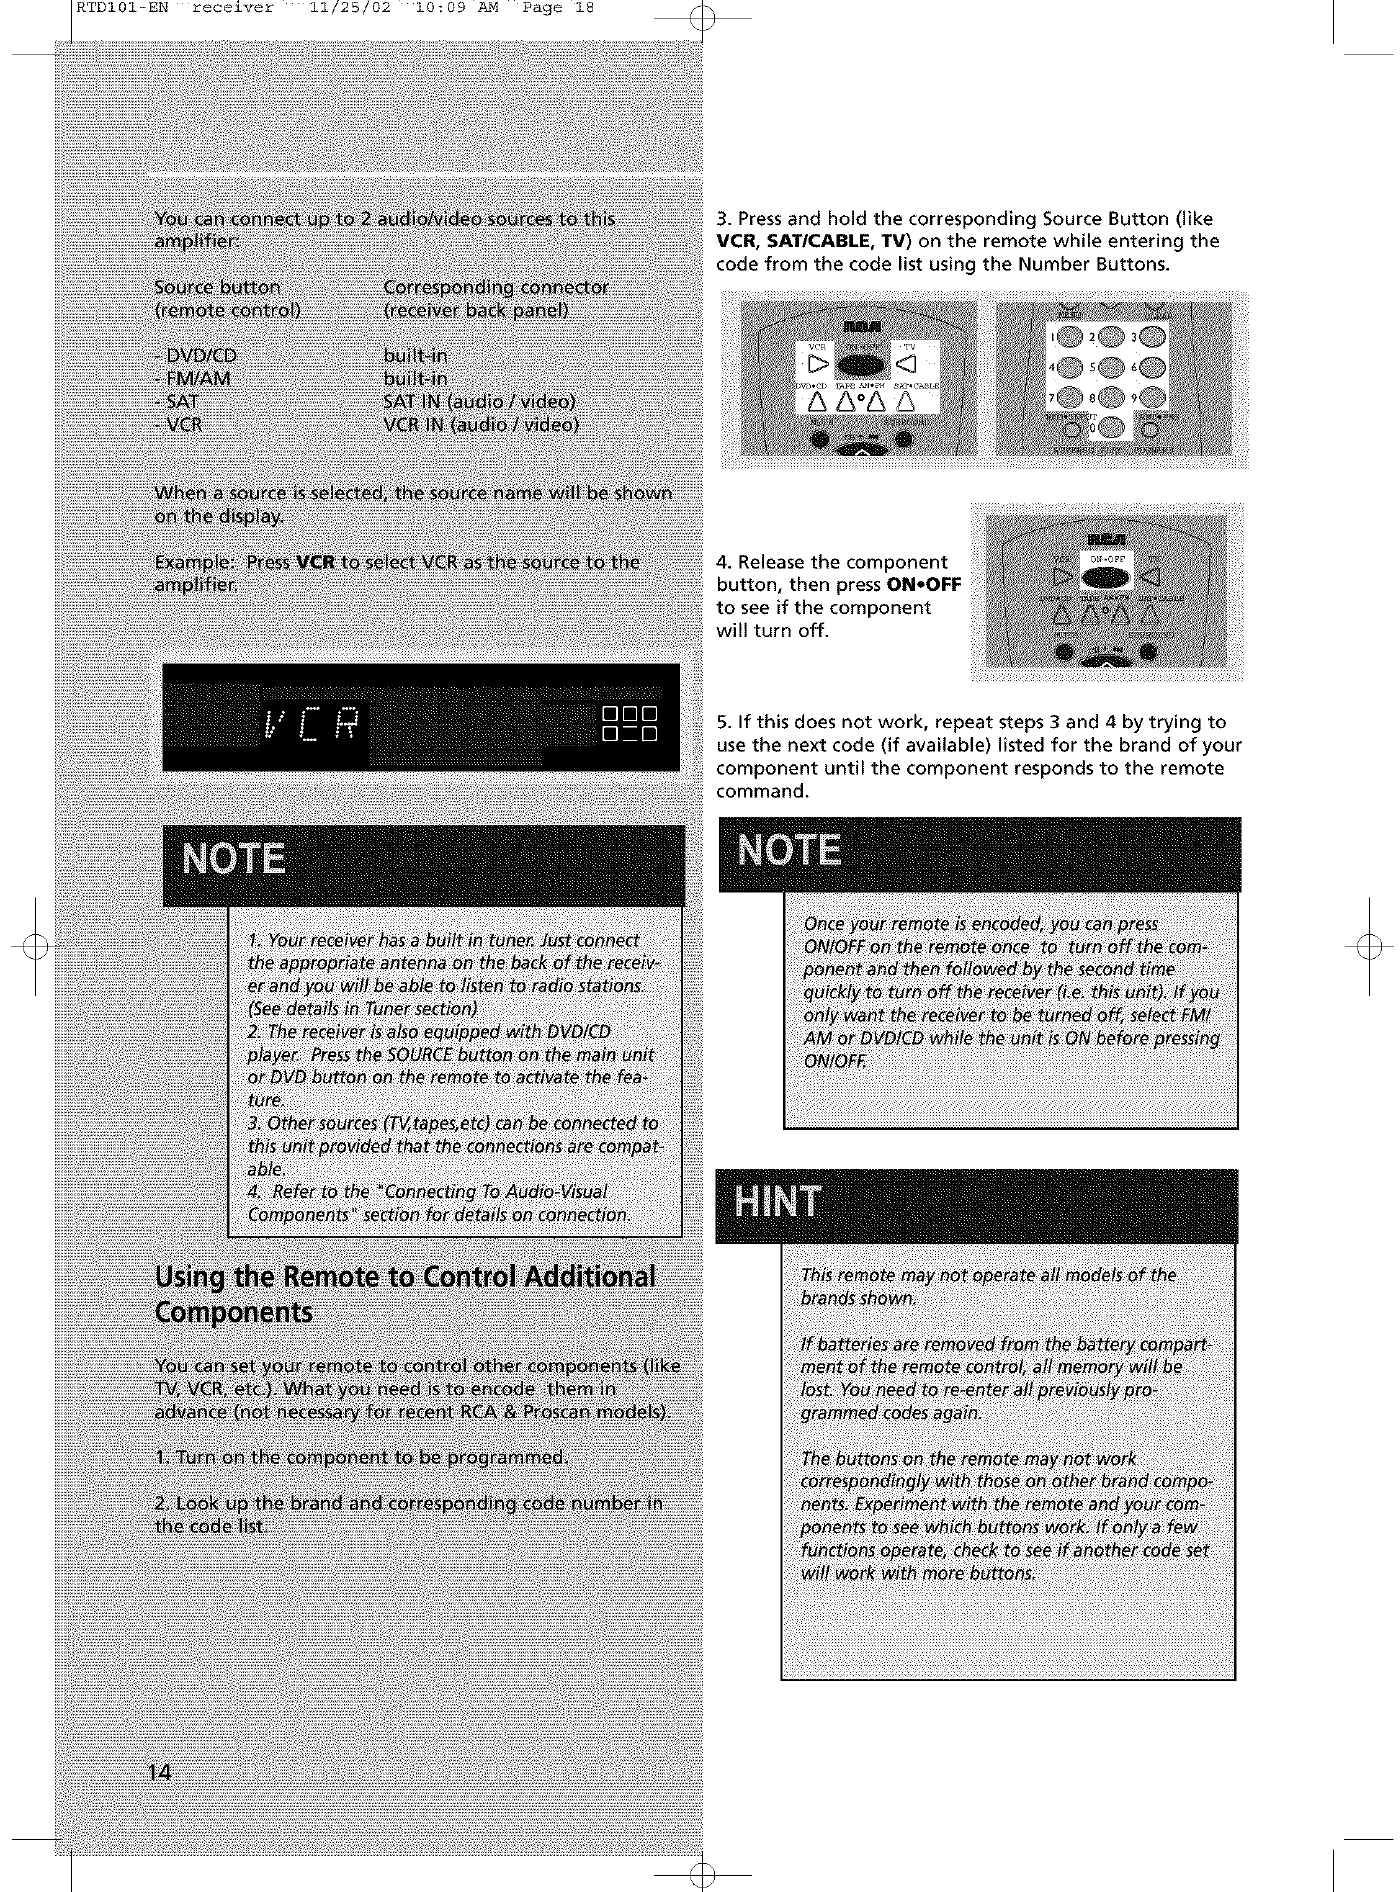
3. Press and hold the corresponding Source Button (like
VCR, SAT/CABLE, TV) on the remote while entering the
code from the code list using the Number Buttons.
4. Release the component
button, then press ON.OFF
to see if the component
will turn off.
5. If this does not work, repeat steps 3 and 4 by trying to
use the next code (if available) listed for the brand of your
component until the component responds to the remote
command.
RTDI01-EN receiver 11/25/02 10:09 AM Page 19
Sound Enhancement Systems
This receiver is equipped with several built-in sound
enhancement systems.
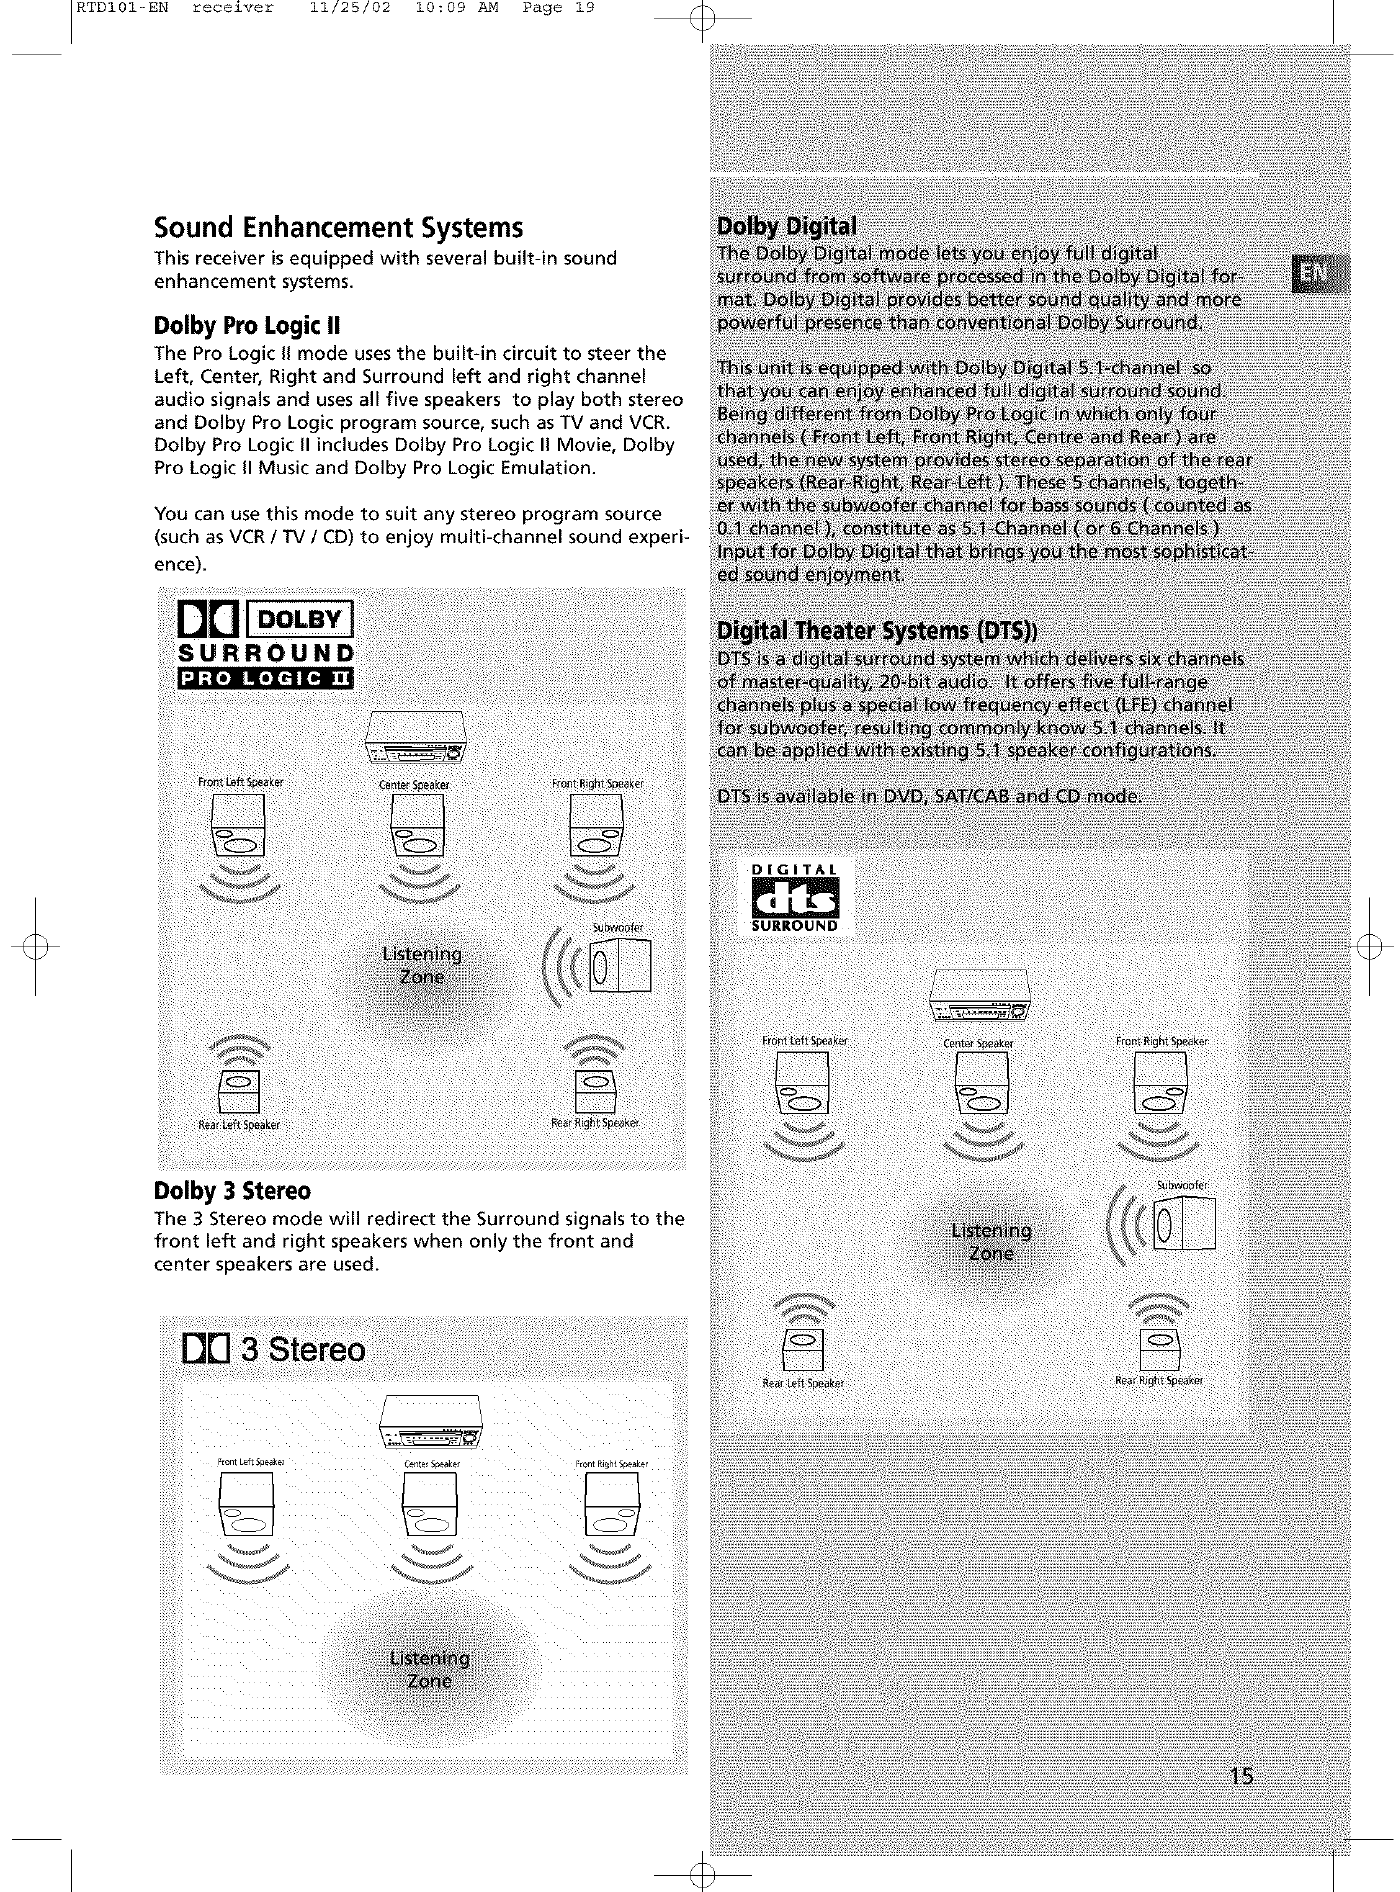
Dolby Pro Logic II
The Pro Logic II mode uses the built-in circuit to steer the
Left, Center, Right and Surround left and right channel
audio signals and uses all five speakers to play both stereo
and Dolby Pro Logic program source, such as TV and VCR.
Dolby Pro Logic II includes Dolby Pro Logic II Movie, Dolby
Pro Logic II Music and Dolby Pro Logic Emulation.
You can use this mode to suit any stereo program source
(such as VCR /TV /CD) to enjoy multi-channel sound experi-
ence).
DOLBY
Dolby 3 Stereo
The 3 Stereo mode will redirect the Surround signals to the
front left and right speakers when only the front and
center speakers are used.
:EontLeftS _ C_e_Scea_ ,,on1 _htSpeaker
<
_J
iiiiiil;ii!ii_!
iiiiiil;ii!ii_!
RTDI01-EN receiver 11/25/02 10:09 AM Page 20
AVAILABLE INPUT
ANL/Optical
Built-in
ANL
Built-in
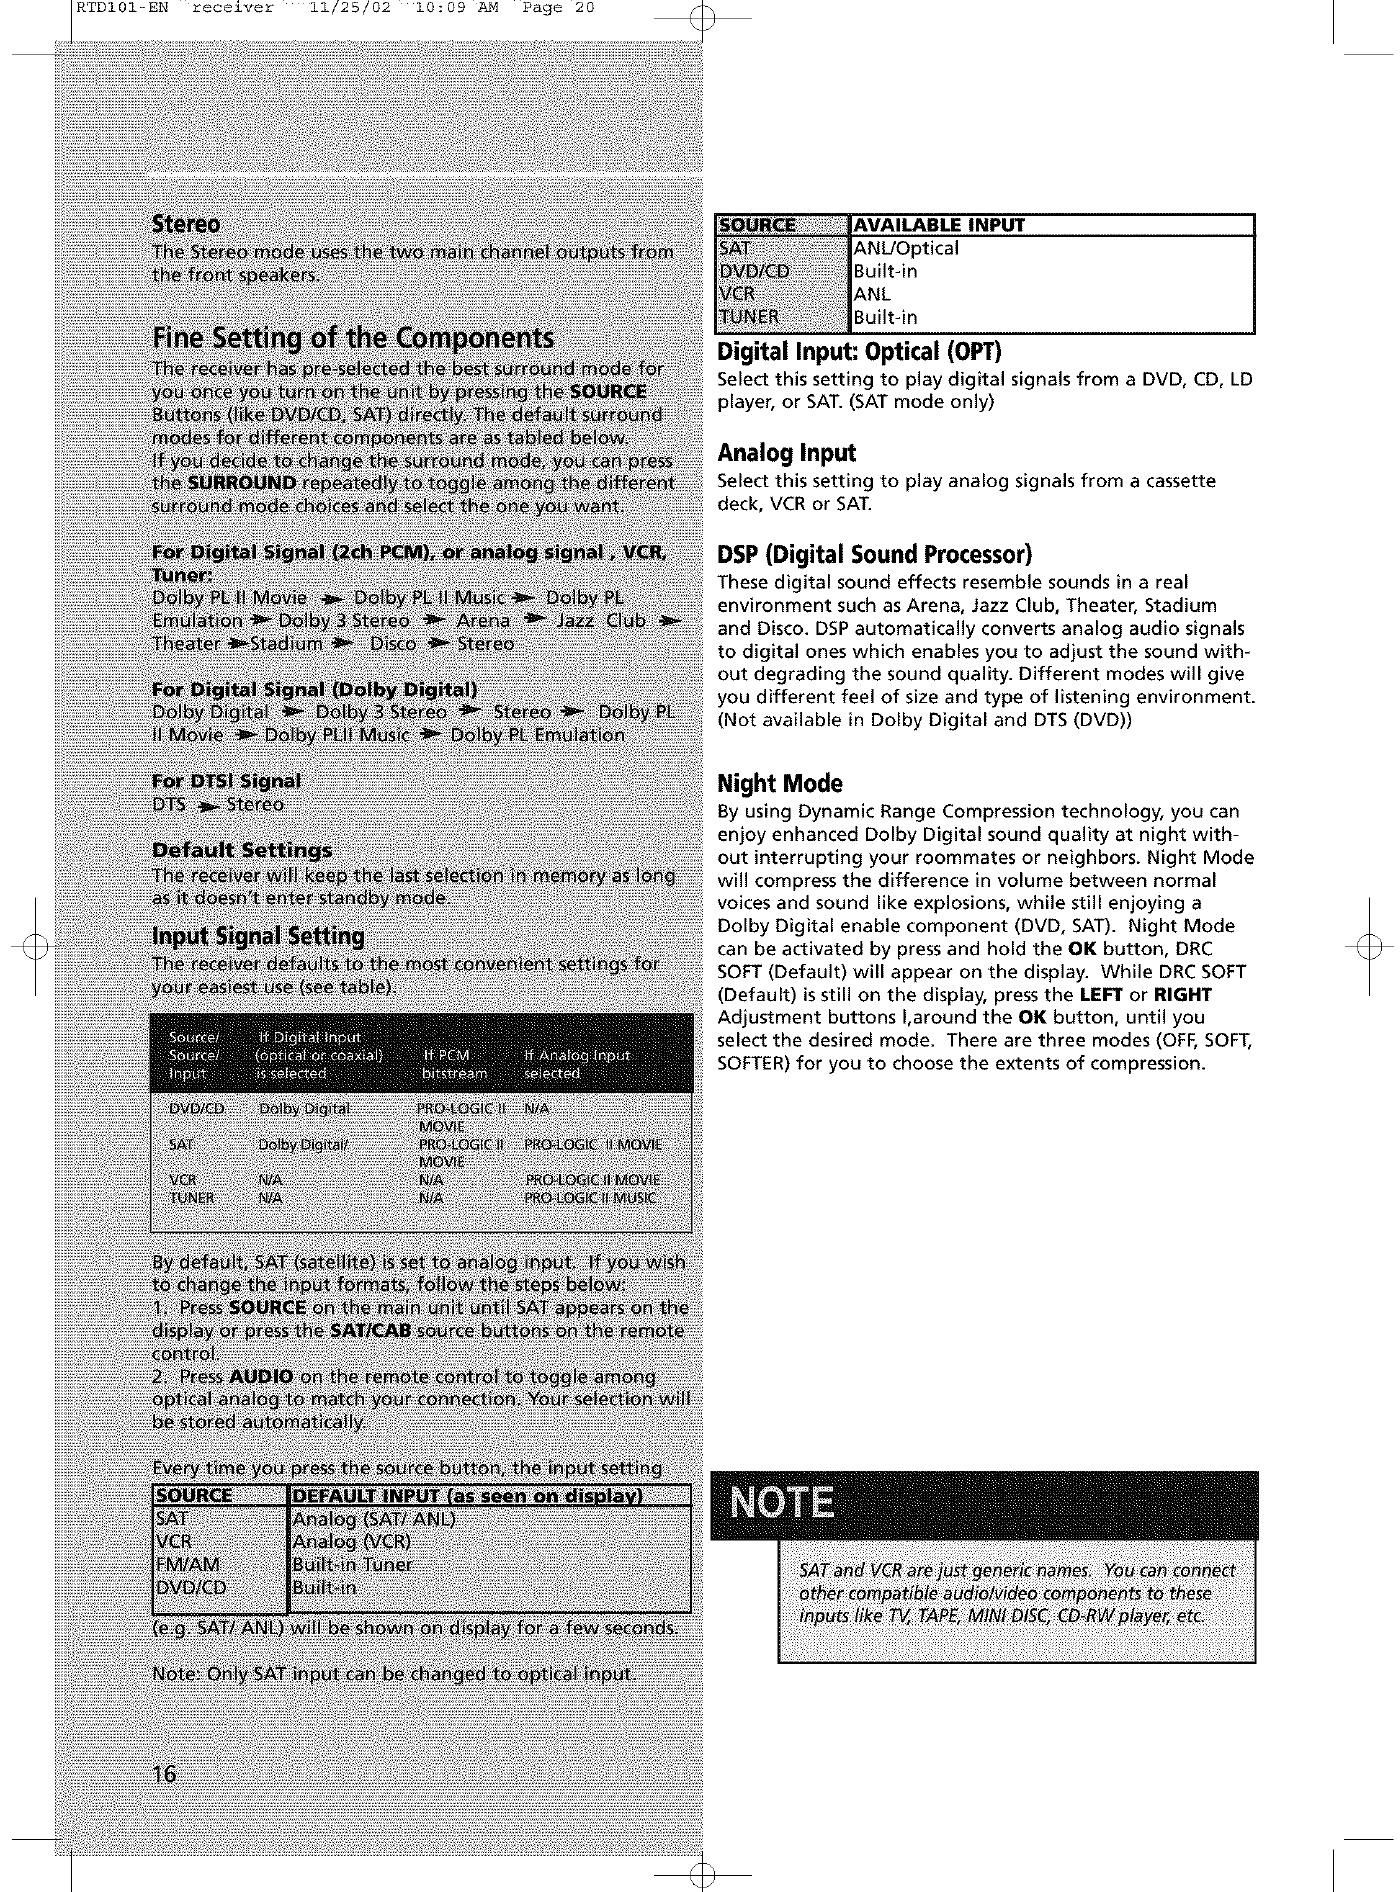
Digital Input: Optical (OPT)
Select this setting to play digital signals from a DVD, CD, LD
player, or SAT. (SAT mode only)
Analog Input
Select this setting to play analog signals from a cassette
deck, VCR or SAT.
DSP(Digital Sound Processor)
These digital sound effects resemble sounds in a real
environment such as Arena, Jazz Club, Theater, Stadium
and Disco. DSP automatically converts analog audio signals
to digital ones which enables you to adjust the sound with-
out degrading the sound quality. Different modes will give
you different feel of size and type of listening environment.
(Not available in Dolby Digital and DTS (DVD))
Night Mode
By using Dynamic Range Compression technology, you can
enjoy enhanced Dolby Digital sound quality at night with-
out interrupting your roommates or neighbors. Night Mode
will compress the difference in volume between normal
voices and sound like explosions, while still enjoying a
Dolby Digital enable component (DVD, SAT). Night Mode
can be activated by press and hold the OK button, DRC
SOFT (Default) will appear on the display. While DRC SOFT
(Default) is still on the display, press the LEFT or RIGHT
Adjustment buttons I,around the OK button, until you
select the desired mode. There are three modes (OFF, SOFT,
SOFTER) for you to choose the extents of compression.
RTDI01-EN receiver 11/25/02 10:09 AM Page 21
Fine Setting of the Speakers
if you use all the speakers provided, all the basic settings
have been set.
However, to make the surround sound more effective and
suit the acoustic conditions in your listening room, you
need to delay the signal from some of the speakers. Such
channel delay compensates for center or surround speak-
ers that are closer to listening position than the front
speakers.
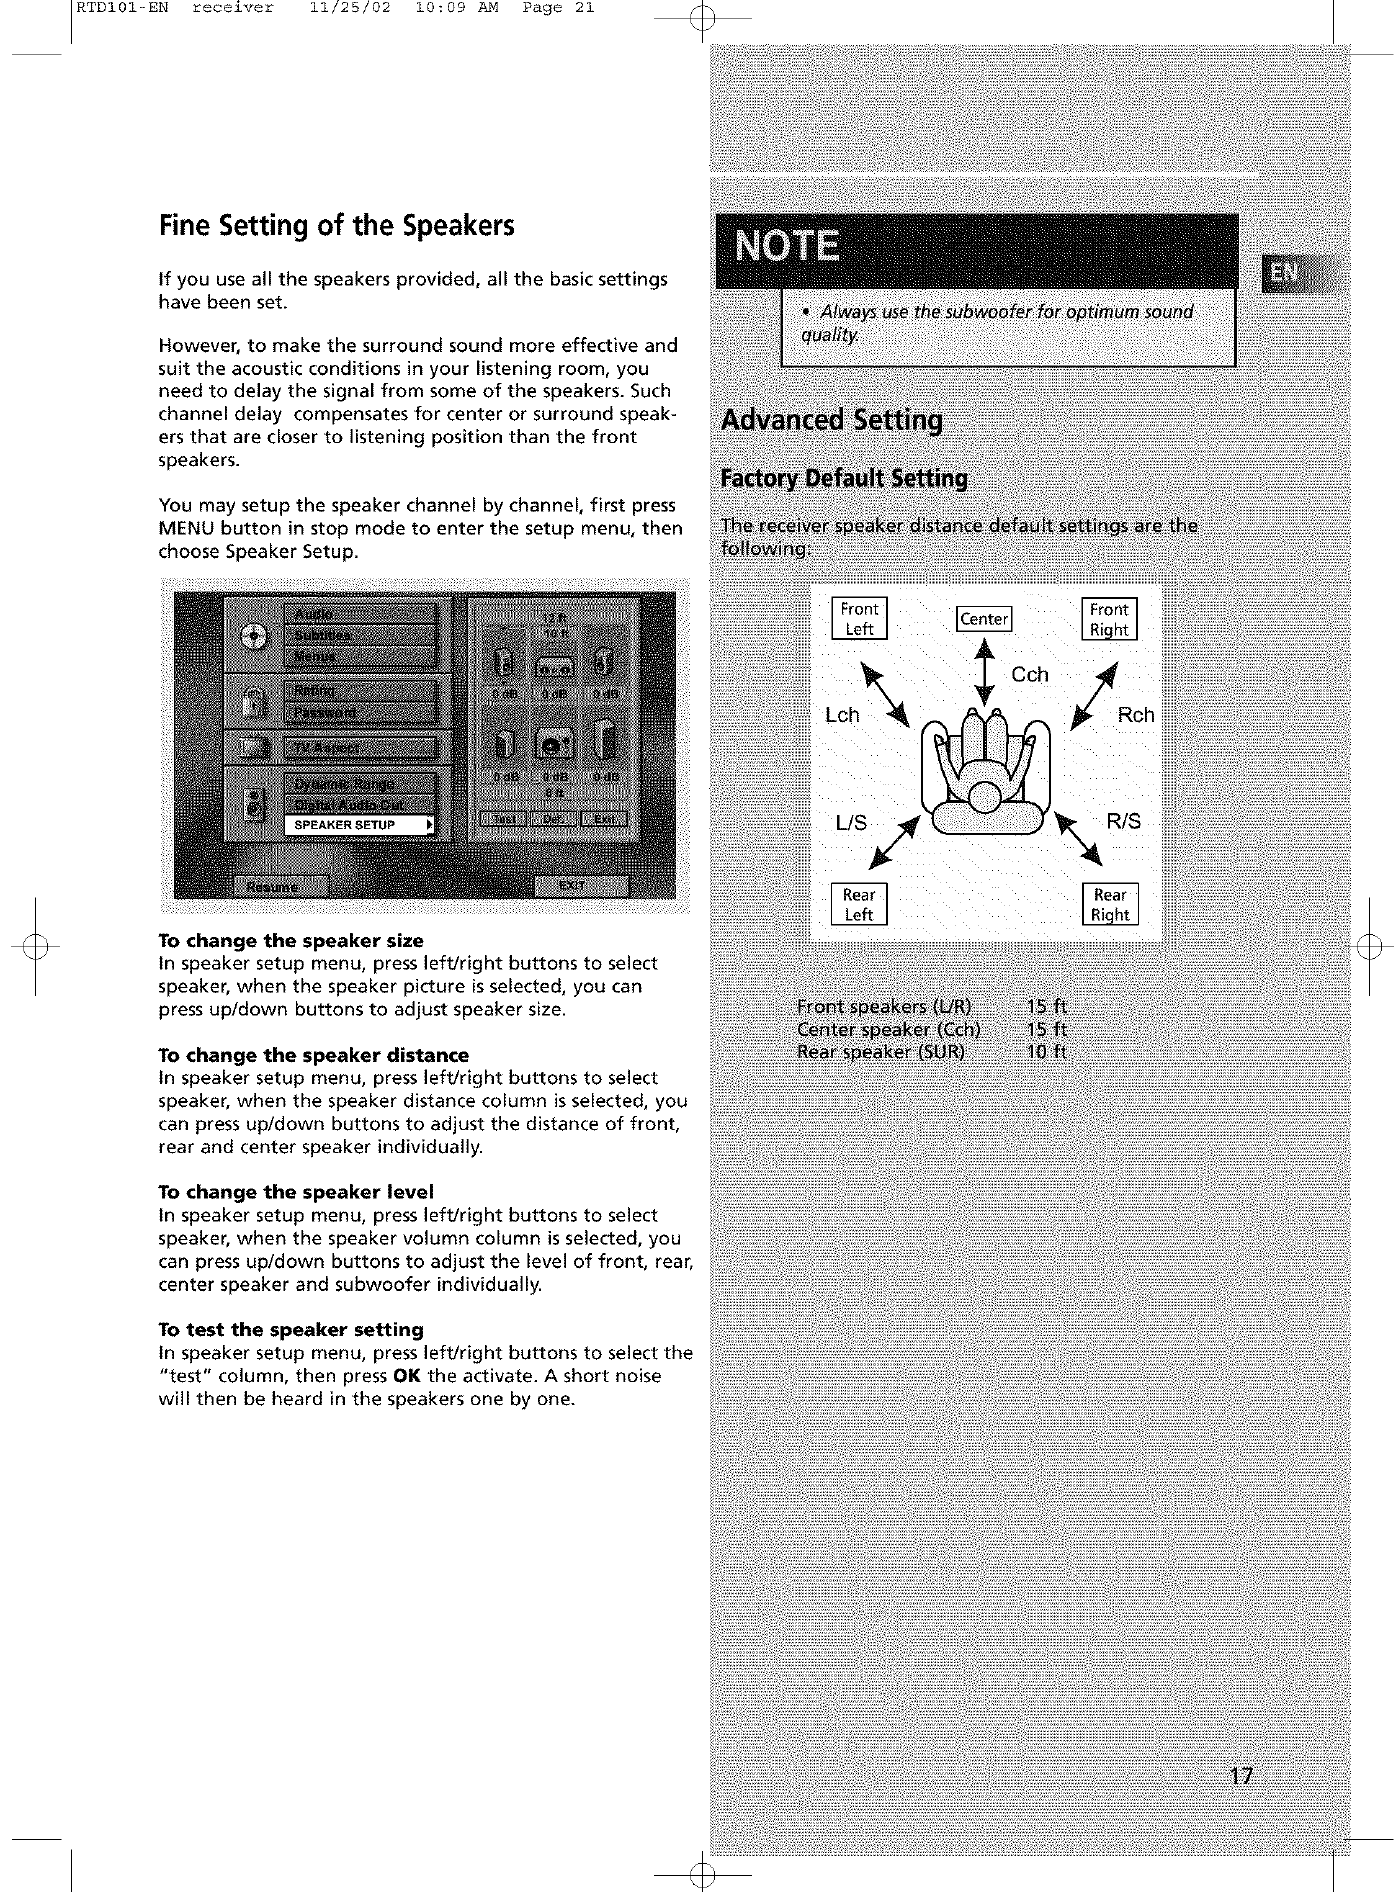
You may setup the speaker channel by channel, first press
MENU button in stop mode to enter the setup menu, then
choose Speaker Setup.
To change the speaker size
in speaker setup menu, press left/right buttons to select
speaker, when the speaker picture is selected, you can
press up/down buttons to adjust speaker size.
To change the speaker distance
in speaker setup menu, press left/right buttons to select
speaker, when the speaker distance column is selected, you
can press up/down buttons to adjust the distance of front,
rear and center speaker individually.
To change the speaker level
in speaker setup menu, press left/right buttons to select
speaker, when the speaker volumn column is selected, you
can press up/down buttons to adjust the level of front, rear,
center speaker and subwoofer individually.
To test the speaker setting
in speaker setup menu, press left/right buttons to select the
"test" column, then press OK the activate. A short noise
will then be heard in the speakers one by one.
RTDI01-EN receiver 11/25/02 10:09 AM Page 22
RTDI01-ENDVD 11/25/02 10:23AM Page1
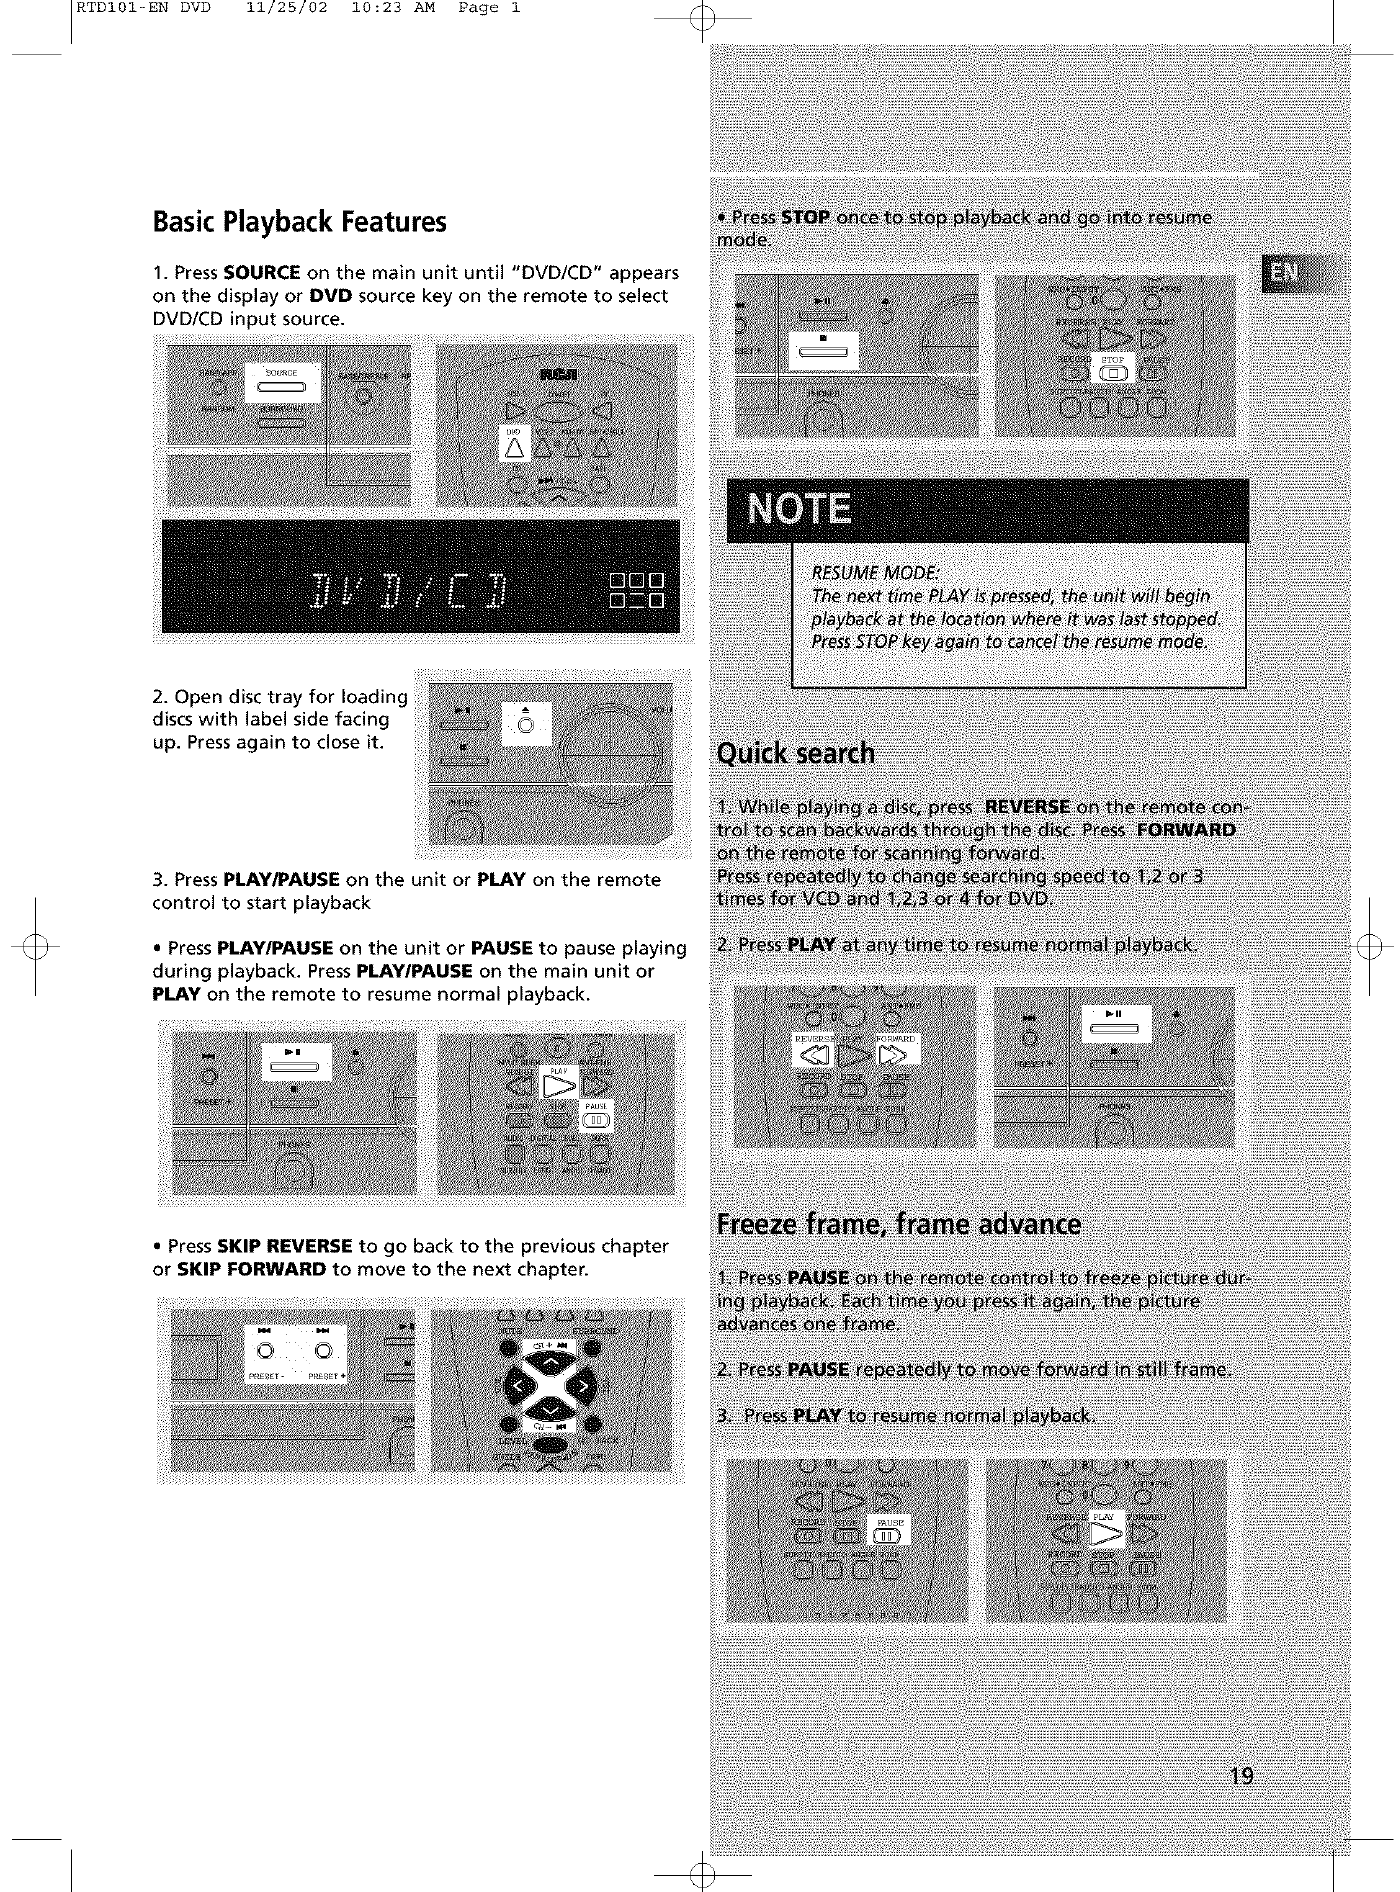
Basic Playback Features
1. Press SOURCE on the main unit until "DVD/CD" appears
on the display or DVD source key on the remote to select
DVD/CD input source.
2. Open disc tray for Ioadinc
discs with label side facing
up. Press again to close it.
3. Press PLAY/PAUSE on the unit or PLAY on the remote
control to start playback
• Press PLAY/PAUSE on the unit or PAUSE to pause playing
during playback. Press PLAY/PAUSE on the main unit or
PLAY on the remote to resume normal playback.
• Press SKIP REVERSE to go back to the previous chapter
or SKIP FORWARD to move to the next chapter.
RTDI01-EN DVD 11/25/02 10:23 AM Page 2
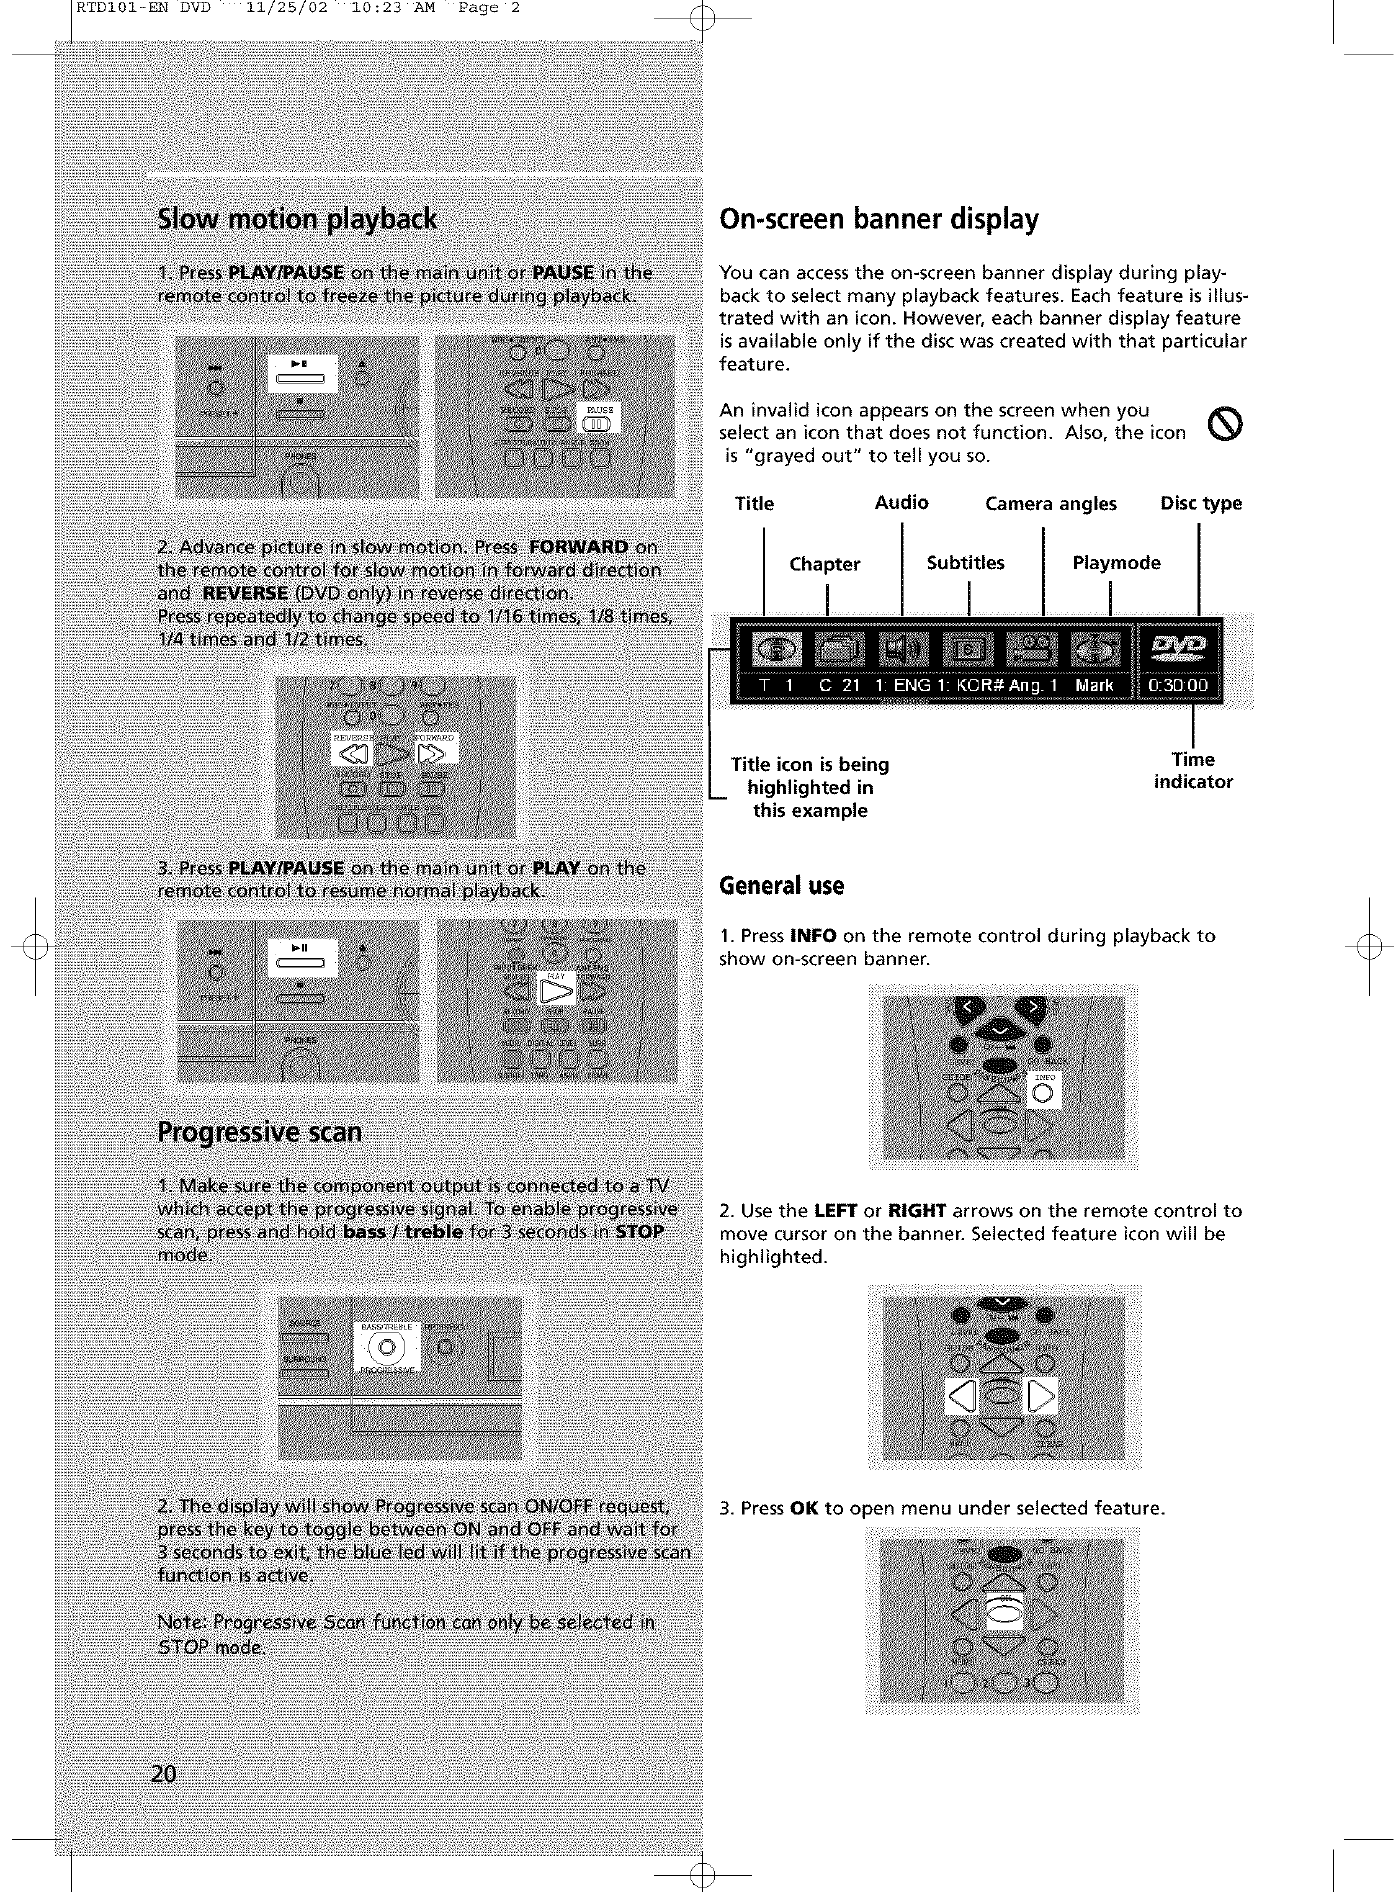
On-screen banner display
You can access the on-screen banner display during play-
back to select many playback features. Each feature is illus-
trated with an icon. However, each banner display feature
is available only if the disc was created with that particular
feature.
An invalid icon appears on the screen when you
select an icon that does not function. Also, the icon
is "grayed out" to tell you so.
Title
...... Cha_ter
Audio Camera angles Disc type
Subtitles Playmode
Title icon is being Time
highlighted in indicator
this example
General use
1. Press INFO on the remote control during playback to
show on-screen banner.
2. Use the LEFT or RIGHT arrows on the remote control to
move cursor on the banner. Selected feature icon will be
highlighted.
3. Press OK to open menu under selected feature.
RTDI01-EN DVD 11/25/02 10:23 AM Page 3
Selecting a title
1. Refer to previous page "General use" to open the title
menu.
2. Enter title number using the number keys on the remote
control. Add 0 in front of single-digit title number
(e.g. 9 = 09). You can also use UP/DOWN key to change
title number.
Selecting a chapter
1. Refer to previous page "General use" to open the title
menu.
2. Enter chapter number using the number keys on the
remote control. Add 0 in front of single-digit chapter
number (e.g. g = 09). You can also use UP/DOWN key to
change title number.
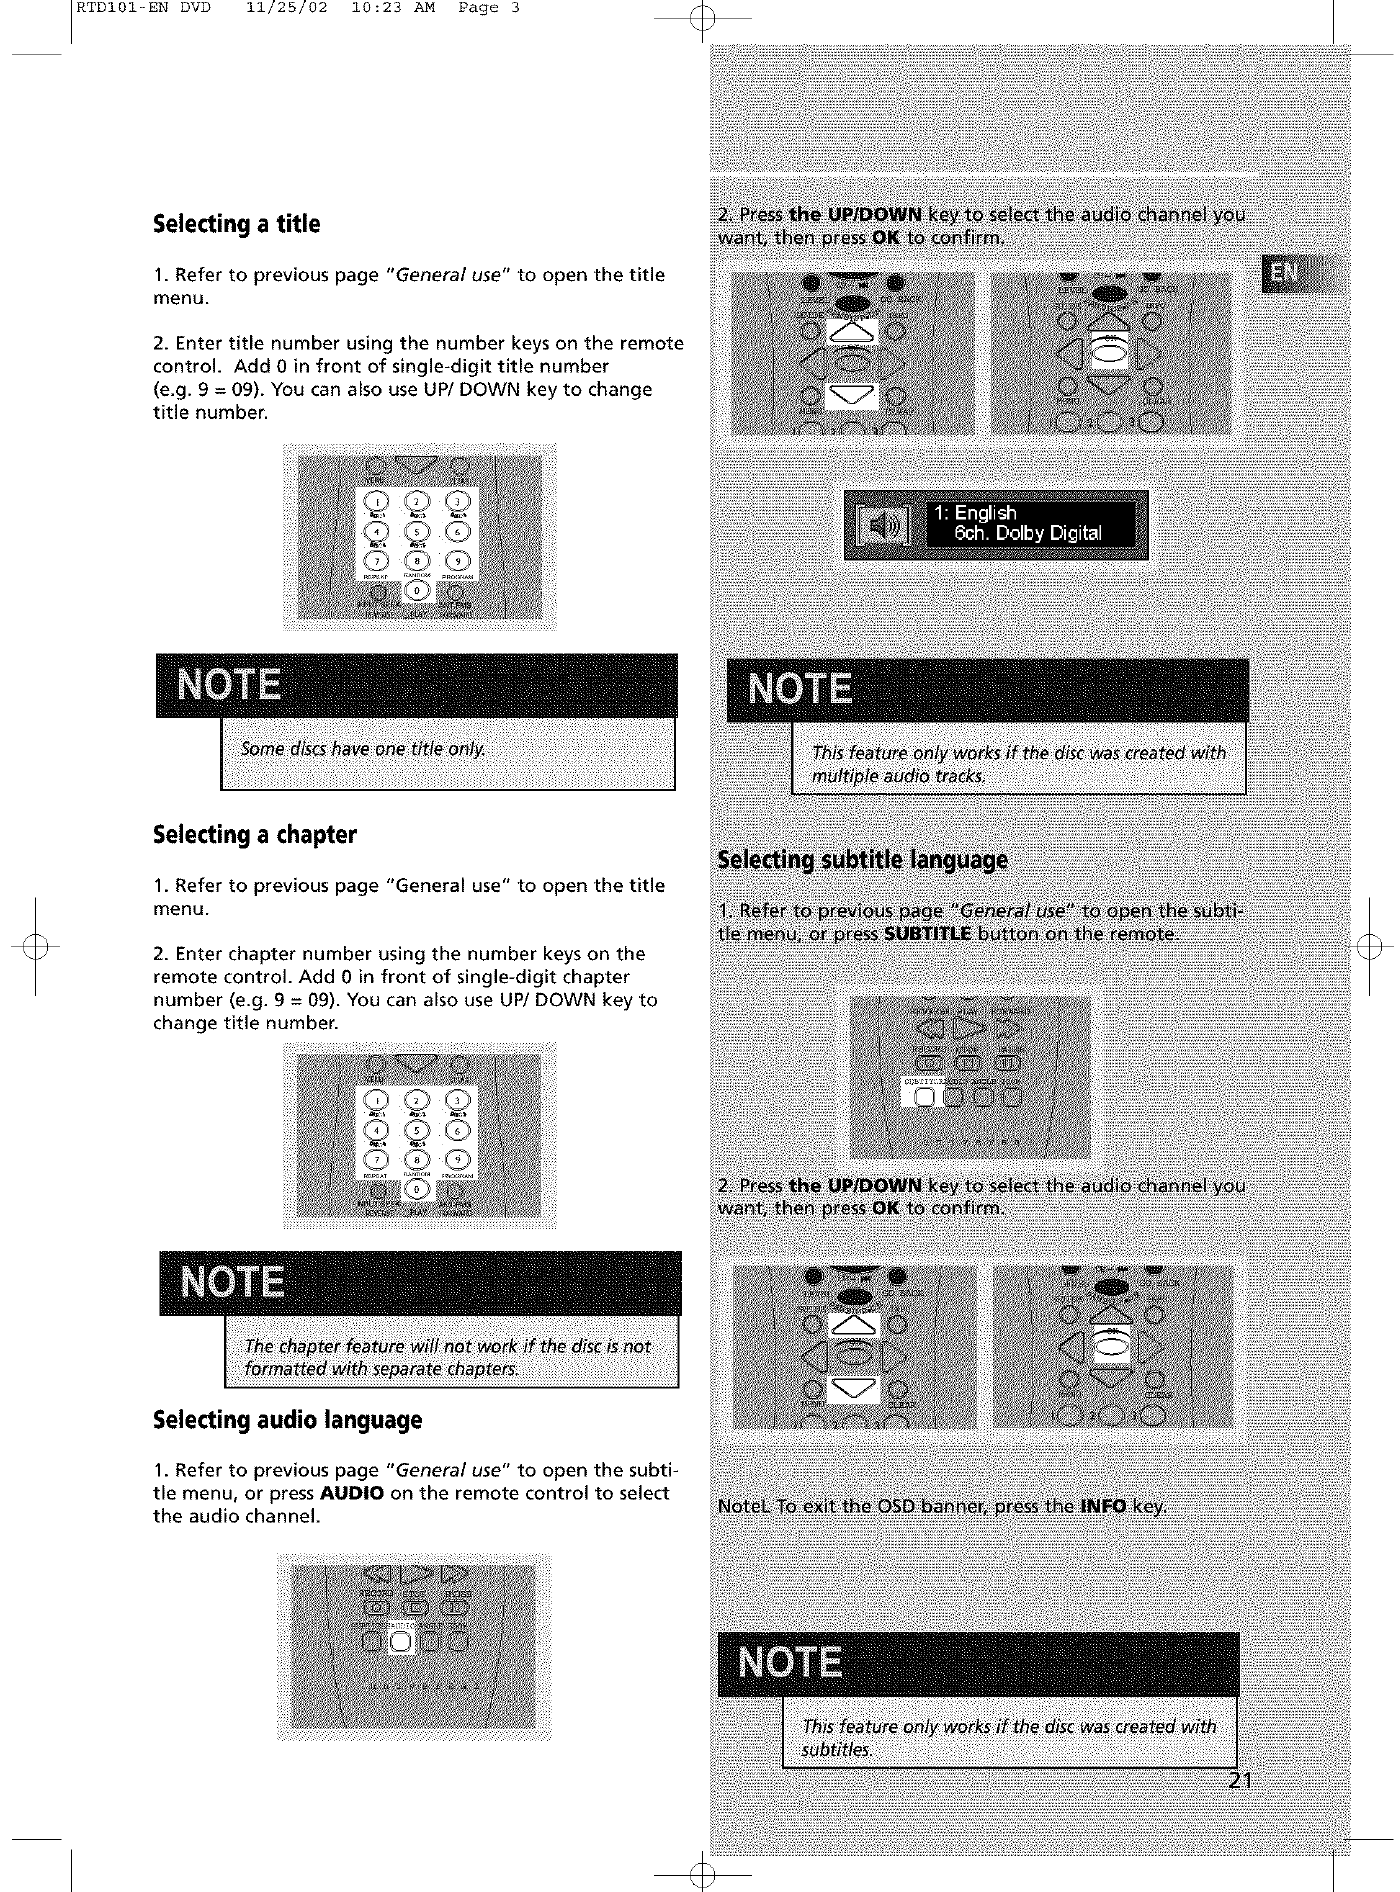
Selecting audio language
1. Refer to previous page "General use" to open the subti-
tle menu, or press AUDIO on the remote control to select
the audio channel.
RTDI01-EN DVD 11/25/02 10:23 AM Page 4
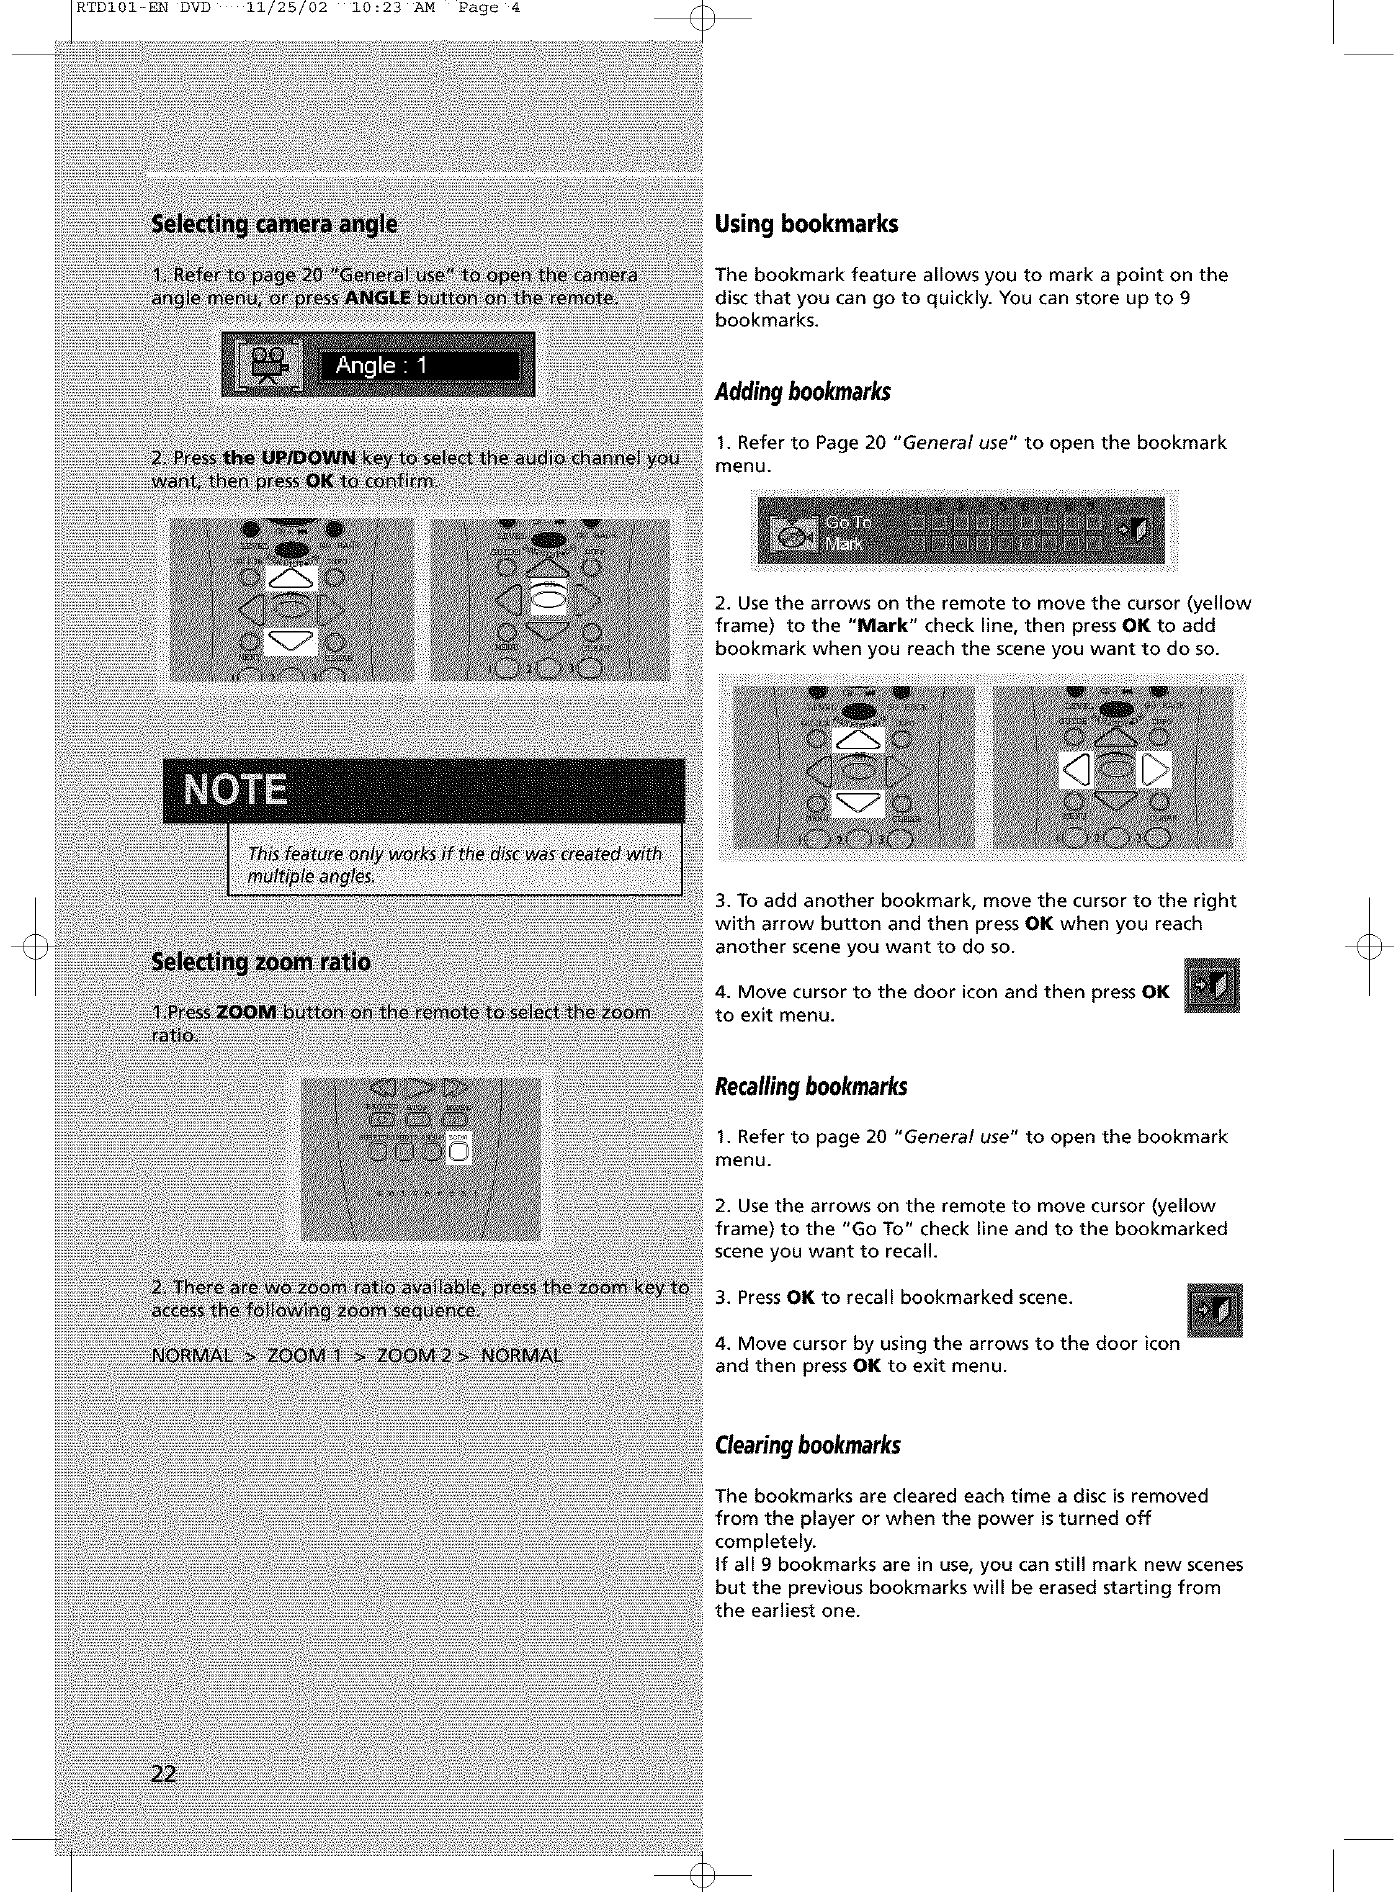
Using bookmarks
The bookmark feature allows you to mark a point on the
disc that you can go to quickly. You can store up to 9
bookmarks.
Adding bookmarks
1. Refer to Page 20 "General use" to open the bookmark
menu.
2. Use the arrows on the remote to move the cursor (yellow
frame) to the "Mark" check line, then press OK to add
bookmark when you reach the scene you want to do so.
3. To add another bookmark, move the cursor to the right
with arrow button and then press OK when you reach
another scene you want to do so.
4. Move cursor to the door icon and then press OK
to exit menu.
Recallingbookmarks
1. Refer to page 20 "General use" to open the bookmark
menu.
2. Use the arrows on the remote to move cursor (yellow
frame) to the "Go To" check line and to the bookmarked
scene you want to recall.
3. Press OK to recall bookmarked scene.
4. Move cursor by using the arrows to the door icon
and then press OK to exit menu.
Clearingbookmarks
The bookmarks are cleared each time adisc is removed
from the player or when the power is turned off
completely.
If all 9 bookmarks are in use, you can still mark new scenes
but the previous bookmarks will be erased starting from
the earliest one.
RTDI01-EN DVD 11/25/02 10:23 AM Page 5
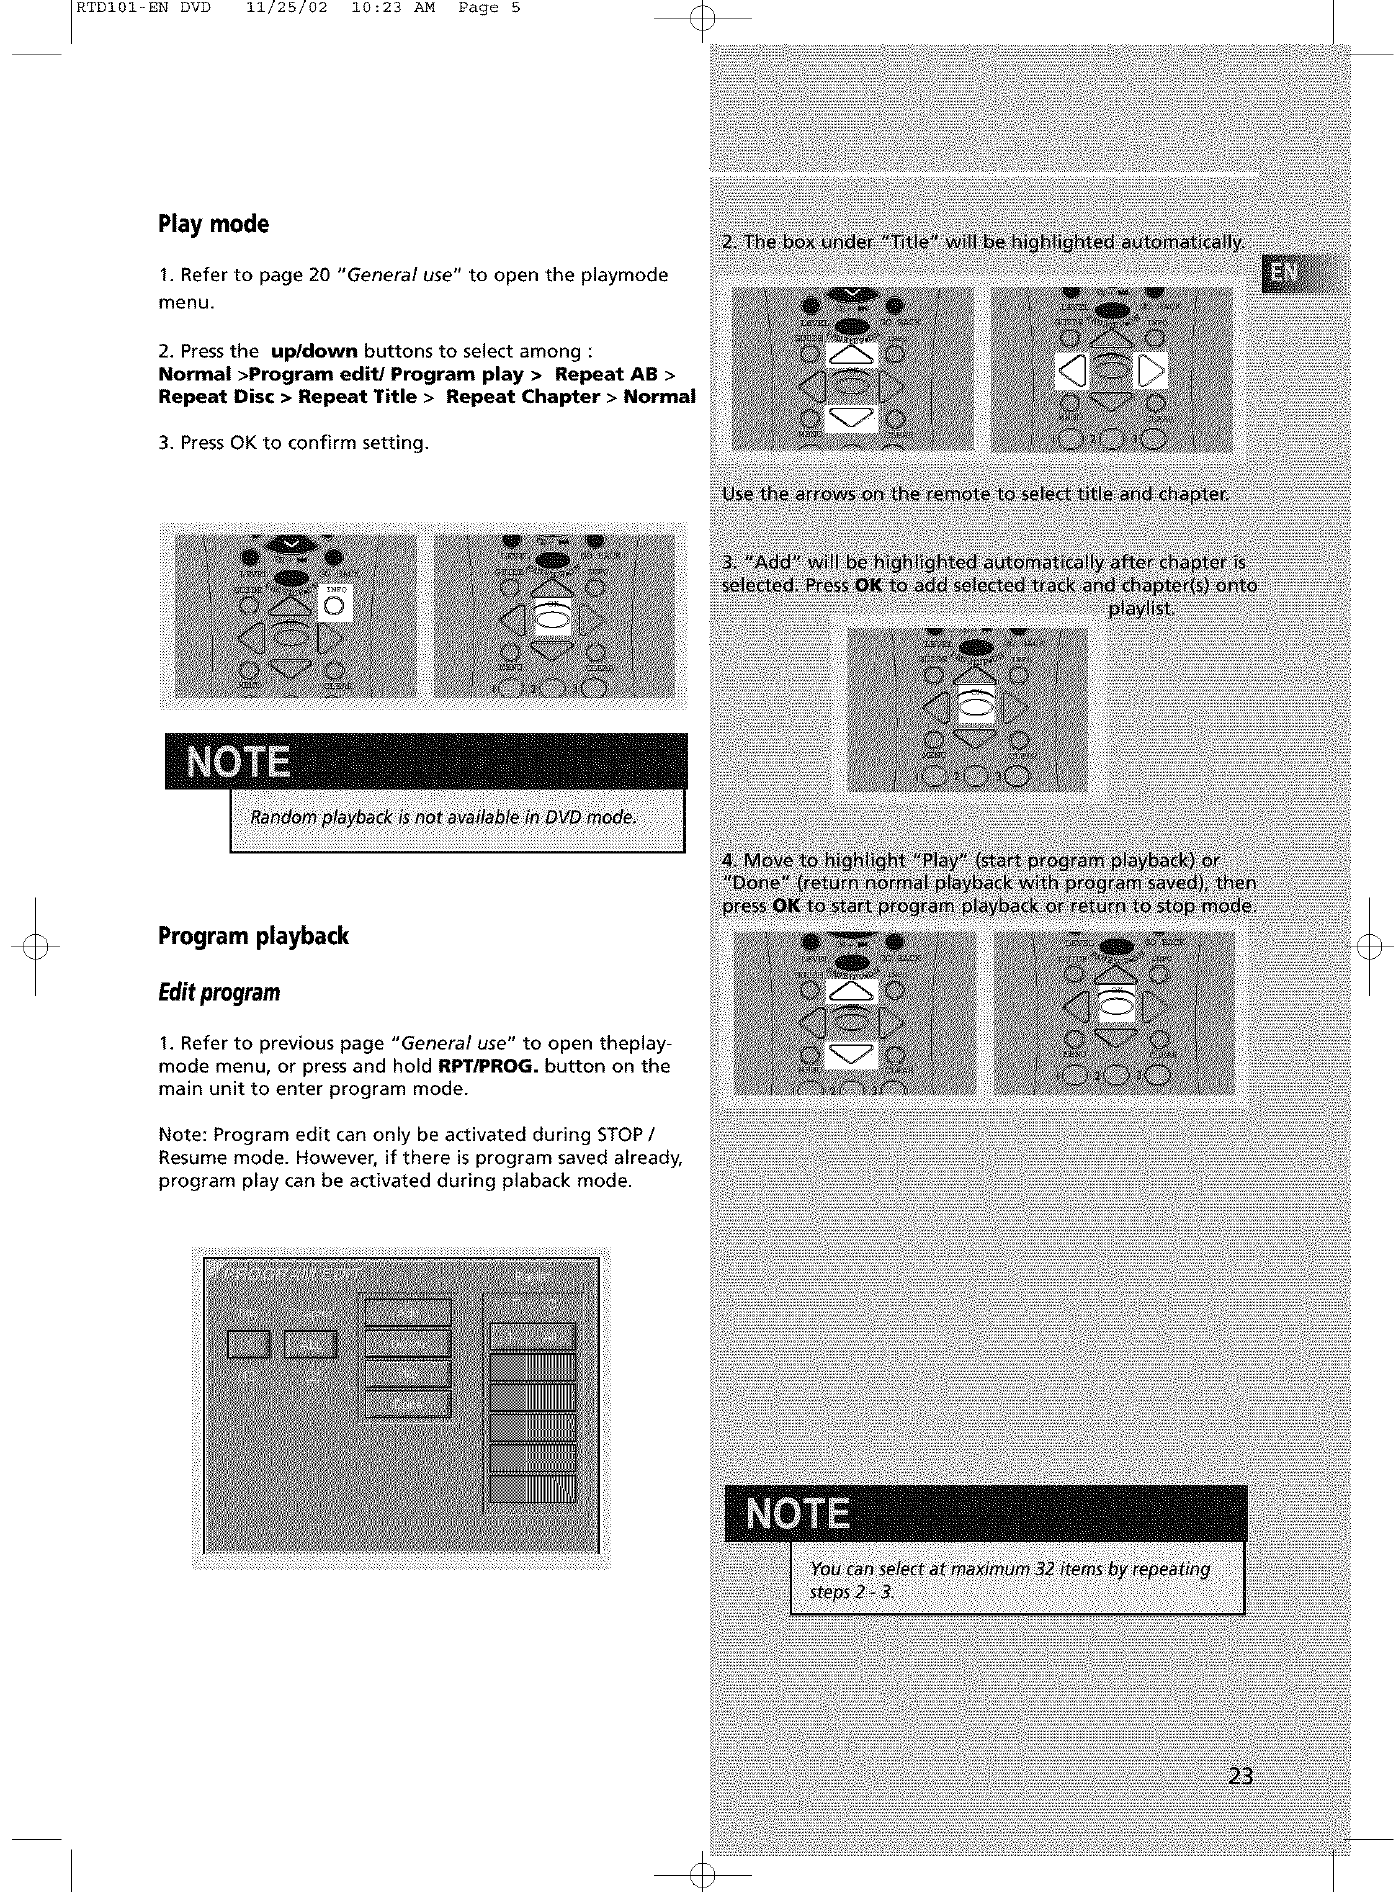
Play mode
1. Refer to page 20 "General use" to open the playmode
menu.
2. Press the up/down buttons to select among :
Normal >Program edit/Program play >Repeat AB >
Repeat Disc •Repeat Title • Repeat Chapter • Normal
3. Press OK to confirm setting.
Program playback
Editprogram
1. Refer to previous page "General use" to open theplay-
mode menu, or press and hold RPT/PROG. button on the
main unit to enter program mode.
Note: Program edit can only be activated during STOP /
Resume mode. However, if there is program saved already,
program play can be activated during plaback mode.
RTDI01-EN DVD 11/25/02 10:23 AM Page 6
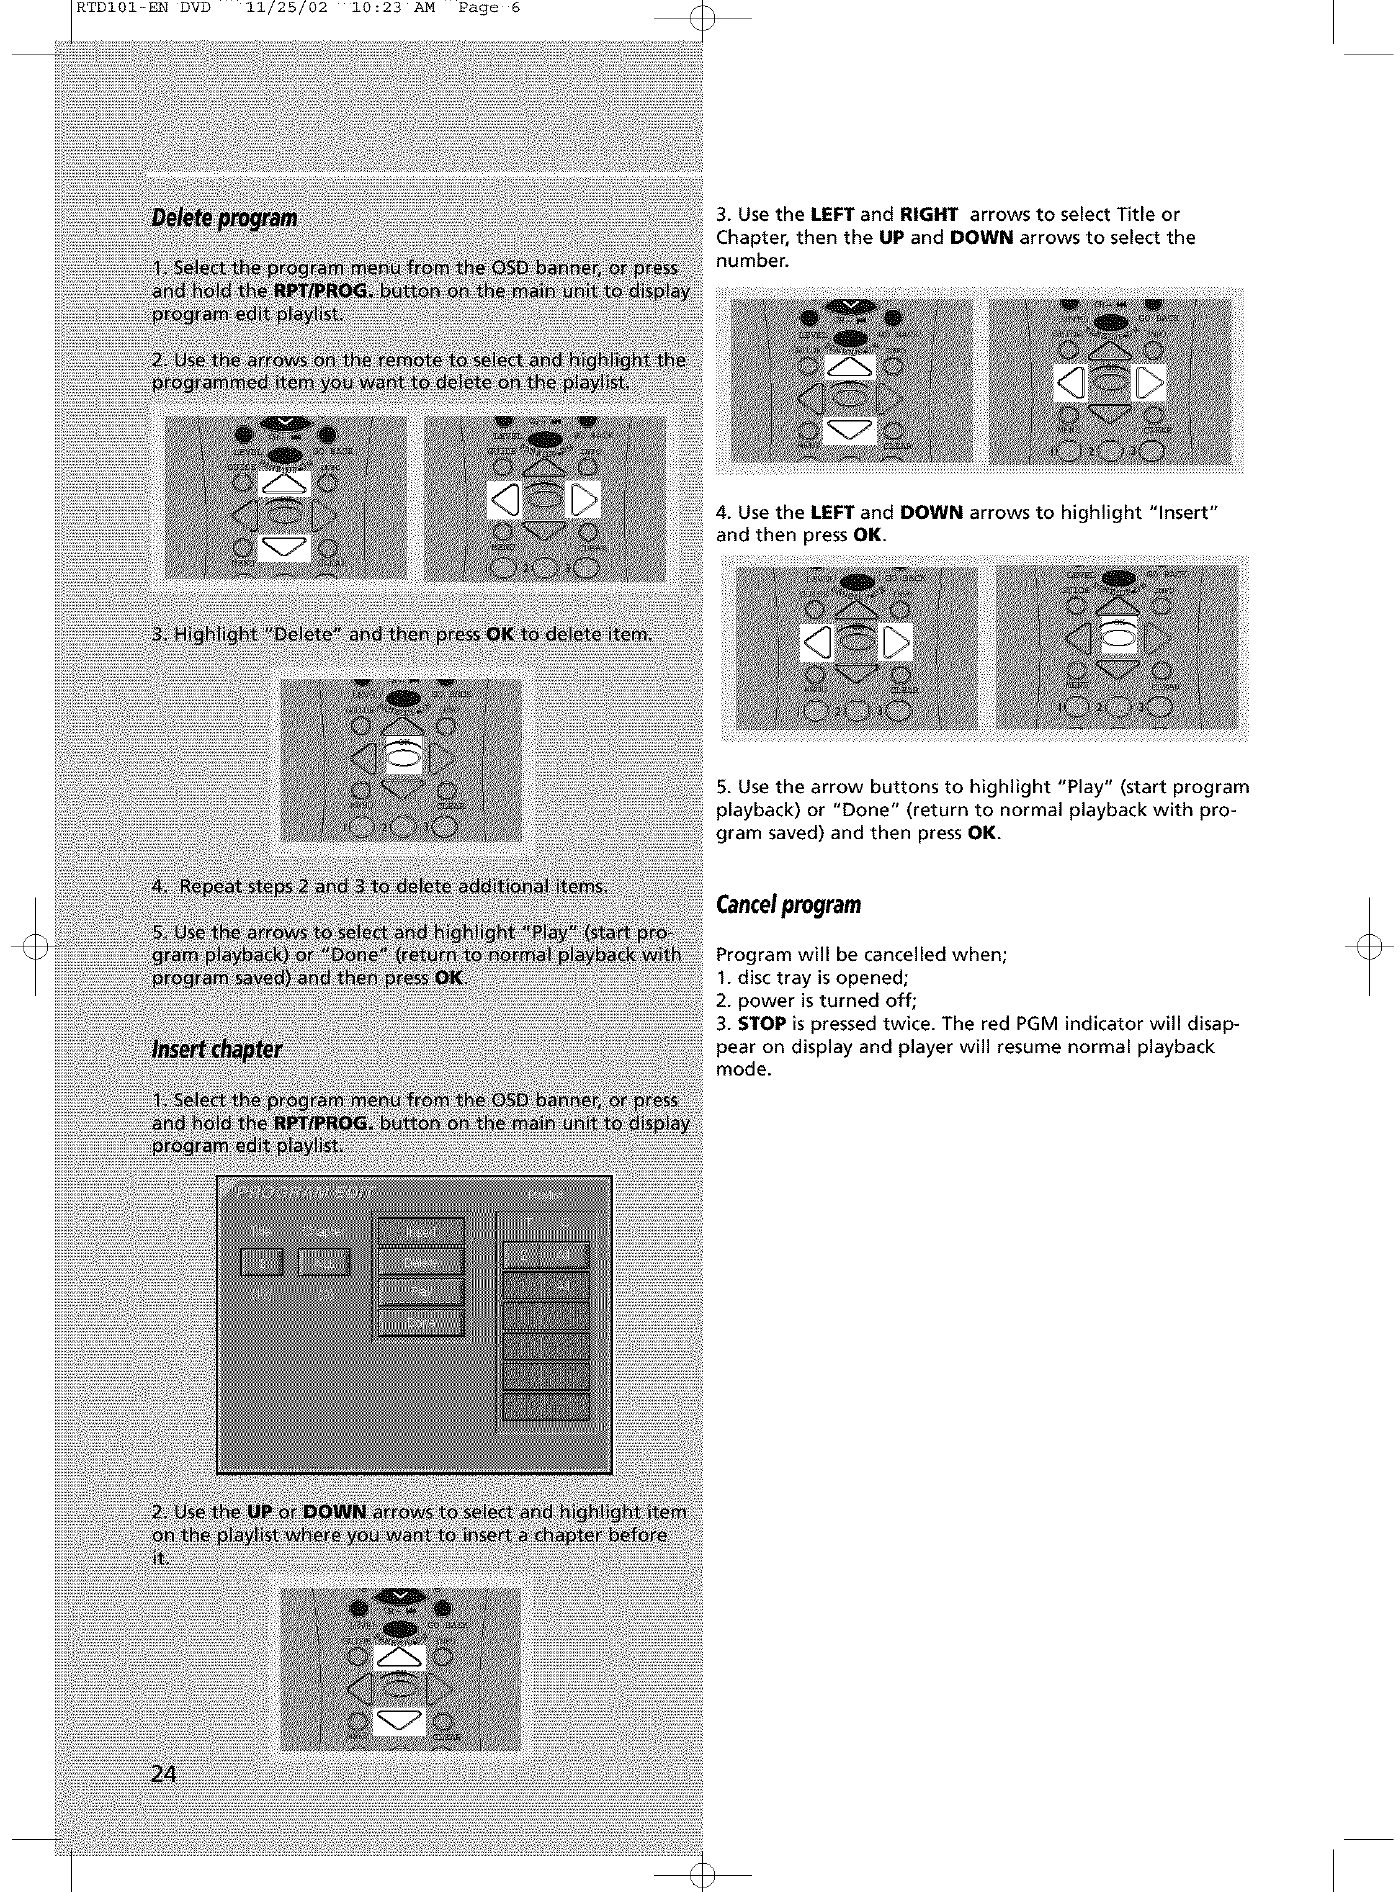
3. Use the LEFT and RIGHT arrows to select Title or
Chapter, then the UP and DOWN arrows to select the
number.
4. Use the LEFT and DOWN arrows to highlight "Insert"
and then press OK.
5. Use the arrow buttons to highlight "Play" (start program
playback) or "Done" (return to normal playback with pro-
gram saved) and then press OK.
Cancelprogram
Program will be cancelled when;
1. disc tray is opened;
2. power is turned off;
3. STOP is pressed twice. The red PGM indicator will disap-
pear on display and player will resume normal playback
mode.
RTDI01-EN DVD 11/25/02 10:23 AM Page 7
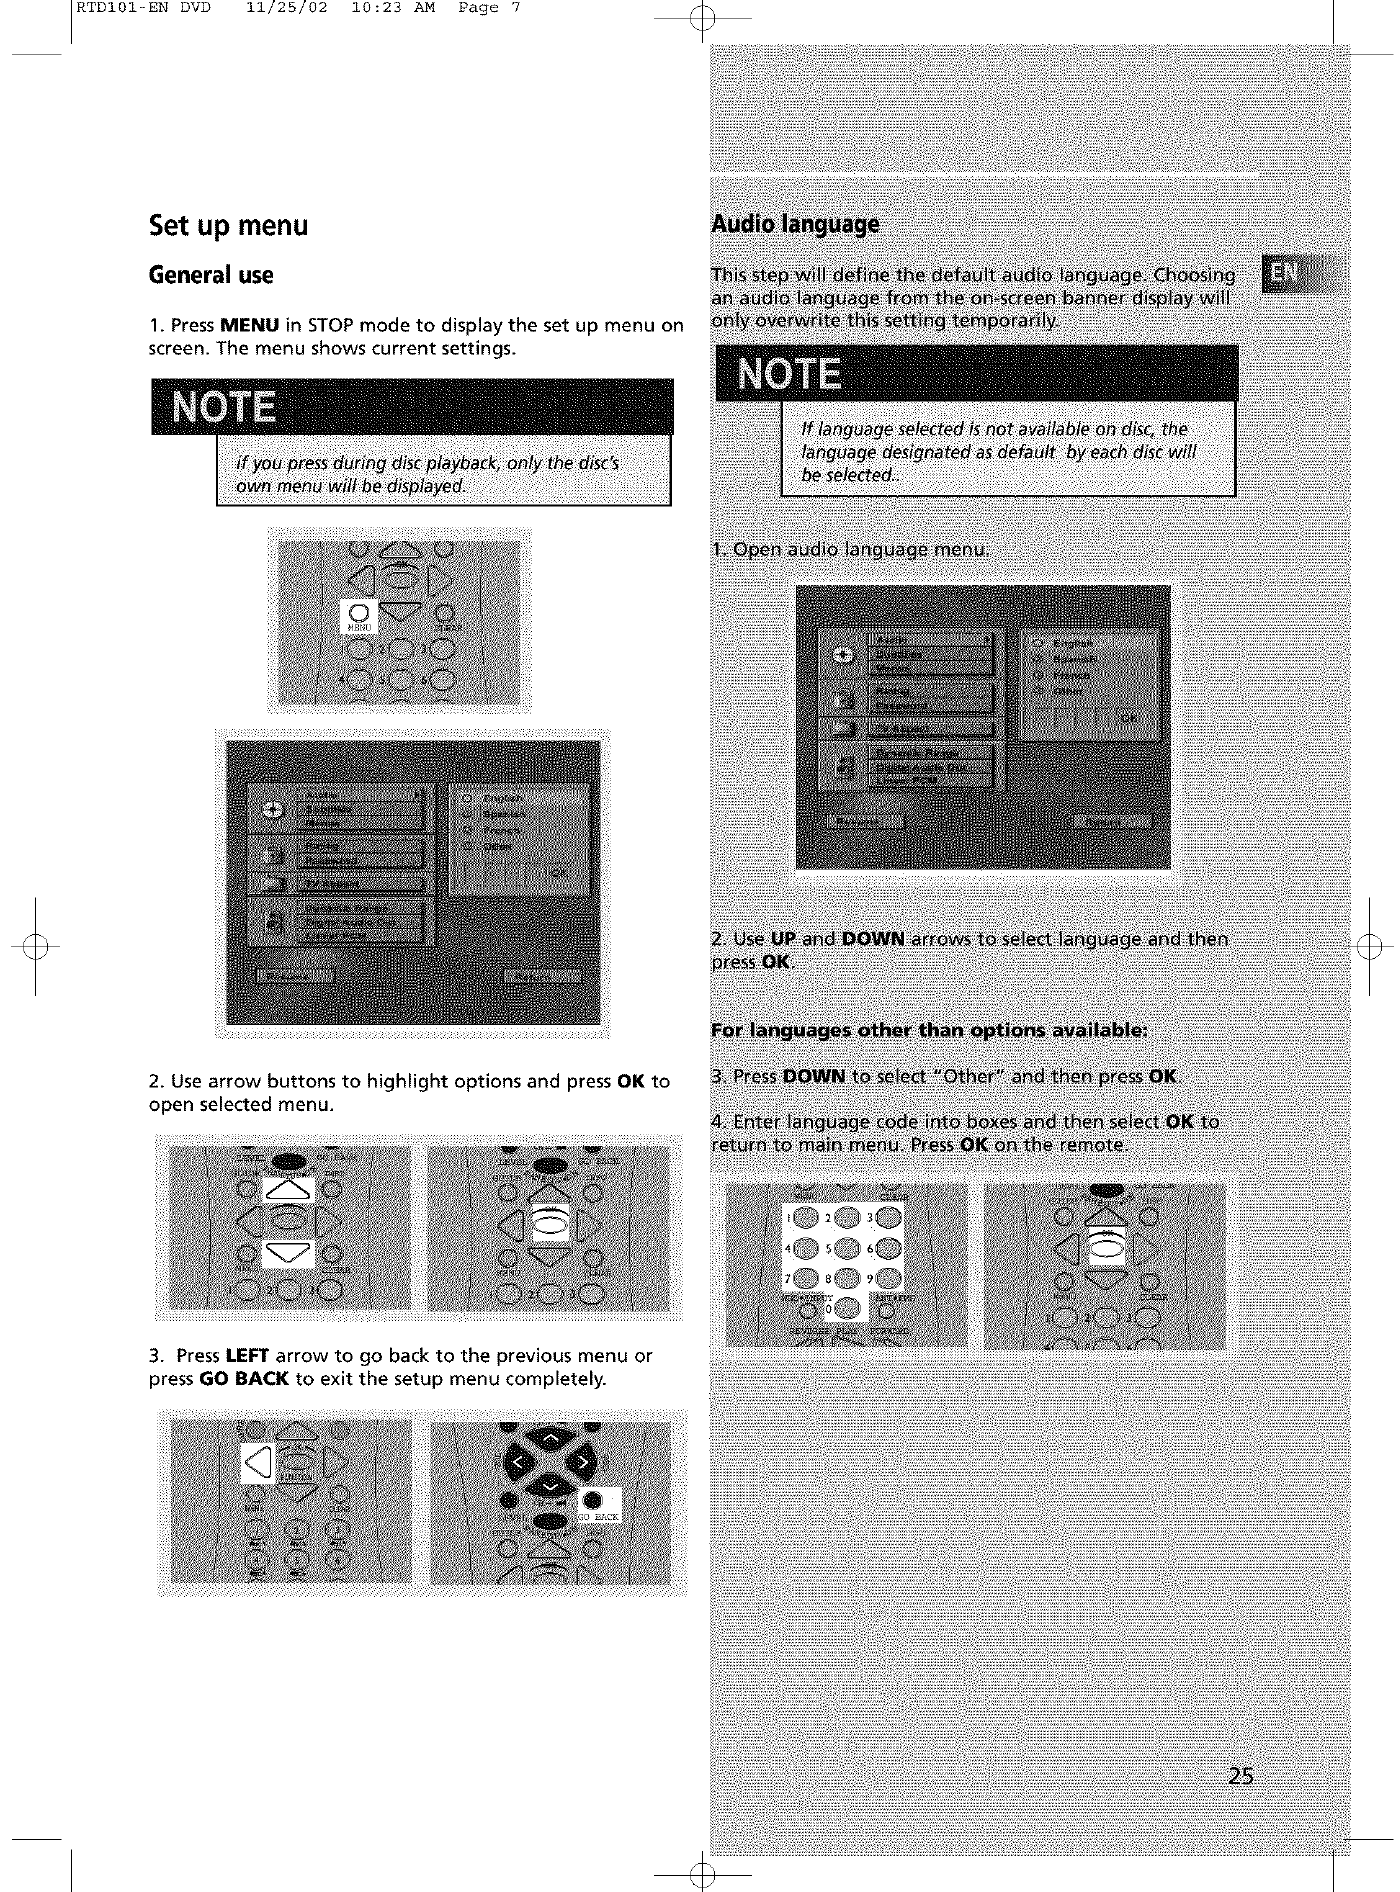
Set up menu
General use
1. Press MENU in STOP mode to display the set up menu on
screen. The menu shows current settings.
2. Use arrow buttons to highlight options and press OK to
open selected menu.
3. Press LEFT arrow to go back to the previous menu or
press GO BACK to exit the setup menu completely.
RTDI01-EN DVD 11/25/02 10:23 AM Page 8
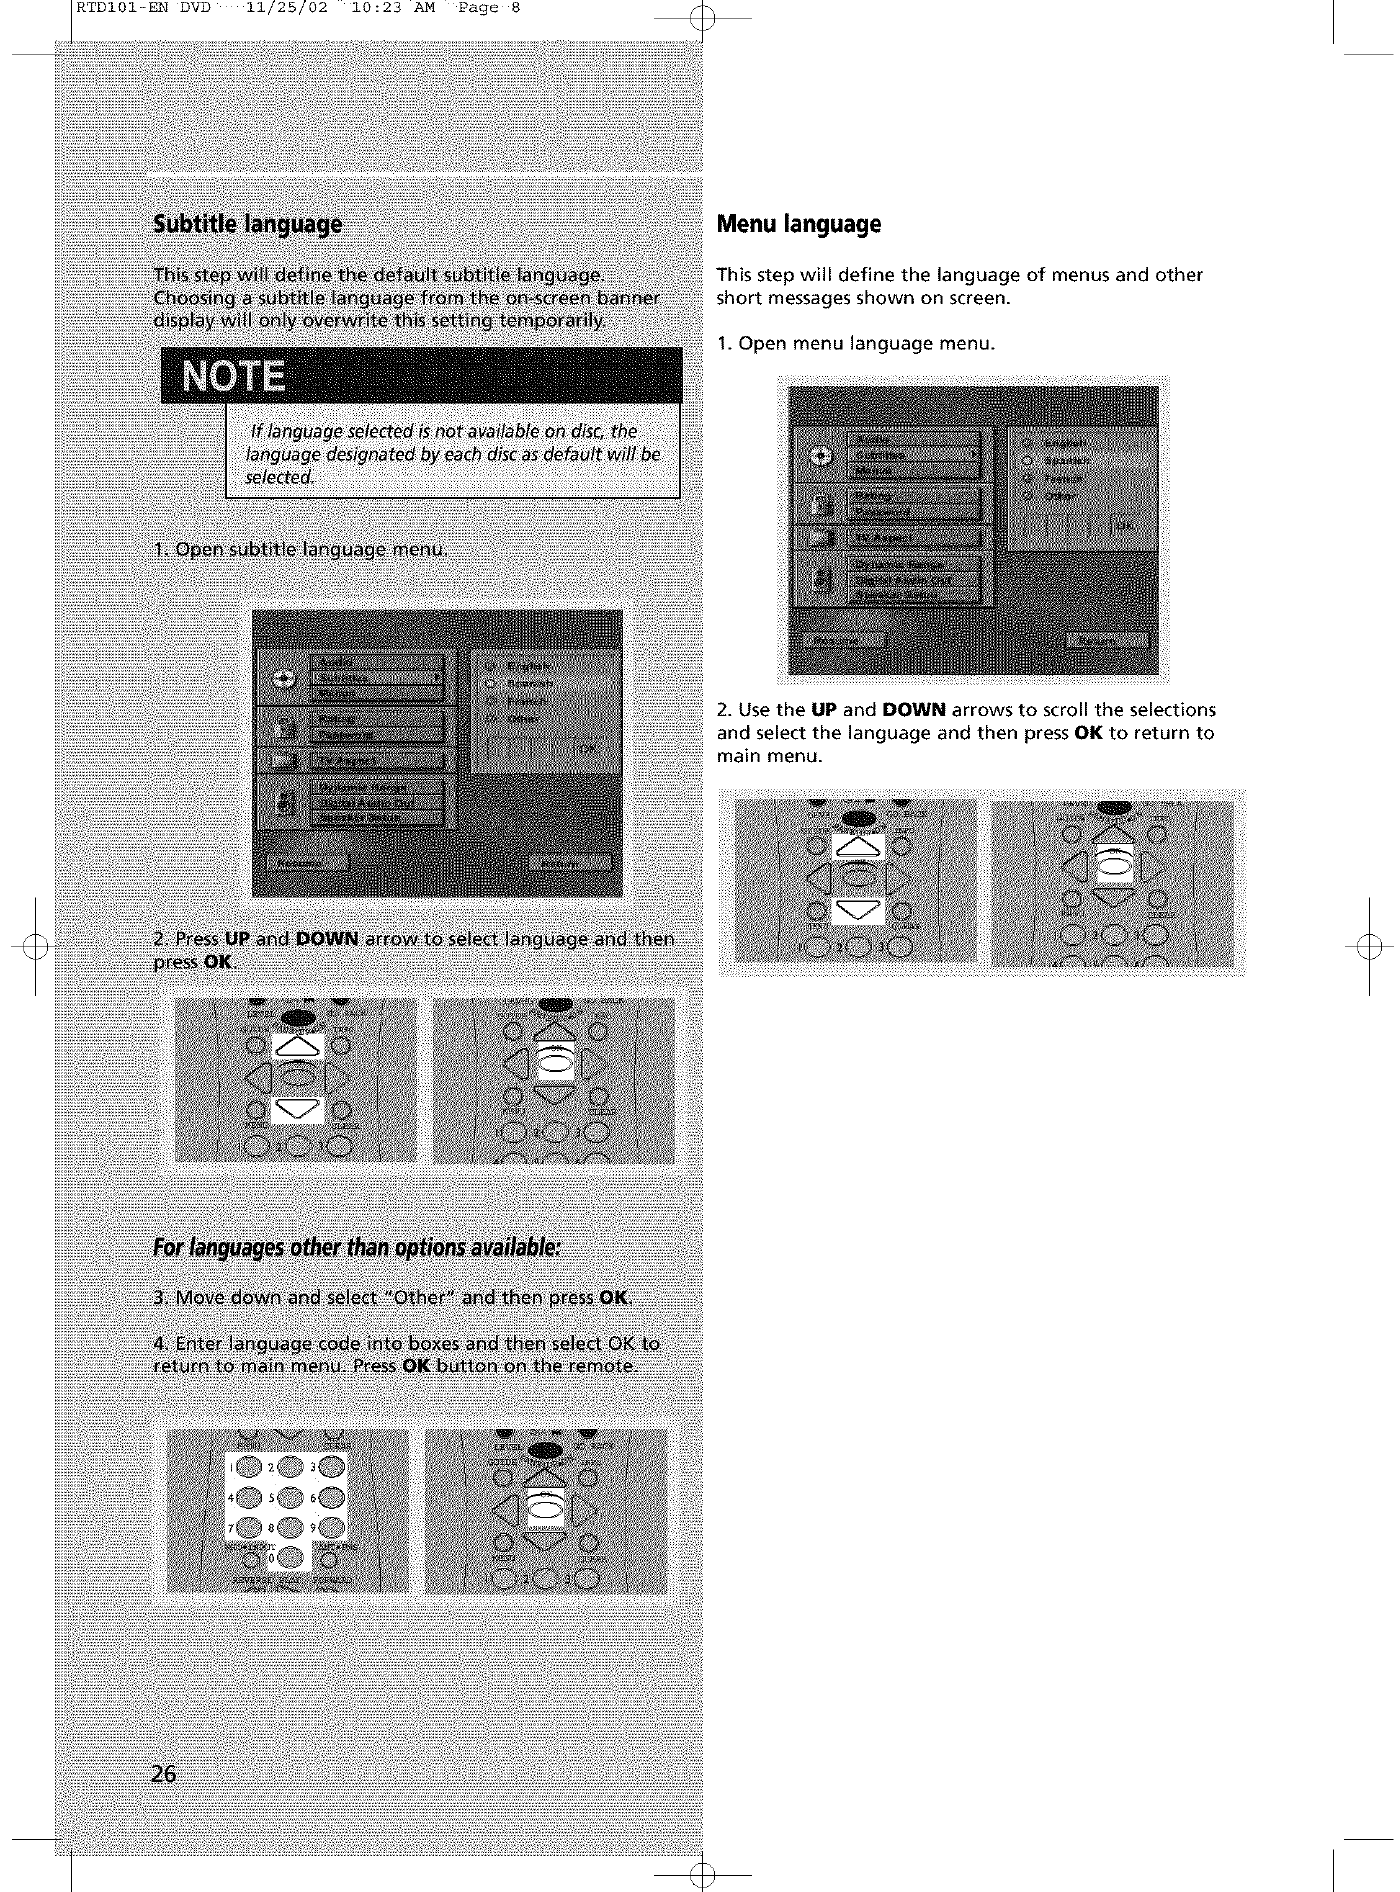
Menu language
This step will define the language of menus and other
short messages shown on screen.
1. Open menu language menu.
2. Use the UP and DOWN arrows to scroll the selections
and select the language and then press OK to return to
main menu.
RTDI01-EN DVD 11/25/02 10:23 AM Page 9
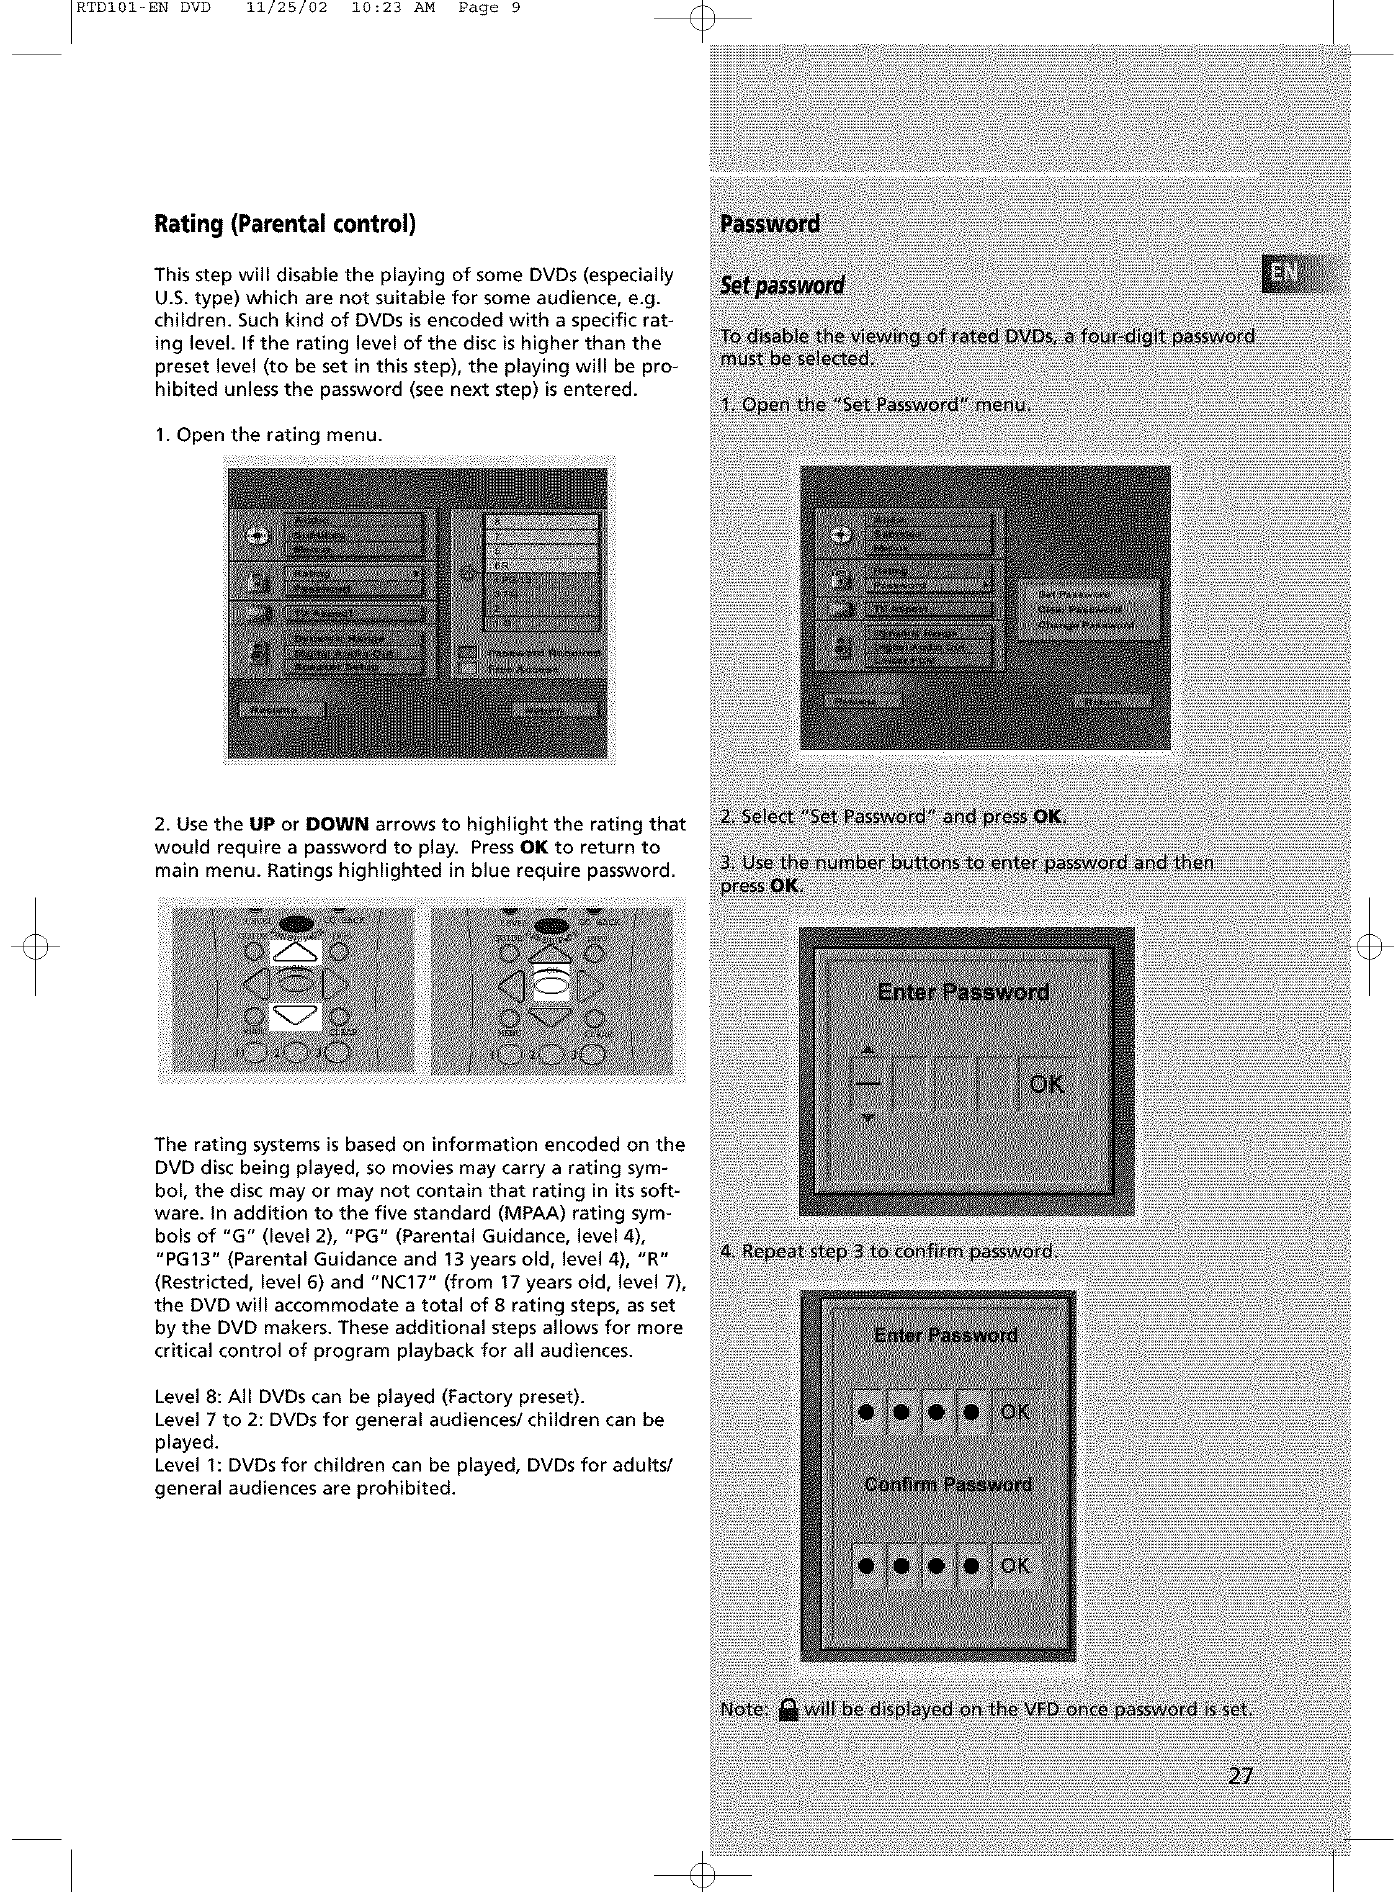
Rating (Parental control)
This step will disable the playing of some DVDs (especially
U.S. type) which are not suitable for some audience, e.g.
children. Such kind of DVDs is encoded with a specific rat-
ing level. If the rating level of the disc is higher than the
preset level (to be set in this step), the playing will be pro-
hibited unless the password (see next step) is entered.
1. Open the rating menu.
2. Use the UP or DOWN arrows to highlight the rating that
would require a password to play. Press OK to return to
main menu. Ratings highlighted in blue require password.
The rating systems is based on information encoded on the
DVD disc being played, so movies may carry a rating sym-
bol, the disc may or may not contain that rating in its soft-
ware. In addition to the five standard (MPAA) rating sym-
bols of "G" (level 2), "PG" (Parental Guidance, level 4),
"PG13" (Parental Guidance and 13 years old, level 4), "R"
(Restricted, level 6) and "NC17" (from 17 years old, level 7),
the DVD will accommodate a total of 8 rating steps, as set
by the DVD makers. These additional steps allows for more
critical control of program playback for all audiences.
Level 8: All DVDs can be played (Factory preset).
Level 7 to 2: DVDs for general audiences/children can be
played.
Level 1: DVDs for children can be played, DVDs for adults/
general audiences are prohibited.
RTDI01-EN DVD 11/25/02 10:23 AM Page i0
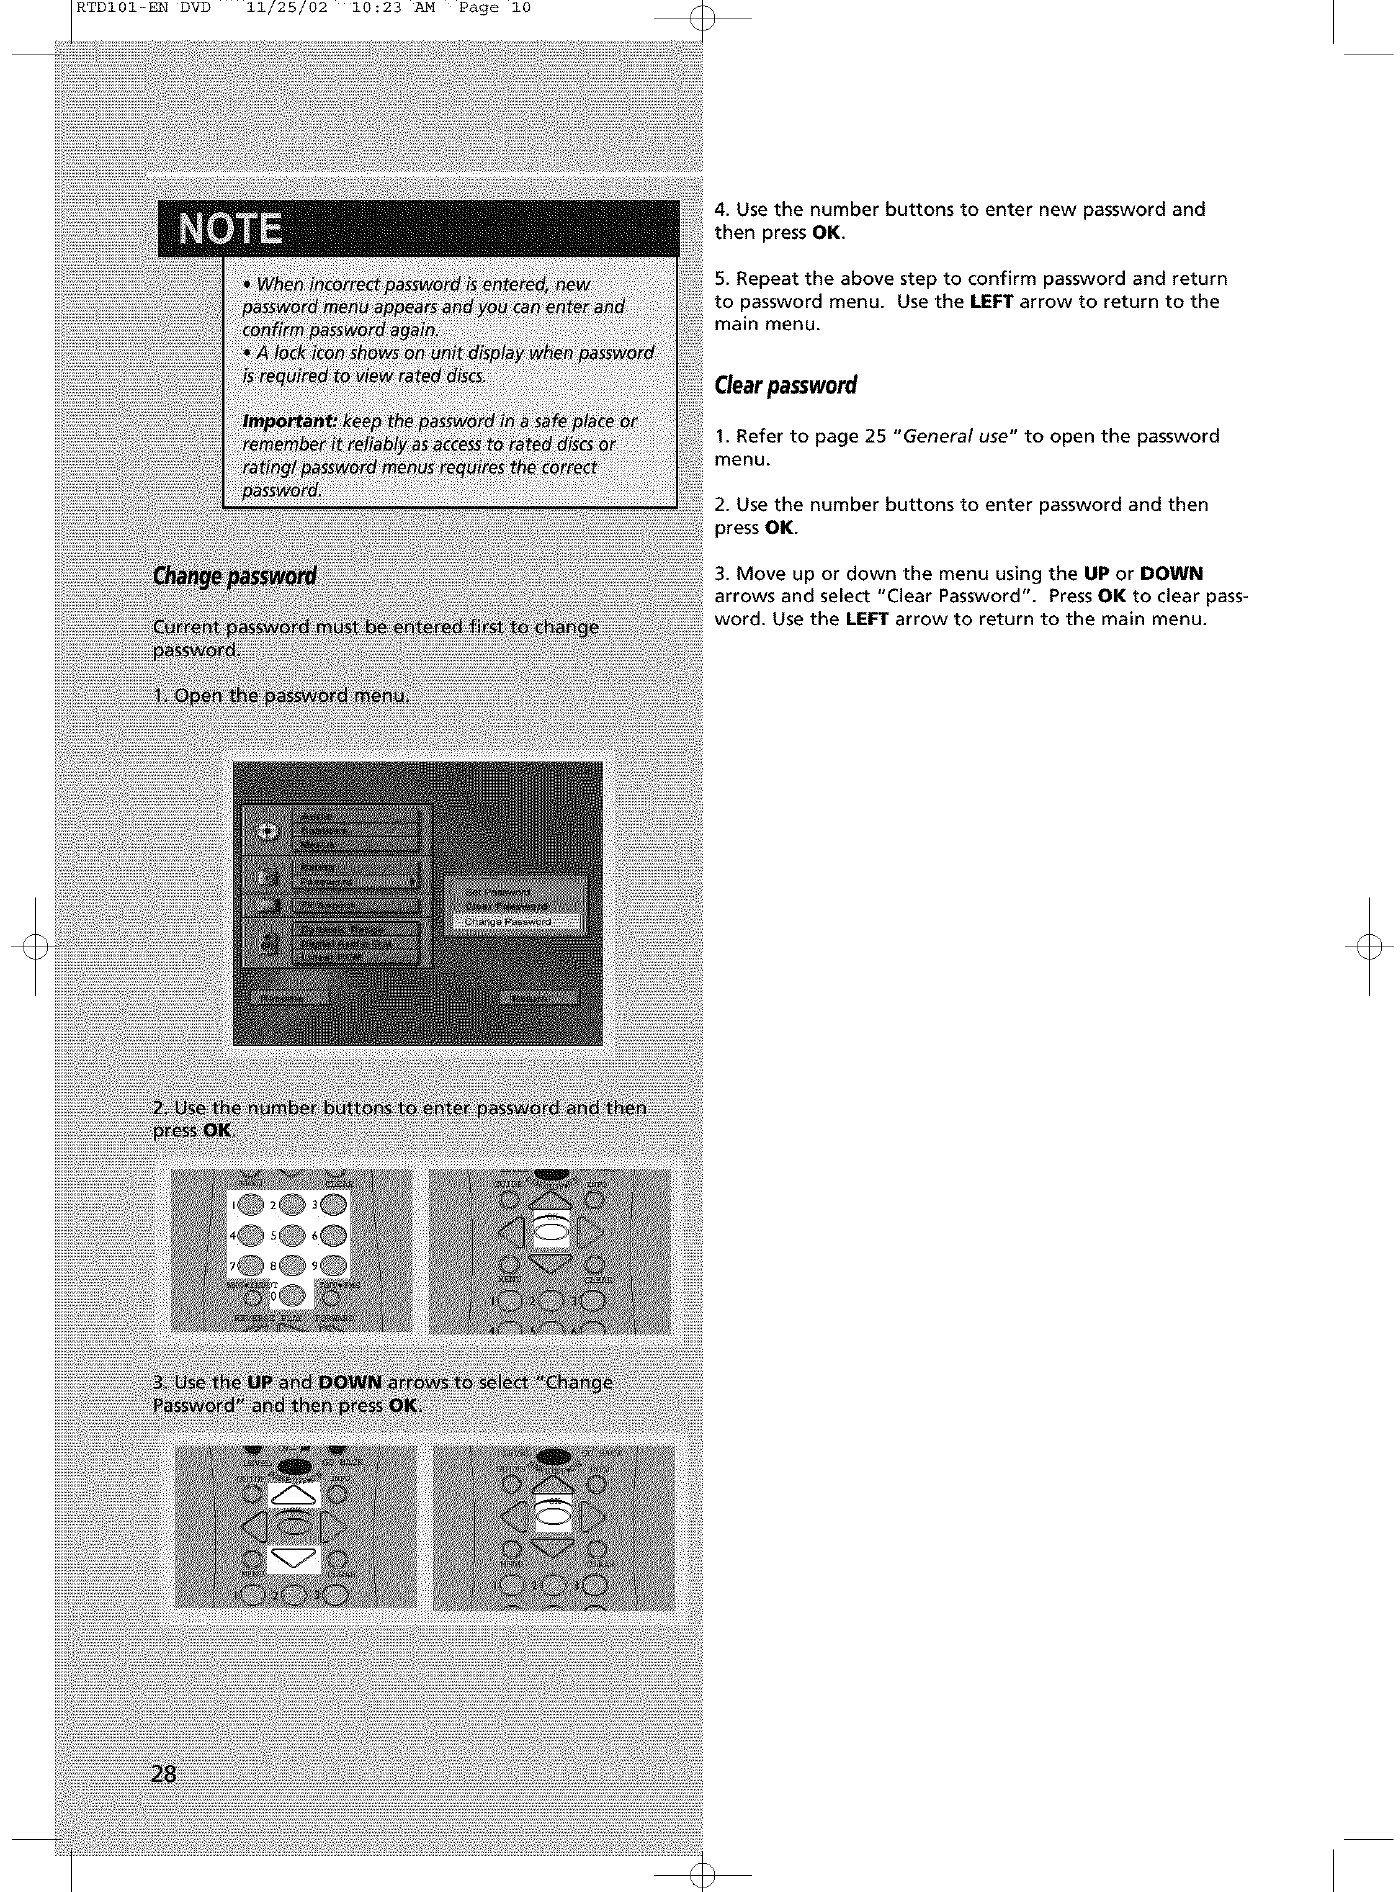
4. Use the number bu_onsto enter new password and
then press OK.
5. Repeat the above step to confirm password and return
to password menu. Use the LEFT arrow to return to the
main menu.
Clearpassword
1. Refer to page 25 "General use" to open the password
menu.
2. Use the number buttons to enter password and then
press OK.
3. Move up or down the menu using the UP or DOWN
arrows and select "Clear Password". Press OK to clear pass-
word. Use the LEFT arrow to return to the main menu.
RTDI01-EN DVD 11/25/02 10:23 AM Page ii
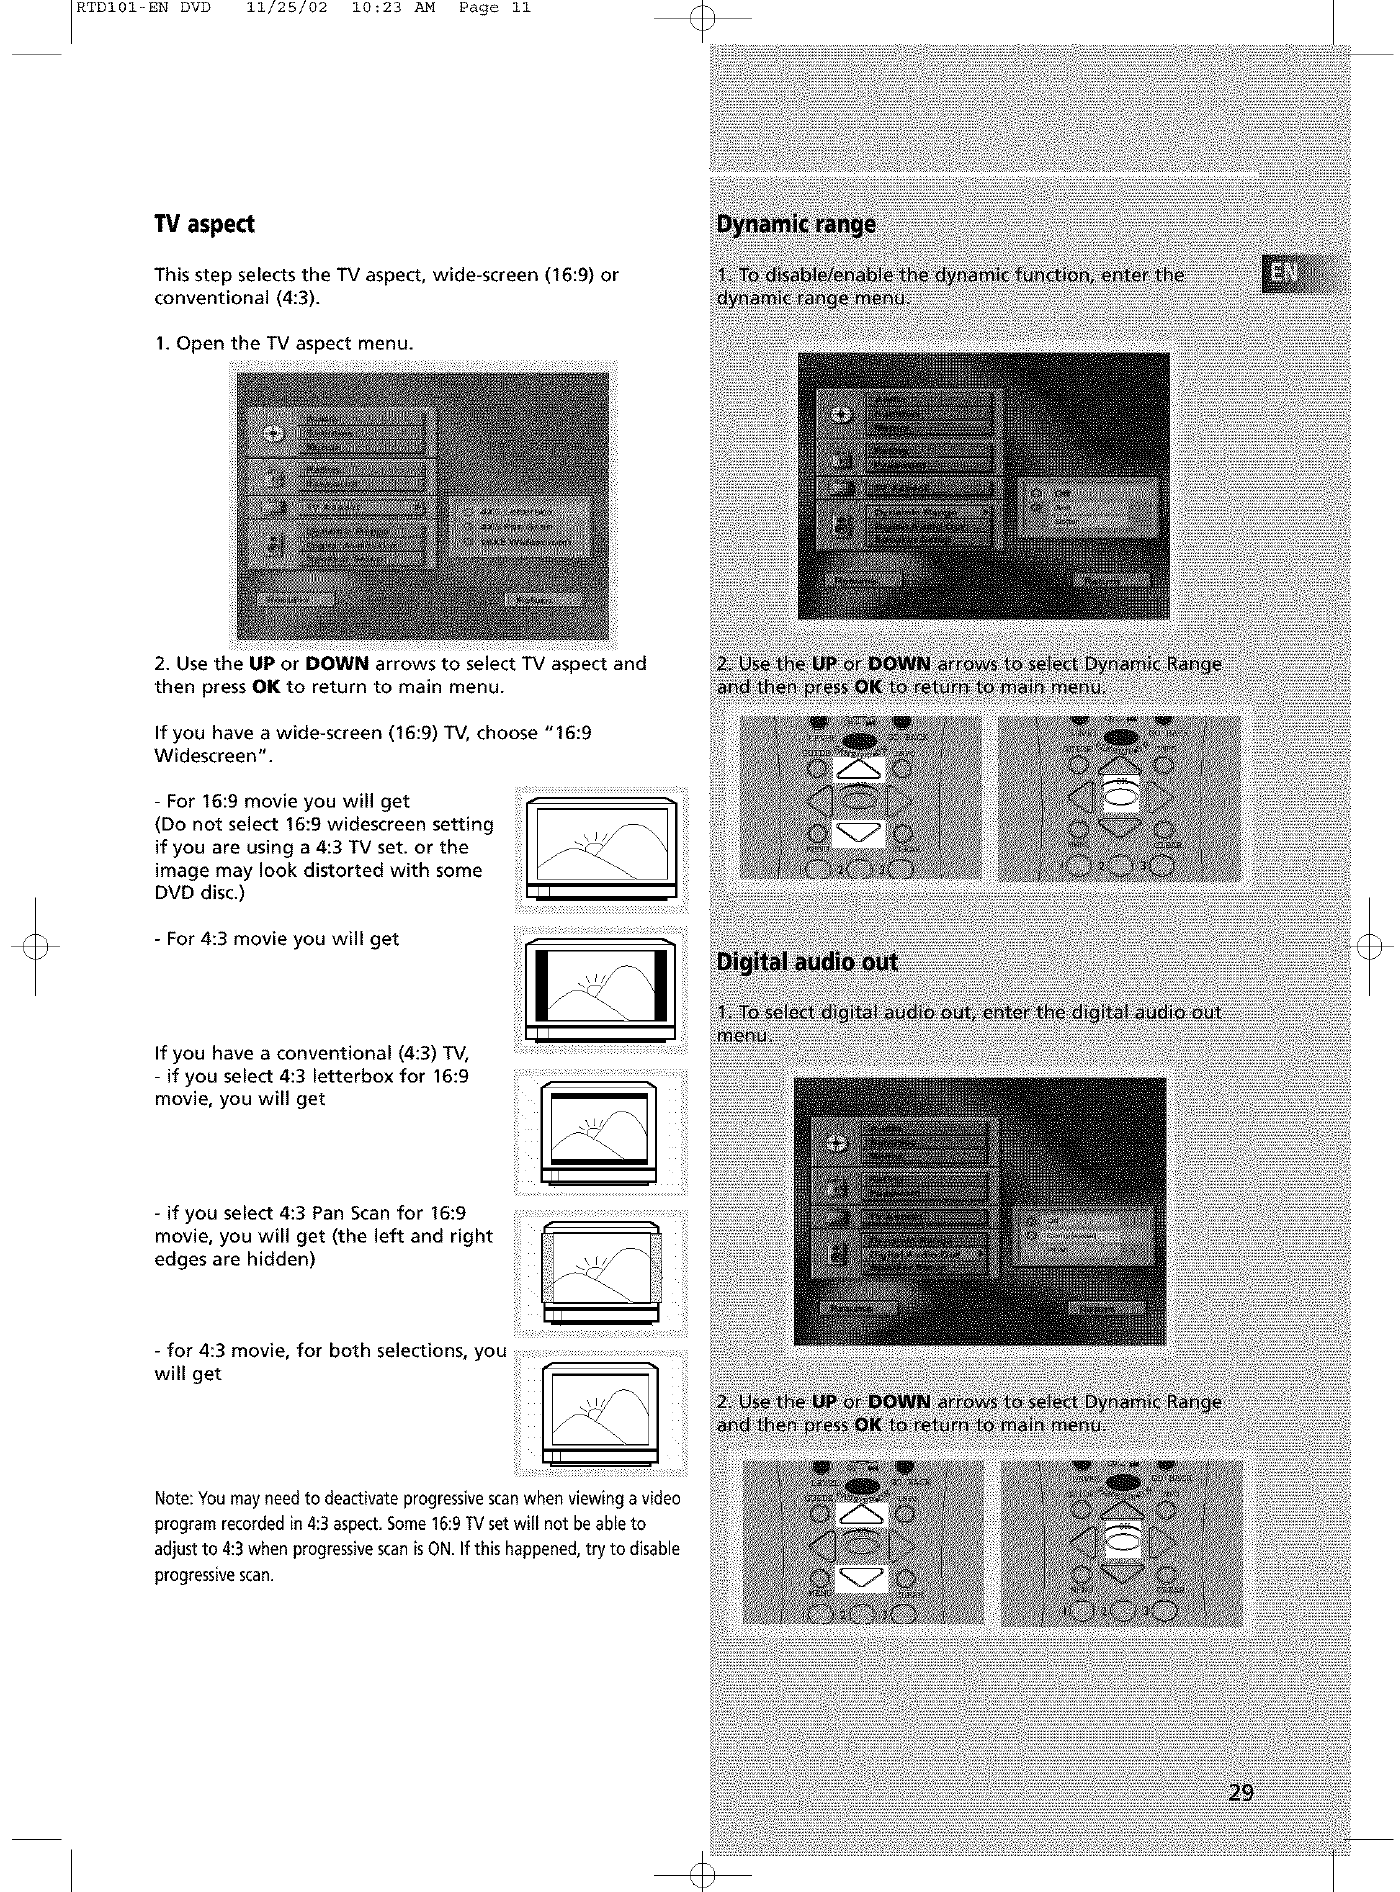
TV aspect
This step selects the TV aspect, wide-screen (16:9) or
conventional (4:3).
1. Open the TV aspect menu.
2. Use the UP or DOWN arrows to select TV aspect and
then press OK to return to main menu.
If you have awide-screen (16:9)TV, choose "16:9
Widescreen".
-For 16:9 movie you will get
(Do not select 16:9 widescreen setting
if you are using a4:3 TV set. or the
image may look distorted with some
DVD disc.)
-For 4:3 movie you will get
If you have a conventional (4:3) TV,
-if you select 4:3 letterbox for 16:9
movie, you will get
-if you select 4:3 Pan Scan for 16:9
movie, you will get (the left and right
edges are hidden)
-for 4:3 movie, for both selections, you
will get
Note: You may need to deactivate progressive scanwhen viewing a video
program recorded in 4:3 aspect. Some 16:9TV set will not be able to
adjust to 4:3when progressive scanisON. If this happened, try to disable
progressivescan.
RTDI01-EN CD_MP3 11/25/02 10:26 AM Page 2
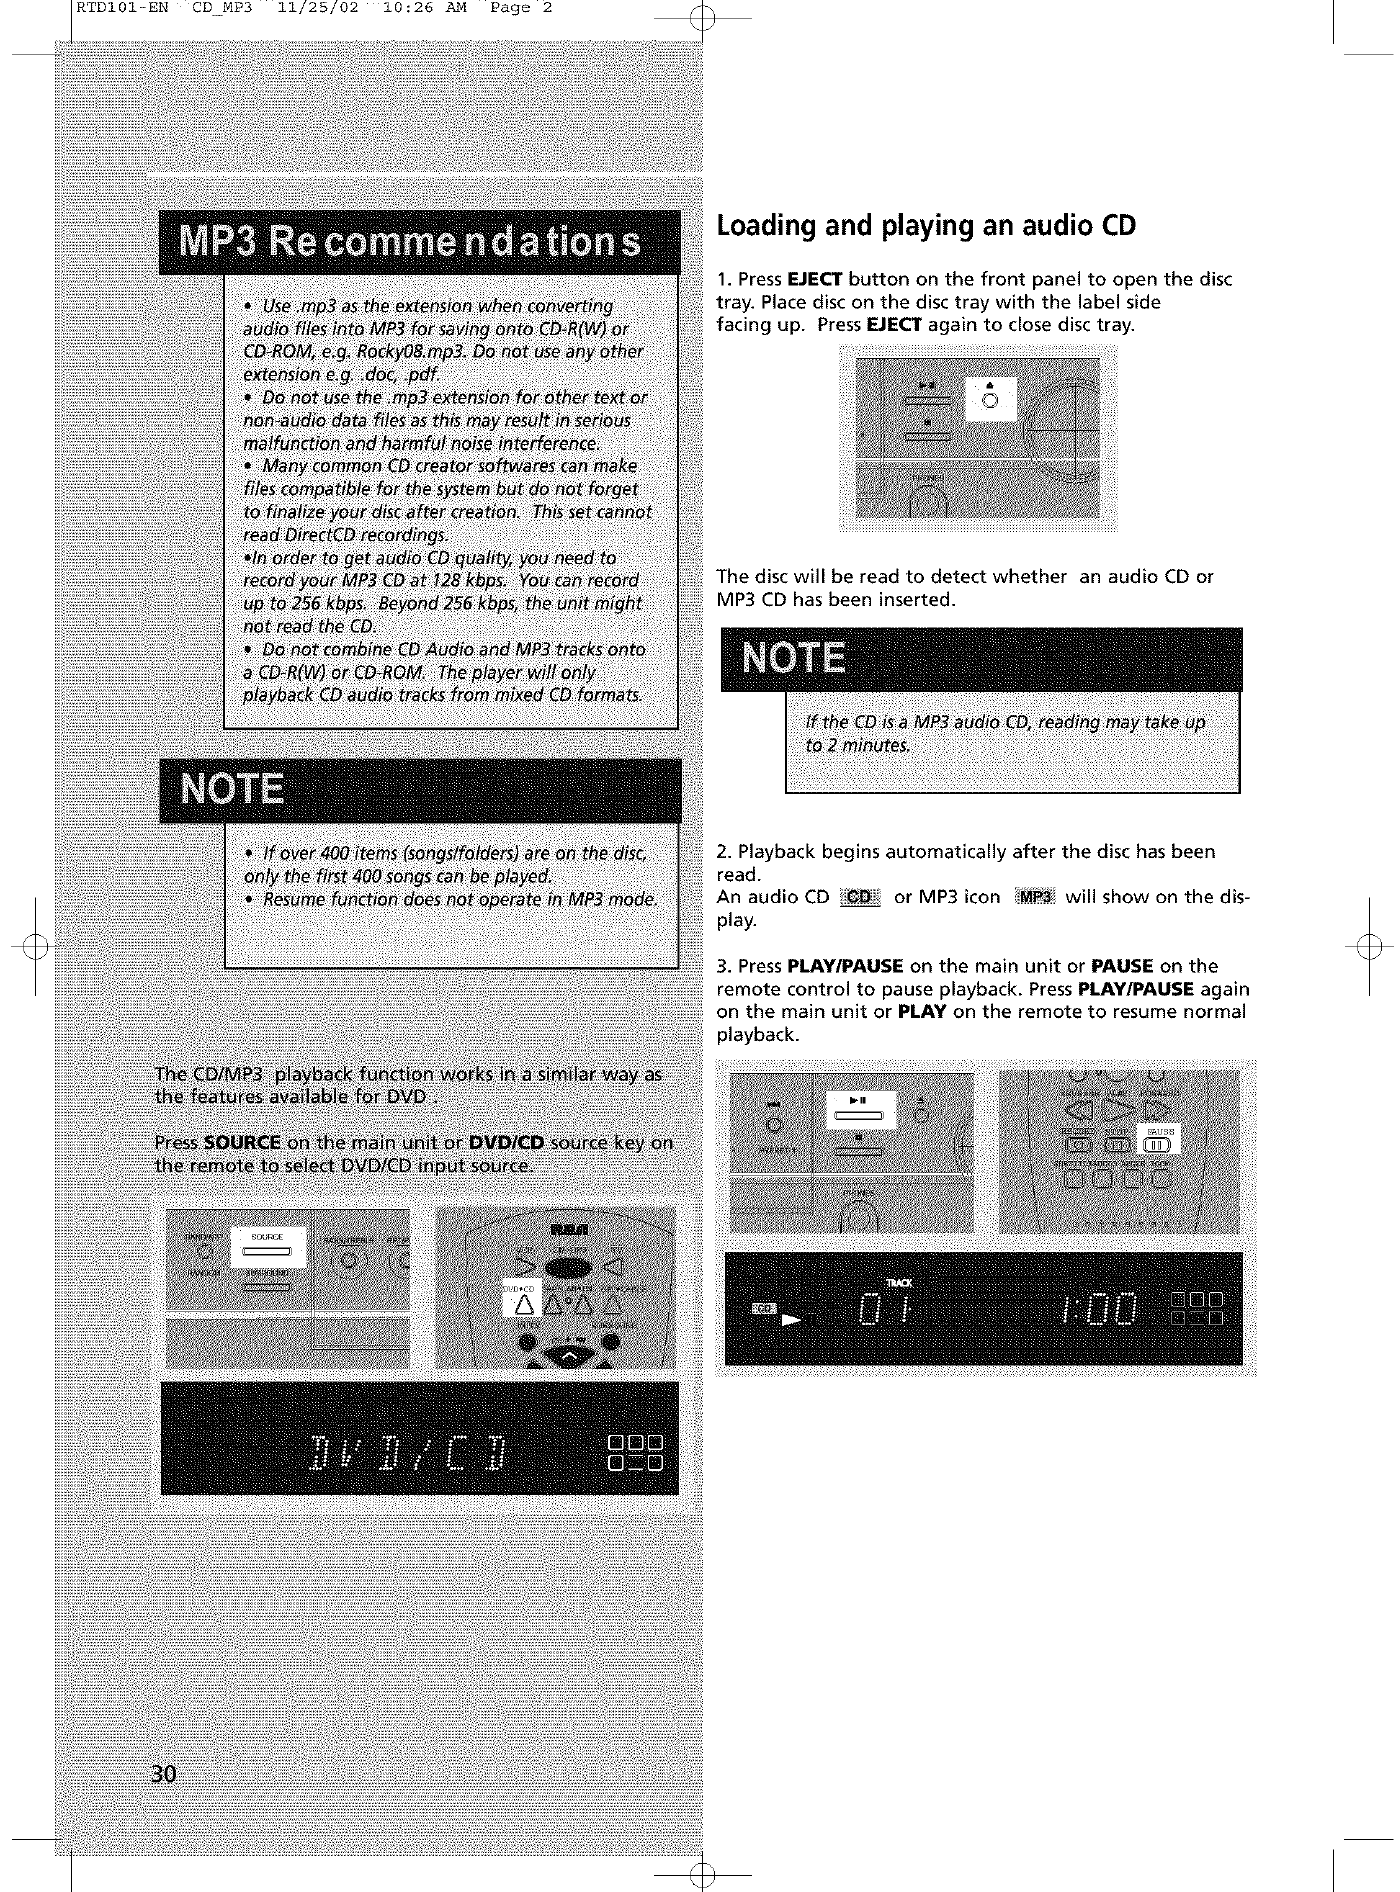
Loading and playing an audio CD
1. Press EJECT button on the front panel to open the disc
tray. Place disc on the disc tray with the label side
facing up. Press EJECT again to close disc tray.
The disc will be read to detect whether an audio CD or
MP3 CD has been inserted.
2. Playback begins automatically after the disc has been
read.
An audio CD _ or MP3 icon _#_ will show on the dis-
play.
3. Press PLAY/PAUSE on the main unit or PAUSE on the
remote control to pause playback. Press PLAY/PAUSE again
on the main unit or PLAY on the remote to resume normal
playback.

RTDI01-EN CD_MP3 11/25/02 10:26 AM Page 3
4. Press SKIP REVERSE on the main unit or CH- on the
remote to return to the previous track. Press SKIP FOR-
WARD on the main unit or CH + on the remote to go to
the next track.
5. Press STOP on the main unit or STOP on the remote con-
trol to end playback.
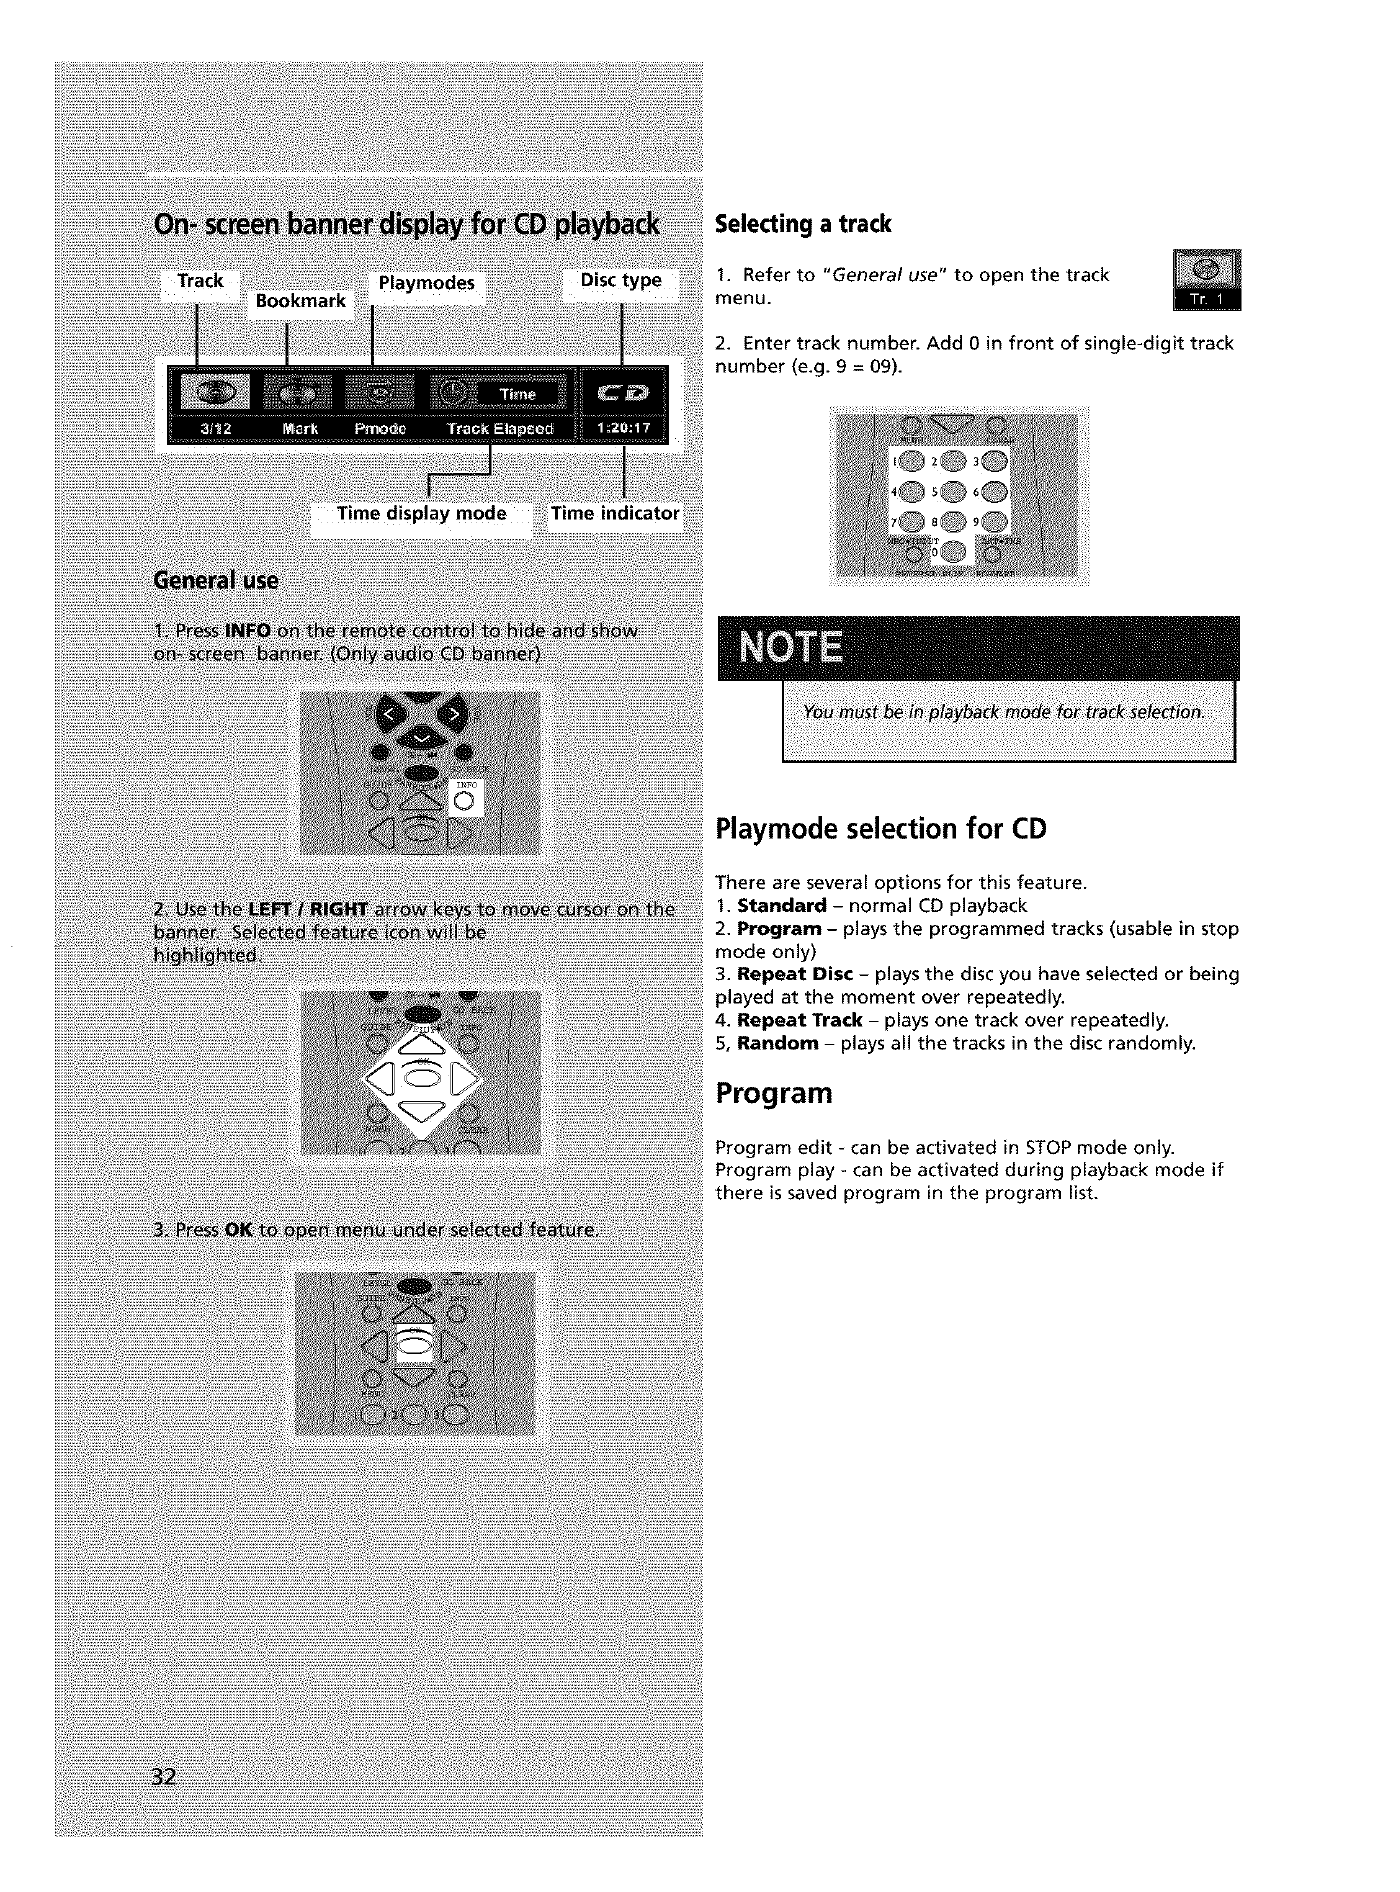
Selecting a track
1. Refer to "General use" to open the track
menu.
2. Enter track number. Add 0 in front of single-digit track
number (e.g. 9 = 09).
Time indicator
Playmode selection for CD
There are several options for this feature.
1. Standard - normal CD playback
2. Program -plays the programmed tracks (usable in stop
mode only)
3. Repeat Disc - plays the disc you have selected or being
played at the moment over repeatedly.
4. Repeat Track - plays one track over repeatedly.
5, Random - plays all the tracks in the disc randomly.
Program
Program edit - can be activated in STOP mode only.
Program play - can be activated during playback mode if
there is saved program in the program list.
RTDI01-EN CD_MP3 11/25/02 10:26 AM Page 5
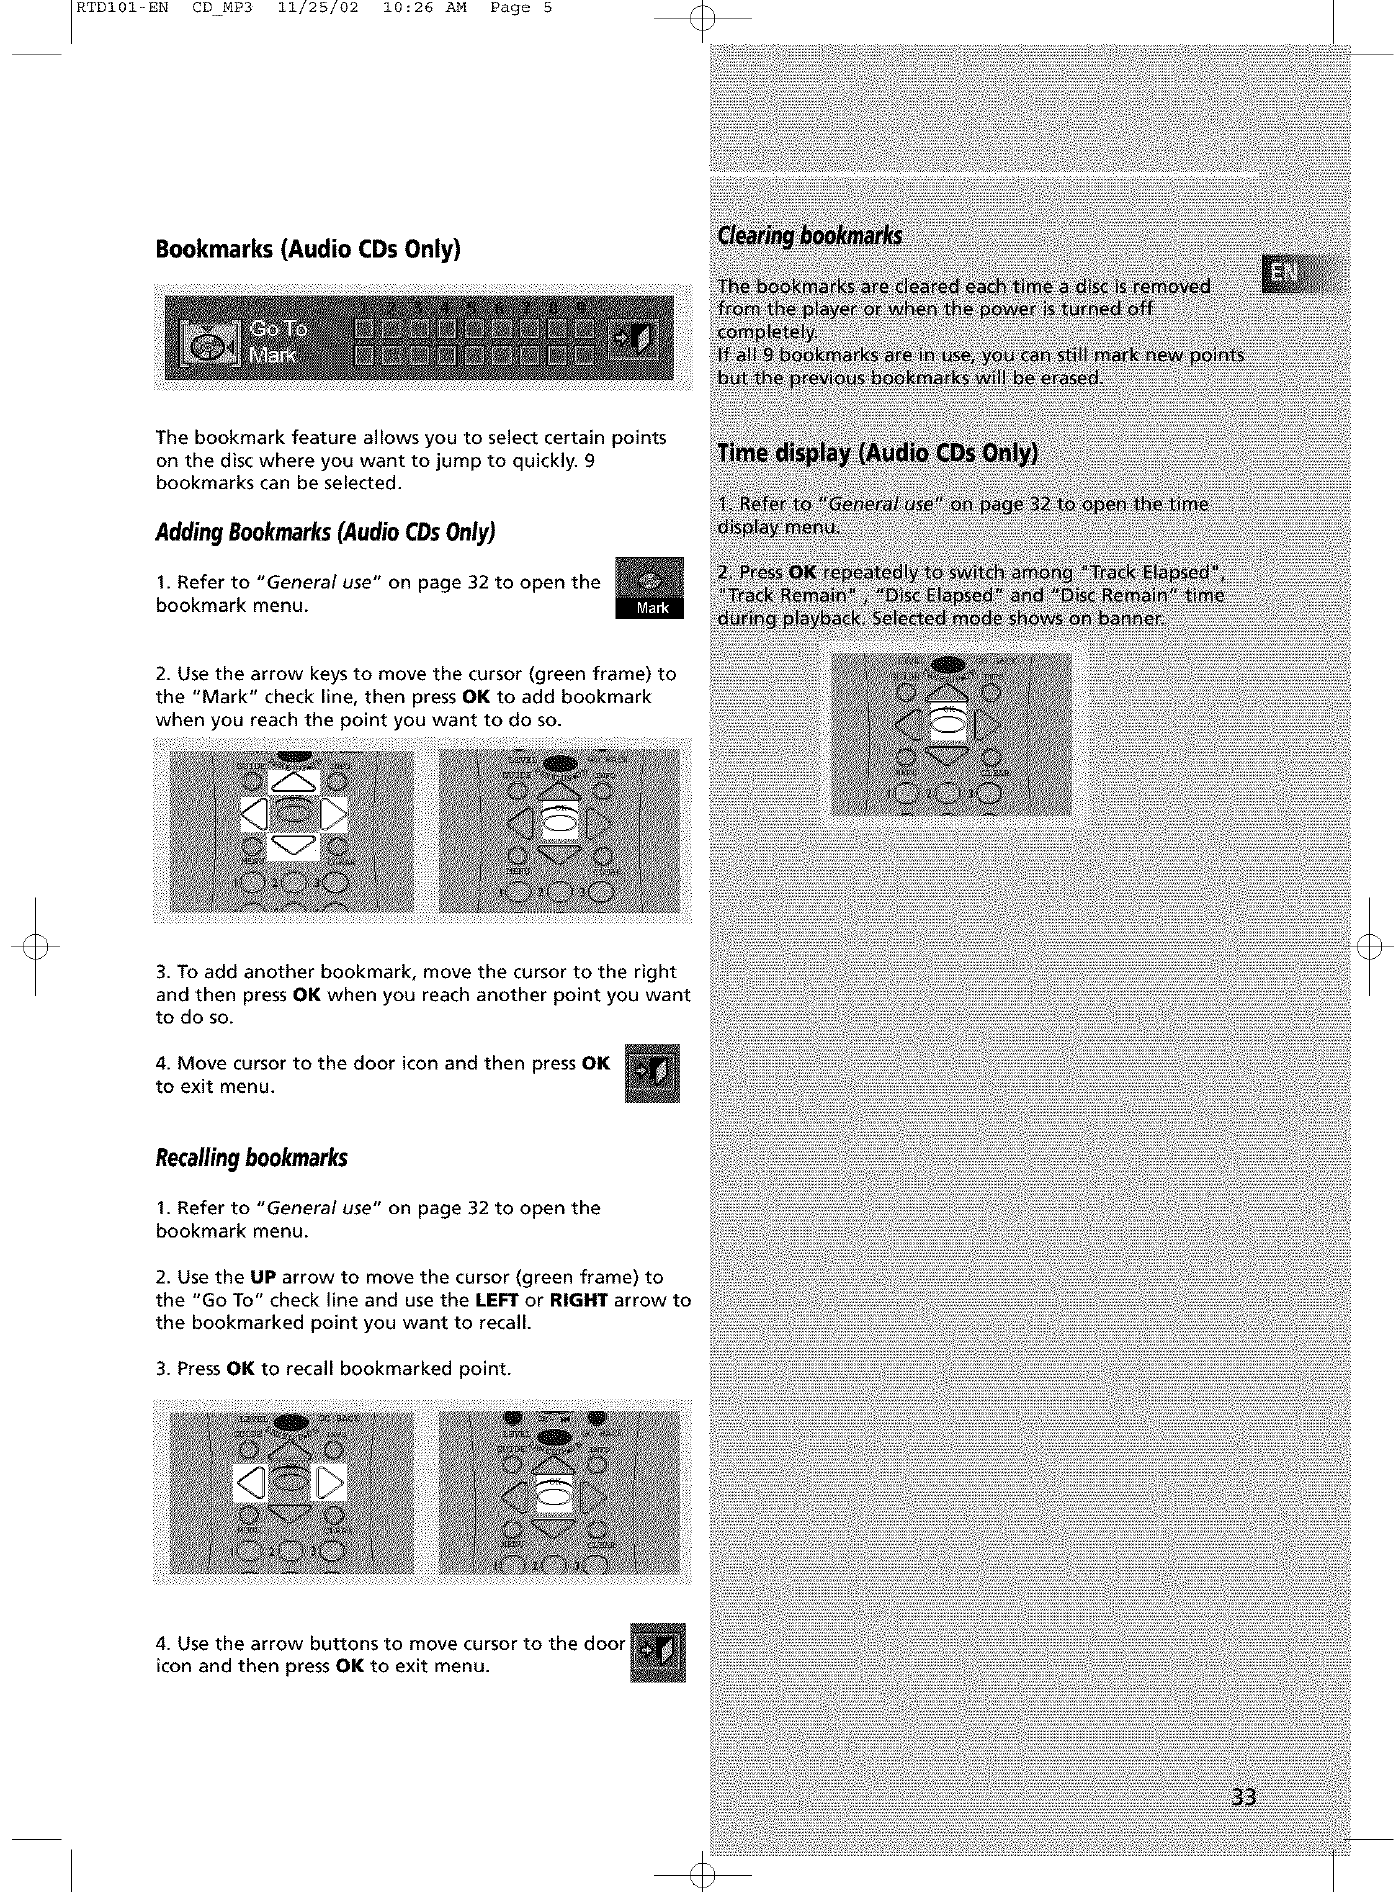
Bookmarks (Audio CDs Only)
The bookmark feature allows you to select certain points
on the disc where you want to jump to quickly. 9
bookmarks can be selected.
Adding Bookmarks(Audio CDsOnly)
1. Refer to "General use" on page 32 to open the
bookmark menu.
2. Use the arrow keys to move the cursor (green frame) to
the "Mark" check line, then press OK to add bookmark
when you reach the point you want to do so.
3. To add another bookmark, move the cursor to the right
and then press OK when you reach another point you want
to do so.
4. Move cursor to the door icon and then press OK
to exit menu.
Recallingbookmarks
1. Refer to "General use" on page 32 to open the
bookmark menu.
2. Use the UP arrow to move the cursor (green frame) to
the "Go To" check line and use the LEFT or RIGHT arrow to
the bookmarked point you want to recall.
3. Press OK to recall bookmarked point.
4. Use the arrow buttons to move cursor to the door
icon and then press OK to exit menu.

RTDI01-EN CD_MP3 11/25/02 10:26 AM Page 6
4. Repeat steps 2 and 3 to add additional tracks to the pro-
gram.
5. Move to highlight "Play" (start program playback) or
"Done" (return to normal playback with program saved)
and then press OK to confirm program playback or return
to the stop mode.
Delete Program
1. In stop mode, press RPT/PROG on the main unit or
enter the OSD banner to display program edit playlist
2. Use the LEFT or RIGHT arrow to select Playlist, then use
the UP or DOWN arrows to select and highlight the
programmed track you want to delete on the playlist
3. Use the arrow buttons to highlight "Delete" and then
press OK to delete track.
4. Highlight "Play" (to start program playback) or "Done"
(to return to normal playback with program saved) and
then press OK.
/nsert track
1. In stop mode, press and hold RPT/PROG. on the main
unit or enter the OSD banner to display program edit
playlist.
2. Use the arrows to highlight item on the playlist where
you want to insert a track before it.
3. Refer to "Edit program" to select a track to be inserted.
4. Highlight "Insert" and then press OK
5. Highlight "Play" (start program playback) or "Done"
(return to normal playback with program saved) and then
press OK.
Cancelprogram
Program will be cancelled when;
1. disc tray is opened;
2. power is turned off;
3. STOP is pressed twice. The red PGM indicator will
disappear on display and player will resume normal play-
back mode. Nevertheless, the program will remain in mem-
ory and can be recalled by pressing PROGRAM again.
RTDI01-EN CD_MP3 11/25/02 10:26 AM Page 7
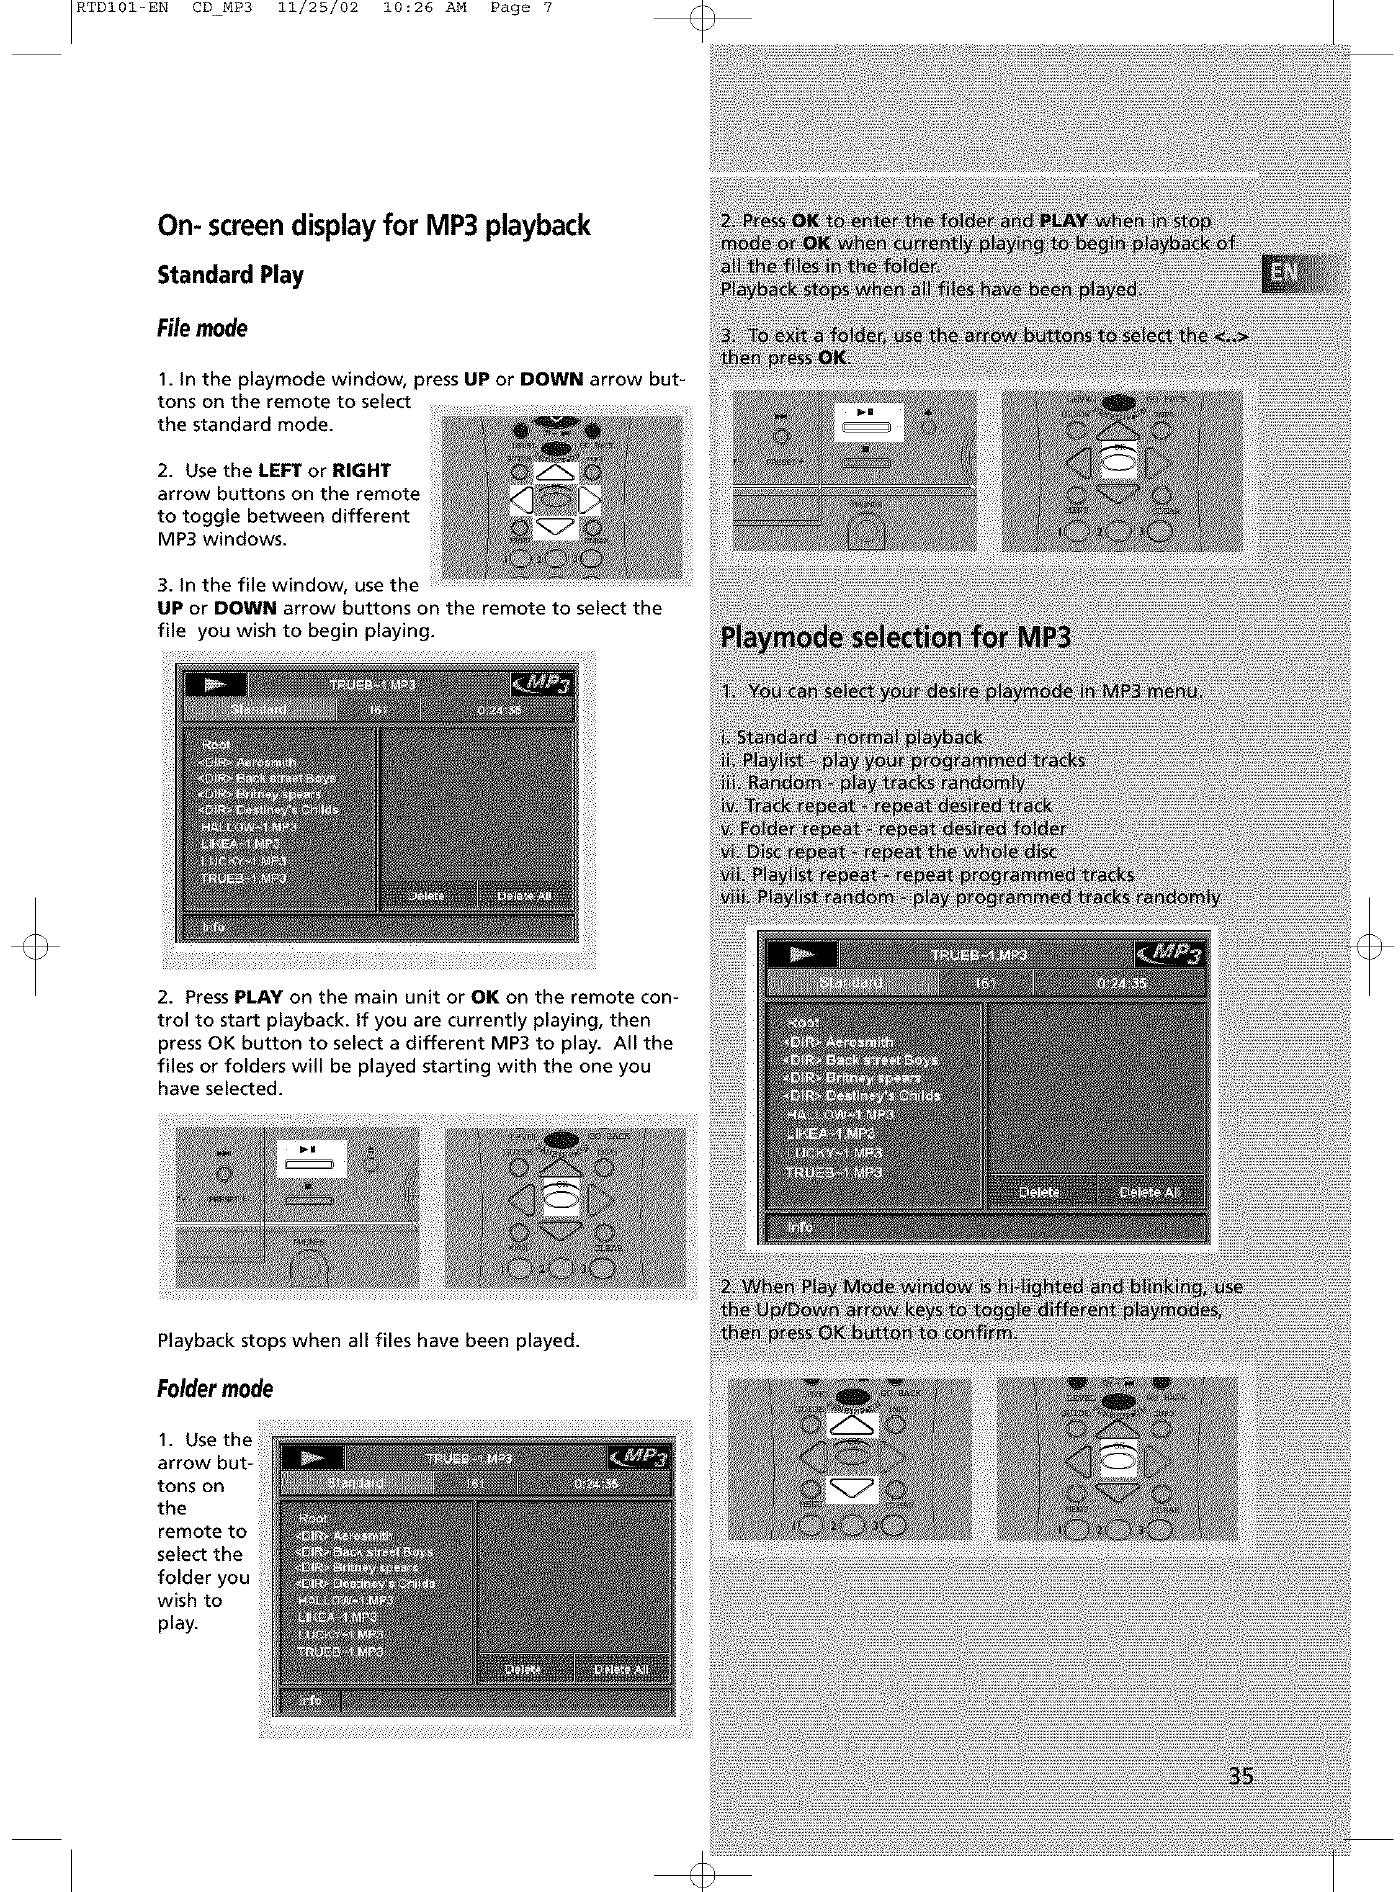
On- screendisplayfor MP3 playback
Standard Play
Filemode
1. in the playmode window, press UP or DOWN arrow but-
tons on the remote to select
the standard mode.
2. Use the LEFT or RIGHT
arrow buttons on the remote
to toggle between different
MP3 windows.
3. in the file window, use the
UP or DOWN arrow buttons on the remote to select the
file you wish to begin playing.
2. Press PLAY on the main unit or OK on the remote con-
trol to start playback, if you are currently playing, then
press OK button to select a different MP3 to play. All the
files or folders will be played starting with the one you
have selected.
Playback stops when all files have been played.
Foldermode
1.
arrow but-
tons on
the
remote to
select the
folder you
wish to
play.
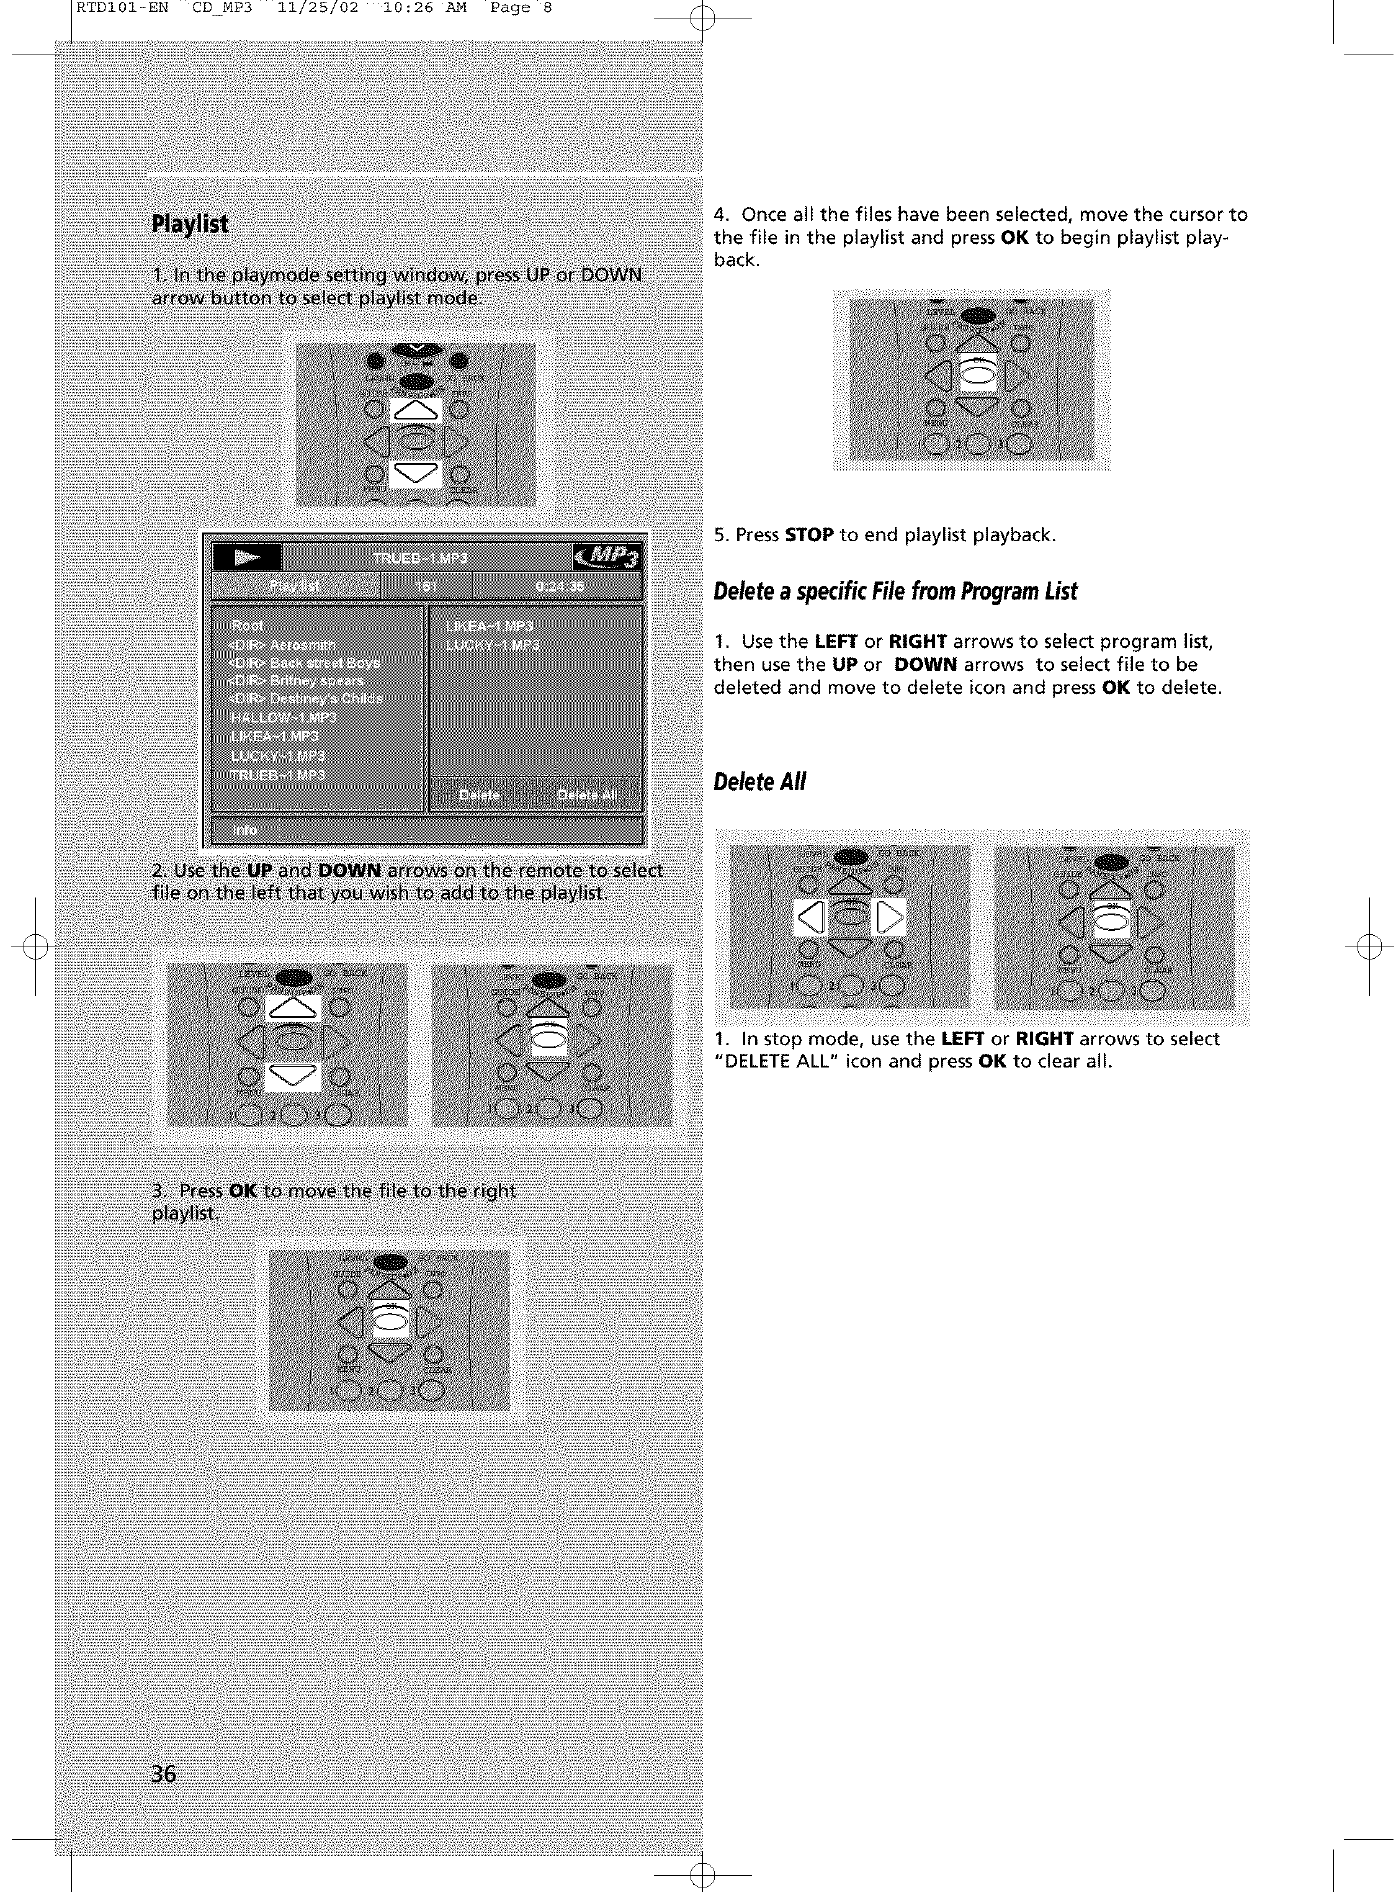
RTDI01-EN CD_MP3 11/25/02 10:26 AM Page 8
4. Once all the files have been selected, move the cursor to
the file in the playlist and press OK to begin playlist play-
back.
5. Press STOP to end playlist playback.
Delete a specificFile from ProgramList
1. Use the LEFT or RIGHT arrows to select program list,
then use the UP or DOWN arrows to select file to be
deleted and move to delete icon and press OK to delete.
Delete All
1. In stop mode, use the LEFT or RIGHT arrows to select
"DELETE ALL" icon and press OK to clear all.
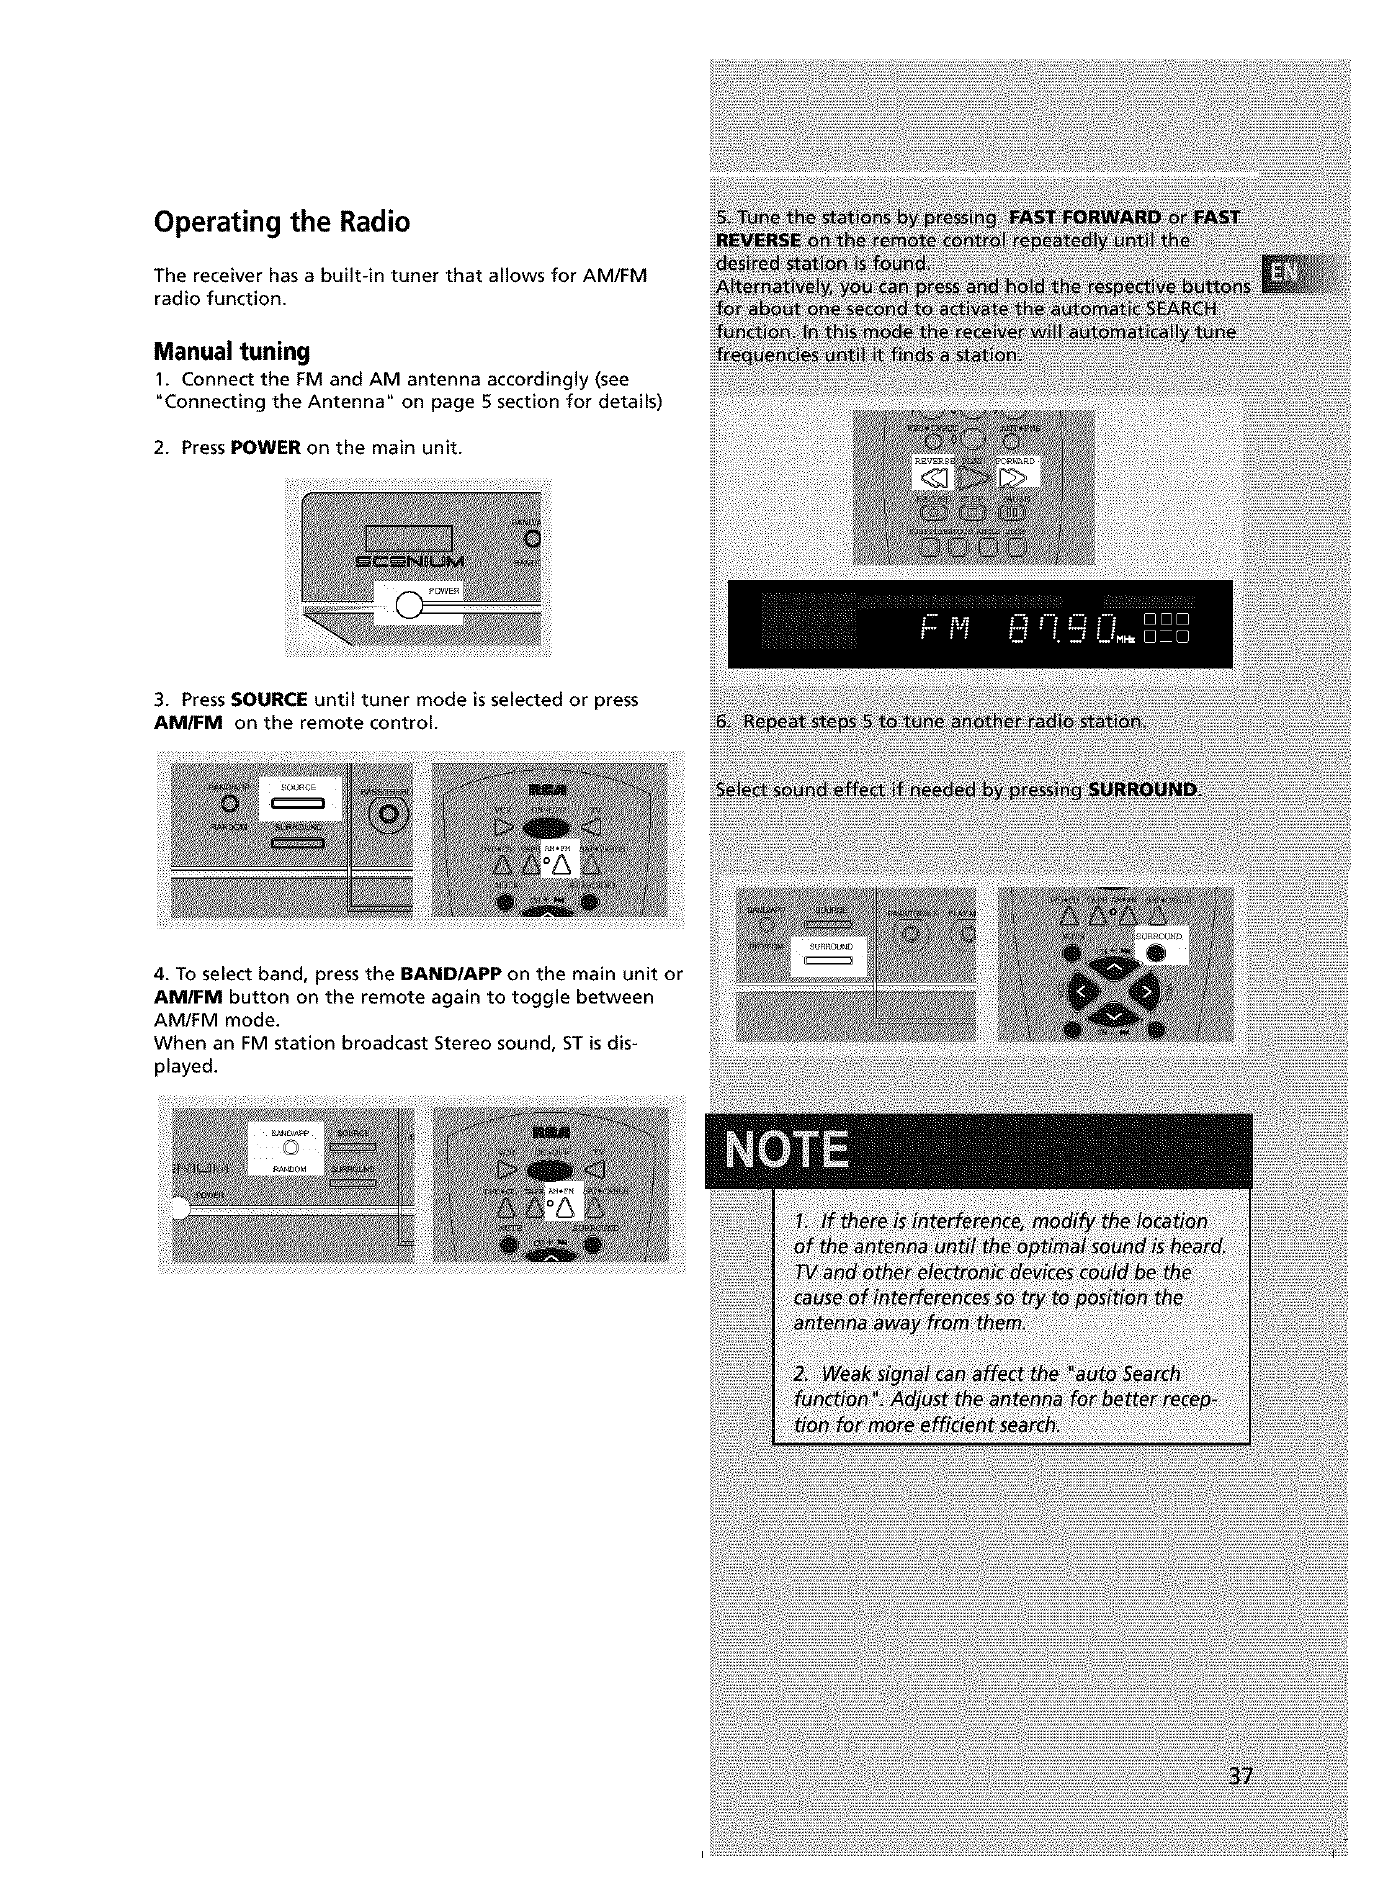
Operating the Radio
The receiver has a built-in tuner that allows for AM/FM
radio function.
Manual tuning
1. Connect the FM and AM antenna accordingly (see
"Connecting the Antenna" on page 5 section for details)
2. Press POWER on the main unit.
3. PressSOURCE until tuner mode is selected or press
AM/FM on the remote control.
4. To select band, press the BAND/APP on the main unit or
AM/FM button on the remote again to toggle between
AM/FM mode.
When an FM station broadcast Stereo sound, ST is dis-
played.
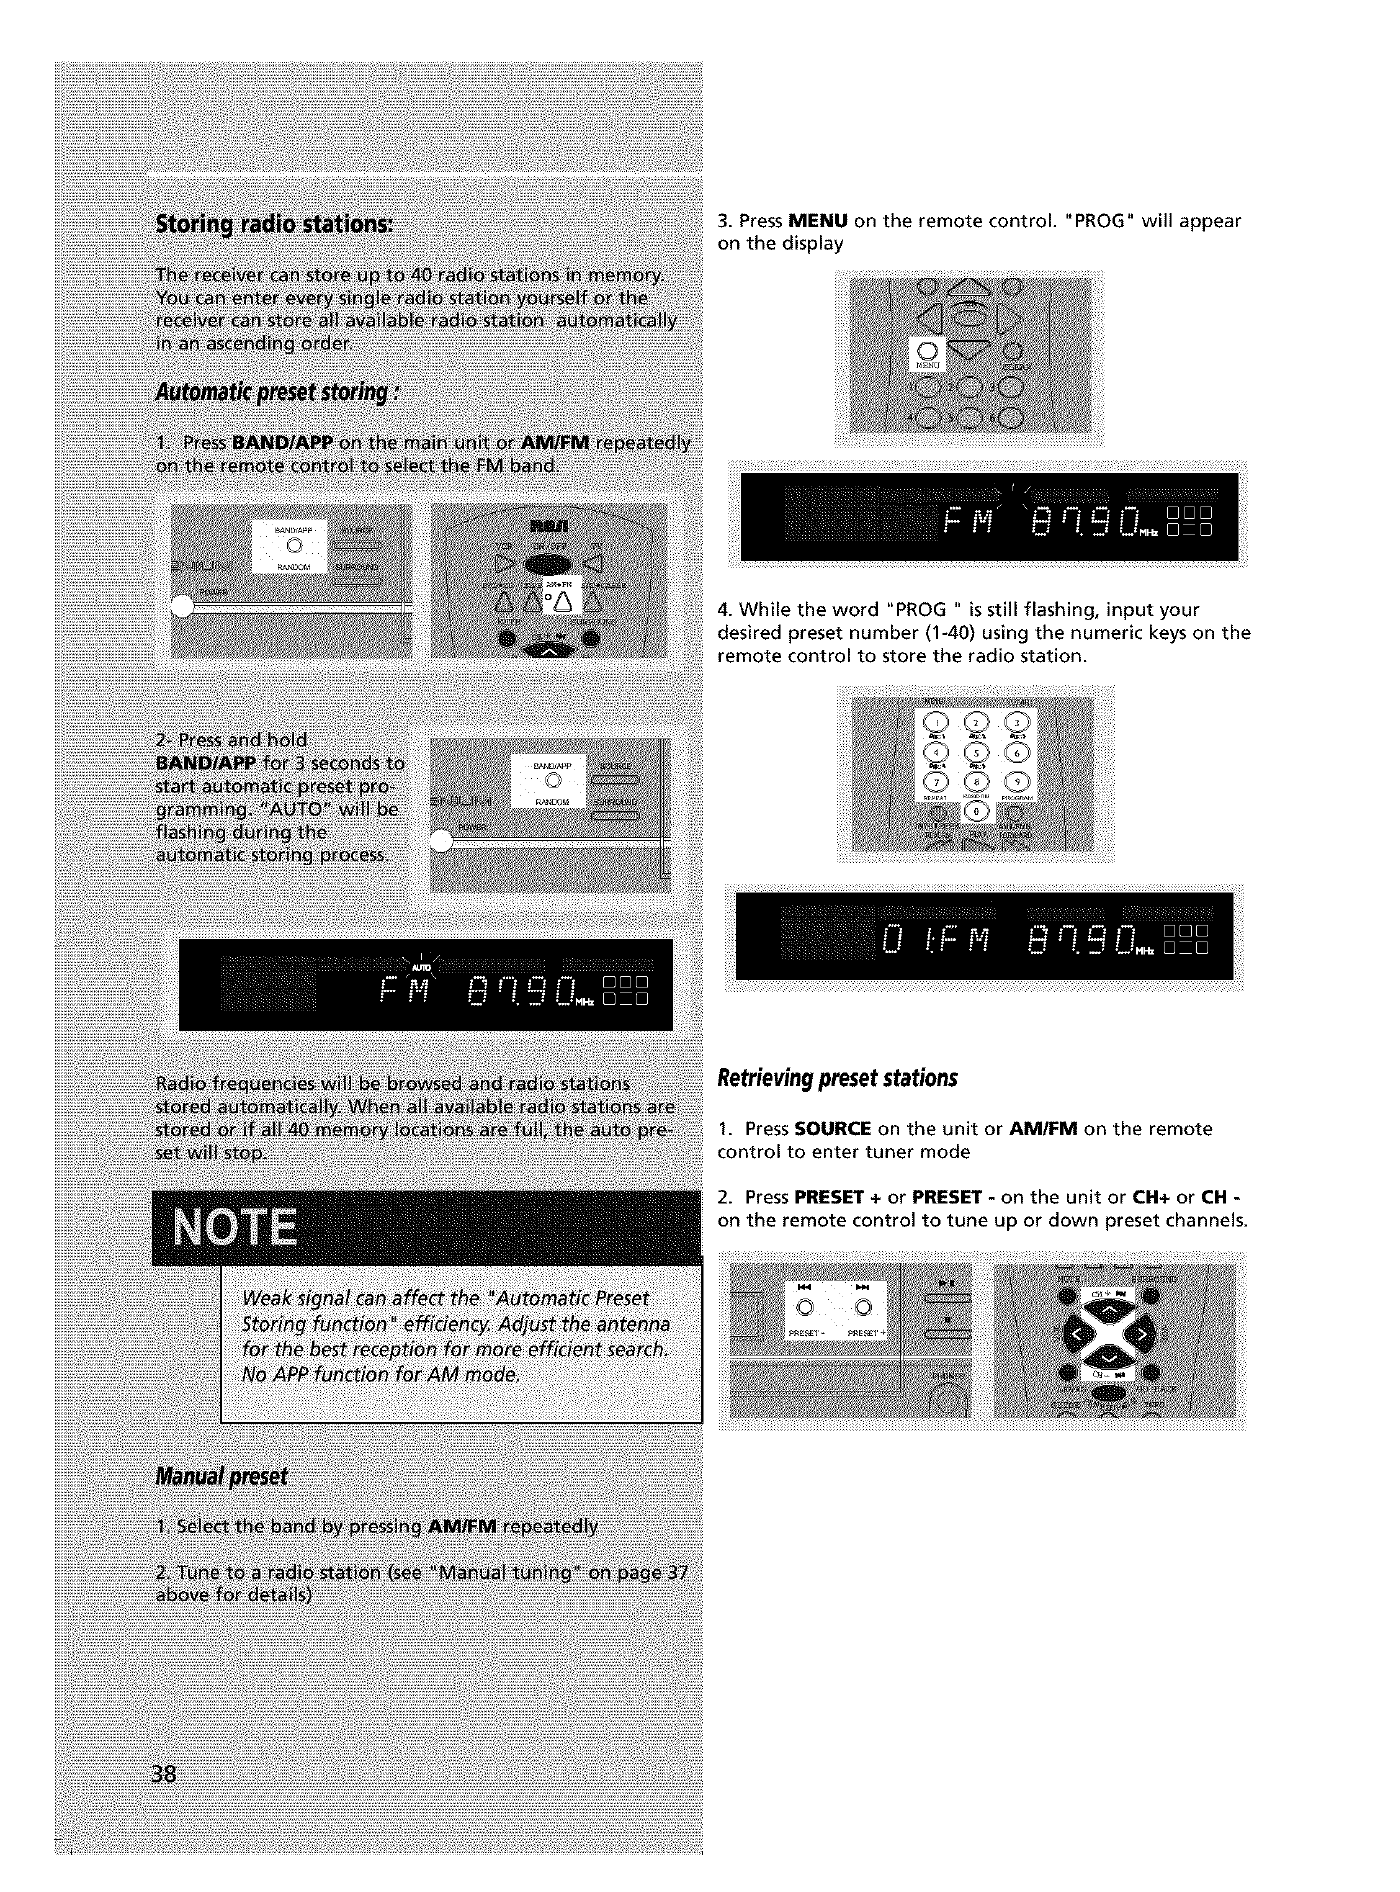
3.PressMENU on the remote control. "PROG" will appear
on the display
4. While the word "PROG " is still flashing, input your
desired preset number (1-40) using the numeric keys on the
remote control to store the radio station.
Retrievingpreset stations
1. Press SOURCE on the unit or AM/FM on the remote
control to enter tuner mode
2. Press PRESET + or PRESET - on the unit or CH+ or CH -
on the remote control to tune up or down preset channels.
Power
Nopower?
• Correctly connect the AC Power Cord to an AC Outlet.
Power is switching off automatically ?
• If the player is not used, i.e. no key pressed for 30 min-
utes, it automatically switches to standby (Auto Power Off).
Press the SOURCE key to switch the player on again.
Thekeysdo not activate the functionstheycontrol(unit
andIor remotecontrol).
• Set the STANDBY key to OFF (red light on) and back to
ON again. Alternatively, turn off the power, disconnect the
power plug and then re-connect it (The player may not be
operating properly due to lightning, static electricity or
some other external factors).
• If keys still do not activate the functions they control
even when the above mentioned corrective actions are
taken, contact your RCA retailer.
• During protection such as OCP, OVP, OTP,the unit may
already go into the "Latch mode", and the unit will need
sometime to power on again. And the blue led will blink
continously for indication, you have to restart the unit by
press the POWER/ECO button on the main unit.
Video and audio
Thereisnopicture?
•Turn on the TV set.
• Check connections.
• Make the correct input selection on the TV set.
•If progressive is on, no picture from composite video and
S-video output in DVD/CD mode.
Thepictureisdistortedor shakesduringsearch,forward
or reverse.
• Search, forward or reverse playback generates a slight
distortion, but this is not a malfunction.
There is no soundor it can hardly be heard ?
• Make sure the speakers are connected.
• Make sure the MUTE button is not on.
• Check connections.
• Make the correct audio input selection and volume
adjustment on the TV set or hifi system (e.g. AV selector).
• There is no sound during a pause (still picture), stiJl pic-
ture advance, or slow playback.
• Disc is defaulted to DTS.
No "Surround" sound ?
• Check speaker configuration in the menu.
Noise interference appears on the TV,while watching a
TVprogram and the DVDplayer is left on ?
•Turn off DVD player.
• The TV is too close to the audio system.
Volumelevel differencesplaying different disctypes
(DVDs,audio I video CDs).
• Adjust the master volume.
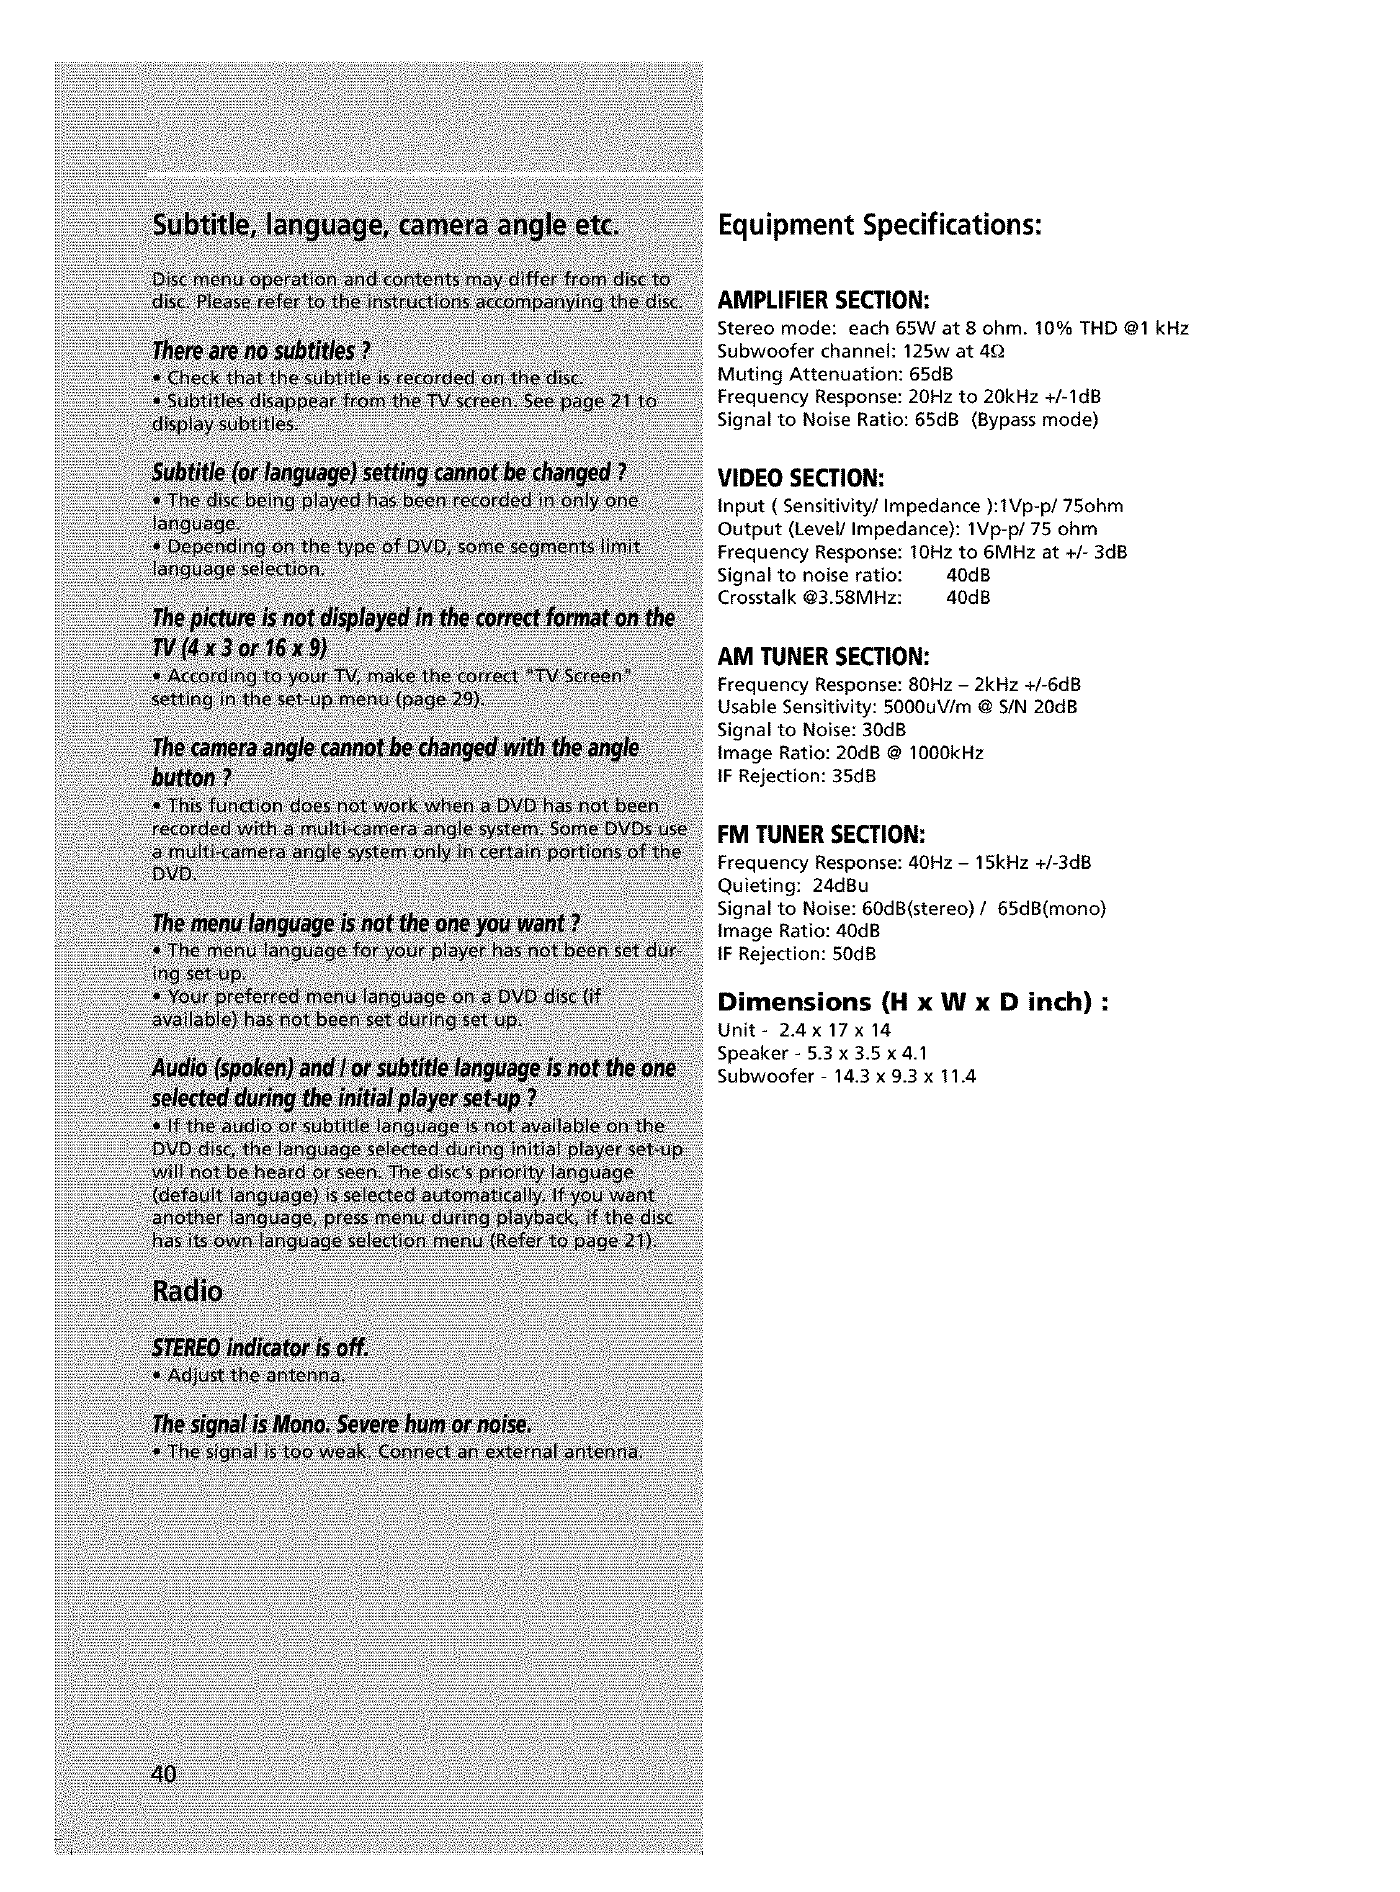
Equipment Specifications:
AMPLIFIER SECTION:
Stereo mode: each 65W at 8 ohm. 10% THD @1 kHz
Subwoofer channel: 125w at 4_
Muting Attenuation: 65dB
Frequency Response: 20Hz to 20kHz +/-ldB
Signal to Noise Ratio: 65dB (Bypass mode)
VIDEO SECTION:
Input ( Sensitivity/Impedance ):lVp-p/75ohm
Output (Level/Impedance): 1Vp-p/75 ohm
Frequency Response: 10Hz to 6MHz at +/- 3dB
Signal to noise ratio: 40dB
Crosstalk @3.58MHz: 40dB
AM TUNER SECTION:
Frequency Response: 80Hz -2kHz +/-6dB
Usable Sensitivity: 5000uV/m @S/N 20dB
Signal to Noise: 30dB
image Ratio: 20dB @1000kHz
iF Rejection: 35dB
FM TUNER SECTION:
Frequency Response: 40Hz -15kHz +/-3dB
Quieting: 24dBu
Signal to Noise: 60dB(stereo) /65dB(mono)
image Ratio: 40dB
iF Rejection: 50dB
Dimensions (H x W x D inch) :
Unit_ 2.4x17x14
Speaker - 5.3 x3.5 x4.1
Subwoofer - 14.3 x9.3 x 11.4
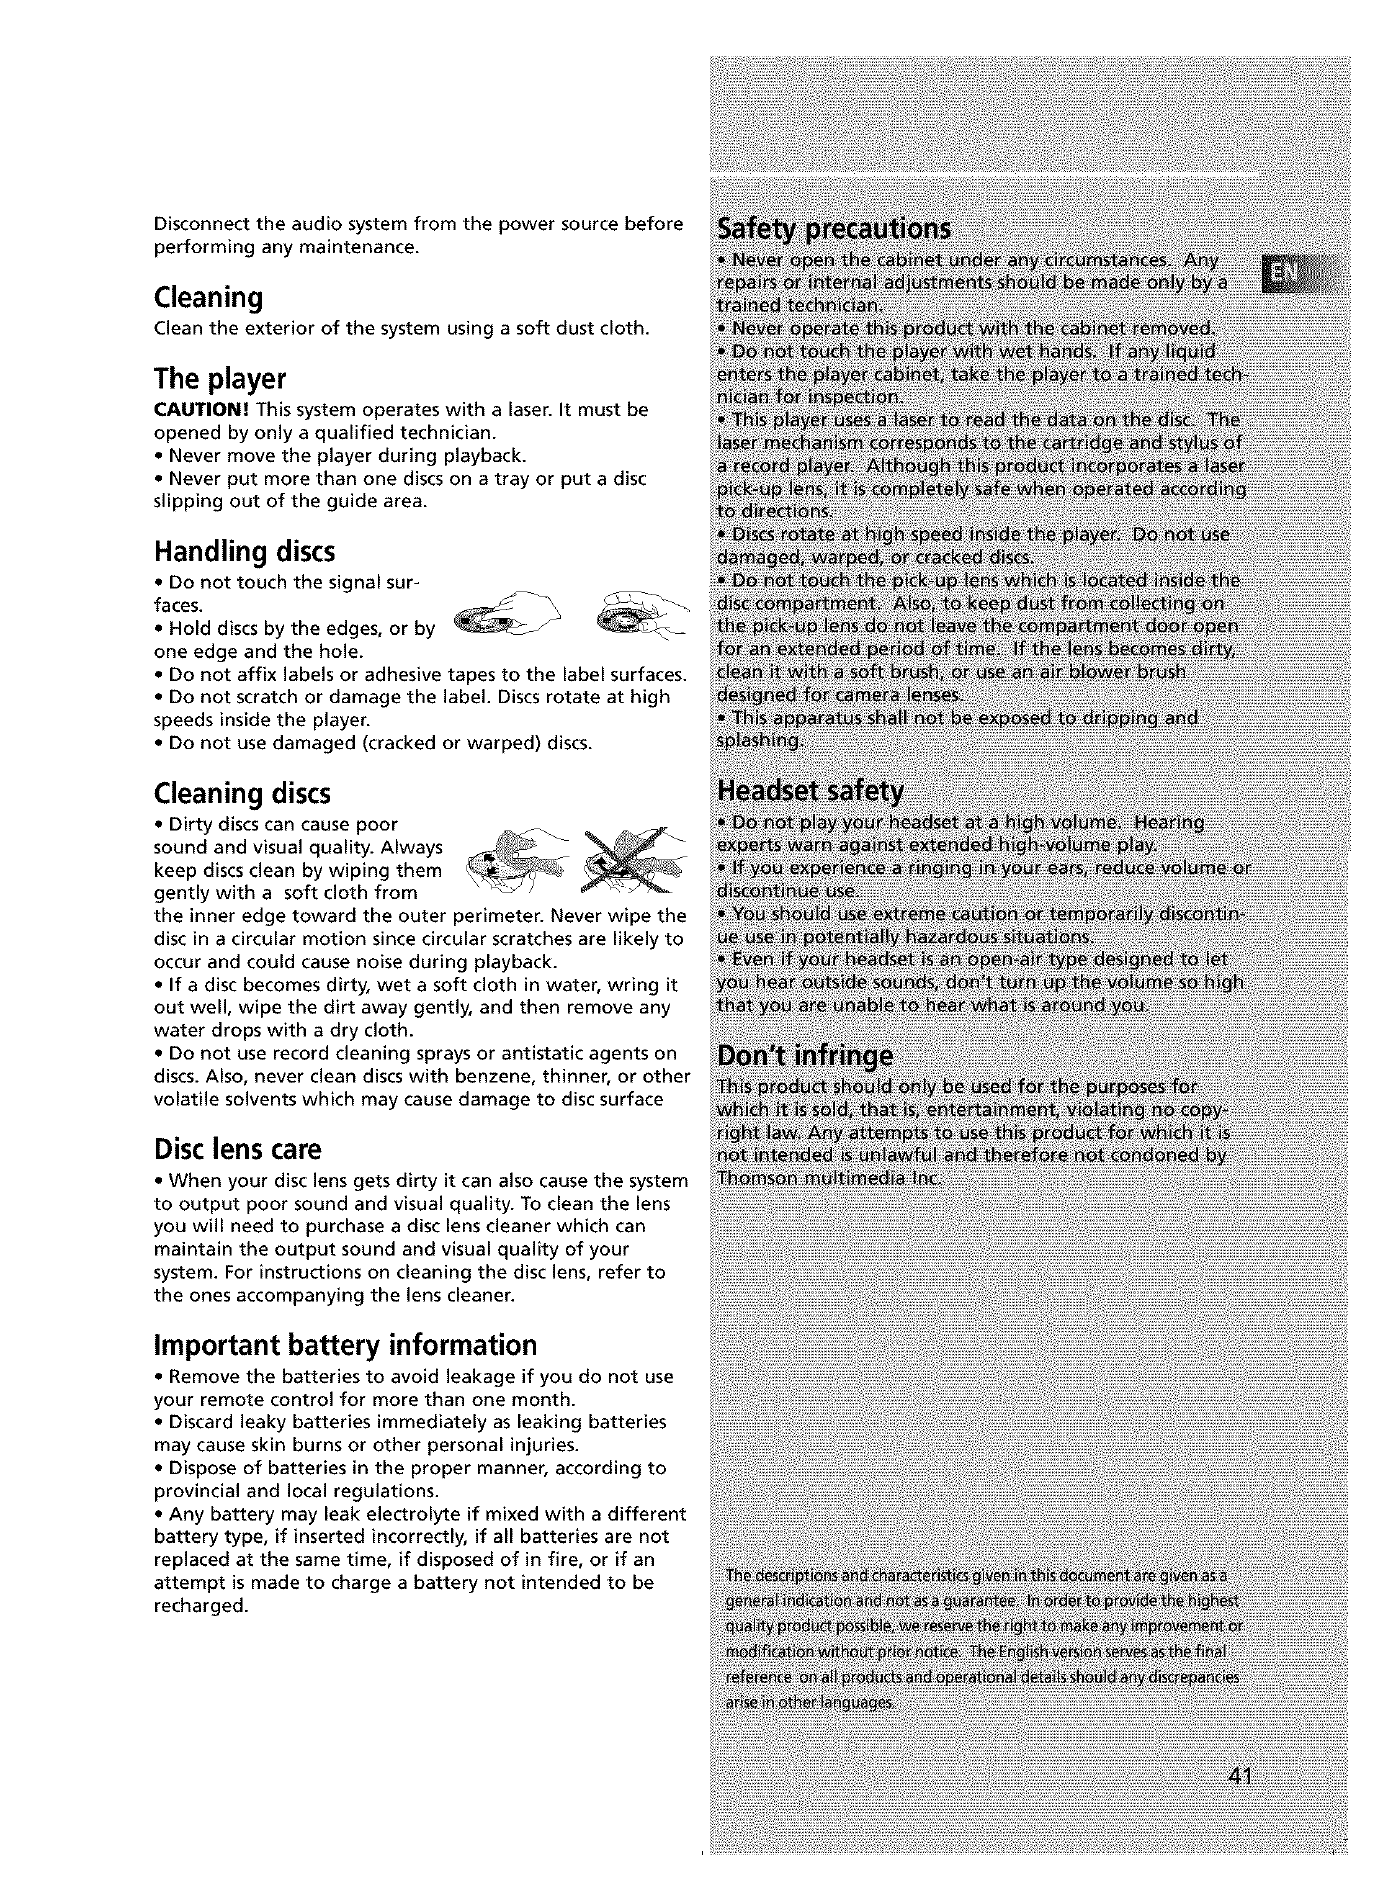
Disconnecttheaudiosystemfromthepower source before
performing any maintenance.
Cleaning
Clean the exterior of the system using a soft dust cloth.
The player
CAUTION! This system operates with a laser. It must be
opened by only a qualified technician.
• Never move the player during playback.
• Never put more than one discs on a tray or put a disc
slipping out of the guide area.
Handling discs
• Do not touch the signal sur-
faces.
• Hold discs by the edges, or by
one edge and the hole.
• Do not affix labels or adhesive tapes to the label surfaces.
• Do not scratch or damage the label. Discs rotate at high
speeds inside the player.
• Do not use damaged (cracked or warped) discs.
Cleaning discs
• Dirty discs can cause poor
sound and visual quality. Always _keep discs clean by wiping them
gently with a soft cloth from
the inner edge toward the outer perimeter. Never wipe the
disc in a circular motion since circular scratches are likely to
occur and could cause noise during playback.
• If a disc becomes dirty, wet a soft cloth in water, wring it
out well, wipe the dirt away gently, and then remove any
water drops with a dry cloth.
• Do not use record cleaning sprays or antistatic agents on
discs. Also, never clean discs with benzene, thinner, or other
volatile solvents which may cause damage to disc surface
Disclens care
• When your disc lens gets dirty it can also cause the system
to output poor sound and visual quality. To clean the lens
you will need to purchase a disc lens cleaner which can
maintain the output sound and visual quality of your
system. For instructions on cleaning the disc lens, refer to
the ones accompanying the lens cleaner.
Important battery information
• Remove the batteries to avoid leakage if you do not use
your remote control for more than one month.
• Discard leaky batteries immediately as leaking batteries
may cause skin burns or other personal injuries.
• Dispose of batteries in the proper manner, according to
provincial and local regulations.
• Any battery may leak electrolyte if mixed with a different
battery type, if inserted incorrectly, if all batteries are not
replaced at the same time, if disposed of in fire, or if an
attempt is made to charge a battery not intended to be
recharged.

2131
2026
2027
2002,2026
2003,2004,2005,2007,2008,2111,2112,
2021
2013
2009,2010
2014
2011
2013
2012,2025
2014
2013,2014,2015,2016,2017,
2018,2019
2021,2022,2114
2020,2110
2062
2027,2061
2013,2014,2015,2016,2017,
2018,2019,2027
2009
2061
2013,2014,2023,2061
2000,2002,2009,2013,2016,
2018,2021,2022,2024,2115
2013
2015,2017,2019,2025,2026,
2027,2028,2110
2110
2009,2010
2000
2002,2026
2014,2029
2014
2002,2012,2014,2015,2021,2024,2025,
2026,
2029,2030,2032,2033,2034,2035,2036,
2037,
2038,2039,2040,2041,2042,2044,2045,
2047,
2065,2105,2113,2116,2117,2130
201I,2023,2048,2049,2050,2051,2052,
2118
2021,2119
2002,2026
2026
2000,2001,2013,2021,2022,2053,2115,
2120
2009,2014,2018,2054,2121
2026
2026
2009
2061
2011
2002,2055,2056,2057,2107,
2111,2120,2122
2023
2021
2021
2009,2010,201I,2013,2014,
2021,2022,2055,2056,2058,
2059,2060,2107,2118
2055,2056,2111
2009,2010,201I,2018,2058,
2111,2123
2009,2010,201I,2016,2018,
2058,2111,2123
2061
2014,2021
2002,2026
2061
2014
2021,2022,2062,2063,2104,
2108,2124
2013
2009,2010,201I,2016,2018,
2021,2058,2062,2064
2014
2021
2021
2002,2011,2013,2014,2021,2023,2026,
2104,2131
2029,2065,2113
2013
2053
2055,2056,2107
2029,2055,2056,2065,2066,2067,2069,
2070,2071,2072,2073,2074,2106,2113,
2123
2075,2131
2021,2131
2002,2013,2026
2002,2013,2016,2026,2053,2061
200_ 2010,2011,2016,2018,2058,2064,
2076,2078,2079,2111,2123
2014
2013
2021
2014,2131
2096
2035
2021,2022,2109,2125,2126,2127
2016,2055,2056,2107,2120
2018
2021,2022,2062,2063
2021,2062,2096,2124
2014
2010,2055,2080,2081,2123
2016,2017,2019,2110
2000, 2001
2061
2104
2011
2011
2021,2022,2125
2000, 2001, 2003, 2013, 2021, 2055, 2056,
2082, 2083, 2084, 2085, 2086, 2087, 2088,
2089,2090,2091,2107,2115,2120,2125
2002,2011,2013,2014,2021,2022,2023,
2026, 2029, 2049, 2050, 2096, 2131
2014
2014
2128
2104
2005,2013,2015,2033,2053,2112
2104,2131
201_ 2092,2111,2123
2011,2013,2023
2012,2015,2025,2032,2035,2038,2065,
2093,2116
2011,2014,2021,2023,2048,2049,2050,
2051,2055,2056,2107,2118
2002, 2017, 2029, 2094, 2095, 2096, 2131
2004, 2056, 2061, 2098
2013
2002,2131
2021,2061,2128
2002, 2004, 2098, 2099, 2119, 2128
2021,2107
2002,2021,2022,2026,2062,2063,2065,
2124
2002,2026
2002,2011
2014
2058,2111
2002,2026,2058,2085,2111
2021,2109
2002, 2014, 2021, 2026, 2100, 2129
2013, 2024, 2047
2015, 2049, 2051, 2055, 2065, 2093, 2116
2013,2014
2013
2009,2010,2015,2016
2010
2009,2010,2015,2016,2113
2013
2002,2013,2014,2015,2021,2023,2026,
2029,2055,2056,2061,2096,2101,2102,
2103,2107,2116,2131
2021, 2026, 2061
2009,2010,2011,2018,2058,2111
2004, 2098, 2104, 2119, 2128
1008
1176
1002
1004,1006,1008,1038,1046
1189
1004,1038
1038
1174
1002
1004, 1006, 1008, 1019, 1062, 1068, 1069,
1074,1075,1076,1077,1088,1116,1161,
1183,1184
1033,1038,1189
1173
1003,1178
1054
1004,1006,1054
1004, 1005, 1006, 1008, 1012, 1013, 1016,
1038,1046,1076,1082,1083,1105,1170,
1171
1117
1004,1006
1049, 1071, 1072, 1089, 1105, 1109, 1117,
1118,1160,1162
1171
1052,1087
1066,1182
1004,1005,1006
1174
100_ 1001,1004,1005,1006,1019,1024,
1033,1046,1052,1062,1069,1074,1075,
1076,1083,1087,1088,1095,1119,1120,
1184
1004,1005,1006,1019
1004, 1083, 1151, 1152, 1153, 1154
5056,5057
5058,5059
500& 5001
506& 5061,5062
_ER
5076
500& 5001
500& 5001
5063
5072
5064
5065
5066
5067
5068
5073
5069
Ionly)
4003
4004
4005
4007
4006
2001
2001
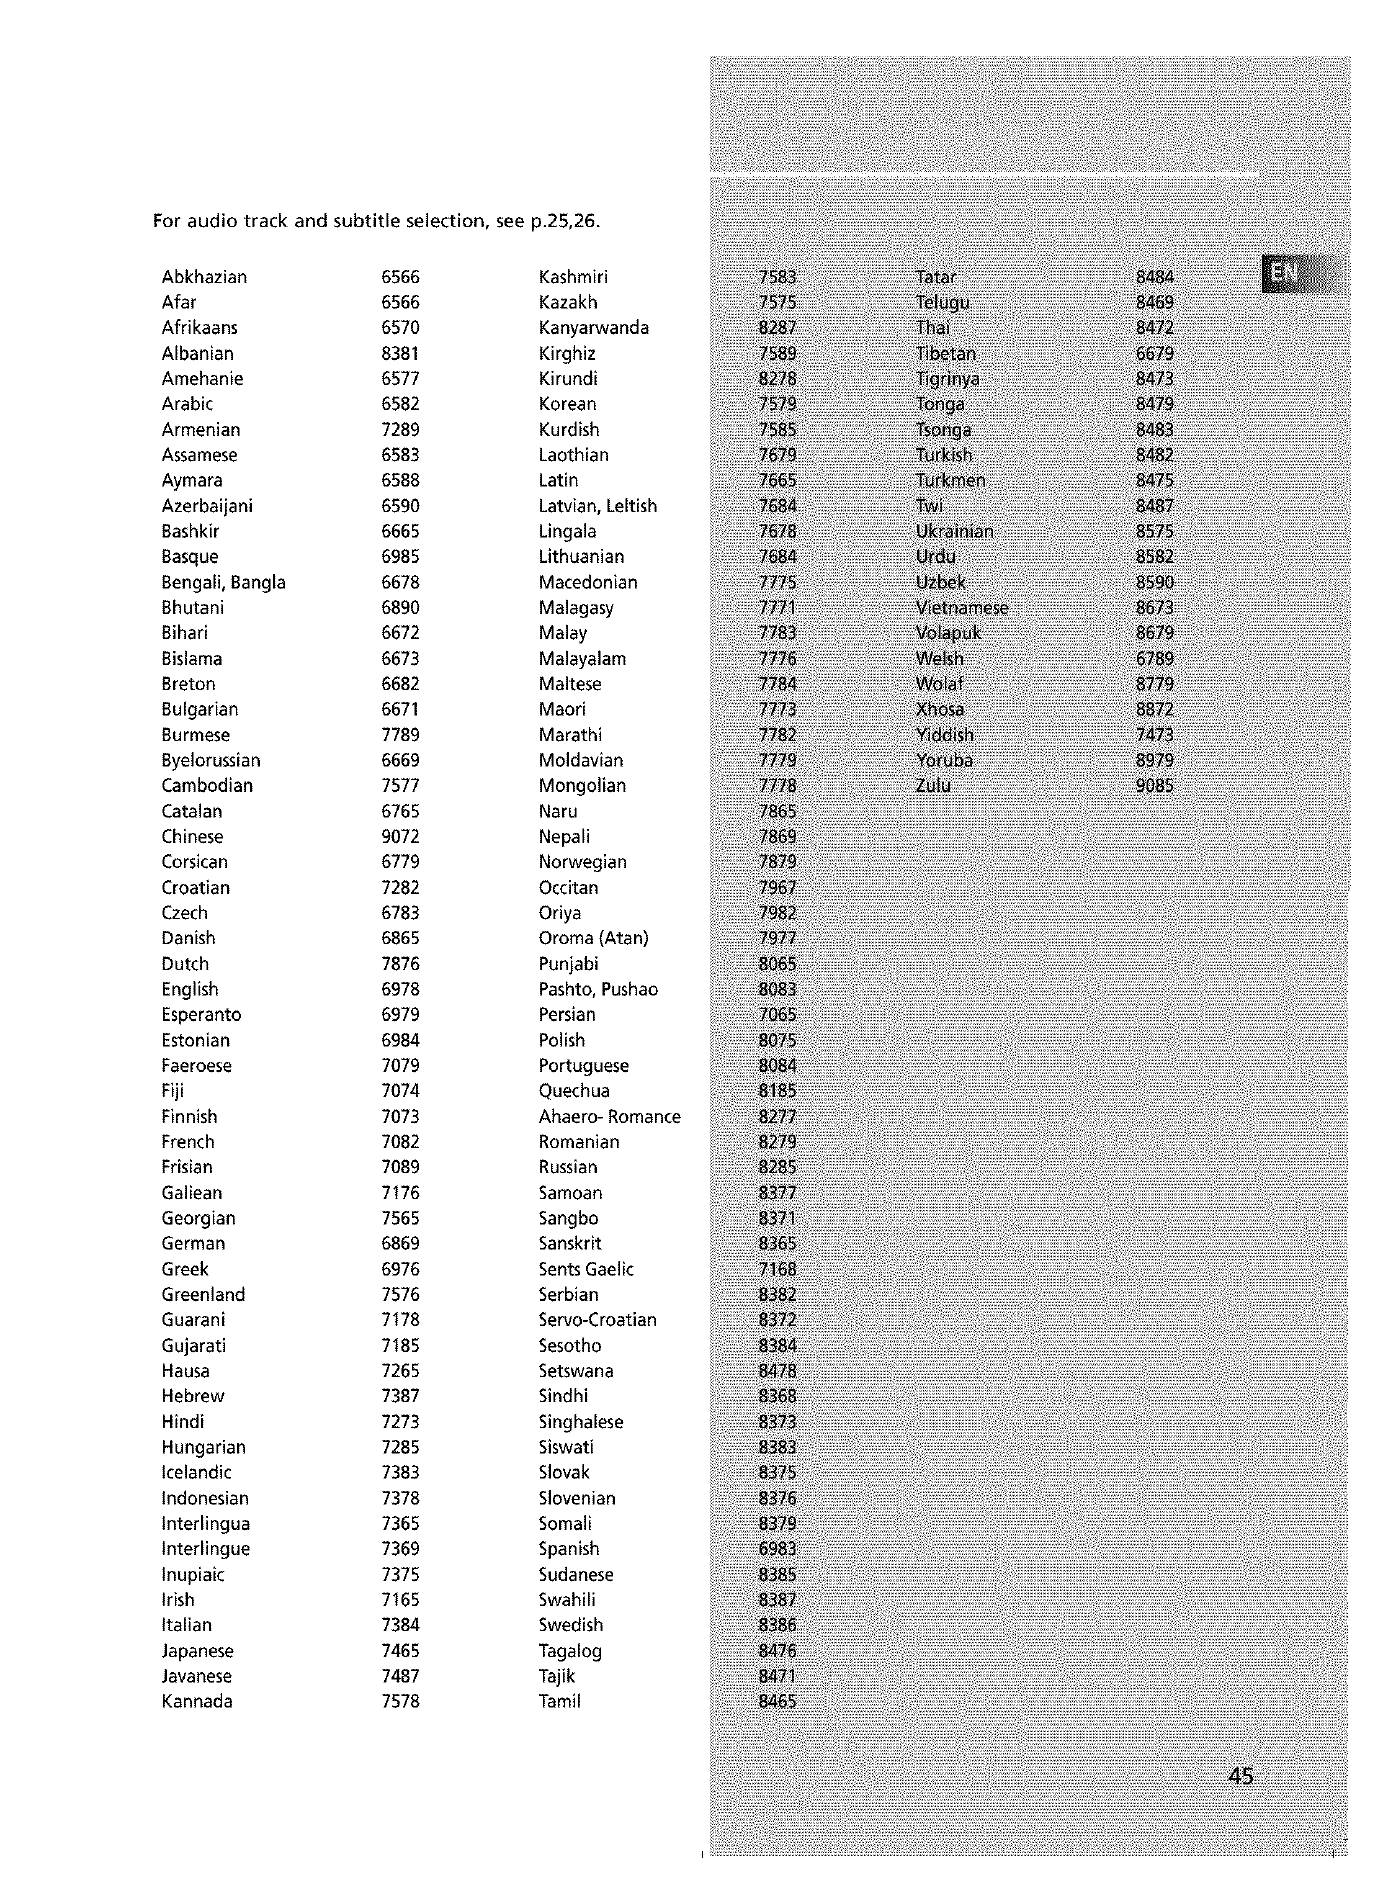
For audio track and subtitle selection, see p.25,26.
Abkhazian 6566 Kashmiri
Afar 6566 Kazakh
Afrikaans 6570 Kanyarwanda
Albanian 8381 Kirghiz
Amehanie 6577 Kirundi
Arabic 6582 Korean
Armenian 7289 Kurdish
Assamese 6583 Laothian
Aymara 6588 Latin
Azerbaijani 6590 Latvian, Leltish
Bashkir 6665 Lingala
Basque 6985 Lithuanian
Bengali, Bangla 6678 Macedonian
Bhutani 6890 Malagasy
Bihari 6672 Malay
Bislama 6673 Malayalam
Breton 6682 Maltese
Bulgarian 6671 Maori
Burmese 7789 Marathi
Byelorussian 6669 Moldavian
Cambodian 7577 Mongolian
Catalan 6765 Naru
Chinese 9072 Nepali
Corsican 6779 Norwegian
Croatian 7282 Occitan
Czech 6783 Oriya
Danish 6865 Oroma (Atan)
Dutch 7876 Punjabi
English 6978 Pashto,Pushao
Esperanto 6979 Persian
Estonian 6984 Polish
Faeroese 7079 Portuguese
Fiji 7074 Quechua
Finnish 7073 Ahaero- Romance
French 7082 Romanian
Frisian 7089 Russian
Galiean 7176 Samoan
Georgian 7565 Sangbo
German 6869 Sanskrit
Greek 6976 SentsGaelic
Greenland 7576 Serbian
Guarani 7178 Servo-Croatian
Gujarati 7185 Sesotho
Hausa 7265 Setswana
Hebrew 7387 Sindhi
Hindi 7273 Singhalese
Hungarian 7285 Siswati
Icelandic 7383 Slovak
Indonesian 7378 Slovenian
Interlingua 7365 Somali
Interlingue 7369 Spanish
Inupiaic 7375 Sudanese
Irish 7165 Swahili
Italian 7384 Swedish
Japanese 7465 Tagalog
Javanese 7487 Tajik
Kannada 7578 Tamil
Limitation of Warranty:
• THE WARRANTY STATED ABOVE IS THE ONLY WAR-
RANTY APPLICABLE TO THIS PRODUCT. ALL OTHER
WARRANTIES, EXPRESS OR IMPLIED (INCLUDING ALL
IMPLIED WARRANTIES OF MERCHANTABILITY OR FIT-
NESS FOR A PARTICULAR PURPOSE) ARE HEREBY DIS-
CLAIMED. NO VERBAL OR WRITTEN INFORMATION
GIVEN BY THOMSON MULTIMEDIA INC., ITS AGENTS
OR EMPLOYEES SHALL CREATE A GUARANTY OR IN
ANY WAY INCREASE THE SCOPE OF THIS WARRANTY.
•REPAIR OR REPLACEMENT AS PROVIDED UNDER THIS
WARRANTY IS THE EXCLUSIVE REMEDY OF THE CON-
SUMER. THOMSON MULTIMEDIA INC. SHALL NOT BE
LIABLE FOR INCIDENTAL OR CONSEQUENTIAL DAM-
AGES RESULTING FROM THE USE OF THIS PRODUCT OR
ARISING OUT OF ANY BREACH OF ANY EXPRESS OR
IMPLIED WARRANTY ON THIS PRODUCT. THIS DIS-
CLAIMER OF WARRANTIES AND LIMITED WARRANTY
ARE GOVERNED BY THE LAWS OF THE STATE OF INDI-
ANA. EXCEPT TO THE EXTENT PROHIBITED BY APPLIC-
ABLE LAW, ANY IMPLIED WARRANTY OF MER-
CHANTABILITY OR FITNESS FOR A PARTICULAR PUR-
POSE ON THIS PRODUCT IS LIMITED TO THE APPLICA-
BLE WARRANTY PERIOD SET FORTH ABOVE.
How State Law relates to warranty:
• Some states do not allow the exclusion nor limitation of
incidental or consequential damages, or limitations on how
long an implied warranty lasts, so the above limitations or
exclusions may not apply to you.
• This warranty gives you specific legal rights, and you also
may have other rights that vary from state to state.
If you purchased your unit outside the United
States:
• This warranty does not apply. Contact your dealer for
warranty information.
Service calls which do not involve defective materials
or workmanship are not covered by this warranty.
Costs of such service calls are the sole responsibility
of the purchaser.

What your warranty covers:
•Defects in materials or workmanship.
For how long after your purchase:
• One year from date of purchase for labor and parts
• The warranty period for rental units begins with the first
rental or 45 days from date of shipment to the rental firm,
whichever comes first.
What we will do:
• Pay any Authorized RCA Audio Service Center the labor
charges to repair your unit.
• Pay any Authorized RCA Audio Service Center for the
new or, at our option, refurbished replacement parts
required to repair your unit.
How you get service:
• Take your unit to any Authorized RCA Audio Service
Center. To identify your nearest Authorized RCA Audio
Service Center, ask your dealer, look in the Yellow Pages, or
call 1-800-336-1900.
• Show the Authorized Service Center Representative your
evidence of purchase date or first rental.
• Pick up your unit when repairs are completed.
• Proof of purchase in the form of a bill of sale or receipt-
ed invoice which is evidence that the product is within the
warranty period must be presented to obtain warranty
service. For rental firms, proof of first rental is also
required.
What your warranty does not cover:
• Customer instruction. (Your Owner's Manual describes
how to install, adjust, and operate your unit. Any addi-
tional information should be obtained from your dealer.)
• Installation and related adjustments.
• Signal reception problems not caused by your unit.
• Damage from misuse or neglect.
• Cleaning of audio heads.
• Batteries.
• A unit that has been modified or incorporated into other
products or is used for institutional or other commercial
purposes.
• A unit purchased or serviced outside Canada.
• Acts of nature, such as but not limited to lightning dam-
age.
Product Registration:
• Please complete and mail the Product Registration Card
packed with your product. It will make it easier to contact
you should it ever be necessary. The return of the card is
not required for warranty coverage.
RCA
Centro de Servicios Autorizados Express (servicio en 24 horas)
M_xico, D.F.
Digital Se_ce
Av. 3 A No, 1 2. Local 2
Col. Santa Rosa
M_x ico D.R
Tel01 53889621
5587759 9
55878971
55673972
Monterrey. N.L Guadalajara, JaL
Audio Est_reoAguil ar Sewicio Especial izado de Jal isco
GraL Zuaz ua 738 Nte Enrique D[az ae Leon No 82 1
Col. Centro CoL Sagrada Familia
Monterrey N.L Guadalajara, JaL
Tel 01 '8_ 3724989 Tel 01 _3_ 1267431
3755440 "2 6 7430
3755884 82532 29
82 582
AGUASCALIENTES
E_ectr6nica J IMSA
Av. Adolfo LTpez Mateos No 230 ote
Col. Centro
Aguascahentes. Ags. C.R
TEL(014911551 81 178 0757
Fax. 01-49 1581 08
El e Apl icada _d_igital es
BAJA CALIFORNIA NORTE 4a. Av. Sur No. 51
El ectrbnica General Internac Col. Centro C.P. 30708
B_vd. Insurgentes No. 16174 Loc2/_. Tapacnula Chis
Ptaz a de Abastos Los Almos Tel 31 *962 B -9998
Tijuana BCN C.P.22440 Fax .101,962_5-4578
TeL 01-66 21 22 1_
TeL/Fax:(01-66 _21 22 15
Baj aEl el_hics
Hacienda de CorraIejo No. 2099
CoL Hidalgo
Mex ica BC.N.C.R 21389
TeL (01-65_ 619818 61 9808
Fax. 01-65 619808 619818
Set#. El ectr6nico Ensenada
Calle 4ta No. 1050 LOG8
Col. Centro.
Ensenada B.C.N.C.£ 2 280[
TeL (01-61 _ 740 0532
Fax.(01-61 788356
BAJA CALIFORNIA SUR
Digital Sound
16 de Seofembre No390
Col. Centro
La Paz. Baja CaliTrnia Sur
TeL(112 32017
Sew. El ecEspecial izado El ecbnica Rico
Cuahutemoc No. 2A turbide, Manuel Acu5a
Col. Centro C.P. 2920O CoL Centro.
San. CristTbaI de Ias Casas. Chis. Cd. Acu8a Coahuila. C.P. 26250
TeSFax.(01-967)8-1355 Te 877 236 23
Fax .101-967_8-1355
Va corn
Av. Morelos 1016 ote
CoL Centro
TorreSr Coah. C.P. 27000
Tel. (01-17)1839 05 22 1551
Fax.t01-17!1811 98
CHIHUAHUA
Zener El ectrbnica
Trasvi5a, Retes No. 3503 A
Col. Sn. Feltoe
Chihuahua Chih. C.R 31240
Tels 01-1411401 1_:6504'
TeL /Fax :( 01-14,26 50 41
Magnavox
Tlax cala 116"
Col. Hidalgo
Cd. Juarez Chihuahua.C.R 3201C
Tel 31-16H2 4031
Fax:(01-16 12 4031
El ecf_nica Tony
Priv. De la calle 6ta o_ente No. 7
Col. Centro
Cd. DeIicias Chihuahua
Tel. 101-14174 30 26
Fax .101-14_ 74 30 2
Fax.(112 32017
Tal Ier El ectrbn'iot}y
20 de Ncvlembre No. 1521
Col. Centro.
Video Sevicio Bel uz
Carretra a todos Santos No. 32
Col. Infonavit Las Bdsas.
Los Cabos san LUCaS 8CS C.R 23410
-els.'01-114 313 65
El e c_ Vision
Allende No. 1 14 esqJqcotencat
Zona Centro
Piedras Negras. CoahuiIa. C.R
Tel. 1878) 2 1875
Fax .(878_ 2 187_
Mul tise,dcios del N_
5 de Ma,'o 295su
CoL Centro
Sabinas CoahuiIa. C.R 26700
Tel. (861_ 264 31
Fax t8611264 31
LGQL/MA
El ecSaturno de Col ima
Nlgromante No. 1 38
Col. Centro
CoIima CoL C.£ 28000
-el. ( 01-331 45554.45000
Tel./Fax: 01-331 _45554
Lab.EI ecf_e Ia Mora
Allende No. 1 ! 0
CoL Centro
Manzanillc CoL C.R 28200
Te1.(01-333 2 3004
Cd. Camargo Chihuahua. C.R Tel. /Fax : 01-333
TeL 1146 23467
_RANGO
Ma cruse Nicios,
Calte Patoni No. 1 05 su[
CoL Centro
Durango, Dg&
]el. 0!-!8 122686
Fax.(0!-18 12 26 86
ESTADO DE MEXICO
El ectrbnica AI c&ntara.
Reforma No. 36
Col. Centro
Chalco Edo. de Mex .C.P. 56600
Te _01-597 51 847
Fax:( 01-597 51 847
Ctro Sew. El ectrbnicos
h Por til_o, esa. Blvd. Coacalco
Col. Villa de las Flores
Coacalco. Edo. de Mex .C.R 557! 0
Tels. 879 3404 _74 6006
Fax :898 24_
SHUREE El ectrbnica
Av. De los Maestros No. 1 ! 3A
Col. Centre. C.R 50060
ToJuca EDM
TeL '0! -72 ! 4-9330
Fax/01-72)13-3424
"iV Se Nid eo
Oriente 9 Ne ! 82
CoL Relorma
Cd. Neza Edo De Mex.C.R 57840
TeL 5857 2547
Fax .5857 639£
Se Nicio Sony Visi6_
Prensa No. 1253
COL Prensa NaL Ind Vatiejo.
Tlaneoan[=a. E.D.M.C.R 54! 7C
Tel. 587 75 99
Fax 587 89 71
Fax .(01-1 ! 4! 313 65
CAMPECHE
vleeoservicto
Av.Lopez Matees N_ 24
Col. Barrio Sn. Roman C.R 24040
CamDeche.Camp.
Tel. t01-981_ 6-3333
:ax J01-981 1-0664
CHIAPAS
KC Video
10a.Norte Oriente _1o.152 A
CoL Centro
Tux tla GuSerrez ChisC.R 29000
Tel. (01-961 81908:3643
=axJ01-961 1819 08
Fax J146 234 67
El ectrbnica li_esional
Blvrd. Francisco Coss No. 450-1
Col. Centro
SaltilIo Coah C.P.25000
Tels 01-84_100300
TeL/Fax (01-84 12 3_z_z_
Audio yVideo El e_nica
MigueI Blanco 307-A
Col Zona CentrQ
Monclova CoahuiIa. C.R 25700
TeL 101-86_ 33 94 06
Fax .(01-86_ 33 94 06
El ect_ Visibn
Juan Aldama No. 6. Presid. Carranz a
Col. Centro
Nueva Rosita Coahuila. C.R
TeL -36_ 14 58,_a
DISTRITC FEDERAL
SIMEL
Rio Churubusco No. 221 5
CoL Agrico_a Orienta
MSxicc D.R C.R 0850_
Tel. 756 0883
Fax :756 0883
Novat©n.
Diag San Antonio No. 121 3
Col. Narvarte
VlexicQD.£ C.E 03020
TeL639 0812
:ax :639 118_
El ectrbnica Ra_l.
San Felipe No. 157
CoL Pedregatde Santa Ursu=a
M6x ico DE C.R 04800
TeL 619 3213
Fax: 6194565
Fax .186 145844
GUANA UAJ_
Tecnol ogia El ectrbnica
Blvd. Adotfo LTpez Mateos No 2834A
COL Haciendas El Rosario
LeTn. Gto. C.R 37130
Tel:101 41773 6634
Fax. 0! 4_ 773 8634
MarEI ec_nic' s
Brisas No. 999
Co LasReinas, C.R3666(
_rapuato,Gto.
]'el 01462 4-7140
Fax 01462.4-]40
"[el eS_i_io Chud_o.
Blv Adolfo L6oez Mateos No 5! OPte
SoL Centro C.R 3800C
Celaya, Gto.
Tel (01-461 t 2-47!4
:ax .101-4613-059 !
Tel e Radio _ega.
Av. 16 de SeDtiembre No 1076
Col. Centro C.R 38600
Acambaro. Gto.
Tel. (01-417 2-0780
Fax 31-4! 7.2-0780
GUERRERO
Nueva EIec. Auditron
Aquiles Serdan No 14B
Col. Centro
Acapulco, Gro. C.R 9393 OO
Tels )I *74 82 62 42
Tel./Fax 101-74 832062
HIDALGO
Tec.EI ectrbnica Digital
Bh d. VaIle de San. J a4er No.
Col. Fracc. Va.e ae San. J ader
Pachuca. rlgo. C.R 42086
TeL 01-771 32436
Tel./Fax 01-771 )3 2436
El _¢trbnica Especial izada
]neeuendencia No. 102 Loc.C
Col. Centre C.R 436 OC
Tutancmgo, tlgo,
Tel. J1-77515-2654 3-9120
Fax (01-775 5-26543-9120
J_
Sew. Esp. De Jal isco
[gnaclo Ramirez No 567
S.H. Sta. Teresita
Guadalajara. Jal. C.R 442 OO
Tels. 01-3 825-3229 827-0721
Tel./Fax: 01-3 825-3229
El ectrbnica integral
Candelaria No.202. Esg Analco
CoL Sta. Maria
Puerto VaIlarta Jal. C.R 48348
Tels. 01-322 43736
TeL/Fax: 01-322 48590
Setesa
5 de Febrero No. 2786
Col. Rancho Blanco
Tlaquepaque.J alisco. C.R 4489 O
TEL(01-3 635-4404 635-1875
Fax (01-3 635-4404. 635-1875
MICHOACAN
Ai ka El ectr6nica
Garcia de Le6n No. 271
CoL Chapuliepec Sun
Morelia Mich. C.R 58260
Tels. 01-43 145521t59036
Tel./Pax: 01.43 159425
Centro Et ectrbnico S_
Just{) Mendoz a No 12
CoL Centro
UruaDan. Mich. C.R 60000
Tels. ( 01-452 4 37 78_08 38
Tel. Fax :_ 01-452 459 09
Mul tiserv Prof ,_rnora
5 de Mayo No. 699A
CoI. El Duero
Zamora Mich. GR 59690
Tel. 01-351 155416
TeL/Fax 01-351 55416
El ectrbnica Hertz
Insurgentes No. 190
Col. Emiliano Zaoa_a
Cuautla Mot. C.R 62744
TeL 01-735 38410
Fax (01-735/38410
El ectronica H_r
_.bertad No. 10E
Col. LaCarolina
Cuemavaca Mot. C.R 6219 O
Tel.(01-73 / 13 9092
Fax. C01-73_13 09 49
N_
Audio Este re o Aguil ar
GraL Zuaz ua 738 Nte
Col. Centro
Monterrey. Nvo. LeSn. CR 64000
Tels )1-8 _372-4989 375-5440
Tel. /Fax : ( 01-8 / 375-5884
Tel eservicio Muril I o
Allende No. 595 Sur.
Col. Centro
Cd. Linares Nvo Leon. C.R 67700
Te )1-821)26650
Fax.(01-821 266 50
NAYARIT
El ectr6nica Show
San Luis No. 118 sur
COL Centro
TOPIC. N&x. C.R 63 O0O
TeL 01-321 45800
Tei./Fax (01-32! 45800
OAXAGA
El Francistor
H_sares No. 207
Col. Centre
Oaxaca Oax C.R 68000
TEL(01-951 164737
Fax 01-951 472 97
Sew. Express El ectrbnico
Pro Reforma No. 6908A
Col. La Liber[aa
Puebla Pue. C.R 72130
Tels./01-22 ! 49 78 1 _:7 02 82
Tel./Fax:t01-22 31 32 93
QLUERETARO
BIauton Industria
Av. Universidad No. 44B
Col. Pathe
Queretarc Oro. C.R 76020
Tels )1-42 t 23 22 6E3 49 34
TeL /Fax:_ 01.42 /23 22 67
QUINTANA ROO
El ectrbnica Beta
Reparaciones El ectrbnicas
.._ ose Rios No 178 ote.
CoL Centro.
Culiacan Sinaloa. C P 8120(
TeL_01-67116 81 32 16 51 45
Fax.(01-67/ 16 81 32 16 51 45
El ectrbnica Morel.os
Morelos No. 201 ore
Col. Centre.
Los Mochis Sinaloa. C.R 81209
TeL r01-68' 12 0588
Fax. 01-68 12 0588
N,fLQ_RA
Wong s ElectrTnicos
_onteverde NO. 267 esq. Balderama
CoL Balderrama
Hermos_llo Son. C.R 83180
Tels. 01432 10549_t00586
Tel./Fax: t01-62 105495
Dasetronik
Guerrero No. 308-h este
Col. Centro
Navo. aa. Sonora. C.R 85800
-_. (01-842 240 64.
Fax. _01-642} 136 64
Audio video El ectr6nica
Av. Zaragoz a No 516 ple
Col. Centre
Cd. Obregor Sonora. C.R 23000
Tel. 101-64) 143828
Fax. 14 75 751
El ectr6nica Unive_l .
Calle 29 At. Alfonso Idberr_ No. 401
Cot. Centro
Cd. Gua I "nas. Sonora. C.P. 85400
Tel. (01-622129 41 "
Micronics
CalIe 10 NQ 607.
COL J ardin 20 de N_iembre
Maderc Tamos. C.R 89440
TeIs. ( 01-12 159689
Fax: (01-12 ! 103882
La boratorio El e ctron ico
Washington 3142
Col. J uarez Centro/
Nuevo Laredc Tamps. C.R 8800(
Tel 01-87/ t49592 149852
Fax. 31-87 1471 71
El ectronica Emmanuel
Obregon No. 2 O5A
Zona Centro
Cd. Mante. Tamaul pas. C.R 89800
Tel. 01-123) 290 81
Fax. '01-123/290 8"
VERA_
Grupo Digita I
I. Zaragoz a NO.212
CoL Centro
Coatzacoalcos /or.C.R 96400
Tel. 01-921 120229
Fax. 31-921 120229
Se rvT_cn cos Prof.
Av. 1 3 No.400 Esq. CaIle 4
CoL Bella Vista
Cordoba Vet. C.R 9459C
Tel 01_271 2 73 22
Fax (01-27112 2539
El ectron ica Arizona
Sustamante No. 46
Col. Centro
Jalapa Vet. C.P. 91 O0C
Tel. 01-28 187868
Fax. (91-28 122534
El ecbnica CastU I o
Ncche Buena # 37
CoL El rastro
Nogales. Sonora. C.R 84000
Tel. 16 3146857
Fax J16 312 3087
Com. y El e ctrBn ica
MigueI Hidalgo No. 103
Col. Buena Vista Sur
MinaBtlan Vet. C.R 9673 O
TeL 01-922 31565
7el./Fax: 01-922)3 1565
Av Sun Yax Chen No 43 Lo( 4
Col. Centro
Cancun Q. Roo. C.R 77508
Tel. 01-98 845412
Fax.f 01-98 873813
El _c_rnicos _ Mas
gnacio Zaragoz a No204-A
Col. Centro. C.R 77000
Chetuma Q. Roo
TeLl983 28663. 24622. 21562
Pax (983/260! 4
LUIS POTOSI
El _ctronica Especial izada
Manuel J. Clouthier No 212 C
Col. Las agu.as
San Luis Potos, SLR C.R 78270
Tels. 01-48/1762 79
TeL/Fax 01-4811419 02
Esta re o Ca
Negrete No. 612
Col. Centro
Cd.Valles SLR C.R 79000
Tel. (01 - 138) 206 51
Fax (01-13_ 20651
SINAL QA
Serv. ElectrBnico del Pacifco
Mariano Escobedo No. 1022
CoI. Centro
Maz atl_n Sin.C.R 6200O
TEL(01-69 82 01 55
TeL/Fax: 01-69 82 01 55
TABA&C_
El ecSigma deTabasco
Av. Gregorio M_ndez No.2819
Col. Atasta
!illanermoss Tab.C.R 86100
Tels. ( 01-93 !54 00 3354 20 3C
TeL/Fax (01-93 540033
TAMAULIPAS
51 ectrbnica Digital
ndeDendencia No. 112 esqJ 1
Col. Centro
_atamoros Tamps. C.R 88000
Te 01-88 _35013
Tel. /Fax.i 01-68 135013
CentD de 8ervicio Lugo
_osalinada Guerrero No. 285
CoL ProL Longonila
Reynosa, Tamps. C.R 88699
Tel. ( 01- 89 249243
Tel. IFa_:(01-89 249243
Esp. El ectronicas
Ma_amoros _oniente 225
CoL Centro
Cd. Victoria Tamps. C.R 87000
TeL 01-131 29945
Fax. (01-131251 93
El ectrbnica Digital BORR
Av Ju&rez No 51 6
Col. 27 de Seotiembre
PozaRica Vet. C.P. 93320
Tel. 01-782 36949
Fax.( 01-782 3 69 49
El ectrbnica DICA
F.del Paso, Troncoso No. 908
CoL Centro
veracruz Vet. C.P91709
Tels. 01-29 3_203381 22 96
Tel./Pax: 01-2931 2 33
Seguridad PI us.
O6ente4 No. 187 Esq.Sur 5
Col. Centro. C.R
Oriz aba ver.
Tel. (01-272 ! 5-0235
YUCATAN
Cinescopms
Calle 70 No. 443 oc.7 _or 49
Col. Centre
M_rida Yuc. C.R 97000
Tels. 01-99 2854_-2859 05
Tel./Fax:_01-99 2859 05
ZACATECAS
El ectronica Mario.
Morelos Poniente No. 1214
Cot. Centro
Zacateca& Eac. C R
Tel. 01.492 27561
Fax 01-492/25761
4J
O_
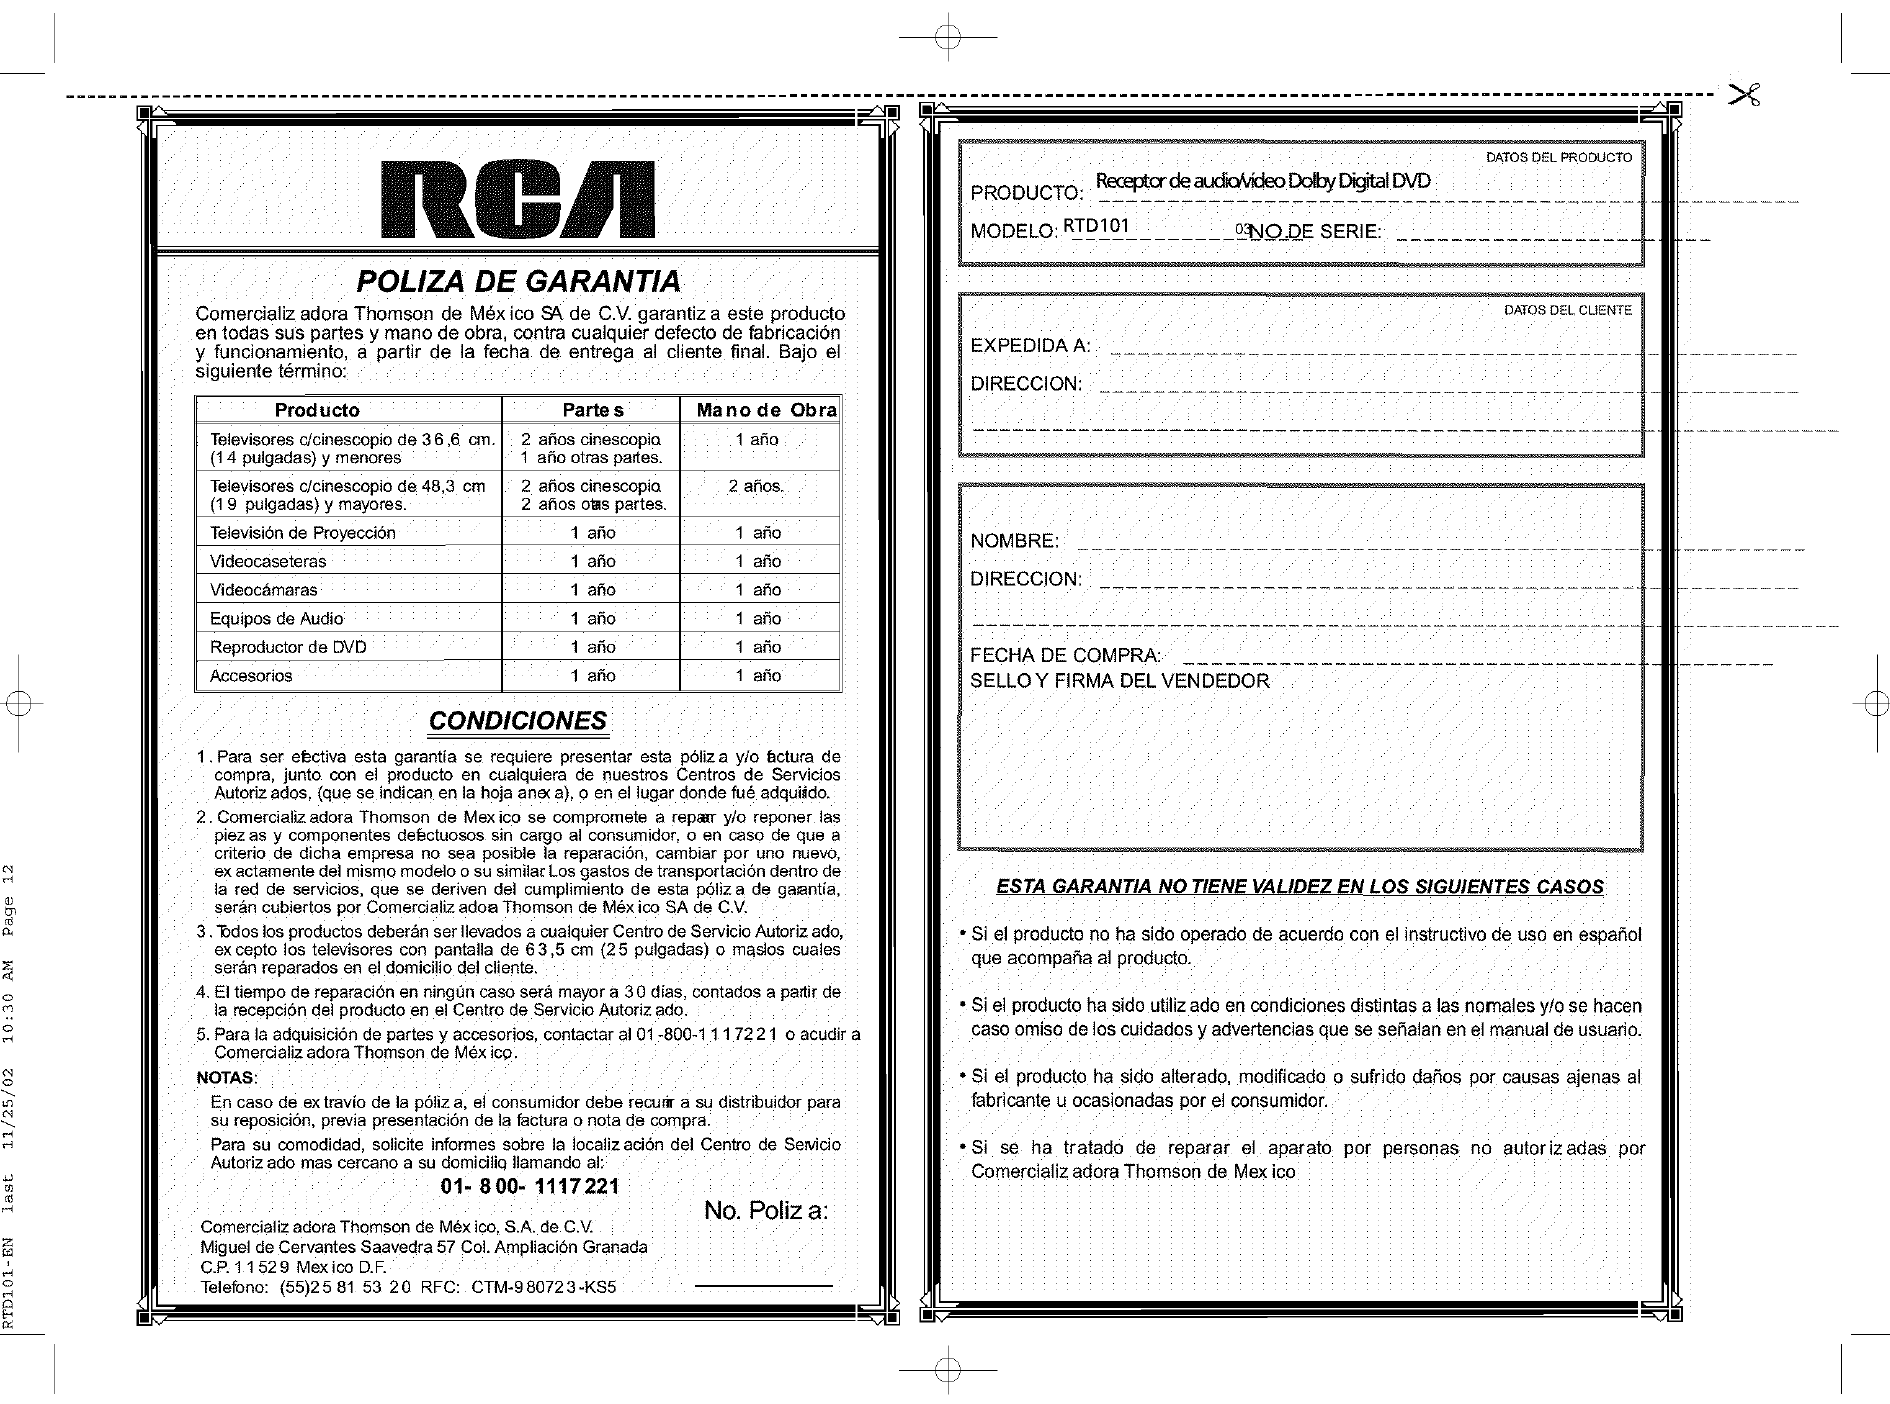
POLIZA DE GARANTIA
Comercializ adorn Thomson de M_x ico SA de C.V.garantiz a este producto
en todas sus partes y mano de obra, contra cualquier defecto de fabricaci6n
y funcionamiento, a partir de la fecha de entrega al cliente final. Baj0 el
siguiente t_rmino:
Producto
Televisores cicinescopio de 3 6,6 cm.
(14 pulgadas)y menores
Televisores c/cinescopio de 48,3 cm
(19 pulgadas) y mayores.
Televisi6n de Proyecci6n
Videocaseteras
Videoc_maras
Equipos de Audio
Reproductorde DVD
Accesorios
Partes Mano de Obra
2 aSos cinescopia 1 aSo
1 aSo otras partes.
2 aSos cinescopio 2 aSos.
2 aSos otis partes.
1aSo 1 aSo
1 aSo 1 aSo
1 aSo 1 aSo
1 aSo 1 aSo
1 aSo 1 aSo
1 aSo 1 aSo
CONDICIONES
1. Para Set efectiva esta garantia se requiere presentar esta p61iza y!o f_ctura de
compra, junto con el producto en cualquiera de nuestros Centros de Servicios
Autoriz ados, (que se indican en la hoja ane(a), 0 en el lugar donde fu6 adqui!do.
2. Comercializ adora Thomson de Mexico se compromete a repaBrry/o reponer las
piezas y componentes deL=ctuosos sin cargo al consumidor, o en caso de que a
criterio de dicha empresa no sea posible la reparaci6n, cambiar por uno nuevo,
ex actamente del mismo modelo o su similar Los gastos de transportaciSn dentro de
la red de servicios, que se deriven del cumplimiento de esta pSliza de ga_antia,
ser&n cubiertos por Comercializ adoa Thomson de M6x ico SA de C.V.
3. Todoslos productos deberan set Ilevados a cualquier Centro de Servicio Autoriz ado,
ex cepto los televisores con pantaUa de 6 3,5 cm (2 5 pulgadas) o maslos cuales
seran reparados en el domicilio del cliente.
4. El tiempo de reparad6n en ningt]n caso sera mayor a 3 0 dias, contados a pa_tirde
la recePciSn del producto en el Centro de Servicio Autoriz ado.
5. Para la adquisici6n de partes y accesorios, c0ntactar a101-800-1 1 1 72 21 o acudir a
Comerdaliz adorn Thomson de M_x ico.
NOTAS:
En caso de extrav{o de la pSliz a, el consumidor debe recu_ a su distribuidor para
su reposiciSn, previa presentaci6n de la factura o nota de compra.
Para su comodidad, solicite informes sobre la Iocalizad6n del Centro de SeMdo
Autoriz ado mas cercano a su domidliq Ilamando al:
01. 800. 1117221 No, Poliz a:
Comercializ adora Thomson de M_x ico, S.A. de C.M
Jel de Cervantes Saavedra 57 Col. Ampliacidn Granada
C.P. 1 1 52 9 Mexico D.F.
Telefon0:(55)2581 53 20 RFc: CTM-.980723-KS5
PRODUCTO: Receptorde aucic_MdeoDolby _1DVD
DATOSDELPRODUCTO
MODELO: RTD101 03NO.DE SERIE:
EXPEDIDA A:
DIRECCION:
DATOS DEL CLtENTE
NOMBRE:
DIRECCION:
FECHA DE COMPRA:
SELLO Y FIRMA DEL VEN DEDOR
ESTA GARANTIA NO TIENE VALIDEZ EN LOS SIGUIENTES CASOS
•Si el producto no ha sido operado de acuerdo con el instructivo de uso en espa_ol
que acompaSa al Droducto.
• Si el producto ha sido utiliz ado en condiciones distintas alas nornales yio se hacen
caso omiso de los cuidados y advertencias que se sefialan en el manual de usuario.
• Si el producto ha sido alterado, modificado o sufrido daSos por causas ajenas al
fabricante u ocasionadas per el consumidor
• Si se ha tratado de reparar el aparato por personas no autorizadas por
Comercializ adora Thomson de Mexico
