RCA TV/VCR Or DVD Combo Manual L0311133
User Manual: RCA RCA TV/VCR or DVD Combo Manual RCA TV/VCR or DVD Combo Owner's Manual, RCA TV/VCR or DVD Combo installation guides
Open the PDF directly: View PDF ![]() .
.
Page Count: 56

TV/VCR
User's G ade
Changing Entertainment. _in.
WARNING
To reduce the risk of fire or
electric shock, do not expose
this product to rain or moisture.
_ AUTION: To reduce the risk of electric shock,
do not remove cover (or back). No user
serviceable parts inside. Refer servicing to
qualified service personnel.
_k This symbol indicates This symbol indicates
"dangerous voltage" inside _r_ important instructions
the product that presents a accompanying the product.
risk of electric shock or
personal injury.
Caution: To prevent electric shock, match wide blade of
plug to wide slot, fully insert.
Attention: Four _viter les chocs _lectriques, introduire la lame la plus
large de la fiche dans la borne correspondante de la prise et pousser jusqt_
au fond.
Refer to the identification/rating label located on the back panel of your
product for its proper operating voltage.
FCC Regulations state that unauthorized changes or modifications to this
equipment may void the user's authority to operate it.
If fixed (non-moving) images are left on the screen for long periods,
they may be permanently imprinted on the picture tube. Such
images include network Iogos, phone numbers, and video games.
This damage is not covered by your warranty. Extended viewing of
channels displaying these images should be avoided.
Cable TV Installer: This reminder is provided to call your attention to
Article 820-40 of the National Electrical Code (Section 54 of the Canadian
Electrical Code, Part 1) which provides guidelines for proper grounding and,
in particular, specifies that the cable ground shall be connected to the
grounding system of the building as close to the point of cable entry as
practical.
Product Registration
Please fill out this product registration card and return it immediately. Returning the card allows us to contact
you if needed.
Keep your sales receipt to obtain warranty parts and service and for proof of purchase. Attach it here and record
the serial and model numbers in case you need them. The numbers are located on the back of the televisiom
Model No.
Serial No.
Purchase Date:
Dealer/Add tess/Phone:
Key Features Overview
Your T%WCR is equipped wifll features that will add to your TV:%rCR viewing experience, The
follo_dng information summarizes these %atures. Chapter 3 provides more information about tile
rest of file q%r/_zCR's features and how to use them,
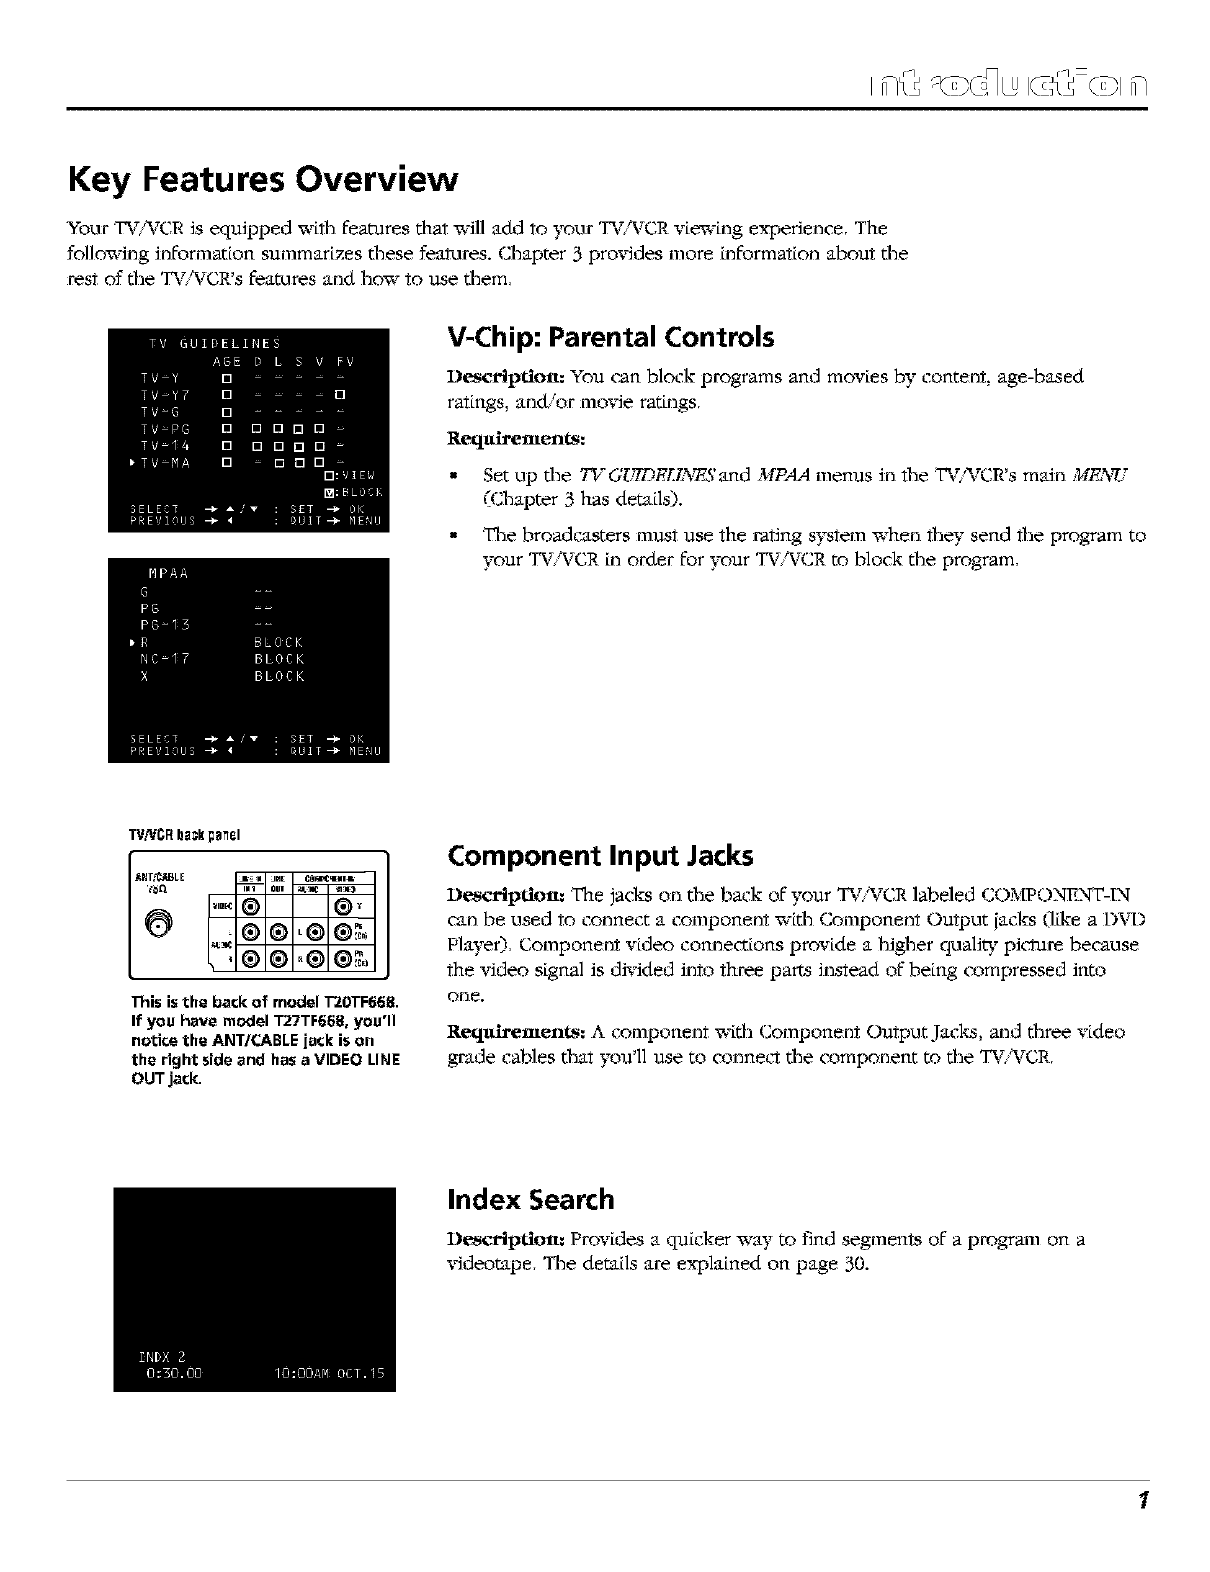
V-Chip: Parental Controls
De_crtpttote You can block programs and movies by content, age-based
ratings, ancUor movie ratings,
Reqldrements:
•Set up tlle 7%7 GI37DELL'_S and MR'4.4 menus in the T_tVCR's main MF_7
(Chapter 3 has details).
• The broadcasters must use the eating system when they send the program to
your TV,_ZCR tn order for your TV,_ZCR to block the program,
TV!VCRb_k _a_el
ANT_BLE JZ_ _H[ CO_aeml&
t_Q ml Oun
".® ®"
This is the back of model 1-20TF668.
If you have model T27TF668, you'll
notice the ANT/CABLE jack is on
the right side and has a VIDEO LINE
OUT jack,
Component Input Jacks
De_crlptiote The jacks on the back of }'our TV,_ZCR labeled COMPONENT-IN
can be used to connect a component with Component Output [acks 0tke a DVD
Player), Component video connections provide a higher quali W picture because
the xqdeo signal is dixqded into three parts instead of being compressed into
one.
ReqlxLvements: A component with Component Output Jacks, and three video
grade cables that you'll use to connetrt the component to the TV,_ZCR,
Index Search
De_¢rlptiote Provides a quicker way to find segments of a program on a
videotape, The details are explained on page 30.
1

(This page intentionally left blank)
Chapter 1: Introduction
Key Features Overview ....................................................................................................
V-Chip: Parental Controls ..................................................................
Component Input Jacks .............................................................................................
Index Search ...............................................................................................................
Chapter 2: Connections & Setup
Things to Consider Before You Connect .........................................................................
Protect Against Power Surges ...................................................................................
Protect Components from Overheating ...................................................................
Position Cables Properly to Avoid Audio Interference ............................................
Important Stand and Base Safety Information ........................................................
Use Indirect light ......................................................................................................
Cables Needed to Connect Components to Your TVNCR ..............................
Choose Your Connection .......................................................................
Connection: TV/VCR Only ................................................................................................
Connection: TV/VCR +DVD Player ...........................................................
Connection: TV/VCR + Satellite Receiver ................................................... 11
Plug in the TV/VCR ............................................................................ 11
Put Batteries in the Remote .................................................................. 11
Now to Use the Remote Control to Complete the Interactive Setup ................... 11
Turn on the TV/VCR ........................................................................... 11
Initial Setup ..................................................................................... 12
Select a Language .................................................................................................... 12
Automatically Searching for Channels ................................................. 12
Add or Erase Channels .................................................................... 13
Turn off the Energy Save feature ....................................................... 13
VCR Basics ....................................................................................................................... 14
Playing a Tape .............................................................................. 14
Basic Recording ....................................................................................................... 14
Chapter 2: The Remote Control
The Buttons on the Remote Control ........................................................ 16
Programming the Remote to Operate Other Components .............................. 18
Find Out If You Need to Program the Remote ...................................................... 18
How to Program the Remote ............................................................ 18
How to Use the Remote After You've Programmed It ............................................... 19
How to Order A New Remote Control ...................................................... 19
3
Chapter 3: Features
Parental Controls and V-Chip ................................................................ 22
How V-Chip Works .................................................................................................. 22
New Rating Systems ...................................................................... 22
Set the TV GUIDELINES Rating Limits ................................................... 23
Set the MPAA Rating Limits ............................................................. 25
Download New Rating System .......................................................... 26
Turning V-Chip Block On and Off ............................................................................ 26
Recording Features ............................................................................ 27
Recording Speeds .......................................................................... 27
Recording Pause ........................................................................... 27
Types of Recording ................................................................................................... 27
Timer Recording ........................................................................... 27
Copying and E_iting Tapes ..................................................................................... 29
One-Touch Recording .................................................................... 29
PWture Search Options ........................................................................ 30
Frame Advance ............................................................................. 30
Slow Motion ............................................................................... 30
Index Search ............................................................................................................. 30
Tracking ..................................................................................................................... 31
Time Counter ............................................................................... 31
Audio Features ................................................................................. 32
Reception .................................................................................................................. 32
Tape Playback ........................................................................................................... 32
Chapter 4: Using the TV/VCR's Menu System
How to Use Your TV/VCR's Menu System .................................................. 34
TIME Menu ............................................................................................................... 34
To set the dock. ....................................................................... 34
Accessing Menus .......................................................................... 34
Exiting from a menu ...................................................................... 34
To set the on timer or sleep timer. ................................................. 35
VIDEO ADJUST Menu ............................................................................................... 36
AUDIO ADJUST Menu .............................................................................................. 36
SELECTLANGUAGE Menu ........................................................................................ 37
Setting Closed-Caption Modes ............................................................................... 37
Additional Setup Features ................................................................ 38
Chapter 5: Additional Information
Troubleshooting ................................................................................ 40
Front Panel ..................................................................................... 43
Back Panel ...................................................................................... 44
Care and Cleaning ............................................................................. 44
RCA TruRat I"V/VCR Combination Limited Warranty ..................................... 45
Finding the I"V/VCR's Video Line Input Channel .......................................... 46
Accessories ..................................................................................... 47
Index ............................................................................................ 49
4
Connections & Setup
Chapter Overview:
*Things to Consider Before You Connect
Choose Your Connection
Connections
Plug in the TV/VCR
Put Batteries in the Remote
Turn on the TV/VCR
Initial Setup
VCR Basics
Changing Entertainment.
Grapbic, s' used within tbis publication are j_or representation only. 5
Things to Consider Before You Connect
Protect Against Power Surges
•Connect all components before you plug any of their power cords Lnto the wall outlet,
•Turn off tlle TV/WCR and/or component before you connect or disconnect an}" cables,
• Make sure all antennas and cables are properly grounded. Refer to the rmportant
Safeguards sheet packed with your TV/%ZC,R,
Protect Components from Overheating
•Don't block ventilation holes on an}, of the components. Arrange the components so that
aLr can cLrcolate freely,
• Don't stack components.
• When you place components Lna stand, make sure you allow adequate ventilation.
• If you connect an audio receiver or ampl[eler, place [t on the top shelf so the heated air
from it won't flow around other components.
Position Cables Properly to Avoid Audio Interference
•Insert each cable firmly into _e designated iack,
•If you place components above the TV/WCR, route all cables down the side of the back of
the TV/WCR Lnstead of straight down the middle of the back of the TV/%TCR.
• If your antenna uses 300-ohm twin lead cables, do not coil the cables. Also, keep the twin
lead cables away from audio/video cables,
Important Stand and Base Safety Information
Choose the location for your TV/_ZGRcarefully. Place the TV/WCR on a stand or base that is of
adequate size and strength to prevent the TV/_.zCRfrom being accidentally tipped over, pushed
off, or pulled off, This could cause personal [njuW and/or damage to the TV/AZCR,Refer to the
Important Safeguards sheet packed x_'ithyour TV/_ZGR.
Use Indirect Light
Don't place _e TV/WCR _x_lere sunlight or room lighting will be directed to_x_ard_e screen,
Use soft or indLrect lighting.
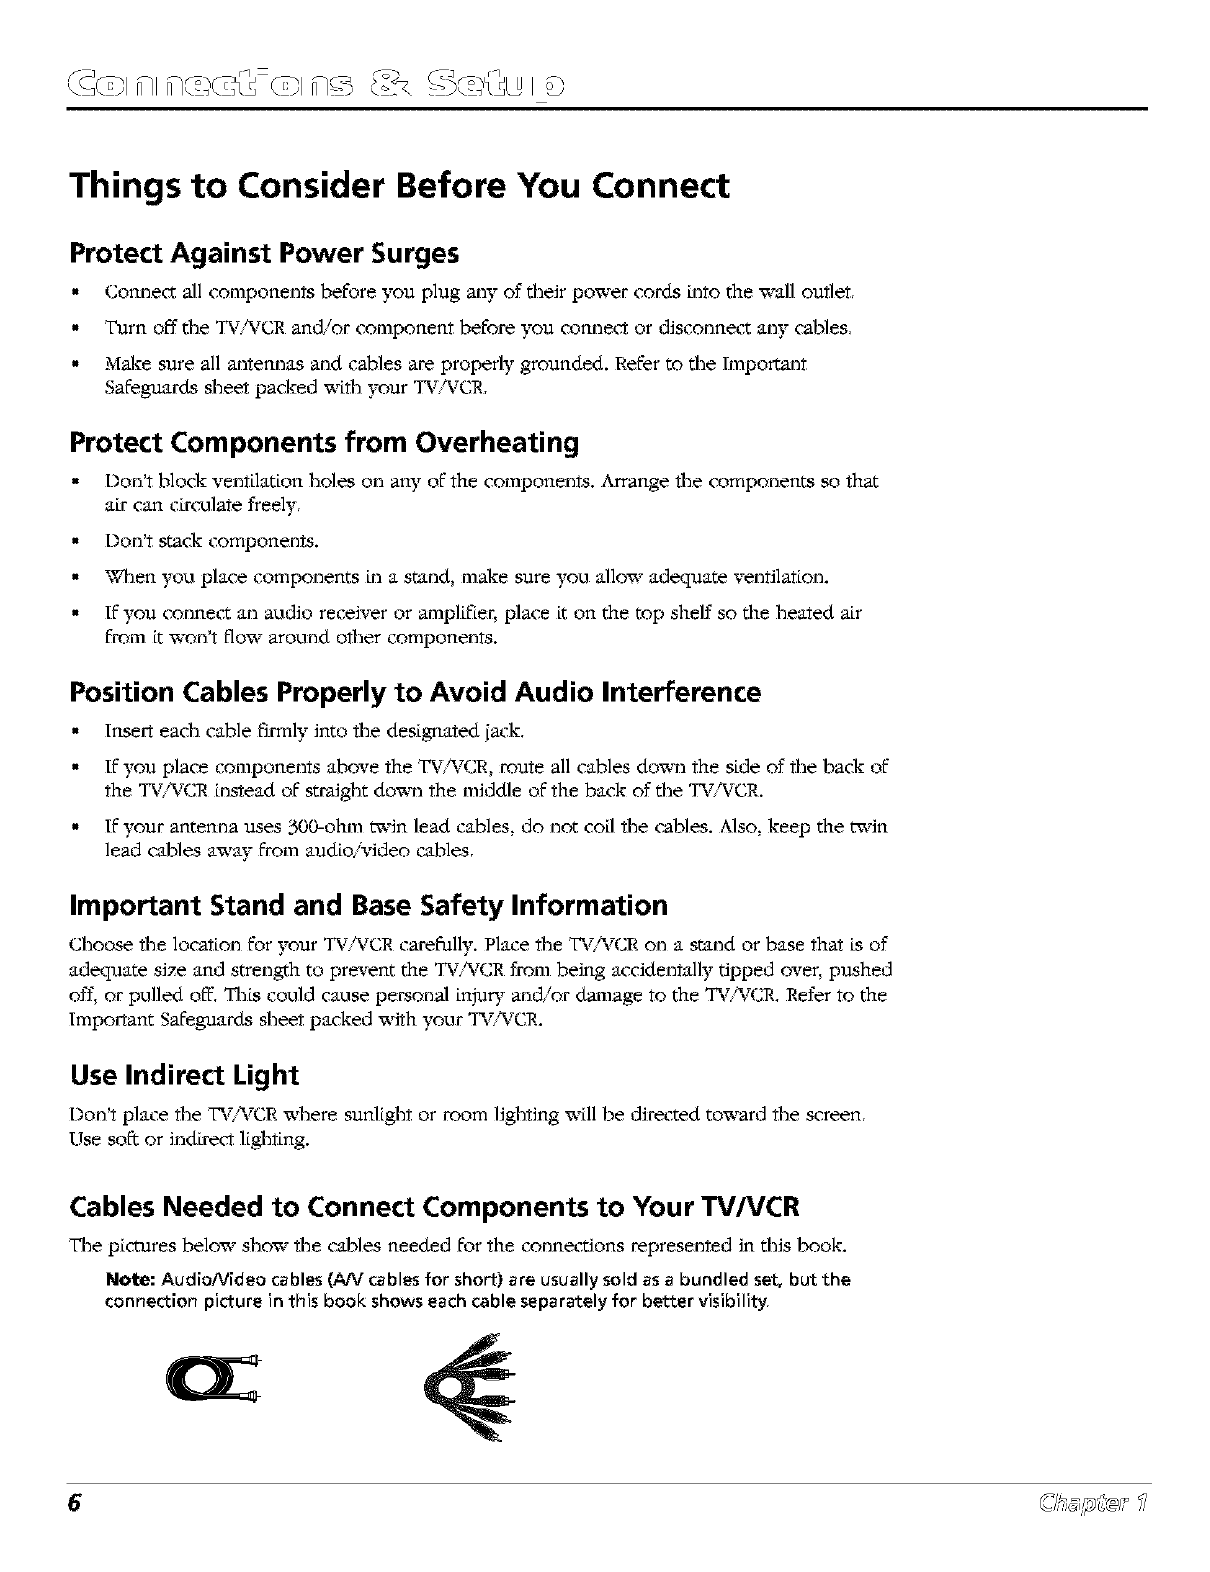
Cables Needed to Connect Components to Your TV/VCR
The pictures below show the cables needed for the connections represented in this book.
Note: AudioNideo cables (AN cables for short) are usually sold as a bundled set, but the
connection picture in this book shows each cable separately for better visibility.
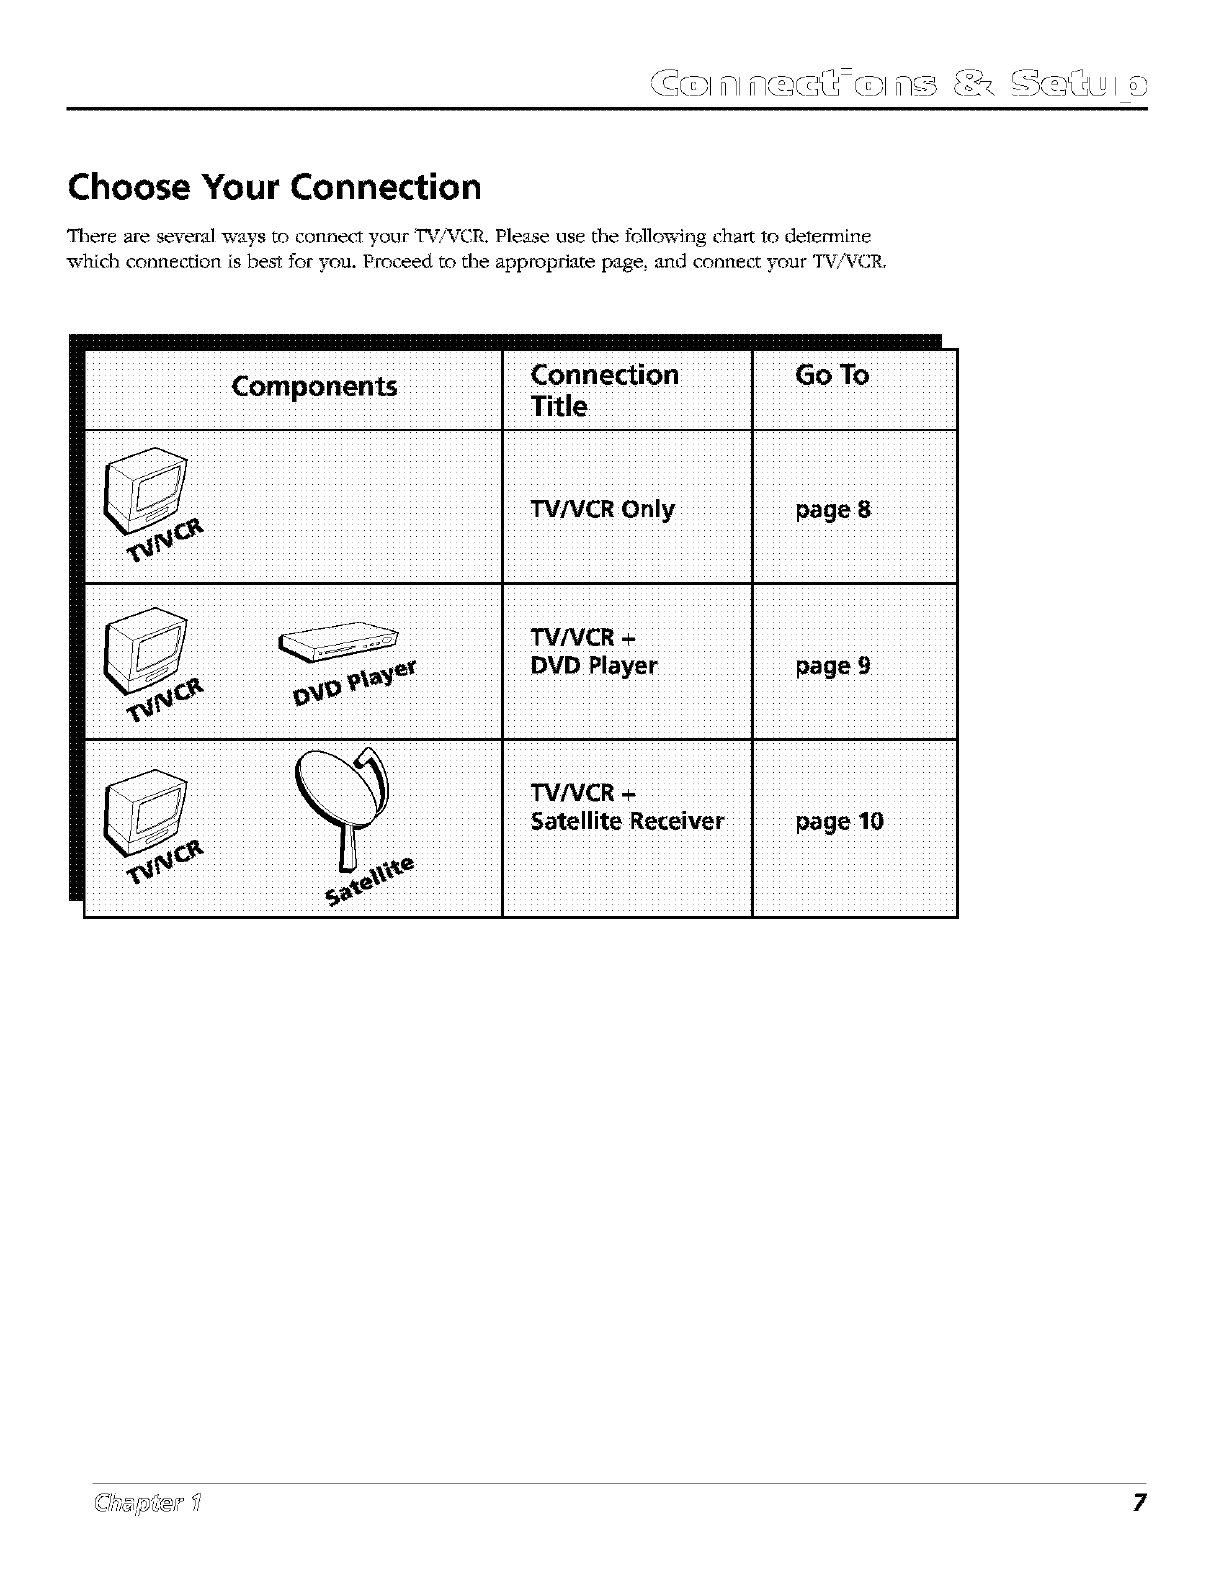
Choose Your Connection
There are several ways to connect your T%%rCR. Please use the fol]o_dng chart to determine
whidl connection is best for you. Proceed to the appropriate page, and connect your T%WCR,
Com.onents, Connection I GoTo
P Title J
iiiiiiIiiiii
(7"8 I_ I
6,,,,_,_@/, ,_ 7
TV/VCRbackpanel
ANI/CABLE
751"Z
,.f-
LINEI._.M LINE _OMFOHEMT-IH
IN 1 CUT AIJ[IIC VIDEO
FromAntenna/CableFeed
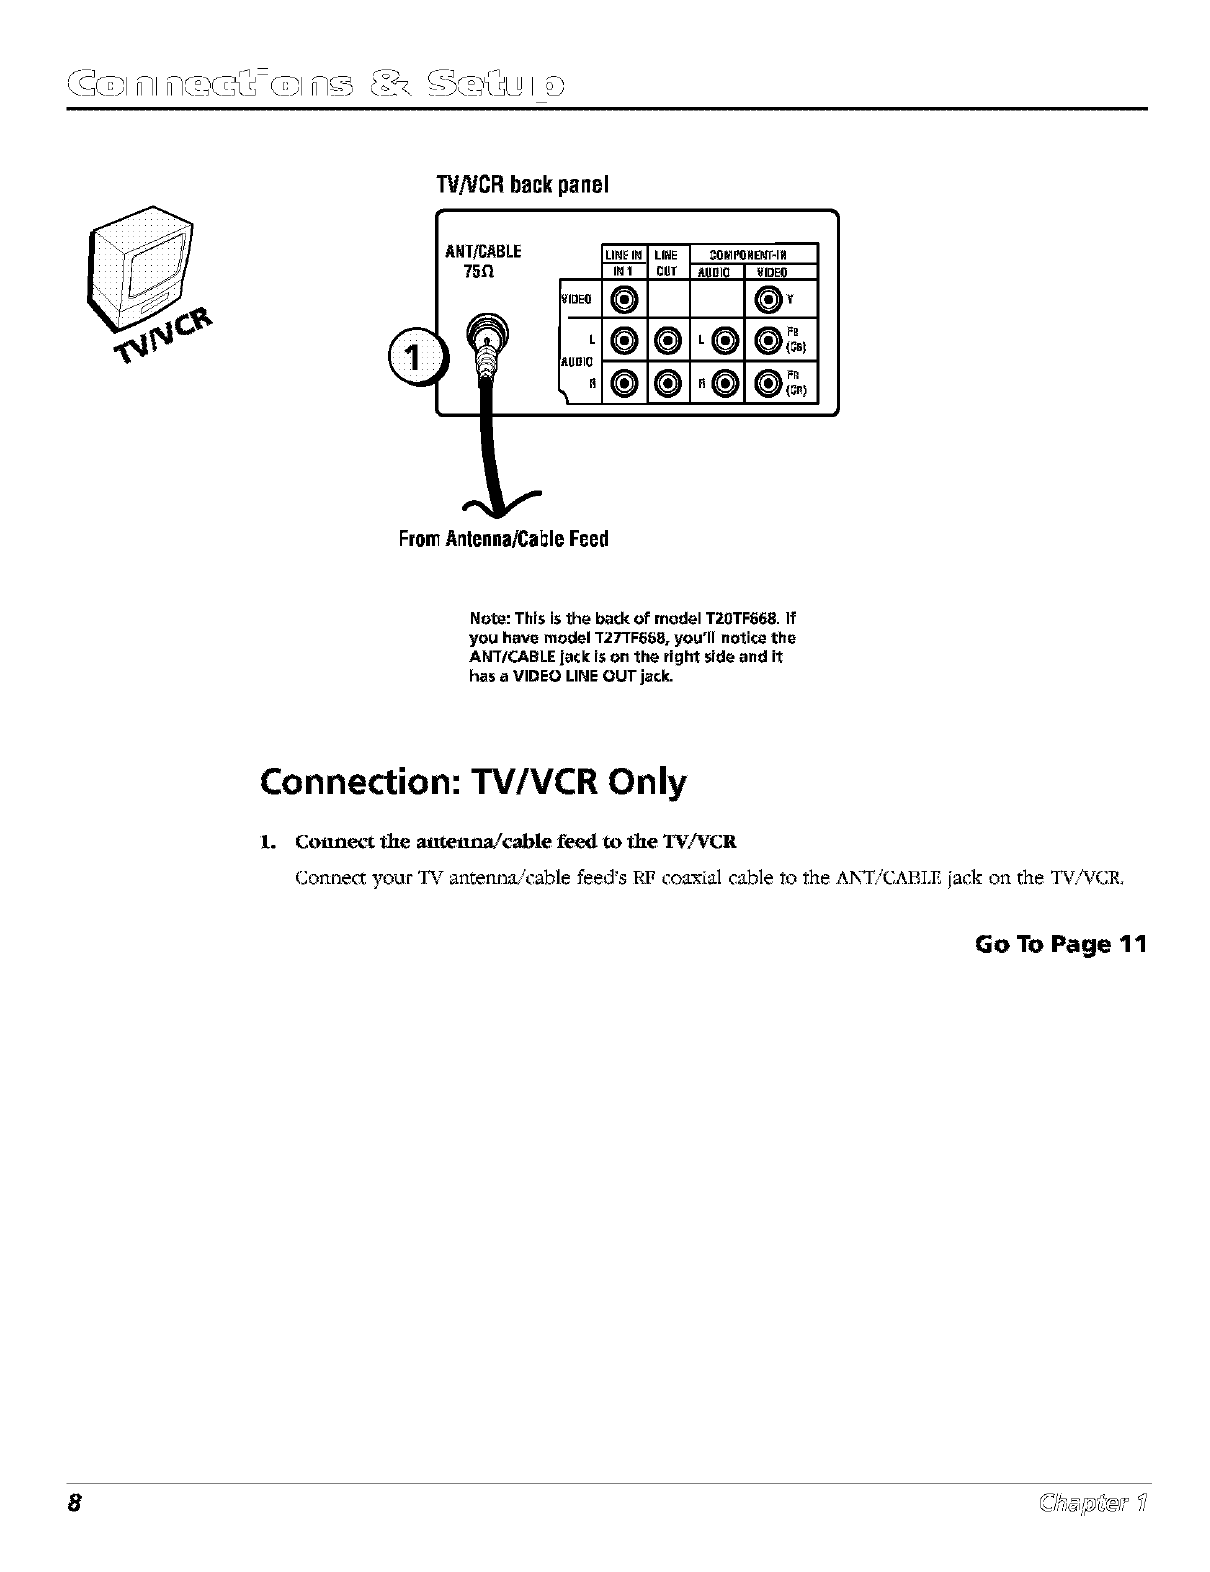
Note: Thin iNthe back of model T20TF668. If
you have model T27TF668, you'll notice the
ANT/CABLE jack iNon the right side and it
has a VIDEO LINE OUT jack.
Connection: TV/VCR Only
1. Coim_-f the aitteim_¢able feed to the "I%'/VCIi
Cormect yoor TV anterma¢cable feed's RF coaxial cable to the AN_iCABI.E jack on the TV,_TCR,
Go To Page 11
©,,,_,_®/,
T'ff[_CR l_k palt6l
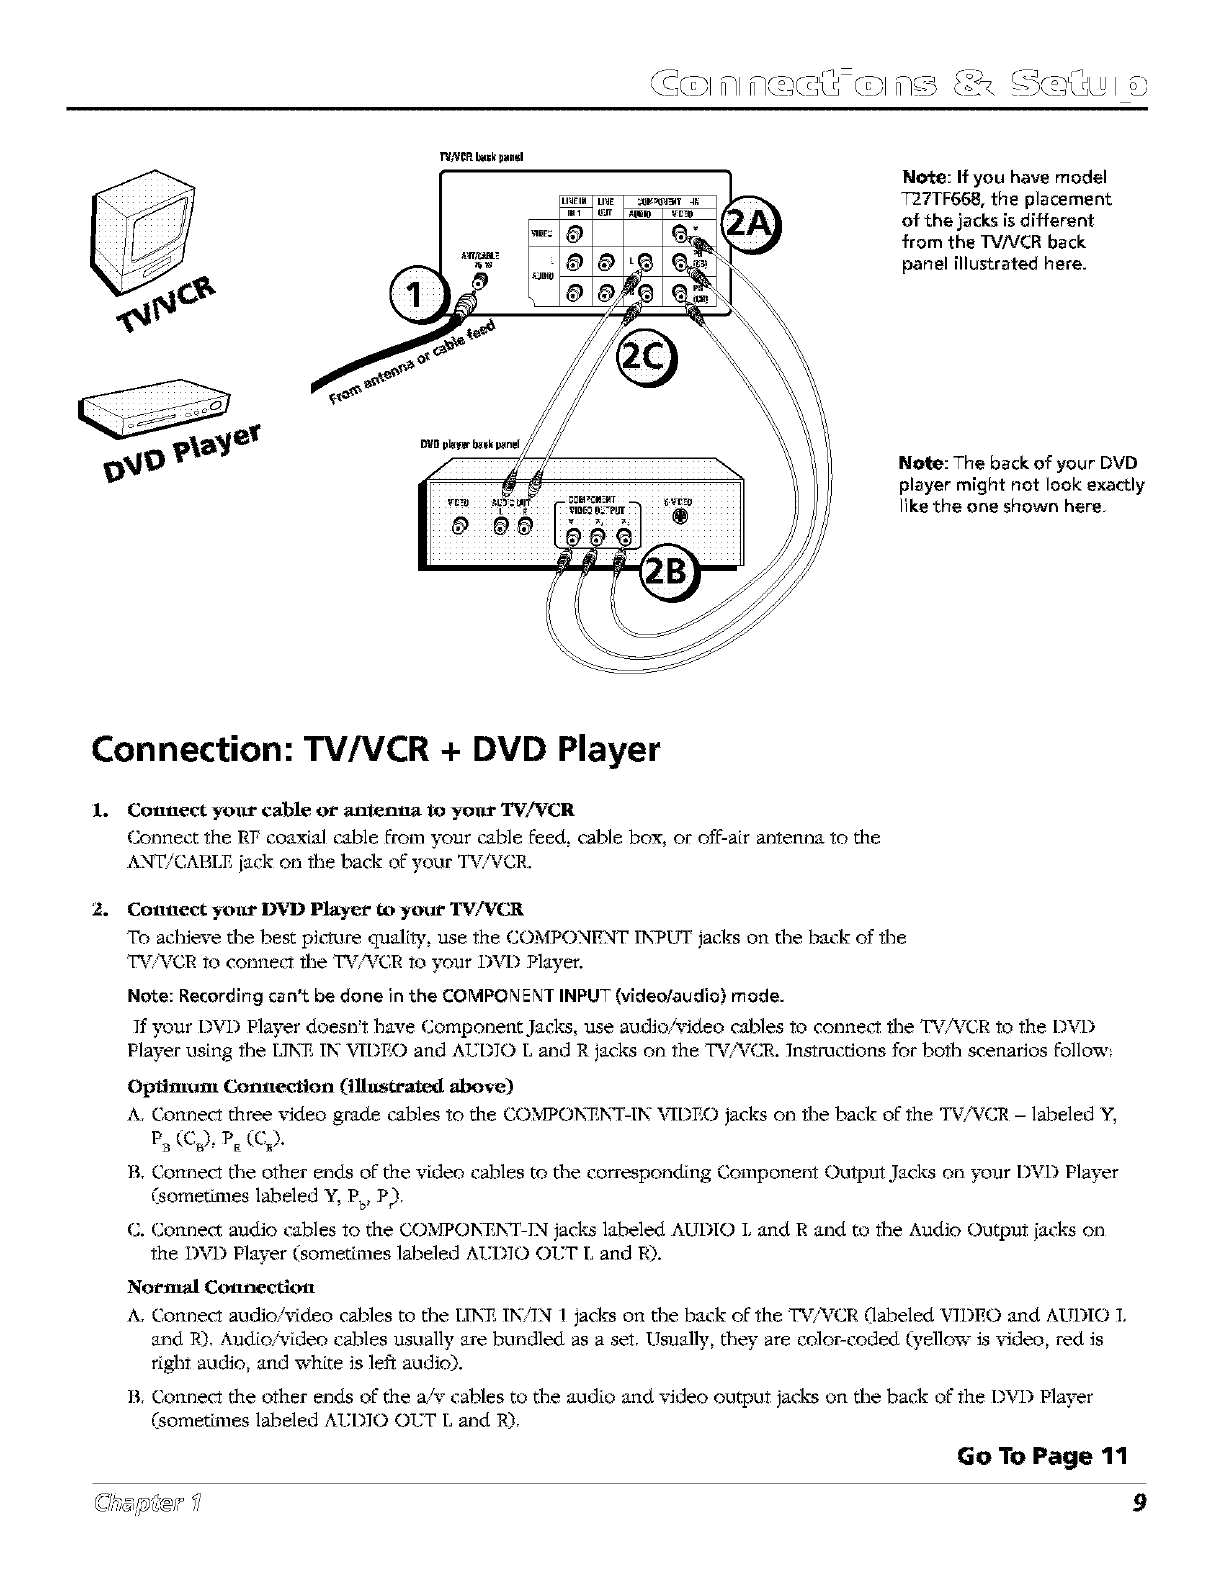
Note: If you have model
T27TF668, the placement
of the jacks is different
from the TV/VCR back
panel illustrated here.
No_e: The back of your DVD
player might not look exactly
like the one shown here,
Connection: TV/VCR +DVD Player
1. Connect yolu" cable or antenna to yoltr TV/VCR
Connect the RF coaxial cable from your cable feed, cable box, or off-air antenna to the
ANTiCABI_ iack on tile back of your TV/%TC,R.
2o Connect yoltr D_,ql) Player to your TV/VCR
To achieve the best picture quality, use the COMPONENT IN_IJT jacks on the back of the
TV/WCR to connect the TV/WCR to your D'_q) Player.
Note: Recording can't be done in the COMPONENT INPUT (video/audio) mode.
If }'our I)VD Player doesn't have Component Jacks, use audio/video cables to connect the TV/_rCR to the DVD
Player using the UN_ IN YIDEO and AIJDIO L and R jacks on the TV]WCR. Instructions for both scenarios fonow:
Optimum Connection Olbu_trated "above)
A, Connect three video grade cables to the COMPON_N_F-IN "vIDEO jacks on the back of the TV/VCR - labeled Y,
(%).
B, Connect %e other ends of the video cables to %e corresponding Component Output Jacks on }'our I)VD Player
(sometLmes labeled Y, Pb, P)'
C. Connect audio cables to the COMPON_N_F-]N jacks labeled AUDIO L and R and to the Audio Output lacks on
the DVD Player (sometLmes labeled ATJI)]O OTJT L and R).
Normal Connection
A, Connect audio/video cables to the LIN_ IN/IN 1 jacks on the back of the TV/_rCR 0abeled X,qDEO and AUDIO L
and R), Audio/video cables usually are, bundled as a set, Usually, %ey are color-coded (yellow is video, red is
right audio, and "a_ite is left audio).
B, Connect the other ends of the aJr cables to %e audio and video output jacks on %e back of the I)VD Player
(sometLmes labeled AIJDIO OIJT L and R),
Go To Page 11

W/VCRbackpanel
From
FromA.tennaiCebleFeed Satellite
Note: If you have model
T27TF668, the placement
of the jacks is different
from the TV/VCR back
panel illustrated here.
N_te: The back of
your satellite receiver
might not look
exactly like the one
shown here.
Connection: TV/VCR + Satellite Receiver
1. Connect file satellite receiver to the TV/VCR
A, Connect one end of an RF coaxial cable (not included) to the TV/AzCRis
ANTiCABI£ lack. Connect the other end to %e satellite receiver's antenna output
lack (sometimes labeled nEFF TO T_.
B, Connect the A,W cables, Connect audio cables to the TV/WCR's ],TNEIN/IN 1
ALTD]O(L and R) jacks and the other ends to %e satellite receiver's corresponding
audio output lacks, Connect one end of the video cable to the TV/_,zCRis LIN_ IN/
IN I "vqDEO lack, and the other end to the satellite receNericable boys video
output lack,
2. Connect antenna or cable to your satellite receiver
Connect the coaxial cable from your antenna, cable feed, or cable box to the Antenna
input jack on the satellite receiver (sometLmes labeled IN FROM ANT).
3. If necessary, connect the satellite's antenna cable to the satellite receiver
If the coaxial cable from the satellite dish antenna isn't aheady connected to the
satellite receiver's input jack (sometimes labeled SATELIJTI_.IN), connect it now,
Go To Page 11
Plug in the TV/VCR
Plug the end of the power cord into the "a_alloutlet. Match the wide blade of the plug with the
"aide slot Lnthe outlet. Insert the plug completely into the outlet,
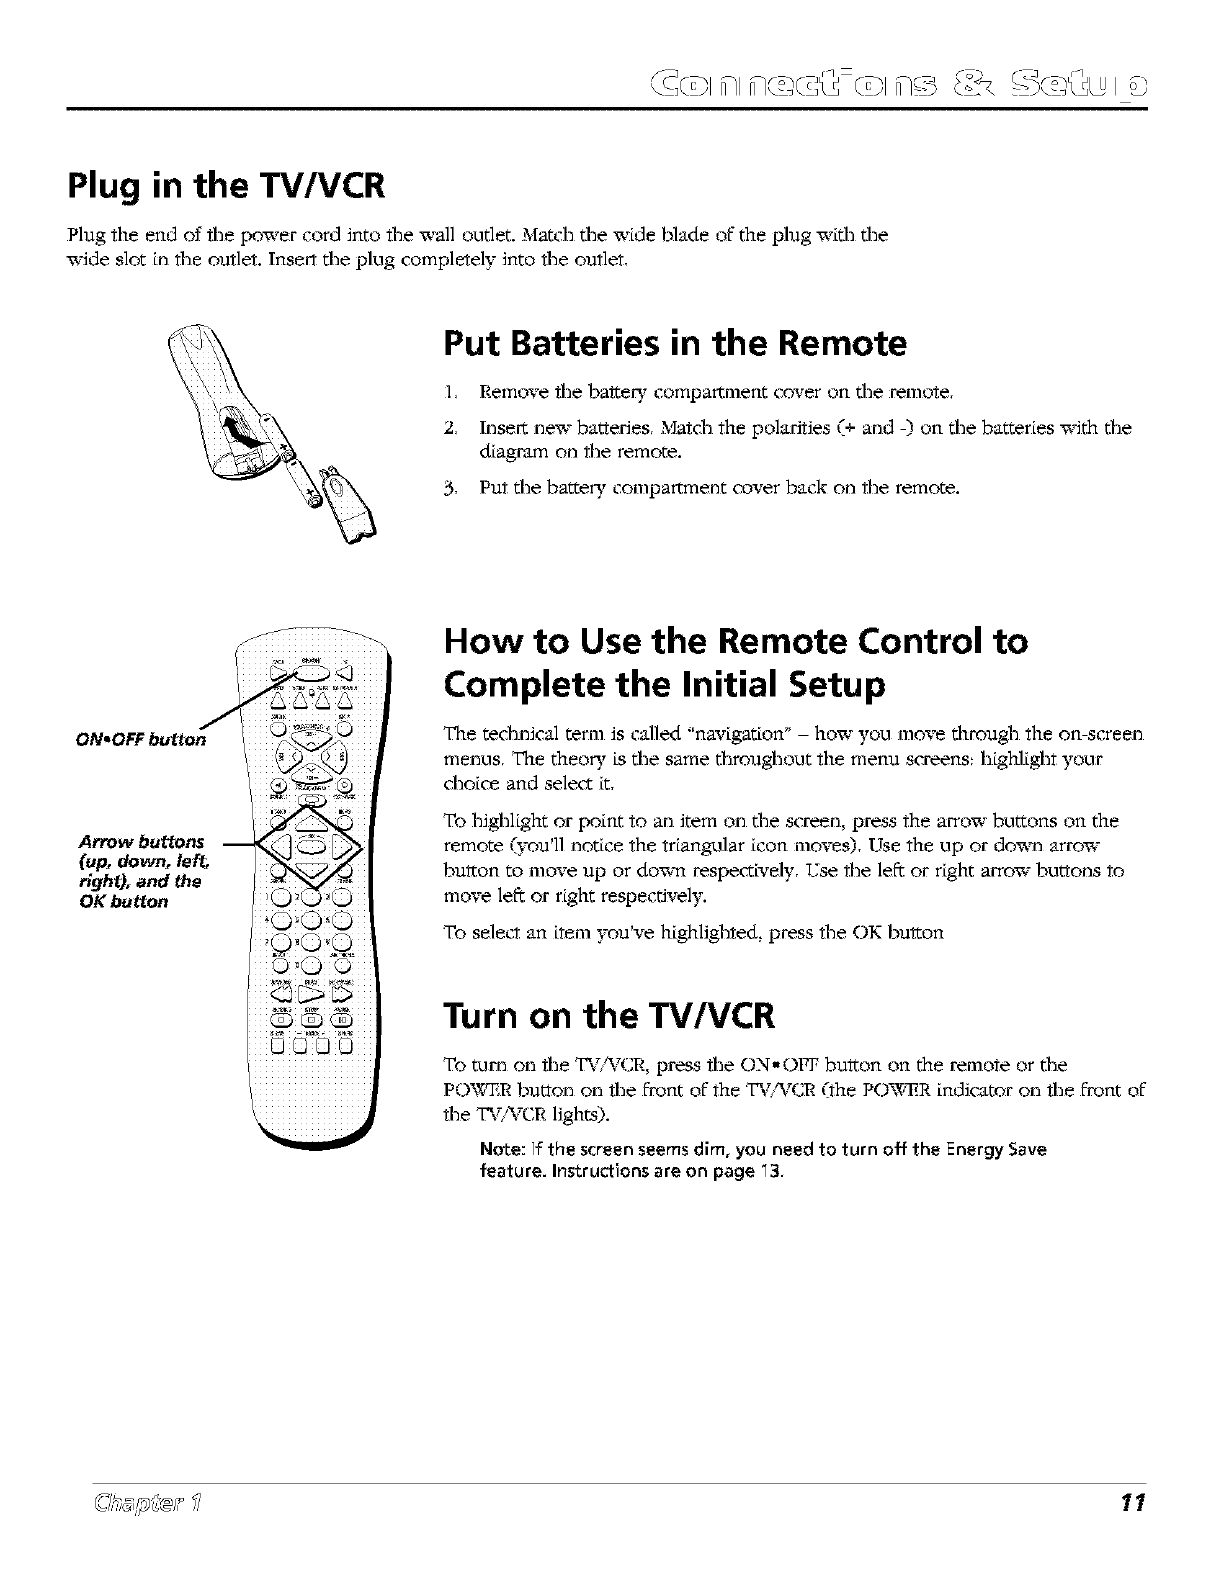
Put Batteries in the Remote
l, Remove the baitery compartment cover on the remote,
2, Inse_ new banedes, Matdl the polarities (+ and -) on the batteries "adth the
diagram on the remote.
3, Put the batte W compartment cover back on the remote.
fA _Ai_iiii
J
ON,OFF button
Arrow butlons --
(up, down, left,
right), and the
OK button
How to Use the Remote Control to
Complete the Initial Setup
The tedmical term is called "navigation' -bow you move through the on-screen
menus, The theo W is the same throughout the menu screens: highlight your
dlo[ce and select it,
To highlight or point to an item on the screen, press the arrow buttons on the
remote (you'll notice the triangular icon moves), Use the up or down arrow
button to move up or do'am respectively, tTse the le_ or right arrow bugons to
move le_ or right respectively.
To selet_ an item you've highlighted, press file OK button
Turn on the TV/VCR
To mm on the TV/WCR, press the ON=OFF bulton on the remote or the
PUrgER button on the front of the TV/WCR (.the POWER indicator on the front of
the TV/WCR lights).
Note: If the screen seems dim, you need to turn off the Energy Save
feature. Instructions are on page _3,
Initial Setup
The first time you mm on your TV_WCR,you'll be asked to set a few screens so that your TV_WCRwill be set up
correctly. Complete the following steps to set up your T%WCR.
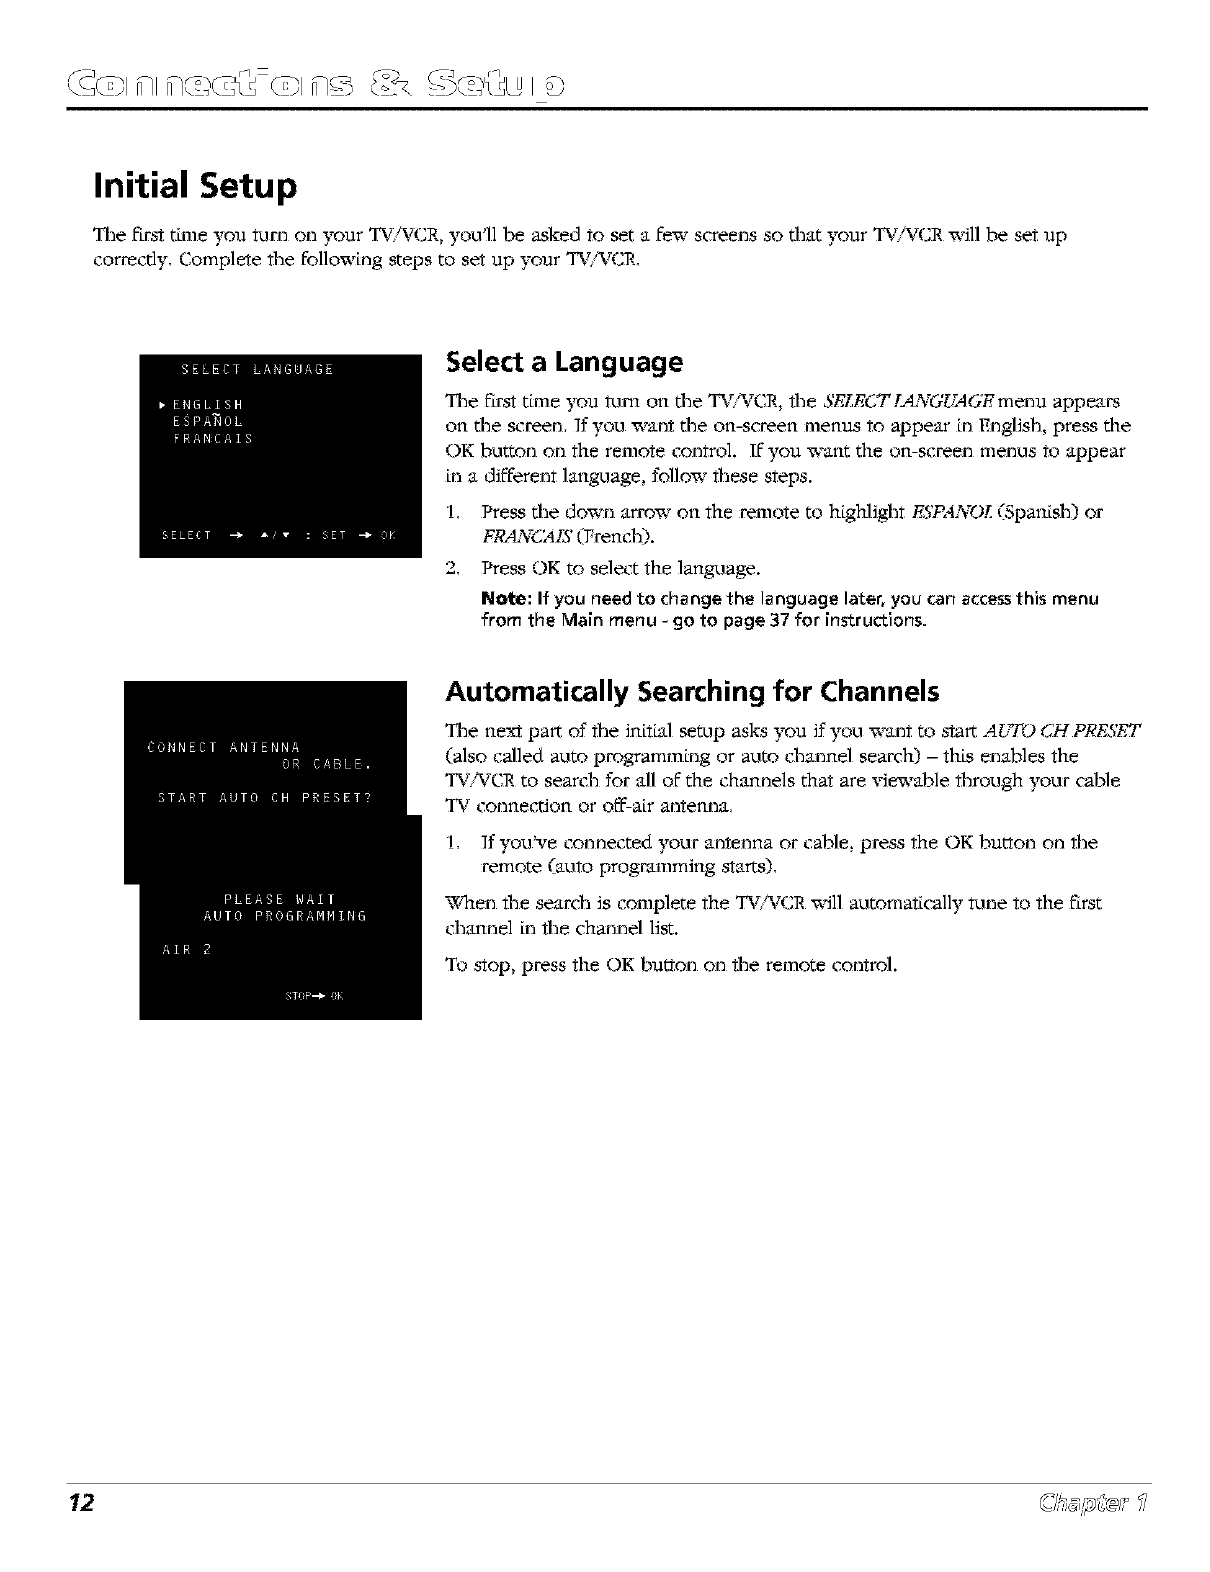
Select a Language
The first thne you turn on the TV_WCR, file SF.LE_gT'[._¥GI_GE menu appears
on the screen. If you want the on-screen menus to appear LnEnglish, press the
OK button on the remote control. 115you want the on-screen menus to appear
in a different language, follow fllese steps.
1, Press the down arrow on the remote to highlight FSPANOL (Spanish) or
FP_4N6;4,(_;(French).
2, Press OK to select the language.
No4te:If you need to changethe language later, you can accessthis menu
from the Main menu - go to page 37 for [ns'cructions.
Automatically Searching for Channels
The next part of file initial setup asks you if you want to start A_:YD CF[PRESET
(also called auto programming or auto channel search) -this enables the
TV,_ZCR to search for all of the channels that are viewable through your cable
TV connection or off-air antenna.
1. If you've connected your antenna or cable, press the OK button on fl_e
remote (auto programming starts),
_qmn file seardl is complete the T%WCR will automatically t_me to the first
channel tn the channel list.
To stop, press the OK button on file remote control,
©,__¢®/, ?
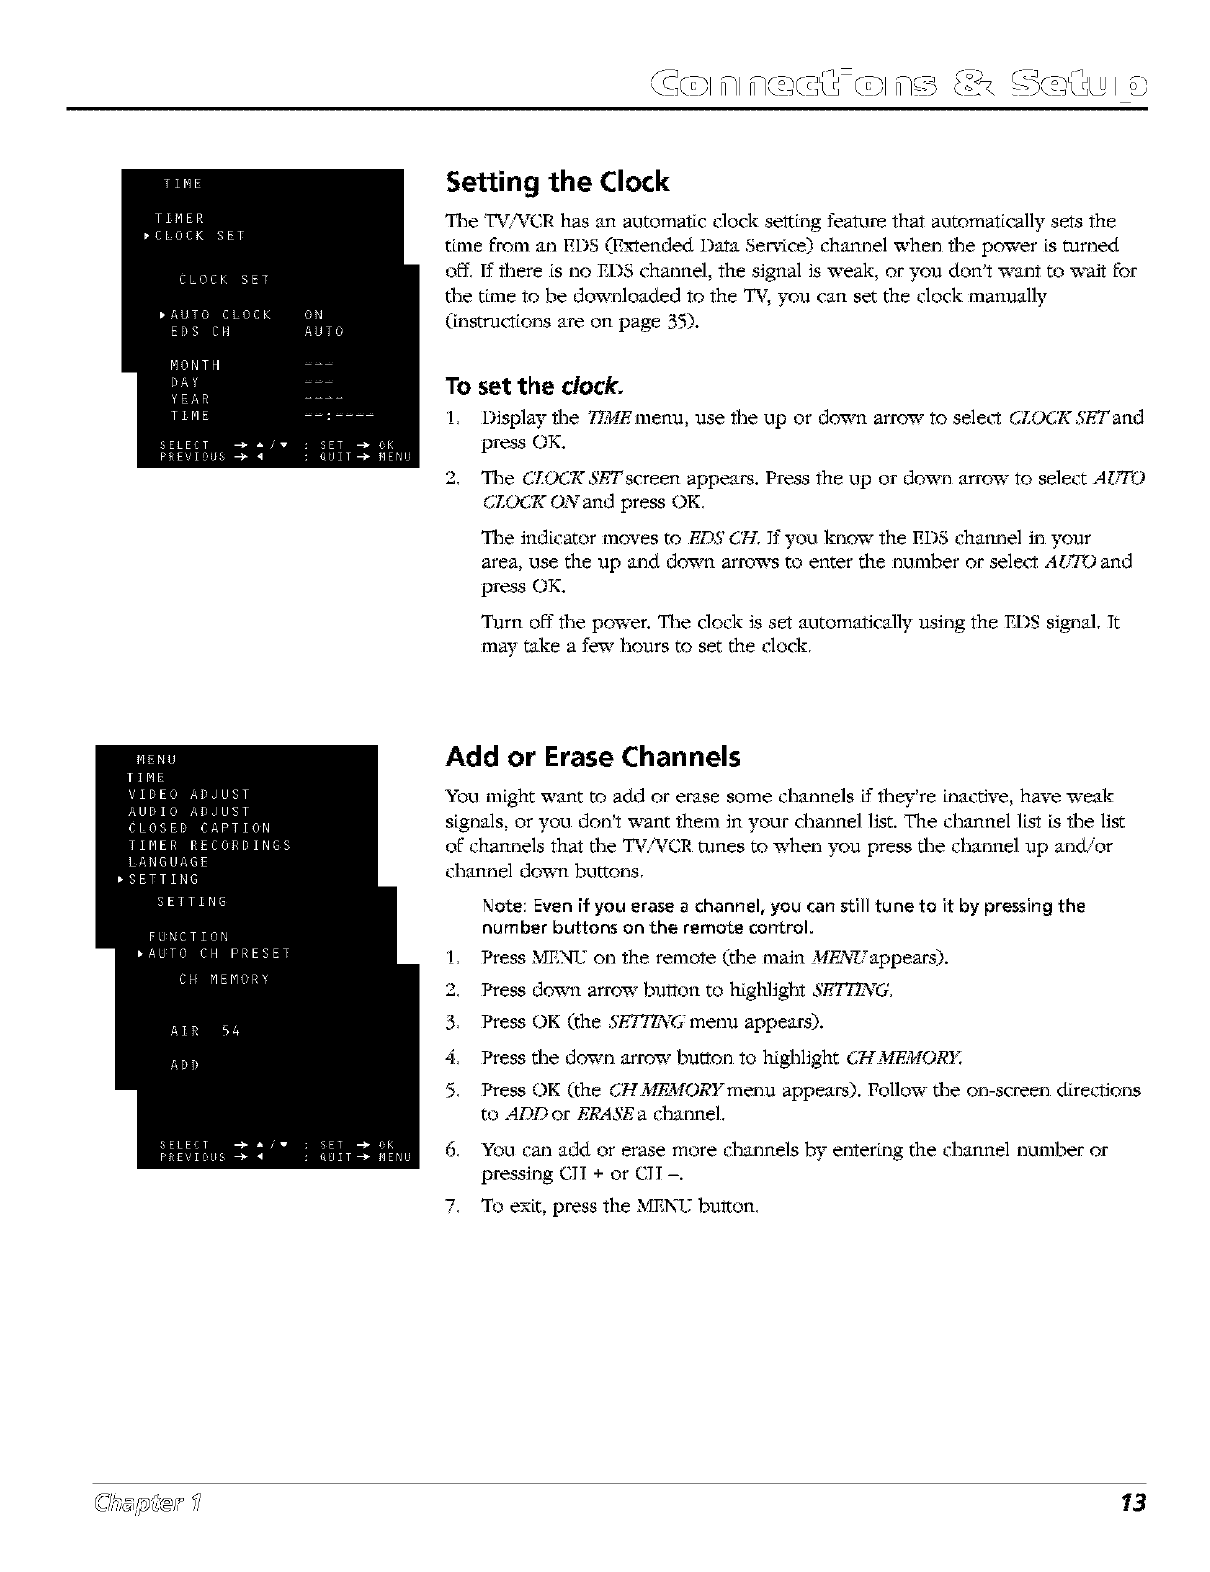
Setting the Clock
The TV/_rCR has an automatic clock setting feature that automatically sets the
time from an EDS (Extended Data Service) channel "a_en the power is turned
off, If there is no EDS channel, the signal is weak, or you don't want to `a_aitfor
%e time to be downloaded to the TV, you can set the clock manually
(instructions are, on page 35).
To
1,
2,
set the clock.
Display the 77ME menu, use the up or do,am arrow to select CLfiK;TgSETand
press OK.
71_e CLfiK;T4SE,Tscreen appears. Press the up or down arrow to select A_VD
¢iiLfiK;_ONand press OK,
The indicator moves to EDS CH. If you know the EDS channel in your
area, use the up and down arrows to enter the number or select a&TrO and
press OK.
T_arn off the power. The dock is set automatically using the EI)S signal, It
mW take a few hours to set the clock,
Add or Erase Channels
You might want to add or erase some channels if th%"re Lnactive, have weak
signals, or you don't `a_ant them in your channel list. The channel list is the list
of channels that the TV:_/GR tunes to when you press the channel up and'or
channel do`am buttons,
Note: Even if you erase a channel, you can still tune to it by pressing the
number buttons on the remote control.
1, Press N'mNL7on the remote (the main MEzNWappears).
2, Press down arrow burton to highlight 5T77_rG,
3, Press OK (the SE_NG menu appears).
4, Press %e down arrow button to highlight (;Tf MEMO,qK
5, Press OK (the CH MEMORYmenu appears). Follow %e on-screen d[retrtions
to ADD or ER,4SE a channel,
6, You can add or erase more channels by entering the channel number or
pressing CII + or CII -.
7, To exit, press the N_mNq_:burton,
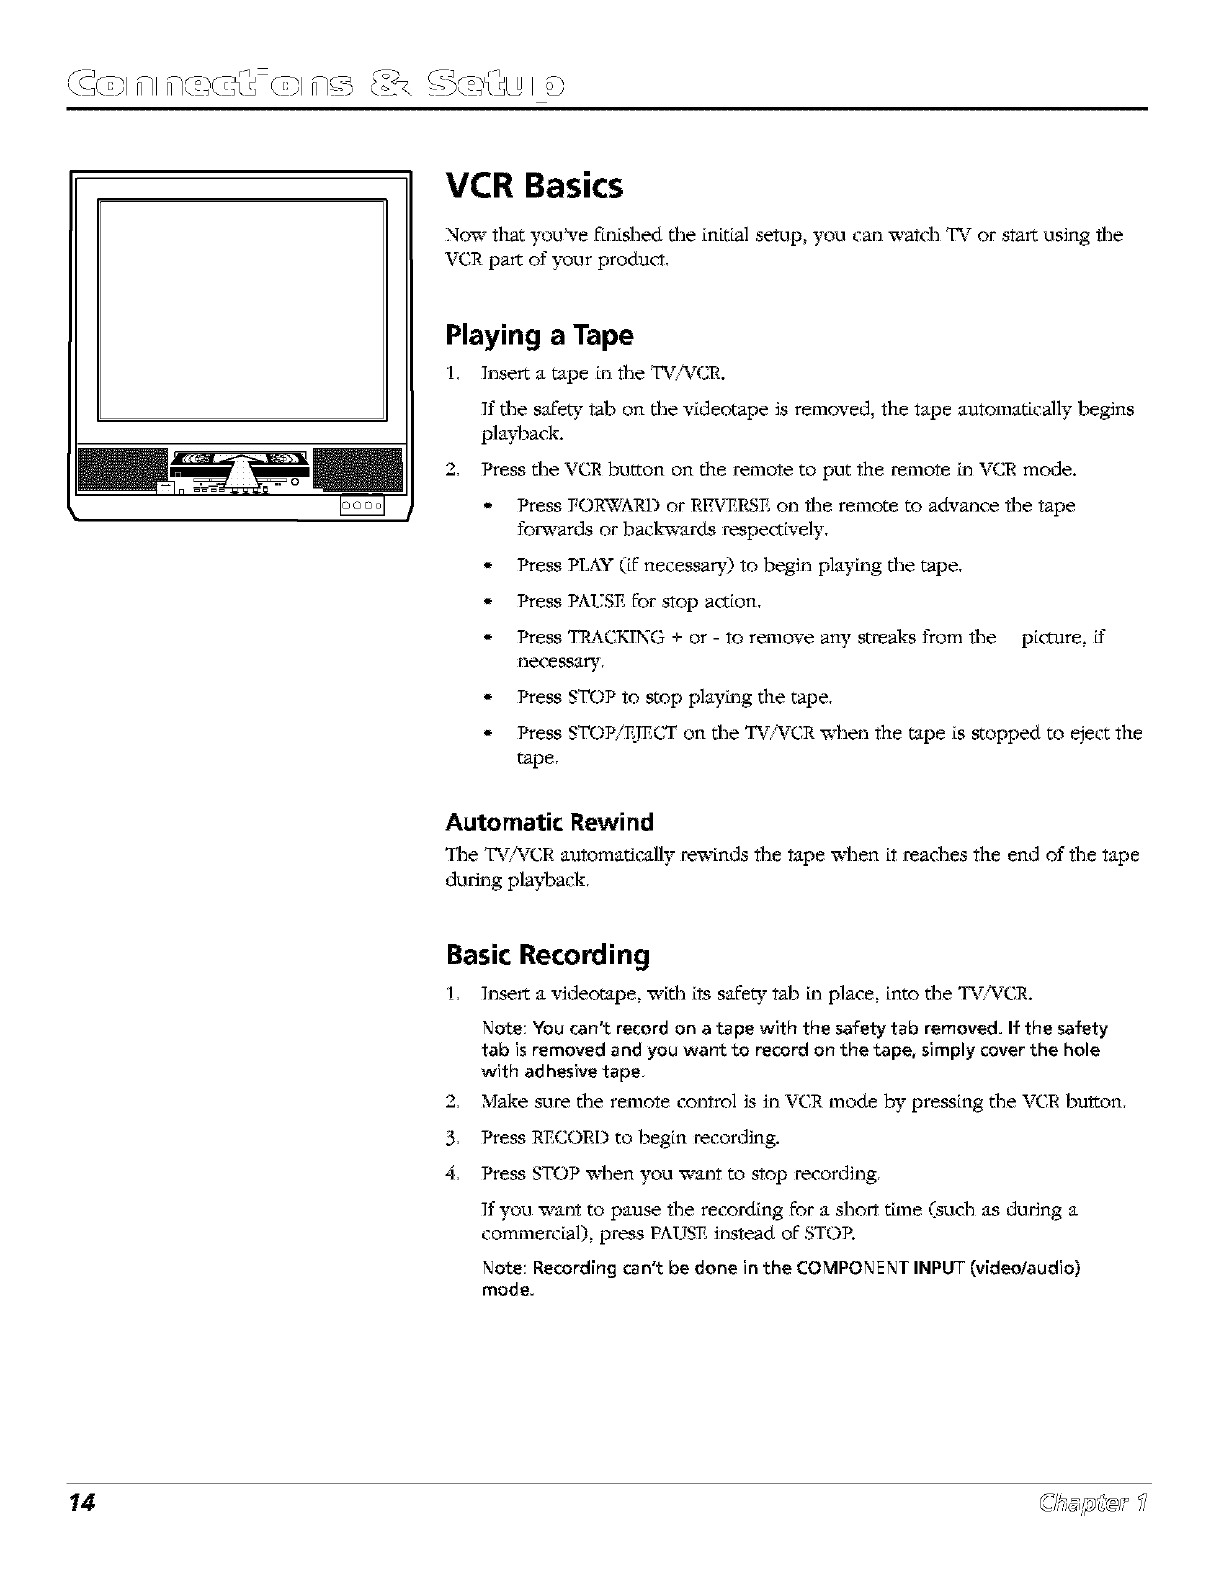
VCR Basics
Now that you've finished tlle initial setup, you can x_-atdl TV or start using file
VCR part of your product,
Playing a Tape
1, Insert a tape _n tlle T%WCR.
If file safe W tab on file videotape is removed, the tape automatically begins
playback.
2, Press the VCR button on t|le remote to put the remote in VCR mode.
*Press FORWARD or RI_RSE on file remote to advance file tape
fom-ards or back-wards respectively,
*Press PLAY (Z necessar39 to begin playing the tape,
*Press PAL:SE for stop action,
- Press TRACKING + or - to remove any streaks from the picCare, g
necessary,
- Press STOP to stop play[ng the tape,
- Press STOP/EJECT on the TV,%ZCRwhen the tape is stopped to eject the
tape,
Automatic Rewind
The T%'¥CR automatically rewinds file tape when it readms the end of file tape
during playback,
Basic Recording
1, Insert a videotape, with its safeW tab _nplace, into the T%_,TCR.
Note You can't record on a tape with the safety tab removed. If the safety
tab is removed and you want to record on the "cape, simply cover the hole
with adhesive tape.
2, Make sure the remote control is in VCR mode by pressing the VCR button,
3. Press RECORD to begin recording.
4. Press STOP when you want to stop recording.
If you want to pause the recording for a short t_me (sudl as during a
commercial), press PAUSE instead of STOP.
Note: Recording can't be done in the COMPONENT INPUT (video/audio)
mode.
Remote Control
Chapter Overview:
,, The buttons on the remote control
,, Programming the remote to operate other components
•How to use the remote after you've programmed it
•How to order a new remote control
,, Code list
Changing Entertainment.
Grapbic, s'used witbin tbis publication are j-_orrepres'*'ntation only. 15
q (DI
ANTENNA
O OO
_LOW -- INDE X * _PEED
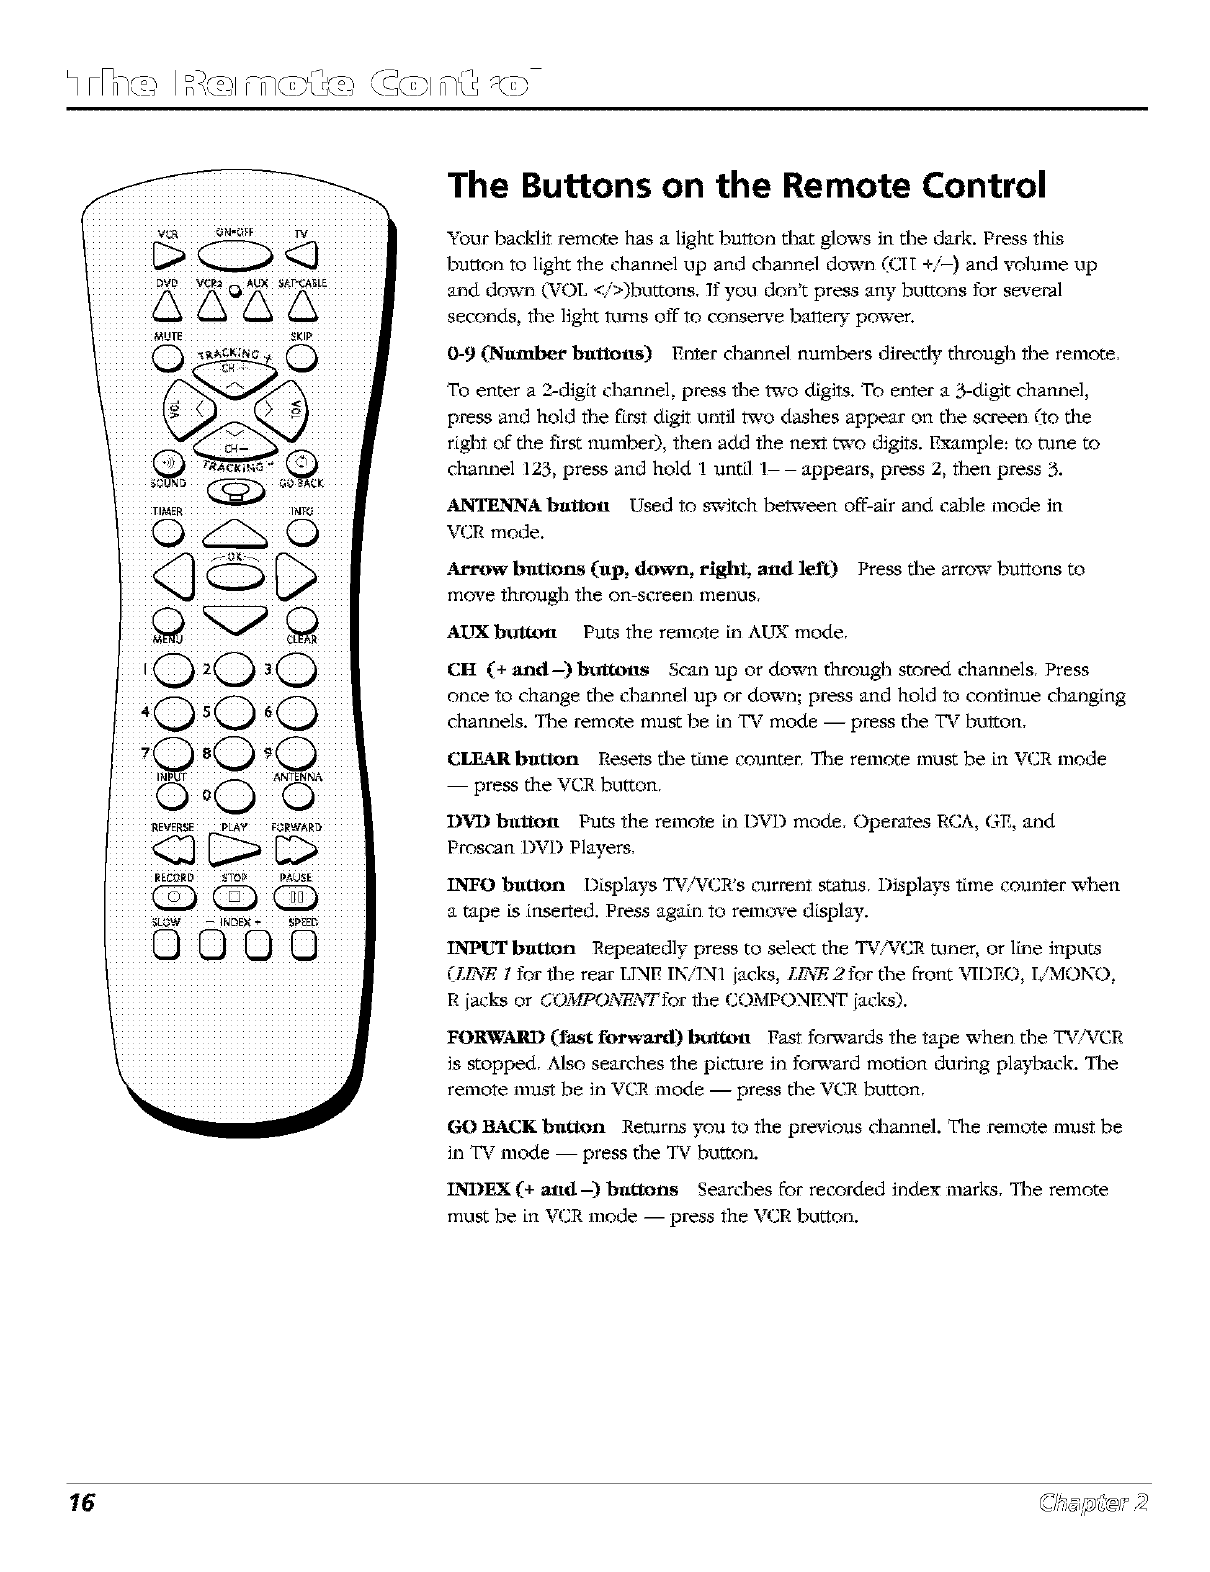
The Buttons on the Remote Control
Your backlit remote has a light button that glows in the dark. Press this
button to light ttxe channel up and channel down (CH +/-) and volume up
and down (VOL </>)buttons, If you don't press any buttons for several
seconds, the light _lms off to conserve ba_e_" power.
0-9 (Nlxmber buttons) Enter dlannel numbers directly through file remote,
To enter a 2-digit channel, press the W¢o d[gils. To enter a 3-digit channel,
press and bold the first d[giI until Va_o dashes appear on the screen (to the
fight of the first number), then add the next two digits. Example: to tune to
cbarmel 123, press and bold 1 until 1- - appears, press 2, then press 3.
._'€ITd_INA buttott Used to s_dtch beW_'een off-air and cable mode in
VCR mode.
._a'vow buttons (up, down, right, and left) Press tile arrow buttons to
move through the on-screen menus,
AL?_ button Puts the remote [n A[_ mode,
Ctt (+ and-) buttons Scan up or down through stored channels, Press
once to change the ch_Lnnel up or down; press and hold to continue dl_Lnging
channels. The remote must be [n TV mode -- press the TV buiton,
CI,KadRbutton Resets tile tLme counter, The remote must be in VCR mode
-- press the VCR button,
I)_,K) buVtott Puts the remote in DVD mode, Operates RCA, GE, and
Proscan DVD Players,
INFO button Displays T%WCR's current status, Displays time counter when
a tape is inserted. Press again to remove display.
INt_T button Repeatedly press to select the TVT/CR tuner, or line inputs
L/_,T., 1 tor fl_e rear LINE ININ1 {acks, L/_'T.,2 for the front V[DEO, IiMONO.
R {acks or COMPO;N_NTfor the COMPONENT {acks).
FOII_ARI) (fast forward) buttott Fast for_-ards the tape when tl_e T%%rCR
is stopped, Also searches tim picture in for'a-ard motion during playback. The
remote must be in VCR mode -- press tl_e VCR button,
GO BACK button Returns you to the previous d_annel. The remote must be
in TV mode -- press t|_e TV button.
]1_11)_X(+ and-) buttons Searches for recorded index marks, The remote
must be in VCR mode -- press the x;t_R [utton.
16
MI_NU blttton Displays the TV/%TCR!smain ME_NY(
MUTE Duttott Lowers the TV:%rCRvolume to its minimum level and automatically rams on dosed-
captioning, Press again to restore volume and turn off closed-captioning.
ON*OFF button In TV or VCR mode, _ams the TV/%rCRon and off, If the remote is _n another
component mode (DVD, SAT*CABLE, etc.) and has been programmed (DVD, SAT*CABLE, etc.),
press the ONoOFF button to turn that component on and off,
PAUSE button Pauses the tape during pla)4,_ack, Press again to advance tape one frame, Also
pauses the tape during recovzt_ng to prevent recording of unx_-anted scenes. The remote must be in
VCR mode -- press the VCR bu_on,
PIAY button Plays a tape. Starts normal plas_,_ack from pause or slow motion, The remote must be
in VCR mode -- press the VCR button,
RECORD button Starts TV/%rCRrecording. The remote must be tn VCR mode -- press the VCR
burton,
REVERSE button Rewinds the tape when the TV/WCR is stopped, Also searches the picture in
reverse duting pla)_,_ack, The remote must be in VCR mode -- press the VCR burton.
SAT*CABLE button Puts remote in cable or satellite mode,
SKIP buttott Press once before changing channels and the TV_%rCRwill m-air 30 seconds before
returning you to the original channel. Press repeatedly to add more time. The remote must be _nTV
mode -- press the TV bu_ton,
SLOW button Press to start slow-too*ion during pla)4,_ack, The remote must be in VCR mode --
press the VCR button,
SOLD/l) blztton Press to select t|le audio outp_lt.
SPEED (Tape Speed) butl.ott Selects a recording speed (SP or EP;. The remote must Le m _ t_R
mode -- press *he VCR bu_on,
STOP button _qmn you're using the VCR, stops the following: record, play, rewind, fast forward,
and pause. The remote must be tn VCR mode -- press the VCR burton.
TIMER buttolt Press to set t_mer recording, Press to operate TV/%rCRx_en timer recording is set
('the PROGRAM I_NT indicator on %e front of "the TV/WCR lights), Press again to reset timer
recording. The remote must be in VCR mode -- press *he VCR bu_on,
TRACKING (+ and-) b_tttotts Reduces streaks x_ich may appear on the pici-c_reduring regular or
slow-motion pla)4,_ack, Reduces picture "jiRer" duting stop-action (paused) pla)%ack, The remote
must be in VCR mode -- press the VCR bu_on,
TV b_,ttott Puts remote LnTV mode,
VCR b_,ttott Puts remote LnVCR mode.
VCR2 b_ttton Puts the remote in VCR2 mode to operate a VCR that has been programmed to work
with the VCR2 bu'i'ion,
VOL (< and >) buttons Decrease or increase the TV/WCR volume.
17
Programming the Remote to Operate
Other Components
Tile universal remote control can be programmed to operate most brands of
remote controllable VC,Rs, satellite receivers and cable boxes, Tile remote is
already programmed to operate most RCA, GE and Proscan TVs, VC,Rs, l)X,q)
players, laserdisc plwers and satellite receivers.
Find Out If You Need to Program the Remote
To determine whether the universal remote needs to be programmed, mm a
component ON, sud3 as a VCR, point the remote at the VCR, and press the
VCR2 button. Tilen press ON-OFF or channel up or channel down to see [f
the VCR responds to the remote commands. If not, the remote needs to be
programmed.
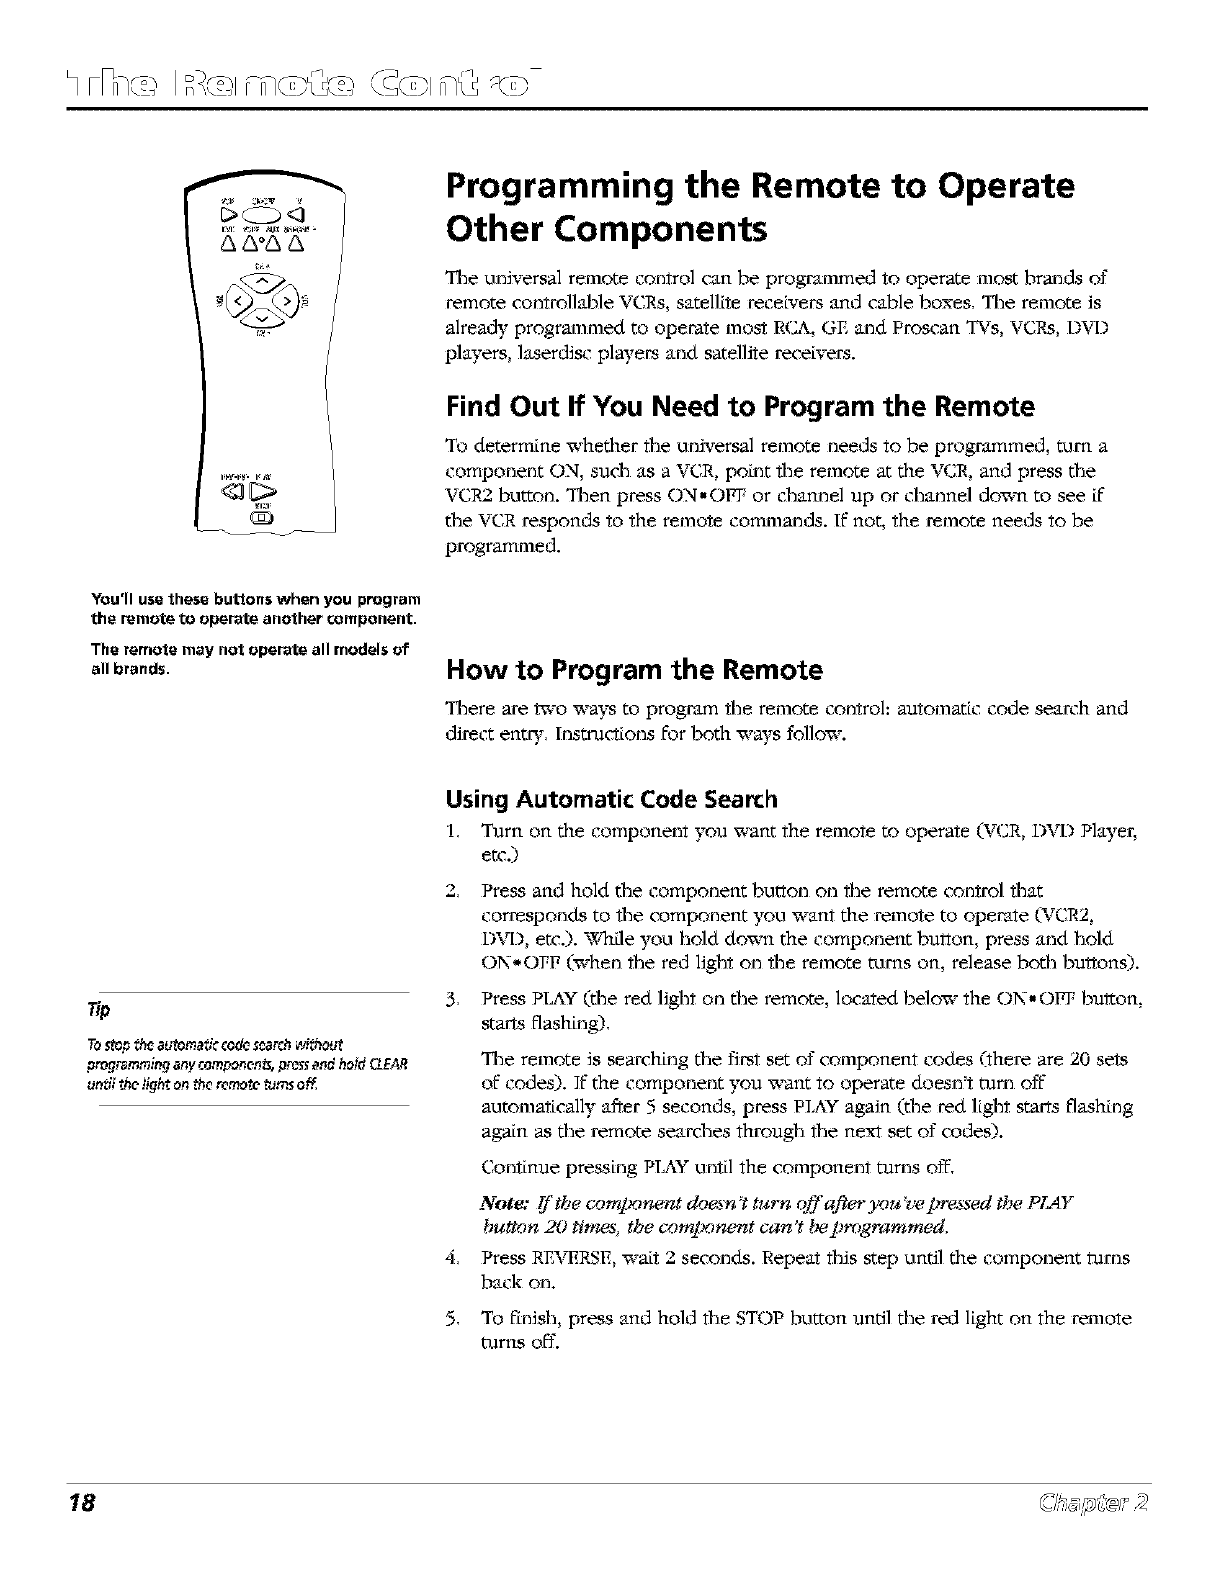
You'll use these buttons when you program
the remote to operate another component.
The remote may not operate all modelsof
all brands. How to Program the Remote
Ti_ere are two x_-ays to program the remote controh automatic code search and
direct ent W, rnstru_ions for both wws follow.
Tostopthe automaticcedesearchwithout
progr_mmin9 any _ornponents,pressand hold CLEAR
until the_ighton the rcmo{_toms off,
Using Automatic Code Search
1, Tam on the component you want the remote to operate (VCR, DVD Player,
etc.)
,) Press and hold the component burton on the remote control that
corresponds to the component you want the remote to operate (VCR2,
DVI), etc.). :ql[le you hold down the component button, press and hold
ON°OFF (when the red light on the remote turns on, release both buttons).
3, Press PLAY (the red light on the remote, located below the ON-OFF bulton,
starts flashing),
Tile remote is seareh_ng the first set of component codes (there are 20 sets
of codes). If the component you x_-antto operate doesn't mm off
automatically after 5 seconds, press PlAY again (the red light starts flashing
again as %e remote seare]les through the next set of codes).
Continue pressing PLAY onfil the component rams off,
Note: _ the co¢_g_onent doe,s'n "tturn oy_'after you '*_'epreaxed the PlAY
button 20 times, the co¢_g_on_nt can't !mprogrammed,
4, Press RE'_RSE, wait 2 seconds. Repeat fl_Js step until the component turns
back on.
5, To finish, press and hold tim STOP button until the red light on the remote
turns off.
18
r_(_ I°__z_ _c_z_ _1 _\_ _=_
Using Direct Entry
1, Turn on the component you want the remote to operate,
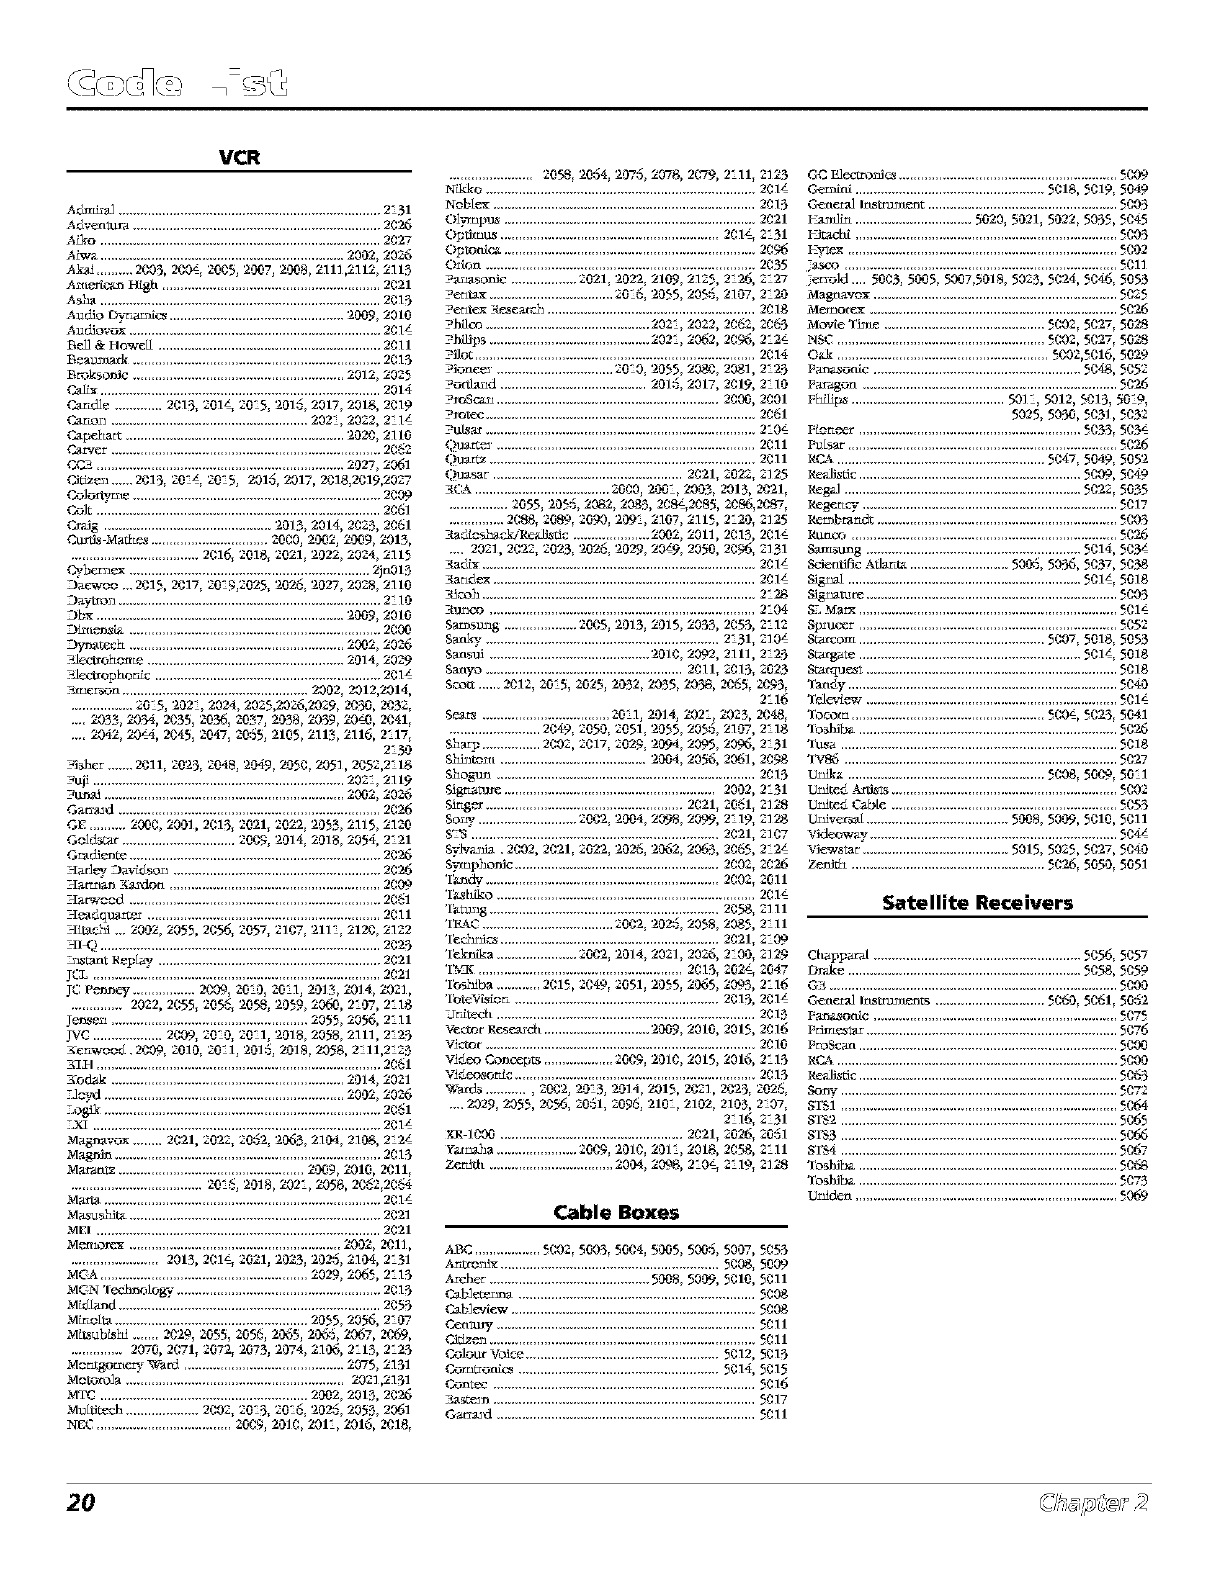
2, Look up the brand and code numbers) for the component on the code list on page 20.
3, Press and hold component button that corresponds to %e component you x_ant the remote
to operate _rCR2, DVD, etc,)
4, Enter the code from %e code list on page 20.
5, Release the component buiton,
6, Press ON-OFF to see tf the component responds to the remote commands, 15it doesn't, t W
pressing %e component button and then ON- OFF again,
7, If you get no response, repeat these steps using %e next code listed for your brand, until
the component responds to the remote commands,
How to Use the Remote After You've
Programmed It
Once the remote has been programmed successfully, you are ready to use it to control your
components, To operate the component:
1, Press the component button _rCR2, DVD, ALPX,or SAT*CABLE) to set the remote to control
the component,
2, Press ON-OFF to mm the component ON or OFF.
3, Use the remote buttons that apply to that component.
NGctes:
-If you keep pressing buttons and nothing happens, the remote is probably in the
wrong mode, You must pressthe component button that matches the component you
want to operate (i,e., if you want to operate the DVD player, pressDVD on the remote
control to put the remote in DVD mode,)
*The buttons might operate differently for other components, especiallywhen you're
using another component's menu system,
How to Order A New Remote Control
To order a new remote control or other accessories to _se with your TVT, TGR,go to Accessory
irffom_ation _n Chapter 5.
19
VCR
AO,_ ........................................................................ 231
A_¢enRn_ .................................................................... 2026
ALko ............................................................................. 2027
Aiwa ................................................................... 2002, 2026
AkaJ .......... 2003, 200_ 2005_ 20_7_ 20_8_ 2111,2112_ 2113
Am_ri_ H_g[l ............................................................ 2021
A_ ............................................................................. 2013
AndJo D-yT_r _eS ................................................ 2009, 2010
Andiovox ..................................................................... 201 A
Be]] & HOWe]] ............................................................. 2011
Beaumark .................................................................... 2013
Broksonic .......................................................... 2012, 2025
Gal£x ............................................................................. 2014
C_r_d]e ............. 2013, 201 A, 20"5, 2015, 2017, 2018, 2019
Garcon ...................................................... 202"_ 2022, 2"1 A
Capebart ............................................................ 2020, 2110
¢'_rTer .......................................................................... 2062
C_4_ .................................................................... 2027, 2061
OAt_er_......2Ol3, 20 z, 205, 2015"5, 2017, 2018,2019,2027
Colorg_me 20_
- K
Cok .............................................................................. 20ul
C_idg .............................................. 2013_ 2014, 2023, 2061
CttrtisMaffms ................................ 2000, 2002, 2009, 2013,
................................... 2016, 2018, 2021, 2022, 2024, 2115
Oyberaex .................................................................. 2In013
Da_woo _. 2015, 2017, 209,2025, 2026, 2027, 2028, 2110
Da?_on ........................................................................ 2110
Db_ .................................................................... 2009, 2010
DL_t_i2_ ..................................................................... 2000
Dyr,atec_t ........................................................... 2002, 2026
£lectro_tolr_ ...................................................... 2014, 2029
£led*ophor_c .............................................................. 201 z
_rner_on ................................................... 2002, 2012,2014,
................. 20"5, 202*, 2024, 2025,2026,2029, 20_, 2032,
.... 2033, 20_4, 2035, 2036, 2037, 2038, 2039, 20_, 2041,
.... 2042, 20£4, 2045, 2047, 205"55, 2105, 2113, 2116, 217,
230
Nsher ___. 2011, 2023, 2048, 2049, 2050, 2051, 2052,218
4uji ..................................................................... 202,2119
4un2J .................................................................. 2002, 2026
G_fl ........................................................................ 2026
GE .......... 2000, 2001, 2013, 2021, 2022, 2053, 2115, 2120
Gold_r ............................... 2009, 2014, 2018, 2054, 2"21
GradJente ..................................................................... 2026
H_I_. Da_¢sson ......................................................... 2026
Ha renan _don .......................................................... 2009
Hat.cod ..................................................................... 2061
H_dquatt_, ............................................................... 2011
Hitachi ... 2002, 2055, 2056, 2057, 2107, 211 ", 2120, 2122
HI(') ............................................................................. 2023
2_t_nt RepLay ............................................................. 2021
JGL ............................................................................... 2021
JG Pem_ey ................. 2009, 20"0, 20"1, 2013, 2014, 2021,
.............. 2022, 2¢55, 2056, 2058, 2059, 20g-_, 2*07, 2"18
Jens_ ...................................................... 2055, 2056, 211
J_C ................... 2009, 20"0, 20"1, 201}}, 205}}, 2111, 2*23
4enwoo_ ,2009, 2010, 20"I, 2015, 2018, 2058, 2"11,2"23
4II-i .............................................................................. 2061
4od_k ................................................................ 2014, 2021
L]_'d .................................................................. 2092, 2026
Lo_ ............................................................................ 2061
Z2_I ............................................................................... 201A
Ma_¢ox ........ 2021, 2022, 2052, 20_3, 2104, 2108, 2"2 A
MaSnin ......................................................................... 2013
M_antz ................................................... 20{)9, 2010, 2011,
.................................... 20"6, 2018, 202*, 2058, 2062,2064
Marta ............................................................................ 201 z
M_u_nt2. ..................................................................... 2021
MEI .............................................................................. 2021
M_nor_'_ .......................................................... 2092, 2011,
........................ 2013, 201 A, 2021, 2023, 2025, 2104, 2"3]
MC..A ......................................................... 2029, 2065, 2"13
MC-N 'l ectmoloK¢ ........................................................ 2013
Mt£ -l_md ........................................................................ 2053
ML_o£ta ..................................................... 2055, 2056, 2W
MLtsubks_fl ....... 2¢29, 2055, 2056, 2065, 20_6, 2067, 20/59,
.............. 2070, 2071, 2072, 2073, 2074, 2106, 213, 223
Montgomery Ward ............................................ 2075, 2131
Motorola ............................................................ 2021,2131
*_TC ......................................................... 20{)2, 2013, 2¢26
Mu[gr_d_ .................... 2¢02, 20"3, 20"6, 2025, 2053, 2061
NEC ..................................... 20¢9, 2010, 201", 2016, 2018,
....................... 2058, 2054, 2075, 2078, 2¢79, 211, 2123
NL_ko .......................................................................... 201 z
Nob[e_ ........................................................................ 2013
Op_nus ............................................................ 201 z, 2"31
O?toni_a ..................................................................... 2¢96
O_ion .......................................................................... 2¢35
_a_sonic .................. 2021, 2022, 2109, 2125, 226, 2"27
_enta_ .................................. 20"6, 2055, 2055, 2107, 220
zentex 4_eat_a ......................................................... 2018
Nlco ............................................. _0_ ,_0_2, 20_, _¢_3
_tf_ps ............................................ 202*, 2062, 20_, 2"2 A
_ilo_ ............................................................................. 2014
?ionee_ ,............................... 20!0, 2055, 2C_3, 2081, 2123
2otflaz_d ........................................ 2015, 2017, 2019, 2110
_roSca_ ............................................................. 2¢00, 2001
_rotec .......................................................................... 2061
Quatt_ ,...................................................................... 2011
Q_t_, ......................................................................... 2011
Quasar .................................................... 2021, 2022, 2125
4{[L& ..................................... 2000, 200", 2003, 2013, 2021,
................ 2055, 2055, 2082, 2083, 20_,2085, 2086,208 _7,
............... 2088, 2089, 2090, 2(Y')', 2107, 2115, 2*20, 2125
_a_t_xac.k/Realista ...................... z00z, z011, 2013, 201
.... 202], 2¢22, 2023, 2026, 2029, 20_9, 2050, 20_, 2131
_adLx ........................................................................... 201 z
_andex ........................................................................ 201 z
_coh ........................................................................... 228
4tmco ......................................................................... 2*04
Samsur_g .................... 20¢5, 2013, 2015, 2033, 2¢53, 2!12
Sank},, ............................................................... 2"31, 210 d
SansuJ ............................................ 201 ¢, 2092, 2111,223
Sanyo ...................................................... 2011, 2013, 2023
Scott ,,,,,, 2012, 20"5, 2025, 2032, 2035, 20_, 2065, 2¢93,
216
S_m ................................... 20"1, 2014, 202,2023, 2048,
......................... 2¢@, 2050, 2051, 2055, 2055, 2107, 2"18
Shar? ................ 2¢02, 2017, 2029, 2_, 2095, 2096, 2"31
Shffamm ........................................ 2004, 2056, 2061, 2¢98
Shogun ....................................................................... 2013
SJ_t_Jre .......................................................... 2002, 231
Singer ...................................................... 2021, _Oul, _]_8
$oz2y, .......................... 20¢2, 2004, 2098, 2099, 2"19, 2128
S_'S .................................................................... 2021, 2107
Sylv_-fia, 2¢02, 2021, 2022, 2026, 2062, 2063, 2¢65, 2"2 z
Syr nphonic ........................................................ 2¢02, 2¢26
'I'_mffv ................................................................ 2¢02, 2011
'I'_t_o ....................................................................... 201 z
'Ik_g ............................................................... 20_8, 2111
'I _L&C .................................... 2002, 2025, 2055, 2085, 2111
Ie_zmc_ ............................................................ 2021_ _=09
'I_&_ka ...................... 20¢2, 2014, 2021, 2026, 2*00, 2129
'I%'E ........................................................ 2013, 202 A, 2047
'IbshJba ............ 2015, 2¢@, 2051, 2055, 2065, 2093, 2"16
'Ibte'viston ........................................................ 2013, 201 z
Ur_tech ....................................................................... 2013
Vet%or Research ............................. 2009, 2010, 2015, 2016
Vie%or .......................................................................... 2010
Vid_ Concep_ ................... 20¢9, 201 ¢, 2015, 2016, 213
Vid_,_ordc .................................................................. 2013
Wards ........... ,2002, 20"3, 2014, 2015, 2021, 2¢23, 2026,
.... 2029, 2055, 20_, 2051, 2096, 210", 2102, 2103, 2*0v,
2"16, 2"31
gR ]000 .................................................. 2021, 2026, 2051
¥_2_a ...................... 20¢9, 2010, 201,2018, 2¢58, 211
Zerdth .................................. 200_, 2_.8, 20 _, 219, 2] 28
Cable Boxes
ABC.................. 5002, 5003, 5004, 5005, 5005, 50W, 5053
Ar_zd_ ............................................................ 5¢08, 5009
Archer ............................................ 5008, 5009, _¢10, _¢11
Cablet_'ma ................................................................. 5¢08
Cabl_mw .................................................................... ¢08
OAt_esa ......................................................................... _¢11
Gol_*ur Voa_e ..................................................... _¢12, 5013
Got nta oni_s ....................................................... 5014, 5015
Gontec ........................................................................ _¢16
d_as_ ........................................................................ 5017
Gat_d ....................................................................... 5011
C_ I_ec_ozfir_ ............................................................ 5¢09
G_mim .................................................... 5018, 5019_ 5049
C_enePM Insh_lten_ .................................................... 5¢03
l-_a_dm ................................ 50_0, 5021, 502_, 503_, _¢45
]-J_dtt ........................................................................ _003
_yt_ .......................................................................... .002
a_co ........................................................................... 501
,et_old ,,,, 50¢3, 5005, 5007,5018, 5023, 5¢24, 50'16, 5053
Magttav_x ................................................................... _0_
Mernore_ .................................................................... 5026
Movie I_me ............................................ _¢0_, 502 , 50_8
NSC ......................................................... 5¢02, 5¢27, 5028
Oak .......................................................... 5002,5016, 5029
Par_onic ......................................................... 5¢¢8, 5¢52
P_,_gon ...................................................................... 5¢26
Ph{Rps .......................................... 501,5012, 5013, 509,
5025, 50_, 5031, 5¢32
PLoneer ............................................................. 5¢33, 503 z
Pu£_ar .......................................................................... 5¢26
RC_ ......................................................... 5¢47, 50@, 5052
Realistic ............................................................. 5¢09. 5¢@
022 50_5'a
--=,- ..................................................................,
Regent€ ...................................................................... 5017
I_embrandt ...................................................................¢03
Runce ......................................................................... 5026
8_r tstmg ........................................................... 5014, 503 z
8cien0fic Atlanta ........................... 50'_5, 50_5, 5¢37, 5¢38
Signal ................................................................ 5014, 5018
S gnatum ..................................................................... _¢03
$7. Mara ....................................................................... 501 z
Sprucer ....................................................................... 5¢52
S_aecom.................................................... ¢0 , 5018, 5053
S_tgate .............................................................. ¢ , 50 8
S_rquest ..................................................................... _¢18
'lanky .......................................................................... 5040
'lelev_ew ..................................................................... 5014
'lo¢om ..................................................... 500 d, 5023, 5041
'lb_b_ ....................................................................... 5¢26
'lusa ............................................................................ 5018
1"_'86 ........................................................................... _¢2,
, _ , ,<
uz_ka ....................................................... ¢08, 50@, 50=1
Uzdt.ed _iStS .............................................................. _¢0_
,d-_
Uznte_. t. able .............................................................. _¢53
Uz_¢er_aa[ ....................................... 50{)8, 50{)9, 5010, 5011
ewstar ........................................ 5015, 50_, _¢2 ,_¢40
Zenith ..................................................... 5¢26, 5050, 5051
Satellite Receivers
Chap?areA ......................................................... 5056, 505 v
D_J_ .................................................................. ¢58, .¢5
G_ ............................................................................... 5000
GeneeM Instmmen_ .............................. 5060, 5061, 5052
Pfimestar ..................................................................... 5¢76
Pto$can....................................................................... 5000
RCA .............................................................................. 000
I_eali_fic ....................................................................... 5¢63
S'_2 ............................................................................ 5065
S'_3 ............................................................................ 5¢66
S'_4 ............................................................................ 5057
'lb_b_ ....................................................................... 5¢68
IostfiLv. ........................................................................ ¢,3
Uzdden ........................................................................ 5069
2O
Using the TV/VCR's
Features
Chapter Overview:
*Parental Controls and V-Chip
Recording Features
Picture Search Options
Audio Features
Changing Entertainment. i,n.
21
O_apbic_' u_'ed u_tbin tbi_'publication are for rei_re*_nmtion only.
.... i
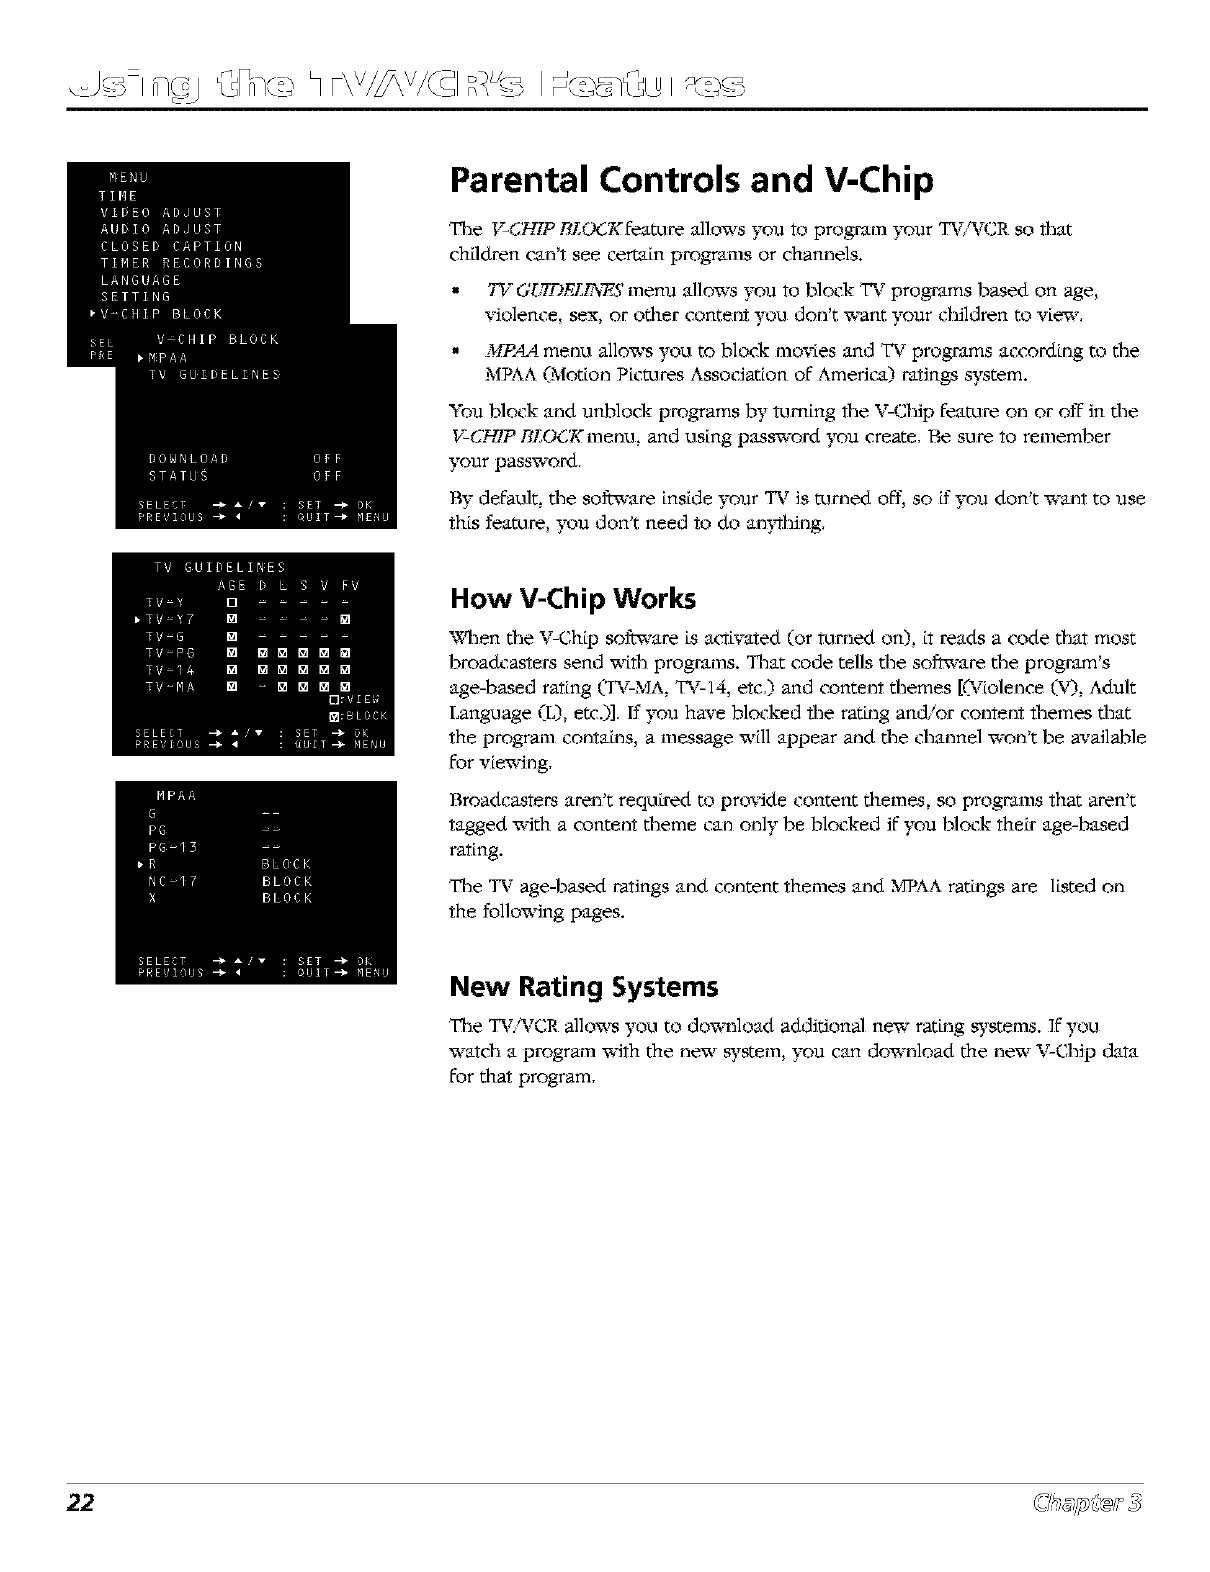
Parental Controls and V-Chip
The V-CHIP BLC_'K feature allows you to program your TV/WCR so that
children can't see ceres_in programs or channels.
•TV GfJYDRLI_S menu allows you to block TV programs based on age,
violence, sex, or other content you don't "a_antyour children to view.
•,hrR'4.4menu allows you to block movies and TV programs accordLng to %e
MPAA (Motion Pictures Association of America) ratings system.
You block and unblock programs by turning the V-Chip feature, on or off in %e
"_7-CHIPBLOCKmentl, and using password you create. Be sure, to remember
your password.
By default, %e software inside your TV is turned off, so i5you don't want to use
this feature,, you don't need to do anything.
How V-Chip Works
When the V-Chip software is a_ivated (or turned on), it reads a code that most
broadcasters send with programs. That code tells the sofia'are the program's
{r
age-based rating (T_MA, T_14, etc.) and content themes [('/olence (x_, Adult
Language (L). etc )] 15you have blocked the ratLng and/or content themes that
the program contaLns, a message xv 11appear and the channel won t Le axmlable
for yield ng.
Broadcasters aren't requLred to provide content themes, so programs that aren't
tagged with a content theme can only be blocked if you block theLr age-based
rating.
The TV age-based ratings and content themes and MPAA ratLngs are listed on
the follo'adng pages.
New Rating Systems
The TV,_TCR allows you to download additional new ratLng s3,stems. ]f you
watdl a program with the new wstem, you can download the new V-Chip data
for that program.
22
.... i
and
Ka_lng I
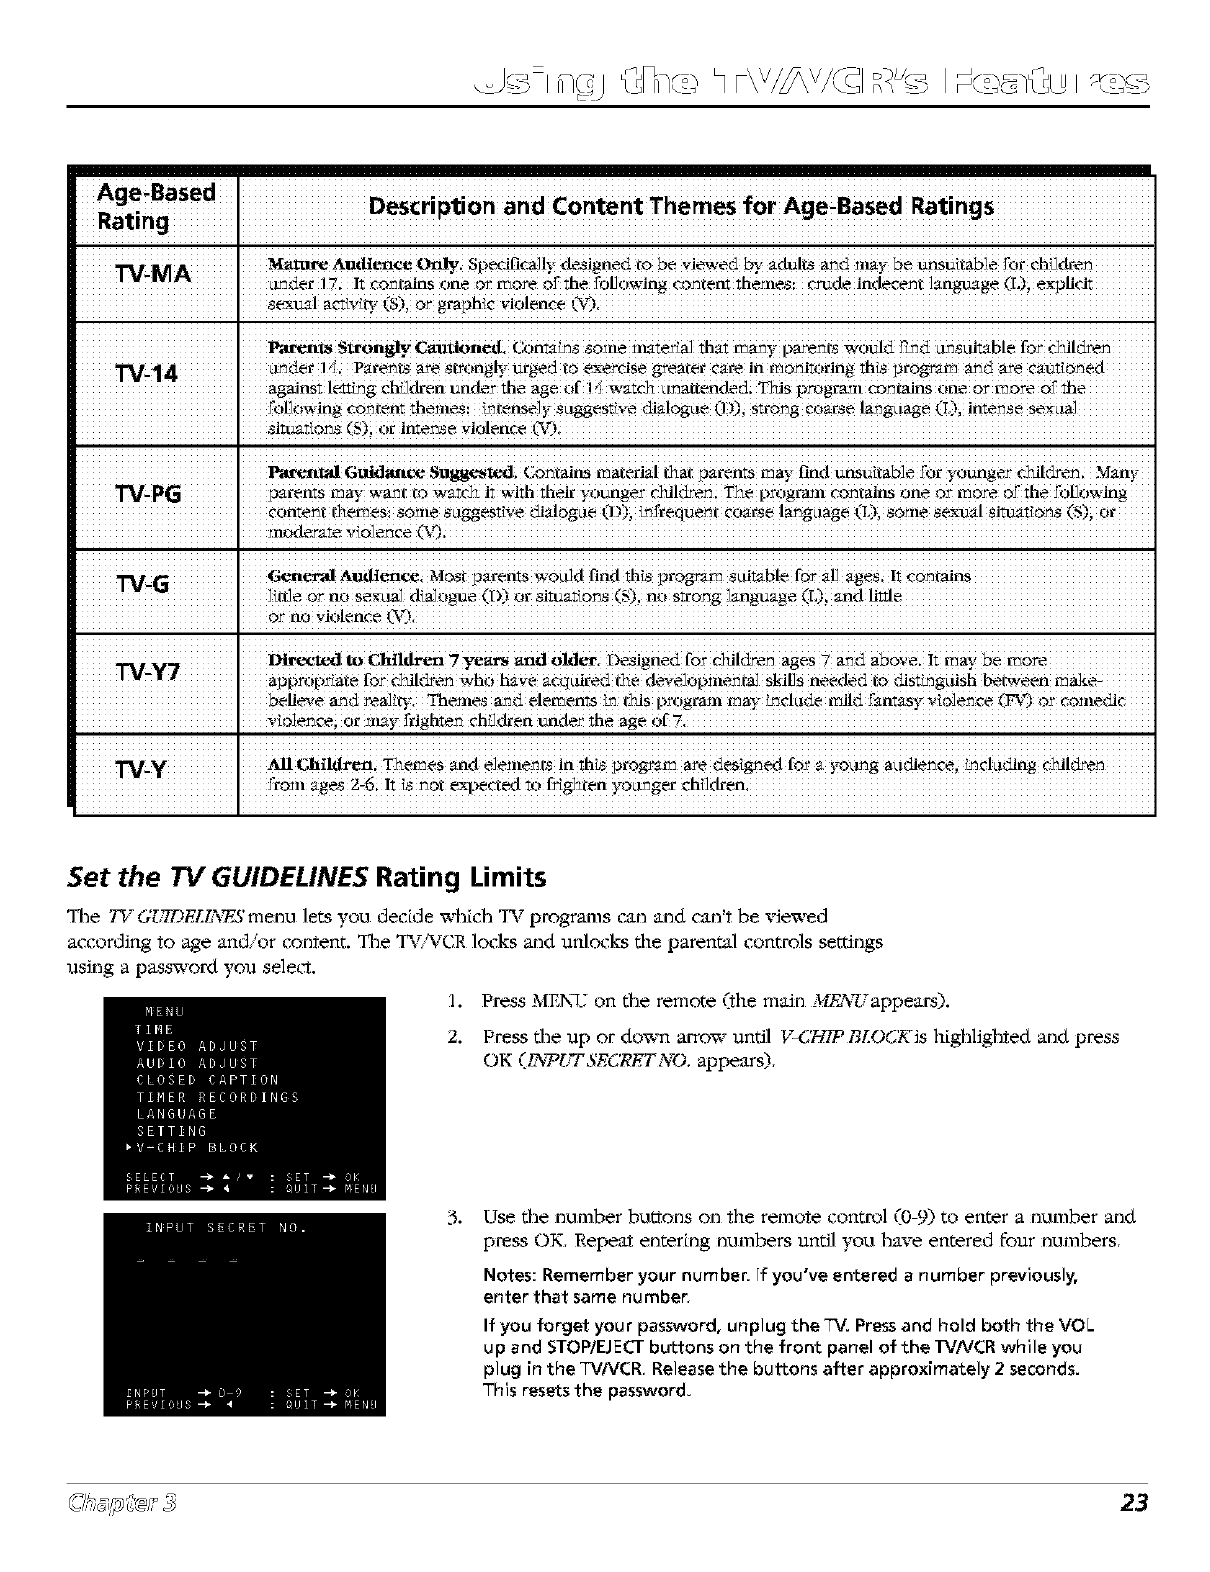
• _ I_ Alldien_ Only. SpecJficaJlv designed _o be viewed bv adult_ and nmy be unsuitabJe for ch_Jdter_
de_ I;I_ co_aln_ one o_ _oye o_ the I'olJowlng ¢_)_tent themes: c_de indecent ]angt_age
[ P',u_l_ S_n_. Caution_L C0_ _ _I)!_ !!rate,a] tha_ m_y pare_t_ Would ProdL_suimb!e for c_i!cbe_
grader!,5. Pater_ts are strongly urged to exercise _eater care in mo_jtnring th_ proem _d are eautior_ed
agent !_ing ChiJ_e_ u"de r the age Of!'_ watch (,_e,dedi T_iS P_gr_!! cO_ai_ O_e or mor_
f01]0wJng ¢0r_tent themeSi _tense!y s_iggestive _a[0g(ie 0_)_ Str0r_g coarse l_g_iage (L)i intense Seg_i_
P',u,ental Guld_at_ Sugg_todi Contains material that parents mayfind unsuftabJef0_ yOUnger eki!&e_. Many
_arems man, want tO watd_ it with their y0unger ckildre_i The pr0gram Contains one 0_ more of the f01d0wing
Iconte_t themes: sonie sa_estive dialogue 03) i_Deque_t coarse langciage (L)i sonie sexual sia_agons (S)ior
moderate vic_ence OT)i
_i¢._nteral Aodten_i Most parents woi_d find th_ pr0_m SUi_ab!efor alJages; !t Contains
]*lXJeo_ no sex:aa] @_ogue (D)or slmat*o_s (S), no strong language {L);and li_le
"o_ n0 vlo!enee t%$,
.......... _ .............. Dlrect, ed:to Ch!ldamn ,vyear_ md old_ Designed for cki!dJe_ agm 7 _d above. !t may be m0re ..................
I appr0pdate for ¢3aildre_wh0 have aeqcdred the deve]opme_ta3 SkilJSneeded tO disfmgctiSh _tween make_
believe _d real!W, Themes _d elements _ tkis pr0grasn may _¢k!de m!!d fantasy vfo]e_¢e (lw)or comedi¢
•vi0Ie_i 0r may ;righte_ eh_en Under the age of Z,
All chtldr'en; Themes and elements in _h_ pro_r_ are desired for a yokingacidie_¢e. _eladlng cklldren
IJ'rom ages 2_6iit iS _0t e_peetedt0 fri_ten _-o{mg_ ehii_en,
Set the TV GUIDELINES Rating Limits
The TV G[_TDELff_5'menu lets you decide _ich TV programs can and can't be _ewed
according to age and/or coment. The T%NCR locks and unlocks the parental controls settings
using a password you select.
1. Press MEN_7 on the remote {the m_un M_'_: appears,
2. Press the up or do'am arrow until V-67g/P BLOCKis highlighted and press
OK (I_79UTSECRETNO appears)
.Use the number buttons on the remote control (0-9) to enter a number and
press OK. Repeat entering numbers until you have entered four numbers,
Notes: Remember your number. If you've entered a number previously,
enter that same number,
If you forget your password, unplug the _v'. Press and hold both the VOL
up and STOP/EJECT buttons on the front panel of the TqNCR while you
plug in the TVNCR, Release the buttons after approximately 2 seconds.
"-his resets the password.
23
.... i
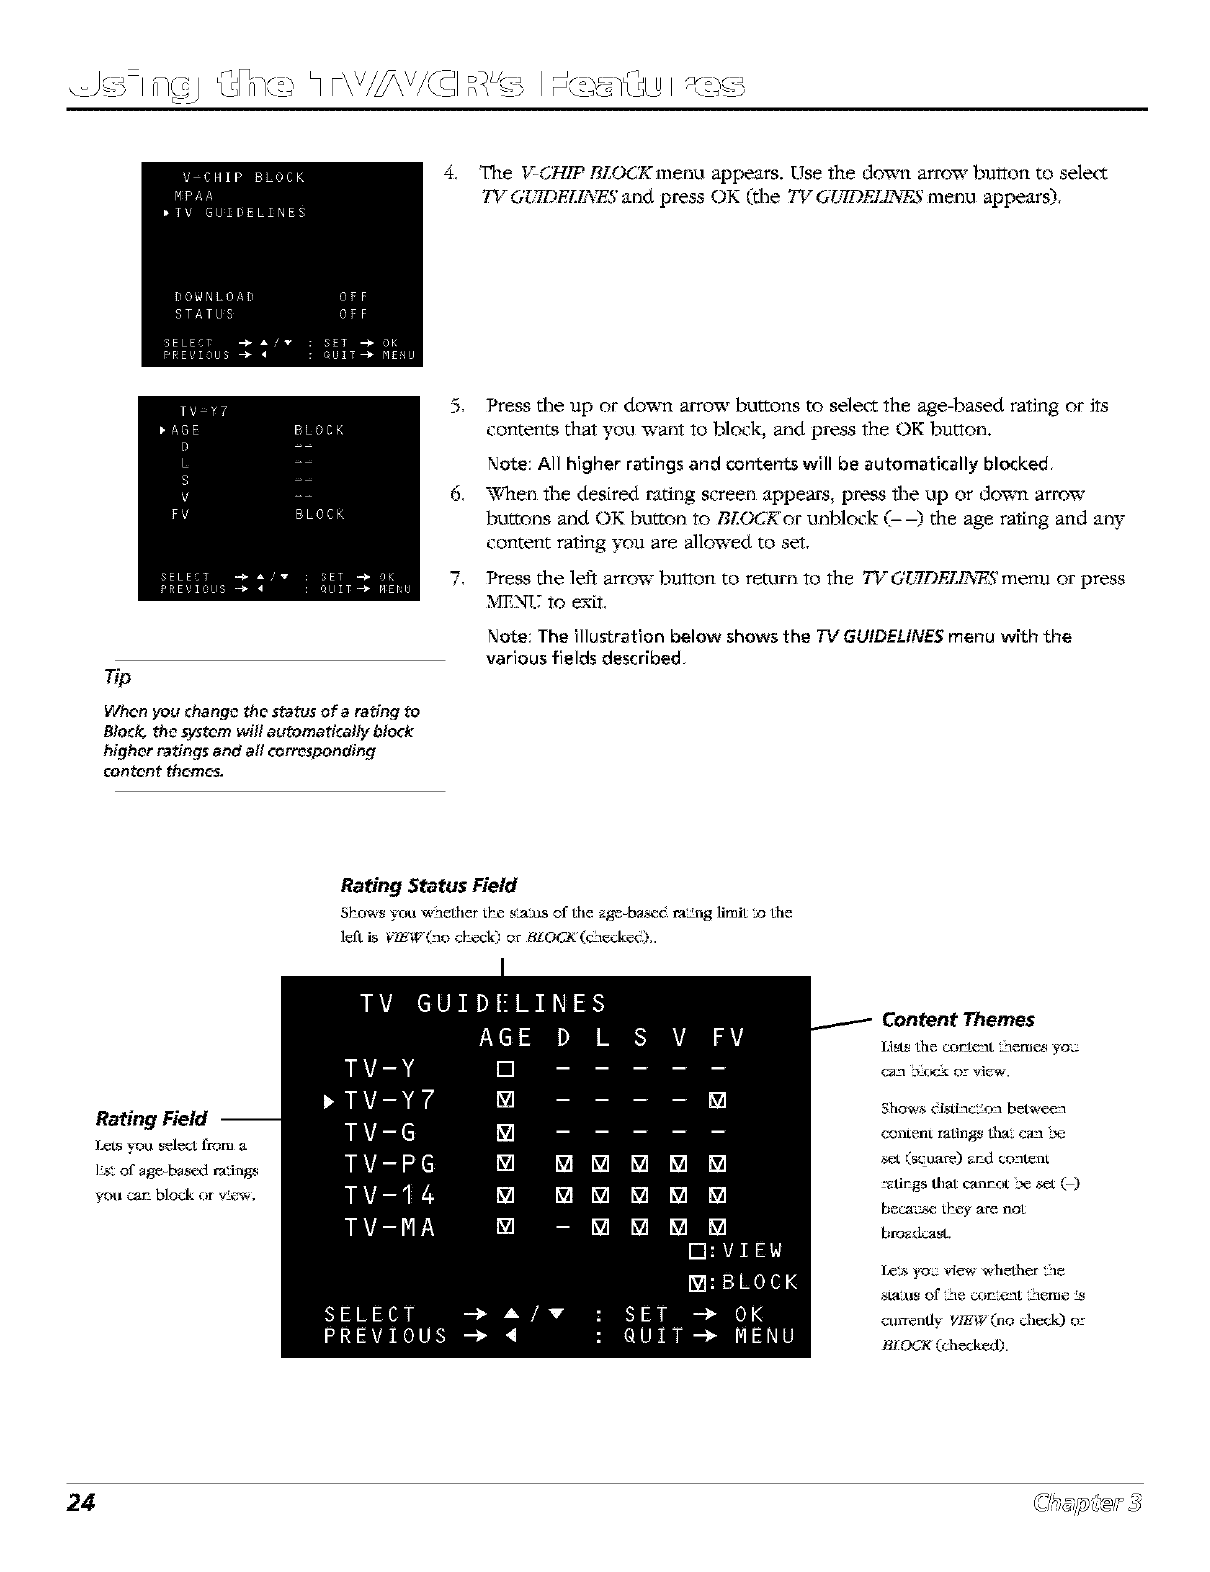
4. Tim V-CHIP BLOCTgmenu appears. Use the do_m arrow button to select
?"VG[)?DELLN_Sand press OK (file TV G[_¥DELI_F,Smenu appears).
rip
When you _hange the status of arating to
81o_1¢ the _'stem will augomati_ally blocR
higher ratings and all corresponding
content themes.
5. Press the up or dox_m arrow buttons to select the age-based rating or its
contents that yoo want to block, and press the OK button.
Note: All higher ratings and contents will be automatically blocked,
6, _qmn the desired rating screen appears, press the up or doom arrow
buttons and OK button to BLOCKor unblock (--) the age rating and an3"
content rating you are allowed to set,
7, Press the left arrow button to remm to the 7"VGg._gDELI_WS"menu or press
MENIJ to e_[t,
Note: The illustration below shows the TV GUfDELINE5 menu with the
various fields described,
Rating Status Field
St:ows _ou w'lether tee ska_us of the age-ba,se_ ra_ng limit othe
lJt is _W(no ct:eck) or ttLO(_ (c'mcke_)..
Rating Field --
I_ts yo_ select from a
ILs'_of age ba_ed ra'Jngs
you car" block or _e_,,
Content Themes
l,ists the torrent ::mines yo=
can b<_K_ oz view.
Shows #Jatinc'Zon between
co[_tent ratings tha'_ ca_n :_e
,set (sc_are) ard co_te_
_atirgs that cantor _ ,set 0
b_ca_se tt'ey are not
broadcast.
1_,;> yo_ vie_ whether _:m
c_rrendy _I_,,W_o d_eck) O-
BLOCh*(check_.
24
.... i
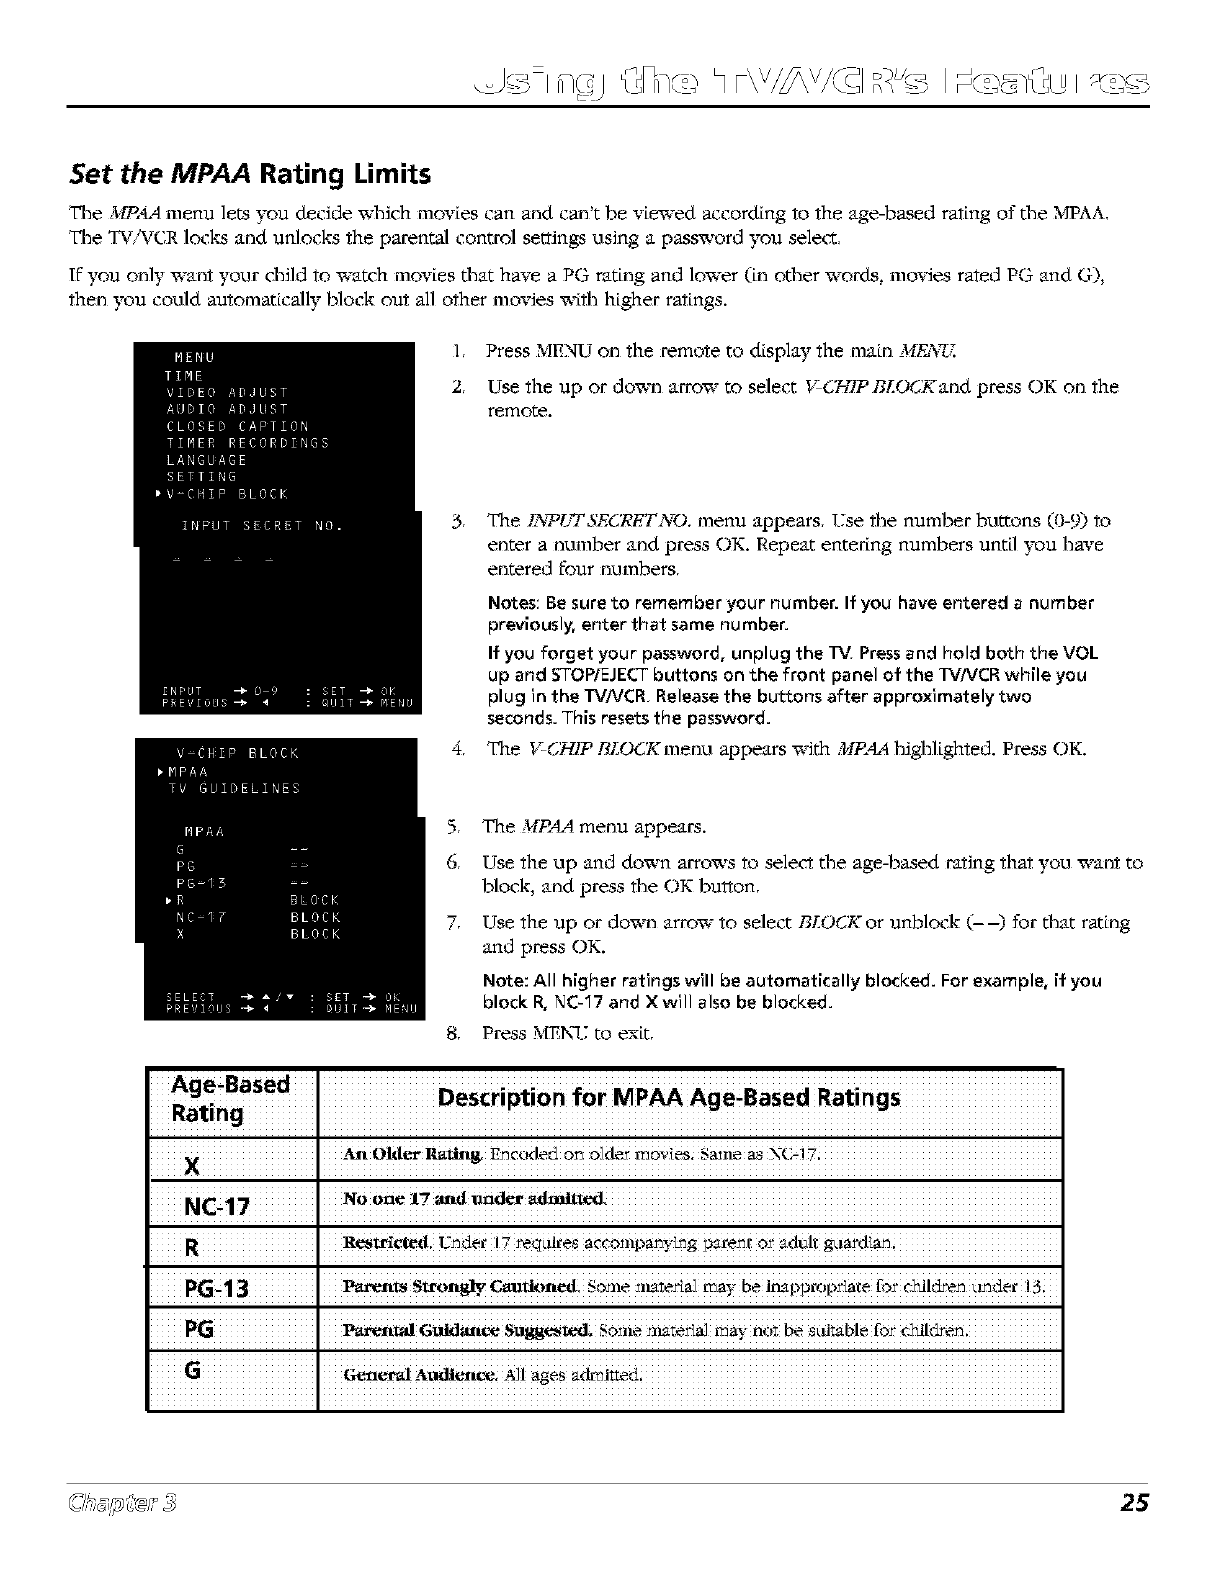
Set the MPAA Rating Limits
Tile MP_4 menu lets you deride which movies can and can't be vi_'ed according to the age-based rating of the MPAA,
Tile TV_CR locks and uMocks the parental control settings using a password you select,
If you only want your dlild to watch movies that have a PG rattng and lower (tn other words, movies rated PG and G),
then you could automatically block out all other movies with higher ratings.
1, Press MENU on the remote to display the ma_n MF_%W.
2, Use the up or down arrow to select V-G;_/P BLOCKand press OK on the
remote.
,The I_7_UT SECRET NO, menu appears, Vse file number buttons (0-9) to
enter a number and press OK. Repeat entering numbers until you have
entered four numbers,
Notes: Be sure to remember your number. If you have entered anumber
previously, enter that same number.
If you forget your password, unplug the "Iv', Press and hold both the VOL
up and STOP/EJEL-- buttons on the front panel of the Tv'NCR while you
plug in the Tv'NCR, Release the buttons after approximately two
seconds. This resets the password.
4, The V-CH/P RLOg_menu appears with MP._4 highlighted. Press OK.
5, The MPAA menu appears.
6, Use the up and do'am arrows to select the age-based rating that you want to
block, and press the OK bu_on,
7, Use the up or down arrow to select BLOgSKor unblock (--) for that rating
and press OK.
Note: All higher ratings will be automatically blocked. For example, if you
block R, NC47 and Xwill also be blocked.
8, Press MEN_.7to exit,
Age'Based I Description for rv'IPAA AgeLBased Ratings
-aat Older l/atin_ E_€(ided 0_ 0]deJ"mov{esi Sa_i_ as NC-7i_i
NC47 NOOn_17 a_td=a_ _
IRc,_l_c_d I :_der 17 re_Lflre8 accompa_¢ng pareJ_t or adult g{iard{ar_
PG,1 Cautl°"_L s0!ne _!ta'te_a]mgbe lmPpr0p_ate fo_ ,,-ki!_e_ cinder 7!3{
• £1 : i
l_ntal GuRt_tce Sugw,_t._l, _o:ne mate_aJ may n(_ be s u_ble for ckil_e_.
I_n_Audlen_ all _geS a&_Jaed
25
.... i
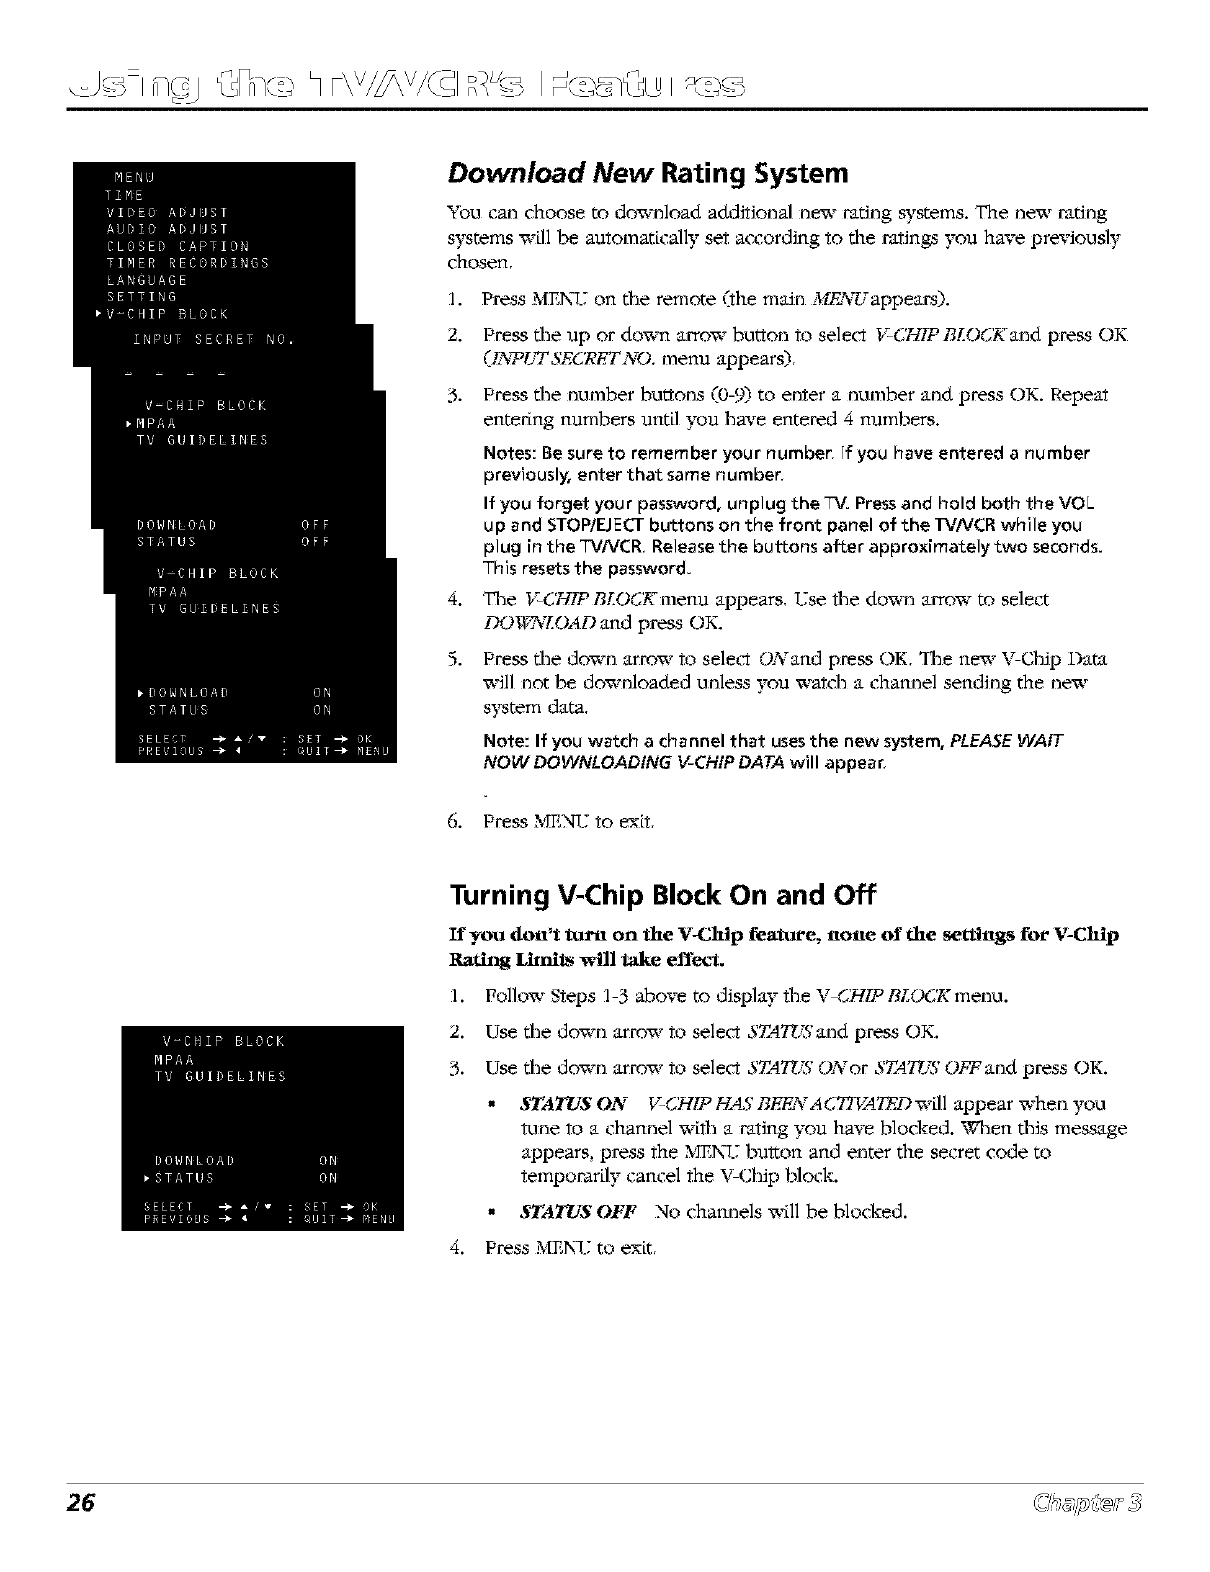
Download New Rating System
You can choose to download additional new radng systems. The new radng
systems w_ll be automatically set according to the ratings you have previously
chosen,
1. Press MEN_Zon the remote (the main ,_/£YUappears).
2. Press the up or do'am arrow button to select V-CTf/P BLO(;Kand press OK
(I_7_UTSECRETNO, menu appears),
.
4.
Press the number buttons (0-9) to enter a number and press OK. Repeat
entedng numbers until you have entered 4 numbers,
Notes: Be sure to remember your number. If you have entered anumber
previously, enter that same number.
If you forget your password, unplug the 7V. Pressand hold both the VOL
up and STOP/EJECT buttons on the front panel of the Tv'NCR while you
plug in the TVNCR Release the buttons after approximately two seconds.
This resets the password.
The V-C.,'-[IPBLO(,;R'menu appears, T,:sethe down arrow to select
DO1_rLOAD and press OK.
.Press the down arrow to select ONand press OK, The new %Chip Data
will not be downloaded unless you `a_at& a channel sending the new
system data,
Note: If you watch a channel that usesthe new system, PLEASE WAIT
NOW DOWNLOAD!NG V-CH!P DATA will appear.
6. Press MENU to exit.
Turning V-Chip Block On and Off
If you do_t't turn on the V-ChIp feature, _to_te of the seUtt_tgs for V-Chip
Rating LRnits will take effect.
1. Follow Steps 1-3 above to display the V-CHIP BLO6_ menu.
2. Use %e down arrow to select STATUSand press OK.
3. Use %e down arrow to select STA?ZTSONor STA?ZTSOFF and press OK.
•STATUS ON V-(JHIP HAS BEF_¥AG77KAT_.Dw[ll appear `a_en you
tune to a channel with a rating you have blocked. When this message
appears, press the MEN_.7button and enter the secret code to
temporarily cancel the V-Chip block.
•STATUS OFF No channels win be blocked.
4. Press MEN].7to exit,
26
.... i
Recording Features
Tile T%WCR provides several different ways to record programs. Tile followLng pages e'xplaLn how to use the
tTpes of recording features. If you're usLng tile remote control, you must press tile VCR button to put tile
remote control LnVCR mode.
Note: Recording can't be done in the COMPONENT INPUT (video/audio) mode,
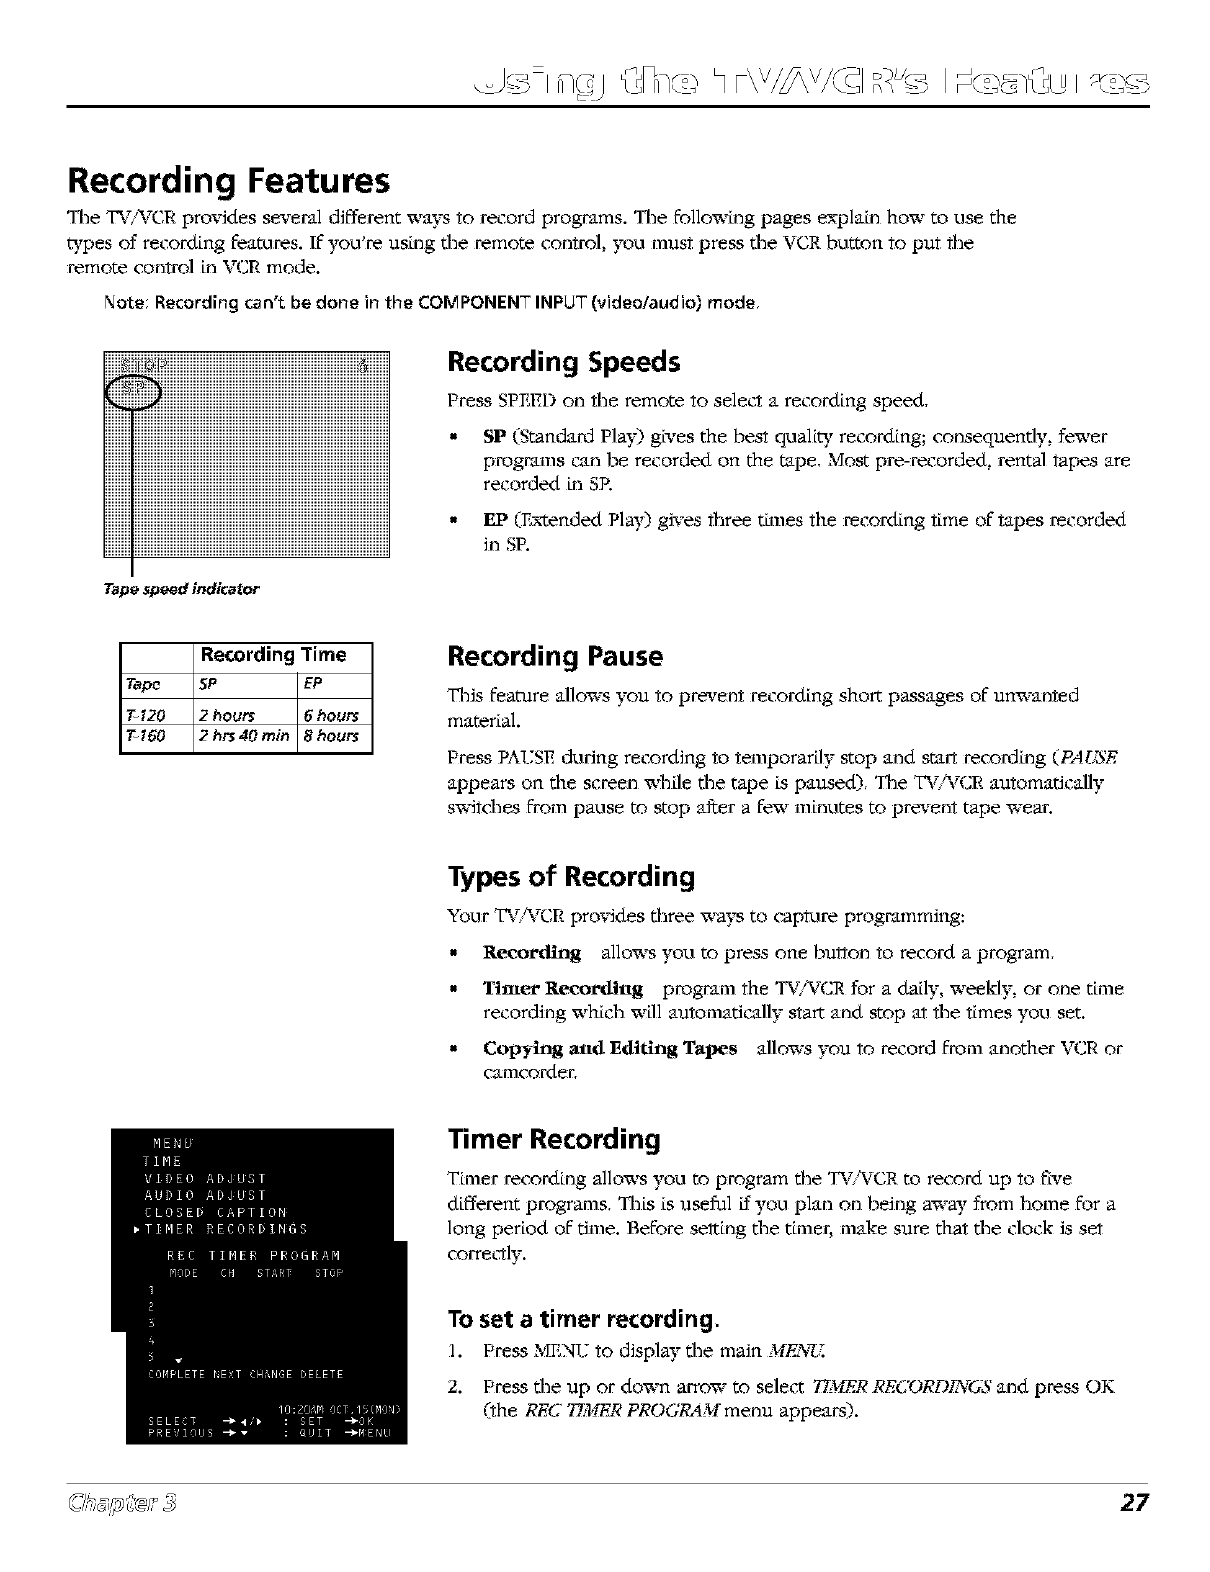
Tape speed indicator
Recording Speeds
Press SPEED on the remote to sele_rt a recording speed,
•SP (Standan:t Pla}O gives the best qualic7 recording; consequently, fewer
programs can be recorded on the tape, Most pre-recorded, rental tapes are
recorded LnSP.
• EP (E'x'tended Play) gives three tLmes the recording time of tapes recorded
in SP.
Recording Time
Tap_ 5P EP
T120 2hou_ 6 hours
T160 2hrs4Omin 8hou_
Recording Pause
_lis _ature allows you to prevent recording short passages of unwanted
material.
Press PAUSE during recording to temporarily stop and start recon_Lng (PAgJB'E
appears on the screen while the tape s paused., Tile T_/_€_R automa_call 7
s_itdms from pause to stop after a few taLus.ires to prevent tape wear.
Types of Recording
Your T%WCR provides three "a_aysto caplvlre programming:
• Recording allows you to press one button to record a program,
• Ttme_ Recot'dtttg program the TV/WCR for a daily, weekly, or one tLme
recording which wLll automatically start and stop at the times you set.
• 42op',j,-hagattd Editing Tapes allows you to record from another VCR or
camcorder,
Timer Recording
TLmer recordLng allows you to program the TV/_ZCR to record up to five
different programs, Tilis is useful if you plan on being aw W from home for a
long period of time. Before seltLng the tLmer, make sure that the clock is set
corre_rtly.
To set a timer recording.
1. Press _'mNUto display the main ME_NW.
2. Press the up or do'an arrow to select 77,WE,q,qECORD1NGS and press OK
(the REC 77ME,qPROGR,'I._Ifmenu appears).
27
.... i
,
4,
,
6,
7,
8,
9,
10,
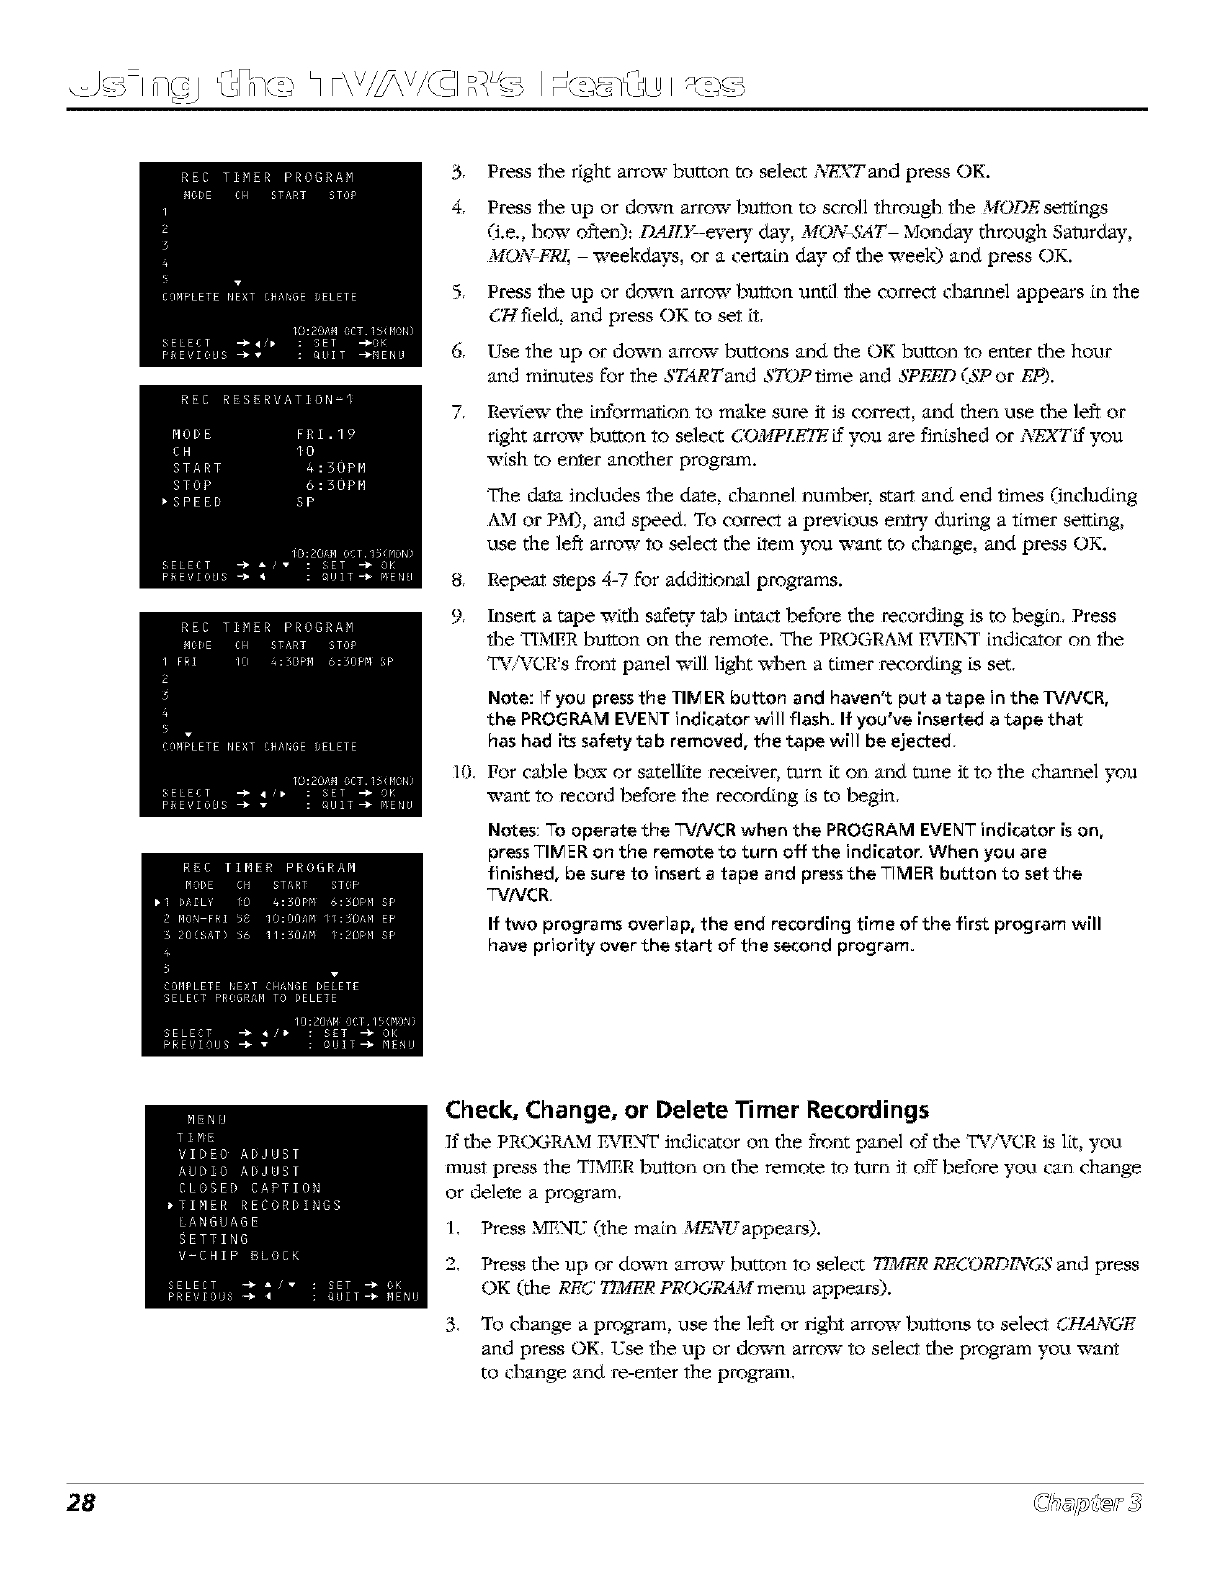
Press the right arrow button to select _'vTTx_and press OK.
Press the up or do'am arrow bulIon to scroll through the MODE sel"_ings
(i.e., how often): DAffY--every day, MO_\qAT- Monday through Saturday,
MOs\VFR[,- weekdays, or a cem_[n d W of %e week) and press OK.
Press tile up or down arrow bulCon until the correct channel appears in the
(7:Tf[eld, and press OK to set it,
Use the up or down arrow buttons and the OK button to enter the hour
and minutes for the STA/_Tand STOP time and SPEED (SP or EP).
Review the information to make sure it is correct, and then use the left or
right arrow button to select COMPLEX+ if you are finished or _'_XTif you
wish to enter another program.
The data includes the date, channel number, start and end times 0ncluding
AM or PM), and speed, To correct a pre_'ious entry during a timer selt[ng,
use the left arrow to select the item you want to change, and press OK.
Repeat steps 4-7 for additional programs.
Insert a tape with safe, W tab intact before the recording is to begin, Press
the TIMER bulton on the remote. The PROGRAM EX+_N_Findicator on the
TV]WCR's front panel will light "a41en a timer recording is set,
Note: If you pressthe TIMER button and haven't put a tape in the TvTVCR,
the PROGRAM EVENT indicator will flash. If you've inserted a tape that
has had its safety tab removed, the tape will be ejected,
For cable box or satellite receiver, turn it on and tune it to the channel you
"a_antto record before the recording is to begin,
Notes: To operate the TV/VCR when the PROGRAM EVENT indicator is on,
press TIMER on the remote to turn off the indicator. When you are
finished, be sure to insert a tape and press the TIMER button to set the
q_NCR.
If two programs overlap, the end recording time of the first program will
have priority over the start of the second program.
Check, Change, or Delete Timer Recordings
If the PROGRAM P_NT indicator on the front panel of the TV]%_CR is lit, you
must press the TIC*mR bulCon on the remote to turn it off before, you can change
or delete a program,
1, Press _*mNU(the main ,_£_Wappears).
2, Press the up or do'am arrow button to select T[ME,_ RECORDLY6S and press
OK (the RE(J TIMER PROGR4M menu appears).
3, To change a program, use the left or dght arrow bulCons to select C_&YGE
and press OK, TJse the up or do'am arrow to select the program you want
to change and re-enter the program,
28
.... i
To delete a program, use the left or right arrow buttons to select DEfET_
and press OK, :Jse the up or down arrow buttons to select the program you
::'ant to delete and press OK.
4. *M_ceryou have reviewed all of your programs press MENU to exit.
iiiiiiiiiiiiiiiiiiiiiiiiiiiiiiiiiiiiiiiiiiiiiiiiiiiiiiiiiiiiiiiiiiiiiiiiiiiiiiiiiiiiiiiiiiiiiiiiiiiiiiiiiiiiiiiiiiiiiiiiiiiiiiiiiiiiiiii
ii
ii
ii
ii
ii
iiiiiiiiiiiiiiiiiiiiiiiiiiiiiiiiiiiiiiiiiiiiiiiiiiiiiiiiiiiiiiiiiiiiiiiiiiiiiiiiiiiiiiiiiiiiiiiiiiiiiiiiiiiiiiiiiiiiiiiiiiiiiiiiiiiiiiiiiiiiiiiiiiiiiiiiiiiiiiiiiiiiiiiiiiiiiiiiiiiiiiiiiiii
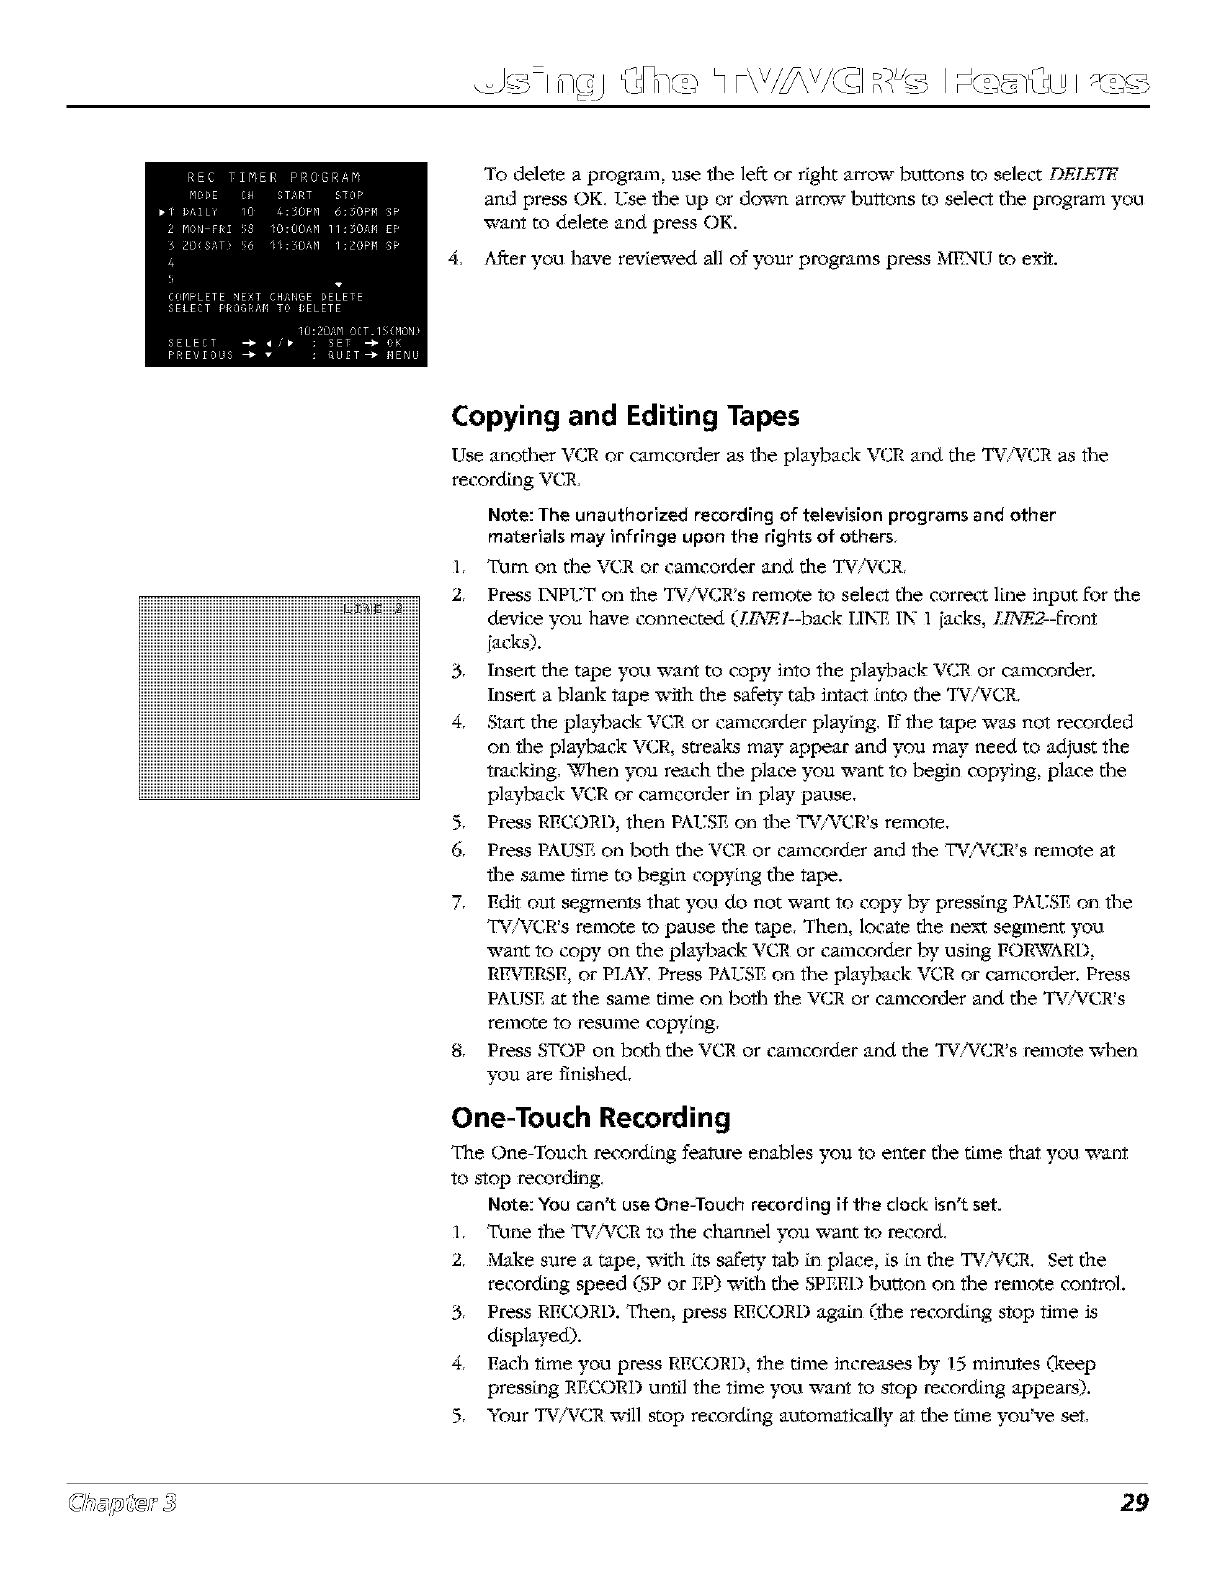
Copying and Editing Tapes
Use another VCR or camco_er as _e playback VCR and the TV/WCR as the
recordLng VCR,
Note:The unauthorized recording of television programs and other
materials may infringe upon the rights of others,
1. T_lm on the VCR or camcorder and the TV/%TCR,
2. Press 1NPIjT on the T%WCR!s remote to select the correct 1Lneinput for the
device you have connected (LL'_l--back LIN_ IN I iacks, L/_.77.2--front
iacks).
3, Insert the tape you want to cop}" into the plaF_ack VCR or camco_er.
Insert a blank tape x_'ith the safe,W tab intact Lnto the TV,_,zCR,
4, Start the pla}&_ack VCR or camcorder playLng, K the tape was not recorded
on the pla3_ack VCR, streaks mW appear and you m W need to adjust the
tracMng, _qmn you reach the place you x_-antto begin cop3dng ,place the
pla3_ack VCR or camcorder LnplW pause,
5, Press RECORD, then PAISSE on the TV_WCR's remote,
6, Press PAUSE on both the VCR or camcorder and the T%WCR's remote at
the same time to begin copying the tape.
7, Edit out segments that you do not want to copy by pressing PAI.TSEon the
T%%TCR'sremote to pause the tape, Then, locate the next segment you
x_-antto copy on the pla}&_ack VCR or camcorder by using FORWARD,
RI_RSE, or PLAY,Press PAI.TSEon the pla'}_ack VCR or camcorder. Press
PAUSE at the same time on both the VCR or camco_er and the TV/%ZCR's
remote to resume copytng,
8, Press STOP on both the VCR or camcorder and the TV_,zCRis remote when
you are f]nished.
One-Touch Recording
The One-Touch recordtng feature enables you to enter the ttme that you want
to stop recording,
Note: You can't use One-Touch recording if the clock isn't set.
1, Tune the T%WCR to the channel you x_-antto record,
2, Make sure a tape, with its safety tab Lnplace, is in the TV,_,zCR, Set the
recordLng speed (SP or EP) with the SPEED button on the remote control.
3, Press RECORD. Then, press RECORD agaLn (the recording stop time is
displayed).
4, Each time you press RECORD, the time increases by 15 minutes (keep
pressLng RECORD until the time you want to stop recording appears).
5, Your TV/WCR will stop recording automatically at the tLme you've set,
29
Picture Search Options
The most basic way to seardl during pla)_ack is using tlle FORWARD or RI_RSE buttons,
This seEtion EOntains several other options available for searEhing a tape, Press PLAY to remm
to normal semen.
Frame Advance
Frame advanEe allows you to view one-stop action frame after another during pla_aEk.
1, Press PAUSE during pla'}_ack to freeze the action,
2, Press PAUSE again each time you x_ant to view the new frame of the scene.
3, Press PLAY to return to normal pla}_ack.
Slow Motion
Slow motion lets you play back the tape in slow motion.
1, Press SLOW on the remote during pla3_ack to start slow-motion pla)])ack,
2, If necessaq, press TRACKING + or - to adjust picture to minimize video noise.
3, Press PLAY to return to normal pla34)ack.
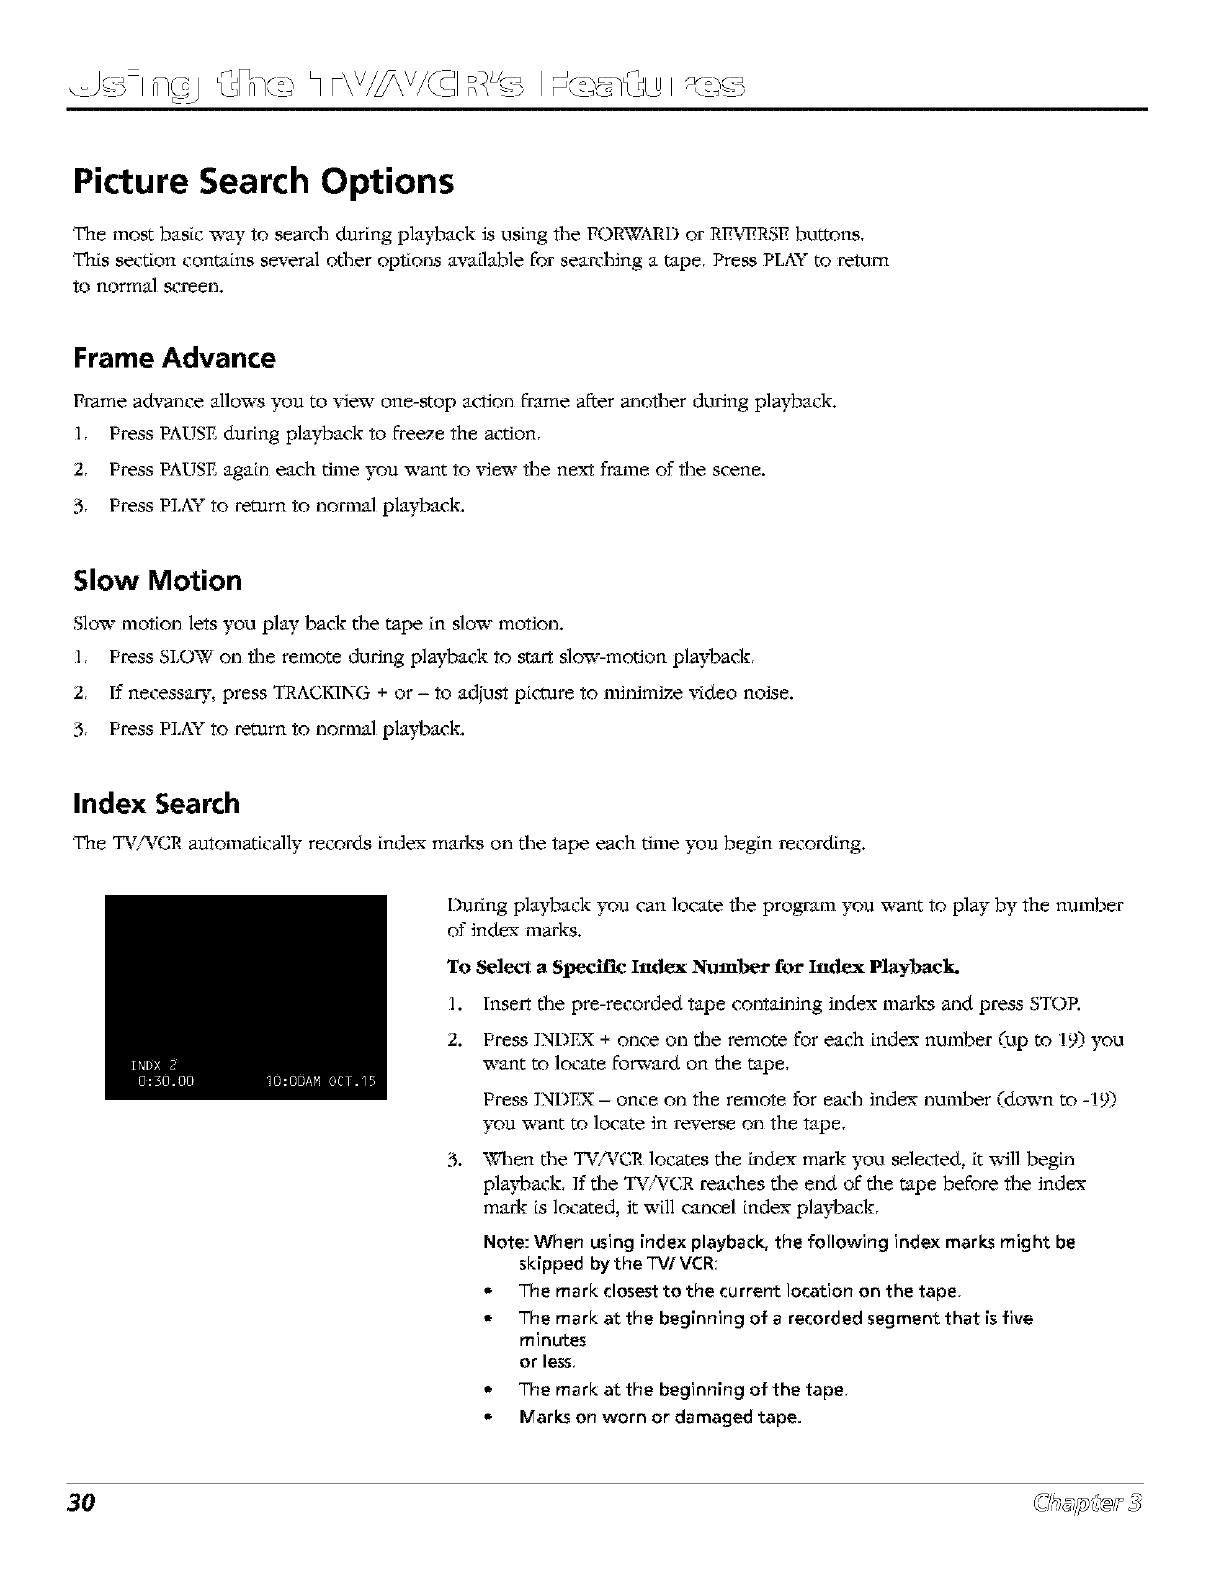
Index Search
The TVzWCRautomatiEally reEords index marks on the tape each time you begin mEording.
During pla?_ack you can locate the program you "a-ant to play by the number
of index marks.
To Select a Specific Ittde_ Number for Index Playback.
1. Insert the pre-recorded tape containing index marks and press STOP.
2. Press INDFX + once on the remote for each index number (up to 19) you
want to locate forward on the tape,
Press INDFX- once on the remote for each index number (do'am to -19)
you "a_ant to locate in reverse on the tape,
.When the TVz%rC,R locates the index mark you selected, it _ill begin
playback, If the TV/%ZC,R reaches the end of the tape before the index
mark is located, it win cancel index pla}_,_ack,
Note: When using index playback, the following index marks might be
skipped by the TV/VCR:
- The mark closest to the current location on the tape,
- The mark at the beginning of a recorded segment that is five
minutes
or less,
- The mark at the beginning of the tape,
- Marks on worn or damaged tape.
30
.... i
Tracking
Your TV/%rCR has automatic tracking which removes streaks and "noise' from the pici_lre,
Tracking has no effect _en recording - only during pla}_ack, Automatic tracking is activated
when you insert a tape. TRAC_I_'_Gflashes on the TV screen during automatic tracking,
Occasionally you may need to manually adjust tracking, especially if tile tape was recorded on a
different VC_, Press the TRACX1NG + or - on the remote (CI[ + or CH- on the front of the TVi
VC_) to remove streaks and noise, You can also use tracking _en pausing a tape to reduce the
n_ise of the still pk_mre. "_'_qlen you use manual tracking, automatic tracking rams off,
The automatic tracking feature is restored the next time you insert a tape.
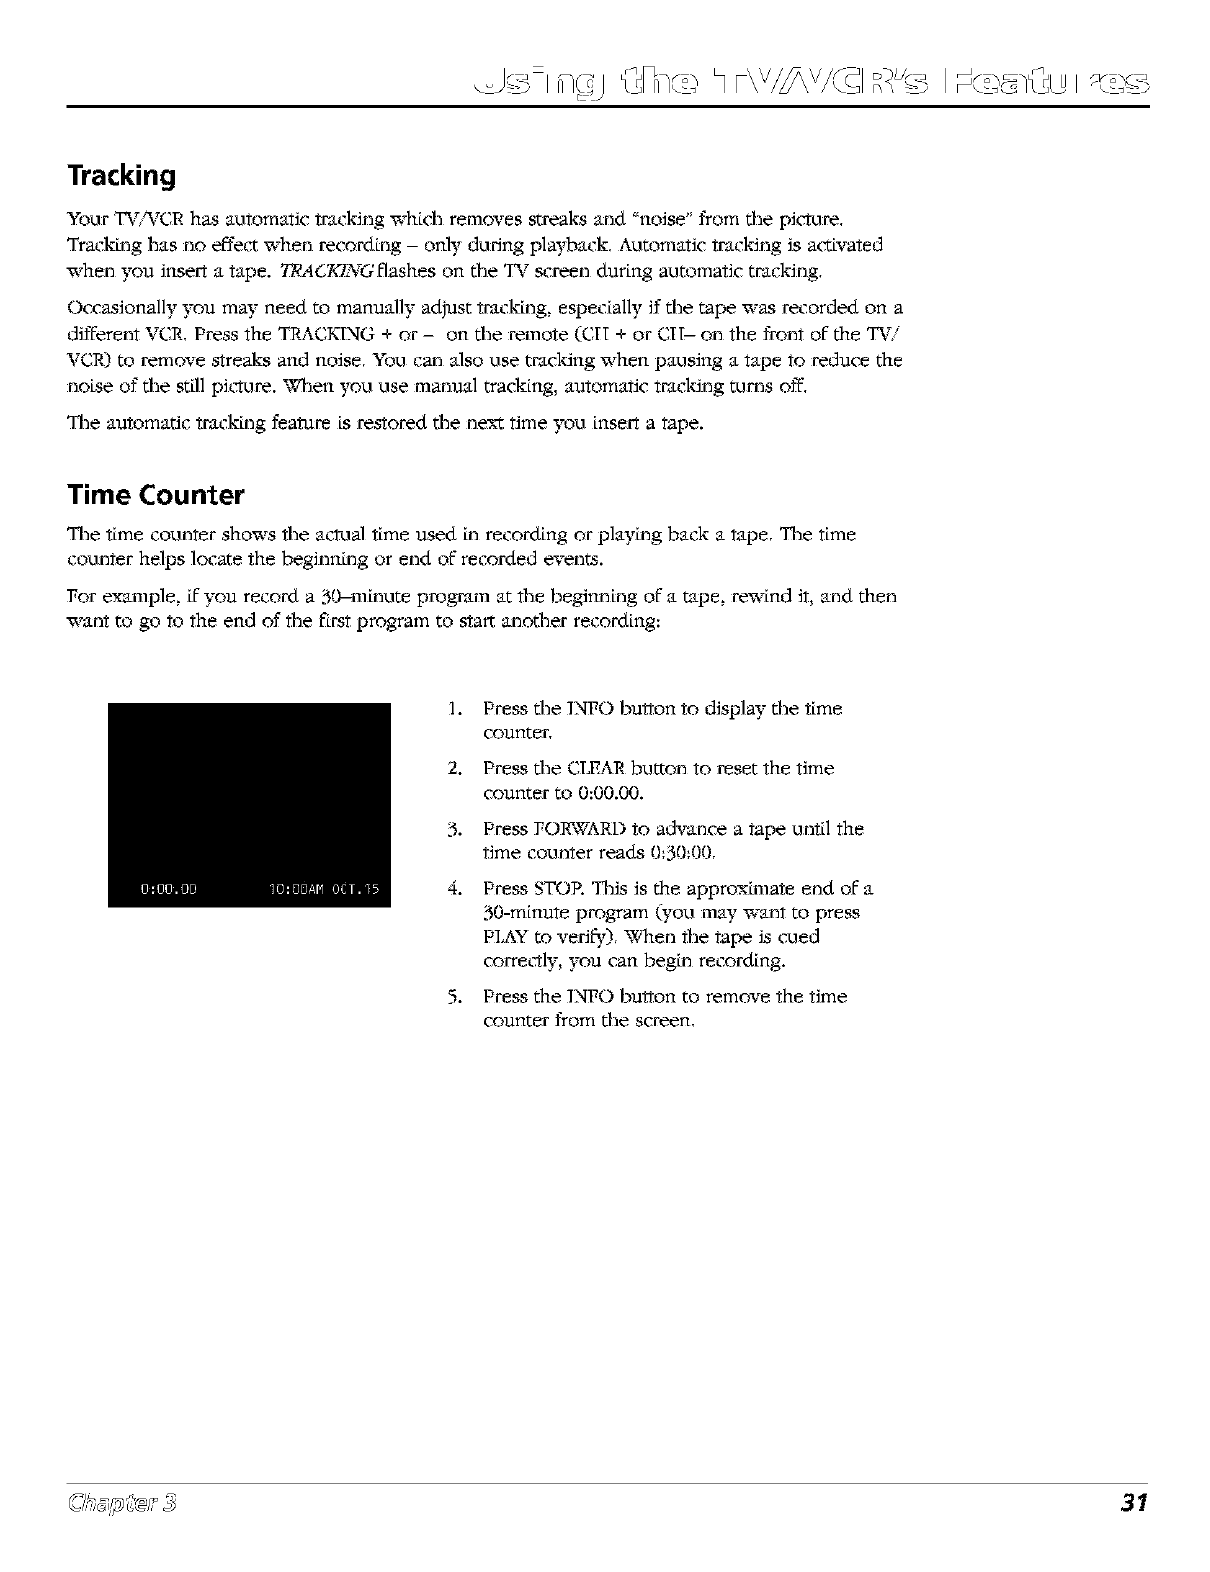
Time Counter
The time counter shows _e a_mal time used Ln recording or pl_Lng back a tape, The time
counter helps locate the beginning or end of recorded events.
For example, if you record a 30-minute program at the beginning of a tape, rewind it, and then
want to go to the end of the first program to start another recording:
1. Press the INFO bu_on to display the time
counter,
2. Press the CIGAR b,_l_on to reset the time
counter to 0:00.00.
3. Press FORWARD to advance a tape until the
time counter reads 0:30:00,
4. Press STOP. This is the approximate end of a
30-minute program (you may want to press
PLAY m yetiS0, _qlen the tape is cued
correaly, you can begin recording.
5. Press the INFO bul'ron to remove the time
counter from the screen,
31

Audio Features
_le audio you select a£fects both tape pla3_ack and recordings,
Note: The TVNCR must be properly connected to a stereo system usingaudio/video cables
to hear stereo sound.
Press the SOt..'ND button on the remote to select the Wpe of audio you x_-antto listen to or
record, You can use the A?JT)[OaDJ_B'Tmenu in tile next chapter to adjust tile sound.
Reception
Some TV programs are broadcast with stereo audio or a Second Audio Program (SAP) x_ich
offers a second language. _le SOUND button on tile remote lets you select the Wpe of audio
you x_-ant to listen to or record, Press the SOLTNDbutton on the remote repeatedly to s_qtch
between ST_REO, _S;_Por MONO.
• STEREO Used to hear/record normal or stereo broadcast T_ STappears on the TV
screen when stereo is being broadcast.
• SAP Used to hear/record a Second Audio Program. £4P appears on the TV screen when
stereo is being broadcast. Records the selected audio (SAP or Main),
•Mono Used to hear/record monoaural sound.
Note:The TVNCR defaults to mono if the stereo signal is weak, too noisy, or the
program isn't being broadcast in stereo (no indicator appears on the screen).
Tape Playback
_le VGR records audio on both the ]Ii-Ti stereo and linear tracks on the tape. Iti-Fi sound is
recorded on separate le_ and right stereo channels. Monaural sound is recorded on the linear
track, Records %e audio (SAP or Main) selected with %e SOUND button. To enioy ]Ii-Fi sound,
connect your TV/WCR to a stereo system using the audio jacks.
Note: Tapes recorded on a mono VCRwill automatically be played back in linear audio,
Press the SOt..'NI) button repeatedly" to s_dtch between LR, L, t_ or mono (no display).
• II, L R,I I (Iti-lR) Used for normal pla3_ack, Both the le_ and dght &annels will be
played from the audio track,
• II,L 0_t-Fi) Used to hear %e le_ &annel of %e ]Ii-Ti track plwed through both speakers,
• R'II 0_t-Fi) Used to hear %e right channel of %e It_-Fi track played through both
speakers.
•LINEaLR (No I)tsplay) Used to plW back the sound recorded on the linear monaural
track, such as a Second Audio Program, or a dubbed voice-over.
32
"_ ©?;
Using the TV/VCR's
Menu System
Chapter Overview:
• How to Use Your TV/VCR's Menu System
• The TIME Menu
• The VIDEO ADJUST Menu
• The AUDIO ADJUST Menu
• The LANGUAGE Menu
• Setting Closed Caption Modes
• Additional Setup Features
Changing Entertainment. Again.
Graphics contained **_thin tbi,s'publication are for rei_rea_ntational purpo,s'es, 33
I£]¢gJ\SDnS,-.h r\v/j\v/dql"
How to Use Your TV/VCR's Menu System
The V-CHIP BLOCKmenu and the 77MER RECORDINGSmeou were explained in Chapter 3, This
Chapter explaLns tim rest of the menu system, tTse tile borons on tile remote to access the menu
system and make changes to tile settLngs, To highlight or point to an item on tile screen, press
the arrow bottons on the remote (you'll notice the triangular icon moves), To select an item or
activate a choice, press the OK bu_on,
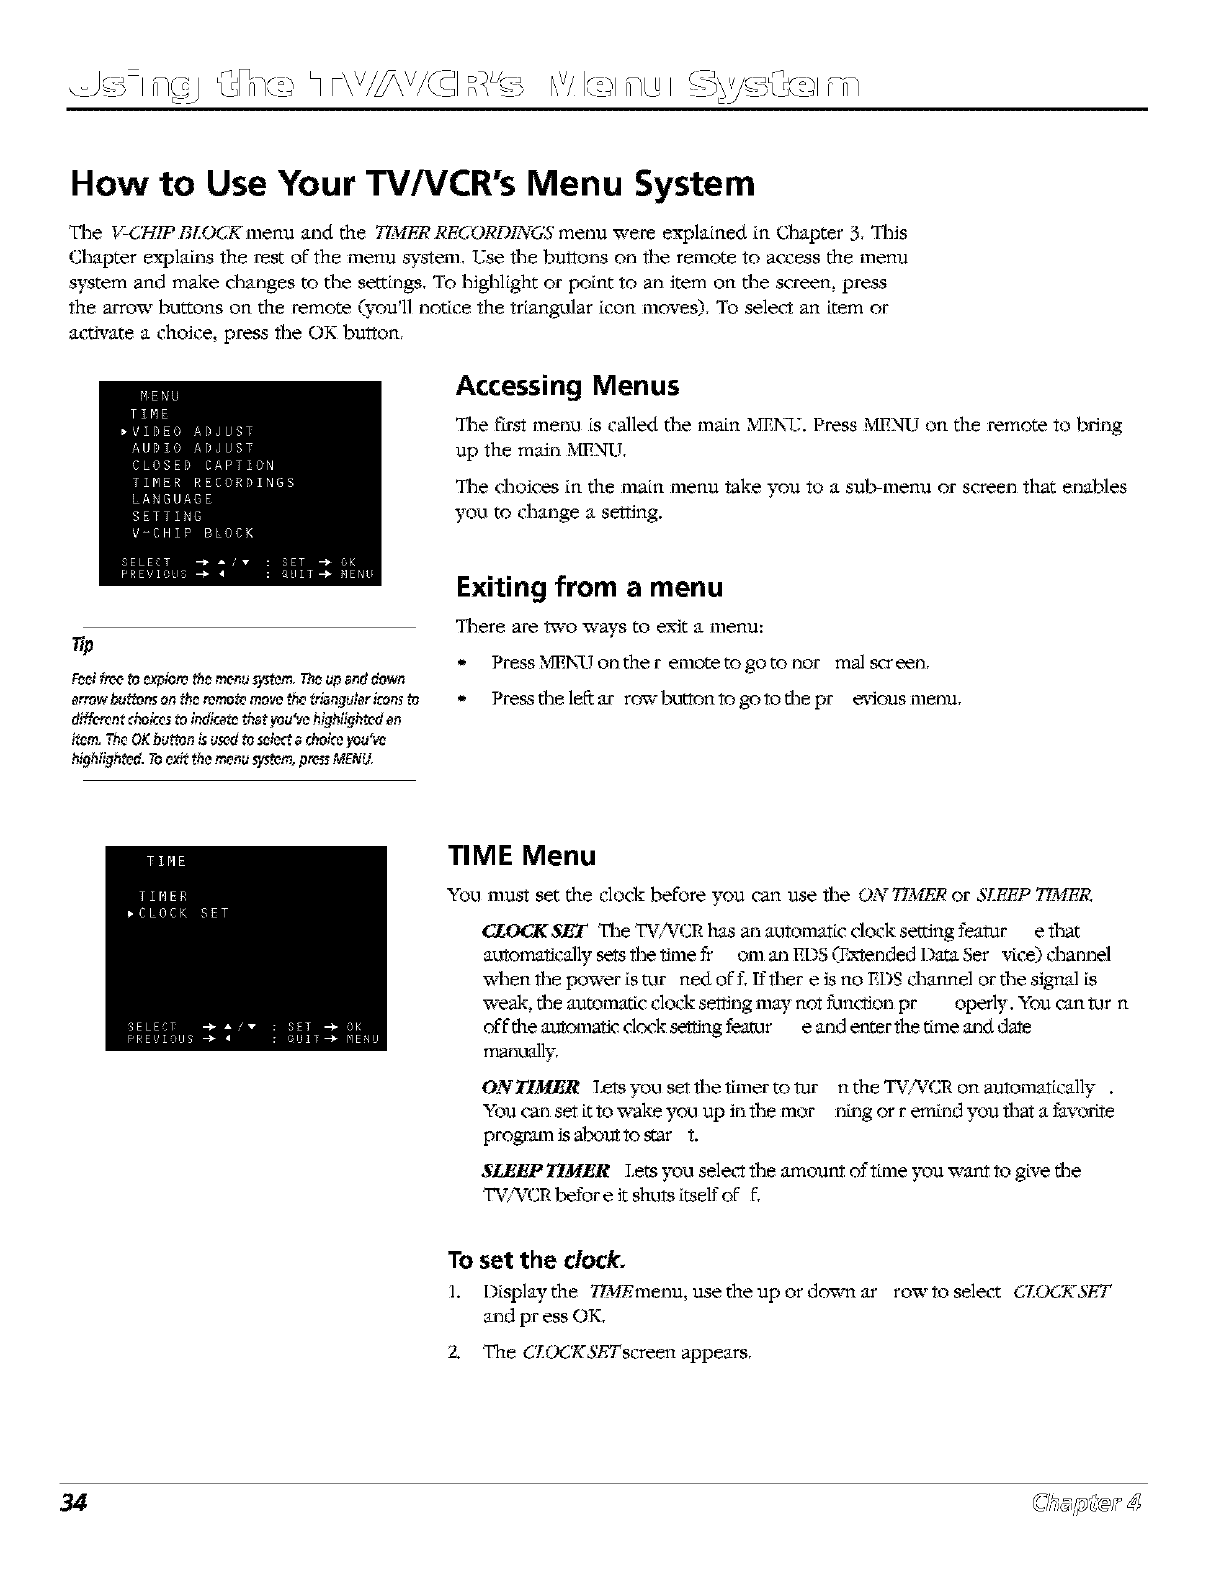
Accessing Menus
The first meno is called the main _'mN_J. Press MENU on the remote to bring
up tim main MENU,
The d_oices in the main menu take you to a sol>menu or screen that enables
you to change a setting.
F_ei#¢_ to _p_o_ the menu sys_m,Theup _nd down
errow bu_ons on the r_rno_ mo_ _c _riangu_r icon_
diffemn__]ccs to indk_toth_ you'd2highiigh_d_n
item.TheOKbunt'onisusedto seie_ _ q:hoke_u'v_
highlightS. Toc'xi_:the mc,nu sTs_m,pre_ MENU.
Exiting from a menu
There are _0 _ays to exit a menu:
*Press _'_N_J on the r emote to go to nor mal_reen,
° Pressthelefcar row button to go to the pr e_iousmenu,
TIME Menu
You must set the clock before you can use the ON T/ME/_ or SLEEP 77MER,
CZO_r'g SET The TV;*ZCRtins an automatic dock setting fearer e that
automagcally sets the gme ff om an EDS (FXtended Data Ser vice) channel
x_4_enthe power is mr ned of f, 15there is no EDS d_annel or the signal iS
weak, the automatic clock se_ng mW not Amci'Jon pr operly. You can lv_rn
off the automagc dock se_ng featur e and enter the time and date
manoally,
ONTIMER Lets you set the tLmer to _r n the TV/WCR on automatically .
You can set it to x_ake you up in the mar n_ng or r en_nd you that a favorite
program is a|,_ut to star t.
SLEEP TIMER Lets you seletrr the amount of tLme you want to give the
TV/WCR]_for e it shots itself of 15.
To set the clock.
1. Displaythe T/ME, menu, use the up or do_m ar rowtoselect C/OCKSET
and pr ess OK,
2. The CLCEg,_SE,Tscreen appears,
34
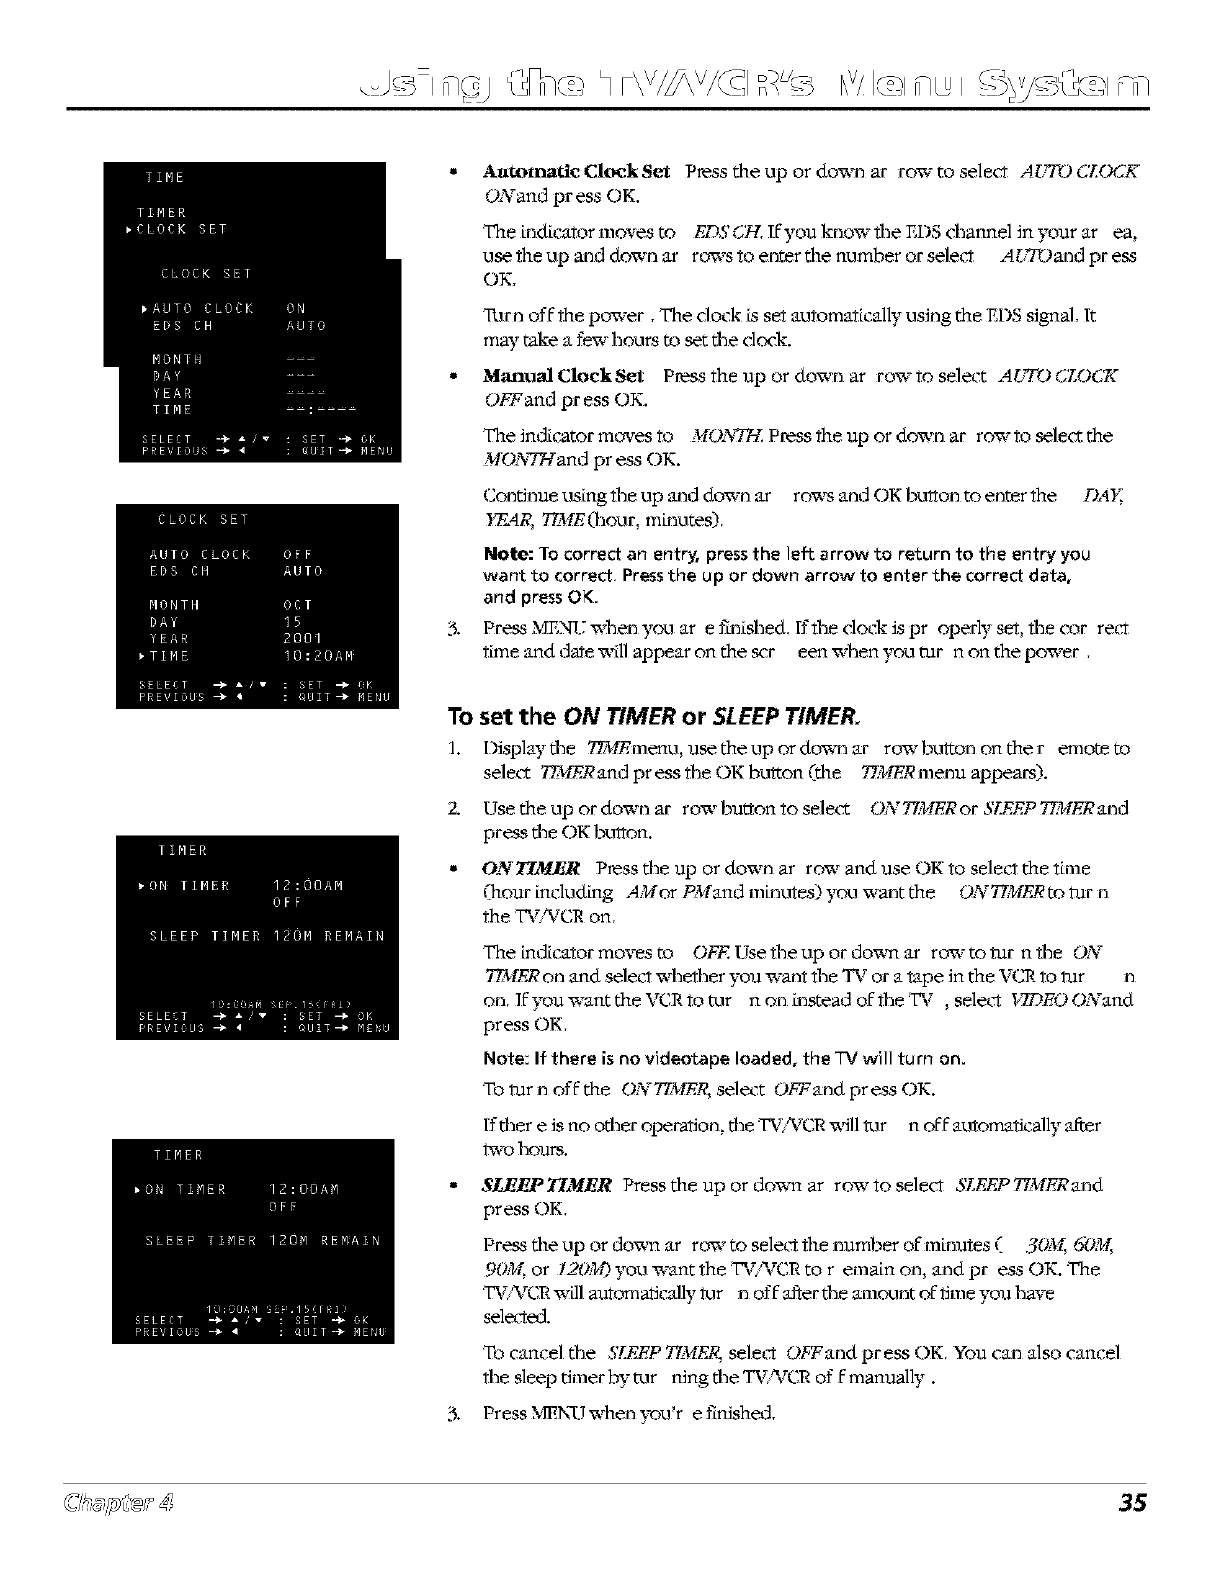
*Autotnatic Clock Set Presstbe up or down ar row to seleet AUTOCEO(JK
ONand press OK.
The Lndicator moves to EDS CH. lfyou know tlle EDS dlannel in your ar ea,
use the up and down ar rows to enter the number or sdecrt AUTOand press
OK.
TLlrn off the power. The dock is set automatically using the EDS signal. It
mW 'take a few hours m set the dock.
* Manual Clock Set Press the up or down ar row to select AUTO r'JLOdg
OFFand press OK.
The indicator mc_res to MO/_W-L Press the up or down ar row to select the
M@"_W-Tandpress OK.
Continue using the up and down ar rows and OK button to enter the DAI_
YF_4_ T/ME(hour, mLnums).
Note: Tocorrect an entry, pressthe left arrow to return to the entry you
want to correct, Pressthe up or down arrow to enter the correct data,
and pressOK.
3. Press_'mNI.7`a_lenyouar et'Lnished, fftheclockispr operlyset, thecor recrt
time and date will appear on the _r een`a41en you mr n on the power.
To set the ON TIMER or SLEEP TIMER.
1. Displaythe T/MEmenu, use the up or down ar rowbu'ttononther ernoteto
select 77ME,qand press the OK burton (.the 7;_ME,qmenu appears).
2. Use the up or down ar row button to select ON 77MERor SLEEP 77MERand
press the OK button.
*ONT!MER Press %e up or down ar row and use OK to select tbe tLme
(_'hourincluding AMor PMand mLnutes) you "a_antthe ONTZ_E/_ to "barn
the TV/_/C,Ron.
The indicator moves to OFF Use the up or do'am ar row to mr n the ON
TIMER on and sdecrt `a4_ether you `a_antthe TV or a tape in the VCN to mr n
on. Jf you want the VCR to mr n on Lnstead of the TV , select _TDEO ONand
press OK.
Note: If there is no videotape loaded, the 7",/will turn on.
To mr n off the ONTIME_ select OFFand press OK.
ff there is no other operation, the TV/WCRwill mr n 01515automatically after
two hours.
,, SLEEP TIMER Press the up or do`am ar row to select SLEEP 77MER and
press OK.
Press the up or do`ana ar row to select the number of mLnutes ( 30_f, 6_)M,
90zl{ or 120M) you want the T%WCR to rema[n on, and pr ess OK. The
TV/%TCRwill automatically tot n off after the amount oftime you have
selected.
To cancel %e SLEEP 77ME_ select OFFand press OK. You can also cancel
the sleep timer by mr ning the %7/%7C,Rof f manually.
N PressMEN%r`a_enyou'r efLnished.
35
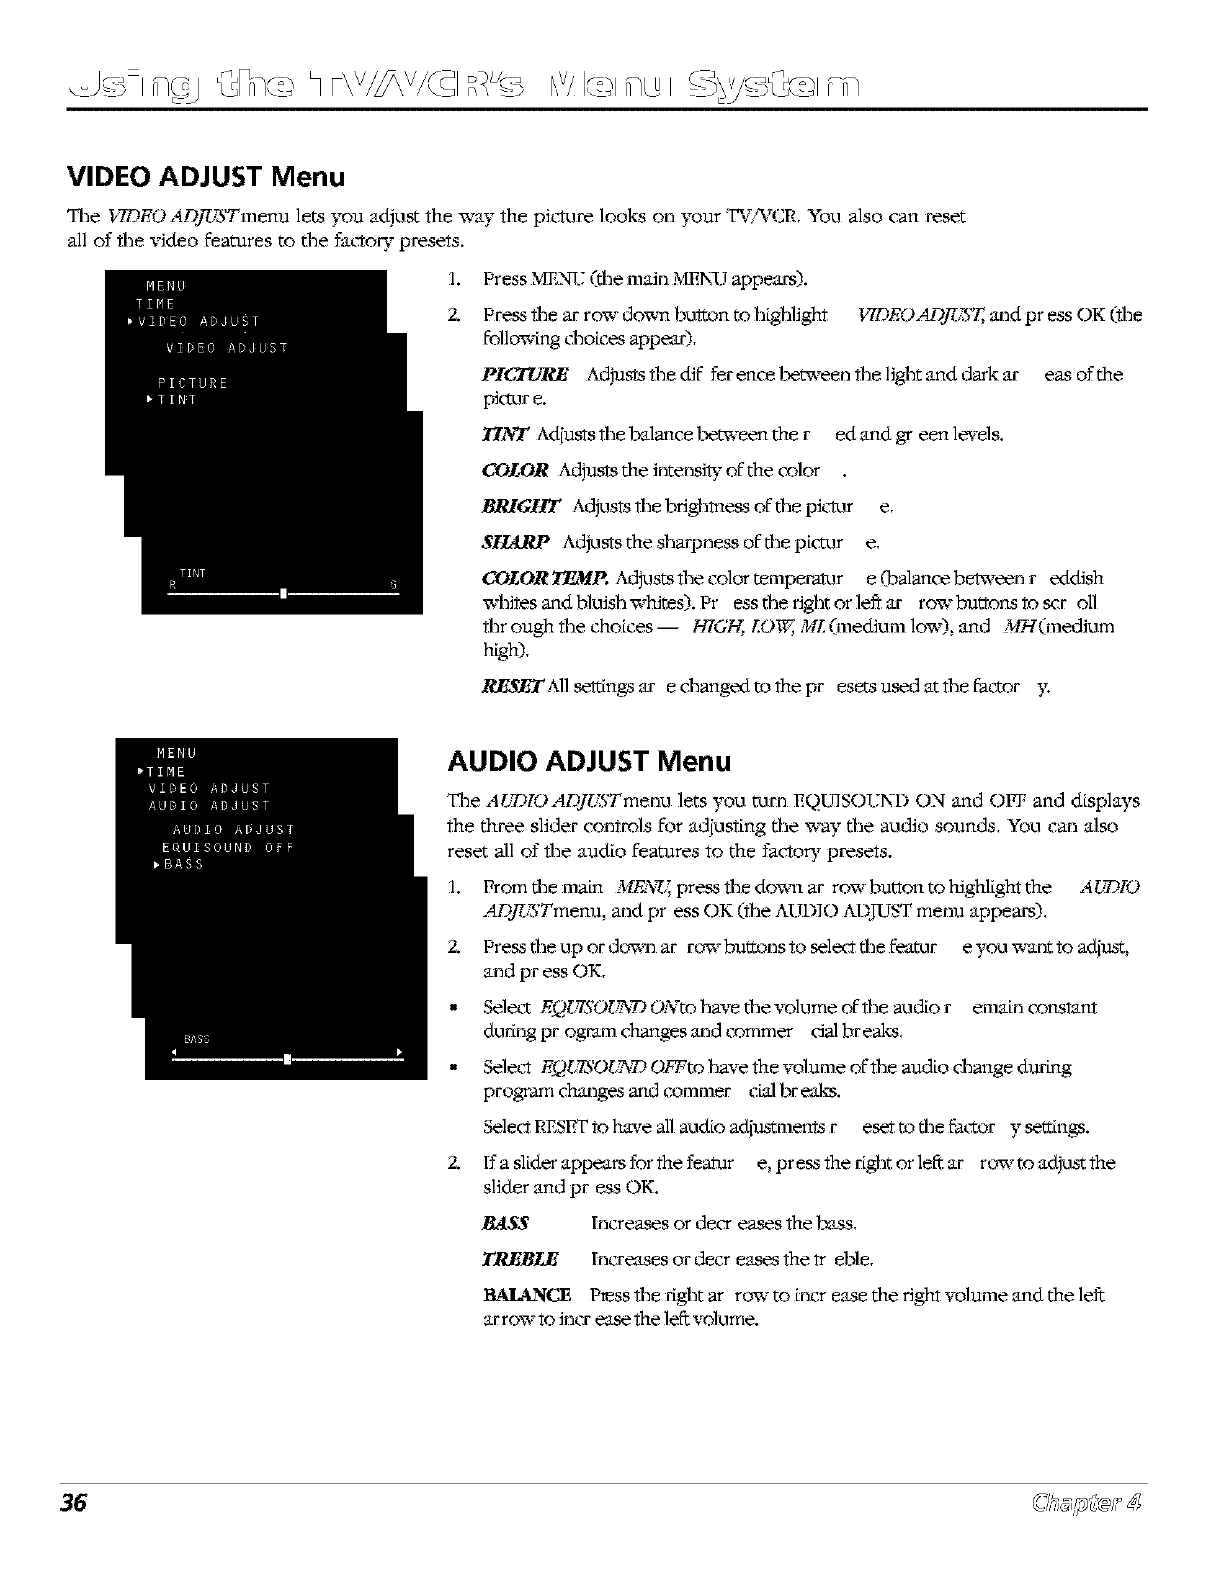
I£]¢gJ\sBs,-. h r\v/j\v/dql"
VIDEO ADJUST Menu
Tile _iTDEOADf'LTSTnmnu lets you adjust the way the picture looks on your TV/_rCR, YOU also can reset
all of the video features to %e facto W presets.
1. Press _'mNT7(tile main MEN_Jappears).
2. Press tile ar row do'am bu_ton to highlight
following choices appeaO,
PIEdTa'R/F Adjusts the Of fer ence lmtween the light and dark ar
pic'&lr e.
T!YF Ad[usts *he balance between the r edandgr eenle_-els.
COLOR Adjusts the inmnsi_" of the color
BPdGI1T A_lusts the brighmess of the pk_r e,
SELRRP Adj_lststhe sharpness of the pictur e,
09LORT_III-*. A_luststhecolortemperatur e(balancebe_,eenr eddish
x_41i*esand bluish whims). Press the right or left ar row buttons *o _r oll
through the choices I HIGH, LOW, ML (medium low), and ,_rHdmedium
h_gh),
R./_ All settings are changed m the Dr esets used at the 15acZor 3:
IqDF,OADf'b3T, and pr ess OK (the
eas of the
AUDIO ADJUST Menu
The AUDIOADJUSTmen_.I lets you turn EQUISOUN-D ON and OFF and displays
the three slider con*rols for adiusting %e x_-ay%e audio sounds, You can also
reset all of the audio features to the facto W prese*s.
1. From the main ,_/F.Nggpress the do'am ar row button to highligh* the AI].TD[O
ADj"bS"Tmenu, and pr ess OK (the AUDIO M)ITIST menu appears),
2. Press the up or down ar rowbuttonstoselectthefeamr e you want to adjust,
and press OK,
• Sdetrc EQISgSOI)_T_ONto have the volume of the audio r ema_n cons*an*
dudng program changes and commer dal breaks,
• Select EQt_TSOt_DOFFtohaveflmvolumeoftheaudio&angeduring
program changes and commer cial breaks.
Select RESET1o have all audio adjustments r eset to the 6actor y settings.
2. lfasliderappearsfor1.hefeatur e, press1.hedghtorleftar rowtoadijust1.he
slider and press OK.
BASS Increases or decr eases 1.he1,'ass,
TREBIAg Increases or decr eases 1"hetreble,
IIAlk_2_ICE PIess the right ar row to _ncr ease the righ1"volume and the left
arrow1"o incr ease 1"heleft volume.
36
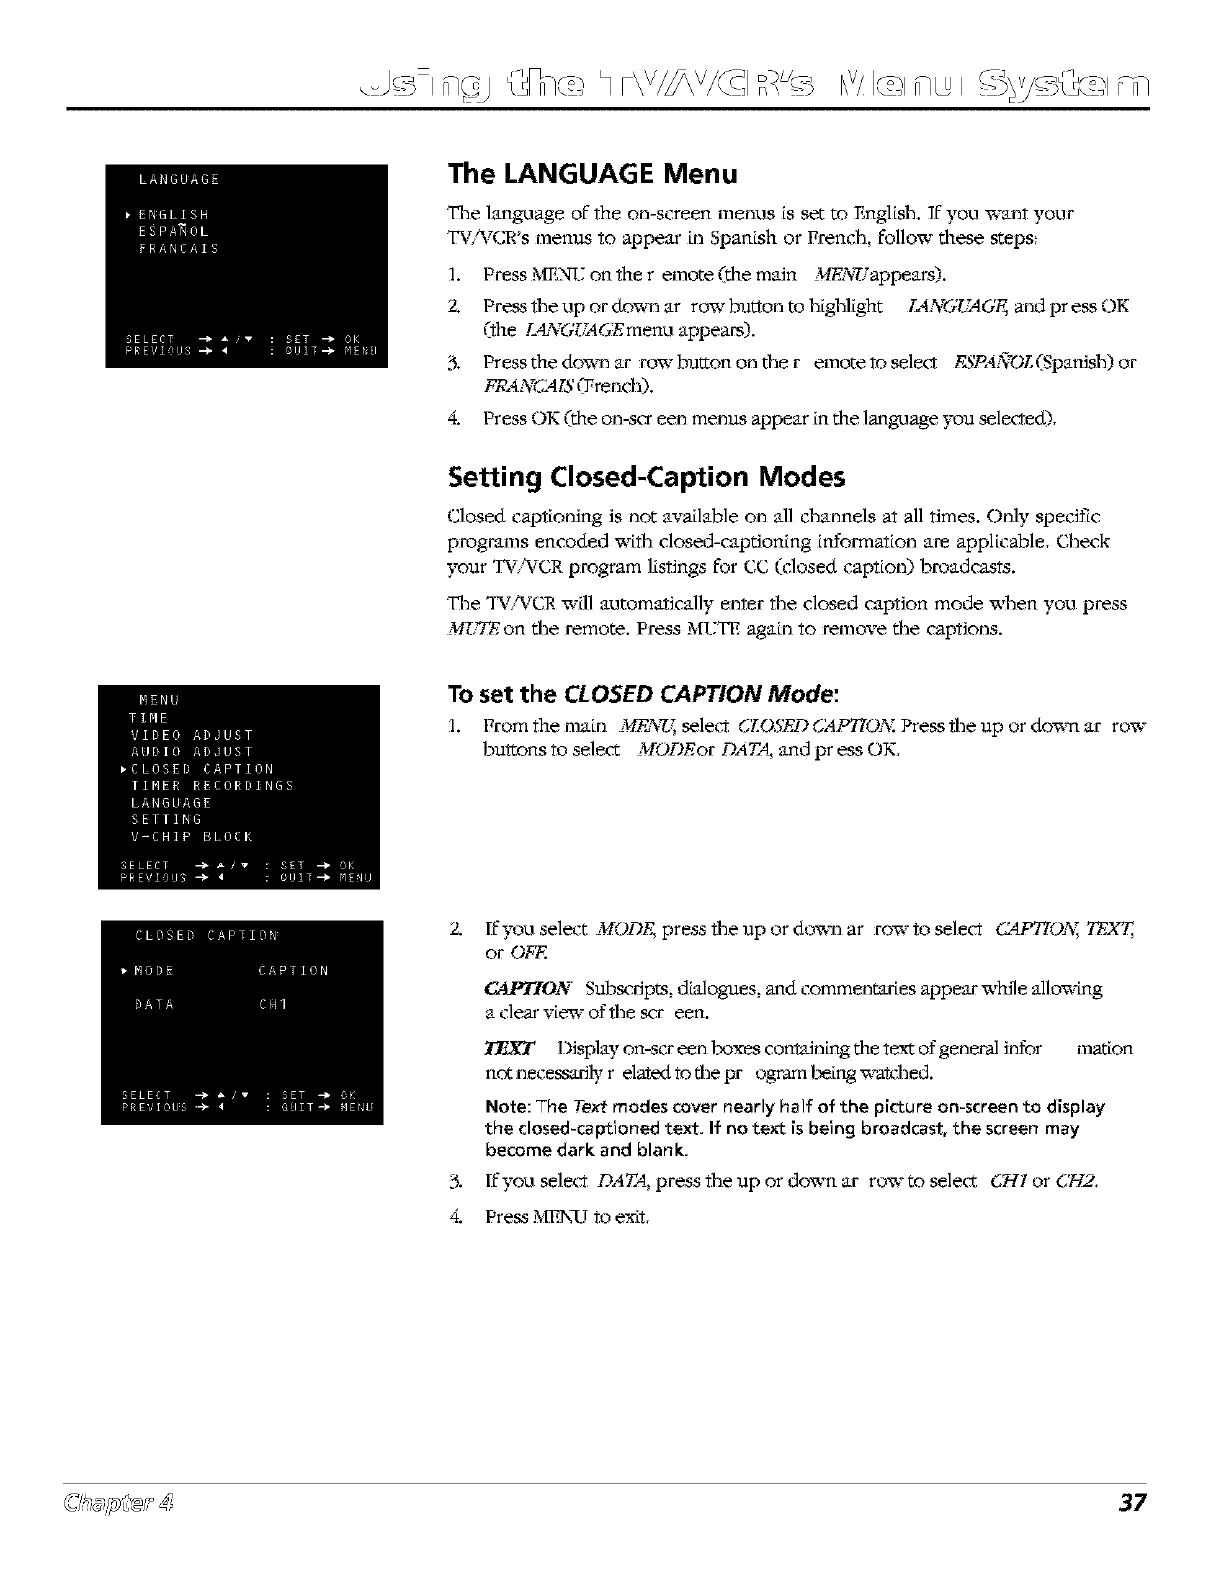
The LANGUAGE Menu
_le language of the on-screen menus is set to English. If you want your
TV/WCR's menus to appear tn Spanish or French, follow these steps:
L Press MENV on the r emote (the main M'ENUappears).
2. Press the up or down ar row button m highlight /AN6U4GF_ and press OK
(.the L_"[GUA GEmenu appears).
3. Presstbedownar ro'a"button on the r emote to select F,SPAzgrOL(SpanJsh)or
FRA77(24IS (French).
4, Press OK (the on-scr een menus appear in the language you selected),
Setting Closed-Caption Modes
Closed captioning is not available on all channels at all times. Only specific
programs encoded w[til closed-captioning [nSommt[on am applicable, Check
your TV/WC,R program listings for CC (closed caption) broadcasts.
The TV/WC,R will automatically enter the closed caption mode "aqlen you press
MUTE on the remote. Press MI.TTEagain to remove the captions.
To set the CLOSED CAPTION Mode:
1. Prom the main M_¥g_ select CLOSED CAPTIO;_: Press the up or do`am ar row
bultons to select MODEor DATA, and press OK,
2.
%
4.
If you select MODE, press the up or down ar rowto select CAPTIO;% TEXZ,
or OFF..
_ON Sub_ripts, dialogues, and commentaries appear while allo'aing
a clear view of the _r een.
TEXT Display on-scr een t'a._xescontaining the text of general infor marion
not necessarily r elated to the program being _atclled.
Note:The Textmodes covernearlyhalfof the pictureon-screento display
the closed-captionedtext.Ifno textis being broadcast,the screen may
become dark and blank.
ffyou select DATA, press the up or do'am ar rowto select CH1 or (]TT2.
Press MEN_3 to exit.
37
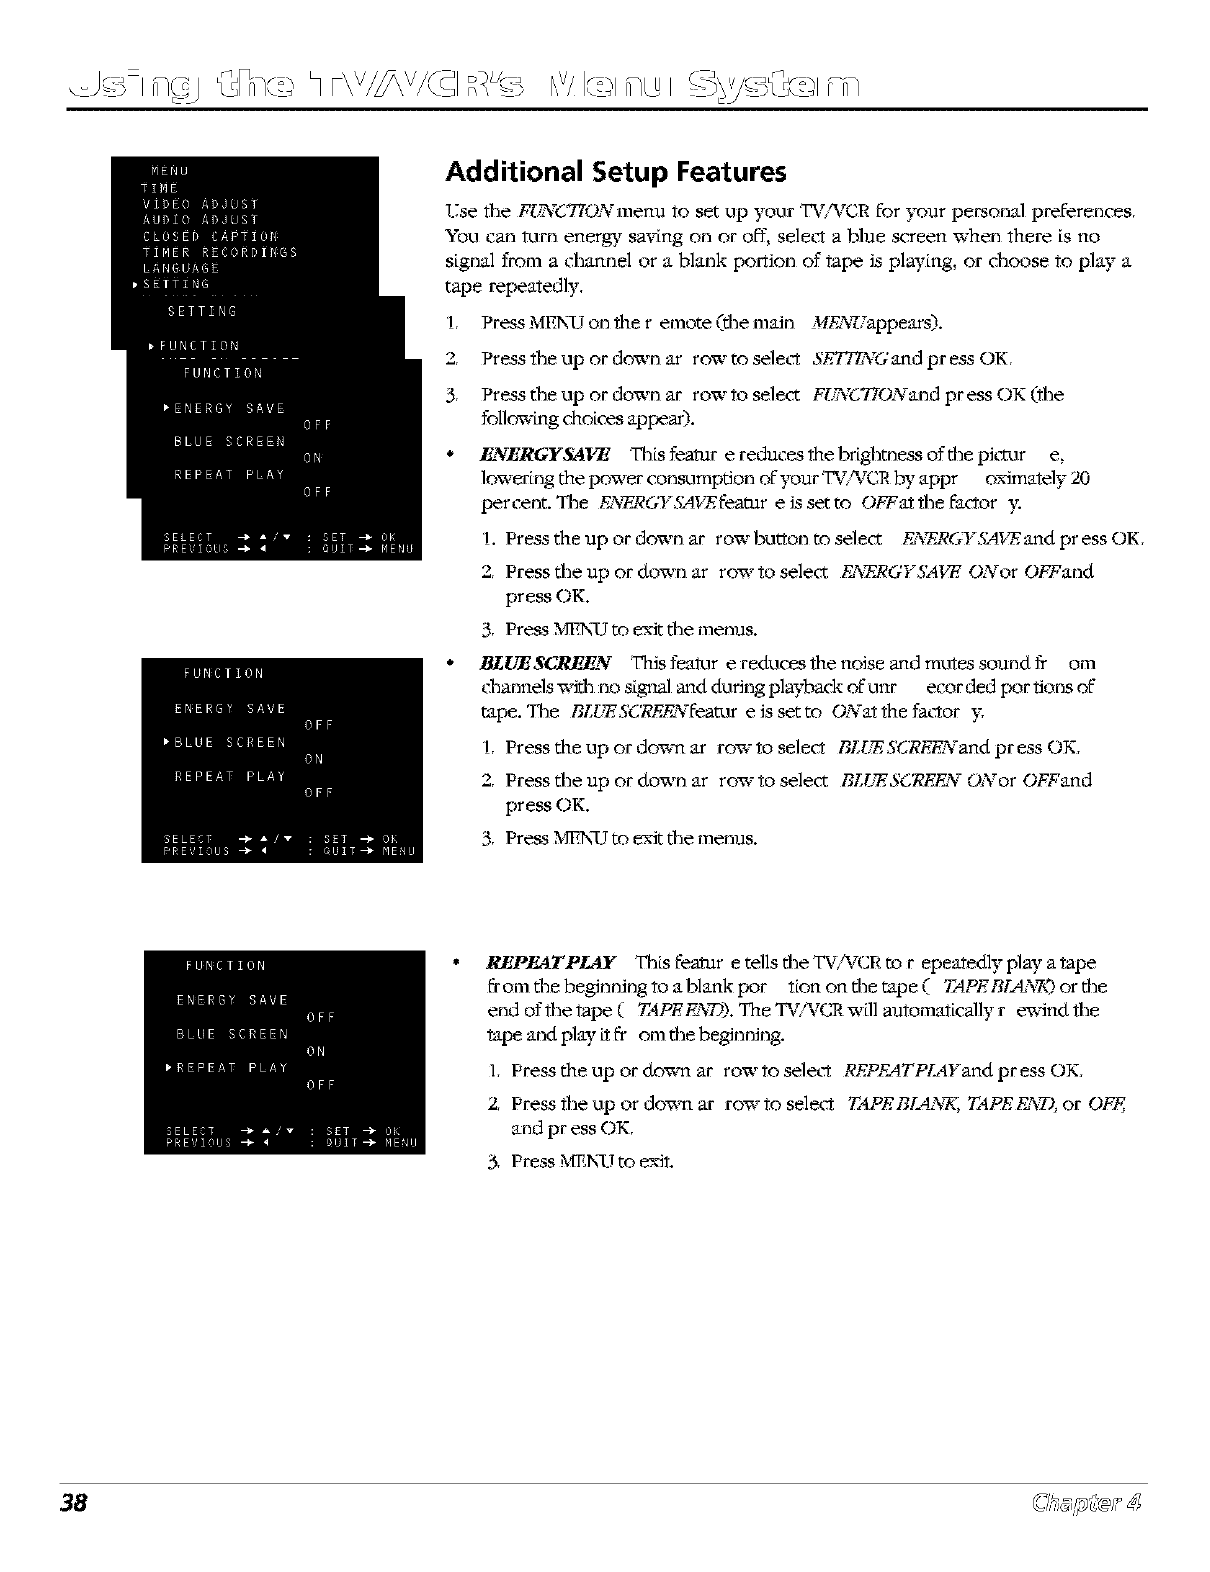
I£]¢gJ\sBs,-. h r\v/j\v/Cql"
Additional Setup Features
_Tsetile F_ET/ON menu to set op your _7:WCR for your personal preferences,
You can _Fn energy saving on or o_, sele_T_ a blue screen when there is no
signal from a channel or a blank portion of tape is playing, or choose to play a
tape repeatedly,
1, Press MENX3on the r emote (the main MF2_Wappears).
2, Press the op or down ar row to sdect SE,_NG and press OK,
3, Press the op or down ar row to select FSW(;7;rONand press OK (the
following choices appear).
•ENERGYSAVE Thisfeamr ereducestlaebr[ghtnessofthepk_mr e,
lowering the power consumption of your T%*TCR133,appr oximately 20
percent. The F2_RGY£qgE, feature is set to OFFat the factor 3:
1. Press the up or down ar row borton to select _'_/_6Y£4VE,, and press OK,
2, Press the up or down ar row to select Fd_RGYS_I_ ONor OFFand
press OK.
3, Press MENX3to exit the men_s.
•BZUE$CREEN ThJsfeaVar e redoces the noise and motes sound fr om
c,hannels with no signal and doring playback of onr ecor ded portions of
tape. The BLlSWSg_EF_Vfeamr e is set to ONat the factor }:
1, Press the op or doom ar rowto select BLIb_SCREENand press OK,
2, Press the up or down ar rowto select BLIb_SCRF_F_NONor OFFand
press OK.
3, Press MENX_Jto exit the menns.
REPEATPI_Y This fearer e tells the T%WCR to repeatedly play a tape
fromthebeginningtoablankpor tion on the tape ( Z4PFBL'_g_)orthe
end of the tape ( Z_IPFF_'_79).The, TV/_,TC_will automatically r ewind the
tape and play itff om the beginning.
1, Press the op or doom ar rowto select REPE4TPTAYand press OK,
2, Press the op or doom ar rowto select E,1PE B*r,'d_'_;E'IPE FaVD,or OFF,
and press OK,
3, Press _NX_J to exit.
38
Other Information
Chapter Overview:
• Troubleshooting
• Care and Cleaning
• Front Panel
• Back Panel
• TV/VCR's Video Input Channel
Limited Warranty
Accessories
• Index
Changing Entertainment. A ,m.
Grap_ics l_d u_thin #_is publication are for repres_,nmtion only, 39
Troubleshooting
Most problems you encounter with your TV/%TCRyou can correct by consul*[ng tile Troubleshooting list that follows.
General TV/VCR Problems
I"V/VCR won't turn on
• Make SLtreyou press tee TV or VC_Rbuttonon the remote control before yOLlpress the ON•O_ bLltCon.
• Somexking might be wrong w{tEy(mr remote control, Press tee POWER button on the J'ront of the TV/VC_R,Tfthe TV _urns on, go to
page 42 Forremote con_roJ SOlLltions,
• Make sLlretee TVA_CRis pJugged in,
• Check tee wall receptacle (or evCension cord) to make sure {tis "]Ne" by pla&ging _ some*king e]se.
Controls don't work
•tJ"yoa're using tee remote control _'orTV flatirons (sach as cEan_ng cEan_els),presstee TV baffon I'_rstto makesLlretee remoteis
in TV IllOde.
• Unp]ug the TV/VCJRfor 10 minutes and teen plug {tback in, TLlrntee TV on and tJ'yagain,
• PROGILa_ME_vTN_I_in4_cator ]{ton tee front panel oJ"the TV/VC_R,Timer recor4mg set, press TLMERon tee remote X__um olTthe
in4tcator, Remember to press TIMERto reset tee Osier recor4mg when y(m are finisEed,
I"V/VCR turns off unexpectedly
• Sleep timer may have been acfwated. Go to page 35 J'orins_ract_ons.
• TV/VURturned on w{tEon timer, AatomaftcalJy tL_rnso;f alter two EOLtrSiJ"no other contJxd is used.
• P]ectronic prote<:0on drcu{t may Pave been acfwated becaLlse of a power sLtrge,Wait 30 seconds and then tLtrnthe TV/VURon aga_.
IJ"this Eappens freqaenfly, tee voltage in yoLlrh(mse may be abnomtalJy kigh or ]ow.
I"V/VCR turns on unexpectedly
• On timer (alarm) may have been acfwated. Go to page 35 J'orins_ract_ons.
Blank screen
• T_"another cEan_el.
• Check video adjL_stments.Go to page 36 J'orinfo aboat tee VIDEOA!2JUSTmenu,
• Make s_re tee line inpat isn't sele_:ced, Repeatedhi press IN_L'T on the remote to sw{tch be_een audio/video _put jacks and tee
tL_er.
• Make s_re blank por0on of tape is not playing,
No sound, picture okay
• Press tee VOI, L!Pbutton to _crease tee sound,
• Maybe SoL_d is mLffed,Press tee ML_TEbutton to restore s(mnd,
No picture, no sound but TV is on
• The channel might be empty -- change channels,
4O
Troubleshooting
Sound okay, picture poor
• T_" adjL_tJng sharpness function _o ffnprove weak signals. Go to page 36 for inS_LlC_O_.
•The enero_ /save fea_re mJgh_ be on. Go to page 713for more infor_L_ton.
Can't select certain channel
• C_tan_el ntay be blocked or not approved b_ tJqe V-CHIP BLOCK menu,
• If Llsing ;he VCR featLtres, yoLl need to switch ;he remo;e to TV mode ;o change chan_els (press ;he TV burton),
Clock is wrong
• Power in_errLlpfto_. Need to rese_ _he clock. Go to page 3"_ for more _formatJon,
•C]ockwas not se_ ancuratehi (cAeck _4M/PMand da_e). Go to page 3,5for more b_formation,
Black box appears on the screen
• (:Josed-captioned tex; mode mJgh; be selected, Check the CLO,YFADCAPTIONmenu, Go ;o page 37 for more insIrLlctions.
Closed captions not appearing on screen
• (:Josed caption mJgh_ no_ be tLmnedon, Go _o pages 37 for more infors_ta_ton.
• SIafton Ilftght not be broadcasting dosed caption,
VCR Playback Problems
Tape plays continuously
•Autorepeat might be _urned on, Go _opage 38 for b_stmctions,
Tape plays automatically
• Tape with safety tab rein(wed sIart_ pla_q_g amo_ta_tcal]y.
Tape won't insert or eject
• Make sure you b_sertthe cassette v,4th the window faning up and safeW Iab facb_g OL_t.
• When rein(wing a ;ape, ntake sure the TV_rCR is connected ;o a working ourleL
• Tt_rn off the TV_CR, ;hen tt_rn i; bank on before _q_g to insert or remcwe ;ape,
Tape won't play or record
• If you're L_sing_he remo_e conIrol, press VCR to pu_ _he remo_e in VCJRmode before yOL_press PL&Yor RECORD,
• Make sure a videoIape has been b_serted,
• Eject and reinsert ;ape,
• The ;ape migh; be broken -- ;tT ano;her ;ape,
• Check ;o see _I";he safeW Iab has been removed, 72it has, ;he TV/V(;R will no; record.
• The TV_CR might be b_pause mode. Press PIAY on the remo_e to re_urn the ;ape _o play mode.
Timer counter not working
• The _bner coLmter v,_dlnot advance during unrecorded portJons of tape.
• Y(m have few(rand ;he tape farther back than a c(mn;er reading of 0:00:09, Am'mL_sO v,_dlappear if tkis has occurred,
41
Troubleshooting (continued)
Snow or streaks in picture or no picture during tape playback
• Some snow/streaks are norm_d during searci_, paLt_e,frame advance, and sJow-mo_on playback,
• C2_ecktape-:tmay be wornoutorofpoorqualiW.
• Might need to adjust the tracS:'mg.Go to page 31 for instrLlctions.
TV/VCR makes noise when stopped
• TVA_CRis removing tape from heads, which is normal, The head q4inder [naide the TVA_CRv,_dlcon_mLleto rotate for a few
minutes aster yoLlput the VCRin stop mode.
VCR Recording Problems
PROGRAM EVENT indicator on front of TV/VCR is flashing
• A tLrnerprogram has been set and you _urned off the TVArCR, but yOLlhaven't [nserted a tape [nto the VURor the tape yoLlinserted
has had its safelT tab removed. Go to page 27 for instnlct:ons.
Cannot record one program while watching a different program
• The TVA_CRonly has one _uner, Only one program can be watched and recorded at the same time,
Timer recording didn't work
• Program entered incorre<:tJy.Go to page 27 for JnsIrLICtiOnS.
• If the TVArCRis con_e<:ted to a cable bo= or sateJlite receiver, the cable bo= or receNer was not tLtrned on and tLtned to correct
chan_el at time recordfmg was tobe_n,
• C_teckto see if the TVTVCJa'stime and date was set correctly, Go to 34 for more information,
• Program exceeded tape's ]en_h or tape was not few(mud beforehand,
• No tape in TVArCR or tape [nserted without a safety tab.
The Remote Control Doesn't Work
•YOLIhave to make sure the remote control ts in the rtght mode -- if you re LLsingx$_.,Rfeatures, you need to press the ¥€.,Rbutton on
the remote to put {tin VCJRmode, T£yoLl'reuskng TV fLtnct{OnS, yOLlneed to press the TV button to pLltthe remote [n TV mode,
•Some;hkng ill't_@t be be_een the remote and the remote sensor on the component. Make sure there is a clear path.
• Maybe the remote isn't aimed directly at the TV/VUR,
• Maybe batter{es [n remote are weak, dead or installed incorre<:tJy.Put new batter{es [n the remote,
• YOLInf_ght need to drakn the remote's microprocessor: remove batter{es and press the number 71button for at least 60 seconds,
Release the 1 bLlttOn,rep]ane the batteries, and (if necessar)_) pro_w'amthe remote again,
Problems with V-Chip/Parental Controls
The rating limits don't work
•YOL_must ;urn "C-Chipon. Go to the main ,16E_¥j(press MEN75on your remote), select V-CH1PI_LOCK,.and set 3°TATgjSto ON Go to
page 22 for knstm_:tions,
I don't remember my password and I want to unlock the TV/VCR
• If you forget yoLtrpassword, unplug the TV/VCJR,simL_JtaneoLm]ypress and hold VOL Lipand STOP/EJECTfbuttons on the front of
the TV/VUR while yOL_pk_g the TV_CR in, Ilold for _o seconds and release, This rese_ the password so yOL_can enter a new one,
42
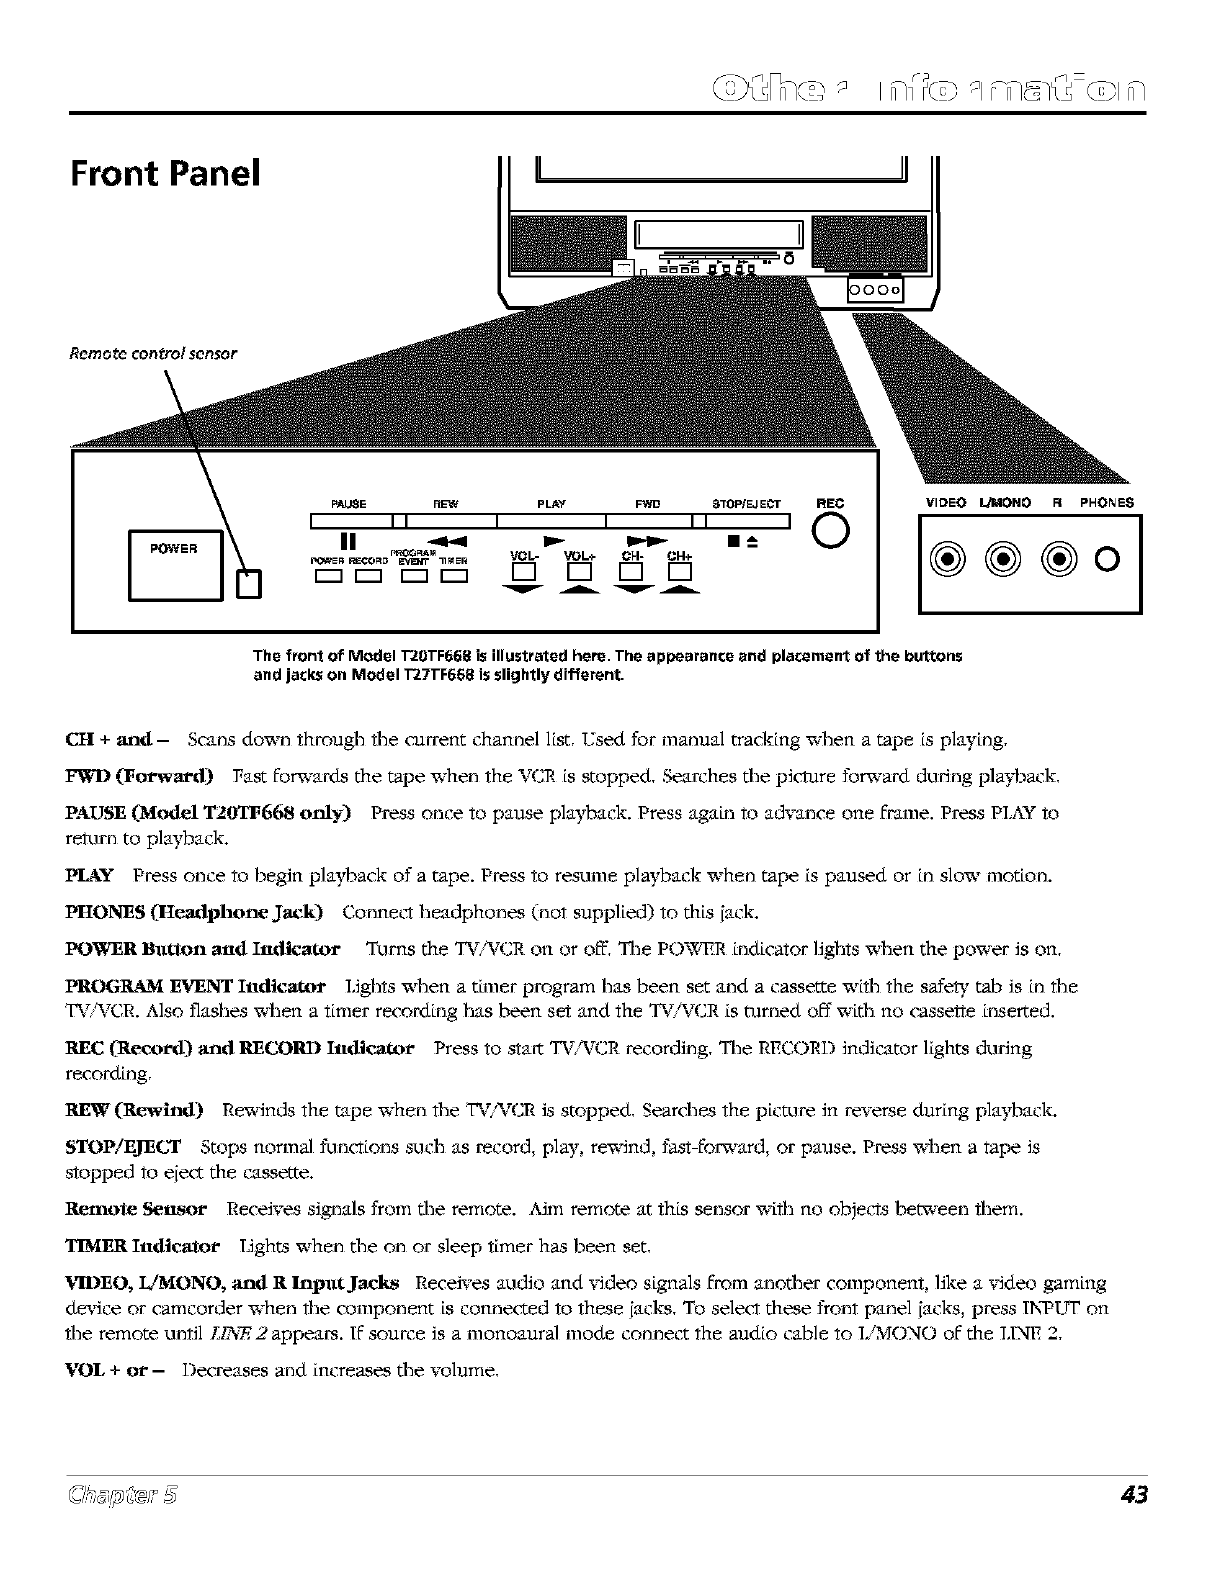
Front Panel
POWER
VIDEO L_ONO R PHONES
®®®oI
The front of Model T20TF668 is illustrated here. The appearance and placement of the buttons
and jacks on Model T27TF668 is slightly different.
CI-I + and- Scans down through file current channel list, tTsed for manual tracking when a tape is playing,
(For'ward) Fast forwards the tape when the V(2R is stopped, Searches %e pit.ire forw'ard during pla)_._ack,
PATJS£(Model T20TIF668 only) Press once to pause pla3_ack. Press again to advance one frame. Press PlAY to
return to pla3_ack.
tR.A¥ Press once to begin pla3_._ack of a tape. Press to resume pla3_ack x_en tape is paused or _nslow motion.
I_O1N_S 0FIeadphone lack) Connetr_ headphones (nm supplied) to this jack.
t_IgCER Blttton attd Ittdtcato*" Ttlrns the TV/WCR on or off, The POWER _ndica*or lights vdlen the power is on,
I_OGRAlVI _'ENT Ittdtcator Ligh*s x_41en a t_mer program has been set and a cassette wifll the s'_e13_tab is _n*lie
TV/%TCR.Also flashes x_41en a timer recording has been se_ and the TV/WCR is turned off with no cassel_e _nserted.
R£C (_e_ot_) and ]_COR1) Ittdt_ator Press to sIatt TV/WCR recording, The RECORD indicator lights dt_ring
recording.
1_ (Rewind) Rewdnds the tape when *l_eTV/W_3Ris stopped. Seardms the picture, in reverse du_ing pla3_ack.
STOP/£J'ECr Stops normal Am_ions such as record, plw, rewind, fas*-forward, or pause. Press x_4_ena tape is
s*opped to eject the cassette.
Remote S_ettsot_ Receives signals from %e remote. Aim remote at this sensor wifl_ no objetr_s between fl_em.
Ittdt_atot_ IJghts x_en %e on or sleep timer has been set.
VIDI_O, L/MONO, and R Inp=,tJad_ Receives audio and _qdeo signals from another componem, like a _qdeo gaming
device or camcorder when *l_e component is connected to these jacks. To selec* these from panel jacks, press IN?tW on
*l_e remote um]l L/_,T.,2 appears. If source is a monoaural mode connect the audio cable to ]iMONO of the LINE 2.
gOI. + ot_- Decreases and increases %e volume.
43
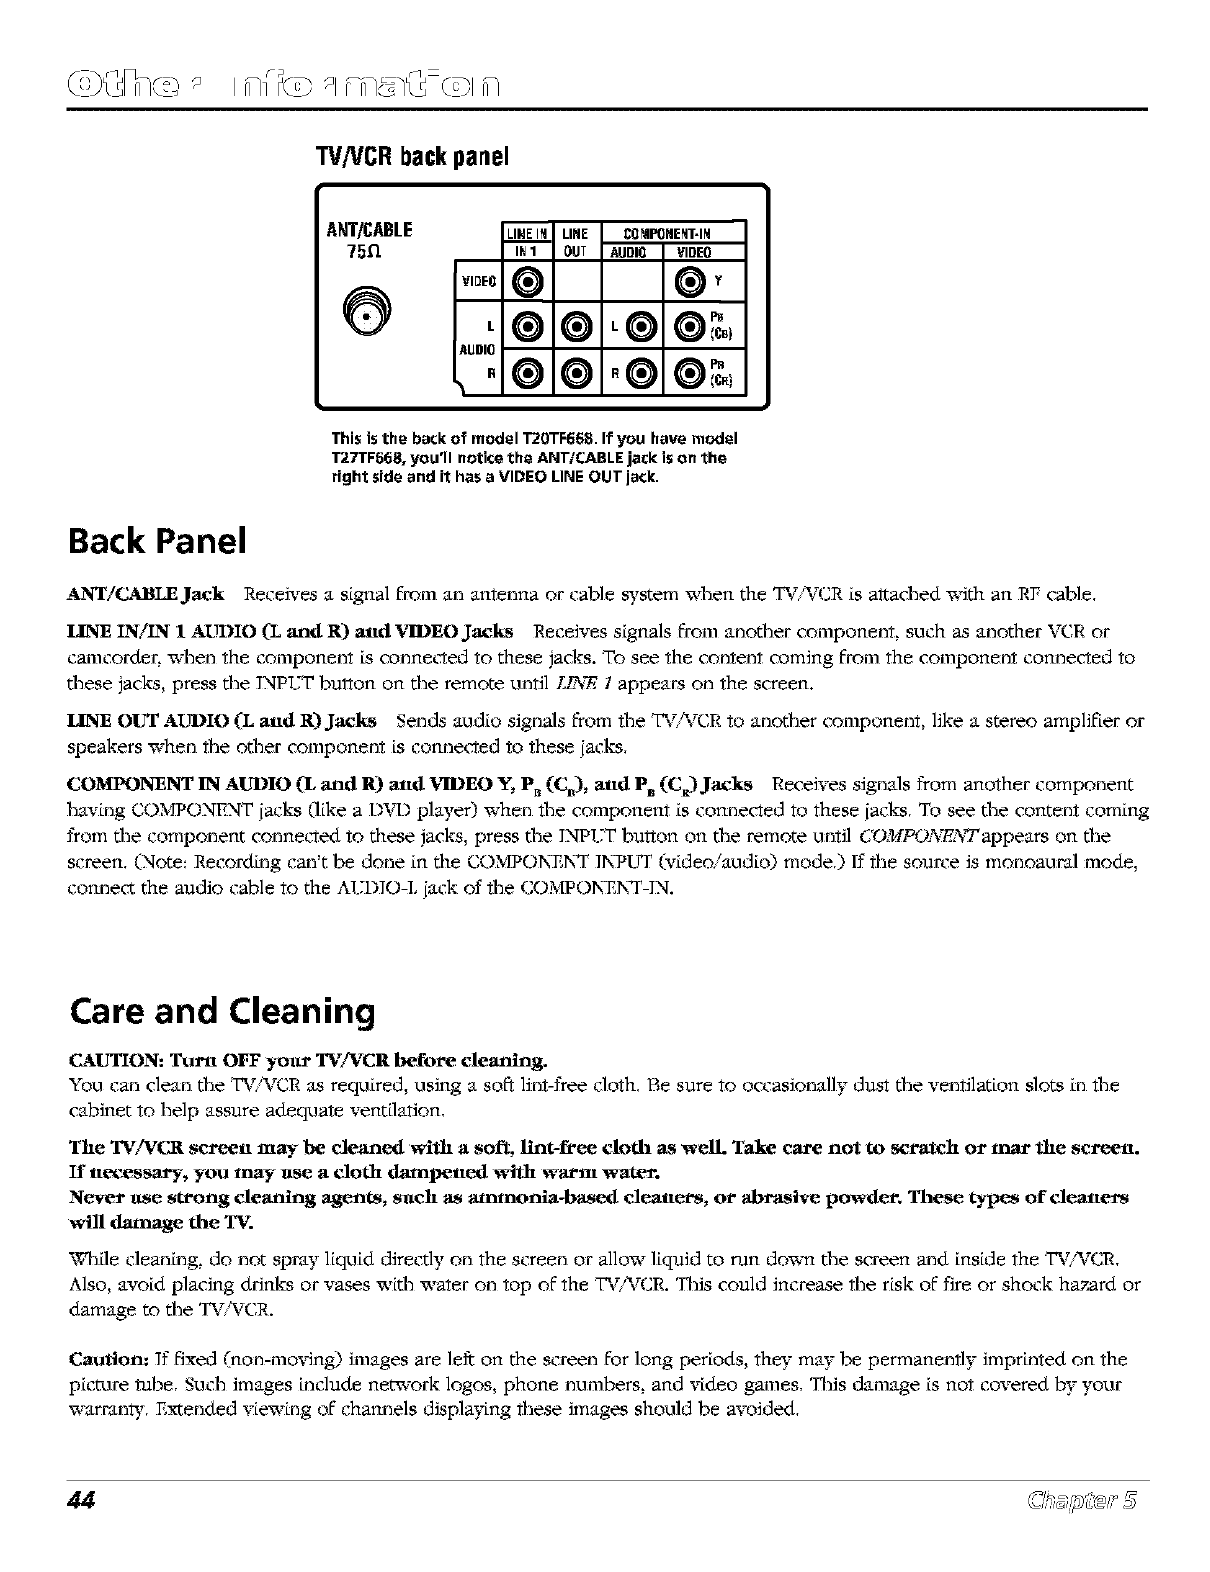
TV]VCRbackpanel
ANT/CABLE LINEIIM LINE CQMPONE_IT-DI
75._. IN 1 OUT AUDIO VIDEO
V,OEO® ®,
AUDIO
This is the back of model T2OTF668. If you have model
T27TF668, you'll notice the ANT/CABLE jack is on the
right side and it has a VIDEO LINE OUT jack.
Back Panel
ANT/CMBLEJack Receives a signal from an antenna or cable s3,stem when the TV.%rCR is aitadled with an RF cable,
lINE IN/IN 1 AUDIO (L and R) and }qIl)EO Jacks Receives signals from another component, such as another VCR or
camcorder, when the component is connected to these jacks. To see the content coming from the component connected to
these jacks, press the INPIJT button on the remote until L/_.T., 1 appears on the screen.
LINE OUT AUDIO (L and R) Jacks Sends audio signals from tile T%WCR to another component, like a stereo amplifier or
speakers when the other component is connected to these iacks,
COMPONENT IN AUDIO (L and R) and VIDEO Y, ]P_(CB),and PB(C_) Jacks Receives signals from another component
havLng COMPONENT iacks 0[ke a l)X,q) player) when the component is connected to these iacks, To see the content coming
from the component connected to these jacks, press the INPUT bu_on on the remote until COM_PO/_ZW'appears on the
screen, (Note: RecordLng can't be done in the COMPON_N_F INPUT (video/audio) mode,) If the source is monoaural mode,
connect the audio cable to the AI._DIO-L iack of the COMPON_N_F-IN.
Care and Cleaning
CAUTION: Turn OFF yoltr TV/VCR before cleaning.
You can clean the T%%rCR as required, using a soft lint-flee cloth, Be sure to occasionally dust the ventilation slots Lntim
cabinet to help assure adequate ventilation,
The TV/VCR screen may be cleaned with asoft, lint-free clot1 as well Take care not to scl-atch or mar the screen.
If necessary, you may l_se a cloth "dampened with warm water.
Never l_se strong cleaning agents, sl_ch as atmnonia-lvased cleaners, or ab*-astve powder. These types of cleaners
will ""da,trmge the T_:
Wlltle cleanLng, do not spray lktuid directly on the screen or allow liquid to run down the screen and inside the T%WCR.
Also, avoid placing drinks or vases with "a_ater on top of the T%WCR. This could increase the risk of fire or shock hazard or
damage to the TV/%rCR.
Caution If fixed (non-moving) images are left on the screen for long periods, the" may be permanently imprLnted on the
picture tube, Such images Lnclude network logos, phone numbers, and video games, This damage is not covered by your
warranl3,, Extended viewLng of channels displaying these images should be avoided,
RCA TruFlat TV/VCR Combination Limited Warranty
Wilt yolu" warranty covers:
• Defeets in m;_erial or worl_rnansh]p,
For how long afmr yoltr purchase.:
• Oneyearffomdateofpur chase for labor char ges,
• Oneyearffomdateofpur chase for par ts.
• Twoyearsfromdateofpur chase for pkCur etabe,
_le warran W period for rental units begins with *lie _'LrStrental or 45 days from date of shipment to the rental firm,
•a_[chever comes first.
_llmt we will do:
• Pay any Authorized RCA Television Service Center the labor charges to rep_r your T%WCR.
• Pay any Authorized RCA Television Service Center for the new or, at our option, refarbished replacement pa_s and
picture, tubes required to repair your TV/%TCR,
How yolx get service:
•For 20" screen size: Take your RCA TV/%TCRto any Authod7_d RCA T ele_sion Set vice C_nter and piclcup when r ep_rs
are complete,
• For _reen sizes lar get than 20": Request home or pick up, r epaJr and r etur n serxice ff om aW Authorized RCA
Tele_qsion Ser _ice, Cemer, pr c_qded that your TV/W(,:Ris located within the geographic ter ritory cover ed by an
Author_,ed RCA T dev_ion Set xqce,Center. If not, you mus* take your TV/YCR to the Set vice Center locaOon at 3,our
own expense, or pw for the cosI the Ser vice Cemer may char gemtranspor tyourur_ttoandff om your home,
• To idem_" your near esIAuthorizedRCASer vice Center , ask your dealer , look in the Y ellow Pages, orcall
• Proof of put chase in the for m of a bill of sale or r eceipted invoice which is evidence that the pr oduet is_itt_n the
•a_arrant}, period mus* be presented to obtsJn war ran Wser vice,, For rental fir ms, pr our of first rental _ also r equir ed.
_glmt yol_r warranty does not cover:
•(_stomer instr u_[on, (Your Owner's Manual clearly describes how to tnsIall, adius* ,and operate your TV/WCR. An3,
additional infor marion should be obtained ff om your dealer).
• Installat[onandr datedad'Nstments.
• Signal recept[on problems not caused by your TV/%TCR.
• Damage ff om m_xlse or neglet_,
• Clearing of aucUoixqdeo heads.
• B'_edes.
• Gzstomer replacement fuses.
• Images bur ned onto the _r een,
• A TV/%K:Rthat tins been modified or incorporated into other pr odu_cs or isused for instiK_onal or other commer
purposes,
• Acts of naVar e, such as but not limited m lightning damage,
• A T%%_CRpurctmsed or set xqced outside the U,S,A,
dal
Pro&,ct regRst_alton=
• Please complete and mail the Pr oduct Reg_tra_on Car d packed "aith },our TV/WCR. It will make it easier to contaet you
should it ever be necessar 3: The return of the car d _ not r equ_r ed for war ran W coverage.
45
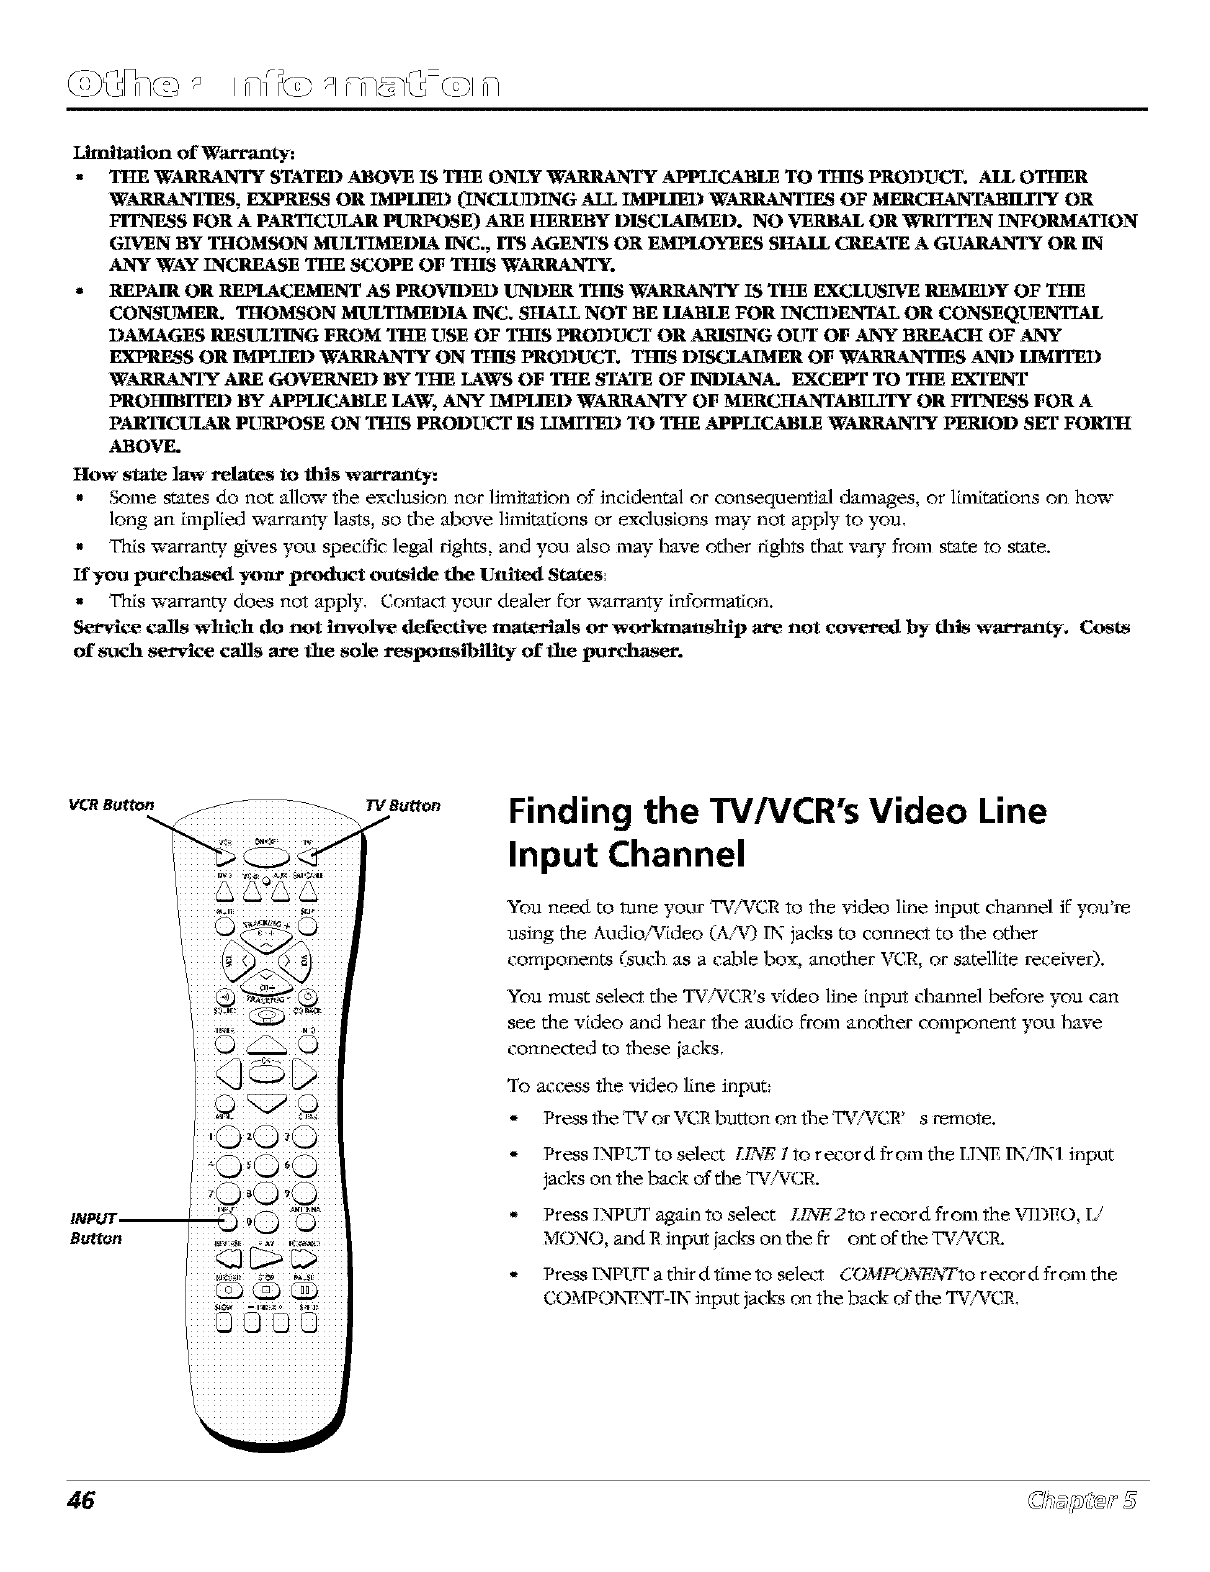
Limitation of War_an_:
• THE WARILANTY STATED ABOVE IS THE ONLY WABILA_NTYAPPLICABI_ TO THIS PRODUCT..ALL OTIIER
WAR1LANTIES, EXPRESS OR _tPLIE1} (INCLUDING ALL BtPLIE1} WABILANTIES OF MERCtLANTABHJ'I_ OR
FITNESS FOR APARTICULAR PURI_SE) ARE HEREBY DISCLAIMED. NO VERILAL OR WRITTF_ INFOR_TION
GIVEN BY TIIOMSON MULT_tEDIA INC., ITS AGENTS OR FA__OYEES StLAJLLCREATE A GUAILANTY OR IN
.ANYWAY INCREASE THE SCOPE OF THIS WABILA_NTY.
•REPAIR OR REPIACFAtENT AS PRO_,qIDE1) UNDER TIIIS WAR1LANTY IS THE EXCLUSIVE REMEDY OF THE
CONSUMER. THO_,ISON MULT_tEDIA INC. SHALL NOT BE LIABLE FOR INCIDENTAL OR CONSEQUENTLAL
1)A2VL_.GESRESULTING FROM THE USE OF THIS PRO1)UCr OR ARISING OLYrOF .ANYBRF_.CH OF ANY
EXPRESS OR IMPLIED WABILANTY ON Tiffs PRODUCt. THIS DISCLAIMER OF WARRANTIES AND LIMrr_)
WARRANTY .ARE GOVE1LNED BY THE L_.WS OF THE STATE OF INDIANA. EXCEPT TO THE EXTENT
PROIIIBITED BY .APPLICABLE LAW, .ANY BtPLIED WARRANTY OF MERCHANTABILITY OR FITNESS FOR A
PARTICULAR PURPOSE ON THIS PRODUCT IS LI_TED TO THE APPLICABLE WAR1LANTYPERIOD SET FORTH
ABOVE.
IIow state law relates to this warrant:
• Some states do not allow the exclusion nor limitation of inc[demal or consequential damages, or l_m[tat[ons on how
long an implied warranl 3, lasts, so the above limitations or excJusions max" not apply to you,
• This warrant3_ gNes you specific legal fights, and you also mW have other rights %at va W from state to state.
If you purd_ased yoltr product outside flae United States:
• This warrant3_ does not apply, Contac* your dealer for w_rran_ [nfom_at[on.
Service cars which do not involve defective materials or workmanship are not covered by dais warranqr. Costs
of such service calls are the sole. respo_tstbili_ _of the purcl_lser.
iNPUT --
Button
iii©ii_iiQii
Finding the TV/VCR's Video Line
Input Channel
You need to rune your T%%rCR to the video 1Lneinput channel if you're
using the Audio/Video (A_%0IN jacks to cormec* to the other
components (such as a cable box, another VCR, or satellite recewer).
You must selec* the TV,%_CR'svideo line input channel before you can
see the video and hear the audio from another component you have
connected to *hese lacks,
To access the video line input:
*Press fl_e T_"or T''CRL_ut_onon fl_eT_"%_'CR' s remote.
* Press ]NPL'T to select Lk'_ 1 to recor d from the IJNE INi]NI input
jacks on the back of the TV:%_CR.
* Press ]NPI.FFagaen to select L13_W2torecord from the T_IDEO, IJ
MONO, and R input lacks on the fr out of the TV/%rCR.
* Press 1NPUI" a thir d *Lineto seletrt CO_WPO£_N'Fto recor d from the
COMPONeNT-IN input jacks on the back of the TV/WCR,
46
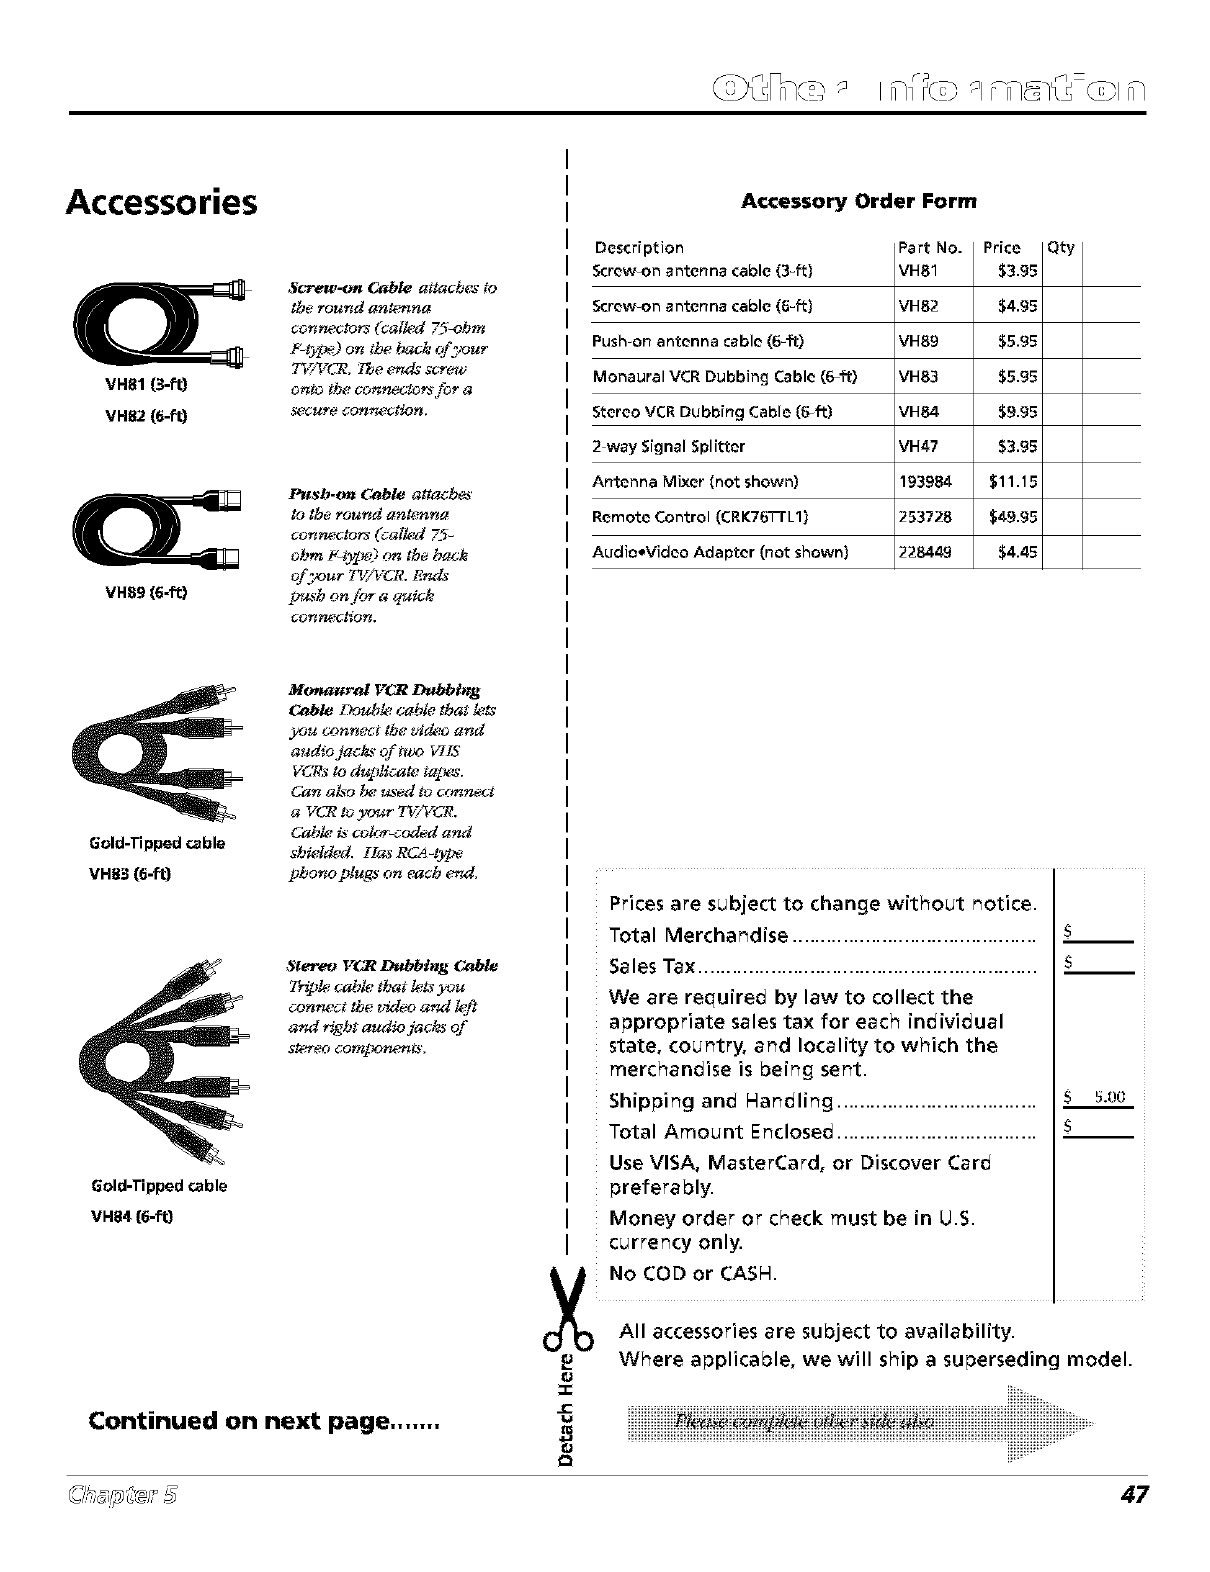
Accessories
VH81 {3-ft)
VH82 {6-ft)
$_-on Cable attache* to
the. round antenna
conmvtom (cal_d 75-obm
F-O_e) on the .t_c_ of 3_ur
TV/VCR. _e *_d.s scr_*
onlo Ibe conne.ctors for a
secure con_w.tion.
l_tsh-on Cable attache.s'
to the. round antenna
conmvtors (cal_d 7_5-
ohm _2_9 c_ the back
of 2_aur TVA/CR. Ends
Fg._h on fort a q_zick
Gold-Tipped_able
VH83 {6-fO
Mcmaural lr_ Da_bbtntJ
Cable Doub_ cable that _ts
you conn_:t the video and
audio jacks of t*_ VI I$
VURa to dupEcate taI',es.
Can a_'o _m _sed to ccr_ne.ct
a VCR to _r TV/VCR.
Cab_ is color-coded and
sbielded. Ilas RCA-_
IJbono plugs on each end.
$[e_--eo lr_ Dwbbtng Cmble
Tr_p_ cable tbat _ls you
con_:¢ the t,_d_, a_d left
and r_gbt audio jacks of
st_r_.o cora_l.%
Gold-Tipped _able
VH84 (6-fO
Continued on next page .......
Accessory Order Form
Description
Screw_on antenna cable (3-ft)
5crew_on antenna cable (6-ft)
Push-on antenna cable (6-_t)
Monaural VCR Dubbing Cable (6_t)
Stereo VCR Dubbing Cable (6-_)
2-way Signal Splitter
Antenna Mixer (not shown)
Remote Control (CRK76TrL1)
Audio_Videe Adapter (net shown)
VH82
VH89
VH83
VH84
VH47
193984
253728
228449
$4.95
$5.g5
$5.95
$9.95
$3.g5
$11._5
$49.95
$4.45
Prices are subject to change without _otice.
Total Merchandise .............................................
Sales Tax ..............................................................
We are required by law to collect the
appropriate sales tax for each individual
state, country, a_d locality to which the
merchandise is being se_t.
Shipping and Handling ..................................... s _.0o
Total Amount E_closed .....................................
Use VISA, MasterCard, or Discover Card
preferabl_
Money order or check must be inU.S.
currency only.
O/_ No COD or CASH.
All accessories are subject to availability.
Where applicable, we will ship a superseding model.
J_
47
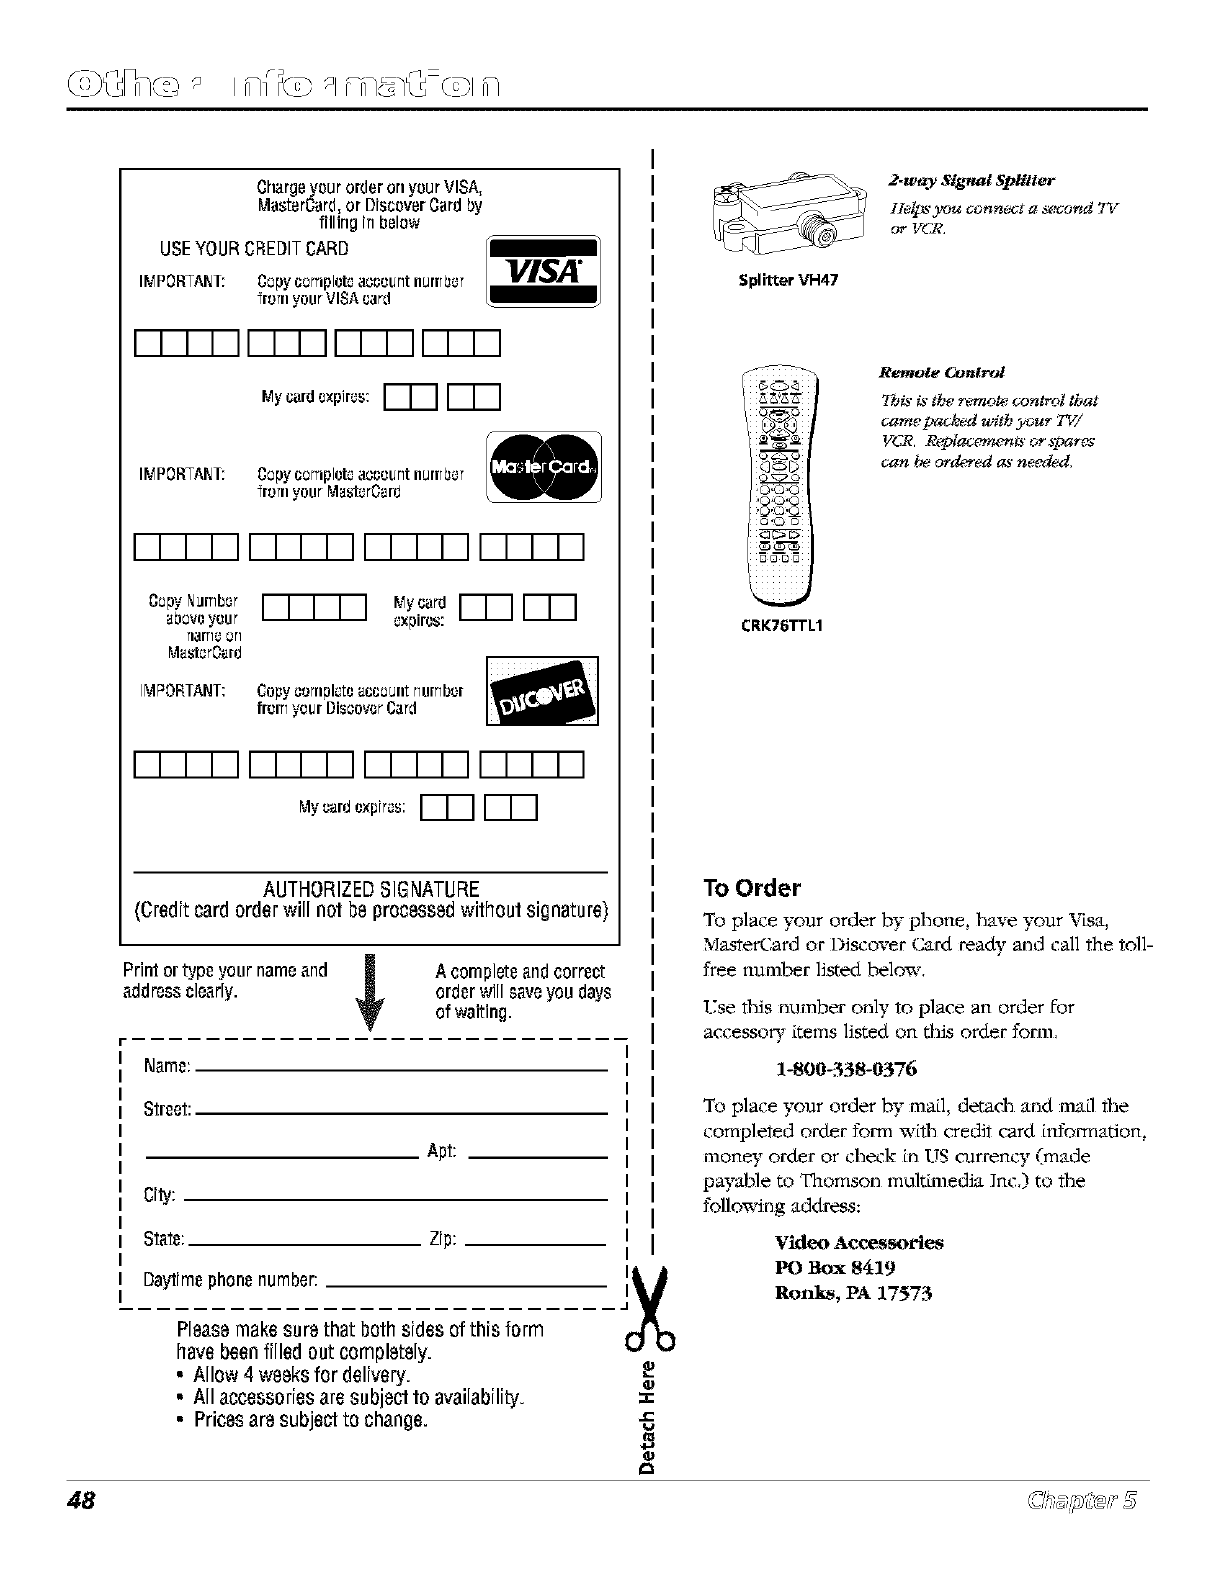
48
ChargeyourorderortyourVISA,
MasterOard,or DiscoverCardby
filling inbelow
USEYOURCREDITCARD
IMPORTARI: OopycorTiplutcaccountnumber
from yourVISAcard
VISA"
FT-N NT-N F-n F-n
f_ycardu×pircs: _
IMPORTART: 0opy completeaccountnumber
from your Megter0ard
r-FNq r-FNq r-FNq r-FNq
0opy Ndmbor
ebovuyour
[laffl_or1
Megt¢r0ard
"_Yp'rdI I IIII
¢xpvus:
IMPORTANT: Copycompleteeccouutnumbor
fromyour DiscovurCard
r-FNq r-FNq r-FNq r-FNq
Myuard expires: [--[--] [--[--]
AUTHORIZEDSIGNATURE
(Credit card order will not be processed without signature)
Print or typeyour nameand / A completeandcorrect
addressclearly. _ orderwill saveyou days
of waiting.
Name:
Street:
Apt:
State; Zip:
Daytimephonenumber:
Please make sure that both sides of this form
have beenfilled out completely.
° Allow 4 weeks for delivery.
° All accessories are subject to availability.
° Prices are subject to change. .{2
Split:or VH47
2-way St,gnat Splitter
lle[_')_ connect a *_ond TV
or V(TR.
CRK76TTL1
R_ole Conl_l
TbLs"is the remo_ conrad tlaat
came packed with your 'IV/
VCJ_. R_lacet_k_' or *2_are*
can ._. ordered as" needed,
To Order
To place your order by phone, have your Visa,
MasterCard or Discover Card ready and call the toll-
free number listed below.
Use fllis number only to place an order for
accessory items listed on this order form,
1-800-338-0376
To place your order by mail, detach and marl the
completed order form with credit card [nfomaation,
mone 7 order or check LnUS currency (made
payable to Thomson moltLmedia inc.) to the
follo_d ng address:
Video Accessories
PC Box 8419
Ronks, PA 17573
Index
A
Accessories /17
Add/erase channels 113
A%_f_:CLABLEjack 8, 10, ,_11
A%TI_%_A bL_tton 116
Arrow buttons 16, 35, 36, 37, 38
AOSDIOAOJU3Tmenu 36
ALldio,video janXs 10, 43, ,{4, ,16
ALltOchanneJ searc2t 12
AUX button 16
B
Back pane.] jacks 44
Back-]{tremote 16
Batteries for remo_e 11
BLI_SCREENfeatLlre 38
C
Cable Box, code list 20
CII bLlttOnS 14, 16, 43
CH_IEMORYmenLI 13
ChanneJs
add or e_ase 13
searching for 12
C,LK&RbL_tton 16, 17
Clock sett'mg (amotztaf_cand manLlaJ), 35
Ck_ed Capf_onJng 36, 37
Code list
CaNe box 20
SateJ3imrece'rver 20
VC.R20
COMPONEN_rjanXs ,{/1
C,onnect:ons
cFto_tng a c<mnecf_<m7
T'v_FVGR+ DVD Player 9
T'v?VCR+Satellite Receiver 10
TV/VCRonJy 8
C,on_ents 3
C,ontn)]s
Back pand ,{-{
Front_YanN43
D
DX¢33bLlttOn16
DX¢33player 9
E
EDS (Extended Data Service) channeJ 34
E_VF_GYSA_feature 38
Energy Save featLtre 13
EQOTSO{i_qOfeature 36
Erase/add channeJs 13
F
Fixed images ,{4
FORNVARDbLlttOn 16
Front panel (bLlttOnS and janis) 43
VWI_ burton 14, 43
G
GO BACK bLlttOn 16
INq)EX bLlttOnS 716
IN]:() bLlttOn 716
l_itiaJ SetLlp 12
IN3°L'T button 16, ,{6
k
LangLlage, select 712
Iaght button 16
Iamited warranty 45
M
Main MFJ%gj713, 34
MEN1]bLltton 13, 16, 34, 37, 38
_K!TE bLlttOn 17
N
N-umber bLlttOnS 16
O
OKbLlttOn 12, 35, 37
0,%"T!MFXfeature 35
ON*OFF bLttton 17
49
P
PAUSE burton 14, 17, ,53
PIIO'-,T.S (headphone jack:) ,53
PIAYbLlffOn 14, 17, 43
P]aying a tape 14
POWERDLItton andind?tca;or 11, 43
Product re#stration 2
PROGRAM EVEN_I_ind?tca;or 42, 43
Prograt_m_ing the remo_e 18
R
REC bLltton 714,43
RECORD button 17
RECORD _dicator 43
Recording
basic 14
Re#stration 2
Remo_e contro]
ba_:eyies 11
buttons 716
progra_ming 18
8eY_$o_" "{3
Repeat play feature 38
Rese_ aud{o 36
RF&'E.IL{,Ebarton 17
RF,_Vbutton .13
Rew4md, automatic 1,5
$
SAT*CABLE ba_on 17
Satellite receiver 10, 20
Search_g ;or channels 12
SELECTLgb'VGUAGEmenLI 37
Sensor, remo_e 43
Setup, _ni_a] 12
SKIP button 17
3ZEEP T/N/F_q;eatLtre 35
SLOW button 17
SOL'_-D bLffton 17
SPEED button 17
Stand and base safe Winformation 6
STOP bLffton 17
STOP/'EJEGT bLffton 1,_, 43
T
Table o; contents 3
T!ME menu 34
TLMER bLffton 17
TLMER ind?tcator 43
TR_C,KIN-G battons 17
Tyoubleshoofmg 40, .{1, .{2
TV button 17, ,_6
V
VCR
code F_st 20
VCR basic3 Z14
VCR barton 717,46
VC,R2 button 17
VIDEO AL)JUYTmenu 36
"vRdeo _pu_ c]'tan_el 46
VOL buttons 17, 43
w
Warranq¢ 45

This page intentionally left blank

This page intentionally left blank

This page intentionally left blank

Visit the RCAwebsite at www.rca.com
Please do not send any products to the Indianapolis address listed in this manual or on the carton. This will only
add delays in service for your product.
Thomson multimedia Inc.
10330 North Meridian Street
Indianapolis, IN 46290
©2001 Thomson multimedia Inc.
Trademark(s)© Registered
Marca(s) Registrada(s)
Printed in Malaysia
TOCOM 15775900
"n.IOMSON
THOMSON t"_
