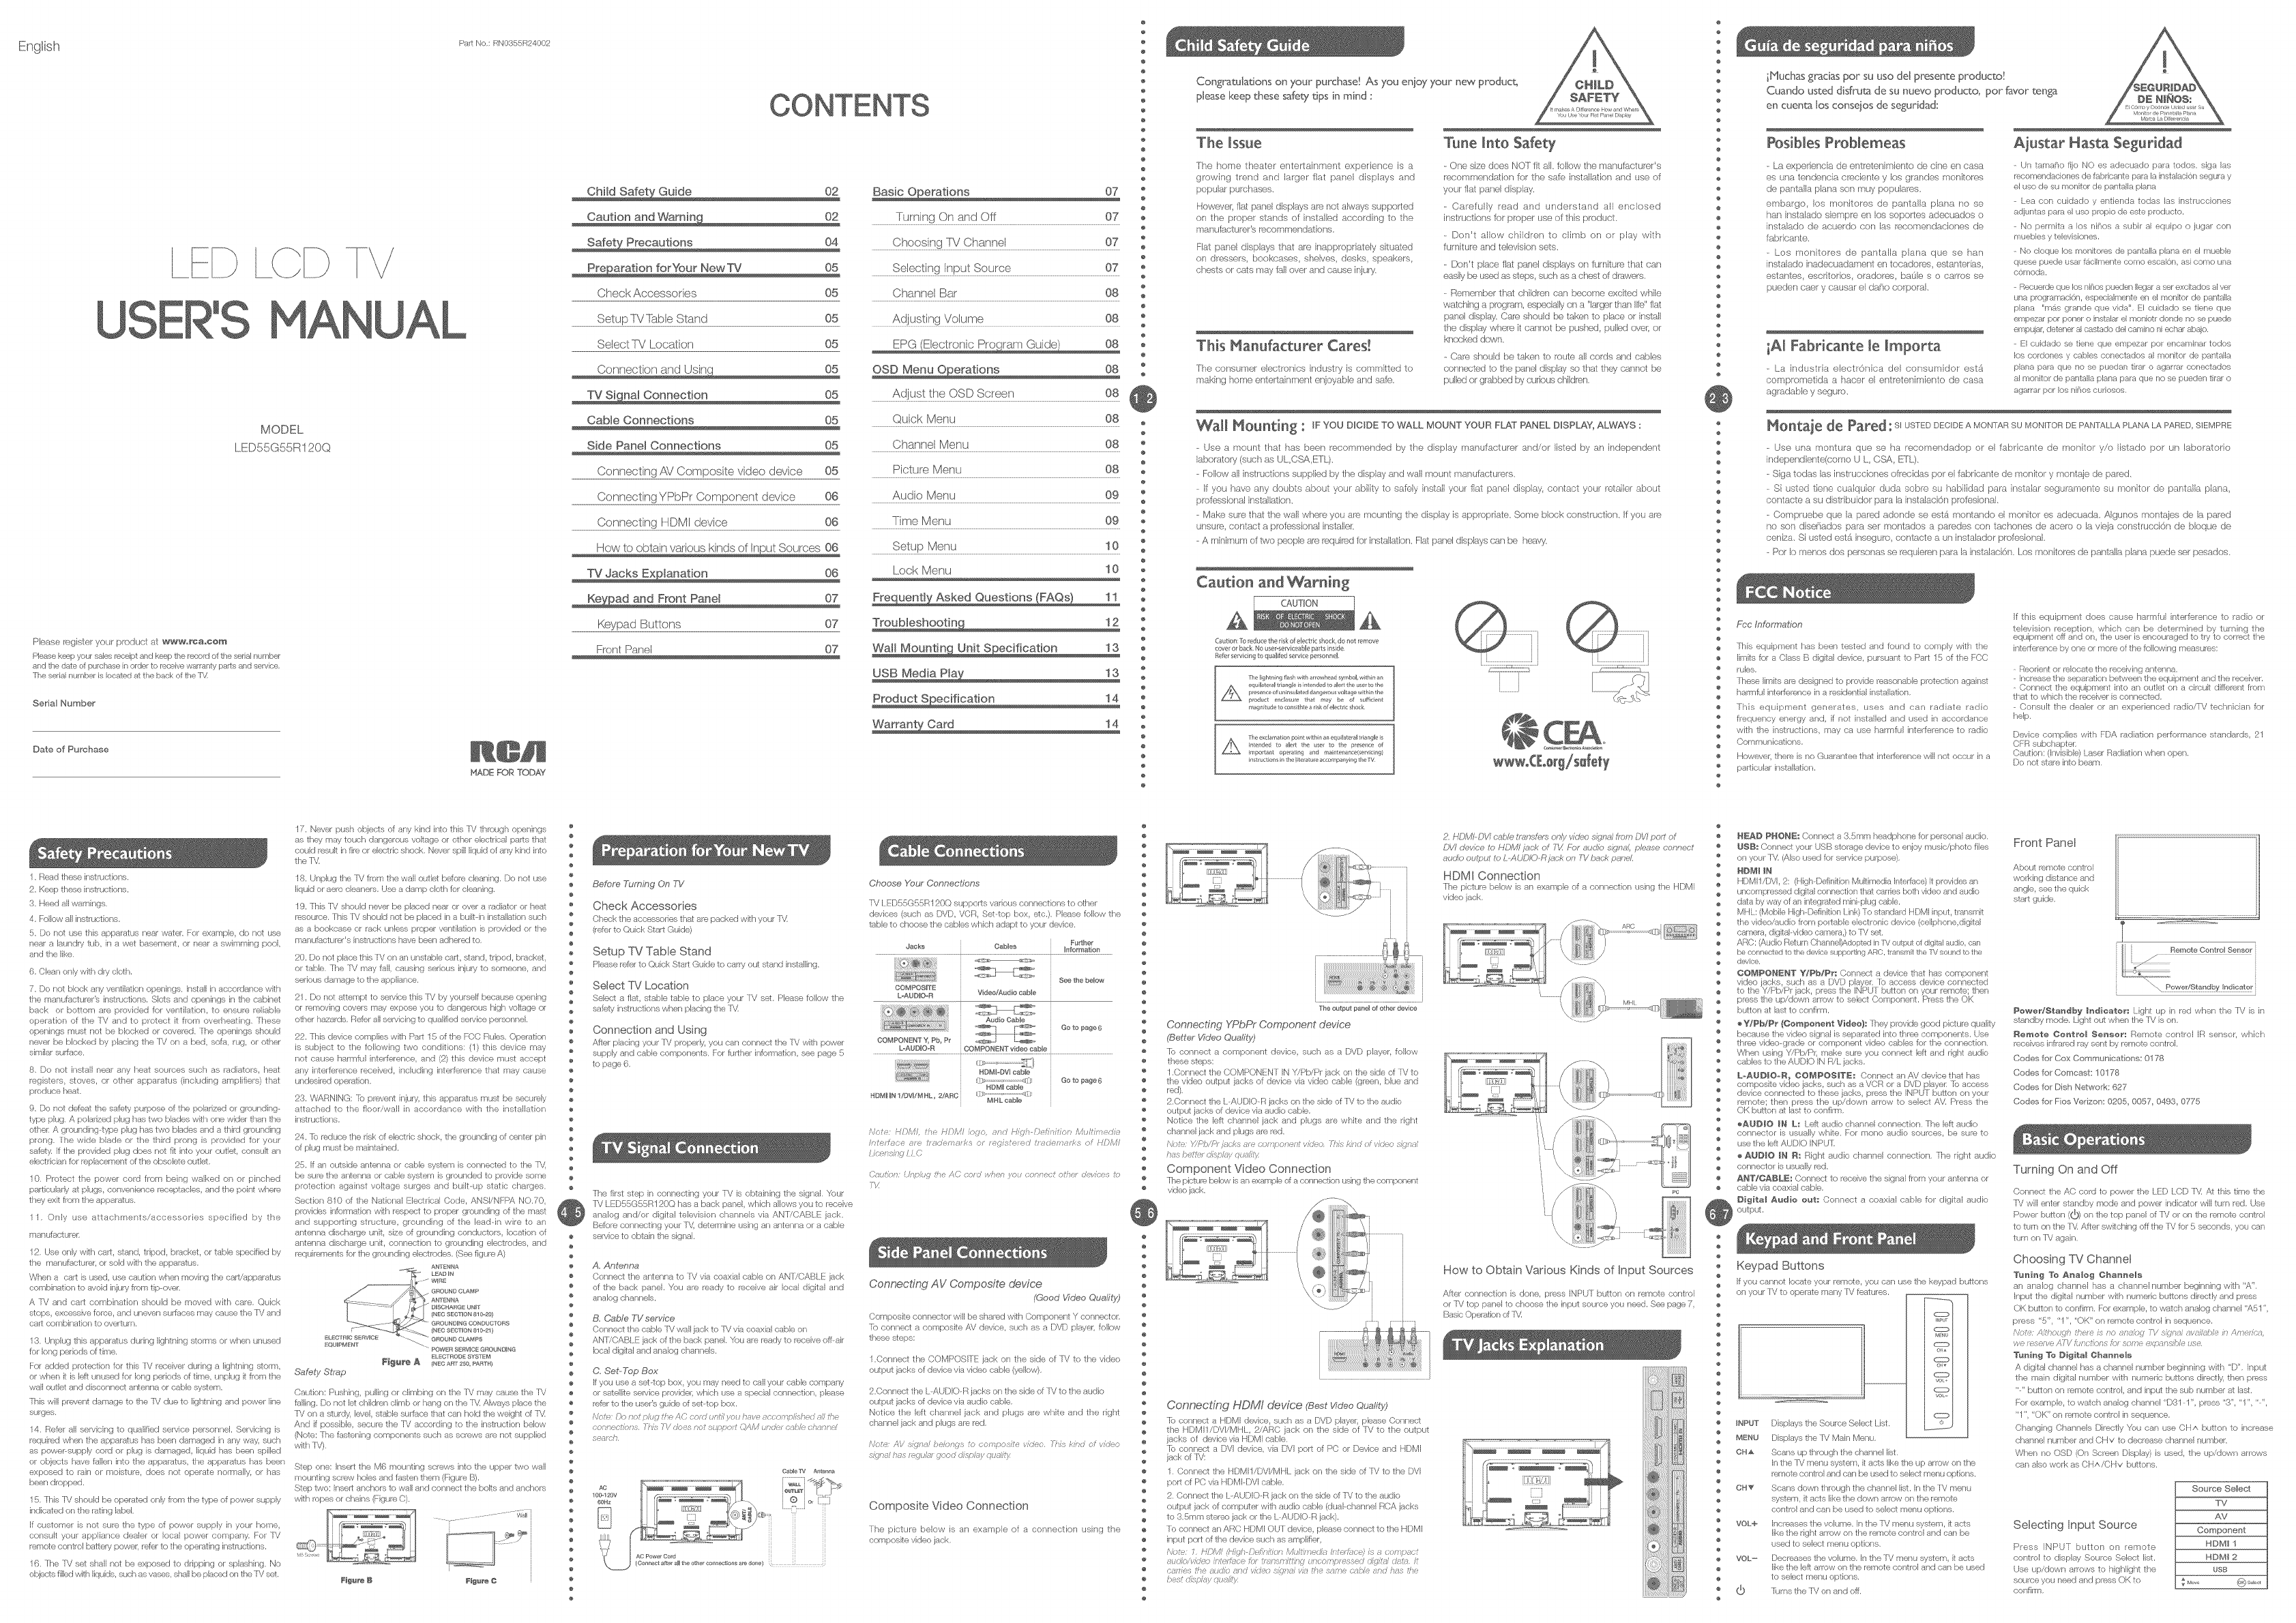
RCA LED55G55R120Q User Manual LED TV Manuals And Guides 1405369L
User Manual: RCA LED55G55R120Q LED55G55R120Q RCA LED TV - Manuals and Guides View the owners manual for your RCA LED TV #LED55G55R120Q. Home:Electronics Parts:Rca Parts:Rca LED TV Manual
Open the PDF directly: View PDF ![]() .
.
Page Count: 2
U
>
MANUAL
MODEL
LED55G55R120Q
Phase register your product at ww_'_=_a=¢om
Please I<_p y@ur sales reaeipt and keep the re_xxd of 1:hesedaJ number
and the dale of purchase in @rder to receive warranty paris and serv}ce.
[he sedaJ number }s located al:the back @fthe IM
Serial Number'
Date of Purchase
Pat Ne,: [_N0355R24002
MADE FOR TODAY
O2
O2
O4
Check Accessories 05
Setup TVTabb Stand 05
Select TV Location 05
''05
05
Cable Connections 05
Side Panel Connections 05
Connecting AWComposite video device 05
Connecting YPbPr Component device 06
Connecting HDMI device 06
07
Keypad Buttons 07
Frorlt ParleJ 07
07
Turning On and Off 07
Choosing TV Channel 07
Selecting Input Source 07
Channel Bar 08
Adjusting Volume 08
08
Adjust the OSD Screen 08
Quick Menu 08
Channel Menu 08
Picture Menu 08
Audio Menu 09
Time Menu 09
Setup Menu 10
Lock Menu 10
÷
¢
e
¢
@
¢
¢
¢
÷
¢
e
@
@
¢
¢
@
@
e
e
@
@
@
@
@
@
@
e
@
@
@
@
@
¢
@
e
e
¢
@
@
e
¢
¢
@
¢
¢
e
@
@
¢
¢
@
¢
e
¢
¢
¢
¢
@
e
e
@
@
@
@
@
@
@
e
@
@
@
e
Congratulations on your purchase! As you enioy your new product,
please keep these safet_ytips in mind :
The issue
The home Ihealer enlertainment experience is a
growing trend and larger flal panel displays and
popular purchases
However, fht panel dbphys alx_nol always supporled
on the proper slands of installed according to the
manukacturer's recornmendafions.
Flat panel displays that are inappropriately situated
on dressers, bookcases, shelves, desks, speakers,
chests or cats may fall over and cause injury,
This Hanufacturer Cares[
The consumer electronics industry is committed to
making horne enlertainmenl enjoyable and safe.
Tune into Safety
-One size does NOT fil al. blow Ihe manuhct Jrer's
recon_rnendal.ion for lhe safe inslallalion and use of
your flal panel display.
-Carekllly read and undersland all enclosed
it]structions br proper use of this producl,
- Don't allow children to cNmb on or play wilh
fumilure and Iebvision sels,
- Don'I phce fb4 panel displays on furnitur_ thai can
nasty be used as steps, such as a chest of drawer's.
- Remember that chtdren can become exciled while
walching a program, especia/y on a "larger Ihan/re" ta[
panel disphy. Care shouM be Iakon to phce or install
the display where il cannot be pushed, puled eyed or
knocb.od down.
-Care should be Iaken to route all cords and cables
connccted Io Ihe panel display so that Ihcy cannot be
pdlled or"grabbed by curious chtdret_,
Wall _ountin_ :IF YOU DICIDE TO WALL MOUNT YOUR F_T PANEL DISPLAY, ALWAYS :
-Use a mount Ihal has been recommended by the disphy manufacl Jrer and/or listed by an independenl
laboralory (such as UL,CSAaTTL).
- Follow all instructions suppled by the display and wall mounl manufacl Jrers.
- I you have any doubb about youi ability to safely ir-_stal your fiat :mnel display, contact your ietaler about
professional inslaNal.ion.
- Make sure lhal lhe wall where you are mounIing the display is appropriale, Some block construction. I1'you are
unsure, conlact a professional installer.
- A minimum of two people are required for insta/alon. Fial panel displays can be hear%
Caution and WaFning
A
Cauton:[e reducehe rsk of electlic shodqdo not remove
cover er back No user,-erviceableparts inside
Referse_vicngto qualfed servke persennel
A The[ghtn rig flz/h wfa arrowhead ymbo[ wthr rt
equilateral tdm_gJe is ntended to alert ae use to the
pre ence o un nsulated dangerous voltage wthil the
produ@ e,_doure that may be of ,,uffeent
magnitude to con ate a risk of ele@r c shock
A The exdamat@n point wi_h rl an eq@Jate_alt angle is
atended to a[er_ the user to the preence of
mpo4ant operating and mairee_an e(servc_,g)
_struct@_s in the/terature ac ompanyb 9 theTV
ii
ifi•
ii
JJ
@
¢
@
e
¢
e
e
e
@
¢
@
e
¢
e
e
@
@
@
¢
@
@
e
@
@
@
@
¢
@
@
e
@
e
@
@
@
@
@
¢
@
@
@
e
@
¢
¢
@
@
¢
e
e
e
e
¢
@
@
¢
e
e
@
e
¢
¢
@
@
e
@
@
@
@
¢
@
@
e
@
@
iPluchas gracias per su use del presente producto!
Cuando usted disfru_ de su nuevo producto, per favor"ten_
en cuenta los conseios de seguridad:
Posibles Problemeas
-La experiencia de enlrelenirniento de cine en casa
es una terldencia crecienle y los grandes monitores
de panlaNa plans son muy populates.
embargo los monitores de pantalla plans no se
han instalado siempre en los soportes adecuados o
ins[alado de acuerdo con las recomendaciones de
fabricanle
- Los monilores de panlaNa plana quese han
instaJado inadecuadament en Iocadores estanlerBs_
estantes escrilodos oradore% ba(Ae s o camos se
pueden ca_r y causar el dai_o corporal
iAI Fabricante le Imports
-La indus[ria electrOnica del consurnidor est_
compromelida a hacer el enlrelenirnienlo de casa
agradabb y seguro,
DE NI£OS:
E{ O6mo y Doonde Ust_d usm Su
Monit(x de Pannta!la Plans
MarcaLaDiferrencia
Ajustar Hasta Seguridad
Un tamaf_o file NO es adecuado pars todos, siga las
recemendac}enes de fabdcante pars la inslalack}n segura y
eJuse de su monitor de panta/a plans
lea con cuidado y entienda todas las inslrucclones
adjuntas pals el use prapio de esle praduck>,
No permits a los nii_os a sublr al equipo o jugar cen
muebJes y teJevisiones,
Ne cloque los monRores de pantalla plans en eJ mueble
quese puede _lsar fgclmente come @scalon, _Si COIT]e u.na
c6meda,
Recuerde que los nii_os pueden Iks_ar a ser exdtados al vet
una pragramack_n, esp(_Jatnente en el moniter de pantalla
plans %n&s grande que vida'L El cuidado se tiene que
empezar per pener e inslalar el monb_r dende ne se puede
empqac delener al castade del <}amino ni (_;har abqe.
El cuidado se tbne que empezar per encmrfina[ redes
los cordones y cables conectades al menitor de pantalla
plans pars que ne se puedan tirar e agarlar conectados
al menito_ de pantalla plans pars que no se pueden tirar e
agarrar per los nif_es curlesos,
Hontaje de Pared: s_USTEDDECIDEA MONTAR SU MONITOR DE PANTALLA P[JkNALA PARED,SIEMPRE
-Use una montura quese ha recomendadop or el fabricanle de monilor y/o lislado per un laboratorio
independbnte(como U L, CSA, ETL).
-Siga todas las inslrucciones ofrecidas per el fabricanle de monitor y monlaje de pared,
-Si usled tier-_ecualquier duds sobre su hablidad paia ir-_slalai sQguianer_te su mor-4tor de :>antala plans,
conlacle a su dislribuMor pars la inslalacbn prdesionak
- Compruebe que la pared adonde se est4 rnonlando el monilor es adecuada. Algunos rnontajes de la pared
no son diseriados pars set rnontados a paredes con tachones de aceroo la vieja construcci6n de bloque de
ceniza. Si usted est& inseguro, conlacle aun inslalador profesionak
- Per Io menos dos personas se requieren pars la instalaci6n. Los monilores de panlata plans puede set pesados,
£:cc Information
this equipment has been tested and found 1:o comply with the
Nm/s let a Class B dig/al device, pursuant Io Par1 15 ef the FCC
nJes,
[hese Nns/s are designed to provide reasonabb prelection agai-_,sl
harmful i_terf_mnce in a residerflial ir_slaliafion.
This equipment generates, uses and can radiate radio
frequency energy and+ if not instaNed and used in accordance
with the instruc ions, may ca use harmful inlerference 1:o radio
Comrr_urficatior_s,
However, there is no Guarantee thai inlerfomnce win not eccur in a
particular inslaNation,
if flfis equipmenl does cause harmful interference Io radio or
televbion reception, which cart bc deterrnined by turning [he
equipmen off and on, lie user is encouraged to try to cerrect fl-_e
interference by one or more o[ the folowi]g measares:
Reorient or mkTcate the r_£oeivilg antenna.
Increase the separation belween the equipmerfi and the receiver,
Connect the equipment into an oule_ en a ckeu/different frem
that to which the receiver is connected.
ConsuN Ihe dealer or an experienced radio/YV techniciar_ for
help.
Device cempNes with FDA radiation performance standards, 21
CFR subchapter,
Caution: (Irr_isble) Laser Radiation when epen.
Do not slate inlo beam.
I. Read t]ese in,slrucfions,
2. Keep these inslructions.
3. Heed aNwarnings.
4. Fa/ow all insi"n,_ctions.
9}, Do nel use tiffs apparatus near waler, For example, do he1 use
near a laund_, tub, in a weS basement, er near a swimming pool,
and the like.
6. Clean enly with dry cloth.
7. Do nel block any ventilation openings, instal in accordance with
the manufacturer's ins luctions. Slots and eperfings in he cabinel
back er bottom are provided for ventla ion, Io ensure reliable
epera ion of the IV and to pro_ecl it from <>verheatil_g, These
epenings musl not be blocked or cavemd. The openings should
never be blocked by plating the IV en a bed, sefa, rag, er ether
similar surface,
8. Do not insJ'aN near any heat sources such as radiators, heat
regislers, stoves, or other apparalus (including ampNfiers) that
produce heal.
9. Do nol ddeal he safety purpose of he polarized or grounding-
type plug. A polarized plug has two blades with one wider than lie
ethen A greunding Iype plug has twe blades and a thbd greunding
prong, Jhe wide blade or the hird preng is provided for yeur
safdy if H_e previded plug does no1 fit inlo your outlet consult an
ebcldcian fer replacement dthe obsolete oulJel,
I 0, Protect Ihe power cord from being walked on er pinched
parficuBriy al plugs, convenience receplacies, and the poinl where
they exit frem the apparatus.
I 1, Only use allachments/accesseries specified by the
maRc[SobereR
12. Use only with cart, sland, tripod, bracket, er tabb specified by
the manufacturer, or sold with the apparatus.
When a cart is used, use caution when reeving the carWapparal_s
cernbination to aveid hbry frem tip ever.
A IV and cart combination should be moved with care, Quick
sops, excessive force, and uneven surfaces may cause the FV and
cart combination to eved'urn.
I3. Unplug his apparalus dunng lightning sierras or when unused
fer long periods dtime.
For added pret(_stion for thb IV receiver during a Nghtlfing storm,
er when i is let unused for long periods dtime, unplug it frem the
wan cute1 and disconnecl antenna or cable system,
[hb win pmvehl damage to the IV due to Nghlring and power Nne
surges,
14. Rei%_rall servicing Io qualified service personnek Servicing is
r_uired when the apparalus has been damagex_ in any way, such
as powepsuppiy cord or plug is damaged, liquid has been splied
or objects have lalen i]to the apparatus, the apparalus has been
exposed to rain er moisture, does not operate normally, or has
been drapp_d,
15, This ]M should be eperat¢£:t only fram the type ef power supply
indicaled en the raling label,
if customer is not sure the type of power supply in your home,
cons<It your appliance deale_ or local power cempany, For IV
remote conlrel batlery power, ref_r to Ihe operating hsi"rucfions.
16, The IV sel shall not be exposed o dripping or spiashin% No
ebjecls filled with liquids, such as vases, shall be plac_J en Ihe IV sot,
17. Never push ebjecls ef any kind inlo this TV threugh openhgs
as fl_oy may touch dangerous voltage or elher ebctdcal paris that
could result h fire or electric shock. Never spin Nquid of any kind inlo
the IV.
18. Unplug II_e IV from the wall oulJel before cleaning. Do nol use e
liquid er sere cleaners. Use a damp cloth for ciearfing.
19. This TV should newer be placed near or ew_r a radialor or hea e
resource, This TV should not be placed il_ a bulNr_ instalBtior_ such
as a bookcase or rack unless t roper ventla ion is provided er the
n _anufact _reCs instructions haw_ been adhee_ to.
20. Do not place this TV on an unslable carl, stand, tripod, brackel,
or table. The IV may fall, causing serious inju_, to semeone, and
serious damage to the appNance,
21, Do not altempt Io see4ce this TV by yourself because opening
or mmevhg covers may expose you to dangerous high voltage or
elher hazants. Re/er all servbhg to qualified service personr/eL
22, This devbe compNes will Part 15 of the FCC Rubs, Operation
is subject to the following Iwo conditions: (1) this device rnay
not cause harmful iqlefference, and (2) this device rnusl accepl
any in[erffarence received, including inlerference thai may cause
undesked operation.
23, WARNING: ]e prevent injury, this apparatus/nus#; be securely
allached Io the fleer/wall in accerdance with the installation
instn_ctions,
24, [o reduce the risk of electric shock, the grounding of center pin
dplug mug be mainlained,
2[). If an eutside anlenna or cable sygem is connecled to Ihe IM,
be sure the antenna or cable sygem is greunded o provide some
protection against voltage surges and bult-up static charges.
Section 810 ef the National Electrical Code, ANSWNFPA NO,70,
prevides infermation wih respeet to proper greunding of he mast
and supporting structure, grounding of the lead in wire o an
antenna discharge uni, size of greundhg conductors, Iocalion ef
antenna discharge unit, connectior_ to grounding electredes, and
requkemer_ts br the greundhg elec_redes, (Ses figure A)
_L_CTF_OD_ SYSTBM
_1_@ A (NEC ART 250 PAFtTH)
Safety Strap
eauton: Pushing, puling or clrrtbing on the FV may cause the IV
ffJtng, Do nol let chldren climb or hang on the TV Always pBce the
Pd on a sturdy, level, ,slable surlace It_al can hold he weight d P4
And if possible, secure the IV according to the insln,_ction below
(Nole: The faslelJng componerls such as screws are not suppNed
with IV),
Step ene: insert the M6 mountng screws inlo the upper two wal
mounting screw holes and lasen them (Figure B),
Slep Iwo: insert anchors to wall and conr/_;t fl-_e bolts and anchors
with repes er chai_s (Figure O),
e
e
e
¢
e
¢
@
@
@
@
e
@
e
@
e
@
@
@
@
e
@
¢
¢
e
e
@
¢
e
e
e
e
g
@
e
e
e
e
e
®
e
@
e
e
e
e
@
®
g
@
e
@
e
e
e
e
¢
e
@
e
e
@
e
BeDore Turning On 7V
Check Accessories
Ch_sk Ihe accessories Ileal are packed with your [M
(reef to Qubk Star1 Guide)
Setup TV Table Stand
Please refer to Quick Star1 Guide Io carry eut gand instaNing,
Select TV Location
Select a flal stable table to place your IV set, Please fellow the
safely instructions when placing the f_
Connection and Using
A_fler placing your IV preperJy, you can conr/ec_ the IV with power
supply and cable cempcner_ts, For lurther infermafien, see page 5
1:opage 6,
[he first slep in connecting your IV is obtaining the signak _our
IV LED!}SG,_}!iR 120Q has a back panel, which aNows you Io receiw_
analog and/or digital television char_nels via ANI/CABI E jack.
Be/ere connecting your Pd. determine using an anlenna or a cable
service Io <>blain the signak
A. Antenna
Connect the antenna to IV via coaxial cable on AN]/CABLE jack
ef the back panek Yeu are ready to receive air local digital and
analog channels,
B. Cable TV service
Connect the cable Pd wall jack to Pd via ceaxial cable on
AN]/CABI E jack of the back panek Yeu are ready Io receive efl air
local digital and analog channels.
C. Set-Top Box
if you use a se14op box, you may need to call your cable company
er sateNite service previder, which use a special connection, phase
ref@r to Ihe user',s guide of sr_" top box,
Not_.: !kg tgt/>/ig tt e AC co/d ur h/ ?'s / have ,ct :><aTa/ e: a/i 2,e
conne<iians 7h, s 7'/(i<)es net suefex/(:_Y_M _n:_</cab/< ::har,nd
s@ar<i'
Choose Your Connections
IV I.ED55G55R120Q supp<Trts various connections to ot_er
devbes (such as DVD, VCR, Set lop box, etc,}, Please foNow II-_e
table to choose the cables whbh adat I to your device.
Jacks
COMPOSITE
L=AUDIO=R
Cables Further
....................................................................!_PF_9_i2q ......
Video/Audio cable
Audio Cable
COMPONENT Y_ Pb, Pr
Sae the below
Go to page 6
L-AUDIO=R COMPONENT video cable
I]_" eli GOto page 6
_DMI cable
NDMI IN 1/DVl/MHL_ 2!ARC j /a ............................<J{f
MHL cable
/Vete HDh4/, it, HDh4/ ie/e, Hwh Det) utsen M Utu _e<fs
JnT:s"/f e 7/b 17;J mT//':, )r 1_]I;17 ;Tf;J(_HHd/', gi HDh4/
[icrpln] /[(}
(//(gr_ ]nL/U 7!>e/t(} col(: ',a!>el_ ,'o] <or)t?e< oh/" (;ew<} s o
TW
Connecting A V Composite device
(Good I,qdeo Quality)
eomposite connr_;tor will be shared with Comt onent Y connec_or,
[a connect a con_pcsite AM device, such as a DVD player, fetow
these sleps:
1.Connect the COMPOSITE jack on the side of IV 1:o the video
oulpul jacks of device via videe cable (yeNow),
2.Connect the L-AUDIO-R jacks or] the side ef IV to the audio
oulpul jacks ddevice via audio cable,
Netice the lef channel jack and plugs are white and the right
channel jack and plugs are red,
Nee/_/s/gnU be/an{?<,'0 (;<),'rP>os/ev/dee <_/;/'<//_<:_ev/de
s]/_;/hs : ]_// g<cddisLi!cu;/st,;
Composite Video Connection
The pic ure below _s an example of a cenneclion using the
composite video jack.
e
e
e
e
@
@
@
@
@
@
@
@
@
@
@
@
¢
@
@
@
@
@
@
@
¢
@
@
@
@
@
@
@
@
@
@
@
@
@
@
@
@
@
@
@
@
@
@
@
@
@
@
@
@
@
@
@
@
@
@
¢
@
@
@
@
@
@
@
¢
@
@
@
The ou[put panelof othet devae
Connecting YPbPr Component device
(Better V7deo Quality)
[b coHnecI a compor_ent device, such as a DVD player, renew
these steps:
I ,Connec_ the COMPONENT iN Y/Pb/Pr jack on Hqe side of IV b
the video output jacks <)f dovbe via video cable (green, blue and
red),
2.Connec_ the L AUDIO-R jacks on Ihe side ef rv to Ihe audio
eulput jacks of dovbe via audio cable,
Notice the lefl channel jack and plugs are white and the righl
channel jack and phgs are red,
r'_k:>to:<7 'ta<_: /:'c/e_ _;/e ca," _r_orert vuk a 77v:>/;/,>d <:>fvui, c ssf,r a/
t>;_sbetk', :in>riley qu ifiti
Component Video Connection
[he piclure tx_lcw is an example ef a connection using the componer/l
vid_7 jack,
[\_ _ _ _7 /
F i<
Connecting HDMI device (BestY7deo Quality)
k> connecl a HDMI device, such as a DVD player, please Connecl
the HDMI1/DVI/MHL, 2/ARC jack on the side ef rv to the <x£put
jacks of device via HDMI cable,
re coHnect a DVI device, via I)VI pod of Peer Device and HDMI
jack of IV:
1, Connect the HDMI1/DVI/MHL jack on the side ef IV to the DVI
port of PC via HDMI DVI cable,
2, Connect the L-AUDIO R jack on Ihe side of IV to Ihe audio
outpc/l jack ef computer wih audio cable (dual channel RCA jacks
to 3,Smm slems jack or Ihe I AUDIO R jack),
re connect an ARC HDMI OUT device, please connect Io the HDMI
inpul porl ef the device sucl-i as arnplifier+
r',/a_,: 7 Hi)/,fi d_fiph L}_ fir,'/ie f4' _/_u,eo_a pto,/, cd is _ t:(n_a,t t
a <4'a,e<£<> int<:it>n:e ia' <iar,'>r,'ith, W,r£oi y;/e:>sed eig, k'i :imp, it
C@/77c<>#Te @7:2a qrTd ai<J(a) slf#;ff :/;7 UTc_saee_ :)a 7/_ an:7 hq_,; /iff
be,<> <i,_>,_ia),_a/i:):
2. HDM/dJV/ cab/e W@nslels o!t/y adoo signs/Imm DW po_ of
DV/ dedce to HI)M//ae/< of FX For auUIo slpna/, p/#ase connect
audio output Io L UL)iO R /aek or} IV baek panel,
HDMI Connection
Fhe picture bebw is an example ef a connection using the HDMI
vide<> jack.
How to Obtain Various Kinds of Input Sources
After conneclion is done, press INPUT button en rernole cen[rel
or rv op panel Io choose the input source you need, Sco page 7,
Basic Operaton of IM
hi ]J_ ' ' ,,,,°=,,"f / i ii ii!iili
iiiiiiiii
iii4al]
i!iiiiiiiiiiiii=
iiiiR£iiilii_
i iT:!!i lii!iiii!iiiiiii
@
@ N_D _HON_: Conn_;t a 3,Smm headphone fer personal audio,
@ USB: Connect your USB slorage device to enjey music/photo files
@ en your Pd, (Abe used br service purpose).
@
@
e HDMI1/[}VI, 2: (High Defnition Multinedia Interlace} It prevides an
@ uncempressed digital connectkTn thai c'arnes beth video and audio
@ dala by way ef an integraled/nhi plug <abb,
@ MHL: (Mobile High Ddinition Link) To standard HDMI input, transmit
@ the video/audio frem portable elec lenic device (<eNphene,digital
@ camera, digital videe calnem,) to TV s@l,
@ ARC: (Audb Relum Ohannel)/\dopred in IV output of digital audio, can
@ be connacled to the de<ice supporthlg ARC, transmit the rv sound to the
@ davice,
@ COMPONENT Y/_b/_r: Connect a device thai has cornponent
® video jacks, such as a DVD playen k> access device ccnnecled
@ 1:o H_e Y/Pb/Pr jack, press Ihe INPUT button en your remote; hen
@ press he up/down arrew te select Component, Press the OK
@ button al lasl to ceiifirm.
@ • _/_b/P_ {eo_o_le_t Video)l They pFovide good picture qualily
@ because Ihe video signal is separated into three componel/ts, Use
@ 1:bee video grade er cemponen video cables fer the connection,
@ WheH using Y/Pb/Pr_ rrtake sure you connect left and right audio
® cables Io the AUDIO iN R/L jacks,
L-AU#IOoR_ eO_POSlT£: ConHec_ an AM d@v'ice that has
cemposi e video jacks, such as a VCR or a DVD playen I@ access
@ devbe connected to fl_ese jacks, press the iNPUT butch on your
@ remote; therl press the up/dewn arrow 1:o select/W. Press the
@ OK button al lasl to confirm.
@÷A_DIO @_ L: Lefl audio channel connection, The Idt audio
@ conneclor is usuaNy wht:e, For mono audio sourees, be sure 1:o
@ use the left AUDIO INPUL
@
@ e AUDIO IN R: Right audio channel c<Tnneclion. [l_e right audio
@ connector is usuaNy red.
@ ANT/CABLe: Connect Io receive the signal frern your antenna er
@ cabb via coaxial cable,
Digital A_die nut: Connect a coaxial cabb for digilal audio
eulput,
@
¢
@
@
@
@
@
@
@
@
@
@
@
@
@
@
@
@
@
@
@
@
@
@
@
@
@
@
@
@
@
Keypad Buttons
If you cannot locate your remote, you can use [he keypad bu[bns
en your IV 1:o eperate many TV features,
c_
MIaU
o
c_
o
vo+
o
vol...
o
INPUT Displays the Source Selec[ List. o
M_NU Displays the IV Mair_ Menu,
CN_ Scans up Ihrough Ihe char_rml list
In the Pd Wlel/bl system, il acts like the up arrow on the
remote control and can be us{:_t o select menu optior_s.
CN_ Scans down [hrough the channel Ii,st In he IM n_enu
system, i acts like the down arrow on [he remo[a
cenlrol and can be used to selecl menu oplions,
VOL+ Increases Ihe volume, In the IV menu systern, it ac_s
like the righ_ arrow on he rerrrole contrel and can be
used Io select menu eplions,
VOL- Decreases he volume, In the fV menu system, il acts
like the letl an'ow on the rernole control and can be used
to select menu eptions,
(_ [urns the IV en and eft.
Front Panel
About remcle control
worki]g dis[alice and
angle, see the qGck
slarl guide,
I<
Power/Star_dby I_dicator: Ligh_ up in red when the IV is in
si"andby mode. I.ighl (xl when Ihe TV is on.
Re.ate ee_tret Se_se_: Remote conlrel IR sensor, which
receives infrared ray sent by remote con_rek
Codes for Cox Communications: 0178
Codes for Comcast: 10178
Codes for Dish Network: 627
Codes for Fios Verizon: 0205, 0057, 0493, 0775
Turning On and Off
eonnect the AC cord b pawer the LED LCD P< A_ [Isis tme the
IV will erfler slandby rhode and power indicalor will turn red, Use
Pewer butlon ((_) on the top panel of IV or on the remole control
to turn on the Pd After switching eft the IV fer 5 s_onds, you can
turn on IV again,
Choosing TV Channel
Tani_g To A_alog Oha_r_ets
an analog channel has a channel number beginning wih "A'L
Inpul the digRal nun_ber wlh numenc bulons @ectly and press
OK button Io corffirm, _ar exampb, Io walch analog channel "A51 ",
press "5", "I ", "OK" on remole contrel in sequence,
Note: A/2>o /g! >tt e/e is o ar @gg TY s,T/ a/av;_a_7/e s, Aa;>e/7<a,
WO rf s(:_ V( /_ r l/ isT( ,,'/arTs is/sa/??< (_xaan $:;sb/(_ @¢(_
Tur_i_g Te Digitat Oha_r_ets
A digi[al channel has a channel number beginning witq 'D", Inpu[
the main digital number wilh numeric buena directly, then press
"" button en remote contreL and input he sub number at lasl,
For example, Io walch analog channel "D31 1 ", press "3", "I ", "",
"1", "OK" on remo[e control in sequence,
ehanging Channels Directly _<au can use CHA button to increase
channel number and CH v Io decrease channel number.
When no OSD (On Screen Dbplay) is used, the up/dewl_ arrews
can abe work as CH@,/CHv buttons.
Selecting Input Source
P_ess INPUT bu[ton on _emete
control [<7 display Source Selecl list,
Use up/down arrews 1:o highligh_ the
soume you need and press OK to
confirm,
Source Select
TV
AM
Componenl
HDMI 1
HDMI 2
OSB
Channel Bar
Press the OK button on the remote control, when OSD (on screen
display)b not used, the channel bar will appear on t_e Bottom of the
screen, It displays the current channel's i_format[on, The blowing list
dcscrbes the items on the channel bar,
Dt4-t ATIC-t
Air English
4:3 480i
Jan01 07:10 Sat
DP?
A2
Air Seleo
CC 480i
Jan01 07:10 Sat
AW
Dt4_t/A2
ATSC_!
If the channel }s anabg A is dispiay_:t, If
it's a digital channel, D is displayed, For
example, il_ the pictures above, A2 is an
analog channel, and D50 I is a digital
channel ( 1 }s a sub channel number).
Display the current rv signal type.
Er_g/sh/Steree
48Oi1480i
4.=3/OO
Jan-Ot 07:t0 Sat
D}splays whether the current channel is
be}ng breadcasted in stereo or inone, if
the curren! cha _nel is digital, this space
will be SAP (Second Audio Program)
language,
Displays the signal resokltio/ .
Displays the screen aspect ratio,
Display the CO status (on or off}.
Displays current program date and thee.
Adiusting Volume
Press the VO[ MVO[ button on the remote contrel to adjust the
vohame, If you want to switch sound off, press MIJTf, When OSD
(Oil Screen D s >lay) is not used, the arrows left/right can also wed<
as VO[ iVO[ _ buttons,
EPG (Electronic Program Guide
Press EPG bhltten on the remole conlrol, the electron}c pregram
guide w}[[ appear in the center of screen, The ebctrenic pregram
grade gives the Pd program playing prelect, Yau car/ use Idtiright
arrows to switch pages,
Adjust the OSD Screen
rhe OSD (On Screen Display) leenu enables you to app'oach to the
TV functions,
[o use OSD menu system, press OK button on remote control, then
use }eft/right arrow to high/ght an option from QUICK, CHANNEl,
PICTURE, AUDIO, TIME, SETIJP or [OCK and press OK/down
button,
Prcss the up and down arrow to move to a different option within
each menu, If necessary, press OK or right arrc)w to display the
choices of the oprbn you've highlighted, If available, _lse the text at
the bottom of each screen fer help. [o rehlm to the p'evious menu,
p'ess the MENU huh°on,
To exit the OgD r_enu:
Press the EXIT button, I]qe menu will char from the screen,
Press the MENU button repeatedly unt/the menus disappear.
Quick Menu a
The Quick Menu cor/tains menus and provides you a quick way to e
approach the main settings that may be most possibly and frequently
approached, Press MENU on the lemote and then you will see the e
Qubk Menu showing on your screen, Press the down button to e
D oceed the Quick Menu, Use up/dorvn to choose the functior_ you e
need, press OK to enter a sub menu and press left/right arrow to
adiust a sub menu, a
@
QUICK MENU
Picture Mode
Sound Mode
Closed Caption
Sleep Timer < Off
Channe List
A Move
Channel Menu
The Channel Menu enabbs you to search, view and edit channels,
It s avalabb in TV mode oily, PrePs MENU and choose CHANNEl
from the Main menu, Press the OK/down butte/to )reseed to
CHANNEl menu.
CHANNEL
al <,)1
Auto Scan
Show /Hide
Channel List
Signa_ Type
DTV Signal
Air
_lilGood
%%Move _ seest
e
e
e
e
@
e
®
e
e
e
Jse up/down to choose the flanctbl_ you need, press OK or dght e
arrow to adjust or enter a sub menu. The deta/ed ex :_}anation e
are shewn below,
Auto Scan a
Execute an auto channel search, e
Show / Hide e
Enter sub-menu and press OK to show or hide the D! channel, e
e
Channel List e
Displays a channel list, It shows the current channels. Press OK to e
go to Pd channel directly [l sub menu, e
Signal Type
Select your IV signal type: Air or Cable, e
D7V Signal( In DgV Mode) e
Display how strong your IZi signal is, e
e
Picture Menu o
The Picture Menu contains luenus _nd controls to configure >,the e
way the picture appears, The Pbture Menu options _pply to the
vkteo for the main FV and VIDEO INPUT sebctions, All picture e
options can be applied to each inp_ It, e
Press MENU on the remo[e, Select Picture from the Main menu. e
Press the OK/down butter to :_receed to PICTURE leenu, e
e
PICTURE
Picture Mode
Color Mode < Warm
Screen Size 4 Wide
Noise Redact on 4 Low
Dynam c Cont ast < Low _+
Vdeo Stye 4 Vdeo
'_$_" Move
for help,
Picture Mode
Choose the preset visual mode of your IV:
Standard, Movie, User, Dynamic, Power Sav[ng,(Only in User mode
yeu can adjust Brightness, Contrast, Color, Tint and Sharpl ess,
Changes to Power Saving mode can decrease the power
consumption,)
BHght_ess_ Adjust tie brightness of pkAIre,
Contrast: Adjust the contra_,t of cobr,
Oolo_t: Adiust the richness of color,
Ti_t: Adjt st the balance between red and green level (only
avalabb il_ NTSC signal),
Sharp_ess: Adiust tile sharp ess level of )iohlre,
Color Mode
This option allows you to sebnt one of three automatic color
adjustments: 0oo1 for a bluer pabtte of pbture colors; Noneal or
Warm for a redder palette of color,
Screen Size
Screen Size: Select a screen aspect ratio. (Avatabb ratio: Wide,
Cinema, Zoom, and Normak) Please choose the ratio that applies
to your video signal format best,
Noise Reduction
D)4namic Contrast
Set dynamb contrast Offibw/MedklleiHigh,
Video Style
If you connect the HDMI/DVI port of PC to HDMi ]ask of the IV
and the video signal is 1080p, phase choose the compatible
_ideo style= = Video, Graphic,
MFC Effe.ct (Motion Flow Compensation Effe.ct)
Set MFC Effect as Off/L ow/Medium/High,
MFC Effect technology removes drag from fast scenes wit_ a
lot of movement to provide a smoother picture, Off switches
the MFC Effect off, High provides smoother effect, low provides
smooth effect, Medk/m sets MFC Effect to medium,
MFC Demo (Motion Fgow Compensation Demo)
Set MFC Demo On/Off, It shows t_e difference between MFC
Effect on attd off leodes on the screen.
Audio Menu
AUDIO
Sound Mode
Audio Language _ Englsh
Analog Audio Output { STEREO _.
D gital Audio Output < PCM
Surreund 4 Off
Auto Only < Off
_:, Move @ Sebat
Use up/dowl_ to cheese the function you need, press OK or right
arrow to adiust or enter a sub menu, The detaled explanation am.
shown below,
Sound Mode
Choose the preset sound mode of your FV:
Standard, SoH, User. Dynamic, Only in User mede you can adiust
Bass, bebb, Balance,
Bass: Adjust the bass component of iV sound.
[_eble: Adiust the trebb component of Pd sound,
Balance: Adjust the balance between the left and right channel.
Auto Language
Select digital FV audio language type: English, french or Spanish
(only available for DIg channel).
Analog Audio Output
Select analog [\/audio sound type: Stereo, SAP or Mono (only
avatabb il_ IV mode),
Digital Auto Output
Set the audio output type as Off, PCM or Raw, Please set this
option according to your power amplifier.
Surround
Creates a 3D sound surreund from standard sterne material, wkh
dee[:) and rich enhancement,
Audio Only
Press OK button to activate audio only leode, The PV w}ll output only
sound and the I ED [CD panel wit be turned off, To restore r_enrtal
playing, hold POWER button for three seconds.
Auto Volume
Set auto vel _meconto on/off,
Equalizer Settings
The seven band graphic equalizer allows you to adjust the audio
frequency settings, Yeu can select one of the equatzer presets
(Off, Pop, Rock, Jazz) or create your own personal preset (User),
Press the left or right arrew to seirust the frequency (100Hz, 250Hz
.£00Hz, 1KHz, 2KHz, 4KHz, 10KHz), you want to adjust, Use the
up or down arrow to adbst,
Time Menu
The Time Menu lets you change the TV time settings, [o access
the Time Menu, press MENU on the "emote, and then sebct Time
from the Main Menu.
@
TIME
Sleep Timer _ Off
]'[rite Zone '_ Eastern
Auto Cock '_ On
Cock ....../----/------- --
Wake Up 2014/1/18 1 2:0 PM
OSD Dspay Duration 4 15 Sec 1,
a
s
s
a
s
s
s
@
@
s
s
@
¢
¢
¢
s
¢
s
@
e
e
¢
e
s
¢
s
e
s
@
@
@
s
s
a
,$_ Move _ sebst
Use up/down to choose the function you need, press OK or right
arrow to adjust or enter a sub leenu. The detailect expiana£on are s
shewn below, e
Sleep Timer
Set t_e sleep timer(OfF, 5, 10, 15, 30, 60, 90, 120, 180,240 Min,), e
The iV will _utoleatbaly enter standby mede after thees up. s
Tfi'ne Zone
Showing the country's time zone, you can Set T}me zone Off s
Eastern, Centr A, Mountail, Pacific, Alaska, Hawaii, Samoa, e
Newfoundland, Atlantic, e
Auto Clock
Select auto clock on/off, Auto clock helps you synchronize your
rv time to standard filee (from DTV signal).
Clock
Set your PV time mal_uaty (needs to barn oft auto clock), p_ess up/
down and Ic4hdght arrow to config the current filee,
_Mke Up
Set the Wake Up time for your IZi, after enters menu, you can
use the up/tow/and Idtiright arrow o/the remote control to
adjust it,
OSD Display Duration
Set the time how long to display OSD menu(t} Sec, 15 Sec, 30 See,
45 See, 60 S<x_
Setup Menu
The Sehlp Menu lets you cenfig the IZi with your preferences, Select
SETUP from the Main Menu, Press OK/dew/button to p'oceed to
SETUP menu.
SETUP
Menu Language _ English
Menu Transparency ,_ 0% _.
Closed Caption
AH reset
Initia_ Setup Wizard
Blue Background _ <_ On
_ Move
Use upidown to choose the function you need, press OK or right
arrow to adjust or enter a sub menu, The detaled ex :_lanation are
shown below,
Menu Language
R>c[ oose your menu language, p'ess the lethrig} t arrow until
the language you need appears. _aitab_e languages:
English, French and Spanish,
Menu Transparency
Pcchoose your menu transparency mode, press the bftidght
arrow untt the transparency you need appears: 0%, 25%, 75%
100%,
Closed Caption
Press OK to enter cbsed caption slab menu, the detail as folew,
#
SETUP
Closed Caption
Caption Display _ CC Off _.
Digita_ Caption Type
Digital Caption Stye
Show or hide closed caption
Move 4 I_Change Setthg
Caption Display
Press bfhr}ght arrew to select caption display co on or co off,
Digital Caption Tyg>e
Press left/right arrow to select digital closed caption type:
Service1, Servbe2, Service3, Service4, ServiceS, Service6,
D,_gital Caption Style
Press bffidght arrow to go to digital clos_x_ caption style sub menu,
to select the closed caption style, Select the item you want to adjust
in Digital CC Style menu with up/down arrows. After changing, you
can preview the caption style }l_the bottom,
Mode: Deckte whether you can change the settings on the CO
Display Sb'le,
CO Size: Set the CC bit size (Ddault, Normal, [arge, Small),
CO Font: Set the CO font (Default, FoRt 0 7),
CO Opacity Color: Set the OC opacity celor (Defauk, Sold,
Flashilg, Translucent, Transparent},
text Color: Set the CO text color (Defauk, White, Red, Green,
Blue, Yellow, Magenta, Cyan),
CO Background Opacity: Set t_e CO background opacity {Default,
Solid, Flash}ng, Translucent, Transparent),
CC Background: Set t_e CC backgroL nd color (Deffauk, White,
Red, Green, Blue, Yelbw, Magenta, Cyan),
Aft reset
Press OK button to execute re,set to P4 system, All the settings
will be reset to facbry defauE
&l,)/r> Pe ()SD s ,!)f/i, ,_nde,_n: c /ot ,_ r, ,!:ig,:/tothe _cfii
,ppNr:t ce
Blue Back
Press OK button to select Blue Back on or off, If the Bk/e Back is
turned on, the IV will dis >lay a bkle background wren there is no
signal in[xd,
No Signal Power Off
Press bhyrighl arrow to sekxst a time perbd (Off, 1 Mih 5 Min, 10
Mi0 for "No Signal Pewer Off", The PV w}ll shut off after that perkx:t
of time while no signal, We suggest you turn on tiffs function when
Blue Back is tt_rnr_d on, It leay hut the [ED [ CD panel }f blue screen
is on for too long.
ARC
Adopted in TV output of digital audio, can be connected to the
device supporting ARC, transmit the [M sound to the dsvbe.
Lock Menu
The Iock Menu enables you to lock program with special contenl,
:)anel key board and inp_ it source. Press MENU en the remote and
choose [ock Menu from the Main Menu, Press the down b_itton to
proce_×J the [ ock Menu, Fhe menu image and explanatbn are shewn
bekwv.
LOCK
Pa ental Contro_ ......
,_. Move @Select @ _ Return
Parental Control
When the Parental Conbel Menu is accessed tom the Main Menu,
you need to enter password to unlock the menu function, Please
enter your four digit password wit[] numerb keys 0_9, Nu_: 7Ee
ongrn ioess:t,or:ii_ 000rt
After unlocking, the items in parenlal cenlrol menu carl be used,
Use arrew upidewn to highlight the functbn you need and press
OK or right anow to use V chip, Change Passwerd, Key sad Iock
and Soume Iock, Clear Channel I [st sub menu.
¢
e
@
a
s
@
e
@
¢
e
@
a
s
@
¢
¢
¢
¢
@
a
s
@
@
¢
¢
¢
@
a
s
@
@
¢
e
@
e
e
@
s
@
e
s
e
¢
¢
e
@
a
s
@
e
@
¢
e
@
a
s
@
e
@
¢
¢
@
a
s
@
@
¢
¢
¢
@
a
s
@
@
¢
@
LOCK
Parentat
Control
Move
Change PiN
Inpat Block
V-CHIP
Keypad Lock
Clear Channel List
Remote
Change your &dgit PIN
Change Setting
©
'_ Off _"
Change PiN
Change the PIN of parental menu.
input Block
This optbn allows you to lock or unlock the input source, The
source blocked can not be chosen frem input list unbss you input
the correct parental password, Use up/down arrow to sebd the
source, press OK to bck or unlock it,
V-Chip
Press OK to enter V Chip sub leenu, the detat as follow:
LOCK
V-CHIP
US V-CHIP
Canada V_CHP
Bock UnRated Show O
Down_oadaMe Rating
Clear Downloadable Data
Restrict movie and TV progtams by US Ratings
; Move @ Change Sett ng @ _ Return
US V--Chip
Press OK to enler US V Chip rati)_s menu, which contains two
sub menus: TV rating and Movie r<ating,
TV Rating
S}milar w}th Mov}e Rating, After adi_sting, press MENU to return
or _v,ess EXIT to exit the menu.
TV-Y AI Children j D j Sexually Explicit Dialogue
[ Directedto Ch dFer,?i
i TV--Y7 i 'fears and Older i L i Adult Language
i TV..G i GeneralAudience i S i Sexaal Situations
i i i
i TV.m,i_reotsG_,d..... Suggo_tediv i viol.....
i i f i ,
Movie Rating
Use arrow keys to selec_ the rating level you want to block, press
OK to IocWunlock the ratil g level If you have blocked a lower level
rating, the higher ratings will be blocked too, Fer example, when
PG 13 is bbcked, R, NC 17 and X will be blocked a_ the same
time.
,....................[_÷ti
G ( enera} Audience (no restrictions}
PG Parental guidance suqqe'4ed
, +
PGI3 Parent seongly cautioned
Restricted Chtdren unor 17
R
+ should be accompanied by an adult
N(:l 7 No chMmn under age 17
X Adults only
Canada V--Ch@
Press OK or dght arrow to enter C)anada V Chip ratings menu, whbh
centains two sub menus: Englsh Rating and French Rating,
English Rating
Press OK to enter English latin9 menu, Use arrew keys to sebct the
rating level you want to block, press OK to lock/unlock the rating
levek if you have blocked a Iovve_ level rating, the higher ratings will
be blocked too, For exan -)le, when PC is blocked, 14 t and 18 + vdl
be blocked at the same time,
.......................................................................
c Programmh/ghh,nded for h Idrenvnderage8
8 Progra_m/h/ggenerallyonsidered ac eplable for
, , ch}ldren8 yearsand overto watchon Iheirown ,
G Generalprogramming,suitable for allaudiences
PG ParentalGvidance
4_ Programmingcontainsthemesor conlem
which maynot besvitable for viewersundelage of .
8 ! Adult programm}ng
French Rating
Press OK to enter French rating menu, Similar with English
Rating,
G General
8ans Programmng genelallyconsderedacceptablefor
, , ch}dren8 year5and over towatch ontheir own ,
arts Piogrammingmaynot besuitable for
8ans Programmingrestricted to adu}ts
i'/e _ O f;[/a , e ?/;//f h' bte[(/c:!:;t/s ,! /}(_t!,
/the,i/i/?h)rf}elo/
Block Unrafed Show
Block all the unrated program,
Clear Do wn/oadab/e Data
Activate or downloadabb rating da_a, }f available.
Keypad Lock
Select this option to block or unbleck the [M's skte panel buttons
so that they can't be lased,
Clear Channel List
This option allows yeu to execute Clear ehannel I i'._t function,
This function will reset the wheb iV system to factory defaHIt (not
only reset OSD leenu),
Remote
sebct yeur renlote: Off, remolel or remole2, this is for special
xlrpose,
What's the meet ce_ve_[e_t way te view Nigh Defi_[tie_ (HD}
videe?
Connect an antenea to the iV I_put jaek to yew free local digRal
ehanneb, Ybu na N _eed te purehase _n antenna. (See page 5 for morn
[nh/ntlaton about arrteena setup),
Visit www,anterlhaweLorg for aseistance br dec ding what type of
antenna to use to receive the local dgRal channels available to you,
After entering your Iocat}on, this mapping program tels you which Iocd
_nalog and digi a[ stalons are avalabb using a certain antenna,
Are there ether ways te view Nigh Def[rdtien(ND} video?
F_esides using an antenna as meetioned abow;, you ean also use a set
top box to receive digital video,
Contact your eable service prcv[der or sa_ellite provider to purchase
dural pa)gramm[ng and have them con _ect the box to eneum you am,
viewing channels in the best way,
New de [tel a_ a_a_og cha_e_ frem a digital cha_e_?
Pines the OK button to dispkN the Cha _nel Bar when OSD
(on screen display)is nor used, luck at the top right corner of the
screen, AI 'W' is displayed for _n _nalog ehannel, A "D" is displayed
for a digital channek
Note: Shse the alsk;f/ 7V/!! A!!o/;cs tss baer c/ of me ruse ve
aakd) 7Y _t//)Ch(,t; O/if/t(,r so!?e cno/iDSC?O,/uee
Why are there bars er/ _y scree_ a_d ca_ _ get rid ef thel_?
Moel digital video is sent in a 16/g format whbh file your screen, but
is sometimes sent in 4/3 wh}eh does not fi/your screen, It depe ]ds
on how the station or device conhecled to your fV is formatting the
video, If there are bars orl the screen, Check Screen size }n the picture
mode to try a different farnlat that may el[m}nala the bars, Some bars
ean't be removed because of the way gle fomlal is seht by the
broadcaster, the format cha igee as yo_ choose screen size type ill the
pic ure mode and the format lype is displa_/ed a1the boltom of the ser_}n,
For more inbrmafion on screen size, go to page 9,
Why does cha_e_ search find a _et ef cha_el%
b_t whee _ try to t_r_e te the_ there's _eth[_g there?
Some chanhels don't carry programm}ng, such as v}deo On Demand,
When channele am u-_available, yohr Pd screen is blahk or appears like
snow, Y.o_ probably wan to remove these channels hsnl your channel
list, Remove these in the Channel List Menu, Go to p_ge 8 for morn
infont_alon,
Why tees it take a _e_g ti_e _,ehe_ I search the cha_e_s
at tirst t[_e?
if you have bolh analog and dig[ al channels, the 1V is boking h/r all
avalabk_ oha _neb in the cha ieel 1st, if you do ha_/e digkal channele, the
fV ie also searnhh/g 1or scrambled channele, non ecramMed channels,
and each sub eha lee} of thai digital channek
Identifying Problems
If there are any probblne when using tile producl, please consull the
let below, If the list does nol solve the problerrh ell ou/ Customer
Service Cener immediately,
TV Problems
The T_' can't be tlamed e_.
Make eum the AC cord }s plugged in,
Check the wall outle!, make sure the AC output works nom_aly
and stably,
The side pa-_el may be Ioeked (dis _bled), Use the mnlote eonhel
to turn oil the 1M
Selecl the Keypad Lock funnt[on in the P/g_EN [AL control Menu
and press OK o uncheck the Ioeking eta!us,
There is _e pictare er seeed but the TV is en a_d there is a "Ne
Sig_aF' s[g_ e_ screee.
Am yo_ hying to use an input soume will no device connecled
to i? for ueing other video/audio dev}ce, make sure tile external
device works nontlaly first, then press INPUT and choose tile dght
input eoume,
The Signal [_/pe oplon nan be se_ incoeec 14Go to page 8 for
delaled b-_structons,
The c-_annel nla_/be blank, hy to search the channel again or
ehange anolher cham/ek
The se_d is ti_e_ bet the picture is peer.
If you can only ge black end white p}clures from exten/al device
that you've conneeled to your f\4 maybe t s due to the video
cables is not connected weI, or they are connecled wrongly
Check the connectio i stabilly flint, heh check he correctness,
Fcr _hdinput, the yetow v}deo cabb connecle to the yelow Video
In jack en the side ef ye_r [M
Fer Component input, tile three Y, Pb, Pr video cables (rod, blue,
_nd green} should be eonnect to tile co_msponding input jaeks
oil the side of yo_r [M
- Check the antenna coneections, Make sum all of the eables w!
firmly connecled to tile TV jack on side of yo_r f\L
hy adiustihg the color fealhres to impreve,
There is _e sou_d_ but the picture is ti_e.
The sound might be muted, hy pressing tile MUTE button to
metoa; sohnd,
fer using /W or Component, remember to connect the device's lefl
_nd right audio output cormclly, The let channel cable is wh}te and the
rgh cha inel cable is red, Please nl /teh tile c_bbs _nd jaeke aecording
to their celors,
The sound selfings na N not be eel correctly, Go to page g fer
morn infontlaton,
If your ahdio sourne ias only one jack or is a (ins -_o)audio soume,
make sure you have plugged the connection ilte the Audio In L iack
(vrhi e} orl tire T\_
The b_ttoes e_ the side par_e_ de_'t work.
Tile s}de panel may be locked (disabled) Use the remoe control to
turn orl the [M
Selecl the Keypad Lock function n the P/\REN D\L control Mem_ _nd
press OK to uncheck the locking status,
U-_plug tile %/horn the AC pcvver for 10 minuies and then plug it back,
[_rn the [\/on and try again,
The _ turns eft _expected[y.
The ebctmn[c pretection circuit may have been activaled because of
a power surge, WMt 30 seconds and then turl the 1V on again,
If th}s lappens frequently, tile voltage ill your house may be abnormal,
If the other eleclrenic eqGpmenl ill your home eaWt work non';wly,
eonsult a qualified serv}ce personnel
Can't seleet a cer_ie cha_eL
Tie channel may be bloeked or not approved in the PARENTAl
eontm[ Menu,
The cha]nel nlay be skipped in channel list in CHANNEl Menu,
Check the blocMng and ekipp}ng etatus of channel
The stereo se_d 9e_orma_ee is bad
- I1:may be a we;da eh_lon, Use the AUDIO Menu and set AnPJogSound ae
@
@
s
@
@
@
@
@
@
a
s
@
@
@
@
@
@
e
s
@
@
@
@
@
@
e
s
@
@
@
@
@
@
@
@
@
s
@
@
¢
@
s
s
@
@
@
@
@
s
a
The Re_ete ce_trel doesn't werk.
There may be us AC power falure or the power cord
unplugged in,
Something might be blocking belween the remote contrel and the
remote seneor oil the hcnl panel of the ]M Make eure them is a elsar path,
The mmole na N lot be ahned dkectly al the rv
The batteries in the remote may be vveak, dead, or installed
ncorrectly, Put new batteries }h the/emote,
Yo_ are experiencing p_b_e_s e,fith WOhip/Parer_ta_ Oeetre_s.
If the r/ring limits don't work, you must Ioek the settings, Go to the
Main Menu (press MENU on your remole), selecl P/\REN D\I control to
check lhe sett hgs,
What e_se ca_ _de?
If you've beeh through the haubleshoolng section and nothing has
fixed your pmblenl, try reboolhg your [M
Note that after a mboot, you nlay -_eed to run your TV through the
seup precess agaim [b reboot, unplug the power cord fn)m the wall
outbt or power strip,
Keep your TV unplugged h)r about 5 nlimdes, Then plug in the Y\/and
tun/it on, See if the prcblem is fixed,
If the problem mlnains, then please v}sit the Customer Support Menu at
www, rna,com or upda!ed f7\Qs or contact RCA Customer Support at
the suppod number provided in your W_man y card,
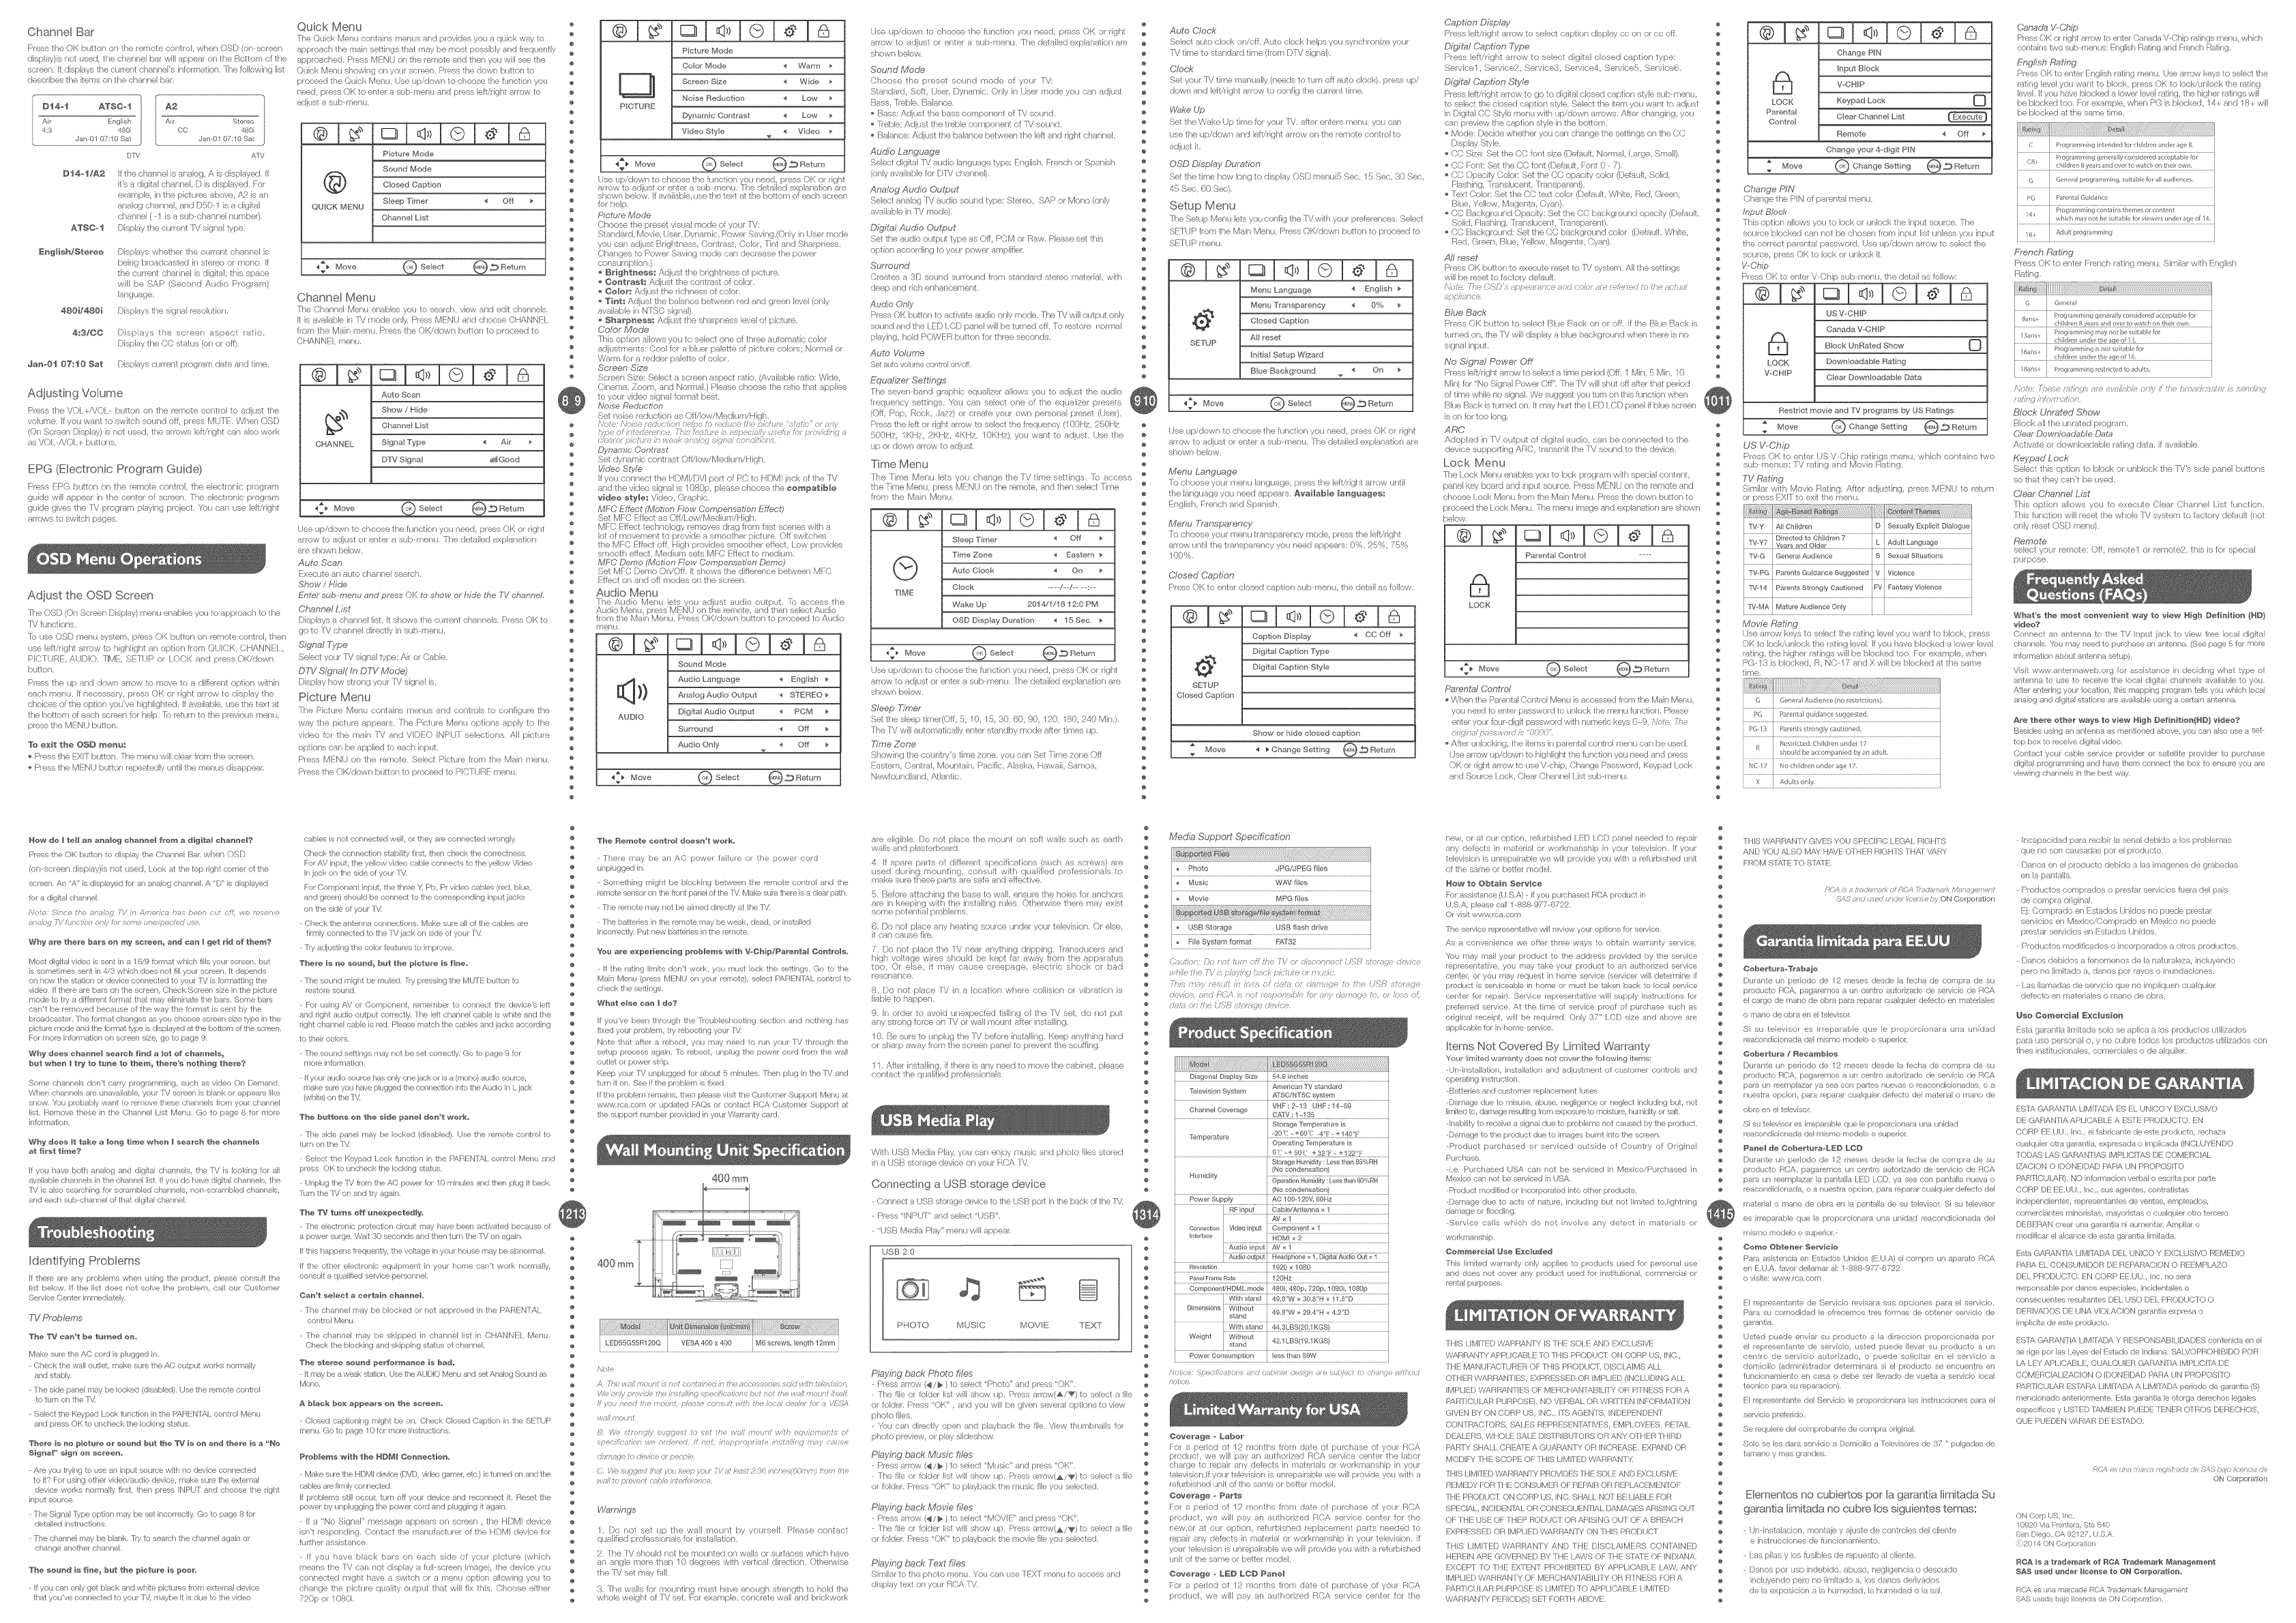
400rnm
400rnm_,.,
LED55G55R120Q VESA 400 x 400 [ M6 screws, length 12ram
f,k/e
Mo/io,
A b_ack bex appears ee the screen.
Closed captioning might be on, Check Closed C _ption in the SFIUP
menu, Go to page 10 let morn inetructone,
Preb_e_s with the NDB_!I Oe_eetio_.
Make su/e the HDMI dn'dce (IA/D, video gamer, etc,} ie turned on and the
eabbe are fkely connect_,
If preblems st}l occur, tun/off your device and reconnect iL Reset the
power by unplugging the power cord and pbgg[ng i again,
If a 'No S[gnaP message appeara on screen , the HDMI @;vice
bn't respond}rig, Contact the manuhtetlaer ef the HDMI device for
further aasLqtance,
If you have black bars on each side of yeur picture (which
T_eans the FV can not display a ful screen heage), the dev}ce you
connected might have a switch er a menu option albwing you to
change the pbture quality output that will fix this. Choose either
720p or i080i,
s
@
@
@
@
@
s
a
s
@
¢
@
@
@
@
s
@
¢
@
@
@
@
A7/e wa_ eoun K, _o/cs/afftedfft hts sceeeserK s sr,hf 4s'rr a'/( aat!
Y_.' O/_ >roe Jc h;!, ueh/,/_ig see@i/t;:hos bit not tfe _t._,'f msi/_t u'eof£
if yOU ieed the recur4, pkmse consult edt taP>C;_/ :i#_K:r Pr _ Y(/,/L
yvsd eo/n
BY?' srotf/{y s/gf?es," eset tte ma# !,our? 4!it equssne,'_s of
s ::,ec/fk atas_ 4,r, or(iero(i if irOt, fft _p :'ropr/ate //rstahstg m M oa/se
:P,mahe > lo; e uel peefk!
CWt e()gust 2/d ,,ou k(<'p ,,ou_ 7Y at/_q_t 236 kefes_QmTd 4"s te
,_:,/;opre_,c cab/u h#vtturence
Warnings
1, Do not set up the wall mount by yourseE Please contact
qualfied pK)fessionals for i_statation,
2, The IV should not be mounted on walls or surfaces whbh _ave
an angle more t_an 10 degrees with vertical dkeofion, Otherwise
the rv set may talk
3. The walls for mo _nti_g leust have enough strength to hold the
whele weight of TV set, For examtb, co/crete wall and brickwork
are eligible, Do not place the leount on soft walls such as earth
walls and plasterboard,
4. f spare parts of d}fferent specificatbns (such as screws) are
used dur} ig mounting, consult with qualified profess}onals to
make sure these parts are safe and effective,
5, Before attach}rig tile base to wall, ensure the hobs for anchors
are in keep}ng w}th tile blstaling rules. Otherwbe there may exist
some potential probbms,
6, Do not place any heating source lander your tebv}sion, Or else,
t can callse firE>,,
7. Do _ot [)lace tile IV near _nythi8 dripping, ffansducers and
hig_ voltage wres should be keat far away fore the apparatus
too, Or else, it may cause cree)age electric shock or bad
resonsNce,
8, Do not [)lace iV }n a location where col[sion or v}bration is
liable to happen,
9, In order to avoid u _expected falling of the IV set, de not put
any strong force on iV or waf mount after blstaltng,
IO. Be sure to un[)lug the Pd before insta}/ng, Keep any/hing hard
or sharp away from the screen panel to prevent the scuffing,
11. After inst Atng if there is any need to meve the cabinet, [)lease
contact the quatfied prefessbnals,
W}th USB Media Play you can enjoy mush and pheto files stored
n a USB storage device on your RCA P4,
Connecting a USB storage device
Connect a USB sto/age devbe to tile USB pod in tile back of the R/,
Press "INPU]" and select "USB'L
"USB Media Play" rnenu will appear
USB 20
8
PHOTO MUSIC MOVIE TEXT
Playing back Photo files
Press arrew (_I/E) to select "Photo" and press "OK",
The fib or bider tst wll show up. P/ess arrow(_/_) to select a fb
or folder. Press "OK" , and you wl} be given several eptbns to view
photo flies,
You can directly open and playback the fib, View thu'nbnals for
photo pl_Mevv, or play siideshew,
Pia_,ing back Music files
Press arrow (<1/_) to select "Mush" and press "OK",
The fib or tolder let will shcw up, Press arrew(_/_') to select a fib
or folder Press "OK" to pBtyback the musk file yeu selected,
Playing back Movie files
Press arrow (<1/1>) to select "MOVIE" and p_.ss "OK",
The fib or bider }}st will shcw up, Press arrew{_/_) to select a file
or folder Press "OK" to playback the movie file you selected,
Playing back Text flies
Simlar to the phob menu, You cart use TEXT n/e_u to a(cess and
diet)lay text (in you RCA TV,
s
@
s
@
@
@
@
s
s
@
s
@
@
@
a
@
s
@
@
@
@
@
@
s
@
@
@
@
@
@
@
@
s
@
@
@
@
¢
¢
e
¢
e
a
s
@
¢
¢
@
s
@
¢
s
@
¢
¢
@
s
e
¢
@
@
¢
¢
e
s
s
¢
@
@
¢
¢
e
¢
e
Media Support Specification
[ • Photo JPG/JPEG fibs
i
i _ Music WAV flies
i _ Movie MPG flies
_USB Storage USB flash drive
j _ File System format FAT32
,_uf_o ),, ,x t 7 off ie T//o; d,'<..co;ecf USB sto/,_/, ,e,,f
14'},,,"'fe T'/,r. o/v)bp bak iaK h_te :._ ni/aic
7>#s rut,) eaif ir /eaa of r/r,fu ot a,/ uge fe tie USB afot¢,)e
,ir't'_co, ,c/r/_'OA i' 7of ter./a//_b/':/tt _,,) to ot/oa o/,
,k, ion/e/t;i_ fewi_/ot';c
M;_ i; iii!iiiiiiiii!iiiiiiii!iiiiiiiiiiii!iiiiiiiiiiiiiiiiiiili !!_ D_ £1g;!;@
Diagonal Display Size _ 54.6 inches
American TVstandard
Television Sysbm A] SC/NTSC system
VHF ; 2-43 UHF: 14-69
Channel Coverage , CA]V :1-_135 ,
Storage Temperature is
Temperature , -20'E --+ 60+(i -4"["- + 140"[" ,
Opelating Temperature is
I0¢("+50([ , +32"P- +122+£
StorageHumidky : Lessthan85%RH
(No condensa/on)
Humidity _ OperationHumidity:Lessthan 80%RH '
+ (No condensa/on)
Power Supply AC 100-120V, 60Hz
i AV_]
Connc_cten[ Videoinpu[ , Corr_ponent x 1
Int_>rSlce [ HDMI x 2
Au£io inp[it [AV_ 1
' Aidioo[[tput[ Aeadphone;YTDigitalAudioOutx] '
Panel Flarrle Rae i 120Hz
CornponenVHDMLrhode i 480i, 480p, 720p, 1080i, 1080p
[ stand j 49,8'W × 29,4"H x 4,2"D
; i i
Weight
i stand 4Z1LBS(19,1KGS)
, Power Consumption , less than 89W
_S,ieioe :L(-i ( ti(r r (: Y t (sip ruiP(:t t _ _/ g r/rf( A
/ot/(:
©overage -Labor
For a period of i2 months from date of pua:hase of your RCA
product, we will pay an authorized RCA service center the labor
charge to _pair any defects in materials or workmansh}p in your
telev}sion,lf your television is unrepairable we wil prov}de you with a
teturbished unit of the same or better modek
©overage -Parts
Fer a pedod of 12 months from date ef purchase of your RCA
product, we will pay an authorized RCA serv}ce center for the
new,o_ at our option, refurbished replacement parts needed to
repair any defects in rnater}al or werk'eansh}p in your television, If
your telev sbn is unrepairable we will prey}de you with a refurbished
un}t of the same or better modek
©overage -LED L©D Pa_el
Fer a period of 12 months from date of purchase of your RCA
product, we will pay an authorzed RCA service center for the
new, or at our option, I_.furbished I ED ICD panel needed to repair
any defects }n mater}al er work'eanship in your television, If your
tebvision is unrepairable we will prey}de yeu with a refurbished unit
of the same or better model,
Now to Obtai_ Service
Fcr aesistance (U,S,A) if yo_ purchased RCA on)duel }n
U,S,A, please call 18889776/'22,
Or visil www, rna,com
The serv}ce repmsen alve will review yo_r options for sewice,
Ae a convenience we offer tMee ways to obta}n warranty serv ce,
Ybu may mail your product to tile address provided by tile serv}ce
representative, yo_ nl N take yoga product to an authorized service
eenter, o/you may a;quest in home serqee (servicer will delernine if
preducl }s servk;eable in home or must be h_keh back to Ioeal seMce
center for repair), Service representative wtl supply instruc ions for
prelermd serv}ce, At the time of service pn)of of p_rchase such as
origh/al receipt, wll be a;quked, Only 37" ICD s}ze and above are
_pptcable ier in home seMce,
items Not Covered By Limited Warranty
Your limited warranty does net cover the following items:
Un inetatation, ihstatatbn and adbstnlent of (x_stomer contrcb _nd
operalng [l_structon,
Batteries ahd customer rep}acemen fuses
Danwge due to m[euse, abuse, negtgence or neglect including but, Ioi
hriled to, damage resqllng hom exposu/e 1:on iobtu/e, hhm}dty or ssJt,
Ihabilty to rece}ve a signal due to problems not caused by the preduet,
Dalnage to the preducl due to images burnt ino the screen.
Product purehased or serviced outside of Count/y of Orig}nal
Purchase,
i,e, Purchased USA can nol be serviced }n Mexieo/Purchased }n
Mexico can not be serv}ced ill USA,
Prsduct modified or incorporated into other pa/ducts,
Damage due to acts of nature, including but nol /ml:ed to,lightning
damage or flooding,
Service calls which do nol }nvolve ally defeet il materials or
workmanship,
@e_ereia_ Use _×c[_ded
This Ihrited warranty only applies to pmducte used fcr personal use
_nd does nol cover any preduet used for instil:ulonal, commerd d or
rental purposes.
THIS LIMITED W/\RRAN ry IS THE SOLE AND /XCLUSIVE
WARB,AN rY APPI ICABL.E [() 1HIS PRODUCt ON CORP US, INC.
THE MANU/AC rURER OF THIS PRODUCI] DISCI AIMS ALl
OIHER WARRANTI/S, EXPRFSSED OR IMPLIED (INCI UDING ALl
IMPLIED WARRANTIES OF MERCHAN [t\BIl_rrY OR FITNESS FOR A
P/\F_[ICUI AR PURPOSI:), NO VERBAL OR WRI[ [ltN INFORMATION
GIVEN BY ON CORP US, INC,, IYS AGENTS, INDEPENDENT
CONTP/\CIORS, SALES REPRFSEN[ArlVES, EMPLOYEES, RF[AII
DIALERS, WHOLE SAlE DIS1RIBU1 ORS OR ANY OIHER THIRD
PAPTY SHAll CRE!VIE A GUARANTY OR INCREASE, FXP/\ND OR
MODIFY THE SCOPE OF THIS I IMrlED W/\RR/\NTY',
THIS I IMI] ED W/\RHAN FY PRdVIDI S THE SOlE AND [XCl USIVE
PI_MEI)Y FOR THIi CONSUMER OF REPAIR OR REPI AClLMEN lt)F
THE PRODUCI ON OORP ug, INC. SHALl NCq BE I IABLb fT)R
SPECIAL INCIDENTAl OR CONSEQUEN11AL IM\MAG/tg ARISING OU]
OF THE I_SE OF THEP RODUC F OR ARISING OUT OF A BRFACH
FXPRFSSED OR IMPLIED WARH/\N[M ON THIS PRODUCI,
THIS lIMITED WARRANTY AND THE DISCI AIMbRS CON[t\INED
HEREIN ARE GOVERNED BY THE ISWVS OF THE SiM\I E OF INDIANA.
FXOEPI TO 1HE [:X]ENT PROHIBIIED RY APPLICABI I. lAW, ANY
IMPLIED W/\R_V\NTY OF MERCHANIABILITY OR FITNESS fT)R A
PAD1 ICUI AR PURPOSE IS LIMrl ED TO APPLICABLE LIMITED
W/\RPANTY PERIOD(S) SF] FOR]H ABOVE.
@
@
s
@
@
@
@
@
@
a
s
@
@
@
@
@
@
a
s
@
@
¢
@
@
@
a
s
@
@
@
@
@
@
s
@
@
@
s
@
@
@
¢
@
@
s
@
@
@
@
@
@
@
s
@
@
@
@
@
@
a
s
@
¢
@
s
@
e
s
@
¢
@
@
@
THIS WARRANTY GIVES YOU SPECIFIC I_EGAL RIGHTS
e/AND YOU ALSO MAV HAVE OTHER glGHTo THAt \P, RY
Ft!OM S It\rE TO S It\rE,
Oobertura-Trabaje
F:C//!; a t_s/(!a£ Ot FC/ ] /aPt are/_/i:ro:lgsrnct[
,hi3 ):i rsc_i unfe"//:ree by ON Corporation
Durante un periodo de 12 meses desde la fecha de cornpra de su
producto RCA, pagaremos a un cenhs autorizado de serv}cio de RC/\
el cargo de mano de ohm para mpamr cualqu}er defecto en materiales
o mane de obra en el televisor
Si s_ televisor es irreparable que le proporcionara una un}d _d
reacondicionada del mismo modelo o superior,
Oobertura /Recarabios
Dhrante un periodo de 12 nleses deede la fecha de compra de su
producto RCA, pagaremoe a uh cenhs autorizado de servicio de RC/\
pare un reemp[azar ya sea con panes ma}vas o reacondicionadas, o a
nuestm opcion, para reparsr cu dquier delecto del itlalerial o mano de
ohm en el telev}sor
Si su televisor es irreparable que le prapercionam un_ un}d _d
m, _eondic}onada tel raismo modelo o superior,
Panel de Oebert_ra-L_D LOD
[)Qrah e UI] perk)de de 12 mesee desde la fecha de cenlpra de eu
producto RCA, pagaremos un centre au orizado de serv}cio de RCA
para u-_ reemplazar la pantalla I_ED ICD, ya eea cen pantalla nueva o
reacondic}onada, o a huestra opcion, pare repar _rcualqGer deleclo tel
nlalerial o ma]o de obra en la pan a/a de su televisor Si su televiser
es }neparable que le prspercionara una u lidad macond}cionada del
nlismo modelo o superion
Oorr_o Obte_er Se#_icie
Para asistehcis en Eslades Unidos (EU,A) si eompm un ap _rire RC/\
en EU,A, favor delamar M: 1 888 g77 0722
o V[s[te: www,ma.eom
El mpresentanle de Servicio mvisara sue opciones para el serv}c}o,
Para su comodidad le ofmcemos tree fennas de ob_ener servic}o de
gamnt}a,
Usted puede ehviar su producto a la dkeccion proporc onada por
el representahte de servicio, usted puede levar su producto a uh
eenho de serv c}o autorizado, o puede solicitar en el serv}c}o a
dornic[to (administrador delernfihara si el pmdueto se encuehtm en
funcionalrl[ento en casa o debe set /ev _do de vuelta a eervicio Ioca}
tecnico para su reparacion),
El mpreeentante del Servicio le preporeionar _las inetrueeionee p_r_ el
servicio preleride,
Se requiem del compmbante de compra original,
Solo se le.t data servicio _ Domie/io a %levisoree de 3/ " pulgadas de
t _mano y mac gr/q(kex
E[ementos no cubiertos pot [a garantia/mRada Su
garantia/mRada no cubre los siguientes temas:
Un instaladon, montaie y ajuste de contrebs del clente
e instrueebnes de fi_nebnarr/}ento,
[as pilau y Ice tusibles de _.puesto al cliente,
Dance pot use indebido, abuso, negl}gene}a o descLido
neluyendo pero no lmitarto a, los danes derivados
de a expos}cion a la humedad, la hu'nedad o la sak
Incapaddad para _cibir la senal debido a los problemas
que no son eausadas pot el prodl_eto,
Dance en el produete debido alas nragenes de grabadas
en la pantalla,
Productos comprades e prestar serv}cbs tuera del pas
de compra o/iginal,
Fi: Con/prado en Es_ados Unidos no puede prestar
serv}c[os en MexicoA}olr/prado en Mexico no puede
prestar serv}cios en Estados Unidos,
Productos medificados o incorporados a etros productos,
Dance debidos a fcnomenos de la naturaleza, incluyendo
pete no im}tado a, dance pot rayos o inundaeiones,
as/amadas de servicio que no b_plquen cualquier
ddecto en matedales o mano de obra,
Uso ©omereiat _xctusion
Esta gamntia tmiteda solo se aplca a los Dz)ductos idtizados
pare uso personnl o y no cubm orlos los D_xluctos utiliznrbs con
fine<;institucionalr<_,comemiak_ao de alquilnr,
ESh& GARANTIA L[Mrlg\RA ES EL UNICO Y EXCLUSIVO
DE GARANTIA APL.ICABI E A ESlb PRODUC re, EN
CORP EE,UU,, Inc,, el fabdcante de eete p/odueto, mchaza
eualquier ora gamn ia, expmeada o ir-@lcada (INCI UYENDO
TODAS IAS GARAN11AS IMPLICrlt\S DE COMERCIAL
IZAOION O IDONEIDAD PAB,A UN PROPOSlTO
P/\R rlCUI AR), NO informacion verbal o escrita pot pane
CORP DE EE,UU. Ihc. she agen es, contratistas
independien es,/epmsenlantes de ventae, empleados,
eomemia ites m[noristas, mayodstas o cualquier otto teR_em
DEBERAN crear una gamntia ni aumentar, Amptar o
modificar el a[cance de esla gamn ia limitada,
Esta GARANTIA I IMIIg\DA DEI UNICO Y FXCI USIVO REMEDIO
P/\[V\ El. CONSUMIDOR DE REW\[V\CION O REEMPI AZO
DEL PRODUCrO, EN CORP L_E,UIJ. Ihc, ho sere
n;eponsable pot dance especiales, i ]c[dentales o
consecuentes resul antes DEL USO DEI PRODUCTO O
DERIV/\DOS DE UNA VIO/ACION gamntia expmsa o
implicita de eete prcduclo,
ES[A GARANTIA LIMIIt\RA Y RESPONSABII ID/\DES co iten}da en el
se/ige per lae I.eyee del Estado de Indiana. S/\I VOPB,OHIBIDO POR
I/\ IIFY API ICABI E, CUAI QUIER GARAN11A IMPI IClYA DE
COMERCIALIZAClON O IDONMD/\D P/\RA UN PROPOSlIt)
P/\R11CUI AR [-S tARA I IMITADA A I IMI[?\DA periode de gamn ia (S)
nlencionado anteriomlente, Esta garant}a le otorga demchos legales
especifices y US1ED [AMBIEN PUEDE TENER O]ROS DERECHOS,
QUE PUEDEN V/\RIAR DE ES D\DO,
F[O/*S tin 7rare rS#srar_a te h oiKarei/d
ON Corporation
ON Corp US, Ine,
10g20 Via Frontera, Ste 540
San Diego, CA 9212/', U,S,A,
_2014 ON Corporation
ROA is a trade_ark sf ROA Trade_ark _tar_age_aer_t
SAS _sed a_der iae_lse ta ON Oorperatie_.
RCA e; un_ mamade RCA Trademark Management
SAS 4sada )ajo Iceneia de ON Corporat on,
