RDI Technology BC200 Wireless P/T HD Camera User Manual CM542512 20180104
RDI Technology (Shenzhen) Co., Ltd. Wireless P/T HD Camera CM542512 20180104
User Manual
1
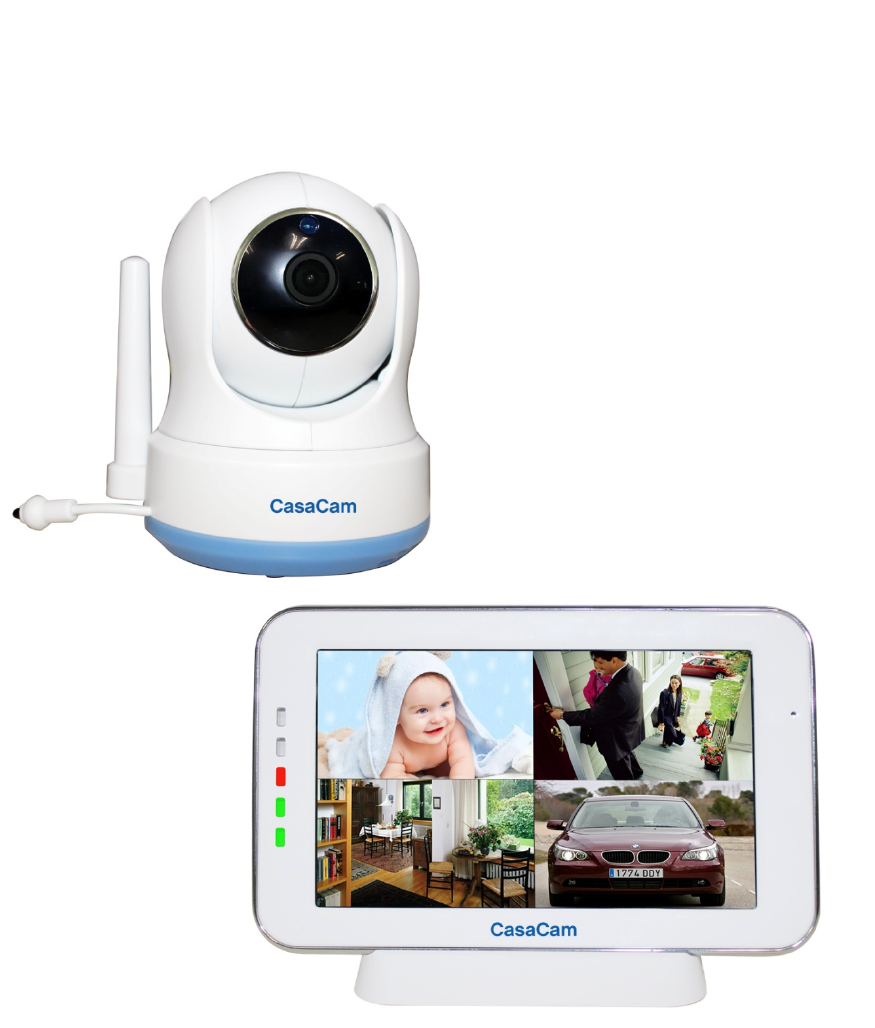
5’’WirelessTouchMonitorwithP/THDCamera
BC200WilrelessP/THDCamera
BM200M5"WirelssTouchMonitor
2
WARNING
STRANGULATIONHAZARD‐Keepcordoutofchild'sreach.NEVERplacecameraorcordswithin3
feetofcriborplaypen.NeveruseextensioncordswithACAdapters.OnlyusetheACAdapters
provided.
•Someadultassemblyorinstallationrequired.
•Thisproductcontainssmallpartsthatmaycausechoking.Keepsmallpartsawayfromchildren.
•ThisproductisNOTintendedtoreplacepropersupervisionofchildren.YouMUSTcheckyour
child’sactivityregularly,asthisproductwillnotalertparentstosilentactivitiesofachild.
•Beforeusingthisproduct,readandfollowallinstructionscontainedinthisbooklet,andreadand
followallinstructionsandwarningsontheproduct.
•NEVERusethetransmitterormonitornearwater,includingnearabathtub,sink,laundrytub,wet
basement,etc.
•Thisproductisintendedforindooruseonly.
•Thisproductisnotintendedforuseasamedicalmonitoranditsuseshouldnotreplaceadult
supervision.
•Thetransmitterdetectsnormalsoundlevelswithinarangeof2to3meters(6to10feet)froma
child.Ifthechildmovesoutsideofthisrange,ifmaynotbeabletodetectsoundsfromhimorher.
•Itisessentialthatyouchecktheoperatingrangeandconditionofthetransmittermonitoroninitial
installationandonaregularbasisafterthat.
•Checkreceptionregularly.Testmonitorbeforeuseandafterchangingcameralocation.
•Donottakeaparttheproductbyyourself.
•Topreventoverheating,keeptheproductandACpoweradaptersawayfromanydirectsunlight
andheatsourcessuchasradiators,heatregisters,cookingdevices(e.g.,stovesandovens)andother
appliancesthatproduceheat(e.g.,amplifiers,televisionsandstereos).
•Ensurethattheproductiswellventilatedduringuse.Avoidcontactwithpillowsandfurniturethat
mayblockventilation.
•UseonlytheACadaptersprovidedwiththeproduct,asotheradaptersmaydamagetheproduct.
Plugtheadaptersonlyintostandardhouseholdcurrent(100~240voltsAC).PlacetheACadapters
avoidingpinchpointsotherwiseyoucandamagetheadapters.
•WhenanACadapterispluggedintoapowersource,DONOTtouchtheexposedendoftheAC
adapter’scord.
•DonotuseextensioncordswiththeACpoweradapterstoavoidentanglement.
•Imagesandsoundsaretransmittedbytheproductoverpublicairwavesandtransmissionsmaybe
pickedupbyotherunits.(Althoughthetransmissiondistanceis100morlonger,itmayvary
dependingonwhetherthereareobstaclesbetweenthecameraandthemonitor.)
•Cautionifyouusethesystemtowatchayoungchild,donotplacethecamerawherethechildcan
reach.
•Whenusingthesystemwithonlybatterypowerandthechargeislow,thenthepictureandor
soundmayaffected.IfthisoccursthenpleaseconnecttheACpoweradapter.
Thetransmissionrangeofthewirelesssignalmayweakenifheavyobstructionssuchasaconcrete,
brick,ormetalwallsarebetweenthecameraandmonitor,orifthereareseveralWi‐Firoutersand
devicesinyourenvironment.
ToavoidinterferencewithRFsignal,keepyourcellphoneatleast3ftawayfromtheCameraand
3
Monitor.
CAUTION
Riskofexplosionifbatteryisreplacedbyanincorrecttype.
Disposeofusedbatteriesaccordingtotheinstructions.
Features:
z 5’’portableLCDmonitor
z 2.4GHzdigitalwirelesstechnology
z Systemexpandableupto4cameras,signaldisplayorquaddisplay
z Multiplelanguageselection
z HD(720P)camerawithnightvisionandsoundtrigger
z Lullabyandtemperaturedisplay
z 2wayaudio‐monitorcantalkbacktocamera
z Nightlight
z Digitalzoom,pan&tilt
z RechargeableLithiumbatteryforportableuse
z ExtendedbatterylifewithPowerSavemode
z Secure,long‐rangedigitalwirelesssignalupto900ft
z Camerawithmountingbracketforwall/ceilingmounting
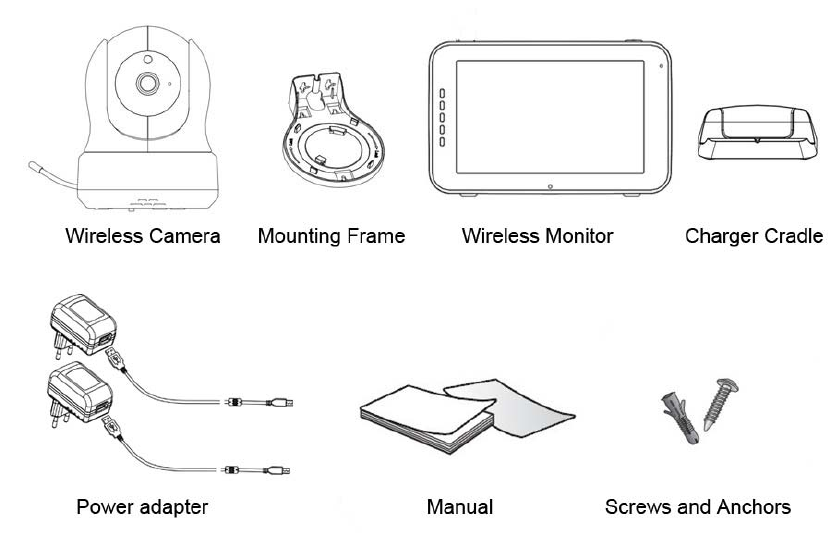
What'sIncluded
4
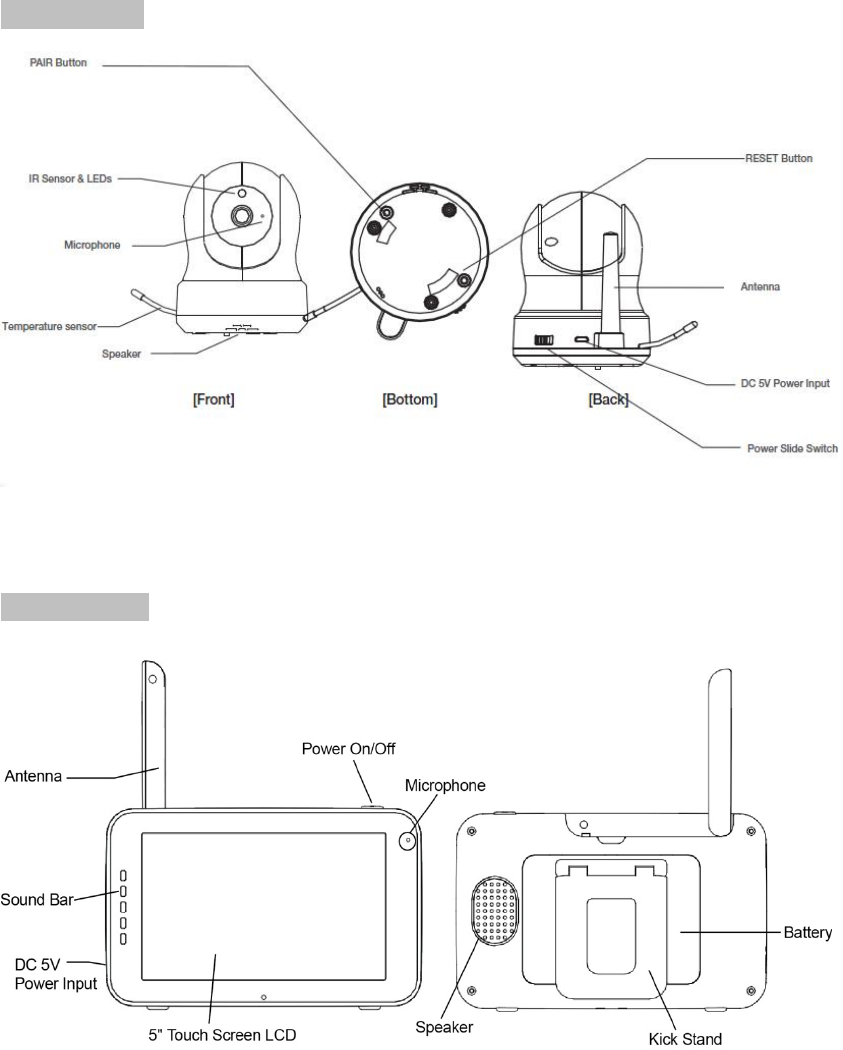
ProductOverview
WirelessCamera
WirelessMonitor
5
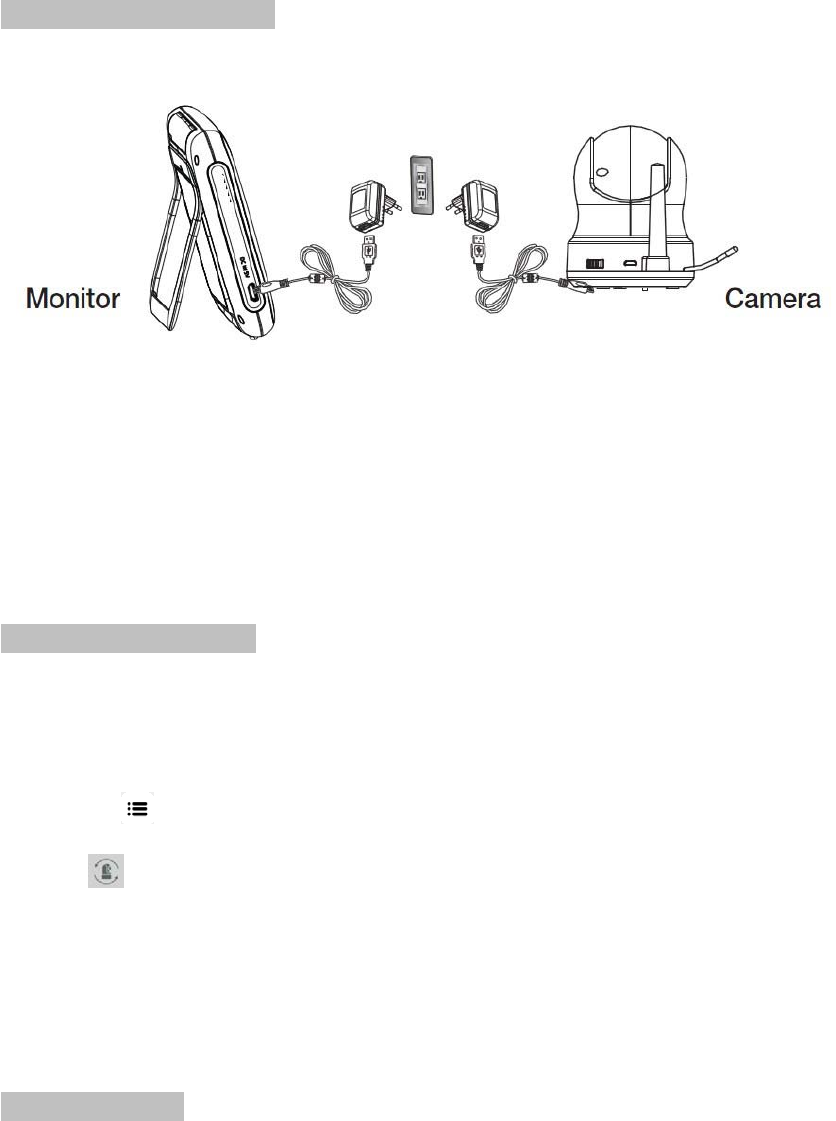
GettingStarted
InstallingtheMonitor&Camera
1. Fullychargethemonitorviapoweradapterorchargingcradlebeforeuse.Cameramustbe
pluggedinatalltimes.
2. Placethecamerainthepreferredposition.Youcanplaceitonthetable/cabinet,ormountitona
wallviamountingframe.
3.Pressthepowerbuttonforabout4‐5secondtoturnonthemonitor.
4.Pressandholdtheon/offbuttontoswitchthecameraon.
PairingtheMonitor&Camera
Theunitsalreadycomepairedforyourconvenience.
Ifyouhaveadditionalcamera,pairyourcameraasfollow:
1.Poweronwirelessmonitorandwirelesscamera.
2.Touchtheliveviewscreenonthemonitortomakethesettingsiconappear.
3.Pressthe[]buttononthemonitor.
4.Press[]iconandselectcameranumber.
(Themonitorwillsearchforthecamerawhensettopairingmode.Acountdownclockwillappearat
themiddleofthescreenandwillstartcountingfrom30to0).
5.Pressthe[PAIR]buttonfoundonthebottomofthecamera.
6.Ifthemonitorsuccessfullypairswiththecamerawithinthe30seconds,itwillautomaticallyswitch
tothecamera'scurrentview.
IndicatorDescription
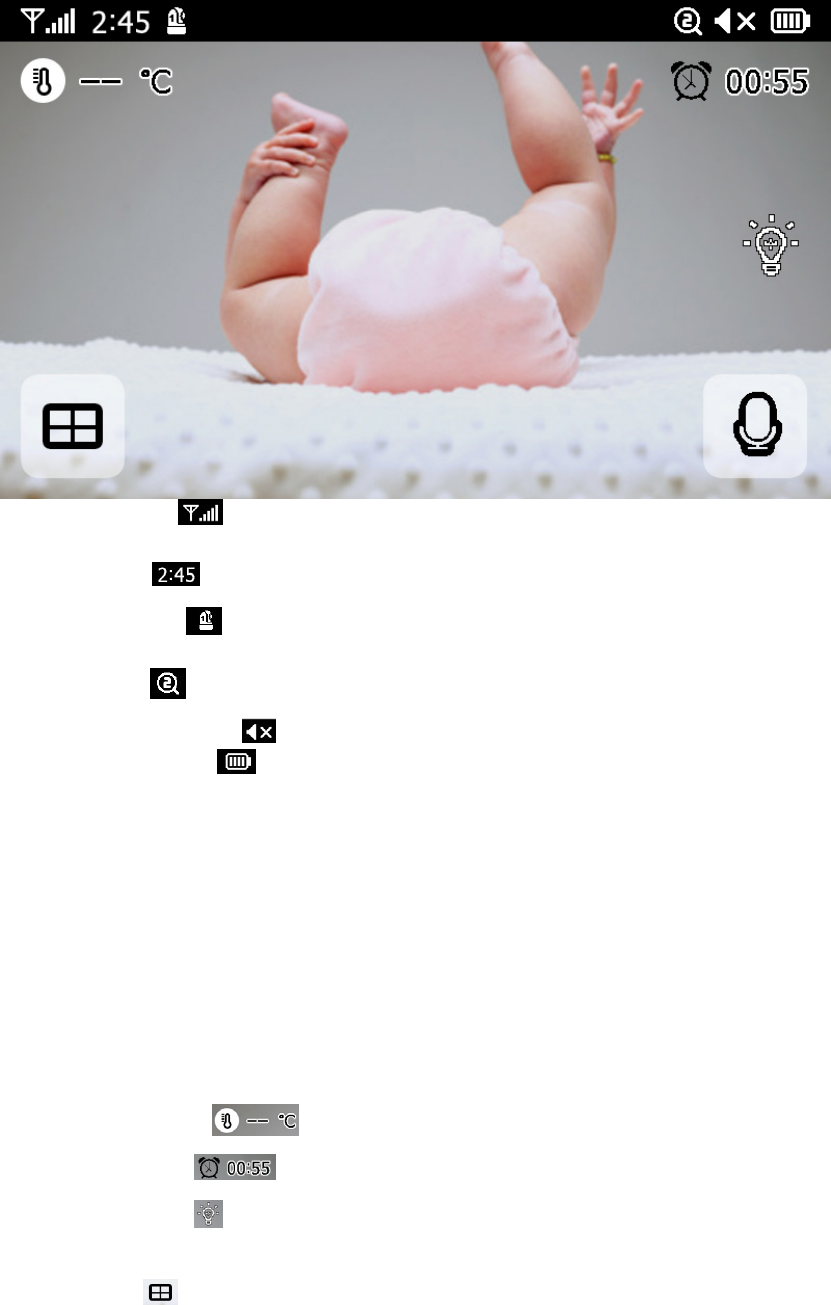
LiveView
6
1. Signalindicator:Showsthestrengthofthesignalbeingreceivedfromthecamera.Ifan'x'
showsuponthesignalbar,thenthesystemis"outofrange".
2. DigitalClock:Displaysthetimethatissetonthemonitor.
3. Cameranumber:Indicateswhichcameraisbeingdisplayedonthecurrentscreen
4. Zoommode:IndicatesZoommode.x1/x1.5/x2
5. MonitorSpeakerMute:Indicatesthemonitor'sspeakerismuted
6. BatteryPowerLevel:Showsthestatusofthebattery
•BatteryStatus
AbatterychargestateindicatorwithintheLCDwillshowthelevelofchargeindicatingfivestates,
includingalert(flashingredbatteryoutline),1/4,1/2,3/4andfull.
FlashingRedBatteryFrame
¼BatteryfillRed
½BatteryfillWhite
¾BatteryfillWhite
FullBatteryfillWhite(thepowersupplyisnotconnected)
FullBatteryfillWhiteandlightningbolticonalternately(thepowersupplyisconnected)
Whenthepowersupplyisconnectedthelightningbolticondisplayedoverthecentre.
7. Temperatu reDisplay: Showsthetemperatureoftheroom.
8. Feedtimecounter: Acountdownclockofthefeedtime.
9. NightLightOn/Off: Indicatesifthenightlightisonoroff.Youcancontrolthenightlighton
thecameraremotelyormanually
10. QuadMode:Pressthisbuttontoswitchtoquadmode.Whentwocamerasarepaired,there
willbetwodisplays.Iftherearemorethantwocameraspaired,therewillbefourdisplays.Up
to4camerascanbepaired.Youcan’tlistentotheaudiofromcameras.
7
11. TalkBack: Pressthisbuttonwhiletalking.
Note:
a) “TalkBack”buttononlyappearonsinglecameraLiveViewmode
b) PressandholdTalkBackbutton,canactivatetalkbackfunction
c) Ifcameraunitwasplayinglullaby,itthenitwillbepaused.
d) Thecameraspeakerloudnesssettingissameaslullabyplaylevel.(selectMenu>Sound>Camera
Volume)
e) IfreleaseTalkBackbutton,thengobacktoLiveViewmode.IfCamerapreviouslylullabyhas
beenturnedon,thenitwillresumeplaylullabyagain.
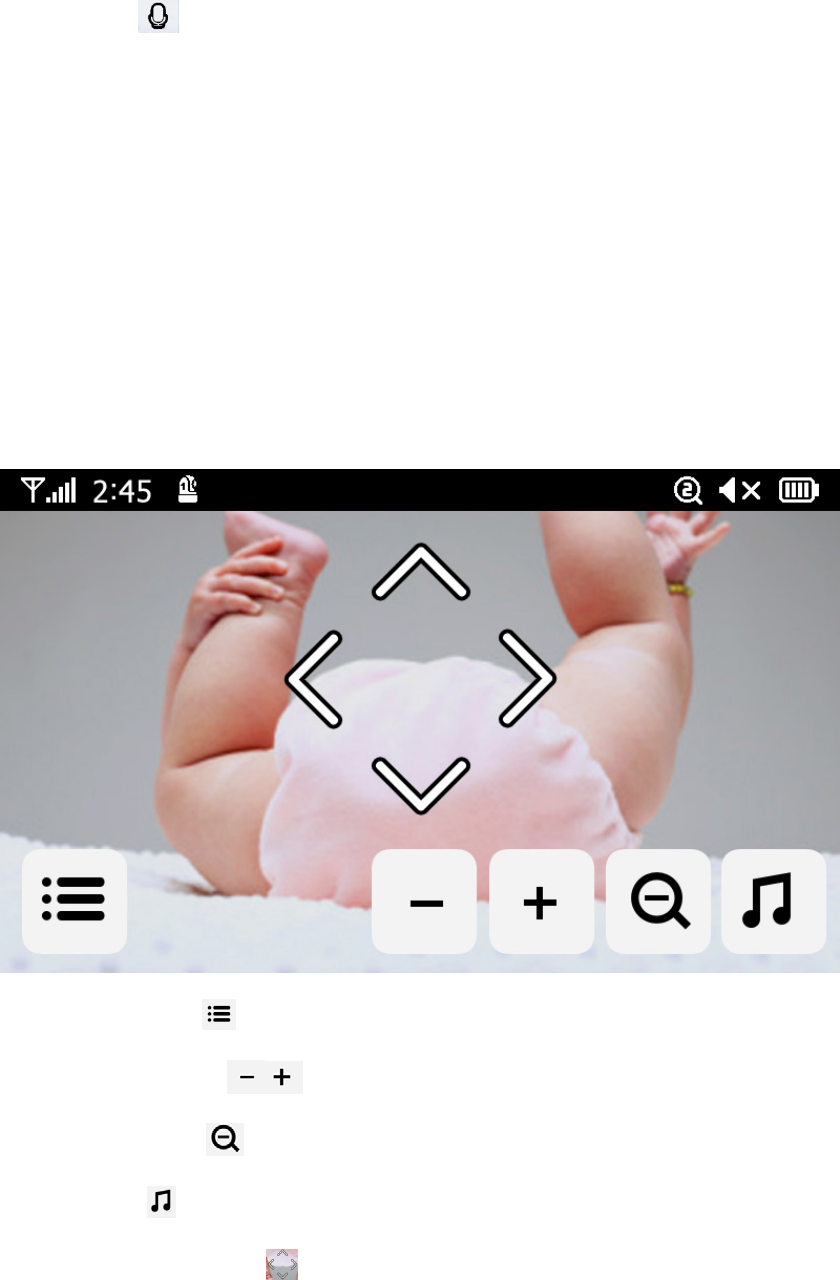
OperationKey
Bytappinganypositiononthescreenthen“Operation”keyscomeout
Ifusertapesscreenwithouttouchinganyfunctionkey(ortimeisoutafter10seconds),thenitwill
backtoLiveViewmode.
1. MenuSetting: Menusettingincludesmonitorandcamerasettings
2. MonitorVolume: adjustthemonitorvolume
3. ZoomIn/Out: Youcanhaveacloserlookviathisbutton
4. Lullaby: PresstheLullabyicontoturnlullabiesON/OFF.Plays4pre‐programmedsongs
5. NavigationControls:UsethisicontoremotelyPan/Tiltthecamera
8
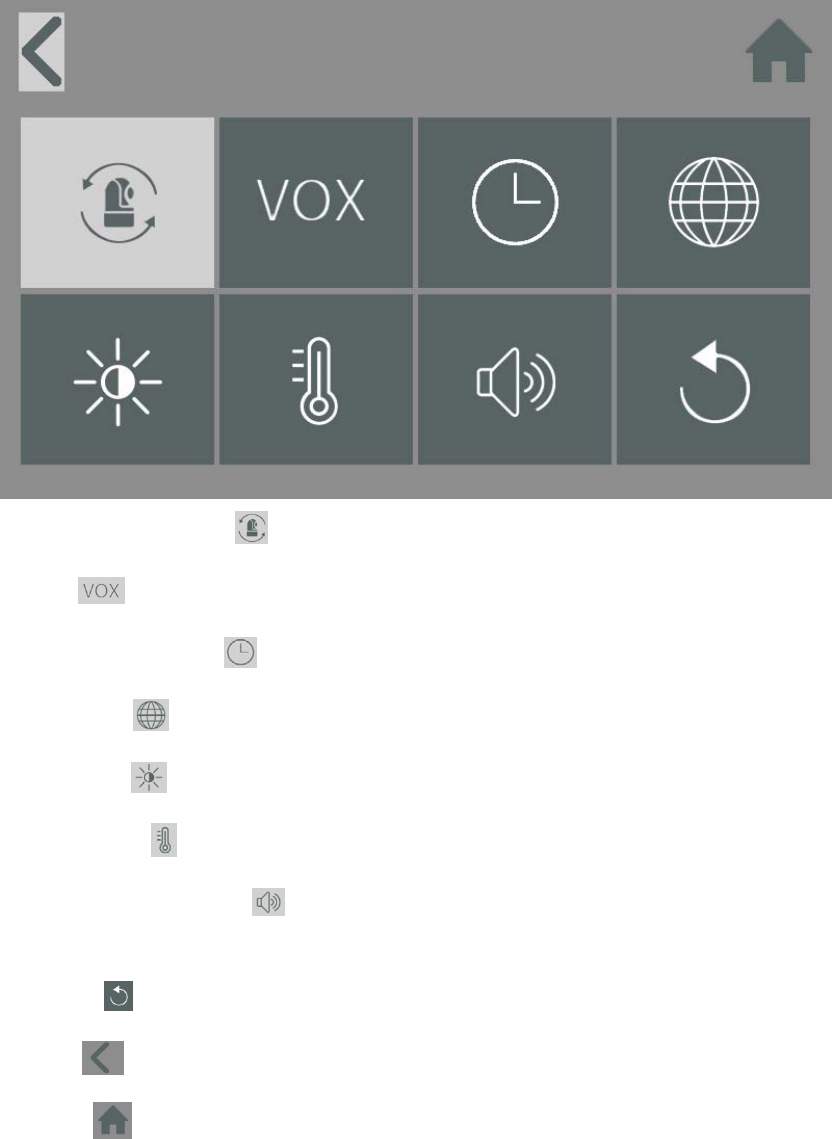
MenuPage
1. Pair/UnpairCamera:Youcanconnectupto4camerastoyoursystem.
2. VOX: SettheVOXsensitivitytodetectloworhighsoundlevels.
3. Date&Time&Timer: Setupthesystemdate&time&feedtimer.
4. Language:Settinglanguageforthemonitor.
5. Brightness: Youcanadjustthebrightnessofeachindividualcamera.
6. Temperature: YoucansetCelsiusorFahrenheit.
7. Camera&AlarmVolume: Youcanadjustthecameraandalarmvolume:5beingtheloudest
and0beingmute.
8. Default: Resetthemonitorbacktoitsfactorysettings.
9. Back: Savethesettingsandreturntopreviouspage.
10. Home: ReturntoLiveView.

9
Specification
Kit
OperatingFrequencyRange2.4GHz
TXPower17dBm
RXSensitivity‐88dBm
TypeofSpreadSpectrum
Used
FHSS
TypeofModulationUsedGFSK
DataRate4Mbps
CommunicationRange300M
Thetransmissionrangeofthewirelesssignal
mayweakenaccordingtoyourenvironment.
Camera
Imagesensortype1/4"ColorCMOSImagesensor
EffectivePixel1280(H)x1024(V)
Powerrequirement5VDC1.5A
ImageResolution10fps@1280*720
Lens3.95mmF2.2
ViewingAngle(Diagonal)55°(FOV)
IRLED/NightVisionRange5m940nm
Operationtemperature‐10~40°C
Monitor
LCDPanelsize5"touchpanel
LCDResolution800x480
OperatingTemperat u re14°F~104°F(‐10~40°C)
OperatingHumidity0%~85%
Powerrequirement5VDC1.5A
FCC Statement
This equipment has been tested and found to comply with the limits for a Class
B digital device, pursuant to part 15 of the FCC rules. These limits are
designed to provide reasonable protection against harmful interference in a
residential installation. This equipment generates, uses and can radiate radio
frequency energy and, if not installed and used in accordance with the
instructions, may cause harmful interference to radio communications.
However, there is no guarantee that interference will not occur in a particular
installation. If this equipment does cause harmful interference to radio or
television reception, which can be determined by turning the equipment off and
on, the user is encouraged to try to correct the interference by one or more of
the following measures:
-Reorient or relocate the receiving antenna.
-Increase the separation between the equipment and receiver.
-Connect the equipment into an outlet on a circuit different from that to which
the receiver is connected.
-Consult the dealer or an experienced radio/TV technician for help.
To assure continued compliance, any changes or modifications not expressly
approved by the party.
Responsible for compliance could void the user’s authority to operate this
equipment. (Example- use only shielded interface cables when connecting to
computer or peripheral devices).
This equipment complies with Part 15 of the FCC Rules. Operation is subject
to the following two conditions:
(1) This device may not cause harmful interference, and
(2) This device must accept any interference received, including interference
that may cause undesired operation.
FCC Radiation Exposure Statement:
The equipment complies with FCC Radiation exposure limits set forth for
uncontrolled enviroment. This equipment should be installed and operated with
minimum distance 20cm between the radiator and your body.
.