RF Solutions Q1864-PDU Positional display unit for Tensator queue forwarding system User Manual
RF Solutions Ltd. Positional display unit for Tensator queue forwarding system
UserManual.wiki
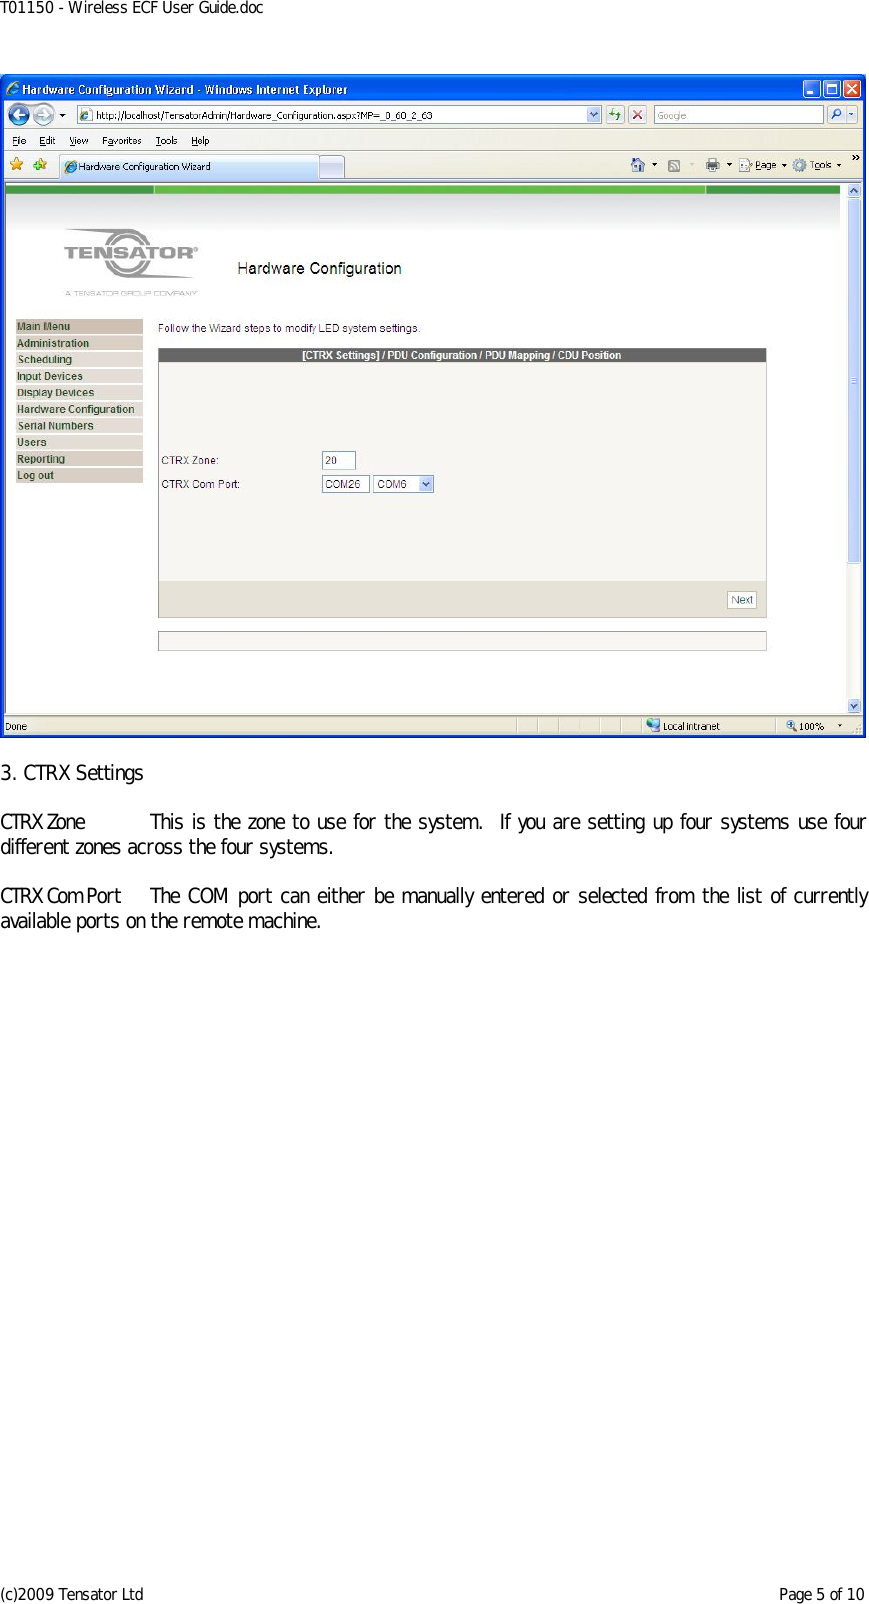
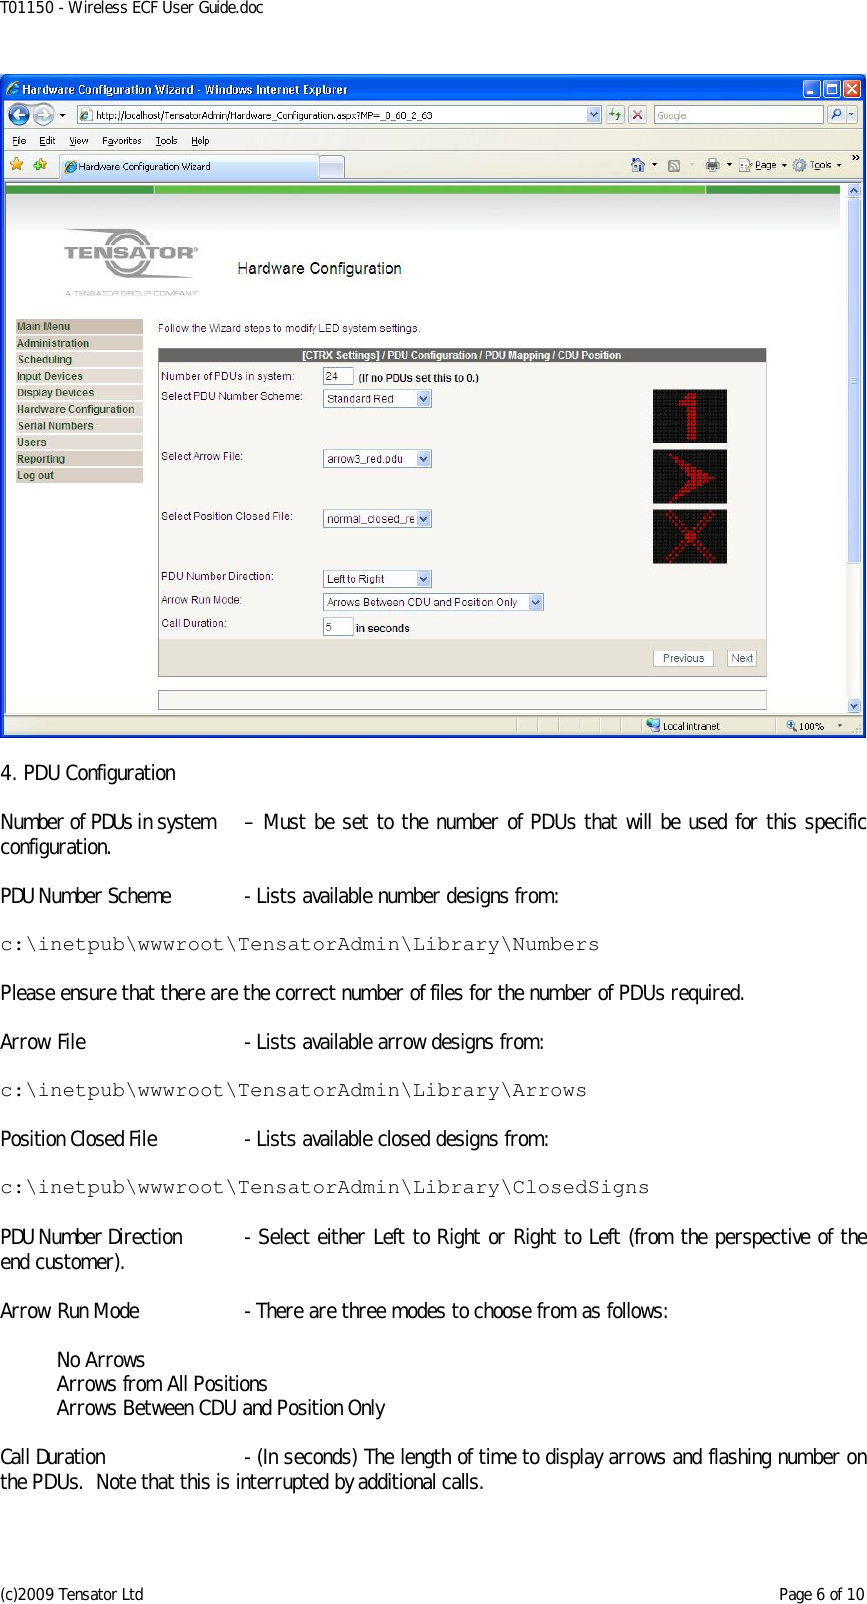
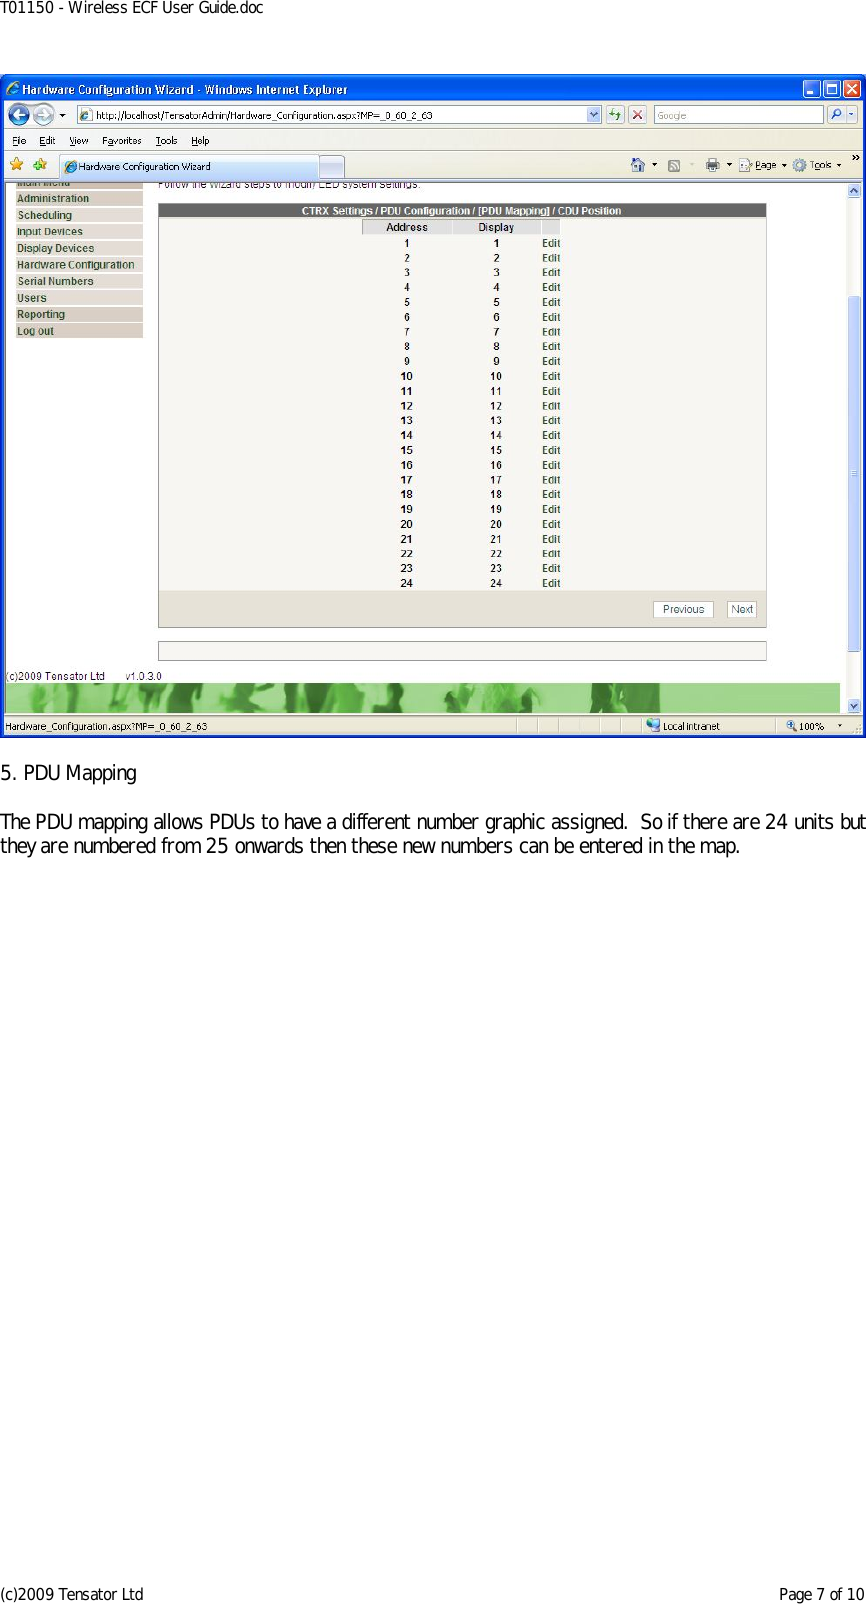
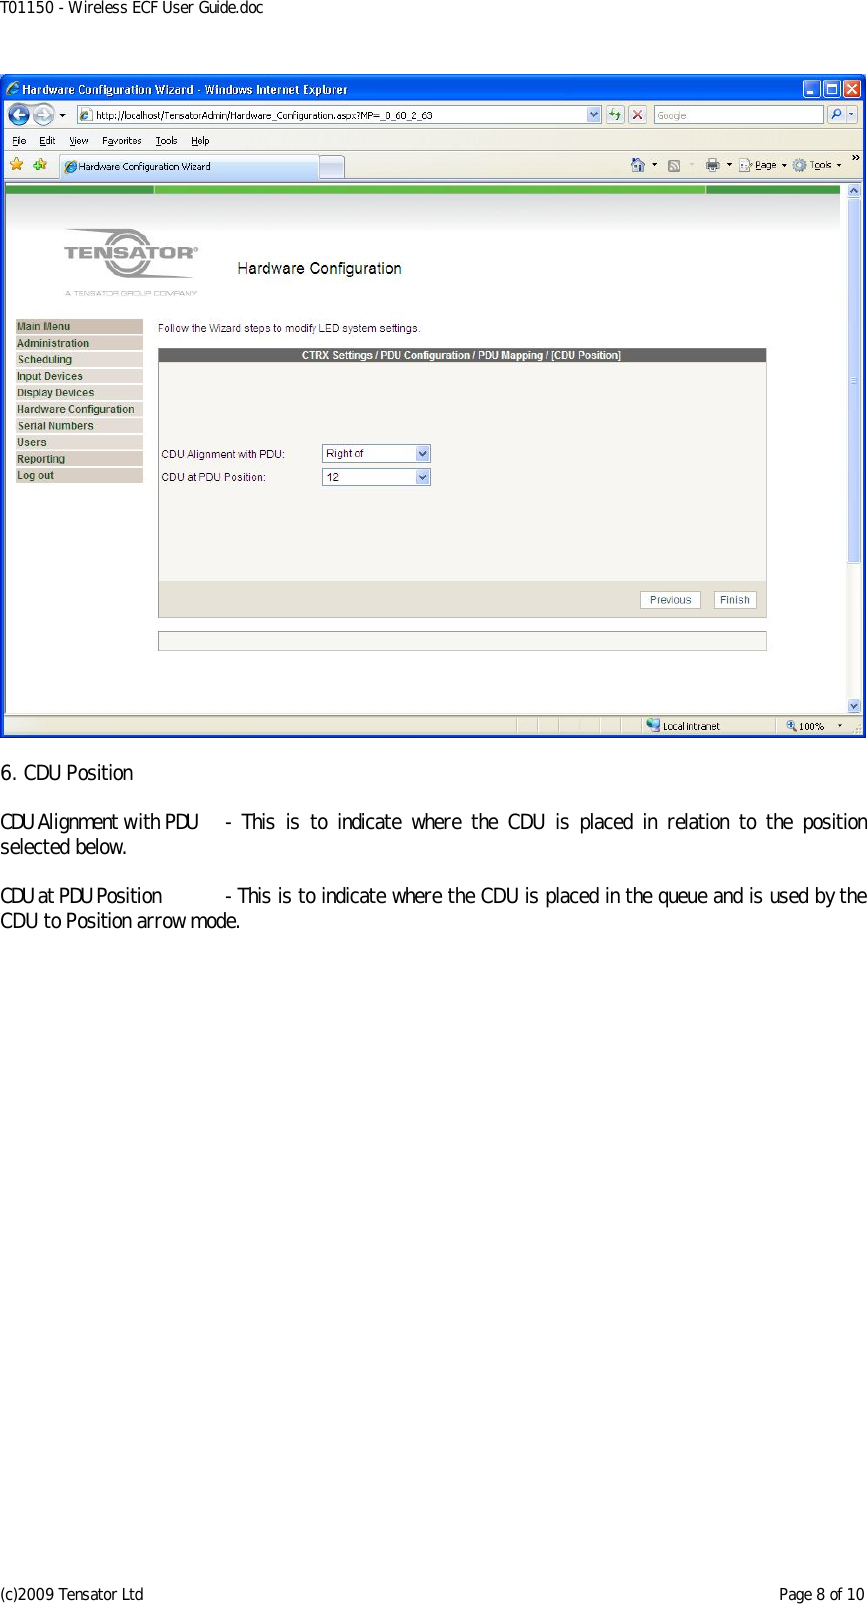
>
RF Solutions
>
Q1864 PDU User Manual
User manual
Navigation menu
Upload a User Manual
Namespaces
Wiki Guide
HTML
PDF
Info
Views
User Manual
Discussion / Help
Navigation