RF Technology RFM71201 Tablet PC / MID User Manual
RF Technology Co., Ltd Tablet PC / MID
User maual
1
Tablet PC
User Manual
2
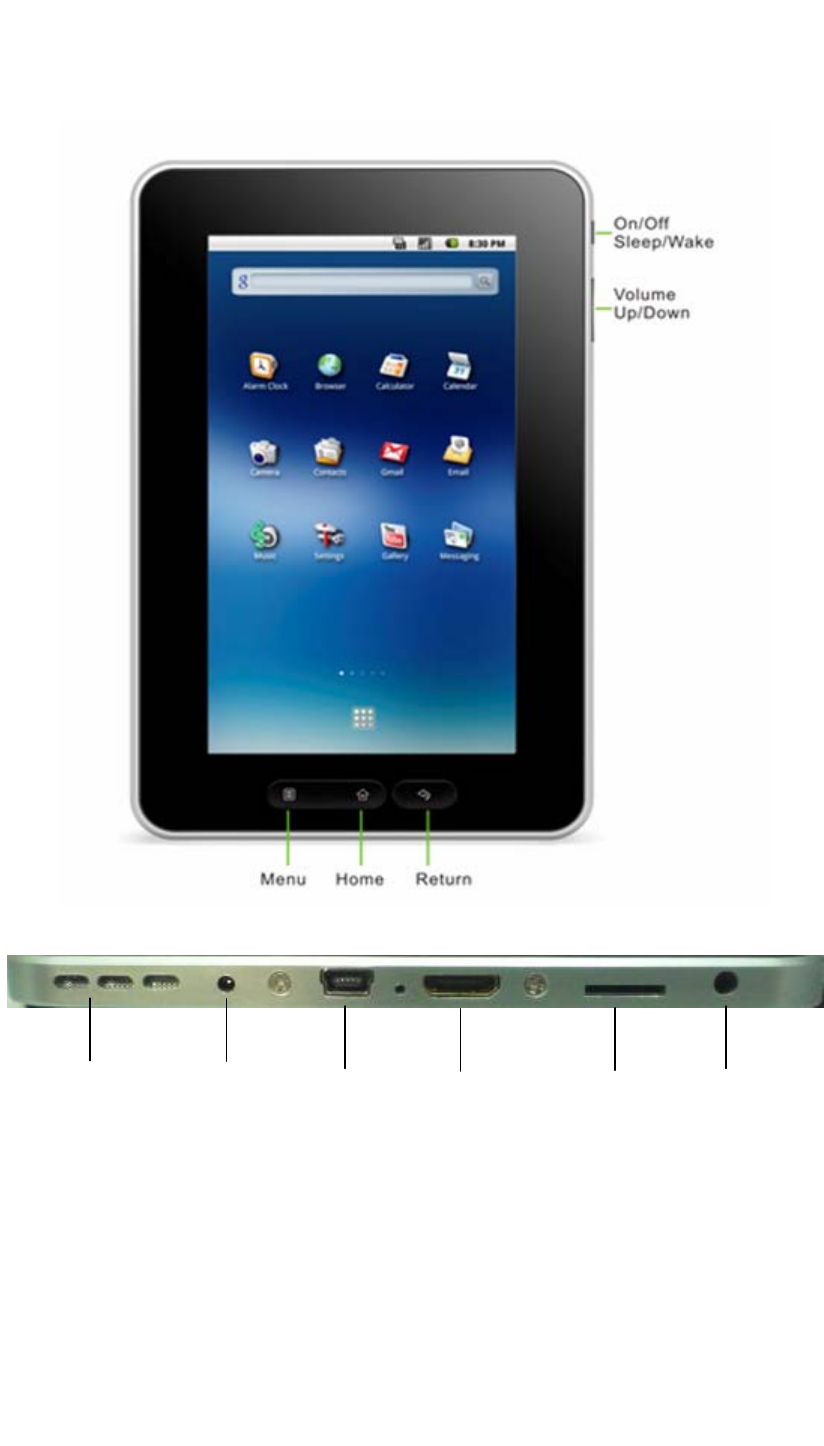
1. Outlook description
2. Power button usage
Starting up:Long press the power button for 3 seconds.
Power off:Long press the power button for 3 seconds →click power off → click confirm
Screen off and on :Short press power button to turn off or turn on screen
Mandatory shutdown: If the device has no response, long press the power button for 6 seconds
to perform mandatory power off
Horn DC-5V USB HDMI TF Card
Earpho
3
Notice: In case of no necessary conditions, It's better not use mandatory power off . Power off
should be performed normally according to the standard steps.
Reset button: Press “reset” only for power off, and users need to power on again after “ reset”.
3. Touch Screen
According to following user guide, and know how to use touch screen.
Click: Click an optional icon on screen as your choice.
Longer press: chose one icon and press longer, can drag then show the icon on desktop menu.
Dragging: Icons can be put into different screen interfaces by dragging the icon between different
screen interfaces.
☆To protect the screen ,please don’t put any objects above the screen surface.
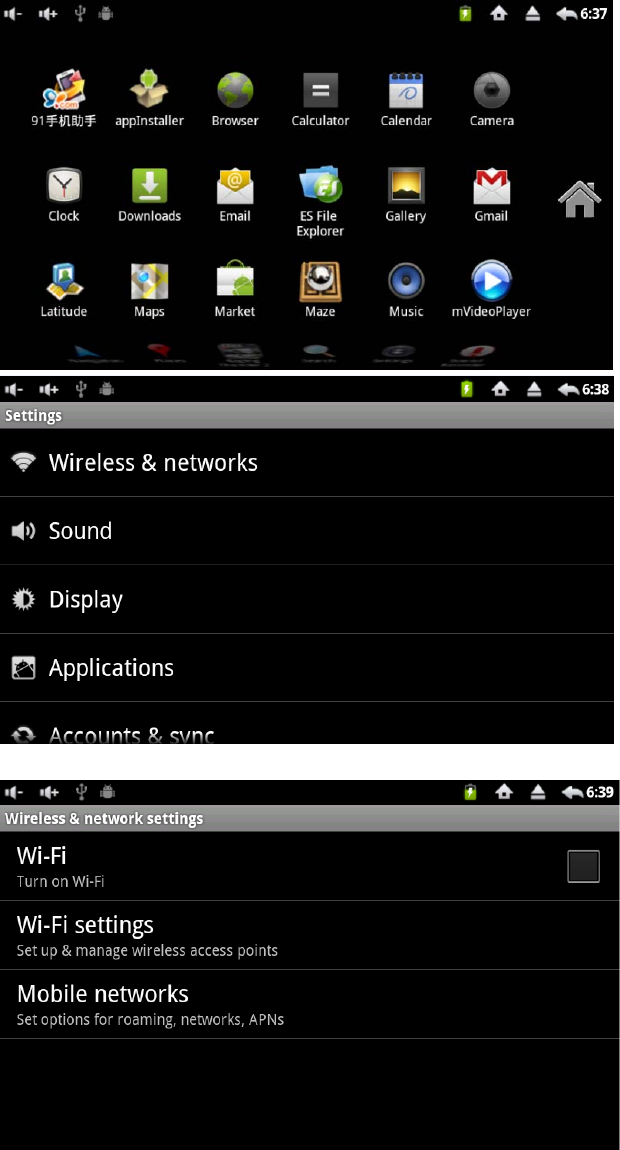
4. Wi-Fi network settings
1.Since many functions need Wi - Fi connection to be enforced ,Set Wi-Fi network before using .
2. Click setting → Wireless&Netword settings。
3. Choose and open Wi-Fi menu to enter Wi-Fi settings.
4.Then all usable Wi-Fi networks can be automatic searched and displyed .If showed as
among the Wi-Fi networks.
And then input password to connection
Click the Wi-Fi network you need → If need password then input it →Click link
5. Press HOME button to back desktop
☆ If the Wi-Fi set is hidden ,wont be searched out of itself. Need to click add Wi
- Fi network, then input relevant information to add your Wi – Fi
5. 3G settings
1. Connect the 3G USB dongle to the USB host of table pc. After connection is made, the LED will be
on from the dongle.
2. Make the connection settings of the local operation. Click the “settings” on the screen of the device.
4
3.Choose below screen “ Wireless & networks”, Choose below screen “Mobile networks”
4.Choose below “ Access Point Names”, Then there is below screen:
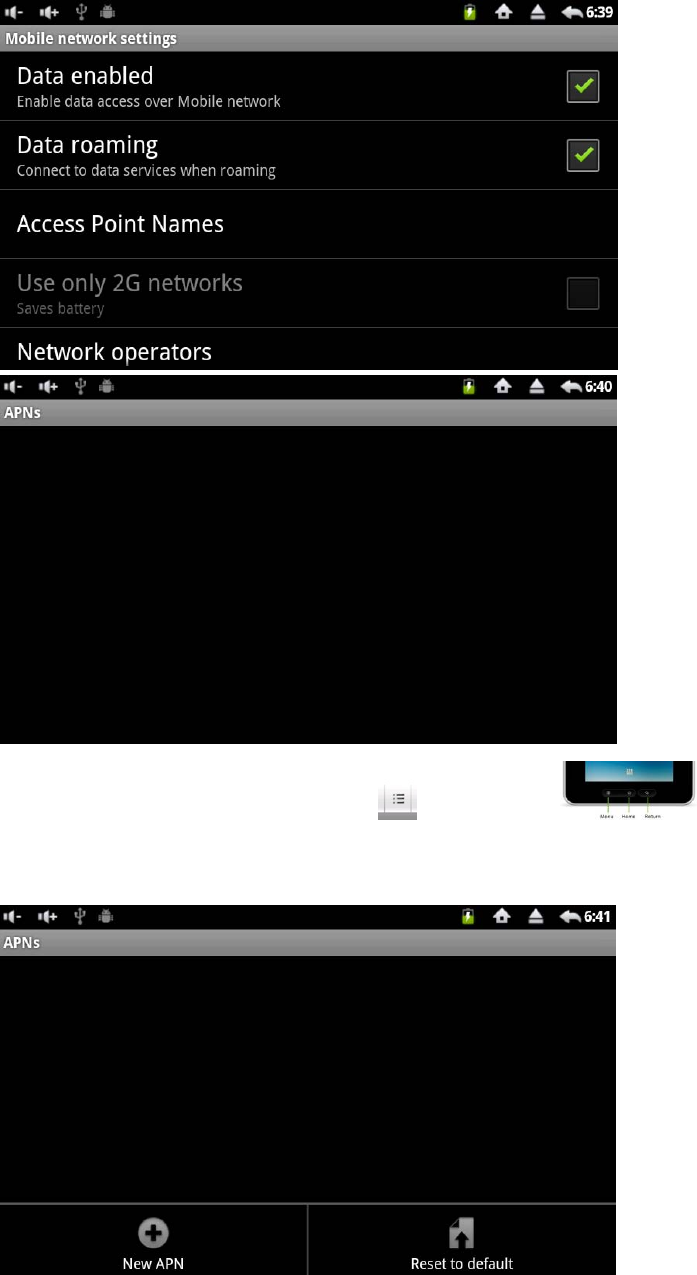
5
5.Click the “menu” ( right upper corner icon , or the device to
press“MENU”button),There is a below menu, and choose “New APN”, There is a blow menu in the
screen:
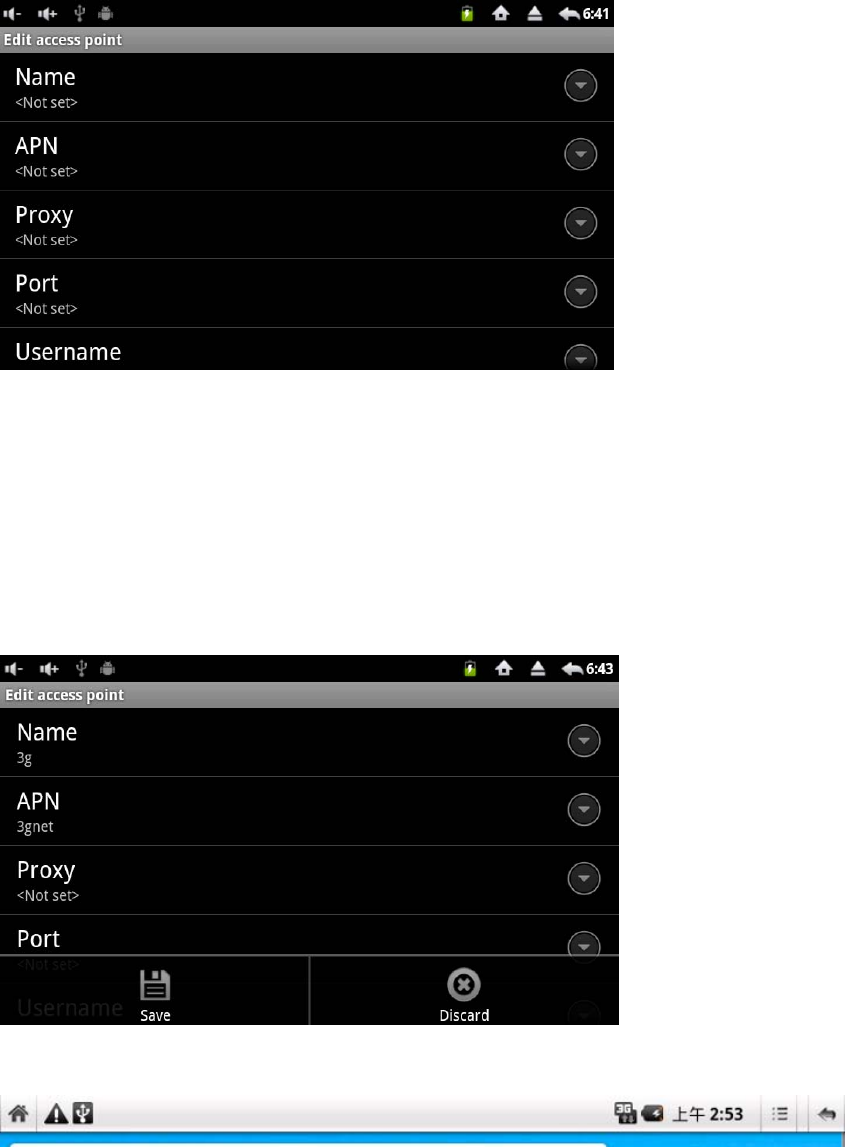
6
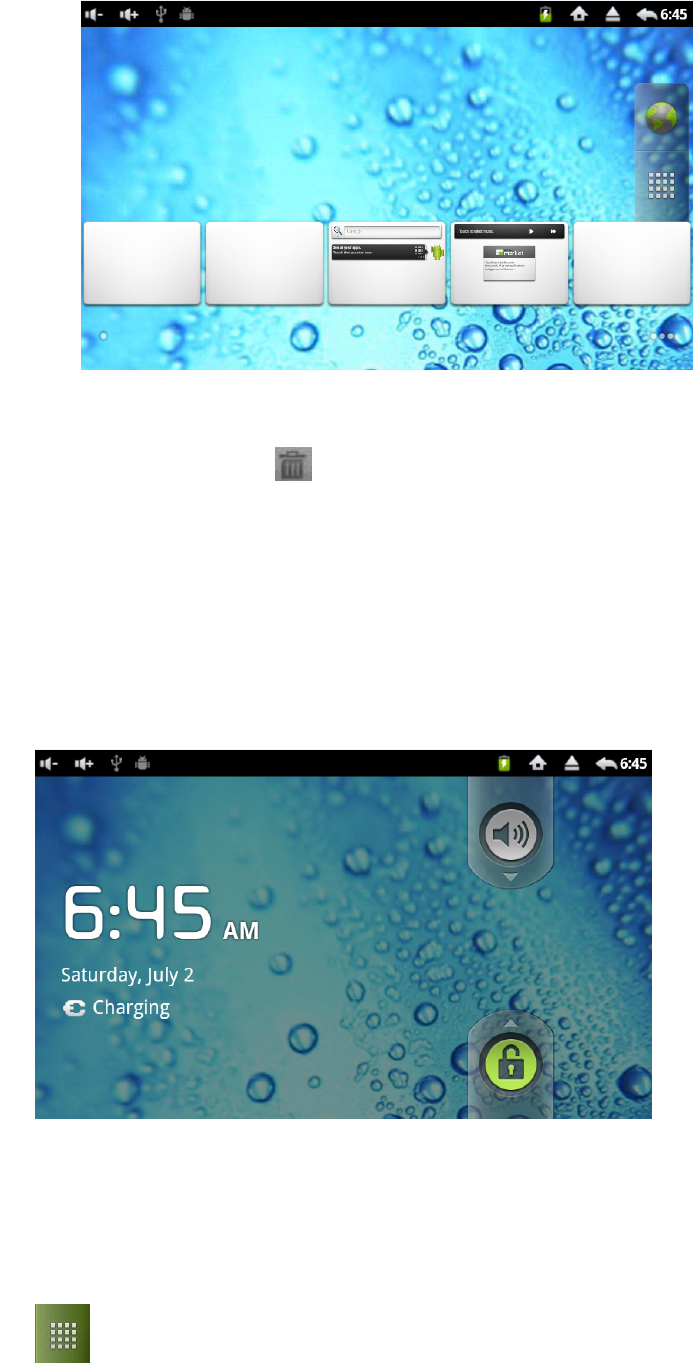
6.For WCDMA, we take our Chinese WCDMA mobile operator as example to set the following:(for
your country WCDMA, please refer to your local standard to set the above)
7.After the setting is done, and press the “menu” button again, there will be a below screen as
shown,and click “save”, The setting is finished for the 3G USB dongle.
8.Return to the main screen of desk, There is a “3G” icon in the right upper corner, and it means the
connection is successful.
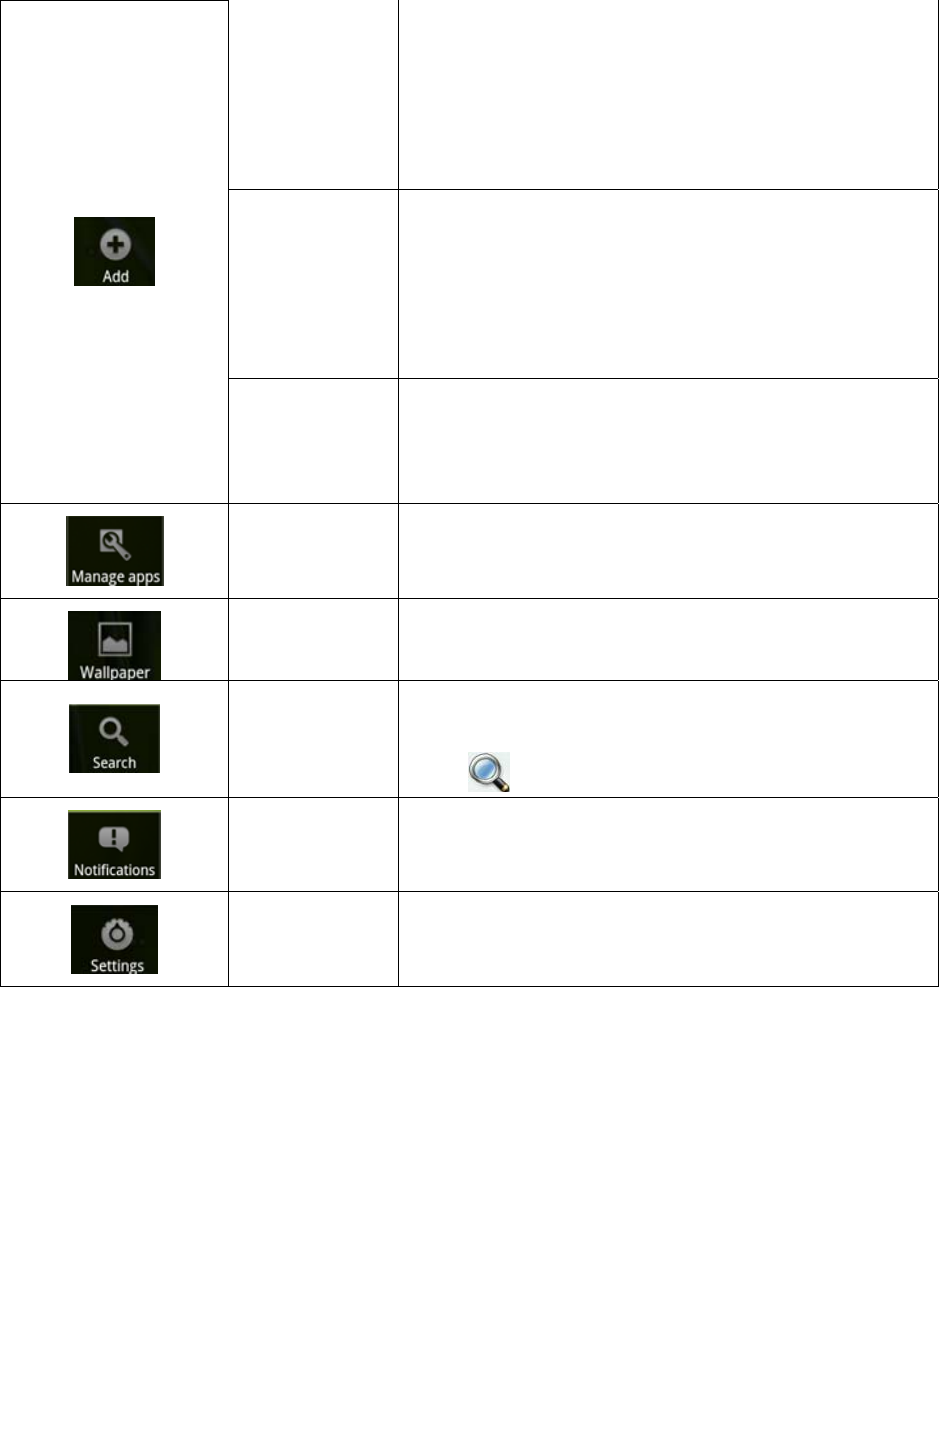
6. Desktop
Name:3GWAP
APN:3gnet
Proxy:Not set
port:80
MMS proxy: Not set
MMS port: Not set
MMC:460
MNC:01
Username:Not set
Password:Not set
Server:Not set
MMSC: Not set
Authentication type:Not set
APN type:Not set
7
☆ Click on any program icon to run it.
☆ Long press and drag icon, move it to other parts of the screen .
☆press longer and drag icon to move it from the desktop cleanup.
7. ScreenLock interface
Can install automatic lock screen or quickly press down the power button to achieve manual lock
screen. Lock screen interface shown below:
8. Programming interface
Click on the desktop to enter Programm interface

8
☆To move a icon to desktop, need long press and drag icon, until it appear on the desktop to release.
☆ Long press and drag icon, move it to other parts of the screen .
☆ Long press and drag icon to , remove it from the desktop cleanup.
9. desktop menu functions
Click MENU button on your desktop to enforce MENU function .
9
Shortcuts
Add in the desktop applications, setting and quick bookmark,
etc.
☆ if you choose the shortcut on the desktop before as your
need item then they will be replicated, namely same multiple
icon will be produced.
widget
Analog clock: add a round-shade analog clock.
Calendar: add a calendar small tools, show the current date and
time.
Music player: add a music small tools, quickly begin to play
music, without having to start the music in application。
folder
New folder : can add empty folder, all contact folder, haved
added star mark contact folders , have the phone number contact
folder.
Application
management
Can apply device to achieve installing, uninstalling, closing ,etc.
choose wallpaper from the picture and wallpaper repository .
Can undertake rapid search.
Click the input items → input content you want to search
→click
Display notification message (including new mail, calendar,
etc.)
See "Settings" for more information.
10. program management
Installation program
☆ can find many interesting and free Android applications. Only need to start the browser, and do
"Android applications" search that can be available
The Android applications you buy or download that can be installed to the device
1.Copy the .apk files you want to install to SD card or device RAM , or install the applications in
the computer by the third party software.
2. Choose a .apk files → install.
10
Applications will be installed and the application icon will be displayed in all applications interface.
3. Click open, program will be operated directly, or click finish to return to main interface
Download program directly from the network.
You can download Android applications directly and can install it to device quickly and conveniently.
1.Click the browser program icon to connect to the network .
2.Input the website, click the download link in device program which you want to installed
3. Download finished , long hold the downloaded files (in downloaded record interface), - click open -
install .
Uninstall program
Android program can be quickly and conveniently uninstalled
1. Click Settings applications →management application.
2.Click uninstall applications →unloading.
3.Click ok for unloading.
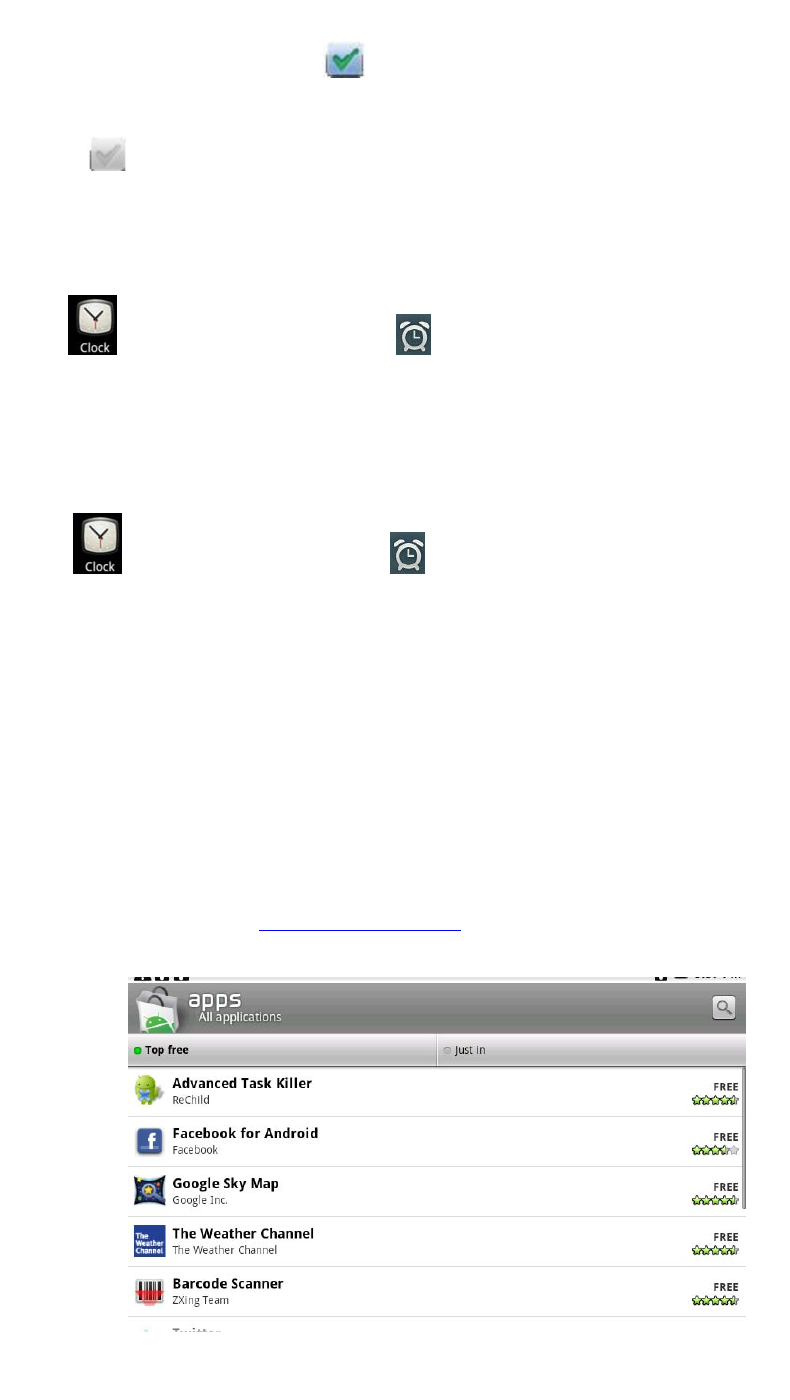
11. Clock
Click the clock program icon. Can see the current date and time
Alarm clock .
several alarm clock can be set in device
☆When icon appears above the screen namely on the status bar that mean at least one
current alarm clock will ring .
alarm clock
1.Enter the clock interface, press the MENU button, select "add alarm".
2. Set the alarm clock you need
3.Click start using alarm clock.
4.Click finish
Close alarm clock hint
1.When reach the alarm clock time it will popup a window of alarm clock name.
2.If you want to ring once in 10 minutes , can click it as suspended ring again.
3.Click cancel to stop hints.
4.Start using alarm clock
5.The alarm that has been set as repeat alarm clock means you want to temporarily cancel enable alarm
11
clock but not delete the alarm clock.
6.In the alarm clock interface, click the icon you want to start using
behind the alarm clock
7. Click to restart
Edit alarm clock
1.Click the clock program icon,→ click.
2.Click the alarm you want to edit into → for editing.
Delete alarm clock
1. Click the clock program icon, →click .
2.Click the alarm you want to delete then enter
3. Click the delete alarm clock.
12. Online software installation
There are a lot of quick software installation program, you can quickly and easy download them to
equipment.
Download program
download and install the application from the Android markets .
First time to run the system require use Android market GMAIL E-mail accounts to login (if not
GAMIL mail account, please in http://gmail.google.com to apply for )
Enter the market, select the desired games or program, device will be automatically download and
installed.
12
when download installation completed, can use this program.
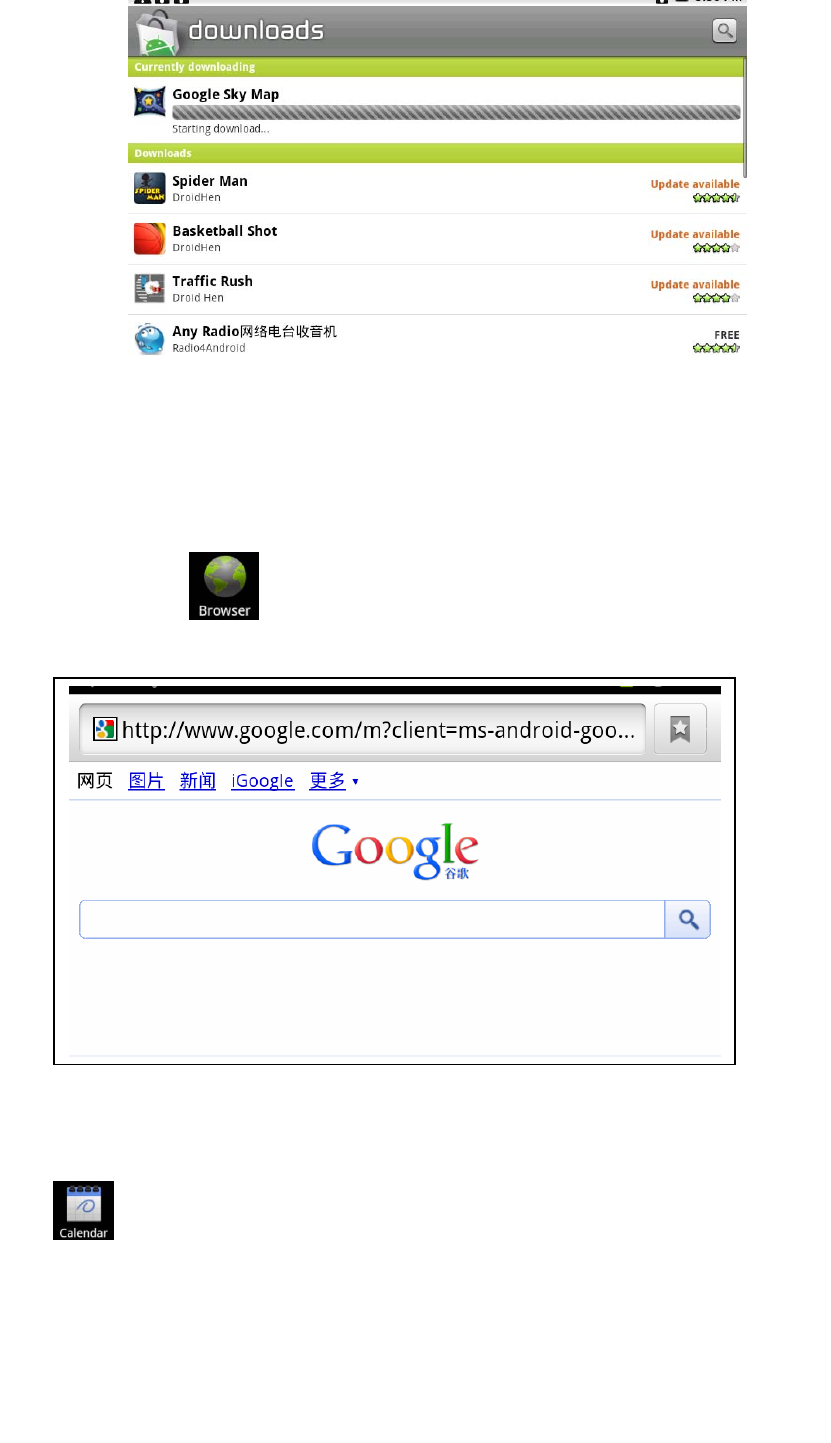
13.Browser
Users can connect to the Internet via a browser
Click desktop browser icon: can open network browsing
14. Calendar
Click the calendar program icon.
First used calendar, need to add a Exchange account. Input account email address and password. Click
on next, according to the prompt complete account configuration, after that the calendar can be used
New activities
1. In the calendar interface, click new event dates you want to build.
13
2.Choose activity time - input relevant activity details in every field
3.click finish
☆color display for gray date mean there are agenda on the day .
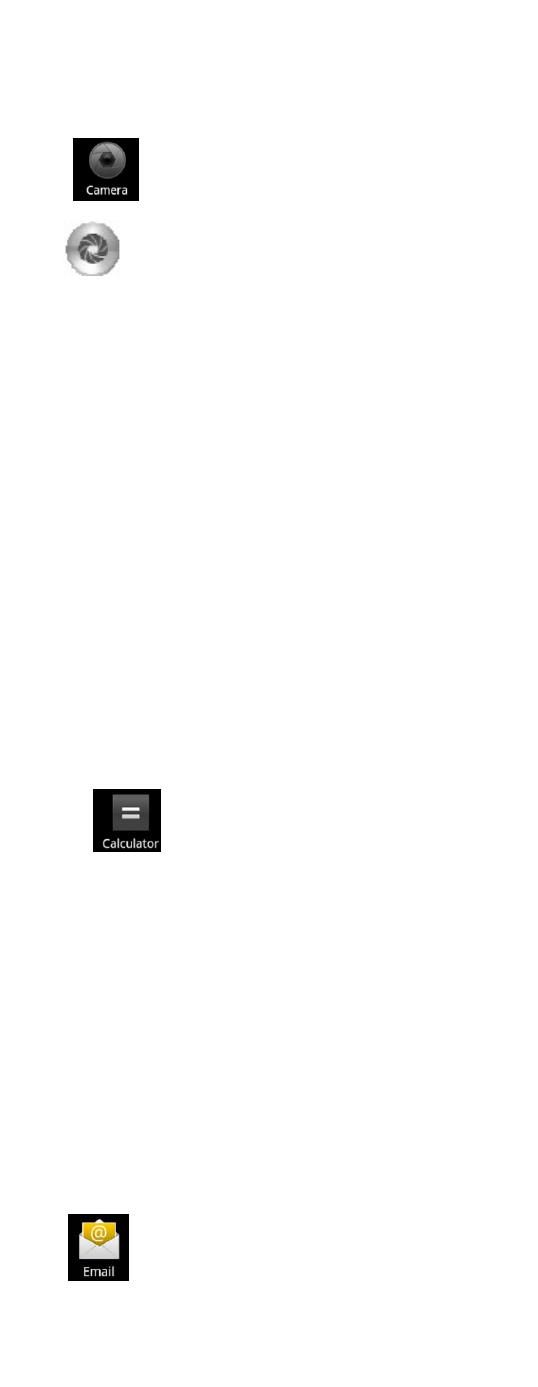
14. Camera
1. Click camera program icon to start.
2.click to make photo
3.Pictures will be kept
Note: before use the camera please insert the memory card.
Menu functions
follow the menu button to display the camera's menu functions.
Switch to video function
Switch to video mode, can record video.
Photo Gallery
Show all photographs made by this camera
15 . Calculator
1.Click the calculator program icon
2.Click on the calculator program icon
3.Click remove to remove all display
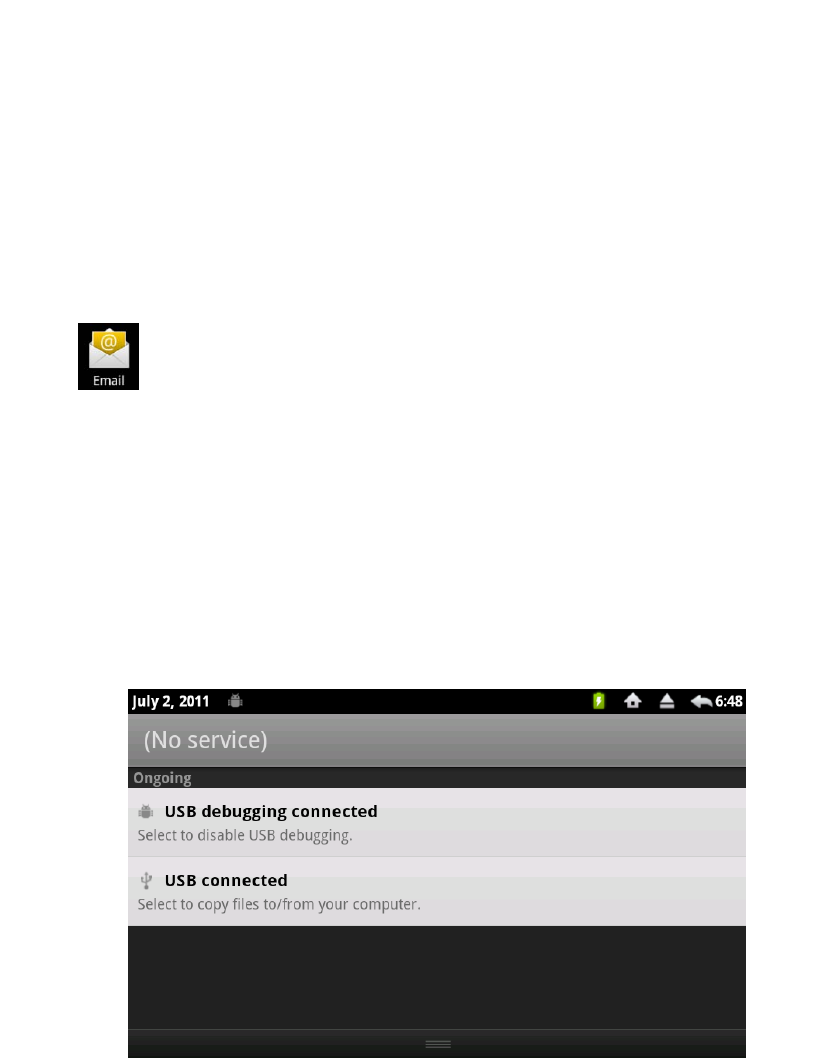
16. E-mail
☆Supports POP3 and SMTP accounts
Add E-mail account
You can enter one or more electronic mail address on device to use
1.Click E-mail program icon.
2.In your account interface, click next.
3. Click E-mail address options, → input your E-mail address.
4.In the password options, → enter your E-mail passwords.
14
5.Click finish
Manual Settings (optional) : the server Settings is according to your email account gmail automatic
filling and suppliers (i.e. j com, etc.),while if you need to change server Settings, click the manual
Settings and make the necessary changes.
1.Click next
2.Optional: input account name.
3.Input the sending message name, click finish
☆After Settings, if you cannot connect to a free email account, please contact with your email
providers to confirm if their server support (POP) and (SMTP) transmission agreement.
Sets the default email account
You must always have an account designated as the default account, thus if you have multiple E-mail
account, you can choose any one as the default.
1.Click E-mail program icon.
2.in your inbox interfac click MENU →account Settings.
3.Click the default account to select .
☆If you delete the setting default account, the list of within next E-mail account will
automatically become the default account.
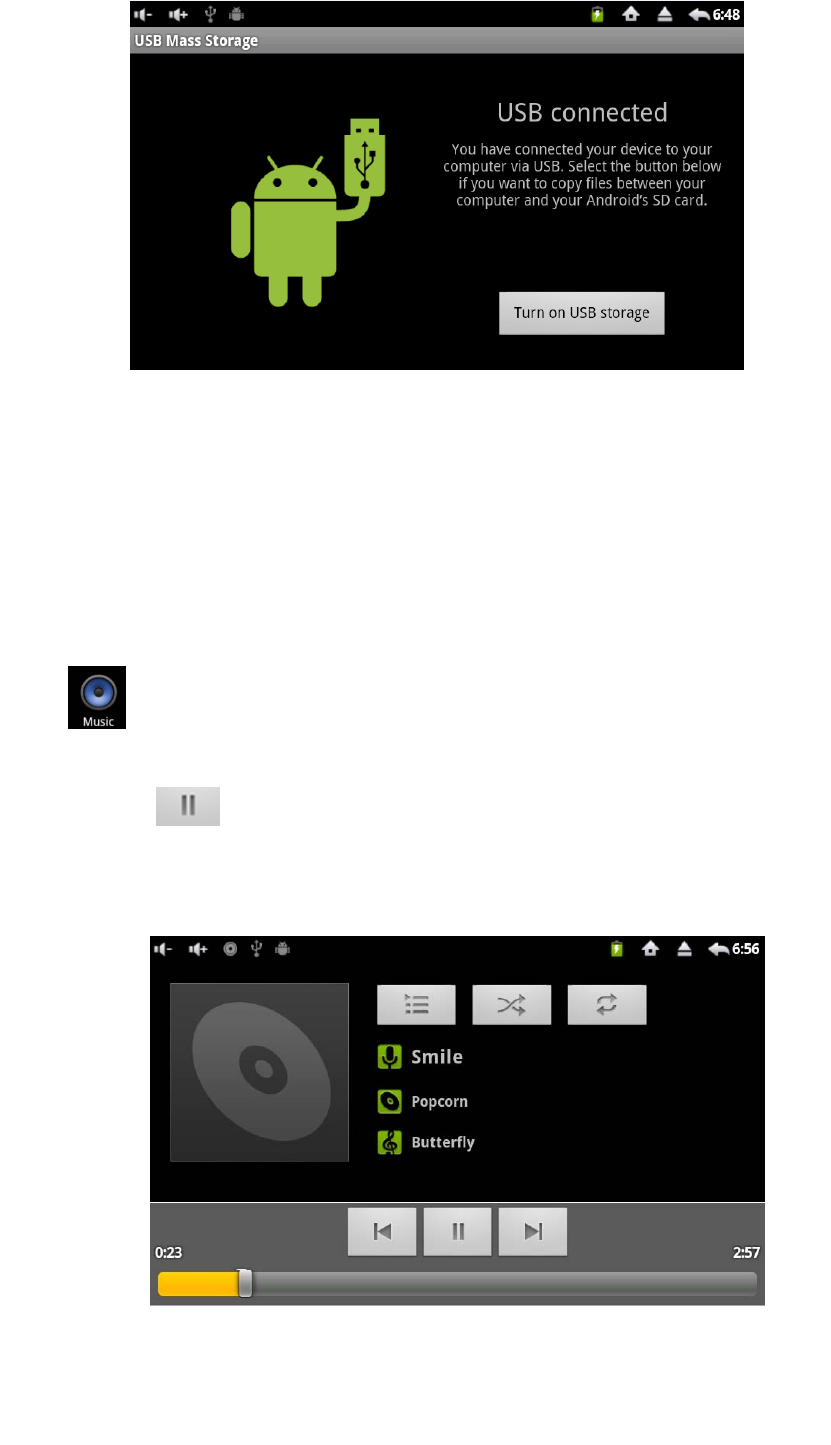
17. Data storage
In standby state, connect device with usb data cable, drop-down on the state bar on the top of the table
15
Click "USB connected", in the verification dialog, choose "Turn on the USB storage", click OK to
confirm, then use PC or TF CARD files to manager .
Operation is completed, click "Turn off USB storage," exit of equipment in PC or document
management in TF CARD, can pull out USB line to off the link with PC
18. Music
☆ support audio format: MP2, MP3, WAV, WMA, and AAC
Play music
1.Click my music program icon.
2. From all/album/artist/directory/my favorite/custom playlist of select you want to play music.
3.Click suspended icon to stop music.
4.To music while playing on an interface, can press Return or press the HOME returns to the desktop.
Click on the right lower corner images into the music player, Interface shown below:
In the interface,user can undertake check lyrics, the play/pause, switching to a/next song, add to my
favorite, looping and random broadcasting operations.
Playlist operation
Add playlist
16
1. Click on the left icon .
2.Input the name of the playlist.
3.Click add.
4.Rename or delete playlists
5.lasting press playlist → click renaming or deleting
Add music to playlist
1.Click and press the music you want to increase - click add
2.Choose the music project in the list to add (if you don't want to add, can click cancel)
Cancel music
Click the music you want to cancel → click cancel
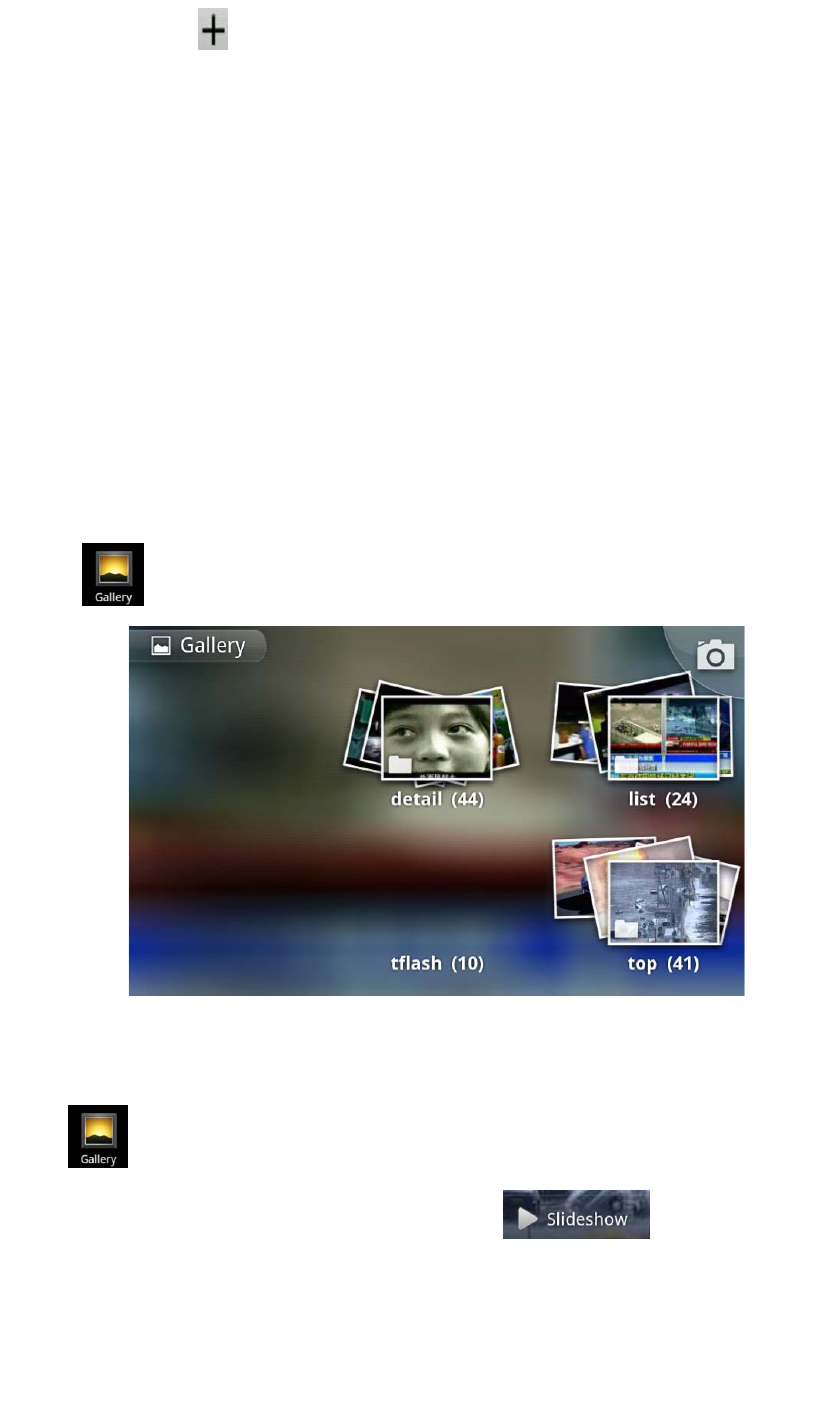
19. Photo Gallery
can see all the pictures and video in photo gallery
Click the photo gallery program icon, enter the Gallery.
Picture
1.Click the photo gallery program icon into the Gallery → choose photos groups to browse.
2. If you want to see a picture in any photo groups ,click and press return to
back to pictures group interface.
Video
1.Click the photo gallery program icon → click on a video group
2.Click the video you want to view
3.Click the screen to video related regulation
4. Press return key to back the photo gallery interface.
17
Delete pictures or video
1.Click the photo gallery program icon -→ click a picture group or video group.
2.Press Menu button →multiple choose
3.Click the images or video that you want to delete .
4.Click the delete → confirm delete operation.
5.Press the HOME button, return to the photo gallery interface
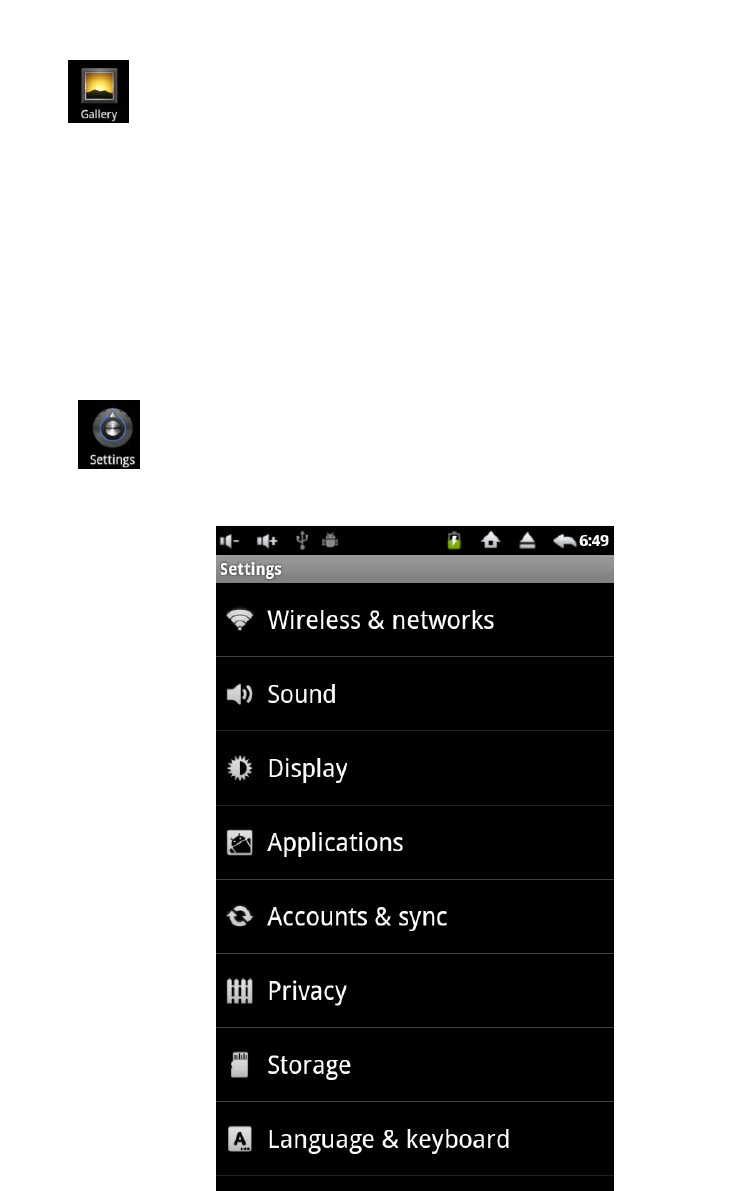
20. Settings
Click on icon to enter setup interface.
18
Wi-Fi Open Wi-Fi
Wi-Fi settings Setup and manage wireless access points
Flight patterns Disuse all wireless connection
Wireless and
network
3G network settings Set 3G network (additional 3G USB dongle is required)
Silentpatterns
Except the media and the alarm clock sounds, all are set
to mute
volume
Adjust media volume, alarm clock volume, and inform the
volume. Click and remove slider,
and then click ok
Inform ringtones Select the desired inform rings.
Select operated sound When selecting screens broadcasting sound
Voice
Prompt screen lock When locking and unlocking screen to playing sounds
Output Settings Choose the HDMI output patterns
brightness Click and remove slider to adjust
screen brightness, and then click ok
Automatic rotating
screen
When make checked, the screen will be automatically
switch between screen and vertical screen according to
equipment drection of rotation
cartoon Show all cartoon Settings in windows display
Screen overtime Adjustment a delayed time for automatically locked
screen
Unknown sources
Allow to install the applications from the non-Android
market
Management
application Manage and delete installation applications
Running services Check and control the currently running services.
The use of storage
space View the used storage space in application
Power usage power consumption situation
applications
development Setup application development options
Background data
Applications can always synchronize, send and receive
data
Account and
synchronization
Self- synchronizing
Applications to automatically synchronize data
privacy
Recovery factory
Settings
Click will remove all the data on device. Click reset
device will be reset, or click to cancel and return to a
screen
Warning! The following will delete all the data from
equipment:
~ Google account
~ system and the application's data and Settings
~To download applications
19
The following won't because the reset to be delete:
~ the current system software and bind application
~ SD documents, such as music or photos
storage
*NAND setting
*TF card setting
*SCSI settings
storage
Internal storage Check your usable storage space
choose Language
According to your location select the corresponding
language
Android
Keyboard
Screen keyboard Settings
Language and
keyboard
User dictionaries User can add words to user dictionaries
Screen
calibration touch screen calibration
set date Set date
Select time zone Select time zone
Set time Set time
Using 24 hour format Can choose to use 24 hours format or 12 hour format
Date and time
Choose the date
format User can choose the date format
Automatic
power off Automatic power off when time Settings
about
equipment
Check status messages, and power usage, legal
information, model, Android version, kernel version and
the version number
21. Battery management
The battery is not fullly charged when packaged , advise you to make battery fully charging for 4
hours at least before you use the device.
Rechargeable battery life, generally depend on the number times of charging and discharging .
However, you can also play through the following Suggestions to extend the battery life:
● To use the device at least once a week
● Regularly for battery fully charge.
● Don't let the battery in long time no power
● Always keep device and battery far away from heat objects
Battery charging
One end of the power adapter meet socket, another end connect to DC interface of device to
charge ,when the battery in charging will display as : Four hours to fully charging
☆ can also use a USB cable to connect the PC to charge .

20
When the battery is fully charged, battery ICONS displayed as:
22. Safety tips
When using your equipment please obey the following basic security matters need attention. This will
reduce fire, electric shock and risk of injury.
● Don't let the product itself get wet in the rain or becom damp .
● Please keep device away from direct sunlight and heat objects
● protect power cable . when connect the power cable, please don't let it be stepped on or
above placed items, avoid to be extrusion. Pay special attention to protection of
equipment connector.
● Please use the original power adapter for charging, using other charger may cause
damage
● Don't dismantle the equipment or repair yourself.
Cleaning equipment
Touch the screen gently. To clean the fingerprint or dust on the screen , it is better to use
such as camera use soft cloth but not gauze to clear the dust .
This device complies with part 15 of the FCC Rules. Operation is subject to the
following two conditions:
(1) This device may not cause harmful interference, and
(2) this device must accept any interference received, including interference that may
cause undesired operation
.
Changes or modifications not expressly approved by the party responsible for
compliance could void the user's authority to operate the equipment.
NOTE: This equipment has been tested and found to comply with the limits for a Class
B digital device, pursuant to Part 15 of the FCC Rules. These limits are designed to
provide reasonable protection against harmful interference in a residential installation.
This equipment generates, uses and can radiate radio frequency energy and, if not
installed and used in accordance with the instructions, may cause harmful interference
to radio communications. However, there is no guarantee that interference will not
occur in a particular installation. If this equipment does cause harmful interference to
radio or television reception, which can be determined by turning the equipment off and
on, the user is encouraged to try to correct the interference by one or more of the
following measures:
-- Reorient or relocate the receiving antenna.
-- Increase the separation between the equipment and receiver.
-- Connect the equipment into an outlet on a circuit different from that to which the
receiver is connected.
-- Consult the dealer or an experienced radio/TV technician for help.
The distance between EUT and user should be no less than 20cm.