RTX CT8003 1.9GHz CORDLESS PHONE User Manual 110d version
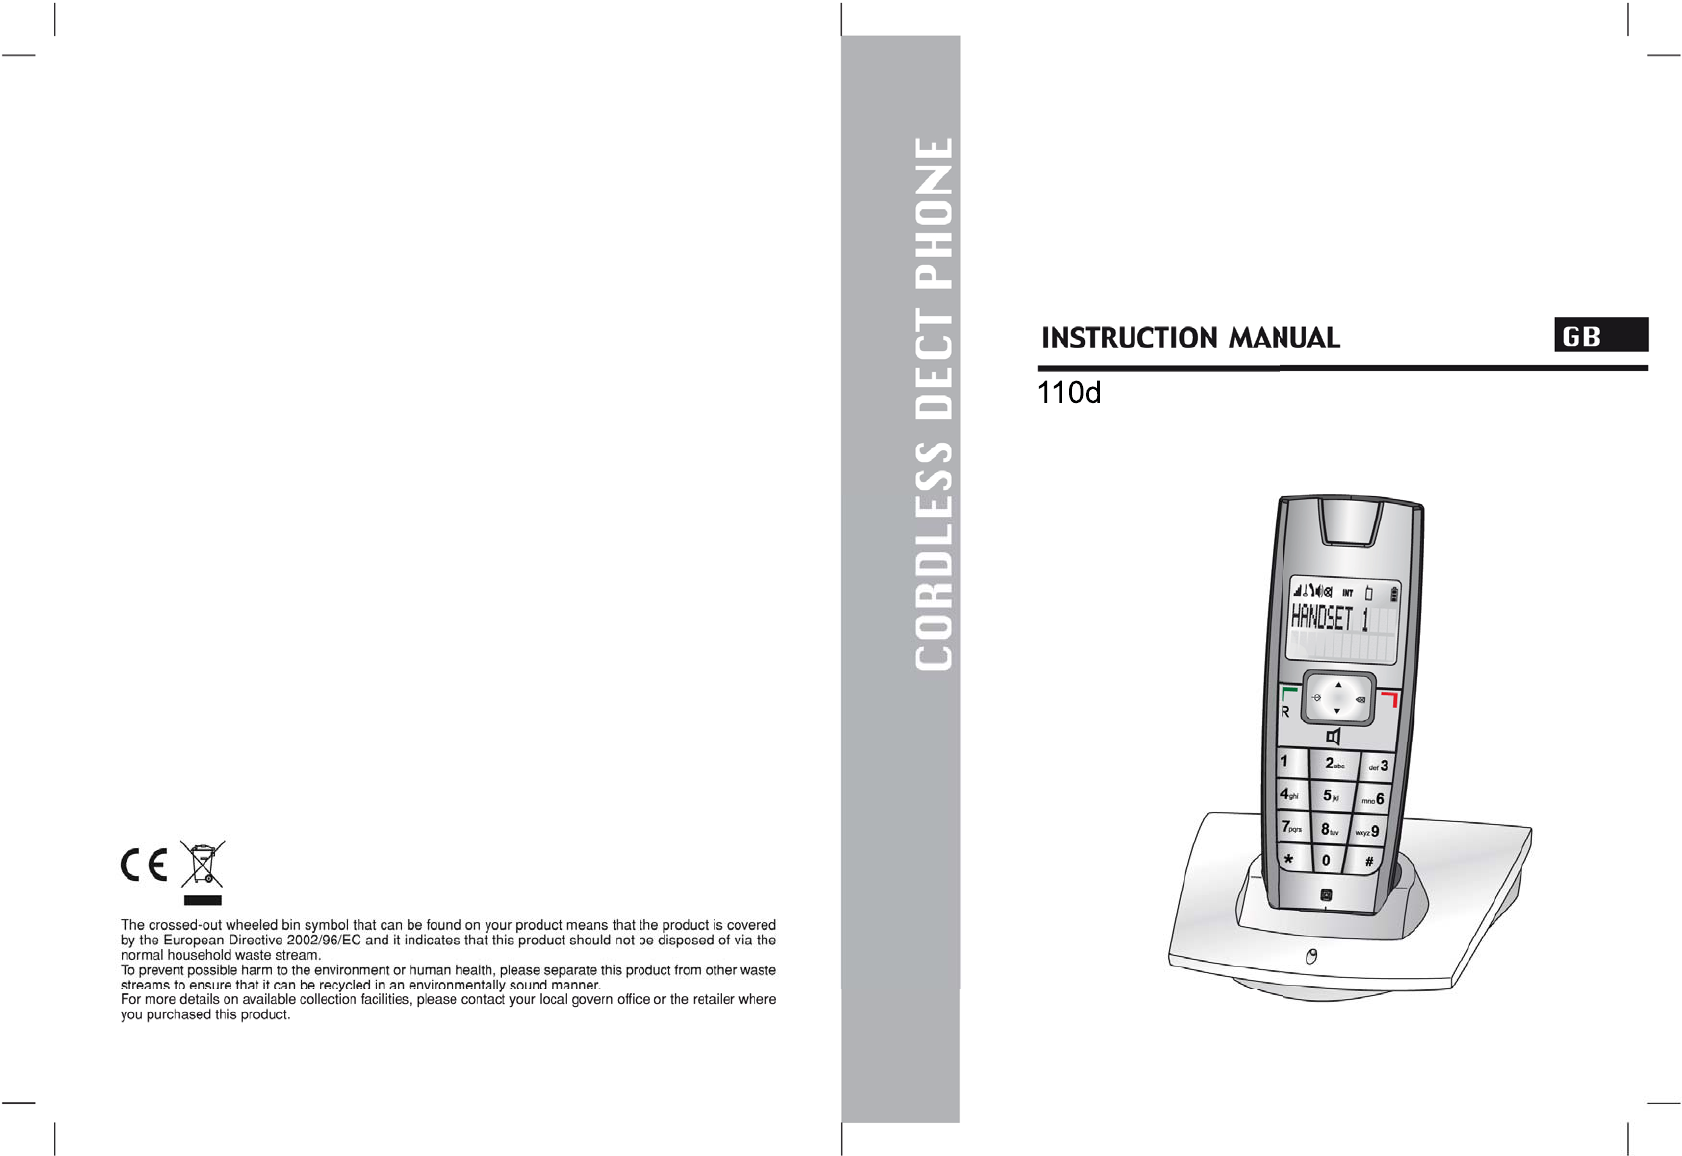
RTX Hong Kong Ltd. 1.9GHz CORDLESS PHONE 110d version
RTX >
MANUAL
Important Safety Instructions / Importantes Mesures De Sécurité
When using your telephone equipment, basic safety precautions should always be followed
to reduce the risk of fire, electric shock and injury to persons, including the following:
1. Do not use this product near water, for example, near a bath tub, wash bowl, kitchen sink
or laundry tub, in a wet basement or near a swimming pool.
2. Avoid using a telephone (other than a cordless type) during an electrical storm. There may
be a remote risk of electric shock from lightning.
3. Do not use the telephone to report a gas leak in the vicinity of the leak.
4. Use only the power cord and batteries indicated in this manual. Do not dispose of batteries
in a fire. They may explode. Check with local codes for possible special disposal instructions.
Certaines mesures de sécurité doivent être prises pendant l’utilisation de matérial téléphonique
afin de réduire les risques d’incendie, de choc électrique et de blessures. En voici quelquesunes:
1. Ne pas utiliser l’appareil près de l’eau, p.ex., près d’une baignoire, d’un lavabo, d’un évier de
cuisine, d’un bac à laver, dans un sous-sol humide ou près d’une piscine.
2. Éviter d’utiliser le téléphone (sauf s’il s’agit d’un appareil sans fil) pendant un orage électrique.
Ceci peut présenter un risque de choc électrique causé par la foudre.
3. Ne pas utiliser l’appareil téléphonique pour signaler une fuite de gaz s’il est situé près de la fuite.
4. Utiliser seulement le cordon d’alimentation et le type de piles indiqués dans ce manuel. Ne pas
jeter les piles dans le feu: elles peuvent exploser. Se conformer aux règlements pertinents quant
à l’élimination des piles.

To Make & Receive Calls
To make a new call –
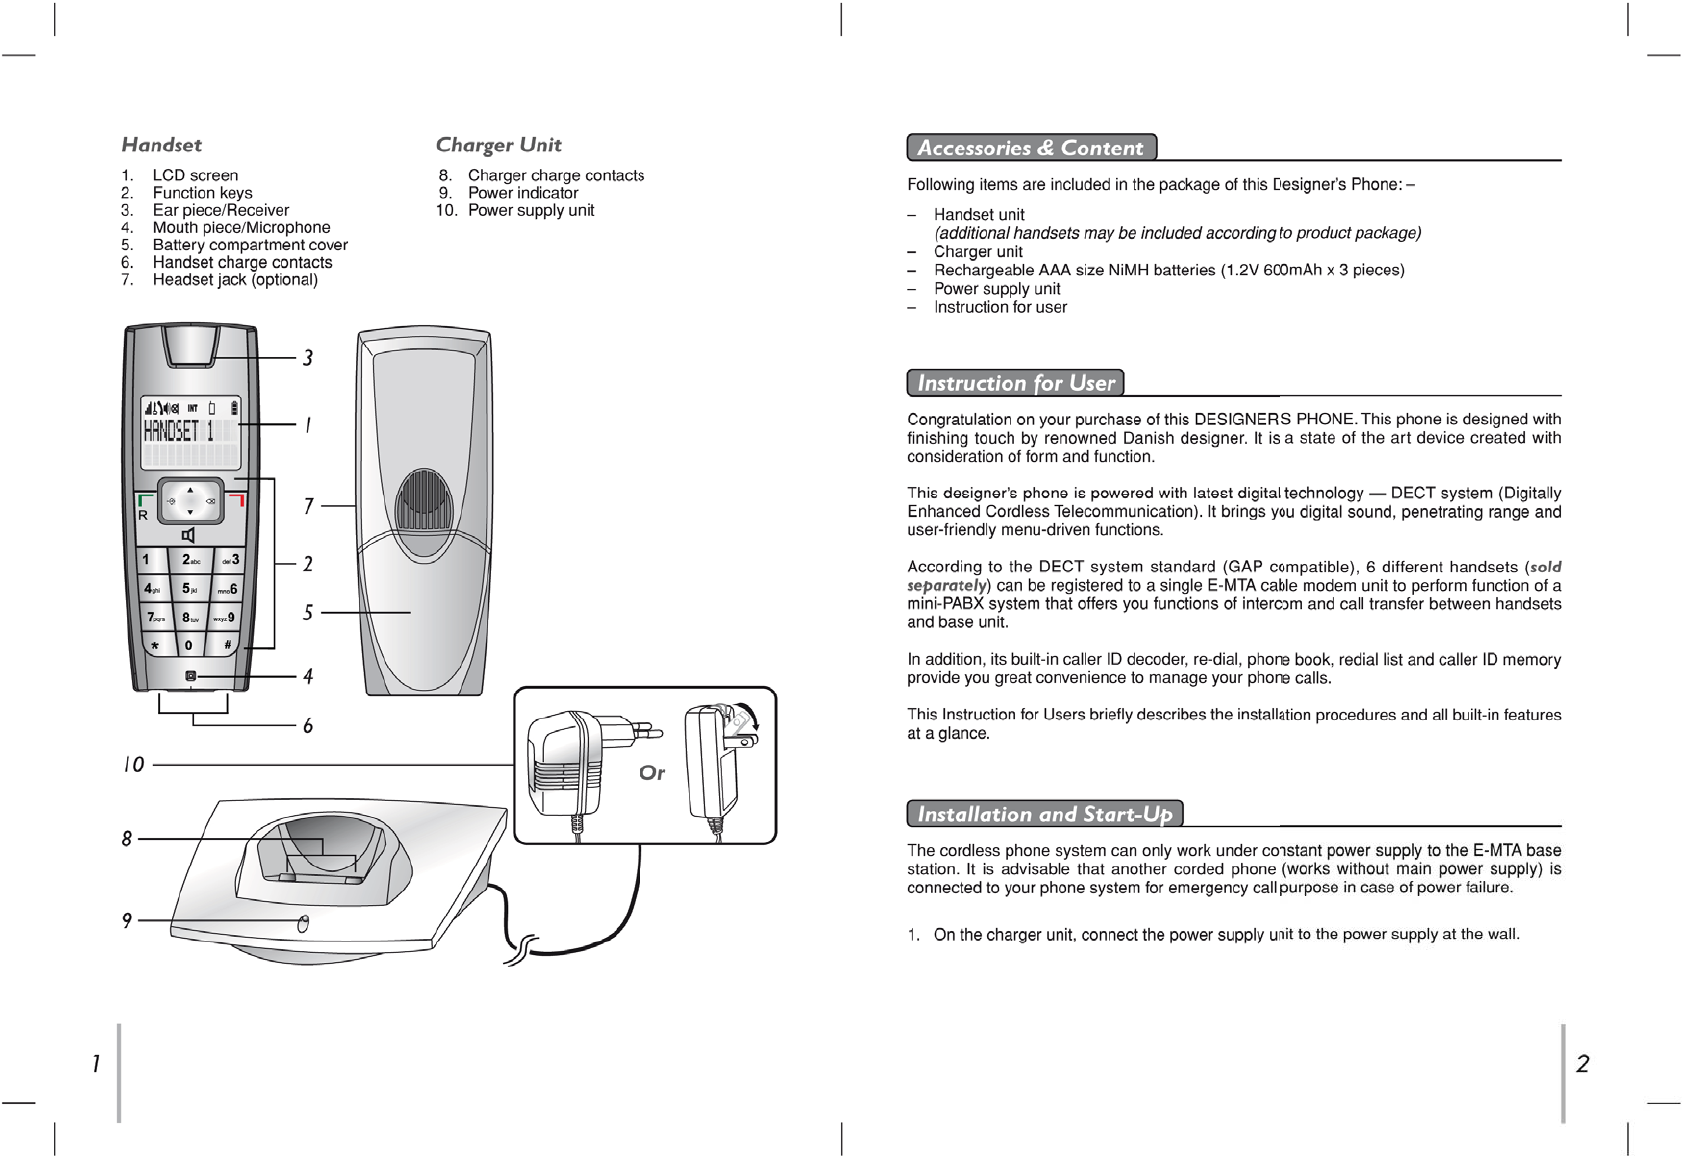
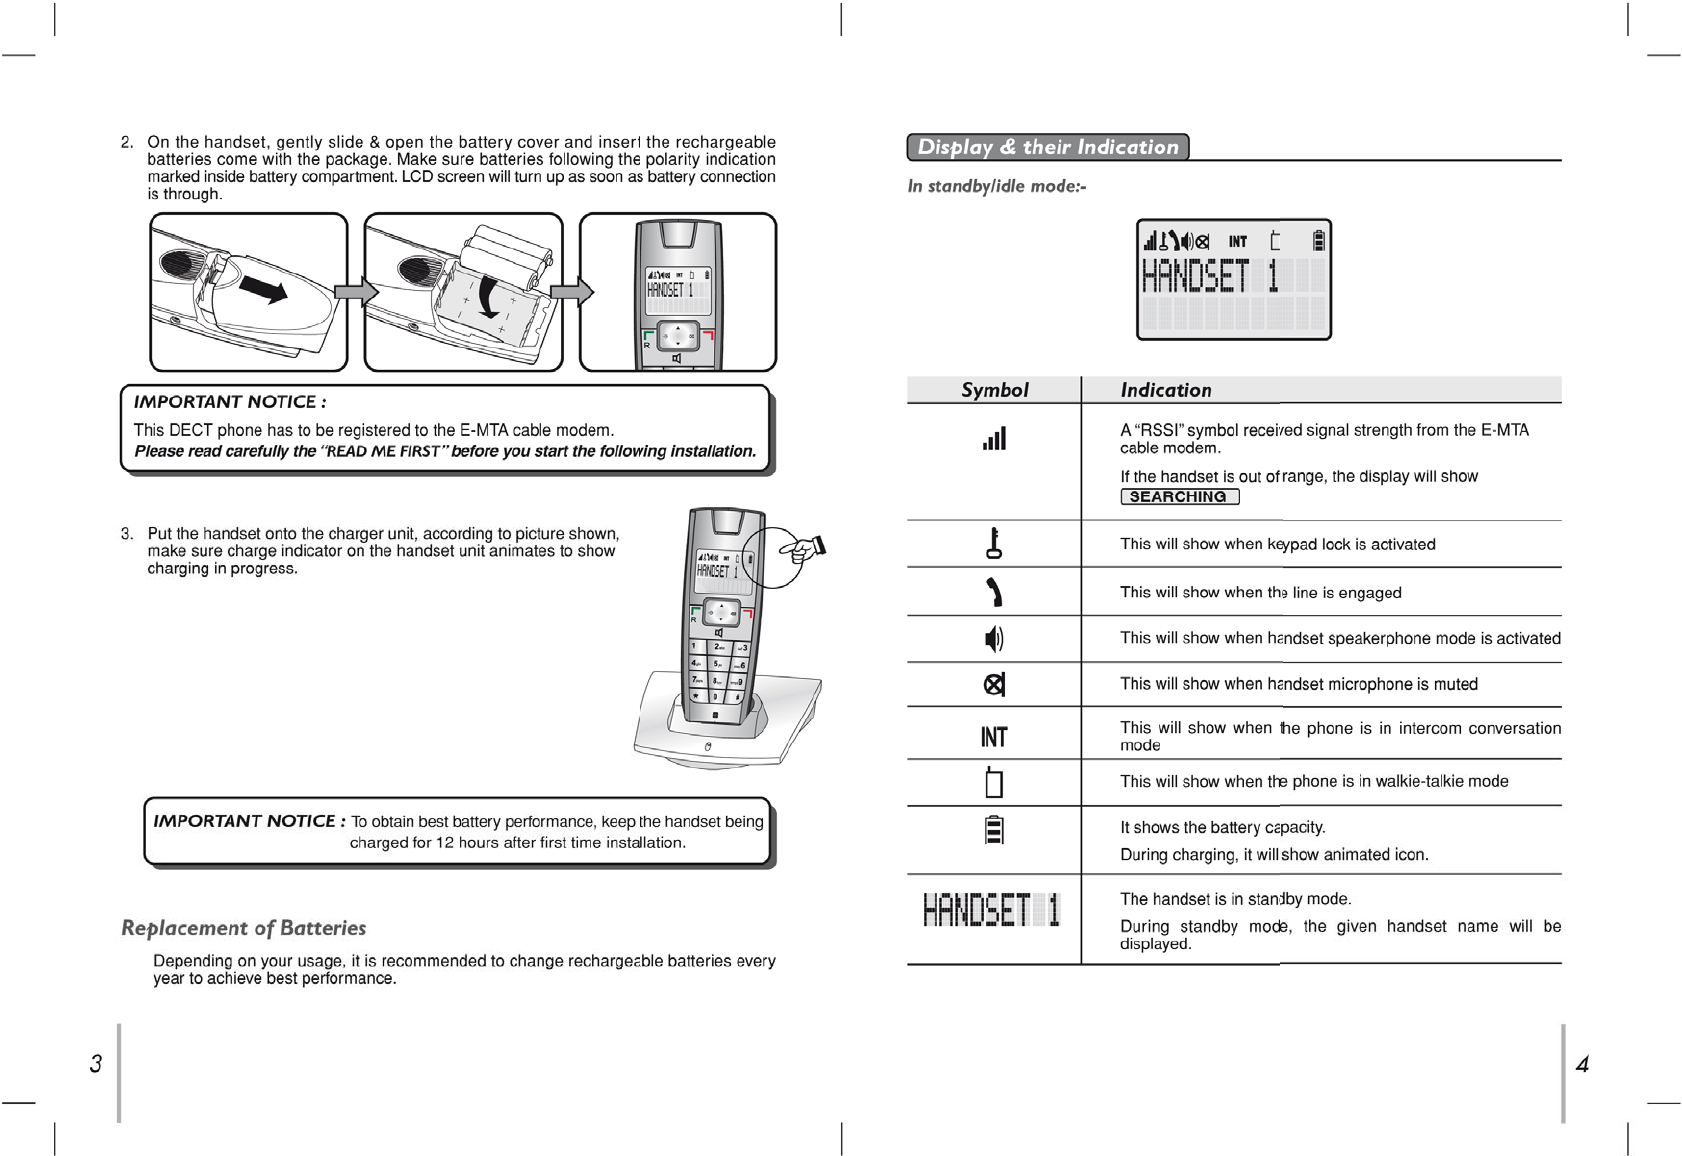
1. Make sure the symbol on the handset screen is steady and this indicates good
connection to the base unit. If the display show SEARCHING , it indicates the
handset is too far away from the base unit.
2. You may enter the telephone number to be called before or after pushing button.
Entered number will be dialed automatically.
Normal Operation
To receive a call –
1. If you have subscribed to caller ID service with your telephone operator, caller’s
number will show on the screen while the handset is ringing.
2. Simply push the button if you decide to answer the call.
To end a call, push button on the handset.
87
To Make & Receive Internal Calls (Intercom)
In a standard package, your phone comes with one handset only. Depending on the
package you have purchased (please consult product packaging), separate handset may
be included for extended usage.
Internal communication (INTERCOM) can be made between handsets - like intercom,
call transfer & conference conversation.
Each handset is given an individual extension number. This individual extension number
will be used when making intercom, call transfer & conference conversation.
To make an internal call to another handset
You may make intercom to another handset registered to the same E-MTA cable modem.
Long push button and entered desired handset number to send a ring to the desired
handset. When the intercom is answered by the designated handset, intercom conversation
can be started.
To answer an intercom ring, simply push button on the called extension unit.
Call Transfer
External call can be transferred from one handset to another handset.
1. During a conversation with external party.
2. Follow the instruction listed in above INTERCOM section to start an internal call,
external call will be put on hold until intercom has been established.
3. Wait till the designated internal handset answers the INTERCOM.
4. When the INTERCOM is answered, push button on the calling handset to
transfer the external call.
NOTE : If INTERCOM was not answered by designated handset, external call can be
retrieved by pushing button on the calling handset.
Keypad Lock
During standby mode, you can lock the keypad by the following procedures.
1. Push button
2. Push button
3. then, the icon and KEYS LOCKED will display on the screen.
4. To unlock the keypad again, please repeat above procedure.
There are 40 phone book memory banks built inside this DECT phone (12 characters and
24 digits). You may store frequently used number into these memory banks.
If more than one handset comes with your product package (refer to information on
package), phone book memories are independent among handsets. Phone book memory
will not be automatically transferred from one handset to the others.
Phone Book
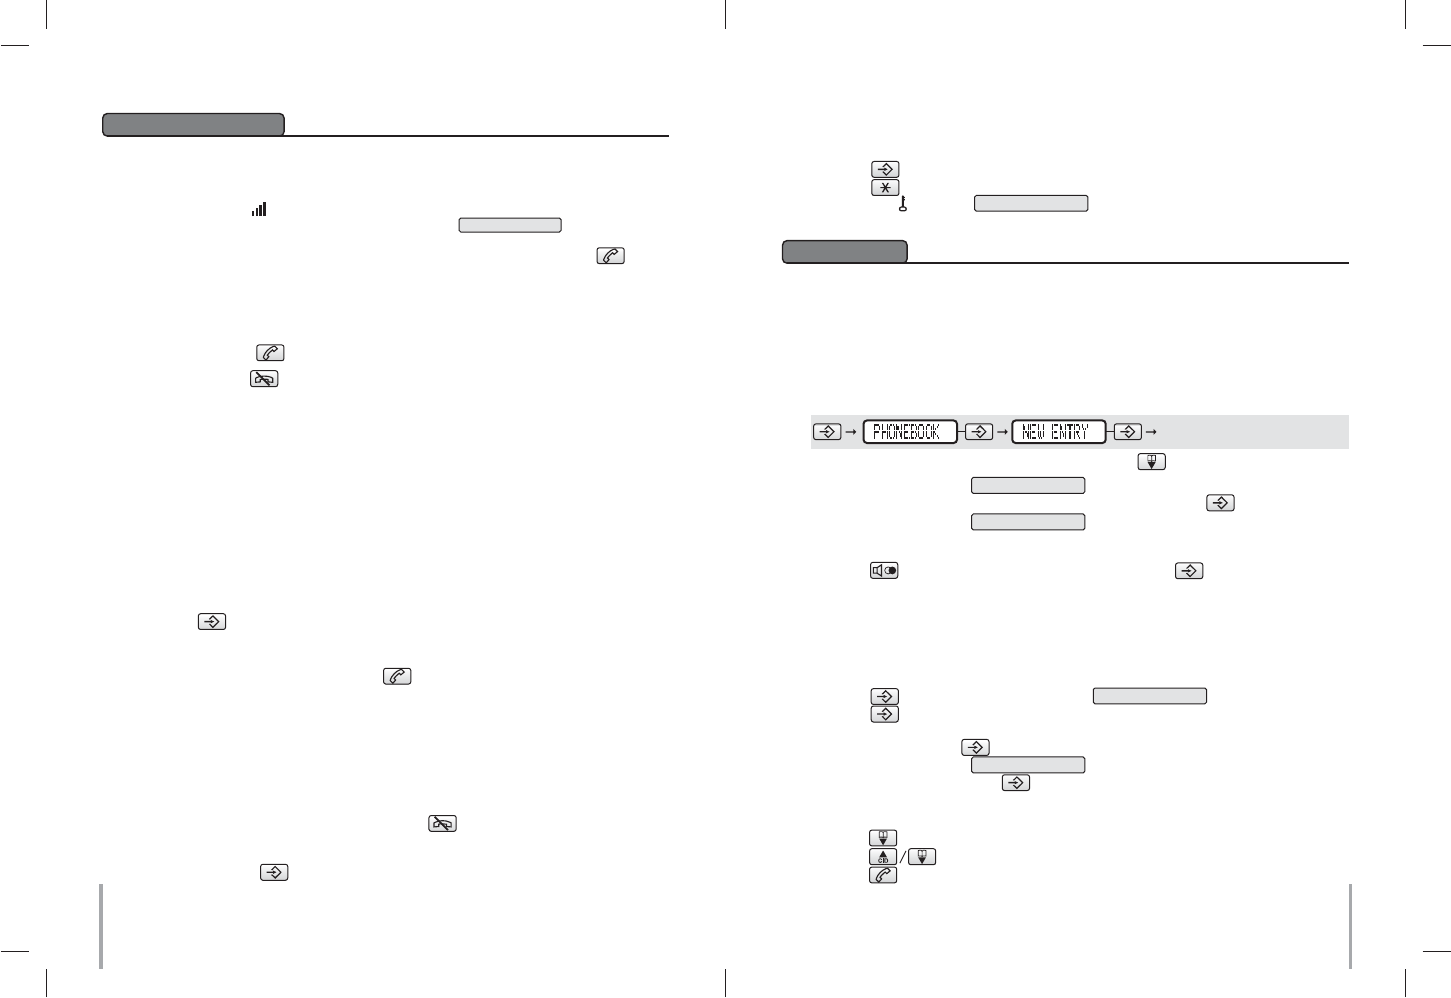
To Make a New Entry
1. The display will show EDIT NUMBER .
2. Use the alphanumeric buttons (0 to 9) to enter a number. Push to save the record.
3. The display will show EDIT NAME .
4. Use the alphanumeric buttons (2-9) to enter a name in the same manner as you
manage alphabet input from your mobile phone. Use the button (0) to enter a space.
Push switch between upper and lower case. Push button to confirm.
5. A beep sound will be heard as confirmation.
To Make a New Entry from Caller ID Memory
You may copy a number stored in Caller ID memory to phone book. (Consult sections of
Caller ID for more details.)
To Make a Call from Phone Book Memory
Key Map:-
Or, you can directly enter the phonebook by pushing button.
1. You view the Call log to get your desired number.
2. Push button. The display will show COPY TO PHB .
3. Push button to confirm.
4. The display will show the number and ask you if you need to edit the number. If no
editing, please push button to confirm.
5. The display will show EDIT NAME .
6. Enter your name and push button to confirm.
1. Push button to view the phonebook memories.
Push button to find the desired entry.
2. Push button to make the call.
109
To Delete Phone Book Memory
If caller ID service is available from your service operator and you have subscribed to this
service, telephone number of the caller will be shown on the screens of handset when there
is an incoming call. If the number is stored in the phone book, the name will be displayed.
Caller Line Identification Presentation (CLIP) Memory (Caller ID)
NOTE:
– This DECT phone stores last 10 caller ID records into caller ID memory. Oldest record
will be replaced by newest record.
– For unread Caller ID records, there will be mark “ ” shown on the record.
To Review Caller ID Records
To Make Call from Caller ID Records
You may make a call from the caller ID records. Simply push button on the
handset when the desired caller’s number is shown when reviewing caller ID records.
This DECT phone is built with features to offer you personalized settings, such as ringing
melody, ringing volume and key click.
Personalizing Your Phone
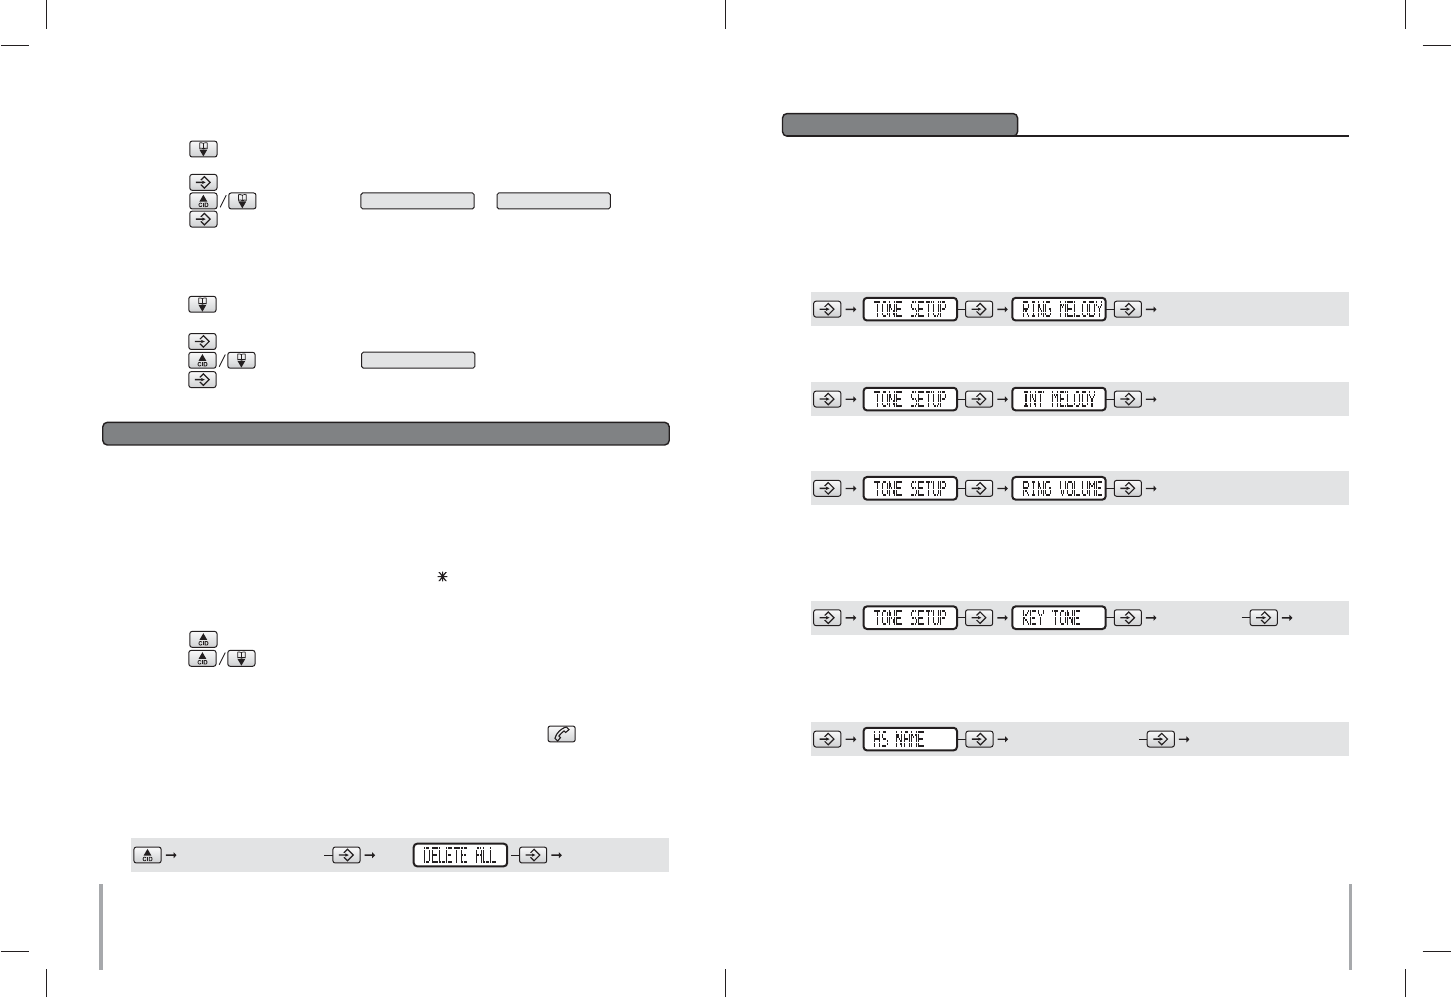
Setting Ring Volume & Melody
Different ringing melody and volume can be programmed to each handset.
To set external ring melody: –
To set internal ring melody: –
Setting Key Beep
When Key Beep turned on, a beep is heard when you push on any button. You may also
select to turn key beep off.
Key Map:-
Key Map:-
Key Map:-
1. Push button to enter phonebook memory.
2. Find your desired entry.
3. Push button.
4. Push button to select DELETE or DELETE ALL .
5. Push button to confirm.
The entry is deleted!
To Change Phone Book Memory
1. Push button to enter phonebook memory.
2. Find your desired entry.
3. Push button.
4. Push button to select EDIT .
5. Push button to confirm.
6. You can now edit your entry.
1. Push button to enter Call log.
2. Push button to scroll among records.
3. The Caller ID memory also tells the date/time of the call.
scroll to your desired ring melody
scroll to your desired ring melody
To set ring volume: –
Key Map:-
scroll to your desired ring volume
select ON/OFF
To Delete Caller ID Records
You can delete all the Caller ID record in your phone by the following procedure:-
Key Map:-
browse the Caller ID record select
Naming Your Handset
You may name your handset up to your preference.
Key Map:-
Walkie-Talkie (N/A in US version)
If you have more than one handset, you can use the DECT phone as walkie-talkie. You
can use this function when you will be out of range from the cable modem. During walkie-
talkie mode, the handset cannot receive incoming calls and cannot make out-going calls.
enter your desired name
Enter the name up to 12 characters.

1211
1. Do not expose this product to dust, strong sunlight, humidity, high temperature or
mechanical shock.
2. Do not use corrosive or abrasive cleansers on this product. Keep the unit dust free by
wiping it with a soft, dry cloth.
3. Do not disassemble this product, it contains no user-serviceable parts.
4. In case of a thunderstorm, it is advised to disconnect the power adaptor, as product
warranty does not cover damage caused by lightning/serge.
5. Only use adaptor and battery pack come with the package.
6. Use only supplied charging cradle for recharging the handset batteries.
Maintenance
Q1. My phone does not work!
A1. Make sure connection of adaptor cord are connected securely to the jack.
A1. Make sure you have inserted batteries into the handset battery compartment, and they
are charged with good capacity and inserted with correct polarity.
A1. If you have connected more than one phone to the same cable modem, make sure all
other telephones connected are put on hook. In some telephone systems, when the first
phone on the same telephone line is used, all other telephones are electrically
disconnected.
A1. Try to connect another telephone to the telephone socket, if the problem persists, it
appears that there is a problem with your telephone line system, consult your network
provider.
A1. If the person of the other end of the conversation does not hear your voice, make sure
you have not activated the MUTE function. To test, activate the MUTE function once more
and your phone should resume to normal operation.
A1. Check if the antenna symbol on the screen is shown. If it is not, it indicates your
handset is too far away from the base unit and radio signal is too weak. You should get
closer to the base unit and try again.
A1. In some critical situation, if the handset is without normal battery charging for a prolonged
period of time, it may lock itself when battery level becomes too low. Try to disconnect the
batteries and put them back on again and put the handset on charger for 12 hours to
resume.
Q2. My phone does not ring!
A2. Check if the phone is set to Silence mode.
A2. Make sure your handset is not switched off.
Q3. The phone book memories do not work as expected!
A3. Make sure you do not enter telephone number longer than limits mentioned in the phone
book section.
Q4. Caller’s number does not show on my phone!
A4. Make sure your phone line is provided with caller ID function from the phone service
provider. In most countries, caller ID function must be paid and subscribed separately
from normal phone function. For details, please consult phone service provider.
A4. Callers may suppress their caller’s number when making their phone call. Caller’s number
does not necessary display when a call is received. For details, please consult phone
service provider.
A4. If a call is made from abroad, caller’s number cannot be transmitted.
A4. Check the CLIP format of your country. Details please refer to CLIP FORMAT section.
Q5. My handset does not work after I have registered my handset to a base unit from
different maker!
A5. According to DECT standard, handset (GAP compatible) can be registered to any DECT
system base unit (GAP compatible). However, maker specific functions may not be
compatible between products. It may happen that only basic function can be operated
if handset and base unit from 2 makers are registered together.
A5. Check if the other base unit is GAP compatible according to DECT standard. Only GAP
compatible products can be compatible to each other.
Trouble Shooting
1. The display will show GROUP: .
2. Enter any 4-digits number and both handsets must enter with the same number.
3. The display will show HS NUMBER: .
4. Define the handset number of the handset which already in the walkie-talkie mode.
5. Now the two handsets are now in walkie-talkie mode.
6. Push button following by the receiver handset number designated in procedure
(4) to start a call.
7. Push button to end a call.
To disable walkie-talkie mode: –
Key Map:-
Please refer to below operation to apply on the two handsets you want to bring them to
walkie-talkie mode
Key Map:-
Answer Type
This phone offers 2 answer type modes for the user to select.
Any Key: During “Any Key” mode, you can answer the incoming call by pushing any
buttons.
Normal: During “Normal” mode, you can answer the incoming call by only pushing
button.
You can change the answer type by the following procedure:-
Key Map:-
select “ANY KEY” or “NORMAL”