RTX CT8111 DECT telephone handset and charger User Manual additional information and
RTX Hong Kong Ltd. DECT telephone handset and charger additional information and
RTX >
additional information and user manual

Additional handset information RTX8111
Important safety information
Charge the battery or handset only in combination with RTX8111 DECT Handset Desktop Charger and the SALOM SSW-2374 or Friwo
FW7712-1 or FW7713/XX or Ten Pao S005SV0500100 or S005SB0500100 adapter that comes with the product.
Plug the SALOM SSW-2374 or Friwo FW7712-1 or FW7713/XX or Ten Pao S005SV0500100 or S005SB0500100 AC/DC adaptor in a wall outlet
socket near the equipment for easy access/removal of the AC/DC adaptor.
Important battery information
This product uses rechargeable Lithium-Ion batteries 3.7V, 1100mAh. Only use batteries that come with the handset or dedicated spare batteries
marked with “Battery Pack, CE-MB206-5C-XX or RTR001FXX”. Do not use any other type, since this may present a risk of leakage, fire, explosion or
other hazardous situation. For battery replacement or removal please remove the battery cover of the handset. Never disassemble, customize or short-
circuit batteries. Do not place battery in fire or heat the battery. Charge battery only with RTX8111 Charger and the
SALOM SSW-2374 or Friwo
FW7712-1 or FW7713/XX or Ten Pao S005SV0500100 or S005SB0500100
adapter or adaptor itself that comes with the product.
Sensitive Electronic Environment
Any radio-based equipment can potentially cause interference with other equipment and can be interfered from other equipment. This also applies for
DECT equipment. However due to the very low transmission power level the chances for interference are very small. Research proves that
operational DECT phones normally don’t influence electronic equipment however some precautions must be taken into account for sensitive
electronic equipment e.g. sensitive laboratory equipment. When DECT phones operate in straight nearness of sensitive electronic equipment
incidental influence can appear. You are advised not to place the DECT phone on or close (less than 10cm) to this kind of equipment, even in standby
mode. Please also use the other documentation supplied with the various parts of your telephone system.
Product disposal information
For countries in the European Union
The symbol depicted here has been affixed to your product in order to inform you that electrical and electronic products should not be disposed
of as municipal waste.
Electrical and electronic products including the cables, plugs and accessories should be disposed of separately in order to allow proper treatment, recovery
and recycling. These products should be taken to a designated facility where the best available treatment, recovery and recycling techniques are available.
Separate disposal has significant advantages: valuable materials can be re-used and it prevents the dispersion of unwanted substances into the municipal
waste stream. This contributes to the protection of human health and the environment.
Please be informed that a fine may be imposed for illegal disposal of electrical and electronic products via the general municipal waste stream. In order to
facilitate separate disposal and environmentally sound recycling, arrangements have been made for local collection and recycling. In case your electrical
and electronic products need to be disposed of please refer to your supplier or the contractual agreements that your company has made upon acquisition of
these products.
For countries outside the European Union
Disposal of electrical and electronic products in countries outside the European Union should be done in line with the local regulations. If no arrangement
has been made with your supplier, please contact the local authorities for further information.
Battery disposal information
Defect or exhausted batteries should never be disposed of as municipal waste. Return old batteries to the battery supplier, a licensed battery dealer or a
designated collection facility. Do not incinerate batteries.
Regulatory information Europe
Declaration of conformity
Česky
“RTX Telecom” tímto prohlašuje, že tento “RTX8111” je ve shodě se základními požadavky a dalšími příslušnými ustanoveními směrnice 1999/5/ES.
Dansk
Undertegnede “RTX Telecom” erklærer herved, at følgende udstyr “RTX8111” overholder de væsentlige krav og øvrige relevante krav i direktiv 1999/5/EF.
Deutsch
Hiermit erklärt “RTX Telecom”, dass sich das Gerät “RTX8111” in Übereinstimmung mit den grundlegenden Anforderungen und den übrigen einschlägigen Bestimmungen der
Richtlinie 1999/5/EG befindet.
Eesti
Käesolevaga kinnitab “RTX Telecom” seadme “RTX8111” vastavust direktiivi 1999/5/EÜ põhinõuetele ja nimetatud direktiivist tulenevatele teistele
asjakohastele sätetele.
English
Hereby, “RTX Telecom”, declares that this “RTX8111” is in compliance with the essential requirements and other relevant provisions of Directive
1999/5/EC.
Español
Por medio de la presente “RTX Telecom” declara que el “RTX8111” cumple con los requisitos esenciales y cualesquiera otras disposiciones aplicables o
exigibles de la Directiva 1999/5/CE.
Ελληνική
ΜΕ ΤΗΝ ΠΑΡΟΥΣΑ Η “RTX Telecom” ΔΗΛΩΝΕΙ ΟΤΙ
“RTX8111”
ΣΥΜΜΟΡΦΩΝΕΤΑΙ
ΠΡΟΣ
ΤΙΣ
ΟΥΣΙΩΔΕΙΣ
ΑΠΑΙΤΗΣΕΙΣ
ΚΑΙ ΤΙΣ
ΛΟΙΠΕΣ
ΣΧΕΤΙΚΕΣ
ΔΙΑΤΑΞΕΙΣ
ΤΗΣ
ΟΔΗΓΙΑΣ
1999/5/ΕΚ.
Français
Par la présente “RTX Telecom” déclare que l’appareil “RTX8111” est conforme aux exigences essentielles et aux autres dispositions pertinentes de la
directive 1999/5/CE.
Íslenska
Hér með lýsir “RTX Telecom” yfir því að “RTX8111” er í samræmi við grunnkröfur og aðrar kröfur, sem gerðar eru í tilskipun 1999/5/EC.
Italiano
Con la presente “RTX Telecom” dichiara che questo “RTX8111” è conforme ai requisiti essenziali ed alle altre disposizioni pertinenti stabilite dalla direttiva
1999/5/CE.
Latviski
Ar šo “RTX Telecom” deklarē, ka “RTX8111” atbilst Direktīvas 1999/5/EK būtiskajām prasībām un citiem ar to saistītajiem noteikumiem.
Lietuvių
Šiuo “RTX Telecom” deklaruoja, kad šis “RTX8111” atitinka esminius reikalavimus ir kitas 1999/5/EB Direktyvos nuostatas.
Malti
Hawnhekk, “RTX Telecom”, jiddikjara li dan “RTX8111” jikkonforma mal-ħtiġijiet essenzjali u ma provvedimenti oħrajn relevanti li hemm fid-Dirrettiva 1999/5/EC
Magyar
Alulírott, “RTX Telecom” nyilatkozom, hogy a “RTX8111” megfelel a vonatkozó alapvetõ követelményeknek és az 1999/5/EC irányelv egyéb elõírásainak.
Nederlands
Hierbij verklaart “RTX Telecom” dat het toestel “ RTX8111” in overeenstemming is met de essentiële eisen en de andere relevante bepalingen van richtlijn
1999/5/EG.
Norsk
“RTX Telecom” erklærer herved at utstyret “ RTX8111” er i samsvar med de grunnleggende krav og øvrige relevante krav i direktiv 1999/5/EF.
Polski
Niniejszym, “RTX Telecom” deklaruje, ze “ RTX8111” jest zgodny z wymaganiami i innymi warunkami Dyrektywy 1999/5/EC.
Português
“RTX Telecom” declara que este “RTX8111” está conforme com os requisitos essenciais e outras disposições da Directiva 1999/5/CE.
Slovensko
“RTX Telecom” izjavlja, da je ta “RTX8111” v skladu z bistvenimi zahtevami in ostalimi relevantnimi določili direktive 1999/5/ES.
Slovensky
“RTX Telecom” týmto vyhlasuje, že “RTX8111” spĺňa základné požiadavky a všetky príslušné ustanovenia Smernice 1999/5/ES.
Suomi
“RTX Telecom” vakuuttaa täten että “RTX8111” tyyppinen laite on direktiivin 1999/5/EY oleellisten vaatimusten ja sitä koskevien direktiivin muiden ehtojen
mukainen.
Svenska
Härmed intygar “RTX Telecom” att denna “ RTX8111” står I överensstämmelse med de väsentliga egenskapskrav och övriga relevanta bestämmelser som
framgår av direktiv 1999/5/EG.
Battery disposal information

Defect or exhausted batteries should never be disposed of as municipal waste. Return old batteries to the battery supplier, a licensed battery dealer or a
designated collection facility. Do not incinerate batteries.
RTX Telecom A/S
Stroemmen 6
9400 Noerresundby
Denmark
Regulatory information United States
Interference information:
This device complies with Part 15 of the FCC Rules. Operation is subject to the following two conditions: (1) this device may not cause harmful interference,
and (2) this device must accept any interference received, including interference that may cause undesired operation.
NOTE: This equipment has been tested and found to comply with the limits for a Class B digital device, pursuant to Part 15 of the FCC Rules. These limits
are designed to provide reasonable protection against harmful interference in a residential installation. This equipment generates, uses and can radiate
radio frequency energy and, if not installed and used in accordance with the instructions, may cause harmful interference to radio communications.
However, there is no guarantee that interference will not occur in a particular installation. If this equipment does cause harmful interference to radio or
television reception, which can be determined by turning the equipment off and on, the user is encouraged to try to correct the interference by one or more
of the following measures:
• Reorient or relocate the receiving antenna.
• Increase the separation between the equipment and receiver.
• Connect the equipment into an outlet on a circuit different from that to which the receiver is connected.
• Consult the dealer or an experienced radio/TV technician for help.
Modifications not expressly approved by RTX Telecom could void the user’s authority to operate the equipment.
Privacy of communications may not be ensured when using this equipment.
Exposure to Radio Frequency (RF) Signals
This wireless phone is a radio transmitter and receiver. It is designed and manufactured not to exceed the emission limits for exposure to radio frequency
(RF) energy set by the Federal Communications Commission (FCC) of the U.S. Government. These limits are part of comprehensive guidelines and
establish permitted levels of RF energy for the general population. The guidelines are based on the safety standards previously set by both U.S. and
international standards bodies. These standards include a substantial safety margin designed to assure the safety of all persons, regardless of age and
health. This device and its antenna must not be co-located or operating in conjunction with any other antenna or transmitter.
This product has been shown to be capable of compliance for localized specific absorption rate (SAR) for uncontrolled environment/general population
exposure limits specified in ANSI/IEEE Std. C95.1-1992 and had been tested in accordance with the measurement procedures specified in FCC/OET
Bulletin 65 Supplement C (2001) and IEEE 1528-2003”
For body worn operation, this handset has also been tested and meets the FCC RF exposure guideline when used with the RTX Telecom belt clip supplied
for this product. Use of other accessories may not ensure compliance with FCC RF exposure guidelines.
Hearing Aid Compatibility (HAC/VC)
This handset meets the FCC standard for Hearing Aid Compatibility.
Regulatory information
Canada
Interference information
This device complies with Industry Canada licence-exempt RSS standard(s). Operation is subject to the following two conditions: (1) this device may not
cause interference, and (2) this device must accept any interference, including interference that may cause undesired operation of the device.
Le présent appareil est conforme aux CNR d'Industrie Canada applicables aux appareils radio exempts de licence. L'exploitation est autorisée aux deux
conditions suivantes : (1) l'appareil ne doit pas produire de brouillage, et (2) l'utilisateur de l'appareil doit accepter tout brouillage radioélectrique subi, même
si le brouillage est susceptible d'en compromettre le fonctionnement.
Privacy of communications may not be ensured when using this equipment.
Exposure to Radio Frequency (RF) Signals
L'exposition à la radiofréquence (RF)
This wireless phone is a radio transmitter and receiver. It is designed and manufactured not to exceed the emission limit for exposure to radio frequency (RF)
energy set by the Ministry of Health (Canada), Safety Code 6. These limits are part of comprehensive guidelines and established permitted levels of RF energy for
the general population. These guidelines are based on the safety standards previously set by international standard bodies. T hese standards include a substantial
safety margin designed to assure the safety of all persons, regardless of age and health.
Ce téléphone sans fil est un émetteur-récepteur radio. Il est conçu et fabriqué pour ne pas dépasser la limite d'émission pour l'exposition aux
radiofréquences (RF) établies par le ministère de la Santé (Canada), Code de sécurité 6. Ces limites font partie de directives complètes et établissent les
niveaux autorisés d'énergie RF pour la population générale. Ces lignes directrices sont fondées sur les normes de sécurité précédemment établies par les
organismes internationaux standard. Ces normes comprennent une marge de sécurité importante destinée à assurer la sécurité de toutes les personnes,
indépendamment de l'âge et la santé.
This device and its antenna must not be co-located or operating in conjunction with any other antenna or transmitter.
Cet appareil et son antenne ne doivent pas être co-localisés ou fonctionner en conjonction avec une autre antenne ou transmetteur.
This device has been shown to be capable of compliance for localized specific absorption rate (SAR) for uncontrolled environment / general public exposure limits specific in
ANSI/IEEE C95.1-1992 and had been tested in accordance with the measurement procedures specified in IEEE 1528-2003”. For body worn operation, this
handset has also been tested and meets the RF exposure limits of IC RSS-102 when used with the belt clip supplied with this product. Use of other
accessories may not ensure compliance with IC RSS-102 RF exposure limits.
Ce dispositif a été montré qu'il était capable de la conformité pour les taux d'absorption localisée spécifique (DAS) pour un environnement non contrôlé /
générales limites d'exposition du public spécifiques dans la norme ANSI / IEEE C95.1-1992 et a été testé en conformité avec les procédures de mesure
spécifiées dans la norme IEEE 1528 -2003 ". Pour le fonctionnement du corps usé, ce combiné a également été testé et répond aux limites d'exposition RF
de IC RSS-102 lorsqu'il est utilisé avec le clip de ceinture fourni avec ce produit. L'utilisation d'accessoires d'autres ne peuvent pas assurer la conformité
avec IC RSS-102 des limites d'exposition aux radiofréquences.
This Class B digital apparatus complies with canadian ICES-003
CET appareil numérique de la classe B est conforme á la norme NMB-003 du Canada.
This product meets the applicable Industry Canada technical specifications.
Le présent materiel est conforme aux specifications techniques applicables d’Industrie Canada
Hearing Aid Compatibility (HAC/VC):
This handset meets the IC CS-03 issue 9 Part V standard for Hearing Aid Compatibility.
FCC Compliance statements
This equipment complies with Part 68 of the FCC rules and the requirements adopted by the ACTA. Inside the battery door of this equipment is
a label that contains, among other information, a product identifier in the format US: T7HW4NANCT8111. If requested, this number must be provided to the
telephone company.
If this equipment RTX8111 causes harm to the telephone network, the telephone company will notify you in advance that temporary discontinuance of
service may be required. But if advance notice isn't practical, the telephone company will notify the customer as soon as possible. Also, you will be advised
of your right to file a complaint with the FCC if you believe it is necessary.
The telephone company may make changes in its facilities, equipment, operations or procedures that could affect the operation of the equipment. If this
happens the telephone company will provide advance notice in order for you to make necessary modifications to maintain uninterrupted service.
If trouble is experienced with this equipment RTX8111, for repair or warranty information, please contact RTX America Inc. , 501 AirTech Parkway
PlainField IN 46168 USA, 1(408)441-8600. If the equipment is causing harm to the telephone network, the telephone company may request that you
disconnect the equipment until the problem is resolved.
Explain which repairs, if any, the customer (user) can perform. If there is a section in the general customer instructions that provides detailed information on
repairs, a reference to that section is acceptable. If this equipment is of a type that is not intended to be repaired, state that fact in place of any repair
instructions.
Connection to party line service is subject to state tariffs. Contact the state public utility commission, public service commission or corporation commission
for information.
If your home has specially wired alarm equipment connected to the telephone line, ensure the installation of this DECT telephone handset and charger
does not disable your alarm equipment. If you have questions about what will disable alarm equipment, consult your telephone company or a qualified
installer.
This equipment is hearing aid compatible.

First
Alcatel-Lucent 8232 DECT Handset
OmniPCX Enterprise
8AL90862USAAed00B Draft 13 april 2012

Contents
2
Toc
Precautions for use . . . . . . . . . . . . . . . . . . . . . . . . . . . . . . . . . . . . . . . . . . . . . . . . . . . . . . p. 4
1. Getting to know your telephone p. 6
1.1 Phone description . . . . . . . . . . . . . . . . . . . . . . . . . . . . . . . . . . . . . . . . . . . . . . . . . p. 6
1.2 Status icons . . . . . . . . . . . . . . . . . . . . . . . . . . . . . . . . . . . . . . . . . . . . . . . . . . . . . . p. 7
1.3 MENU icons. . . . . . . . . . . . . . . . . . . . . . . . . . . . . . . . . . . . . . . . . . . . . . . . . . . . . . p. 7
1.4 Call icons . . . . . . . . . . . . . . . . . . . . . . . . . . . . . . . . . . . . . . . . . . . . . . . . . . . . . . . . p. 8
1.5 Accessing the MENU and navigating . . . . . . . . . . . . . . . . . . . . . . . . . . . . . . . . . . p. 8
2. Getting started p. 9
2.1 Installing the battery in the telephone . . . . . . . . . . . . . . . . . . . . . . . . . . . . . . . . . . p. 9
2.2 Charging your telephone battery . . . . . . . . . . . . . . . . . . . . . . . . . . . . . . . . . . . . . . p. 9
2.3 Switching on your telephone . . . . . . . . . . . . . . . . . . . . . . . . . . . . . . . . . . . . . . . . . p. 10
3. Using your telephone p. 11
3.1 Making a call . . . . . . . . . . . . . . . . . . . . . . . . . . . . . . . . . . . . . . . . . . . . . . . . . . . . . p. 11
3.2 Calling from your personal directory . . . . . . . . . . . . . . . . . . . . . . . . . . . . . . . . . . . p. 11
3.3 Calling your correspondent by name (company directory) . . . . . . . . . . . . . . . . . . p. 11
3.4 Receiving a call . . . . . . . . . . . . . . . . . . . . . . . . . . . . . . . . . . . . . . . . . . . . . . . . . . . p. 12
3.5 Redialing . . . . . . . . . . . . . . . . . . . . . . . . . . . . . . . . . . . . . . . . . . . . . . . . . . . . . . . . p. 12
3.6 Requesting automatic callback if internal number is busy. . . . . . . . . . . . . . . . . . . p. 12
3.7 During a call. . . . . . . . . . . . . . . . . . . . . . . . . . . . . . . . . . . . . . . . . . . . . . . . . . . . . . p. 13
4. During a conversation p. 14
4.1 Make a second call . . . . . . . . . . . . . . . . . . . . . . . . . . . . . . . . . . . . . . . . . . . . . . . . p. 14
4.2 Receiving a second call. . . . . . . . . . . . . . . . . . . . . . . . . . . . . . . . . . . . . . . . . . . . . p. 14
4.3 Switching between two calls (Broker call) . . . . . . . . . . . . . . . . . . . . . . . . . . . . . . . p. 14
4.4 Transferring a call . . . . . . . . . . . . . . . . . . . . . . . . . . . . . . . . . . . . . . . . . . . . . . . . . p. 15
4.5 Three-way conference with internal and/or external correspondents (conference) p. 15
4.6 Placing an outside call on hold (parking). . . . . . . . . . . . . . . . . . . . . . . . . . . . . . . . p. 15
4.7 Activate / Deactivate voice frequency . . . . . . . . . . . . . . . . . . . . . . . . . . . . . . . . . . p. 16
5. Sharing p. 17
5.1 Answering the general bell . . . . . . . . . . . . . . . . . . . . . . . . . . . . . . . . . . . . . . . . . . p. 17
5.2 Call pick-up . . . . . . . . . . . . . . . . . . . . . . . . . . . . . . . . . . . . . . . . . . . . . . . . . . . . . . p. 17
5.3 Hunting groups . . . . . . . . . . . . . . . . . . . . . . . . . . . . . . . . . . . . . . . . . . . . . . . . . . . p. 17
5.4 Sending a written message to an internal correspondent . . . . . . . . . . . . . . . . . . . p. 18
5.5 Send a voice message copy . . . . . . . . . . . . . . . . . . . . . . . . . . . . . . . . . . . . . . . . . p. 18
5.6 Sending a recorded message to a number a distribution list. . . . . . . . . . . . . . . . . p. 19
6. Keep in touch p. 20
6.1 Diverting calls to your voice mailbox . . . . . . . . . . . . . . . . . . . . . . . . . . . . . . . . . . . p. 20
6.2 Consulting your voice mailbox. . . . . . . . . . . . . . . . . . . . . . . . . . . . . . . . . . . . . . . . p. 20
6.3 Program your associate number . . . . . . . . . . . . . . . . . . . . . . . . . . . . . . . . . . . . . . p. 20
6.4 Define an overflow number . . . . . . . . . . . . . . . . . . . . . . . . . . . . . . . . . . . . . . . . . . p. 21
6.5 Diverting calls to another number (immediate diversion) . . . . . . . . . . . . . . . . . . . p. 21
6.6 Different types of diversions . . . . . . . . . . . . . . . . . . . . . . . . . . . . . . . . . . . . . . . . . p. 21
6.7 Cancelling all diversions . . . . . . . . . . . . . . . . . . . . . . . . . . . . . . . . . . . . . . . . . . . . p. 22
6.8 Consulting text messages . . . . . . . . . . . . . . . . . . . . . . . . . . . . . . . . . . . . . . . . . . . p. 22
7. Programming your telephone p. 23
7.1 Initializing your voice mailbox . . . . . . . . . . . . . . . . . . . . . . . . . . . . . . . . . . . . . . . . p. 23
7.2 Modifying your personal code . . . . . . . . . . . . . . . . . . . . . . . . . . . . . . . . . . . . . . . . p. 23
7.3 Adjusting the audio functions. . . . . . . . . . . . . . . . . . . . . . . . . . . . . . . . . . . . . . . . . p. 23
7.4 Activating headset mode . . . . . . . . . . . . . . . . . . . . . . . . . . . . . . . . . . . . . . . . . . . . p. 24
7.5 Adjusting your telephone functions . . . . . . . . . . . . . . . . . . . . . . . . . . . . . . . . . . . . p. 24
7.6 Selecting language . . . . . . . . . . . . . . . . . . . . . . . . . . . . . . . . . . . . . . . . . . . . . . . . p. 25
7.7 Programming your personal directory . . . . . . . . . . . . . . . . . . . . . . . . . . . . . . . . . . p. 25
7.8 Modifying a card in the personal directory. . . . . . . . . . . . . . . . . . . . . . . . . . . . . . . p. 26
7.9 Erase a record from the personal directory . . . . . . . . . . . . . . . . . . . . . . . . . . . . . . p. 26
7.10 Programming an appointment reminder . . . . . . . . . . . . . . . . . . . . . . . . . . . . . . . . p. 26
7.11 Identify the terminal you are on . . . . . . . . . . . . . . . . . . . . . . . . . . . . . . . . . . . . . . . p. 27
7.12 Locking your telephone . . . . . . . . . . . . . . . . . . . . . . . . . . . . . . . . . . . . . . . . . . . . . p. 27
8. Registering the telephone p. 28
8.1 Registering the telephone on a system for the first time . . . . . . . . . . . . . . . . . . . . p. 28
8.2 Registering the telephone on other systems . . . . . . . . . . . . . . . . . . . . . . . . . . . . . p. 28
Contents

3
9. Using the telephone in GAP mode p. 30
9.1 Making a call . . . . . . . . . . . . . . . . . . . . . . . . . . . . . . . . . . . . . . . . . . . . . . . . . . . . . p. 30
9.2 Receiving a call . . . . . . . . . . . . . . . . . . . . . . . . . . . . . . . . . . . . . . . . . . . . . . . . . . . p. 30
9.3 Calling from your personal directory . . . . . . . . . . . . . . . . . . . . . . . . . . . . . . . . . . . p. 30
9.4 Redialling the last number dialed (redial) . . . . . . . . . . . . . . . . . . . . . . . . . . . . . . . p. 31
9.5 Sending DTMF signals . . . . . . . . . . . . . . . . . . . . . . . . . . . . . . . . . . . . . . . . . . . . . p. 31
9.6 Sending a calibrated cut-off. . . . . . . . . . . . . . . . . . . . . . . . . . . . . . . . . . . . . . . . . . p. 31
9.7 Programming your personal directory . . . . . . . . . . . . . . . . . . . . . . . . . . . . . . . . . . p. 31
9.8 Deleting a card . . . . . . . . . . . . . . . . . . . . . . . . . . . . . . . . . . . . . . . . . . . . . . . . . . . p. 32
9.9 Customizing and adjusting your telephone . . . . . . . . . . . . . . . . . . . . . . . . . . . . . . p. 32
10. Accessories p. 34
10.1 Phone package . . . . . . . . . . . . . . . . . . . . . . . . . . . . . . . . . . . . . . . . . . . . . . . . . . . p. 34
10.2 Chargers . . . . . . . . . . . . . . . . . . . . . . . . . . . . . . . . . . . . . . . . . . . . . . . . . . . . . . . . p. 34
10.3 Characteristics of the mains power adapter . . . . . . . . . . . . . . . . . . . . . . . . . . . . . p. 35
10.4 Presentation of the battery pack . . . . . . . . . . . . . . . . . . . . . . . . . . . . . . . . . . . . . . p. 35
10.5 Headphone / external microphone . . . . . . . . . . . . . . . . . . . . . . . . . . . . . . . . . . . . p. 35
10.6 Cleaning your telephone . . . . . . . . . . . . . . . . . . . . . . . . . . . . . . . . . . . . . . . . . . . . p. 35
10.7 Transporting and protecting your telephone . . . . . . . . . . . . . . . . . . . . . . . . . . . . . p. 35
11. Glossary p. 36
Declaration of compliance . . . . . . . . . . . . . . . . . . . . . . . . . . . . . . . . . . . . . . . . . . . . . . . . . p. 37

Precautions for use
4
howtoc
Coverage area
The DECT functions provided by your Alcatel-Lucent system allow user mobility management via
DECT cordless telephones.
Radio coverage of the Alcatel-Lucent system is ensured by a network of radio terminals. The coverage
area of a radio terminal is called a cell.
• Mobility:
A user can make or receive calls in any cell.
• Radio transfer:
This function enables the user to move during a conversation and go from one cell to another. The
transfer takes place automatically and has no effect on the conversation. In some cases, slight
crackling may be audible at the moment of transition.
Use of approved DECT equipment
This DECT telephone is designed to be used with a private automatic branch exchange (PABX) without
an Alcatel-Lucent wire. The CE symbol means that this product is compliant with current Community
directives, more especially the following directives:
Pursuant to directive 1999/5/CE (R&TTE) published in the Official Journal of the European Community
of April 7, 1999, these items of equipment use the DECT harmonized frequency spectrum and can be
used in all the countries of the European Community, in Switzerland and Norway.
89/336/CEE Electromagnetic Compatibility
73/23/CEE (low voltage)
1999/5/CE (R&TTE)
No guarantee is given concerning possible interference affecting DECT equipment,
due to other authorised utilisation of the radio frequencies concerned.

Precautions for use
5
Operating conditions
This approved DECT telephone is intended to be used with an Alcatel-Lucent cordless PBX. The following
conditions must be respected, notably concerning the use of radioelectric frequencies:
•dect equipment can only be used to establish links between fixed points if these links are temporary and the
equivalent isotropically radiated power at the antenna is less than 250 mw.
•The conditions of access to a DECT equipment telepoint network shall be stipulated by contract with the
operator of the authorized telepoint network concerned.
•The mains power socket used must be close to the charger/holder and easily accessible, so that it can be
used as an 'on/off' facility.
•Switch off the telephone before changing the battery.
•Do not expose your telephone to severe conditions (rain, sea air, dust, etc.).
•Correct operation of your telephone is not guaranteed at temperatures outside the range -10C to 45C.
•You must not switch on or use your telephone near gas or inflammable liquids.
•A volume level that is too high can cause irreparable loss of hearing. Adjust the sound volume of your handset
to a reasonable level.
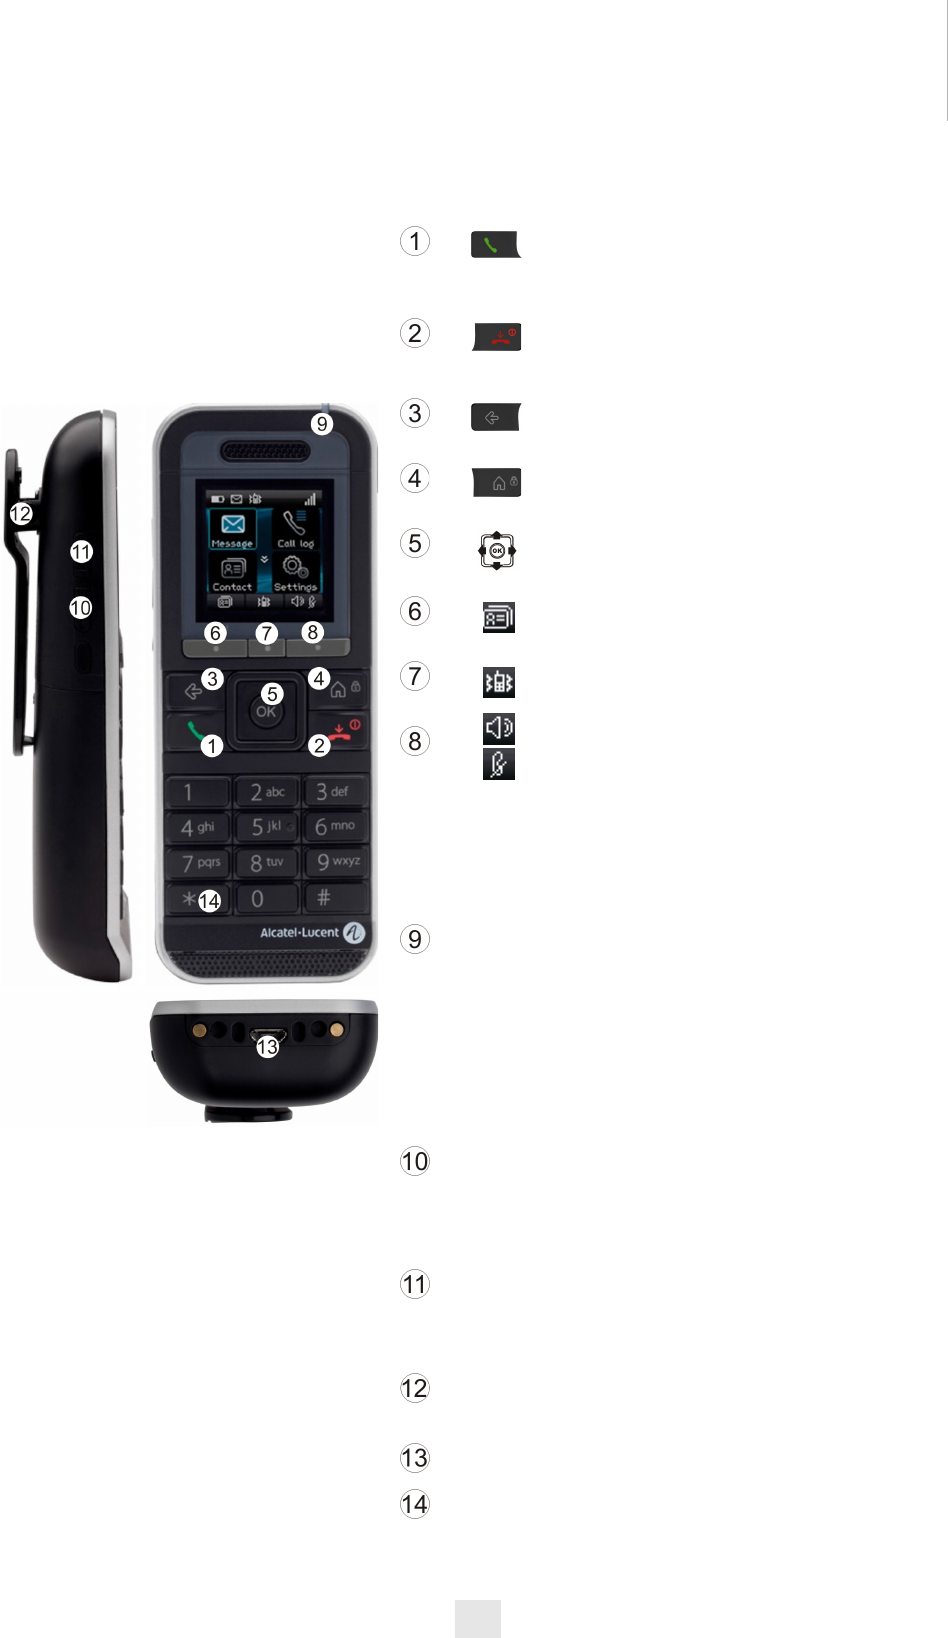
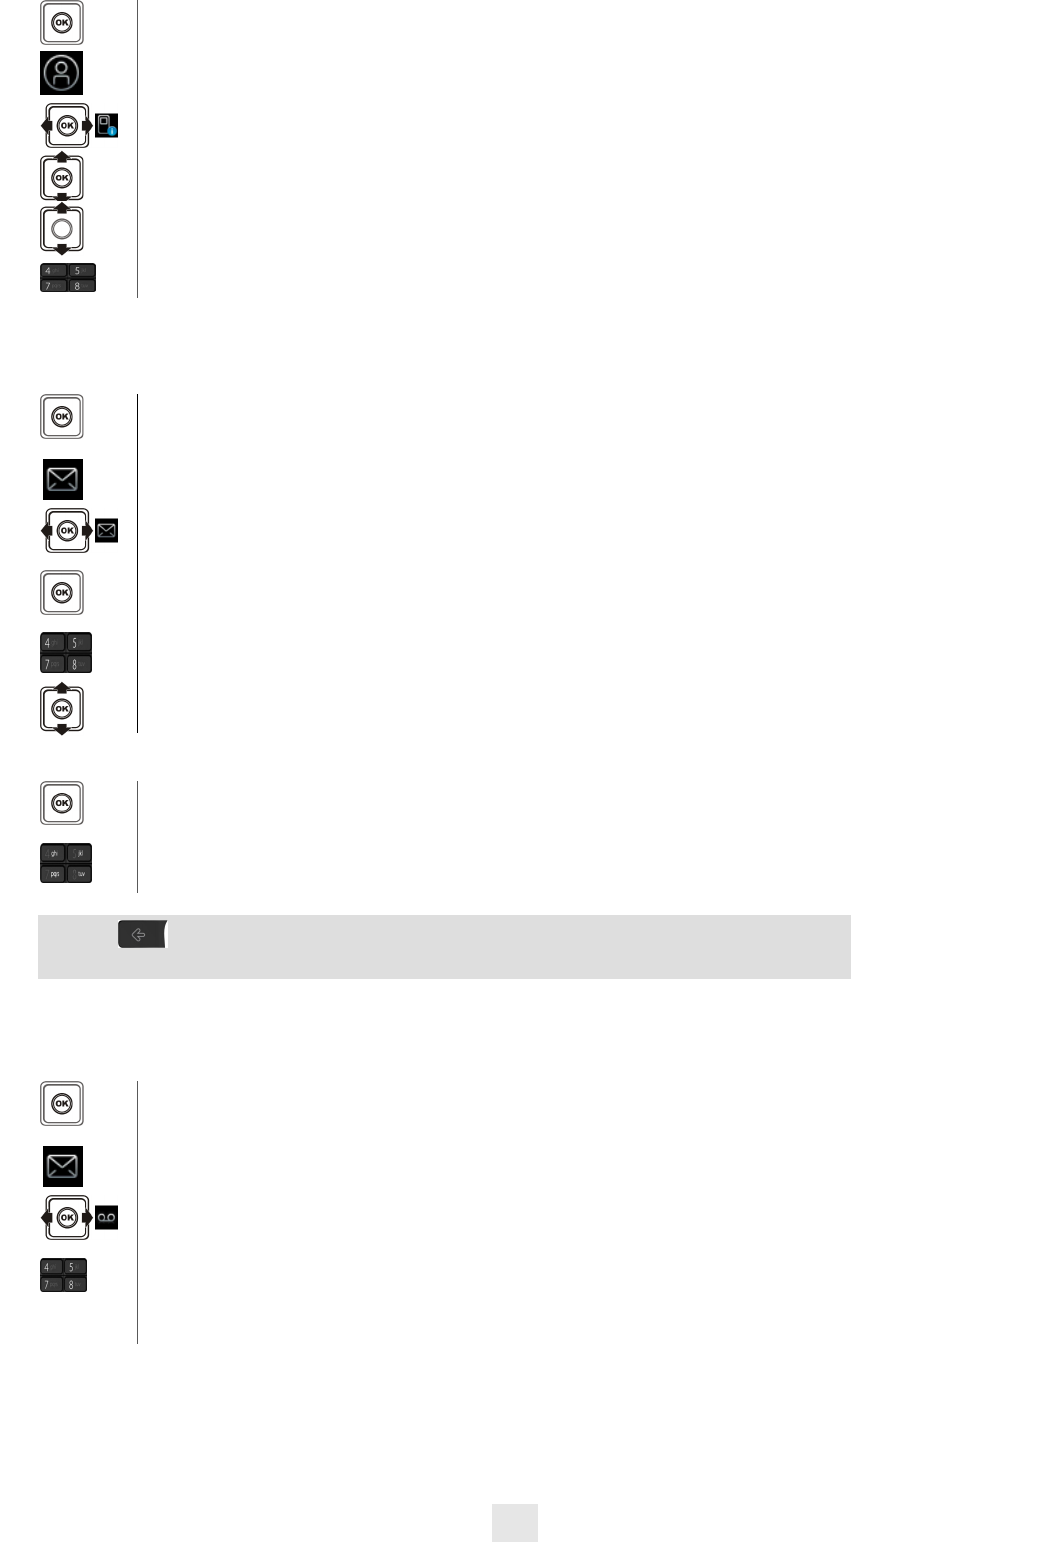
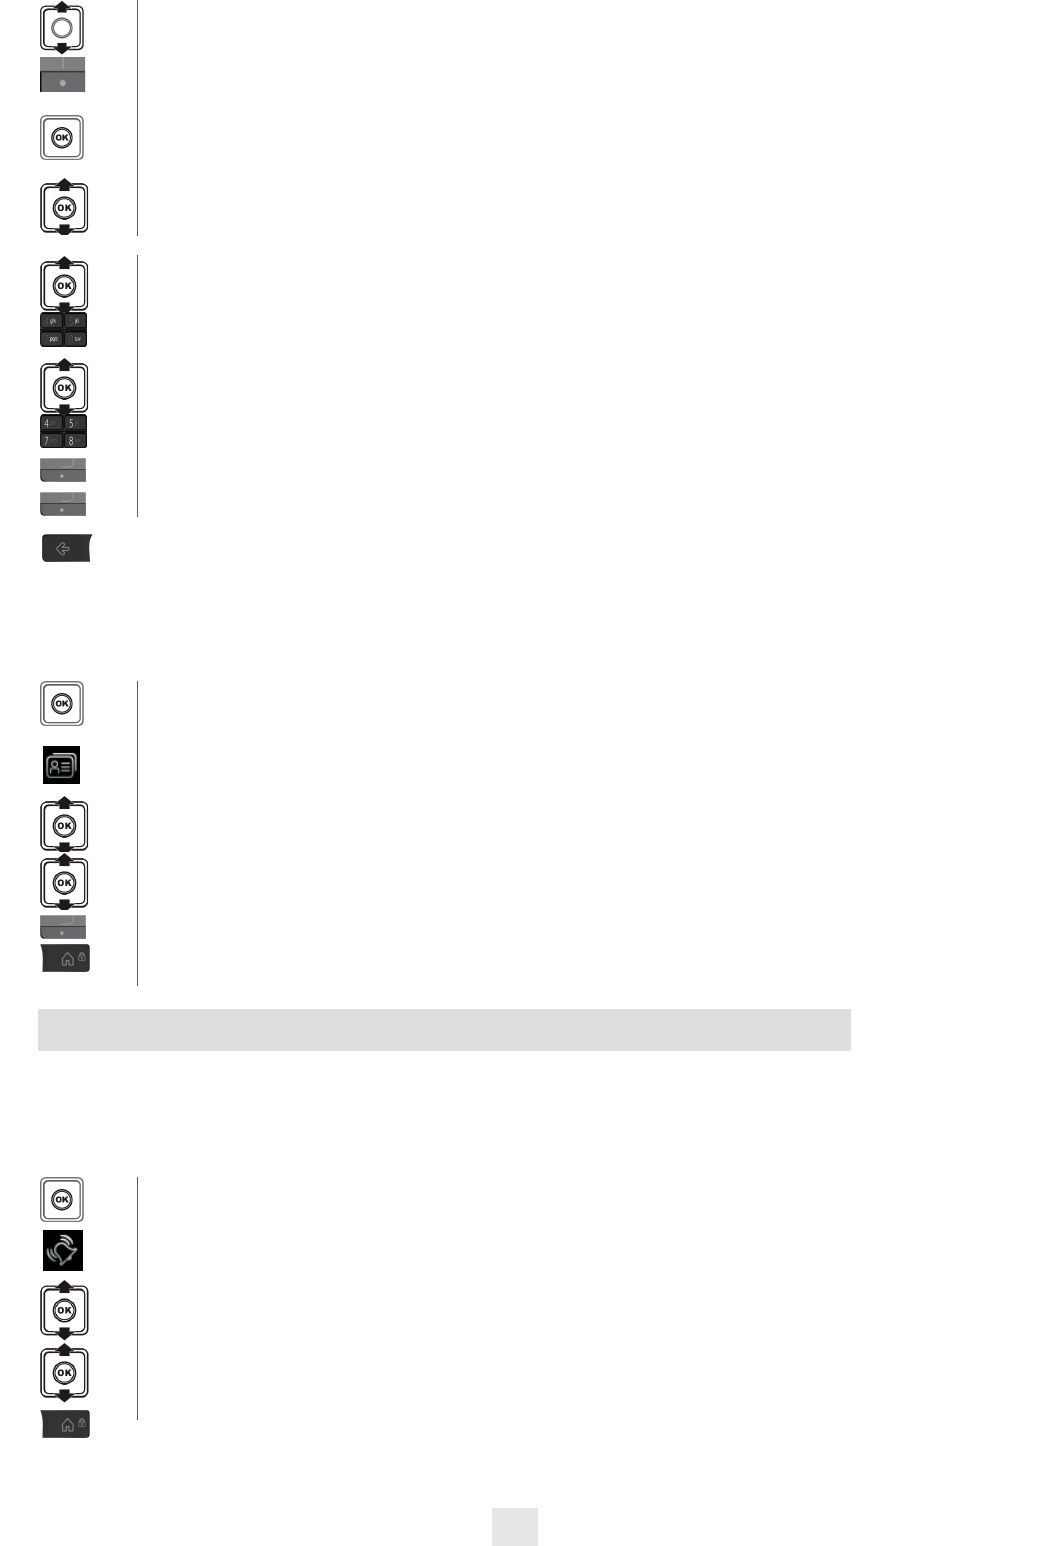
Getting to know your telephone 1
6
Other
1.1 Phone description
•Answer the call
•Long press: redial list
•Switching between two calls (Broker call)
•Switch off ringer
•Hang up
•Short press: Switch on the phone
•Long press: Switch off the phone
•Return to previous menu
•Erase a character
•Delete an entire field
•Back to homepage
•Lock/unlock keypad
•Access MENU
•Confirm
•Navigate
•Short press: access the company directory
•Long press: Customizing your telephone ;
Telephone ID (Features depending on the system)
•Access the ringer and vibrator adjustment feature
•Short press: Activate/deactivate the loudspeaker
•Long press: Activate/deactivate the mute feature
LED
•Green steady: the phone is on the charger and the battery is
fully charged
•Red steady: the phone is on the charger and the battery is
charging
•Slow yellow flashing: telephonic event such as unread
message, missed call,...
•Quick yellow flashing: incoming call
•Red flashing: out of coverage
•Flashes when the phone is in the charger has the same
meaning as when the phone is out of the charger except that
between the yellow flash the led is red or green depending on
the charging state.
•Short press: Decrease the volume (4 steps) of ringing bell
during an incoming call or decrease volume of loudspeaker
during a conversation.
•Long press: activate / deactivate the mute feature.
•Short press: increase the volume (4 steps) of ringing bell
during an incoming call or increase volume of loudspeaker
during a conversation.
•Long press: activate / deactivate the loudspeaker.
•Clip to hook your phone on your belt. You can dismount the
clip and place a cover instead that is provided in the phone
package.
•USB Plug for charging the battery and maintenance
•Long press (Features depending on the system): Access to
personal speed dial / Access the DTMF feature during a
conversation

7
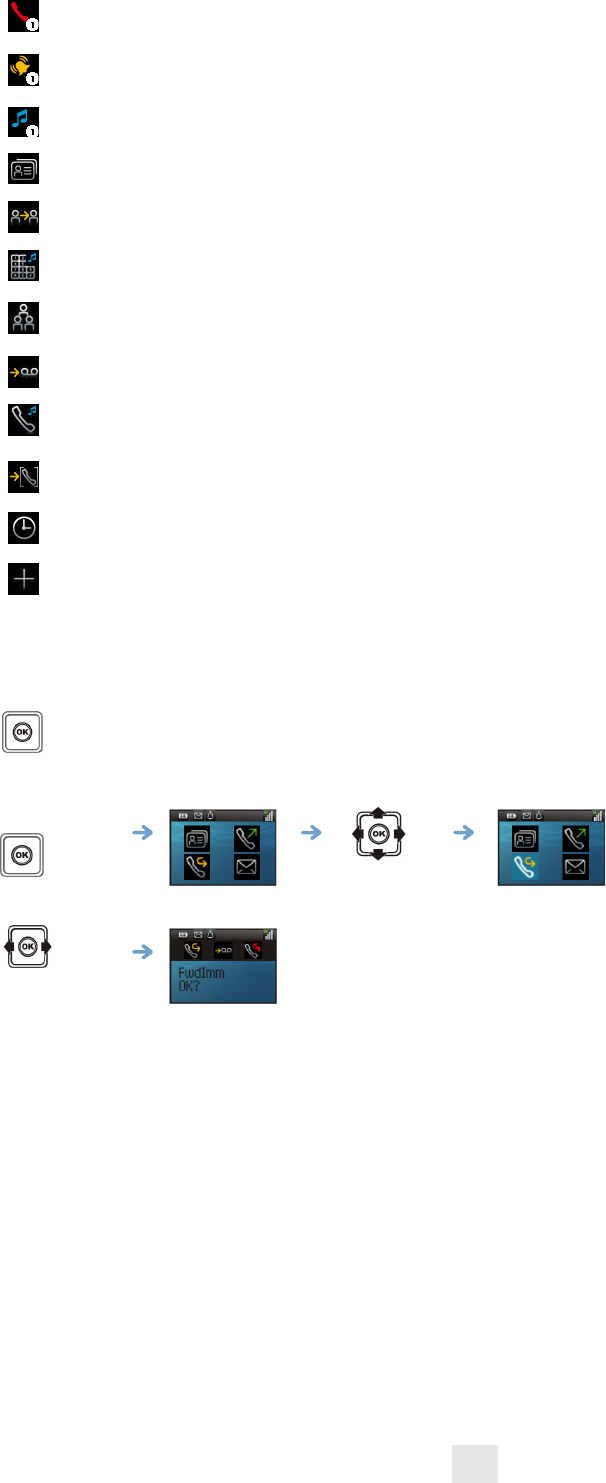
1.2 Status icons
The status icons are displayed on the welcome screen and indicate the status of the telephone.
1.3 MENU icons
The MENU is accessible from the welcome screen by pressing the OK key. (OK:)
It provides access to all the functions available on your system.
Battery charge level
Received messages voice mail and callback request texts and unanswered calls
Appointment programmed
Call diversion activated
Vibrator active
Ringer active
Ringer disabled
Radio reception quality
Loudspeaker on (in conversation)
Mute on (in conversation)
Economy mode activated and used (green)
Economy mode activated (grey)
You can obtain details on the status icons from the tooltips that appear on the
welcome screen when you use the navigator:
Directories:
manage your personal directory and access the company directory.
Redial
call back the last number dialed.
Divert
divert your calls to another number.
Mailbox:
consult and send voice and text messages.
Call pick-up:
answer a call intended for another telephone.
Appointment:
program a call-back time.
System lock:
prohibit outgoing calls and modification of the programming.
Guide: programming, list of functions,...
Adjustment: ;
adjust contrast, activate or deactivate the beeps, lighting, etc.
System selection
Installation
ManagerAssistant
Choice of language
Ringing setting
8
1.4 Call icons
In the event of a multiple call, the icons are given indices to represent the different correspondents
1.5 Accessing the MENU and navigating
The MENU is accessible from the welcome screen by pressing the OK key.
Making a call
Receiving a call
Call on hold
Accessing the directories
Transferring a call
Switching to DTMF signals
Setting up a conference
Diverting your calls to your voice message service
Putting on common hold
Parking an external communication
Call duration and cost
Additional options (Features depending on the system)
Access
MENU
Select a function in the MENU
You can move horizontally along the various icons within the function
Getting started 2
9
Other
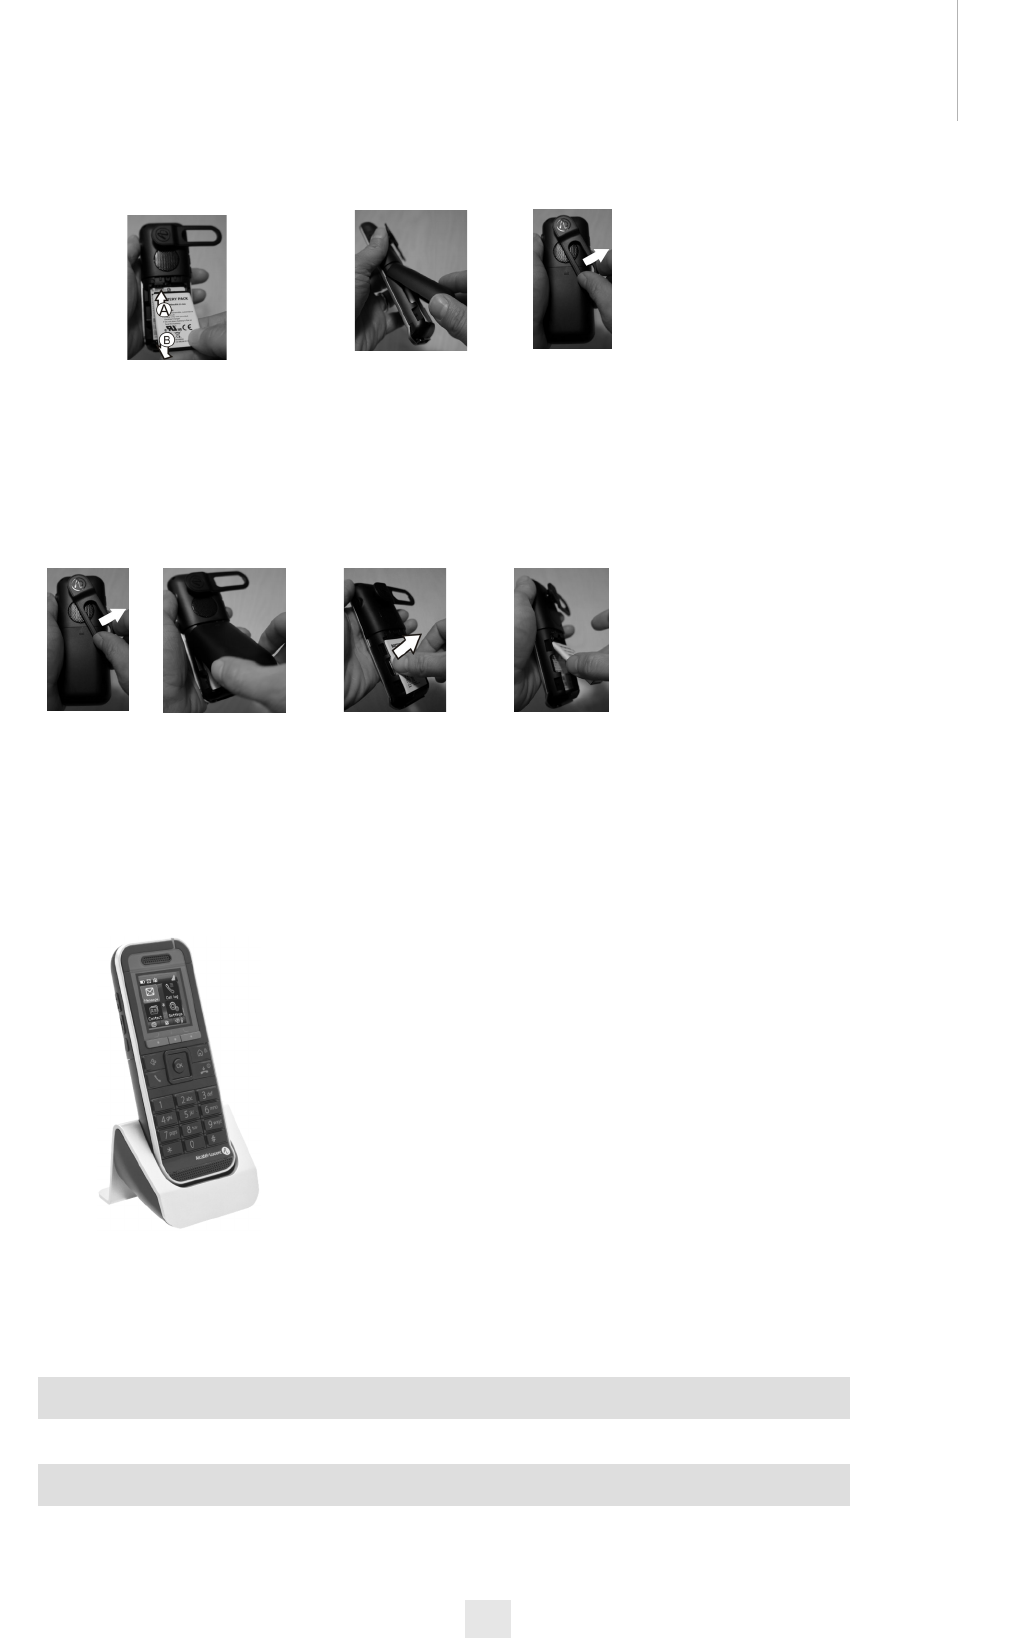
2.1 Installing the battery in the telephone
•Installing the battery in the telephone
•To remove it
2.2 Charging your telephone battery
Recharge your telephone battery regularly. The telephone can be on or off when recharging the battery. If the
telephone is to remain unused or out of its charger for several weeks, remove the battery and store it separately.
Position the battery
"connectors" side as shown
in the drawing (A). Terminate
the installation of the battery
in its compartment by
pressing as shown in the
drawing (B).
Replace the cover.
Lift up the cover. Remove the battery from its
compartment as shown in the
drawing.
Connect the charger and place the telephone in the charging holder. The
telephone LED is green when charging.
The battery charging time is 3 hours.
Switch off the telephone before changing the battery.

10
2.3 Switching on your telephone
If the display fails to light up or the battery icon is flashing, recharge the battery.
If the radio reception icon doesn’t appear on the telephone display:
•Check that you’re in an area covered (if you’re not, move close to a radio terminal).
•Check that the telephone is properly installed in the system (consult the PABX manager).
Switching off your telephone:
Press the switch on/off key (long press).
Your telephone is switched on
Press the switch on/off
key
If the display indicates: 'System 1 Auto install ?', see paragraph 'Registering the
telephone' or contact your installation technician.
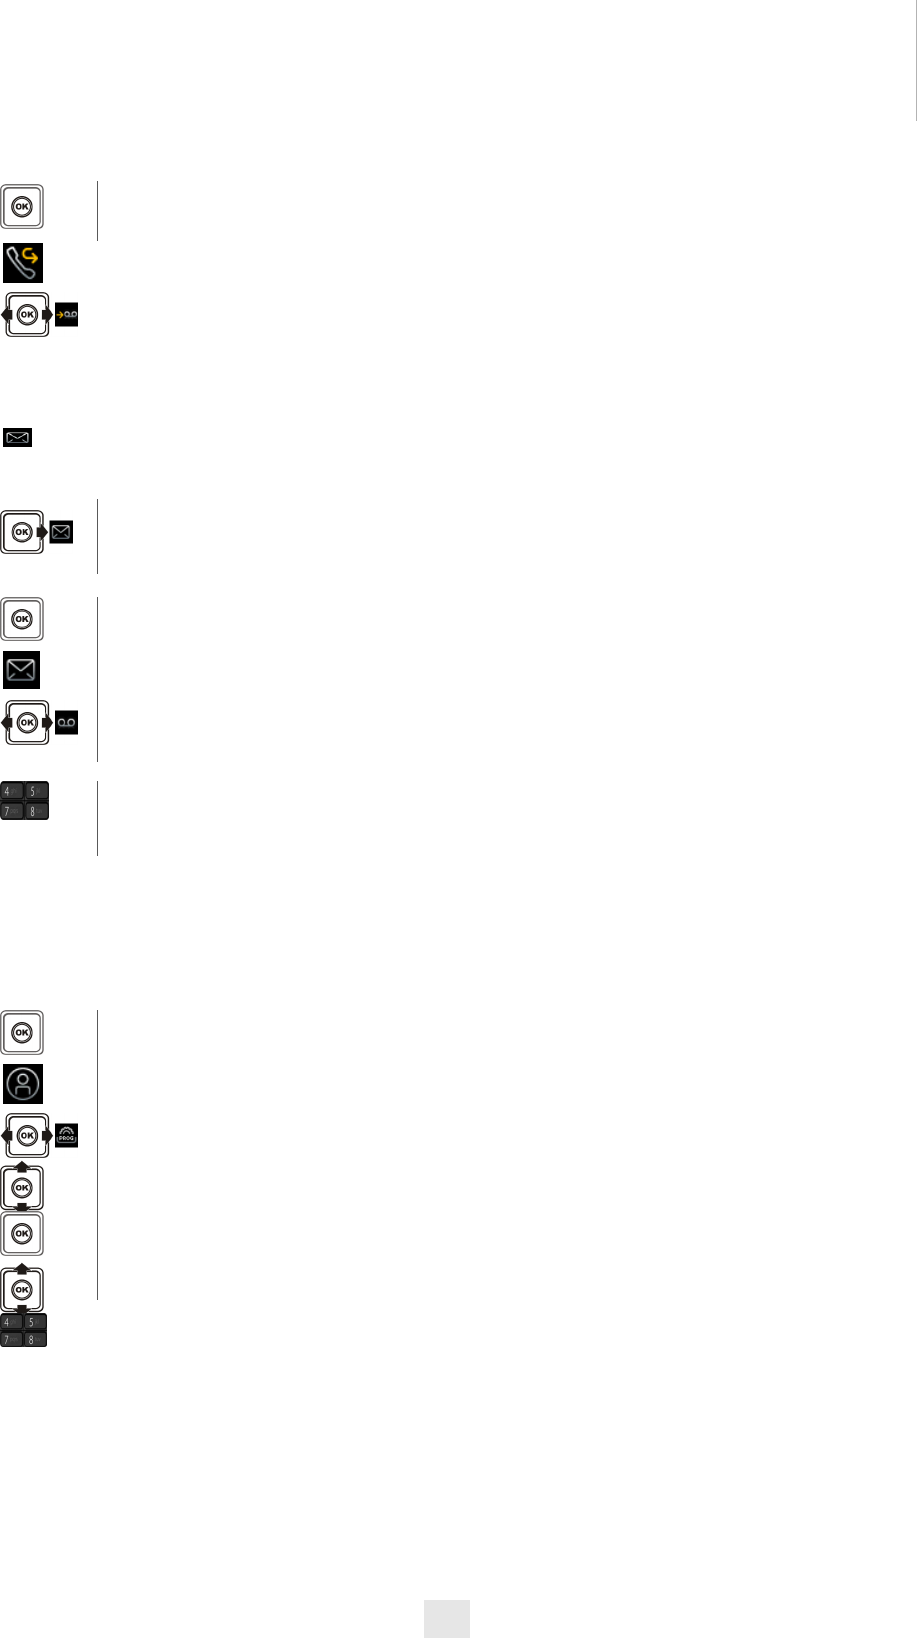
Using your telephone 3
11
Other
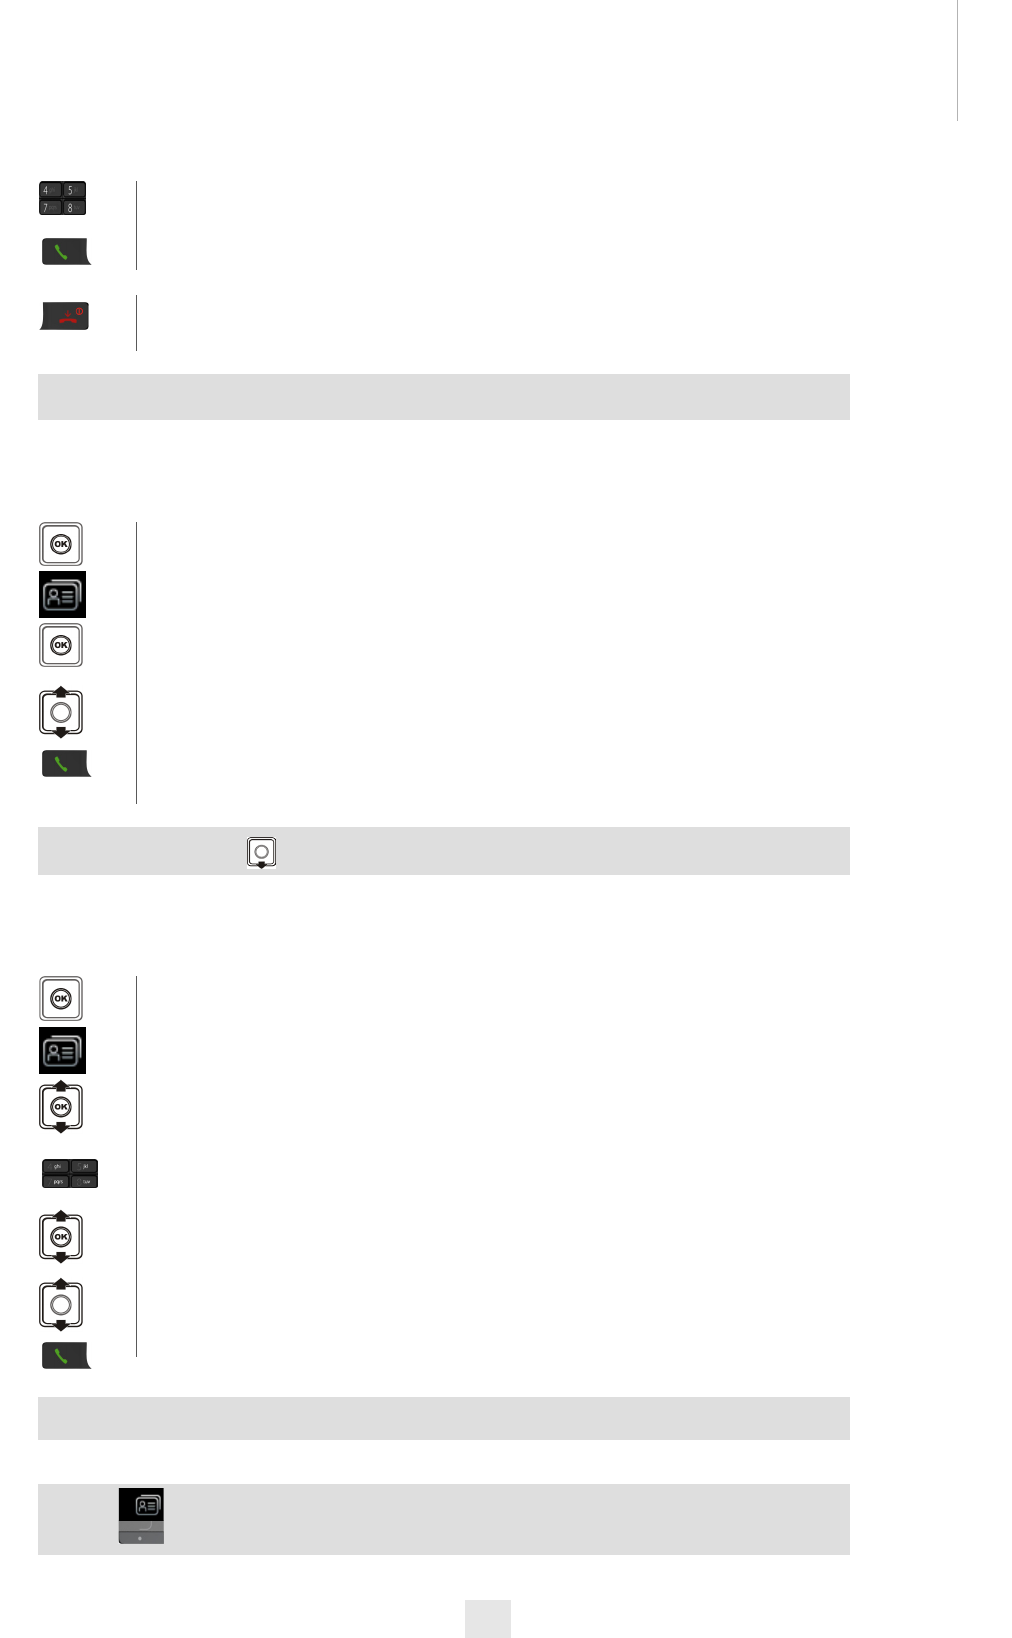
3.1 Making a call
3.2 Calling from your personal directory
3.3 Calling your correspondent by name (company directory)
•dial
•send the call
You are in communication
•hang up
To make an external call, dial the outside line access code before dialing your
contact number
•access menu
•contacts
• personal dir
validate access to the personal directory
•select the name of the person you wish to call
•send the call
Quick access:
•access menu
• contacts
• phone book
•enter the first letters of the name, name-first name or the initials of your
correspondent
•apply
•select the type of search you want (last name, last name and first name or
initials)
•select the desired name
•send the call
Name must be entered in format name space first name.
For fast access to this function from the home screen page, press the
directory key.

12
3.4 Receiving a call
3.5 Redialing
•Redialling the last number dialed (redial)
•Call back on the last 8 number dialed
3.6 Requesting automatic callback if internal number is busy
The telephone of the internal correspondent you are trying to contact is busy, and you want the person to call you
back as soon as they are free.
You are receiving a call:
•answered incoming calls
•disabling the ringer:press the hang up key when your telephone rings: it is still
possible to answer by pressing the unhook key.
Speak
•hang up
The ringer does not ring if:
. the vibrator is active, the vibrator active icon is displayed on the screen saver.
. the ringer is disabled, the ringer disabled icon is displayed on the screen saver.
•long press
•access menu
• redial
•select the no. in the last 8 issued
•send the call
• call back
To cancel the automatic callback request, enter the 'Cancel automatic callback'
function code.
13
3.7 During a call
During a call and without losing the connection, there are several ways to access the options offered by your
system, using:
•the list of icons at the top of the screen
•the list of items at the bottom of the screen
Call in progress
Slot for second call (reception of a call ou call
waiting)
transfer
Conference
Contacts
Voice frequency
Additional options: Enquiry call , Record , Park/
retrieve , Forbidden service , Back
Call duration and cost

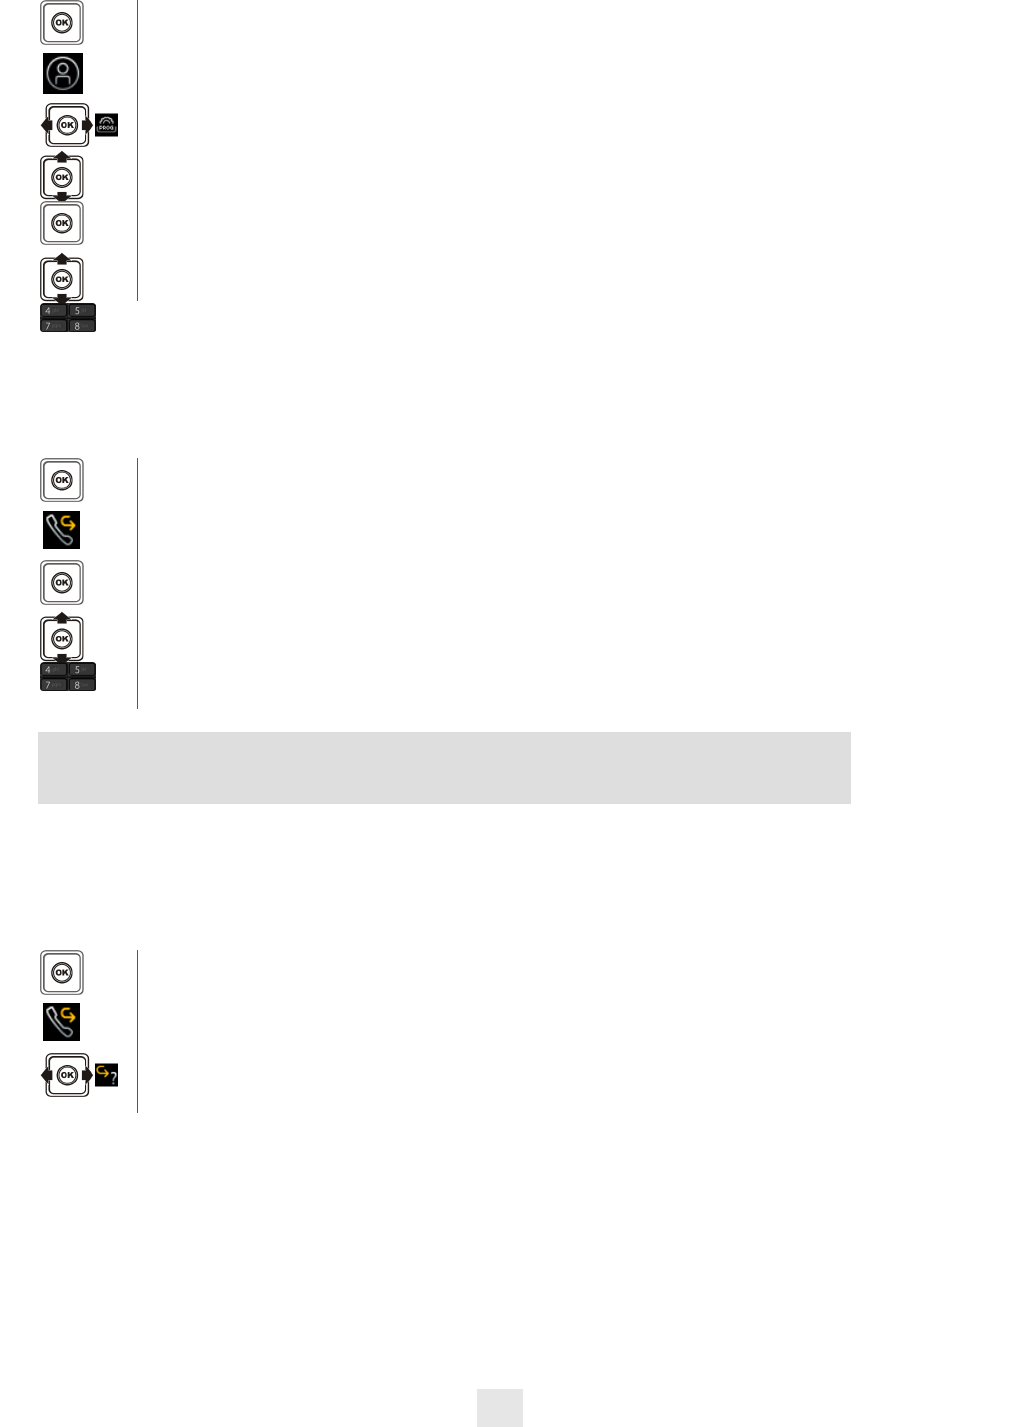
During a conversation 4
14
Other
4.1 Make a second call
•Recover the correspondent on hold
4.2 Receiving a second call
You are in conversation and a correspondent is trying to contact you:
4.3 Switching between two calls (Broker call)
During a call, to recover the correspondent on hold:
You are in conversation with one correspondent
•dial the number
•send the call
•the first call is on hold
•hang up
Your telephone rings
•recover the correspondent on hold
You can also initiate a second call by first validating the 'Other call' option and using
the personal directory or the company directory.
The caller’s name is displayed for 3 seconds, and a beep is sent
•answered incoming calls
•the first call is on hold
Over 3 seconds, move with the navigate-left-right key to the receiving a second call
icon, to see the identity of the second caller (and off-hook if necessary)
•During a call, to recover the correspondent on hold:
•recover the correspondent on hold
You can establish the identity of the waiting call without taking it by using
the navigate-left-right key.
•You can establish the identity of the waiting call without taking it by using the navigate-left-
right key.
•display the correspondent’s identity
•recover the correspondent on hold
15
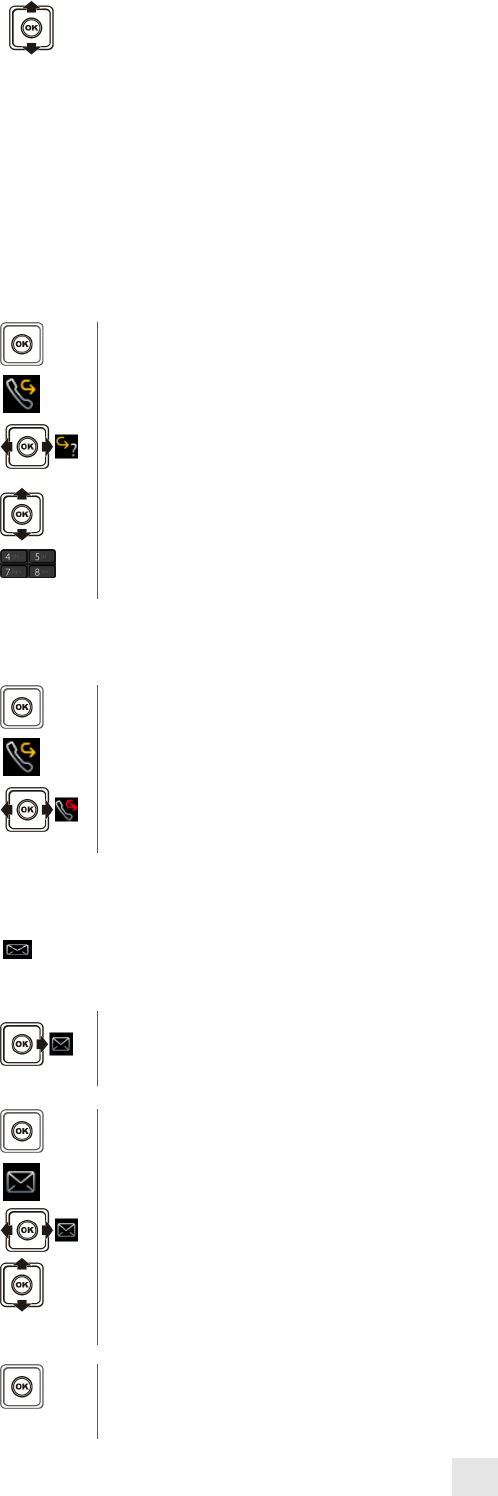
4.4 Transferring a call
During a conversation, to transfer the call to another number:
4.5 Three-way conference with internal and/or external correspondents (conference)
During a conversation, a second call is on hold
Cancel conference and return to first correspondent (if conference is active)
After the conference, to leave your two correspondents talking together:
4.6 Placing an outside call on hold (parking)
You can park an outside correspondent in order to take the call on another set.
You are in communication with a first correspondent
•call the recipient of the transfer
•send the call
You are in conversation with the destination number
•transfer
the two correspondents are connected
After dialling the number of the recipient, you can transfer your call directly without
waiting for your correspondent to answer by selecting 'Transfer'. You can initiate the
transfer by using the 'Transfer' icon or text. The transfer between two external
correspondents and the transfer action by the on-hook key depends on the system
configuration
• conference
•You are in conference mode
• end conference
You are holding an external conversation
•park
•number to be called
Your correspondent is parked and hears the hold melody.
If you on-hook without entering the number of a call park destination set, the call will
be parked on your set.
16
To recover your parked call:
4.7 Activate / Deactivate voice frequency
During a call, you sometimes have to send DTMF signals, for example, for a voice message service, an automatic
switchboard or when remotely consulting an answering machine:
•access menu
• services
• services
• pick-up services
•Park/retrieve
You are on a call
If the parked call is not recovered within a preset time (by default 1 minute 30), it is
directed to the operator.
•you are in conversation with one correspondent
• send mf
•to activate
•sending dtmf signals
• de-activate mf
The function is automatically cancelled when you hang up
Sharing 5
17
Other
5.1 Answering the general bell
When the operator is absent, incoming external calls are diverted to a general bell. You can answer these calls:
5.2 Call pick-up
You hear a telephone ringing in an office where no-one can answer. If authorised, you can answer the call on
your own telephone.
If the telephone ringing is not in your pick-up group:
If the telephone ringing is in your own pick-up group:
5.3 Hunting groups
Hunting group call:
Some extensions can be associated to form a group. You can contact any one of them by dialling the group
number.
•access menu
• services
• services
• pick-up services
• Night pick up
•access menu
• services
• services
• pick-up services
• exit pick up
• dial a number
•enter number of ringing telephone ;
•apply
• group pick up
The system can be configured to prevent call pick-up on certain telephones.
Belonging to a group does not affect the management of direct calls. A specific
telephone within a group can always be called by using its own number.
18
Temporary exit from your hunting group / Return into your group:
5.4 Sending a written message to an internal correspondent
If selected message has to be completed:
5.5 Send a voice message copy
•access menu
• services
• services
• divers services
• Hunting grp in / Hunting grp out
•your group number
•apply
•access menu
• messages
•text msg
•Confirm
• send a message?
•Confirm
•dial the number of your correspondent (dial, directories, last numbers dialed...)
•Confirm
•select the type of message to send (fixed messages, prg messages, new
message)
•follow information displayed on the screen
•confirm access to the message to be completed ;
•complete the message
•apply
When editing a message to be completed you can use the delete key to
delete any characters key ined. The browser lets you move the cursor in
an input field.
•access menu
• messages
• voice msg
•Confirm access to the voice mailbox
•personal code
•Confirm
•listen to the message to send and follow the voice guide instructions

19
5.6 Sending a recorded message to a number a distribution list
•access menu
• messages
• voice msg
•Confirm access to the voice mailbox
•personal code
•confirm
•follow the instructions of the voice guide
Keep in touch 6
20
Other
6.1 Diverting calls to your voice mailbox
6.2 Consulting your voice mailbox
When you have received a message, the Message icon is displayed on the welcome screen. The red LED
on your telephone flashes to indicate there is a message.
6.3 Program your associate number
The associated number can be a phone set number, the voice mail number or the pager number. It can be used
as overflow number.
•access menu
•forward.
• fw immediate voice mail.
•Confirm
•the number of new vocal messages is displayed in the phone notification area ;
OR
•access menu
• messages
• voice mails
•confirm access to the voice mailbox
•personal code
•confirm
•follow the instructions of the voice guide
•access menu
• services
•associate
•apply
•modify.
•dial the number of your correspondent (dial, directories, last numbers dialed...)
•confirm
21
6.4 Define an overflow number
When your set is not available, outside the coverage area or not working, calls to your set will be automatically
forwarded to this number if it has been defined.
6.5 Diverting calls to another number (immediate diversion)
The number can be your home, portable or car phone, voice mailbox or an internal extension (operator, etc.).
6.6 Different types of diversions Example of diversion on busy
•Different types of diversions
You can initiate different types of forwarding from the call forward list.
•access menu
• services
•overflow
•apply
• modify / delete
•dial the number of your correspondent (dial, directories, last numbers dialed...)
•confirm
•access menu
•forward.
•confirm access to immediate diversion
• fwd immediate
• activate fwd / modify fwd
•dial the number of your correspondent (dial, directories, last numbers dialed...)
•confirm
You can continue to make calls while your telephone is diverted.
General remark concerning diversions: you can only activate a single diversion on
your telephone. Programming a new diversion will cancel the previous one.
•access menu
•forward.
•confirm access to immediate diversion
•select the 'list of diversions' icon
22
•Example of diversion on busy
6.7 Cancelling all diversions
6.8 Consulting text messages
When you have received a message, the Message icon is displayed on the welcome screen. The yellow LED
on your telephone flashes to indicate there is a message.
Fwd on Busy When you are in conversation, all
your calls are diverted to the number
you choose.
Fwd on No Rep When you are absent, all your calls
are forwarded to the number of your
choice (delayed forwarding on no
answer)
Fwd Busy/NoRep When you are absent or already in
communication, all your calls are
forwarded to the number of your
choice (delayed forwarding on no
answer or busy)
Remote Forward Program the forwarding of a set from
another set (immediate remote
forwarding)
•access menu
•forward.
•Confirm access to immediate diversion
•select the 'list of diversions' icon
• fwd on busy.
•dial the number of your correspondent (dial, directories, last numbers dialed...)
•Confirm
•access menu
•forward.
•select the 'diversion cancellation' icon
•confirm
•the number of new vocal messages is displayed in the phone notification area
OR
•access menu
• messages
• text mails
•confirm
•select the desired message
•confirm to read it
• Read the message
•confirm access to 'options' ;
•from the options menu, you can erase the message, callback the message
sender, answer the message or read the next message
Programming your telephone 7
23
Other
7.1 Initializing your voice mailbox
7.2 Modifying your personal code
Your personal code is used to access your voice mailbox and to lock your telephone. You can change your
personal password as often as you want.
7.3 Adjusting the audio functions
You can select the ring tone for your telephone (6 choices) and adjust its volume (4 levels).
•you can use the message icon on the welcome screen to initialize your voice
mailbox.
OR
•access menu
•messages
• voice mails
•confirm access to the voice mailbox
•enter your temporary password
•enter your new password
•record your name
•end of recording
•follow the instructions of the voice guide
•access menu
• services
• password
•enter the old password
•enter the new password
•enter new password again to confirm
•apply
As long as your voice mailbox has not been initialized, personal code is 0000.
Each digit of the code is symbolized by an asterisk.
•access menu
•ring
24
•Choose the tune
•Adjusting the ringer volume
•You can adjust the buzzer/ringer mode according to your needs
This key can be used to switch rapidly from the ringer to the vibrator and vice-versa.
7.4 Activating headset mode
This mode allows you to answer calls automatically (without doing anything) and to direct the call to the external
headset.
7.5 Adjusting your telephone functions
• ring melody
•select the melody of your choice
•apply
•level
•select the volume of your choice
•apply
•press on the ringer/vibrator key
•off:ringer and buzzer are deactivated
• Ring only:rings only
• Vibrate and ring:vibrates before ringing
• Vibrate only:vibrates only
• Vibrate & Ring:vibrates and rings simultaneously
•access menu
• settings
• headset mode
•on
•access menu
• settings
•select the function* you want to activate or disable
•activate / disable
•return to idle
25
*You can activate or disable the following functions:
7.6 Selecting language
7.7 Programming your personal directory
Your personal directory can contain up to 10 numbers.
To key in the name: the keys in the keypad include letters that you can display by pressing them successively.
Example: press '8' twice to display the letter 'U'.
Handset name you can enter a name for your handset
Status to know the software version of your phone
Ascending ringing activate or deactivate the ascending ringing
Coverage warning activate or deactivate the coverage warning
Keypad tone activate or deactivate the keypad tone
Headset mode activate or deactivate the headset mode
Economy mode activate or deactivate the economy mode
Vibrator to adjust the ringer and/or the vibrator
Security to activate the automatic keylock or change
the PIN code
Reset settings
to reset the setting and go back to the
default settings
•access menu
• language
•select the language of your choice
•apply
The initial language selection is made automatically by the system.
•access menu
• contacts
• personnal dir
•position the cursor on an existing record
•apply
•create
•enter the name
•apply
•enter the number
•apply
26
7.8 Modifying a card in the personal directory
7.9 Erase a record from the personal directory
7.10 Programming an appointment reminder
•access menu
• contacts
• personnal dir
•select the card to be modified
•apply
• modify
•modify the name
•apply
•modify the number
•apply
Use the browser to position on the character or digit to modify.
To delete a character, briefly press the delete key ; to erase a field full of
characters, hold down the erase key (long press).
•access menu
• contacts
• personnal dir
•select the record to erase
•apply
• delete
•confirm
•access menu
• alarms
• set appointment
•enter the time of the appointment
•apply
•where appropriate, dial the number of the destination set
•apply
At the programmed time, your telephone rings:
press the On-hook key to accept the appointment.
27
To cancel your appointment call-back request:
7.11 Identify the terminal you are on
7.12 Locking your telephone
•Locking your terminal
This service enables you to prohibit outside calls and any programming changes on your telephone:
•Unlock your terminal
•Lock/unlock keypad
If you do not validate the answer to the first call-back, a second call-back will be
made. After a second call-back with no answer, the call-back request will be
cancelled. If your line is forwarded to another set, the appointment reminder will not
follow the forwarding
•access menu
• alarms
• cancel appointment
•where appropriate, dial the number of the destination set
•apply
•displays your telephone number (long press)
•access menu
•lock
•lock/unlock
•apply
•access menu
•lock
•apply
•personal code
•press and release (missing ggk pt)
Registering the telephone 8
28
Other
8.1 Registering the telephone on a system for the first time
For the mobile telephone to function, it must be registered on at least one Alcatel-Lucent or GAP system
(registration operation).If when first switched on the display indicates: 'System 1 Auto install ?' your telephone
has not been registered on any system; consult your installation technician or proceed as follows:1. Prepare
your system for registration (see system installation guide).2. When the system is ready, the station always
displays the starting screen:
•Registration can begin
a- If the system does not use an AC code
b- If the system uses an AC (authentication code)
The registration operation can last up to 2 minutes.
If the operation has been done correctly (subscription accepted), the telephone is ready to be used and
the radio reception quality icon is displayed.
If the registration operation has not been successful, the station proposes launching the subscription again.
8.2 Registering the telephone on other systems
The telephone can be declared on several systems (maximum of 5).
Note: the input is usually reserved for use with your main Alcatel-Lucent system. You can select the other inputs
to register the telephone under another system (Alcatel-Lucent or other system).
To make a new registration, when the telephone has already been registered on one or more systems, proceed
as follows:
1. Prepare your system for registration (see the system installation manual or consult your installation manager).
2. When the system is ready:
• auto install
•confirm
•launch subscription
•register
•enter the pin code
•apply
•select a system
•enter park code
•apply
•enter access code
•apply
•select power mode
Utilization of the telephone in GAP mode can lead to functional limitations for which
no claims will be considered under the terms of the warranty.
29
If the registration operation runs correctly (Subscription accepted), the telephone is ready for use, and the radio
coverage icon appears.
If the registration operation has not been successful, the station proposes launching the subscription again.
Depending on the type of system concerned, registration may require one or more additional operations on the
system.
Selecting your telephone system
Your telephone can be programmed to function on 5 different DECT systems (Alcatel-Lucent or GAP).
•access menu
•install
• register
•enter the pin code
•apply
•select a system
•enter park code
•apply
•enter access code
•apply
•select power mode
Launch subscription
•return to idle
•access menu
•install
• select network
•select the desired input (the chosen option is indicated by the radio button with
a central dot)
•return to idle
The selection is retained even after switching the telephone on/off. The selection of
a specific system (SYSTEM...) forces operation on a specific system. This selection
must be changed if one wishes to change system. Selecting 'Lock to any' enables
the telephone to connect automatically when it enters a system coverage zone. If
the systems programmed in the telephone have common coverage zones, the
telephone selects the first system found.
Using the telephone in GAP mode 9
30
Other
Your telephone complies with the GAP standard and can be used in simplified mode on another DECT/GAP
system (other PABX or indoor relay unit).
Unless otherwise specified, the functions described below are available on your telephone in combination with
the mandatory functions provided by your fixed GAP system.
Automatic transfer between radio cells:
This telephone function enables you to move around between radio relay units, without any break in
communications. However, this facility depends on the inherent limitations of the fixed system, notably its ability
to manage several radio relays.
Display function:
When a call is made from the telephone, the digits dialed are displayed. When you receive a call, the display
indicates the caller’s number or name, if this function is provided by the fixed system.
9.1 Making a call
9.2 Receiving a call
9.3 Calling from your personal directory
This utilisation may involve functional restrictions outside the coverage of our
guarantee.
•dial
•send the call
You are in communication:
•hang up
You are receiving a call
•answered incoming calls
•disabling the ringer:press the hang up key when your telephone rings: it is still
possible to answer by pressing the unhook key.
Speak
•hang up
•access menu
•contacts
•select the name of the person you wish to call
•send the call

31
9.4 Redialling the last number dialed (redial)
9.5 Sending DTMF signals
During a call, you sometimes have to send DTMF signals, for example, for a voice message service, an automatic
switchboard or when remotely consulting an answering machine. To do this:
Press the star key (hold down for a few seconds).
9.6 Sending a calibrated cut-off
The calibrated cut-off activates functions such as transfer to another telephone set.To make a calibrated cut-off:
Press the 0 key (hold down for a few seconds).
9.7 Programming your personal directory
Your directory can contain up to 12 numbers
•Add new contact
•long press
OR
•access menu
• call log
•select the name of the person you wish to call
•send the call
•access menu
• contacts
•more
• add contact
•apply
• name:
•enter the name (10 characters maximum)
•apply
•select the type of contact
work / mobile / home
•enter the number
•apply
•save
•yes
•return to idle
To key in the name: the keys in the numeric keypad include letters that you can
display by pressing them successively. Example: press twice in succession on 8 to
display the letter 'U'. To insert a pause in a number, press the 1 (hold down for a few
seconds). To insert a measured break, press 0 (hold down for a few seconds).
32
•Modify a contact
To delete a character, briefly press the delete key. ; to erase a field full of characters, hold down the erase
key (long press).
9.8 Deleting a card
9.9 Customizing and adjusting your telephone
Choosing your melody:
•select the card to be modified
•edit
OR
•select the type of contact
work / mobile / home
• edit contact
• name:
•enter the name (10 characters maximum)
•apply
•select the type of contact
work / mobile / home
•enter the number
•apply
•save
•yes
•access menu
• contacts
•select the card to delete
•apply
• delete contact
•apply
•yes
•return to idle
To delete all contacts, select: P1-Delete all cont.
•access menu
•ring
• off site-ringing / on site ringing
•apply
•select the melody of your choice (you can: play/stop the melody and select the
melody)
•apply
•return to idle
33
Adjusting the ringer volume:
Selecting language:
Other features:
•access menu
•ring
• ring volume
•apply
•increase / reduce the volume
•apply
•return to idle
•access menu
• settings
• language
•Select the language of your choice
•apply
•return to idle
•access menu
• Ring
•Vibrator: to adjust the ringer and/or the vibrator
• Keypad tone: activate or deactivate the keypad tone
• Confirmat. sound: activate or deactivate a signal when you confirme a action
• Coverage warning: activate or deactivate the coverage warning
• Charger warning: activate or deactivate a warning when the phone is charging
• Ascending ringing: activate or deactivate the ascending ringing
• Headset mode: activate or deactivate the headset mode
•apply
•return to idle
•access menu
•Settings
• Economy mode: activate or deactivate the economy mode
• Security: to activate the automatic keylock or change the PIN code
• Handset name: you can enter a name for your handset
• Reset settings: to reset the setting and go back to the default settings
•Status: to know the software version of your phone
•Silent charging
•apply
•return to idle

Accessories 10
34
Other
10.1 Phone package
10.2 Chargers
Your phone charger is provided with the following equipments:
•How to load your phone on the desk support
•How to load your phone with the USB cable
When you purchase your phone, it is equiped with a clipbelt
installed on its back.
You can uninstall this clipbelt and replace it by the cap
provided in the box of your new phone.
•turn the clipbelt by doing a counterclockwise quarter
turn
•Uninstall the clipbelt by pulling it towards you.
Place the cover to put in place of clipbelt such as described
on the picture.
Push the cover towards the back of the phone until the
cover is clipped.
An ACDC adaptator made of a body and a separate plug head to
clip on the body ACDC adaptator.
An USB cable
A desk support for loading your phone
Put your phone on its support. Plug the USB cable on the 5V
socket of the desk support. Plug the other end of the USB cable
on the ACDC adaptator. Plug the adaptator on the mains power
supply.
Plug the USB cable on the USB plug of your phone. The other
end of the USB cable can be plugged on the ACDC adaptator or
on a computer USB plug.

35
10.3 Characteristics of the mains power adapter
input: 100/240 V - 50/60 Hz
Output: 5V - 1A
10.4 Presentation of the battery pack
Initial charge:
10.5 Headphone / external microphone
The side of the telephone features a headphone / external microphone socket. Contact your retailer for
information on the various headphone models.
10.6 Cleaning your telephone
Your telephone does not require any particular servicing. However, it may be cleaned using a soft, damp cloth.
10.7 Transporting and protecting your telephone
To avoid losing your telephone, get into the habit of clipping it onto your belt. Your telephone can also be carried
in a protective case.
The mains power socket used must be close to the charger/holder and easily
accessible, so that it can be used as an 'on/off' facility.
Autonomy of your
telephone
On standby in the radio
coverage zone
up to 200
hours
In continuous conversation up to 20
hours
Place the
telephone in
the charging
holder
On charge (3
hours)
Battery
icon
flashing
The
battery is
charged
Maximum battery performance is only reached after around 10 charge/discharge
cycles.
These batteries contain polluting substances: do not dispose of them in a dustbin -
take them to a specialized collection point.
Do not use soap or detergent that would risk altering the colours or damaging the
surface of the telephone.
Various models of carrying case are available. Ask your installation technician for
information. It is vital to use the special protective carrying case if your telephone is
to be used in an industrial environment (presence of dust, filings, vapours of diverse
origins and risk of being dropped). If the telephone is used with a carrying case, the
belt clip must be removed.

Glossary 11
36
Other
Call transfer
Function enabling a call to be transferred to another telephone within the system.
Common directory:
This directory contains all the speed-dial numbers accessible to the users of the France Télécom diatonis
system.
Conference:
The conference function allows the user, in contact with two correspondents, to set up a three-way
conference.
DECT:
European cordless telephone standard: Digital Enhanced Cordless Telecommunication.
DECT telephone: cordless telephone complying with the DECT standard.
GAP (Generic Access Profile):
Specific operating mode defined in the European DECT standard. The telephone GAP mode is a basic and
simplified form of operation compatible with other DECT GAP systems (other PBX or indoor relay).
Hunting groups:
Several telephones grouped under one directory number. A call to this number is directed to one of the free
telephones within the group.
Intrusion:
Function allowing intrusion into a conversation between two correspondents.
Personal assistant:
This facility enables the caller to avoid having to leave a message in the voice mailbox and directs him/her to
an extension number, an outside number, a mobile or the switchboard.
Parking:
This function places an outside call on hold, for subsequent recovery on another 'authorised' extension within
the system.
Password
This directory contains all the abbreviated numbers that can be accessed by users of the Alcatel-Lucent
installation
Personal directory:
This directory contains the personal numbers of the user of a terminal.
Pick-up group:
This function enables you to answer a call ringing on another terminal. Calls can only be picked up within the
pick-up group.
Broker call
During a conversation, DTMF codes are sometimes required. These codes are used when a user wants to
consult a voice server, access a PABX or remotely consult an answering machine.

Declaration of compliance
37
Safety Instructions
7KLVDSSURYHG'(&7WHOHSKRQHLVLQWHQGHGWREHXVHGZLWKDQ$OFDWHO/XFHQWFRUGOHVV3%;7KHIROORZLQJFRQGLWLRQVPXVWEH
UHVSHFWHGQRWDEO\FRQFHUQLQJWKHXVHRIUDGLRHOHFWULFIUHTXHQFLHV
ವ&KDQJHVRUPRGLILFDWLRQVWRWKHHTXLSPHQWQRWH[SUHVVO\DSSURYHGE\WKHSDUW\UHVSRQVLEOHIRUFRPSOLDQFHFRXOGYRLGWKHXVHUಬV
DXWKRULW\WRRSHUDWHWKHHTXLSPHQW
ವ7ROLPLWWKHULVNRILQWHUIHUHQFHSHRSOHZLWKSDFHPDNHUVPXVWNHHSWKHZLUHOHVVWHOHSKRQHDZD\IURPWKHLUHTXLSPHQWPLQLPXP
GLVWDQFHRIFP
ವ,WLVUHFRPPHQGHGWRIROORZWKHVWDQGDUGDFFHSWDQFHSURFHGXUHVEHIRUHXVLQJWKLVHTXLSPHQWLQKXPDQVDIHW\FULWLFDODUHDV
KRVSLWDOV
ವ'(&7HTXLSPHQWFDQRQO\EHXVHGWRHVWDEOLVKOLQNVEHWZHHQIL[HGSRLQWVLIWKHVHOLQNVDUHWHPSRUDU\DQGWKHHTXLYDOHQW
LVRWURSLFDOO\UDGLDWHGSRZHUDWWKHDQWHQQDLVOHVVWKDQP:
ವ7KHFRQGLWLRQVRIDFFHVVWRD'(&7HTXLSPHQWWHOHSRLQWQHWZRUNVKDOOEHVWLSXODWHGE\FRQWUDFWZLWKWKHRSHUDWRURIWKH
DXWKRUL]HGWHOHSRLQWQHWZRUNFRQFHUQHG
ವ'RQRWH[SRVH\RXUWHOHSKRQHWRVHYHUHFRQGLWLRQVUDLQVHDDLUGXVWHWF
ವ6ZLWFKRIIWKHWHOHSKRQHEHIRUHFKDQJLQJWKHEDWWHU\
ವ<RXPXVWQRWVZLWFKRQRUXVH\RXUWHOHSKRQHQHDUJDVRULQIODPPDEOHOLTXLGV
ವ7KHKHDGVHWLQFOXGHVPDJQHWLFHOHPHQWVWKDWPD\DWWUDFWVKDUSPHWDOOLFREMHFWV
ವ7KHUHLVDGDQJHURIH[SORVLRQLIWKHEDWWHU\LVUHSODFHGLQFRUUHFWO\8VHRQO\UHFRPPHQGHGEDWWHU\%1$$
&KLQD6KHQ]KHQ'51%DWWHU\&R/WG575);;&KLQD(IIRUW/LPLWHG&(0%&;;/LLRQ9P$K:K
ವ7KHPDLQVSRZHUVRFNHWXVHGPXVWEHFORVHWRWKHFKDUJHUKROGHUDQGHDVLO\DFFHVVLEOHVRWKDWLWFDQEHXVHGDVDQRQRII
IDFLOLW\
ವ%DWWHU\FKDUJH&KDUJHWKHEDWWHU\IRUDERXWKRXUVEHIRUHLQLWLDOXVH
ವ8VHRQO\'(&7+DQGVHWFKDUJLQJXQLWV '(&7+DQGVHW'HVNWRSFKDUJHU%1$$'(&7+DQGVHW
'HVNWRSFKDUJHU3686$/2066:)ULZR):1):;;7HQ3DR66966%<RX
FDQFKDUJHWKHGHYLFHE\FRQQHFWLQJLWWRD86%SRUWW\SH$8VHRQO\WKHFDEOHSURYLGHGZLWKWKH'(&7+DQGVHW
'HVNWRS&KDUJHU86%$SOXJ
7KHODEHOVDQGLFRQVSUHVHQWHGLQWKLVGRFXPHQWDUHQRWFRQWUDFWXDOO\ELQGLQJDQGPD\EHPRGLILHGZLWKRXWSULRUZDUQLQJ7KHODEHOV
DQGLFRQVGLVSOD\HGRQ\RXUSKRQHGHSHQGRQWKHV\VWHPWRZKLFK\RXDUHFRQQHFWHGDQGPD\GLIIHUIURPWKRVHVSHFLILHGLQWKLV
GRFXPHQW
5HJXODWRU\6WDWHPHQWV
(8()7$
7KLVHTXLSPHQWLVLQFRPSOLDQFHZLWKWKHHVVHQWLDOUHTXLUHPHQWVRI577('LUHFWLYH(&
7KH'HFODUDWLRQRI&RQIRUPLW\PD\EHREWDLQHGIURP\RXULQVWDOOHU
86$DQG&DQDGD
+DQGVHW7KLVGHYLFHFRPSOLHVZLWK3DUW-DRIWKH)&&5XOHVDQGZLWK5663RI,QGXVWU\&DQDGD)&&,'7+&7,&
%&7,WKLVGHYLFHFRPSOLHVZLWK3DUWRIWKH)&&5XOHVDQGZLWK,&&63DUW9RI,QGXVWU\&DQDGD7KH$&7$
UHJLVWUDWLRQQXPEHULV867+:1$1&7
&KDUJHUV7KLVGHYLFHFRPSOLHVZLWK3DUW-BRIWKH)&&5XOHVDQGZLWKICES-003RI,QGXVWU\&DQDGD
2SHUDWLRQLVVXEMHFWWRWKHIROORZLQJWZRFRQGLWLRQVWKLVGHYLFHPD\QRWFDXVHKDUPIXOLQWHUIHUHQFHDQGWKLVGHYLFHPXVWDFFHSW
DQ\LQWHUIHUHQFHUHFHLYHGLQFOXGLQJLQWHUIHUHQFHWKDWPD\FDXVHXQGHVLUHGRSHUDWLRQ
([SRVXUHWR5DGLR)UHTXHQF\6LJQDOV
7KLVGHYLFHKDVEHHQGHVLJQHGDQGPDQXIDFWXUHGQRWWRH[FHHGWKH6$56SHFLILF$EVRUSWLRQ5DWHUDGLRIUHTXHQF\SRZHU
WUDQVPLVVLRQOLPLWVHVWDEOLVKHGE\WKHGLIIHUHQWFRXQWULHVFRQFHUQHG7KH6$5YDOXHPHDVXUHGLVHTXDOWR102:NJWKHJOREDOO\
DFFHSWHGPD[LPXPOLPLWEHLQJ:NJ
8VHU,QVWUXFWLRQV
2QO\XVHWKHKDQGVHWLQWHPSHUDWXUHVEHWZHHQ10r&WRr&18r)WRr)).
7KLVDSSDUDWXVLV+HDULQJ$LG&RPSDWLEOH+$&WKLVGHYLFHFRPSOLHVZLWK3DUWRIWKH)&&5XOHVDQGZLWK,&&63DUW9RI
,QGXVWU\&DQDGD
$FRXVWLFVKRFNSURWHFWLRQ
7KHDFRXVWLFOHYHORIWKHVLJQDOJHQHUDWHGE\WKHKDQGVHWHDUSLHFHLVOHVVWKDQG%VSOIRUDWUDQVLHQWVLJQDOG%VSOIRU$XVWUDOLD
DQGOHVVWKDQG%VSOUPVIRUDFRQWLQXRXVVLJQDOG%$IRU$XVWUDOLD
'LUHFWLYH(&VSHFLI\LQJWKHULVNVLQKHUHQWLQQRLVHDWZRUN
7KHULQJFRQWULEXWHVWRZDUGVRYHUDOOGDLO\QRLVH7RUHGXFHWKHOHYHOWKHIROORZLQJLVUHFRPPHQGHGUHGXFHWKHVHWWLQJSURJUDPD
SURJUHVVLYHULQJ
3ULYDF\
3ULYDF\RIFRPPXQLFDWLRQVPD\QRWEHHQVXUHGZKHQXVLQJWKH%OXHWRRWKKDQGVHWRUDQ\DGGLWLRQQDO%OXHWRRWK®GHYLFH
'LVSRVDO
7KHHTXLSPHQWPXVWEHUHWXUQHGWRDFROOHFWLRQSRLQWIRUHOHFWURQLFHTXLSPHQWZDVWHGLVSRVDO
'HIHFWLYHEDWWHULHVPXVWEHUHWXUQHGWRDFROOHFWLRQSRLQWIRUFKHPLFDOZDVWHGLVSRVDO