Contents
- 1. User Manual 1
- 2. User Manual 2
User Manual 2

RTX 7234 Quickguide
RTX7234 consists of:
RTX7232 Headset
RTX7431 Base Station
Technical Reference Document
Version 1.0
© Mar-2018 RTX A/S, Denmark
Thank you for purchasing the RTX7234 headset.
In this quick guide, you will find all necessary information regarding your new RTX7234 headset.
RTX 7234 Key features:
• Wideband audio
• Noise-cancelling microphone
• DSP assisted echo & noise-cancellation
• Convertible wearing styles: Headband, Ear-hook and neckband
• Bendable boom arm with 270° rotation
• Acoustic shock protection
• Touch Call Control on ear cup
• Mute light in boom arm tip
• Single connectivity: USB interface
• 4 headsets conference on single-base
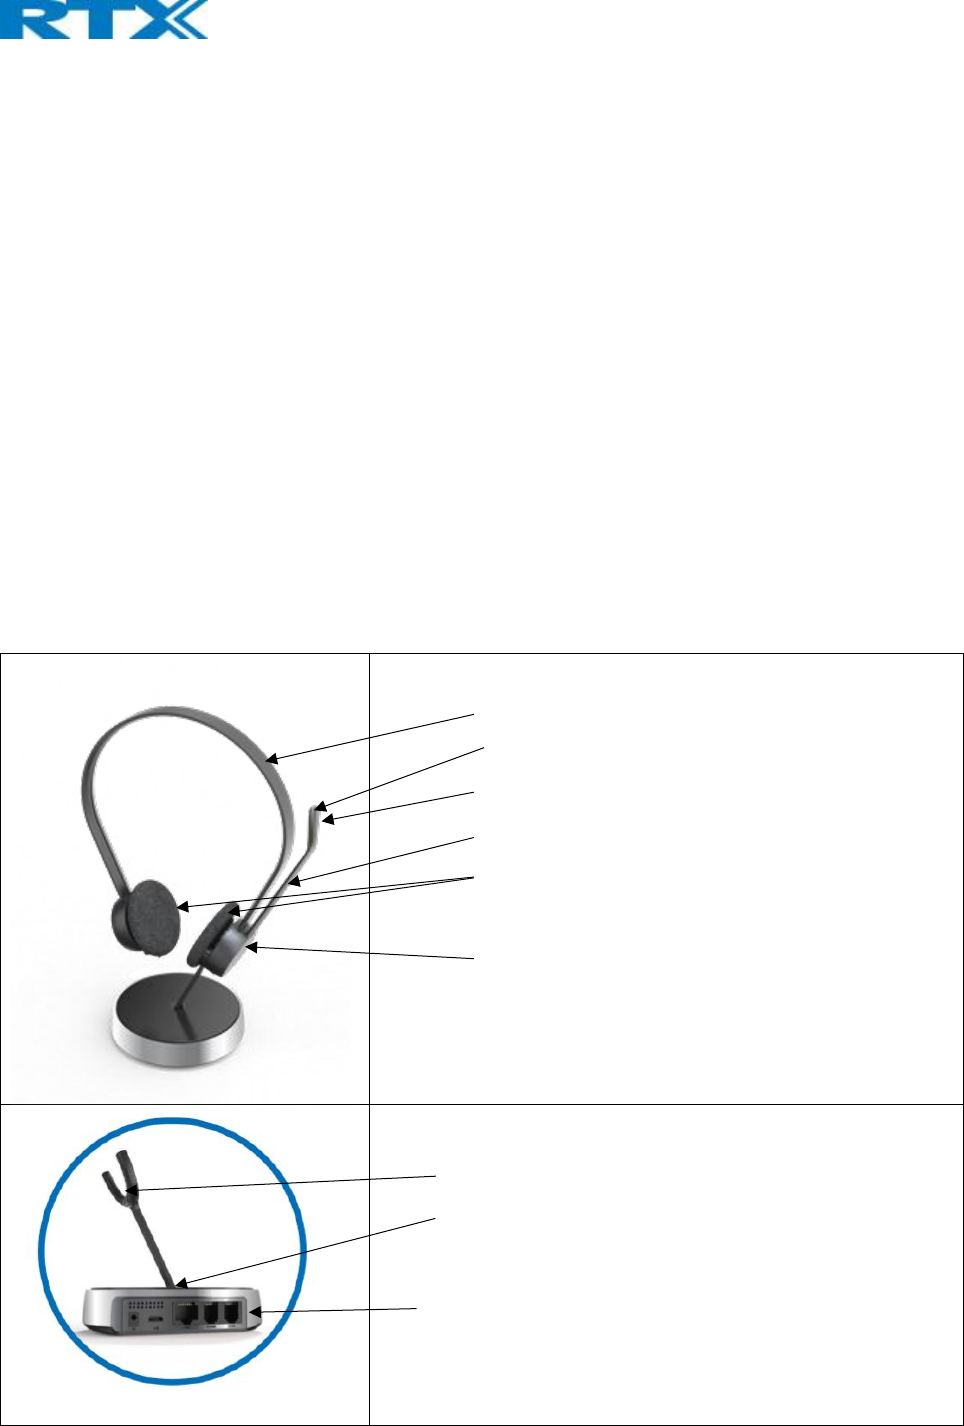
PART OVERVIEW:
Charging pins
LED Indicator
Ports: Power, USB (Micro),
Socket A = RJ12
Socket B = RJ9
Socket C = RJ45
Headband
Mute LED (On inside of Boom arm)
Microphone
Boom arm
Speakers
Touch area
WHAT IS IN THE BOX:
1 pcs Base Station
1 pcs Headset
1 pcs USB micro cable
1 pcs Power plug
ACCESSORIES:
Available accessories: Ear cushions in different colors
Replaceable Ear cushions are available in different colors, please contact your reseller for more information.
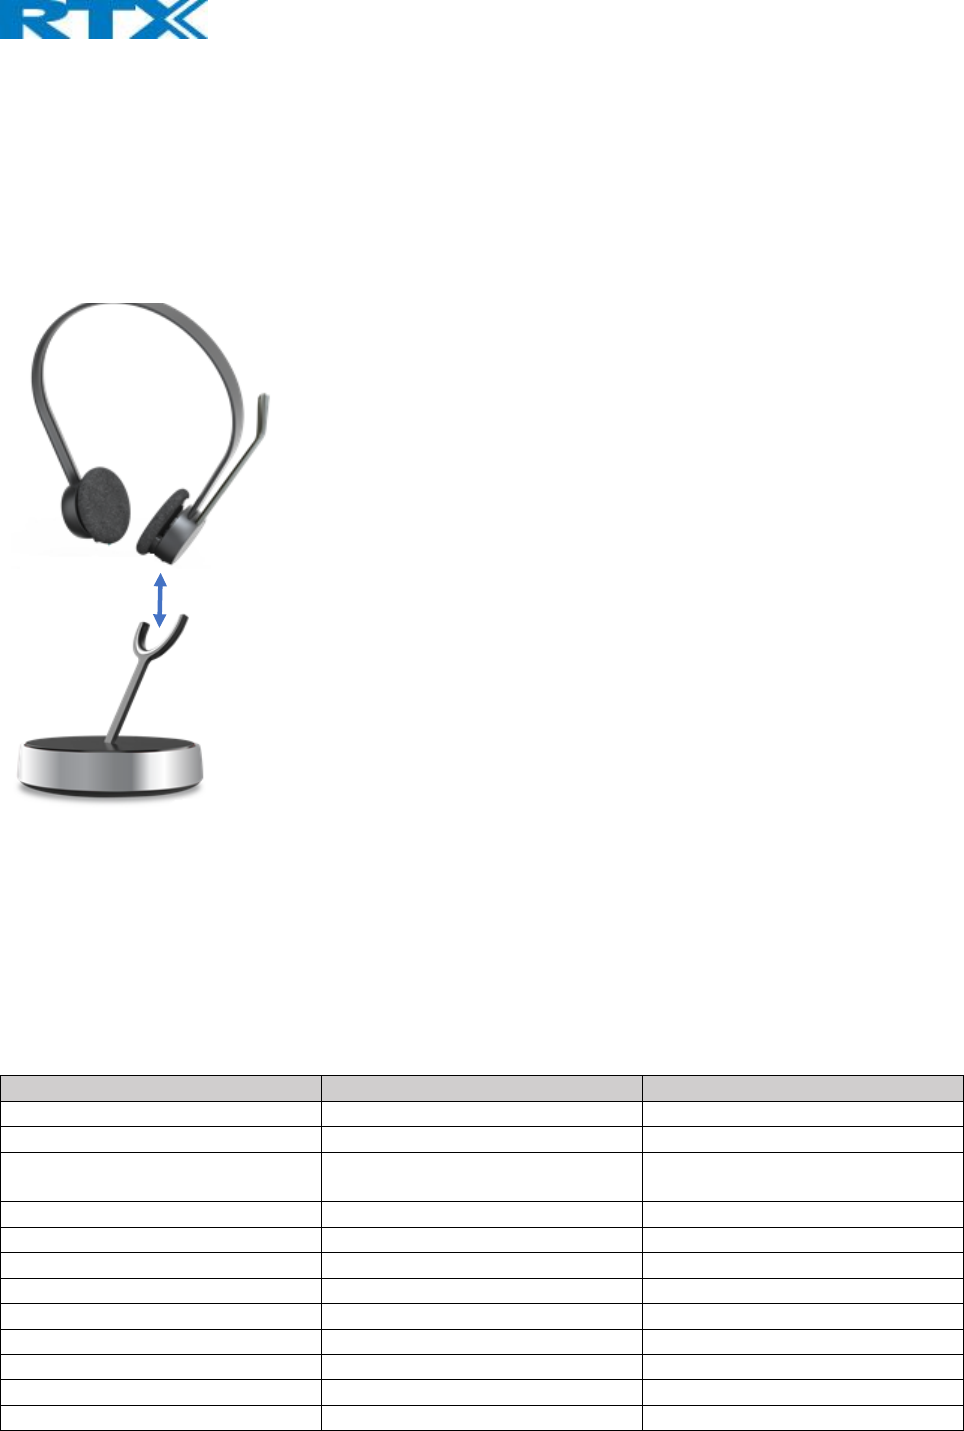
HOW TO REMOVE THE HEADSET FROM THE CHARGING STAND:
Press the top of the right ear cushions (the one with the boom arm) and tip the headset to the left.
You will feel a soft click when the headset releases.
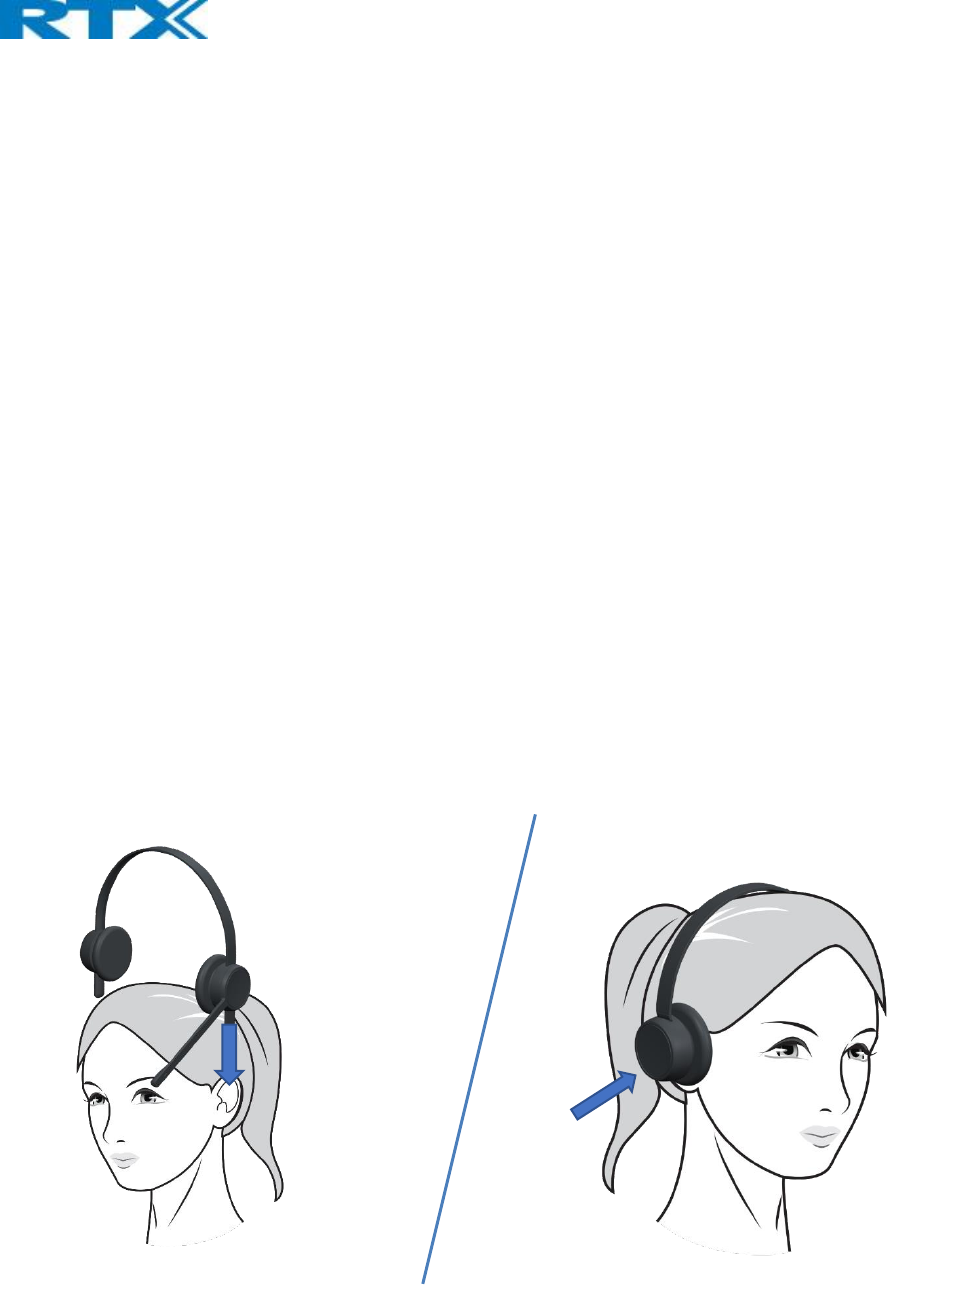
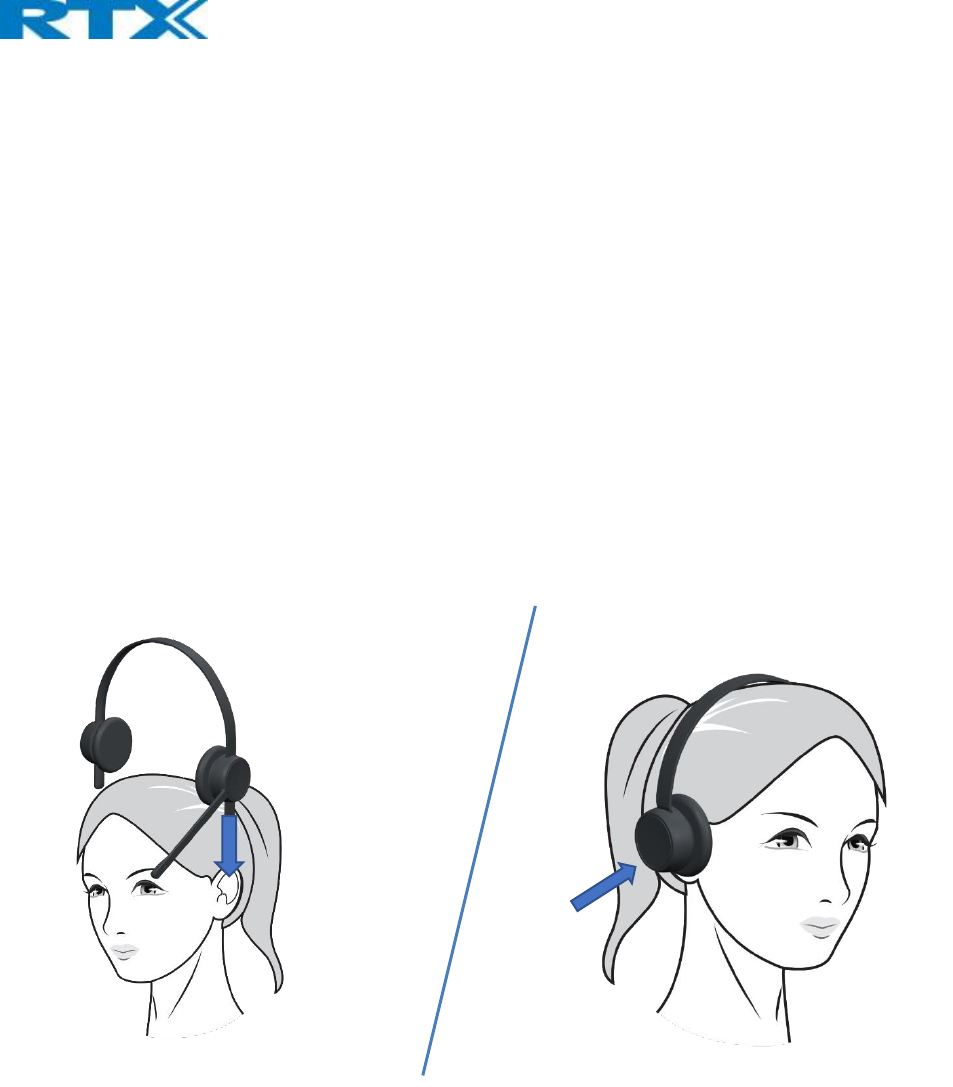
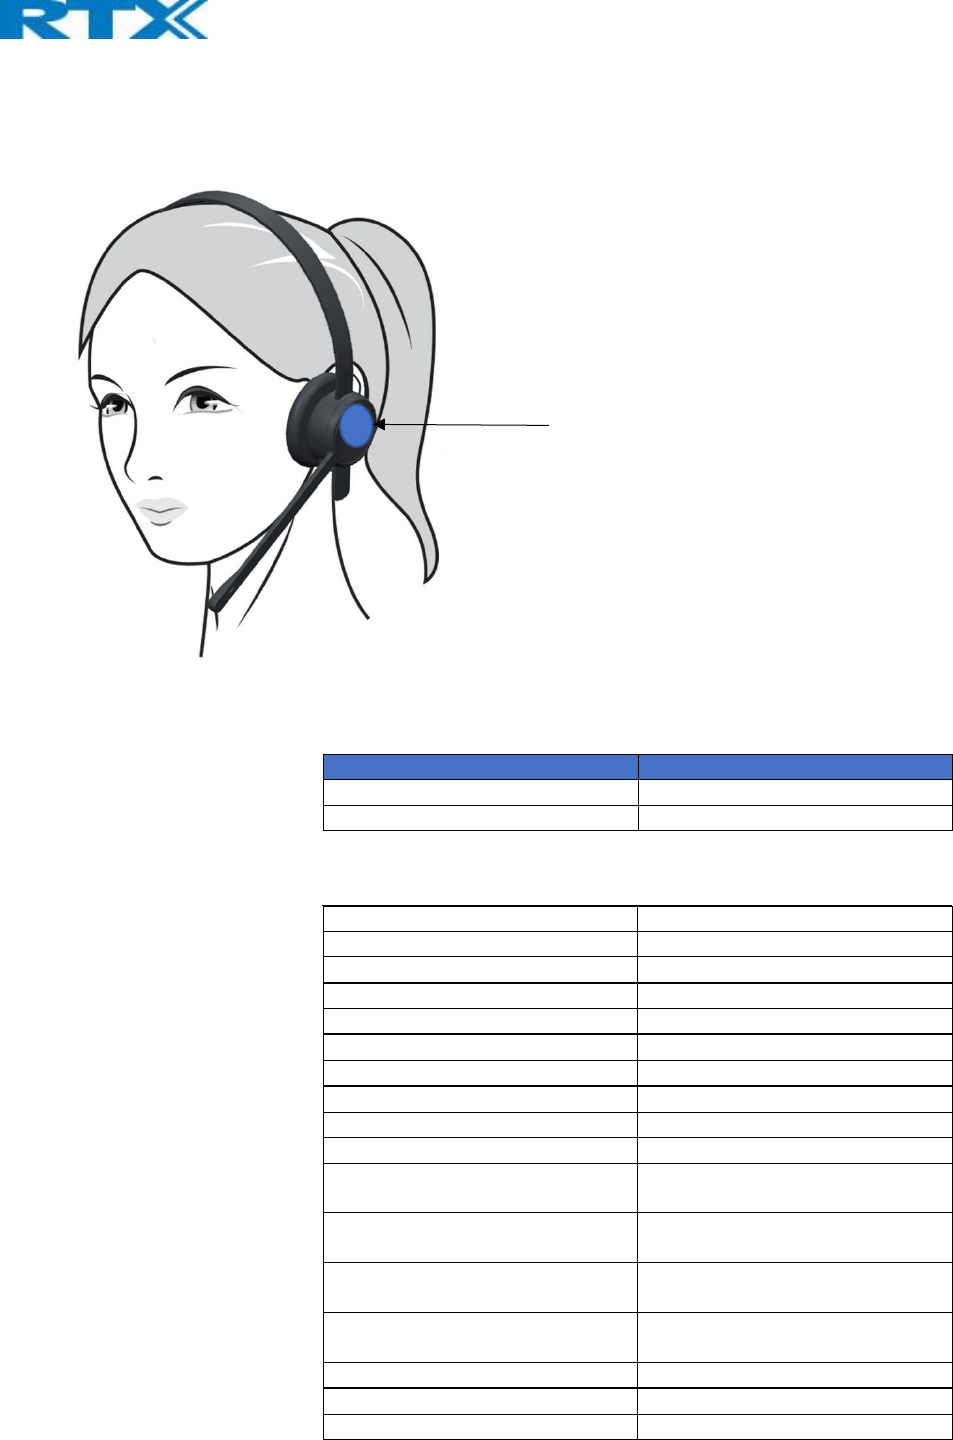
WEARING THE HEADSET:
All RTX corded headsets have a flexible and adjustable headband.
For best audio experience the microphone should be placed on the left ear.
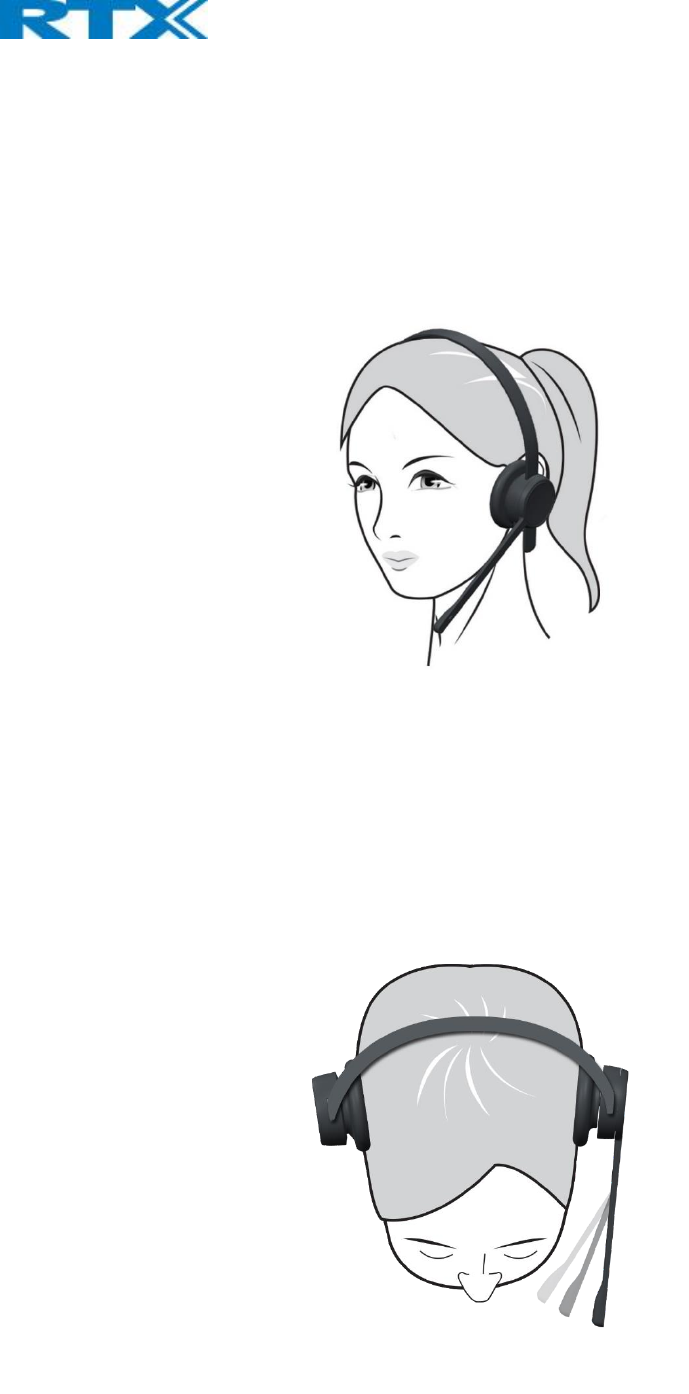
Adjusting the headband:
Place the headband on your head with the headset on your ear, and adjust the headband for a comfortable fit.
Positioning the microphone:
For optimal sound quality, adjust the bendable boom arm until it is right in front of your mouth and less than 3-4 cm
(1,25-1,5”) away.
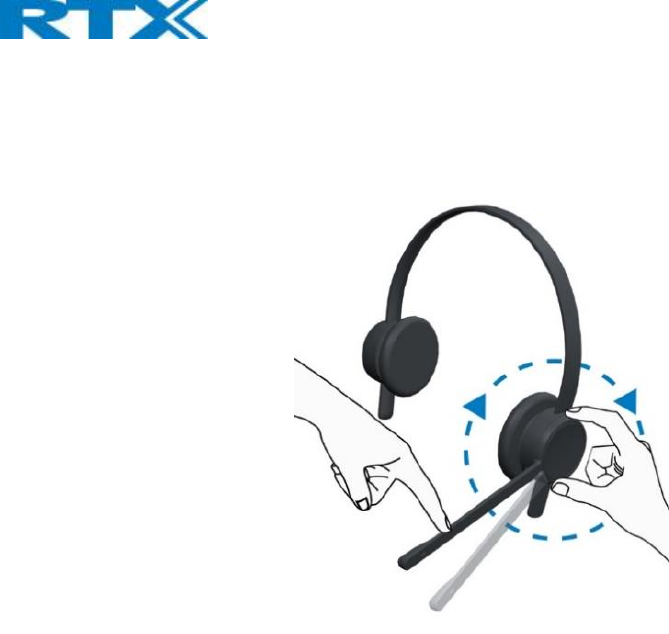
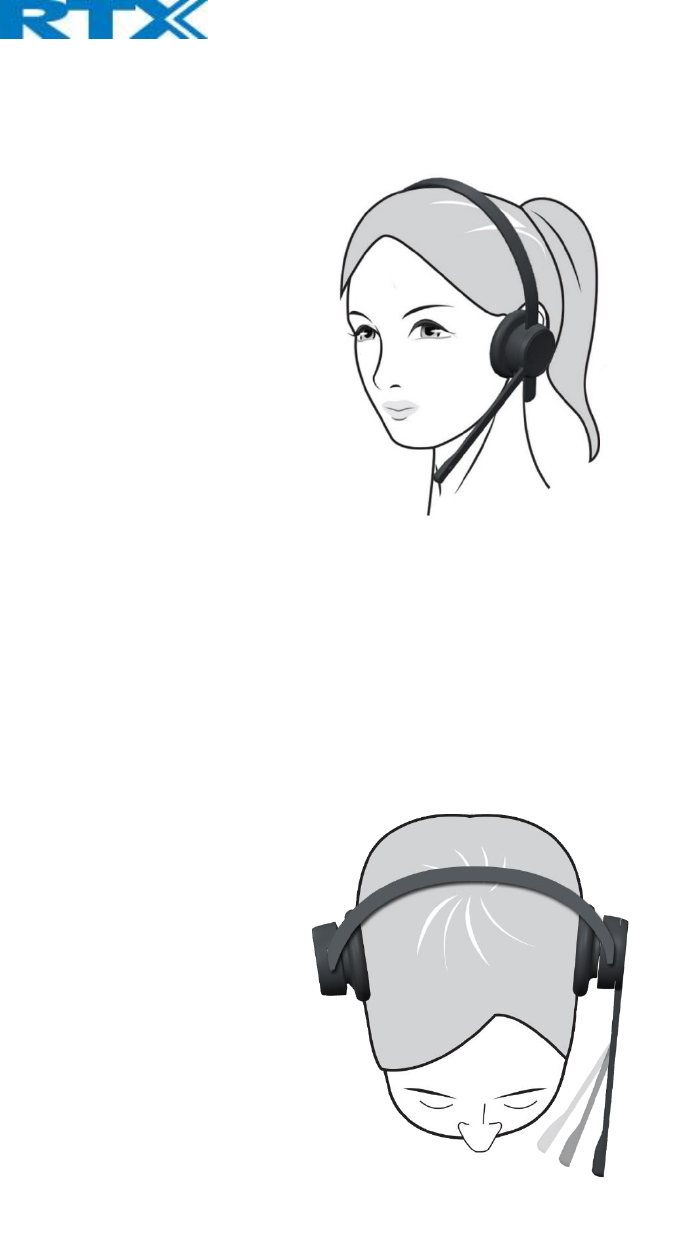
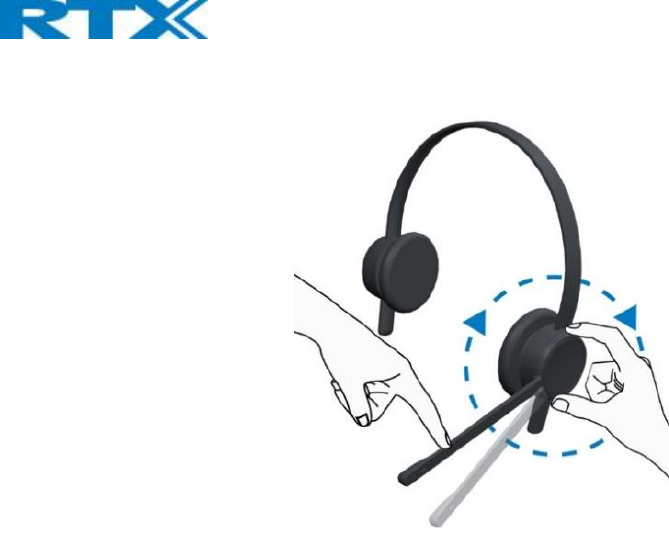
Rotating the bendable boom arm:
The boom arm can be rotated 270°
Replacing the ear cushions:
To replace the ear cushions, softly remove the old ear cushions with your fingers and gently attach the new ones.
HOW TO CHARGE:
Connect the base station into a wall charger, using the power plug that is delivered with the headset. Place the
headset in the base station. (The earcup with the boom arm goes into the base station)
It takes 3 hours to fully charge the headset.
The headset can only by powered, by AC Power plug
Battery status:
The LED on the charging cradle have different battery status indicators.
Status Default Color Pattern
Battery low – not cradled Red Steady on
Battery low - charging Red Long slow blink repeated
Battery not low – not full
- not cradled
Yellow Steady on
Battery charging Yellow Long slow blink repeated
Battery full – not cradled Green Steady on
Battery full - cradled Green Long slow blink repeated
Battery info missing White Short slow blink repeated
No master registration Blue Steady on
Registering Blue Long slow blink repeated
Registering, success Green Long blink, twice
Registering, failed Red Single long blink
Connection to headset lost White Short fast blink repeated
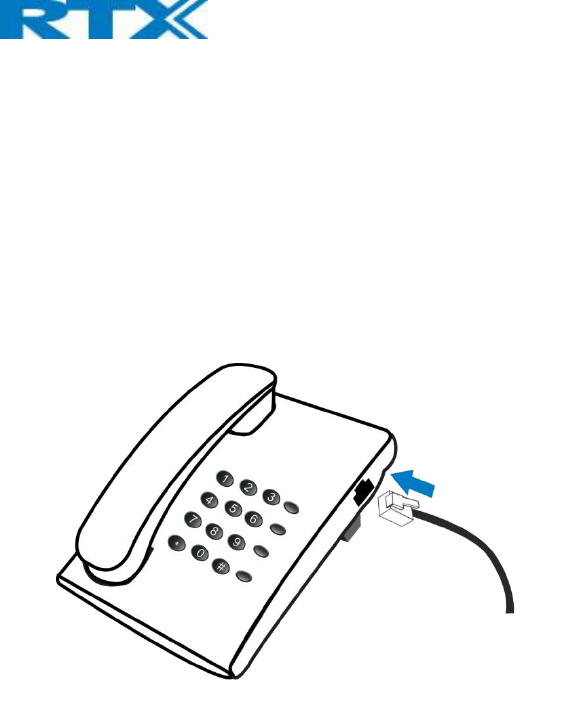
HOW TO CONNECT:
Simply plug-in the RJ9, RJ12 or RJ45 cable into the phone.
HOW TO USE:
Left ear cup touch functions.
There are 3 touch terms:
Short press – 300 ms to 1,5 sec press
Double Press (two short presses)
Long Press – 1,5 sec to 5 sec press

Status Mute light
Microphone Muted ON
Microphone Un-Muted OFF
Answer Call Short press
End Call Double press, when call is active
Reject Call Double press
Volume up Slide up
Volume Down Slide down
Mute Short press, when call is active
Un-mute Short press, when call is muted
Put call on hold Long press, when a call is active
Retrieve call on hold Long press, when call is on hold
Reject 2nd incoming call Short press
Receive 2nd incoming call, and
terminate first call
Double press
Receive 2nd incoming call, and put
first call on hold
Long press
One active call and one call on hold Short press, to mute/Unmute the
active call
One active call and one call on hold Double press to terminate active
call.
One active call and one call on hold Long press, to swap between calls
Resume music Short press
Play next number Double press
Touch area

Pause/Play music Short press
Configuration tool
Not ready yet
Firmware update
Not ready yet
Support:
For support please contact productsupport@rtx.dk
Security:
Important safety information:
Read the instruction manual carefully before using this product.
If this product is passed on to a third party, this manual must follow the product.
This product may not be used if it has visible damage.
To avoid hearing damage, do not use this product with the volume set too high for extended periods of time.
This product must only be cleaned with a dry and soft cloth.
To avoid damages to the product, do not expose it to high levels of humidity, moist, extreme low or high
temperatures.
This product contains a Lithium-Polymer battery.
In case of misuse, the battery can:
• Explode
• Catch Fire
• Generate heat
• Generate smoke or gas
FCC Caution:
Any Changes or modifications not expressly approved by the party responsible for
compliance could void the user's authority to operate the equipment.
This device complies with part 15 of the FCC Rules. Operation is subject to the following
two conditions: (1) This device may not cause harmful interference, and (2) this device
must accept any interference received, including interference that may cause undesired
operation.
Note: This equipment has been tested and found to comply with the limits for a Class B digital
device, pursuant to part 15 of the FCC Rules. These limits are designed to provide reasonable
protection against harmful interference in a residential installation. This equipment generates,
uses and can radiate radio frequency energy and, if not installed and used in accordance with
the instructions, may cause harmful interference to radio communications. However, there is
no guarantee that interference will not occur in a particular installation. If this equipment does
cause harmful interference to radio or television reception, which can be determined by
turning the equipment off and on, the user is encouraged to try to correct the interference by
one or more of the following measures:
—Reorient or relocate the receiving antenna.
—Increase the separation between the equipment and receiver.
—Connect the equipment into an outlet on a circuit different from that to which the receiver is
connected.
—Consult the dealer or an experienced radio/TV technician for help.
FCC Radiation Exposure Statement:
This equipment complies with FCC radiation exposure limits set forth for an
uncontrolled environment .This equipment should be installed and operated with
minimum distance 20cm between the radiator& your body.
This transmitter must not be co-located or operating in conjunction with any other antenna or
transmitter.

RTX 7232 Quickguide
RTX7232 consists of:
RTX7232 Headset
RTX7441 Base Station
Technical Reference Document
Version 1.0
© Mar-2018 RTX A/S, Denmark

Thank you for purchasing the RTX7232 headset.
In this quick guide, you will find all necessary information regarding your new RTX7232 headset.
RTX 7232 Key features:
• Wideband audio
• Noise-cancelling microphone
• DSP assisted echo & noise-cancellation
• Convertible wearing styles: Headband, Ear-hook and neckband
• Bendable boom arm with 270° rotation
• Acoustic shock protection
• Touch Call Control on ear cup
• Mute light in boom arm tip
• Single connectivity: USB interface
• 4 headsets conference on single-base
PART OVERVIEW:
WHAT IS IN THE BOX:
1 pcs Base Station
1 pcs Headset
1 pcs USB micro cable
1 pcs Power plug
Headband
Mute LED ( On inside of Boom arm)
Microphone
Boom arm
Speakers
Touch area
LED Indicator
Base Station with Power plug and USB
(micro) on back
ACCESSORIES:
Available accessories: Ear Cushions in different colors
Replaceable Ear Cushions are available in different colors, please contact your reseller for more information.
HOW TO REMOVE THE HEADSET FROM THE CHARGING STAND:
Press the top of the right ear cushions (the one with the boom arm) and tip the headset to the left.
You will feel a soft click when the headset releases.
WEARING THE HEADSET:
All RTX corded headsets have a flexible and adjustable headband.
For best audio experience the microphone should be placed on the left ear.
Adjusting the headband:
Place the headband on your head with the headset on your ear and adjust the headband for a comfortable fit.
Positioning the microphone:
For optimal sound quality, adjust the bendable boom arm until it is right in front of your mouth and less than 3-4 cm
(1,25-1,5”) away.
Rotating the bendable boom arm:
The boom arm can be rotated 270°
Replacing the ear Cushions:
To replace the ear Cushions, softly remove the old ear Cushions with your fingers and gently attach the new ones.

HOW TO CHARGE:
Connect the base station into a wall charger, using the power plug that is delivered with the headset. Place the
headset in the base station. (The earcup with the boom arm goes into the base station)
It takes 3 hours to fully charge the headset.
The headset can only by powered, by AC Power plug
Battery status:
The LED on the charging cradle have different battery status indicators.
Status Default Color Pattern
Battery low – not cradled Red Steady on
Battery low - charging Red Long slow blink repeated
Battery not low – not full
- not cradled
Yellow Steady on
Battery charging Yellow Long slow blink repeated
Battery full – not cradled Green Steady on
Battery full - cradled Green Long slow blink repeated
Battery info missing White Short slow blink repeated
No master registration Blue Steady on
Registering Blue Long slow blink repeated
Registering, success Green Long blink, twice
Registering, failed Red Single long blink
Connection to headset lost White Short fast blink repeated
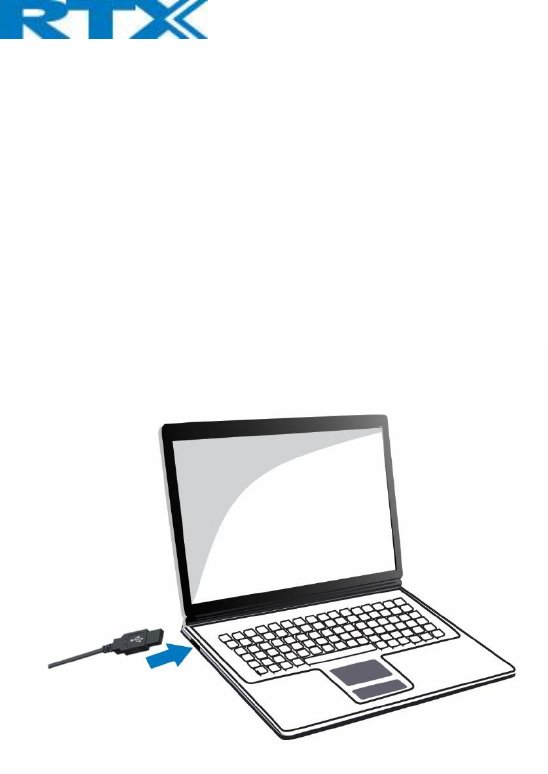
HOW TO CONNECT:
The first time you plug-in the USB cable (Into base Station and PC), the headset driver will automatically load and the
headset is now ready for use.
HOW TO USE:
Left ear cup touch functions.
There are 3 touch terms:
Short press – 300 ms to 1,5 sec press
Double Press (two short presses)
Long Press – 1,5 sec to 5 sec press
Status Mute light
Microphone Muted ON
Microphone Un-Muted OFF
Answer Call Short press
End Call Double press, when call is active
Reject Call Double press
Volume up Slide up
Volume Down Slide down
Mute Short press, when call is active
Un-mute Short press, when call is muted
Put call on hold Long press, when a call is active
Retrieve call on hold Long press, when call is on hold
Reject 2nd incoming call Short press
Receive 2nd incoming call, and
terminate first call
Double press
Receive 2nd incoming call, and put
first call on hold
Long press
One active call and one call on hold Short press, to mute/Unmute the
active call
One active call and one call on hold Double press to terminate active
call.
One active call and one call on hold Long press, to swap between calls
Resume music Short press
Play next number Double press
Touch area
Pause/Play music Short press
Configuration tool
Not ready yet
Firmware update
Not ready yet
Support:
For support please contact productsupport@rtx.dk
Security:
Important safety information:
Read the instruction manual carefully before using this product.
If this product is passed on to a third party, this manual must follow the product.
This product may not be used if it has visible damage.
To avoid hearing damage, do not use this product with the volume set too high for extended periods of time.
This product must only be cleaned with a dry and soft cloth.
To avoid damages to the product, do not expose it to high levels of humidity, moist, extreme low or high
temperatures.
This product contains a Lithium-Polymer battery.
In case of misuse, the battery can:
• Explode
• Catch Fire
• Generate heat
• Generate smoke or gas
FCC Caution:
Any Changes or modifications not expressly approved by the party responsible for
compliance could void the user's authority to operate the equipment.
This device complies with part 15 of the FCC Rules. Operation is subject to the following
two conditions: (1) This device may not cause harmful interference, and (2) this device
must accept any interference received, including interference that may cause undesired
operation.
Note: This equipment has been tested and found to comply with the limits for a Class B digital
device, pursuant to part 15 of the FCC Rules. These limits are designed to provide reasonable
protection against harmful interference in a residential installation. This equipment generates,
uses and can radiate radio frequency energy and, if not installed and used in accordance with
the instructions, may cause harmful interference to radio communications. However, there is
no guarantee that interference will not occur in a particular installation. If this equipment does
cause harmful interference to radio or television reception, which can be determined by
turning the equipment off and on, the user is encouraged to try to correct the interference by
one or more of the following measures:
—Reorient or relocate the receiving antenna.
—Increase the separation between the equipment and receiver.
—Connect the equipment into an outlet on a circuit different from that to which the receiver is
connected.
—Consult the dealer or an experienced radio/TV technician for help.
FCC Radiation Exposure Statement:
This equipment complies with FCC radiation exposure limits set forth for an
uncontrolled environment .This equipment should be installed and operated with
minimum distance 20cm between the radiator& your body.
This transmitter must not be co-located or operating in conjunction with any other antenna or
transmitter.