RadarFind T21120 INDOOR EQUIPMENT LOCATION SYSTEM User Manual A Tag Installation Manual rev2 0
RadarFind Corporation INDOOR EQUIPMENT LOCATION SYSTEM A Tag Installation Manual rev2 0
Installation Manual
Copyright © RadarFind Corp 2008
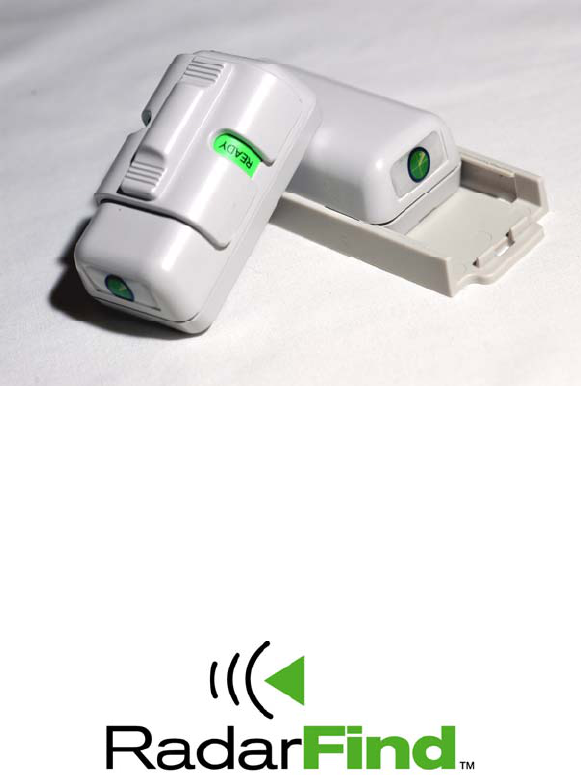
A-Tag
Models
T11-120 – Status
&
T21-120 – Non Status
RTLS Tags
Installation Instructions
RadarFind™ Corporation
877-RadarFind (723-2734)
www.radarfind.com

Radarfind Corporation
12/5/2008 A-Tag Installation Instructions Page 2 of 10
Copyright © RadarFind Corp 2008
Warnings:
It is important to follow all instructions shipped with this product.
UNPACKING: After unpacking the unit, examine it for damage that may have occurred in transit. If
the equipment has been damaged, do not attempt to install or operate it. File a claim immediately
with the carrier stating the extent of the damage, or contact RadarFind customer service for repair
or replacement.
Read and understand all instructions before installing or operating this equipment.
The selection of the mounting location for the device is to be accomplished under the direction of the
director of Clinical Engineering and conform to all company policies, and must be in accordance
with specifications in the sub-chapter for each device type.
CAUTION: Risk of malfunction. Install these devices only in areas with an ambient temperature
between 0° and 50°C.
[15.19] This device complies with Part 15 of the FCC Rules. Operation is subject to the following two
conditions: (1) this device may not cause harmful interference, and (2) this device must accept any
interference received, including interference that may cause undesired operation.
[15.21] Information to user: Changes or modifications not expressly approved by the RadarFind
Corporation could void the user's authority to operate the equipment
[15.105] NOTE: This equipment has been tested and found to comply with the limits for a Class A
digital device, pursuant to Part 15 of the FCC Rules. These limits are designed to provide reasonable
protection against harmful interference when the equipment is operated in a commercial
environment. This equipment generates, uses, and can radiate radio frequency energy and, if not
installed and used in accordance with the instruction manual, may cause harmful interference to
radio communications. Operation of this equipment in a residential area is likely to cause harmful
interference in which case the user will be required to correct the interference at his own expense.
[15.249] This equipment operates under Section 15.249 of the Title 47 FCC Rules.
Radarfind Corporation
12/5/2008 A-Tag Installation Instructions Page 3 of 10
Copyright © RadarFind Corp 2008
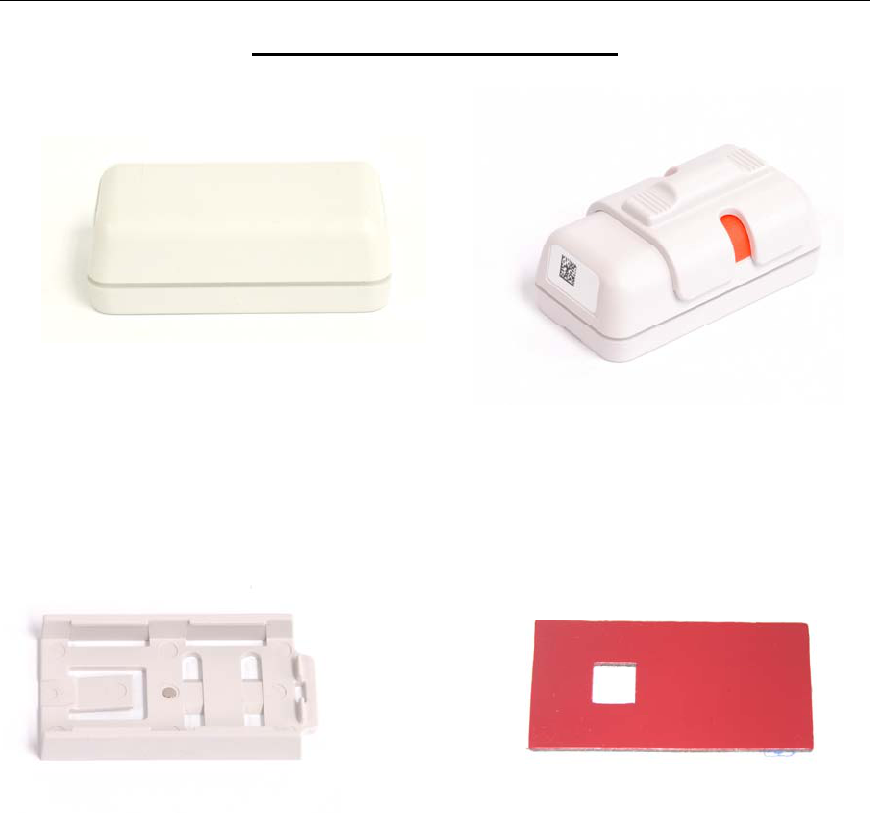
Contents of standard package:
Either
(1) T21-120 - A-Non status Tag or (1) - T11-120 – A-Status Tag
(1) 80-100-1003 A-Tag Mounting Base (1) 80-000-1001 – Adhesive Pad
Radarfind Corporation
12/5/2008 A-Tag Installation Instructions Page 4 of 10
Copyright © RadarFind Corp 2008
Accessories
A12-3T00 (2) Stainless steel mounting straps
(for application of Radarfind tag mounting base (Part# TBA-3160) to
tubular structures)
Note: For best performance the steel straps require a special tool to tighten
and cut the strap.
Radarfind Corporation
12/5/2008 A-Tag Installation Instructions Page 5 of 10
Copyright © RadarFind Corp 2008
General Guidelines:
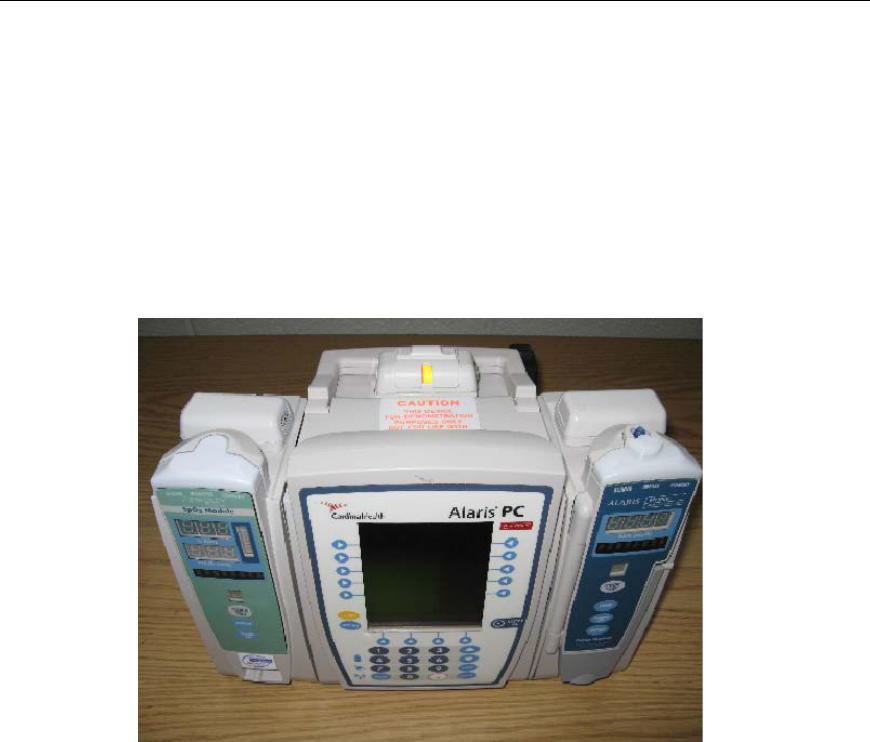
All tags on an asset type should be the same type, e.g. all infusion pumps should
have an A-Status Type tag.
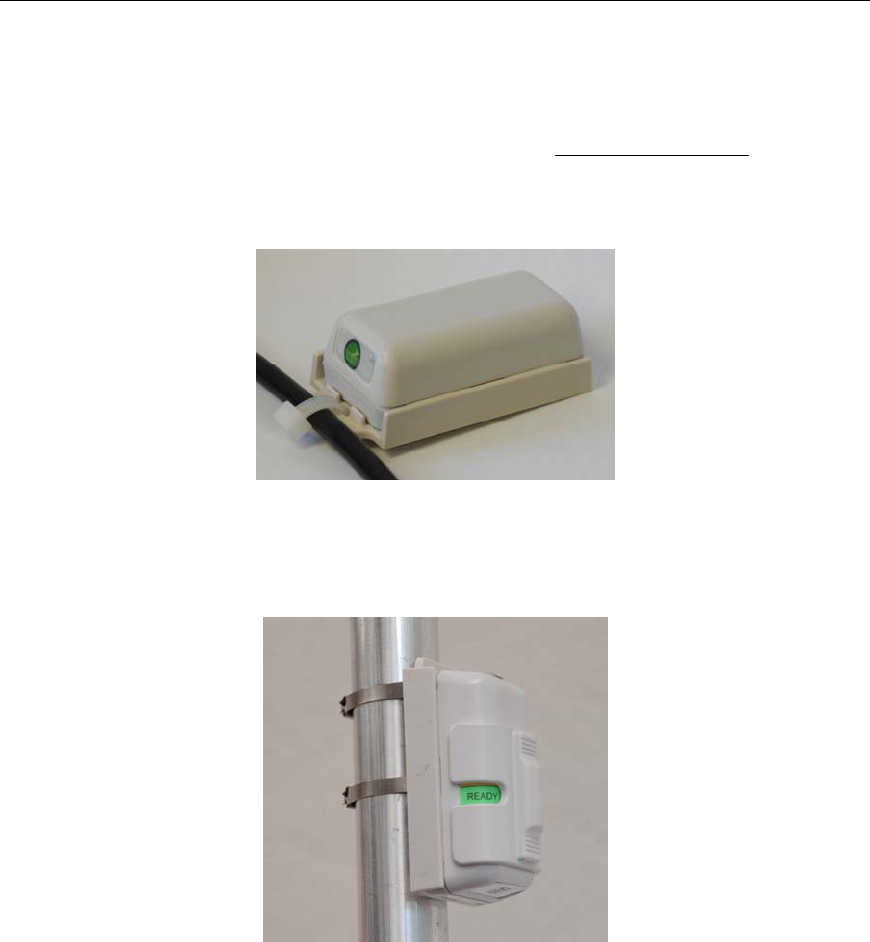
Select a standard location on each asset type for the tag. For A-Status tags select a
location where the status indicator is plainly visible and can be easily accessed by
the user when switching the status switch. Be sure to choose a place where the tag is
protected from physical impacts when the device is being used or transported.
Example Status tag placement
The tag location should not interfere with normal use of the asset, and have
sufficient clearance on the open end of the base to insert the locking base key and
insert and remove the tag.
For best performance do not place the tag in a location covered with metal, such as
inside of a control box or enclosed area under a bed frame.
Radarfind Corporation
12/5/2008 A-Tag Installation Instructions Page 6 of 10
Copyright © RadarFind Corp 2008
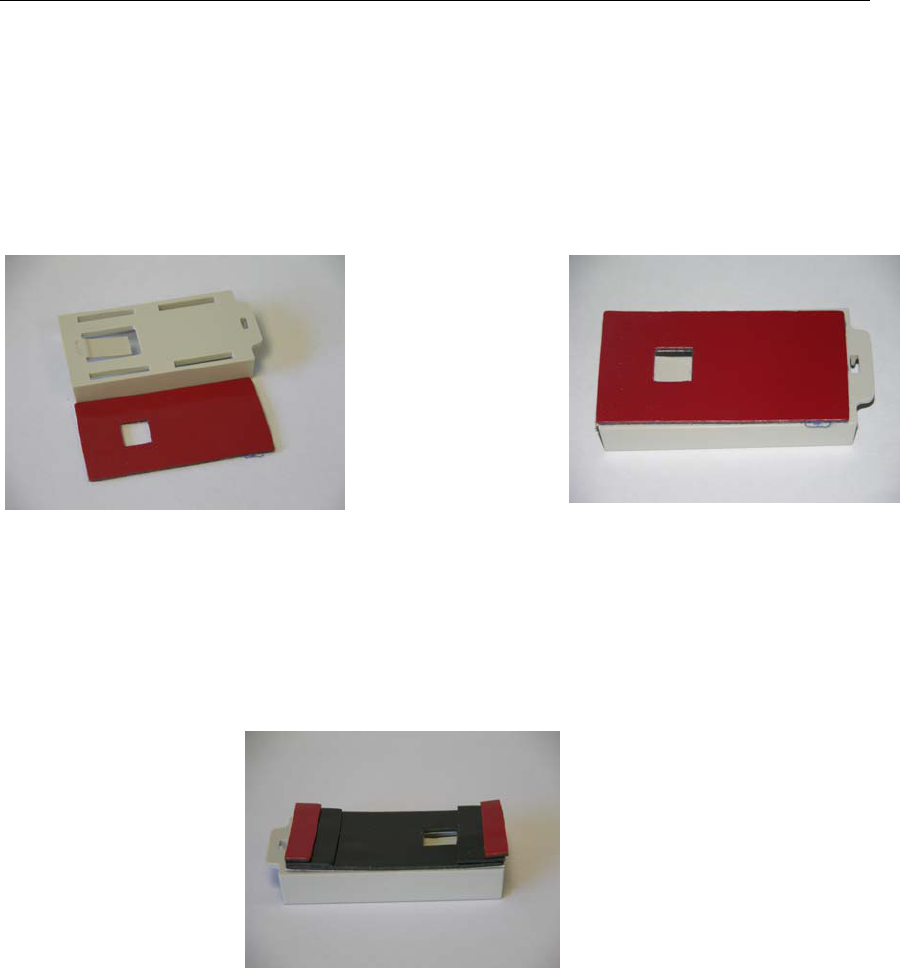
Using adhesive pad – Clean the area on the asset with alcohol to ensure a good bond.
Remove white side of the adhesive covering and place on tag base, aligning the hole
in the center of the adhesive over the base locking mechanism. Remove red backing
and apply to asset. (Be sure to leave sufficient clearance at the open end of the base
to insert and remove the tag from the base)
Adhesive Orientation Apply adhesive to base 1st
Adhesive mounting tips for curved surfaces:
If the target location is not completely flat you may need to add strips under the
ends of the adhesive pad (cut the strips from a spare pad)
Building up adhesive to conform to curved substrates
Radarfind Corporation
12/5/2008 A-Tag Installation Instructions Page 7 of 10
Copyright © RadarFind Corp 2008
Auxiliary attachment:
Use a standard plastic “Tie-Rap” to attach the tag base to permanently mounted cords or
handles of assets where there is no convenient flat mounting spot.
Use tie-rap to attach tag to oddly shaped assets
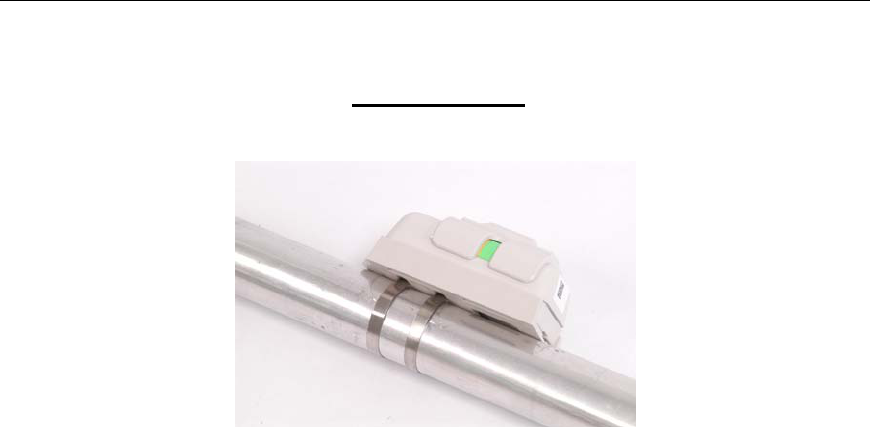
Mounting to tubular fixtures:
Use stainless steel straps to attach tag to tubes or poles.
For best results mounting to tubular fixtures, such as IV poles or wheelchair frames, the
locking base is equipped with strapping holes. These holes are designed to be used with
thin stainless steel straps, available from Radarfind ( Part # A12-3T00 ) or Panduit:
http://www.panduit.com/search/search_results.asp?Ne=1&recName=MLT1S%2DCP&N=50
00001+336+3000858+®ion=USA
Note: that the best results are obtained by using the strapping gun designed for these
steel straps.
Radarfind Corporation
12/5/2008 A-Tag Installation Instructions Page 8 of 10
Copyright © RadarFind Corp 2008
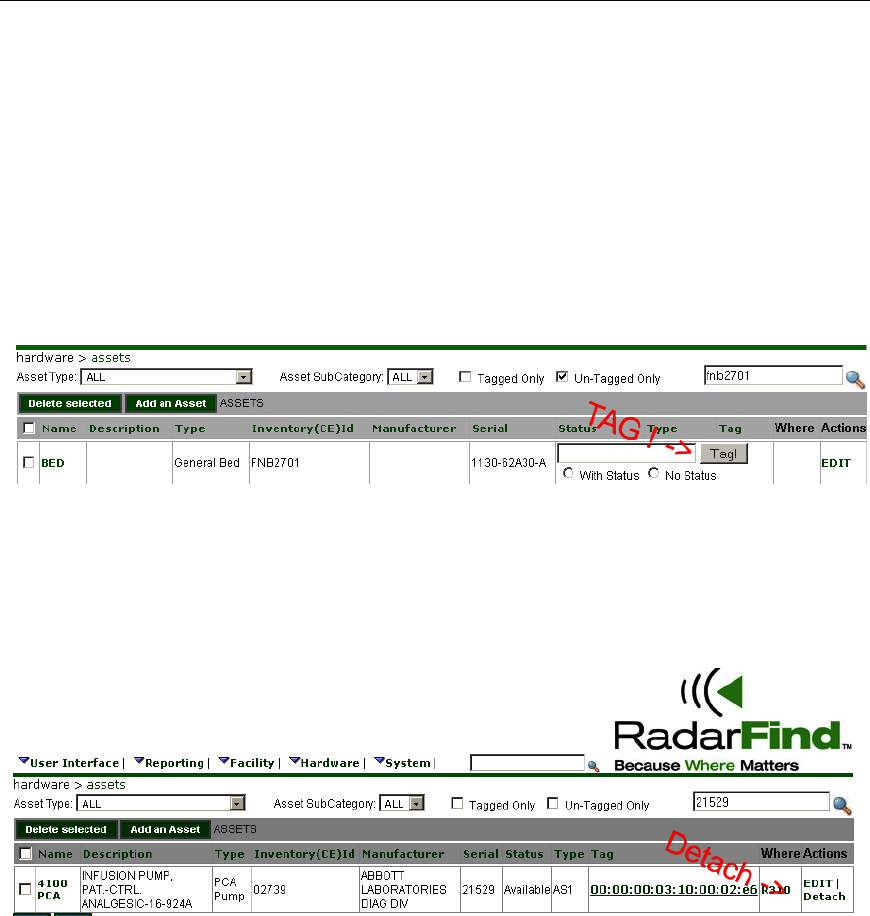
Installation Steps – Attaching tags with adhesive:
Step # 1 - Select location for tag and clean area for adhesive with alcohol.
Step # 2 - Attach adhesive to tag base with adhesive or straps.
Step # 3 – (Assuming that you have already entered your assets - See next page for
ADDING assets in the RadarFind database.) Select asset by entering the serial number or
asset inventory number. Enter or scan tag ID into the Radarfind software, select which tag
type, status or non-status, and hit <Tag!>
Once a tag is assigned to an asset any searching or display can be done by looking for the
asset.
If you need to remove a tag from an asset please un-assign the asset in the following
screen by selecting the correct asset and clicking DETACH.
Radarfind Corporation
12/5/2008 A-Tag Installation Instructions Page 9 of 10
Copyright © RadarFind Corp 2008
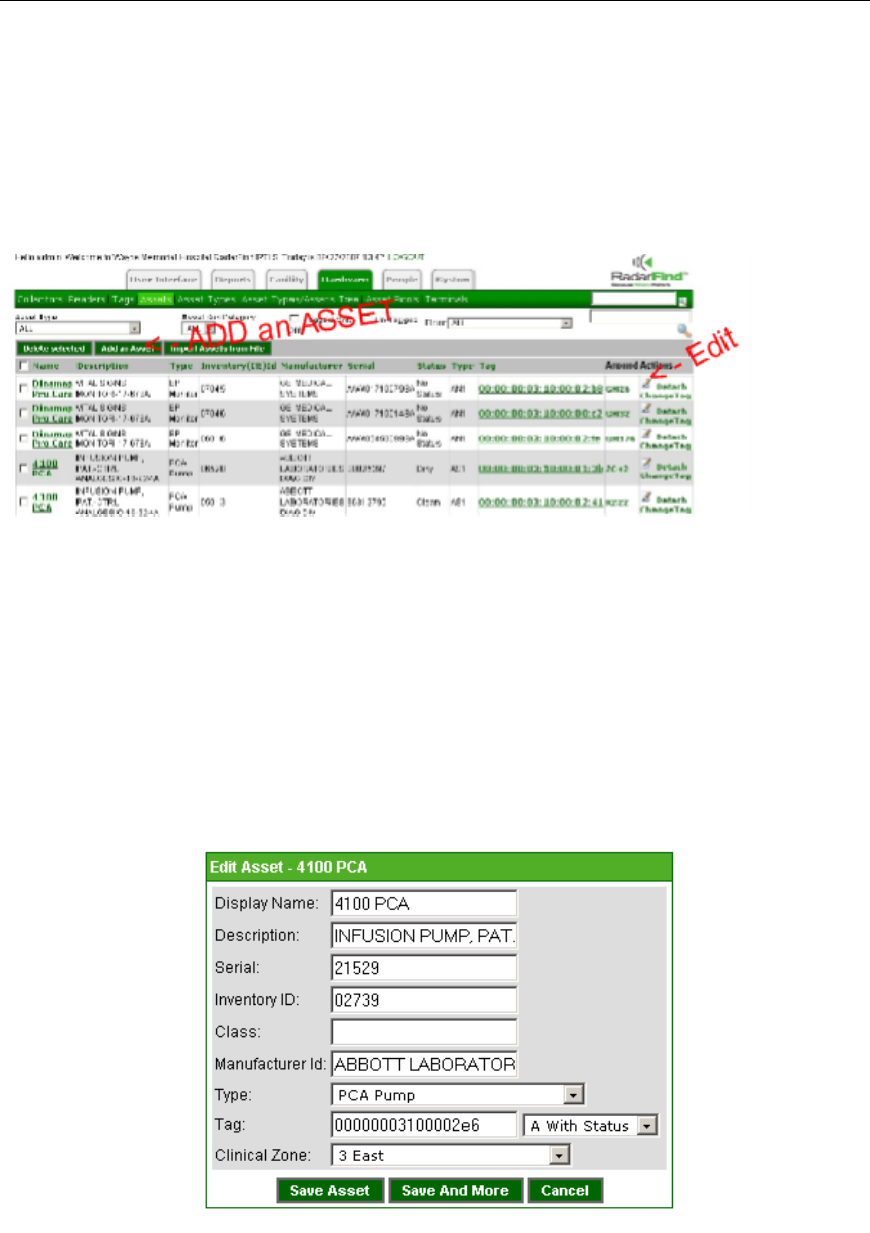
Run-Time Asset Additions or Edits
To edit a current asset locate the asset in the asset table and hit the edit icon.
To add a new asset to the database select Add an Asset from the menu bar.
Selecting either Edit or Add will bring you to the following asset edit screen where you can enter
or edit details concerning the asset. The important lines are:
1 – Display Name - The Asset Name
2 – Inventory ID – Your property tag ID number - this number must be unique to all assets.
3 – Type – Select the appropriate asset sub-category from the drop down list
If you wish you can also scan a tag ID into the Tag field here as well as the list screen above.
Please remember to select whether the tag is a STATUS or NON-STATUS tag.
The Clinical zone field indicates the department which “Owns” or is “Home” to the asset. At this
time it is not used elsewhere in the RadarFind system.
Radarfind Corporation
12/5/2008 A-Tag Installation Instructions Page 10 of 10
Copyright © RadarFind Corp 2008
Technical Specifications:
Models T11-120 – Status & T21-120 – Non Status RTLS Tags
DC power: Internal sealed lithium battery
Power consumption: Average 15uA
Communications 902-928 MHz FSK
Transmit Power +8dBm maximum
Antenna: Unity gain isotropic
Communications: FCC Subpart 15.249
Operating: 5 to 35º C, 5% to 90% RH, non condensing
Packaging: ABS Plastic (UL Flammability Rating V0)
Accessories: Adhesive pad, holding base, plastic mounting straps, and steel
mounting straps
Dimensions: Optional holding base (2.6”L x 1.5”W x 0.375”D)
Tag T11-120 (2.5” L x 1.25” W x 1” D)
Tag T21-120 (2.5” L x 1.25” W x 7/8” D)
Non-status FCC Label Status FCC label
RadarFind Corporation ™