Radio Shack 3201258T Wireless Microphone User Manual
RadioShack Corporation Wireless Microphone
User manual
Step 4
Set TALK-MUTE-OFF switch to TALK. Then turn the
audio source and receiver volume up to the desired
level. The READY indicator light displays indicating that
the microphone signals are within range of the receiver.
• To avoid the popping noise that may occur
when switching from OFF to TALK, use MUTE.
TALK-MUTE-OFF to OFF.
verify they operate at different frequencies. See
your microphone or receiver for its frequency.
Step 3
Press POWER on the receiver to turn it on. The
POWER indicator lights up. Fully extend the antennae.Fully extend the antennae.
Set the volume on your PA amplier or other audio
source to a minimum level. Then turn power on.
• Dispose of old batteries promptly and properly.
• Do not burn or bury batteries.
• Use only fresh batteries of the required size and
recommended type.
• Do not mix batteries of different sizes or types.
• If you do not plan to use your microphone system for a
chemicals that can damage electronic parts.
RadioShack. Your
from the receiver allowing you to move freely.
microphone receiver
9V AC adapter user’s guide
what’s included
battery notes
32-1258
170MHz Single Channel Wireless
Microphone System
Frequency ............. 169.505MHz, 170.245MHz or 171.905MHz
Operating Range ............................................ 200 feet (Typical)
Frequency Response ..........................................120---13000Hz
microphone
RF Power ........................................................................ 10dBm
Sensitivity............................................ 106 dB SPL at 7KHz FM
Power Source ................................................Two AA Batteries
receiver
Sensitivity with S/N 20dB ....................................................1uV
S/N Ratio at 1mV RF Input .................................................75dB
Image Rejection .................................................................55dB
Line Output .....................................................................510mV
Microphone Output ..........................................................10mV
Power Requirement ................................................ AC Adapter
without notice. Product may vary from depiction.
specications
Warning: Modifying, tampering with, or adjusting this unit, or replacing
any transmitter component (crystal, semiconductor, etc.) may result in a
violation of the FCC rules.
Consult your local RadioShack store or an experienced radio/TV technician
for help.
If you cannot eliminate the interference, the FCC requires that you stop
using your microphone system. Changes or modications not expressly
approved by RadioShack may cause interference and void the user’s
authority to operate the equipment.
This device complies with Part 15 of the FCC Rules. Operation is subject to
the condition that this device may not cause harmful interference.
This wireless microphone system complies with Part 90 of the FCC Rules.
There are three frequencies available for the system. You must obtain a
license for each frequency you plan to use before operating your system.
One license can include both frequencies. Visit http://wireless.fcc.gov/uls/,
or call your local FCC ofce to apply for your license. Your ability to obtain
a license will depend on how you plan to use the system.
For RF exposure
“IMPORTANT NOTE: To comply with the FCC RF exposure compliance
requirements, no change to the antenna or the device is permitted. Any
change to the antenna or the device could result in the system exceeding
the RF exposure requirements.”
For devices less than 200mW ERP
SAFETY INFORMATION
Your wireless microphone contains a low power transmitter. When the EUT
is powered on, it sends out radio frequency (RF) signals. In August 1996,
the Federal Communications Commissions (FCC) adopted RF exposure
guidelines with safety levels for wireless devices.
IMPORTANT
To maintain compliance with the FCC’s RF exposure guidelines, hold the
transmitter and antenna at least 1 inch (2.5 centimetres) from your face
and speak in a normal voice, with the antenna pointed up and away from
the face. Ensure that the antenna is at least 1 inch (2.5 centimetres) from
your body when you are using your wireless microphone.
Use only the supplied antenna. Unauthorized antennas, modications,
or attachments could damage the transmitter and may violate FCC
regulations.
rf emission information
©2006. RadioShack Corporation.
All rights reserved. RadioShack and
RadioShack.com are trademarks
used by RadioShack Corporation.
32-1258
04A06
AO0262AAA1
Printed in China
This product is warranted by RadioShack against manufacturing defects
in material and workmanship under normal use for one (1) year from the
date of purchase from RadioShack company-owned stores and authorized
RadioShack franchisees and dealers. For complete warranty details and
exclusions, check with your local RadioShack store.
RadioShack Customer Relations
300 RadioShack Circle, Fort Worth, TX 76102 04/04
limited one-year warranty
Please read this user’s guide before installing, setting up
and using your new product.
www.radioshack.com
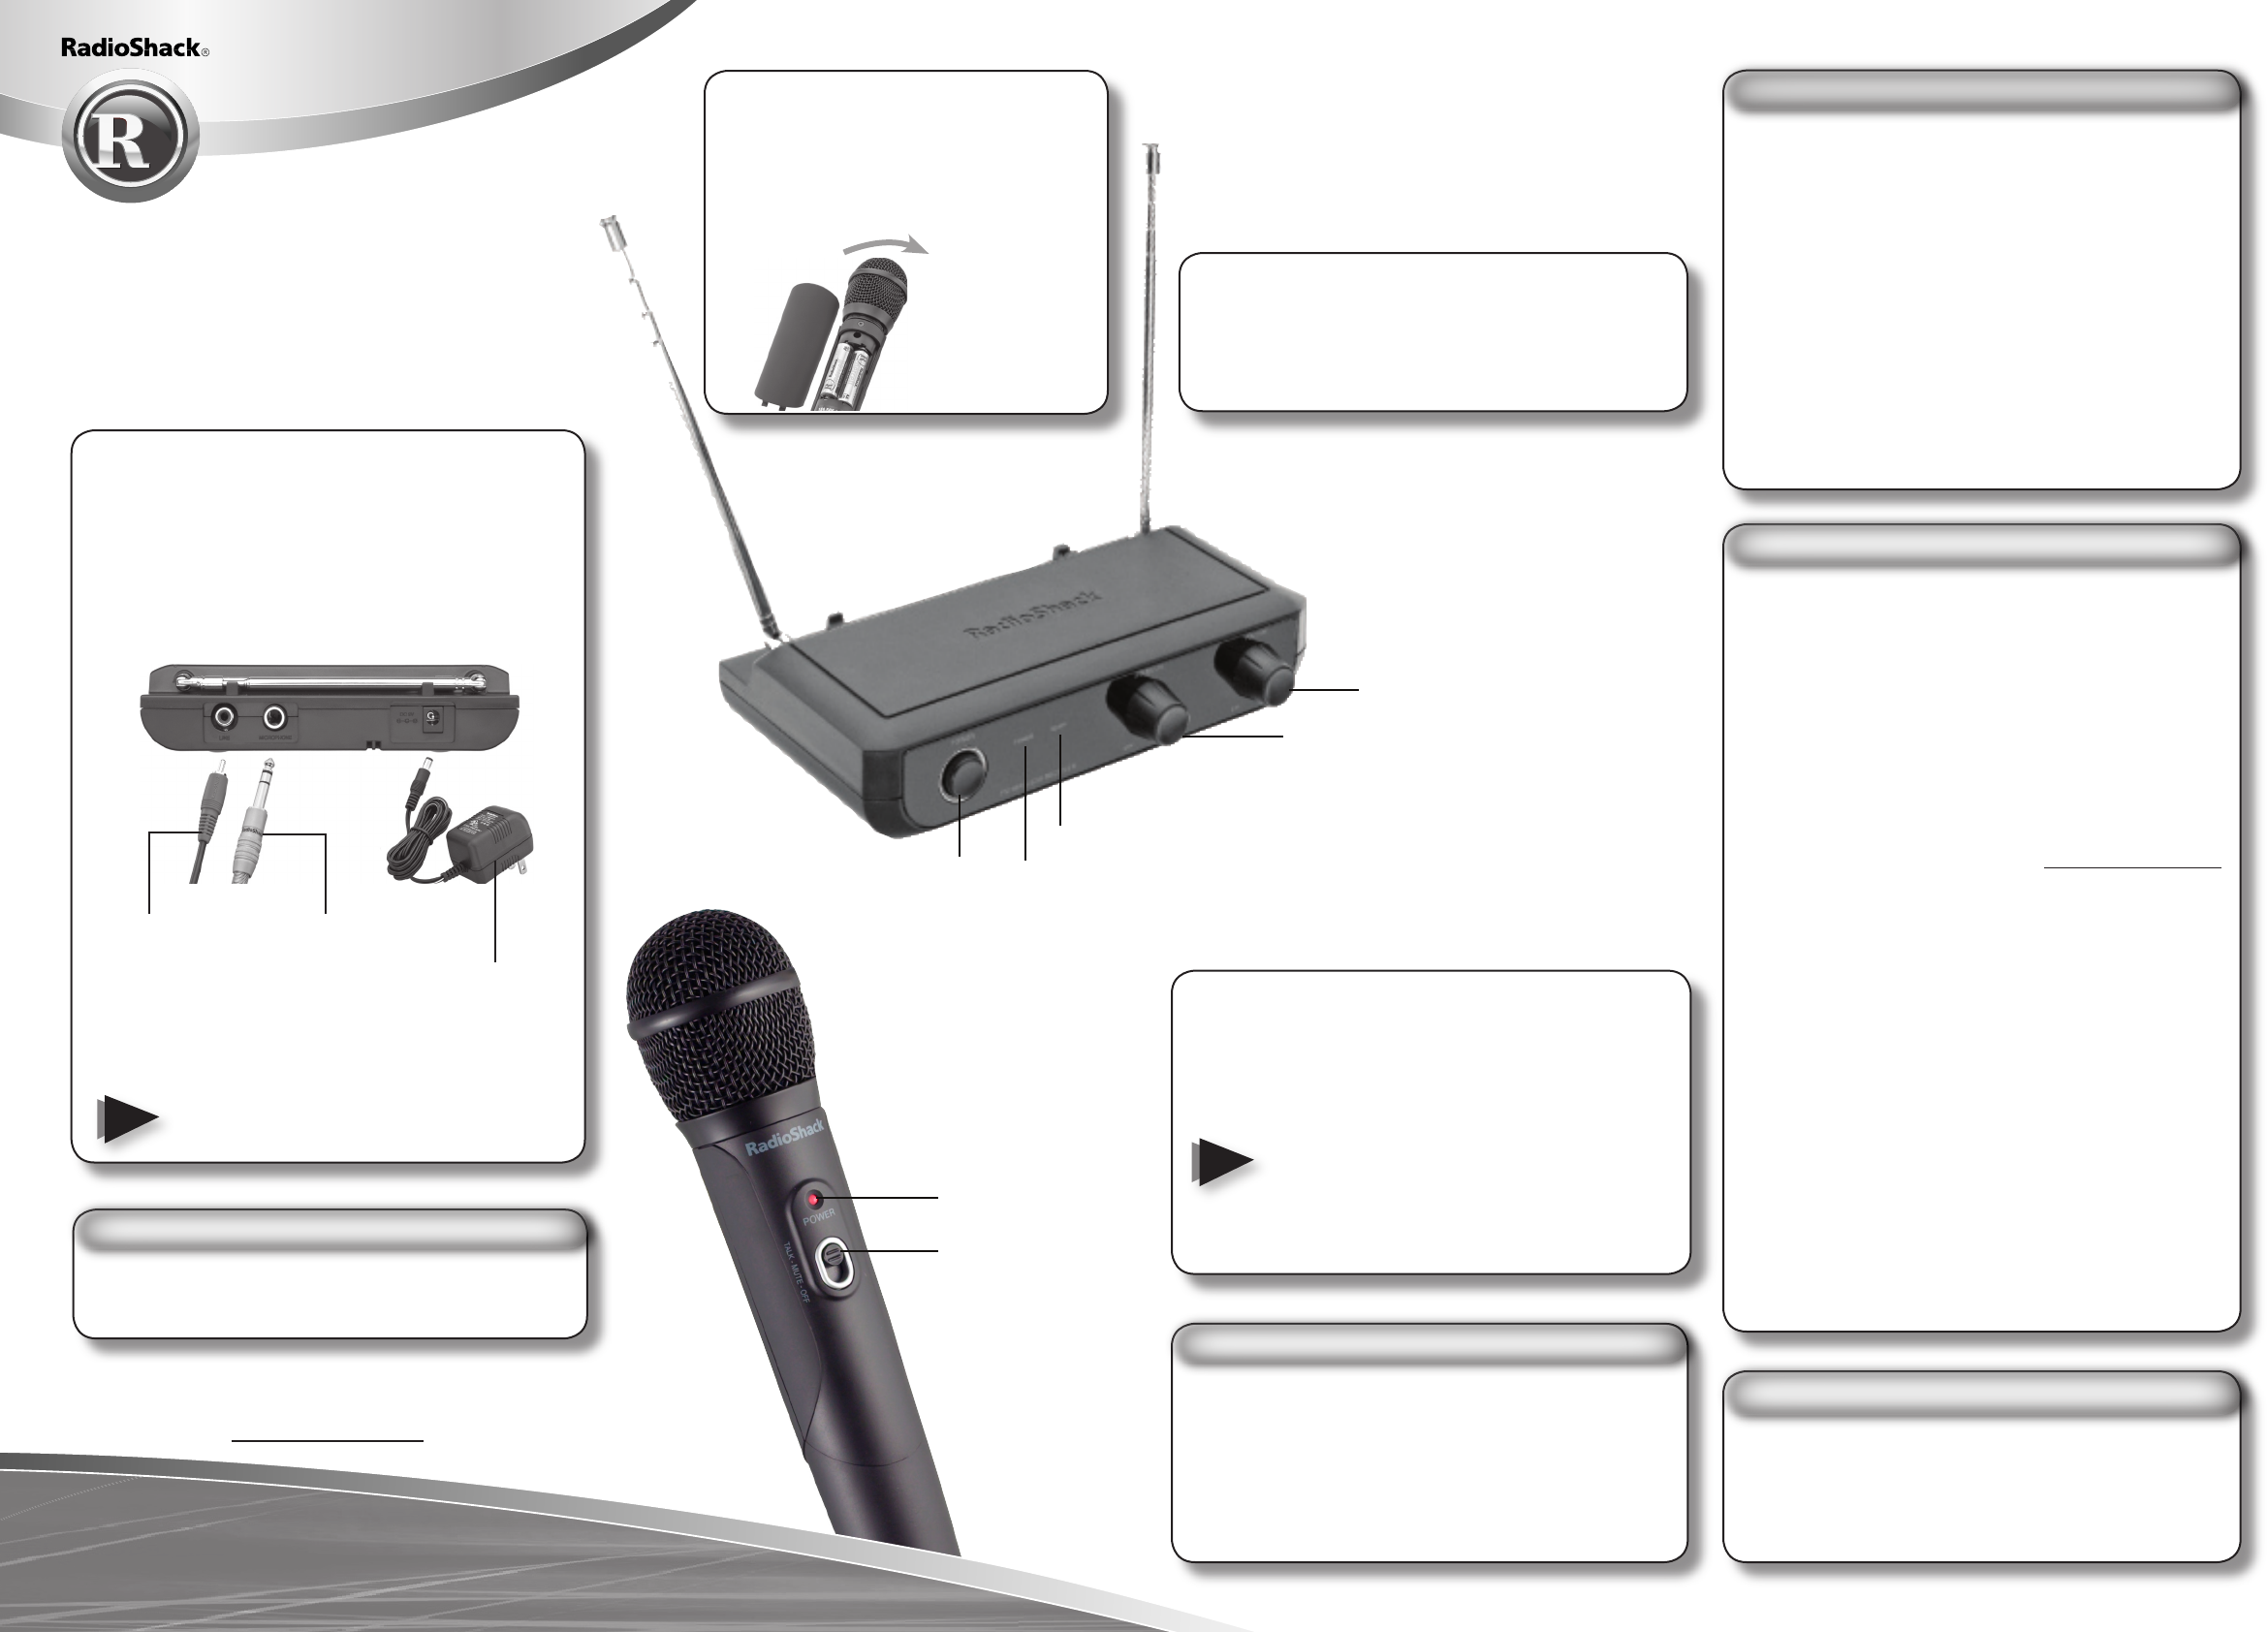
Connect your
receiver to the
input jack on
your amplier
using the LINE
jack.
(Optional)
Connect your
receiver to
your amplier
with the
MICROPHONE
jack.
Plug the AC
adapter into
an outlet.
SQUELCH
Rotate to limit the background noise and
control the transmitting distance. To increase
the transmitting distance, rotate it to MIN.
POWER indicator
Replace the batteries
when light is off.
POWER indicator
READY indicator
POWER button
TALK-MUTE-OFF
VOLUME
Rotate to adjust your microphone’s
volume.
NOTES
Step 2
Unscrew the microphone grille and
remove the battery cover. Insert two
AA batteries with correct polarity.
Then replace the battery cover and the
microphone grille.
Twist
Step 1
Set the volume to a minimum level and plug in the
AC adapter. Then, using a shielded audio cable (notusing a shielded audio cable (not
included), connect the LINE jack on your receiver
to the input jack on your amplier, or other device
Optionally, or if the input jack is in use, you canif the input jack is in use, you can
connect using the MICROPHONE jacks on your
receiver and amplier with a 1/4” audio cable (not
included).
NOTE