Radio Systems 3002511 WIRELESS FLEX TRANSMITTER User Manual
Radio Systems Corp WIRELESS FLEX TRANSMITTER Users Manual
Users Manual
Stance
Analyzer
VET Therapy
www.petsafevet.com

VET Therapy
2 www.petsafevet.com
IMPORTANT SAFETY INFORMATION
EXPLANATION OF ATTENTION WORDS AND SYMBOLS USED IN THIS GUIDE
This is the safety alert symbol. It is used to alert you to potential personal injury hazards. Obey all safety messages that follow this
symbol to avoid possible injury or death.
WARNING indicates a hazardous situation which, if not avoided, could result in death or serious injury.
CAUTION, used without the safety alert symbol, indicates a hazardous situation which, if not avoided, could result in
harm to your pet.
NOTICE is used to address safe use practices not related to personal injury.
Do not plug the Stance Analyzer into the same electrical outlet as the computer it will be connected to. Do not place a
pet on the Stance Analyzer without the pad in place. Toe and toe nails may become stuck in the seam or edge of the
Stance Analyzer.
RISK OF EXPLOSION IF BATTERY IS REPLACED BY AN INCORRECT TYPE. DISPOSE OF USED BATTERIES
ACCORDING TO THE INSTRUCTIONS.
The RECEIVER SHOULD BE PLACED IN A SAFE PROTECTED AREA, where it will not be dropped or fall.
Do not immerse any part of the unit in water. Do not pour water directly on any part of the unit.
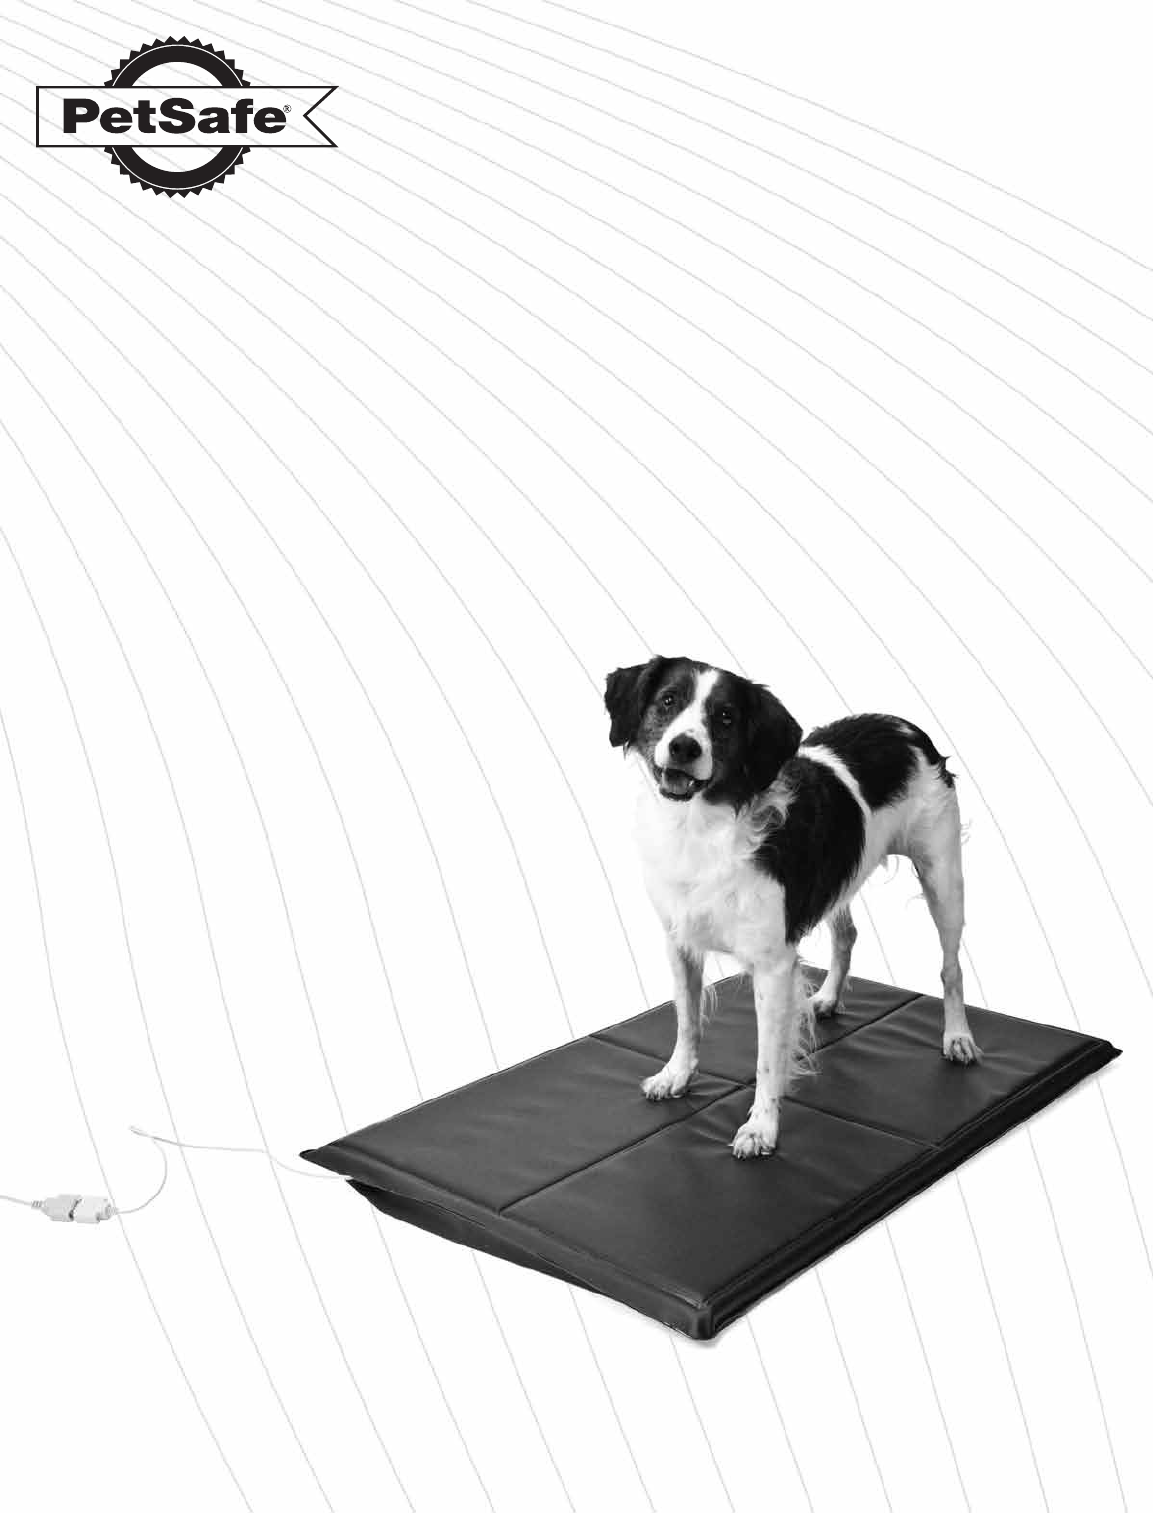
Thank you for choosing the PetSafe Vet Therapy Stance Analyzer.
The Stance Analyzer is designed to help veterinarians and vet
professionals accurately measure standing lameness and assess
treatment effectiveness. Software updates for this product and
support are available at www.petsafevet.com.
Stance Analyzer
www.petsafevet.com 3
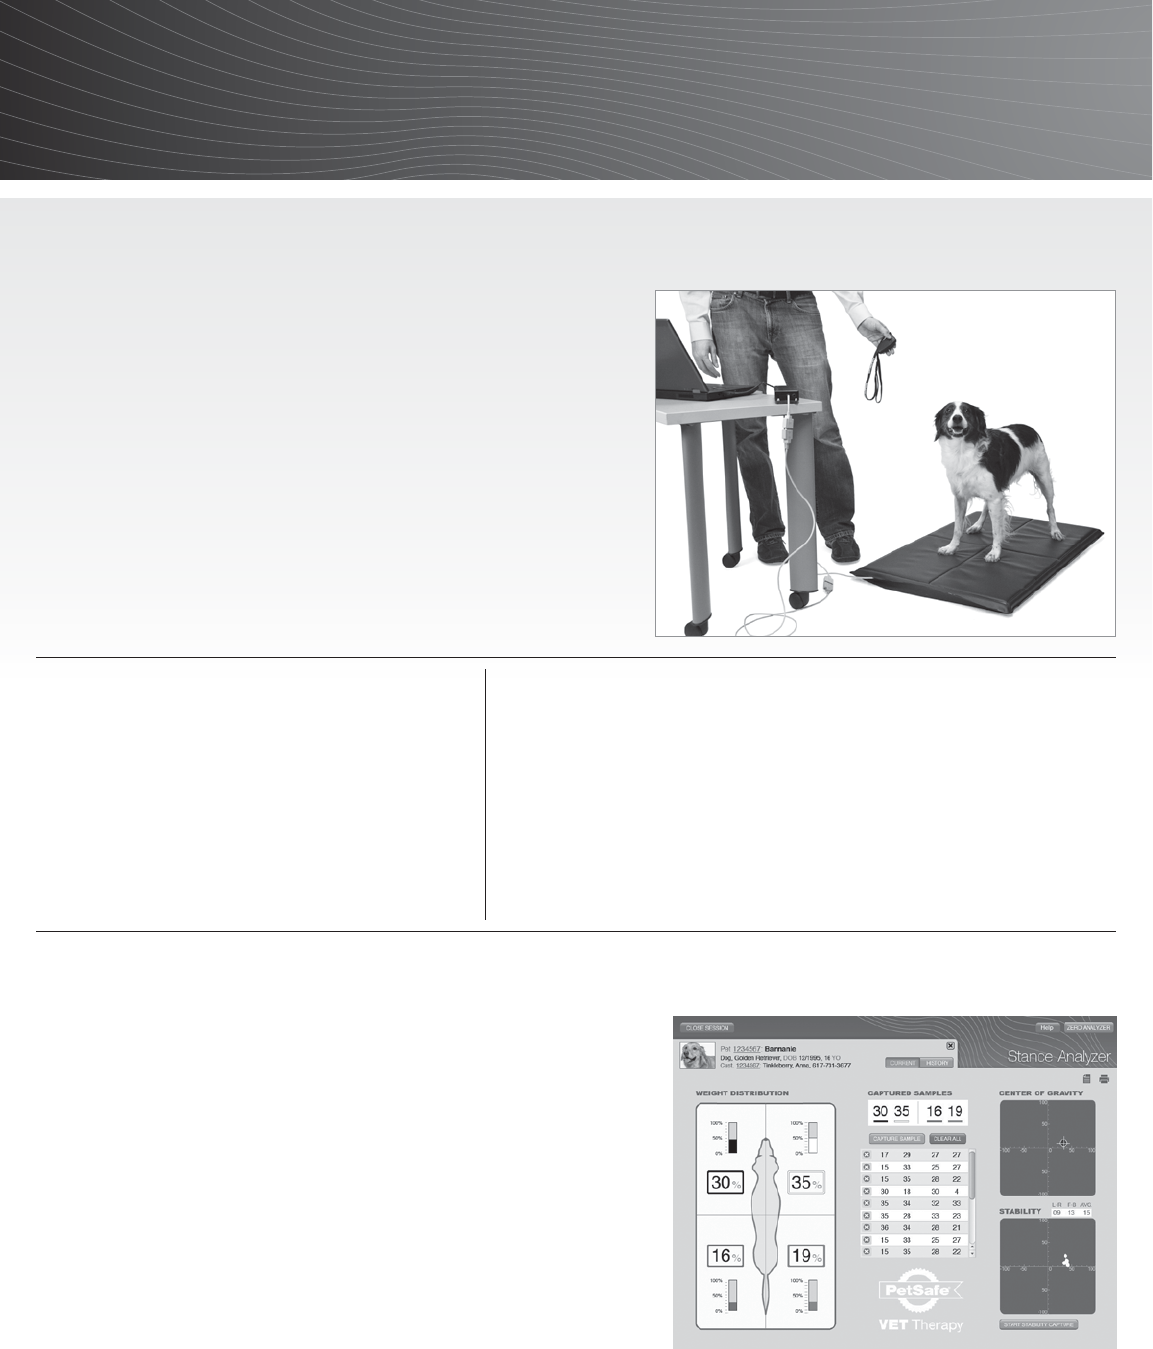
HOW IT WORKS
The Stance Analyzer works when a pet is placed on the device, with
one leg in each quadrant of the unit. The unit then quickly measures
the pet’s percentage of weight distribution in each leg, center of
gravity and stability. A snap shot of the pet’s stance is taken through
a remote control or directly through the Stance Analyzer software.
The Stance Analyzer provide veterinarians with data to diagnose
standing lameness and track treatment effectiveness overtime. The
software allows printing of the graphs to share with pet owner’s to
further demonstrate the patient’s progress. The Stance Analyzer is
effective for pet’s weight X lbs up to XXX lbs.
COMPONENTS
1. Stance Analyzer
2. Software CD
3. Stance Analyzer Remote
4. Power cord
5. USB receiver connector cord
6. Stance Analyzer base pad
REQUIREMENTS
PC — XP or above for software
Screen Resolution — At least 1024x768 for optimum performance
Internet Connection (Recommended)
DISPLAY DEFINITIONS
Weight Distribution – This graph at the top left graph on your screen
displays the percentage of weight each of the patient’s limbs is baring
(Left Front, Right Front, Left Rear, Right Rear). This is a snap shot view
based on the most recent sample.
Center of Gravity Chart – This graph, located on the upper right
portion of the screen, displays your patient’s Center of Gravity. This
snap-shot reading is based on the most recent sample.
Stability Graph – The Stability Graph, on the bottom right of the
Center of Gravity Chart, shows data collected over time. This graph
reports the change in stability of your patient as collected in your most
recent Stability Test.
Captured Samples – The Captured Samples Chart, on the right of the
Weight Distribution Chart, shows samples collected. The most recent
samples are displayed. Scroll down to view older samples.
Weight Distribution History Tab – This tab, graphs the patient’s Weight Distribution over time (visit-to-visit), which shows
your patient’s progress. To the right of the history is a graphical representation on the current average for comparison.
VET Therapy
4 www.petsafevet.com
SETTING UP THE STANCE ANALYZER
Choose a level location for the Stance Analyzer. It should be within 5-6 feet of
a computer.
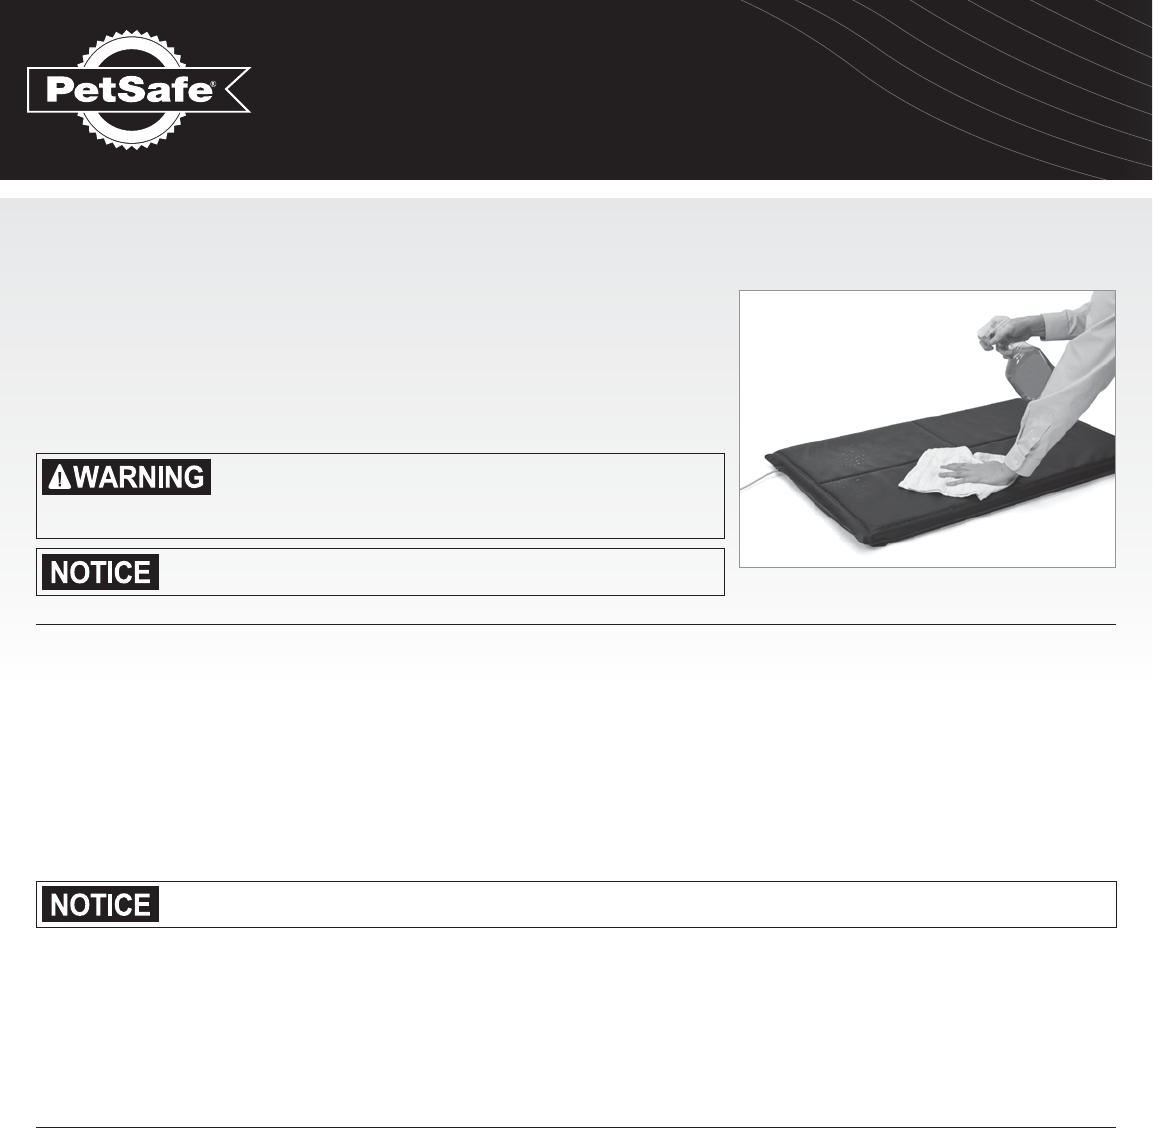
Plug the Stance Analyzer into a standard wall outlet. Ensure the base pad
is on the unit, with the PetSafe logo at the top of the unit. The pad is water
resistant and can be cleaned with a damp cloth and every day standard
cleaning supplies.
Do not plug the Stance Analyzer into the same electrical outlet as
the computer it will be connected to. Do not place a pet on the
Stance Analyzer without the pad in place. Toe and toe nails may
become stuck in the seam or edge of the Stance Analyzer.
Do not immerse any part of the unit in water. Do not pour water
directly on any part of the unit.
LOADING THE STANCE ANALYZER SOFTWARE
Important: Do not connect the Stance Analyzer to your computer until after the software has loaded.
1. Insert the PetSafe Stance Analyzer Start-Up CD into your computer device.
2. The Installation Wizard will walk you through the installation process. This window will open automatically. If your CD
does not run automatically, open My Computer and run the Set-Up file.
3. Attach the USB connector found on the Stance Analyzer to your computer. The USB connected is attached to the
Receiver Connector.
The RECEIVER SHOULD BE PLACED IN A SAFE PROTECTED AREA, where it will not be dropped or fall.
4. Depending on the prior configuration of the computer, the computer will likely prompt you for driver software for the
USB device. Choose the selection indicating Windows should choose the best option. This will occur twice (requires
two drivers).
5. After the driver software installs, open the PetSafe Stance Analyzer Software. Click on the PetSafe Stance Analyzer
Icon on your Desktop.
6. The Stance Analyzer is now ready.
REMOTE CONTROL
A remote control is provided for the Stance Analyzer. This captures stance data for a patient without having to the step
away from the patient. It will be a more accurate and quick data capture. The remote control may need to be paired with
the Stance Analyzer.

Stance Analyzer
www.petsafevet.com 5
REMOTE PAIRING PROCEDURE
1. Hold programming button (in the electronics Box) for ~ 1 second.
2. Green light will flash.
3. Press either remote button twice (separated by ~ 1 second).
4. When accepted, the Green light will flash rapidly for ~ 2 seconds.
5. If no codes are recognized within 10 seconds, the Green light will stop flashing and no changes will occur.
REPLACING THE REMOTE BATTERY
If the remote control does not activate the Stance Analyzer to capture data, repair the remote and check the battery.
1. Unscrew the back of the remote control using a Phillips head screw driver.
2. The remote uses a CR 2032 battery. Replace the battery. Replace the back of the remote and tighten the screws.
CONDUCTING A STANCE ANALYSIS
1. When starting to conduct a stance analysis, open the Stance Analyzer program. Then click the “Open Session”
button at the top left of the screen. Either select the existing patient or click “create new” to create a new account.
If creating a new patient file:
A. Enter the patient owner’s first and last name, mobile number, e-mail address, street address, city, state, and
zip code.
B. Once you have entered the patient’s owner, choose or find the owner’s name on the list and select “edit” and
enter the name of the patient.
C. Choose cat or dog.
D. Select the pets breed from the list. If the breed is unknown or mixed, select “other.”
E. Enter the date of birth for the patient.
F. A photo of the patient can also be loaded to the file. The image resizes to fit the profile space.
Note: Multiple pets can be added to one owner.
If you are collecting additional data on an existing patient:
A. Search for patient using a data field, such as name or e-mail address.
B. Select the record, and click “Open.”
2. Calibrate the Stance Analyzer. To do this, remove all weight from the analyzer and press the “Zero Analyzer” button
found at the upper right corner of the screen. This button may turn red while calibrating and will turn green after
calibration is complete.
Important: IT IS HIGHLY RECOMMENDED THAT THE “Zero Pads” FUNCTION IS PERFORMED PRIOR TO EACH PA-
TIENT SESSION.

VET Therapy
6 www.petsafevet.com
3. Place the patient on the Stance Analyzer. The patient
should be facing towards the PetSafe logo on the base
pad. The patient must have one leg in each quadrant and
be as still as possible.
Note: A treat holding arm and clip have been developed as an
accessory to the Stance Analyzer. A PetSafe Lickety Stik is
helpful in keeping patients still. To use one, place the Lickety
Stik in the Accessory Clip and place in front of the Stance
Analyzer. Adjust the arm so that the Lickety Stik is positioned
directly in front of the patient’s mouth.
Important: When using a treat to keep the patient in place,
the patient should not have to tilt his or her head back or
lean down to use the Lickety Stik. This will skew the stance
analysis.
4. Watch the patient on the Stance Analyzer. When the stance is representative of the patient’s stance, hit the “Capture
Sample” button on the display screen, or hit Button 1 on the remote to take a sample. Repeat this process as many
times as you desire. All samples will be stored and displayed on screen. Each sample is a single data capture.
Consider taking 6-10 samples per session to get the most valid data from the patient.
5. The Stance Analyzer System will provide an average of the samples taken and display the results for Weight
Distribution, Captured Samples, Center of Gravity and Weight Distribution History Graphs. For a full explanation of
these graphs, see Display Definitions.
6. If the patient moves suddenly, lies down, or the sample seems skewed, it is necessary to delete the sample. Click on
the red ‘x’ next to the invalid data.
STABILITY TEST
1. To complete a stability test for the patient, confirm the patient is positioned correctly on the Stance Analyzer.
2. To start the test, click the “Start Stability Capture” button under the Stability Graph on the screen or press “Button 2”
on the remote control.
3. Once the system has collected the data, click the “Stop Stability Capture” or “Button 2” again.
4. Results of the Stability Test will be displayed on the Stability Graph.
SAVING PATIENT DATA
1. To save the patient’s data, click the “Close Session” button at the top of the screen. The system will ask “Are you sure
you want to the session?” click “Yes”. The system will ask “Do you want to save the data?” click “Yes”. The system
will store the average of the data and the date of collection for each patient.
2. To print a copy for a record or for the patient’s owner, click “Print.”
Stance Analyzer
www.petsafevet.com 7
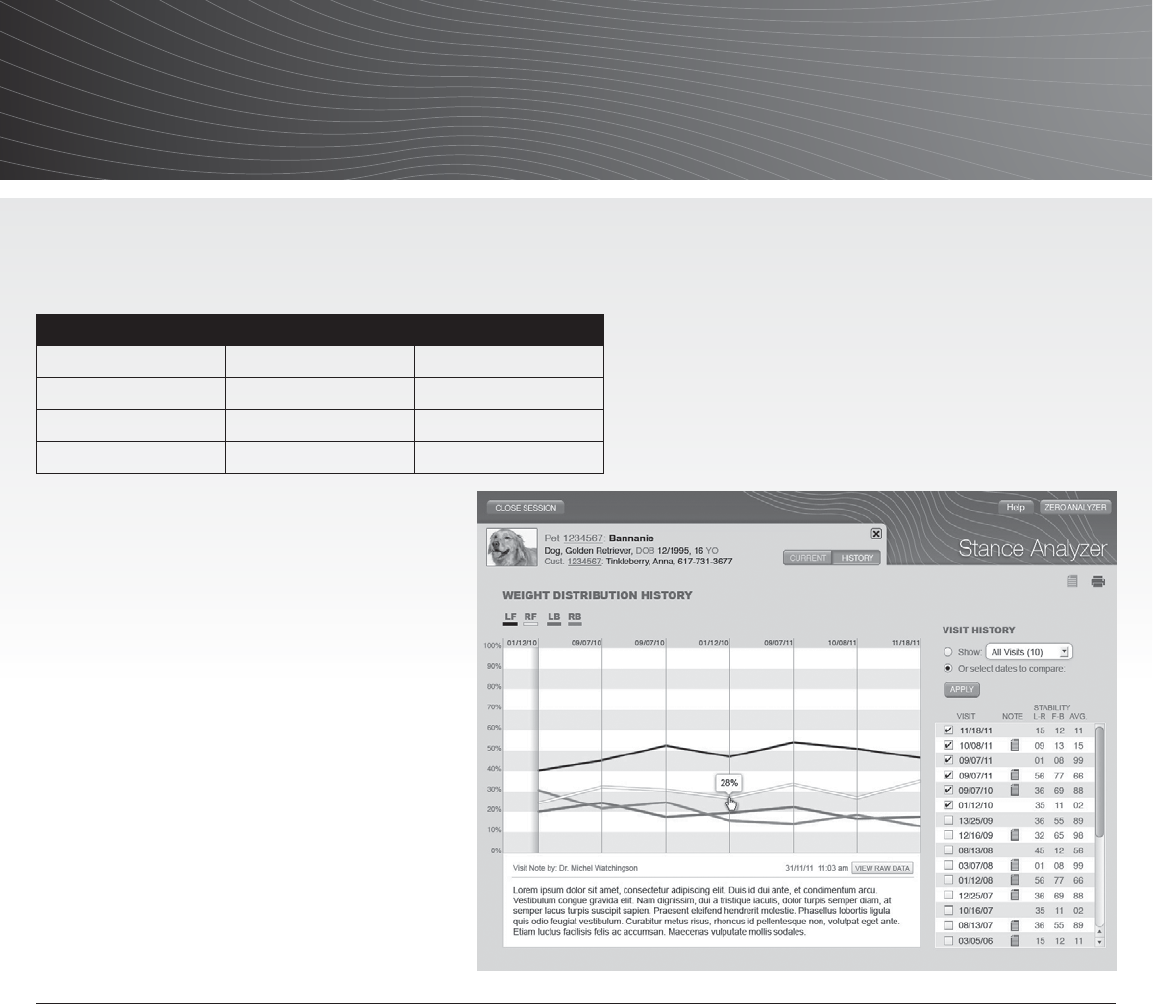
REVIEWING THE DATA
Within the charts, each line represents one of the patient’s leg.
PATIENT’S LEG LINE COLOR SYMBOL
Front Left Black
Front Right White
Back Left Red
Back Right Green
Select “Show all history” to see the patient’s
complete record, or select and compare data
from specific dates.
In a healthy patient, the front leg lines will
overlap and the rear leg lines will overlap on
the chart. When the patient is suffering from
lameness the lines will not overlap. However,
when a treatment method for lameness is
showing progress in a patient, each of the front
leg lines will begin to converge and each of the
back leg lines will converge overtime.
A “Notes” section is also provided to document
patient notes, treatment, observations of the
patient within the file. The notes are attached
the each day’s session.
HELP
Click the “Help” Button at the top of the screen for additional product support.

VET Therapy
8 www.petsafevet.com
WARRANTY
Radio Systems Corporation® (“Company”) warrants that the Stance Analyzer (“Product”) is free of defects in material and
workmanship. This warranty shall remain in effect for one year (12 months) from the date of original consumer purchase.
If this Product fails to function during the one year warranty period due to a defect in material or workmanship, Company
or the selling dealer will repair or replace this Product without charge within a period of thirty (30) days from the date on
which the Product is returned to the Company or the dealer. All repairs to the Product must be performed by a service
center certified by the Company. Any modifications or repairs performed by unauthorized centers or groups will void this
warranty.
This Warranty Does Not Cover:
ANY MALFUNCTION OR FAILURE IN THE PRODUCT CAUSED BY PRODUCT MISUSE, INCLUDING, BUT NOT LIMITED
TO, DROPPING THE UNIT, RECEIVER, OR REMOTE AND FAILURE TO PROVIDE REASONABLE AND NECESSARY
MAINTENANCE OR ANY USE THAT IS INCONSISTENT WITH THE PRODUCT USER MANUAL.
Replacement parts or labor furnished by anyone other than the Company, the selling dealer or a certified Company service
technician.
Defects or damage caused by labor furnished by someone other than the Company, the selling dealer or a certified
Company service technician.
COMPANY SHALL NOT BE LIABLE IN ANY EVENT FOR INCIDENTAL OR CONSEQUENTIAL DAMAGES.
Some states do not allow the exclusion or limitation of incidental or consequential damages, so the above limitation or
exclusion may not apply to you. To Obtain Service From Company or the selling dealer under this warranty:
1. A written claim must be made within the warranty period to the Company or the selling dealer. Written claims made to
the Company should be sent to:
Telephone: xxx-xxx-xxxx
Fax: xxx-xxx-xxxx
2. The Product must be returned to the Company or the selling dealer by the owner.
This warranty gives you specific legal rights and you may also have other rights which vary from state to state or location
to location.
The Company does not authorize any person or representative to create for it any other obligation or liability in connection
with the sale of the Product. Any representation or agreement not contained in the warranty shall be void and of no effect.
THE FOREGOING WARRANTY IS IN LIEU OF ALL OTHER WARRANTIES, EXPRESSED OR IMPLIED, INCLUDING ANY
WARRANTY OR MERCHANTABILITY OR FITNESS FOR A PARTICULAR PURPOSE.

Stance Analyzer
www.petsafevet.com 9
FCC - USA
This device complies with part 15 of the FCC Rules. Operation is subject to the following two conditions: (1) This device
may not cause harmful interference, and (2) this device must accept any interference received, including interference that
may cause undesired operation.
Modification or changes to this equipment not expressly approved by Radio Systems® Corporation may void the
user’s authority to operate the equipment.
NOTE: This equipment has been tested and found to comply with the limits for a Class B digital device, pursuant to
part 15 of the FCC Rules. These limits are designed to provide reasonable protection against harmful interference in a
residential installation. This equipment generates, uses, and can radiate radio frequency energy and, if not installed and
used in accordance with the instructions, may cause harmful interference to radio communications. However, there is
no guarantee that interference will not occur in a specific installation. If interference does occur to radio or television
reception, which can be determined by turning the equipment off and on, the user is encouraged to try to correct the
interference by one or more of the following measures:
• Reorient or relocate the receiving antenna.
• Increase the separation between the equipment and the receiver.
• Connect the equipment to an outlet on a circuit different from that to which the receiver is connected.
• Consult customer care, the dealer, or an experienced radio/TV technician for help.
IC - CANADA
This device complies with Industry Canada licence-exempt RSS standard(s). Operation is subject to the following
two conditions: (1) this device may not cause interference, and (2) this device must accept any interference, including
interference that may cause undesired operation of the device.
Le présent appareil est conforme aux CNR d’Industrie Canada applicables aux appareils radio exempts de licence.
L’exploitation est autorisée aux deux conditions suivantes : (1) l’appareil ne doit pas produire de brouillage, et
(2) l’utilisateur de l’appareil doit accepter tout brouillage radioélectrique subi, même si le brouillage est susceptible d’en
ompromettre le fonctionnement.

VET Therapy
10 www.petsafevet.com

Stance Analyzer
www.petsafevet.com 11
Radio Systems® Corporation
10427 PetSafe Way
Knoxville, TN 37932
www.petsafevet.com
Protected by US Patents ######
© 2012 Radio Systems Corporation
Manual Part Number: 4XX-XXXX