Radsone ES100 Bluetooth Receiver User Manual EarStudio Manual ENG added pages
Radsone Inc. Bluetooth Receiver EarStudio Manual ENG added pages
UserManual.wiki
>
Radsone
>
ES100 User Manual
User Manual
Navigation menu
Upload a User Manual
Namespaces
Wiki Guide
HTML
PDF
Info
Views
User Manual
Discussion / Help
Navigation
![[Buttons] [Power Button] Power On/Off •Power On: Press&hold for more than 2 seconds -BLUE LED blinks once when power is on. “power-on sound” plays when it is on. -Automatically connects to a device that has been connected before. GREEN LED blinks once every 3 seconds after the “connection sound.” -Enters Discoverable Mode/Paring Mode when there’s no device that has been connected before. GREEN LED blinks twice every 0.5 seconds. •Power Off: Press&hold for more than 4 seconds -RED LED blinks once right before power off. “power-off sound” plays when it is off. RADSONE 2Previous TrackVolume Up Volume DownNext Track Power](https://usermanual.wiki/Radsone/ES100/User-Guide-3694132-Page-2.png)
![Play/Pause •Play: Press once -GREEN LED slowly blinks once every 3 seconds during Bluetooth/USB playback. •Pause: Press once Hands-free Calling •Receiving Incoming Call: Press once -BLUE LED slowly blinks once every 3 seconds -“Call-receiving sound” when received. •Rejecting Incoming Call: Press&hold for more than 2 seconds -“Call-rejection sound” when refused. •End Call: Press once -“Call-end sound” when ended. [Next Track Button] Playback Control •Next Track: Press once [Previous Track Button] Playback Control •Previous Track: Press once RADSONE 3](https://usermanual.wiki/Radsone/ES100/User-Guide-3694132-Page-3.png)
![Pairing mode •Enter Discoverable mode/Pairing mode: Press&hold for more than 2 seconds -GREEN LED blinks twice every 0.5 seconds after “enter paring-mode sound.” -Disconnects from the current connected device when entering this mode. [Volume Up Button] Volume Control •Volume Up: Press once/Press multiple times/Press&hold -Volume increases by 2dB for each press. -Press&holding the button increases the volume consistently up to 6dB. [Volume Down Button] Volume Control •Volume Down: Press once/Press multiple times/Press&hold -Volume decreases by 2dB for each press. -Press&hold the button decreases the volume consistently down to -52dB. -Pressing the button at the minimum volume turns to a mute level. RADSONE 4](https://usermanual.wiki/Radsone/ES100/User-Guide-3694132-Page-4.png)
![[LED] Discoverable mode / Pairing mode: GREEN - Blinks twice every 0.5 sec. Bluetooth Connected: GREEN - Blinks once every 3 sec. Incoming Call: BLUE - Blinks 3 times every 2 sec. Outgoing Call: BLUE - Blinks 3 times every 2 sec. Active Call: BLUE - Slowly blinks once every 3 sec. Bluetooth Playback: GREEN - Slowly blinks once every 3 sec. USB Playback: GREEN - Slowly blinks once every 3 sec. Battery Low: RED - Maintains the regular LED pattern. The LED-off phase changes to RED Charging: RED - Maintains the regular LED pattern. The LED-off phase changes to RED. Charging Complete: GREEN - Maintains the regular LED pattern. The LED-off phase changes to GREEN. (Ex. LED changes during Bluetooth playback: GREEN LED slowly on - LED Off repeats every 3 seconds. LED changes during Bluetooth playback while battery low state: GREEN LED slowly on - RED LED repeats every 3 seconds.!RADSONE 5](https://usermanual.wiki/Radsone/ES100/User-Guide-3694132-Page-5.png)
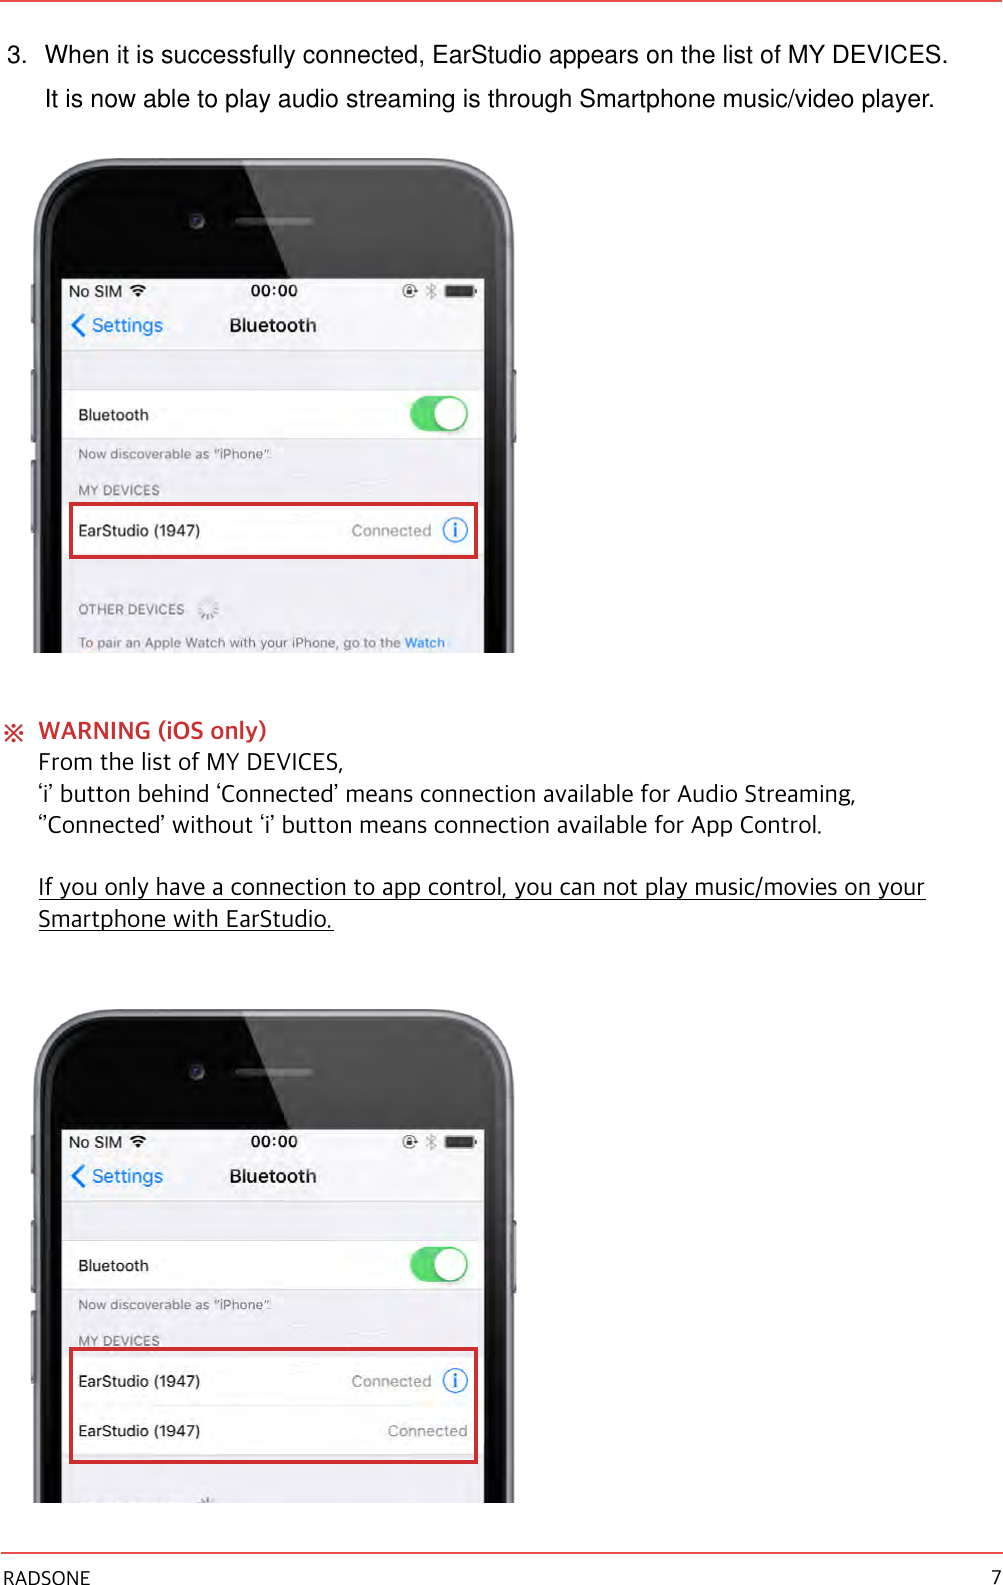
![[How to Connect] [Connecting Bluetooth] 1. Turn on EarStudio (Press Power button for 2 seconds ) 2. Once the power is turned on, It automatically enters into Pairing mode. GREEN LED blinks twice every 0.5 seconds during Pairing mode. Then, select EarStudio from the Settings from the Smartphone. (When EarStudio is already connected to the other Smartphone and when it is not in Paring mode, please press the Previous Track Button for over 2 seconds to enter into Pairing mode) RADSONE 6](https://usermanual.wiki/Radsone/ES100/User-Guide-3694132-Page-6.png)
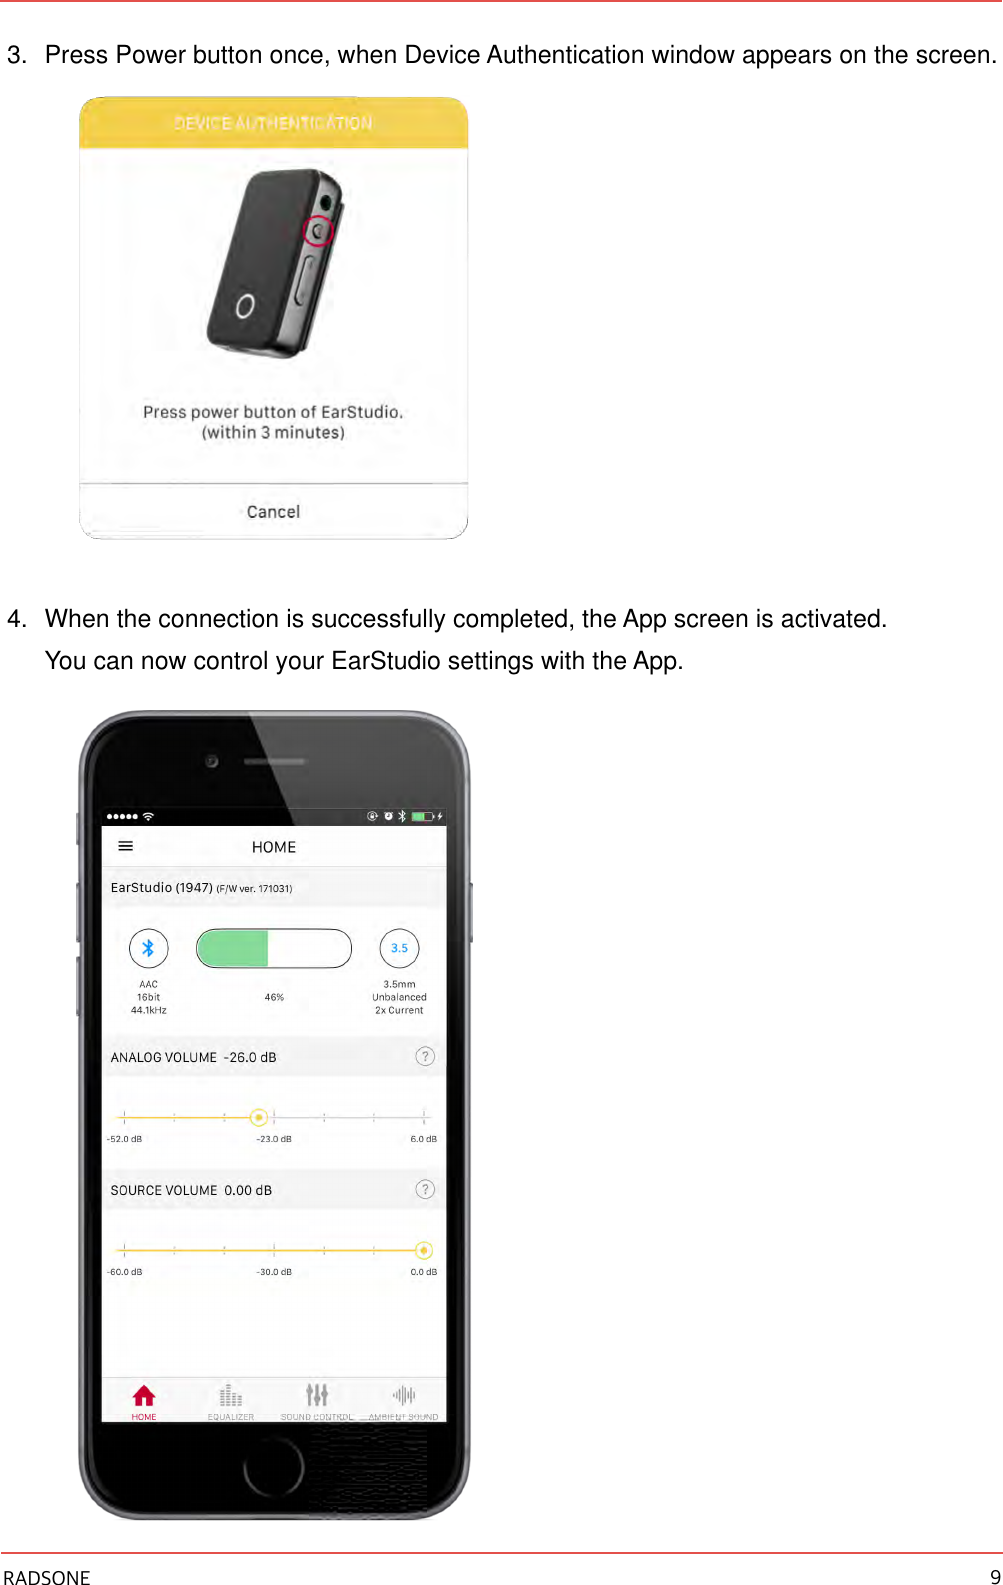
![[App Connection] 1. Menu button on the top left - DEVICE SEARCH 2. Select EarStudio from the list. RADSONE 8](https://usermanual.wiki/Radsone/ES100/User-Guide-3694132-Page-8.png)
![[App Features] [Home Tab] •HD Jitter Cleaner -HD Jitter Cleaner enhances the phase accuracy, removing the additional jitter caused by the inter clock mismatch between source and sink devices. -Able to set the values for Bluetooth playback and USB playback separately. -Cannot control while on a call. •USB Power Mode -EarStudio’s USB Power Mode can be set to Self-Powered Mode. Use it when USB Host requires Self-powered Mode when connecting to an iPhone using an Apple Camera Kit -When Battery is low, the Self-Powered mode is automatically released when the USB cable is connected. ※WARNING In Self-Powered mode, EarStudio will not charge even when the charger is connected, so you must manually set it to Normal Mode before charging. RADSONE 10HD Jitter CleanerUSB Power Mode](https://usermanual.wiki/Radsone/ES100/User-Guide-3694132-Page-10.png)
![[Equalizer Tab] •Equalizer -There are 12 basic Presets and 4 User Presets that can be set by the user. -To save the User Preset, move the slider to the desired value and press User Preset button for 3 seconds or more. -Cannot control while on a call. RADSONE 13](https://usermanual.wiki/Radsone/ES100/User-Guide-3694132-Page-13.png)
![[Sound Control Tab] •DCT -DCT eliminates subtle digital noise inherent in all digital sound sources and restores sound details to provide music with originally intended sound quality. The higher the level, the greater the DCT intensity. -Cannot control while on a call. •DAC Digital Filter -Able to set Digital filter of the built-in AK4375a DAC. Sharp Roll-off : Pre and post echoes make powerful sound. Slow Roll-off : Minimal echo reproduces original sound. Sharp Delay Sharp Roll-off : Post echo enhances bass sound. Slow Delay Sharp Roll-off : Minimal echo reproduces original sound. -Cannot control while on a call. RADSONE 14](https://usermanual.wiki/Radsone/ES100/User-Guide-3694132-Page-14.png)
![[Ambient Sound Tab] •Ambient Sound -In the Ambient mode, DSP mixes up streamed music over Bluetooth and ambient sound captured from the built-in microphone of EarStudio. Music Only : music only. ambient sound 0%. 50% : music (50%) + ambient sound (50%) Ambient Only : ambient sound only. music 0% -It can be useful when you are on a bicycle or to catch an announcement on the subway or so. -Cannot control while on a call. •Ambient Sound Microphone Volume -Able to adjust the volume of the Ambient Sound before the DSP mixer. The larger the volume, the louder the sound captured by the microphone. -Setting Preamp on increases the volume by 21dB. -Not the same as Microphone volume during a call. -Cannot control while on a call.!RADSONE 15](https://usermanual.wiki/Radsone/ES100/User-Guide-3694132-Page-15.png)
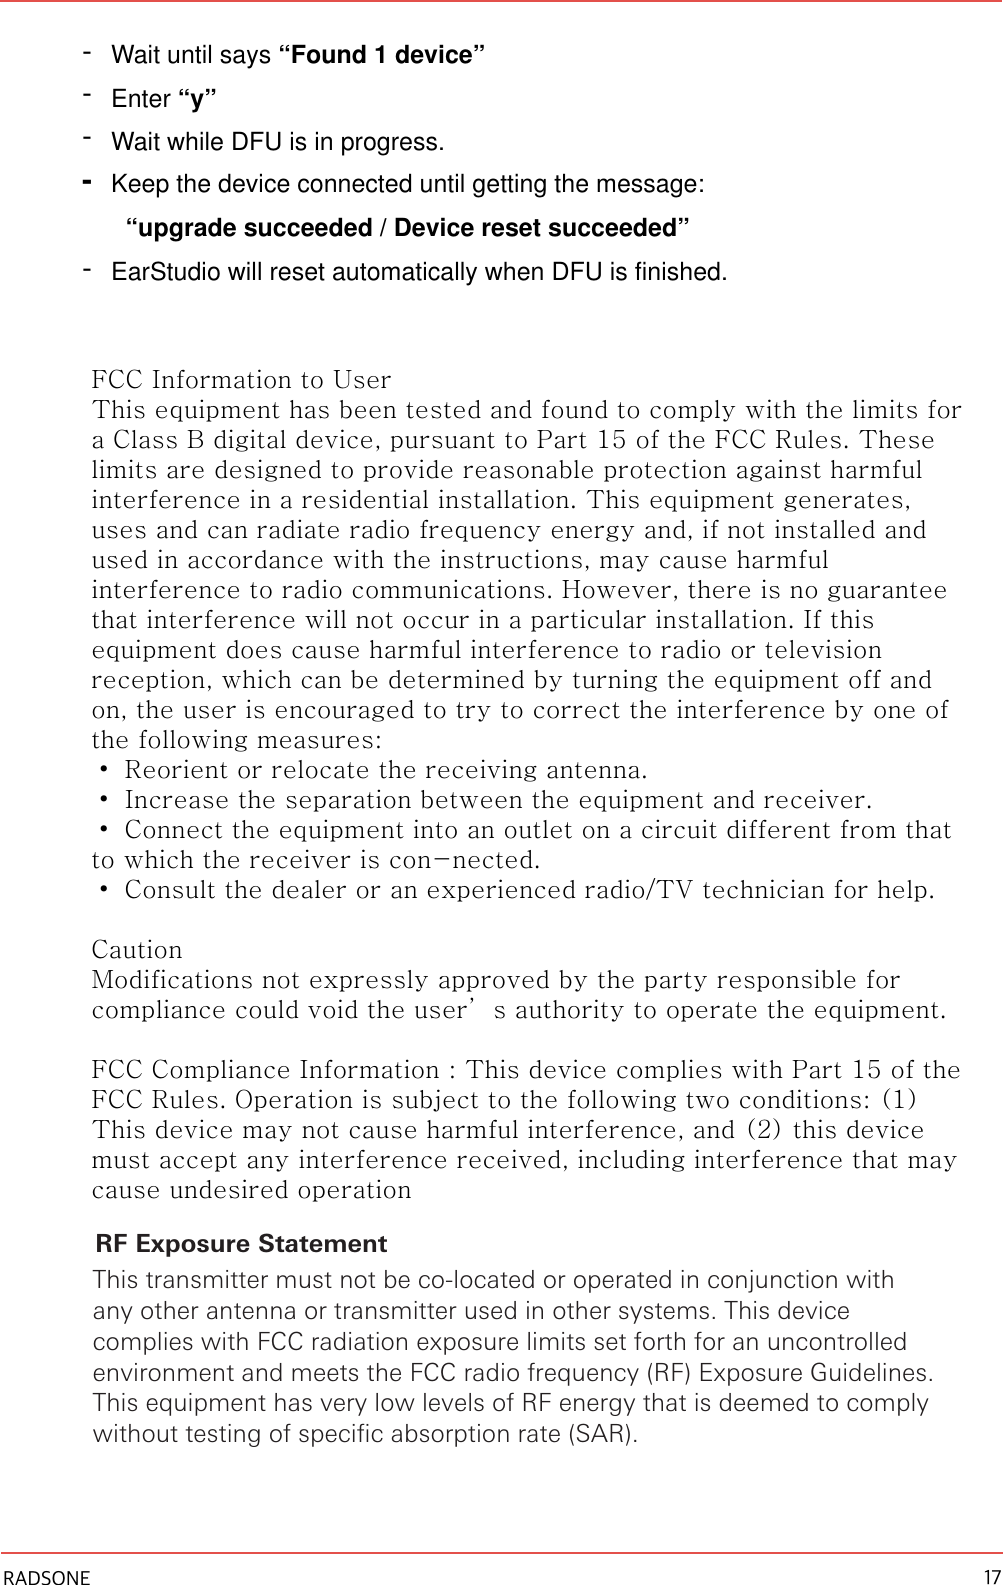
![[Device Firmware Upgrade] Entering DFU mode •While press-and-holding the Power Button, connect EarStudio to Windows PC through the USB data cable -LED will be off, if entered DFU mode successfully. Run batch file •Download and unzip the latest update archive for EarStudio -e.g.) EarStudio_20160622_Build_1.zip -When unzipped, you will see 5 files as below: EarStudio_Device_Firmware_Upgrade.bat EarStudio_Image.bin HidDfu.dll HidDfuCmd.exe readme.txt •Run EarStudio_Device_Firmware_Upgrade.bat RADSONE 16](https://usermanual.wiki/Radsone/ES100/User-Guide-3694132-Page-16.png)