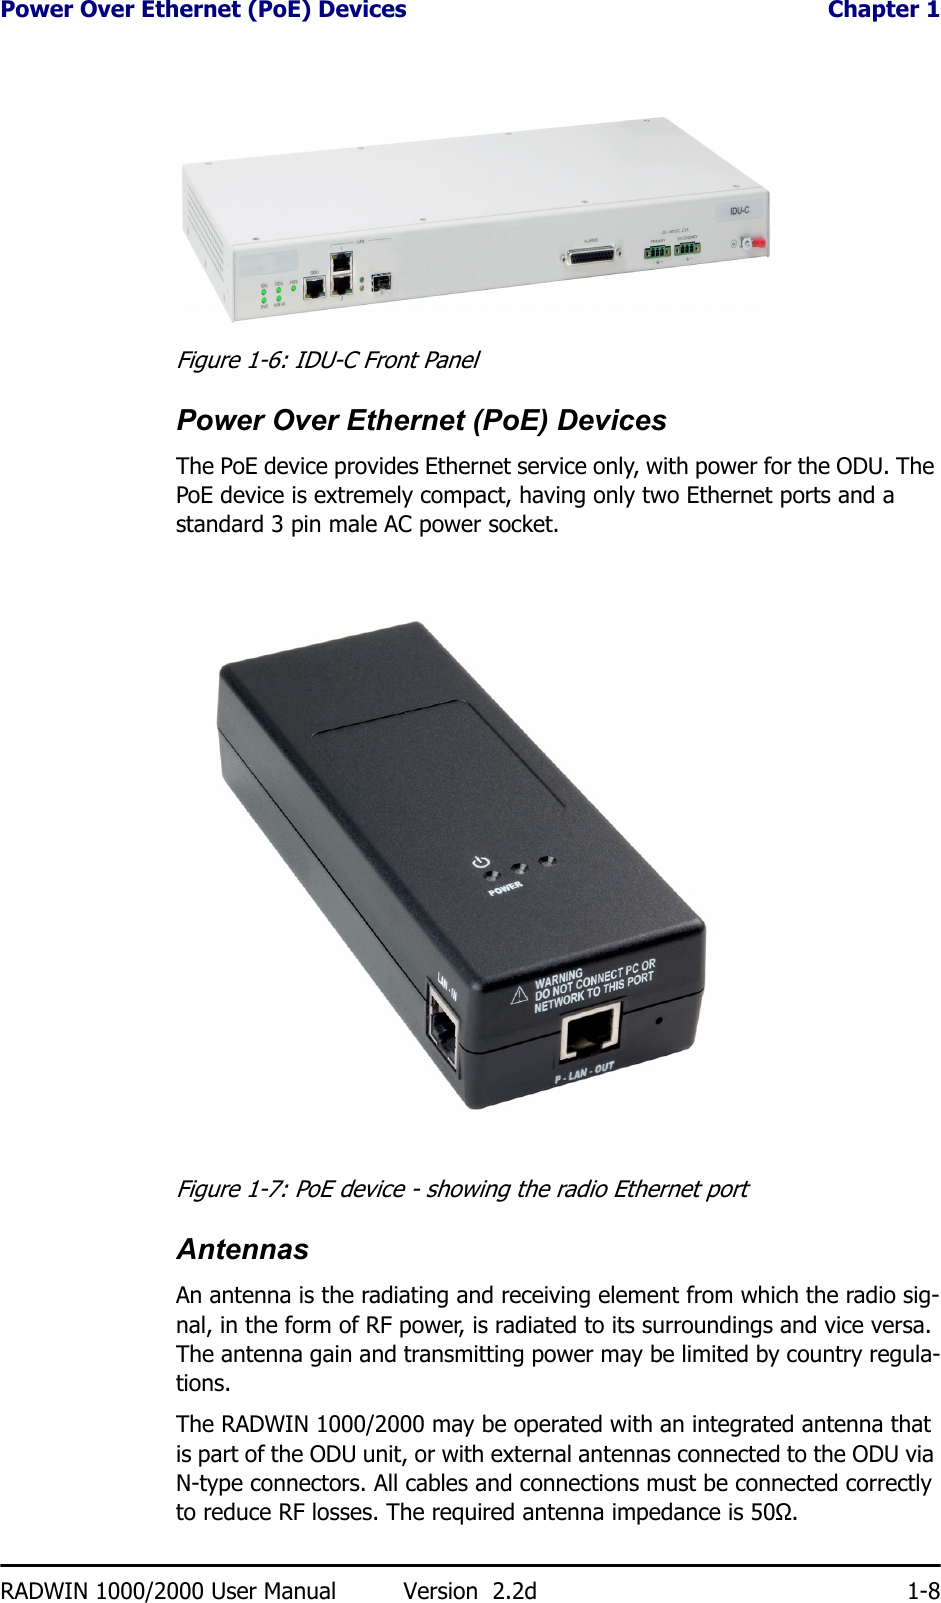
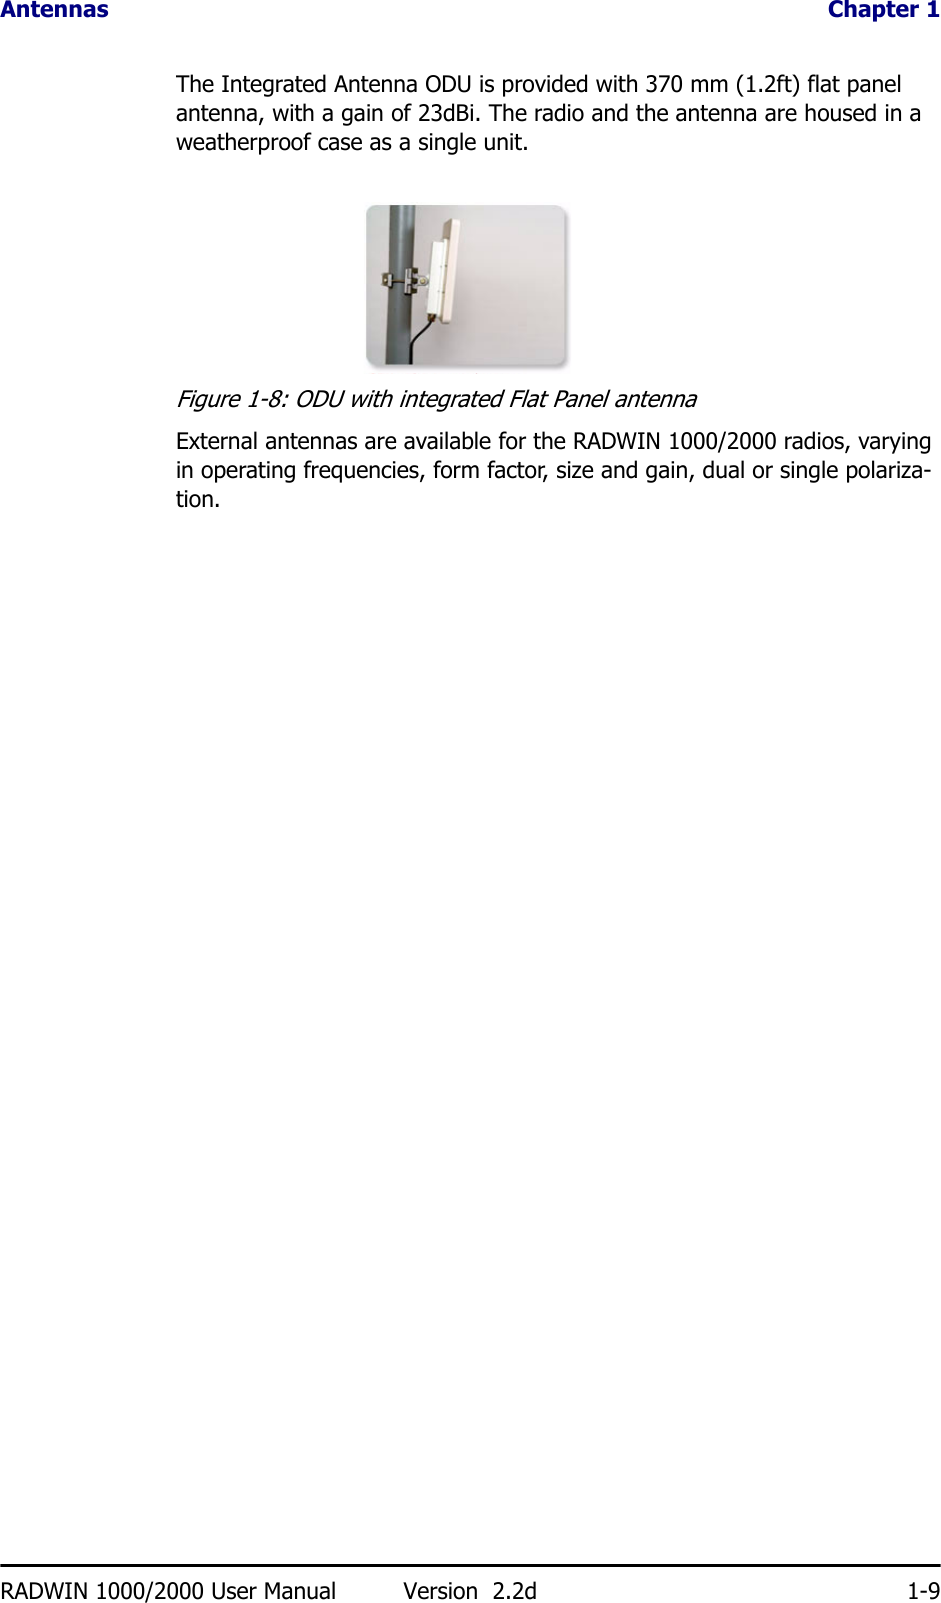
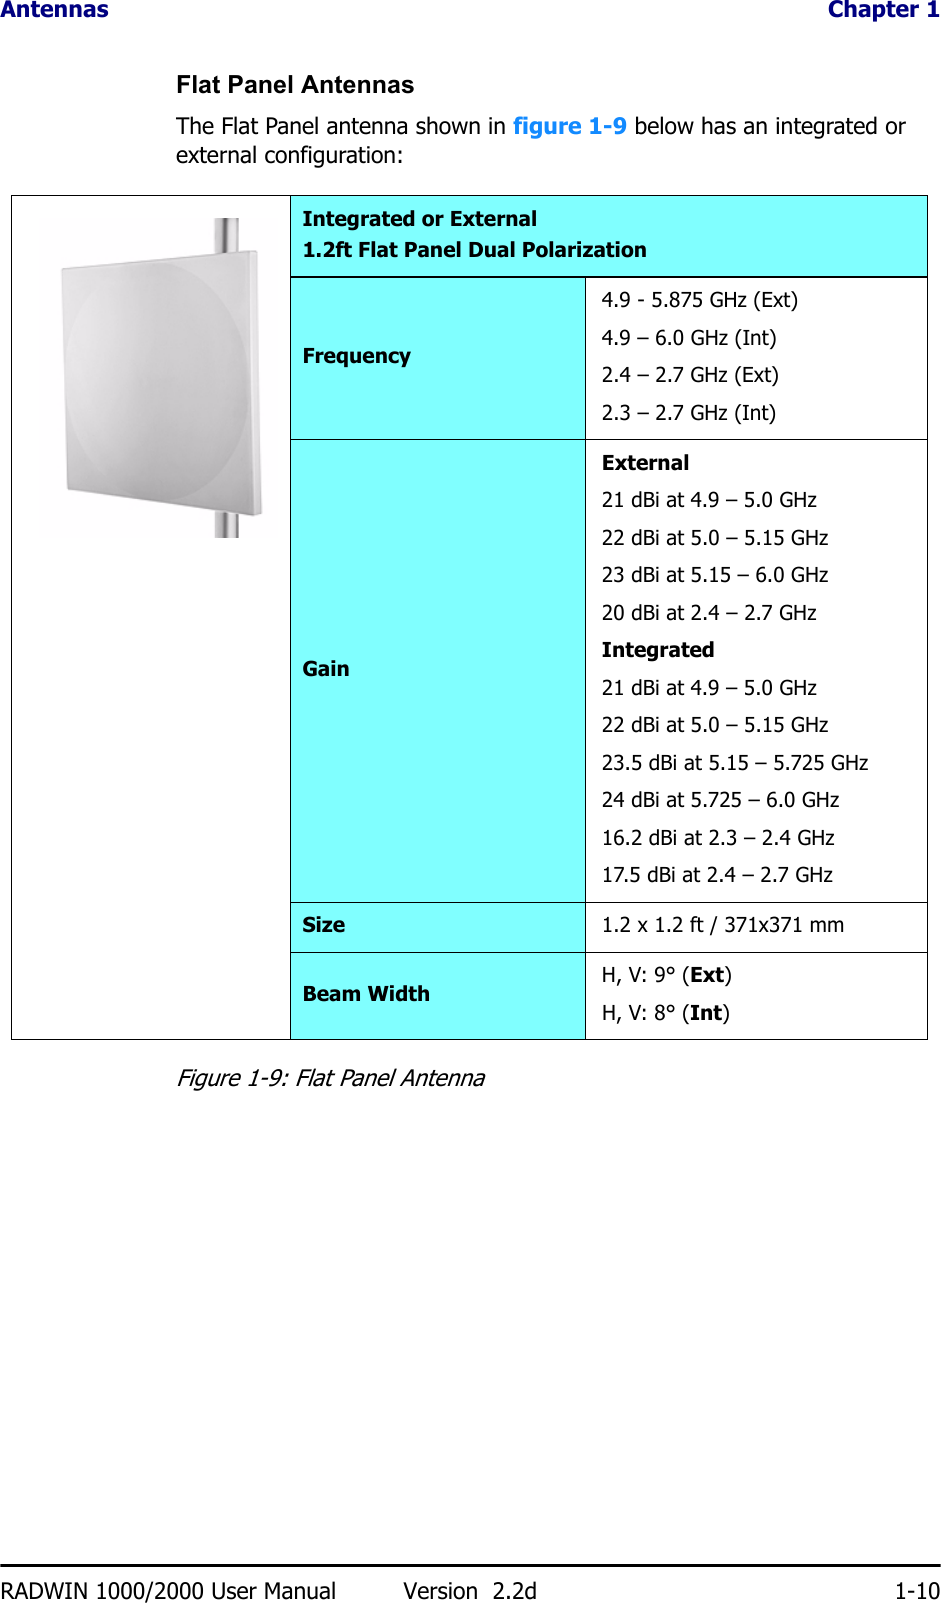
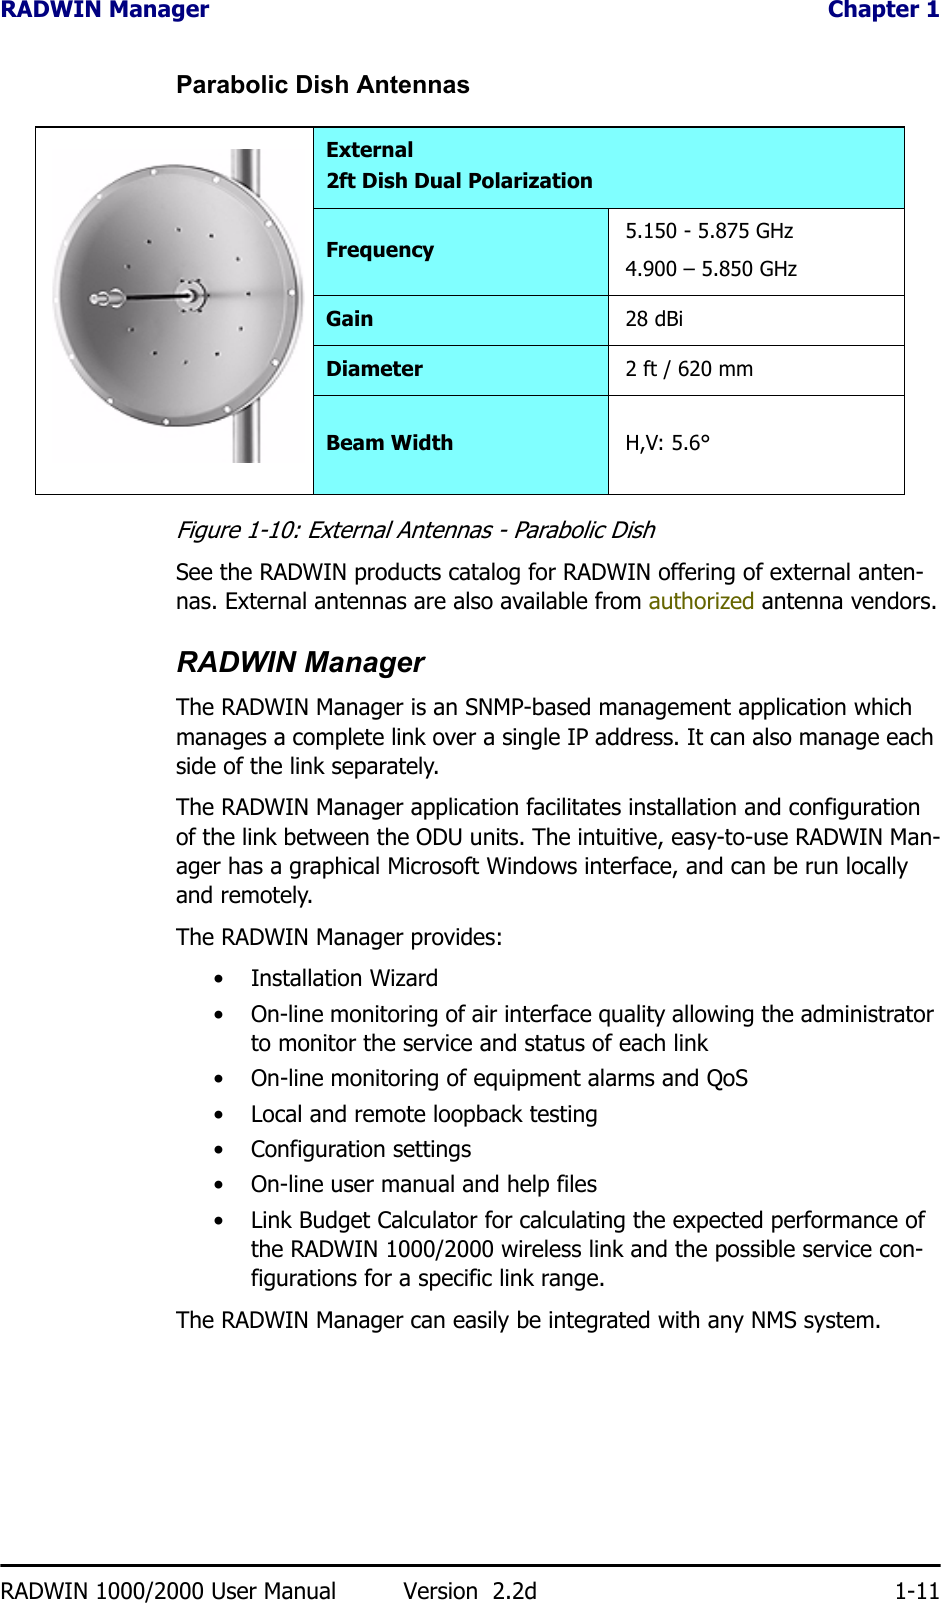
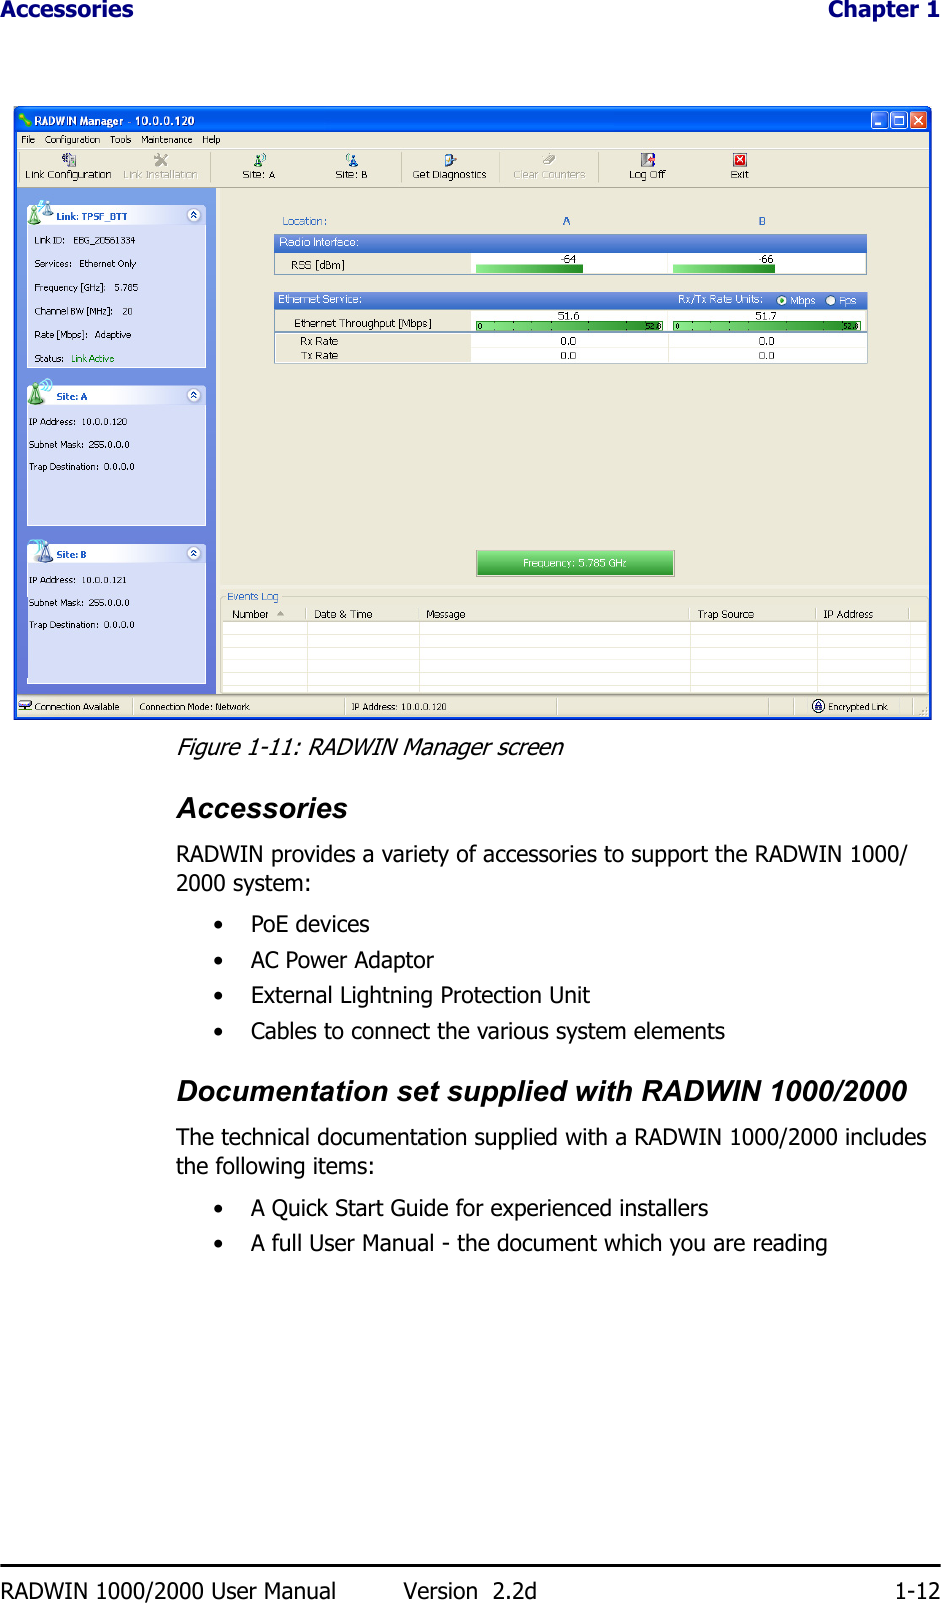
Radwin RW2024I Outdoor Radio Unit Operating in 2.4GHz band User Manual STW

Radwin Ltd. Outdoor Radio Unit Operating in 2.4GHz band STW

Users Manual

UM 2000-09/08.08RADWIN 1000/2000Broadband Wireless Transmission SystemUser ManualVersion 2.2d
RADWIN 1000/2000 User Manual Version  2.2d iRADWIN 1000/2000User ManualNoticeThis manual contains information that is proprietary to RADWIN Ltd. (RADWIN hereafter). No part of this publication may be reproduced in any form whatsoever without prior written approval by RADWIN.Right, title and interest, all information, copyrights, patents, know-how, trade secrets and other intellectual property or other proprietary rights relating to this manual and to the RADWIN products and any software components contained therein are proprietary products of RADWIN protected under international copyright law and shall be and remain solely with RADWIN.The RADWIN name is a registered trademark of RADWIN Ltd. No right, license, or interest to such trademark is granted hereunder, and you agree that no such right, license, or interest shall be asserted by you with respect to such trademark.You shall not copy, reverse compile or reverse assemble all or any portion of the User Manual or any other RADWIN documentation or products. You are prohibited from, and shall not, directly or indirectly, develop, market, distribute, license, or sell any product that supports substantially similar functionality based or derived in any way from RADWIN products.Your undertaking in this paragraph shall survive the termination of this Agreement.This Agreement is effective upon your opening of a RADWIN product package and shall continue until terminated. RADWIN may terminate this Agreement upon the breach by you of any term thereof. Upon such termination by RADWIN, you agree to return to RADWIN any RADWIN products and documentation and all copies and portions thereof.For further information contact RADWIN at the address below or contact your local distributor.DisclaimerThe parameters quoted in this document must be specifically confirmed in writing before they become applicable to any particular order or contract. RADWIN reserves the right to make alterations or amendments to the detail specification at its discretion. The publication of information in this document does not imply freedom from patent or other rights of RADWIN, or others.
RADWIN 1000/2000 User Manual Version  2.2d iiRADWIN Worldwide OfficesFor technical support contact: support@radwin.comFor technical support in India only, contact: support-india@radwnin.comFor sales support contact: sales@radwin.comWebsite: www.radwin.comCorporate Headquarters27 Habarzel StreetTel Aviv, 69710IsraelTel: +972 3 766 2917Support Headquarter27 Habarzel StreetTel Aviv, 69710IsraelTel: +972 3 766 2900Mobile: +972 54 766 0044RADWIN North America900 Corporate DriveMahwah, NJ 07430USATel (1): 1 800 444 7234 / 341Tel (2): +1 201 529 1100 / 341Latin America HeadquartersRua Grao Mogol 828Belo Horizonte, MG 30310-010BrazilTel (1): +55 31 919 76 402Tel (2): +972 54 758 6808India HeadquartersMohan Co-operative Industrial EstateE-13, B-1 ExtnNew Delhi, 110044IndiaTel: +91 11 4053 9180APAC Headquarters1 Jalan Kuala #13-01The Morningside, 239639Singapore Tel: +65 9878 3004Indonesia Sales OfficeJl. Jenderal Sudirman Kav. 86 Jakarta, 10220IndonesiaTel: +62 8138 570 0657Philippines Sales Office37A. A luna St. West Rembo Makati City, 1200 PhilippinesTel: +63 2882 6886Mobile: +63 91 789 23427China Sales OfficeAsian Games VillageHuiyuan Gongyu J1312Beijing 100101ChinaTel: +86 010 8498 0629
RADWIN 1000/2000 User Manual Version  2.2d iiiRegulatory ComplianceGeneral NoteThis system has achieved Type Approval in various countries around the world. This means that the system has been tested against various local technical regulations and found to comply. The frequency bands in which the system operates may be “unlicensed” and in these bands, the system can be used provided it does not cause interference.FCC - ComplianceThis equipment has been tested and found to comply with the limits for a Class B digital device, pursuant to Part 15 of the FCC Rules. These limits are designed to provide reasonable protection against harmful interference in a residential installation. This equipment generates, uses and can radiate radio frequency energy and, if not installed and used in accordance with the instructions, may cause harmful interference to radio communications. However, there is no guarantee that interference will not occur in a particular installation. If this equipment does cause harmful interference to radio or television reception, which can be determined by turning the equipment off and on, the user is encouraged to try to correct the interference by one or more of the following measures:• Reorient or relocate the receiving antenna.• Increase the separation between the equipment and receiver.• Connect the equipment into an outlet on a circuit different from that to which the receiver is connected.Consult the dealer or an experienced radio/TV technician for help.Changes or modifications to this equipment not expressly approved by the party responsible for compliance (RADWIN Ltd.) could void the user's authority to operate the equipment.WarningIt is the responsibility of the installer to ensure that when using the outdoor antenna kits in the United States (or where FCC rules apply), only those antennas certified with the product are used. The use of any antenna other than those certified with the product is expressly forbidden in accordance to FCC rules CFR47 part 15.204.CautionOutdoor units and antennas should be installed ONLY by experienced installation professionals who are familiar with local building and safety codes and, wherever applicable, are licensed by the appropriate government regulatory authorities. Failure to do so may void the product warranty and may expose the end user or the service provider to legal and financial liabilities. Resellers or distributors of this equipment are not liable for injury, damage or violation of regulations associated with the installation of outdoor units or antennas.WarningThe antenna used for this transmitter must be installed to provide a separation distance of at least 232 cm from all persons and must not be co-located or operated in conjunction with any other antenna or transmitter.
RADWIN 1000/2000 User Manual Version  2.2d ivIndoor Units comply with part 15 of the FCC rules. Operation is subject to the following two conditions:(1) These devices may not cause harmful interference.(2) These devices must accept any interference received, including interference that may cause undesired operation.Canadian Emission Requirements for Indoor UnitsThis Class B digital apparatus complies with Canadian ICES-003.Cet appareil numẻrique de la classe B est conforme ả la norme NMB-003 du Canada.Safety PracticesApplicable requirements of National Electrical Code (NEC), NFPA 70; and the National Electrical Safety Code, ANSI/IEEE C2, must be considered during installation.NOTES:1. A Primary Protector is not required to protect the exposed wiring as long as the exposed wiring length is limited to less than or equal to 140 feet, and instructions are provided to avoid exposure of wiring to accidental contact with lightning and power conductors in accordance with NEC Sections 725-54 (c) and 800-30.In all other cases, an appropriate Listed Primary Protector must be provided. Refer to Articles 800 and 810 of the NEC for details.2. For protection of ODU against direct lightning strikes, appropriate requirements of NFPA 780 should be considered in addition to NEC.3. For Canada, appropriate requirements of Section 60 of the CEC 22.1should be considered as applicable.WarningThis product was tested with special accessories - indoor unit (IDU or PoE), FTP Cat 5e shielded cable with sealing gasket, 12 AWG grounding cable - which must be used with the unit to insure compliance.
RADWIN 1000/2000 User Manual Version 2.2d vTable of ContentsNotice....................................................................................................................... iRADWIN Worldwide Offices.................................................................................... iiRegulatory Compliance.............................................................................................. iiiChapter 1 IntroductionWelcome! .............................................................................................................. 1-1Key Applications..................................................................................................... 1-2WiMAX and IP Backhaul ......................................................................................1-2Broadband Access ..............................................................................................1-2Private Networks ................................................................................................1-3Key Features of RADWIN 1000/2000 ....................................................................... 1-3RADWIN 1000/2000 Link ........................................................................................ 1-5The Radio Outdoor Unit (ODU) ............................................................................1-5The Indoor Unit (IDU).........................................................................................1-7Power Over Ethernet (PoE) Devices .....................................................................1-8Antennas ...........................................................................................................1-8Flat Panel Antennas................................................................................................... 1-10Parabolic Dish Antennas ............................................................................................ 1-11RADWIN Manager.............................................................................................1-11Accessories ......................................................................................................1-12Documentation set supplied with RADWIN 1000/2000.........................................1-12How to Use this Manual ........................................................................................ 1-13A Little Terminology ............................................................................................. 1-13Conventions Used in this Manual ........................................................................... 1-15Notifications .....................................................................................................1-15Typographical conventions ................................................................................1-15General .................................................................................................................... 1-15Software................................................................................................................... 1-15Windows Terminology.......................................................................................1-16Chapter 2 Site PreparationPlanning the Link Site ............................................................................................. 2-1Overview ...........................................................................................................2-1The Site Survey...................................................................................................... 2-1Introduction .......................................................................................................2-1Recommended Equipment...................................................................................2-1Stage 1: Preliminary Survey .................................................................................... 2-2Stage 2: Physical Survey......................................................................................... 2-3Additional Outdoor Site Requirements ..................................................................2-4Additional Indoor Site Requirements ....................................................................2-4Stage 3: RF Survey................................................................................................. 2-4Chapter 3 Hardware InstallationSafety Practices...................................................................................................... 3-1Preventing overexposure to RF energy .................................................................3-1Grounding..........................................................................................................3-1Protection against Lightning ................................................................................3-2General..............................................................................................................3-2Package Contents................................................................................................... 3-2ODU Package Contents .......................................................................................3-2IDU Package Contents ........................................................................................3-4External Antenna Package Contents .....................................................................3-5Additional Tools and Materials Required ................................................................... 3-5Tools and Materials.............................................................................................3-5Cables and connectors ........................................................................................3-5Hardware Installation Sequence .............................................................................. 3-5Outdoor installation ................................................................................................ 3-6Mounting the ODU ..............................................................................................3-6Mounting external antennas ................................................................................3-7Mounting the Lightning Protection Devices ...........................................................3-7
RADWIN 1000/2000 User Manual Version 2.2d viOutdoor Connections ..........................................................................................3-8Indoor Installation.................................................................................................. 3-8Mounting the IDUs..............................................................................................3-8Connecting power to the IDU ............................................................................3-11Connecting the ODU to the IDU.........................................................................3-11Installing a Link using PoE Devices.....................................................................3-11Connecting User Equipment...............................................................................3-12Connecting and Aligning ODUs / Antennas ............................................................. 3-12Chapter 4 Link Installation: The RADWIN ManagerInstalling theRADWIN Manager Application .............................................................. 4-1Minimum System Requirements...........................................................................4-1Installing the Software ........................................................................................4-1Starting the RADWIN Manager ................................................................................ 4-2Login Errors ........................................................................................................... 4-5Unsupported Device............................................................................................4-5Incorrect IP Address ...........................................................................................4-6Incorrect Password .............................................................................................4-6Continuing without an IP Address............................................................................ 4-6Changing the Log On Password ...........................................................................4-7Installing the Link: First steps.................................................................................. 4-7Default Settings..................................................................................................4-9Front Panel LEDs on the IDU-C............................................................................4-9Installation Menu and Toolbar Functionality........................................................4-10Installing the Link: Overview ................................................................................. 4-13Installing the Link: Step 1, Start the Wizard ........................................................... 4-14Installing the Link: Step 2, System Parameters ....................................................... 4-14Changing the Link Password..............................................................................4-16Installing the Link: Step 3, Channel Settings........................................................... 4-17Installing the Link: Step 4, Tx Power and Antenna Settings ..................................... 4-19General............................................................................................................4-20Dual Antennas at Both Sites ..............................................................................4-20Single Antennas at Both Sites ............................................................................4-21Single and Dual Antennas..................................................................................4-21Considerations for Changing Antenna Parameters ...............................................4-22Installing the Link: Step 5, Services ....................................................................... 4-25Installing the Link: Step 6, Installation Summary and Exit ....................................... 4-26Chapter 5 Configuring the LinkLink Configuration: Getting Started.......................................................................... 5-1The Main Window of the RADWIN Manager..........................................................5-1The RADWIN Manager Toolbar ............................................................................5-2The RADWIN Manager Main Menu .......................................................................5-3Elements of the RADWIN Manager Main Window ..................................................5-6Configuring the Link: Overview.............................................................................. 5-10Configuring the Link: Step 1, Start the Wizard ........................................................ 5-11Configuring the Link: Step 2, System Parameters.................................................... 5-11Configuring the Link: Step 3, Channel Settings ....................................................... 5-12Configuring the Link: Step 4, Tx Power and Antenna Settings.................................. 5-18Configuring the Link: Step 5, Services.................................................................... 5-20Configuring the Link: Step 6, Configuration Summary and Exit................................. 5-21Chapter 6 Site ConfigurationConfiguring the Site................................................................................................ 6-1Editing the Configuration Parameters by Site ........................................................6-1Functions on the left of the dialog box:......................................................................... 6-2Functions at the top of the dialog box:.......................................................................... 6-2Viewing Air Interface Details ................................................................................... 6-3Changing the Transmit Power ................................................................................. 6-4Site Management: IP Address and VLAN .................................................................. 6-4Configuring the ODU Address ..............................................................................6-4Configuring VLAN Settings...................................................................................6-5
RADWIN 1000/2000 User Manual Version 2.2d viiLost or forgotten VLAN ID............................................................................................ 6-7Setting the Date and Time ...................................................................................... 6-7Ethernet Properties................................................................................................. 6-9Configuring the Bridge ........................................................................................6-9ODU Mode................................................................................................................ 6-10IDU Aging time ......................................................................................................... 6-10Configuring Ethernet Ports Mode .......................................................................6-11Setting the Maximum Information Rate ..............................................................6-12Displaying the Inventory ....................................................................................... 6-12Security Features ................................................................................................. 6-13Changing the Link Password..............................................................................6-14RADWIN Manager Community Strings ................................................................6-14Editing Community Strings......................................................................................... 6-15Forgotten Community string....................................................................................... 6-16Muting the alignment tone .................................................................................... 6-17Setting External Alarm Inputs................................................................................ 6-17Managing Configuration Files................................................................................. 6-18Backup Configuration to a File ...........................................................................6-18Restoring a Configuration File............................................................................6-19Resetting .........................................................................................................6-19Configuration with Telnet...................................................................................... 6-20Chapter 7 Monitoring and DiagnosticsRetrieving Link Information (Get Diagnostics)........................................................... 7-1Link Compatibility................................................................................................... 7-3Reinstalling and Realigning a Link............................................................................ 7-3The Link Budget Calculator ..................................................................................... 7-4Performance Monitoring.......................................................................................... 7-4The Monitor Log .................................................................................................7-4Saving the Monitor Log................................................................................................ 7-4Viewing Performance Reports....................................................................................... 7-5Performance Monitoring Report Toolbar........................................................................ 7-9Setting Air Interface Thresholds ................................................................................... 7-9The Events Log ................................................................................................7-10RADWIN Manager Traps ...................................................................................7-11Setting the Events Preferences................................................................................... 7-12Saving the Events Log ............................................................................................... 7-13Reverting Alarm Messages ......................................................................................... 7-14Active Alarms............................................................................................................ 7-14Remote Power Fail Indication..................................................................................... 7-15Troubleshooting ................................................................................................... 7-16Replacing an ODU ................................................................................................ 7-16Restoring Factory Setup........................................................................................ 7-17Online Help.......................................................................................................... 7-17Customer Support ................................................................................................ 7-17Appendix A Technical SpecificationsConfiguration ........................................................................................................  A-1Radio ...................................................................................................................  A-1Ethernet Interface .................................................................................................  A-3Management.........................................................................................................  A-3Mechanical............................................................................................................  A-3Power...................................................................................................................  A-4Environmental.......................................................................................................  A-4Safety...................................................................................................................  A-4EMC .....................................................................................................................  A-4Air Interface..........................................................................................................  A-4Appendix B Wiring SpecificationsODU-IDU Cable .....................................................................................................  B-1 User Port Connectors............................................................................................  B-1LAN Port ........................................................................................................... B-1IDU-C Alarm Connector...................................................................................... B-3
RADWIN 1000/2000 User Manual Version 2.2d viiiAppendix C Pole and Wall InstallationODU Mounting Kit Contents....................................................................................  C-1Mounting RADWIN 1000/2000 on a pole .................................................................  C-2Mounting RADWIN 1000/2000 on a Wall.................................................................  C-3Mounting an External Antenna ...............................................................................  C-3Appendix D Link Budget CalculatorOverview ..............................................................................................................  D-1User Input ........................................................................................................ D-1Link Budget Calculator Internal Data ................................................................... D-1Calculations ..........................................................................................................  D-2EIRP ................................................................................................................. D-2Expected RSS and Fade Margin........................................................................... D-2Min and Max Range ........................................................................................... D-2Service.............................................................................................................. D-2Availability ........................................................................................................ D-2Antenna Height ................................................................................................. D-3Running the Link Budget Calculator ........................................................................  D-3About the Fresnel Zone........................................................................................  D-13Appendix E Lightning Protection and Grounding GuidelinesGrounding for Antenna Cable .................................................................................. E-1Grounding for Indoor/Outdoor Units ........................................................................ E-2ODU Grounding ..................................................................................................E-2IDU Grounding ...................................................................................................E-2External Lightning Surge Suppressors and Grounding................................................ E-3Internal ESD Protection circuits ............................................................................... E-7Appendix F MIB ReferenceIntroduction........................................................................................................... F-1About the MIB....................................................................................................F-1Terminology.......................................................................................................F-1Interface API ......................................................................................................... F-1Control Method...................................................................................................F-1Community String...............................................................................................F-2Private MIB Structure ............................................................................................. F-2MIB Parameters ..................................................................................................... F-4Supported Variables from the RFC 1213 MIB ........................................................F-4MIB Parameters..................................................................................................F-5MIB Traps............................................................................................................ F-18General............................................................................................................F-18Trap parameters...............................................................................................F-18RADWIN Manager Traps ...................................................................................F-21Appendix G External Alarms SpecificationExternal Alarms Specification..................................................................................  G-1Appendix H Combo Configuration ToolWhat is the Combo Configuration Tool? ..................................................................  H-1Who may use the Combo Configuration Tool ...........................................................  H-1Caveat to the use of the Combo Configuration Tool .................................................  H-1Prerequisites to using the Combo Configuration Tool................................................  H-2Operating the Combo Configuration Tool.................................................................  H-2Before using the Combo Configuration Tool.............................................................  H-2Using the Combo Configuration Tool.......................................................................  H-2If you receive an error message .............................................................................  H-6Appendix I Regional Notice: French CanadianProcédures de sécurité............................................................................................  I-1Généralités......................................................................................................... I-1Mise à la terre .................................................................................................... I-1Protection contre la foudre .................................................................................. I-2Précautions de sécurité pendant le montage de ODU ............................................ I-2Connecter la terre à IDU-C .................................................................................. I-3
RADWIN 1000/2000 User Manual Version 2.2d ixInstallation sur pylône et mur..................................................................................  I-4Contenu du kit de montage ODU ......................................................................... I-4Montage sur un pylône ....................................................................................... I-5Montage sur un mur ........................................................................................... I-6Montage d'une antenne externe........................................................................... I-7Contenu du kit de montage d'une antenne externe ............................................... I-7Index
RADWIN 1000/2000 User Manual Version  2.2d xList of FiguresFIGURE 1-1 TYPICAL WIMAX AND IP BACKHAUL APPLICATION ....................................................1-2FIGURE 1-2 TYPICAL BROADBAND ACCESS APPLICATION ...........................................................1-2FIGURE 1-3 PRIVATE NETWORK..........................................................................................1-3FIGURE 1-4 EXAMPLE OF LINK ARCHITECTURE - SYSTEM COMPONENTS ........................................1-5FIGURE 1-5 ODU FORM FACTORS.......................................................................................1-6FIGURE 1-6 IDU-C FRONT PANEL.......................................................................................1-8FIGURE 1-7 POE DEVICE - SHOWING THE RADIO ETHERNET PORT ...............................................1-8FIGURE 1-8 ODU WITH INTEGRATED FLAT PANEL ANTENNA ......................................................1-9FIGURE 1-9 FLAT PANEL ANTENNA ....................................................................................1-10FIGURE 1-10 EXTERNAL ANTENNAS - PARABOLIC DISH...........................................................1-11FIGURE 1-11 RADWIN MANAGER SCREEN..........................................................................1-12FIGURE 1-12 SITE CONFIGURATION WINDOW WITH OPEN MANAGEMENT PANEL............................1-17FIGURE 3-1 ODU MOUNTING KIT .......................................................................................3-3FIGURE 3-2 CONNECTORIZED ODU - FRONT AND REAR VIEWS...................................................3-3FIGURE 3-3 INTEGRATED ODU - FRONT AND REAR VIEWS ........................................................3-4FIGURE 3-4 IDU-C PACKAGE CONTENTS - THE IDU-C .............................................................3-4FIGURE 3-5 IDU-C PACKAGE CONTENTS - THE MOUNTING KIT AND DC POWER PLUGS .....................3-4FIGURE 3-6 TYPICAL INSTALLATION DIAGRAM (WITH EXTERNAL ANTENNA)....................................3-6FIGURE 3-7 IDU-C FRONT PANEL .......................................................................................3-8FIGURE 3-8 IDU-C - A PERSPECTIVE VIEW ...........................................................................3-9FIGURE 3-9 IDU-C LEDS...............................................................................................3-10FIGURE 3-10 DU-C OWER CONNECTORS.............................................................................3-11FIGURE 3-11 BEEP SEQUENCE FOR ANTENNA ALIGNMENT ........................................................3-13FIGURE 4-1 LAN PORTS ON THE FRONT PANEL OF THE IDU-C ...................................................4-2FIGURE 4-2 PINGING AN UNINSTALLED AND UNCONFIGURED LINK................................................4-3FIGURE 4-3 LOGIN SCREEN ...............................................................................................4-3FIGURE 4-4 LOGIN SCREEN WITH COMMUNITY OPTIONS VISIBLE.................................................4-5FIGURE 4-5 UNSUPPORTED DEVICE MESSAGE .........................................................................4-5FIGURE 4-6 UNREACHABLE DEVICE MESSAGE ..........................................................................4-6FIGURE 4-7 OPENING RADWIN MANAGER WINDOW PRIOR TO INSTALLATION ...............................4-8FIGURE 4-8 IDU-C FRONT PANEL LEDS............................................................................4-10FIGURE 4-9 LINK INSTALLATION WIZARD............................................................................4-14FIGURE 4-10 : INSTALLATION WIZARD, SYSTEM DIALOG BOX ..................................................4-15FIGURE 4-11 CHANGE LINK PASSWORD DIALOG BOX..............................................................4-16FIGURE 4-12 LOST OR FORGOTTEN LINK PASSWORD RECOVERY................................................4-17FIGURE 4-13 CHANNEL SETTINGS - AUTOMATIC CHANNEL SELECTION........................................4-18FIGURE 4-14 CHANNEL SETTINGS - SHOWING AVAILABLE INSTALLATION RATES ............................4-19FIGURE 4-15 TRANSMISSION POWER AND ANTENNA PARAMETERS.............................................4-20FIGURE 4-16  ANTENNA CONFIGURATION DIALOG WITH OPENED TYPE SELECTION .........................4-23FIGURE 4-17 ANTENNA PARAMETERS CHANGE WARNING..........................................................4-24FIGURE 4-18 TX POWER LIMITS .......................................................................................4-24FIGURE 4-19 SERVICES AND RATES DIALOG.........................................................................4-25FIGURE 4-20 INSTALLATION WIZARD EXIT SUMMARY ............................................................4-26FIGURE 4-21 MAIN WINDOW OF THE MANAGER AFTER INSTALLATION.........................................4-27FIGURE 5-1  MAIN WINDOW, WIRELESS LINK IS ACTIVE ..........................................................5-2FIGURE 5-2 ETHERNET BANDWIDTH INDICATION ....................................................................5-8FIGURE 5-3 LINK CONFIGURATION WIZARD.........................................................................5-11FIGURE 5-4 CONFIGURATION WIZARD, SYSTEM DIALOG BOX....................................................5-12FIGURE 5-5 CHANNEL SETTINGS DIALOG BOX - AUTOMATIC CHANNEL SELECTION .........................5-13FIGURE 5-6 SEARCHING FOR THE BEST OPERATING CHANNEL ...................................................5-14FIGURE 5-7 CHANNEL SETTINGS WITHOUT AUTOMATIC CHANNEL SELECTION................................5-15FIGURE 5-8 CHANNEL FREQUENCY OPTIONS .........................................................................5-16FIGURE 5-9 CHOOSING AN “OTHER” OPERATING CHANNEL FREQUENCY ......................................5-17FIGURE 5-10 TRANSMISSION POWER AND ANTENNA PARAMETERS.............................................5-18FIGURE 5-11  ANTENNA CONFIGURATION DIALOG WITH OPENED TYPE SELECTION .........................5-19FIGURE 5-12 SERVICES AND RATES DIALOG.........................................................................5-20FIGURE 5-13 CONFIGURATION WIZARD EXIT SUMMARY..........................................................5-21
RADWIN 1000/2000 User Manual Version  2.2d xiFIGURE 5-14 MAIN WINDOW OF THE MANAGER AFTER CONFIGURATION ......................................5-22FIGURE 6-1 CONFIGURATION DIALOG BOX ............................................................................6-2FIGURE 6-2 AIR INTERFACE DETAILS....................................................................................6-3FIGURE 6-3 CHANGING THE TRANSMIT POWER.......................................................................6-4FIGURE 6-4 MANAGEMENT ADDRESSES - SITE CONFIGURATION DIALOG BOX..................................6-5FIGURE 6-5 CONFIGURING MANAGEMENT TRAFFIC VLAN SETTINGS .............................................6-6FIGURE 6-6 DATE AND TIME CONFIGURATION........................................................................6-8FIGURE 6-7 CHANGE DATE AND TIME ..................................................................................6-8FIGURE 6-8 DATE AND TIME CONFIGURED FROM AN NTP SERVER...............................................6-9FIGURE 6-9 BRIDGE CONFIGURATION - SITE CONFIGURATION DIALOG BOX .................................6-10FIGURE 6-10 INVENTORY SCREEN .....................................................................................6-13FIGURE 6-11 AVAILABLE SECURITY FEATURES.......................................................................6-14FIGURE 6-12 CHANGING THE COMMUNITY STRING ................................................................6-16FIGURE 6-13 ALTERNATIVE COMMUNITY DIALOG BOX ............................................................6-17FIGURE 6-14 EXTERNAL ALARM CONFIGURATION ..................................................................6-18FIGURE 6-15 TELNET MANAGEMENT SCREEN .......................................................................6-22FIGURE 7-1 GET DIAGNOSTICS DIALOG BOX .........................................................................7-2FIGURE 7-2 PREFERENCES DIALOG BOX.................................................................................7-5FIGURE 7-3 BASIC PERFORMANCE MONITORING REPORT ..........................................................7-6FIGURE 7-4 A TYPICAL PERFORMANCE MONITORING REPORT .....................................................7-6FIGURE 7-5 THRESHOLD CONFIGURATION DIALOG BOX .............................................................7-9FIGURE 7-6 EVENTS LOG DISPLAY.....................................................................................7-10FIGURE 7-7 PREFERENCES DIALOG BOX...............................................................................7-13FIGURE 7-8 ACTIVE ALARMS SUMMARY ..............................................................................7-15FIGURE 7-9 ONLINE HELP FOR RADWIN 1000/2000...........................................................7-17FIGURE B-1 EXAMPLE FOR CONNECTING THE ALARM CONNECTOR................................................ B-4FIGURE C-4 MOUNTING ON A POLE..................................................................................... C-2FIGURE C-5 MOUNTING ON A WALL ................................................................................... C-3FIGURE D-1 ACCESSING THE LINK BUDGET CALCULATOR ......................................................... D-4FIGURE D-2 LINK BUDGET SCREEN..................................................................................... D-5FIGURE D-3 PRODUCT SELECTOR ....................................................................................... D-7FIGURE D-4 RATE SELECTOR............................................................................................. D-8FIGURE D-5  CALCULATION OF DISTANCE FROM SITE COORDINATES............................................ D-9FIGURE D-6 CLIMACTIC C FACTORS.................................................................................. D-10FIGURE D-7 CLIMACTIC C FACTOR DESCRIPTION ................................................................. D-11FIGURE D-8 WORLD MAP SHOWING C FACTOR CONTOURS ..................................................... D-12FIGURE D-9 FRESNEL ZONE ............................................................................................ D-13FIGURE E-1 GROUNDING ANTENNA CABLES ............................................................................E-2FIGURE E-2 GROUNDING A TYPICAL POLE INSTALLATION ...........................................................E-3FIGURE E-3 GROUNDING A TYPICAL WALL INSTALLATION...........................................................E-4FIGURE E-4 ODU SURGE SUPPRESSOR AND GROUNDING ..........................................................E-4FIGURE E-5 TRANSTECTOR’S SURGE SUPPRESSOR ...................................................................E-5FIGURE E-6 SURGE SUPPRESSOR AND GROUNDING AT BUILDING ENTRY POINT................................E-7FIGURE F-1 TOP LEVEL SECTIONS OF THE PRIVATE MIB...........................................................F-3FIGURE I-4 MONTAGE SUR UN PYLÔNE ................................................................................. I-5FIGURE I-5 MONTAGE SUR UN MUR ..................................................................................... I-6
RADWIN 1000/2000 User Manual Version 2.2d xiiList of TablesTABLE 1-1 AVAILABLE ODU PRODUCTS - RELEASE 2.2D..........................................................1-7TABLE 1-2 RELEASE 2.1 IDU-C PRODUCTS...........................................................................1-7TABLE 3-1 COMPONENTS OF AN IDU-C FRONT PANEL ..............................................................3-9TABLE 3-2 IDU-C FRONT PANEL LEDS..............................................................................3-10TABLE 4-1 PC REQUIREMENTS FOR THE RADWIN MANAGER APPLICATION...................................4-1TABLE 4-2 RADWIN MANAGER: OFFLINE FUNCTIONALITY........................................................4-7TABLE 4-3 DEFAULT SETTINGS ...........................................................................................4-9TABLE 4-4 FRONT PANEL LEDS........................................................................................4-10TABLE 4-5 RADWIN MANAGER MAIN MENU FUNCTIONALITY ...................................................4-11TABLE 4-6  RADWIN MANAGER TOOLBAR..........................................................................4-12TABLE 4-7 LINK INSTALLATION WIZARD .............................................................................4-13TABLE 4-8 RADWIN 1000/2000 TRANSMISSION RATES .......................................................4-22TABLE 5-1  RADWIN MANAGER TOOLBAR............................................................................5-3TABLE 5-2 RADWIN MANAGER MAIN MENU FUNCTIONALITY .....................................................5-4TABLE 5-3 LINK DETAILS ..................................................................................................5-6TABLE 5-4 LINK SITE DETAILS, SITE A AND SITE B .................................................................5-7TABLE 5-5 STATUS BAR INDICATORS....................................................................................5-9TABLE 5-6 LINK CONFIGURATION WIZARD ..........................................................................5-10TABLE 6-1 ODU MODE CONFIGURATION FOR COMMON ...........................................................6-11TABLE 6-2 TELNET COMMANDS ........................................................................................6-20TABLE 7-1 GET DIAGNOSTICS DATA AND DESCRIPTION ............................................................7-2TABLE 7-2 LINK COMPATIBILITY TRAP MESSAGES ...................................................................7-3TABLE 7-3 EXPLANATION OF PERFORMANCE DATA....................................................................7-8TABLE 7-4 ACTION OF THE TOOLBAR BUTTONS.......................................................................7-9TABLE 7-5 RADWIN MANAGER TRAP MESSAGES..................................................................7-11TABLE 7-6 ACTIVE ALARMS COMMAND BUTTONS ...................................................................7-15TABLE 7-7 LED FAULT INDICATORS ...................................................................................7-16TABLE 7-8 TROUBLESHOOTING .........................................................................................7-16TABLE B-1 ODU-IDU CONNECTOR PINOUT.......................................................................... B-1TABLE B-2 FAST ETHERNET CONNECTOR PINOUT................................................................... B-2TABLE B-3 IDU-C ALARM CONNECTOR (DRY-CONTACT) ......................................................... B-3TABLE B-4 TERMINAL BLOCK 3-PIN -48VDC ........................................................................ B-4TABLE C-1 BILL OF MATERIALS: ODU MOUNTING KIT............................................................. C-1TABLE F-1 SUPPORTED RFC 1213 VARIABLES .......................................................................F-4TABLE F-2 PRIVATE MIB PARAMETERS .................................................................................F-5TABLE F-3 MIB TRAPS...................................................................................................F-18TABLE G-1 OUTPUT ALARMS PINOUT .................................................................................. G-1
RADWIN 1000/2000 User Manual Version 2.2d 1-1Chapter 1IntroductionWelcome!Welcome to the RADWIN 1000/2000 radio series, designed for the IP and WiMAX Backhaul, Private Networks and Broadband Access global markets. The RADWIN 1000/2000 series is an innovation in high-capacity carrier-grade sub-6GHz radios, and designed to meet the requirements of current and next-generation markets and applications. RADWIN 1000/2000 also features software configurable antenna port activation enabling single (RADWIN 1000) or dual (RADWIN 2000) antenna port operation. The device configured as RADWIN 2000 has an advanced air-interface based on MIMO, antenna diversity.The RADWIN 1000/2000 radio series offers unmatched performance and carrier-class quality with the following features:• Superior spectral efficiency at 5, 10 and 20MHz channels• High Ethernet capacity (up to130Mbps at 20MHz  channel band-width)• Combo frequency products for maximum flexibility • Advanced air-interface based on MIMO, built-in diversity and OFDM technologies• Superior range performance• Simple installation and management•High Tx powerThe RADWIN 1000/2000 radio series supports the 4.9, 5.3, 5.4 and 5.8 GHz spectrum bands, and complies with international standards and regulations (FCC, IC Canada).The model RADWIN 1000 RW-1020-0150 / RADWIN 2000 RW-2020-0150 supports the 2.4GHz band and complies with FCC and IC standards
Key Applications  Chapter 1RADWIN 1000/2000 User Manual Version  2.2d 1-2Key ApplicationsWiMAX and IP BackhaulThe RADWIN 1000/2000 radio series offers WiMAX operators and ISPs a unique, highly scalable and cost-effective backhaul solution. Designed to suit a wide range of topologies, RADWIN 1000/2000 is easy to install and maintain, enabling operators to quickly and efficiently expand their net-works and introduce new services to a growing subscriber base.Figure 1-1: Typical Wimax and IP Backhaul applicationBroadband AccessWith RADWIN 1000/2000, service providers can quickly and efficiently expand their networks, and provide high-capacity services that meet the increasing demand for high-quality, high-speed broadband. Figure 1-2: Typical Broadband Access application
Private Networks  Chapter 1RADWIN 1000/2000 User Manual Version  2.2d 1-3Private NetworksRADWIN 1000/2000 is the ultimate solution for private networks such as enterprises, education, government and utility organizations that wish to own and manage their own networks and eliminate the costly recurring charges from service providers.RADWIN 1000/2000's cost-effective solution enables a variety of organiza-tions to connect geographically dispersed sites at ranges of up to 80km (50 miles).Figure 1-3: Private NetworkKey Features of RADWIN 1000/2000Some of the outstanding features of the RADWIN 1000/2000 radio series are as follows:⇒High CapacityThe RADWIN 1000/2000 system provides a high-capacity link of up to 130Mbps at 20MHz channel bandwidth.⇒Superior Spectral EfficiencyBuilt on advanced MIMO and OFDM technologies, the RADWIN 1000/2000 system provides a high-capacity link at channel band-widths of 5, 10 and 20MHz. These channel bandwidths support high robustness of the air interface under interference and harsh condi-tions. In countries where applicable, narrow channel bandwidths reduce the cost of the spectrum license.⇒Advanced Air InterfaceThe RADWIN 1000/2000 system provides an advanced air-interface based on MIMO, built-in diversity and OFDM technologies, resulting in an exceptionally robust air interface. Using the following technologies, the RADWIN 1000/2000 air inter-face is designed to ensure nonstop, high quality transmission, even under interference and harsh conditions:
Key Features of RADWIN 1000/2000  Chapter 1RADWIN 1000/2000 User Manual Version  2.2d 1-4• Automatic Adaptive Rate (AAR) is a mechanism that dynami-cally adapts the air interface rate by changing both the signal modulation and coding.• Automatic Channel Selection (ACS) chooses the best channel by monitoring the available radio channels and dynamically select-ing a channel which is best suited for transmission at any given time.• Automatic Repeat Request (ARQ) is a mechanism for error con-trol during data transmission. When the receiver detects an error in the received information, it automatically requests the transmitter to resend the information. This process is repeated until the transmission is error free or the error continues beyond a predetermined number of maximum transmissions. RADWIN 1000/2000's ARQ mechanism is optimized for time-critical traffic.• Forward Error Correction (FEC) with very low overhead and algorithms specifically designed for the varying conditions of license-exempt frequency bands, ensuring fast, robust and error-free communications.⇒High transmission (Tx) power of 29.95dBm The RADWIN 1000/2000 system supports high Tx power, compliant with radio regulations. High Tx power increases the system's avail-ability and range, and enables the high performance with smaller antennas, thus reducing the total cost of the solution (lower CAPEX), installation and tower rent costs (lower OPEX).⇒Superior range performanceThe RADWIN 1000/2000 system supports high capacity at superior ranges. The Link Budget Calculator (appendix D) is used to deter-mine the capacity and range according to the choice of product, antenna, type of service and environmental conditions.⇒Simple installation and managementRADWIN 1000/2000 systems are extremely simple to install and maintain. They are typically up and running in less than an hour.The RADWIN Manager application has full local and remote manage-ment capabilities. The user-friendly SNMP based management tool provides full end-to-end configuration, event logging, and perfor-mance monitoring capabilities.⇒Enhanced SecurityThe security features of RADWIN 1000/2000 include:• RADWIN 1000/2000's AES 128-bit integrated advanced encryp-tion support provides enhanced air interface security for carri-ers and private networks. It ensures user data protection with one of the most sophisticated commercially available combined encryption and authentication techniques, CCM/AES. This tech-nique combines message authentication (preventing anti-spoof-ing and replay protection) with commercial encryption, and
RADWIN 1000/2000 Link  Chapter 1RADWIN 1000/2000 User Manual Version  2.2d 1-5complies with the IEEE 802.11i (phase iii) security recommen-dations.CCM/AES uses a symmetric 128-bit encryption key (EK), and a nonce, and provides both message encryption and authenticat-ing signature. The nonce mechanism enables the receiver to remember already received genuine messages and reject all replayed messages.• Initial encryption and authentication is based on a user-defined master key (Link Password). While standard Wireless LAN encrypts only the Ethernet Payload, the AES encrypts both the source and destination MAC addresses.• In addition to normal login access, Read or Write Community access is available at loginRADWIN 1000/2000 LinkThe RADWIN 1000/2000 point-to-point solution is a wireless communication link. Typically each side of the link is comprised of an Outdoor Unit (ODU) and antenna and an Indoor Unit (IDU) or PoE device as shown in figure 1-4 below.The link is managed by the SNMP-based RADWIN Manager application.The IDU and the ODU are connected by a CAT5e cable that carries the ser-vice traffic and power. Figure 1-4: Example of Link Architecture - System ComponentsThe Radio Outdoor Unit (ODU)The ODU is the radio transceiver of the RADWIN 1000/2000 system. It sup-ports two radios for MIMO operation. It is available with an integrated antenna (Integrated Antenna ODU) or with connectors for an external antenna (Connectorized ODU).
The Radio Outdoor Unit (ODU)  Chapter 1RADWIN 1000/2000 User Manual Version  2.2d 1-6The ODU may be mounted on a pole or a wall, and connects to the IDU or PoE device using a CAT5e cable.The ODU comes in two form factors as shown in figure 1-5 below:Figure 1-5: ODU Form Factors• Integrated Antenna ODUThis ODU has an integrated 370mm (1.2ft) flat panel antenna, with a gain of 23dBi. The ODU contains both the radio and the antenna as a single unit housed in a weatherproof case.•Connectorized ODUThis ODU has 2x N-type connectors for connecting an external antenna.a. Connectorized ODU - Frontb. Connectorized ODU - Rearc. Integrated Antenna ODU - Frontd. Integrated Antenna ODU - Rear
The Indoor Unit (IDU)  Chapter 1RADWIN 1000/2000 User Manual Version  2.2d 1-7The ODU products available in release 2.2d are shown below:The only available external antenna is, single bipolar.For further information, see page 4-20, Installing the Link: Step 4, Tx Power and Antenna Settings.The Indoor Unit (IDU)The IDU has the service ports and provides aggregation of these services towards the ODU that transports them over the air. The IDU also provides power to the ODU.The IDU-C is a carrier-class 19 inch, 1U unit, providing two Ethernet ports, dry contact alarms and indication leds. It has two DC power feed connec-tors. An AC to DC converter is available for powering the IDU-C from an AC source. The IDU-C is designed to be rack mounted.One IDU-C product is available in release 2.2d:Table 1-1: Available ODU Products - Release 2.2dPart NumberDescriptionForm Factor Frequency Bands and RegulationsRW-2050-0150 Integrated antenna  FCC/IC5.725 – 5.850 GHzFCC/IC5.250 – 5.350 GHz FCC/IC5.470 – 5.725 GHzFCC/IC4.940 – 4.990 GHzRW-2050-0250Connectorized for external antenna (2x N-type)RW-2020-0150RW-1020-0150Integrated and connectorized antenna (2x N-Type) FCC/IC2.400 – 2.4835GHzTable 1-2: Release 2.1 IDU-C ProductsPart Number Ethernet ports Power Form factor7200-2000 2Dual DC feed-20 to -60VDC 19" 1U
Power Over Ethernet (PoE) Devices  Chapter 1RADWIN 1000/2000 User Manual Version  2.2d 1-8Figure 1-6: IDU-C Front PanelPower Over Ethernet (PoE) DevicesThe PoE device provides Ethernet service only, with power for the ODU. The PoE device is extremely compact, having only two Ethernet ports and a standard 3 pin male AC power socket.Figure 1-7: PoE device - showing the radio Ethernet portAntennasAn antenna is the radiating and receiving element from which the radio sig-nal, in the form of RF power, is radiated to its surroundings and vice versa. The antenna gain and transmitting power may be limited by country regula-tions.The RADWIN 1000/2000 may be operated with an integrated antenna that is part of the ODU unit, or with external antennas connected to the ODU via N-type connectors. All cables and connections must be connected correctly to reduce RF losses. The required antenna impedance is 50Ω.
Antennas  Chapter 1RADWIN 1000/2000 User Manual Version  2.2d 1-9The Integrated Antenna ODU is provided with 370 mm (1.2ft) flat panel antenna, with a gain of 23dBi. The radio and the antenna are housed in a weatherproof case as a single unit.Figure 1-8: ODU with integrated Flat Panel antennaExternal antennas are available for the RADWIN 1000/2000 radios, varying in operating frequencies, form factor, size and gain, dual or single polariza-tion.
Antennas  Chapter 1RADWIN 1000/2000 User Manual Version  2.2d 1-10Flat Panel AntennasThe Flat Panel antenna shown in figure 1-9 below has an integrated or external configuration:Figure 1-9: Flat Panel AntennaIntegrated or External1.2ft Flat Panel Dual PolarizationFrequency4.9 - 5.875 GHz (Ext)4.9 – 6.0 GHz (Int)2.4 – 2.7 GHz (Ext)2.3 – 2.7 GHz (Int)GainExternal21 dBi at 4.9 – 5.0 GHz 22 dBi at 5.0 – 5.15 GHz 23 dBi at 5.15 – 6.0 GHz20 dBi at 2.4 – 2.7 GHzIntegrated21 dBi at 4.9 – 5.0 GHz 22 dBi at 5.0 – 5.15 GHz 23.5 dBi at 5.15 – 5.725 GHz24 dBi at 5.725 – 6.0 GHz16.2 dBi at 2.3 – 2.4 GHz17.5 dBi at 2.4 – 2.7 GHzSize 1.2 x 1.2 ft / 371x371 mmBeam Width H, V: 9° (Ext)H, V: 8° (Int)
RADWIN Manager  Chapter 1RADWIN 1000/2000 User Manual Version  2.2d 1-11Parabolic Dish AntennasFigure 1-10: External Antennas - Parabolic DishSee the RADWIN products catalog for RADWIN offering of external anten-nas. External antennas are also available from authorized antenna vendors.RADWIN ManagerThe RADWIN Manager is an SNMP-based management application which manages a complete link over a single IP address. It can also manage each side of the link separately.The RADWIN Manager application facilitates installation and configuration of the link between the ODU units. The intuitive, easy-to-use RADWIN Man-ager has a graphical Microsoft Windows interface, and can be run locally and remotely. The RADWIN Manager provides:• Installation Wizard• On-line monitoring of air interface quality allowing the administrator to monitor the service and status of each link• On-line monitoring of equipment alarms and QoS• Local and remote loopback testing• Configuration settings• On-line user manual and help files• Link Budget Calculator for calculating the expected performance of the RADWIN 1000/2000 wireless link and the possible service con-figurations for a specific link range.The RADWIN Manager can easily be integrated with any NMS system.External2ft Dish Dual PolarizationFrequency 5.150 - 5.875 GHz4.900 – 5.850 GHzGain 28 dBiDiameter 2 ft / 620 mmBeam Width H,V: 5.6°
Accessories  Chapter 1RADWIN 1000/2000 User Manual Version  2.2d 1-12Figure 1-11: RADWIN Manager screenAccessoriesRADWIN provides a variety of accessories to support the RADWIN 1000/2000 system:•PoE devices•AC Power Adaptor• External Lightning Protection Unit• Cables to connect the various system elementsDocumentation set supplied with RADWIN 1000/2000The technical documentation supplied with a RADWIN 1000/2000 includes the following items:• A Quick Start Guide for experienced installers• A full User Manual - the document which you are reading
How to Use this Manual  Chapter 1RADWIN 1000/2000 User Manual Version  2.2d 1-13How to Use this ManualThis User Manual is divided into functionally distinct chapters reflecting the activities required to set up a RADWIN 1000/2000. The division is shown in the following table:A Little TerminologyIn the field, a link typically has a local or headquarters site as for example in figure 1-2 above. Here the service provider is the local or headquarters site. The service recipient is the remote site.Where the link is completely internal to a corporation, the choice of the local and remote is just a matter of convenience. Chapter/AppendixSubject Audience2 Site Preparation Site survey team3 Hardware Instal-lationField technician4 Link Installation: The RADWIN Man-agerInstallation technician5Configuring the LinkInstallation technician, System manager6 Site Configuration Installation technician, System manager7 Monitoring and DiagnosticsInstallation technician, System managerA Technical Specifi-cationsInstallation technician, System managerB Wiring Specifica-tionsInstallation technicianC Pole and Wall InstallationInstallation technicianD Link Budget Cal-culatorInstallation technicianE Lightning Protec-tion and Ground-ing GuidelinesField technicianFMIB ReferenceSystem managerGExternal Alarms SpecificationInstallation technician, System manager, Field technicianH Combo Configura-tion ToolInstallation technician
A Little Terminology  Chapter 1RADWIN 1000/2000 User Manual Version  2.2d 1-14A link then, consists of two sites.In Broadband Wireless terminology, the local and remote sites are some-times referred to as “near” and “far”, “HQ” and “remote” and so on.The site which is closer to the network core (often the local site) will be referred to as site A, and the opposite side of the link, usually closer to the end user, as site B.This choice is application-neutral and will be used throughout the manual both to describe the sites and their names as in the examples.The link is configured and managed using a PC, the managing computer connected to site A. (The precise requirements for the managing computer are set out in chapter 3, Hardware Installation).RADWIN 1000/2000 supports three connection methods for the managing computer:•Local - a direct peer to peer connection between the Ethernet ports on the managing computer and the IDU or PoE device. Local con-nection is always read-write.•Network - the managing computer and the site A IDU or PoE device belong to a LAN and communicate through a router or hub•Over-the-air - the managing computer connects to site B via the air interfaceThe managing computer may be connected to the link through an IDU or a PoE device. In what follows, where ever we refer to an IDU it includes PoE devices unless stated otherwise. Typically, if we need to refer to an IDU as such, we will use a model name such as IDU-C.
Conventions Used in this Manual  Chapter 1RADWIN 1000/2000 User Manual Version  2.2d 1-15Conventions Used in this ManualNotificationsNotifications consist of Notes, Cautions and Warnings.Typographical conventionsGeneralWhere a term is defined or introduced for the first time, it is shown in Bold-face. You will have noticed this usage in the Terminology section above.SoftwareThe RADWIN Manager is a Microsoft Windows application following the user interface conventions of familiar Microsoft Windows programs.We would describe the chain of menu commands indicated in the following screen shot, like this:Tools|Active Alarms|1 Ausing Boldface for the menu labels and vertical bars to separate them.NoteThe purpose of a Note is to• Draw your attention to something that may not be obvious or coun-ter-intuitive• Emphasize a special feature or peculiarity of the RADWIN 1000/2000• Offer an external reference for additional information• Add a caveat that would not qualify as a full Caution or Warning (see below)• Provide additional background to what follows• Offer a recommendation• Highlight an indication of something to watch out for• Advise you if an action has “side effects” i.e. it may disturb something else that would be best left undisturbed• Remind you of something that should be kept in mindCautionA Caution is a notification of risk of damage to equipment or of service degradationWarningA Warning is a notification of risk of danger to persons operating near the equipment
Windows Terminology  Chapter 1RADWIN 1000/2000 User Manual Version  2.2d 1-16Similarly, mouse click items will be referred to like this:“Click Next to continue.”(A mouse click always uses the left mouse button unless stated otherwise.)Windows TerminologyLook at figure 1-11 above. The main application display which you see consists of a frame-window with a menu bar, system icons and content. It will be referred to as a window, the main window or the Manager win-dow depending on context.The top line of icons is the tool bar, and provides part of the menu bar functionality with a mouse click.At the bottom of the window is the status bar, a line of icons and text boxes.The central part of the main window consists of several panes: On the right, there are Radio Interference, Ethernet Service and the Frequency panes. The left hand pane (with the blue background) is split into three sub-panes.If you click Site A or Site B in the tool bar, you will be offered another win-dow, which in turn displays on of several panels depending on which func-tion you choose.
Windows Terminology  Chapter 1RADWIN 1000/2000 User Manual Version  2.2d 1-17Figure 1-12: Site Configuration window with open Management panel

Navigation menu