Rapoo Technology M7093BT Bluetooth Optical Mouse User Manual User Guide for M7093BT
Shenzhen Rapoo Technology Co., Ltd Bluetooth Optical Mouse User Guide for M7093BT
User manual
Quick Start Guide
Of
Bluetooth Optical Mouse
V0.2
Installation
Step1. Inserting Batteries
1. Remove the battery cover.
2. Insert 2 AAA batteries.
3. Place back the battery cover. As the Mouse has power switch, please make
sure the power switch is on.
Step2. Connecting the Mouse to the Dongle
Before you install the Bluetooth Mouse, please make sure that you computer
support Bluetooth function, and finished the Bluetooth software installation.
Software available like Wincomm, IVT or the Microsoft built-in software.
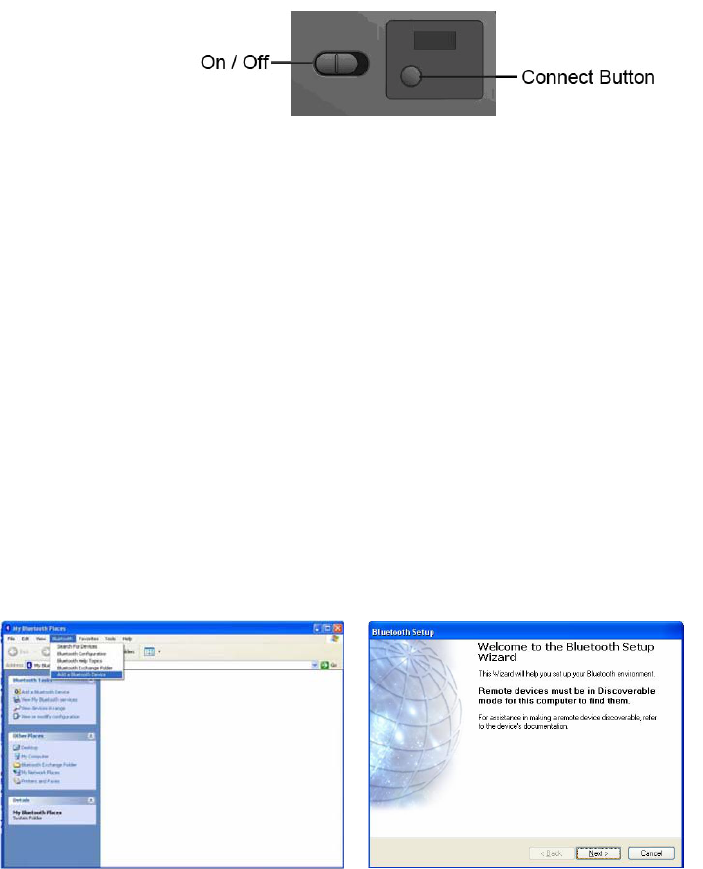
Press the connect button at the bottom more than 1 second , then the Mouse is
ready for the match, please note that the connect button is only usefull during
the match procedure.
Match Procedure
A. Match on Widcomm
1. Double click the Icon again, “My Bluetooth Place” pops up.
2. Click “Bluetooth Setup – Bluetooth Setup Guide”.
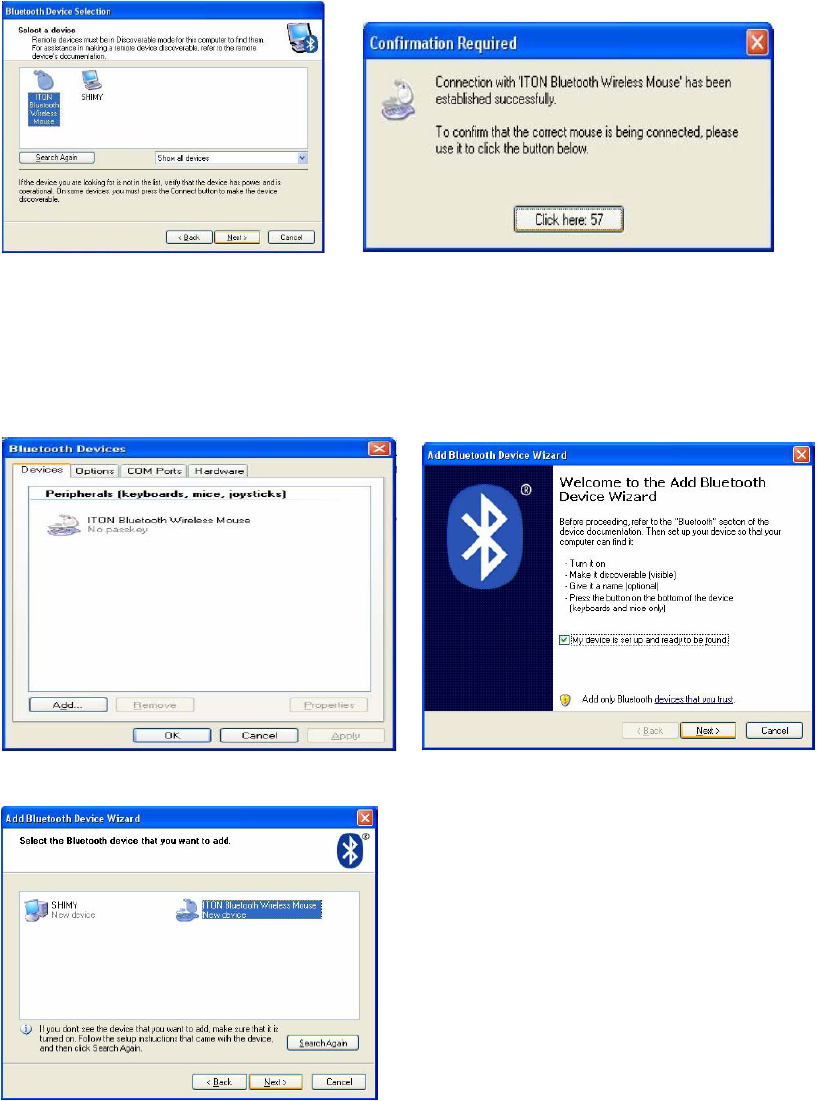
3. In the Setup Guide window, click next button, wait until the system found
the mouse, select “Mouse”, click “Next”. Hint for connection.
4. Click “Click here”, now you can use your mouse at ease.
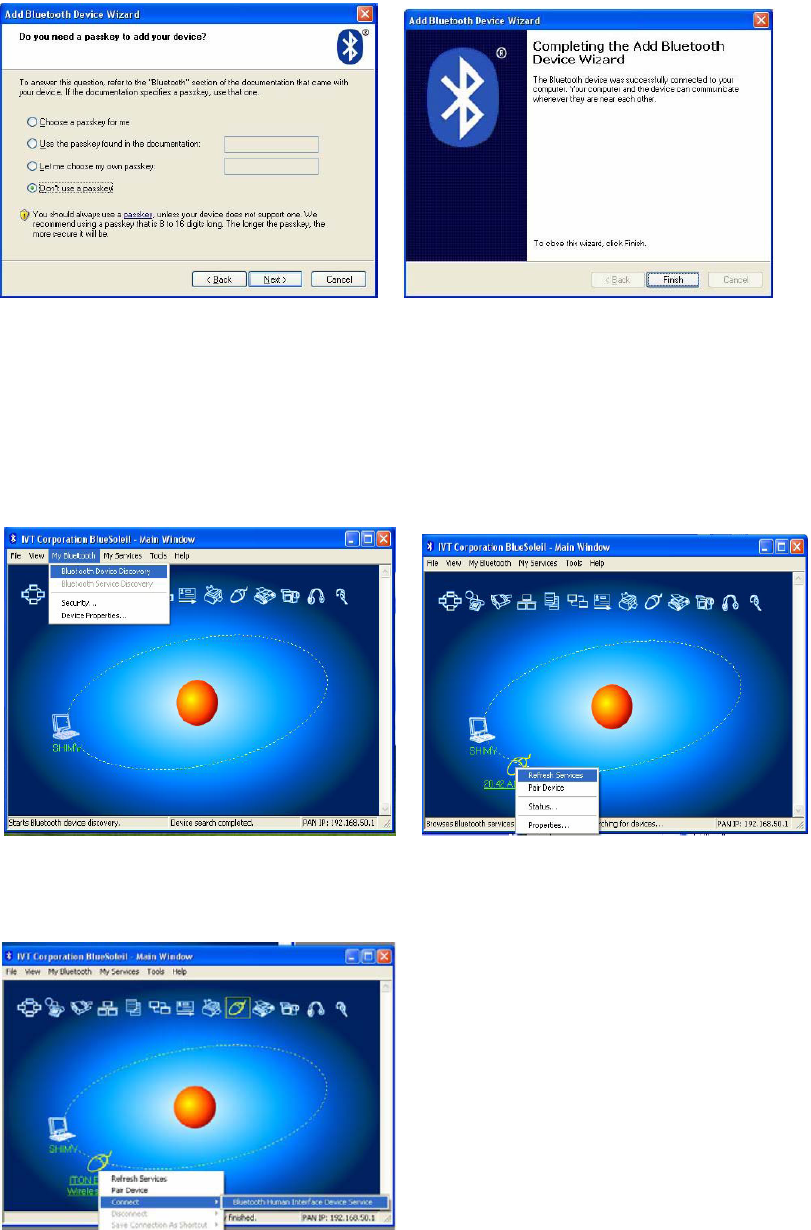
B. Match on Microsoft built-in software
1. Make sure that the Bluetooth Function has been activated. Double click the
Bluetooth Icon on the Task Bar or in the Control Panel, open the “Bluetooth
Management” window, click “Add”, tick off “facility is ready for searching”,
click “Next”.
2. Wait till the Mouse is found, select mouse, click “Next”.
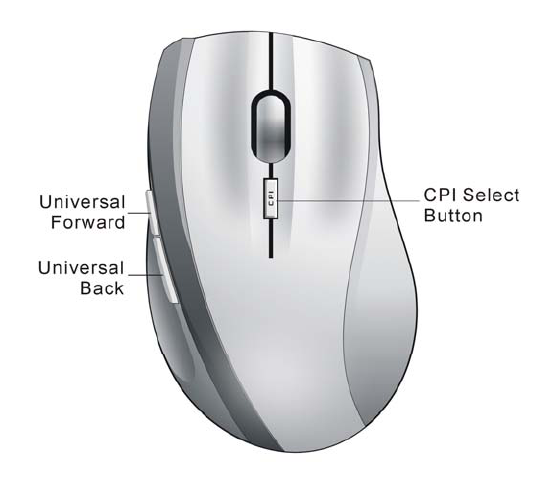
3. Select “No Password”, click “Next”, the system will install the new facility
automatically.
C. Match on IVT software
1. Make sure that the Bluetooth Function has been activated. Double click the
Bluetooth Icon, open the Management window, select “Search for
Bluetooth facilities” or click the Round Ball in the middle of the window.
2. Click the Bluetooth Mouse founded, click the right button for “Refresh
Service”.
3. Select the Bluetooth Mouse again, click the right button for “Connect-
Bluetooth Input Service”, the system will auto install the HID facility. After
that you can use you Bluetooth Mouse at ease.
Mouse Function
Speed Control
Press the CPI button and you can toggle the CPI between 800 CPI and 1600
CPI (Laser Version, Optical is between 500 CPI and 1000 CPI)
Troubleshooting
1. Before you install your Bluetooth Mouse, please make sure you have done
the Bluetooth Dongle installation procedure, and the Bluetooth facility is
turned on.
2. If you press the Connect Button inadvertently or some abnormal
disconnection occurs during using, please reconnect the mouse. If unable
to rematch, kindly delete the Mouse Icon to erase the stored info of the
mouse in the computer.
3. Make sure there is no change of the Bluetooth facility. If anything changed,
please kindly rematch.
4. Please kindly check the batteries. If they are short of power, replace them
with new ones.
FCC Statement
This equipment has been tested and found to comply with the limits for a Class
B digital device, pursuant to part 15 of the FCC rules. These limits are
designed to provide reasonable protection against harmful interference in a
residential installation. This equipment generates, uses and can radiate radio
frequency energy and, if not installed and used in accordance with the
instructions, may cause harmful interference to radio communications.
However, there is no guarantee that interference will not occur in a particular
installation. If this equipment does cause harmful interference
to radio or television reception, which can be determined by turning the
equipment off and on, the user is encouraged to try to correct the interference
by one or more of the following measures:
-Reorient or relocate the receiving antenna.
-Increase the separation between the equipment and receiver.
-Connect the equipment into an outlet on a circuit different from that to which
the receiver is connected.
-Consult the dealer or an experienced radio/TV technician for help.
To assure continued compliance, any changes or modifications not expressly
approved by the party responsible for compliance could void the user’s
authority to operate this equipment. (Example- use only shielded interface
cables when connecting to computer or peripheral devices).
Radiation Exposure Statement
This equipment complies with FCC radiation exposure limits set forth for an
uncontrolled environment and it also complies with Part 15 of FCC RF Rules.
Operation is subject to the following two conditions:
1) This device may not cause interference and
2) This device must accept any interference, including interference that may
cause undesired operation of the device.
Caution!
The manufacturer is not responsible for any radio or TV interference caused by
unauthorized modifications to this equipment. Such modifications could void
the user authority to operate the equipment.