Raven E1008500 Remote Control Transmitter for Bed User Manual manual
Raven Industries Remote Control Transmitter for Bed manual
Raven >
manual
Wi-Fi Bridge
Setup / Operation Guide
www.adjustablesbyleggett.com 993011XX EDR11XXX 10/09
iPhone™ and iPod™ touch functionality
only.

Copyright © 2009 Leggett & Platt, Inc.
Table of Contents
Before Beginning ........................................................................ 4
Prodigy™ Wi-Fi Bridge Receiver Installation .............................. 5
Prodigy™ Bridge Application Setup ........................................... 7
Prodigy™ Position Screen .......................................................... 11
Prodigy™ Massage Screen ........................................................ 12
Prodigy™ Presets Screen ........................................................... 13
Prodigy™ Sleep Timer Screen ................................................... 14
Prodigy™ More Screen .............................................................. 15
Prodigy™ Gentle Wake Alarm Screen ....................................... 16
Prodigy™ Diagnostics Screen .................................................... 17
FCC DISCLAIMER
Changes or modifications not expressively
approved by the party responsible for compliance
could void the user’s authority to operate the
equipment.
4 Prodigy™ Wi-Fi Bridge Setup / Operation Guide 993011XX
STEP 1
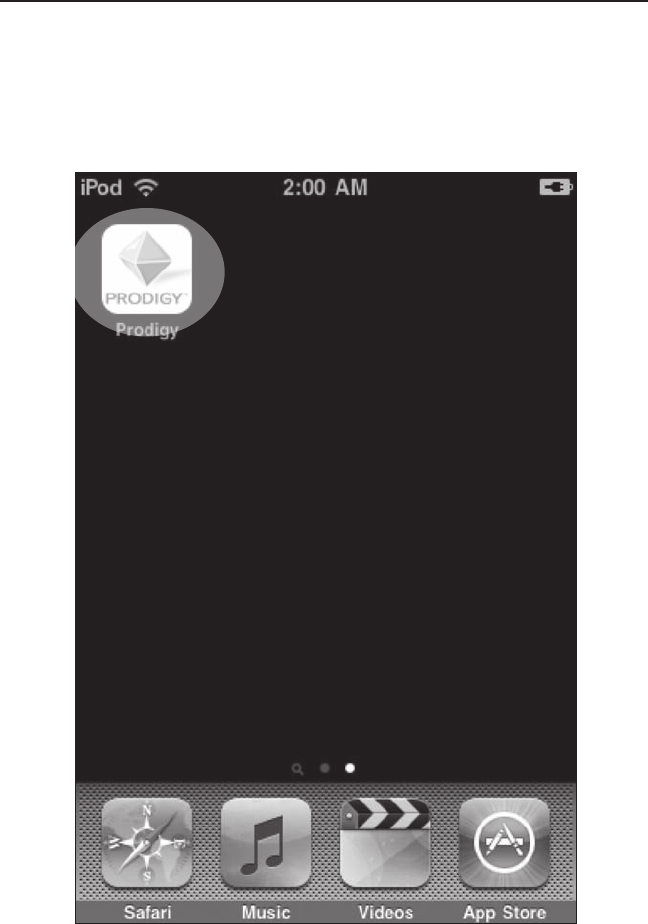
Before beginning Prodigy™ Wi-Fi Bridge setup, be sure you
have uploaded the Prodigy Bridge App. to your iPhone™ or
iPod™ touch (FIGURE 1). Go to . . .
FIGURE 1: Home screen with Prodigy™ Bridge App.
Before Beginning
Prodigy™ Wi-Fi Bridge Setup / Operation Guide 993011XX 5
Prodigy™ Wi-Fi Bridge Receiver Installation
STEP 2
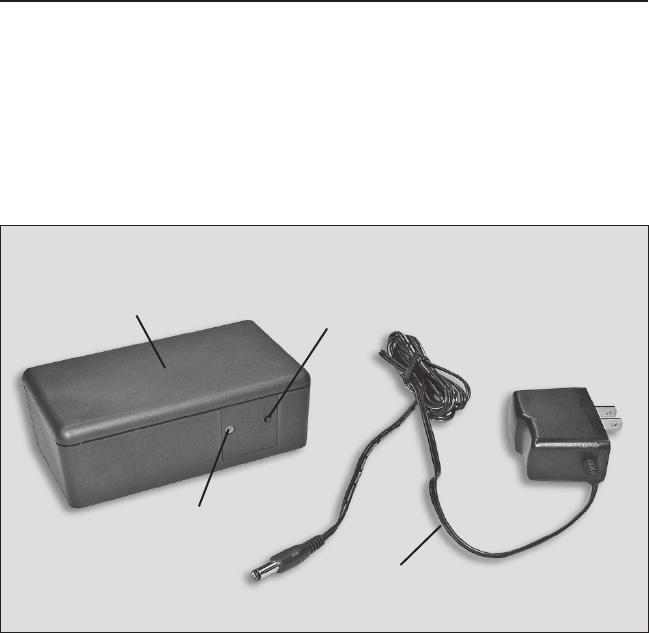
Locate the Prodigy™ Wi-Fi Bridge receiver and electrical power
cord (FIGURE 2).
FIGURE 2: Prodigy™ Wi-Fi Bridge receiver and electrical power cord.
ACTIVATE
BUTTON
TRANSMISSION
LIGHT
ELECTRICAL
POWER CORD
WI-FI BRIDGE
RECEIVER
6 Prodigy™ Wi-Fi Bridge Setup / Operation Guide 993011XX
Prodigy™ Wi-Fi Bridge Receiver Installation
STEP 3
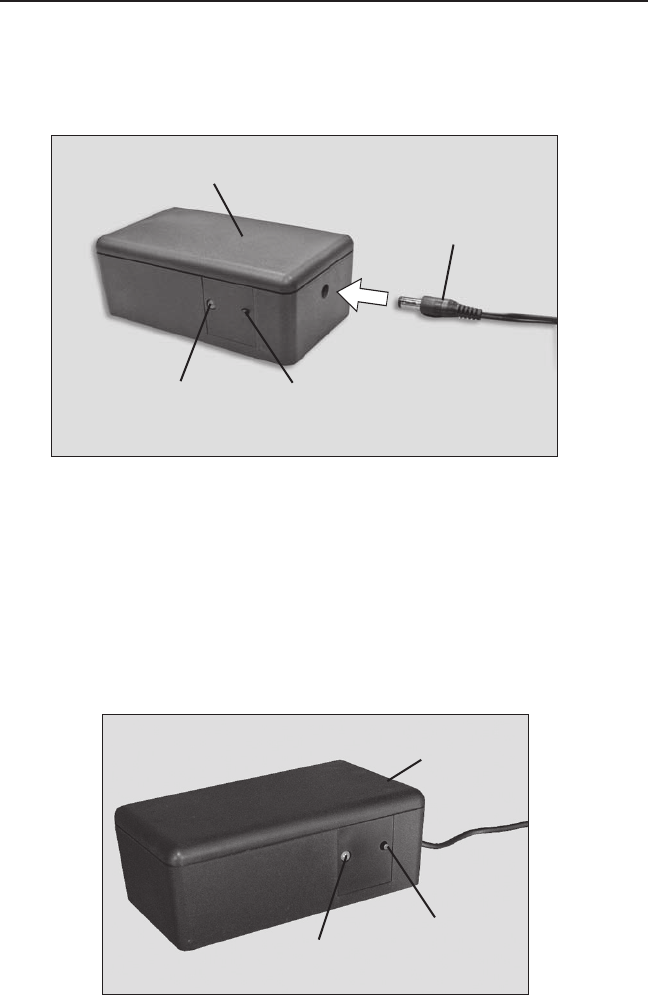
Insert the power cord into the Prodigy™ Wi-Fi Bridge receiver,
then plug into electrical power source (electrical surge
protection device recommended, not included) (FIGURE 3).
LEARN
BUTTON
TRANSMISSION
LIGHT
POWER
DOWN BOX
ACTIVATE
BUTTON
TRANSMISSION
LIGHT
ELECTRICAL
POWER CORD
WI-FI BRIDGE
RECEIVER
FIGURE 3: Prodigy™ Wi-Fi Bridge receiver power cord installation
and activation button location.
FIGURE 4: Power down box learn button location.
STEP 4
Press the activate button on the Prodigy™ Wi-Fi Bridge receiver for (1)
second, then press the learn button on the Prodigy™ adjustable base
power down box for (1) second (FIGURES 3 and 4). The transmission
light on both receiver boxes will flash on-and-off in succession
indicating communication. NOTE: The Prodigy™ Wi-Fi Bridge receiver
must be in the same general location as the power down box.
Prodigy™ Wi-Fi Bridge Setup / Operation Guide 993011XX 7
STEP 5
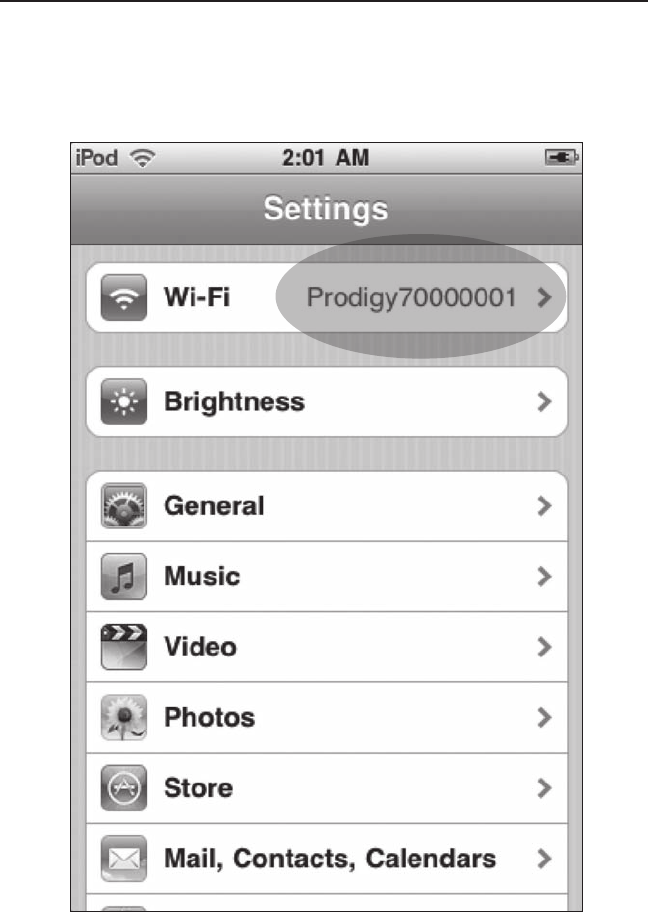
Access the Settings screen from the Home screen (FIGURE 5).
Select Wi-Fi ProdigyXXXXXXXX (number is particular to your
device).
Prodigy™ Bridge Application Setup
FIGURE 5: Settings screen.
8 Prodigy™ Wi-Fi Bridge Setup / Operation Guide 993011XX
STEP 6
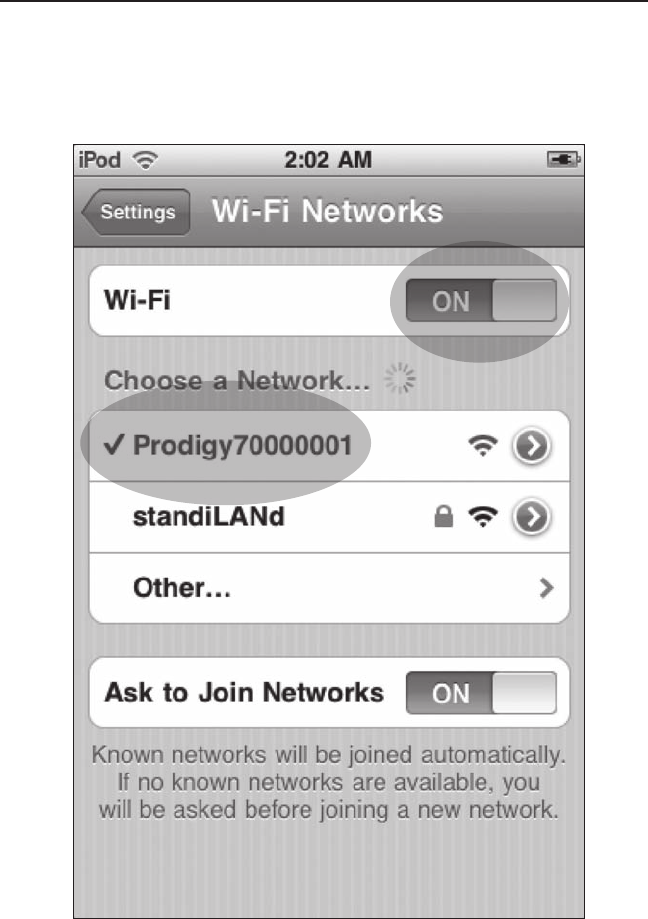
The Wi-Fi Networks screen appears. Make sure Wi-Fi function
is set to ON. Select √ProdigyXXXXXXXX (FIGURE 6).
Prodigy™ Bridge Application Setup
FIGURE 6: Wi-Fi Networks screen.
Prodigy™ Wi-Fi Bridge Setup / Operation Guide 993011XX 9
STEP 7
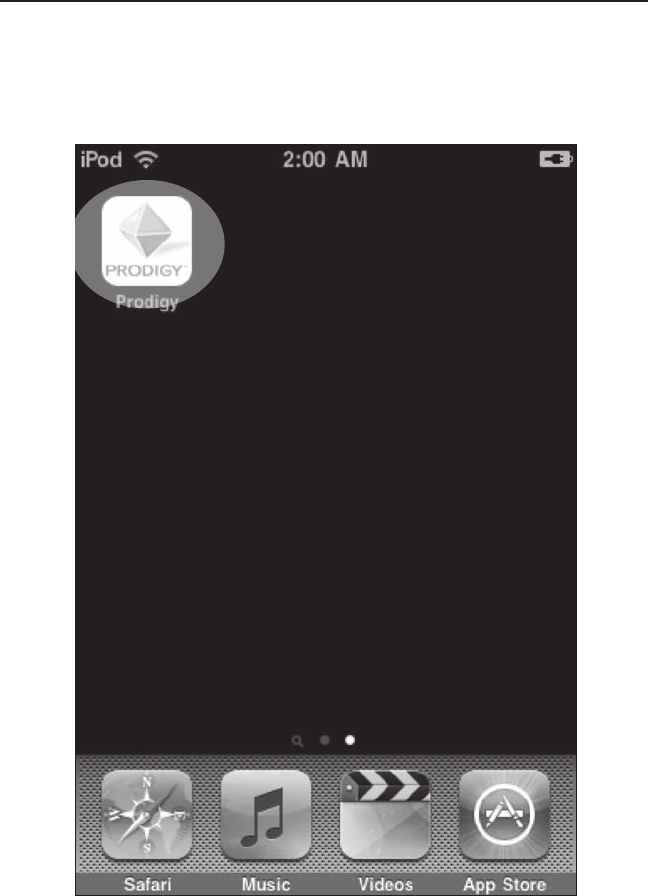
Select the Prodigy™ Bridge App. from the Home screen
(FIGURE 1).
FIGURE 1: Home screen with Prodigy™ Bridge App.
Prodigy™ Bridge Application Setup
10 Prodigy™ Wi-Fi Bridge Setup / Operation Guide 993011XX
STEP 8
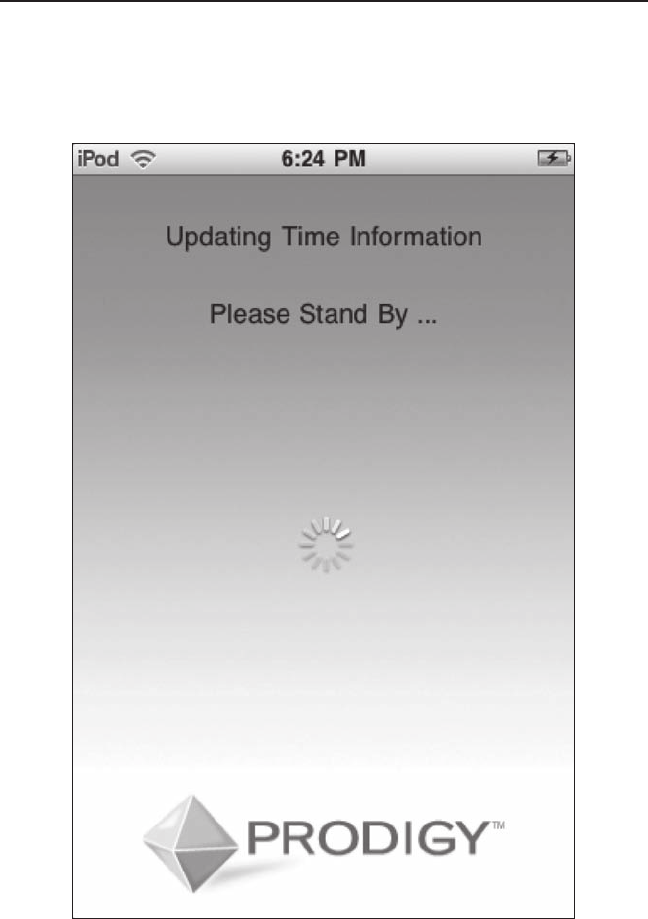
A screen will appear indicating device is updating (FIGURE 7).
Let device complete updating (this may take a few moments).
Prodigy™ Bridge Application Setup
FIGURE 7: Updating screen.
Prodigy™ Wi-Fi Bridge Setup / Operation Guide 993011XX 11
Prodigy™ Position Screen
STEP 9
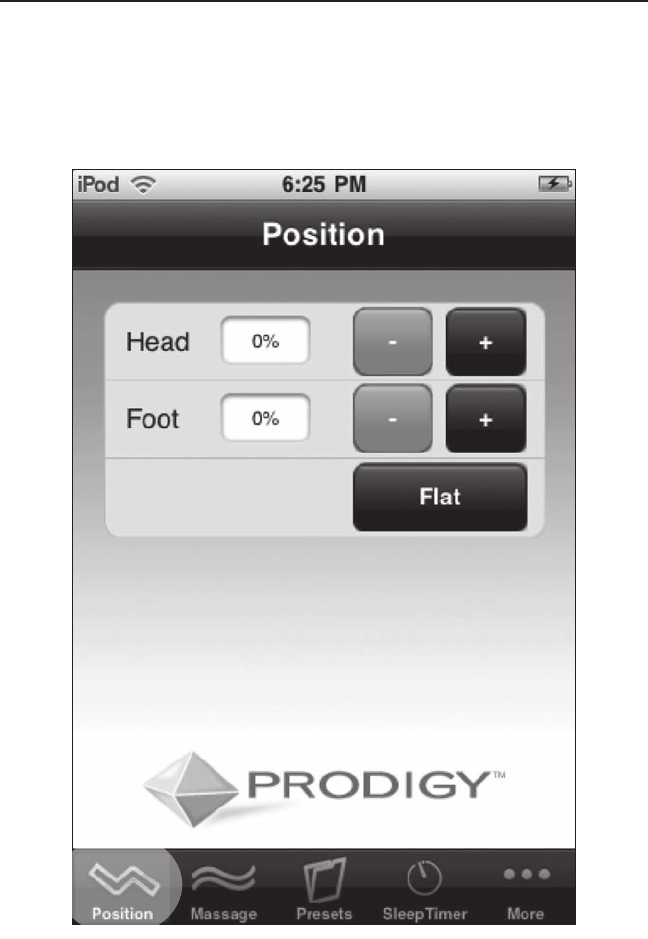
The Position screen will appear indicating Prodigy™ Wi-Fi Bridge
setup was successful (FIGURE 8). Touch desired position button
to activate adjustable base with your iPhone™ or iPod™ touch.
FIGURE 8: Position screen. (Active screen is highlighted.)
12 Prodigy™ Wi-Fi Bridge Setup / Operation Guide 993011XX
Prodigy™ Massage Screen
STEP 10
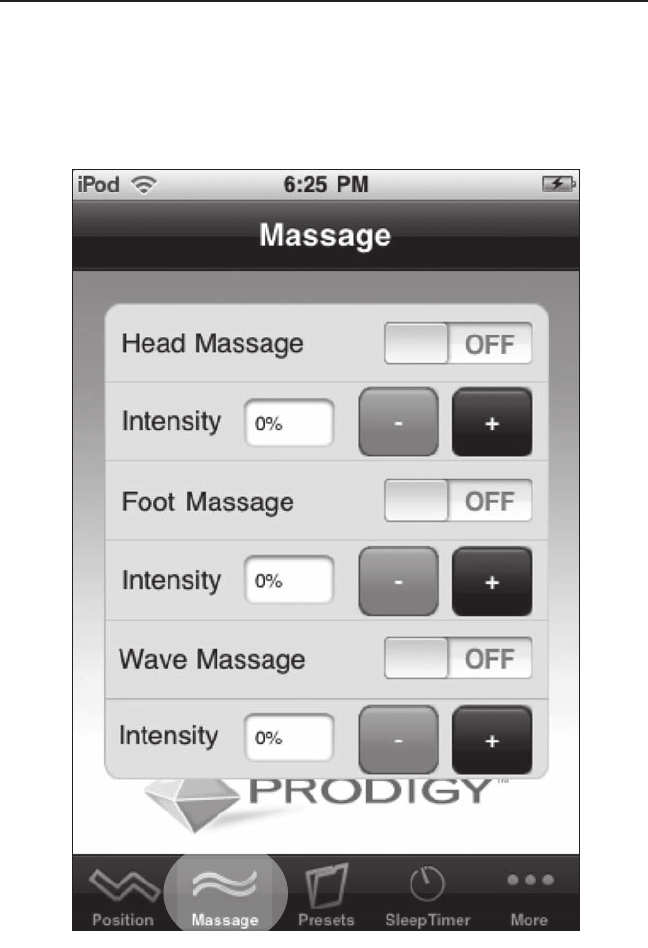
Touch the Massage icon to access massage function. The
Massage screen will appear. Adjust the massage by touching
the appropriate button (FIGURE 9).
FIGURE 9: Massage screen.
Prodigy™ Wi-Fi Bridge Setup / Operation Guide 993011XX 13
Prodigy™ Presets Screen
STEP 11
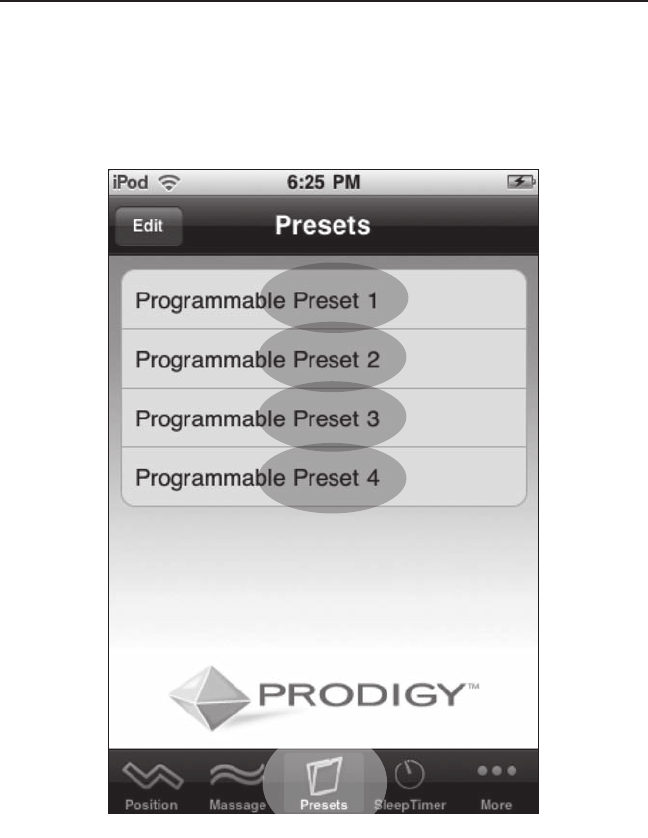
Touch the Presets icon to access preset function. The Presets
screen will appear. Touch a Presets button to return the bed to a
factory preset position (FIGURE 10).
FIGURE 10: Presets screen.
To reprogram a preset position:
1. Adjust the bed to the desired position.
2. On the Presets screen, touch the edit button.
3. Select the preset number to save as the new position.
4. The new position is now programmed.
14 Prodigy™ Wi-Fi Bridge Setup / Operation Guide 993011XX
Prodigy™ Sleep Timer Screen
STEP 12
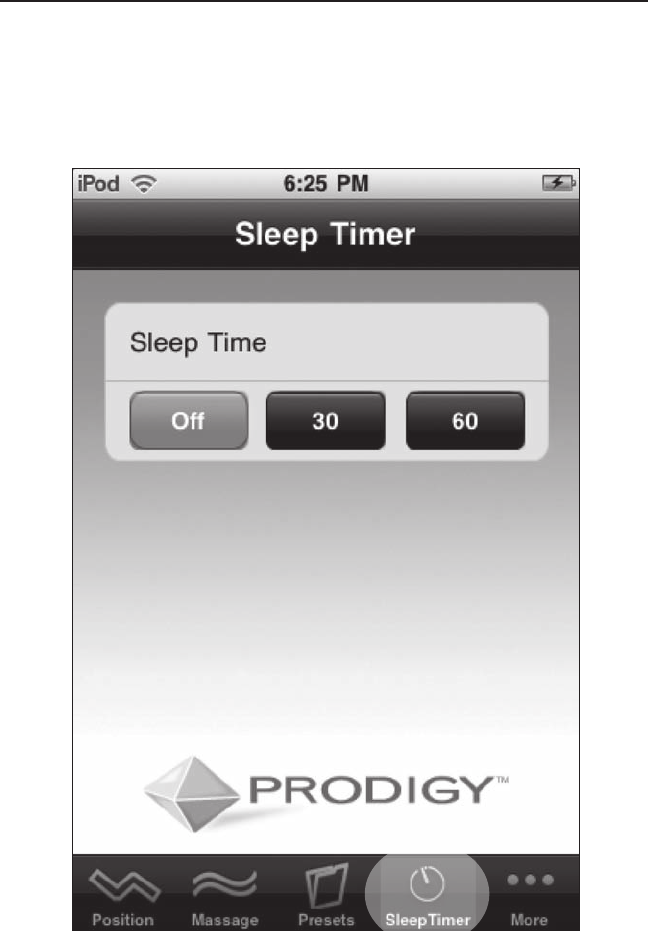
Touch the Sleep Timer icon to access sleep timer function. The
Sleep Timer screen will appear. Set the sleep timer by touching
the appropriate button (FIGURE 11).
FIGURE 11: Sleep Timer screen.
Prodigy™ Wi-Fi Bridge Setup / Operation Guide 993011XX 15
Prodigy™ More Screen
STEP 13
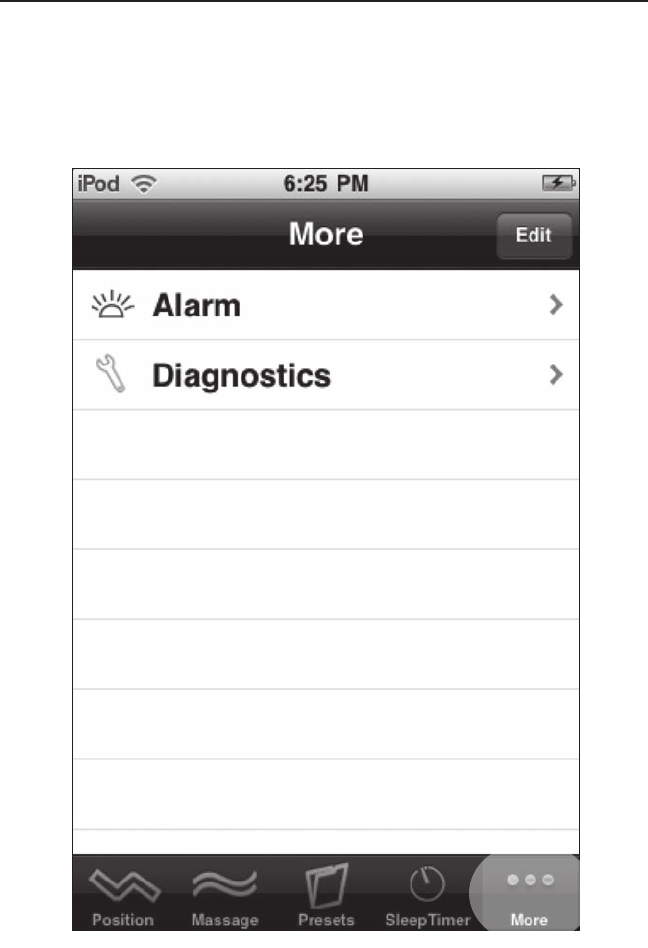
Touch the More icon to access extra functions. The More
screen will appear. Touch the appropriate button to access the
Gentle Wake Alarm and Diagnostics screens (FIGURE 12).
FIGURE 12: More screen.
16 Prodigy™ Wi-Fi Bridge Setup / Operation Guide 993011XX
Prodigy™ Gentle Wake Alarm Screen
STEP 14
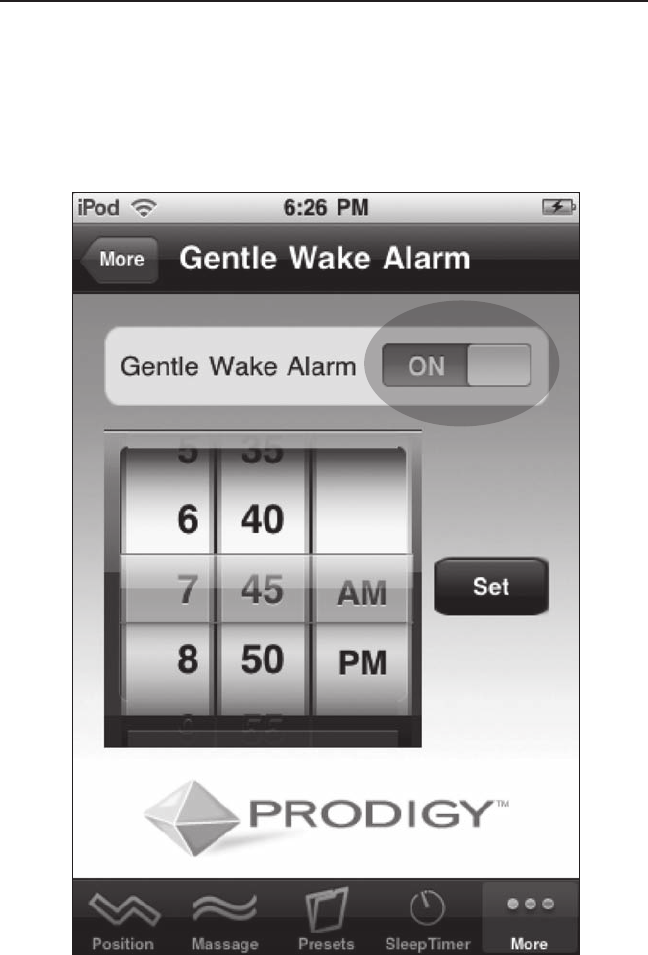
After selecting the Alarm button from the More screen, the
Gentle Wake Alarm screen will appear. Make sure Gentle Wake
Alarm is set to ON. Scroll to find the appropriate time and then
touch the Set button (FIGURE 13).
FIGURE 13: Gentle Wake Alarm screen.
Prodigy™ Wi-Fi Bridge Setup / Operation Guide 993011XX 17
Prodigy™ Diagnostics Screen
STEP 15
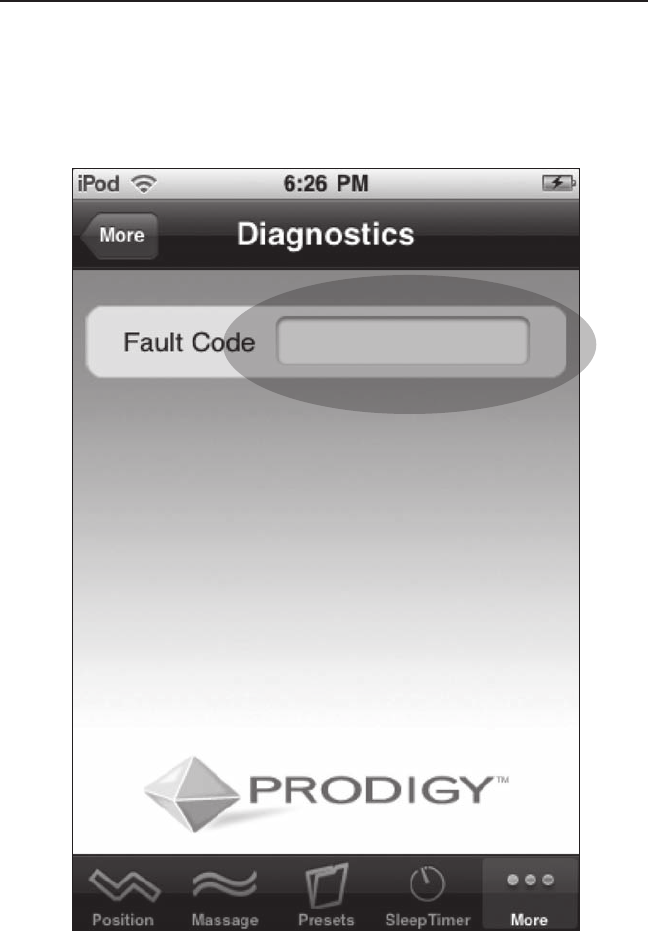
After selecting the Diagnostics button from the More screen,
the Diagnostics screen will appear. A number will appear in the
Fault Code field if there is a fault (FIGURE 14).
FIGURE 14: Diagnostics screen.

FCC DISCLAIMER
Changes or modications not expressively
approved by the party responsible for compliance
could void the user’s authority to operate the
equipment.
WARNING: A 20 cm separation distance must be
maintained between this transmitter and any nearby
person during operation

For customer service, call toll free 800.888.3078
For customer service online, email:
accustomerservice@leggett.com
www.adjustablesbyleggett.com