USERS MANUAL

Raytac
ZP1000
Wireless
Zoom Presenter
User’s Guide
Be sure to carefully read this User’s
Guide first for the proper use of the
Wireless Zoom Presenter and keep it
for future reference.

2
Information in this document is subject to change without notice. No part of
this document may be reproduced or transmitted in any form or by any means,
electronic or mechanical, for any purpose, without the express written prior
permission of the seller.
The seller provides this document without warranty, or condition of any kind.
The seller may make improvements or change in the product described in this
documentation at any time.
Other product and company name herein may be the trademarks of their
respective owners.
○
c 2004 All rights reserved.
IMPORTANT SAFETY AND HEALTH INFORMATION
WARNING! RISK OF INJURY!
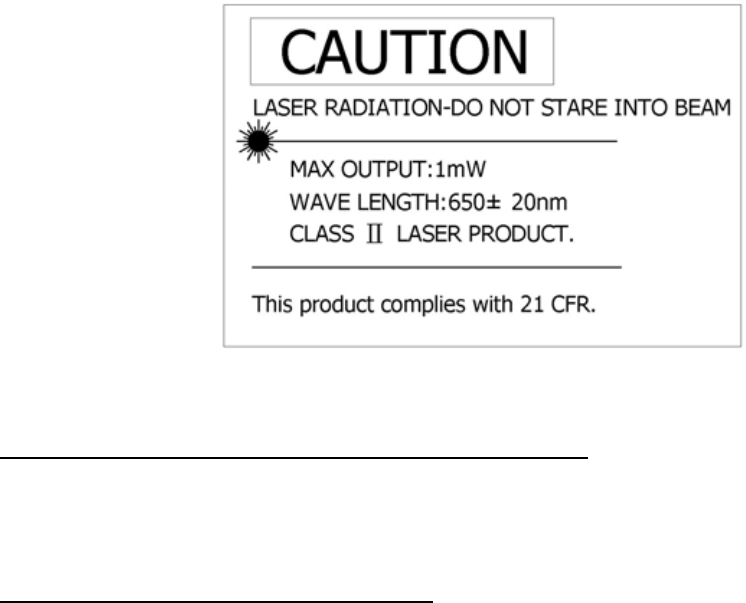
Laser beam can cause permanent damage to eyes. Do not look into the laser beam or
shine the laser beam into your eyes, other peoples’ eyes, or pet’s eyes.
WARNING! RISK OF INJURY!
Keep this device away from Children. This is a working tool, not a toy or entertainment
device. It should only be used by adults.
Trademarks:
Microsoft, Windows, Windows Vista and PowerPoint are registered trademarks of Microsoft Corporation.
Other trademarks and registered trademarks not listed above may be used in this manual.

3
Introduction
Thank you for choosing the omni-directional Wireless Zoom Presenter
—“Totally Control Your Presentation”
What’s the benefits
Making your presentation easier and more successful
With the omni-directional Wireless Zoom Presenter, you will be able to manipulate
your presentation to zoom and move around your presentation screen, you also
don’t need to stand beside your notebook computer or have an additional person
to assist you, nor do you need to aim at the receiver of the remote control. This
Wireless Presenter provides you with a single tool to manage your presentations.
Multi-function Design
The omni-directional Wireless Zoom Presenter combines the features of the
presentation controls, wireless mouse, Zoom in/out and laser pointer into one
ergonomic device. Excellent 2.4GHz RF technology enables you to control the
computer up to 100 feet (30 meters) away from the receiver (connected to the
USB port), the laser pointer functions up to 130 feet (40 meters) from the target.
Easy to use
The omni-directional Wireless Zoom Presenter is a USB plug-and-play device,
and the laser beam safety design provides protection against unintentional laser
beam into human eyes.
Equipment Checklist
Wireless Zoom Presenter (with USB receiver in the back) 1
AAA batteries 2
User’s Guide 1
Driver disc 1
Pouch (optional) 1
System Requirement
Operating systems: Windows®98 SE, Me, 2000, XP, Windows VistaTM
One available USB port for connecting the USB receiver.
4
Getting Started
Inserting the battery
Open the battery cover and insert two AAA batteries.
Notes on batteries:
Be sure that the polarity of the batteries is set properly.
Do not charge, heat, open, or short-circuit the batteries.
Do not use different type of batteries together, or mix old and new
batteries.
Connecting the RF receiver
Take out the USB receiver from the back of the Wireless Zoom Presenter, connect the
USB receiver to an available USB port in your computer.
Do as follows, depending on your operating system:
Windows® 98 SE/Me
The system prompts you to insert the operating system CD-ROM. Follow the
instructions on the screen to install the required drivers.
Windows® 2000/XP, Windows VistaTM
The operating system identifies the receiver as a “USB Human Interface Device”
and begins installation automatically. Follow the instructions or messages on the
screen to complete the installation.
Activate the Laser
Press and hold both Laser key for around three seconds to activate the laser.(the
mode indicator flashes)
Note: The Wireless Zoom Presenter might be jammed if there are have several 2.4GHz
remote controls within range and work in the same RF channel, in such case, you may try
to change RF ID as follows. (Implement RF ID change only when serious RF interference)
1. Press the ID link button on the USB receiver and the LED lights up steady, the
receiver is ready for linking.
2. Press the Zoom In and Zoom out keys on the Presenter simultaneously for three
seconds. The LED on the receiver begins blinking to confirm a successful link.
5
Installing software
1. Place the driver disc into your computer’s CD-ROM drive.
2. Run “RaytacZoom_v1.0_Setup.exe” (The version of this driver is subject to change
without notice for improvement.)
3. After installation, the software will create one icon on your desktop (optional) called
“RaytacZoom.ppa”
Now, your Wireless Zoom Presenter is ready to go.
To use Raytac Zoom Presenter
1. Run “RaytacZoom.ppa” and choose “Microsoft PowerPoint” as default executed
program.
2. click “Tool” on the tool bar of PowerPoint, select “Macro” and click “Macro Security”
3. In the “Macro Security”, choose “Middle”, and confirm your selection.
4. Close the program and restart “RaytacZoom.ppa”.
5. You will have PowerPoint program pop up, and system will ask you if you want to
execute Macro, click “Enable Macro”.
6. Plug the Raytac Remote USB dongle into the USB slot, and now you are ready to use.
7. Open your PowerPoint file, and press F5 on keyboard or “Slide” on the Zoom
Presenter to start your slide in the full screen mode.
8. Click the “Zoom In/Out” key on your remote, you will have a Zoom icon on the left top
corner to show that you can using the Zoom functions.
9. You can click “Zoom In/Out” key to zoom your window every click., the maximum is
four times the zoom.
10. You can slide either in zoom mode or normal mode, but the next page will always come
up under the normal mode.
11. These zoom functions will be activated as long as this PowerPoint activated, and will
be deactivated after you switch the PowerPoint off.
12. If you don’t want to have the zoom functions on, just turn on your PowerPoint, and
don’t activate the Raytac Zoom functions.
Note: if you want to zoom a specific area, you can active the zoom functions, and move the
area you want to magnify at the center of the screen, then, to zoom the screen.

6
Using the Wireless Zoom Presenter
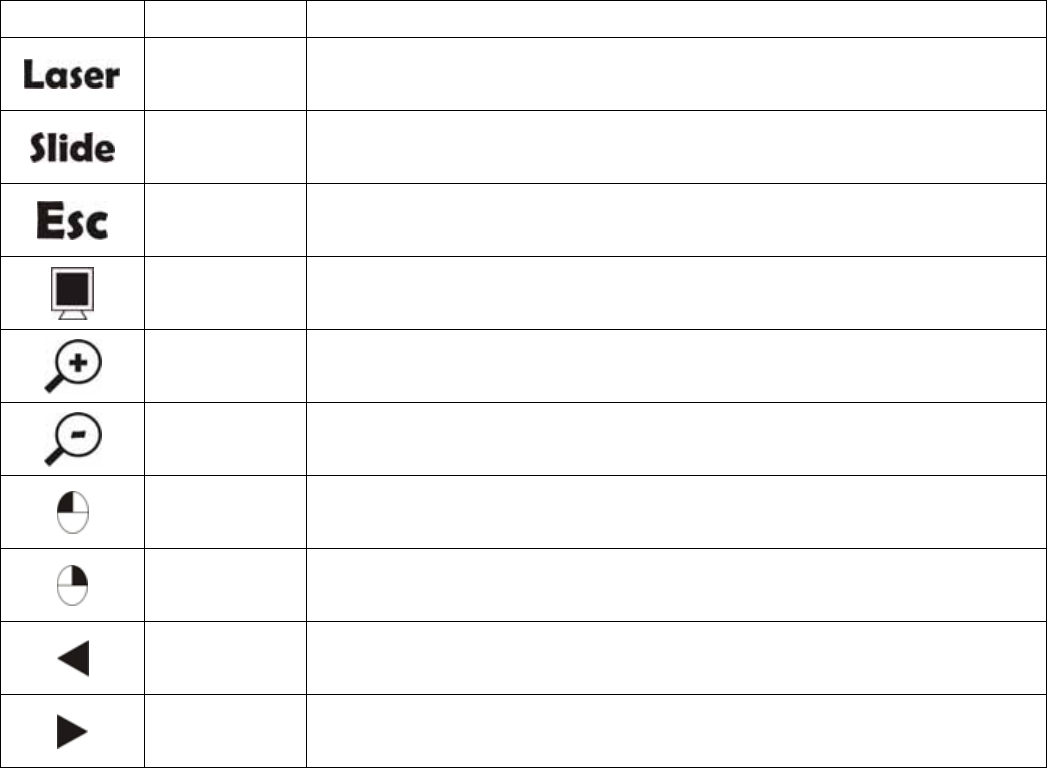
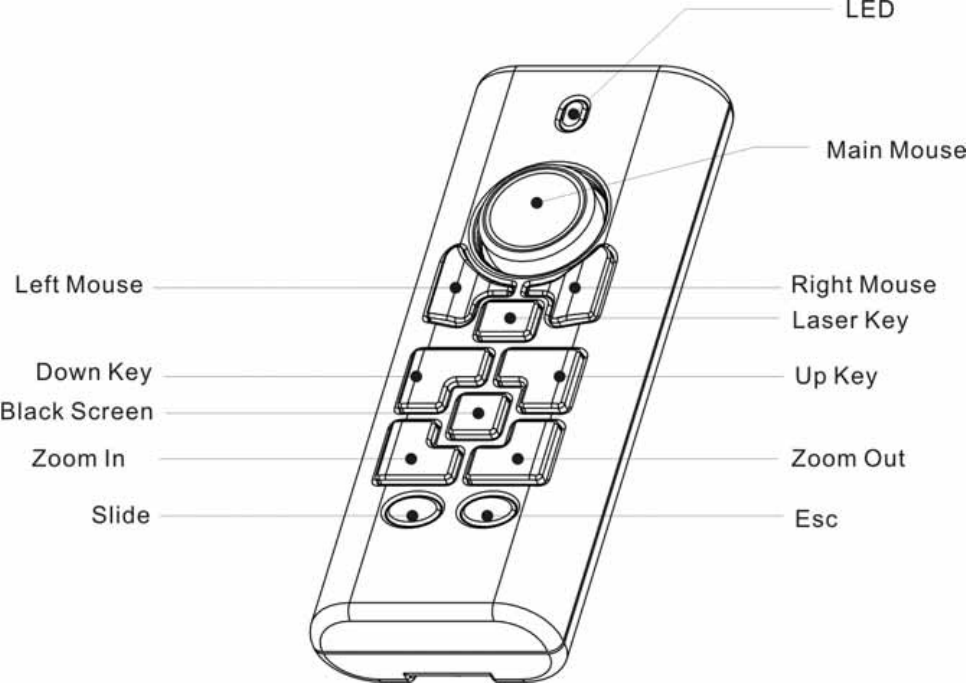
The function of each key is described below.
Icons Keys Function description
Laser Press Laser key for around three to activate the laser function first,
and then press Laser key to shoot the laser beam.
Slide Click to start the slide show. (similar to pressing F5 in PowerPoint)
ESC Click this key to exit the slide show. (similar to pressing Esc in
PowerPoint)
Black Screen Click this key to dark the screen, click again to resume normal
Zoom In Start Zoom In function
Zoom out Start Zoom Out function
Left Mouse Normal Mouse left key
Right Mouse Normal Mouse right key
Up Normal Up key
Down Normal Down key
Composite Key Mode
Function of two keys pressing at the same time.
1. To Press together for over three seconds, the LED indicator will be switch
off. The Zoom Presenter will also be shut down.
2. To Presss Mouse Right/Left keys together for over three seconds, you are to
activate the pairing of the Zoom Presenter. The detail process of Paring the
Zoom Presenter and the USB dongle, please refer to the Paring of the unit
on section .

7
Figure 2
8
Additional Information
Specifications
System
Frequency range: 2400~2483MHz
Remote range: Approx. 100 feet (30 meters) indoors, 328 feet (100 meters)
outdoors
Operating voltage: Remote control: 2.4V~3.3V, Laser: 2.6V~3.3V
Power: AAA batteries * 2
Power consumption: Normal < 10mA; Laser < 20mA; Sleep < 10uA
Output power: Under 1mW
Laser: Semiconductor laser(λ= 650 nm), emission duration: continuous
Laser output power: Max.0.95 mW
Physical Dimensions
Size: Tx: 105(l) x 40(w) x 20(h) mm. Rx: 49(l) x 16(w) x 3.5(h) mm
Weight: Tx 63 grams (include batteries)
Environmental Requirements
Temperature:
Operating: 0℃(32℉)~60℃(140℉)
Non-operation: -10℃(14℉)~65℃(149℉)
Humidity(non-condensing):
Operating: 10%~85% RH
Non-operating: 10%~95% RH
Note: Design and specifications are subject to change without notice.
Care and Maintenance
For cleaning, you are advised to use a soft, slightly moistened cloth.
Avoid using solvents or abrasive substances.
Do not open the presenter: for maintenance, consult qualified staff only.
Thank you for using the omni-directional Wireless Zoom Presenter again.
DOC NO.: EB-B3010-201
9
Federal Communication Commission Interference Statement
This equipment has been tested and found to comply with the limits for a Class B
digital device, pursuant to Part 15 of the FCC Rules. These limits are designed to
provide reasonable protection against harmful interference in a residential
installation. This equipment generates, uses and can radiate radio frequency
energy and, if not installed and used in accordance with the instructions, may cause
harmful interference to radio communications. However, there is no guarantee that
interference will not occur in a particular installation. If this equipment does cause
harmful interference to radio or television reception, which can be determined by
turning the equipment off and on, the user is encouraged to try to correct the
interference by one of the following measures:
- Reorient or relocate the receiving antenna.
- Increase the separation between the equipment and receiver.
- Connect the equipment into an outlet on a circuit different from that to which the
receiver is connected.
- Consult the dealer or an experienced radio/TV technician for help.
FCC Caution: Any changes or modifications not expressly approved by the party
responsible for compliance could void the user's authority to operate this equipment.
This device complies with Part 15 of the FCC Rules. Operation is subject to the
following two conditions: (1) This device may not cause harmful interference, and (2)
this device must accept any interference received, including interference that may
cause undesired operation.
This transmitter must not be co-located or operating in conjunction with any other
antenna or transmitter.