Razer RC30013602 CHARGING DOCK User Manual
Razer Inc. CHARGING DOCK
UserManual.wiki
>
Razer
>
RC30013602 User Manual
User Manual
Navigation menu
Upload a User Manual
Namespaces
Wiki Guide
HTML
PDF
Info
Views
User Manual
Discussion / Help
Navigation
![2 DEVICE LAYOUT [Placeholder image] A. Left mouse button B. Right mouse button C. Scroll wheel D. Left tilt-click - scroll left E. Right tilt-click - scroll right F. Sensitivity button - stage up* G. Sensitivity button - stage down* H. Mouse button 5 I. Mouse button 4 J. Side Strips K. Ultraslick mouse feet L. Adjustable click force mechanism M. Wireless on/off switch N. 16000 DPI4G sensor [Placeholder image] O. Charging cable P. Charging dock Q. Screwdriver Note: Once you have installed Razer Synapse, you will have access to more DPI options which you can configure to the Sensitivity buttons. H I K K L L K N O P Q M D E F G J](https://usermanual.wiki/Razer/RC30013602/User-Guide-2705600-Page-2.png)
![3 SETTING UP YOUR RAZER MAMBA ADJUSTING THE CLICK FORCE 1. Take the screwdriver provided and insert it firmly into the adjustable click force mechanism. [Placeholder image] 2. Rotate the screwdriver clockwise to increase or counterclockwise to decrease the resistance. [Placeholder image] LIGHTING SCHEME WHEN CHARGING THE RAZER MAMBA LED INDICATOR BATTERY STATUS (scroll wheel blinking: red) [Placeholder image] Low power (<25%) (1st[Placeholder image] LED breathing) Charging (0%-15%) (2nd[Placeholder image] LED breathing) Charging (>5%-30%) (3rd[Placeholder image] LED breathing) Charging (>30%-45%) (4th[Placeholder image] LED breathing) Charging (>45%-60%) (5th[Placeholder image] LED breathing) Charging (>60%-75%) (6th[Placeholder image] LED breathing) Charging (>75%-90%) (7th[Placeholder image] LED breathing) Charging (>90%-99%) (All LEDsspectrum cycling) [Placeholder image] Fully charged (100%) Note: Thislighting scheme is only applicable if the Razer Mamba is placed on the charging dock. The Razer Mamba will resume its own lighting effects once it is removed from the charging dock.](https://usermanual.wiki/Razer/RC30013602/User-Guide-2705600-Page-3.png)
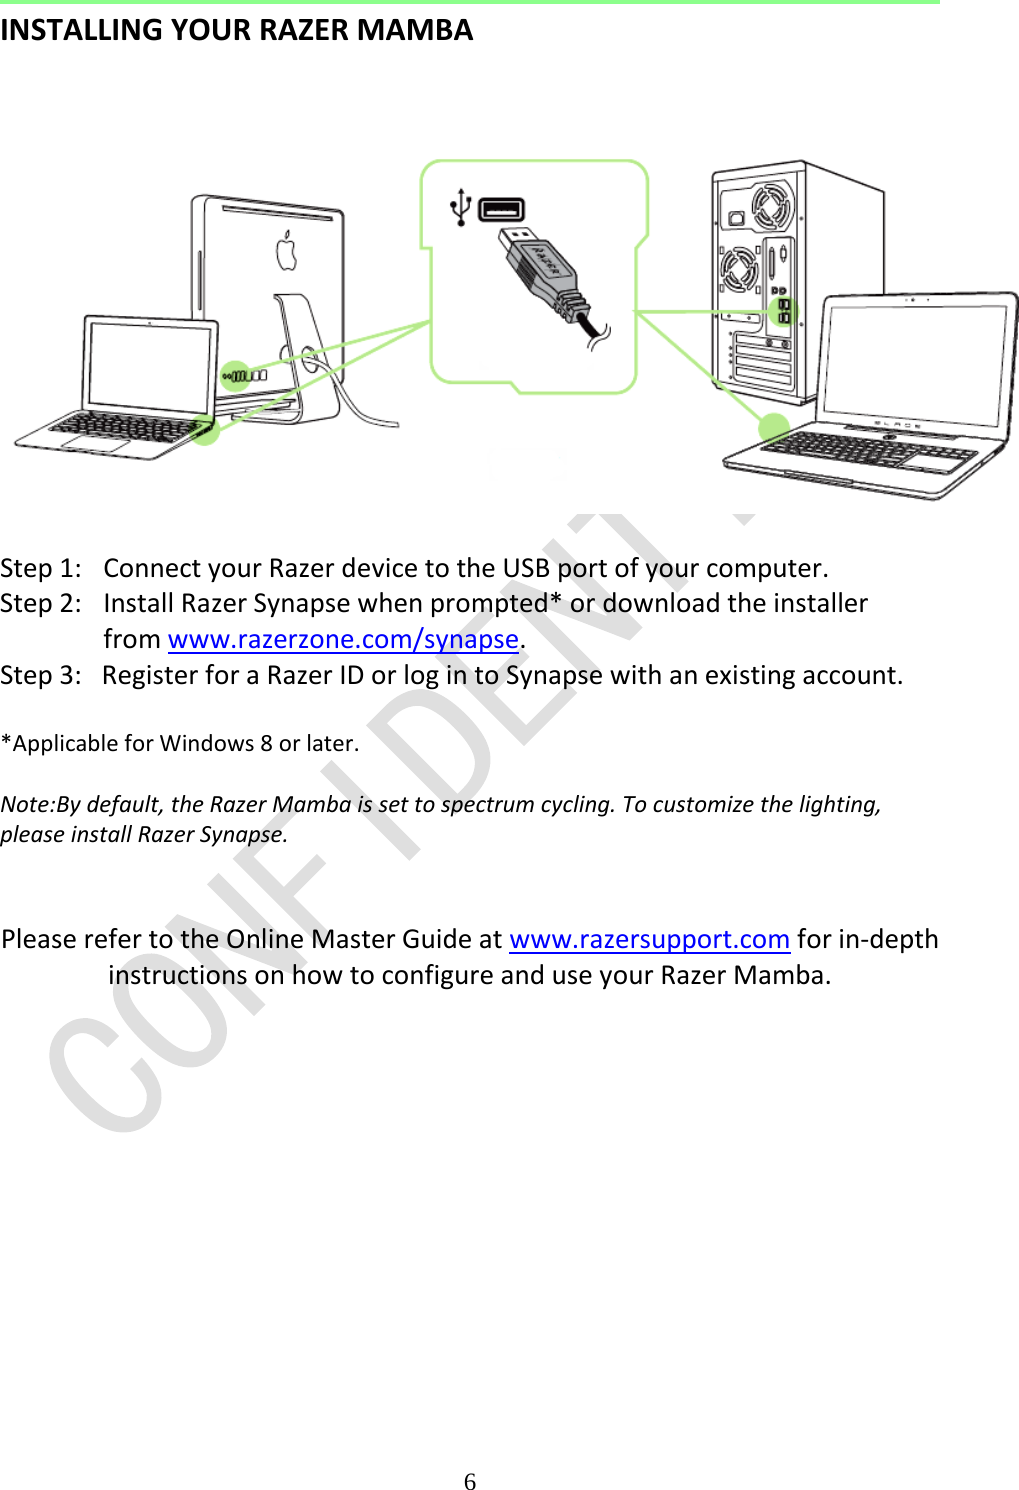
![4 CHARGING YOUR RAZER MAMBA For best results, please fully charge your Razer Mamba before using it forthe first time. A depleted battery will be fully charged in about 5hours. If the Razer Mamba has not been used for an extended period, you mayneed to recharge it before use. The Razer Mamba requires a USB connection that is able to supply sufficient power to charge the battery. The battery charging process of the Razer Mamba may be affected if connected to a non-powered USB hub or non-powered USB ports found on certain keyboards and other peripherals. When in doubt, it is preferable to connect the Razer Mamba directly to the USB port of your computer. WIRELESS MODE 1. Insert the micro USB connector to the charging dock and then insert the USB connector to your computer. [Placeholder image] 2. Slide the switch to the Wireless ON position as shown here. To conserve battery power, always move the switch to the Wireless OFF position when not using your mouse in wireless mode. [Placeholder image]](https://usermanual.wiki/Razer/RC30013602/User-Guide-2705600-Page-4.png)
![5 3. To charge the Razer Mamba in wireless mode, ensure that the switch is set to Wireless OFF position and then place the mouse on the charging dock. [Placeholder image] WIRED MODE Insert the micro USB connector to the Razer Mamba and then insert the USB connector to your computer. [Placeholder image] The Razer Mamba is now ready for use as a high performance wired mouse. In addition, its battery will automatically start charging in wired mode.](https://usermanual.wiki/Razer/RC30013602/User-Guide-2705600-Page-5.png)
![8 REGISTRATION / TECHNICAL SUPPORT REGISTRATION Sign up now for a Razer Synapse account to get real-time information on your product’s warranty status. To learn more about Razer Synapse and all its features, visit www.razerzone.com/synapse. If you are already a Razer Synapse user, register your product by clicking on your email address at the Razer Synapse application and select Warranty Status from the dropdown list. To register your product online, visit www.razerzone.com/registration. Please note that you will not be able to view your warranty status if you register via the website. Your product’s serial number can be found here [Placeholder image]](https://usermanual.wiki/Razer/RC30013602/User-Guide-2705600-Page-8.png)