Razer RC30015902 Wireless Gaming Headset User Manual
Razer Inc. Wireless Gaming Headset
UserManual.wiki
>
Razer
>
RC30015902 User Manual
User Manual
Navigation menu
Upload a User Manual
Namespaces
Wiki Guide
HTML
PDF
Info
Views
User Manual
Discussion / Help
Navigation

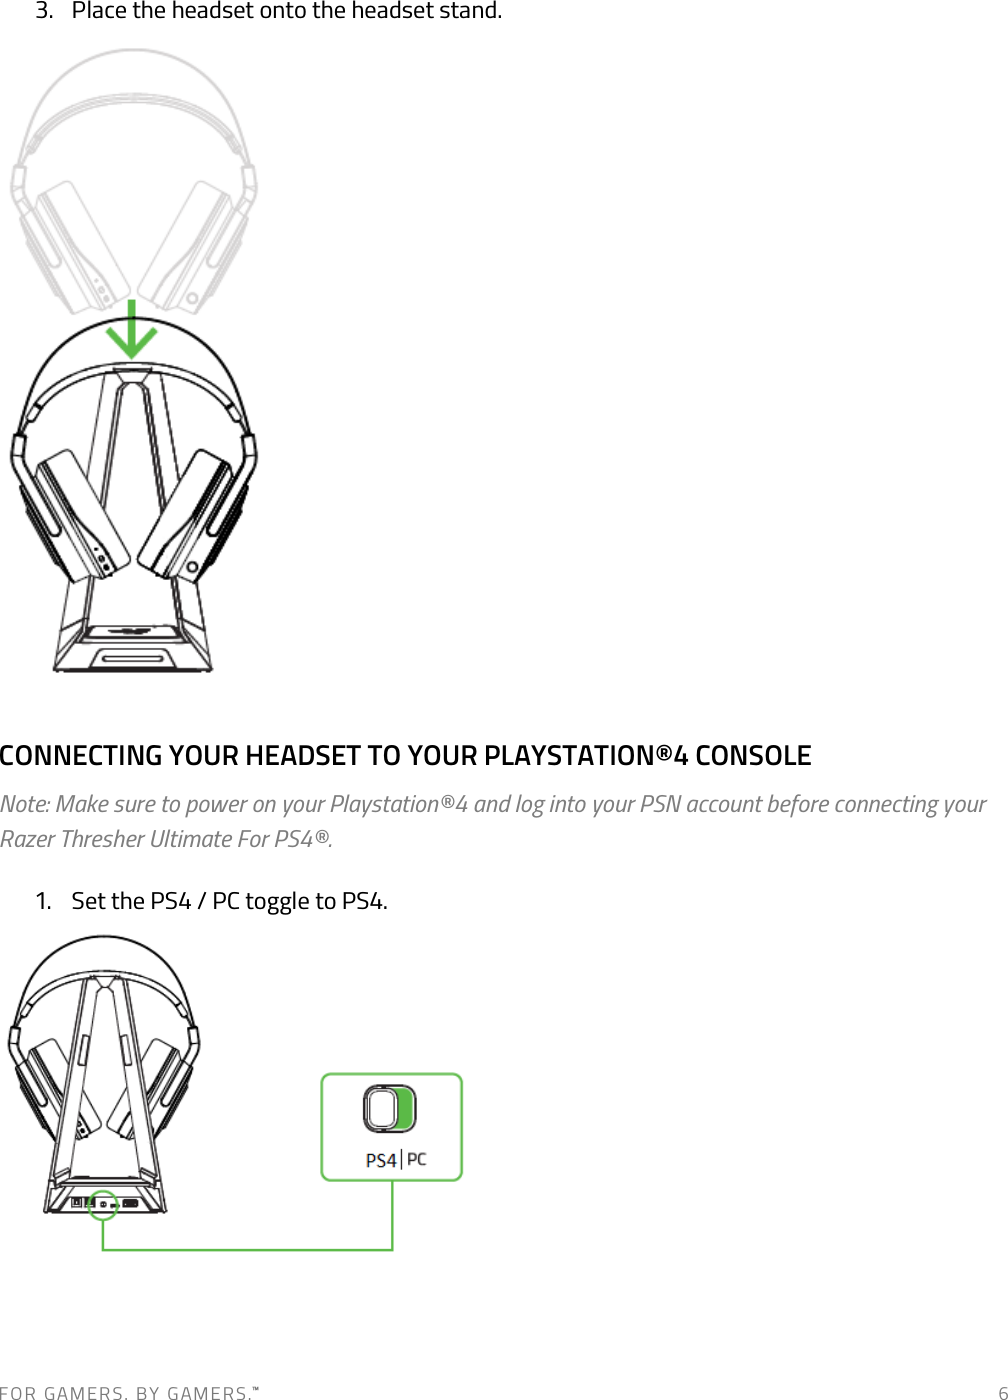
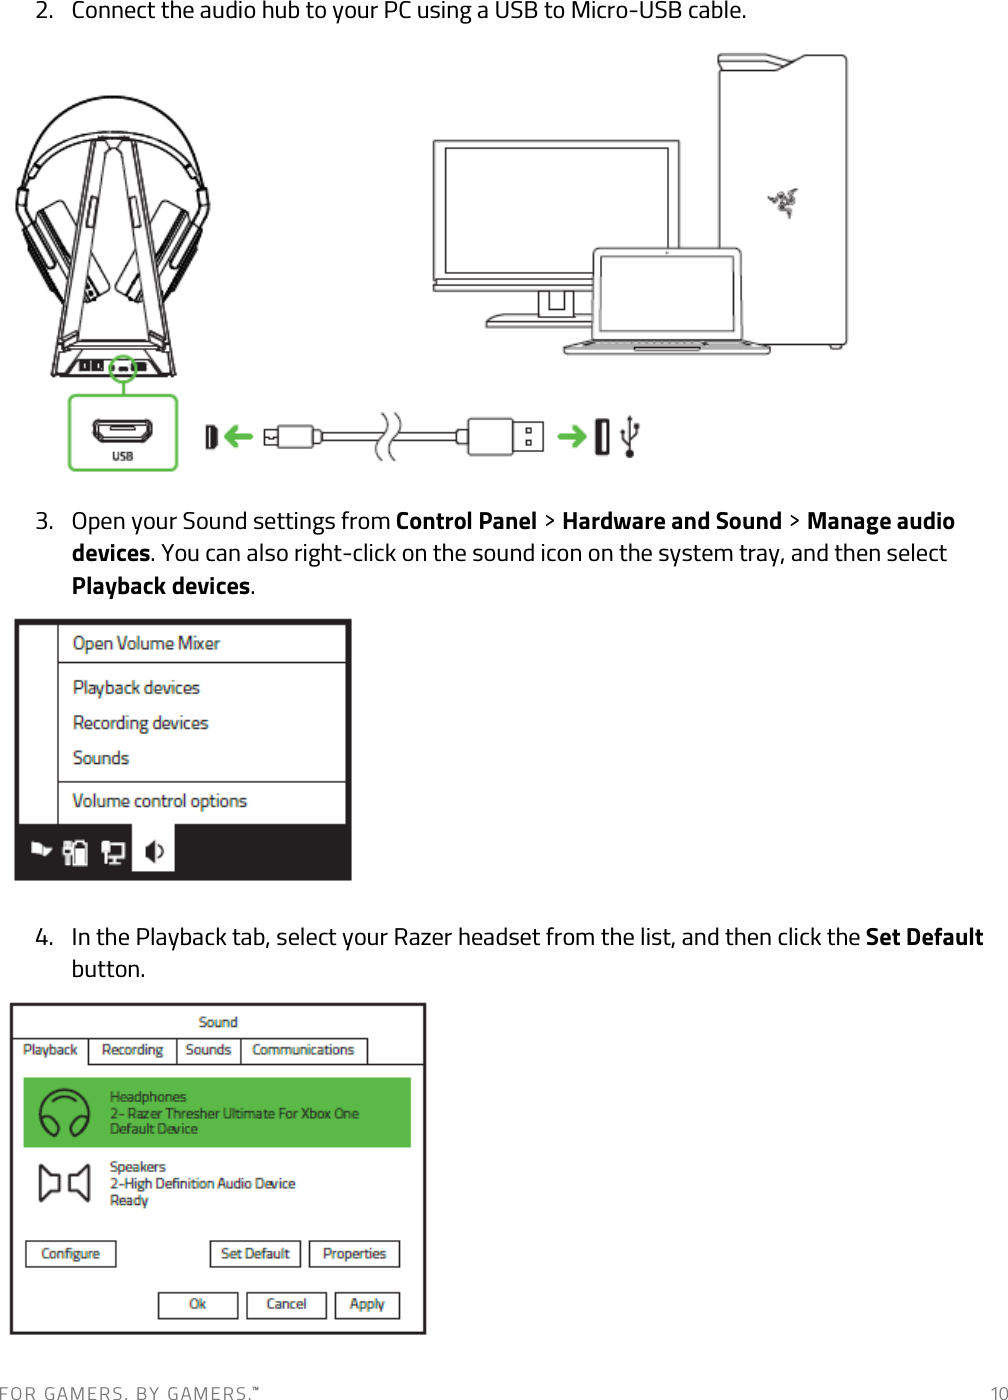
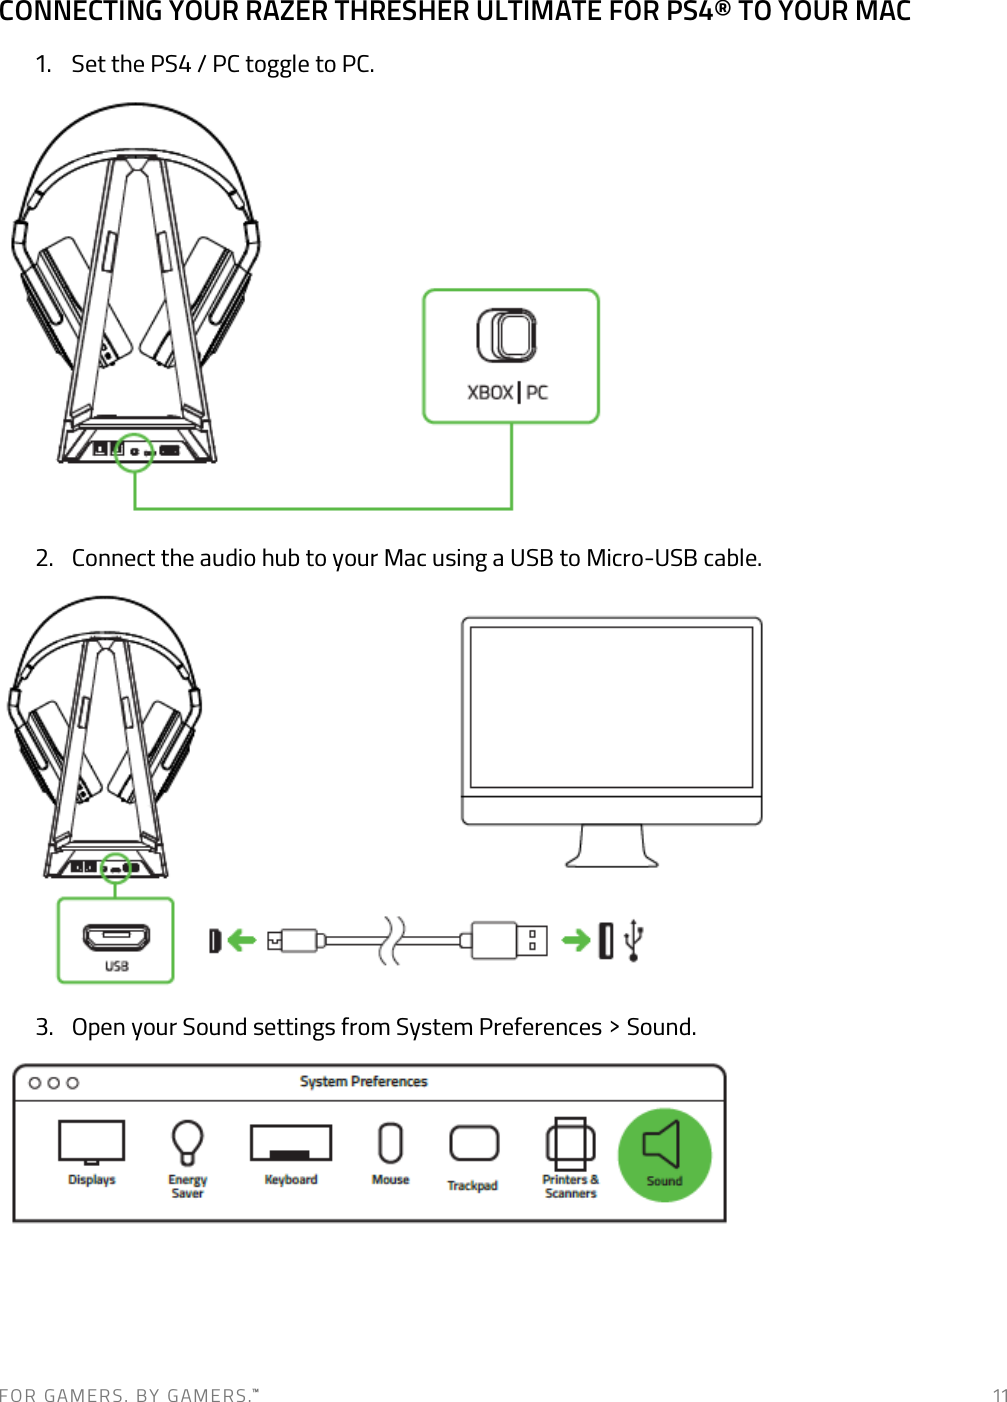
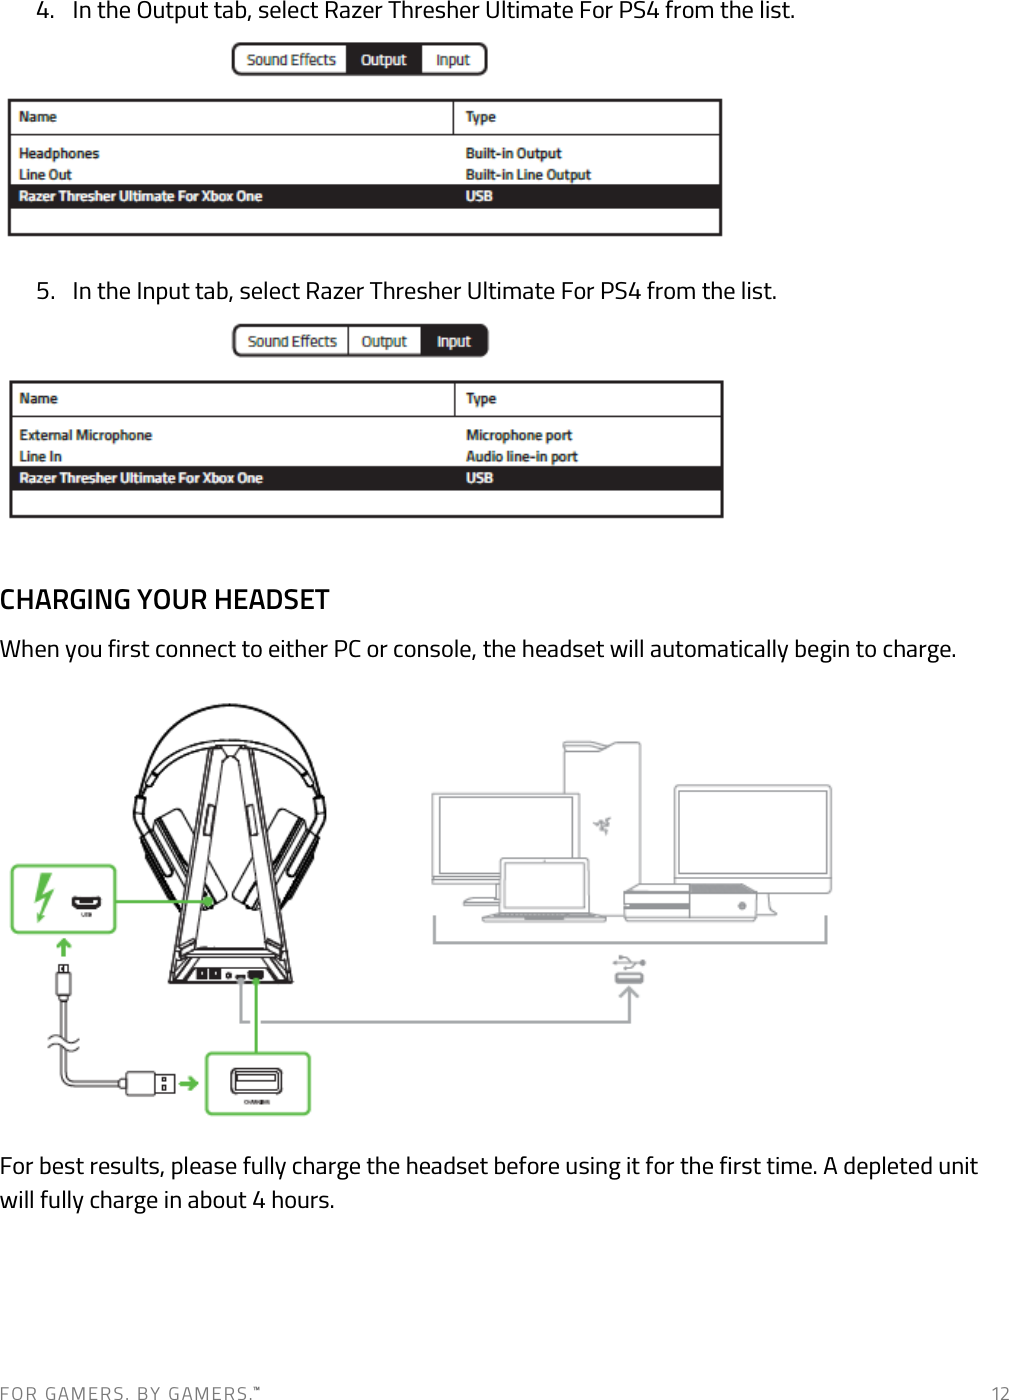
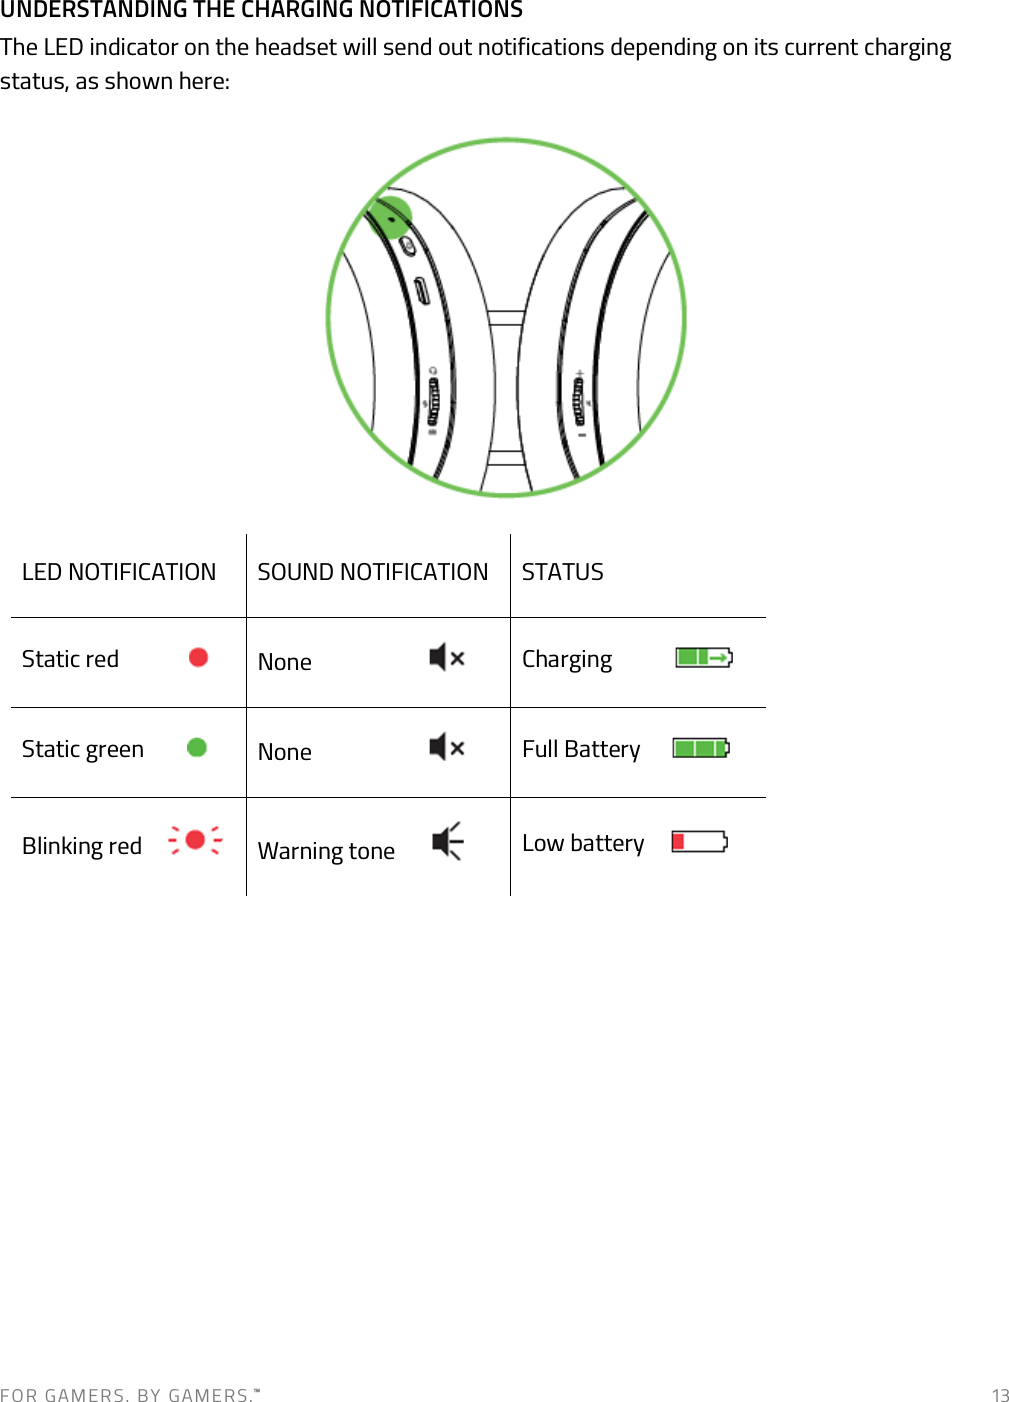
![F O R G A M E R S . B Y G AM E R S .™ 9 7. Go to Settings > Devices > Audio Devices, and then select your Razer headset for the Input Device and Output Device options. CONNECTING YOUR RAZER THRESHER ULTIMATE FOR PS4® TO YOUR PC 1. Set the PS4 / PC toggle to PC. [IMAGE PLACEHOLDER]](https://usermanual.wiki/Razer/RC30015902/User-Guide-3425156-Page-10.png)