Razer RZ030188 Wireless Keyboard User Manual RZ03 0188 english IPIG
Razer Inc. Wireless Keyboard RZ03 0188 english IPIG
Razer >
Users Manual
0 | For Gamers. By Gamers.™
DtD:15/4/2016
User manual for
Model : RZ03-0188

1 | Razer™
PACKAGE CONTENTS / SYSTEM REQUIREMENTS
PACKAGE CONTENTS
•
Wireless Keyboard( RZ03-0188)
•Micro-USB to USB charging cable
•Important Product Information Guide
SYSTEM REQUIREMENTS
•12.9-inch iPad Pro
•iOS 9 or higher

2 | For Gamers. By Gamers.™
REGISTRATION / TECHNICAL SUPPORT
Sign up now for a Razer Synapse account to get real-time information on your
product’s warranty status. To learn more about Razer Synapse and all its features, visit
razerzone.com/synapse.
If you are already a Razer Synapse user, register your product by clicking on your email
address at the Razer Synapse application and select Warranty Status from the
dropdown list.
To register your product online, visit razerzone.com/registration. Please note that you
will not be able to view your warranty status if you register via the website.
TECHNICAL SUPPORT
What you’ll get:
•6 months limited manufacturer’s warranty.
•Free online technical support at razersupport.com.
Your product’s serial number can be found here

3 | Razer™
DEVICE LAYOUT
A. Protective case
B. Detachable magnetic hinge
C. Mechanical keyboard
D. Power button
E. LED indicators
F. Metal kickstand
G. Charging cable
4 | For Gamers. By Gamers.™
SETTING UP YOUR RAZER MECHANICAL KEYBOARD CASE
GETTING STARTED
1. Connect your Razer Mechanical Keyboard Case to a suitable power source using
the charging cable.
*not included
Note: It is highly recommended that you use a USB power adapter as some USB ports and hubs may not
be suitable for charging.
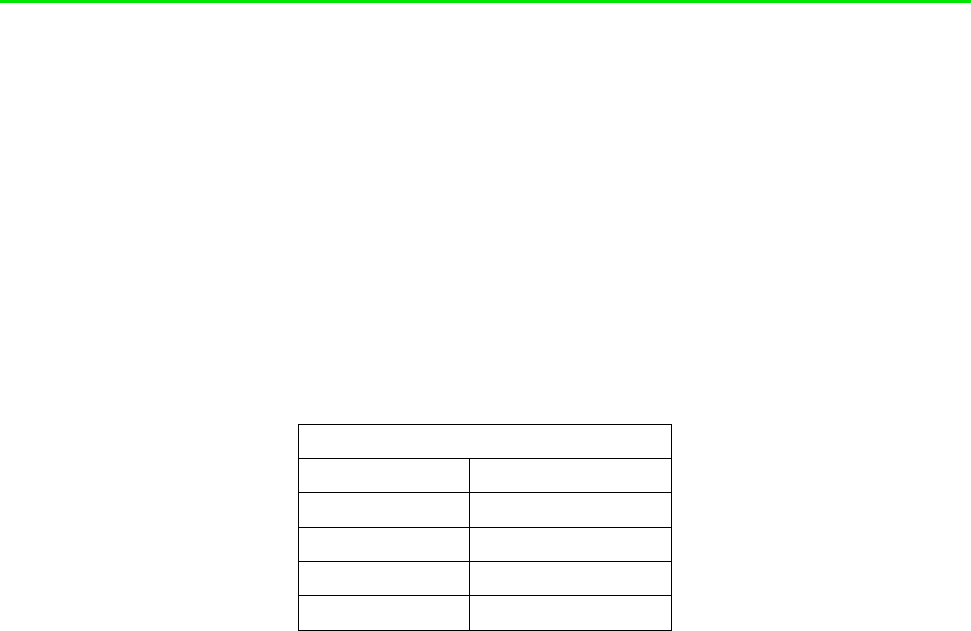
2. Wait for Razer Mechanical Keyboard Case to fully charge.
Keyboard b
attery
i
ndicator
Status
Notification
Full
Solid Green
Low
Solid
Yellow
Critical
Blinking Red
Charging
Solid Red
Note: A depleted battery will take at least 3.5 hours to fully charge.
3. Gently place your iPad Pro into the protective case.
4. Press down on the sides of the protective case to fasten your iPad Pro.
REMOVING YOUR iPAD PRO
1. Unfasten the corner of your iPad Pro from your Razer Mechanical Keyboard
Case.
2. Use the corner gap to carefully remove your iPad Pro from your Razer
Mechanical Keyboard Case.

5 | Razer™
USING YOUR RAZER MECHANICAL KEYBOARD CASE
METAL KICKSTAND
Your Razer Mechanical Keyboard Case is equipped with an adjustable metal kickstand
located at the back of the protective case. To open the metal kickstand, hold the
protective case with one hand then use your other hand to pull the metal kickstand
away from the protective case. Once opened, you can use your Razer Mechanical
Keyboard Case for typing or for viewing media.
To close, hold the protective case with one hand and use the other hand to push the
metal kickstand towards the case. After that, push the sides of the metal kickstand to
lock it in place.
BLUETOOTH PAIRING
1. Power on your Razer Mechanical Keyboard Case.
Note: While your Razer Mechanical Keyboard Case is in search mode, the Bluetooth indicator will continuously
blink.
2. Enable Bluetooth on your iPad Pro.
3. Select “Razer Keyboard” from the list of devices found.
4. Enter the 6-digit code on your Razer Mechanical Keyboard Case.
5. Wait for pairing to complete.
When pairing is complete, the LED indicator will change to static blue for 5 seconds before turning off.
Once your iPad Pro has been paired, your Razer Mechanical Keyboard Case will
automatically reconnect to the device every time the keyboard is powered on. After 30
seconds, if your Razer Mechanical Keyboard Case fails to pair with your iPad Pro, it will
automatically power off. If you want to pair your Razer Mechanical Keyboard Case to
another device, simply un-pair the keyboard then repeat the Bluetooth pairing steps
again.
6 | For Gamers. By Gamers.™
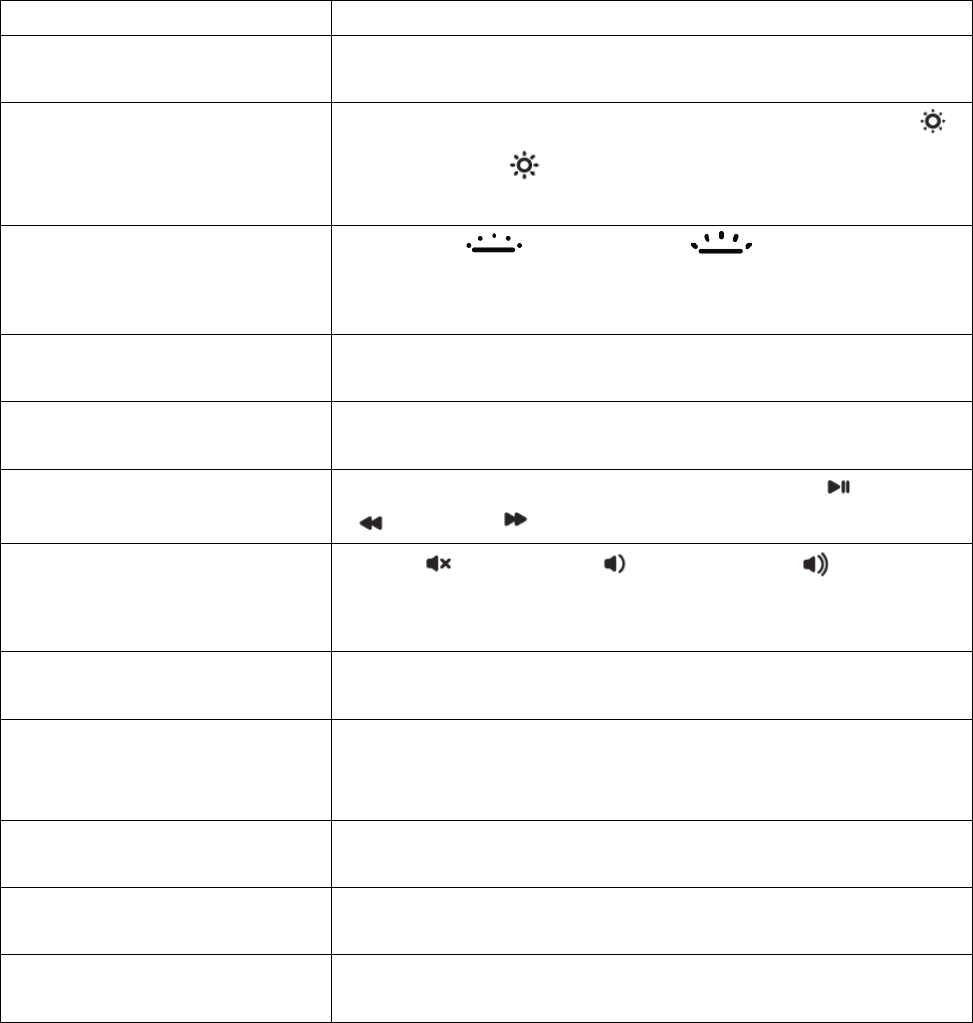
SPECIAL FUNCTION KEYS
Special function keys offer the same functionality as the physical buttons and
commands on your iPad Pro. Special function keys include the following:
Special
Function Keys
Description
Home
R
eturn to the Home screen as well as
access
other
useful shortcuts using the Home key.
Screen brightness
The screen brightness keys allow you to decrease ( )
or increase ( ) the brightness of your iPad Pro
display.
Keyboard backlight
Decrease ( ) or increase ( ) the brightness of
your keyboard’s backlight LEDs using the keyboard
backlight keys.
Spotlight Search
Use the
spotlight
key to
search
for useful information in
your iPad Pro, your apps, or the Internet.
Sleep/Wake
The sleep/wake key locks your iPad Pro and puts it to
sleep mode.
Media The media keys allow you to play/pause ( ), rewind
( ) or skip ( ) media content on your iPad Pro.
Volume control
Mute ( ), decrease ( ) or increase ( ) the audio
output of songs, notifications, sound effects, and other
media.
Bluetooth
Pair or reset the Bluetooth connection of your iPad Pro
using the Bluetooth key.
Keyboard battery status
The keyboard battery status key s
hows
you
the current
battery level of your Razer Mechanical Keyboard Case
(See keyboard battery indicator for more info).
Language
The language key allows you to s
how or
to
change
your
iPad Pro’s keyboard format.
Command
Combine the command key with other keys to access
app-based shortcuts.
Virtual Keyboard
Use the virtual keyboard key to show or hide the
on
-
screen keyboard.

7 | Razer™
TROUBLESHOOTING YOUR RAZER MECHANICAL KEYBOARD CASE
Should the Razer Mechanical Keyboard Case stop responding, you can manually
shutdown the keyboard using the pinhole reset button as shown here:
*not included
If this does not solve the issue, please contact our customer support team at
razersupport.com.

8 | For Gamers. By Gamers.™
SAFETY AND MAINTENANCE
SAFETY GUIDELINES
In order to achieve maximum safety while using your Razer Mechanical Keyboard Case,
we suggest that you adopt the following guidelines:
1. Should you have trouble operating the device properly and troubleshooting does
not work, unplug the device and contact the Razer hotline or go to
razersupport.com for support. Do not attempt to service or fix the device
yourself at any time.
2. Do not take apart the device (doing so will void your warranty) and do not
attempt to operate it under abnormal current loads.
3. Keep the device away from liquid, humidity or moisture. Operate the device only
within the specific temperature range of 0°C (32°F) to 40°C (104°F). Should the
temperature exceed this range, unplug and/or switch off the device in order to
let the temperature stabilize to an optimal level.
MAINTENANCE AND USE
The Razer Mechanical Keyboard Case requires minimum maintenance to keep it in
optimum condition. Once a month we recommend you unplug the device from the
computer and clean it using a soft cloth or cotton swab with a bit of warm water to
prevent dirt buildup. Do not use soap or harsh cleaning agents.

9 | Razer™
LEGALESE
COPYRIGHT AND INTELLECTUAL PROPERTY INFORMATION
©2016 Razer Inc. Patent Pending. All rights reserved. Razer, For Gamers. By Gamers.,
triple-headed snake logo, and the Razer logo are trademarks or registered
trademarks of Razer Inc. and/or affiliated companies in the United States or other
countries. All other trademarks are the property of their respective owners.
© 2016 Apple Inc. All rights reserved. Apple, the Apple logo and iPhone are trademarks
of Apple Inc., registered in the U.S. and other countries. IOS is a trademark or
registered trademark of Cisco in the U.S. and other countries and is used under license.
The Bluetooth word mark and logos are owned by the Bluetooth SIG. Inc. and any use
of such marks by Razer is under license.
Razer Inc. (“Razer”) may have copyright, trademarks, trade secrets, patents, patent
applications, or other intellectual property rights (whether registered or unregistered)
concerning the product in this guide. Furnishing of this guide does not give you a
license to any such copyright, trademark, patent or other intellectual property right.
The Razer Mechanical Keyboard Case (the “Product”) may differ from pictures whether
on packaging or otherwise. Razer assumes no responsibility for such differences or for
any errors that may appear. Information contained herein is subject to change without
notice.
LIMITED PRODUCT WARRANTY
For the latest and current terms of the Limited Product Warranty, please visit
razerzone.com/warranty.
LIMITATION OF LIABILITY
Razer shall in no event be liable for any lost profits, loss of information or data, special,
incidental, indirect, punitive or consequential or incidental damages, arising in any way
out of distribution of, sale of, resale of, use of, or inability to use the Product. In no
event shall Razer’s liability exceed the retail purchase price of the Product.
10 | For Gamers. By Gamers.™
COSTS OF PROCUREMENT
For the avoidance of doubt, in no event will Razer be liable for any costs of
procurement unless it has been advised of the possibility of such damages, and in no
case shall Razer be liable for any costs of procurement liability exceeding the retail
purchase price of the Product.
GENERAL
These terms shall be governed by and construed under the laws of the jurisdiction in
which the Product was purchased. If any term herein is held to be invalid or
unenforceable, then such term (in so far as it is invalid or unenforceable) shall be given
no effect and deemed to be excluded without invalidating any of the remaining terms.
Razer reserves the right to amend any term at any time without notice.
FCC Statement
This equipment has been tested and found to comply with the limits for a Class B digital device, pursuant to part 15 of the
FCC Rules. These limits are designed to provide reasonable protection against harmful interference in a residential
installation. This equipment generates uses and can radiate radio frequency energy and, if not installed and used in
accordance with the instructions, may cause harmful interference to radio communications. However, there is no guarantee
that interference will not occur in a particular installation. If this equipment does cause harmful interference to radio or
television reception, which can be determined by turning the equipment off and on, the user is encouraged to try to correct
the interference by one or more of the following measures:
—Reorient or relocate the receiving antenna.
—Increase the separation between the equipment and receiver.
—Connect the equipment into an outlet on a circuit different from that to which the receiver is connected.
—Consult the dealer or an experienced radio/TV technician for help.
FCC Statement
This device complies with FCC radiation exposure limits set forth for an uncontrolled environment.
This device complies with Part 15 of the FCC Rules. Operation is subject to the following two conditions: (1) this device may
not cause harmful interference, and (2) this device must accept any interference received, including interference that may
cause undesired operation.
Caution!
Any changes or modifications not expressly approved by the party responsible for compliance could void the user's
authority to operate the equipment.
Canada Statement
This device complies with Industry Canada’s licence-exempt RSSs. Operation is subject to the following two conditions:
(1) This device may not cause interference; and
(2) This device must accept any interference, including interference that may cause undesired operation of the device.
Le présent appareil est conforme aux CNR d’Industrie Canada applicables aux appareils radio exempts de licence.
L’exploitation est autorisée aux deux conditions suivantes :
(1) l’appareil ne doit pas produire de brouillage;
(2) l’utilisateur de l’appareil doit accepter tout brouillage radioélectrique subi, même si le brouillage est susceptible d’en
compromettre le fonctionnement.
The device meets the exemption from the routine evaluation limits in section 2.5 of RSS 102 and compliance with RSS-102
RF exposure, users can obtain Canadian information on RF exposure and compliance.
Le dispositif rencontre l'exemption des limites courantes d'évaluation dans la section 2.5 de RSS 102 et la conformité à
l'exposition de RSS-102 rf, utilisateurs peut obtenir l'information canadienne sur l'exposition et la conformité de rf.