Remote Diagnostic Technologies 0002 Tempus 2000 Patient Monitor User Manual CUD 34 Revision 00 Tempus 2000
Remote Diagnostic Technologies Ltd. Tempus 2000 Patient Monitor CUD 34 Revision 00 Tempus 2000
Contents
- 1. Users Manual Part 1
- 2. Users Manual Part 2
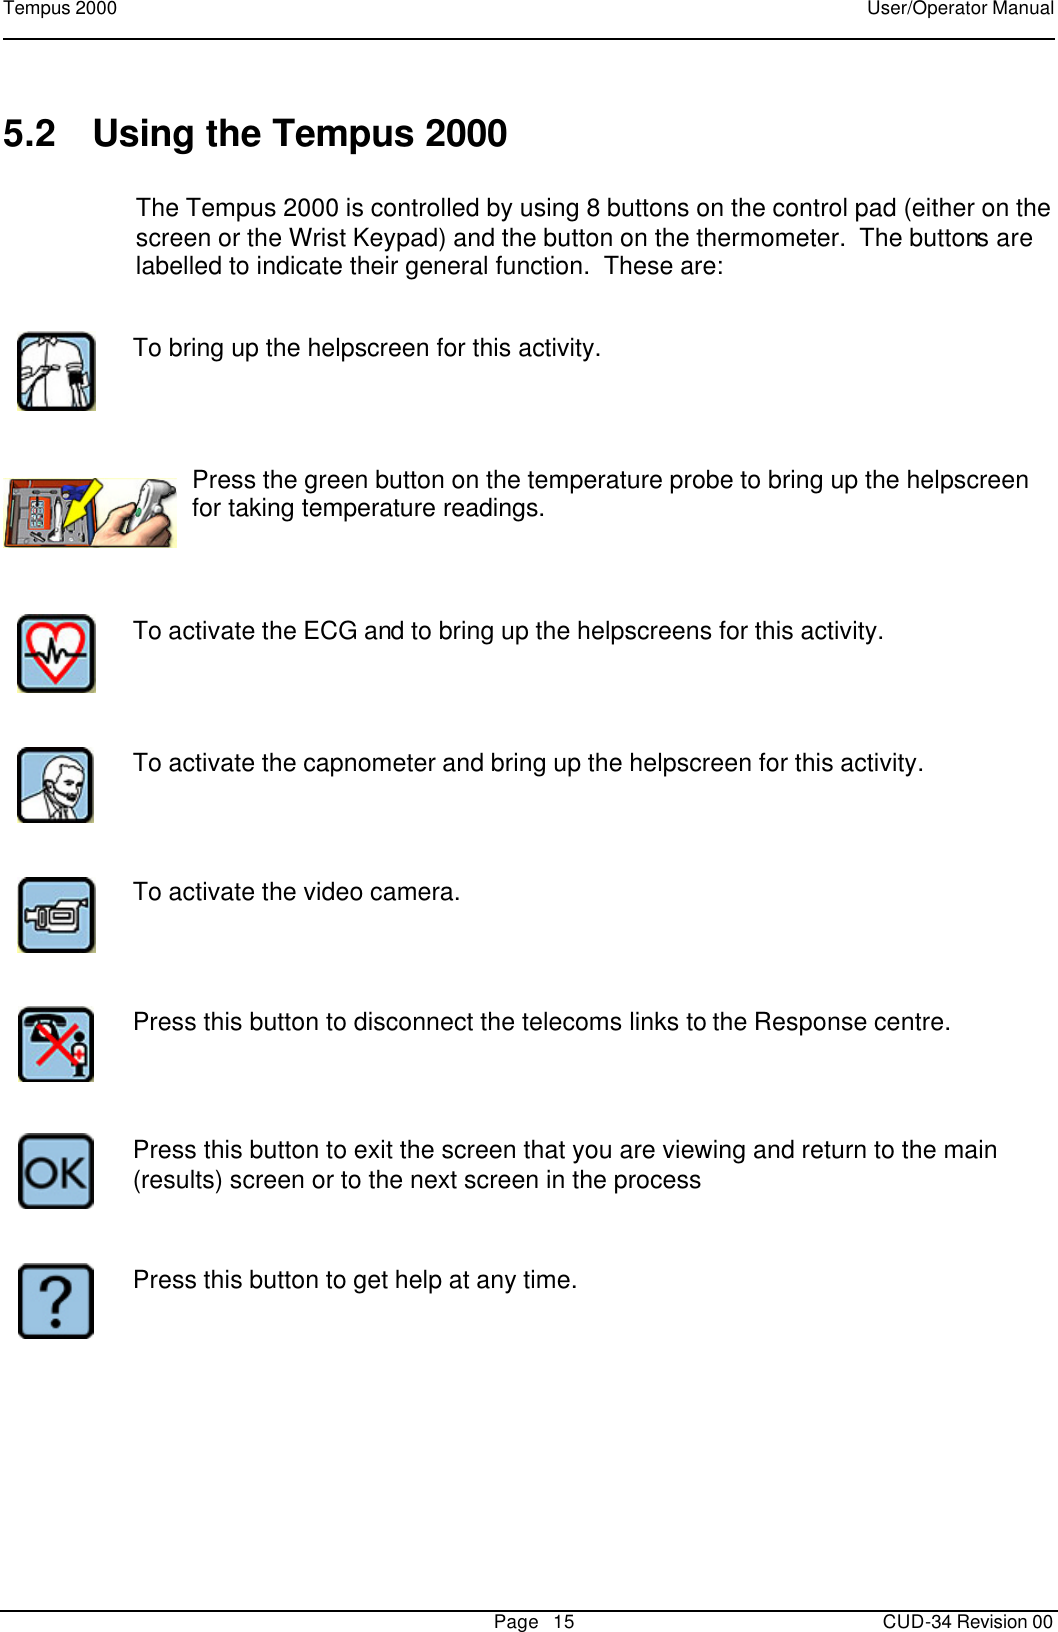
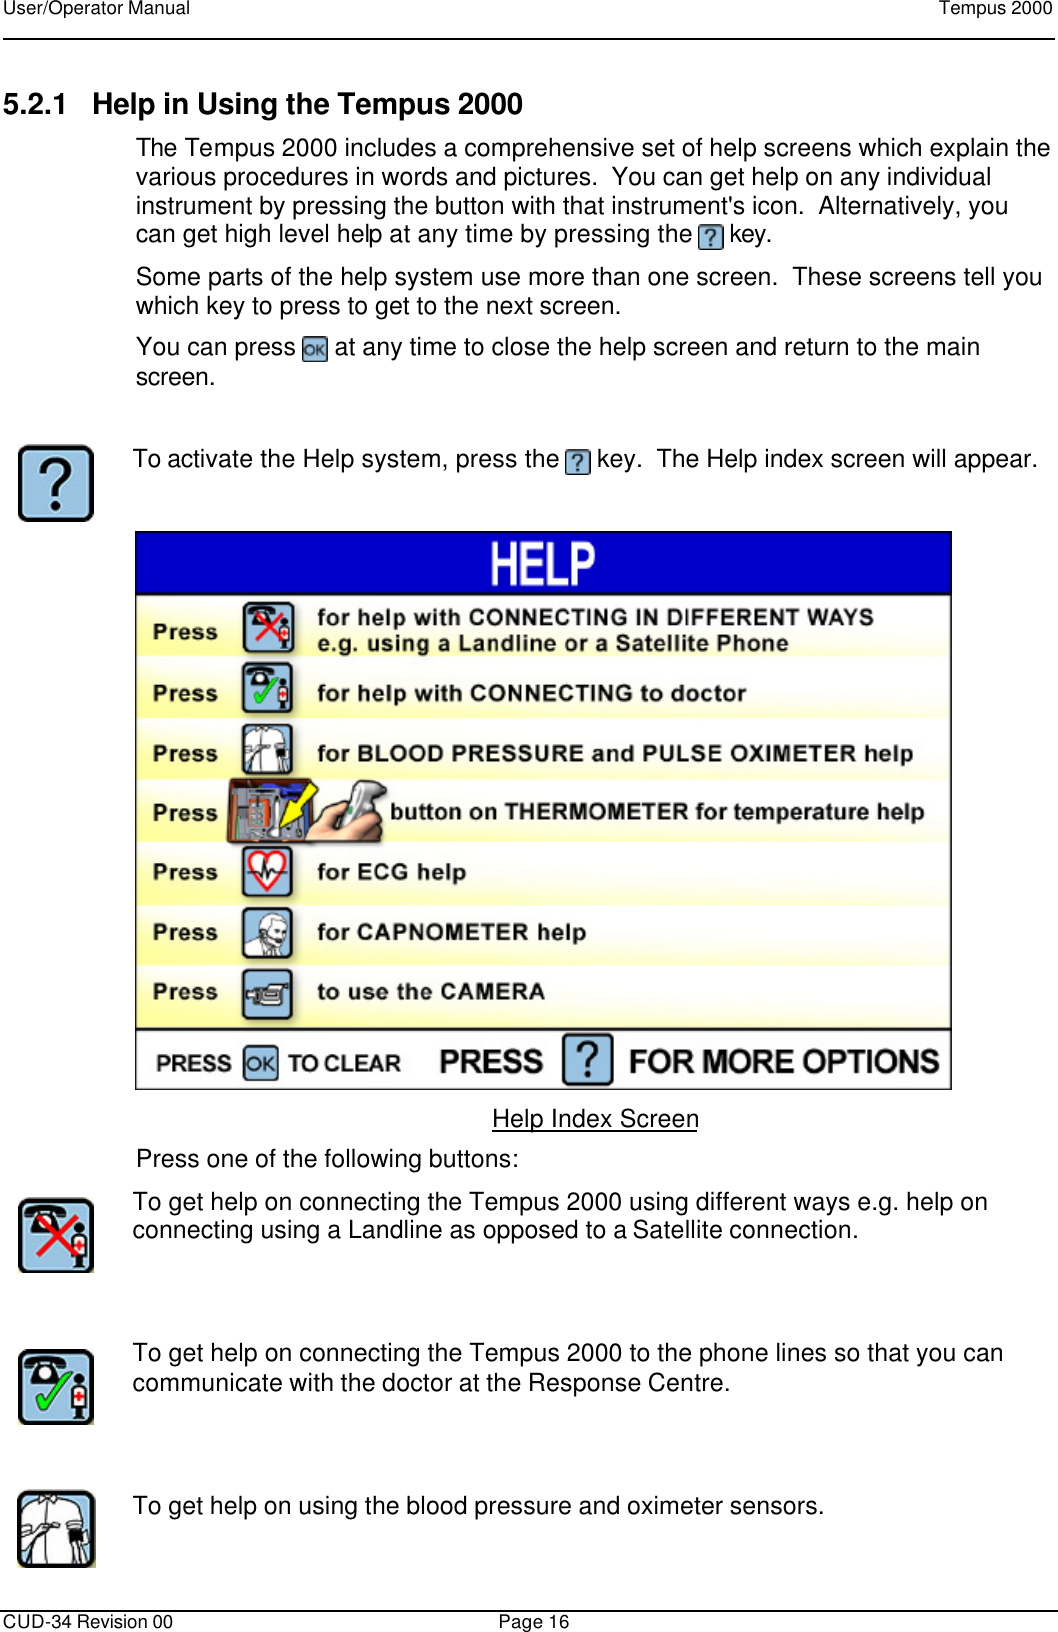
Users Manual Part 1