Remote Technologies RTI0100 Home Theater Universal R/C User Manual
Remote Technologies Inc Home Theater Universal R/C Users Manual
UserManual.wiki
>
Remote Technologies
>
RTI0100 User Manual
Users Manual
Navigation menu
Upload a User Manual
Namespaces
Wiki Guide
HTML
PDF
Info
Views
User Manual
Discussion / Help
Navigation

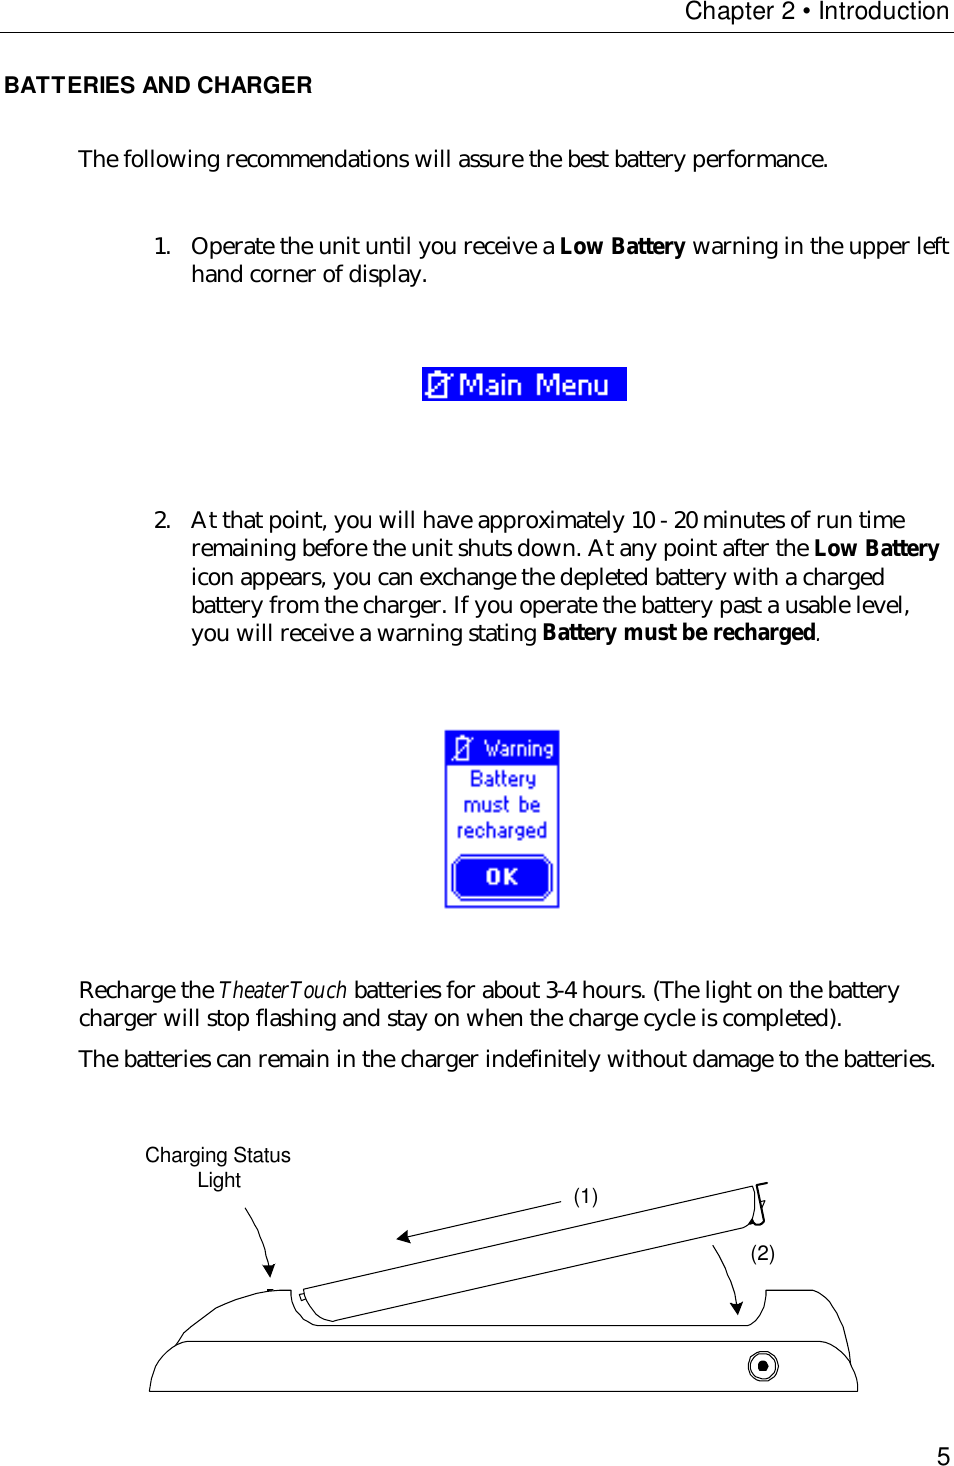

![TheaterTouch System Controller28HOW TO DELETE COMMANDS FROM BUTTONS1. Select the Delete Command tool from the Tool Palette.2. Place the mouse cursor over the button with the command you wish todelete.3. Click the left mouse button.HOW TO SAVE A FILEThe files created with TheaterTouch Designer hold all the elements that make up anindividual remote file. They have the extension .rti and may be stored in anydirectory.Default directory is: [C:\Program Files\TheaterTouch Designer\My Remotes]Note: If a file already exists on the disk, the current copy is backed up in a filewith the extension .rtb and the new file is saved with the .rti extension.1. Click the Save File Command on the Toolbar.2. Specify the name and directory for the file when saving for the first timeand click Save.HOW TO OPEN AN EXISTING FILE1. Click the Open File Command from the Toolbar.2. Click on the file you wish to open.3. Click Open.](https://usermanual.wiki/Remote-Technologies/RTI0100/User-Guide-90250-Page-38.png)

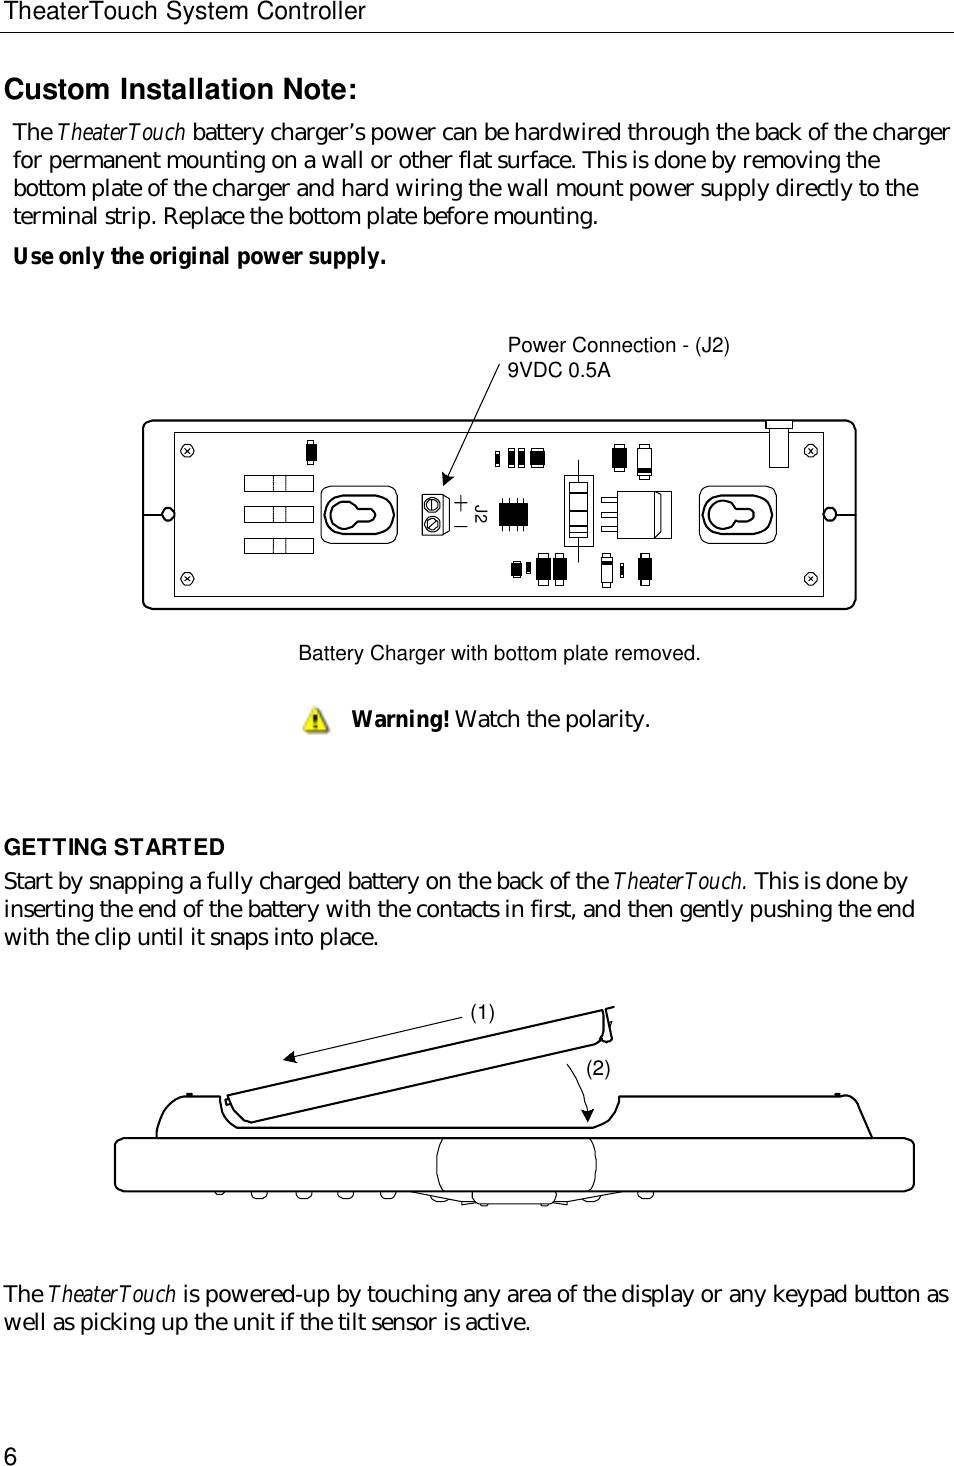
![Chapter 5 • TheaterTouch Designer Advanced Features37HOW TO MOVE A BUTTON1. Use the Select Button tool from the Tool Palette, to select thebutton(s).2. Hold down the left mouse button to drag the selection to a new location.3. Release the left mouse button to place the buttons.HOW TO RESIZE A BUTTONExisting buttons on the touchscreen grid may be re-sized using TheaterTouch Designer.The text on a button may be clipped if the size is reduced, but any associatedcommand or macro will not be lost.1. Use the Select Button tool from the Tool Palette to select the button.Note that to resize a button, only one button can be selected. If theselection can be resized, small boxes will appear in the red border on allfour sides.2. Position the mouse over the edge of the button that you would like toresize.3. Click the left mouse button.4. Drag the mouse to change the size.5. Release the mouse button when you have the desired size.HOW TO PLACE A CUSTOM BUTTONThe Custom Button Library Browser allows you to select and place Custom Buttonsonto the Touchscreen grid.1. Select the Place Custom Button tool from the Tool Palette.2. Select the library in which the custom button you want is located byclicking the Open Library button, selecting the library and clicking Open.Default directory is: [C:\Program Files\TheaterTouch Designer\Custom Buttons]3. Click on a button name and a preview of the button will appear in theCustom Button Library Browser.4. Click OK to insert the custom button on the Touchscreen grid and closethe Custom Button Library Browser.5. Drag the custom button to the proper place on the page.](https://usermanual.wiki/Remote-Technologies/RTI0100/User-Guide-90250-Page-47.png)