Remotec Technology BW8380 Z-Wave Remote Controller User Manual
Remotec Technology Limited Z-Wave Remote Controller
UserManual.wiki
>
Remotec Technology
>
BW8380 User Manual
user manual
Navigation menu
Upload a User Manual
Namespaces
Wiki Guide
HTML
PDF
Info
Views
User Manual
Discussion / Help
Navigation

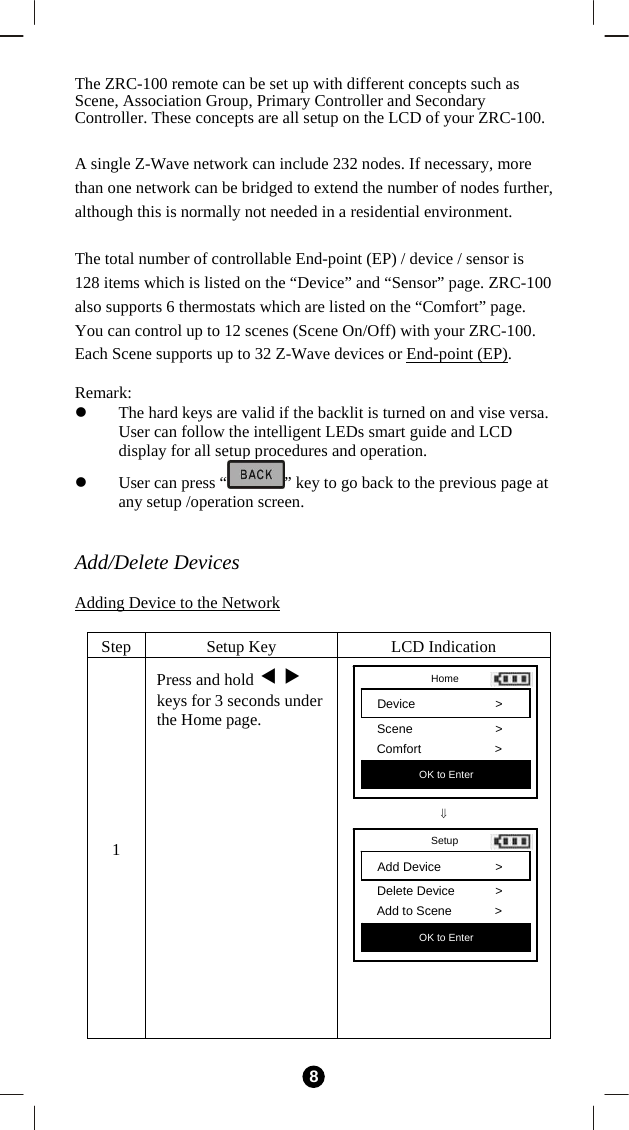
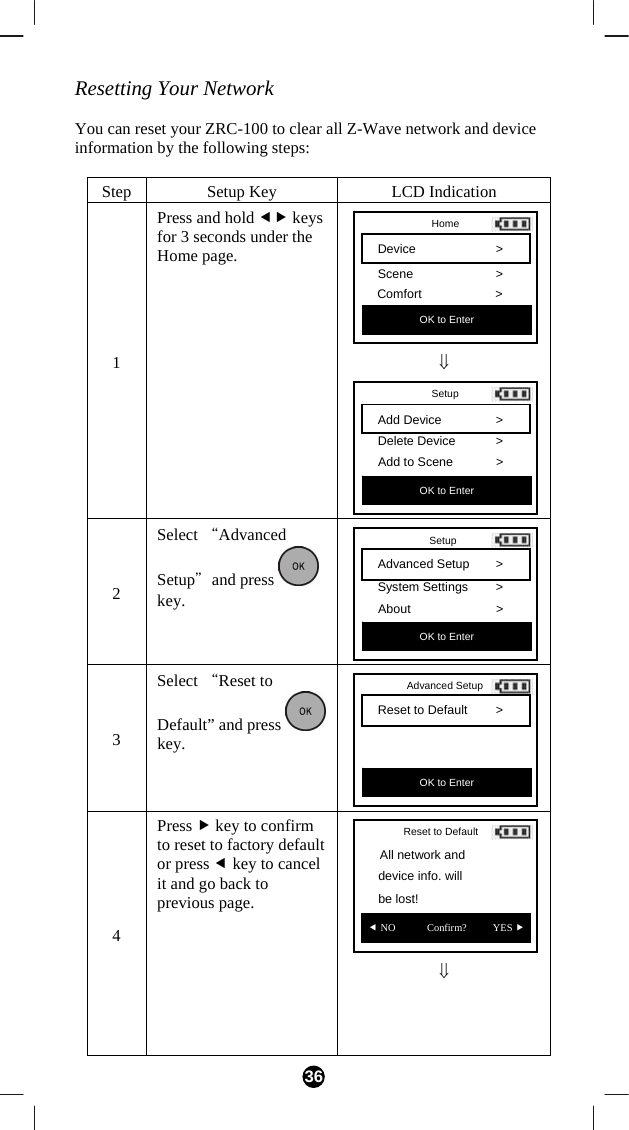
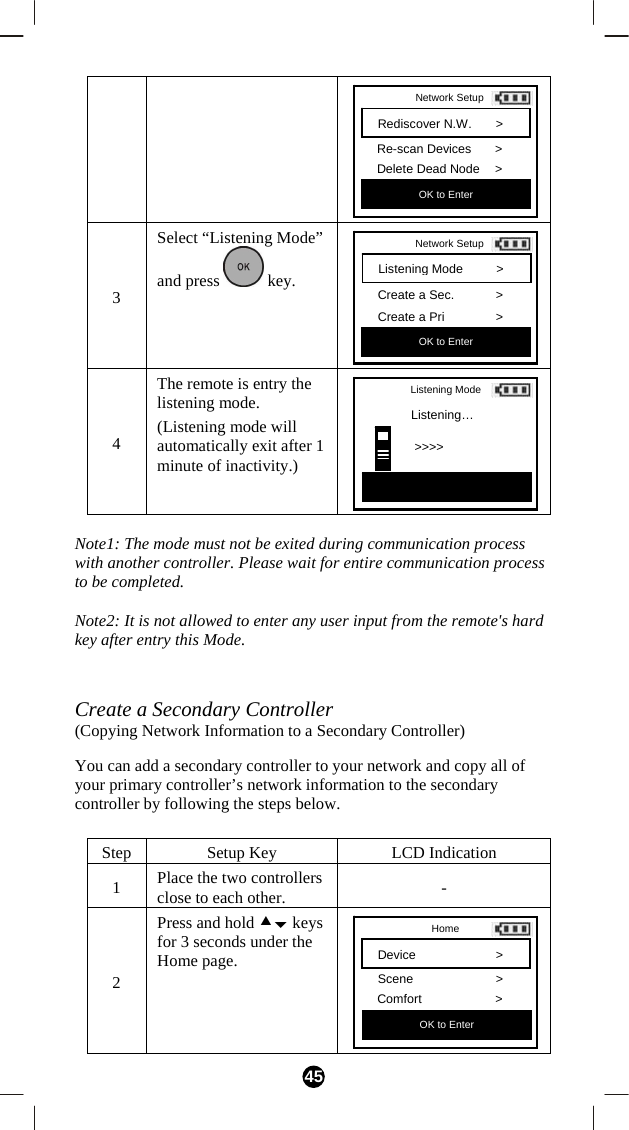
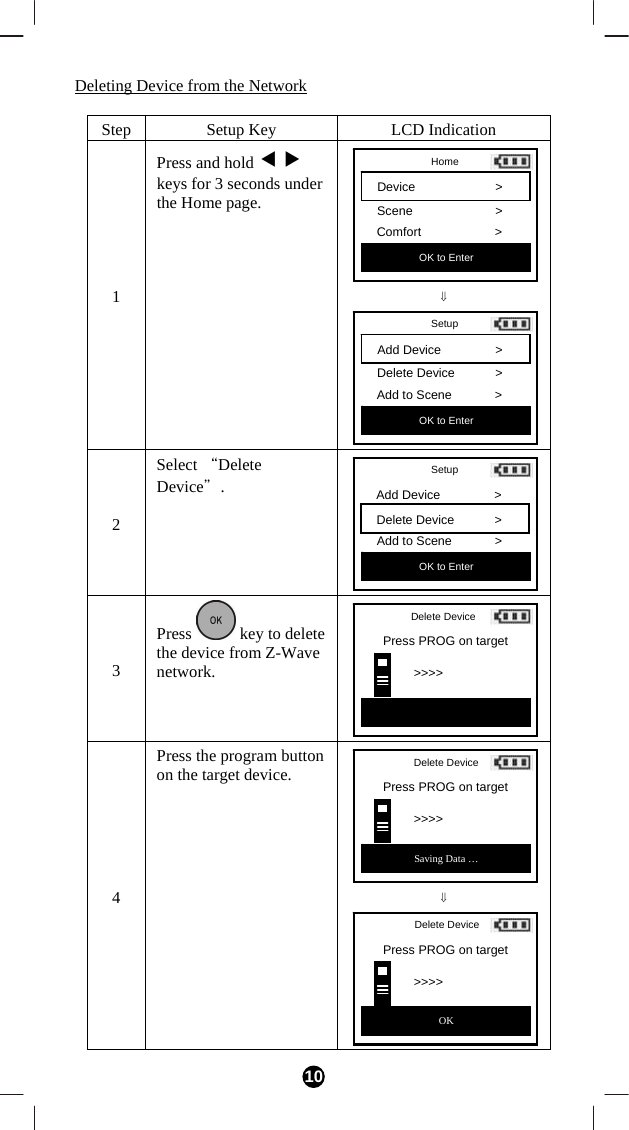
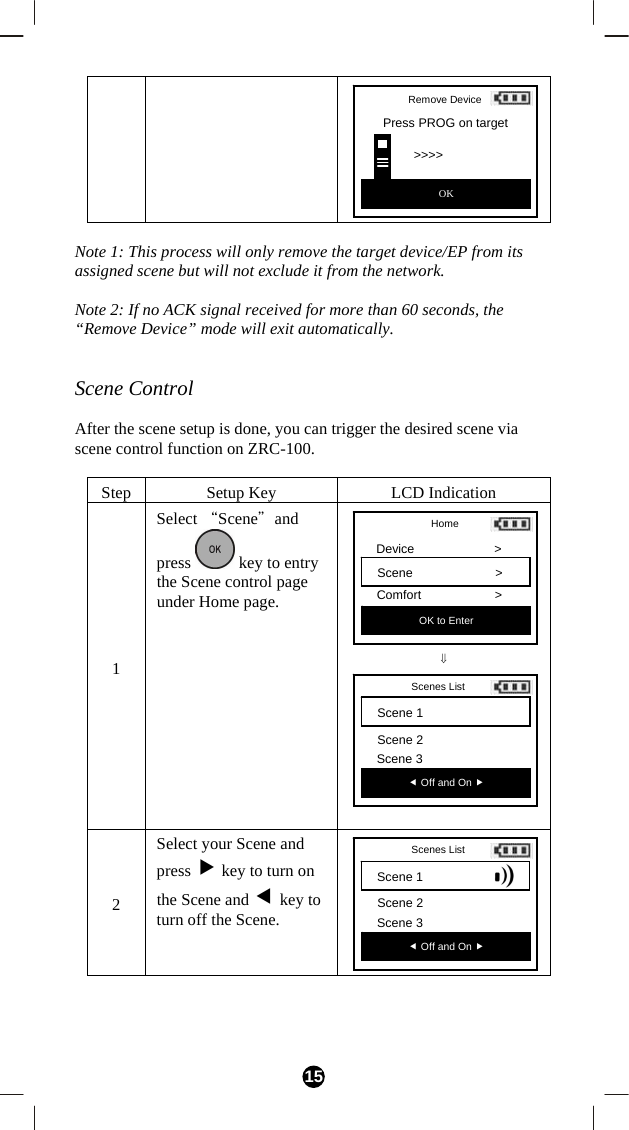
![9 2 Select “Add Device". 3 Press key to add the device into Z-Wave network. 4 Press the program button on the target device. ⇓ Note 1: If you can’t add your Z-Wave device, this device might have been included in another Z-Wave network. In this case, please delete this device following the steps in the [Deleting Device from the Network] section then add this device again. Note 2: This step can be skipped if the device is already included in the network. Note 3: If no ACK signal received for more than 60 seconds, the “Add Device” mode will exit automatically. Add Device Press PROG on target >>>> Saving Data … Add Device Press PROG on target >>>> OK Add Device Press PROG on target >>>> Setup Add Device > Delete Device > Add to Scene > OK to Enter](https://usermanual.wiki/Remotec-Technology/BW8380/User-Guide-1679530-Page-9.png)
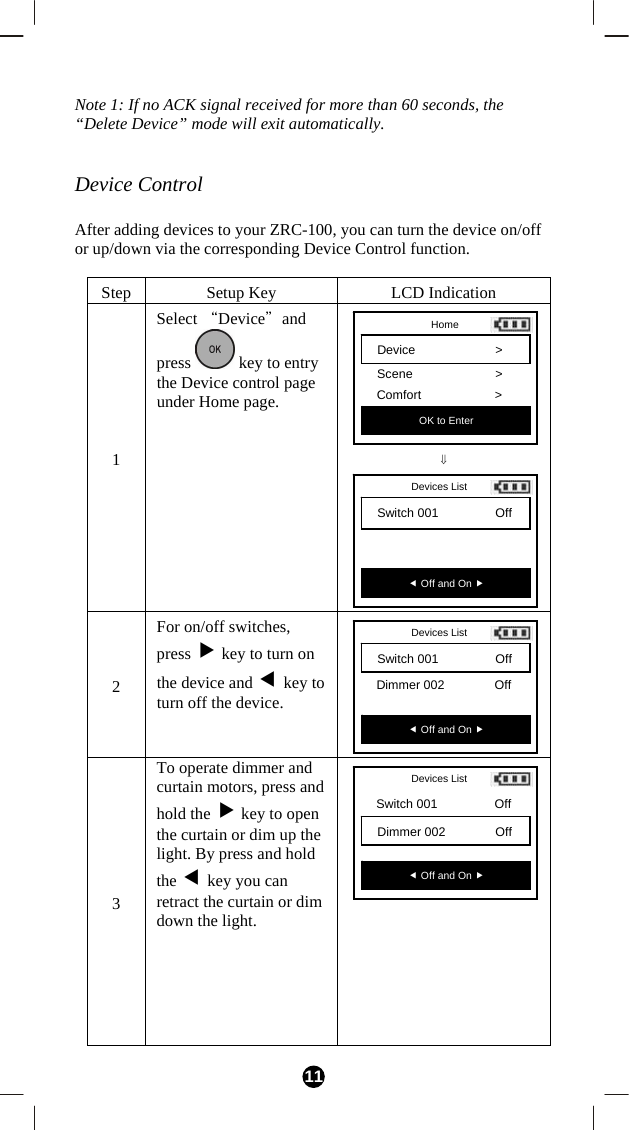
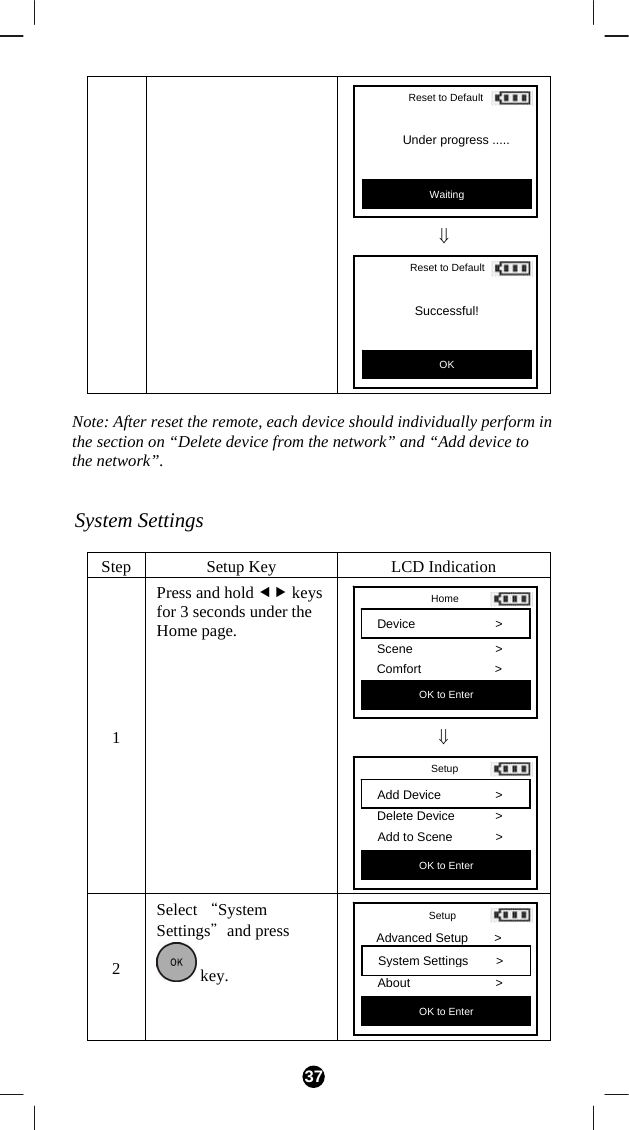
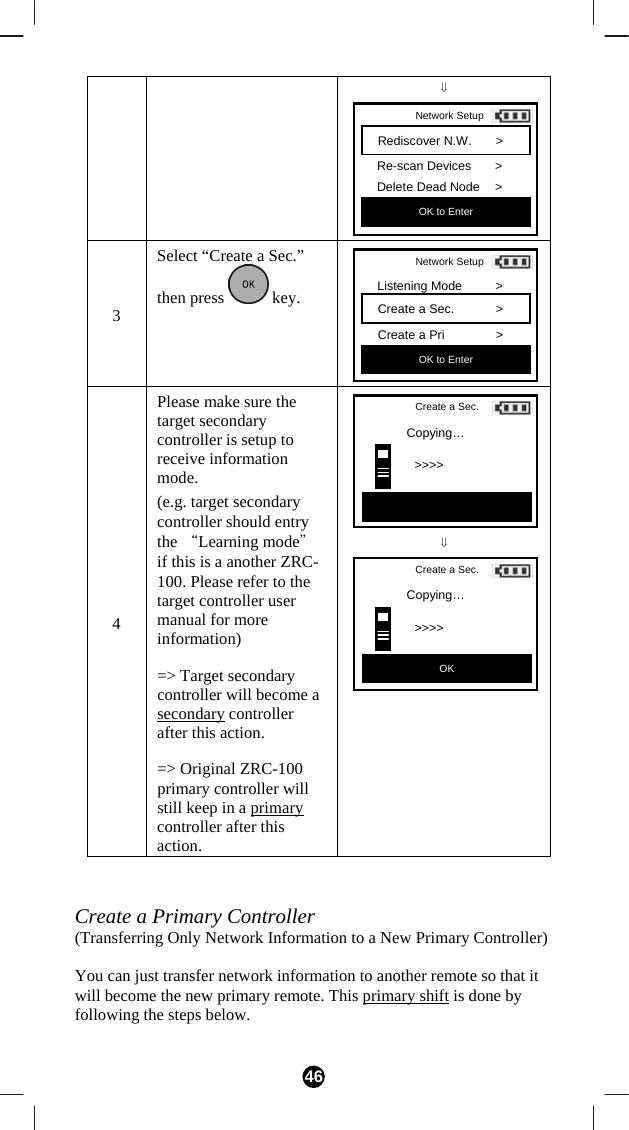
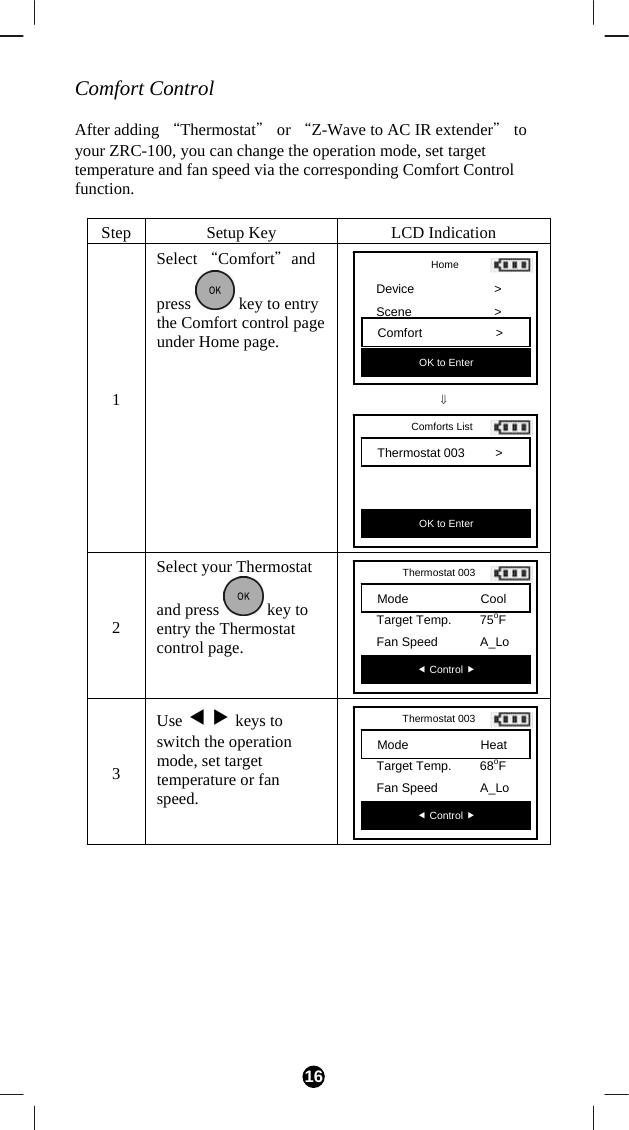
![13 2 Select “Add to Scene"and press key. 3 Select a Scene which you want to add the device into Scene and press key. 4 Press the program button on the target device. ⇓ 5 Adjust the target device on/off or dim level with its program button, to the desired level. Note 1: Your target device must be included in the network before this setup procedure, please refer to [Adding Device to the Network] section. Setup Add Device > Delete Device > Add to Scene > OK to Enter Setup Add Device > Delete Device > Add to Scene > OK to Enter Select Scene Scene 1Scene 2Scene 3OK to Enter Add Device Press PROG on target >>>> Add Device Set Desired level >>>> OK to Save Add Device Press PROG on target >>>> OK](https://usermanual.wiki/Remotec-Technology/BW8380/User-Guide-1679530-Page-13.png)
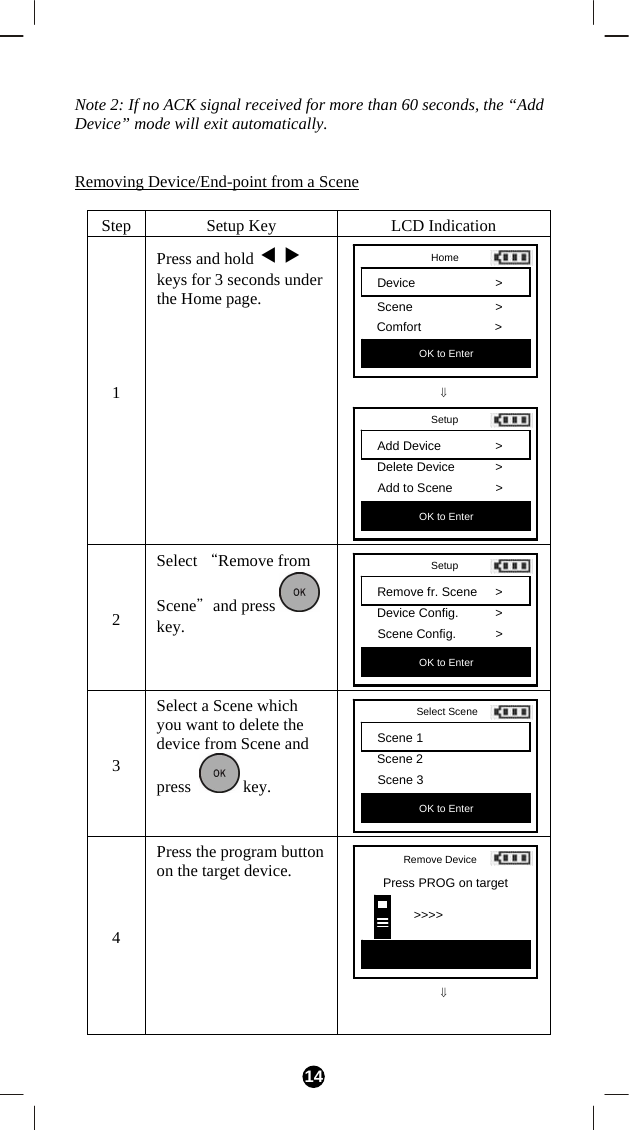
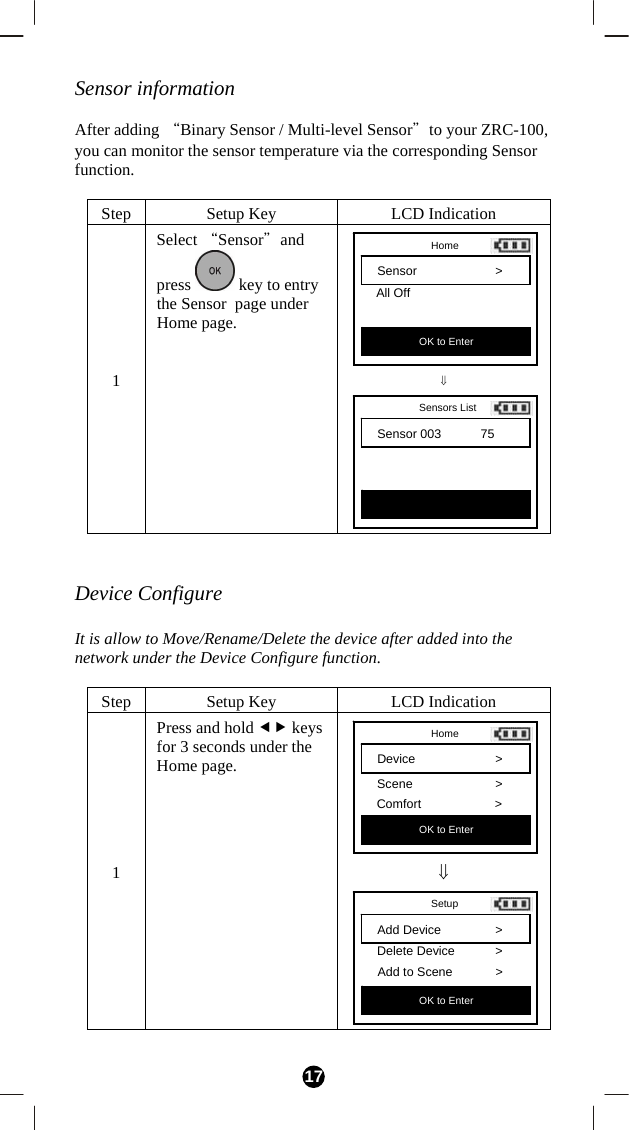


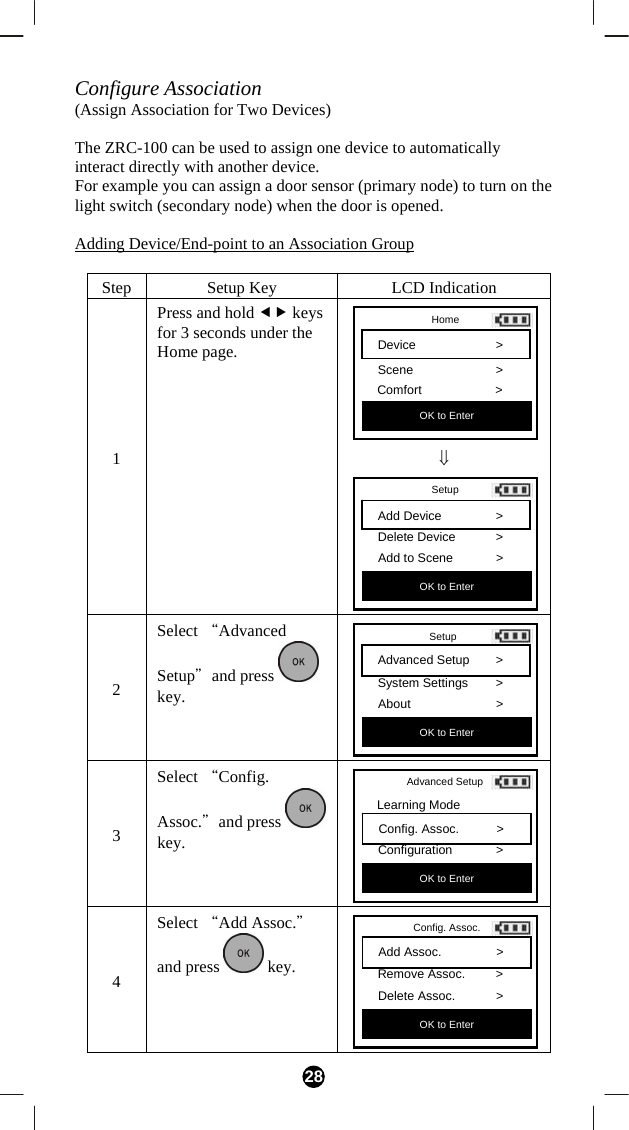
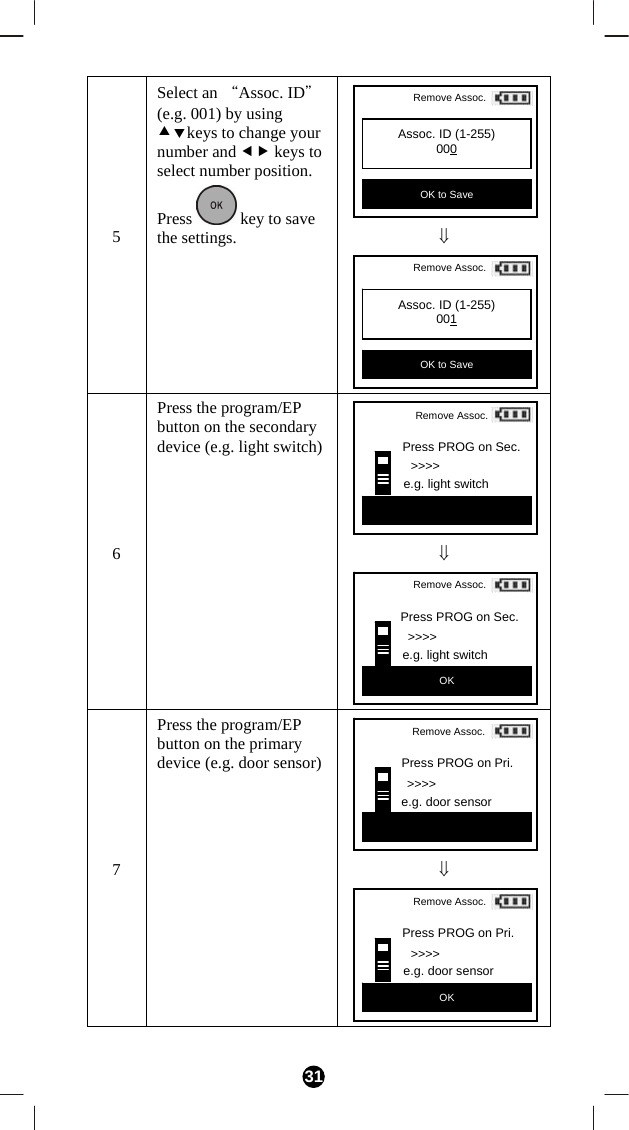
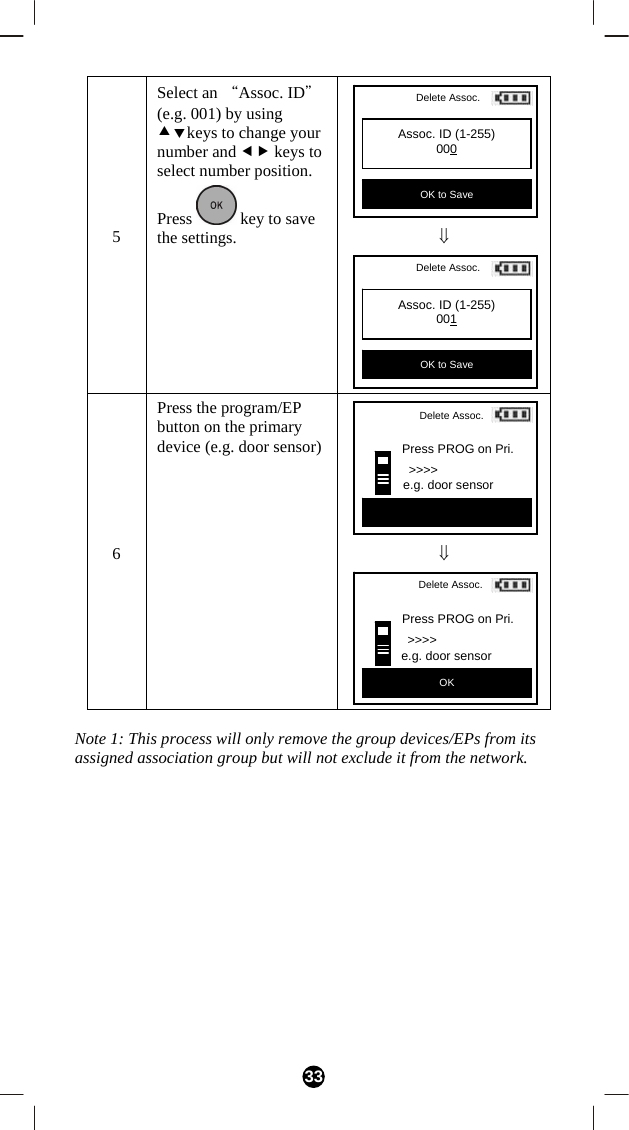
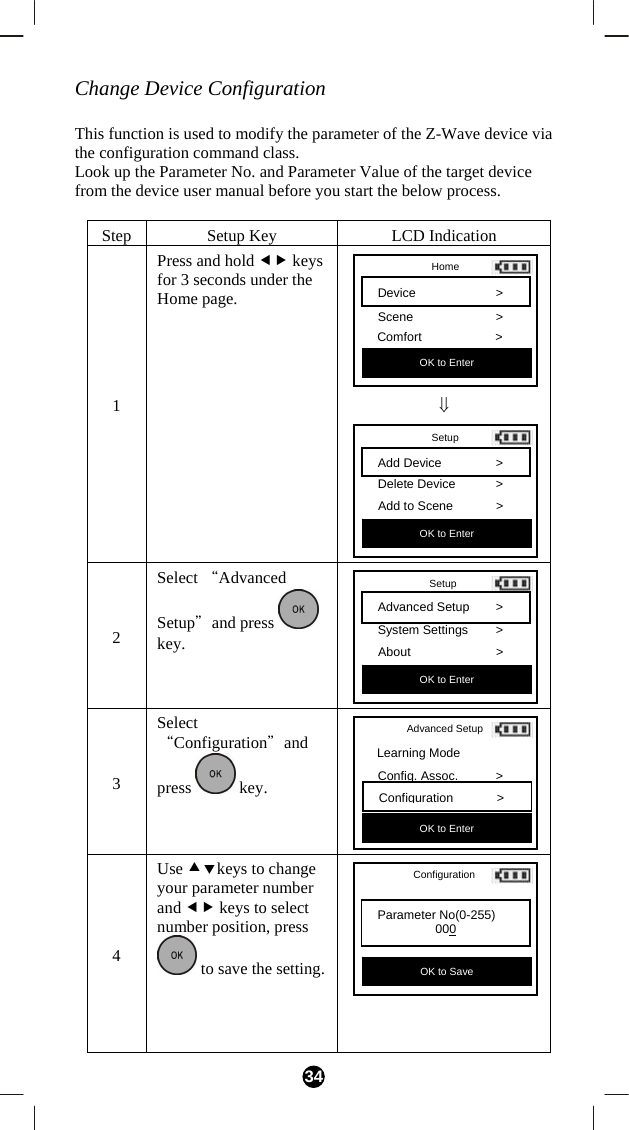
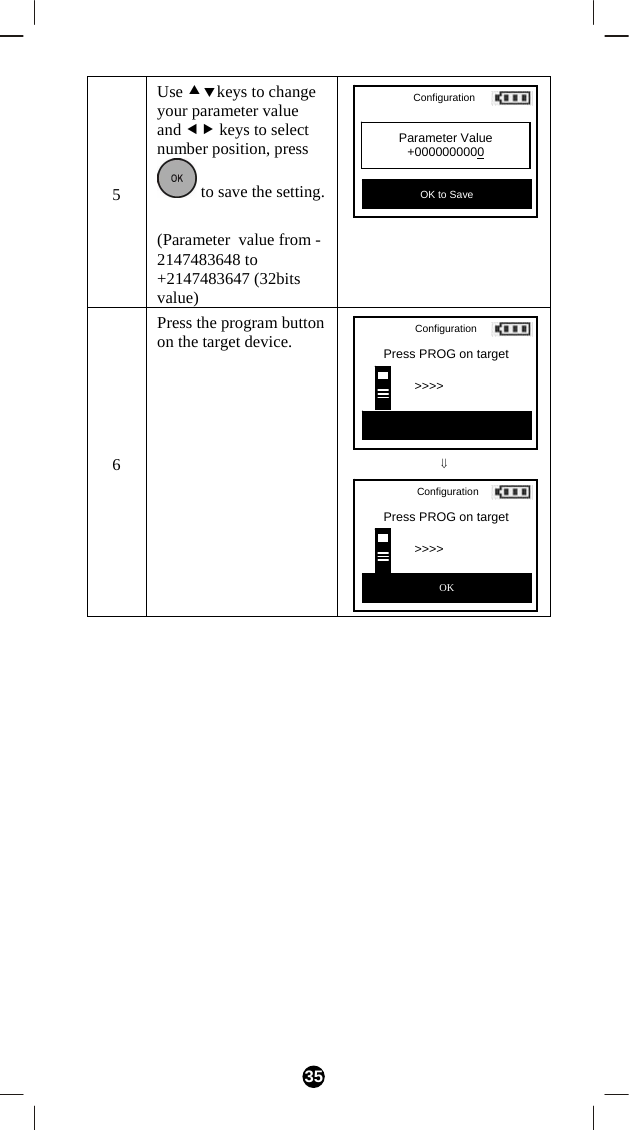
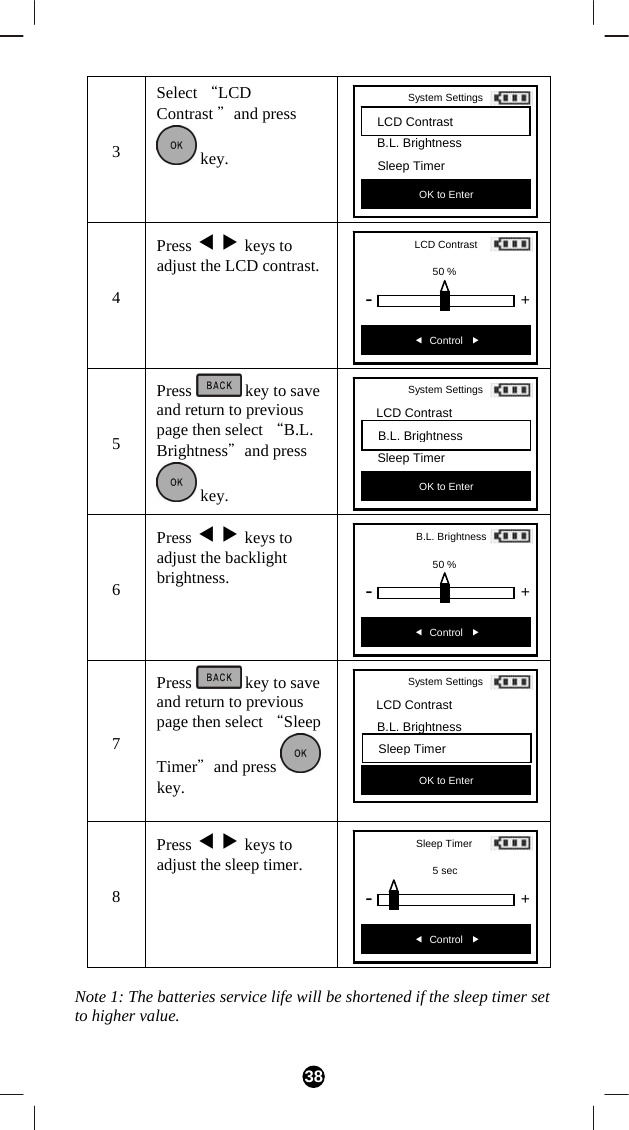
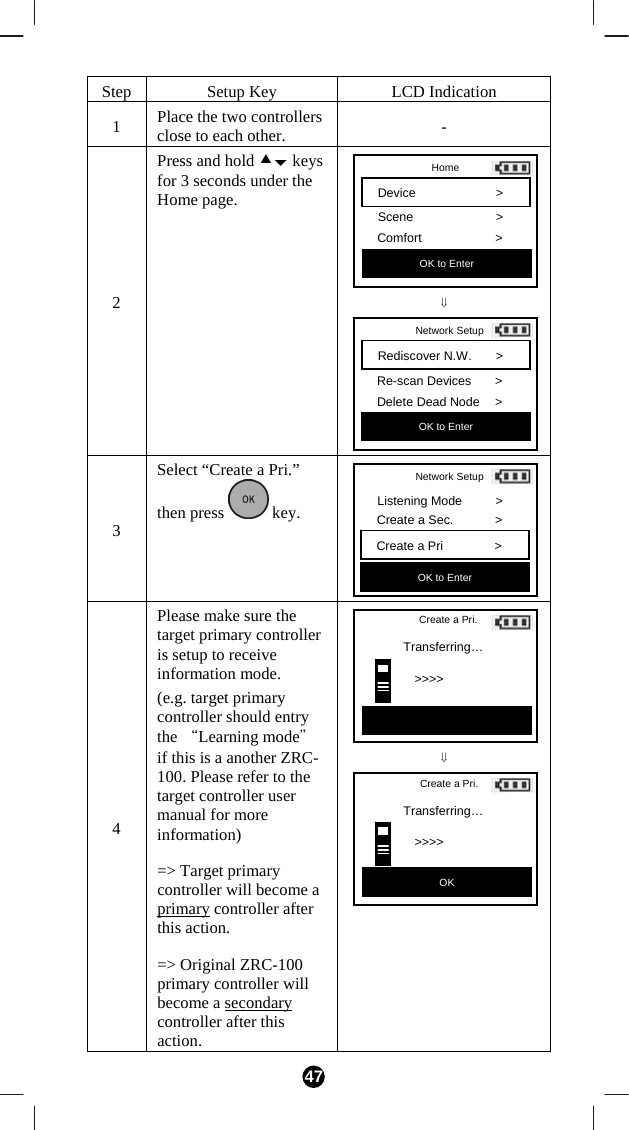
![30 Note 1: Your target device must be included in the network before this setup procedure, please refer to [Adding Device to the Network] section. Removing Device/End-point from an Association Group Step Setup Key LCD Indication 1 Press and hold ef keys for 3 seconds under the Home page. ⇓ 2 Select “Advanced Setup"and press key. 3 Select “Config. Assoc."and press key. 4 Select “Remove Assoc."and press key. Home Device > Scene > Comfort> OK to Enter Setup Add Device > Delete Device > Add to Scene > OK to Enter Setup Advanced Setup > System Settings > About> OK to Enter Advanced Setup Learning Mode Config. Assoc. > Configuration > OK to Enter Config. Assoc. Add Assoc. >Remove Assoc. > Delete Assoc. > OK to Enter](https://usermanual.wiki/Remotec-Technology/BW8380/User-Guide-1679530-Page-30.png)