Remotek WU110 USB Wireless LAN User Manual Manual
Remotek Corporation USB Wireless LAN Manual
Remotek >
Manual
User Manual
WU110
USB Adaptor
Version 1.0—June 2002
2
Copyright Statement
No part of this publication may be reproduced in any form or by any means or
used to make any derivative such as translation, transformation, or adaptation
without permission form Remotek Corporation, as stipulated by the United
States Copyright ACT of 1976.
FCC Certifications
This equipment has been tested and found to comply with the limits for a
Class B digital device, pursuant to Part 15 of the FCC Rules. These Limits are
designed to provide reasonable protection against harmful interference in a
residential installation. This equipment generates, uses and can radiate radio
frequency energy and, if not installed and used in accordance with the
instructions, may cause harmful interference to radio communications.
However, there is no guarantee that interference will not occur in a particular
installation. If this equipment does cause harmful interference to radio or
television reception, which can be determined by turning the equipment off and
on, the user is encouraged to try to correct the interference by one or more of
the following measures:
Reorient or relocate the receiving antenna
Increase the separation between the equipment and receiver
Connect the equipment into an outlet on a circuit different from that to
which the receiver is connected
Consult the dealer or an experienced radio/TV technician for help
FCC Caution: To assure continued compliance, (example - use only
shielded interface cables when connecting to computer or peripheral devices).
Any changes or modifications not expressly approved by the party responsible
for compliance could void the user's authority to operate this equipment.
This device complies with Part 15 of the FCC Rules. Operation is subject to
the following two conditions: (1) This device may not cause harmful
interference, and (2) this device must accept any interference received,
including interference that may cause undesired operation.
IMPORTANT NOTE:
FCC Radiation Exposure Statement:
This equipment complies with FCC radiation exposure limits set forth for an
uncontrolled environment. This equipment should be installed and operated
with minimum distance 20cm between the radiator & your body.
This transmitter must not be co-located or operating in conjunction with
any other antenna or transmitter.
3
Contents
1. Introduction..........................................................................................................4
2. Installation Overview..........................................................................................5
3. Installation Procedure of WU110......................................................................6
4. Configuration Utility ............................................................................................8
4.1. “Monitor” tab................................................................................................8
4.2. “Statistics” tab............................................................................................10
4.3. “Site Survey” tab........................................................................................11
4.4. “Encryption” tab.........................................................................................12
4.5. “Advanced” tab...........................................................................................13
4.6. “Version” tab...............................................................................................13
5. Technical specifications of WU110..................................................................14
4
1. Introduction
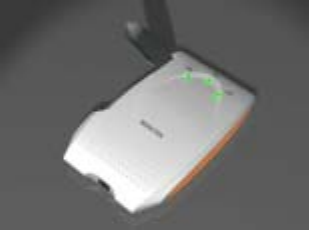
Thank you for purchasing USB Wireless LAN Adaptor-WU110 from Remotek
Corp.. This quick start manual will assist you with the installation procedure.
The package you have received should contain the following items:
WU110 USB WLAN Adaptor
USB to Mini USB Cable
User manual
CD ROM containing Wireless LAN Management utility and drivers
Note: if anything is missing, please contact your vendor.
5
2. Installation Overview
Here are some steps you will perform in establishing your wireless network
connection:
Install the Access Point at first. AP is needed in case of infrastructure
network mode.
Install the software using the Installation CD-ROM.
Insert the Wireless LAN adaptor (WU110).
Install the driver of USB WLAN adaptor.
Install the network protocols required to communicate on your network.
Most likely you will need the TCP/IP protocol.
6
3. Installation Procedure of WU110
Please follow the following steps one by one in order to install the USB WLAN
Adaptor successfully.
Step 1.
Power on your computer and allow Window 95/98/2000 to load
fully.
Step 2.
Be sure that there is no USB adaptor inserted yet.
Step 3.
Insert the given Installation CD-ROM and then click on the setup.ex.
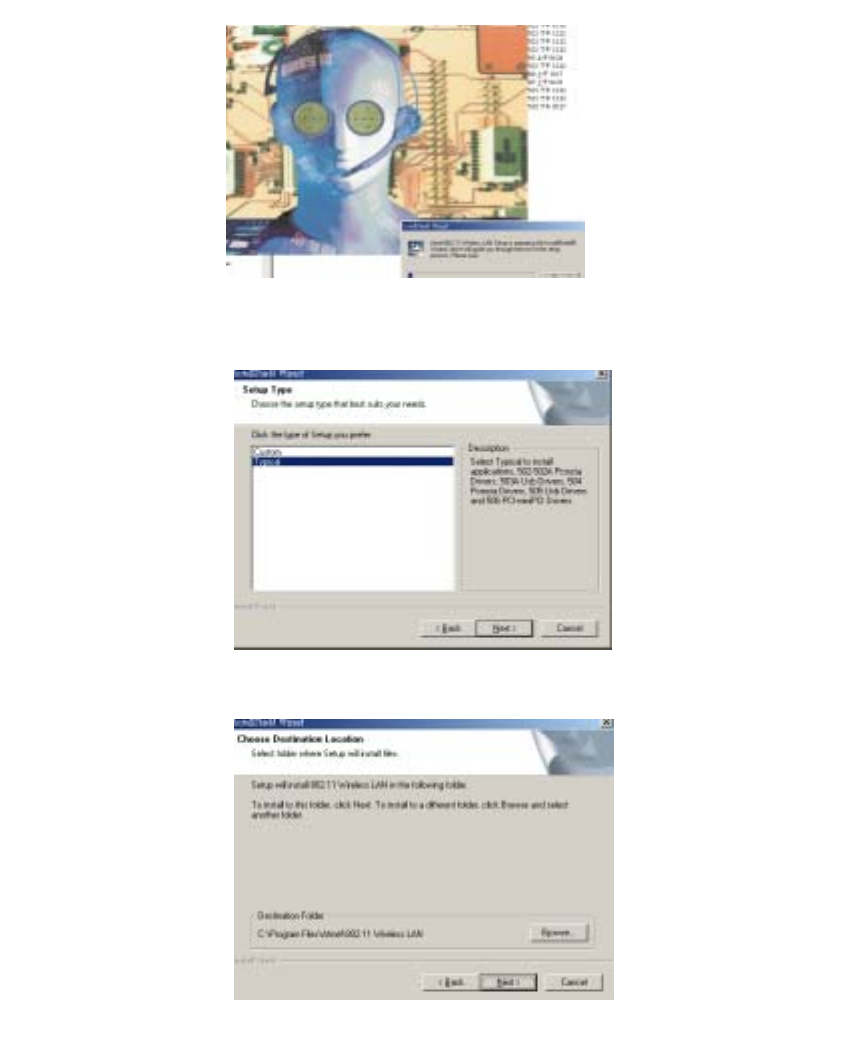
Step 4.
Chose the typical installtion or custom installtin accroding your
necessary.
Step 5.
Select folder where Setup will install program.

7
Or chose Browse to select installation folder where you want to locate.
Step 6.
It takes a few seconds for copying the utility files and then click on
Finish to complete the installation
Step 7.
Message that notifies you to restart your computer may pop up.
Select Yes. It will shut down your computer and restart.
Step 8.
Insert the WU110 - USB WLAN Adaptor into USB slot, windows will
install the driver automatically.
Step 9.
If the Configuration & Monitor Utility icon is not on system tray, it
shows the installation is not successful. Run setup.exe again, and
then chose “remove” item from menu to uninstall program. After
restart your PC again. go to Setp 3.
If you find the Red sign on system tray, which means your Wireless
LAN Adaptor haven’t connected to an Access Point Successfully.
Please double-click on the red sign on system tray to open
Configuration & Monitor Utility. Select Site Survey tab, and click
Re-Scan to find all site nearby. You may double-click on the
site(BSSID) that you want to connect to.
Step 10.
Modify TCP/IP settings of Windows. You can select either Static or
DHCP setting. If you use the static IP setup then enter the IP value,
Subnet masking, DNS, and Gateway Address values. After setting
these parameters appropriately, click OK to make the settings
available. If you are operating on Windows 95/98, message that
notifies you to restart your computer should pop up. Select Yes. It
will shut down your computer and restart to make settings available.
8
4. Configuration Utility
The Configuration Utility is a powerful application that helps you to configure
the WU-210P and monitor the statistics of the communication. Please keep on
mind that this utility can be used to change the following configuration
parameters when the cards are active. The Configuration Utility appears as icon
on the system tray of Windows every time the card is running. You can open it
by double-clicking on the icon.
Users can navigate through sheets. “Hide” button will exit application. Here we
explain the use and meanings of the various screen messages.
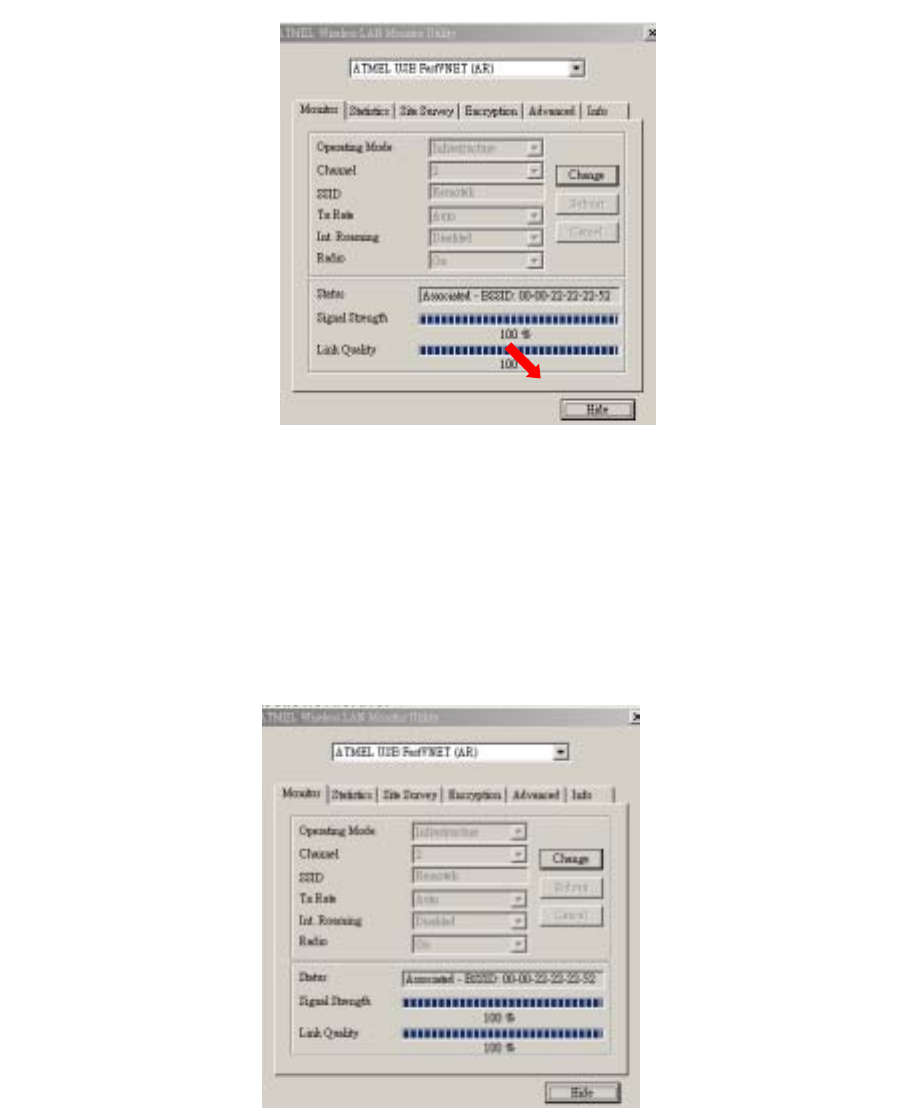
4.1. “Monitor” tab
You can change the configuration by clicking on the “Change”, and click
“Submit” after the configuration has been changed.
9
Operating mode: shows one of these network modes:
Infrastructure – This mode of operation requires the presence of an
802.11 Access Point. All communication is done via the Access Point.
Ad-Hoc – This mode is for the 802.11 peer-to-peer operation. All
communication is done from client to client without the use of an Access
Point. The user should switch to the channel that he wants to approach.
The first method is to set the clients with the same channel.
Channel: shows radio channel number used for networking. Only Access
Points and Ad-Hoc nodes can create a BSSID therefore this parameters is not
active if the mode is infrastructure. Infrastructure client nodes will always go
the same channel as their AP.
SSID: shows the SSID of the BSS that you want to join.
Tx Rate: shows the transfer rate. There are 1 Mbps, 2M bps, 5.5 Mbps, 11
Mbps, and auto mode. If you select auto mode, the card will select the most
suitable rate automatically.
Power Mgmt Mode: shows Power Management modes:
Active – Adaptor will always be in active mode.
Power Save – Adaptor will save power when it is idle.
Signal strength: This bar shows signal strength level. The higher the blue bar
is, the more power of radio signal received by Remotek USB WLAN adaptor is.
This indicator helps to find the most comfortable antenna/workstation position
for quality network operation.
Link quality: The measured signal level gives the overall Link Quality and
Connection Status.
10
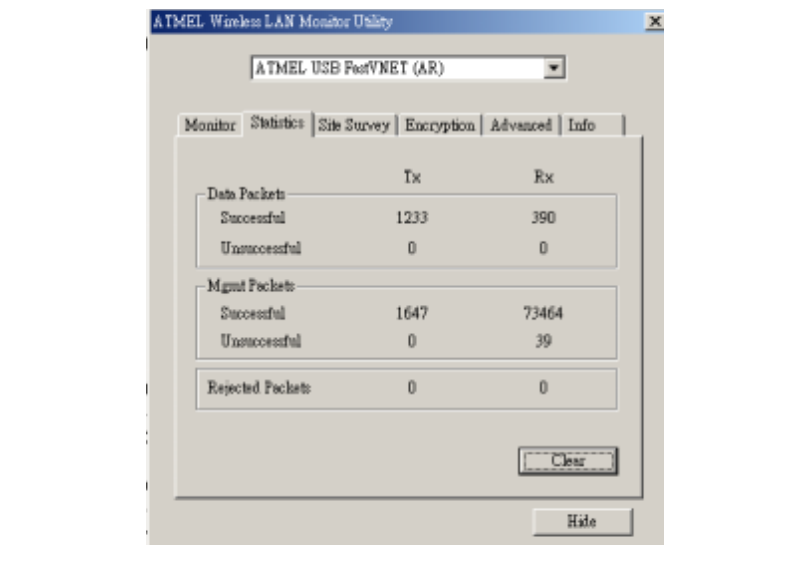
4.2. “Statistics” tab
It shows all amounts of packets that received or transmitted by the adaptor.
Data Field: shows the amounts of data packets transmitted or received by the
adaptor. And also shows how many data packets are transmitted or received
successfully or not.
Management Field: shows the amounts of management packets transmitted
or received by the adaptor. And also shows how many management packets are
transmitted or received successfully or not.
Rejected Packets Field: shows the amounts of rejected packets transmitted
or received by the adaptor.
11
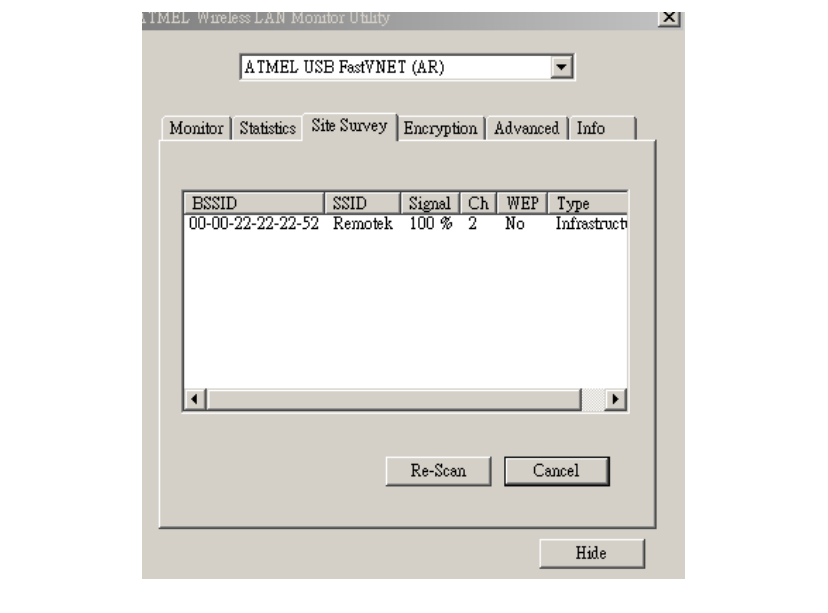
4.3. “Site Survey” tab
It shows all APs or adaptors in Ad-Hoc mode nearby. You may click Re-Scan to
collect the wireless device information to know the BSSID and Ch(Channel).
If you want to connect to any device on the list, double-click on the device. The
adaptor will connect to the device you have selected.

12
4.4. “Encryption” tab
You may desire an additional measure of security on your wireless network,
which can be achieved by using WEP(Wired Equivalent Privacy) encryption.
WEP encrypts each frame transmitted from the radio using one of the keys
entered from this panel. When an encrypted frame is received it will only be
accepted if it decrypts correctly. This will only happen if the receiver has the
WEP key used by the transmitter.
This panel allows the entry of four keys, which can then be written to the driver
and registry. Each key must consist of 10 digits. If entered incorrectly, program
will not write keys to driver. Key1-Key4: These four fields must be used to enter
the keys.
Submit- this button updates the driver with the four keys displayed in Key1
through Key4. The keys are also written to the registry for permanent storage.
Encryption- this checkbox enables or disables encryption operation. When it is
checked through 64 bits and 128 bits, encryption is enabled. When disabled is
checked, encryption is hidden.
13
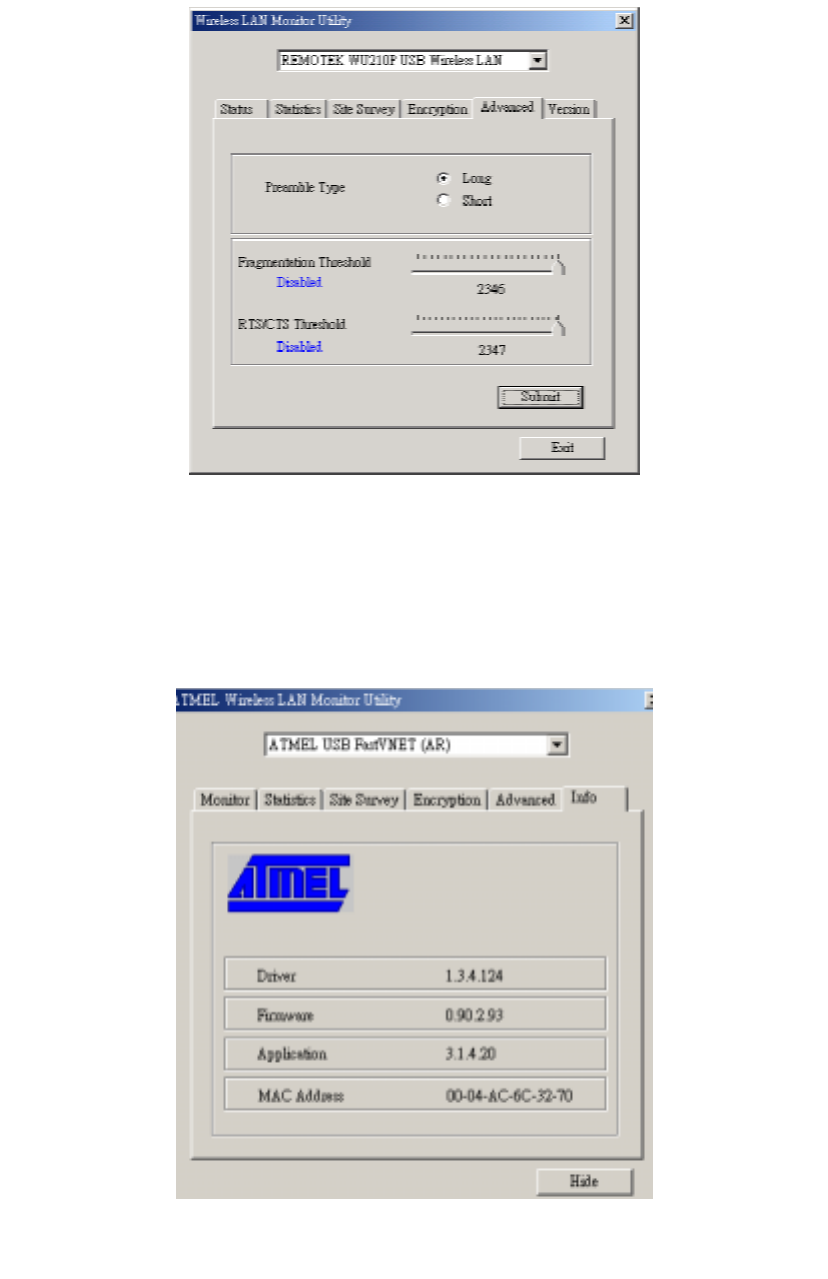
4.5. “Advanced” tab
We can find and change some advance settings here. They are Preamble
Type, Fragmentation Threshold, and RTS/CTS Threshold. Note that the
adaptor has a feature to select the preamble type from AP automatically.
4.6. “Version” tab
It shows Driver Version, Firmware Version, and Application Version.

14
5. Technical Specifications of WU110
Model No WU110 USB
Standard IEEE802.11b
Card Type USB 1.1
Transmission range Outdoor: 100~300M, Indoor: 30~100M
Radio Type Direct Sequence Spread Spectrum
Data Rate 1,2,5.5,11 Mbps per Channel
Frequency band USA & Canada:2.400 GHz ~2.4835GHz
Europe: 2.4000~2.4835GHz
Compatibility Windows 98/2000/ME/XP
Certification FCC, CE
LED Indicators PWR, TX, RX
Power consumption 5V DC Input from USB
TX less than 380mA, RX less than320mA
Dimensions 100x65x14mm
Weight 29g
Operating Temperature 0℃ to 55℃, 32℉ to 131℉
Storage Temperature -20℃ to 70℃, -4℉ to 158℉
Operating Humidity 0% to 70% Non-Condensing
Storage Humidity 0% to 95% Non-condensing
Data Encryption 64 bit or 128 bit KEY WEP Encryption
Software Installation for WLAN Monitor and Driver
USB Cable 1M