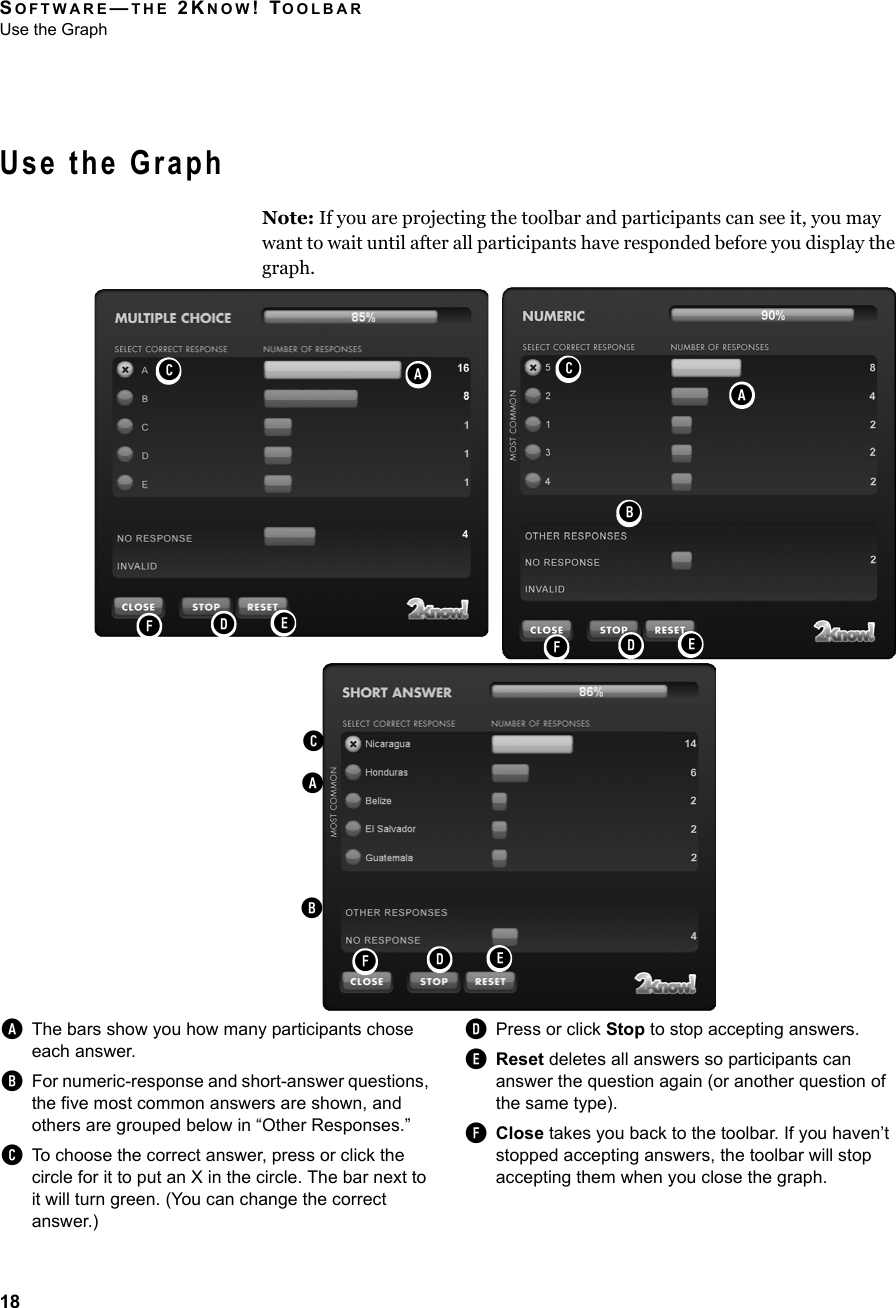
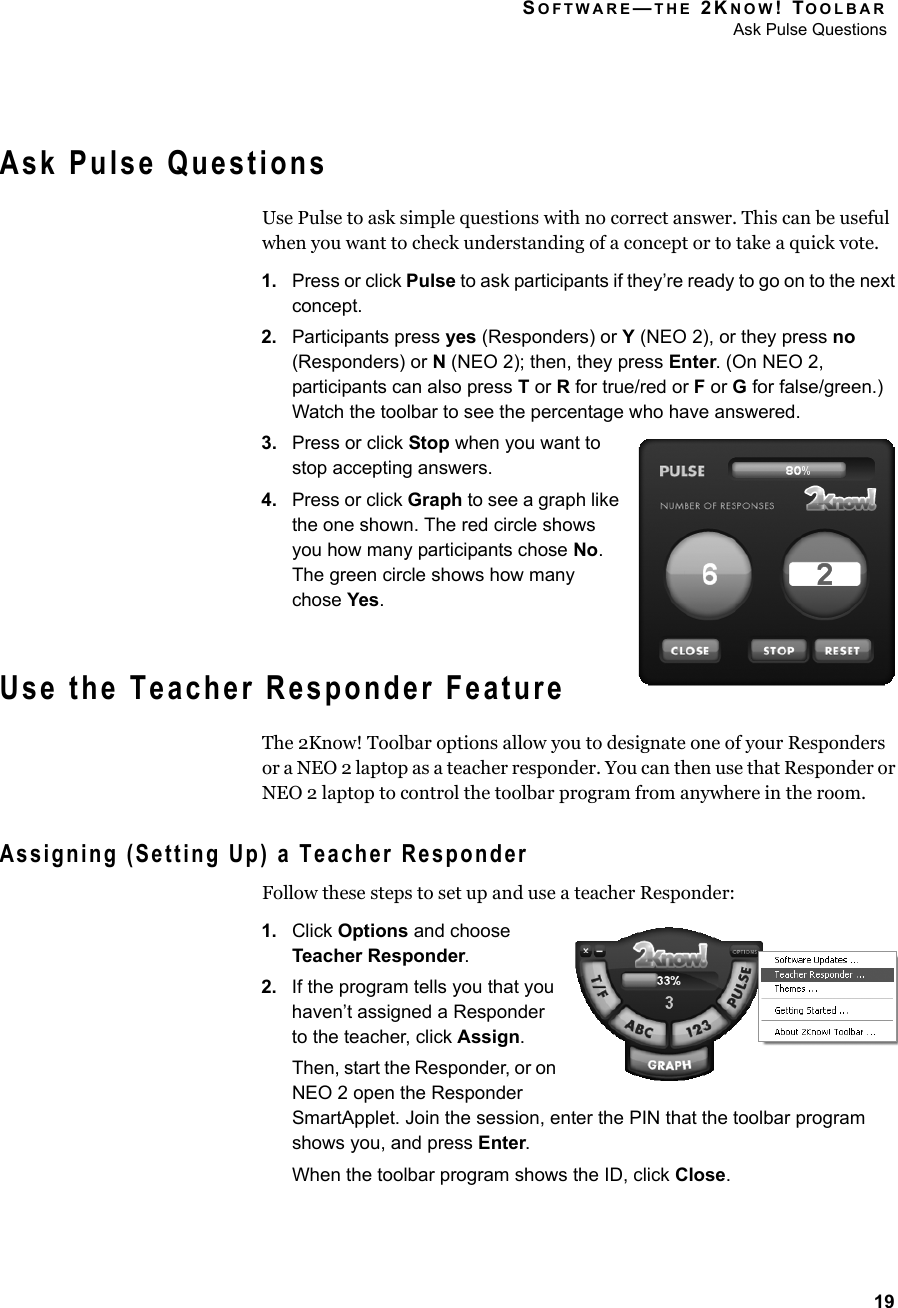
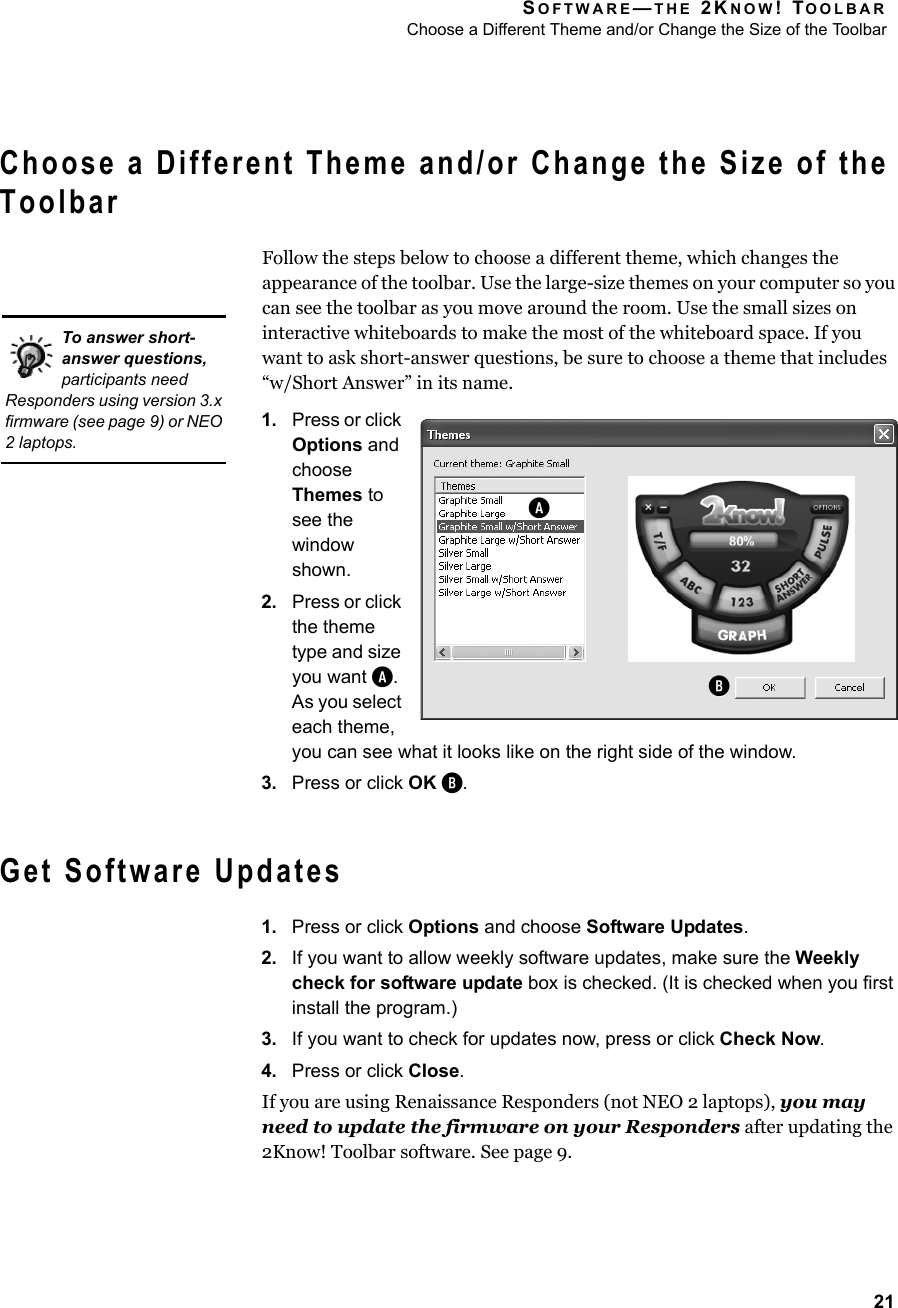
Renaissance Learning RESP Handheld Classroom Response Transmitter User Manual 2KnowResourceGuide
Renaissance Learning, Inc Handheld Classroom Response Transmitter 2KnowResourceGuide
Contents
- 1. user manual
- 2. user manual note
- 3. final manual
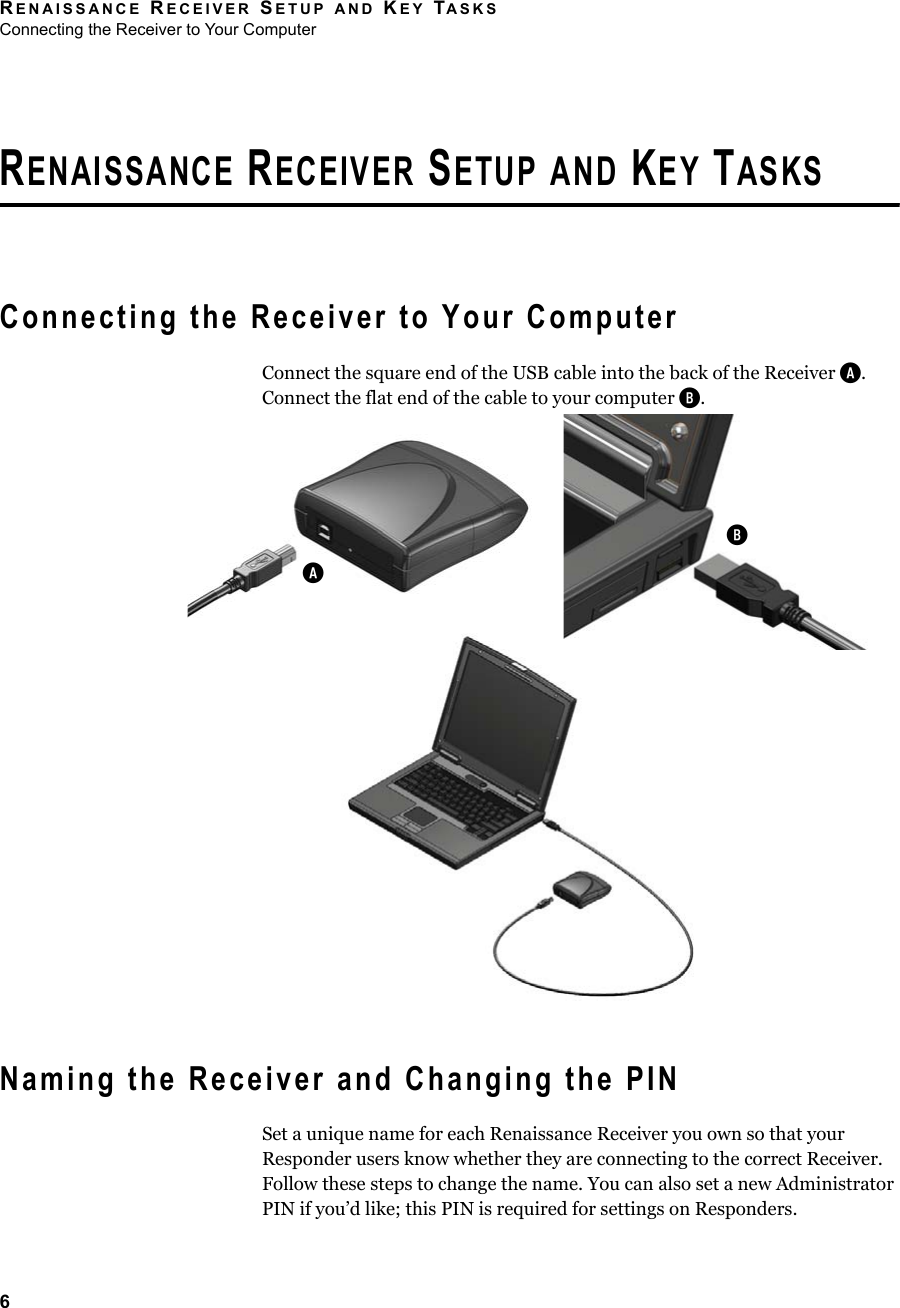
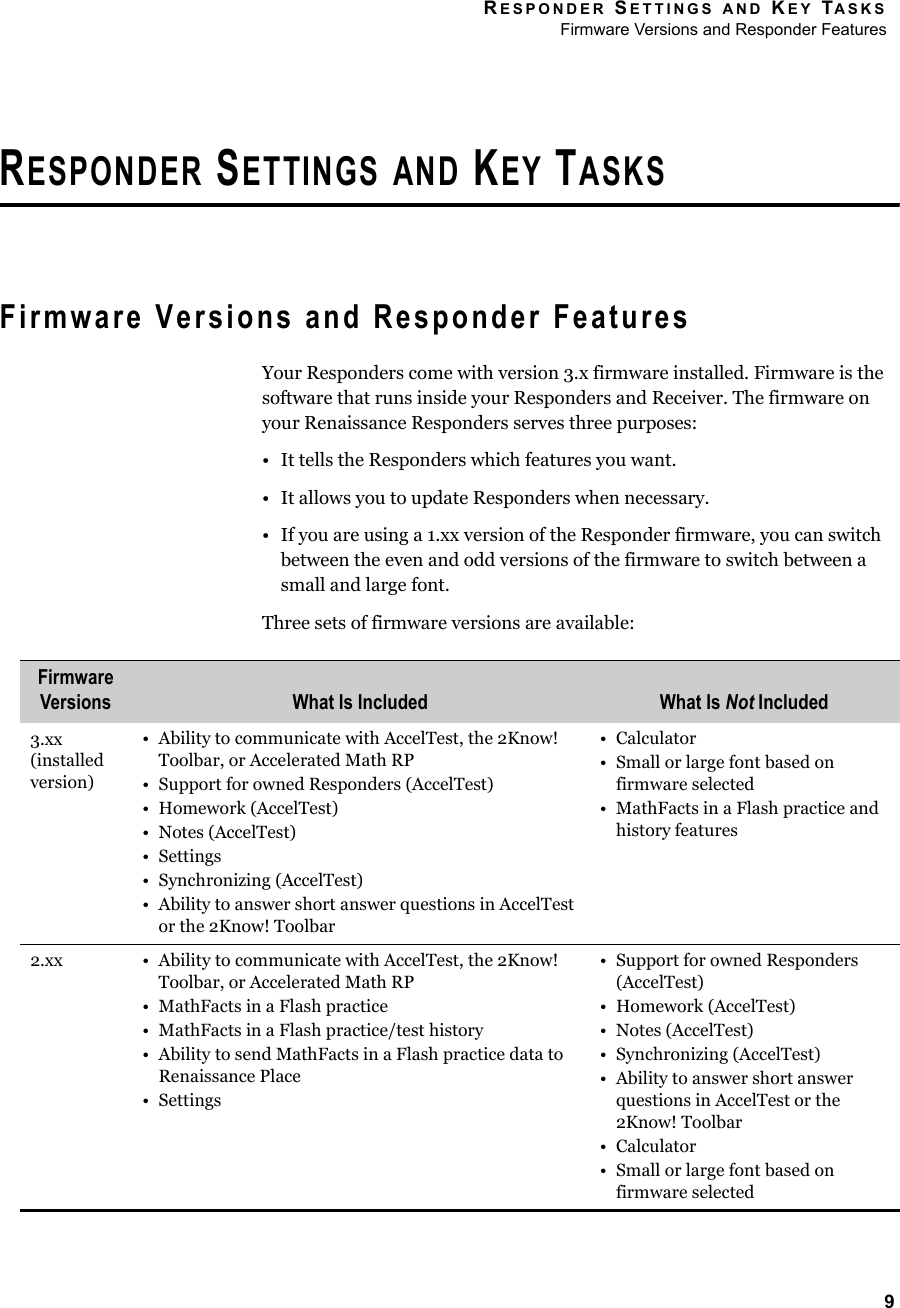
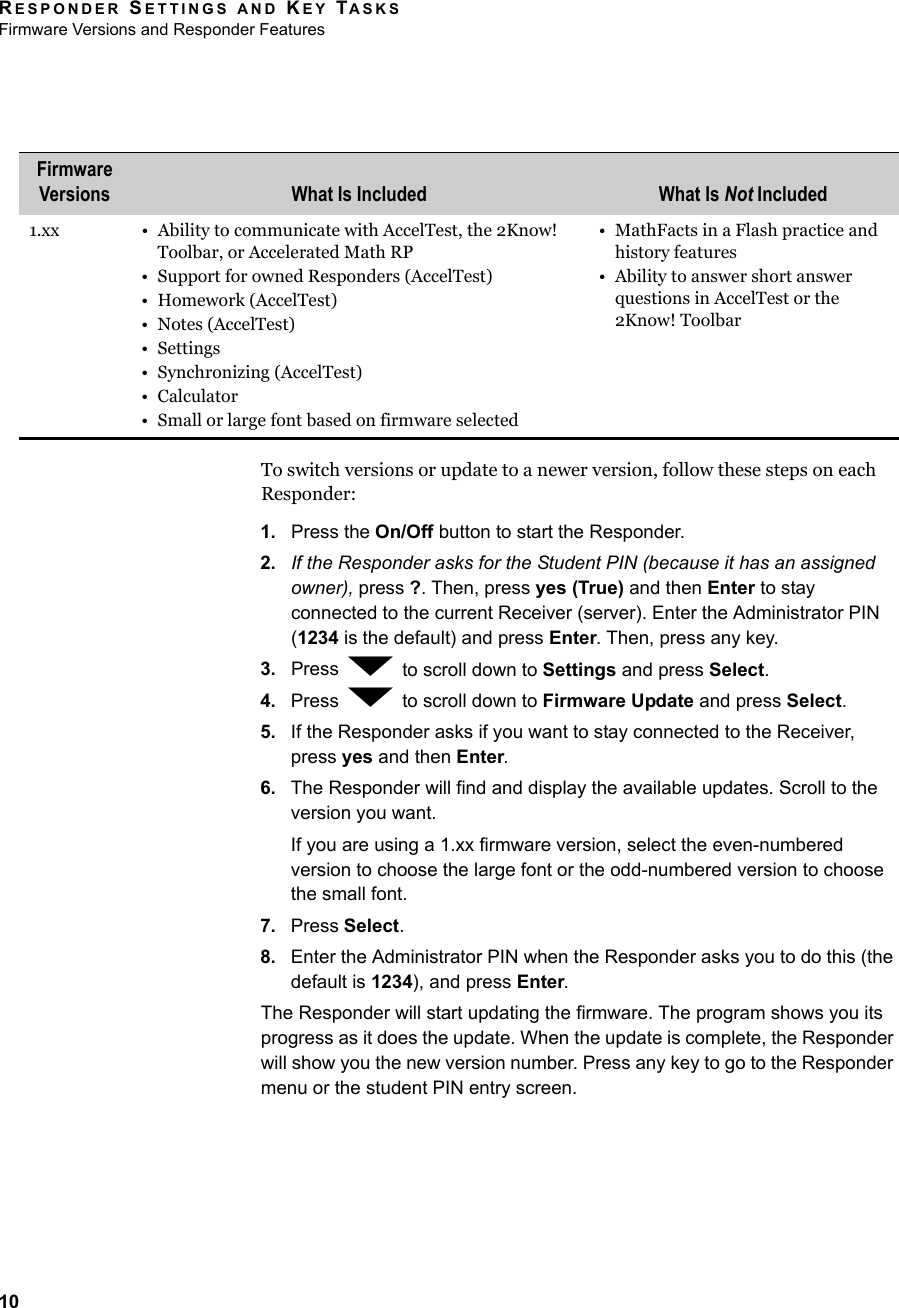
user manual