Rhine Electronics Co 7223T Transmitter of Remote Control User Manual 7223T
Rhine Electronics Co Ltd Transmitter of Remote Control 7223T
User manual
1/2 2014/6/5
INSTRUCTIONS FOR OPERATION
SETING THE OPERATING CONTROLS
1.This unit operates on CR 2032 3volts battery*2 (not included).
To prevent possible damage if the battery should leak , be sure to remove
the battery when the unit is not use .
2. Store the controller away from excess heat or humidity .
3. This remote control unit is required with 64 code combinations. To prevent
possible interference from or to other remote units such as garage door
openers, car alarm or security system . If you find that your fan and light
kit go on and off without using your control , simply change the combination
code in your transmitter and receiver .
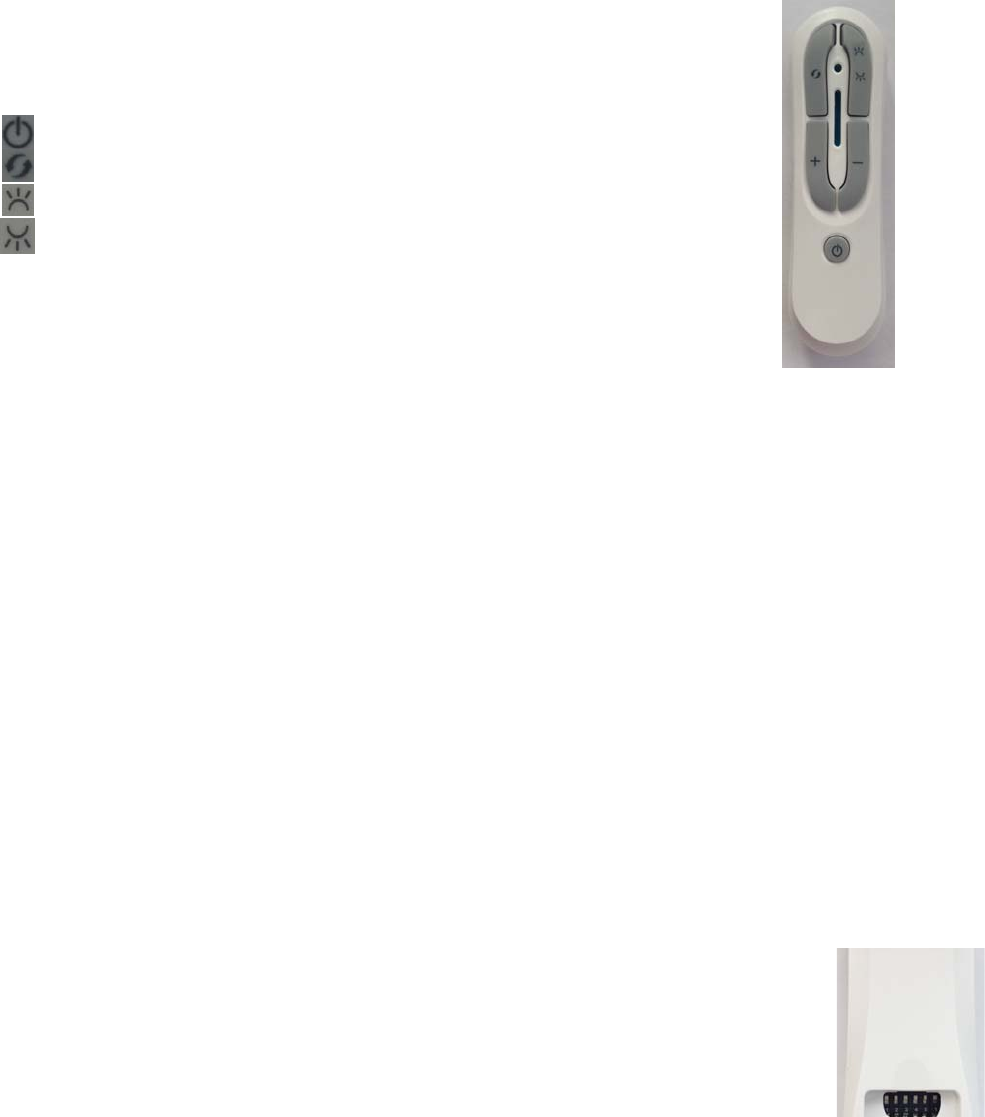
4.Operation buttons on the panel of transmitter .
+ key – For fan speed up
- key – For fan speed down
key – For fan speed off .
key – For fan speed Reverse .
key – For upper light brightness and ON/OFF control .
key – For bottom light brightness and ON/OFF control .
5.Start the fan :
Press the selected speed button to run the fan at the desired .
By press the speed up-down button to select the needed speed, and though the LED light to see the
fan speed.
6.Turn off the fan :
Press the OFF button .
7.Light control :
Turn the light on or off by only touching the LIGHT CONTROL button .
Keep pressing the button in excess of 0.7 second it becomes a dimmer ,
the light varies cyclically in 0.8 second .
One of the important feature of this control is AUTO-RESUME . After power
on , it allows the light return to where it was off .
GENERAL INFORMATION :
This REMOTE controller is designed to separately control your
ceiling fan speed and light brightness .
INSTRUCTIONS FOR INSTALLATION AND OPERATION OF FAN SPEED
CONTROLLER
A. Setting the code on your new transmitter .
1. Remove battery cover .
Press firmly below arrow and slide battery cover off .
2. Slide code switches to your choice of UP and DOWN position .
Factory setting is all UP . Do not use this setting .

2/2 2014/6/5
Use ball point pen or small screwdriver .
Slide firmly up or down .
B. Setting the code on your new Receiver unit .
1. Slide code switches to the same positions as set on your transmitter .
They must be set to same positions to work .
2. Replace battery cover on transmitter .
3. Make sure the code switches are on the left positions .
NOTICE :
The changes or modifications not expressly approved by the
party responsible for compliance could void user’s authority
to operate the equipment .
THIS DEVICE COMPLIES WITH PART 15 OF THE FCC RULES. OPERATIONS IS
SUBJECT INTERFERENCE AND (2) THIS DEVICE MUST ACCEPT ANY
INTERFERENCE RECEIVED, INCLUDING INTERFEERENCE THAT MAY CAUSE
UNDESRIED OPERATION.
The term “IC:” before the radio certification number only signifies that Industry Canada
Technical specifications were met.
Operation is subject to the following two conditions: (1) this device may not cause
interference, and (2) this device must accept any interference, including interference that may