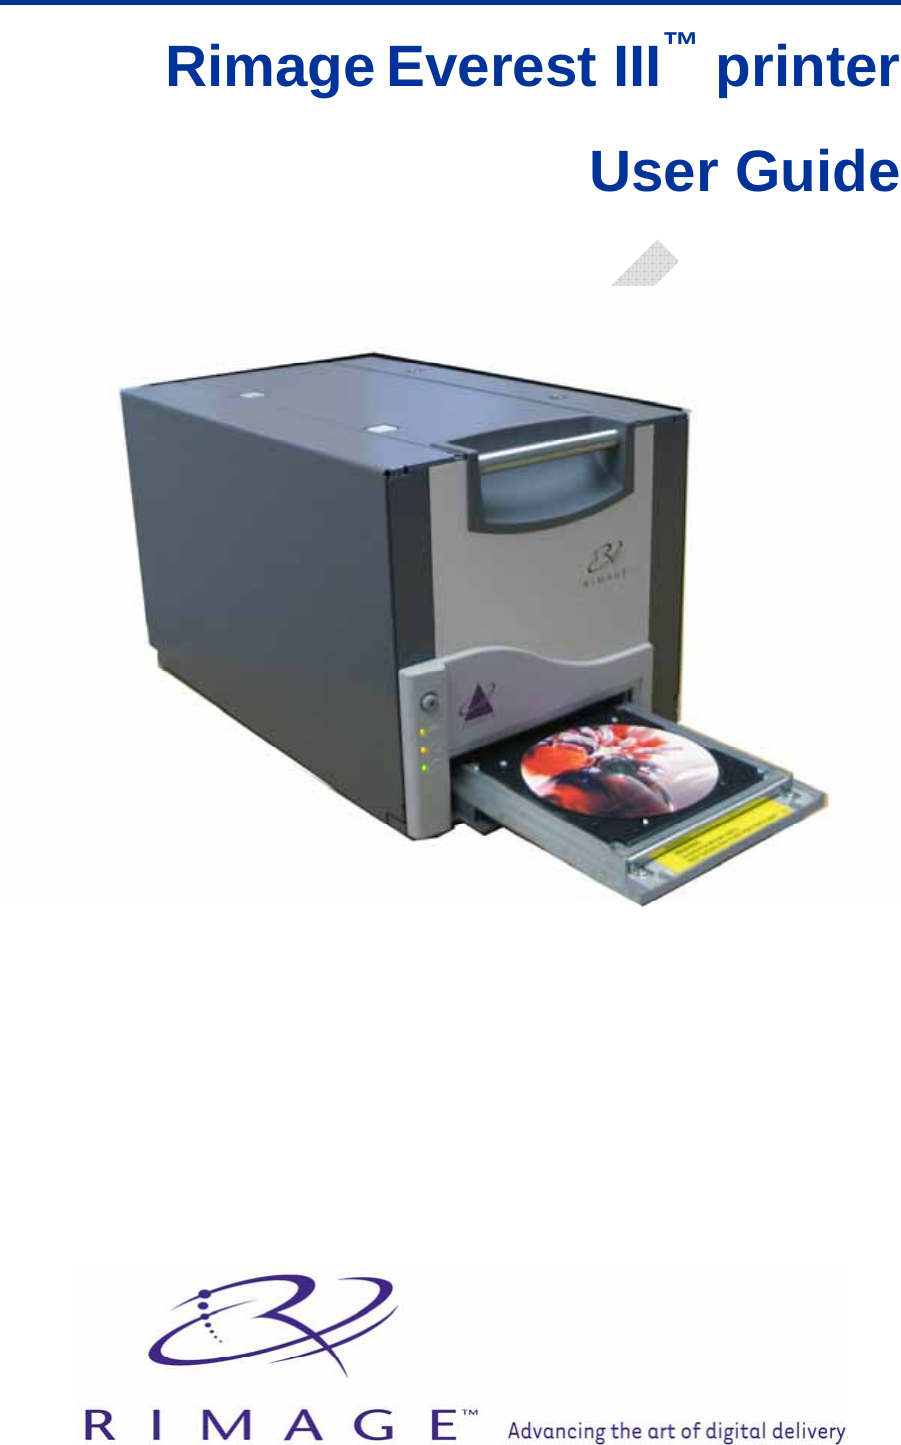
Rimage CDPR22 Rimage Everest II printer User Manual Everest III printer

Rimage Corporation Rimage Everest II printer Everest III printer

Manual

       Rimage Everest III™ printer  User Guide
   Corporate Headquarters: Rimage Corporation 7725 Washington Avenue South Minneapolis, MN 55439 USA 800 553 8312 (toll free US) Service: +1 952 946 0004 (International) Fax: +1 952 944 6956 European Headquarters: Rimage Europe GmbH Hans-Böckler-Straße 7 63128 Dietzenbach, Germany Tel: +49-(0) 6074-8521-0 Fax: +49-(0) 6074-8521-21 CD and DVD Recording Software Disclaimer This Product, Software, or Documentation may be designed to assist you in reproducing material in which you own the copyright or have obtained permission to copy from the copyright owner. Unless you own the copyright or have permission to copy from the copyright owner, you may be violating copyright law and be subject to payment of damages and other remedies. If you are uncertain about your rights, you should contact your legal advisor. If you are neither in possession of the copyright nor have authorization from the owner of the copyright, unauthorized copying of CDs or DVDs violates national and international legislation and can result in severe penalties. Rimage Corporation reserves the right to make improvements to the equipment and software described in this document at any time without any prior notice. Rimage Corporation reserves the right to revise this publication and to make changes from time to time in the content hereof without obligation of Rimage Corporation to notify any person or organization of such revisions or changes. This document may contain links to web sites that were current at the time of publication, but may have moved or become inactive since. This document may contain links to sites on the Internet that are owned and operated by third parties. Rimage Corporation is not responsible for the content of any such third-party site. ©2006, Rimage Corporation  Rimage™ is a trademark of the Rimage Corporation. Everest Printer™ is a trademark of the Rimage Corporation. Dell® is registered trademark of Dell Computer Corporation. FireWire® is a registered trademark of Apple Computer, Inc. Macintosh® is a registered trademark of Apple Computer, Inc.  All other trademarks and registered trademarks are the property of their respective owners.
   Support information US, Asia/Pacific, Mexico/Latin America  Europe Rimage Corporation 7725 Washington Avenue South Minneapolis, MN 55439 USA Attn: Rimage Services Service: North America: 800-553-8312 Asia/Pacific, Mexico/ Latin America: 952-946-0004 FAX: 952-946-6956 When you contact Rimage Services, please provide: •  Unit serial number and software version. •  Functional and technical description of the problem. •  Exact error message received. Rimage Europe GmbH Hans-Böckler-Straße 7 63128 Dietzenbach, Germany Tel:  +49-(0) 6074-8521-0 FAX: +49-(0) 6074-8521-21 Rimage Europe Technical Websitehttp://www.rimage.de/support.html Select the appropriate Support link to learn more. If you cannot find a solution on our website, email Rimage Services, Europe at support@rimage.de. Learn more online At www.rimage.com/support.html, you can experience Rimage’s world-class Support and Services. 1. Select your product family.   2. Select your product.   3.  Learn more on your product page.      From your product page you can access: •  Information about the latest software and firmware updates • Product specifications •  Troubleshooting tips and FAQs •  The latest documents • Printing tips • Current firmware and driver downloads
Contents 110875_A                                                                                                                                   i Contents Introduction ...................................................................................... 1 Printer Requirements.......................................................................................1 Operating System requirements............................................................................1 Media requirements............................................................................................... 1 Ribbon requirements.............................................................................................1 Label design requirements....................................................................................2 Identify the parts of the Everest printer ......................................... 3 Front view........................................................................................................3 Control panel.........................................................................................................4 Rear view ........................................................................................................5 Everest printer switches ........................................................................................6 Operate the Everest printer ............................................................. 7 Powering on and off the Everest printer ..........................................................7 Installing the Everest printer driver ..................................................................7 Installing the Everest printer driver on Macintosh ................................................. 8 Placing a disc on the printer tray .....................................................................9 Setting up your printing preferences on a Windows PC ................................10 Navigate to printing preferences .........................................................................10 Setting media size, media type, orientation, and ribbon type..............................11 Setting print quality, color matching, and image adjustments .............................12 Setting the printable area ....................................................................................13 Adjusting the print alignment and color density...................................................14 Setting up your printing preferences on a Macintosh.....................................15 Navigate to printing preferences .........................................................................15 Setting media type, ribbon type, and print quality ............................................... 15 Setting color matching, brightness, and threshold ..............................................16 Setting the printable area ....................................................................................17 Adjusting the print alignment and color density...................................................18 Checking the ribbon remaining......................................................................18 Maintain the Everest printer .......................................................... 20 Maintenance schedule...................................................................................20 Changing the print ribbon ..............................................................................21 Changing the retransfer ribbon......................................................................23 Cleaning the Everest printer ..........................................................................25
  Rimage Everest III printer  ii Clean the print head............................................................................................25 Clean the tacky rollers.........................................................................................26 Clean the air filter ................................................................................................27 Clean the platen roller .........................................................................................28 Learn More ...................................................................................... 30 Everest Printer Specifications .............................................................................30 Technical support and product updates ..............................................................31 Safety information ............................................................................................... 31 Safety testing.......................................................................................................32 Rimage Everest III Printer Limited 1 Year Warranty ...........................................36
 Introduction  110875_A   1 Introduction This manual provides the information needed to operate the Rimage Everest III printer, identify the parts, and configure printing preferences. To unpack and set up your Everest printer, refer to the Everest Unpacking and Setup Instructions included with your product. Printer Requirements Operating System requirements The Rimage Everest printer is compatible only with Windows® 2000 Professional, Windows® XP Professional, and Macintosh® OSX v 10.3/10.4. Media requirements You must use discs that are coated with a surface designed for thermal printing. The media in Rimage Media Kits™ is designed for optimum use in the Everest printer.  For more information about Rimage Media Kits™ – convenient packages of thermal retransfer-printable discs and ribbons, all guaranteed by Rimage – contact Rimage at 800-445-8288. Ribbon requirements - Important: Use only Everest III print ribbons with the Everest III printer. Print ribbons designed for the Everest II printer or earlier will not print correctly in the Everest III printer. The Everest printer requires a print ribbon and a retransfer ribbon. The standard print ribbon has three colors: Cyan, Magenta, and Yellow (CMY). These three colors combine in printing to create full color discs. Print ribbons are also available in black and CMY+White (CMY+W).   Ribbons  Part Number  Number of Discs Printed 3-Color (CMY)  203638-001  500 4-Color (CMY+W)  203639-001  375 Black (monochrome)  203640-001  1000 Retransfer ribbon  203474-001  500 Retransfer ribbon  203384-001  1000
Rimage Everest III printer  2  110875_A Label design requirements The Everest printer Windows compatible software ships with a label editor called CD Designer™, which is installed on your PC during a typical installation of the Rimage software. If you have a Windows based PC, you can use CD Designer to design your labels.  Note: CD Designer is not Macintosh compatible and will not be installed with the Macintosh compatible software. If you have another software application that you prefer, or if you are using a Macintosh computer, you can create a label and save it as an Acrobat® (.pdf) file, a .jpg file, or a .tiff file. - t!  Importano  If you are using a standalone Everest printer or an AutoEverest AutoPrinter, you can print using a label file designed in any program.  o  If your Everest printer is on a Rimage autoloader (except the AutoEverest AutoPrinter) and using Windows compatible software, only the Acrobat (.pdf) or CD Designer (.btw) file can print directly to the Everest printer.  To create a label with a software application other than CD Designer, use the following criteria: •  Color depth – Save the artwork for the label with the color set to millions of colors. •  DPI – Use pictures or logos set to 300 DPI (Dots Per Inch). •  Label design size – A full size disc is 120 mm (4.723”). The hole is 15 mm (0.59”). The printable area and hub sizes vary depending on the disc manufacturer.   Pri  ntable Area118 mm Hub Size24 mm  •  Media – The media that is in Rimage Media Kits™ has a printable area of 24-118 mm. On most labels, print settings of 24 mm and 118 mm are recommended. For more information about Rimage Media Kits™ – convenient packages of thermal retransfer-printable discs and ribbons, all guaranteed by Rimage – contact Rimage at 800-445-8288.
 Identify the parts of the Everest printer  110875_A   3 Identify the parts of the Everest printer This section describes the Everest printer hardware and features.  Front view  Side cover latches Handle Side cover Control panel   Printer tray
Rimage Everest III printer  4  110875_A Control panel  The control panel, located on the front of the printer, includes an operator button and four indicator lights. The control panel allows you to monitor and control the Everest printer. # Tip: If all indicator lights are blinking, the printer did not initialize properly. To correct this issue: 1.  Remove the power cord. The Everest printer powers down. 2.  Set the mode switch to the proper position. For more information, refer to the table on page 6. 3.  Reconnect the power cord. The Everest printer powers on.  Image  Name  Functionality  Operator Button  The operator button is used to complete the following tasks:  •  Open the printer tray •  Close the printer tray •  Reset after an error  •  Put the printer in sleep mode # Tip: To put the printer into sleep mode, press and hold the operator button for 10 seconds. Press the operator button again to resume normal operation. The error indicator light, located on the operator button, illuminates when operator action is required.      Error indicator light  Disc Present indicator light The Disc present indicator light illuminates when a disc is placed on the tray or when the disc is properly clamped.  The Disc present indicator light flashes when an Everest print latch is open or a ribbon is not detected.  Active indicator light  The active indicator light illuminates when the printer has completed initialization.  The active indicator light flashes when the Everest printer is receiving data from the host. The power indicator light illuminates when the Everest printer is powered on.   Power indicator light
 Identify the parts of the Everest printer  110875_A   5 Rear view  USB connector  Mode switch Serial connector Voltage switch Power connector  Original shipping screw position Shipping screw storage position
Rimage Everest III printer  6  110875_A Everest printer switches There are two switches on the rear of the Everest printer: the mode switch and the AC voltage switch.  Mode switch Voltage switch  Mode switch  - Important! You must power off the Everest printer before changing the mode switch. The mode switch is a rotary switch used to set the operational mode of the Everest printer. The printer must be powered off for the mode to be changed. After changing the mode, the printer must be powered on again to recognize the change. The opening at the base of the cap on the switch indicates the selected mode.  Switch Position  Mode  Mode Switch 2 Regular operation 3 Diagnostic 5 – 9  Reserved AC voltage switch  The AC voltage switch is used to select the AC voltage of the power outlet. nWarning! Set the AC voltage switch to match the AC voltage of the AC power outlet!
 Operate the Everest printer  110875_A   7 Operate the Everest printer This section provides the information needed to use your Everest printer. Powering on and off the Everest printer The Everest printer does not have a power switch:  Note: The printer will go into sleep mode if it is idle for more than 30 minutes. When this occurs, the printer will take 2-3 minutes to warm up after a job is sent to the printer.  •  If the Everest printer is on an autoloader, the printer is powered on when the autoloader is powered on. To power off the Everest printer, power off the autoloader. •  If the Everest printer is a standalone printer, connect the power cord from the Everest printer to a power outlet to power on the printer. To power off the Everest printer, disconnect the power cord. Installing the Everest printer driver  Before printing, you must install the printer driver. If your Rimage Everest printer was included with an autoloader that has an embedded PC or a control center, the Everest printer driver is already installed. 1.  Connect the Everest power cord to the printer. 2.  Ensure that the Everest printer is powered on.  Note: If the Everest printer is a standalone printer (not on an autoloader), the Everest printer will power on when you connect the power cord. If the Everest printer is on an autoloader, the Everest printer will power on when you power on the autoloader. For more information, refer to ‘Powering on and off the Everest printer’ on page 7. 3. Connect the USB cable from the Everest printer to the computer. 4.  Insert the software disc in the computer disc drive. The printer driver will automatically install from the Rimage Software disc.
Rimage Everest III printer  8  110875_A Installing the Everest printer driver on Macintosh - Important! To install the Everest printer driver, you must log on with an administrator account. 1.  Install the printer driver. a.  Insert the software disc in the computer disc drive. b. Run the Rimage Everest Installer. c. Select the Install button. The installation begins. d.  When the installation is complete, select Quit. The installation completes and the installation window closes. 2.  Add the Everest printer to your printer list. • Using OSX v 10.4 a.  Navigate: System Preferences > Print & Fax. The Print & Fax window opens. b. From the Print & Fax window, select  . The Printer Browser window opens. c. From the Printer Name list, select CDPR22.  d. Select Add. The printer is added to the printer list and the Printer Browser window closes.  e. Close the Print & Fax window.  • Using OSX v 10.3 a.  Navigate: System Preferences > Print & Fax. The Print & Fax window opens. b. From the Print & Fax window, select Setup Printers. The Printer List window opens. c. From the Printer List window, select Add. The Printer List window updates to display available printers. d.  From the printer list popup menu, select USB. In the printer list, CDPR22 displays. e.  From the printer list, select CDPR22.  f. Select Add. The printer is added to your printer list and the Printer List window closes. g. Close the Print & Fax window.
 Operate the Everest printer  110875_A   9  Placing a disc on the printer tray Use this procedure to place a disc on the printer tray. - Important! To avoid scratching or damaging the recording surface of the disc, you must place the disc properly on the printer tray. 1.  To open the printer tray, press the operator button. 2.  Place the disc on the print pad with the printable surface facing up and the stacking ring facing the print pad.  -Important: The disc must not rest on the holding pins or the centering pin. Print pad  Holding pins Printer tray Centering pin
Rimage Everest III printer  10  110875_A - u are printing PDF labels using a Rimage toPrinter). erties dialog opens. 5.  ab, select Printing Defaults… The Rimage Everest III Printing Defaults dialog opens.  Setting up your printing preferences on a Windows PC Printing preferences allows you to set up your Everest printer to produce the best possible labels on your discs. Navigate to printing preferences Use either procedure below to navigate to the Everest Printing Preferences. Accessing Printing Preferences through Windows Start menu  Note: Using this method, printing preferences are saved in the printer driver settings. If you are printing labels from CD Designer, use the procedure below.  1.  Navigate: Start > Printers and Faxes. 2.  Right-click on the appropriate Everest printer. The dropdown menu displays. 3.  From the dropdown menu, select Printing Preferences. The Rimage Everest III Printing Preferences dialog opens. Accessing Printer Preferences through CD Designer  Note: Using this method, printing preferences are saved with the label file and are used instead of the printer driver settings.   1.  Open the desired label file in CD Designer.  2. From the File menu, select Print. The Print window opens. 3. From the Printer Name dropdown list, select Everest. 4. Select the Document Properties button. The Rimage Everest Properties dialog opens. Accessing Printer Preferences when printing PDFs Use the procedure below to access printing preferences for PDF files. Important! The procedure below applies only if yoautoloader (except the AutoEverest Au1.  Navigate: Start > Printers and Faxes. 2.  Right-click on the appropriate Everest printer. The dropdown menu displays. 3.  From the dropdown menu, select Properties. The Rimage Everest III Prop4. From the Rimage Everest III Properties dialog, select the Advanced tab. At the bottom of the Advanced t
 Operate the Everest printer  110875_A   11 Setting media size, media type, orientation, and ribbon type 1.  Navigate to printing preferences (refer to page 10). 2. Select the Main tab. 3.  View or change the printing preferences. a. From the Media Type dropdown list, select the appropriate Media Type. b. From the Media Size dropdown list, select the appropriate Media Size.  c.  Select the desired number of copies. d.  Select the desired Orientation. e. From the Ribbon dropdown list, select the appropriate Ribbon Type. If you select CMY+White ribbon, select Manual or Auto: • Select the Manual radio button to send one color label file and then manually send another label file telling the printer where to apply the white background.  • Select the Auto radio button option to automatically print a white background.   If you select Auto, select Complete White Undercoat or Make Pure White Transparent from the dropdown list.   The Complete White Undercoat selection applies a white background to the entire printable area of the disc. The printable area is defined on the Advanced tab.   The Make Pure White Transparent selection does not print the areas of a label that are pure white.   4.  When you have made the desired choices, select Apply. 5.  To close the Preferences window, select OK.
Rimage Everest III printer  12  110875_A Setting print quality, color matching, and image adjustments 1.  Navigate to printing preferences (refer to page 10). 2. Select the Advanced tab. 3.  View or change the printing preferences. a. From the Print Quality pane, select the desired Print Quality. b. From the Color Matching pane, select the desired Color Matching.  Note: The default setting for color matching is CMYK. c. From the Image Adjustments dropdown list, select None, High contrast, Vivid colors, or Custom.  If you select Custom: i. Select the Settings button. The Custom Settings window opens.  ii.  From the dropdown list, select the desired Print Threshold settings. iii.  To adjust image contrast and saturation, move the Contrast and Saturation sliders. iv.  To close the Custom Settings window, select OK. 4.  When you have made the desired choices, select Apply. 5.  To close the Printing Preferences window, select OK.
 Operate the Everest printer  110875_A   13 Setting the printable area This functionality allows you to adjust the printable area settings for standard CD/DVD 120 mm media. This allows you to set the outer and inner diameters to print the disc label without overlapping the disc edges.  # Tip: Most discs like the one shown above have the following printable areas:  Outer Diameter 118 mm Inner Diameter 24 mm  # Tip: Most discs like the one shown above have the following printable areas: Standard Area  Outer Diameter 118 mm Inner Diameter 38 mm Hub Area  Outer Diameter 35 mm Inner Diameter 24 mm 1.  Navigate to printing preferences (refer to page 10). 2. Select the Advanced tab. 3.  View or change the printing preferences. a.  To modify the printable area, select Modify. The Printable Area Settings window opens. b. In the Standard Area settings, enter: •  The desired outer diameter •  The desired inner diameter c.  To print on a disc with a stacking ring, select the radio button labeled Advanced.  d. In the Hub Area settings, enter: •  The desired outer diameter •  The desired inner diameter e.  To apply the settings, select OK. f.  To close the window without applying the settings, select Cancel. 4.  When you have made the desired choices, select Apply. 5.  To close the Printing Preferences window, select OK.
Rimage Everest III printer  14  110875_A Adjusting the print alignment and color density 1.  Navigate to printing preferences (refer to page 10). 2. Select the Utility tab. 3. From the Printer status pane, select Status. The Status Monitor window opens. # Tip: On the Status tab, you can view information about the Everest printer such as the current firmware version, the progress of a print job, the installed ribbon type, the percentage of unused ribbon remaining and the percentage of retransfer ribbon remaining. 4. From the Printer Information tab, select Settings for the setting you wish to modify. 5.  View or change the Print Alignment Settings. a. From the Print Alignment Settings pane, select the Modify button. b.  Select the desired print alignment settings. 6.  View or change the Color Density Settings. a. From the Color Density Settings pane, select the Modify button. b.  Select the desired color density settings. 7.  To close the Status Monitor dialog, select Close.
 Operate the Everest printer  110875_A   15 Setting up your printing preferences on a Macintosh Printing preferences allow you to set up your Everest printer to produce the best possible labels on your discs.   Note: The location of the preferences described in this section will change depending on the program used to print the label file. Navigate to printing preferences 1.  Open the label file in the application of your choice. 2. From the File menu, select Print. The Print dialog opens. 3. From the Printer dropdown list, select CDPR22.  Setting media type, ribbon type, and print quality 1.  Navigate to printing preferences (refer to page 15). 2.  From the presets pane popup menu select Everest III Settings. The Everest III Settings pane displays. 3.  View or change the printing preferences. a. From the Media Type dropdown list, select the appropriate media type. b. From the Ribbon dropdown list, select the appropriate ribbon type. If you select CMY + White from the Ribbon dropdown list, from the Mode dropdown list select one of the following options: • The Auto: Complete white undercoat selection applies a white background everywhere on the printable area of the disc.  • The Auto: Make Pure white transparent selection makes pure white areas of an image transparent.  • Manual: Step 1 (CMY) and Manual: Step 2 (White) allow you to manually determine where a white background is applied. c.  Select the desired print quality. 4.  When you have made the desired choices, select Print.
Rimage Everest III printer  16  110875_A Setting color matching, brightness, and threshold 1.  Navigate to printing preferences (refer to page 15). 2.  From the presets pane popup menu select Everest III Colors. The Everest III Colors pane displays. 3.  View or change the printing preferences. a. From the Color Matching dropdown list, select the desired color matching. b. From the Matching Method dropdown list, select the desired matching method. c.  To modify the image brightness, move the Brightness slider. d. From the Threshold dropdown list, select the desired threshold. 4.  When you have made the desired choices, select Print.
 Operate the Everest printer  110875_A   17 Setting the printable area This functionality allows you to adjust the printable area settings for standard CD/DVD 120 mm media. This allows you to set the outer and inner diameters to print the disc label without overlapping the disc edges.  Note: Printable area settings created within a CD Designer label file will override the printer and fax settings on Windows.  # Tip: Most discs like the one shown above have the following printable areas:  Outer Diameter 118 mm Inner Diameter 24 mm  1.  Navigate to printing preferences (refer to page 15). 2.  From the presets pane popup menu select Printable Area Settings. The Printable Area Settings pane displays. 3.  View or change the printing preferences. a.  To increase or decrease the standard printable area, enter the desired values in the Outer Diameter and Inner Diameter fields. b.  To set the printable area for a disc with a stacking ring, select Advanced. The advanced settings display. i.  To increase or decrease the hub area, enter the desired values in the Outer Diameter and Inner Diameter fields. 4.  When you have made the desired choices, select Print.  # areas: Seter 38 mm HInner Diameter 24 mm  Tip: Most discs like the one shown above have the following printabletandard Area  Outer Diameter 118 mm Inner Diamub Area  Outer Diameter 35 mm
Rimage Everest III printer  18  110875_A #ally  Everest III printers will not display accurately in the consumable monitoring application. Adjusting the print alignment and color density In the Everest III Utility, you can adjust the print alignment and the color density.  # Tip: The Everest III Utility allows you to view information such as the current firmware version, the serial number, and the installed ribbon type. Through the Everest III Utility, you can also update your printer firmware. 1.  Navigate to the Everest III Utility.  Note: The settings in the Everest III Utility can be modified only when the Everest printer is idle (no jobs currently printing). a.  Navigate: System Preferences > Print & Fax. The Print & Fax window opens. b.  If you are using OS X v10.3, in the Print & Fax window, select Set up Printers. The Printer list opens. c.  From the printer list, select CDPR22. The CDPR22 window opens.  d.  From the CDPR22 toolbar, select Utility. The Everest III Utility opens. 2.  In the Everest III Utility, select the Alignment tab. The alignment settings display. 3.  View or change the alignment settings. a.  To modify the horizontal alignment, in the Horizontal Alignment Settings pane, move the All Color slider. b.  To modify the vertical alignment, in the Vertical Alignment Settings pane, move the Color and Monochrome sliders. 4.  View or change the color density settings. a.  In the Everest III Utility, select the Density tab. The density settings display. b.  To modify the color density settings, in the Color Density Settings pane, move the Cyan, Magenta, and Yellow sliders. c.  To modify the grayscale density settings, in the Grayscale Density Settings pane, move the Black slider. 5.  To save the modified settings, select Save. Or To close the window without saving your changes, select Quit. Checking the ribbon remaining The operator panel on Producer III autoloaders will display the number of prints remaining on the print ribbon and the retransfer sheet. For stand alone Everest III printers and AutoPrinters, the Status tab in the Status monitor for Windows will allow you to view information about the Everest printer such as the current firmware version, the progress of a print job, the installed ribbon type, the percentage of unused ribbon remaining and the percentage of retransfer sheet remaining.  Tip: If you remove a ribbon from the Everest III printer and reinsert it, the system will recognize the amount of ribbon remaining in the consumable monitoring application. Partiused ribbons from other
 Operate the Everest printer  110875_A   19
Rimage Everest III printer  20  110875_A Maintain the Everest printer - Important! For optimum performance, keep the Everest printer in a clean, dust-free environment.  To keep the Everest printer operating at optimum performance, you must maintain the Everest printer. Maintenance tasks and frequency are described in the table below. Maintenance schedule Task  Frequency Change the print ribbon  3-Color Ribbon (CMY)  After 500 discs 4-Color  Ribbon (CMY+W)  After 375 discs Black Ribbon (monochrome)  After 1000 discs  Change the retransfer ribbon  After 1000 discs Clean the print head  Recommended every 2000 discs (as needed) Clean the tacky rollers  Recommended  every 2000 discs (as needed) Clean the air filter  As needed Clean the platen roller  As needed The platen roller should be cleaned only if you notice a diminished print quality, such as white specks, on the printed disc.  Required tools: # Tip: For best results, use the Everest cleaning kit, which includes the tools listed below. •  Sponge swabs with long handles •  High grade isopropyl alcohol
 Maintain the Everest printer  110875_A   21 Changing the print ribbon Before changing the Everest print ribbon, allow time for the new ribbon to become acclimated to the environment. Allow more time for greater temperature and/or humidity differences. - Important! Ribbons must be stored at a temperature between 50°– 90°F (10°–32°C). Avoid moisture and direct sunlight. Do not reuse ribbons. Before you begin: Power off the printer.  1. Remove the print ribbon. a. Press the two cover latches to release the side cover. b. Lower the side cover.        c. Turn latch 1 counter-clockwise. d. Remove the print ribbon carrier. e. Remove the print ribbon from the carrier. 2.  Discard the used print ribbon. # Tip: Perform cleaning procedures while the print ribbon is removed. Refer to ‘Cleaning the Everest printer’ on page 25.   Cover latches Side cover Latch 1 Print ribbon carrier
Rimage Everest III printer  22  110875_A  3.  Install the new print ribbon. a. Remove the new ribbon from the packaging. b. Install the supply roll end of the print ribbon on the top of the carrier.  c. Insert the large shaft in the large opening and press the small shaft into place.  Note: The ribbon must come over the tacky roller.  d.  Wrap the ribbon around the guide rollers. e. Install the take up roll. f. Rotate the take up roll so the ribbon is aligned and lies flat. # Tip: You may need to lift the ribbon up from the tacky roller to straighten it. Large openingSmall shaft Tacky roller Supply rollGuide rollers d a  nced to the take up roll.   Note: If you installemonocolor ribbon, advance the ribbon so the ink portion of the ribbon isadvaPull handle Supply roll Take up roll 4. Reassemble the printer. a. Slide the carrier into the printer. b. Close latch 1. c. Close the side cover. 5.  Power on the printer. The printer is ready.
 Maintain the Everest printer  110875_A   23 Changing the retransfer ribbon Before changing the Everest retransfer ribbon, allow time for the new ribbon to become acclimated to the environment. Allow more time for greater temperature and/or humidity differences. Ribbons must be stored at a temperature between 50°– 90°F (10°–32°C). Avoid moisture and direct sunlight. Do not reuse ribbons.  Before you begin: Power off the printer.   1. Remove the retransfer ribbon. a. Press the two cover latches to release the side cover. b. Lower the side cover.  c. Open latches 1, 2, and 3. d.  Pull out the retransfer ribbon carrier.  Note: The retransfer ribbon carrier cannot be removed from the printer. e.  To remove the retransfer ribbon from the carrier, lift the retransfer rolls up and carefully slide the retransfer ribbon from the retransfer ribbon carrier.  Cover latches Side cover Retransfer ribbon carrier Latch 2 Latch 3
Rimage Everest III printer  24  110875_A  2.  Discard the used retransfer ribbon. 3.  Install the new retransfer ribbon. a. Remove the retransfer ribbon from the packaging. b.  With the supply roll on the left side, slide both retransfer rolls under the retransfer ribbon carrier.  c. Install the supply roll on the left side of the carrier and snap the roll into place. d. Bring the take up roll up and around the guide rollers and snap the roll into place. e.  Ensure that the retransfer ribbon is aligned and straight across all the ribbon guides. f.  To take up the ribbon slack, turn the take up roll counterclockwise Supply rollTake up roll  Position of lower guide 4. Reassemble the printer. a. Slide the retransfer carrier into the printer. b. Close latches 1, 2, and 3.  c. Close the side cover.  5.  Power on the printer. The printer is ready.
 Maintain the Everest printer  110875_A   25  Cleaning the Everest printer Clean the print head Before you begin: Power off the printer.  1. Access the print head. a. Press the two cover latches to release the side cover. b. Lower the side cover.  c. Open latch 1. d. Remove the print ribbon carrier. For specific instructions, refer to page 21. 2. Clean the print head. p Caution! Wipe the print head from one end to the other. Do not stop wiping in the middle of the print head.  pCaution! Do not scratch the print head. The white area in the picture shows the area to clean.  a. Apply isopropyl alcohol to the sponge swab. Latch 1  Printhead Wipe direction b. Use the sponge swab to wipe across the print head from one end to the other. c.  Repeat as needed until the print head is clean of dust and debris. d. Use the sponge swab to remove any waxy buildup from the roller below the print head. 3. Prepare the printer for use. a. Install the print ribbon carrier. b. Close all latches. c. Close the side cover. d.  Power on the printer. The printer is ready.
Rimage Everest III printer  26  110875_A Clean the tacky rollers Before you begin: Power off the printer.  1. Remove the print ribbon. For specific instructions, refer to page 21. 2.  To access the tacky rollers, remove the supply roll (the unused portion) of the print ribbon from the print ribbon carrier. 3. Clean the tacky rollers. a. Apply isopropyl alcohol to the sponge swab. b. Use the sponge swab to clean tacky roller 1. c. Use the sponge swab to remove any waxy buildup from other parts of the ribbon carrier. d. Reinstall the supply roll on the print ribbon carrier.  e.  Inside the printer, use the sponge swab to wipe tacky roller 2. 4. Prepare the printer for use. a. Install the print ribbon carrier. b. Close all latches. c. Close the side cover. Ribbon carrier Tacky roller 1 Ribbon carrier d.  Power on the printer. The printer is ready.  Tacky roller 2
 Maintain the Everest printer  110875_A   27 Clean the air filter Before you begin: Power off the printer.  1. Remove the air filter. a.  At the rear of the Everest printer, remove the two screws holding the fan cover. b. Remove the air filter. 2. Clean the air filter. a.  Use water to clean the air filter. Screws Fan cover b. Allow the air filter to dry.   3. Prepare the printer for use. a. When the air filter is dry, place it inside the fan cover. b. Use the two screws to attach the fan cover. c.  Power on the printer. The printer is ready.
Rimage Everest III printer  28  110875_A Clean the platen roller - Important! The platen roller should be cleaned only if you notice a diminished print quality, such as white specks on the printed disc. Before you begin: 1.  Ensure that the printer is powered off. 2.  At the back of the printer, change the mode switch to position 3 (Diagnostic Mode). 3.  Power on the printer.   1. Access the platen roller. a. Press the two cover latches to release the side cover. b. Lower the side cover.  c. Open latches 1, 2, and 3. d. Remove the print ribbon carrier. For specific instructions, refer to page 21. e.  Pull out the retransfer ribbon carrier. For specific instructions, refer to page 23.   The retransfer ribbon carrier cannot be removed from the printer. Note:2.  To access and select diagnostic 1, press and hold the operator button for 2 seconds. The platen roller rotates and the front panel Active indicator light blinks. 3. Clean the platen roller. p Caution! Do not apply pressure when cleaning the platen roller with the sponge swabs. Applying pressure may damage the platen roller, leaving scratch marks on the printed disc. a. Apply isopropyl alcohol to the sponge swab.  b.  As the platen roller rotates, use the sponge swab to wipe the platen roller, allowing it to rotate a full turn before moving to the next area.   4.  Press and release the 5.  Power off the printer. operator button to exit diagnostics mode. Retransfer ribbon carrier Platen roller
 Maintain the Everest printer  110875_A   29 6. Prepare the printer for use. a. Install the print ribbon carrier. b. Install the retransfer ribbon carrier. c. Close all latches. d. Close the side cover. e. Turn the mode switch to the correct operating position. For more information, refer to page 6. f.  Power on the printer. The printer is ready.
Rimage Everest III printer  30  110875_A Learn More Everest Printer Specifications Item   Description Printing Speed (including tray cycle time) 60 seconds or less for CMY color coverage. 66 seconds for CMY+W First print is 5 minutes, which includes warm-up time. Printing Modes  Monochrome, CMY, and CMY+W Print Quality  Equivalent of 160 LPI (Lines Per Inch) using variable dot technology Media Types  CDs or DVDs with Everest-compatible coating Ribbons  Monochrome (Black) CMY (Cyan, Magenta, and Yellow) CMY+W (Cyan, Magenta, Yellow, and White) Ribbon Capacity  Retransfer Ribbon = 1000 discs or 500 discs Black Ribbon = 1000 discs CMY Ribbon = 500 discs CMY+W Ribbon = 375 discs Physical Properties  9.5” H x 9.5” W x 15.35” D (24.2 cm x 24.2 cm x 39.0 cm) Depth with print tray extended – 22.25” or 56.5 cm Left side cover open for print ribbon replacement –  add additional 9.1” or 23 cm 44 lbs (20 Kg) Shipping Weight – 49 lbs Interface  USB (Universal Serial Bus) – B type connector Power  100-240 VAC, 50-60 Hz, 500 Watts, 3.9 Amps at 115 VAC/ 2.9 Amps at 220 VAC. Operating Temperature  59° F to 86° F (15 ° C to 30° C)  Relative Humidity  30% to 70% non-condensing Minimum System Requirements  Windows-based PC Pentium 300 or better with 128MB RAM Windows 2000 Professional or XP Professional USB port Macintosh computer G3 or better with 128 MB RAM Macintosh OS X  v 10.3/10.4  USB port
 Learn More  110875_A   31 np d the precautions in the User Guide and familiarize yourself with their meaning ntage slide switch on the back of the unit. Before use, check that it is set n d er cord d. Do not insert your fingers. n sharp edges. np  cted completely by unplugging the cable. n a position that allows immediate disconnection of the when disconnecting the cable from the outlet. his may result in utlet. Contact your dealer for repairs. p Caution! Do not use outdoors p Caution! If used outside of own premises, general authorization is required. Technical support and product updates Support for the Rimage Everest printer is available through your authorized reseller. - Important: Register your Rimage Everest printer so we can notify you of upgrades as they become available. Safety information This manual and the indications on the product allow proper and safe operation.  The indication marks below help protect you and other persons from injury, and equipment from damage.   Warning! According to ANSI (American National Standards Institute) standards, a warning is used to indicate situations that could result in bodily injury to personnel operating or maintaining the equipment. Caution: Indicates that failure to observe this guideline could result in loss or damage to the equipment, product, software, or data. To ensure safety, please reabefore using the equipment. Safety Precautions  Warning! This printer has a volto the correct voltage. Please do not use any voltage other than 110VAC or 220VAC. This could result in a fire and an electric shock. Warning! Do not disassemble or use tools on the printer. All service procedures should be performeby an authorized field technician, or sent in for repair. Do not service the printer with the powplugged in the AC outlet. n be opened by hanWarning! The front bezel of the printer can n Warning! Do not touch the heater roller.  Warning! The interior of the printer contains Warning! Keep out of reach of children. Caution! Any equipment that has AC line voltage, or low DC voltages, such as switches, power supplies, fuses, fans, non-stepper motors, must be replaced with Rimage–approved components to maintain the safety approval issued by UL. pCaution! This printer has no power switch. Power is disconneRimage recommends installing the printer ipower cable. Always hold the plug p Caution! Do not use the printer if it is overheating, or an abnormal smell is detected. Ta fire and an electric shock. In case of heating or abnormal smell, immediately disconnect the cable from the o  pCaution! This product is designed for an office environment.
Rimage Everest III printer  32  110875_A ufficient free space for opening the printer tray. Do not touch the printer tray while it is moving.  ower is supplied, the printer will stop. Never reach into the printer while it is operating. Do not attempt to bypass the door interlock.  P name: Ep Caution! Allow sp Caution! If the side cover is opened while pSafety testing roduct  verest III printer Model: CDPR22 Notice for USA       e user’s authority to operate this equipment. stalled and used in accordance with the instructions, may u tions. However, there is no articular installation. If this ception, cg mear d equipment and meets the FCC/IC radio frequency (RF) pplement C to OET65. This equipment has very d to comply without maximum  et nd/or peripherals in order to meet FCC emission limits.   Federal Communications Commissions (FCC) Warning Any unauthorized modification to this equipment may result in the revocation by the FCC of th Federal Communications Commissions (FCC) Notice This equipment has been tested and found to comply with the limits for a Class B digital device, pursuant to part 15 of the FCC Rules. These limits are designed to provide reasonable protection against harmful interference in a residential installation. This equipment generates, uses, and can radiate radio frequency energy and, if not inca se harmful interference to radio communicaguarantee that interference will not occur in a pequipment does cause harmful interference to radio or television rewhi h can be determined by turning the equipment off and on, the user is encouraged to try to correct the interference by one or more of the followinsures:  • Reorient or relocate the receiving antenna • Increase the separation between the equipment and receiver. • Connect the equipment into an outlet on a circuit different from that to which the receiver is connected.  • Consult the dealer or an experienced radio/TV technician for help. This equipment complies with FCC/IC radiation exposure limits set forth founcontrolleExposure Guidelines in Suw levels of RF energy that is deemelopermissive exposure evaluation (MPE).  But it is desirable that it should beinstalled and operated with at least 8 in (20 cm) or more between the radiator and the person’s body (excluding extremities: hands, wrists, fend legs). aAdditional FCC Notices  Properly shielded and grounded cables and connectors must be used for connection to host computer a
 Learn More  110875_A   33 afety precautions for RF exposure or operated in conjunction with any other antenna or transmitter. S This transmitter must not be co-located  Product Safety Statement This product complies with UL 60950-1.  Notice for Canada  1997. a norme NMB-003Canadian Department of Communications (DOC) Statement This Class B digital apparatus complies with Canadian ICES-003 Issue 3:Cet appareil numerique de la classe B est conforme a l  du Canade.  This product complies with CAN/CSA-C22.2 No. 60950-1-03 1st edition.  C Notice for Europe  A1: 2001& A2: This product is in conformity with the EMC Directive (89/336/EEC) and the Low-Voltage Directive (73/23/EEC) through compliance with the following European standards: EN 60950:2000, EN 55022:1998 + A1:2000 & A2: 2003, EN 55024:1998 & 2003, EN 61000-3-2:2000; EN 61000-3-3:1995 & A1: 2001. The CE mark has been
Rimage Everest III printer  34  110875_A ation declares that this equipment Everest III printer, affixed in accordance with the CE Marking Directive 93/68/EEC. Hereby, Rimage Corpormodel CDPR22 is in compliance with the essential requirements and other relevant provisions of Directive 1999/5/EC. Hiermit erklärt Rimage Corporation, dass sich das Gerät Everest III printer in Übereinstimmung mit den grundlegenden Anforderungen und den übrigen einschlägigen Bestimmungen der Richtlinie 1999/5/EG befindet.  Por medio de la presente Rimage Corporation declara que el Everest III cumple con los requisitos esenciales y cualesquiera otras disposiciones aplicables o exigibles de la Directiva 1999/5/CE. Notice for France Par la présente Rimage Corporation déclare que l'appareil Everest III printer est conforme aux exigences essentielles et aux autres dispositions pertinentes de la directive 1999/5/CE.  Notice for Italy Con la presente Rimage Corporation dichiara che questo Everest III è confoai requisiti essenziali ed alle altre disposizioni pertinenti stabilite dalla diretti1999/5/CE. rme va  Jméno výrobce] tímto prohlašuje, že tento Everest III printer je ve shodě se základními požadavky a dalšími příslušnými ustanoveními směrni ce 1999/5/ES. Undertegnede Rimage Corporation erklærer herved, at følgende udstyr Everest III printer overholder de væsentlige krav og øvrige relevante krav i direkti1999/5/EF.  v Por medio de la presente Rimage Corporation declara que el Everest III printer cumple con los requisitos esenciales y cualesquiera otras disposiciones aplicables o  exigibles de la Directiva 1999/5/CE. ΜΕ ΤΗΝ ΠΑΡΟΥΣΑ Rimage Corporation ΔΗΛΩΝΕΙ ΟΤΙ Everest III printer ΣΥΜΜΟΡΦΩΝΕΤΑΙ ΠΡΟΣ ΤΙΣ ΟΥΣΙΩΔΕΙΣ ΑΠΑΙΤΗΣΕ ΙΣ ΚΑΙ ΤΙΣ ΛΟΙΠΕΣΣΧΕΤΙΚΕΣ ΔΙΑΤΑΞΕΙΣ ΤΗΣ ΟΔΗΓΙΑΣ 1999/5/ΕΚ.  Hierbij verklaart Rimage Corporation dat het toestel Everest III printer in  overeenstemming is met de essentiële eisen en de andere relevante bepalingenvan richtlijn 1999/5/EG.   ara que este Everest III printer está conforme com os iais e outras disposições da DirectivaRimage Corporation declrequisitos essenc  1999/5/CE.   oświadcz sr jest zgodny z iczymi wymogami oraz pozostałymi stosownymNiniejszasadnzym Rimage Corporation a, że Evere t III printei postanowieniami Dyrektywy 1999/5/EC.  oration vakuuttaa täten että Everest III pr ite on direktiivin 1999/5/EY oleellisten vaatimusten ja sitä koskevien direktehtojen mukainen. inter tyyppinen laiivin muiden Rimage Corp Härmed intygar Rimage Corporation att denna Everest III printer står I överensstämmelse med de väsentliga egenskapskrav och övriga relevanta bestämmelser som framgår av direktiv 1999/5/EG. Notice for Norway  Rimage Corporation erklærer herved at utstyret Everest III printer er i samsvar med de grunnleggende krav og øvrige relevante krav i direktiv 1999/5/EF. This subsection does not apply for the geographical area within a radius of 20km from the centre of Ny-Alesund.  Hér með lýsir Rimage Corporation yfir því að Everest III printer er í samræmi við grunnkröfur og aðrar kröfur, sem gerðar eru í tilskipun 1999/5/EC.  Rimage Corporation týmto vyhlasuje, že Everest III printer spĺňa základné požiadavky a všetky príslušné ustanovenia Smernice 1999/5/ES.
 Learn More  110875_A   35 Rimage Corporation izjavlja, da je ta Everest III printer v skladu z bistvenimi  1999/5/ES.  zahtevami in ostalimi relevantnimi določili direktive Alulírott, Rimage Corporation nyilatkozom, hogy a Everest III printer megfelel a vonatkozó alapvetõ követelményeknek és az 1999/5/EC irányelv egyéb elõírásainak.  Hawnhekk, Rimage Corporation, jiddikjara li dan Everest III printer jikkonforma mal-ħtiġijiet essenzjali u ma provvedimenti oħrajn relevanti li hemm fid-Dirrettiva 1999/5/EC.  reikalavŠiuo Rimage Corporation deklaruoja, kad šis Everest III printer atitinka esminius imus ir kitas 1999/5/EB Direktyvos nuostatas.  ūtiskajām prasībām un citiem ar to saistītajiem noteikumiem. Ar šo Rimage Corporation deklarē, ka Everest III printer atbilst Direktīvas 1999/5/EK b direktiivi 1999/5/EÜ põhinõuetele ja nimetatud direktiivist tulenevatele teistele Käesolevaga kinnitab Rimage Corporation seadme Everest III printer vastavust asjakohastele sätetele.  This product complies with VCCI Notice for Japan VCCI V.3/2005.04 Notice for Australia roduct complies CISPR22:2004 CTICK This pwith AS/NZS
Rimage Everest III printer  36  110875_A Rimage Everest III Printer Limited 1 Year Warranty  Rimage warrants, to the original end user only, that all non-consumable parts of the Everest printer will be free from defects in material or workmanship for 12 months, according to the following terms:  • Rimage will replace or repair, at Rimage's discretion, any non-consumable parts found defective within the Warranty period.  • Valid from the date Rimage ships the product to you.  • Factory depot repair:   To Rimage’s location in Minnesota from a location within the US or Canada with a typical response of 15 business days.    To Rimage’s location in Germany from a location in Europe with a typical response of 15 business days.   To Rimage Minnesota from a location that is not in the US or Canada with a typical response of up to 25 business days. • Several Maintenance Contracts that provide faster service are available for an additional fee. • Rimage will pay ground service freight charges for components shipped to you.  The use of non-Rimage certified parts may void this warranty. This Warranty does not include the following:  • Work done at the customer's location, or customer's loss of data.  • Shipment costs of equipment or components returned to the Rimage factory.  • Equipment malfunctions as a result of repairs made by technicians who are not authorized or certified by Rimage. • Software and/or firmware enhancements released after purchase of the product.  • Equipment or parts that were tampered with, misused, neglected, or that were modified in any respect without the written consent of Rimage.  • Equipment or parts that have been damaged due to shipping or accidents, or damaged by lightning, storms, water, or power surges.  • Printer consumables including ribbons, transfer sheets, or print head.  You may not assign this Warranty without Rimage's written consent. Rimage is the intended beneficiary of this Warranty; if there is any inconsistency between this Warranty and any other agreement included with or relating to Rimage products, this Warranty shall govern. If any term of this Warranty is illegal or unenforceable, the legality and enforceability of the remaining provisions are not affected or impaired. This Warranty is to be interpreted under the laws of the State of Minnesota, without giving effect to conflict of law rules.  Rimage must receive written notice of any claimed defect or failure to perform within five (5) days after such failure or defect is first observed. For warranty service, call Rimage at (952) 946-0004.  The Limited Warranty set forth above is Rimage's only Warranty in connection with the Rimage Everest printers. All other Warranties, whether written or oral, express or implied, contractual or statutory, including, but not limited to any Warranties of merchantability or fitness for any particular purpose are specifically excluded and disclaimed. In no event shall Rimage's liability under this Warranty exceed the obligation to repair or replace, at Rimage's discretion, a Warranted product, and, without limiting the foregoing, Rimage's liability under this Warranty shall not exceed the cost of the covered product.

Navigation menu