Riso Kagaku RFMHL00 RFID TAG Reader/Writer User Manual fm
Riso Kagaku Corporation RFID TAG Reader/Writer fm
Contents
- 1. User Manual
- 2. Host Manual 1
- 3. Host Manual 2
- 4. Host manual 1
- 5. Host manual 2
Host Manual 2
2-23
2
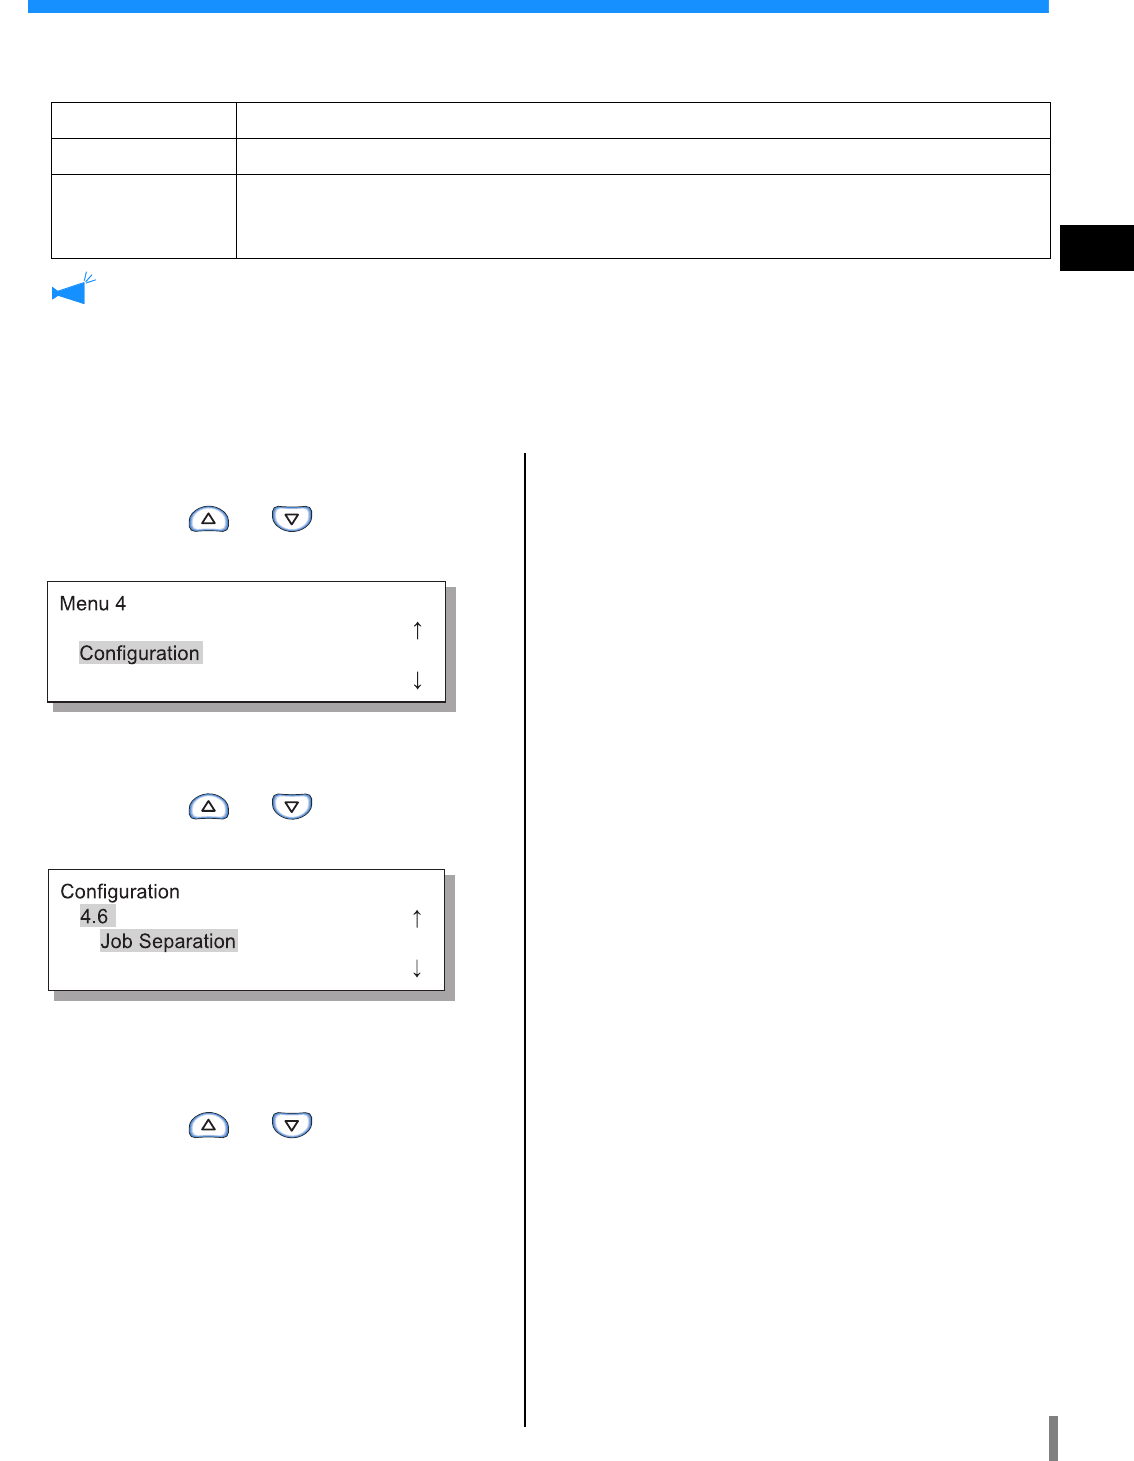
4.6 Job Separation
The setting of Job separation (set with the printer driver) can be changed while printing of the current job is performed.
#
##
#Settings
•When inserting separation paper, specify the feed tray separately.
"5.3 Separation Paper""p.2-36
•If "5.3 Separation Paper" is set to "Off," printing stops for a few seconds in place of insertion of separation paper.
•Although Job Separation can also be set on the "Options" tab of the printer driver, you can temporarily stop printing with the
PRINT/ PAUSE Key and change or reset this function on the printer.
•If an optional HC Finisher is connected, "Punching" and "Add Cover" of the HC Finisher can also be set with this function.
1 Press the MENU Key.
2 Press the or key to display
"Configuration."
3 Press the OK Key.
4 Press the or key to display
"Job Separation."
5 Press the OK Key.
The submenu of Job Separation is displayed.
6 Press the or key to select.
7 Press the OK Key.
When the screen in step 4 reappears, you can continue
setting.
To exit the setting, press the PRINT/PAUSE key.
OFF Job Separation is not performed.
Between Jobs Separation paper is inserted between jobs.
Every Division Separation paper is inserted every division.
When collated printing is directed by the printer driver, separation paper is inserted between sets.
When non collated printing is directed, separation paper is inserted between pages.
2-24
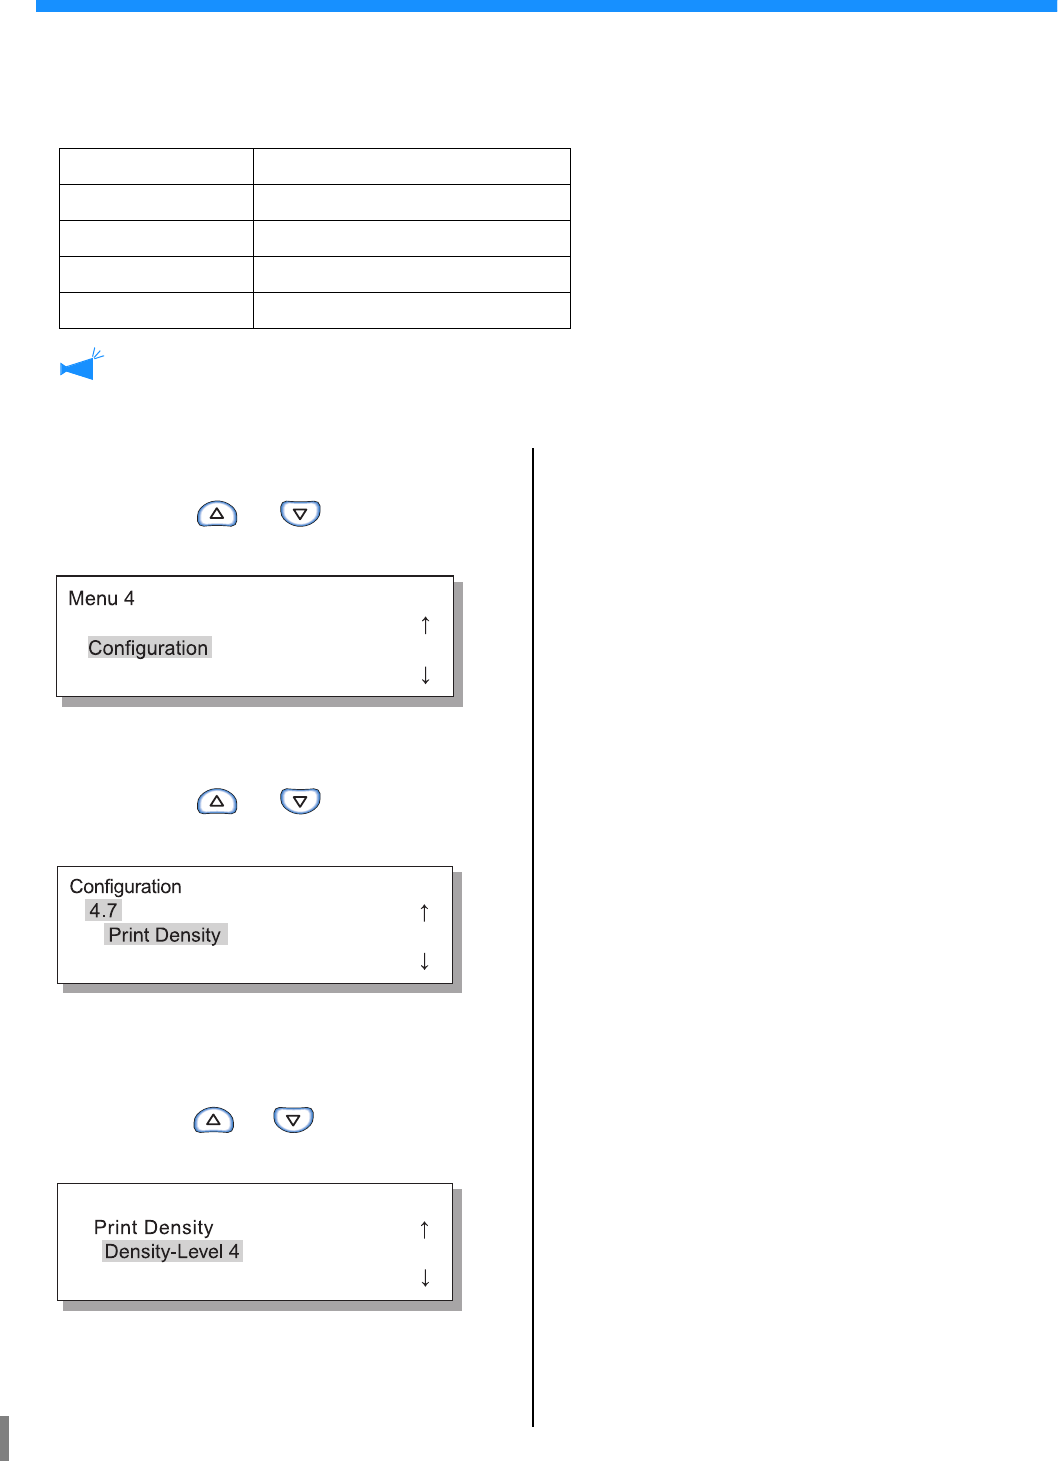
4.7 Print Density
You can manually change the print density.
The density of overall printing is set. To adjust specific colours or to change the halftone reproduction method, use the "Image
processing" tab of the printer driver to adjust or process the image using the application software.
#
##
#Settings
Although Print Density can also be set on the "Options" tab of the printer driver, you can temporarily stop printing with the PRINT/
PAUSE Key and change or reset this function on the printer.
1 Press the MENU Key.
2 Press the or key to display
"Configuration."
3 Press the OK Key.
4 Press the or key to display
"Print Density."
5 Press the OK Key.
The submenu of Print Density is displayed.
6 Press the or key to select the
desired density.
7 Press the OK Key.
When the screen in step 4 reappears, you can continue
setting.
To exit the setting, press the PRINT/PAUSE key.
Density-Level 5 Dark
Density-Level 4 Medium dark
Density-Level 3 Standard
Density-Level 2 Medium light
Density-Level 1 Light
2-25
2
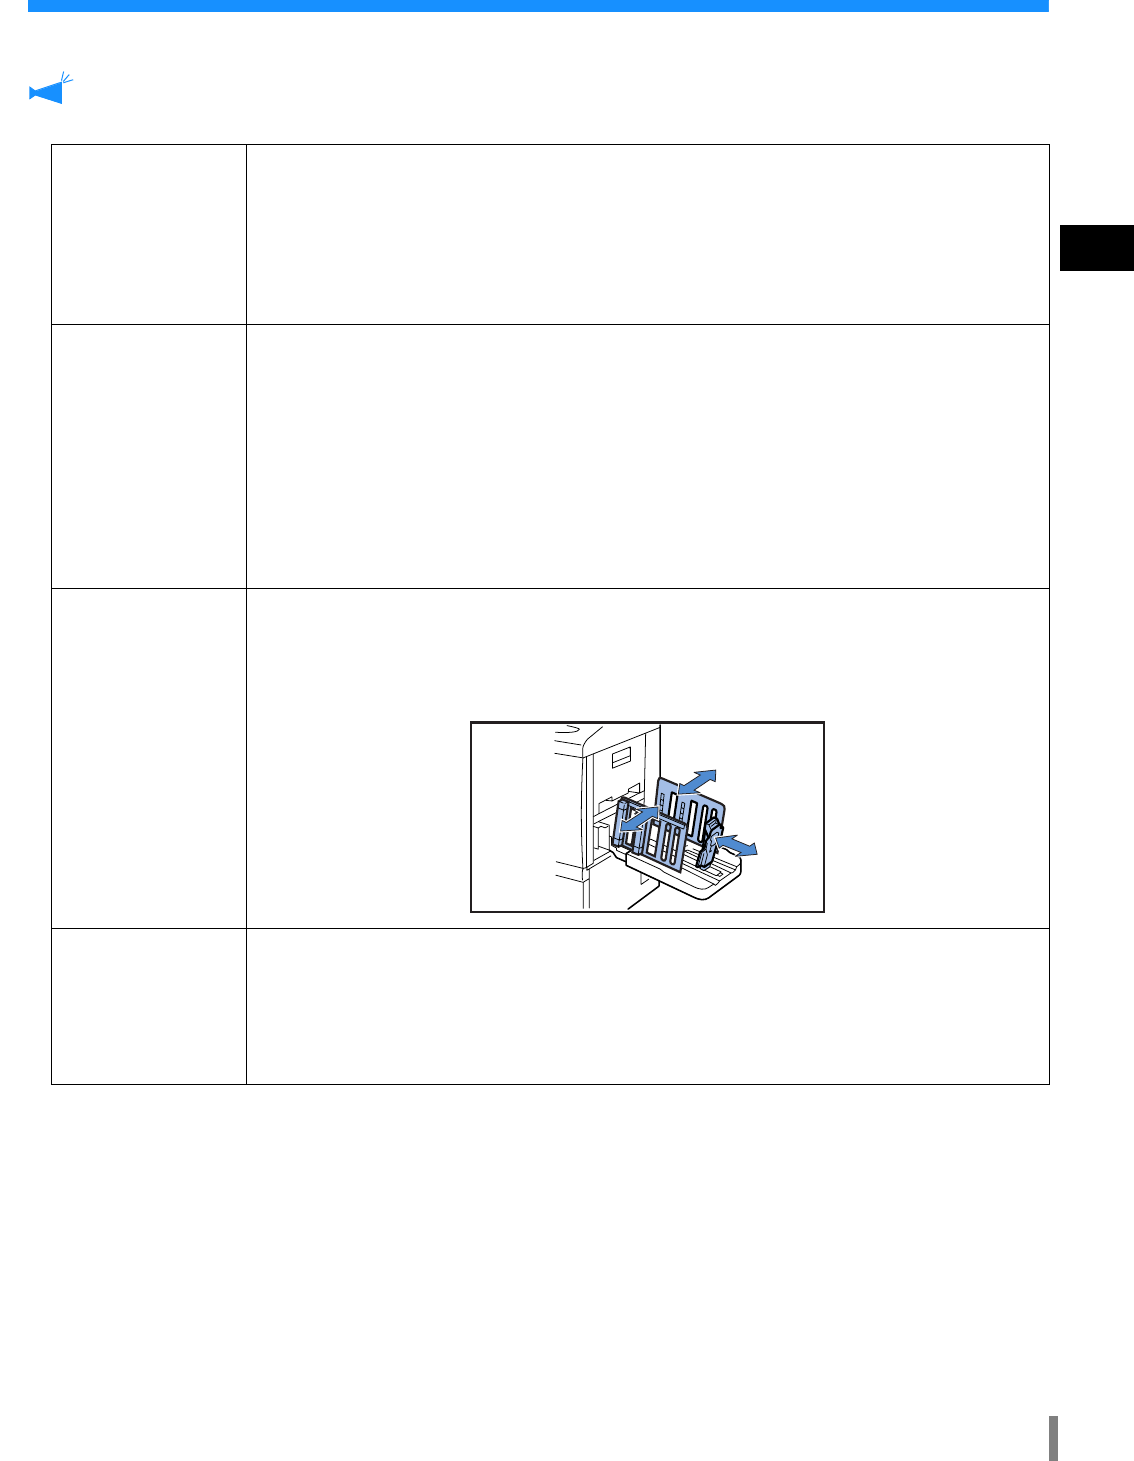
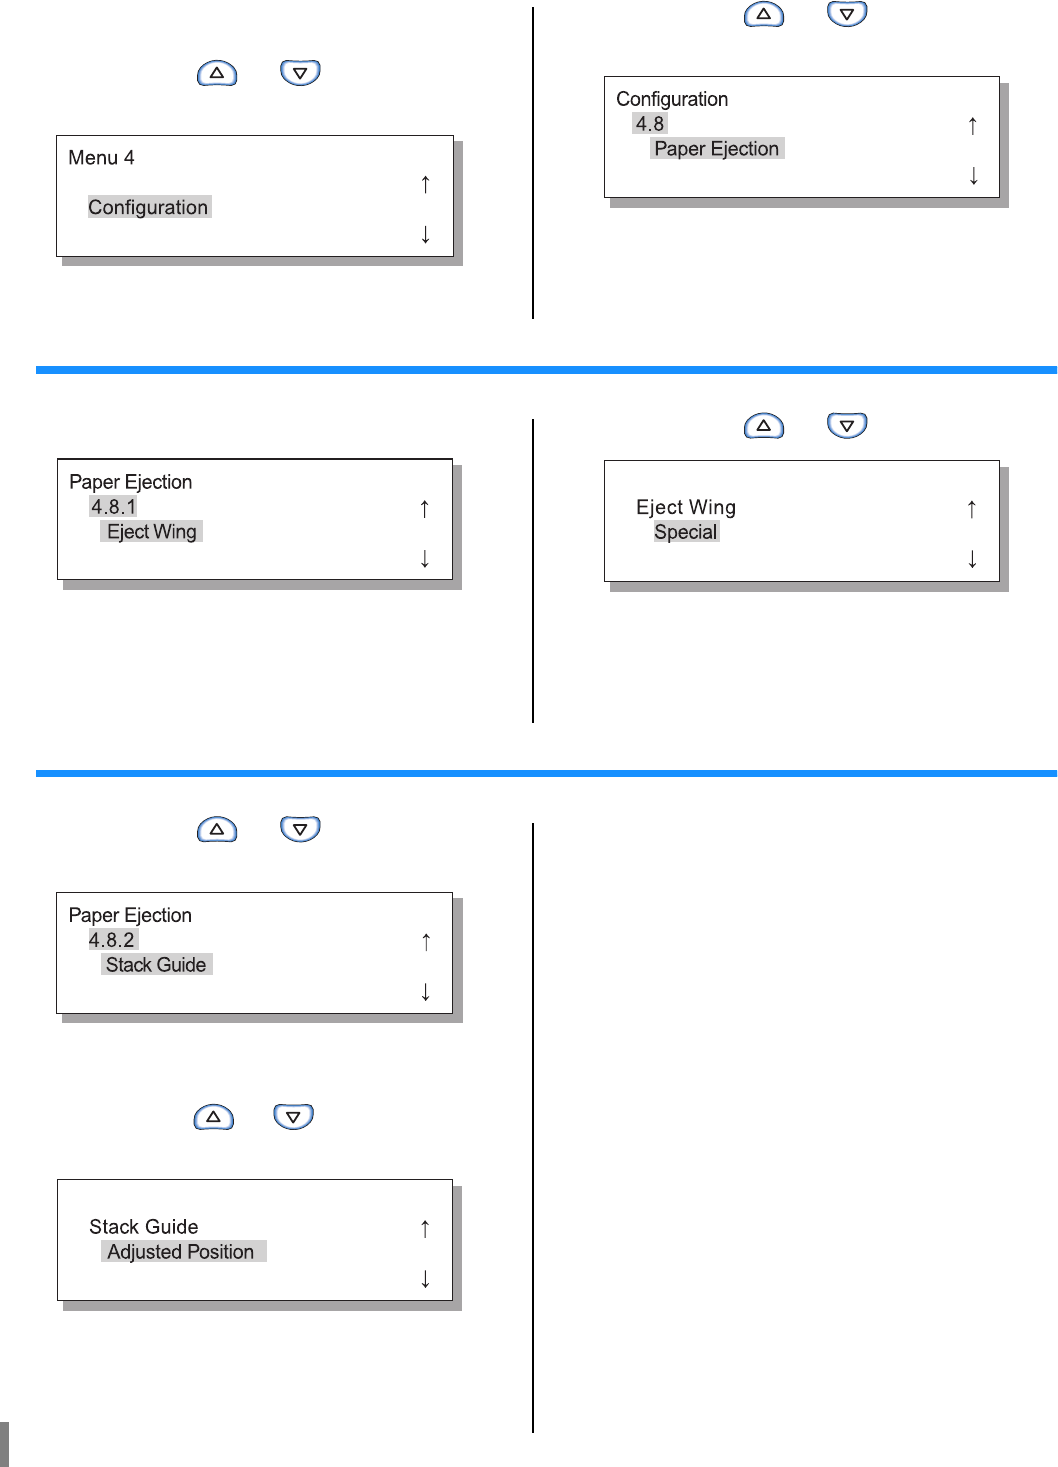
4.8 Paper Ejection
Sets the position and adjustment of the Eject Wing and the Auto Stacking Tray.
If an optional HC Finisher is connected, this menu is not displayed.
#
##
#Settings
!
!!
!If "Auto" or "OFF" has been selected in "4.8.2 Stack Guide," when "4.8.3 Stack Guide Adjust" is selected, the setting of
"4.8.2 Stack Guide" is changed to "Adjusted Position."
!
!!
!The setting of "4.8.3 Stack Guide Adjust" is cancelled and changed to "Auto" in the following cases.
•The power is turned off and then on again.
•The printer is activated from the sleep or stand-by mode.
•Another paper size is selected that is different from what you set on the "Stack Guide Adjust".
•"Auto" is selected for "4.8.2 Stack Guide."
4.8.1
Eject Wing
Adjusts the Eject Wing so that the position changes for proper paper arrangement when printed
paper is ejected.
Auto: The Eject Wing is automatically adjusted to optimum position based on
the type and size of paper.
Special: The Eject Wing can be set according to special paper. For details, contact
your local dealer (or service representative).
4.8.2
Stack Guide
Selects the method of adjusting the positions of the Side Guides and the End Guide.
Auto: The positions of the Side Guides and the End Guide are automatically
adjusted according to the type, size, and orientation of paper.
Adjusted Position: Since the guides of the Auto Stacking Tray move automatically according
to the paper size, the set positions cannot be changed by hand. Use this set-
ting when a little wider (narrower) space is desired depending on the
paper. Set the positions in 4.8.3.
OFF: The Stack Guides are not adjustable. If paper of larger than 320mm × 432
mm (125/8" × 17")is used for printing, set "OFF" and fold the Stack Guide.
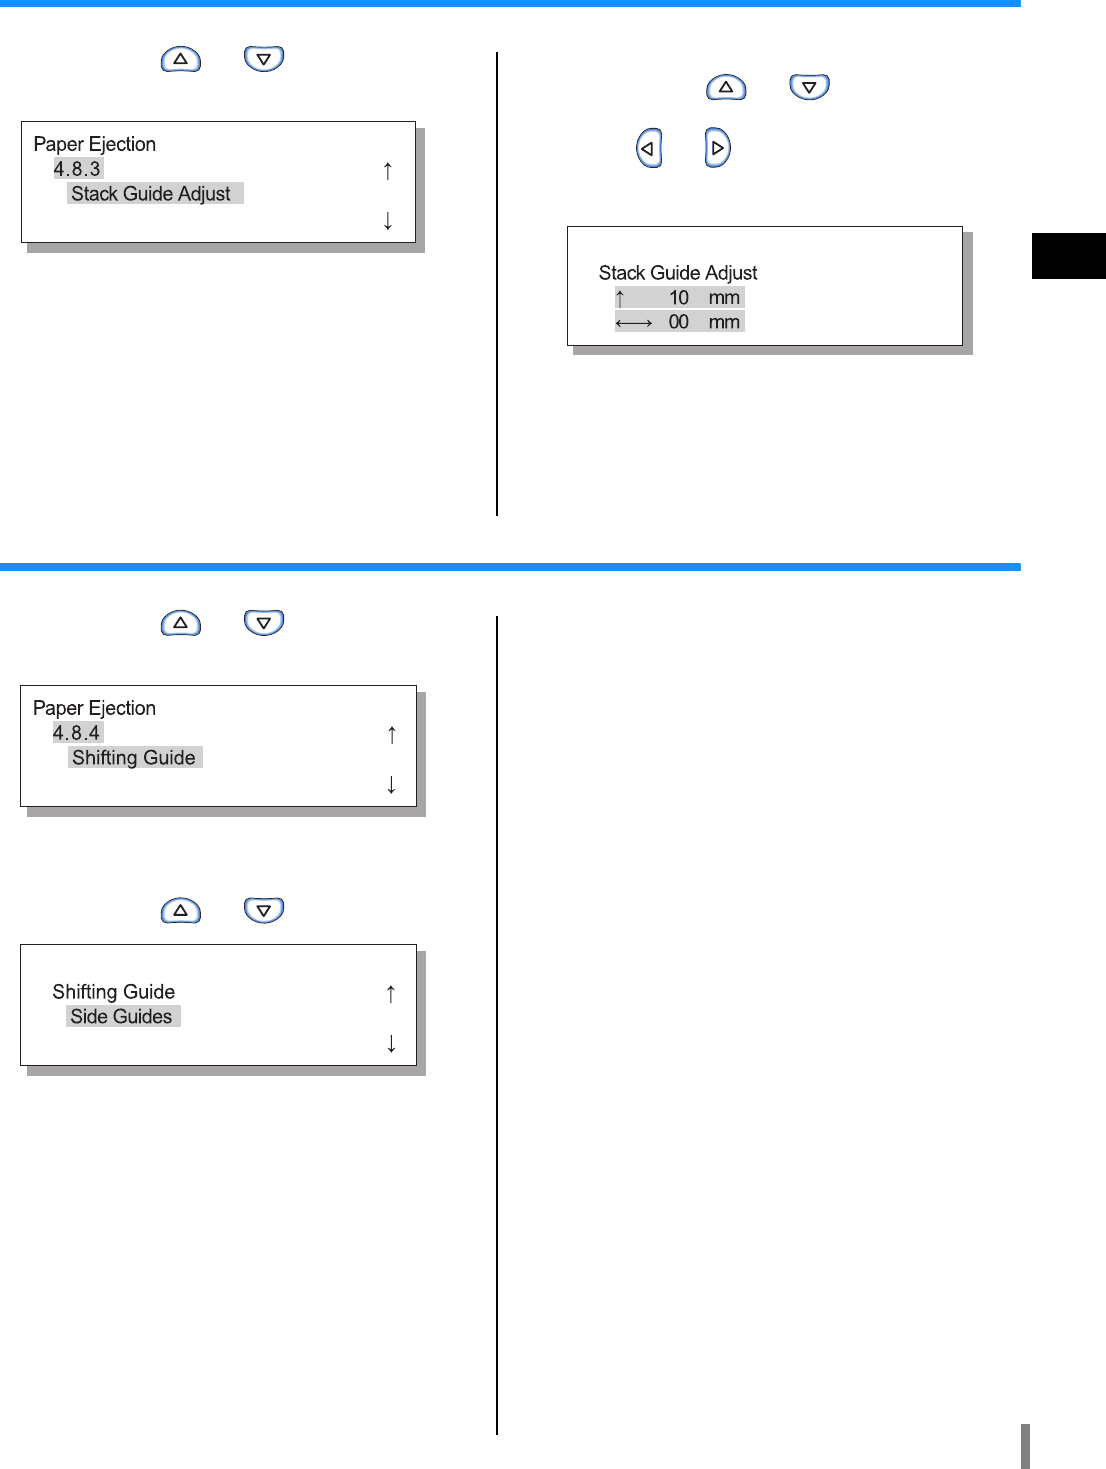
4.8.3
Stack Guide Adjust
The positions of the Side Guides and End Guide can be specified in 1 mm (0.04") increments when
"Adjusted Position" is selected in "4.8.2 Stack Guide."
Side Guides: -20 (narrower) mm to +20 (wider) mm (-13/16"(narrower) to +13/16"(wider)) than
paper size
End Guide: -20 (to left) mm to +20 (to right) mm (-13/16"(to left) to +13/16"(to right)) from paper size
4.8.4
Shifting Guide
When printing is complete, if you press the Stack Guide Open Button, the Stack Guides move out-
ward to allow easy removal of prints. The guides to be moved at this time are specified.
For the Stack Guide Open Button, refer to "p.1-4.
End Guide: Only the End Guide moves outward.
Side Guides: Only the Side Guides move outward.
End and Side Guides: Both the End Guide and Side Guides move outward.
2-26
1 Press the MENU Key.
2 Press the or key to display
"Configuration."
3 Press the OK Key.
4 Press the or key to display
"Paper Ejection."
5 Press the OK Key.
The submenu of "Paper Ejection" is displayed.
4.8.1 Eject Wing
1 Ensure that "Eject Wing" is displayed.
2 Press the OK Key.
3 Press the or key to select.
4 Press the OK Key.
When the screen in step 1 reappears, you can continue
setting.
To exit the setting, press the PRINT/PAUSE key.
4.8.2 Stack Guide
1 Press the or key to display
"Stack Guide."
2 Press the OK Key.
3 Press the or key to select the
method of adjusting the positions.
4 Press the OK Key.
When the screen in step 1 reappears, you can continue
setting.
If "Adjusted Position" is selected, adjust the amount
of movement in 4.8.3.
To exit the setting, press the PRINT/PAUSE key.
2-27
2
4.8.3 Stack Guide Adjust
1 Press the or key to display
"Stack Guide Adjust."
2 Press the OK Key.
3 To adjust the Side Guide positions,
press the or key , and to
adjust the End Guide position, press
the or key.
Only the arrow that corresponds to the pressed key is
displayed therefore the relevant value changes.
4 After setting is complete, press the
OK Key.
When the screen in step 1 reappears, you can continue
setting.
To exit the setting, press the PRINT/PAUSE key.
4.8.4 Shifting Guide
1 Press the or key to display
"Shifting Guide."
2 Press the OK Key.
3 Press the or key to select.
4 Press the OK Key.
When the screen in step 1 reappears, you can continue
setting.
To exit the setting, press the PRINT/PAUSE key.
2-28
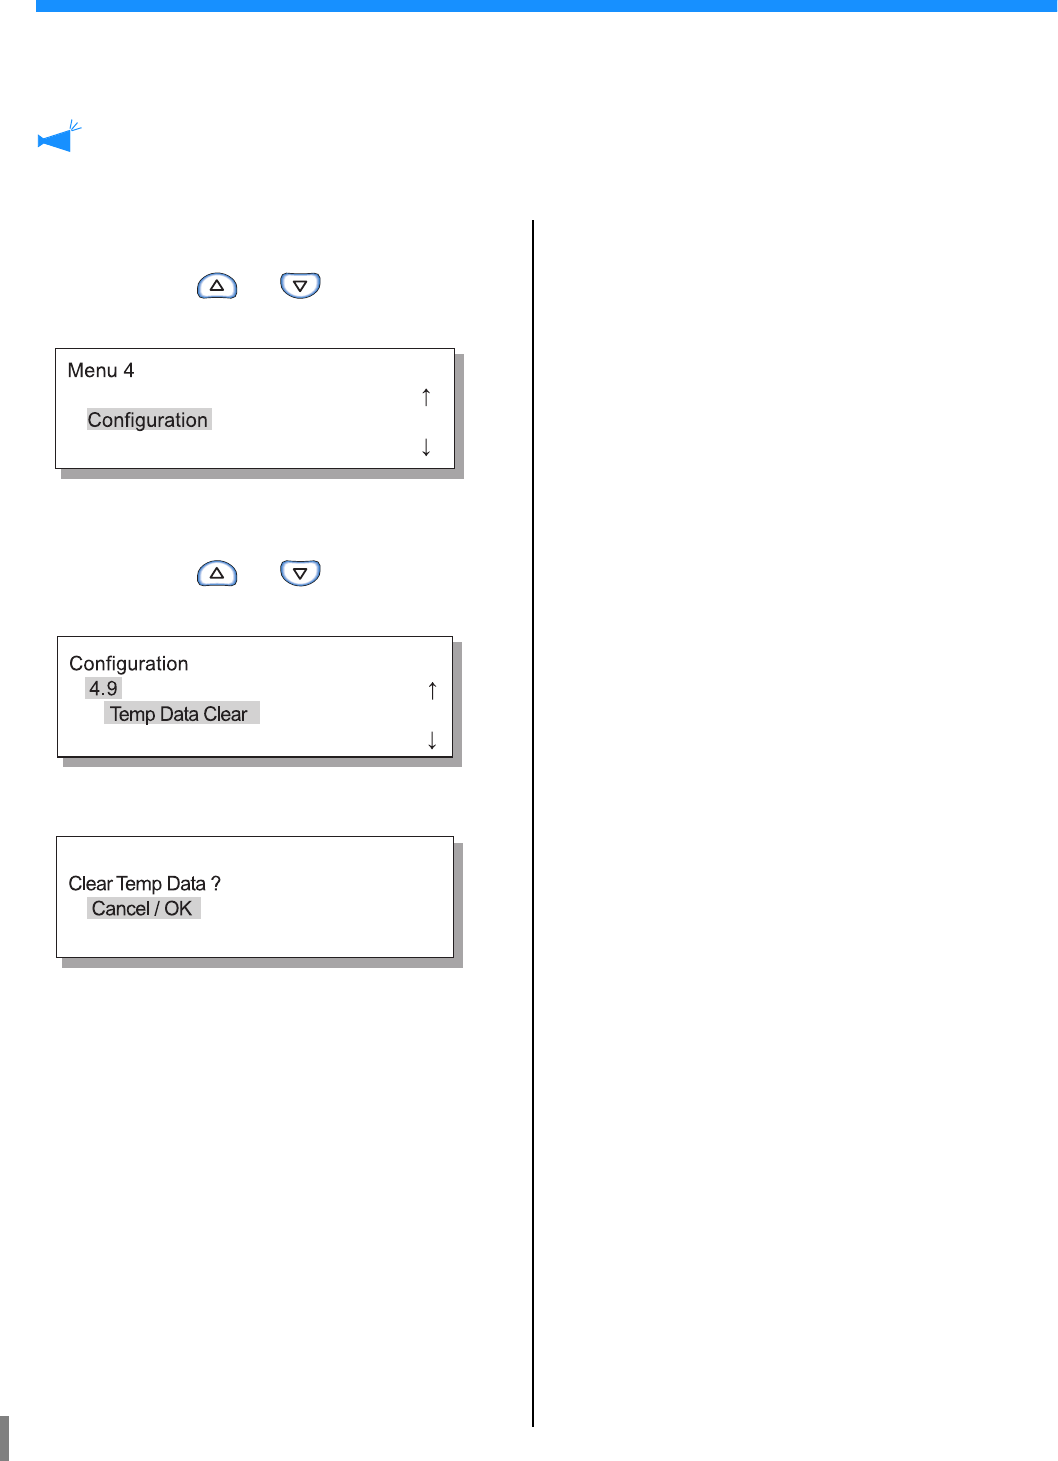
4.9 Temp Data Clear
If a check mark is placed at [Keep the last page of the job in the printer.] in [Controller setting 2] - [Initial setting] of [Adminis-
trator] of RISO Console, the last page of previous printing (last sheet in case of duplex printing) is left in the controller as retained
data. If retention of data after printing is not desired because of a confidential document, the data can be cleared.
To clear the temporary data when printing stops temporarily, use "Menu 7 Job Clear" to clear the current job and then clear the tem-
porary data.
"Menu 7 Job Clear""p.2-55
1 Press the MENU Key.
2 Press the or key to display
"Configuration."
3 Press the OK Key.
4 Press the or key to display
"Temp Data Clear."
5 Press the OK Key.
6 Check the message. To clear the data,
press the OK Key.
Message "Executing ..." is displayed and the data is
cleared and the screen returns to the Step 4. If the
CANCEL Key is pressed, the screen returns to the
step 4.
To exit the setting, press the PRINT/ PAUSE Key.
2-29
2
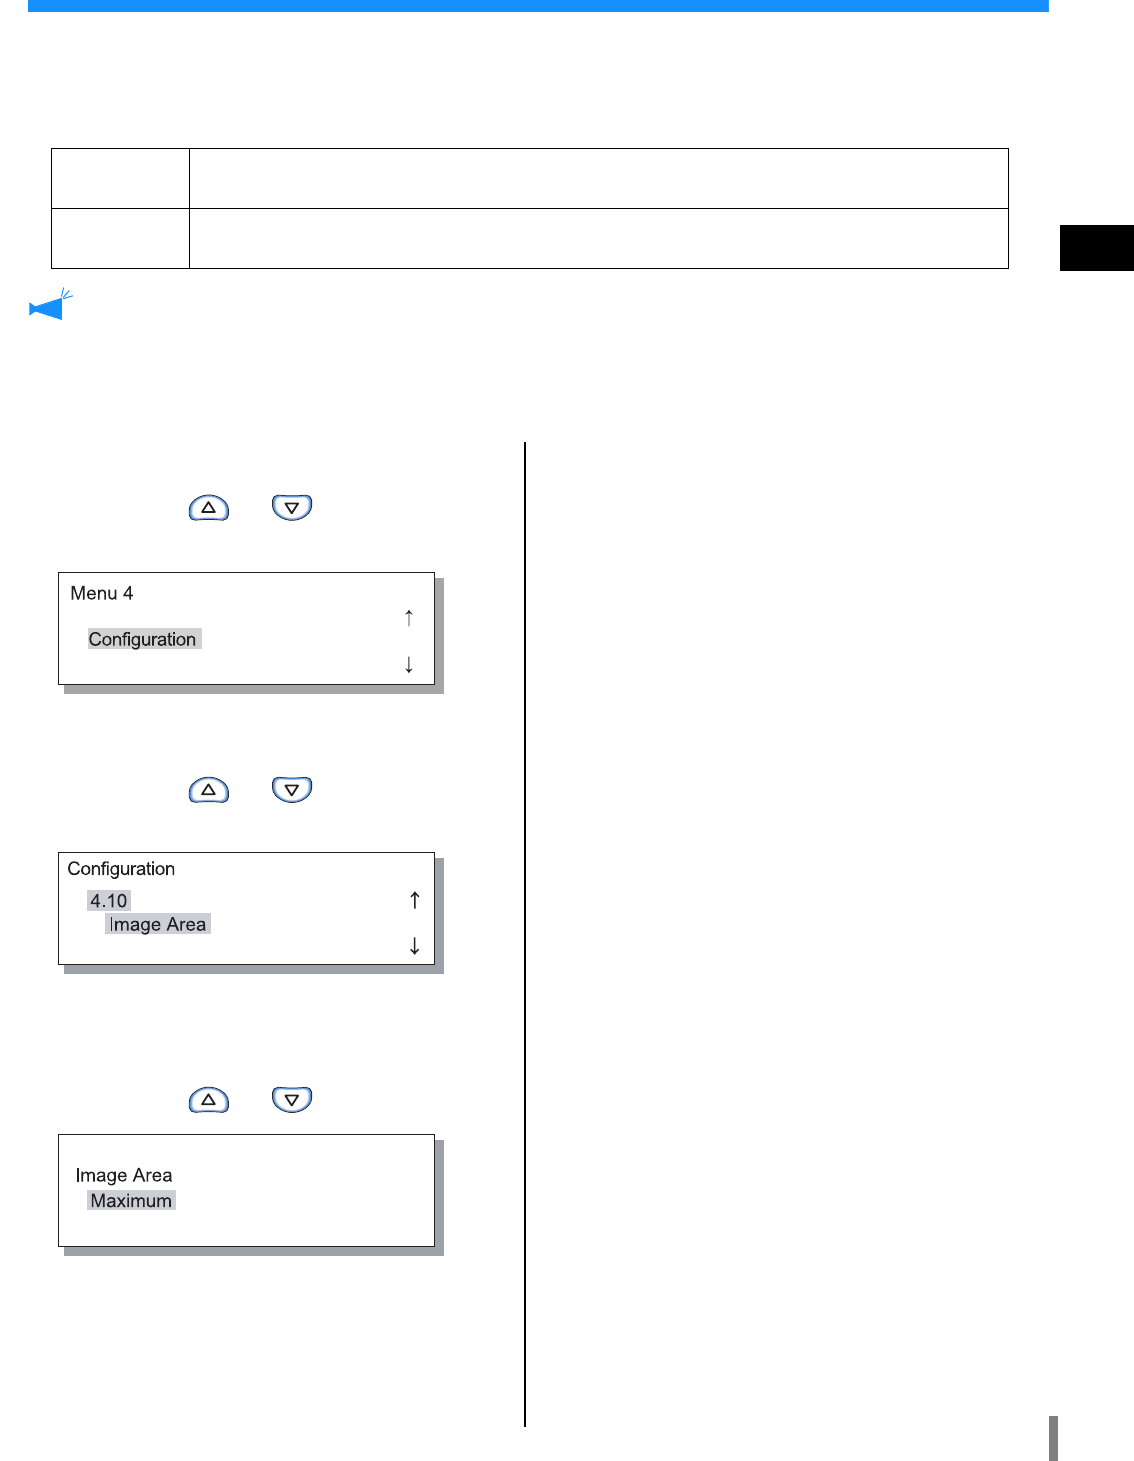
4.10 Image Area (Maximum Print Area)
With this machine, a certain area of space is left along the edges of paper regardless of the original size. Normally, use the setting
"Standard." If the image is larger than the printable area, the relevant part of the image is not printed. (Reduction is not per-
formed.)
#
##
#Settings
•If the image is larger than the guaranteed print area ("p.viii), deterioration of print quality such as blur of characters and pictures may
occur depending on the original image.
•Even if the paper size is larger than 316mm × 460mm (127/16" × 181/8"), the actual maximum printable area is 314mm × 458mm
(123/8" × 185/16".)
•If "Maximum" is selected, the interior of the machine and the paper may be stained with ink.
1 Press the MENU Key.
2 Press the or key to display
"Configuration."
3 Press the OK Key.
4 Press the or key to display
"Image Area"
5 Press the OK Key.
The submenu of "Image Area" is displayed.
6 Press the or key to select.
7 Press the OK Key.
When the screen in step 4 reappears, you can continue
setting.
To exit the setting, press the PRINT/ PAUSE Key.
Standard Printing can be performed into the area 3mm (1/8") inside from the sides of paper.
Print Area : 310mm × 454mm (123/16" × 177/8")
Maximum Printing can be performed into the area 1mm (0.04") inside from the sides of paper.
Maximum Print Area : 314mm × 458mm (123/8" × 185/16")
2-30
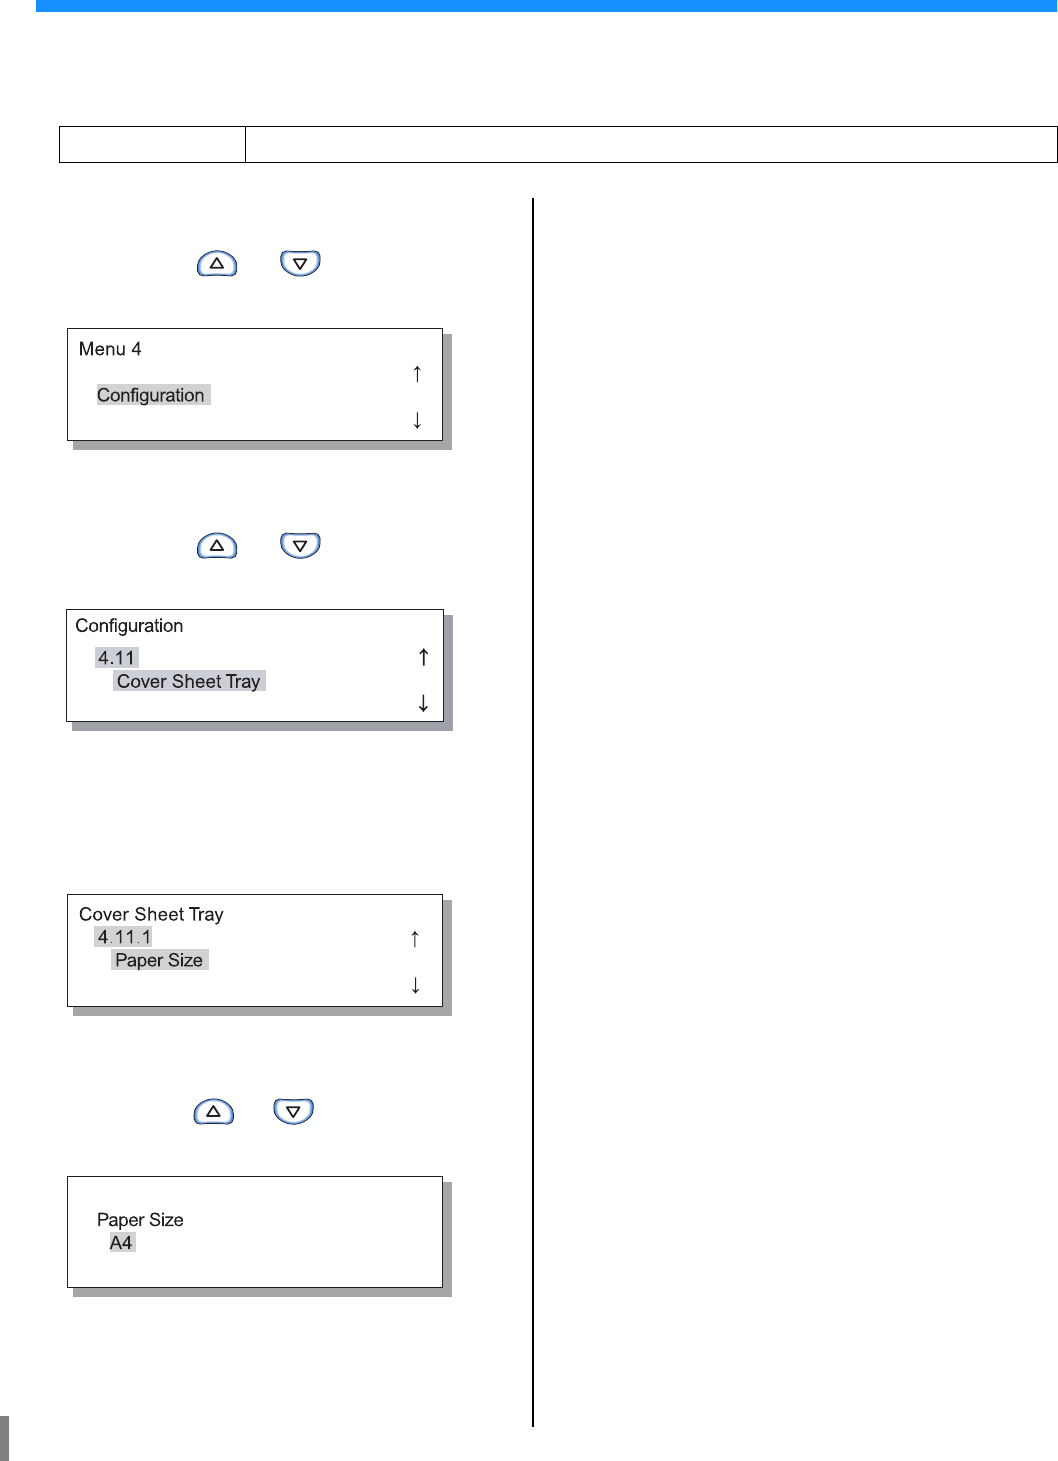
4.11 Cover Sheet Tray (Only when the HC Finisher is connected)
Set the size and type of paper to be loaded in the Cover Sheet Tray in the optional Finisher. Be sure to set them when you have
changed the type or size of paper.
#
##
#Settings
1 Press the MENU Key.
2 Press the or key to display
"Configuration."
3 Press the OK Key.
4 Press the or key to display
"Cover Sheet Tray"
5 Press the OK Key.
The submenu of "Cover Sheet Tray" is displayed.
6 Check that "Paper Size" is displayed.
7 Press the OK Key.
8 Press the or key to select the
desired size.
9 Press the OK Key.
When the screen in step 1 reappears, you can continue
setting.To exit the setting, press the PRINT/PAUSE
key.
4.11.1 Paper Size Can be selected from Auto, A3, B4, A4, B5, A4-R, B5-R, Ledger, Legal, Letter, Letter-R.
2-31
2
Menu 5 Administration
Sets basic information of the printer such as paper type entry, maintenance, and initial setting.
The items set here are effective until the setting is changed regardless of when the power is on or off.
#
##
#Functions
The functions that can be set are shown below.
!
!!
!5.1 Paper Size Entry"p.2-32
Five paper sizes such as non-standard sizes can be registered.
!
!!
!5.2 Paper Type Entry "p.2-33
Five paper types including printer recommended paper, standard paper, and any other types of paper can be registered.
!
!!
!5.3 Separation Paper "p.2-36
Set the feed tray to be exclusively used for separation paper.
!
!!
!5.4 Count Management "p.2-37
The number of printed sheets that can be checked.
!
!!
!5.5 Head Maintenance "p.2-40 "Ink Cartridge Replacement" "p.3-18
Perform maintenance of the ink head in the following cases:
•Part of print image is blurred.
•A certain colour is too light.
•The printer has not been used for a long time.
!
!!
!5.6 Configuration Information Print "p.2-42
Print the settings in a list.
!
!!
!5.7 Network Configuration "p.2-45
Set the DHCP, IP address, subnet mask, and default gateway if the printer is used through network.
!
!!
!5.8 Initial Setting "p.2-46
Set basic conditions such as details of sleep, beep sound, language, and metric/inch switch.
How to Enter the Administration Menu
1 Press the MENU Key.
2 Press the or key to display
"Administration."
3 Press the OK Key.
A confirmation screen is displayed.
4 Check the message and press the OK
Key.
"5.1 Paper Size Entry" is displayed.
If the CANCEL key is pressed, the screen in step 2
will reappear.
2-32
5.1 Paper Size Entry
Five non-standard paper sizes can be registered.
When using non-standard size paper, be sure to register the size in advance.
Registered values are displayed in Paper Size of "4.1.1 Standard Feed Tray," "4.2.1 Feed Tray 1," and "4.3.1 Feed Tray 2."
If the paper sizes have been registered, the registered values will be displayed.
#
##
#Range of paper size that can be set
*When using “Offset output” function:131mm
•Be sure to set this item before proceeding to "4.1.1 Standard Feed Tray," "4.2.1 Feed Tray 1," and "4.3.1 Feed Tray 2."
•The registered sizes can also be changed.
•To clear a registered paper size, set the paper size to "000 mm x 000 mm."
If a paper size is registered for the Standard Feed Tray or another feed tray and paper of the registered size is actually set, the size
cannot be deleted from the choices of "Paper Size."
•If an optional HC Finisher is connected, the paper sizes that can be used depend on the Finisher functions to be used. For details,
see "HC5500 User's Manual for Printer Driver."
1 Use steps 1 to 4 ("
""
"p.2-31) to display
"Administration."
2 Press the or key to display
"Paper Size Entry".
3 Press the OK Key.
4 Press the or key to display
the desired number to be registered.
5 Press the OK Key.
The submenu of "Paper Size Entry" is displayed.
6 Press the keys to move the cur-
sor, and press the keys to
enter the paper size.
7 Press the OK Key.
To exit the setting, press the PRINT/PAUSE key.
Width (Vertical) Length (Horizontal)
Printer 90 - 340mm
(39/16 - 133/8")
148 - 550mm
(513/16 - 215/8")
Printer with HC Finisher 100 - 330mm
(315/16 - 13")
148 - 488mm
(513/16 - 193/16")
Printer with HC Auto Stacker 100* - 305mm
(315/16 - 121/16")
148 - 432mm
(57/8 - 171/16")
2-33
2
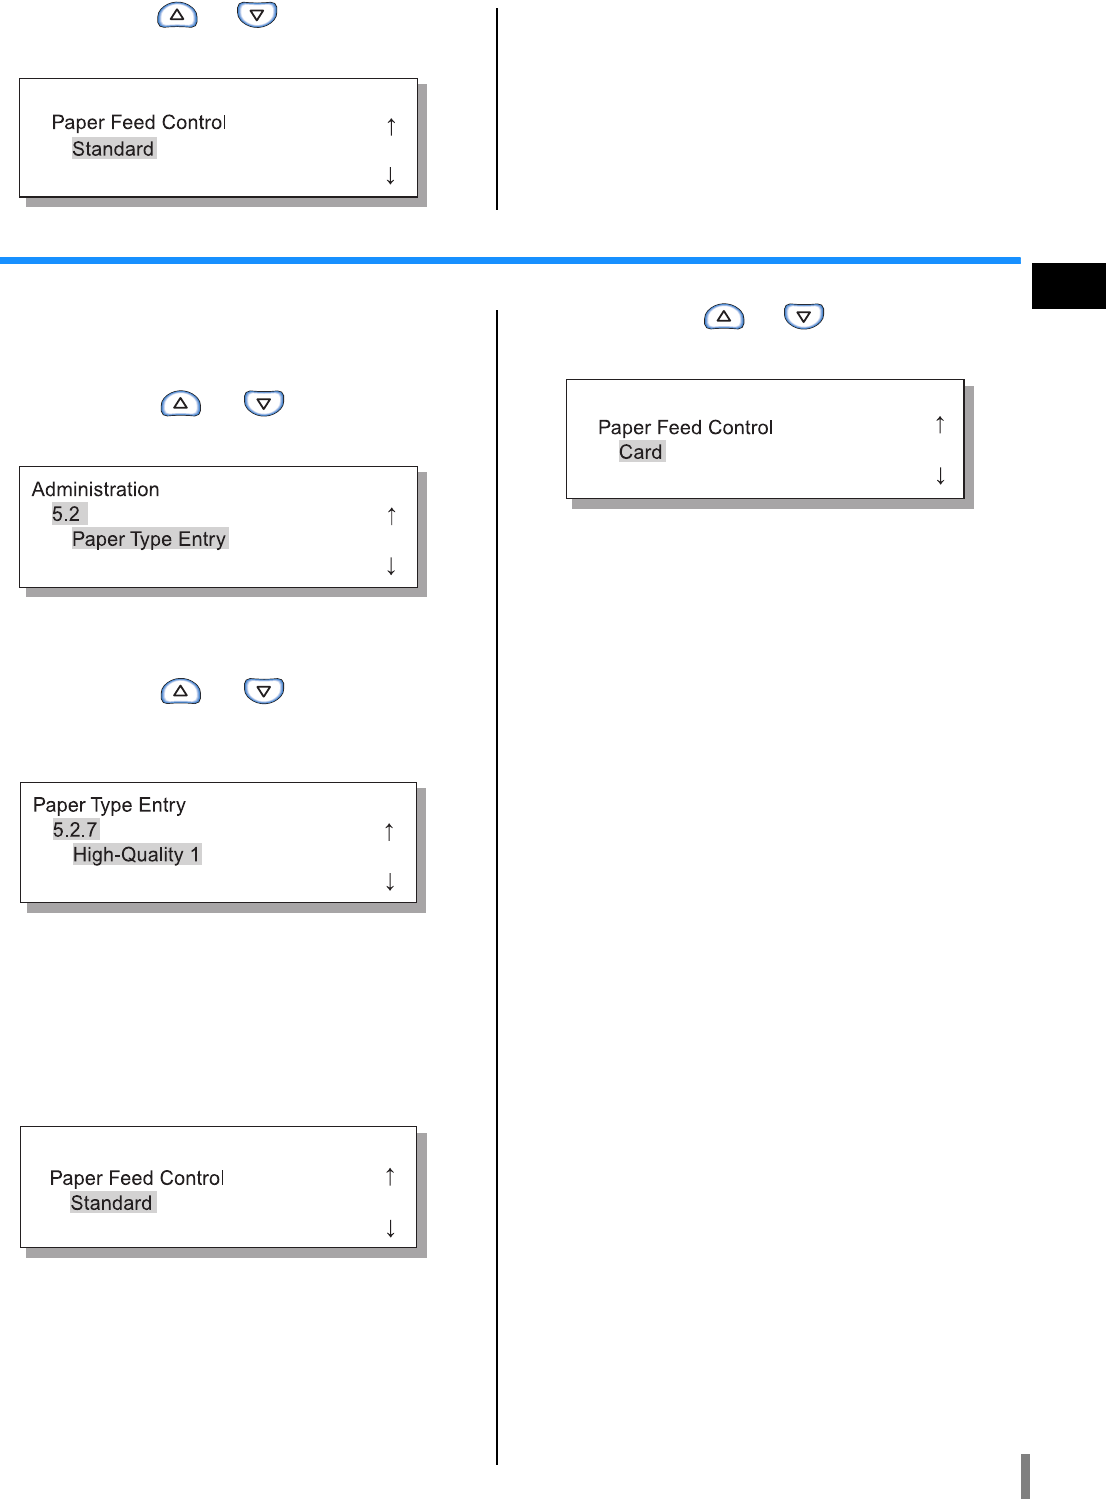
5.2 Paper Type Entry
If any paper other than printer recommended paper is used or paper is not fed properly, it could result in poor print quality. You
should register the paper type and feeding according to the paper type specifications. The registered setting is displayed in Paper
Type of "4.1.2 Standard Feed Tray," "4.2.2 Feed Tray 1," and "4.3.2 Feed Tray 2."
Also if printer recommended paper is used and paper is not fed properly because of operating environment or the like, the setting
can be changed.
When changing the setting or registering paper other than printer recommended paper, contact your local dealer (or service rep-
resentative) for consultation. Advice on proper setting will be given.
#
##
#Settings
If the following settings are made concerning the paper, the paper type is not displayed at "4.2.2 Feed Tray 1" and "4.3.2 Feed Tray
2." (These types of paper cannot be used in these trays.)
•Paper Type: Envelope, Card, Card-IJ
•Paper Feed Control: Envelope, Postcard
Paper Type 1 - 5 Register required information on
the paper type and paper feed for
paper of which a new size is regis-
tered in "5.1 Paper Size Entry" or
paper other than recommended
paper.
!
!!
!Registration
Sets whether or not the registered paper type is displayed as a
choice when setting a paper type in "4.1.2," "4.2.2" or "4.3.2."
ON: This item is displayed.
OFF: This item is not displayed.
!
!!
!Paper Type
Determine the image quality (colour matching) by selecting the
paper type. Select the same item as the paper to be used for
printing.
When printing, specify the same item in [Paper type] of the
[Main setting] tab of the printer driver screen.
•Standard Paper 1
•High-Quality 1
•High-Quality 2
•Envelope
•Card
•Card-IJ
!
!!
!Paper Feed Control
Select the paper thickness.
•Standard
•Card
•Thin/Light
•Envelope
•Custom:
Can be set in advance. For details, contact your local dealer
(or service representative) for inquiry.
Standard Paper 1
High-Quality 1
High-Quality 2
Envelope
Card
Card-IJ
If paper load in the Standard Feed
Tray or another feed tray is not fed
properly, change the Paper Feed
Control for the relevant paper.
If the paper type is Envelope,
Card or Card IJ, Paper Feed
Control cannot be changed.
!
!!
!Paper Feed Control
Select paper thickness.
•Standard
•Card
•Thin/Light
•Envelope
•Custom:
Can be set in advance. For details, contact your local dealer
(or service representative) for inquiry.
2-34
5.2.1 Registering a New Paper Type
1 Use steps 1 to 4 ("
""
"p.2-31) to display
"Administration."
2 Press the or key to display
"Paper Type Entry."
3 Press the OK Key.
4 Press the or key to display
the desired number to be registered.
5 Press the OK Key.
The submenu of Registration appears.
Set whether or not to display the registered paper type (1 to
5) in "Paper Type."
6 Press the OK Key when "Registra-
tion" is displayed.
7 Press the or key to select ON
or OFF.
8 Press the OK Key.
The screen in step 6 appears again.
Set the Paper Type.
9 Press the or key to display
"Paper Type."
10 Press the OK Key.
The submenu of paper type appears.
11 Press the or key to select the
desired paper type.
12 Press the OK Key.
The screen in step 9 appears again.
Perform Paper Feed Control.
13 Press the or key to display
"Paper Feed Control."
14 Press the OK Key.
The submenu of paper feed control appears.
2-35
2
15 Press the or key to select the
desired paper type.
16 Press the OK Key.
The screen in step 13 reappears, you can continue set-
ting.
To exit the setting, press the PRINT/PAUSE key.
5.2.6- Changes the Paper feed control of the existing paper type.
1 Use steps 1 to 4 ("
""
"p.2-31) to display
"Administration."
2 Press the or key to display
"Paper Type Entry."
3 Press the OK Key.
4 Press the or key to display
the desired paper type to change the
settings.
5 Press the OK Key.
The submenu of Paper feed control appears.
Perform paper feed control.
6 Press the OK Key.
7 Press the or key to select the
desired Paper feed control.
8 Press the OK Key.
When the screen in step 6 reappears, you can continue
setting.
To exit the setting, press the PRINT/PAUSE key.
2-36
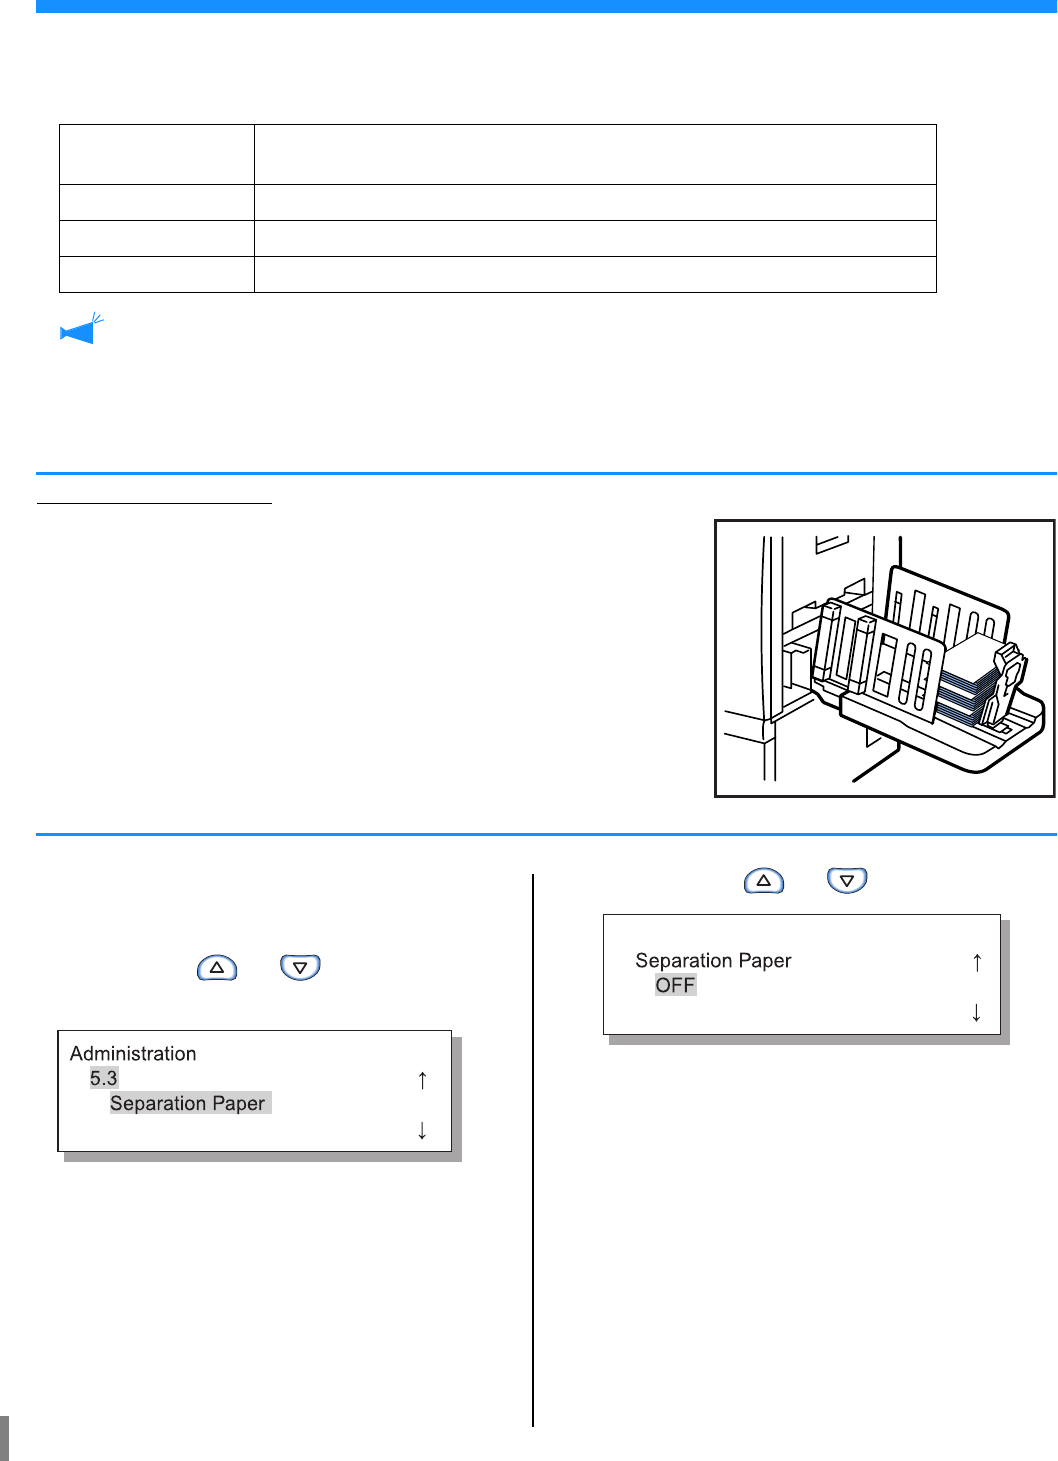
5.3 Separation Paper
If you use "4.6 Job Separation", specify the feed tray in which the separation paper is loaded.
#
##
#Settings
The separation paper can be used even if the size and the orientation are different from those of the printer paper.
•The separation paper tray is used exclusively for Job Separation. If "Menu 6 Feed Tray Selection" is set to "Auto" and "Menu
4.4 Feed Tray Relay" is set, this feed tray is not used for printing.
•If the separation paper tray runs out of paper during printing, no-paper error will be displayed and printing stops temporarily.
•If a HC Finisher is connected, paper in the separation paper tray can be added as a front cover or a back cover by using the "Add
cover" function of the HC Finisher. In this case, specify the tray in which cover sheets are loaded. If "OFF" is set, an error will
be displayed when printing is performed.
Caution in the following case
If paper larger than the paper for printing or paper of a different orientation is specified as sep-
aration paper, the stack guides are spread according to the larger paper size. Printed paper,
therefore, may not be arranged properly.
1 Use steps 1 to 4 ("
""
"p.2-31) to display
"Administration."
2 Press the or key to display
"Separation Paper."
3 Press the OK Key.
The submenu of separation paper appears.
4 Press the or key to set.
5 Press the OK Key.
When the screen in step 1 reappears, you can continue
setting.
To exit the setting, press the PRINT/PAUSE key.
OFF The separation paper tray is not specified. Printing stops for a few seconds in place
of insertion of separation paper.
Standard Feed Tray The Standard Feed Tray is used for separation paper.
Feed Tray 1 Feed Tray 1 is used for separation paper.
Feed Tray 2 Feed Tray 2 is used for separation paper.

2-37
2
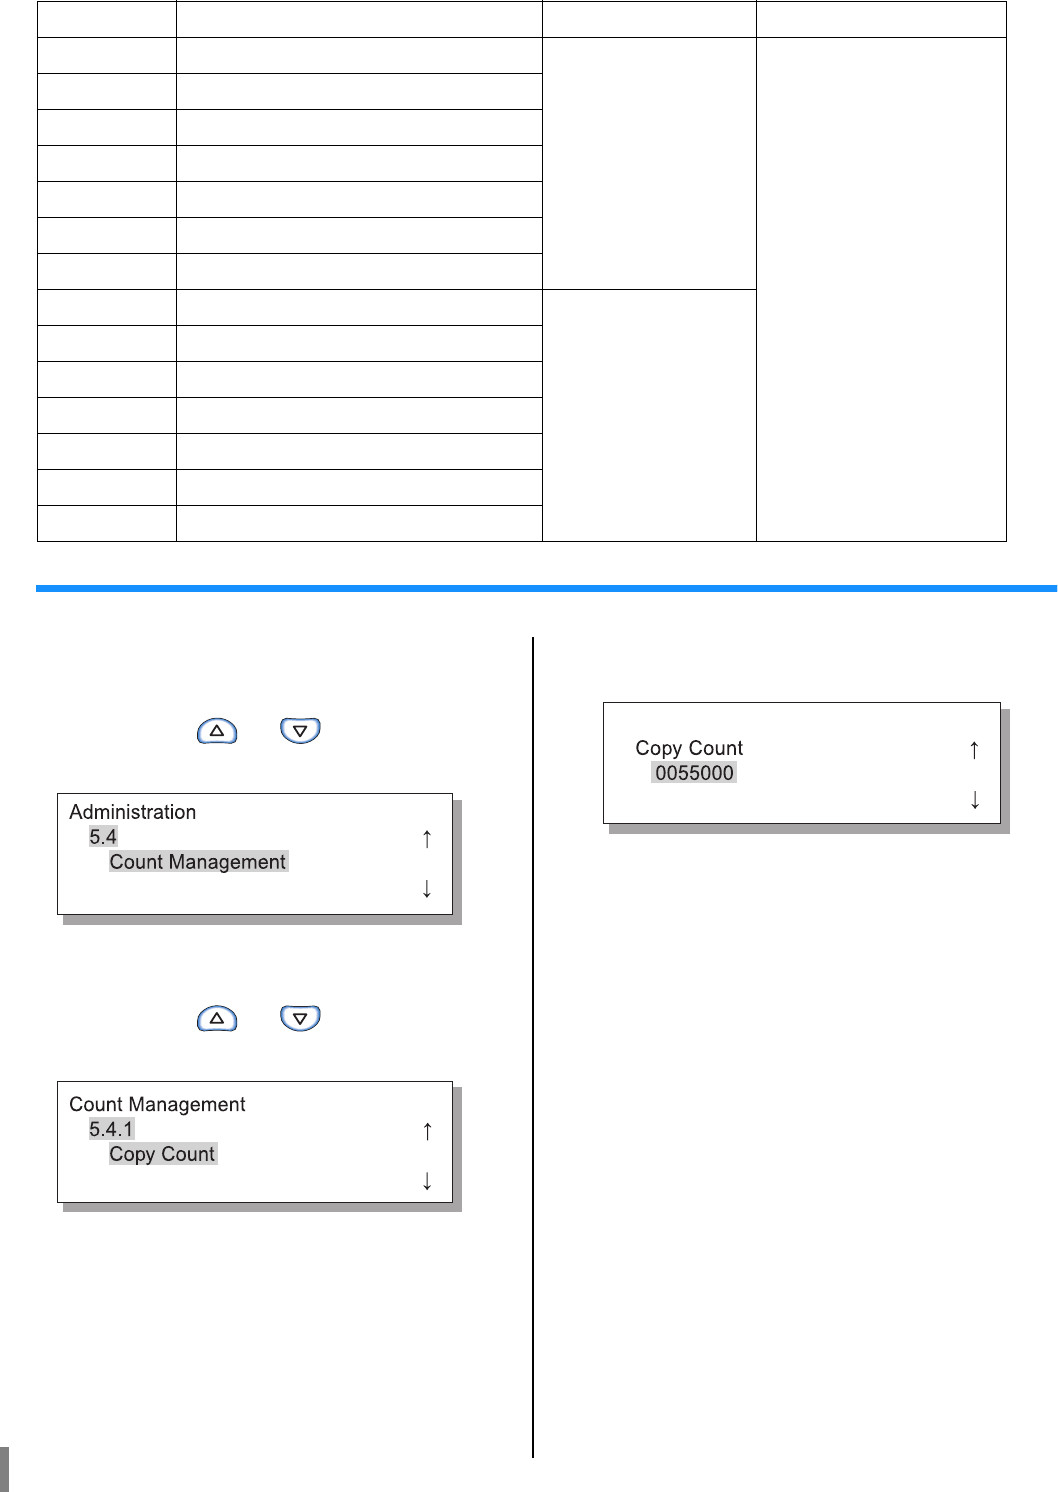
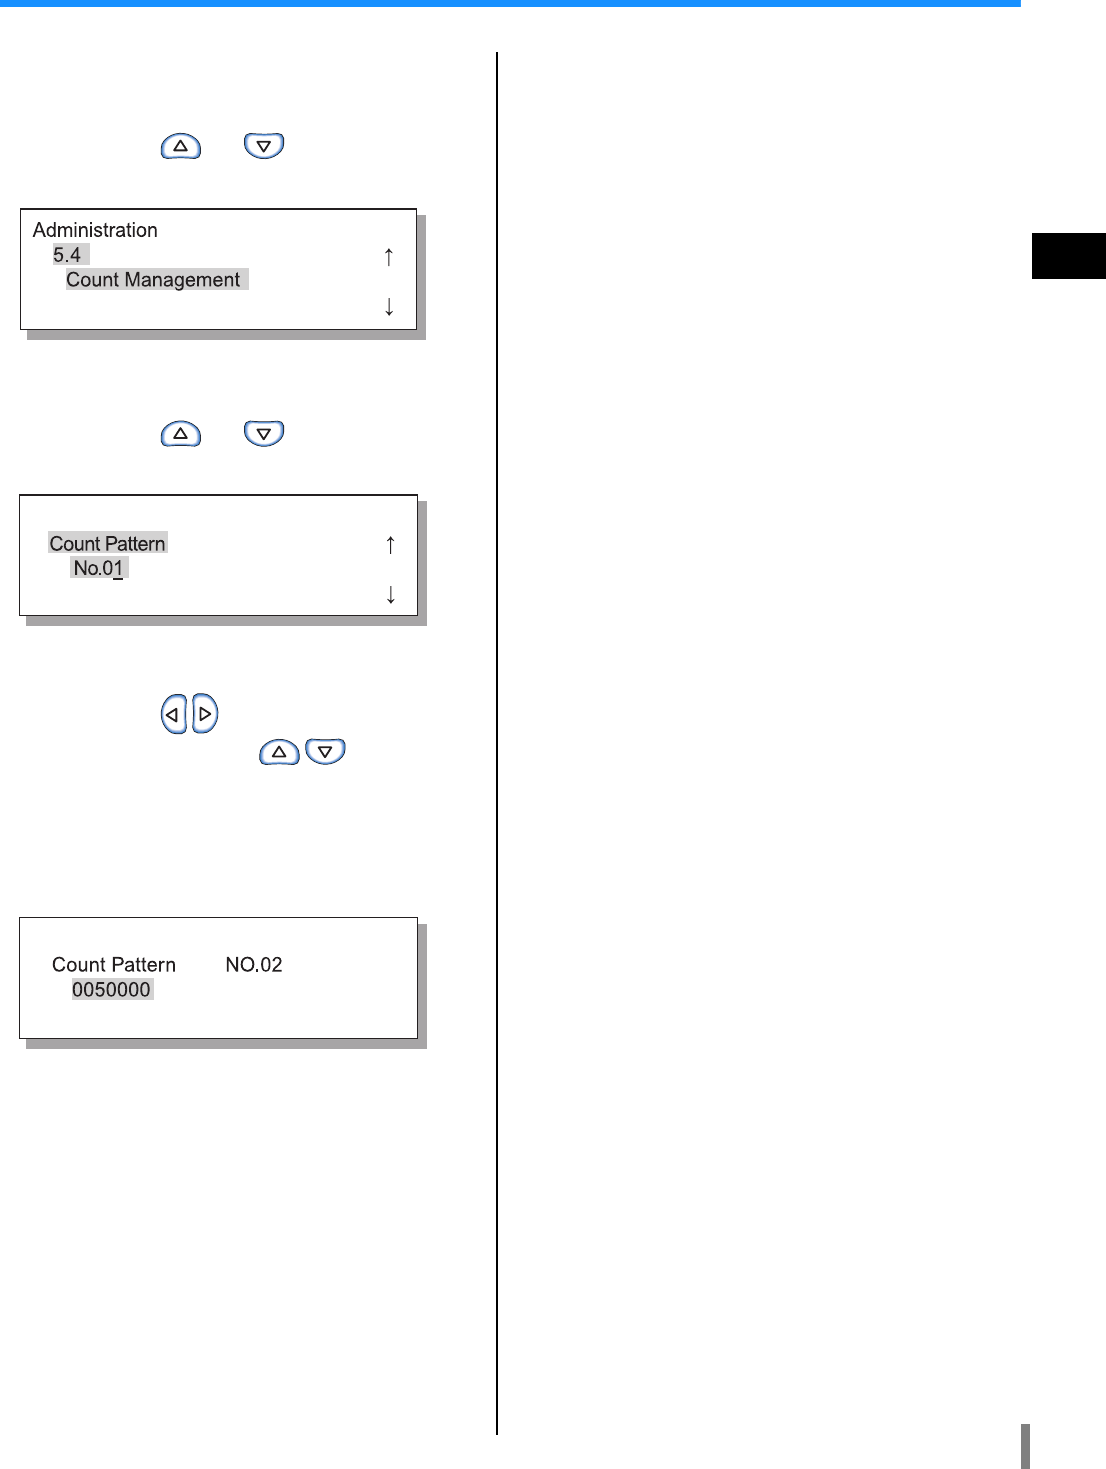
5.4 Count Management
The number of printed sheets can be checked.
•The number of sheets that have been ejected in the Paper Receiving Tray is displayed.
•For copy count, in duplex printing, each side is counted, and therefore one sheet of both sides is counted by two. Since the paper trans-
fer path varies depending on the functions that you use, one sheet in simplex printing may be counted as two.
•For Count Pattern, one sheet is counted as one regardless of simplex or duplex printing.
#
##
#Settings
5.4.2 is not displayed.
In Count Pattern, the number of printed sheets is displayed according to the combined conditions shown below.
The Paper Size Number is as follows.
5.4.1
Copy Count
The total number of sheets that have been printed until now is displayed.
Paper on which printing is not performed such as separation paper is also counted.
5.4.3
Count Pattern
Specify a count number for which conditions such as paper size, simplex/duplex, and colour/mono-
chrome are determined. The relevant number of sheets is displayed.
Paper on which printing is not performed such as separation paper is not counted.
Size No.1 A3 (Ledger)
Size No.2 A4 (Letter)
Size No.3 B4 (Legal)
Size No.4 B5 (Statement)
Size No.5 Foolscap
Size No.6 Irregular paper size of which the length is 320 mm (1213/16") or more for the Standard Feed Tray or 316
mm (125/8") or more for other feed trays
Size No.7 Irregular paper size of which the length is less than 320 mm (1213/16") for the Standard Feed Tray or
less than 316 mm (125/8") for other feed trays
Count No. Paper Size Number Simplex/ Duplex Colour/ Monochrome
01 Size No.1
Simplex
Colour
02 Size No.2
03 Size No.3
04 Size No.4
05 Size No.5
06 Size No.6
07 Size No.7
08 Size No.1
Duplex
09 Size No.2
10 Size No.3
11 Size No.4
12 Size No.5
13 Size No.6
14 Size No.7
2-38
5.4.1 Copy Count
1 Use steps 1 to 4 ("
""
"p.2-31) to display
"Administration."
2 Press the or key to display
"Count Management."
3 Press the OK Key.
4 Press the or key to display
"Copy Count."
5 Press the OK Key.
The total number of sheets is displayed.
6 After checking is complete, press the
OK Key.
When the screen in step 4 reappears, you can continue
setting.
To exit the setting, press the PRINT/PAUSE key.
15 Size No.1
Simplex
Monochrome
16 Size No.2
17 Size No.3
18 Size No.4
19 Size No.5
20 Size No.6
21 Size No.7
22 Size No.1
Duplex
23 Size No.2
24 Size No.3
25 Size No.4
26 Size No.5
27 Size No.6
28 Size No.7
Count No. Paper Size Number Simplex/ Duplex Colour/ Monochrome
2-39
2
5.4.3 Count Pattern
1 Use steps 1 to 4 ("
""
"p.2-31) to display
"Administration."
2 Press the or key to display
"Count Management."
3 Press the OK Key.
4 Press the or key to display
"Count Pattern."
5 Press the OK Key.
6 Press the keys to move the cur-
sor, and press the keys to
input the count No. of Count Pattern.
7 Press the OK Key.
The number of sheets of the specified count pattern is
displayed.
8 After checking is complete, press the
OK Key.
When the screen in step 4 reappears, you can continue
setting.
To exit the setting, press the PRINT/PAUSE key.
2-40
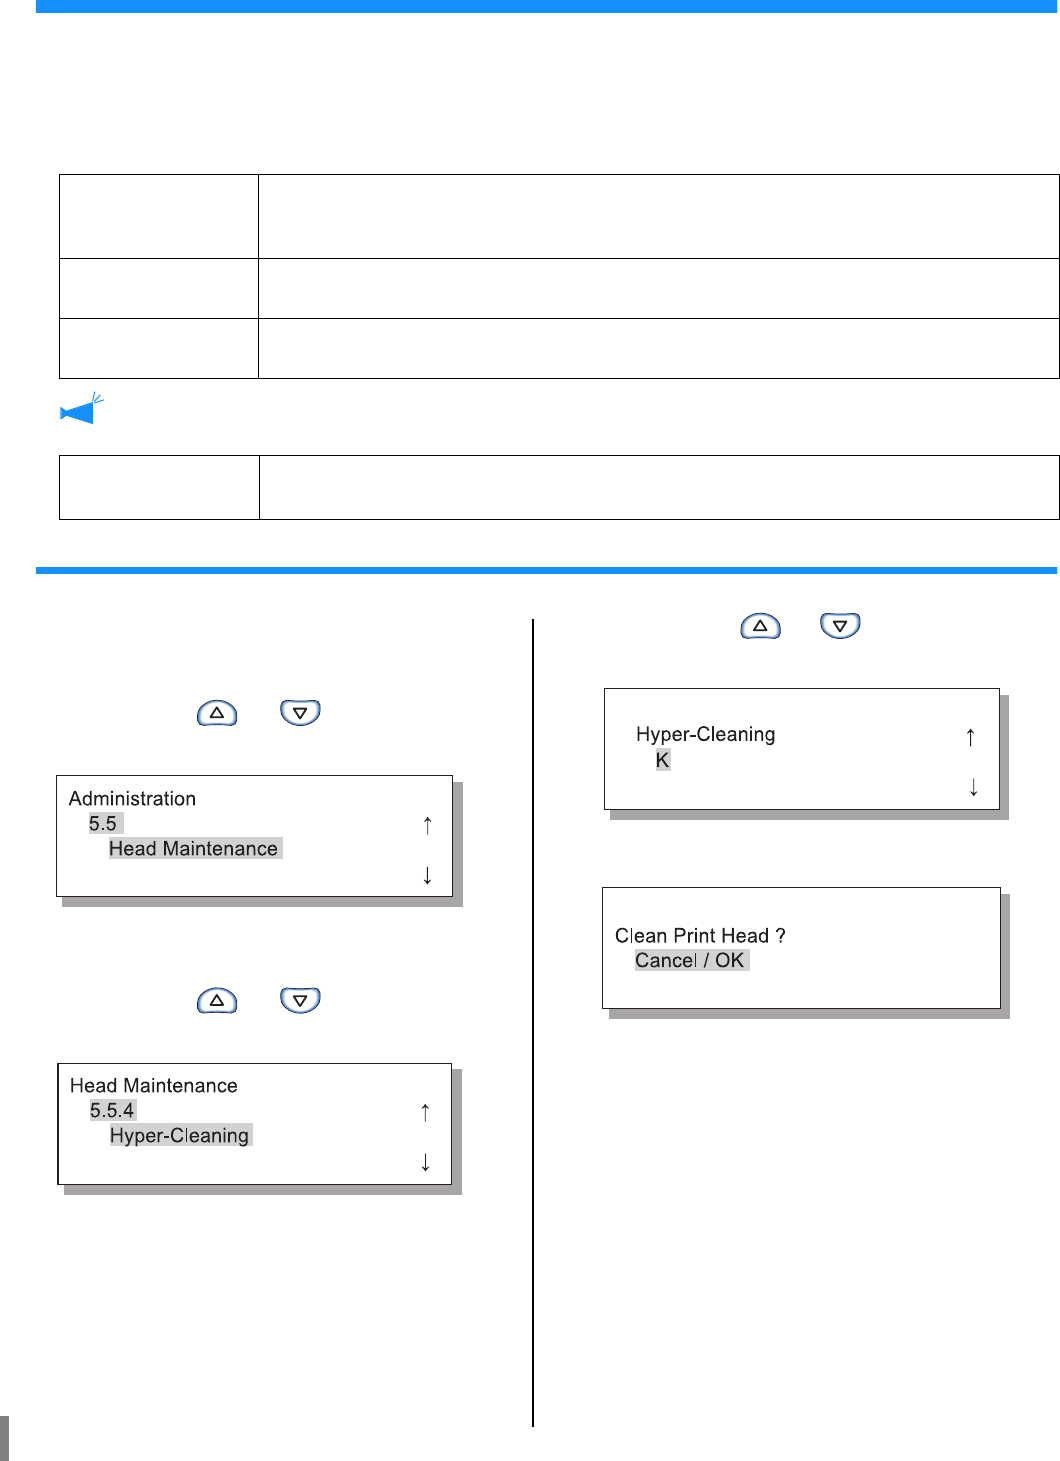
5.5 Head Maintenance
Perform maintenance of the print head section. You can also set the cycle of automatic cleaning. Use this function when there is
a problem of image quality. For example, if parts of print images are blurred, white lines appear, a specific colour is light and
when the printer will not be used or has not been used for a long time.
In the factory default setting, the cleaning cycle is set to 500 sheets.
#
##
#Settings
5.5.1 - 5.5.3 are not displayed.
5.5.4 Hyper-Cleaning
1 Use steps 1 to 4 ("
""
"p.2-31) to display
"Administration."
2 Press the or key to display
"Head Maintenance."
3 Press the OK Key.
4 Press the or key to display
"Hyper-Cleaning."
5 Press the OK Key.
6 Press the or key to select the
head to clean.
7 Press the OK Key.
8 After checking the message, press
the OK Key.
When message "Cleaning Print Head-K" blinks,
cleaning is performed. After cleaning is complete, the
screen in step 4 will appear again.
To finish cleaning the setting, press the PRINT/
PAUSE key.
5.5.4
Hyper-Cleaning
Performed when a warning message is displayed or the head is actually clogged. This cleaning is
stronger than Normal Cleaning. Specify the head of K (black), C (cyan), M (magenta) or Y (yellow)
respectively to perform cleaning.
5.5.5
Normal Cleaning
Performed to prevent the head section from clogging. Head cleaning for four colours K (black), C
(cyan), M (magenta), and Y (yellow) is performed simultaneously.
5.5.6
Cleaning Cycle
Normal Cleaning is automatically performed each time the specified number of sheets are printed.
The cleaning cycle can be set to 100 - 3000 sheets in 100 sheet increments.
5.8.50
Head Recovery
The print heads can be cleaned and initialized. When a printing machine is not used for a long
period of time, this function is useful."p.2-53

2-41
2
5.5.5 Normal Cleaning
1 Use steps 1 to 4 ("
""
"p.2-31) to display
"Administration."
2 Press the or key to display
"Head Maintenance."
3 Press the OK Key.
4 Press the or key to display
"Normal Cleaning."
5 Press the OK Key.
6 After checking the message, press
the OK Key.
When message "Cleaning Print Head" blinks, clean-
ing is performed. After cleaning is complete, the
screen in step 4 will appear again.
To exit the setting, press the PRINT/PAUSE key.
5.5.6 Cleaning Cycle
1 Use steps 1 to 4 ("
""
"p.2-31) to display
"Administration."
2 Press the or key to display
"Head Maintenance."
3 Press the OK Key.
4 Press the or key to display
"Cleaning Cycle."
5 Press the OK Key.
6 Press the or key to select the
desired cleaning cycle.
7 Press the OK Key.
The screen in step 4 will reappear.
To exit the setting, press the PRINT/PAUSE key.
2-42
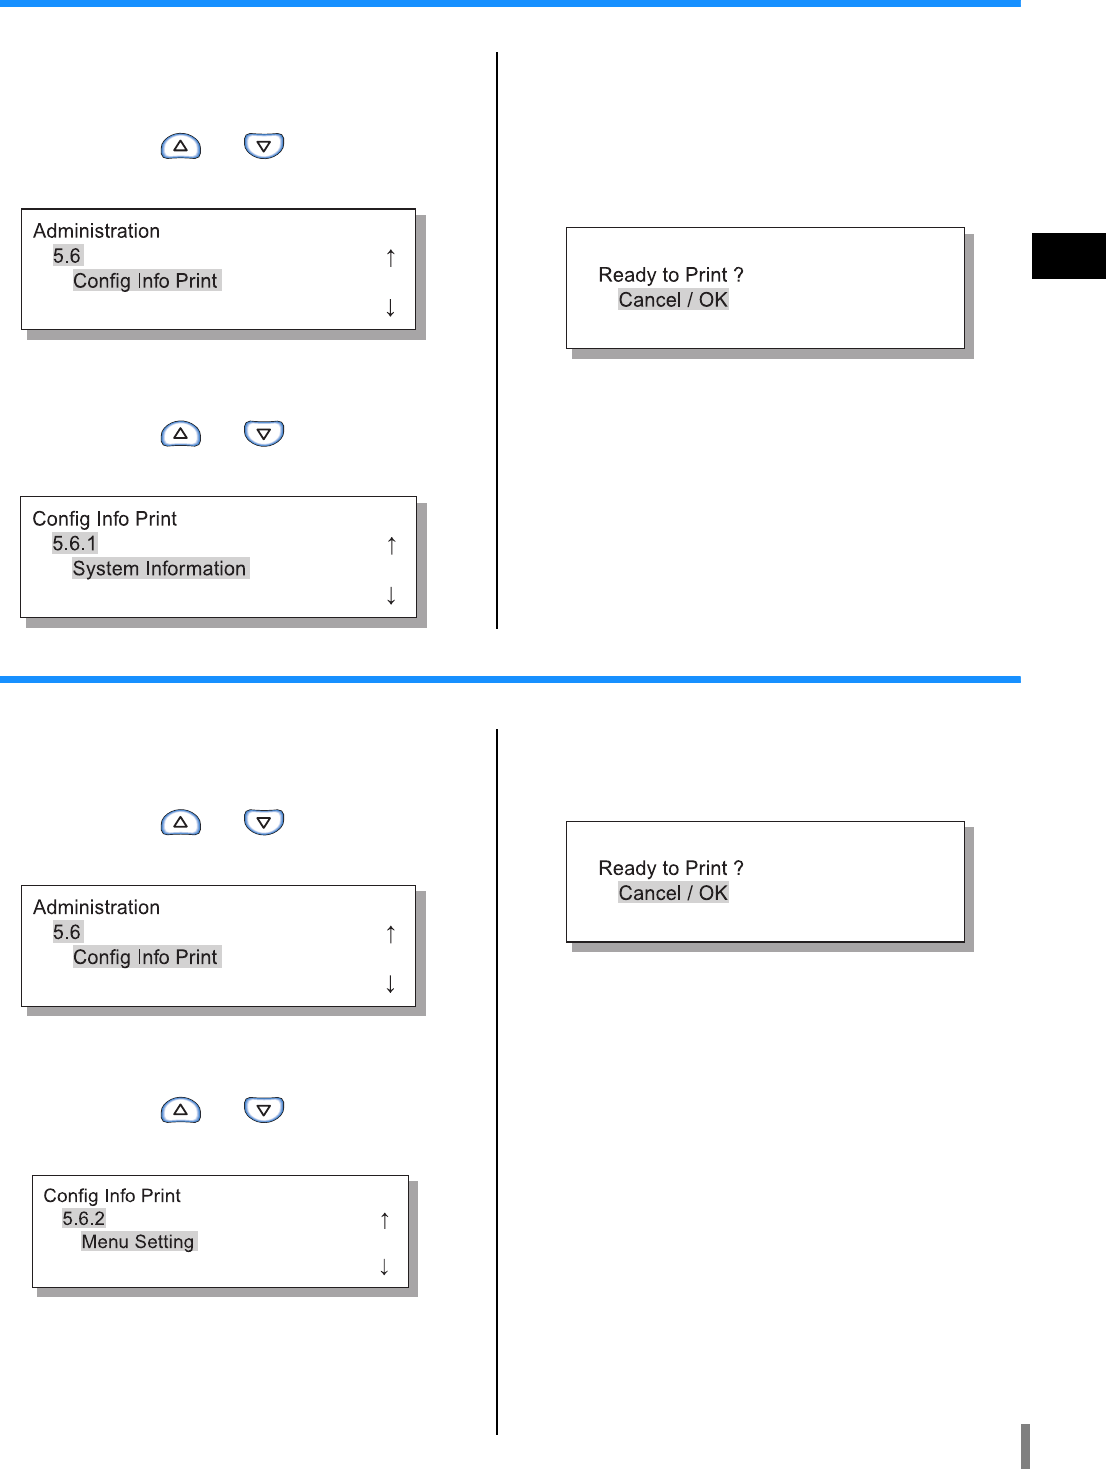
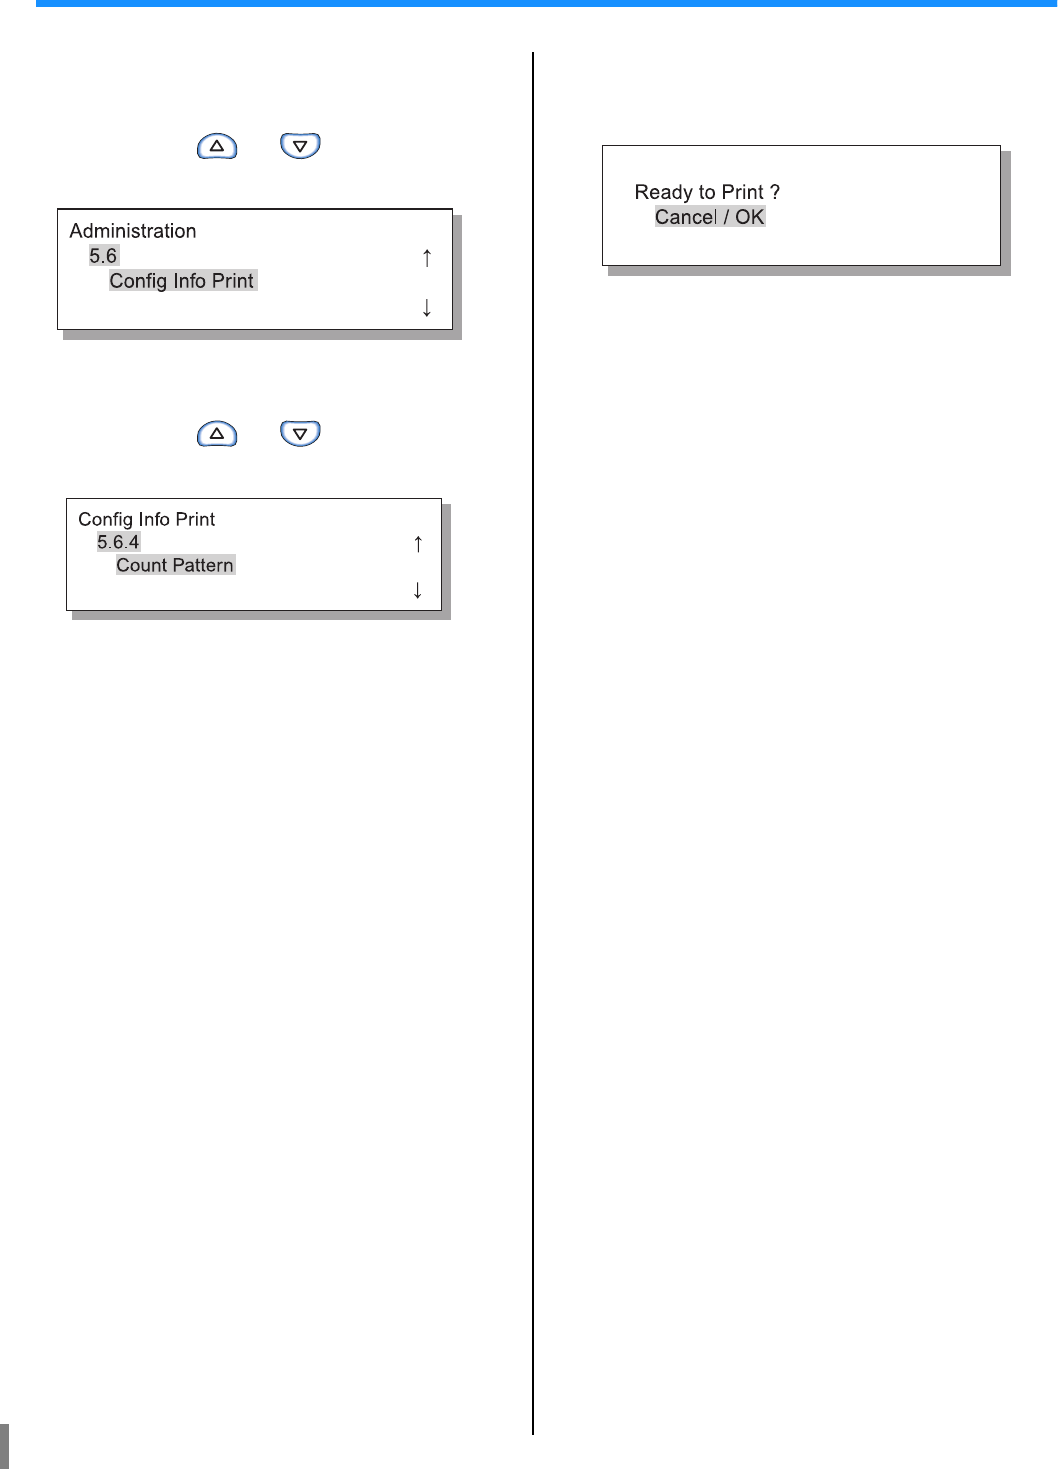
5.6 Configuration Information Print
Configuration settings are printed in a list. Current printer settings and menu settings can be checked in a list.
#
##
#Settings
Restrictions in configuration information print
•Perform configuration information print when printing is not being performed, for exammple, when "Ready" is displayed.
•Configuration Information Print can be printed only on paper loaded on the Standard Feed Tray.
("Menu 6 Feed Tray Selection" is automatically set to Standard Feed Tray.)
•For Configuration Information Print, A4-sized paper is required. When "No Paper" is displayed, load A4-sized paper onto the Stan-
dard Feed Tray.
The counter of the finisher functions is composed of the Finisher Counter number and the number of times. Finisher Counter
number means the finisher function. (Only when the HC Finisher is connected.)
When the number of times is printed as [ ***], it means that finisher function is not available with your finisher.
5.6.1
System Information
Information such as printer memory capacity, firmware version, and IP
address can be checked in a list.
5.6.2
Menu Setting
The menu settings made on the operation panel can be checked in a list.
5.6.4
Count Pattern
The result of "5.4.3 Count Pattern" and the count of the finisher function
(only if an optional finisher is connected) can be checked in a list.
Finisher Count number Meaning (function)
Finisher Counter1 Punching / 2 holes
Finisher Counter2 Punching / 3 or 4 holes
Finisher Counter3 Stapler / Rear 1 position
Finisher Counter4 Stapler / Front 1 position
Finisher Counter5 Stapler / 2 positions
Finisher Counter6 Booklet / Fold and staple
Finisher Counter7 Booklet / Fold
Finisher Counter8 N/A
Finisher Counter9 Cover Sheet Tray feeding
2-43
2
5.6.1 System Information
1 Use steps 1 to 4 ("
""
"p.2-31) to display
"Administration."
2 Press the or key to display
"Config Info Print."
3 Press the OK Key.
4 Press the or key to display
"System Information."
5 Press the OK Key.
6 After checking the message, press
the OK Key.
When printing is complete, the screen in step 4 will
reappear, and you can continue setting.
7 Press the PRINT/PAUSE Key.
A list of system information is printed.
5.6.2 Menu Setting
1 Use steps 1 to 4 ("
""
"p.2-31) to display
"Administration."
2 Press the or key to display
"Config Info Print."
3 Press the OK Key.
4 Press the or key to display
"Menu Setting."
5 Press the OK Key.
6 After checking the message, press
the OK Key.
To cancel the setting, press the Cancel key.
7 Press the PRINT/PAUSE key.
A list of the settings is printed.
2-44
5.6.4 Count Pattern
1 Use steps 1 to 4 ("
""
"p.2-31) to display
"Administration."
2 Press the or key to display
"Config Info Print."
3 Press the OK Key.
4 Press the or key to display
"Count Pattern."
5 Press the OK Key.
6 After checking the message, press
the OK Key.
To cancel the setting, press the Cancel key.
7 Press the PRINT/PAUSE key.
A list of "5.4.3 Count Pattern" and the count of the fin-
isher function (only if an optional finisher is con-
nected) is printed.
2-45
2
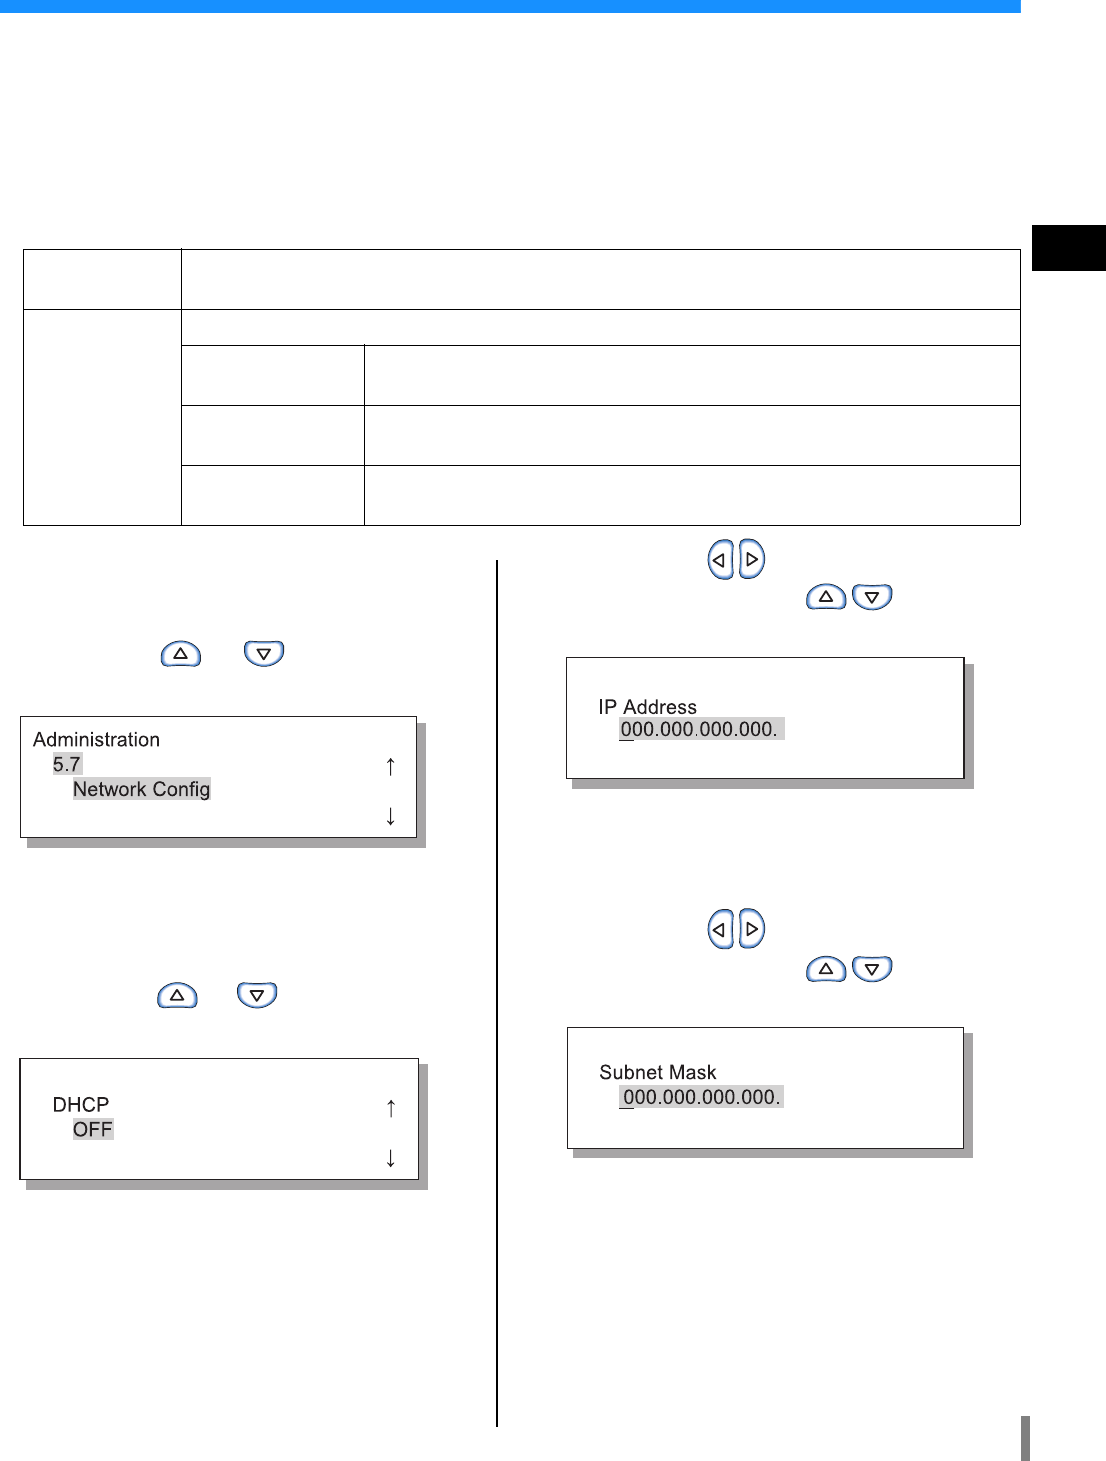
5.7 Network Configuration
If the printer is connected to a network and all the conditions shown below are satisfied, you can register the network configura-
tion. If the conditions below are not satisfied, you can check the settings.
•DHCP OFF
•IP address is "000.000.000.000"
To change the setting, use "Administrator" of RISO Console or supplied software "RISO IP Setting Tool."
The settings will be effective after the printer is restored from the sleep mode. For details, consult your network administrator.
#
##
#Settings
1 Use steps 1 to 4 ("
""
"p.2-31) to display
"Administration."
2 Press the or key to display
"Network Config."
3 Press the OK Key.
Set the DHCP.
4 Press the or key to select ON
or OFF.
5 Press the OK Key.
If you have selected ON, proceed to step 10.
Input the IP address.
6 Press the keys to move the cur-
sor. and press the keys to
enter the value.
7 Press the OK Key.
Input the subnet mask address.
8 Press the keys to move the cur-
sor, and press the keys to
enter the values.
9 Press the OK Key.
Input the default gateway address.
DHCP ON The IP address, subnet mask, and default gateway are obtained from the DHCP server, and the settings
of the printer controller are automatically set and registered..
DHCP OFF Set the following three items on the Operation Panel.
IP address Input the IP address of the printer.
Set the address in the range of "000.000.000.000" - "255.255.255.255."
Subnet mask Input the subnet mask address.
Set the address in the range of "000.000.000.000" - "255.255.255.255."
Default gateway Input the default gateway address.
Set the address in the range of "000.000.000.000" - "255.255.255.255."
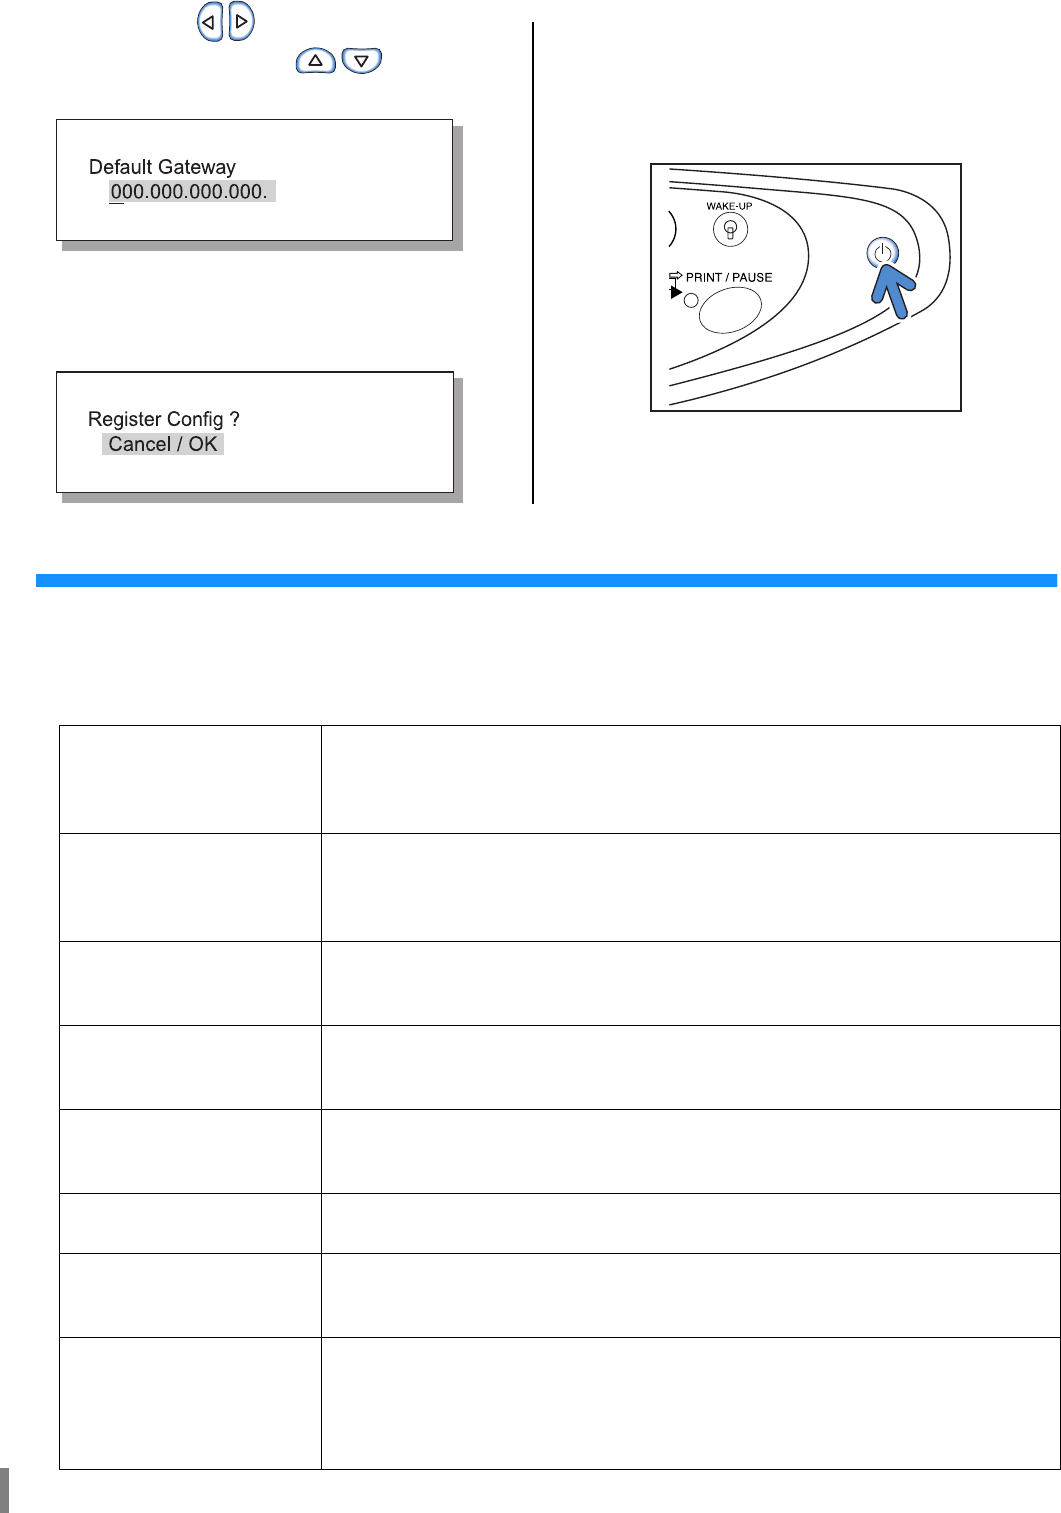
2-46
10 Press the keys to move the cur-
sor, and press the keys to
enter the values.
11 After checking the message, press
the OK Key.
Message "Registered. Restart Printer" is displayed.
12 Press the Sleep Key to turn off the
power and then on again.
After message "Shutting Down" disappears and the
Power Key becomes orange, press the Sleep Key
again to turn ON the power.
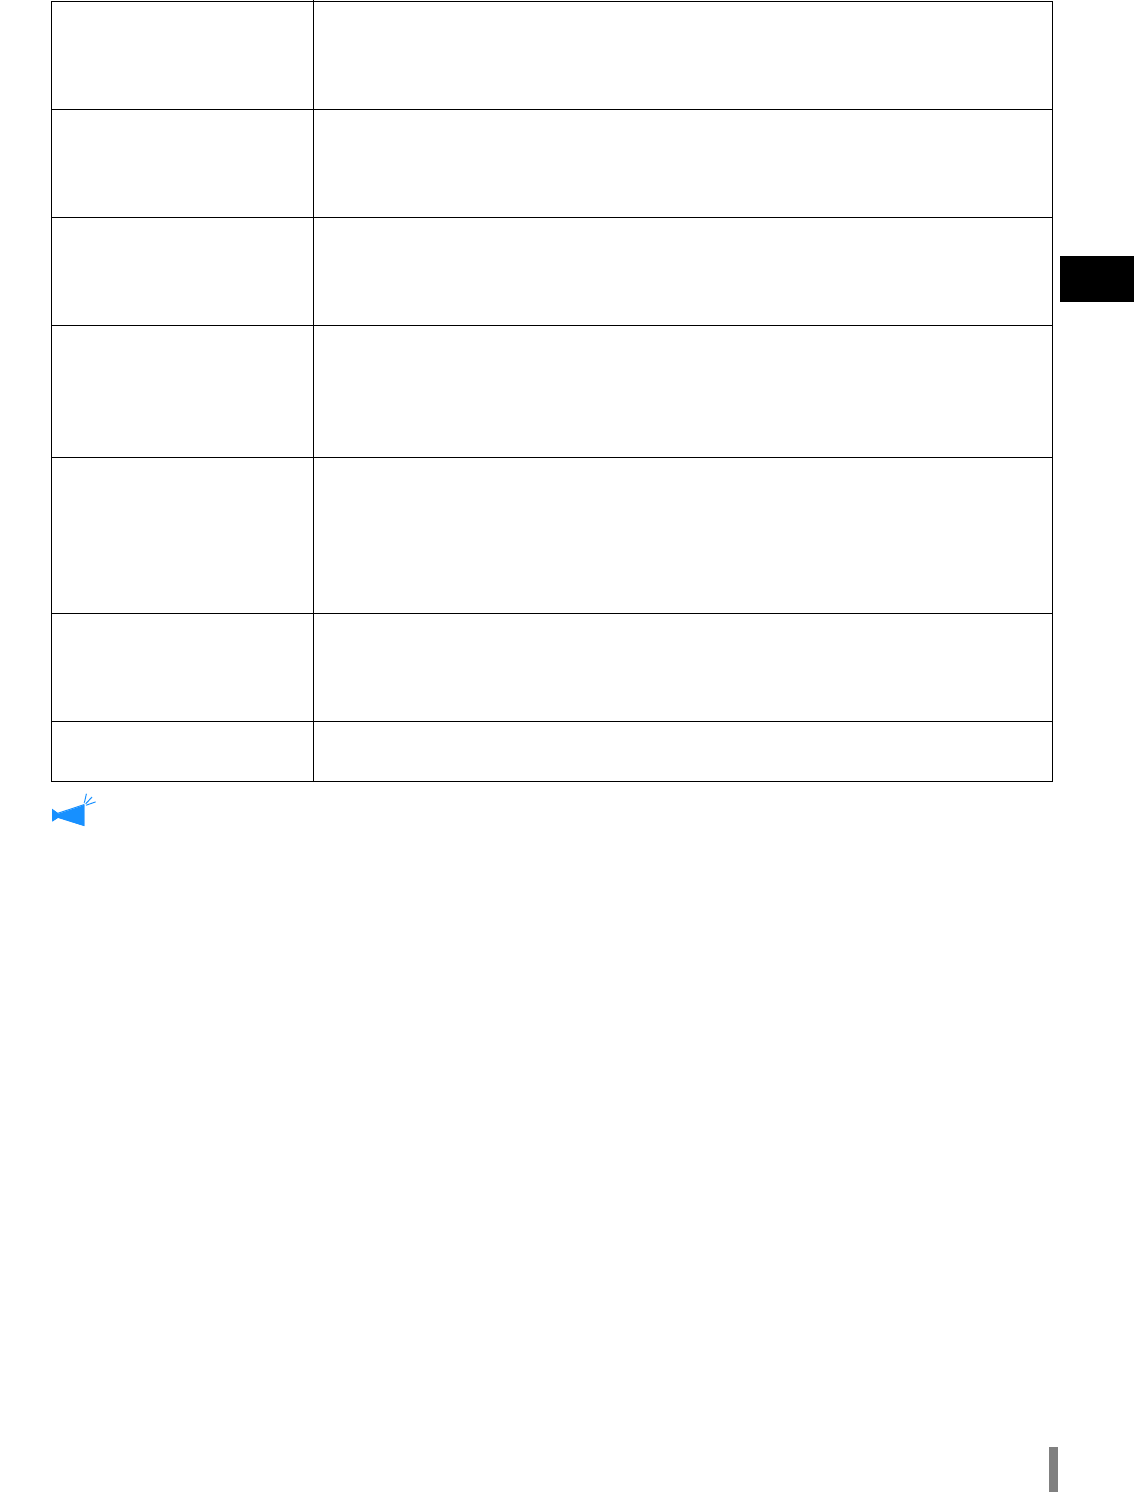
5.8 Initial Setting
Basic setting such as details of sleep, buzzer sound, language, metric/inch switch, and print head nozzle initialization is made
here.
AAA indicates factory default setting.
#
##
#Settings
5.8.1
Sleep
Set whether or not to use the sleep mode for suppressing power consumption when the
printer is not used for a certain time.
ON: Sleep is enabled.
OFF: Sleep is disabled.
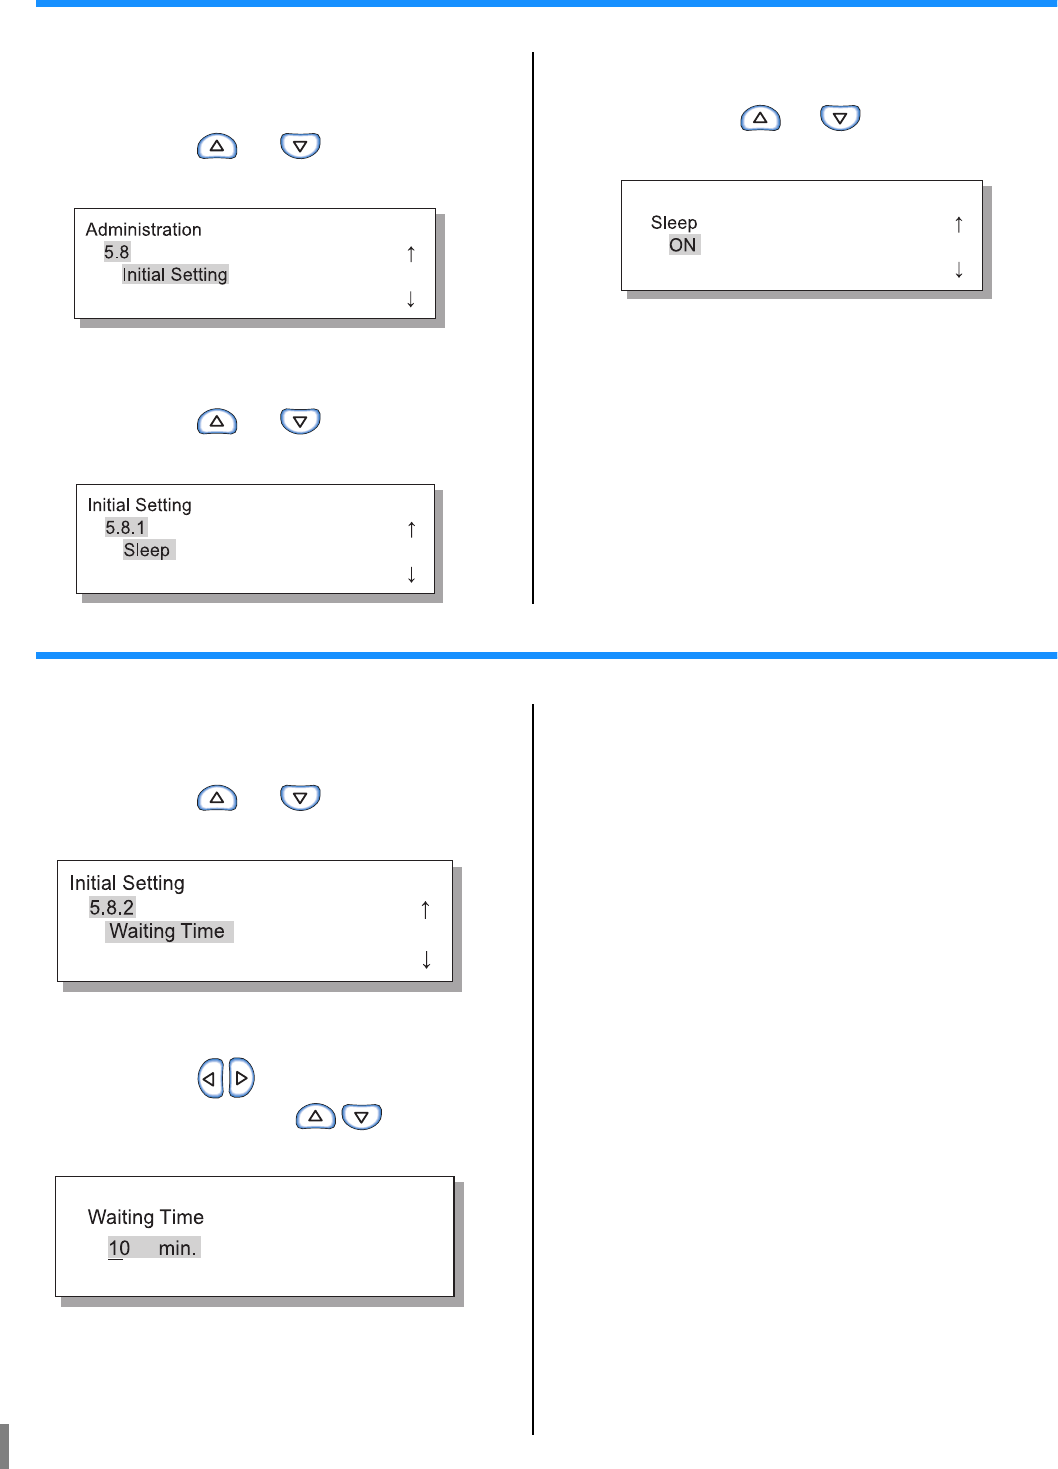
5.8.2
Waiting Time
Set the time that elapses until the printer enters the sleep mode if the sleep function is
enabled.
The time can be set to 1 - 99 minutes.
60
5.8.3
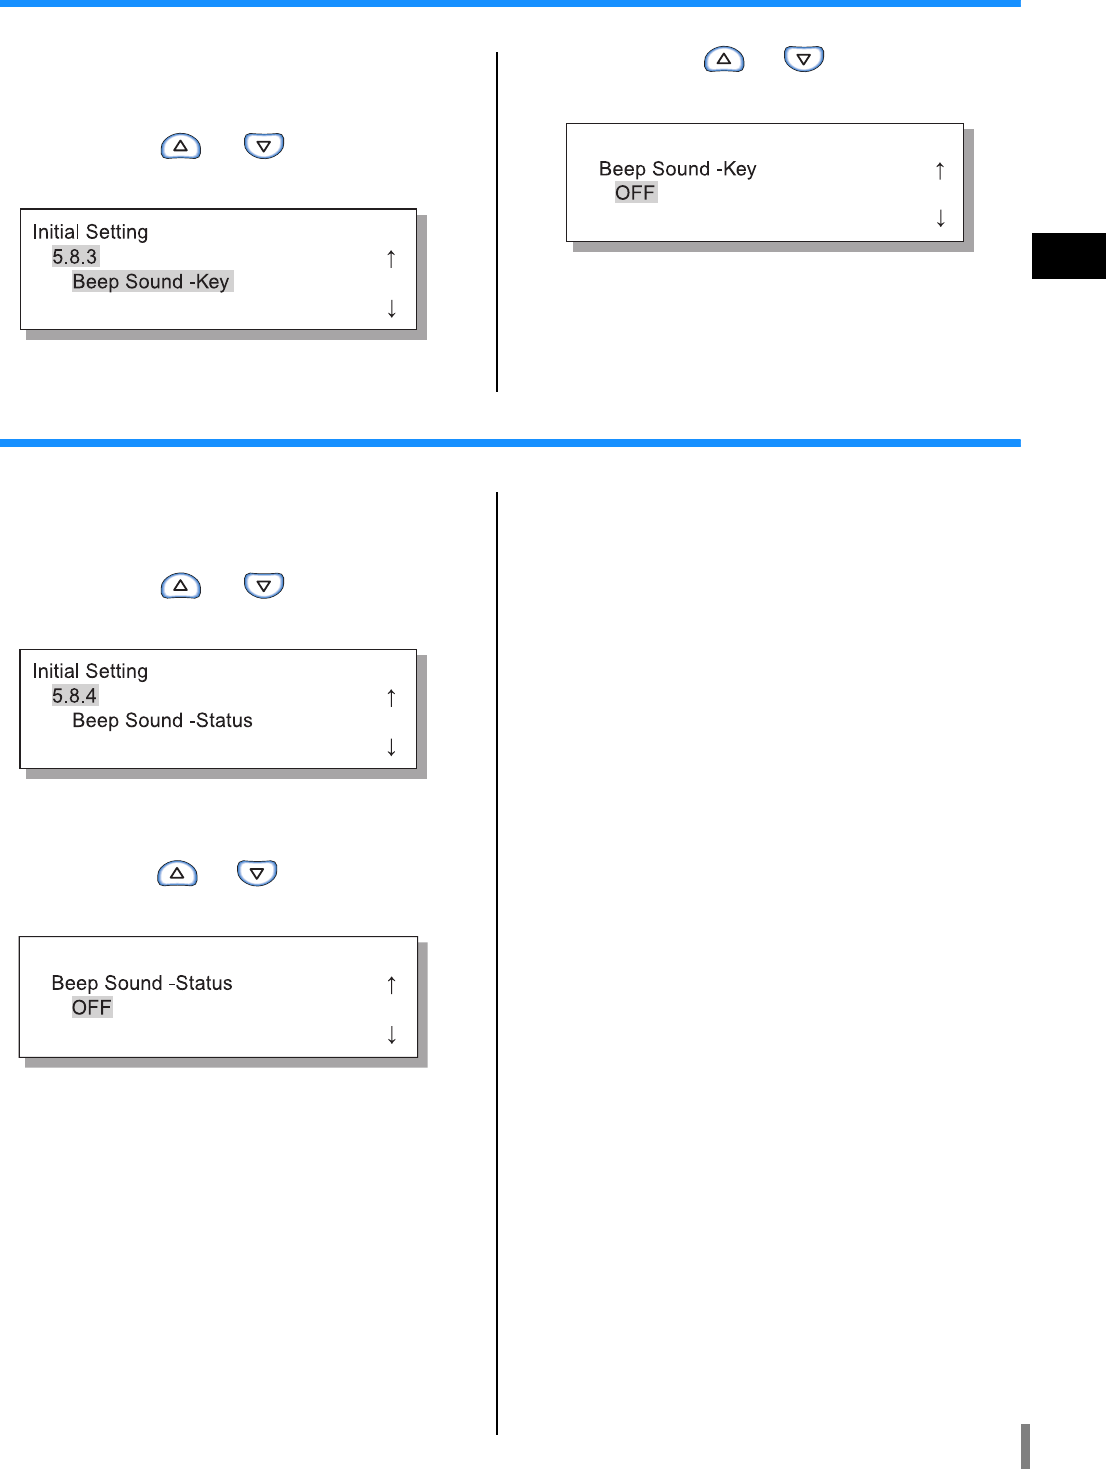
Beep Sound - Key
Set whether or not to sound the beeper when a key on the Operation Panel is pressed.
ON: Beep sound is enabled.
OFF: Beep sound is disabled.
5.8.4
Beep Sound - Status
Set whether or not to sound the beeper when, for example, printing is completed.
ON: Beep sound is enabled.
OFF: Beep sound is disabled.
5.8.5
Beep Sound - Error
Set whether or not to sound the beeper when an error such as paper jam occurs.
ON: Beep sound is enabled.
OFF: Beep sound is disabled.
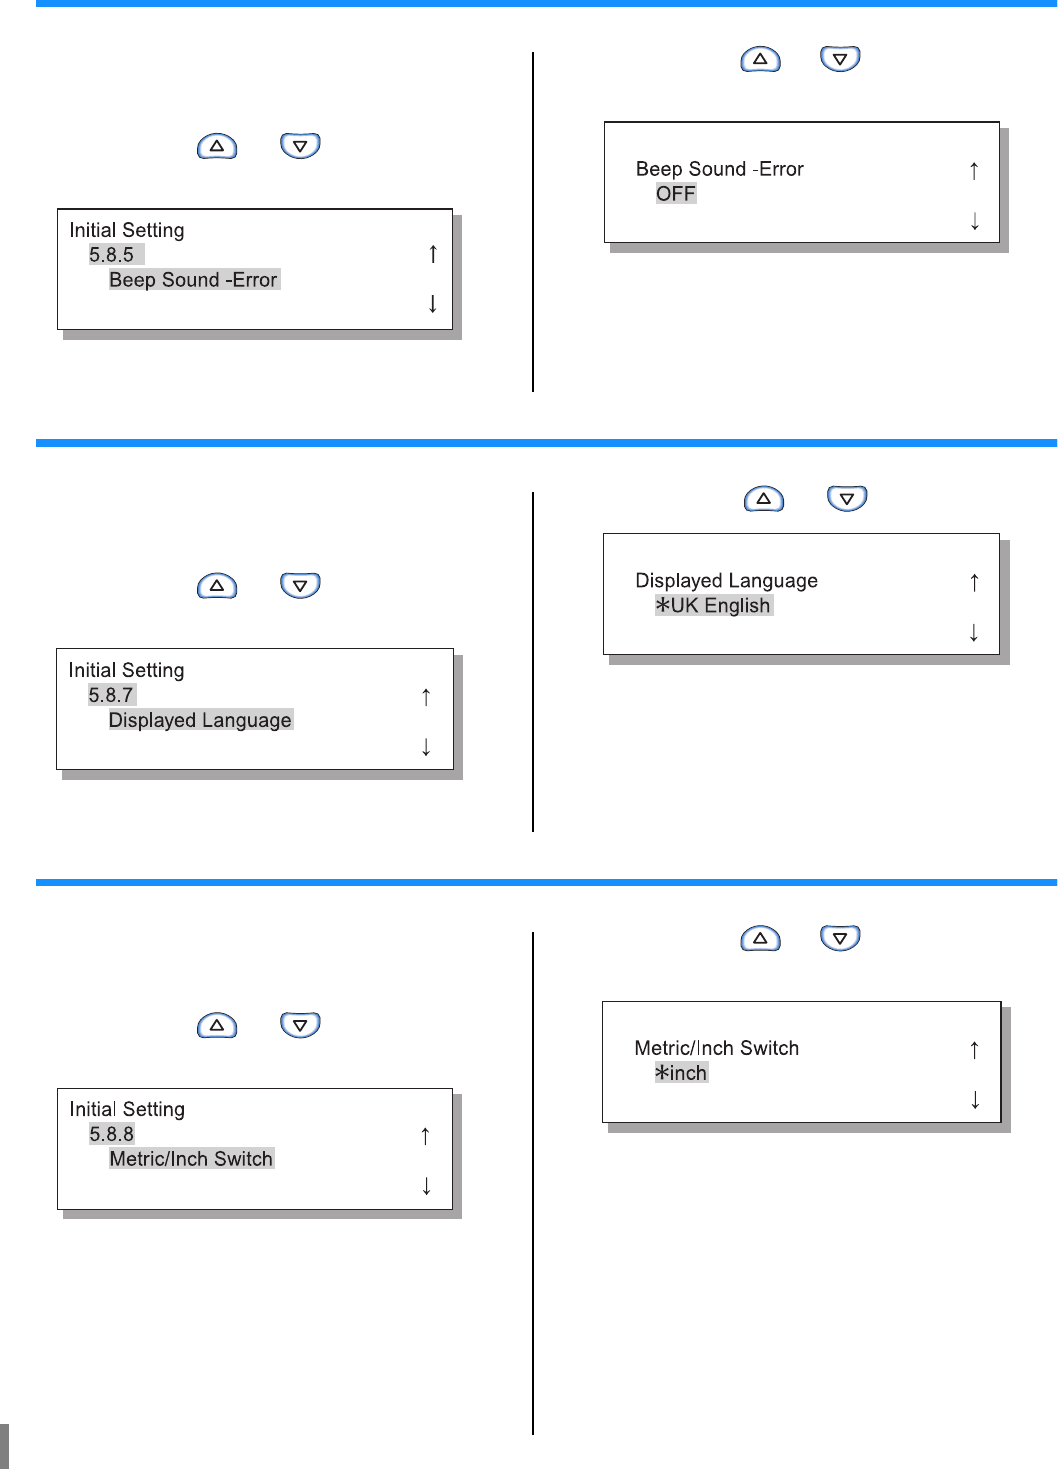
5.8.7
Displayed Language
Set the language displayed on the Operation Panel.
Japanese/UK English/US English/French/German/Italian/Spanish/Portuguese
5.8.8
Metric/Inch Switch
Select the Metric or Inch unit for display on the Operation Panel.
mm: Displayed in mm.
inch: Displayed in inch.
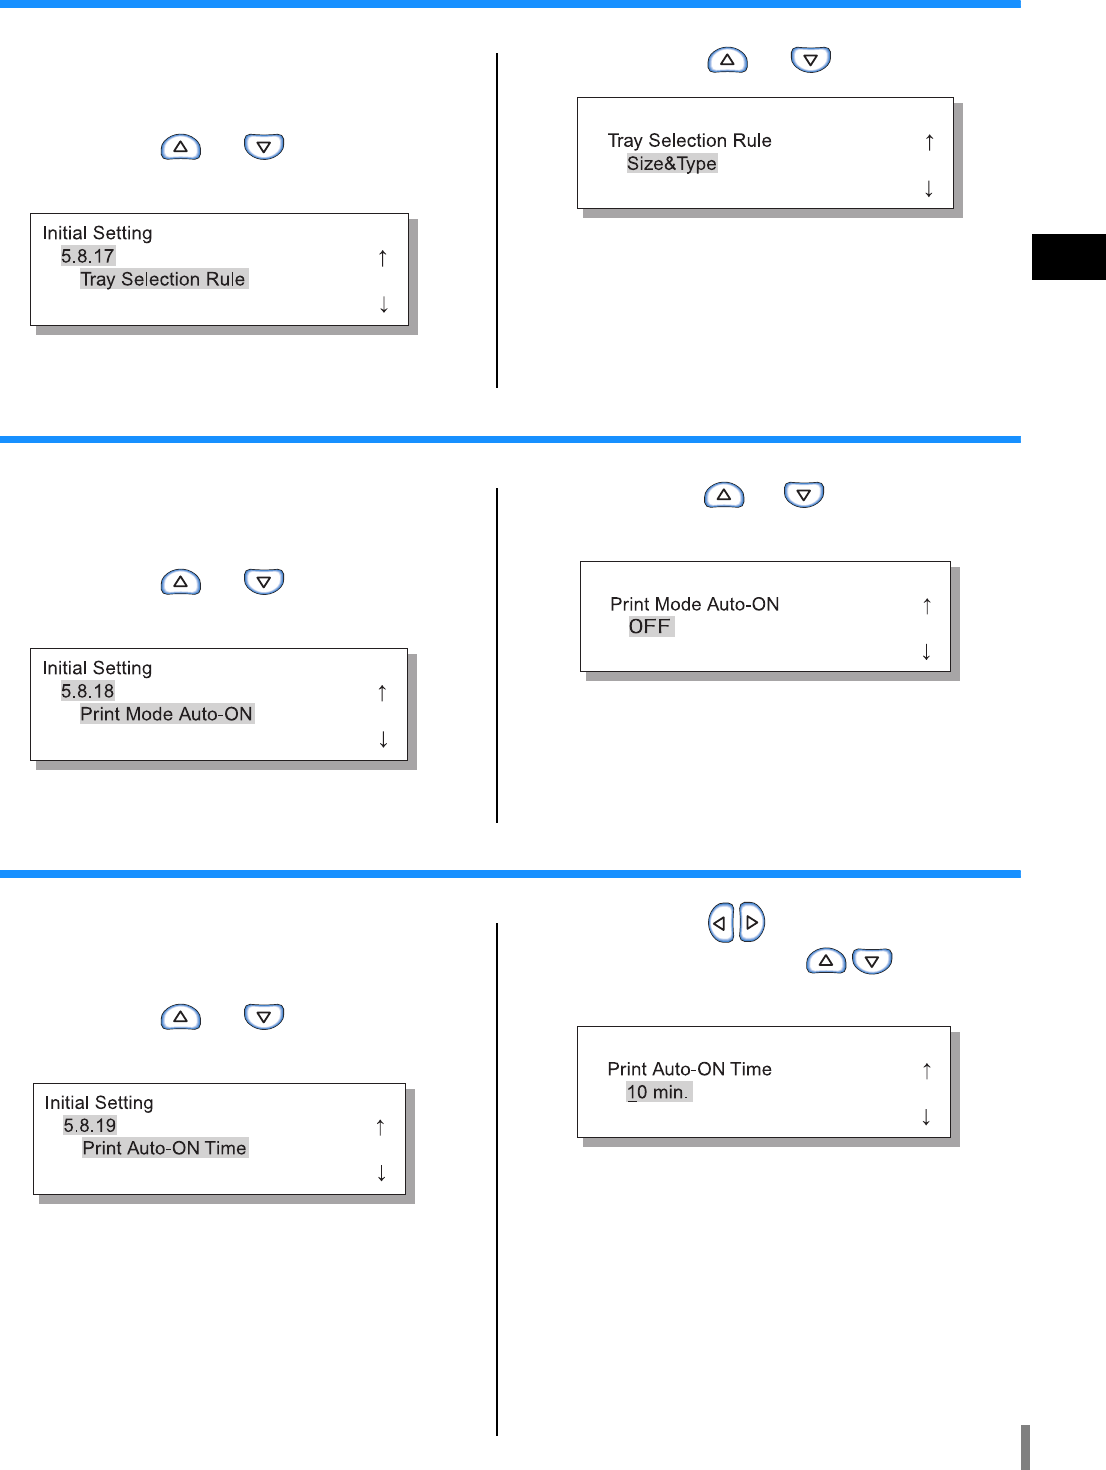
5.8.17
Tray Selection Rule
Sets the condition for selecting a tray using the auto tray selection function.
Size: A tray in which paper of the size specified by the controller is set will be selected with
auto tray selection.
Size & Type: A tray in which paper of the size and type specified by the controller is set will
be selected with auto tray selection.
2-47
2
5.8.6, 5.8.9 - 5.8.16, 5.8.24 -5.8.49 are not displayed.
5.8.18
Print Mode Auto-ON
Sets whether or not the print mode is automatically turned on when the printer is not used
for a certain time with the print mode OFF.
ON: The print mode will be automatically turned off.
OFF: The print mode will not be turned off.
5.8.19
Print Auto-ON Time
Sets the time that elapses until the print mode is turned on when "Print Mode Auto-ON" is
set to "ON."
The time can be set to 1 to 60 minutes.
5
5.8.20
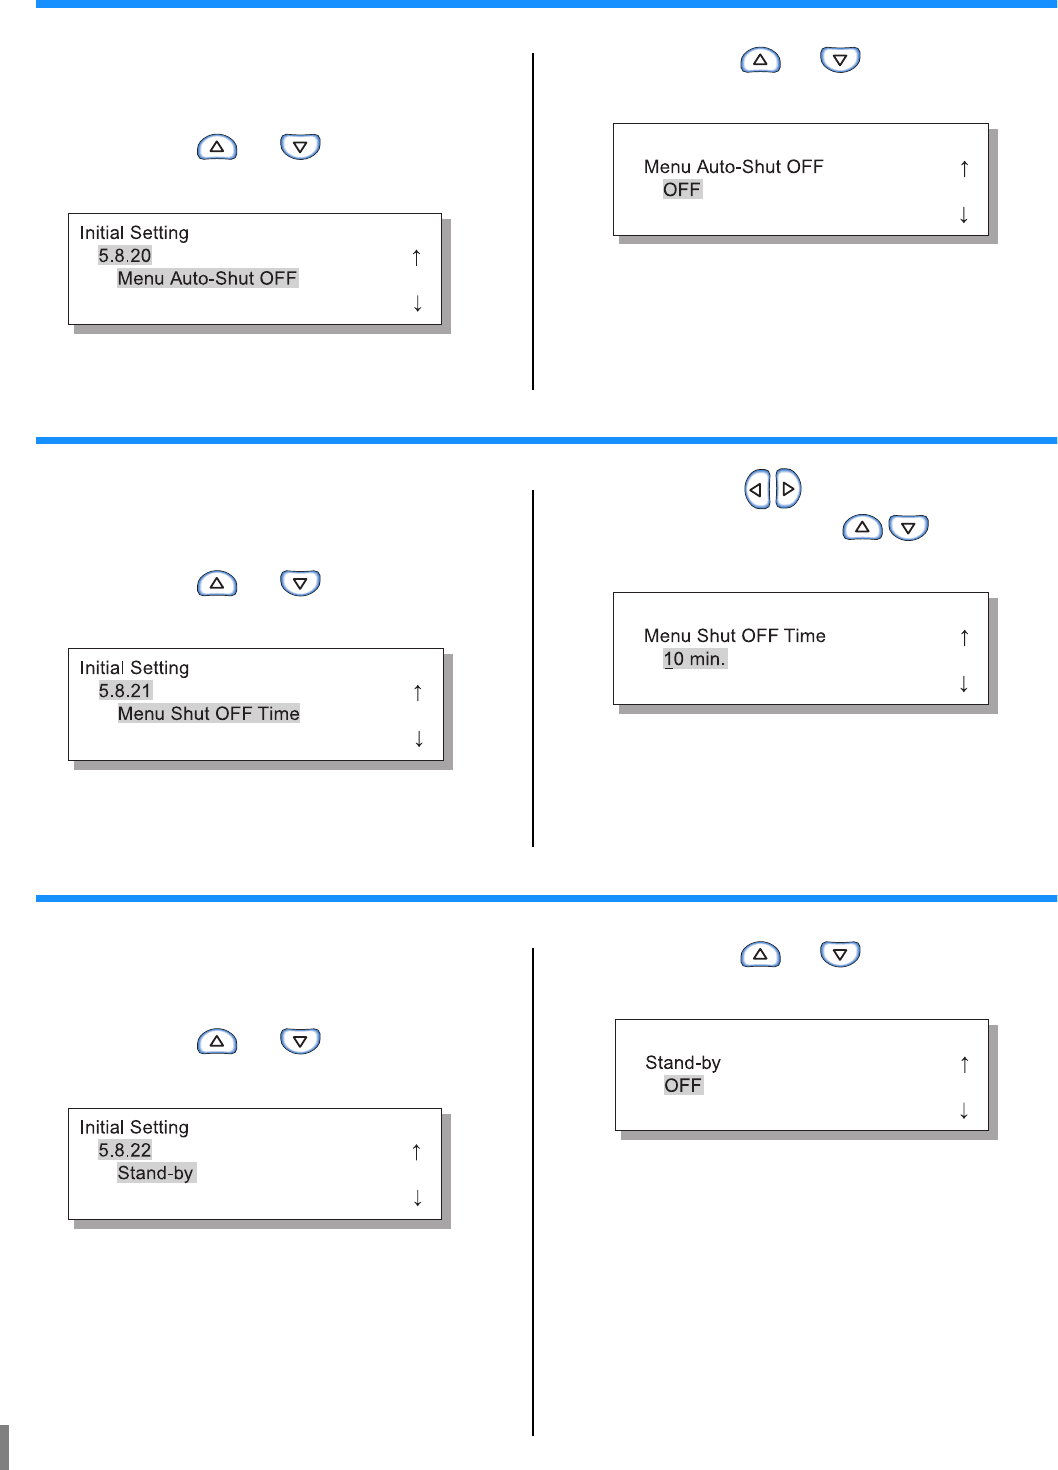
Menu Auto-Shut OFF
Sets whether or not the print mode is automatically turned off when no operation is made for
a certain time on the menu setting screen.
ON: The print mode will be automatically turned off.
OFF: The print mode will not be turned off.
5.8.21
Menu Shut OFF Time
Sets the time that elapses until the print mode is turned off when "Menu Auto-Shut OFF" is
set to "ON."
At this time, the current menu settings will not be retained.
The time can be set to 1 to 60 minutes.
5
5.8.22
Stand-by
Sets whether or not the printer enters the stand-by mode to reduce power consumption when
the printer is not used for a certain time.
In the stand-by mode, when the printer receives data from a computer, the printer is auto-
matically started and starts printing.
ON: The stand-by mode is enabled.
OFF: The stand-by mode is not used.
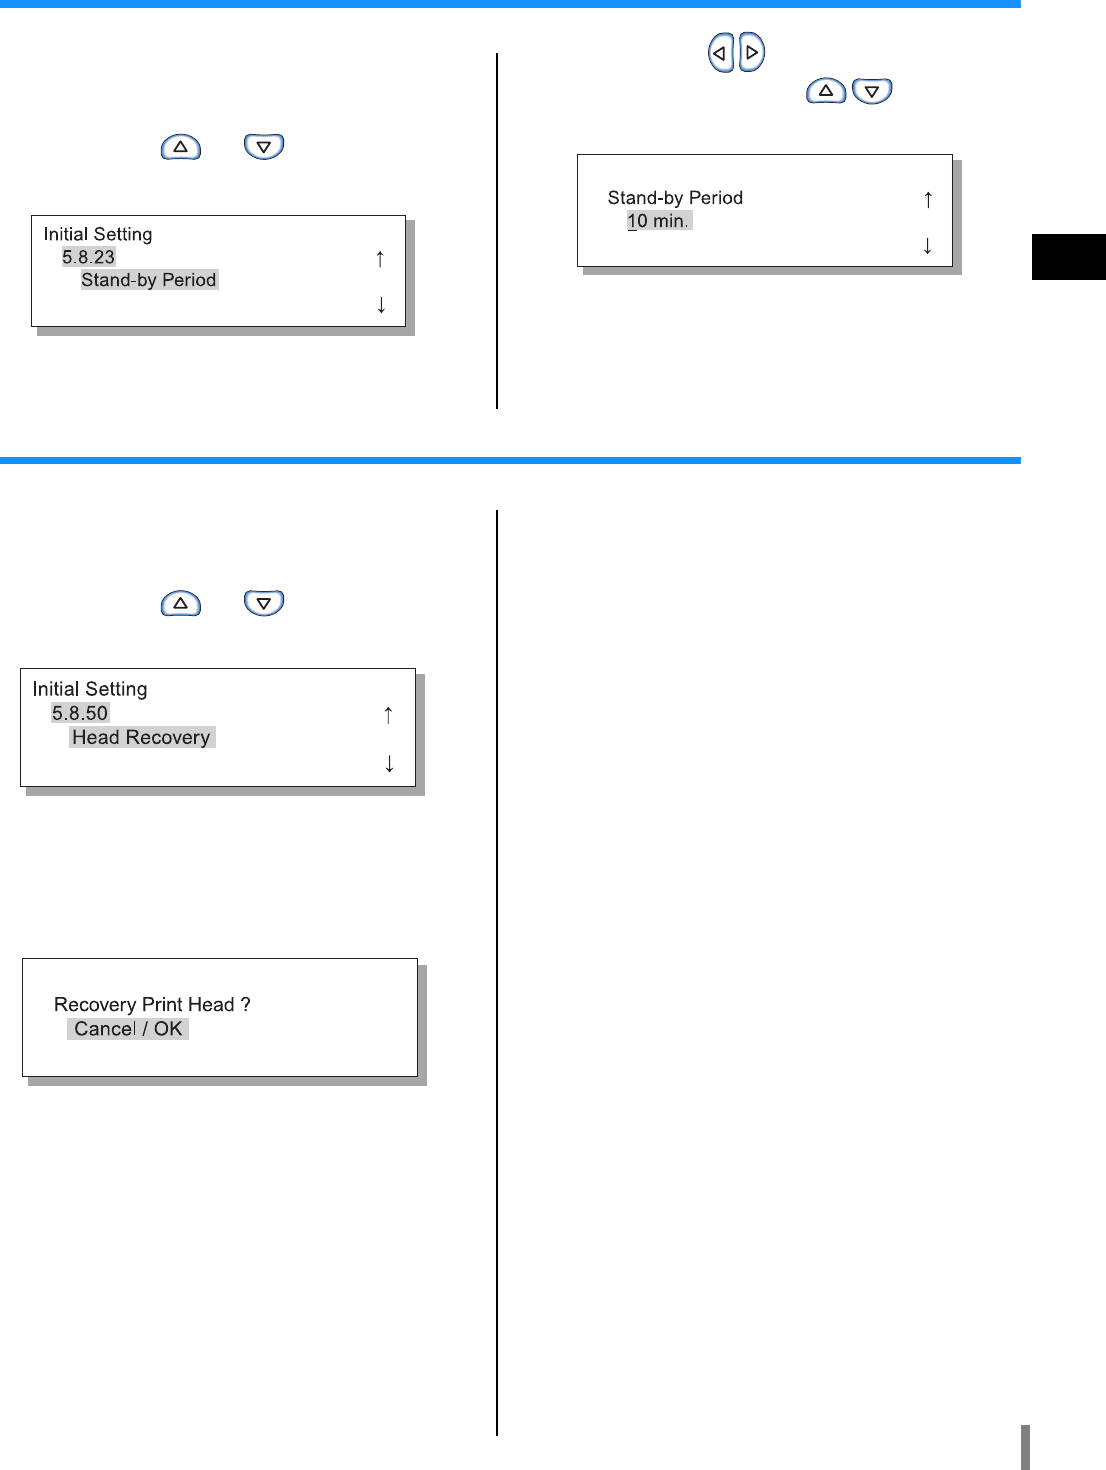
5.8.23
Stand-by Period
Sets the time that elapses until the printer enters the stand-by mode when "Stand-by" is set
to "ON."
The time can be set to 1 to 99 minutes.
5
5.8.50
Head Recovery
Performs powerful cleaning of the print head nozzles to restore them to the initial state after
the printer is not used for a long time.
2-48
5.8.1 Sleep
1 Use steps 1 to 4 ("
""
"p.2-48) to display
"Administration."
2 Press the or key to display
"Initial Setting."
3 Press the OK Key.
4 Press the or key to display
"Sleep."
5 Press the OK Key.
6 Press the or key to select ON
or OFF.
7 Press the OK Key.
When the screen in step 4 reappears, you can continue
setting.
To exit the setting, press the PRINT/PAUSE key.
5.8.2 Waiting Time
1 Use steps 1 to 3 of "5.8.1 Sleep"
("
""
"p.2-48) to display "Initial Setting."
2 Press the or key to display
"Waiting Time."
3 Press the OK Key.
4 Press the keys to move the cur-
sor, and press the keys to
input the Waiting Time.
5 Press the OK Key.
When the screen in step 2 reappears, you can continue
setting. To exit the setting, press the PRINT/PAUSE
key.
2-49
2
5.8.3 Beep Sound -Key
1 Use steps 1 to 3 of "5.8.1 Sleep"
("
""
"p.2-48) to display "Initial Setting."
2 Press the or key to display
"Beep Sound -Key."
3 Press the OK Key.
4 Press the or key to select ON
or OFF.
5 Press the OK Key.
When the screen in step 2 reappears, you can continue
setting.
To exit the setting, press the PRINT/PAUSE key.
5.8.4 Beep Sound -Status
1 Use steps 1 to 3 of "5.8.1 Sleep"
("
""
"p.2-48) to display "Initial Setting."
2 Press the or key to display
"Beep Sound -Status."
3 Press the OK Key.
4 Press the or key to select ON
or OFF.
5 Press the OK Key.
When the screen in step 2 reappears, you can continue
setting.
To exit the setting, press the PRINT/PAUSE key.
2-50
5.8.5 Beep Sound -Error
1 Use steps 1 to 3 of "5.8.1 Sleep"
("
""
"p.2-48) to display "Initial Setting."
2 Press the or key to display
"Beep Sound -Error."
3 Press the OK Key.
4 Press the or key to select ON
or OFF.
5 Press the OK Key.
When the screen in step 2 reappears, you can continue
setting.
To exit the setting, press the PRINT/PAUSE key.
5.8.7 Displayed Language
1 Use steps 1 to 3 of "5.8.1 Sleep"
("
""
"p.2-48) to display "Initial Setting."
2 Press the or key to display
"Displayed Language."
3 Press the OK Key.
4 Press the or key to select.
5 Press the OK Key.
When the screen in step 2 reappears, you can continue
setting.
To exit the setting, press the PRINT/PAUSE key.
5.8.8 Metric/
//
/Inch Switch
1 Use steps 1 to 3 of "5.8.1 Sleep"
("
""
"p.2-48) to display "Initial Setting."
2 Press the or key to display
"Metric/
//
/Inch Switch."
3 Press the OK Key.
4 Press the or key to select the
unit.
5 Press the OK Key.
When the screen in step 2 reappears, you can continue
setting.
To exit the setting, press the PRINT/PAUSE key.
2-51
2
5.8.17 Tray Selection Rule
1 Use steps 1 to 3 of "5.8.1 Sleep"
("
""
"p.2-48) to display "Initial Setting."
2 Press the or key to display
"Tray Selection Rule."
3 Press the OK Key.
4 Press the or key to select.
5 Press the OK Key.
When the screen in step 2 reappears, you can continue
setting.
To exit the setting, press the PRINT/PAUSE key.
5.8.18 Print Mode Auto-ON
1 Use steps 1 to 3 of "5.8.1 Sleep"
("
""
"p.2-48) to display "Initial Setting."
2 Press the or key to display
"Print Mode Auto-ON."
3 Press the OK Key.
4 Press the or key to select ON
or OFF.
5 Press the OK Key.
When the screen in step 2 reappears, you can continue
setting.
To exit the setting, press the PRINT/PAUSE key.
5.8.19 Print Auto-ON Time
1 Use steps 1 to 3 of "5.8.1 Sleep"
("
""
"p.2-48) to display "Initial Setting."
2 Press the or key to display
"Print Auto-ON Time."
3 Press the OK Key.
4 Press the keys to move the cur-
sor, and press the keys to
input the desired time.
5 Press the OK Key.
When the screen in step 2 reappears, you can continue
setting.
To exit the setting, press the PRINT/PAUSE key.
2-52
5.8.20 Menu Auto-Shut OFF
1 Use steps 1 to 3 of "5.8.1 Sleep"
("
""
"p.2-48) to display "Initial Setting."
2 Press the or key to display
"Menu Auto-Shut OFF."
3 Press the OK Key.
4 Press the or key to select ON
or OFF.
5 Press the OK Key.
When the screen in step 2 reappears, you can continue
setting.
To exit the setting, press the PRINT/PAUSE key.
5.8.21 Menu Shut OFF Time
1 Use steps 1 to 3 of "5.8.1 Sleep"
("
""
"p.2-48) to display "Initial Setting."
2 Press the or key to display
"Menu shut OFF Time."
3 Press the OK Key.
4 Press the keys to move the cur-
sor, and press the keys to
input the desired yime.
5 Press the OK Key.
When the screen in step 2 reappears, you can continue
setting.
To exit the setting, press the PRINT/PAUSE key.
5.8.22 Stand-by
1 Use steps 1 to 3 of "5.8.1 Sleep"
("
""
"p.2-48) to display "Initial Setting."
2 Press the or key to display
"Stand-by."
3 Press the OK Key.
4 Press the or key to select ON
or OFF.
5 Press the OK Key.
When the screen in step 2 reappears, you can continue
setting.
To exit the setting, press the PRINT/PAUSE key.
2-53
2
5.8.23 Stand-by Period
1 Use steps 1 to 3 of "5.8.1 Sleep"
("
""
"p.2-48) to display "Initial Setting."
2 Press the or key to display
"Stand-by Perid."
3 Press the OK Key.
4 Press the keys to move the cur-
sor, and press the keys to
input the desired time.
5 Press the OK Key.
When the screen in step 2 reappears, you can continue
setting.
To exit the setting, press the PRINT/PAUSE key.
5.8.50 Head Recovery
1 Use steps 1 to 3 of "5.8.1 Sleep"
("
""
"p.2-48) to display "Initial Setting."
2 Press the or key to display
"Head Recovery."
3 Press the OK Key.
4 After checking the message, press
the OK Key.
When the message "Cleaning Print Head ?" blinks,
cleaning is performed. After cleaning is completed,
the screen in step 2 reappears.
To exit the setting, press the PRINT/PAUSE key.
2-54
Menu 6 Feed Tray Selection
If the paper conditions of data received from a computer and the setting of "5.8.17 Tray Selection Rule" do not match the conditions
of any of the Standard Feed Tray and other feed trays, printing will not start. In this case, you can specify the Standard Feed Tray or
another feed tray where the printer paper is set and start printing with no trouble.
#
##
#Selectable Feed Trays
1 Press the MENU Key.
2 Press the or key to display
"Feed Tray Selection."
3 Press the OK Key.
4 Press the or key to select the
desired feed tray.
5 Press OK Key.
When the screen in step 2 reappears, you can continue set-
ting.
To exit the setting, press the PRINT/PAUSE key.
Selectable feed trays Selectable feed trays are shown below.
Auto Normally, set "Auto." A feed tray proper for data from the computer and the setting of "5.8.17 Tray
Selection Rule" is automatically selected.
Standard Feed Tray Printed onto paper in the Standard Feed Tray.
Feed Tray 1 Printed onto paper in Feed Tray 1.
Feed Tray 2 Printed onto paper in Feed Tray 2.
2-55
2
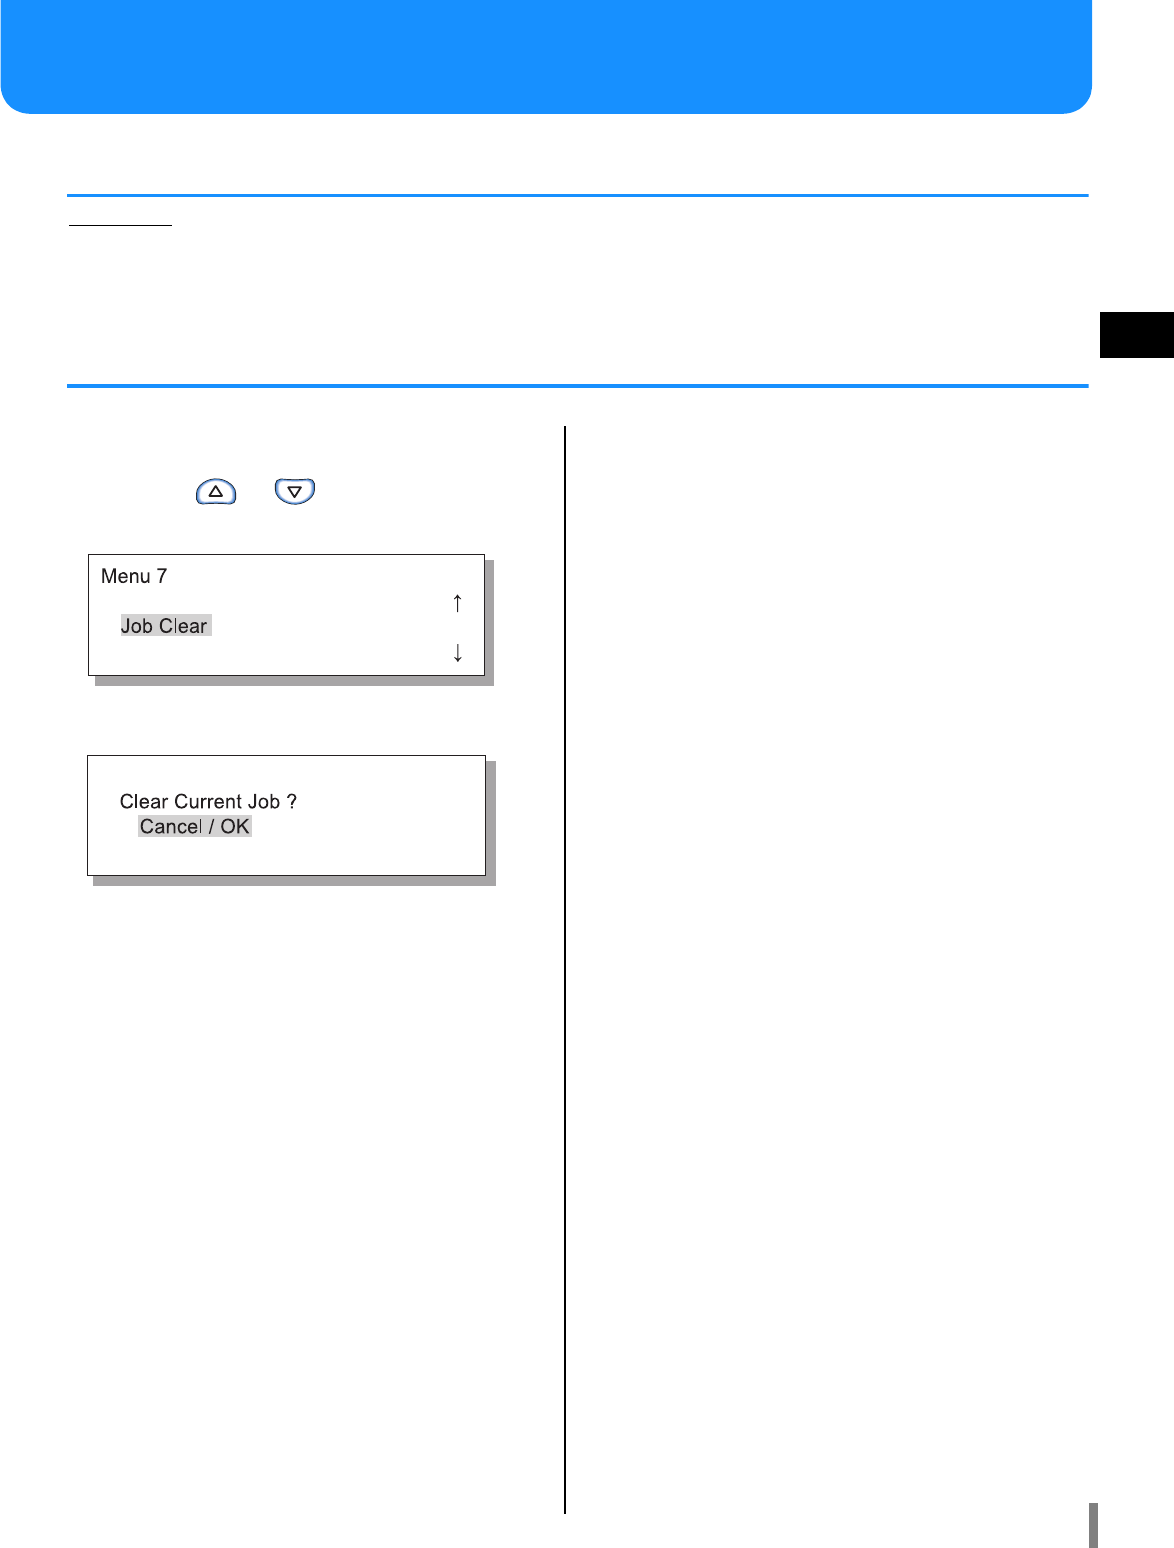
Menu 7 Job Clear
Cancels the currently printed job and clears the data.
What is Job?
When data is transmitted from a computer to the printer, the controller processes the data and sends the print data to the FORCEJET™ ENGINE.
The processed data is called "Job."
"Job" means the data shown below.
•Data suspended temporarily
•Data for which additional printing is set with the Temporary Data Retrieve function.
1 Press the MENU Key.
2 Press the or key to display "Job
Clear."
3 Press the OK Key.
4 Check the message. To clear, press the
OK Key.
Message "Executing" is displayed and the data is cleared.
If the CANCEL key is pressed, the screen in step 2
appears again.
When the screen in step 2 reappears, you can continue set-
ting.
To exit the setting, press the PRINT/ PAUSE Key.

2-56

3-1
Chapter3 Troubleshooting
This chapter describes the causes of and measures against trouble indicated with an error message displayed on
the Operation Panel or lighting symbol. This chapter also describes how to remove jammed paper and replac-
ing an ink cartridge.
3-2
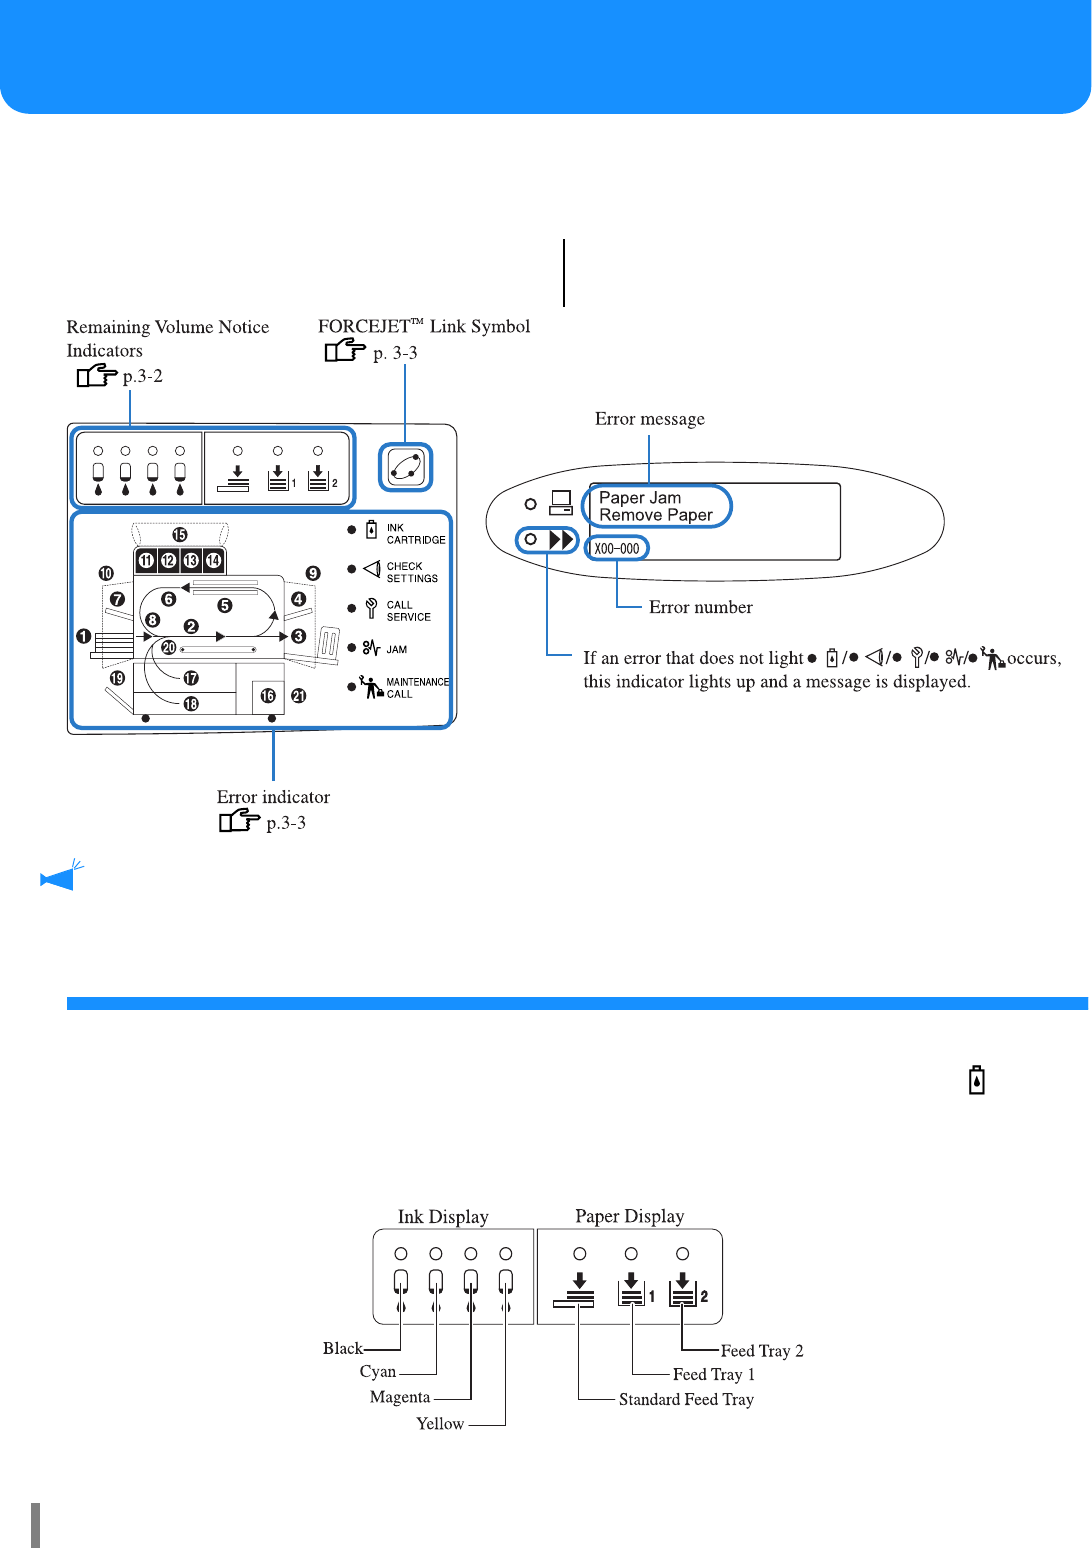
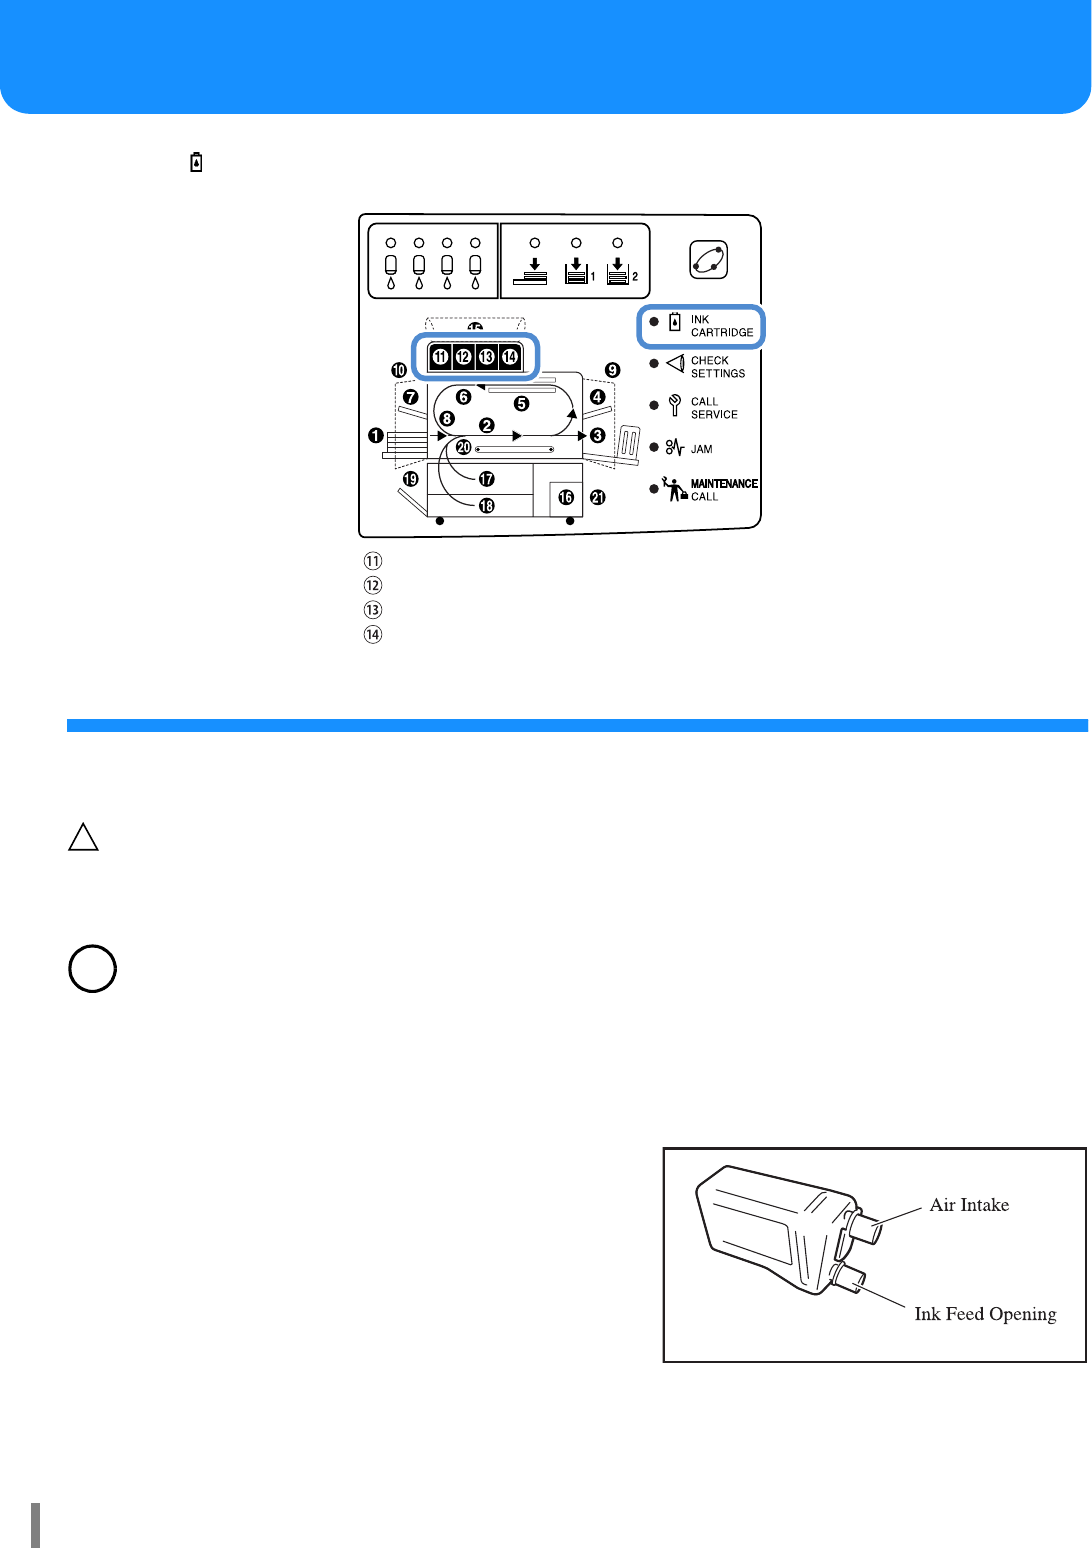
Explanation of Set Error Display
If trouble occurs during printing, printing stops and a symbol lights up on the Operation Panel or an error message appears in the dis-
play.
You can check the location based on the symbol or number and see the information from the message in the display.
Symbol Display on Operation Panel
A symbol indicating the relevant portion or type lights up. It
may indicate a paper jam or ink cartridge replacement.
Error Message
A message indicating the detail of the error and the solution
appears in the display.
If [21] in the panel is lit, an error occurs in the optional Finisher.
HC Finisher: Refer to "HC Finisher Maintenance Guide".
HC Auto Stacker: Refer to the following page and subsequent ones in this Guide.
Remaining Volume Notice Indicators
If remaining volume of paper in the Feed Trays (Standard Feed Tray) or when ink is low (approximately 30%), the relevant
Remaining Volume Notice Indicator will light up.
After the indicator lights up, printing can be continued. When the ink runs out, the INK CARTRIDGE Indicator and the car-
tridge number in which the ink runs out will light up which will cause printing to halt. When paper runs out, a message indicating
to add paper will appear in the display and will be stopped. If the indicator lights up, prepare ink cartridges or paper for replace-
ment.
"Ink Cartridge Replacement""p.3-18 "Loading Paper""p.1-11

3-3
3
FORCEJET™ Link Symbol
HC5500 Series realizes high speed printing by performing the optimum data processing and colour management with the printer
controller and adjusting print speed, paper size, paper quality, and ink quantity totally with the FORCEJET™ ENGINE. The
FORCEJET™ Link Symbol indicates whether each printing related section functions properly.
If colour management cannot be performed properly because, for example, an ink cartridge is not set, the FORCEJET™ Link
Symbol goes out. At this time, check the status of consumables and settings.
Error Message and Error Number
#
##
#Error Number
Under a message in the display, an error number that consists of alphanumeric characters is displayed. The first letter of the
error number indicates the error type.
The number of digits in relation to error number depends on the error location.
Example of Error
Number
Description
S00-000 System Error Displayed when inspection or repair by service personnel is
required.
Contact your local dealer (or service representative).
U00-000 Unit Error Displayed when repair by service personnel is required.
Contact your local dealer (or service representative).
You can use the printer except the relevant unit by pressing the Can-
cel key.
X00-000 H00 Paper Jam Displayed when a paper jam occurs.
X00-000 F00 Paper Jam Displayed when consumables or parts to be replaced periodically
must be replaced soon.
Y00-000 Consumables Error Displayed when consumables or parts to be replaced periodically
must be replaced soon.
Z00-000 Check Settings Error Displayed when a cover or anything related is not securely closed.
W00-000 Warning Various warning messages are displayed.
M00-000 Maintenance Call Displayed when maintenance of this unit is required. Contact your
local dealer (or service representative).
3-4
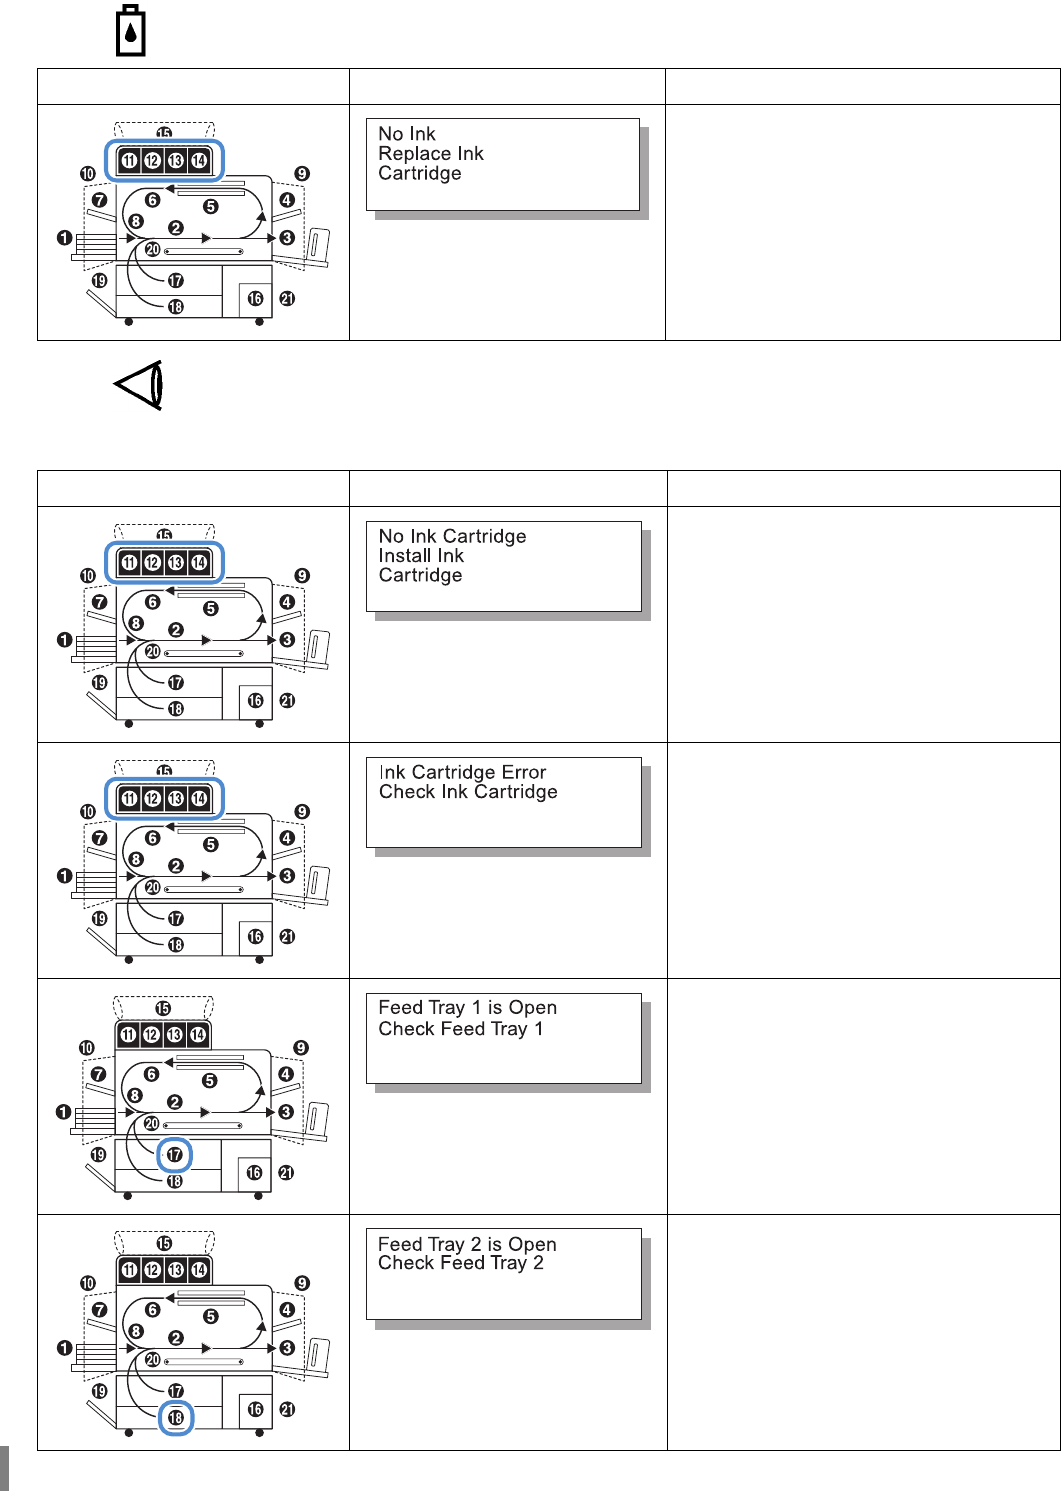
Y00-000 Ink Replacement Error
Z00-000 Check Settings Error
If a cover has not been securely closed or in situation of an ink cartridge or Feed Tray which has not been properly set. Check the
location, take proper measures, and close the cover.
Lighting location Message Solution
The supply in the ink cartridge runs out. Set a
new ink cartridge.
"p.3-18
Lighting location Message Solution
If an ink cartridge has not been properly set,
make sure to check if the cartridges are securely
inserted.
"p.3-18
If the colour of an ink cartridge is not correct or
a cartridge with a different shape has been set,
make sure to check the location and reset the
cartridge.
"p.3-18
If Feed Tray 1 has not been securely closed, be
sure to securely close it.
If Feed Tray 2 has not been securely closed, be
sure to securely close it.
3-5
3
If Standard Feed Tray has not been properly
opened, open the Standard Feed Tray properly.
If a cover has not been securely closed, make
sure to check the location indicated by an indi-
cator and close the cover securely.
HC Auto Stacker is not in place. Be sure to
attach it to the printer.
Jam Release Cover has not been securely
closed, be sure to close it.
Lighting location Message Solution

3-6
S00-000 System Error
X00-000 H00 Paper Jam Error
X00-000 F00 Paper Jam Error
This indication is displayed only if an optional Finisher is connected.
Lighting location Message Solution
(Nothing is lit.) An error occurs in the printer. If the same mes-
sage appears even when the power is turned off
and then on again, contact your local dealer (or
service representative).
At this time, report also the error number indi-
cated in the Message Display.
"p.3-3
Lighting location Message Solution
If there’s a paper jam in the printer, paper mis-
feed or paper double feed occurs, be sure to check
the location indicated by the indicator and
remove the paper.
"p.3-9
Lighting location Message Solution
A paper jam occurs in the optional Finisher.
Check the indicated jam location and remove the
paper.
For details, HC Finisher: Refer to "HC Finisher
Maintenance Guide".
HC Auto Stacker: Refer to the "p.3-17 in this
Guide.
3-7
3
M00-000 Maintenance Call
W00-000 Warning
Lighting location Message Solution
The Ink Drain Tank is almost full. Contact your
local dealer (or service representative).
(Nothing is lit.) (No message.) When the Maintenance Call Indicator lights up,
periodical maintenance is required. Contact your
local dealer (or service representative).
(Nothing is lit.) No colour profile corresponding to the installed
ink is provided. Contact your dealer (or service
representative).
When the Maintenance Call Indicator lights up
and the message left is displayed, contact your
dealer ( or service representative).
Lighting location Message Solution
If paper or separation paper runs out, be sure to
load more paper.
"Loading Paper""p.1-11
Paper in the Interposer Tray has run out or paper
that matches the size specified from the printer
driver is not loaded. Load the paper.
3-8
If the guides in the Auto Stacking Tray are not
properly set, make sure to check the Auto Stack-
ing Tray.
Paper is jammed in the HC Auto Stacker. Open
the Jam Release Cover to remove paper. Press the
Cancel Key on the printer after removing jammed
paper."p.3-17
Paper ejected onto the Shift Tray of the HC Auto
Stacker exceeded the capacity of the tray.
Remove paper from the Shift Tray. Open the Jam
Release Cover once and then press the Cancel
Key on the printer.
(Nothing is lit.) The hard disk in the controller section is full.
Check the data in the hard disk (such as storage
data) and delete unnecessary jobs.
(Nothing is lit.) The system requires cleaning. Carry out the nor-
mal cleaning.
(Nothing is lit.) There is no paper in any of the Feed Trays and the
Standard Paper Feed Tray that corresponds to the
paper size and type specified from the printer
driver. After loading paper, specify the relevant
Feed Tray using "Menu 6 Feed Tray Selection"
from the Operation Panel of the printer.
"Although paper is set, "No Paper" error can
occur." "p.3-22
(Nothing is lit.) With "Paper Feed Control," "Envelope" is set for
the tray to which duplex printing or facedown out-
put is specified by the printer driver. Change the
setting of Paper Feed Control or the printer driver.
"Menu 6 Feed Tray Selection" "p.2-54
"4.1.2 Paper Type" "p.2-20
(Nothing is lit.) For duplex printing, different paper sizes are set
for the front page and the back page. Set the same
size for both the front and back pages.
Lighting location Message Solution
3-9
3
Paper jam occurs
If a paper jam occurs in the printer or paper is not fed, printing stops, the JAM indicator, and the number indicating the jam loca-
tion will light up. In this case, remove the jammed paper and press the PRINT/PAUSE Key, printing will resume.
Since this unit performs high speed printing, paper jams may occur at multiple locations. In this case, remove all the jammed paper.
If an optional HC Finisher is connected and a paper jam occurs in the HC Finisher (21 on the Operation Panel is lit), refer to "HC Finisher
Maintenance Guide."
!
When removing jammed paper, take care not to leave pieces of paper inside the printer.
#
##
#Paper Jam Location
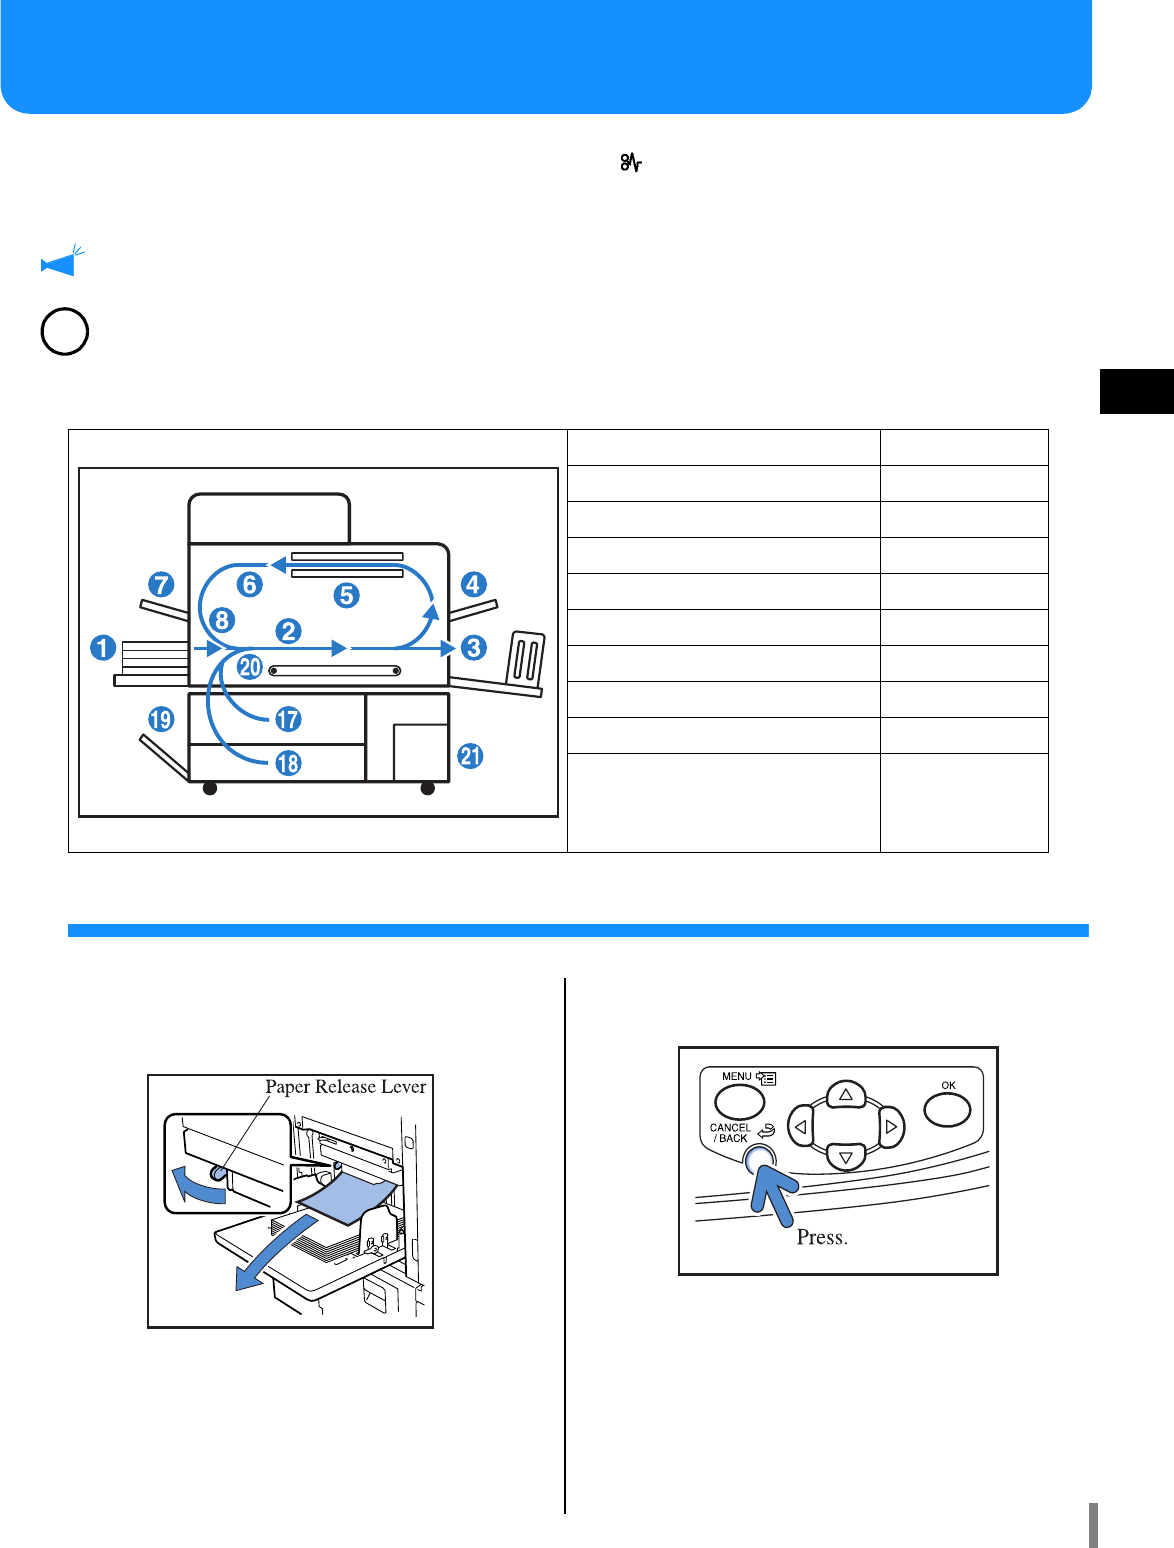
Details of the indicated locations are shown below. For detailed procedure, refer to the respective indicated page.
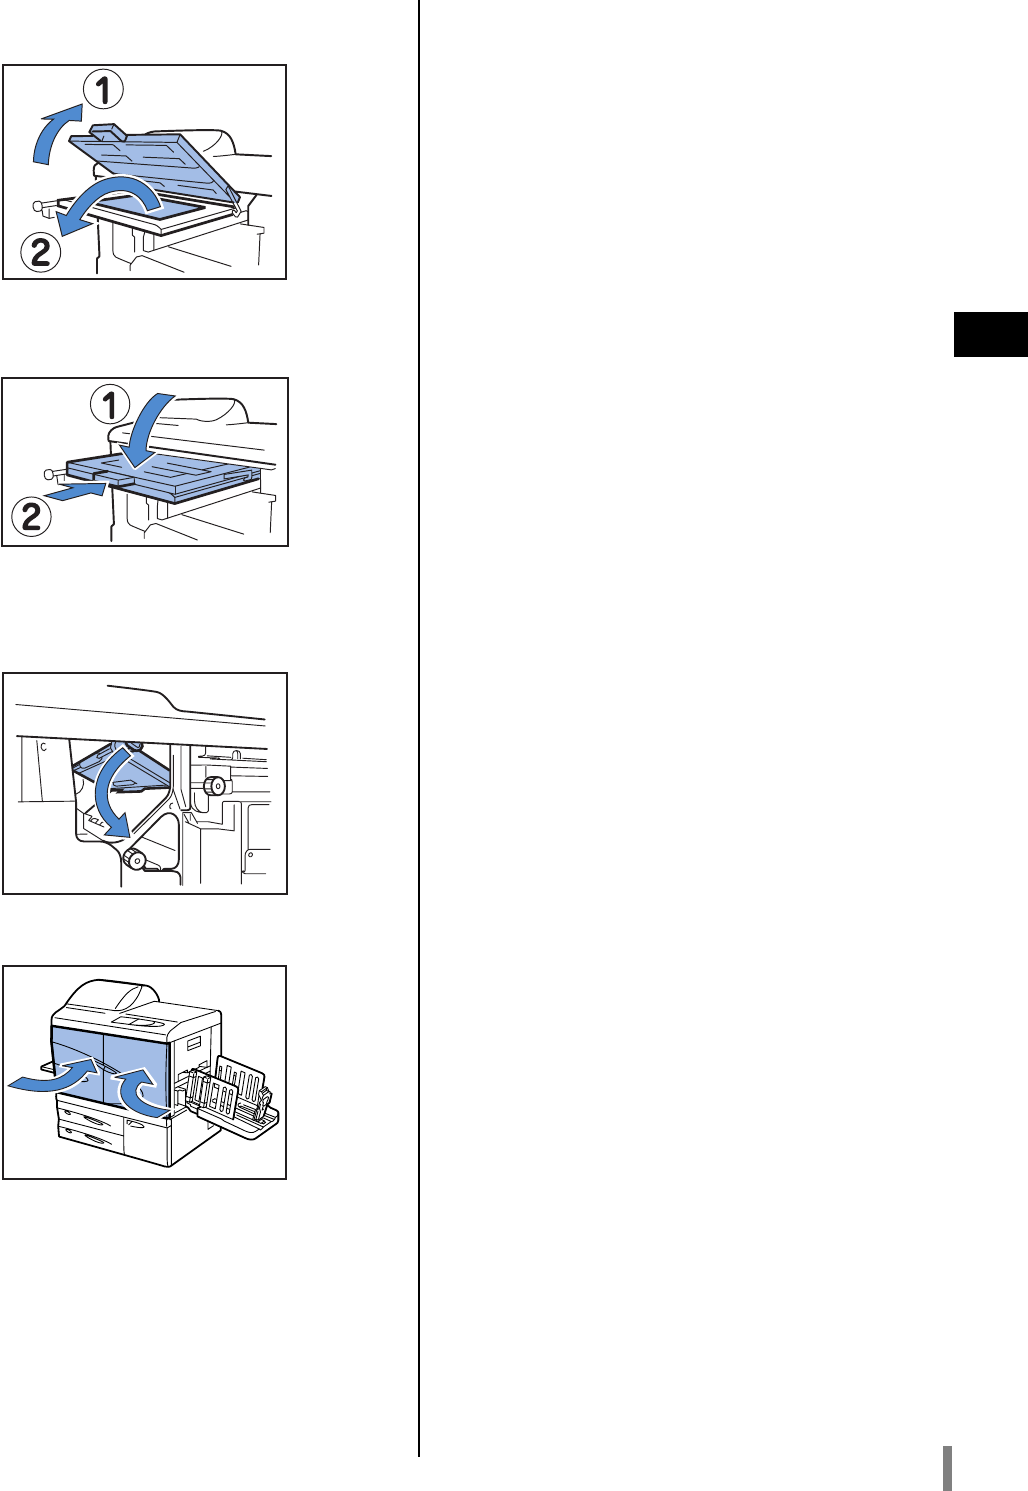
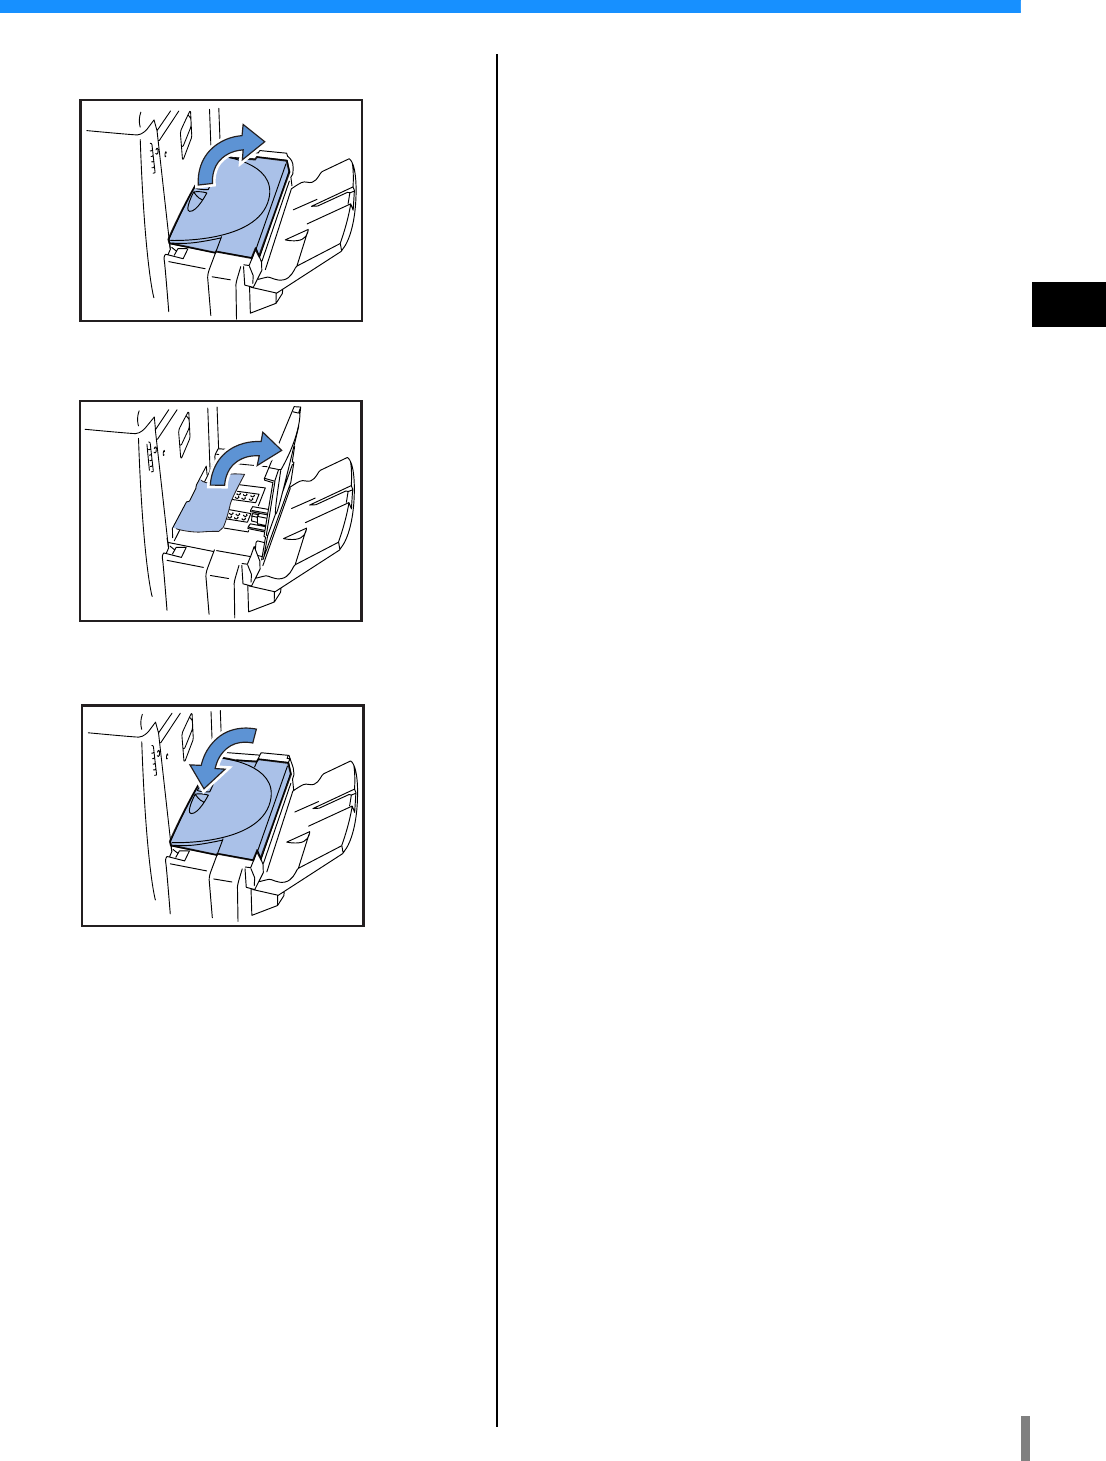
(1) Paper Jam in the Standard Paper Feed Tray
1 While pressing the Paper Release
Lever on the paper feed side to the
left, remove the paper.
2 Press the CANCEL/
//
/ BACK Key.
The paper jam error is cleared.
Jam location Page referred to
(1) Standard Paper Feed Tray "p.3-9
(2)On Transfer Roller "p.3-10
(3) Paper Receiving Section "p.3-10
(4) Right of Transfer Unit "p.3-11
(5) Duplex Transfer Unit "p.3-12
(6)(7)(8) Left of Transfer Unit "p.3-14
(17)(18)(19) Paper Feed Tray 1 or 2 "p.3-15
(20) Transfer Unit "p.3-16
(21) HC Auto Stacker "p.3-17
3-10
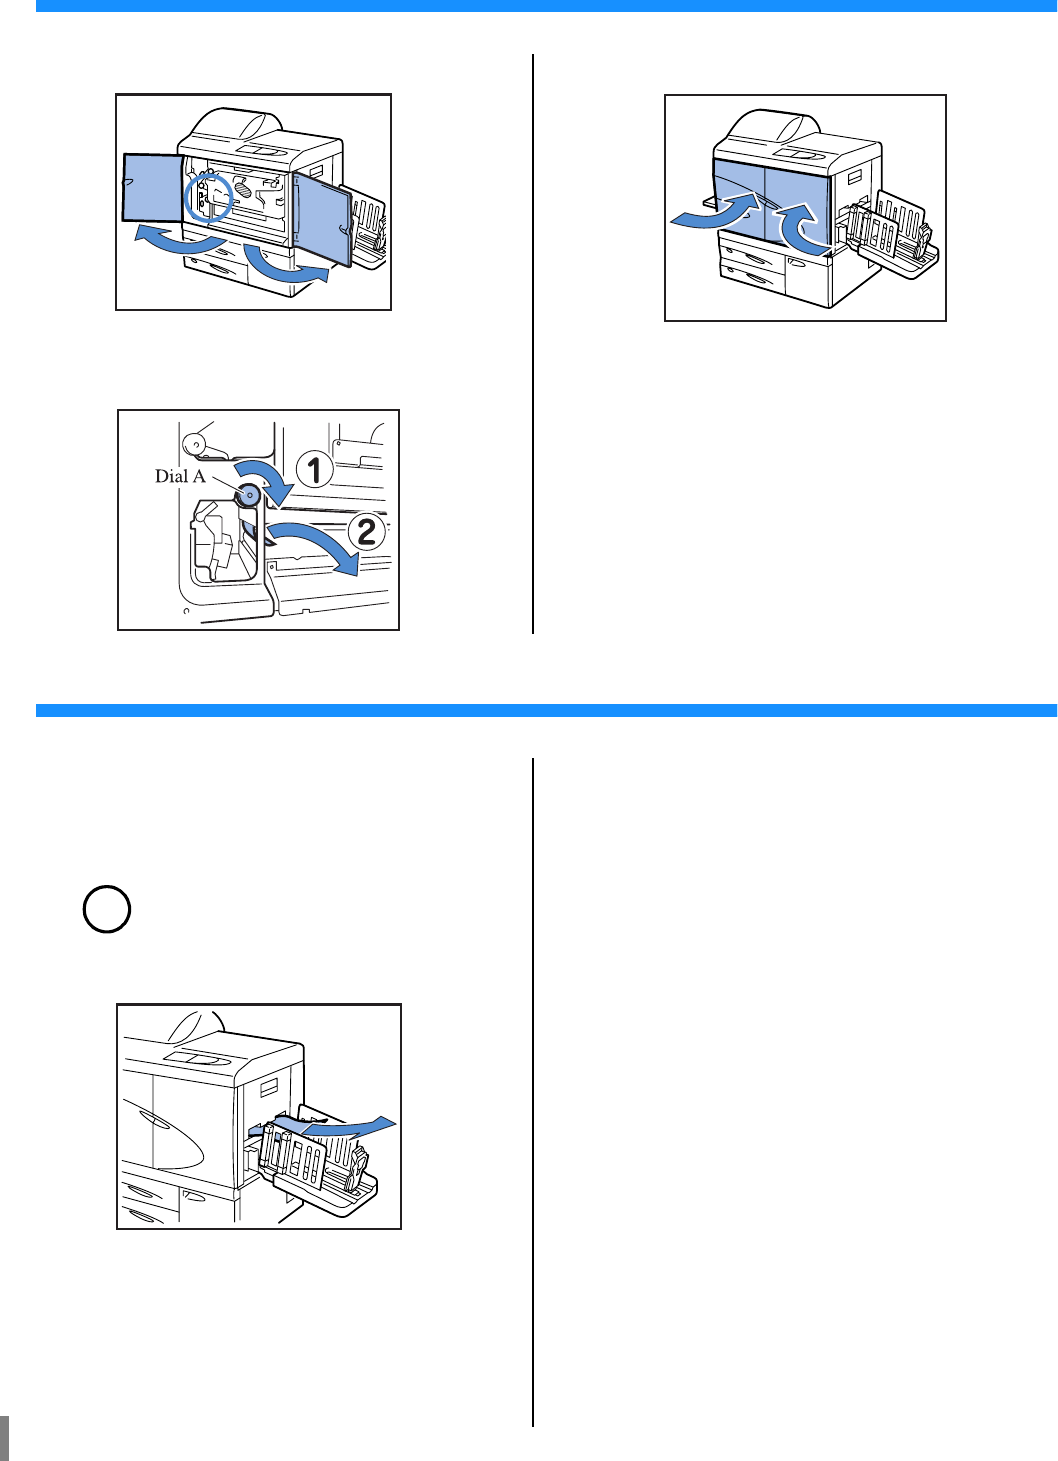
(2) Paper Jam on the Transfer Roller
1 Open the Front Cover.
2 Turn Dial A and remove the paper
from the Transfer Roller side.
3 Close the Front Cover.
(3) Paper Jam in the Paper Receiving Section
1 Pull out the jammed paper and
remove it.
Pull out the jammed paper from the side of the Paper
Receiving Tray.
!
If it is not easy to pull out, do not pull it forc-
ibly because the paper might be torn.
Open the Front Cover and remove the
paper from the side of the Transfer Roller.
3-11
3
(4)Paper Jam in the Right of the Transfer Unit
1 Open the Right Transfer Path Cover.
2 Remove the paper.
3 Close the Right Transfer Path Cover.
When the HC Auto Stacker is connected.
1 While pressing the Release Lever,
pull the Auto Stacker to the side.
2 Open the Right Transfer Path Cover.
3 Remove the jammed paper.
4 Close the Right Transfer Path Cover.
3-12
5 Return the Auto Stacker to its original
position.
(5)Paper Jam in the Duplex Transfer Unit
1 Open the Front Cover.
2 Lift the tab at the left side of the
Reversing Path Cover and lock it.
3 Turn Dial B.
If the paper is removed, proceed to step 7.
!
Turn Dial B several times to check to see if
any paper remains.
Multiple sheets of paper may have
jammed.
Turn the dial repeatedly until no paper can
be removed.
4 Pull out the Duplex Transfer Unit.
3-13
3
5 Open the unit and check inside.
If paper remains, remove it.
6 Return the Duplex Transfer Unit to its
original position.
7 Return the tab at the left of the
Reversing Path Cover to its original
position.
8 Close the Front Cover.
3-14
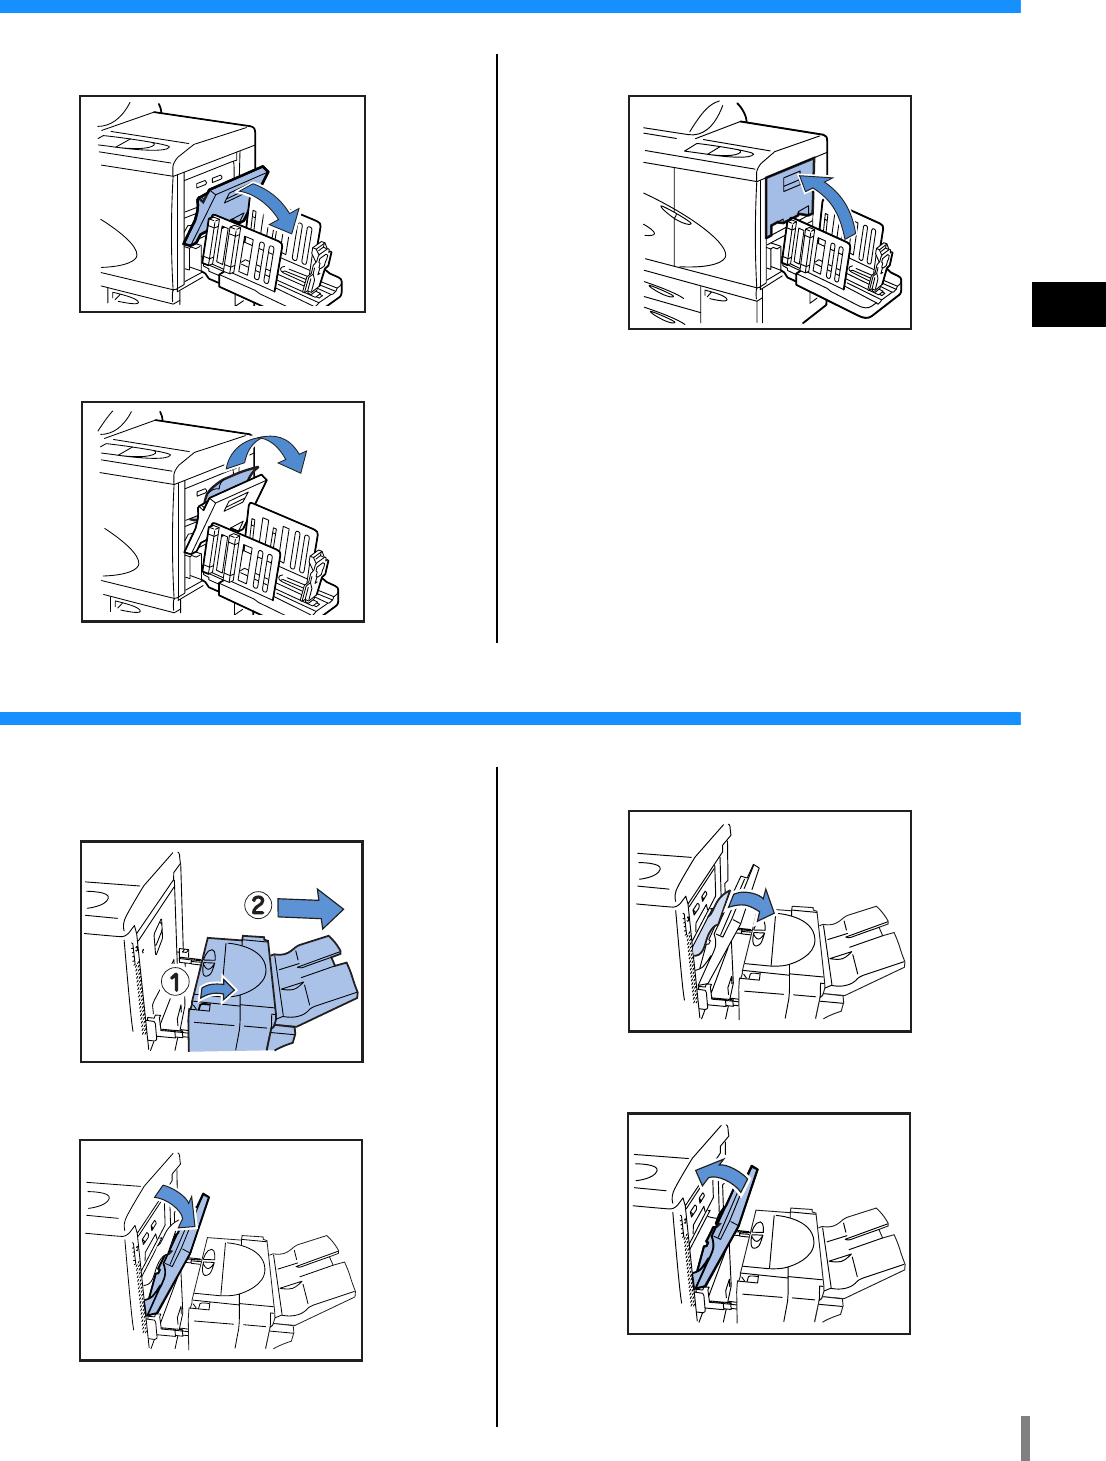
(6)(7)(8) Paper Jam in the Left of the Transfer Unit
1 Open the Front Cover.
2 Lift the tab at the left side of the
Reversing Path Cover and lock it.
3 While turning Dial B in the direction
indicated by the arrow, remove the
paper.
4 If the paper cannot be removed, open
the Left Transfer Path Cover and
remove the paper.
5 If the paper cannot be removed, while
turning Dial C in the direction indi-
cated by the arrow, remove the paper.
6 Return the tab at the left of the
Reversing Path Cover to its original
position.
7 Close the Front Cover.
3-15
3
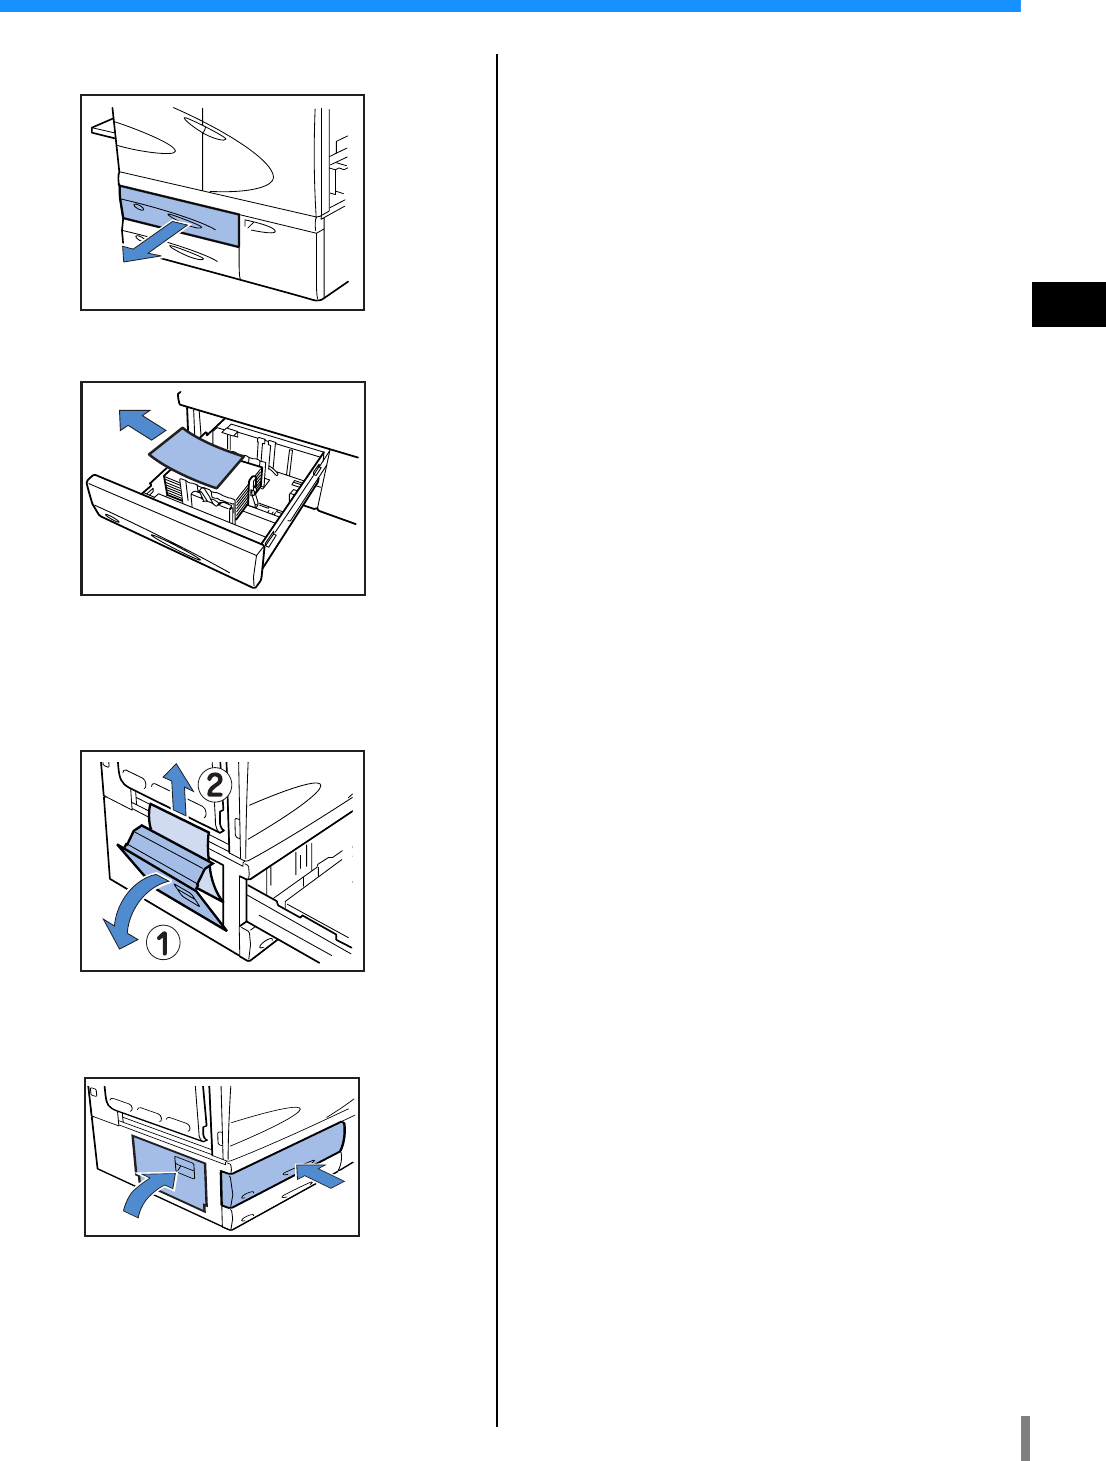
(17)(18)(19) Paper Jam in Paper Feed Tray 1/
//
/ Paper Feed Tray 2
1 Pull out the Feed Tray.
2 Remove the jammed paper.
3 If the paper cannot be removed, open
the Transfer section door at the left
side of the Feed Tray and remove the
paper.
4 Close the door and return the Feed
Tray.
3-16
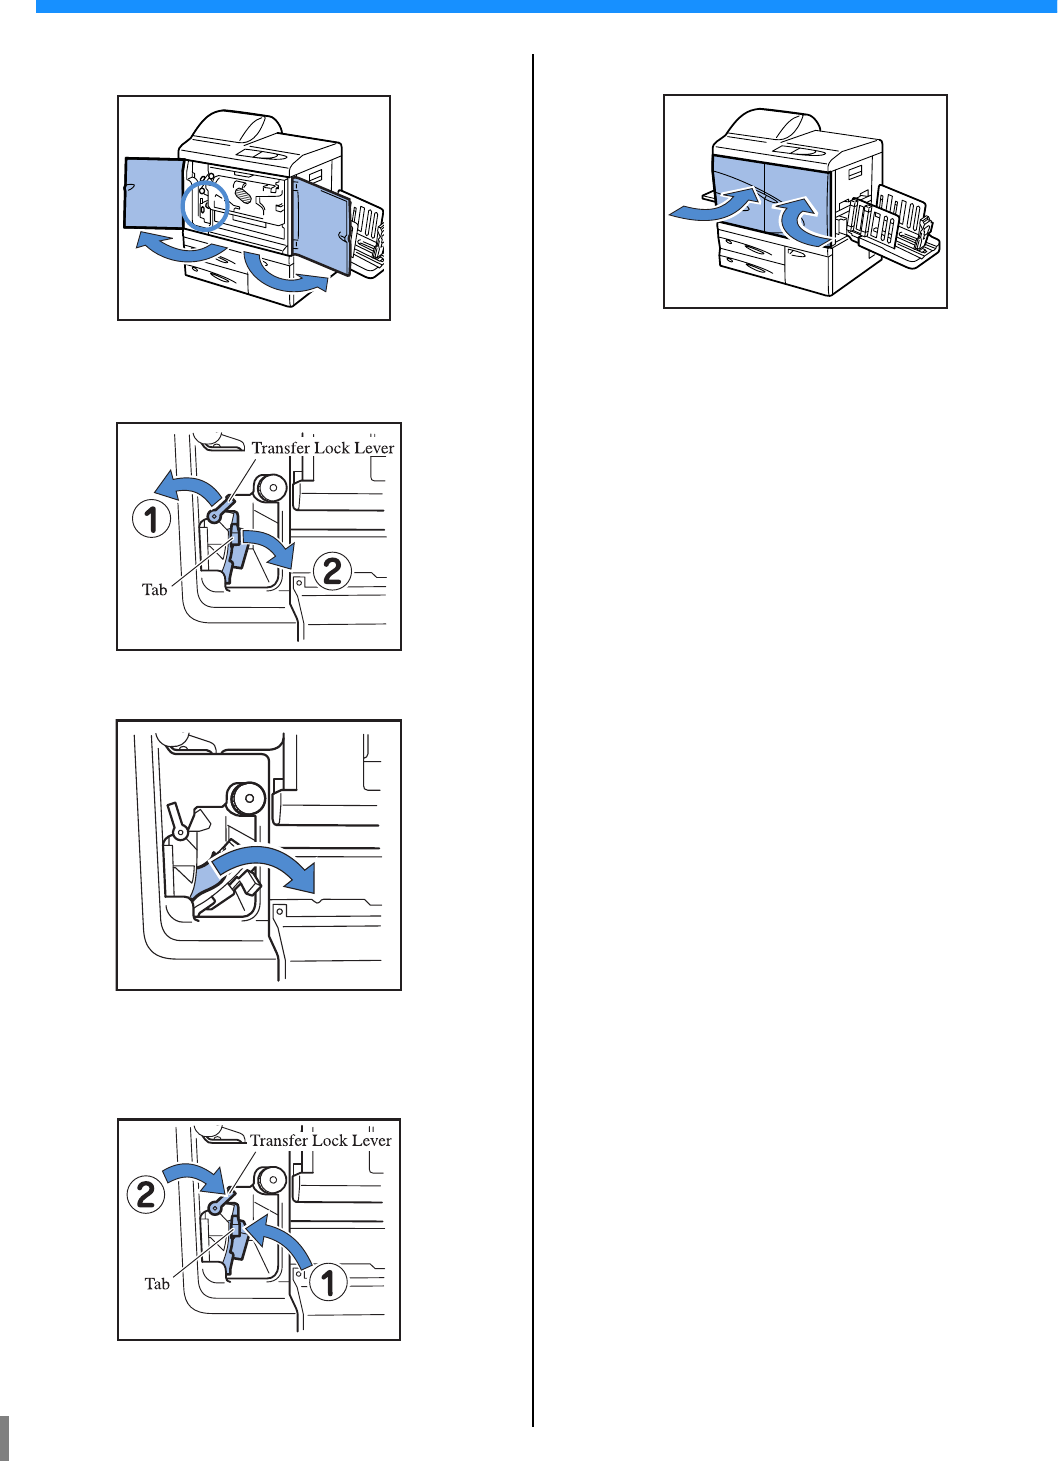
(20) Paper Jam in the Transfer Unit
1 Open the Front Cover.
2 Turn the Transfer Lock Lever to the
left and turn down the tab to the right.
3 Remove the jammed paper.
4 Return the tab to its original position
and turn the Transfer Lock Lever to
the right.
5 Close the Front Cover.
3-17
3
(21) Paper Jam in HC Auto Stacker (option)
1 Open the Jam Release Cover.
2 Remove the jammed paper.
3 Close the Jam Release Cover.
3-18
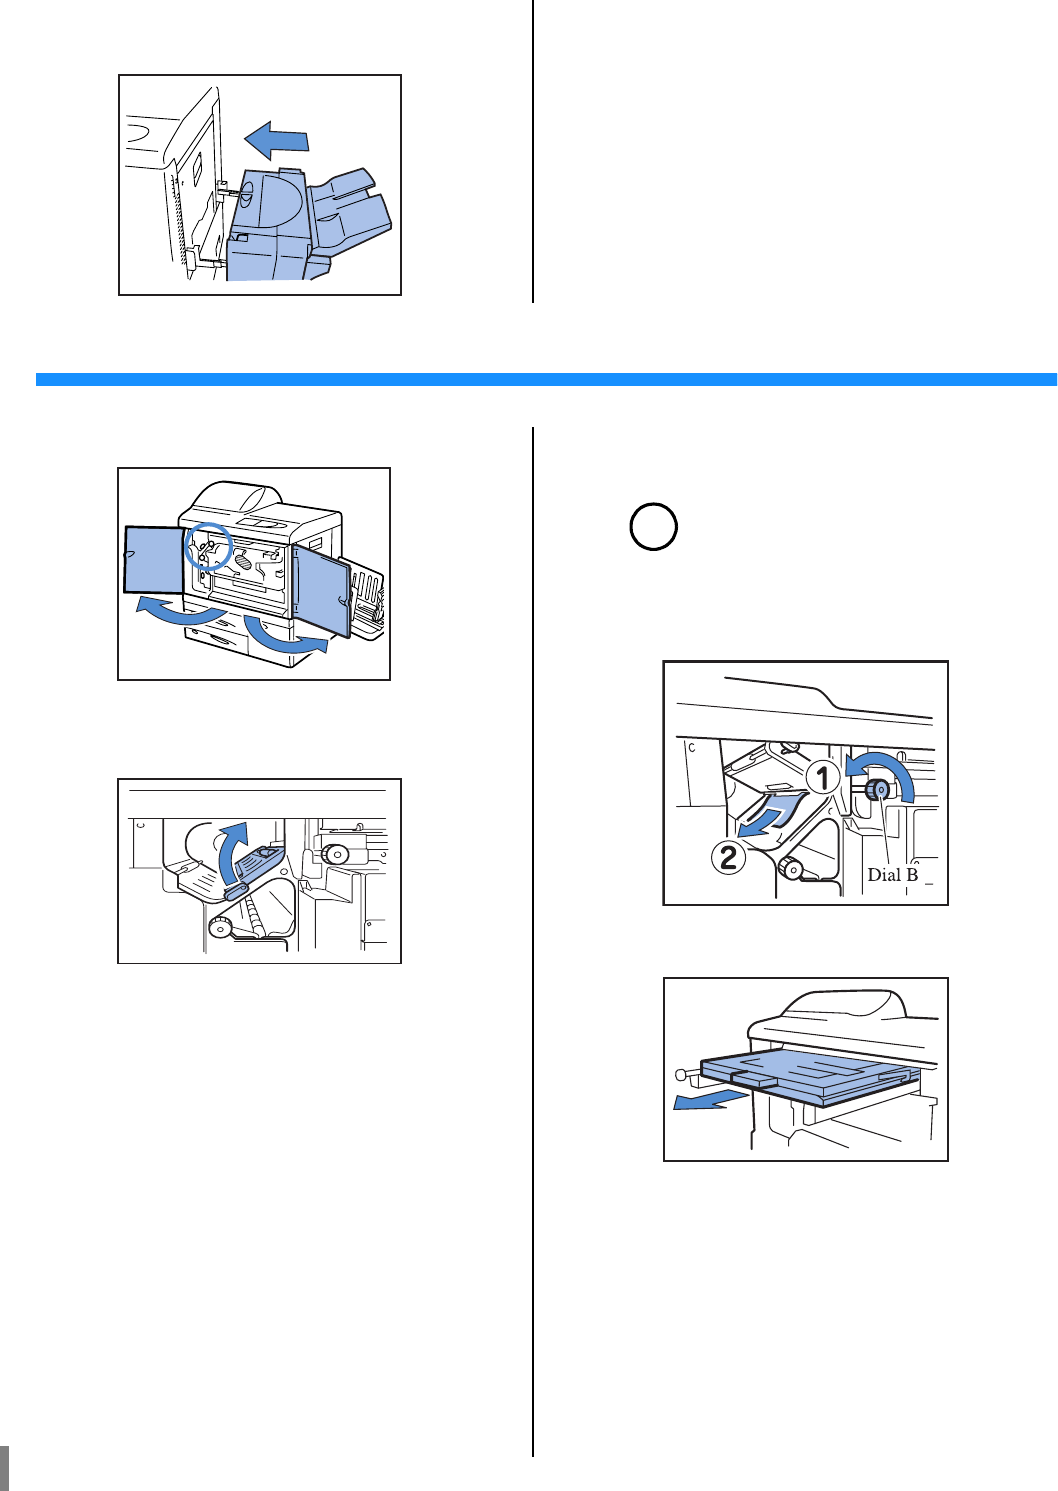
Ink Cartridge Replacement
If ink runs out, the INK CARTRIDGE indicator and the indicator that shows the location of the empty cartridge will light up, print-
ing will be halted. Be sure to check the colour of the Ink Cartridge and replace it.
Ink Cartridge
This section describes the notes in handling an Ink Cartridge. Handling of Ink Cartridge is also described in "Safety Precautions"
("p.v) and "Before Starting to Use" ("p.vii, p.viii). Read also the description on these pages.
CAUTION
!
Ink may be stuck to the ink feed opening. Be careful not to touch it with your hands or clothes. If your hands
are stained with the ink, wash it off immediately with a detergent. If ink gets into your eyes, flush it out imme-
diately with plenty of water.
!
•Be sure to use dedicated ink specified by our company. Otherwise, a failure or trouble might occur.
•Do not remove the Ink Cartridge until the INK CARTRIDGE indicator lights up.
•Do not shake or drop the Ink Cartridge.
•Do not keep the Ink Cartridge with its nozzle downward.
•When replacing an ink cartridge, do not leave the printer with an ink cartridge removed. A failure might occur.
•Do not shake the Ink Cartridge. If the cartridge is shaken, air bubbles are generated and ink may not be dis-
charged properly, resulting in blurred printing.
•Do not remove the caps(white) from the ink feed opening
and the air intake.
•Do not add ink into the Ink Cartridge.
•Use as soon as possible after purchase to maintain optimum print quality.
Black (K)
Cyan (C)
Magenta (M)
Yellow (Y)
3-19
3
<Used Ink Cartridge>
•Do not release the ink left in the cartridge into a sewer or personal disposal unit.
•Used Ink Cartridges are collected by a service representative. After use is complete, attach the cap and put
the cartridge into the inner bag and packing material.
When attaching the cap or packing, be sure to hold the Ink Cartridge with the cap up. Caution : Do not turn
the Ink Cartidge upside down.
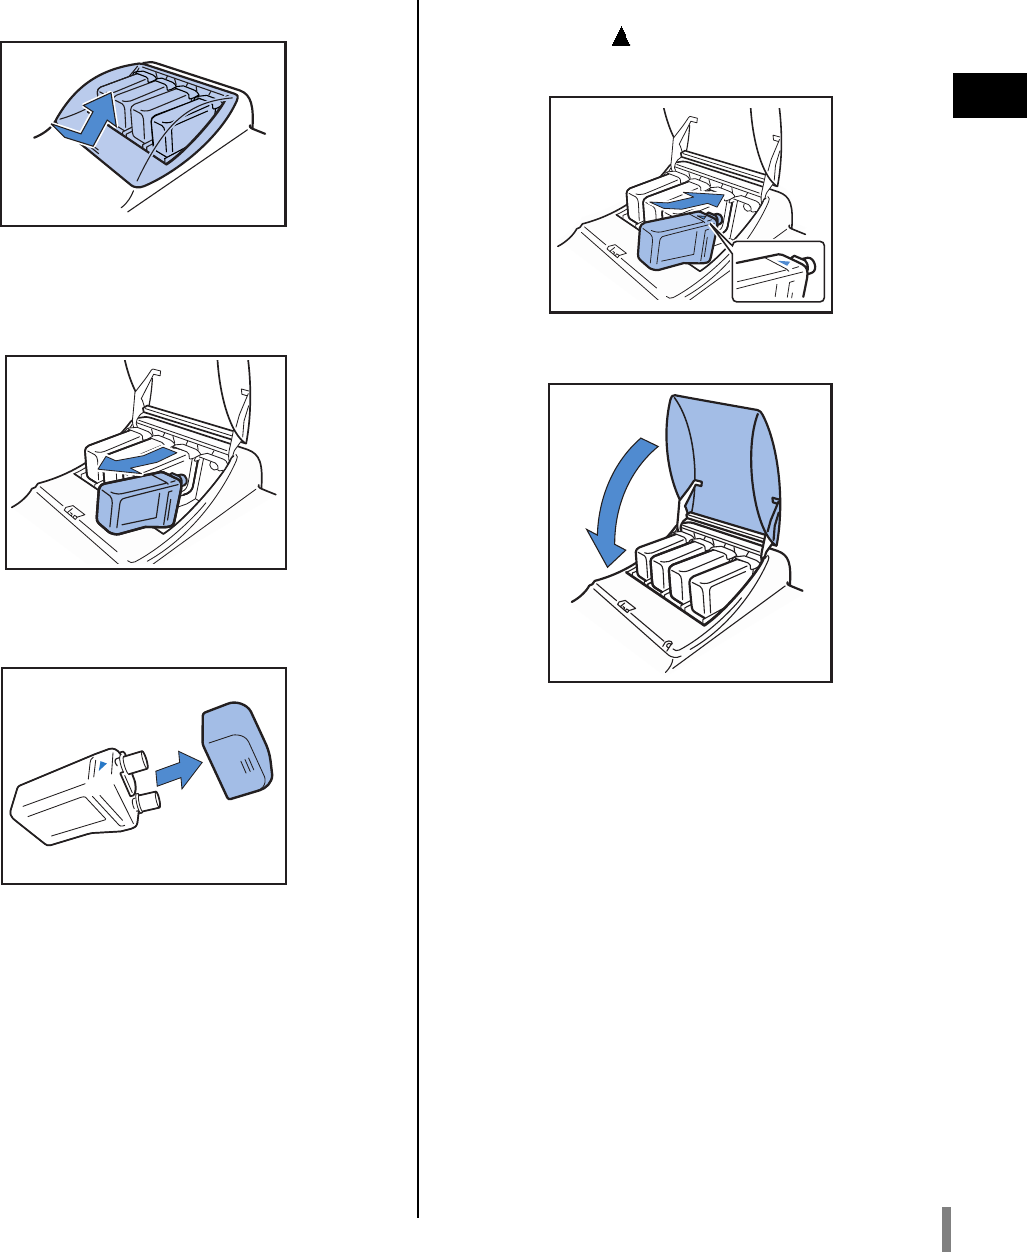
As an example, procedure for replacing the Yellow (Y) Ink Cartridge ((14) is light) is described.
1 Open the Ink Cover.
2 While lifting the Ink Cartridge to be
replaced, pull it toward the front side
and remove it.
3 Remove the cap from the new Ink Car-
tridge.
4 Hold the surface of the Ink Cartridge
with the mark up and insert the car-
tridge until it stops.
5 Close the Ink Cover.

3-20
Other Trouble
The printer does not operate.
In addition, try the following operation. If the printer does not operate even after this operation, contact your local dealer or our
company.
•Turn off the printer and then on again.
•Restart the computer that is connected to the printer.
Problem Cause and Solution
Even if the power is turned on, nothing
appears on the Operation Panel.
Be sure to check the following.
•If the power plug is inserted into the outlet.
•If the power cord is securely connected to the unit.
•If the circuit breaker of the mains is disconnected.
•If the main power switch is turned on. If not, turn on the main power switch and
then press the Power Key on the Operation Panel.
Test print is normally output but data
from a computer cannot be properly
printed.
Make sure to check the network setting and the IP address setting before installing the
printer driver again.
•If a file of the programme or application software seems not normal, print from
another file or other application software. If printing from certain file or applica-
tion software is impossible, be sure to check the print setting of the application
software.
•Use the printer driver of the latest version.
For the latest version, contact your local dealer or service representative.
3-21
3
The printer does not operate according to the setting.
Printing is not clean.
Problem Cause and Solution
"Job separation" is set in the printer
driver screen but job separation cannot
be performed.
"Separation Paper" is set to "OFF" in the menu setting.
If "5.3 Separation Paper" of the menu setting is set to "OFF," job separation paper
is not inserted. (If "OFF" is set, printing stops for a few seconds at the time of sepa-
ration.)
To insert job separation paper, select the desired tray at "5.3 Separation Paper" of the
menu setting.
"4.6 Job Separation" "p.2-23
"5.3 Separation Paper""p.2-36
Unable to print onto paper in the Stan-
dard Feed Tray.
The Standard Feed Tray is not set as a tray for "Auto tray selection."
Set "4.5 Triple-Tray Source" of the menu setting.
"4.5 Triple-Tray Source""p.2-22
Alternatively, set "6 Feed Tray Selection" of the menu setting to "Standard Feed
Tray." "Menu 6 Feed Tray Selection""p.2-54
Problem Cause and Solution
Printed image is light or blurred. Type of paper loaded for a Feed Tray (or the Standard Feed Tray) is not correct.
Load the correct paper type at [Paper Type] of the menu setting.
Print density setting is light.
In the printer driver screen or the printer menu setting, set darker print density.
"Prinr density" of "HC5500 User’s Manual for Printer Driver""p.2-24
When setting in the printer menu setting: "p.2-24
The print head is clogged.
Perform "Normal Cleaning" from the menu setting.
If the problem cannot be solved with the method above, specify particularly the
head of a lighter colour and perform "Hyper-Cleaning."
"5.5 Head Maintenance""p.2-40
Printed image is too dark. Type of paper loaded for a Feed Tray (or Standard Feed Tray) is not correct.
Load the correct paper type at [Paper Type] of the menu setting.
White stripes appear on images. The print head is clogged.
First, perform "Normal Cleaning" from the menu setting.
If the problem cannot be solved even if normal cleaning is performed several times,
perform "Head Recovery."
"5.5 Head Maintenance""p.2-40
"5.8.50 Head Recovery""p.2-53
Paper is stained. Paper that cannot be used is loaded.
Check the paper types that can be loaded in the Standard Feed Tray and the other
Feed Trays.
"Usable Paper""p.1-7
Edge of paper is stained. Curled paper is used.
The curled portion hits the print head and is stained. Since the print head may be
damaged, do not use curled paper.
Performing duplex printing
Note that the edges of paper may be stained depending on the original.
3-22
Others
Problem Cause and Solution
Print speed is too low. The guides in the Standard Feed Tray (Feed Tray) do not fit the paper width.
The paper size is judged based upon the guide positions, and print speed depends on
specifications of paper size. Adjust the stack guides securely to the width of the
paper.
A paper jam occurs each time printing is
performed.
Too much paper is loaded in the Standard Feed Tray or other Feed Trays.
When the maximum number of sheets of paper that can be loaded in the Standard
Feed Tray or other Feed Trays is exceeded for the number of paper that can be
loaded. Please refer to "Loading Paper""p.1-11.
Paper is not loaded properly.
Check the Stack Guide positions. For proper paper loading, refer to "Loading
Paper""p.1-11.
Paper that cannot be used is loaded.
Check the paper types that can be loaded in the Standard Feed Tray and the other
Feed Trays. Do not use particularly wrinkled or curled paper because it may cause
a paper jam.
"Usable Paper""p.1-7
Non-standard size paper is used.
When loading non-standard size paper, you must register the size at "5.1 Paper
Size Entry" and "5.2 Paper Type Entry" of the menu setting in advance.
"5.1 Paper Size Entry""p.2-32
"5.2 Paper Type Entry""p.2-33
•There’s too much paper powder.
•Double feed occurs.
•Thick paper such as postcard is mis-
fed.
•The back surface of thick paper such as
postcard is peeled off.
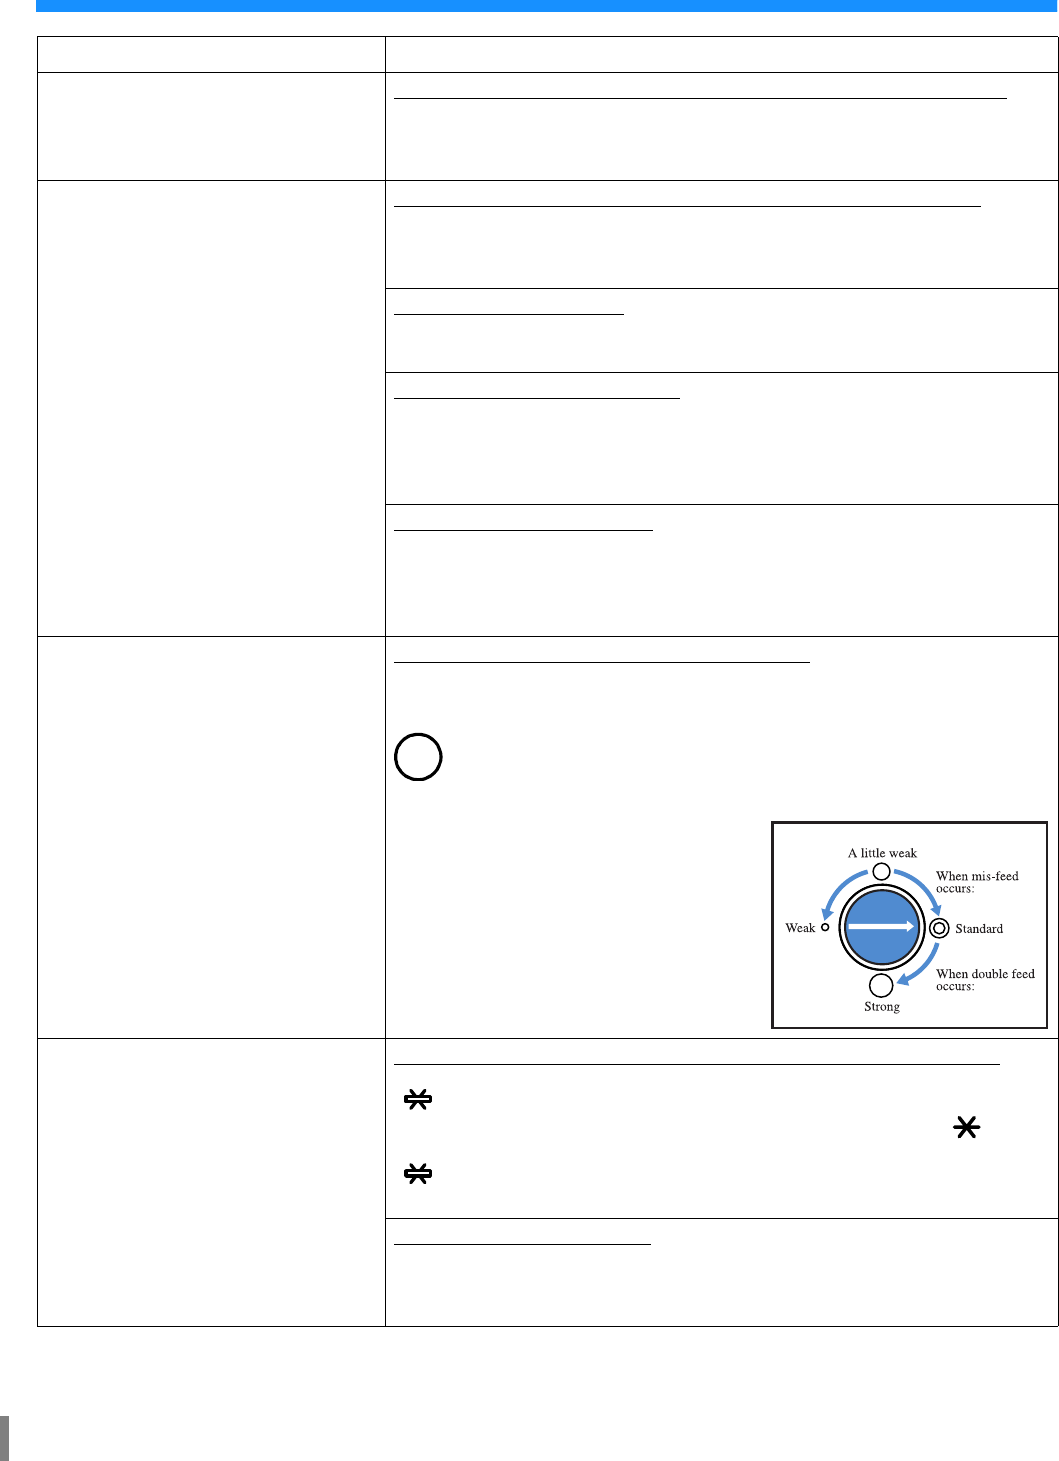
The paper stripper pressure is not properly adjusted.
Use a coin to turn the Paper Stripper Dial located in the paper feed side to adjust the
pressure.
!
Before starting adjustment, be sure to remove the paper from the
Standard Feed Tray and check that the tray lowers to the lowermost
position.
•If there’s too much paper powder, paper is
mis-fed or the back side of postcard curls
up, turn the dial counterclockwise.
•If double feed occurs, turn the dial clock-
wise.
Paper is not fed at all. The Paper Feed Pressure Adjustment Lever does not fit the paper thickness.
When using thick paper, set the Paper Feed Pressure Adjustment Lever to the
" (CARD)" position.
When printing onto paper other than thick paper, set the lever to the " (NOR-
MAL)" position. If paper mis-feed occurs frequently, however, set the lever to the
" (CARD)" position.
"Paper Feed Pressure in Standard Paper Feed Tray""p.1-14
Paper feed control is not proper.
Change the paper feed control set in the Standard Feed Tray or other Feed Trays at
"5.2 Paper Type Entry" of the menu setting.
"5.2 Paper Type Entry""p.2-33
3-23
3
Although paper is set, "No Paper" error
can occur.
[Paper size] and [Paper type] set in the printer driver screen do not match those in
the menu setting on the printer.
Even if proper paper is loaded in the feed tray, if the settings of "Paper Size" and
"Paper Type" of the menu setting on the printer are not correct, "No Paper" error
occurs. Set the conditions of the feed tray according to the paper in the feed tray.
Alternatively, a condition is set at "Tray selection Rule." Ensure that the paper
placed in the tray matches the condition of the tray setting.
"Configuration 4.1/4.2/4.3" "p.2-19
"5.8.17 Tray Selection Rule" "p.2-51
Press the Cancel/Back key to display the output paper size at the lower left of the
operation panel. Check the size and set paper of the correct size or specify the
proper tray from the operation panel of the printer to perform printing. If you spec-
ify the Feed Tray on the Operation Panel of the printer, printing can be performed.
"Menu 6 Feed Tray Selection" "p.2-54
The selected tray is set for "Separation Paper."
Set "5.3 Separation Paper" of the menu setting to "OFF."
"5.3 Separation Paper" "p.2-36
The Standard Feed Tray is not a feed tray for auto feed tray selection.
If "4.5 Triple-Tray Source" is set to "ON", the Standard Feed Tray is included into
feed trays for selection when "Auto feed tray selection" is selected in "Paper feed
tray" of the printer driver.
"4.5 Triple-Tray Source" "p.2-22
Problem Cause and Solution

3-24

4-1
Chapter4 Appendix

4-2
List of Options
A variety of options are available for convenient use of this unit. For purchase, contact your dealer (or service representative) for
inquiry.
RISO Scanner HS2000
By connecting a scanner and a display monitor (products specified by our company), you can perform high-speed full-colour
printer copies.
Finisher Functions
By connecting an HC Finisher to this machine, you can perform automatically postprocessing of printing such as stapling,
punching, booklet creation at a high speed.
HC Auto Stacker
This device provides only “Offset” position ejection at each set. But it is smaller and simpler than HC Finisher.
(As of January 2006)
4-3
Consumables
•Note that specifications and types of consumables are subject to change without prior notice.
•For the price, contact your local dealer (or service representative) for inquiry.
Ink Cartridge
!
Use ink cartridges specifications as directed by our company. Do not use other products because use of
improper consumables may cause a failure or trouble.
Colour Quantity Unit
RISO HC Ink Cyan
NET. 1,000ml 1 piece
RISO HC Ink Magenta
RISO HC Ink Yellow
RISO HC Ink Black
4-4
Specifications
!
!!
!Main Body
*1 For A4/85g/m2 (22.6-lb bond)
*2 When printing onto an envelope, a margin of 10 mm width is made.
*3 The printer is in the print mode but is not printing (at 20°C).
*4 Consumables and controller are not included.
Print Type Line Type Ink Jet System
Resolution Normal: 600 dpi or equivalent
Fine: 900 dpi or equivalent (Line Smoothing: ON)
Print Head Piezo type, Physical Resolution 300 dpi, 8 Gradation
Ink Oil-based pigment type, Cyan/Magenta/Yellow/Black, 1,000ml for each
Print Speed (*1) 120 ppm, Duplex 48 ppm (A4, Landscape, Normal mode)
Duplex Printing Standard
Printer Collate Standard
Paper Size Paper Feed Tray: Max. A3 (297mm × 432mm)/Ledger(11" × 17")
Min. 182mm × 182mm (73/16" × 73/16")
Standard Paper Feed Tray: Max. 340mm × 550mm (133/8" × 215/8")
Min. 90mm × 148mm (39/16" × 513/16")
Paper Weight Paper Feed Tray: 52g/m2 to 104g/m2 (14-lb bond to 28-lb bond) paper
Standard Paper Feed Tray: 46g/m2 to 210g/m2 (12-lb bond to 56-lb bond) paper
Printable Area Max. 314mm × 458mm (123/8" × 185/16") (margin width of 1mm (0.04"))
Guaranteed Print Area (*2) Min. 80mm × 138mm (31/8" × 57/16") (margin width of 5mm (3/16"))
Max. 306mm × 450mm (121/16" × 173/4") (margin width of 5mm (3/16"))
Feed Tray Capacity (*1) Paper Feed Tray 1: 1,000 sheets
Paper Feed Tray 2: 500 sheets
Standard Paper Feed Tray: 1,000 sheets
Paper Receiving Tray Capac-
ity (*1)
1,000 sheets
RISO Extended Print Func-
tion
Proof copy (set in the driver) / test print (printer) / print position adjustment (20mm (13/16") in ver-
tical and horizontal directions / adjustable in temporary data in printer) / additional print (tempo-
rary data retrieve)
Printer Memory 640MB
Power Source 100 - 240V~, 50/60Hz, 12.0 - 6.0A or more
Power Consumption Maximum: 800W or less
Ready (*3): 300W or less
Stand-by: 150W or less
Sleep mode: 20W or less
Operating Noise Operating: 68dB or less
Operating Environment Temperature: 15°C - 30°C (59°F to 86°F), Humidity: 40% - 70% (no dew condensation)
Weight Approximately 266kg (597.7lb) (including stand) (*4)
Dimensions (W × D × H) In use: 1,800mm × 695mm × 1,135mm (707/8" × 273/8 × 4411/16")
Paper Receiving Tray and Standard Feed Tray folded: 1,220mm × 695mm × 1,135mm
(48" × 273/8" × 4411/16")
4-5
!
!!
!HC AUTO STACKER (Option)
*1 When using “Offset output“ function: 131mm (53/16")
*2 For A4 / 85 g/m2 (22.6 lb bond) paper
!
!!
!Controller Section (If the RISO Controller PS7R-9000 / 5000 is installed)
Paper Size 100mm (*1) - 305mm x 148mm - 432mm (315/16" (*1) - 12" x 513/16" - 17")
Paper Weight 46 g/m2 to 210 g/m2 (12-lb bond to 56-lb bond) Paper
Tray Capacity (*2) It varies according to paper size.
Approximately 1,150 sheets for A4/B5/Letter
Approximately 500 sheets for A3/B4/Ledger/Legal
Approximately 100 sheets for Statement/Postcard/Irregular size
Operating Environment Temperature: 15°C - 30°C (59°F to 86°F), Humidity: 40% - 70% (no dew condensation)
Weight Approximately 19.9 kg (43.9 lb)
Dimensions (W x D x H) 503 mm x 530 mm x 748 mm (1913/16" × 207/8 × 297/16")
Principal Speci-
fications
Controller RISO Controller PS7R-9000 RISO Controller PS7R-5000
Printer that can be
connected
RISO HC5500T
CPU Intel® Pentium®4 3.4GHz Intel® Celeron® 2.9GHz
Memory Capacity 1024MB 256MB
HDD 160GB (user available area: 150GB) 80GB (user available area: 70GB)
User available area: Job receiving area, Storage and Form storage, Font installation area
OS Linux
Interface Ethernet / 1000Base-T, 100Base-TX, 10Base-T
Type Outside unit type
Power supply / maxi-
mum power con-
sumption
100 - 240V~, 50/60Hz, 2.5 - 1.8A or more
Maximum: 300W
Dimensions /weight
(W × D × H)
180mm × 405mm × 359mm (7" × 1515/16" × 141/8") / approximately 10kg (22lb)
PDL (page descrip-
tion language)
Adobe® PostScript®3™
Applicable protocol TCP/IP, Apple Talk®
Installed font 139 fonts
Font download (by installer supplied with font)
Applicable OS Windows 2000 (SP2 or later) / XP (SP1 or later)
MacOS9 (9.2.2), MacOSX (10.2.6 or later)
4-6
Principal Func-
tions
Colour Management "ComColor™ Standard" colour management is provided.
* Auto colour matching function based on output setting and paper setting
Pagination Multi-up (single page) / Multi-up (multi-page) / Booklet / Fold
Image Processing Gamma control: Contrast / Density
Line Smoothing
Screening: Error diffusion / Dot screen
Image Position
Adjustment
Image position can be adjusted in the vertical and horizontal directions from -20mm to
20mm (-13/16" to 13/16") on both the front and back sides.
Form Function Registration of form, Overlay Function
Paper Feed/Ejection
Processing
Auto tray selection, Duplex printing, Job separation, Printer collate, Support of HC Fin-
isher (optional), Output face setting
Clustering Job delegation (up to 4 units of controllers can be registered)
Job split (Job split limit: Number of pages / Output volume)
Sample page print Configuration, Sample image, PS font list
Security print Security code setting, Job name display setting
Web Console
Function
Monitoring Function Engine status display, Remaining volume display, Paper information display
Job Manager Func-
tion
Job status display
Job storage management
Archive management
Form management
Scan and Storage management
Custom Setting Func-
tion
Account record display, Storage of history (monthly/ daily), Head maintenance, Network
scan
Administrator Func-
tion
Network setting, Security setting, Font download, Direct output setting, Storage folder
setting, Paper size entry, Initial Setting
Applicable Browser Windows: Internet Explorer Ver. 6.0 SP1 or later / J2SE1.4.2 or later
MacOS9: Internet Explorer Ver. 5.1.6 for Mac or later / MRJ2.2.6 or later
MacOSX (10.2 - 10.3): Internet Explorer Ver. 5.2.3 for Mac or later
MacOSX (10.4 or later): Safari 2.0 or later
4-7
!
!!
!Controller Section (If the RISO Controller HC3R-5000 is installed)
Principal Specifi-
cations
Printer that can be connected RISO HC5500T
CPU Intel® Celeron® 2.9GHz
Memory Capacity 256MB
HDD 80GB (user available area: 70GB)
User available area: Job receiving area, Storage area
OS Linux
Interface Ethernet / 1000Base-T, 100Base-TX, 10Base-T
Type Outside unit type
Power supply / maximum
power consumption
100 - 240V~, 50/60Hz, 2.5 - 1.8A or more
Maximum: 300W
Dimensions / weight
(W × D × H)
180mm × 405mm × 359mm (7" × 1515/16" × 141/8") / approximately 10kg
(22lb)
PDL (page description lan-
guage)
Original PDL
Applicable protocol TCP/IP
Applicable OS Windows 2000 (SP2 or later) / XP (SP1 or later)
Principal Func-
tions
Colour Management "ComColor™ Standard" colour management is provided.
* Auto colour matching function based on output setting and paper setting
Pagination Multi-up (single page) / Multi-up (multi-page) / Booklet / Poster
Image Processing Gamma control: Contrast / Brightness / Chromaticness
Line Smoothing
Screening: Error diffusion / Dot screen
Image Position Adjustment Image position can be adjusted in the vertical and horizontal directions from -
20mm to 20mm (-13/16" to 13/16") on both the front and back sides.
Paper Feed/Ejection Pro-
cessing
Auto tray selection, Duplex printing, Job separation, Printer collate, Support of
HC Finisher (optional), Output face setting
Sample page print Configuration, Sample image
Security print Security code setting, Job name display setting
Web Console
Function
Monitoring Function Engine status display, remaining volume display, paper information display
Job Manager Function Job status display
Job storage management
Scan and Storage management
Custom Setting Function Account record display, Storage of history (monthly/ daily), Head mainte-
nance, Network scan
Administrator Function Network setting, Security setting, Direct output setting, Storage folder setting,
Initial Setting
Applicable Browser Windows: Internet Explorer Ver. 6.0 SP1 or later / J2SE1.4.2 or later

4-8
Index
A
Administration . . . . . . . . . . . . . . . . . . . . . . . . . 2-6, 2-31
Arranger . . . . . . . . . . . . . . . . . . . . . . . . . . . . . . . . . 1-16
Auto-Control Stacking Tray. . . . . . . . . . . . . . . . 1-4, 1-16
B
Basic Printing Operation . . . . . . . . . . . . . . . . . . . . 1-18
Beep Sound -Error . . . . . . . . . . . . . . . . . . . . . . 2-8, 2-50
Beep Sound -Key . . . . . . . . . . . . . . . . . . . . . . . 2-8, 2-49
Beep Sound -Status . . . . . . . . . . . . . . . . . . . . . 2-8, 2-49
Between Jobs. . . . . . . . . . . . . . . . . . . . . . . . . . . . . 2-23
Black (K) Ink Cartridge . . . . . . . . . . . . . . . . . . . . . . . 1-2
C
CANCEL/BACK Key . . . . . . . . . . . . . . . . . . . . . . . . . 2-4
Check Settings Error . . . . . . . . . . . . . . . . . . . . . . . . 3-4
Cleaning Cycle . . . . . . . . . . . . . . . . . . . . 2-7, 2-40, 2-41
Configuration . . . . . . . . . . . . . . . . . . . . . . . . . . 2-5, 2-18
Configuration Information Print . . . . . . . . . . . . 2-7, 2-42
Consumables . . . . . . . . . . . . . . . . . . . . . . . . . . . . . . 4-3
Control Panel . . . . . . . . . . . . . . . . . . . . . . . . . . . . . . 1-5
Copy Count . . . . . . . . . . . . . . . . . . . . . . . . . . . 2-7, 2-38
Count Management . . . . . . . . . . . . . . . . . . . . . 2-7, 2-37
Count Pattern . . . . . . . . . . . . . . . . . . . . . 2-7, 2-39, 2-42
Cover Sheet tray . . . . . . . . . . . . . . . . . . . . . . . . . . . 2-6
Cover Sheet Tray
(only if an HC Finisher is connected) . . . . . . . . . . . 2-30
Cursor Keys . . . . . . . . . . . . . . . . . . . . . . . . . . . . . . . 2-4
Cyan (C) Ink Cartridge . . . . . . . . . . . . . . . . . . . . . . . 1-2
D
Data indicator . . . . . . . . . . . . . . . . . . . . . . . . . . . . . . 2-2
Default gateway . . . . . . . . . . . . . . . . . . . . . . . . . . . 2-45
Description of error. . . . . . . . . . . . . . . . . . . . . . . . . . 2-3
DHCP . . . . . . . . . . . . . . . . . . . . . . . . . . . . . . . . . . . 2-45
Displayed Language. . . . . . . . . . . . . . . . . . . . . 2-8, 2-50
Double Feed Check . . . . . . . . . . . . . . . . . . . . . 2-5, 2-21
Duplex Display . . . . . . . . . . . . . . . . . . . . . . . . . . . . . 2-3
Duplex Indicator . . . . . . . . . . . . . . . . . . . . . . . . . . . . 2-2
Duplex Transfer Unit. . . . . . . . . . . . . . . . . . . . . . . . 3-12
E
Eject Wing . . . . . . . . . . . . . . . . . . . . . . . . . . . . 2-6, 2-26
End Guide . . . . . . . . . . . . . . . . . . . . . . . . . . . . . . . 1-16
Envelope . . . . . . . . . . . . . . . . . . . . . . . . . . . . . . . . 1-21
Error indicator. . . . . . . . . . . . . . . . . . . . . . . . . . . . . . 3-2
Error Message . . . . . . . . . . . . . . . . . . . . . . . . . . 3-2, 3-3
Error Number . . . . . . . . . . . . . . . . . . . . . . . . . . . 3-2, 3-3
Error number . . . . . . . . . . . . . . . . . . . . . . . . . . . . . . . 2-3
Every Division . . . . . . . . . . . . . . . . . . . . . . . . . . . . . 2-23
F
Feed Tray 1 . . . . . . . . . . . . . . . . . . . . . . 2-5, 2-19, 2-54
Feed Tray 2 . . . . . . . . . . . . . . . . . . . . . . 2-5, 2-19, 2-54
Feed Tray Descent Button . . . . . . . . . . . . . . . .1-2, 1-15
Feed Tray Paper Guide . . . . . . . . . . . . . . . . . . . . . . . 1-2
Feed Tray Relay . . . . . . . . . . . . . . . . . . . 1-15, 2-6, 2-21
Feed Tray Selection . . . . . . . . . . . . . . . . . . . . . 2-9, 2-54
Finisher Functions . . . . . . . . . . . . . . . . . . . . . . . . . . . 4-2
FORCEJET™ Link Symbol . . . . . . . . . . . . 1-5, 3-2, 3-3
Front Cover . . . . . . . . . . . . . . . . . . . . . . . . . . . . . . . . 2-2
Front Cover (left) . . . . . . . . . . . . . . . . . . . . . . . . . . . . 3-5
Front Cover (right) . . . . . . . . . . . . . . . . . . . . . . . . . . . 3-5
G
Guaranteed Print Area. . . . . . . . . . . . . . . . . . . . . . . . viii
H
HC Auto Stacker . . . . . . . . . . . . . . . . . . . . . . . 1-6, 3-17
Head Maintenance. . . . . . . . . . . . . . . . . . . . . . 2-7, 2-40
Head Recovery . . . . . . . . . . . . . . . . . . . . . . . . 2-9, 2-53
High-Quality 1 . . . . . . . . . . . . . . . . . . . . . . . . . . . . . 2-35
High-Quality 2 . . . . . . . . . . . . . . . . . . . . . . . . . . . . . 2-35
How to Close the Standard Feed Tray . . . . . . . . . . . 1-15
Hyper-Cleaning . . . . . . . . . . . . . . . . . . . . . . . . 2-7, 2-40
I
Image Area . . . . . . . . . . . . . . . . . . . . . . . . . . . . . . . . 2-6
Image Area (Maximum Print Area) . . . . . . . . . . . . . 2-29
Initial Setting . . . . . . . . . . . . . . . . . . . . . . . . . . 2-8, 2-46
Ink Cartridge . . . . . . . . . . . . . . . . . . . . . . . vii, 3-18, 4-3
Ink Cartridge Replacement . . . . . . . . . . . . . . . . . . . 3-18
Ink Cover . . . . . . . . . . . . . . . . . . . . . . . . . 1-2, 3-5, 3-19
Ink Drain Tank . . . . . . . . . . . . . . . . . . . . . . . . . . . . . . 3-7
Ink Replacement Error. . . . . . . . . . . . . . . . . . . . . . . . 3-4
Ink Unit. . . . . . . . . . . . . . . . . . . . . . . . . . . . . . . . . . . . 1-2
IP address . . . . . . . . . . . . . . . . . . . . . . . . . . . . . . . . 2-45
Items That Can Be Set from the Menu . . . . . . . . . . . 2-5
J
Job Clear . . . . . . . . . . . . . . . . . . . . . . . . . . . . . 2-9, 2-55
Job Separation. . . . . . . . . . . . . . . . . . . . . . . . . 2-6, 2-23
L
LAN cable . . . . . . . . . . . . . . . . . . . . . . . . . . . . . . . . . . x
Left Transfer Path Cover . . . . . . . . . . . . . . . . . . 1-2, 3-5

4-9
List of Options . . . . . . . . . . . . . . . . . . . . . . . . . . . . . . 4-2
Location for Installation . . . . . . . . . . . . . . . . . . . . . . iv, vi
M
Magenta (M) Ink Cartridge . . . . . . . . . . . . . . . . . . . . 1-2
Main Display . . . . . . . . . . . . . . . . . . . . . . . . . . . 1-2, 1-5
Main Power Switch . . . . . . . . . . . . . . . . . . . . . 1-4, 1-10
Mainrtenance Door . . . . . . . . . . . . . . . . . . . . . . . . . . 1-2
Maintenance Call. . . . . . . . . . . . . . . . . . . . . . . . . . . . 3-7
Maximum Print Area . . . . . . . . . . . . . . . . . . . . . . . . . . ix
Menu Auto-Shut OFF . . . . . . . . . . . . . . . . . . . 2-8, 2-52
MENU Key. . . . . . . . . . . . . . . . . . . . . . . . . . . . . . . . . 2-4
Menu name . . . . . . . . . . . . . . . . . . . . . . . . . . . . . . . . 2-2
Menu number . . . . . . . . . . . . . . . . . . . . . . . . . . . . . . 2-2
Menu Setting . . . . . . . . . . . . . . . . . . . . . . . . . . 2-7, 2-42
Menu Shut OFF Time . . . . . . . . . . . . . . . . . . . 2-9, 2-52
Message Display . . . . . . . . . . . . . . . . . . . . . . . . 1-5, 2-2
Metric/Inch Switch . . . . . . . . . . . . . . . . . . . . . . 2-8, 2-50
N
Network Configuration. . . . . . . . . . . . . . . . . . . 2-8, 2-45
Normal Cleaning . . . . . . . . . . . . . . . . . . . 2-7, 2-40, 2-41
O
OK Key . . . . . . . . . . . . . . . . . . . . . . . . . . . . . . . . . . . 2-4
Operation Environment . . . . . . . . . . . . . . . . . . . . . . . . vi
Original Size/Tray Display . . . . . . . . . . . . . . . . . . . . . 2-3
Output volume . . . . . . . . . . . . . . . . . . . . . . . . . . . . . 1-19
Overall Dimensions . . . . . . . . . . . . . . . . . . . . . . . . . . . vi
P
Paper Arranger . . . . . . . . . . . . . . . . . . . . . . . . 1-4, 1-16
Paper Ejection . . . . . . . . . . . . . . . . . . . . . . . . . 2-6, 2-25
Paper Feed Control . . . . . . . . . . . . . . . . . . . . . . . . . . . 7
Paper Feed Pressure . . . . . . . . . . . . . . . . . . . . . . . 1-14
Paper Feed Pressure Adjustment Dial . . . . . . 1-2, 3-22
Paper Feed Pressure Adjustment Lever . . . . . 1-2, 1-14
Paper Feed Tray . . . . . . . . . . . . . . . . . . . . . . . 1-2, 1-12
Paper Feed Tray 1 . . . . . . . . . . . . . . . . . . . . . . . . . . 3-15
Paper Feed Tray 2 . . . . . . . . . . . . . . . . . . . . . . . . . . 3-15
Paper Jam Error . . . . . . . . . . . . . . . . . . . . . . . . . . . . 3-6
Paper Jam in the Standard Paper Feed Tray. . . . . . . 3-9
Paper jam occurs. . . . . . . . . . . . . . . . . . . . . . . . . . . . 3-9
Paper Receiving Section . . . . . . . . . . . . . . . . . . . . 3-10
Paper Receiving Tray . . . . . . . . . . . . . . . . . . 1-16, 1-20
Paper Size. . . . . . . . . . . . . . . . . . . . 2-5, 2-6, 2-20, 2-30
Paper Size Display . . . . . . . . . . . . . . . . . . . . . . . . . . 2-2
Paper Size Entry . . . . . . . . . . . . . . . . . . . . . . . 2-6, 2-32
Paper Top Guide . . . . . . . . . . . . . . . . . . . . . . . . . . . 1-12
Paper Type . . . . . . . . . . . . . . . . . . . 2-5, 2-7, 2-20, 2-34
Paper Type Entry. . . . . . . . . . . . . . . . . . . . . . . 2-6, 2-33
Power Key . . . . . . . . . . . . . . . . . . . . . . . . . . . . . . . . . 1-5
Power Switch. . . . . . . . . . . . . . . . . . . . . . . . . . . . . . 1-10
Print Auto-ON Time. . . . . . . . . . . . . . . . . . . . . 2-8, 2-51
Print Density . . . . . . . . . . . . . . . . . . . . . . . . . . 2-6, 2-24
Print Mode Auto-ON . . . . . . . . . . . . . . . . . . . . 2-8, 2-51
Print Position Adjust . . . . . . . . . . . . . . . . . . . . 2-5, 2-14
Print Quantity Display . . . . . . . . . . . . . . . . . . . . 2-2, 2-3
Print range . . . . . . . . . . . . . . . . . . . . . . . . . . . . . . . 1-19
Printer Configuration . . . . . . . . . . . . . . . . . . . . . . . . . 2-1
PRINT/PAUSE Key . . . . . . . . . . . . . . . . . . . . . . 1-5, 2-4
R
Registration . . . . . . . . . . . . . . . . . . . . . . . . . . . . . . . .2-7
Remaining Volume Notice Indicators . . . . . . . . 1-5, 3-2
Right Transfer Path Cover . . . . . . . . . . . . . . . . . . . . . 3-5
RISO Scanner HS2000. . . . . . . . . . . . . . . . . . . . . . . 4-2
S
Separation Paper . . . . . . . . . . . . . . . . . . . . . . 2-7, 2-36
Shifting Guide . . . . . . . . . . . . . . . . . . . . . . . . . 2-6, 2-27
Side Guide . . . . . . . . . . . . . . . . . . . . . . . . . . . . . . . 1-16
Side Guide Locking Levers . . . . . . . . . . . . . . . . . . . 1-12
Sleep. . . . . . . . . . . . . . . . . . . . . . . . . . ix, 1-10, 2-8, 2-48
Sleep Key . . . . . . . . . . . . . . . . . . . . . . . . . . . . . . . . 1-10
Specifications . . . . . . . . . . . . . . . . . . . . . . . . . . . . . . 4-4
Stack Guide . . . . . . . . . . . . . . . . . . . . . . . . . . 2-6, 2-26
Stack Guide Adjust . . . . . . . . . . . . . . . . . . . . . 2-6, 2-27
Stack Guide (end) . . . . . . . . . . . . . . . . . . . . . . 1-4, 1-16
Stack Guide Open Button . . . . . . . . . . . . 1-4, 1-17, 1-20
Stack Guide (side) . . . . . . . . . . . . . . . . . . . . . 1-4, 1-16
Standard Feed Tray. . . . . . . . . . . . . . . . . 2-5, 2-19, 2-54
Standard Paper 1 . . . . . . . . . . . . . . . . . . . . . . . . . . .2-35
Standard Paper Feed Tray . . . . . . . . . . . . . . . 1-2, 1-13
Stand-by . . . . . . . . . . . . . . . . . . . . . . . . . . . . . 2-9, 2-52
Stand-by Period . . . . . . . . . . . . . . . . . . . . . . . 2-9, 2-53
Status . . . . . . . . . . . . . . . . . . . . . . . . . . . . . . . . 2-2, 2-3
Submenu. . . . . . . . . . . . . . . . . . . . . . . . . . . . . . . . . 2-11
Subnet mask . . . . . . . . . . . . . . . . . . . . . . . . . . . . . . 2-45
System Error . . . . . . . . . . . . . . . . . . . . . . . . . . . . . . . 3-6
System Information . . . . . . . . . . . . . . . . . . . . . 2-7, 2-42
T
Temp Data Clear . . . . . . . . . . . . . . . . . . . . . . . 2-6, 2-28
Temp Data Retrieve . . . . . . . . . . . . . . . . . . . . 2-5, 2-17
Test Print. . . . . . . . . . . . . . . . . . . . . . . . . . . . . 2-5, 2-16
Transfer Roller. . . . . . . . . . . . . . . . . . . . . . . . . . . . . 3-10
Transfer Section Door . . . . . . . . . . . . . . . . . . . . 1-2, 3-5
Transfer Unit . . . . . . . . . . . . . . . . . . . . . . . . . . . . . . 3-16
Transfer Unit (left) . . . . . . . . . . . . . . . . . . . . . . . . . . 3-14
Transfer Unit (right) . . . . . . . . . . . . . . . . . . . . . . . . . 3-11
Tray Selection Rule . . . . . . . . . . . . . . . . . . . . . 2-8, 2-51
Triple-Tray Source . . . . . . . . . . . . . . . . . . . . . . 2-6, 2-22
U
Unusable Paper . . . . . . . . . . . . . . . . . . . . . . . . . . . . 1-8

4-10
Usable Paper . . . . . . . . . . . . . . . . . . . . . . . . . . . . . . 1-7
V
Vent Hole . . . . . . . . . . . . . . . . . . . . . . . . . . . . . . . . . 1-4
W
Waiting Time . . . . . . . . . . . . . . . . . . . . . . . . . . 2-8, 2-48
WAKE-UP key . . . . . . . . . . . . . . . . . . . . . . . . . 1-5, 1-10
Warning . . . . . . . . . . . . . . . . . . . . . . . . . . . . . . . . . . . 3-7
Y
Yellow (Y) Ink Cartridge . . . . . . . . . . . . . . . . . . 1-2, 3-19
033-03024-203