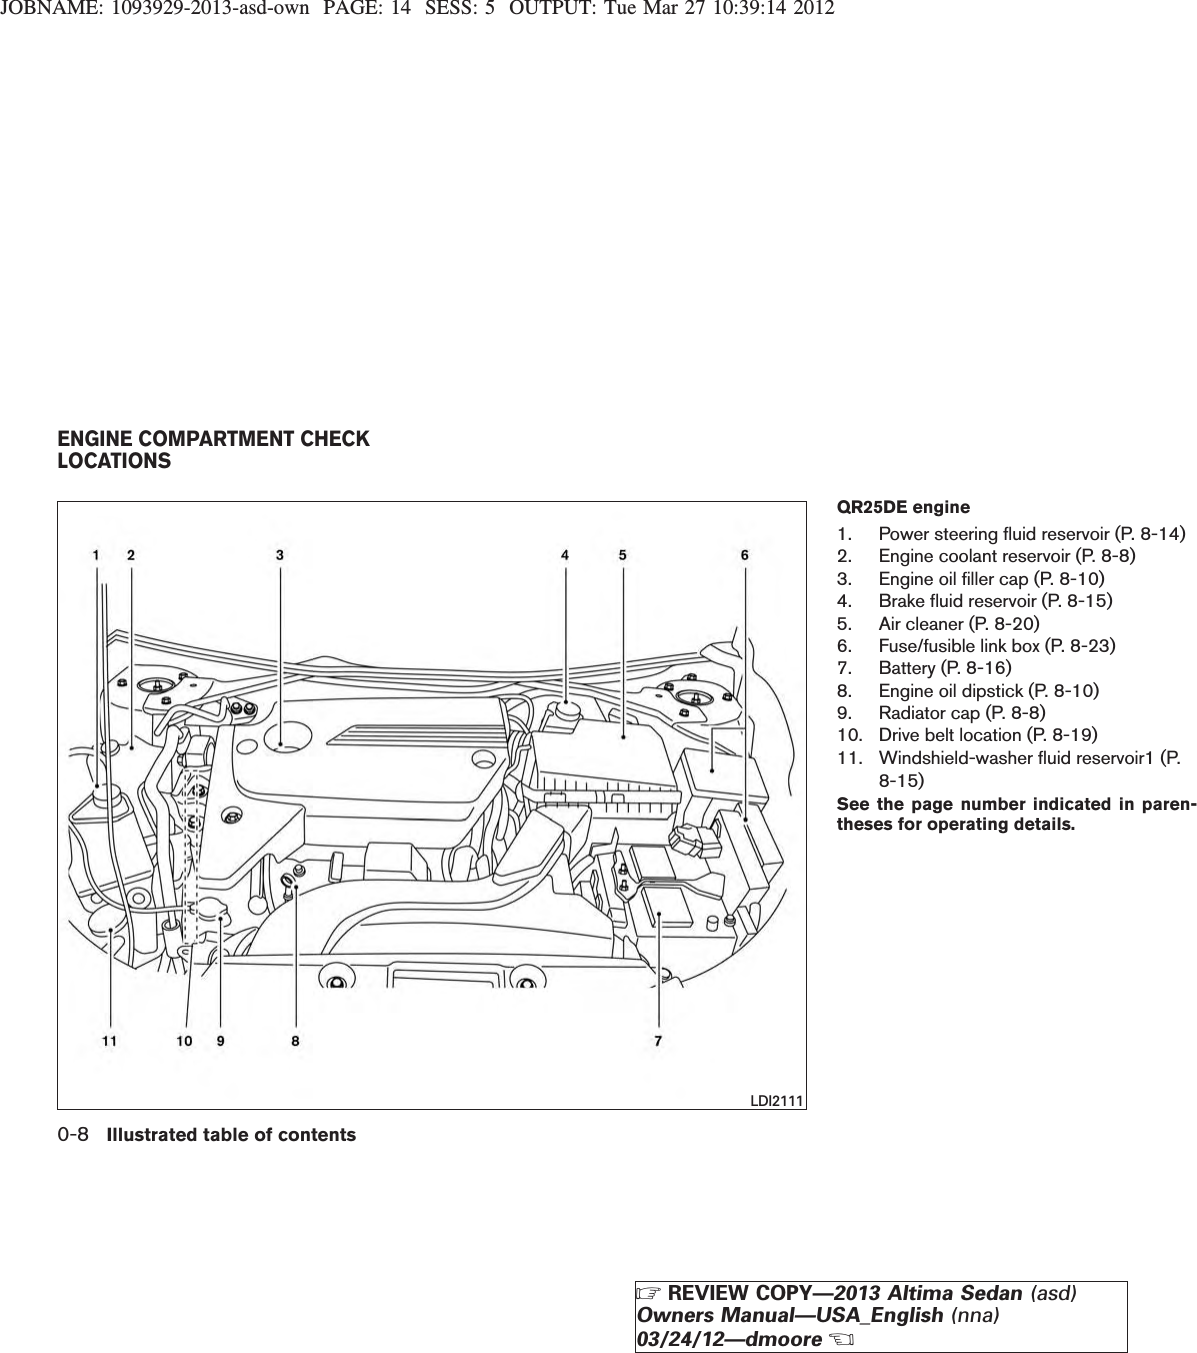
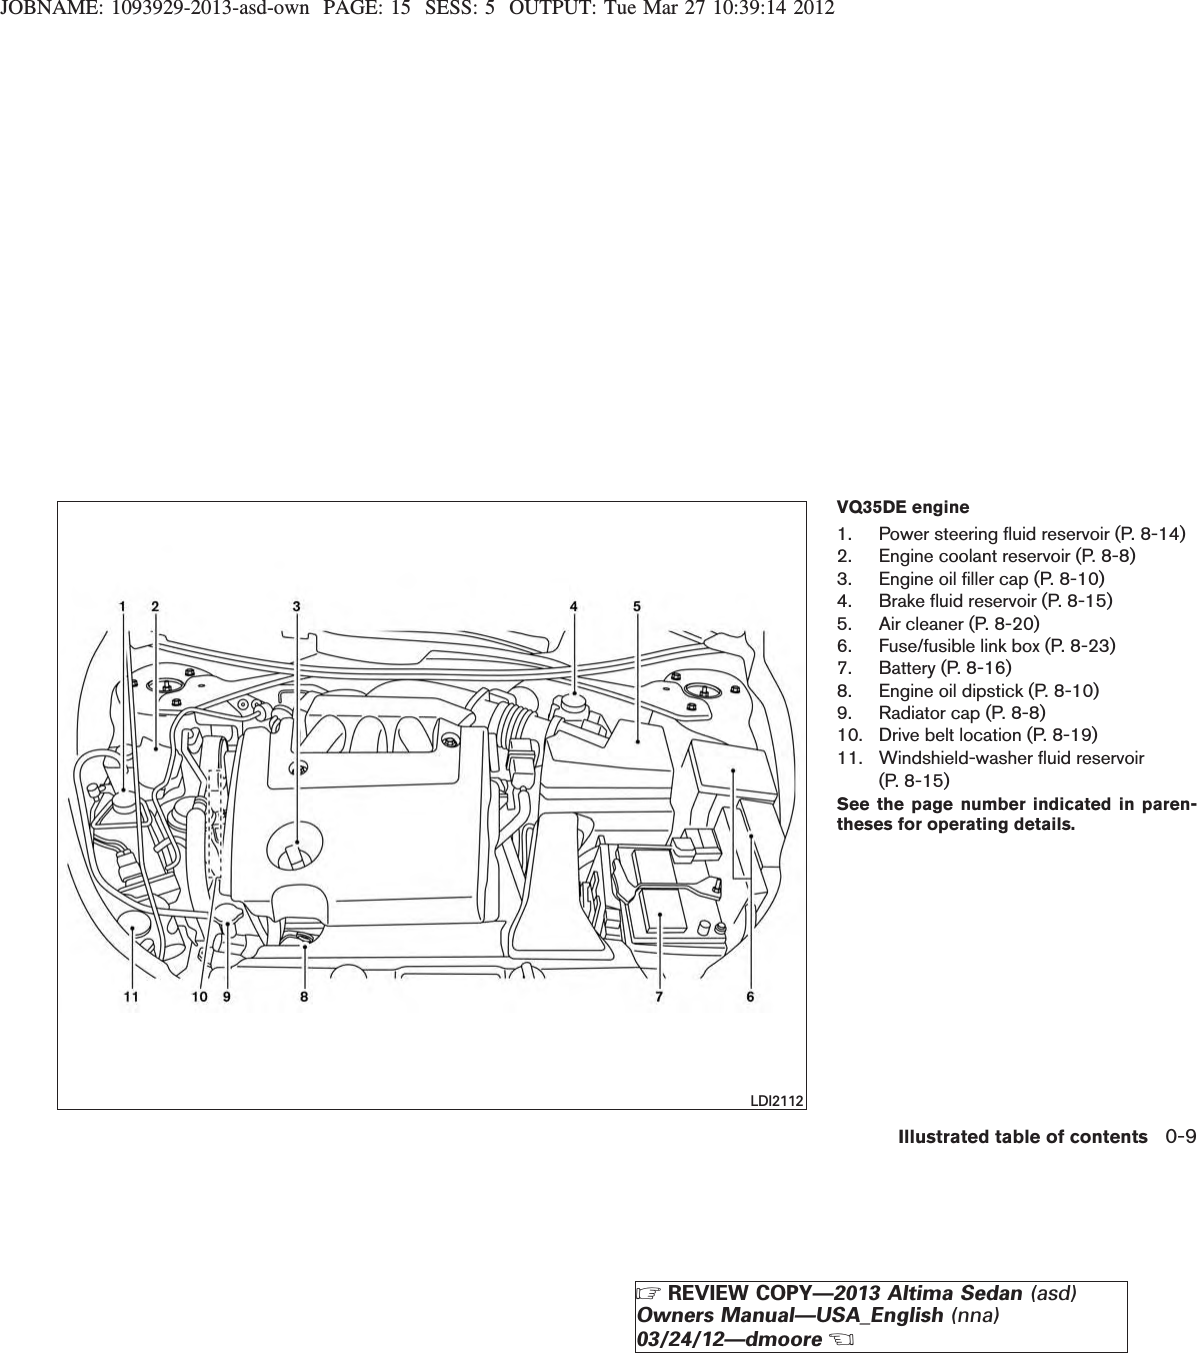
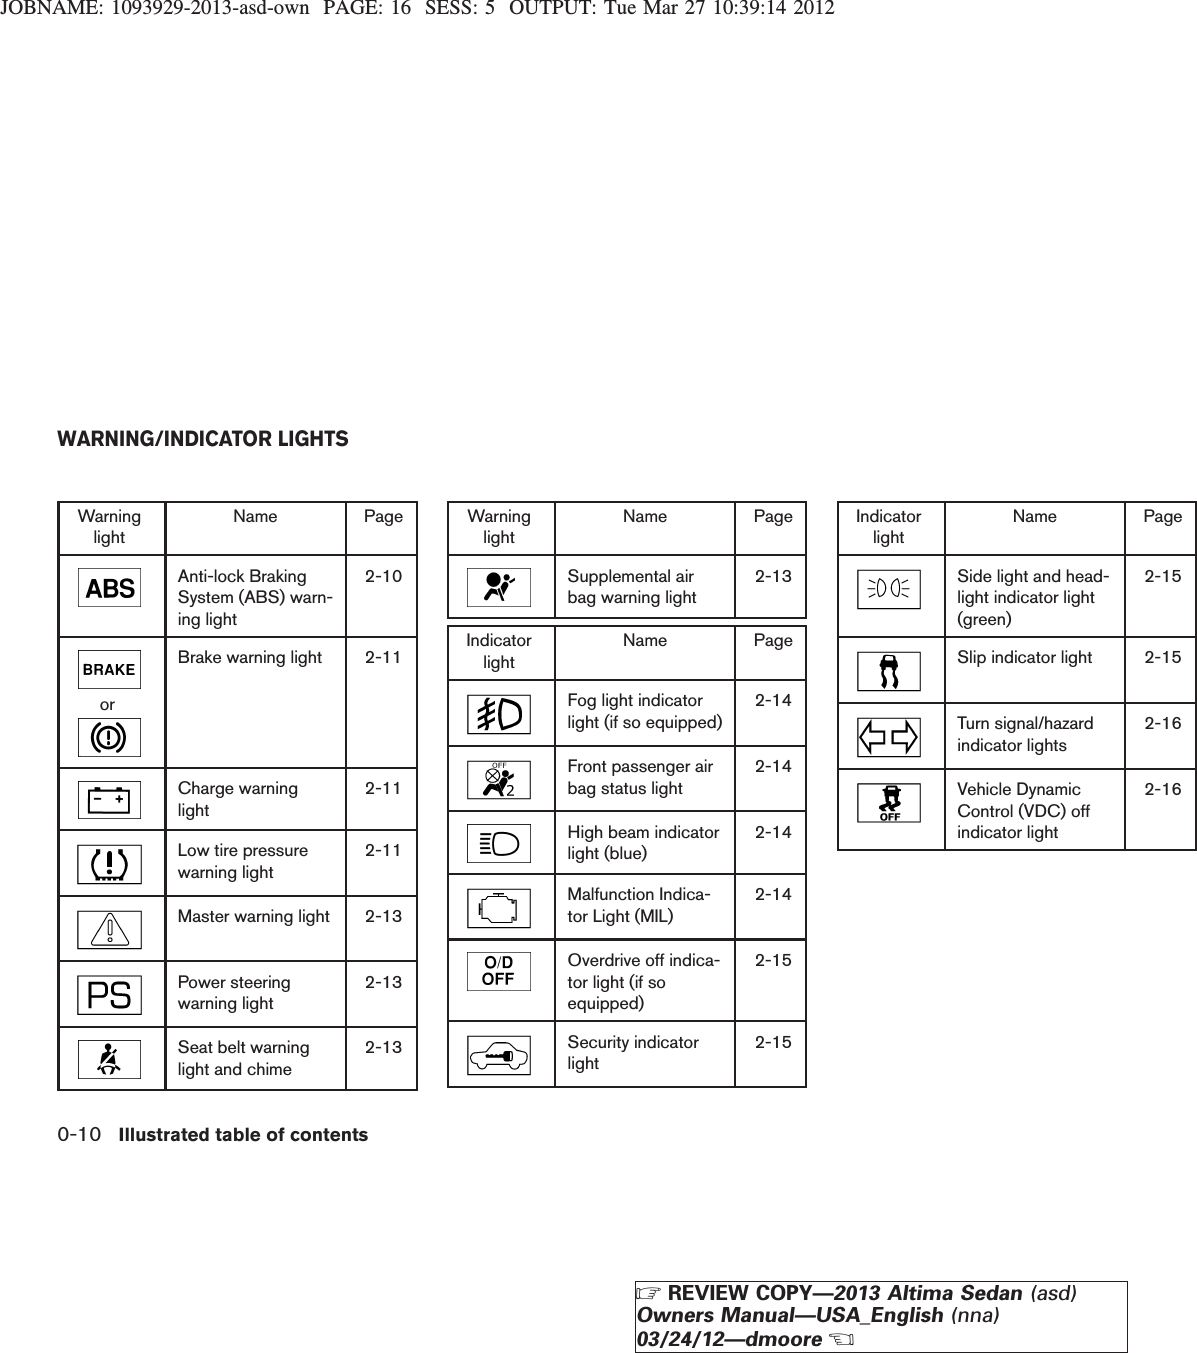
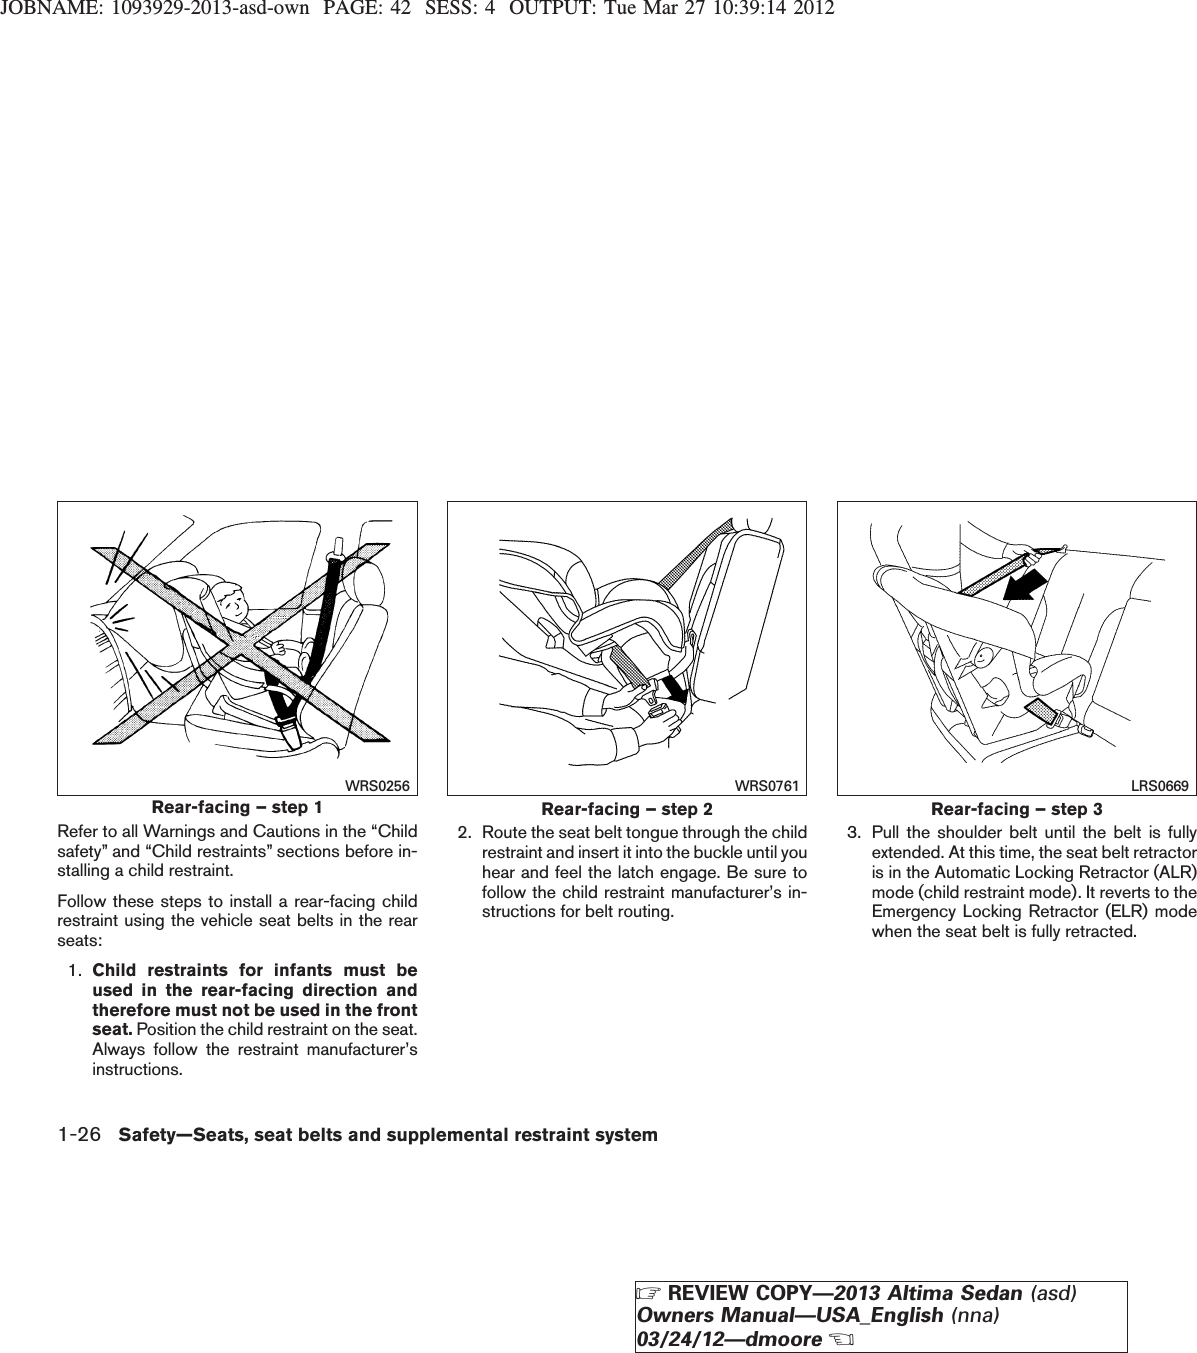
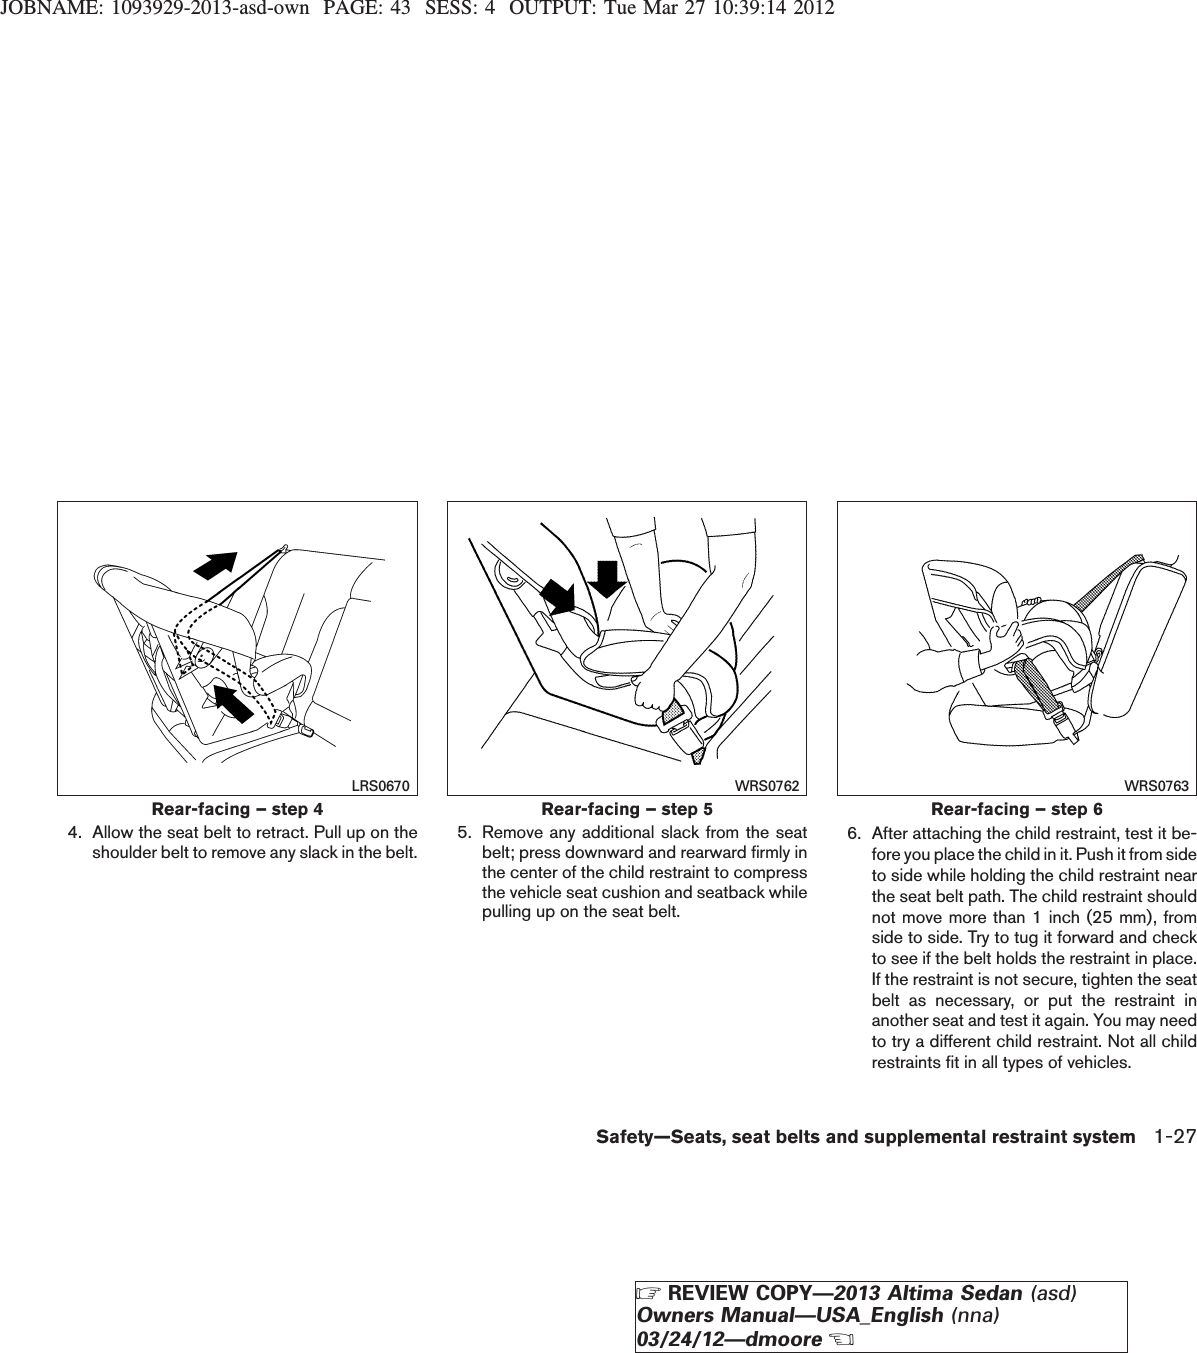
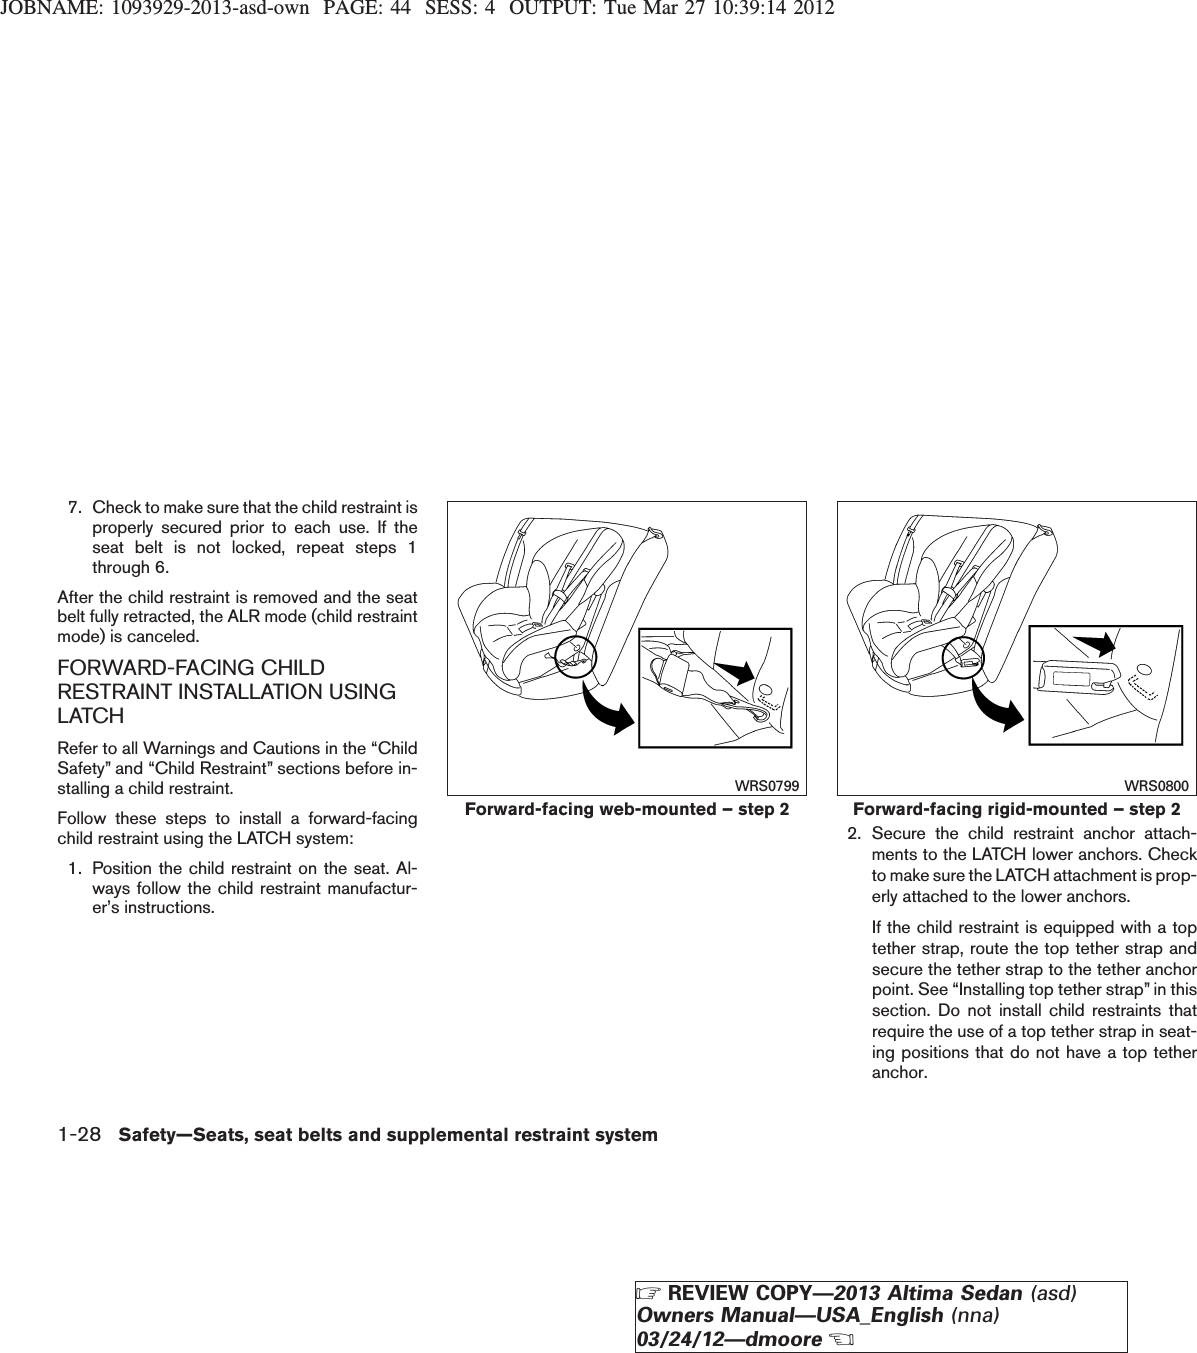
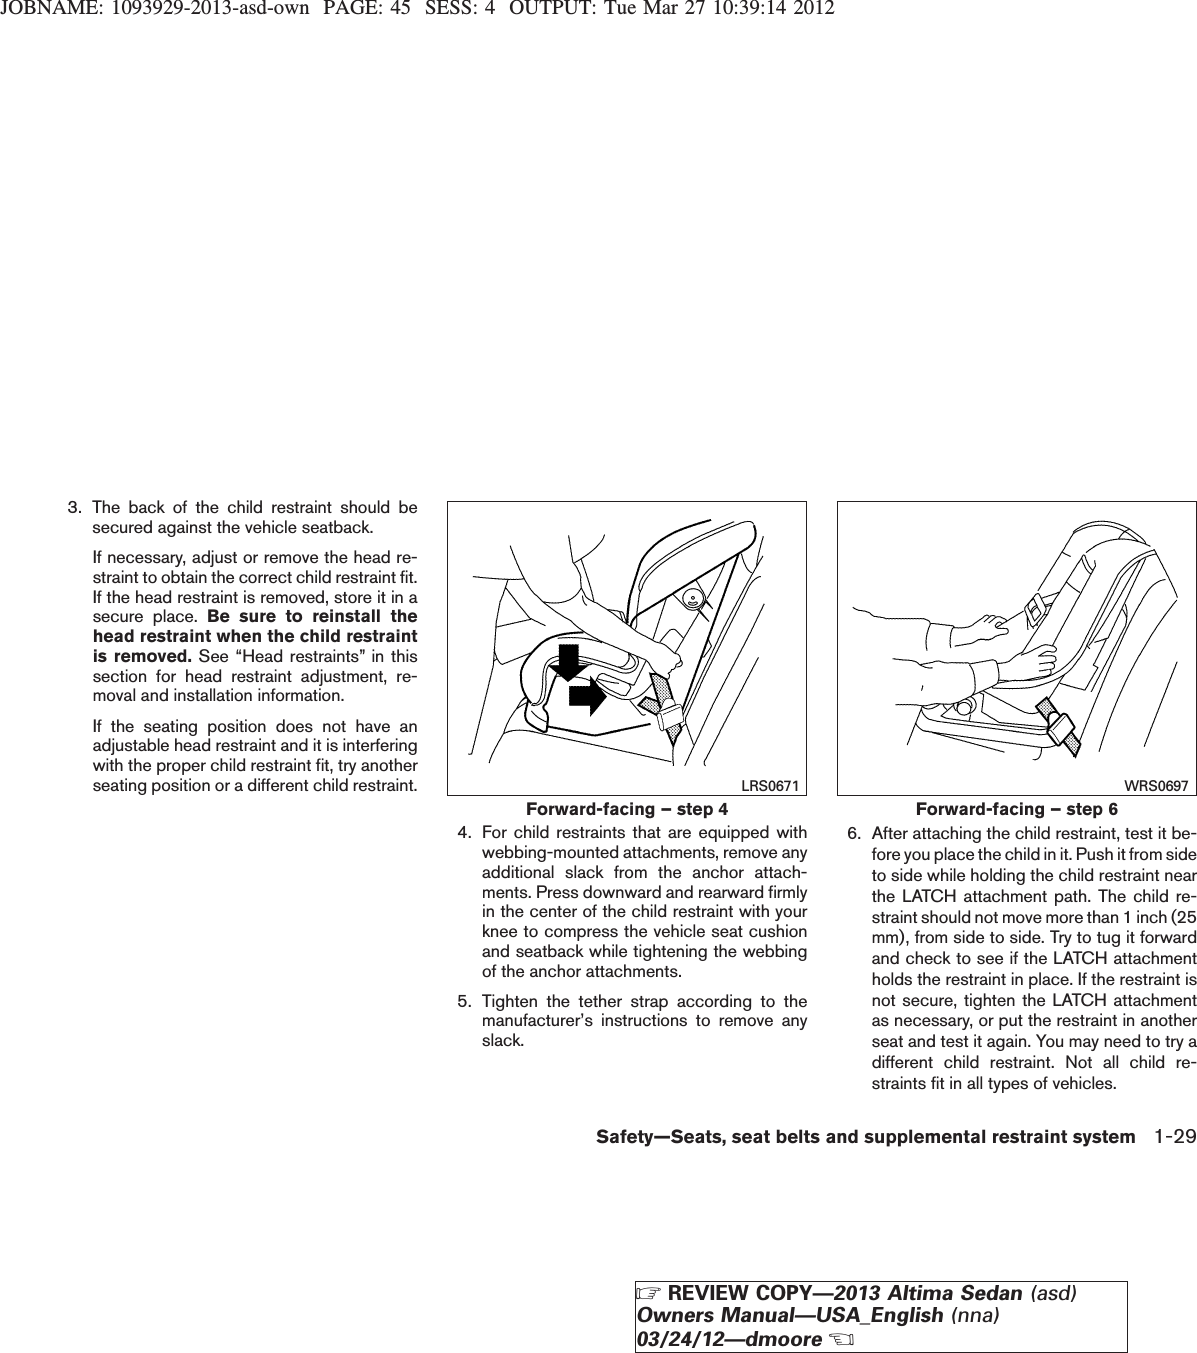
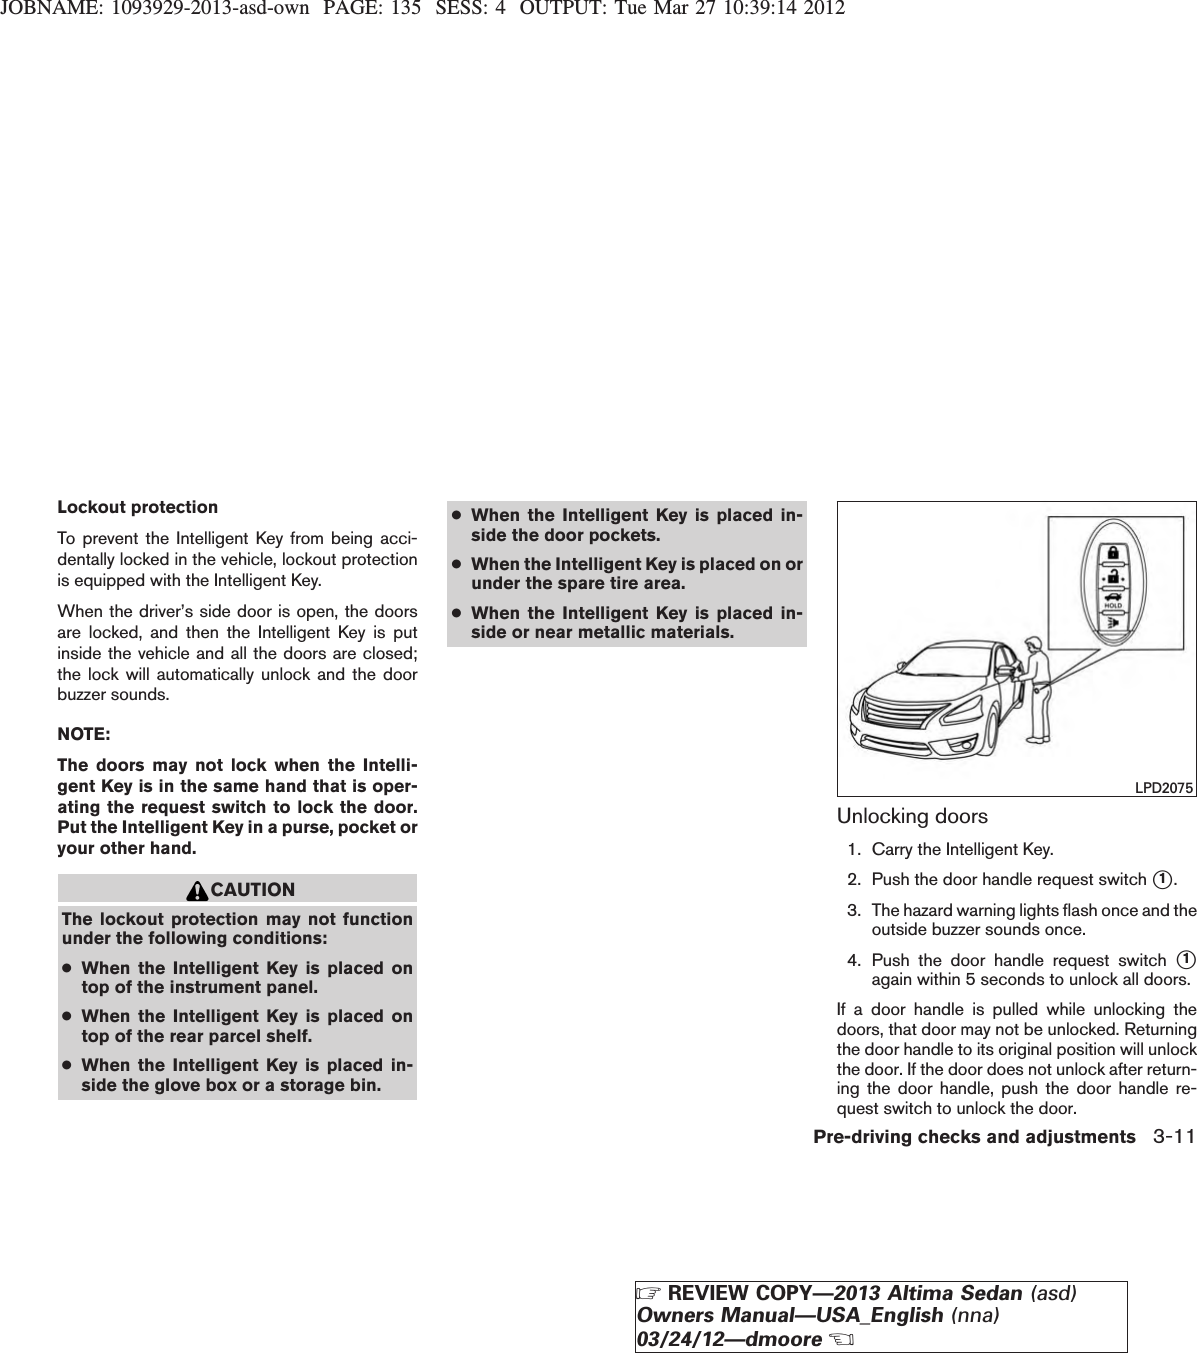
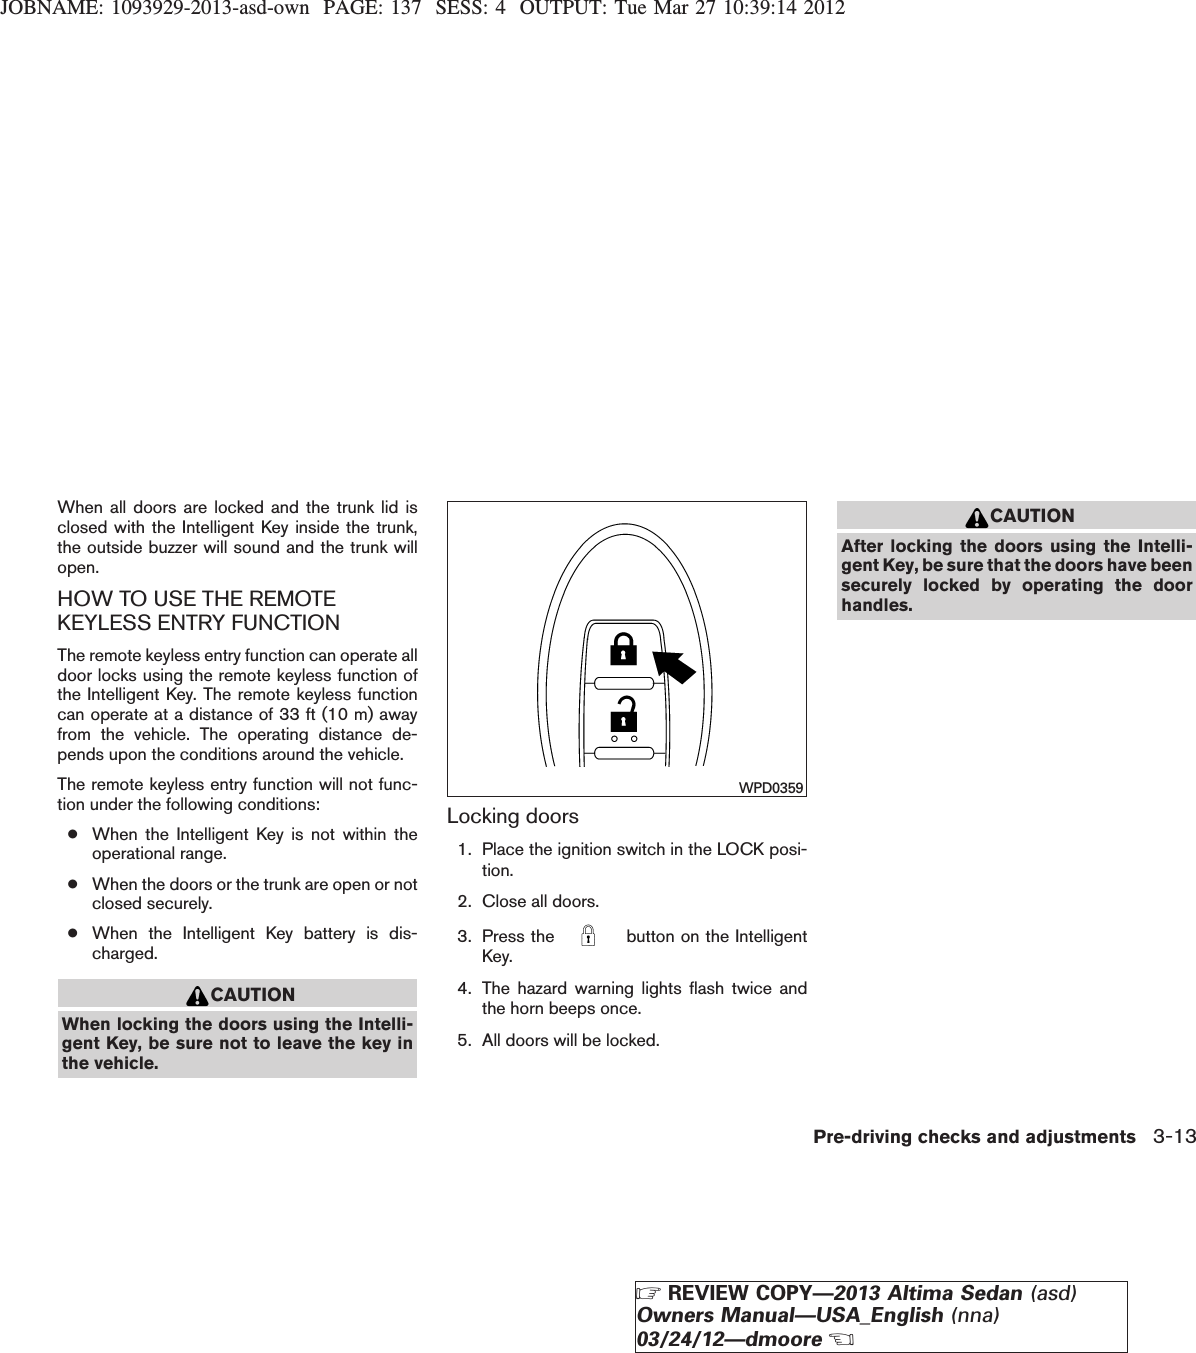
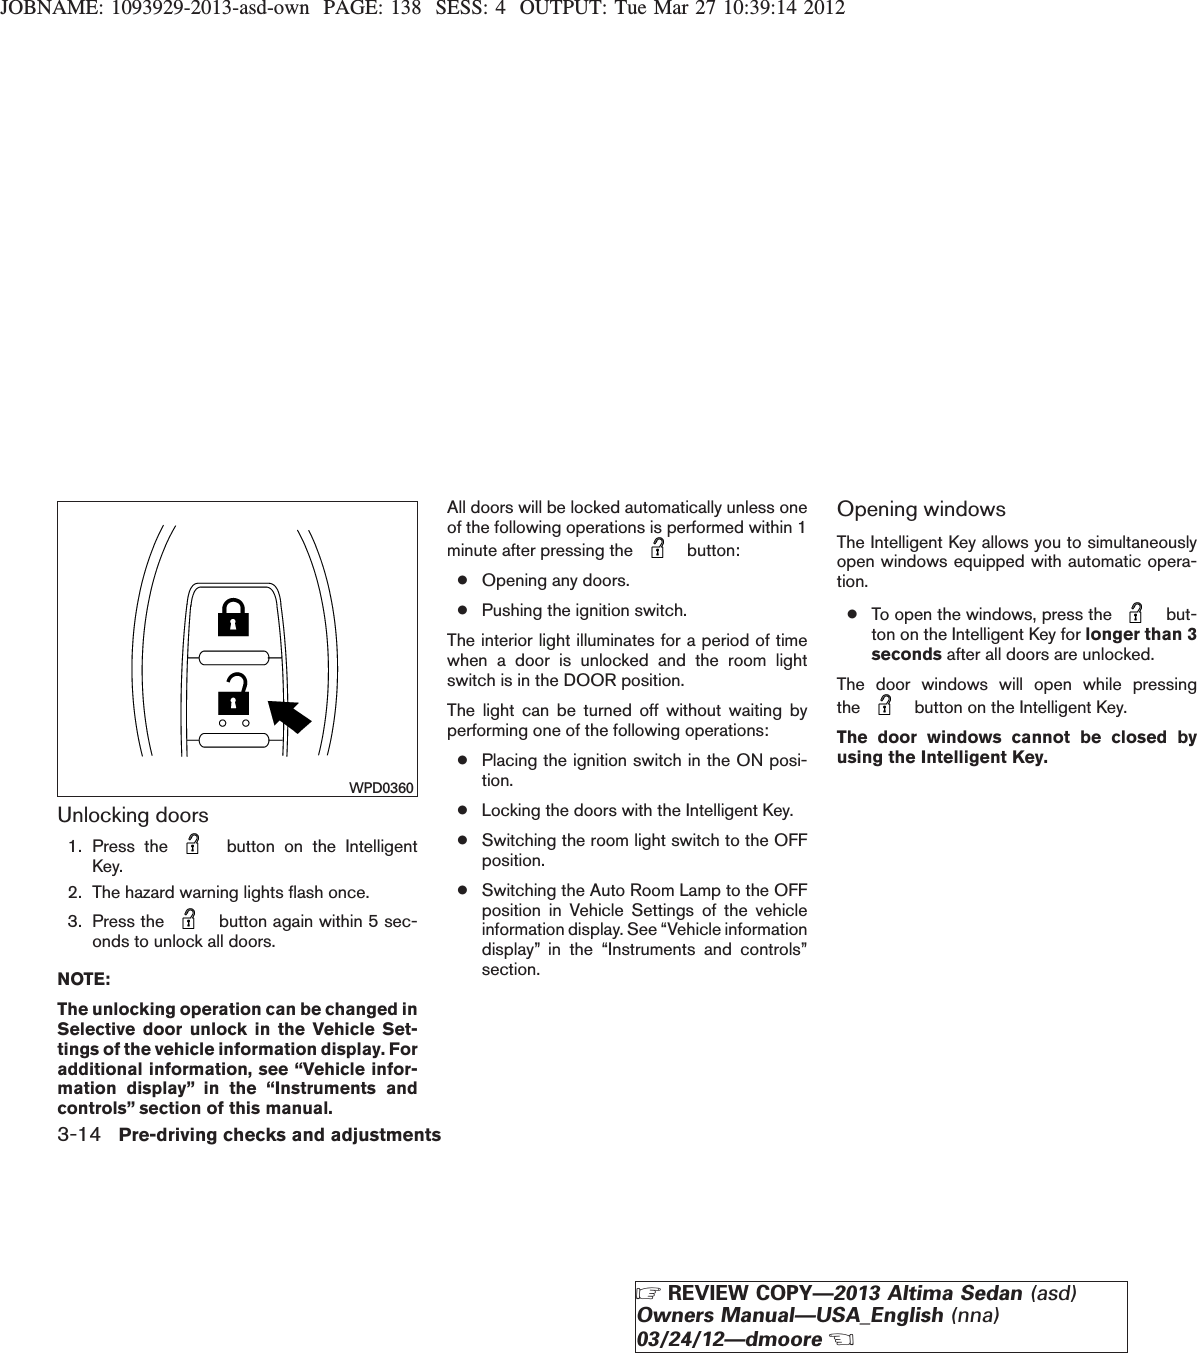
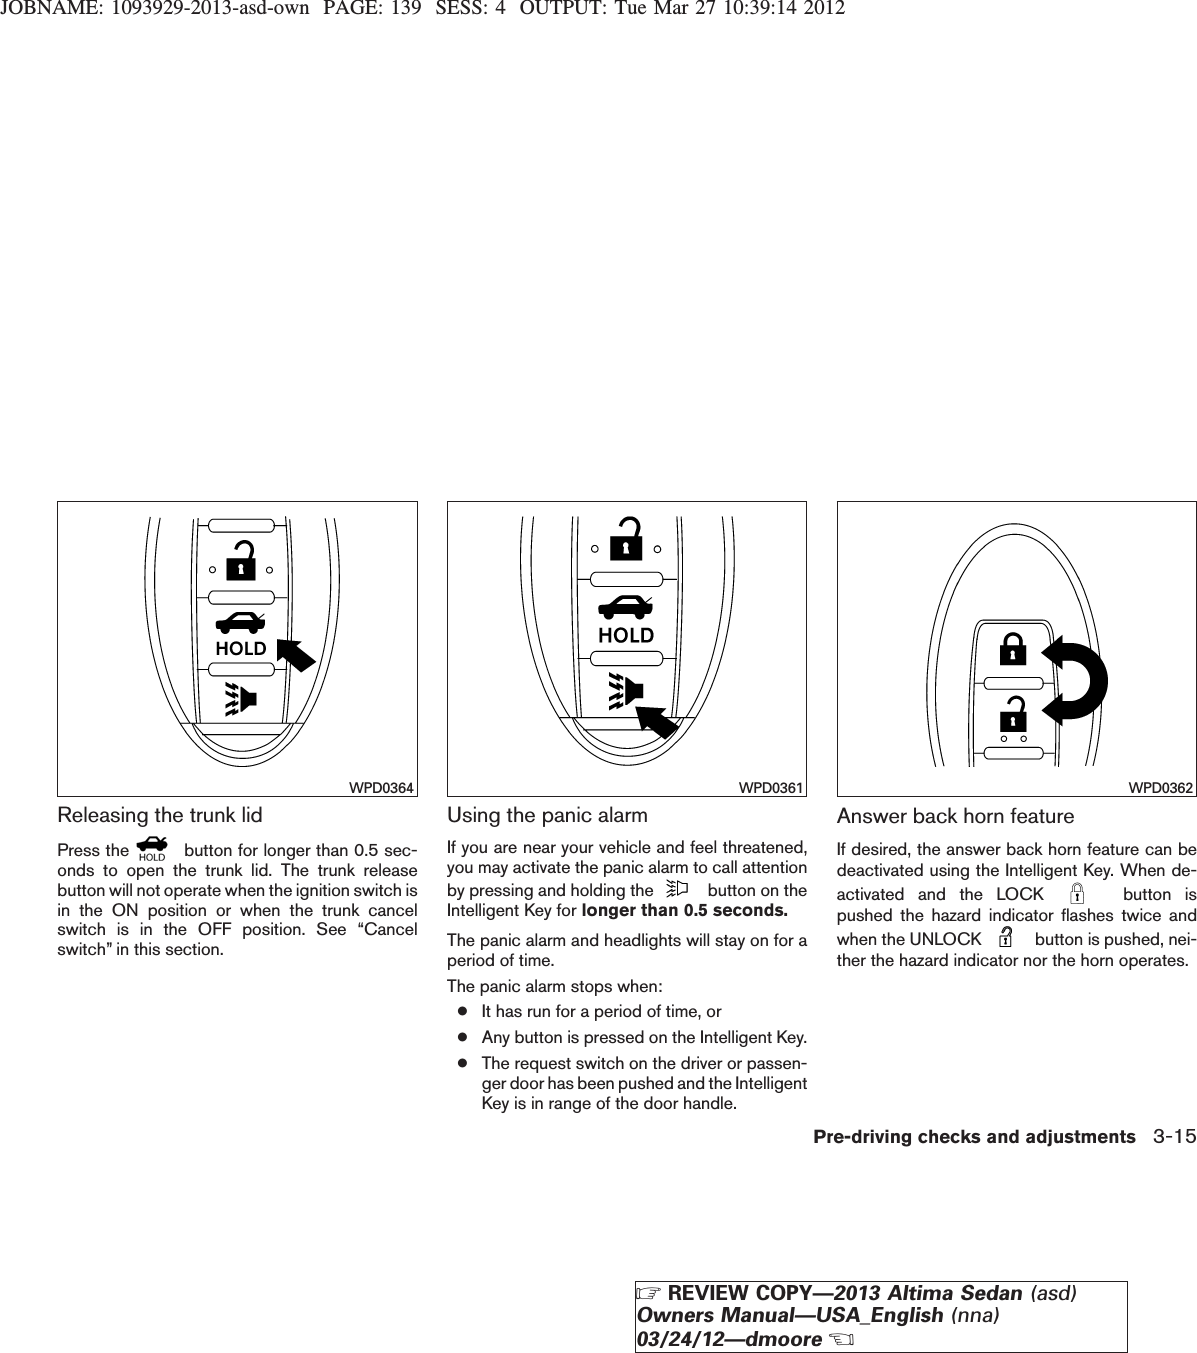
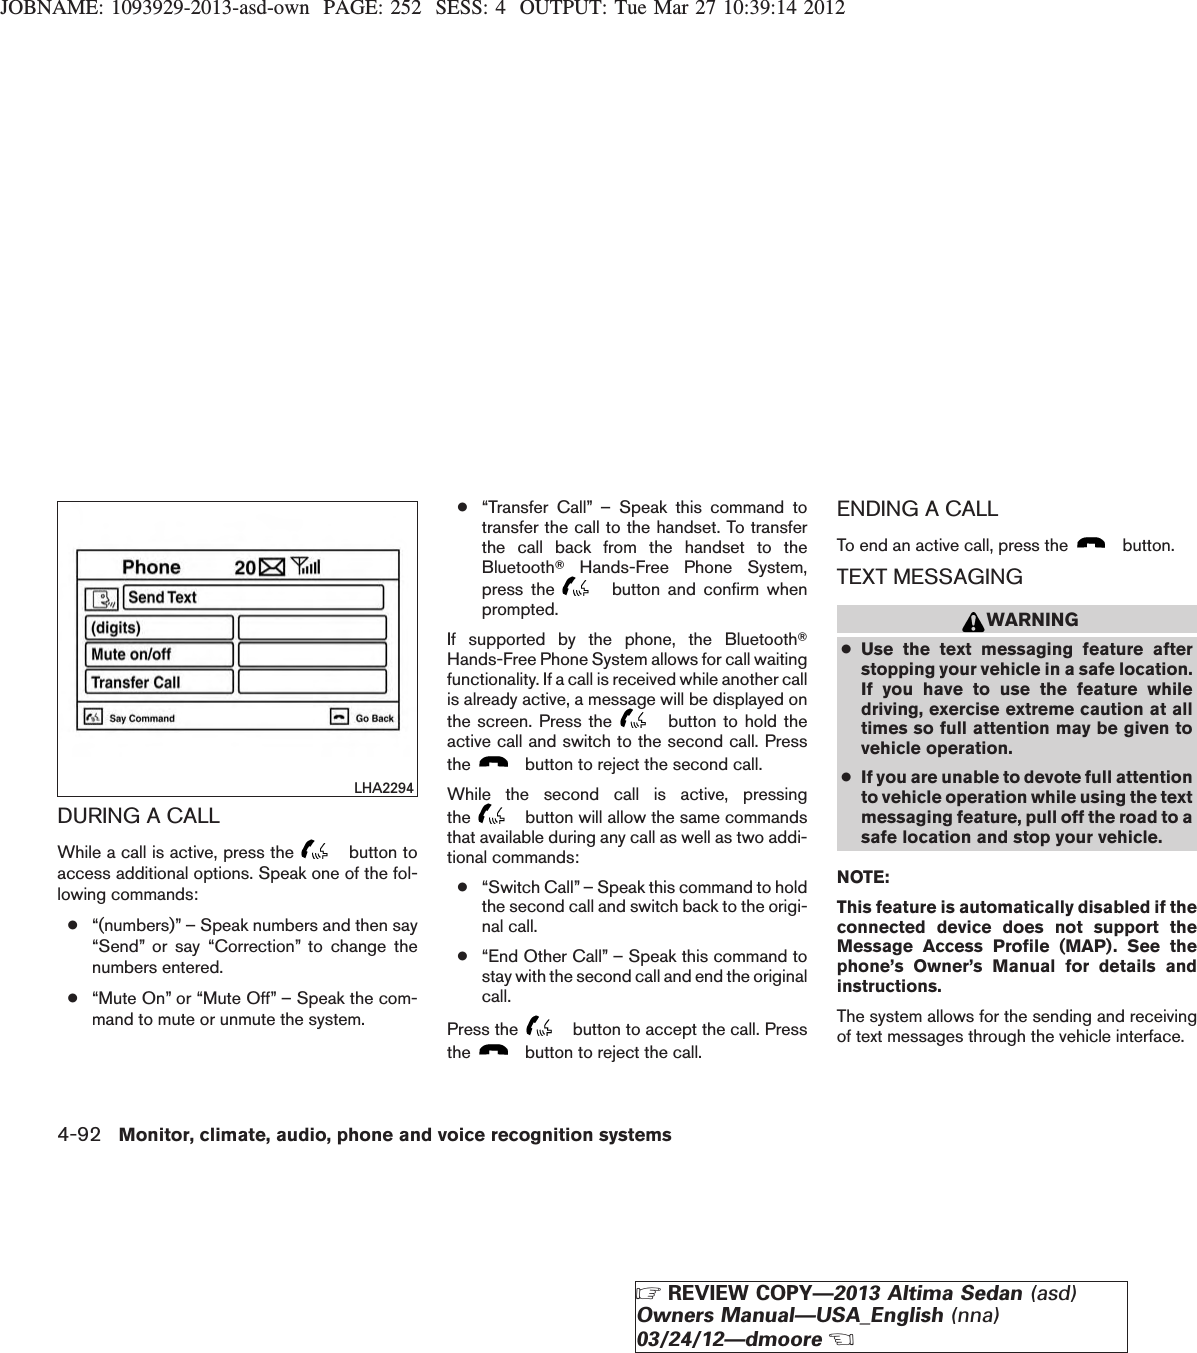
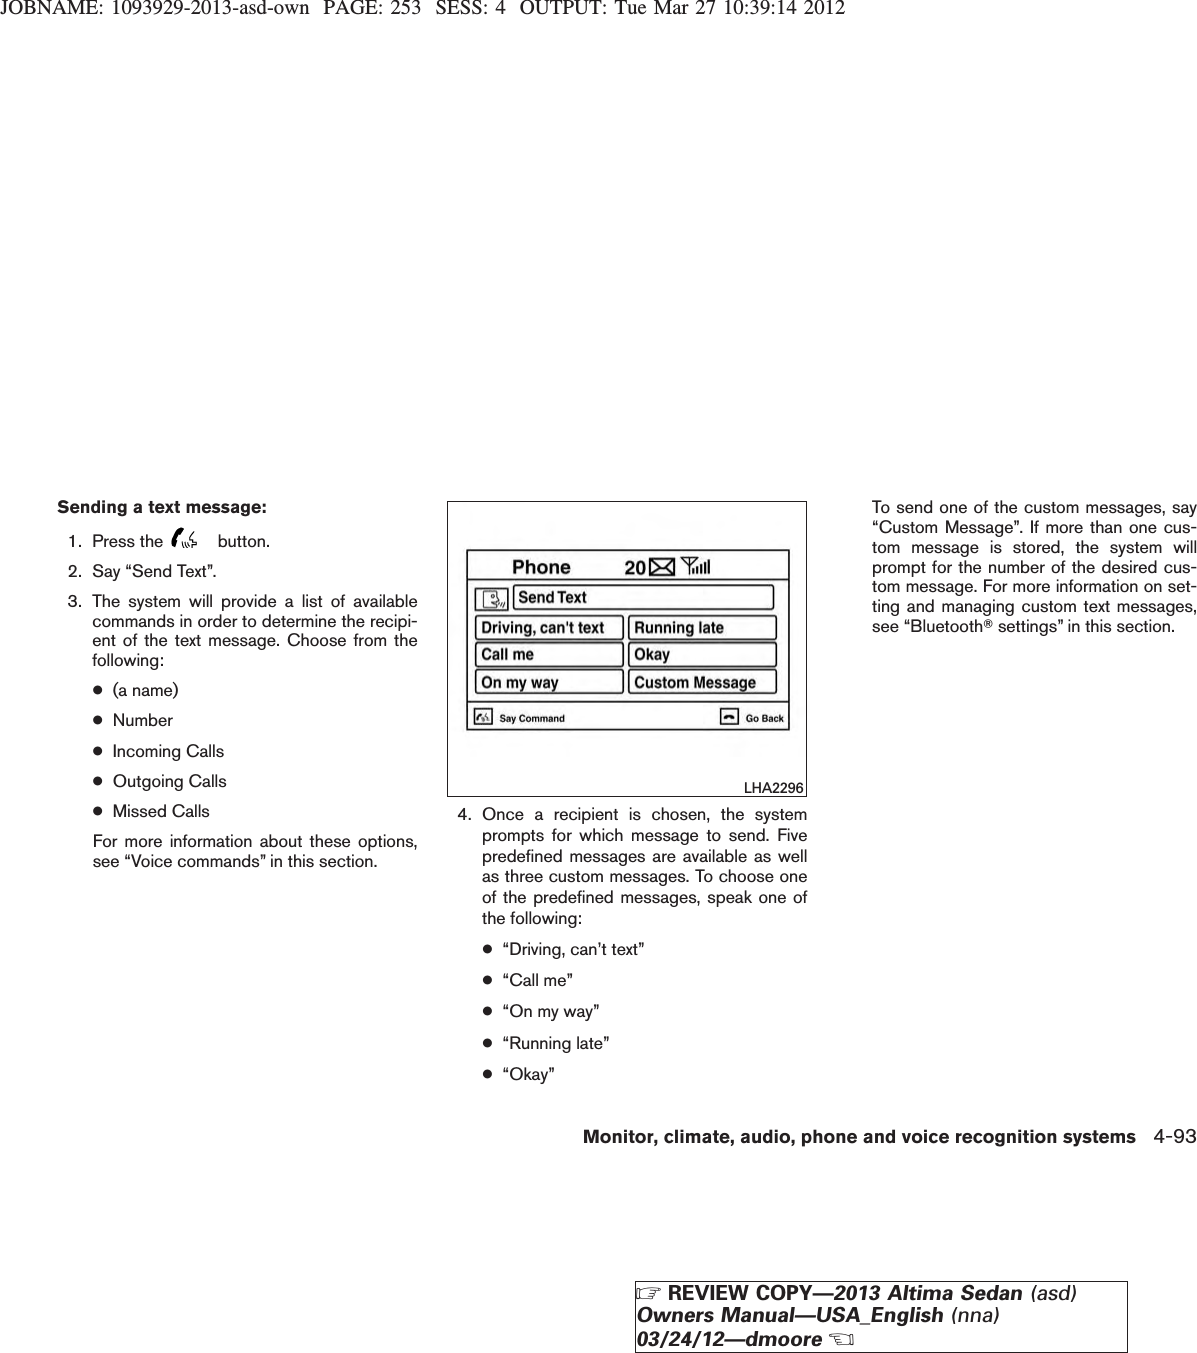
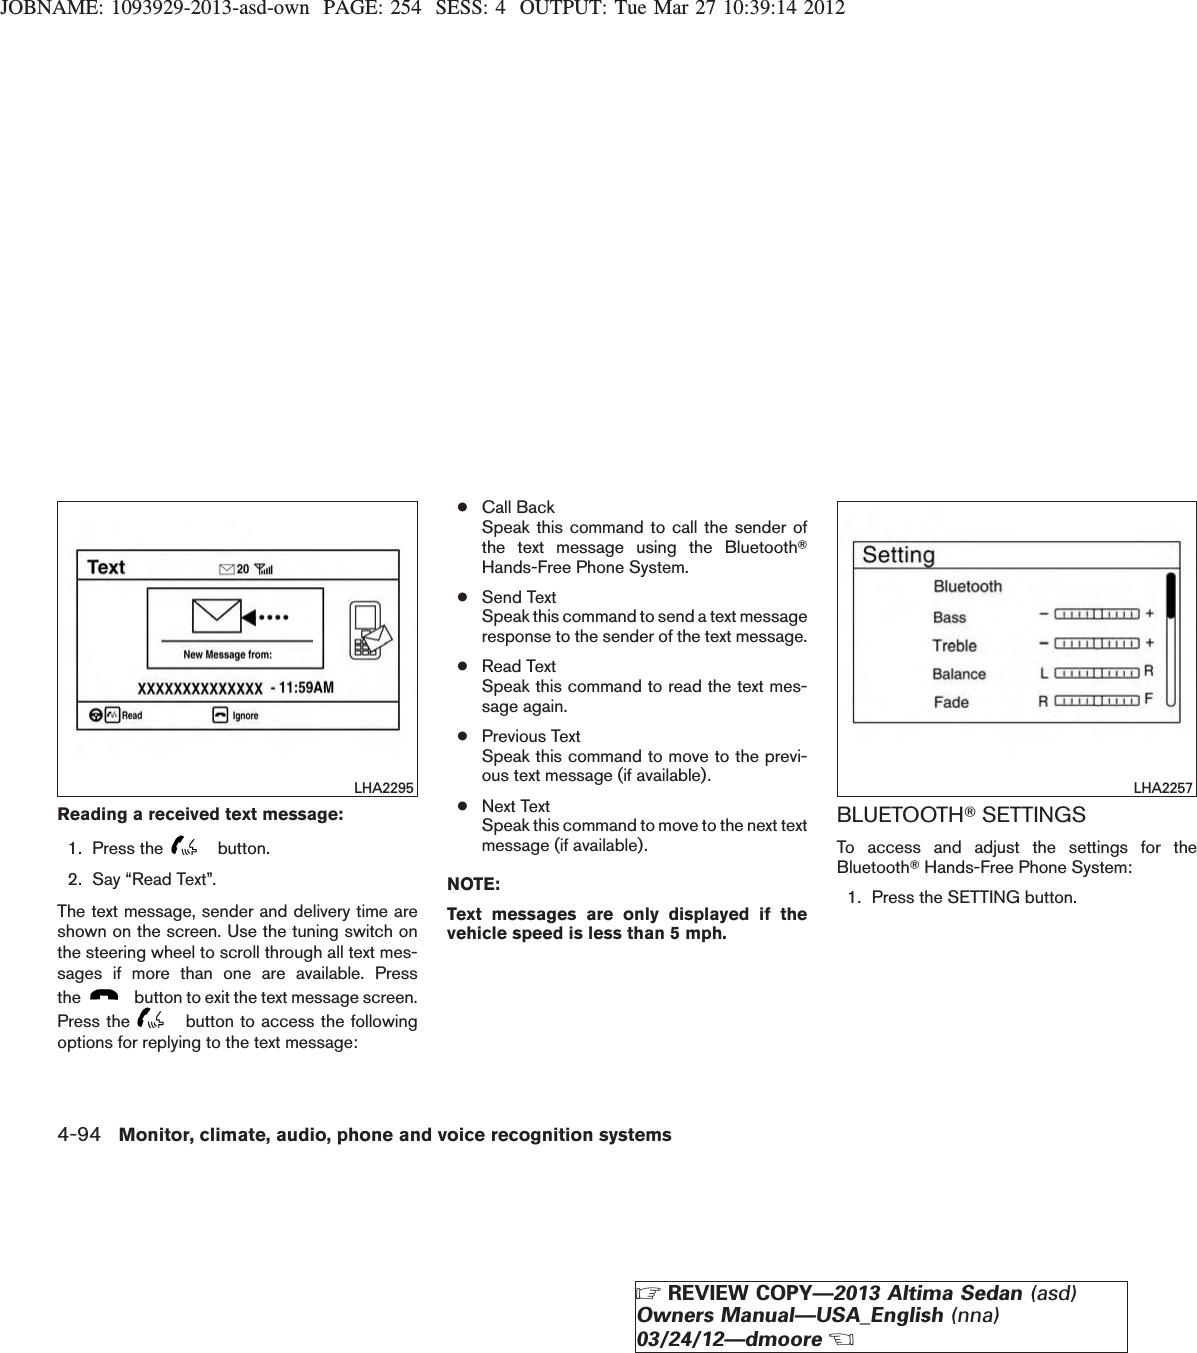
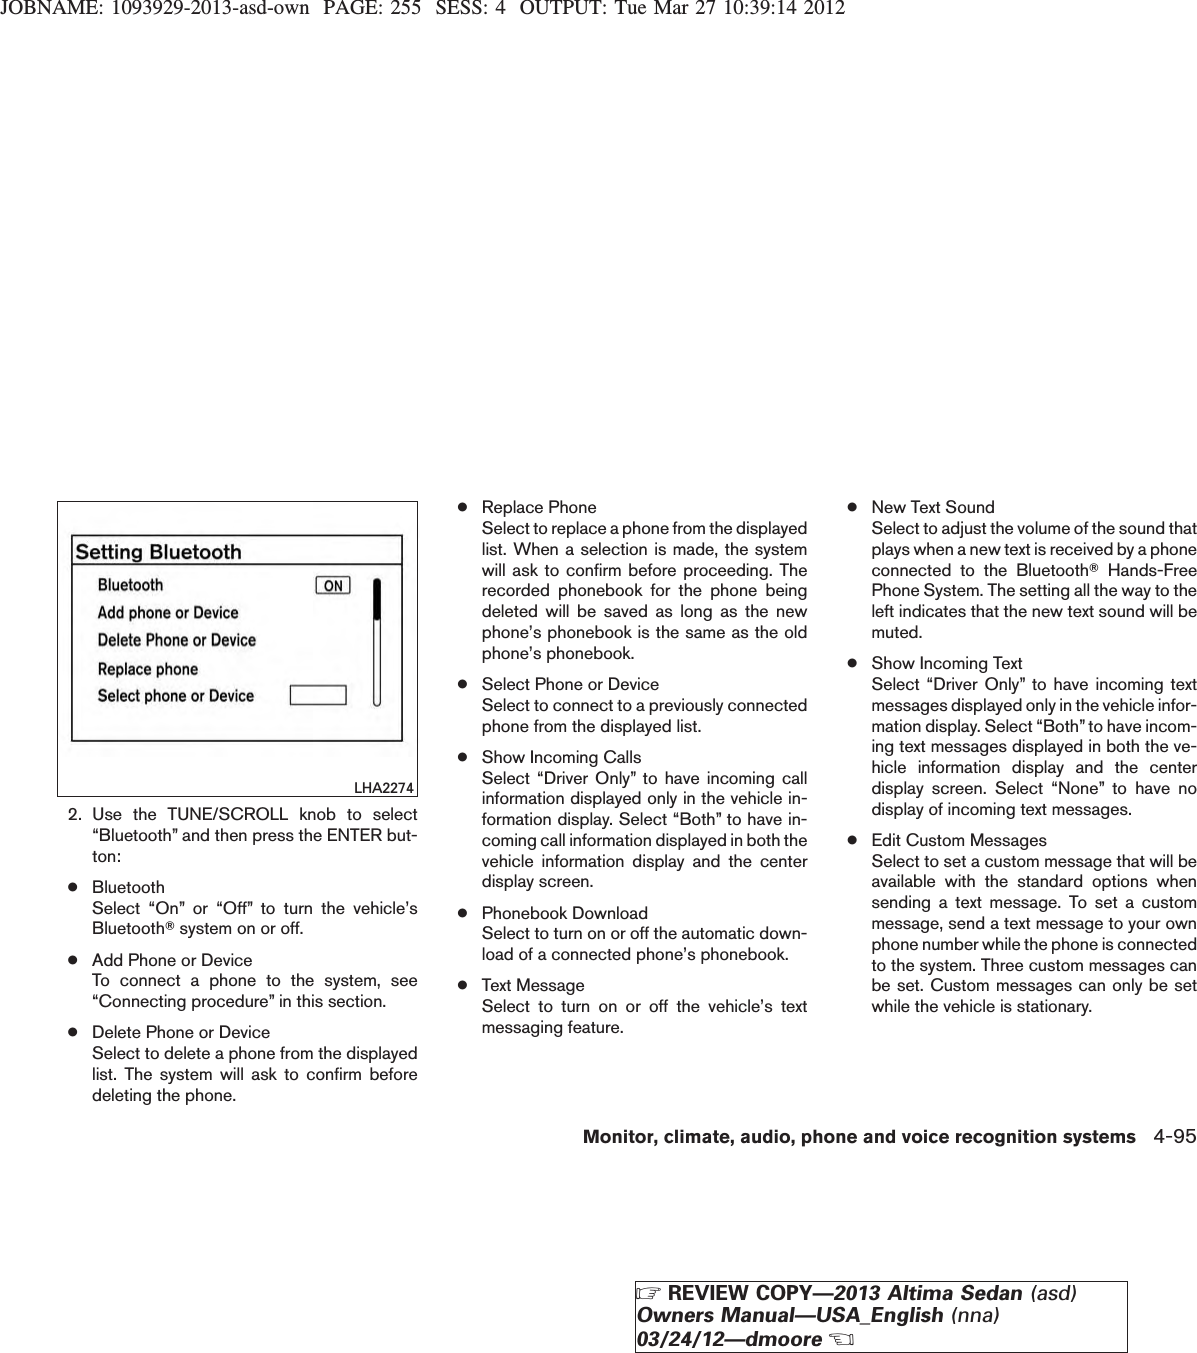
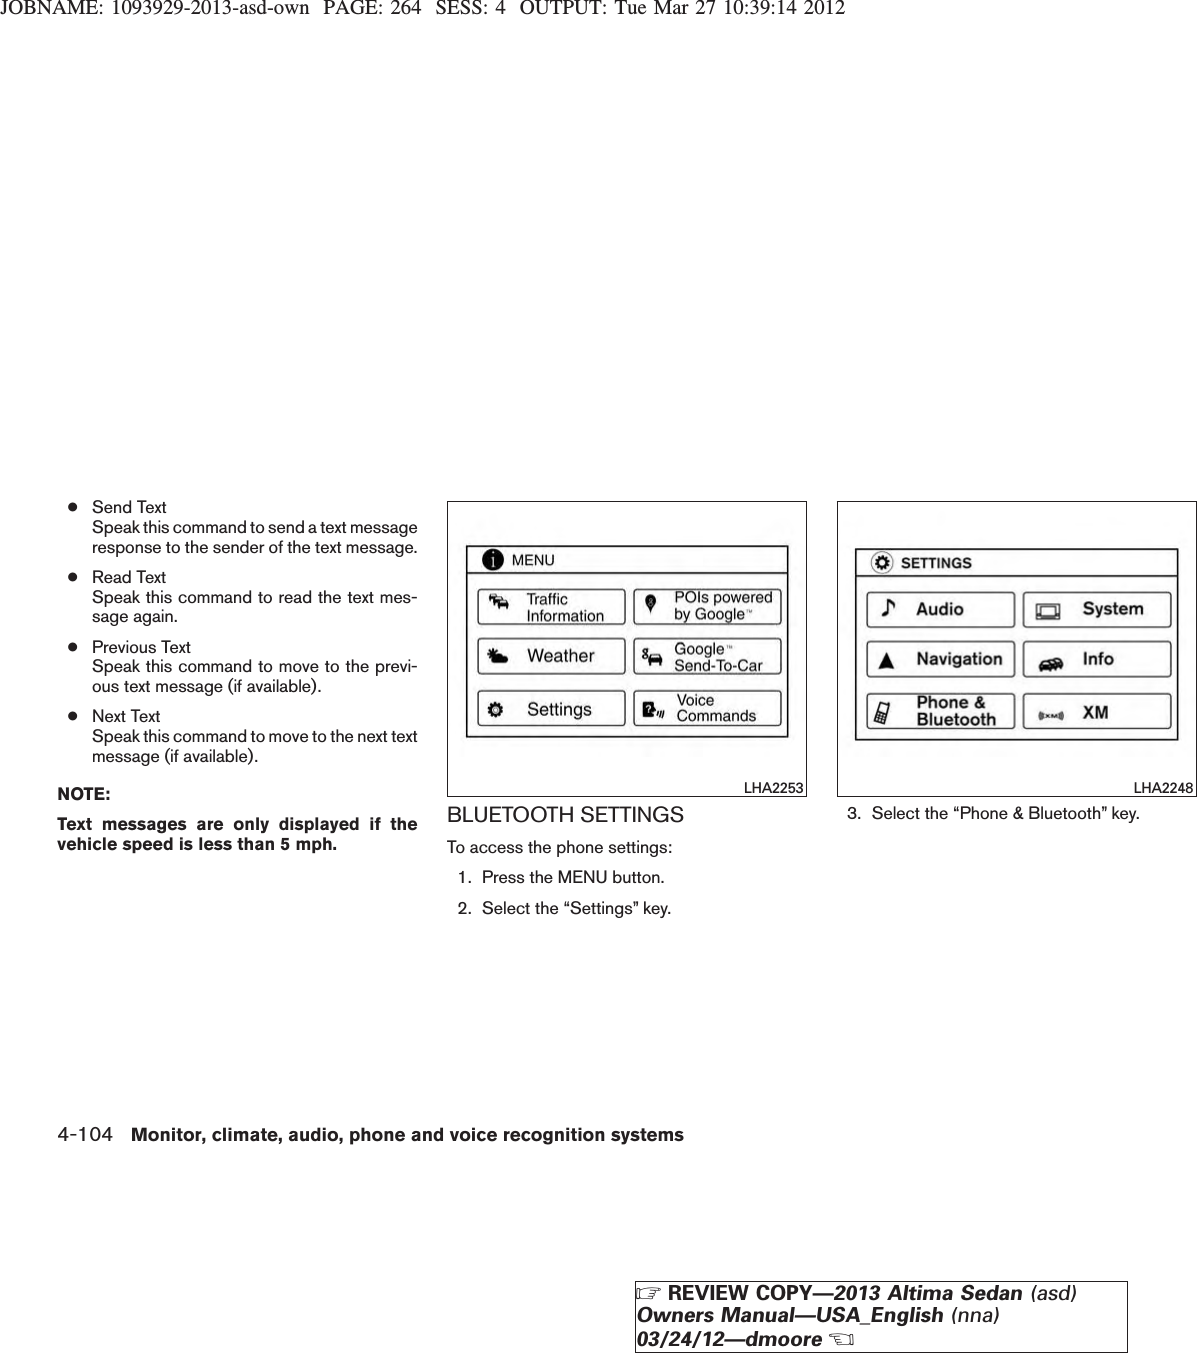
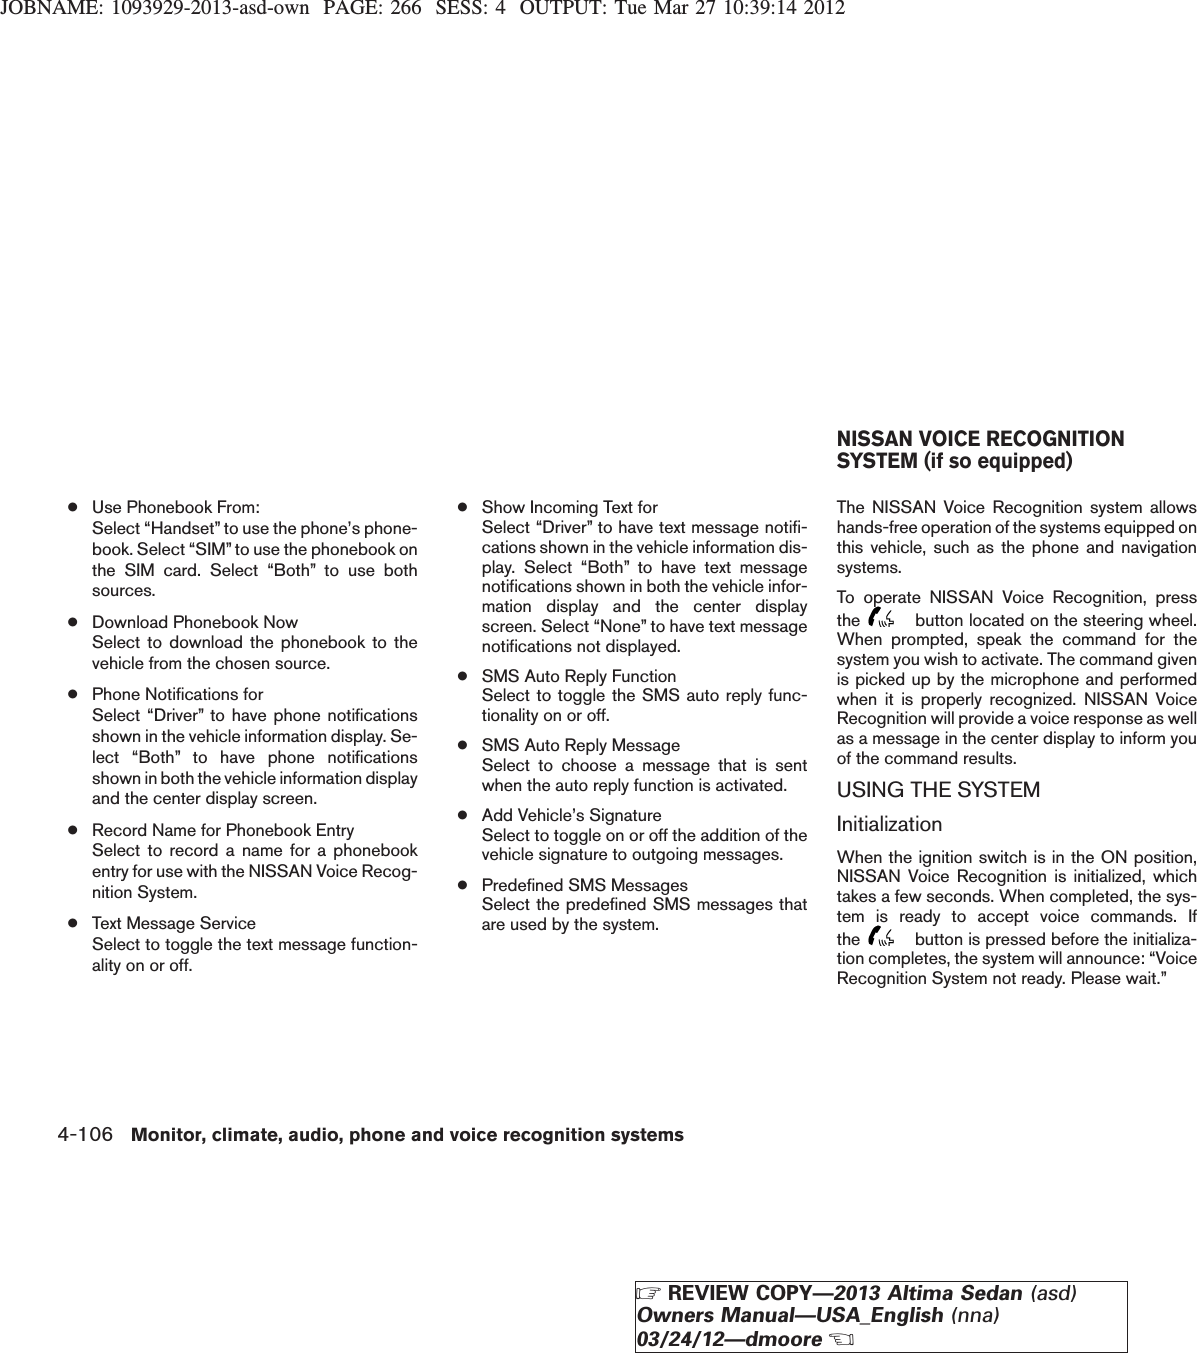
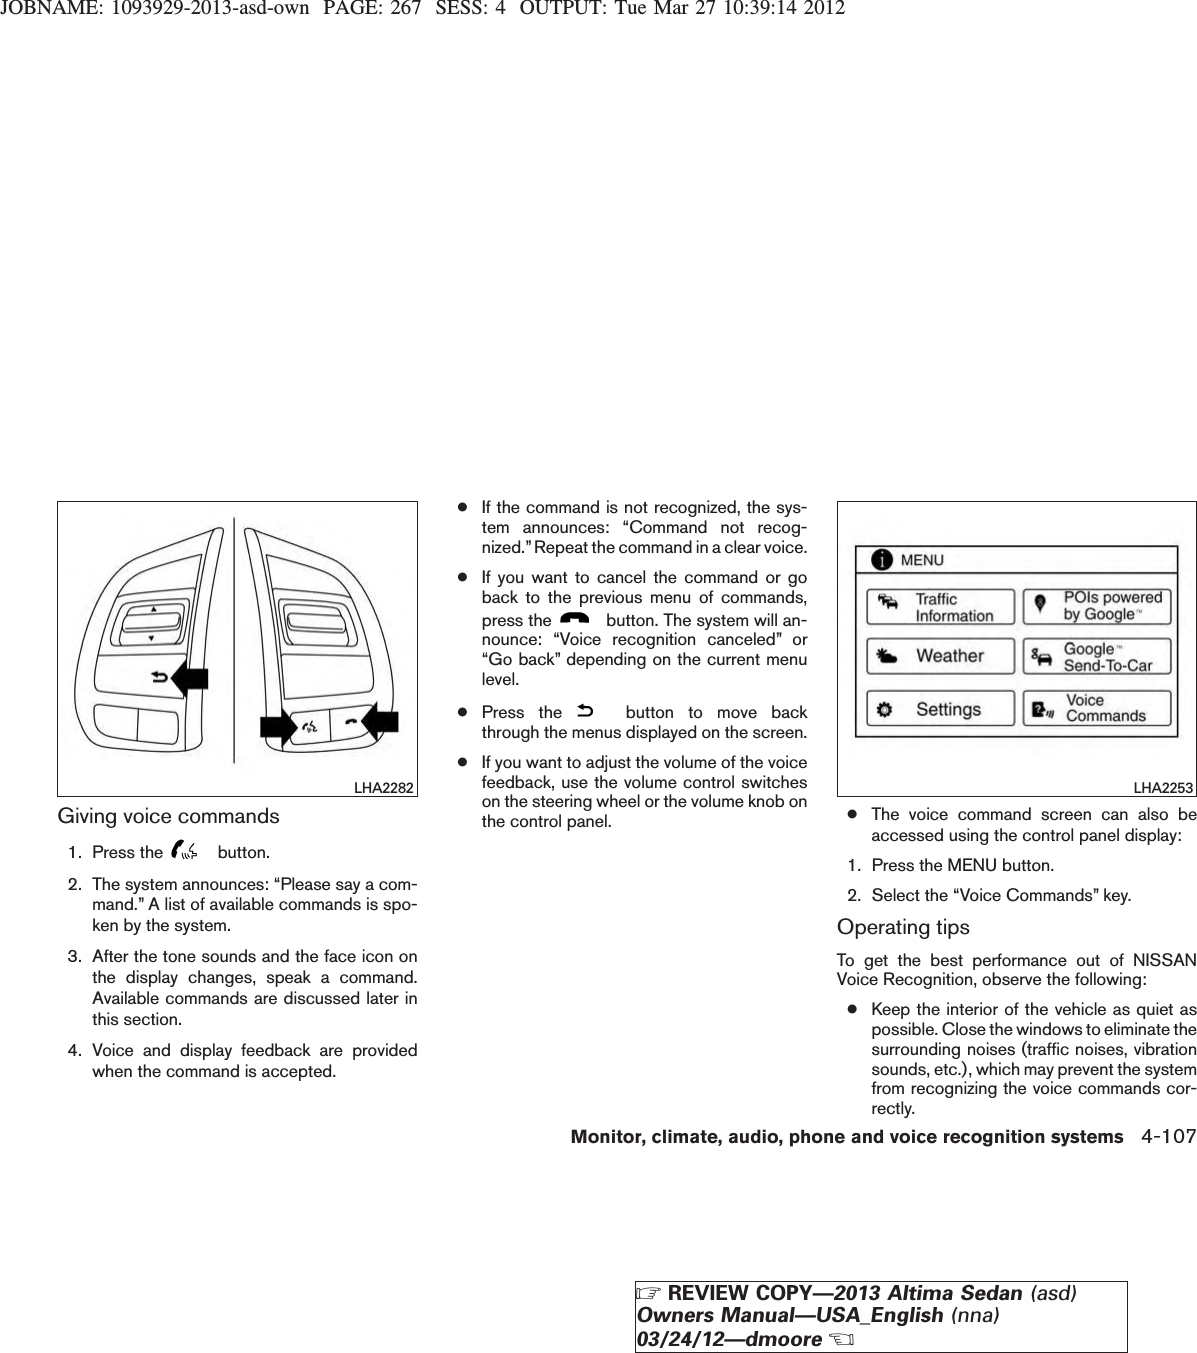
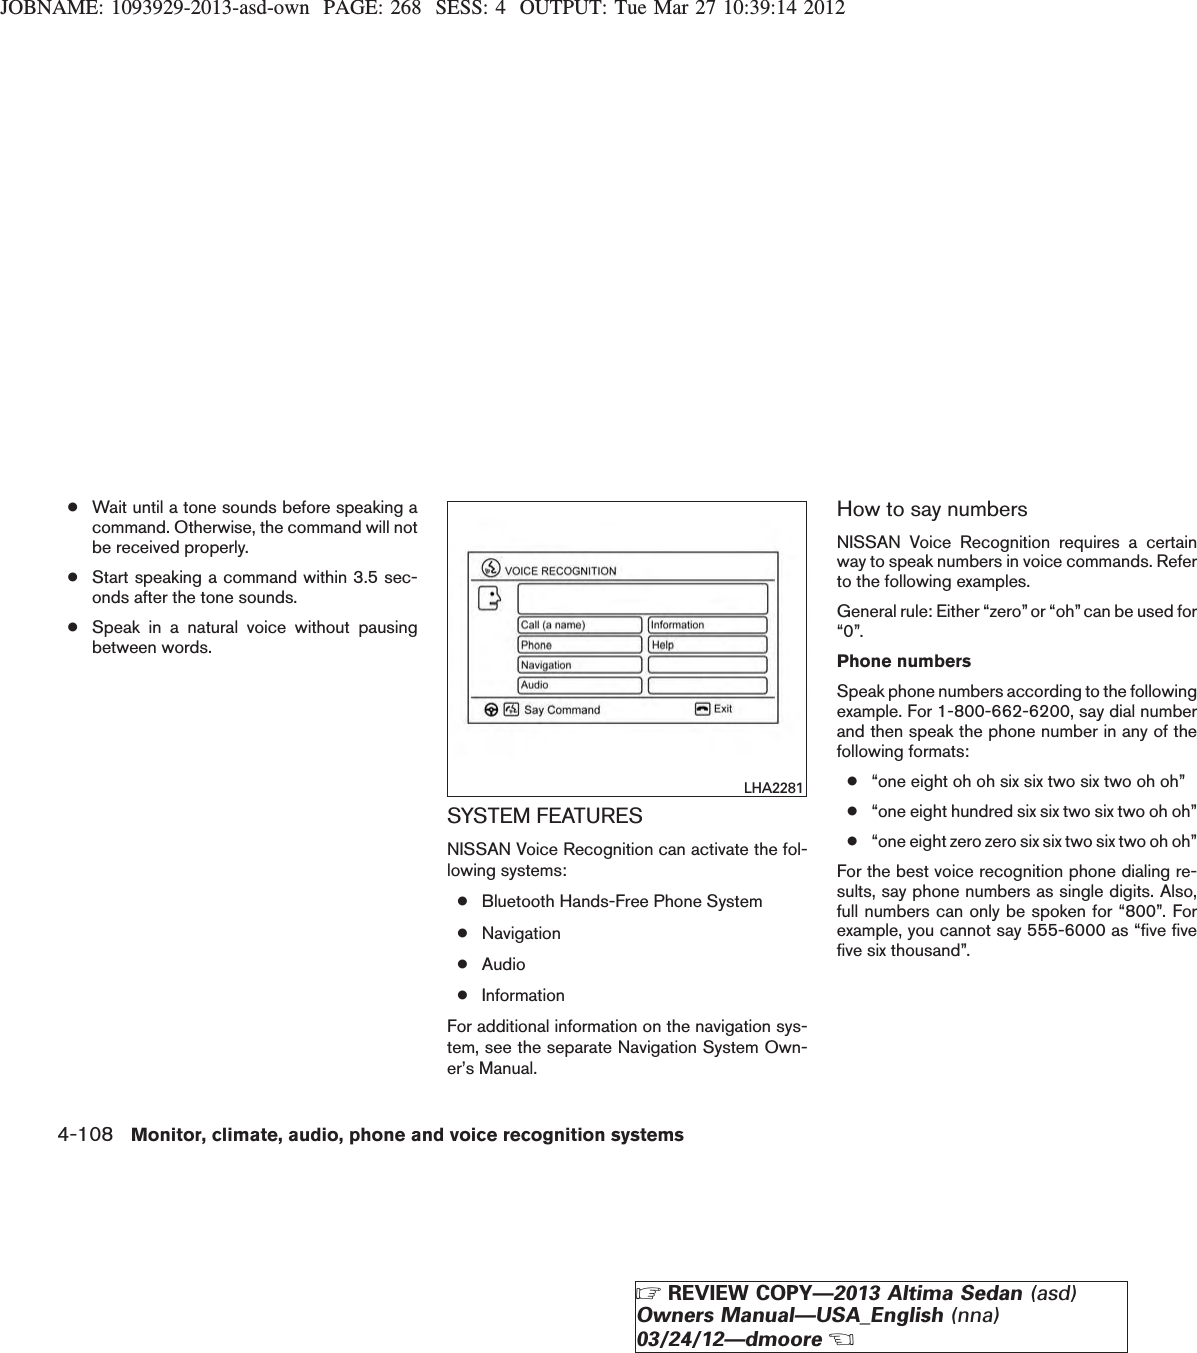
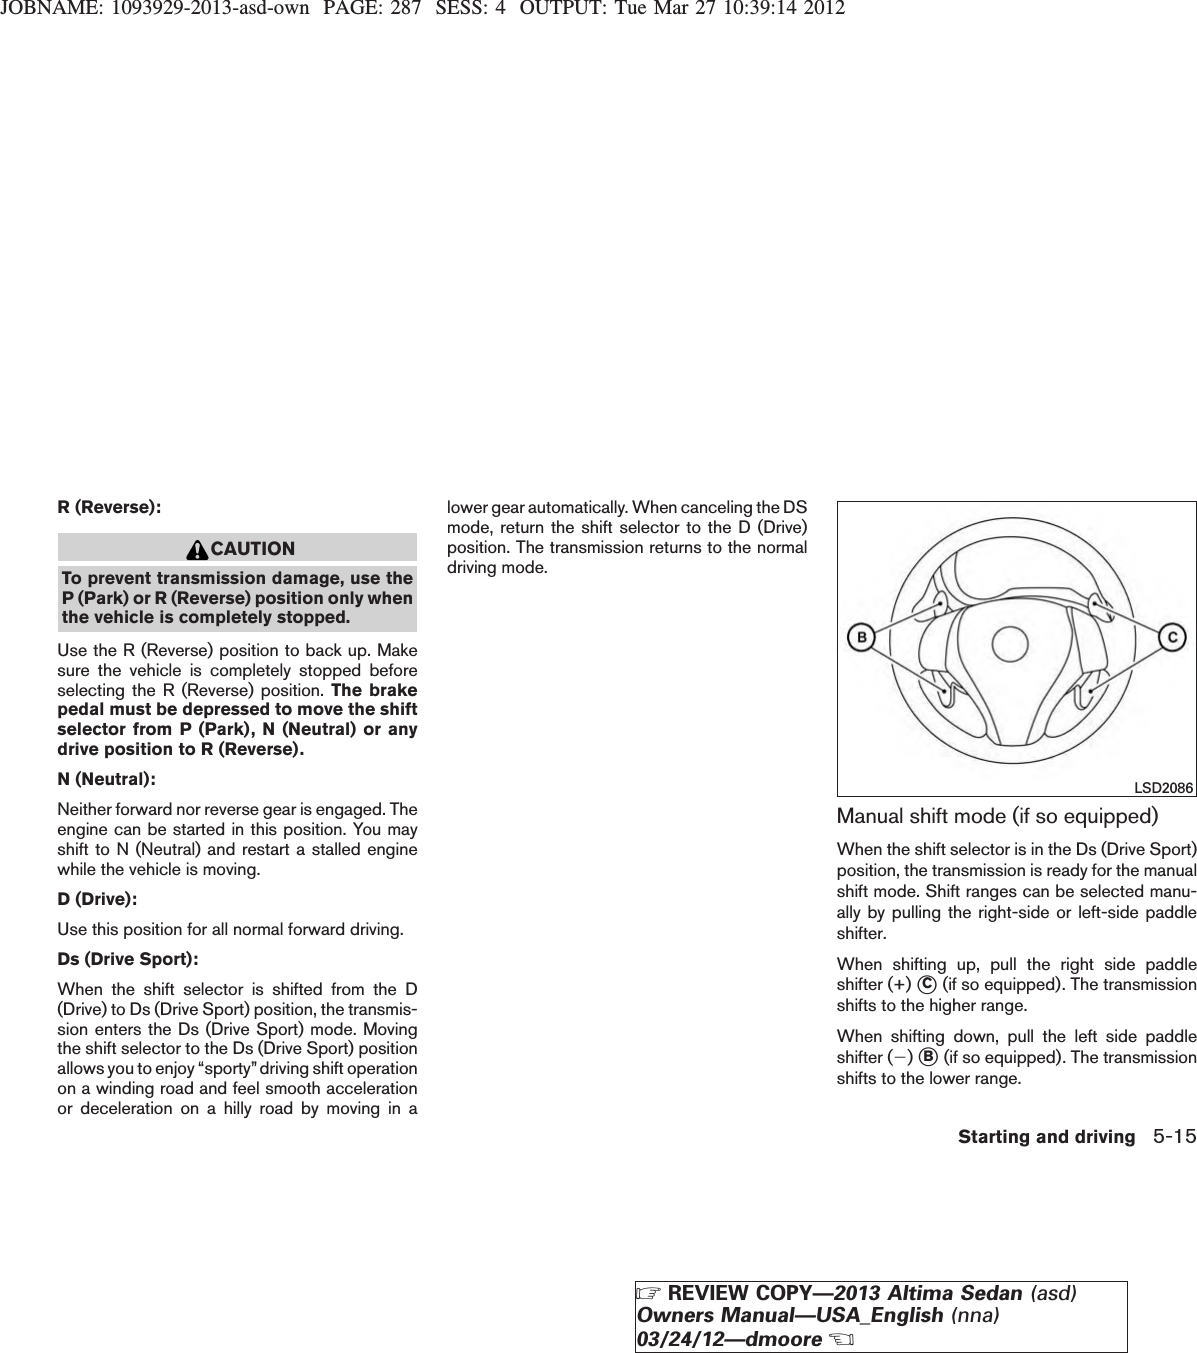
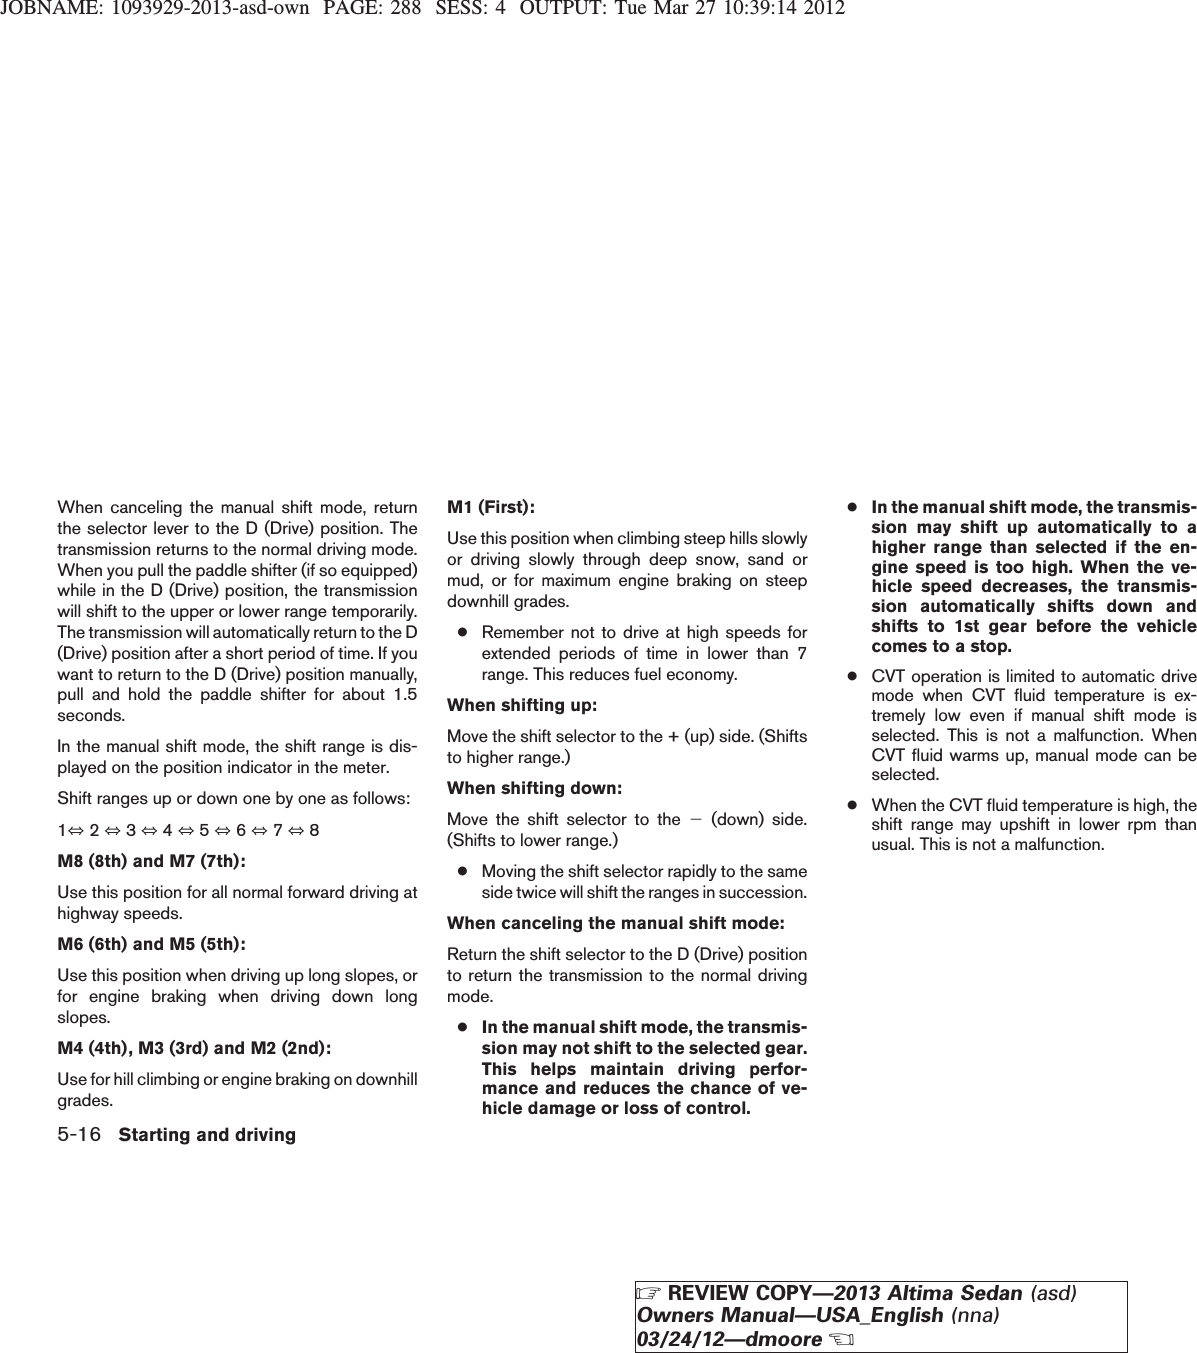
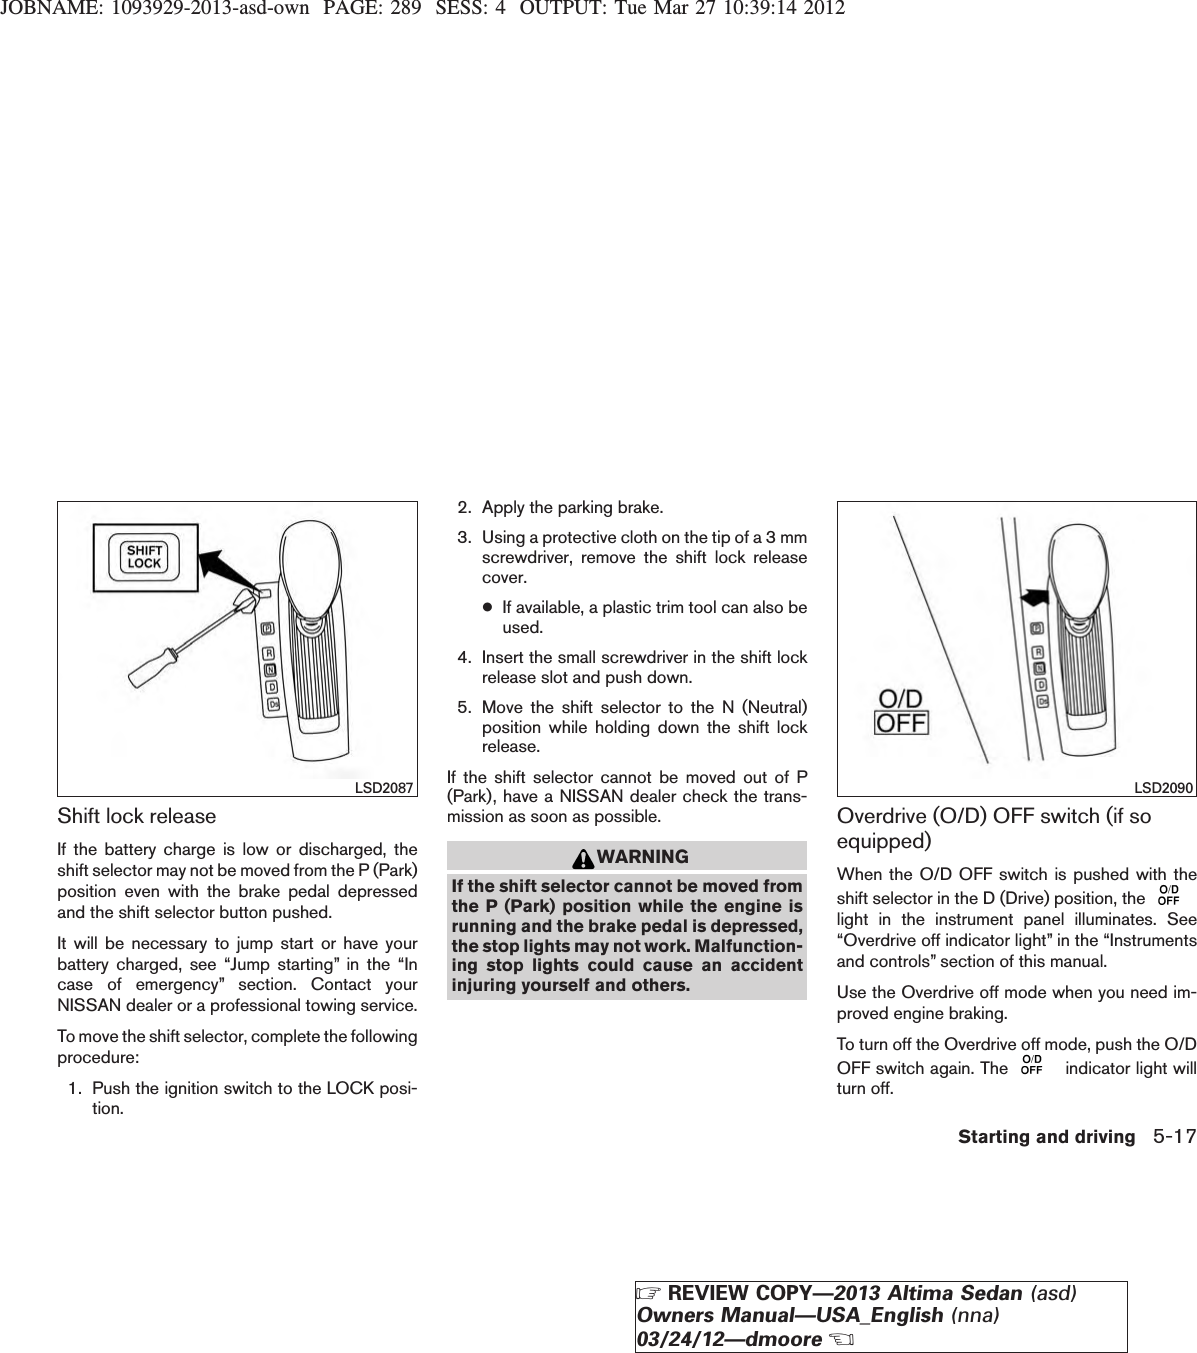
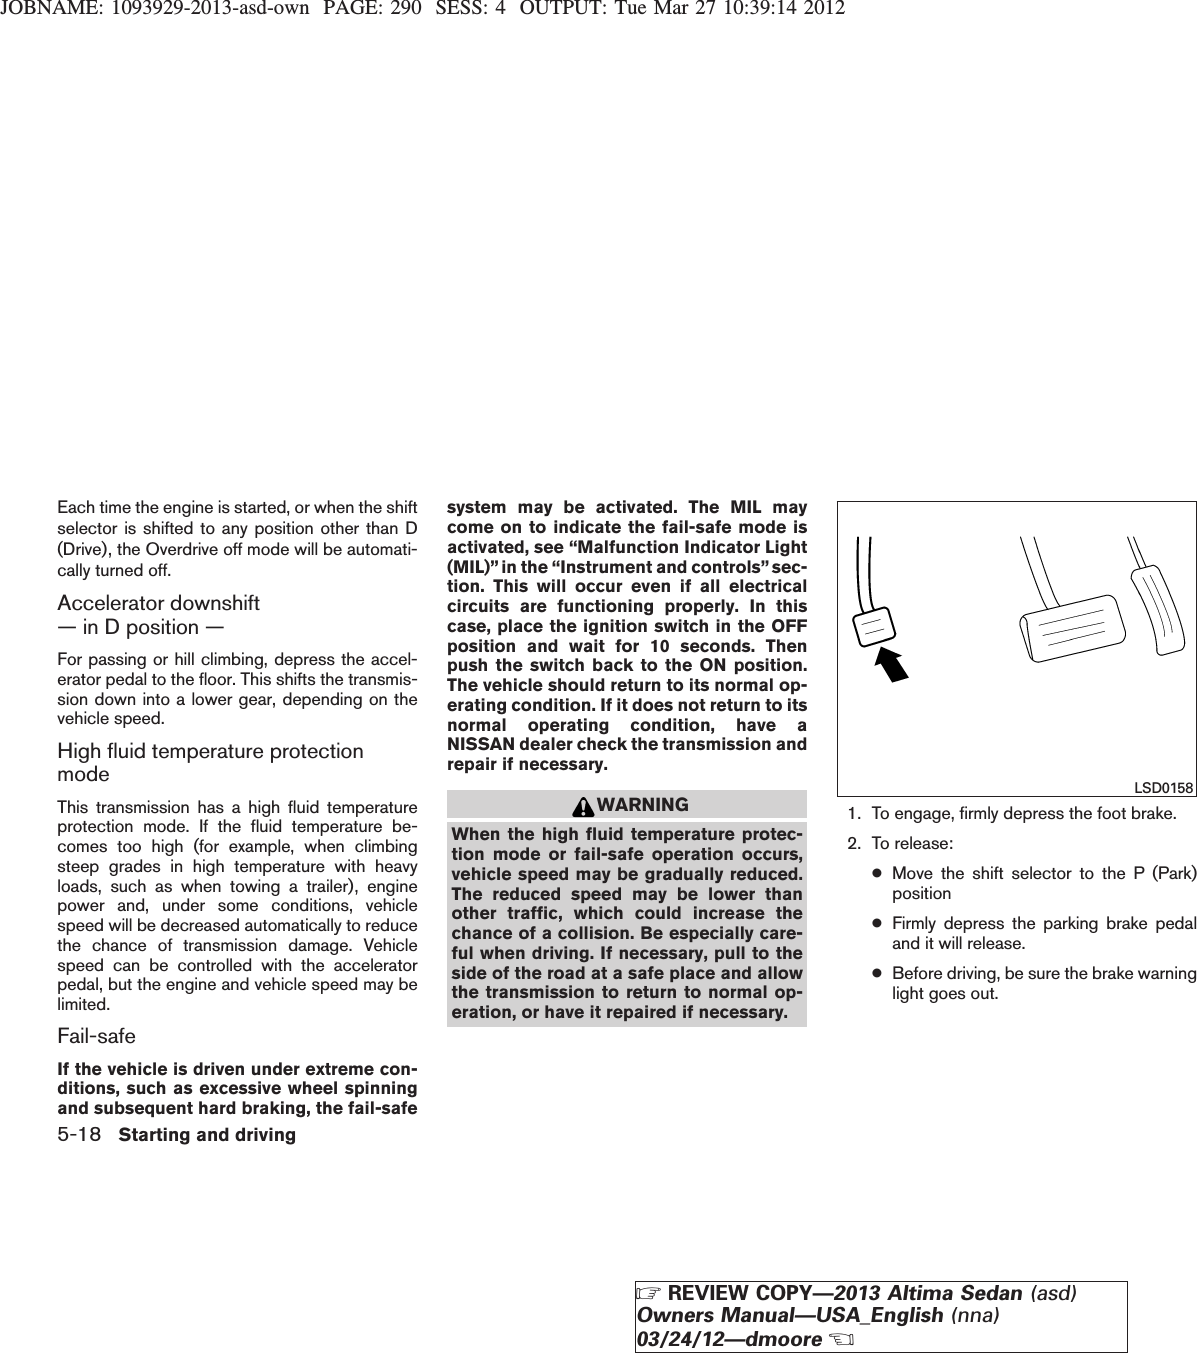
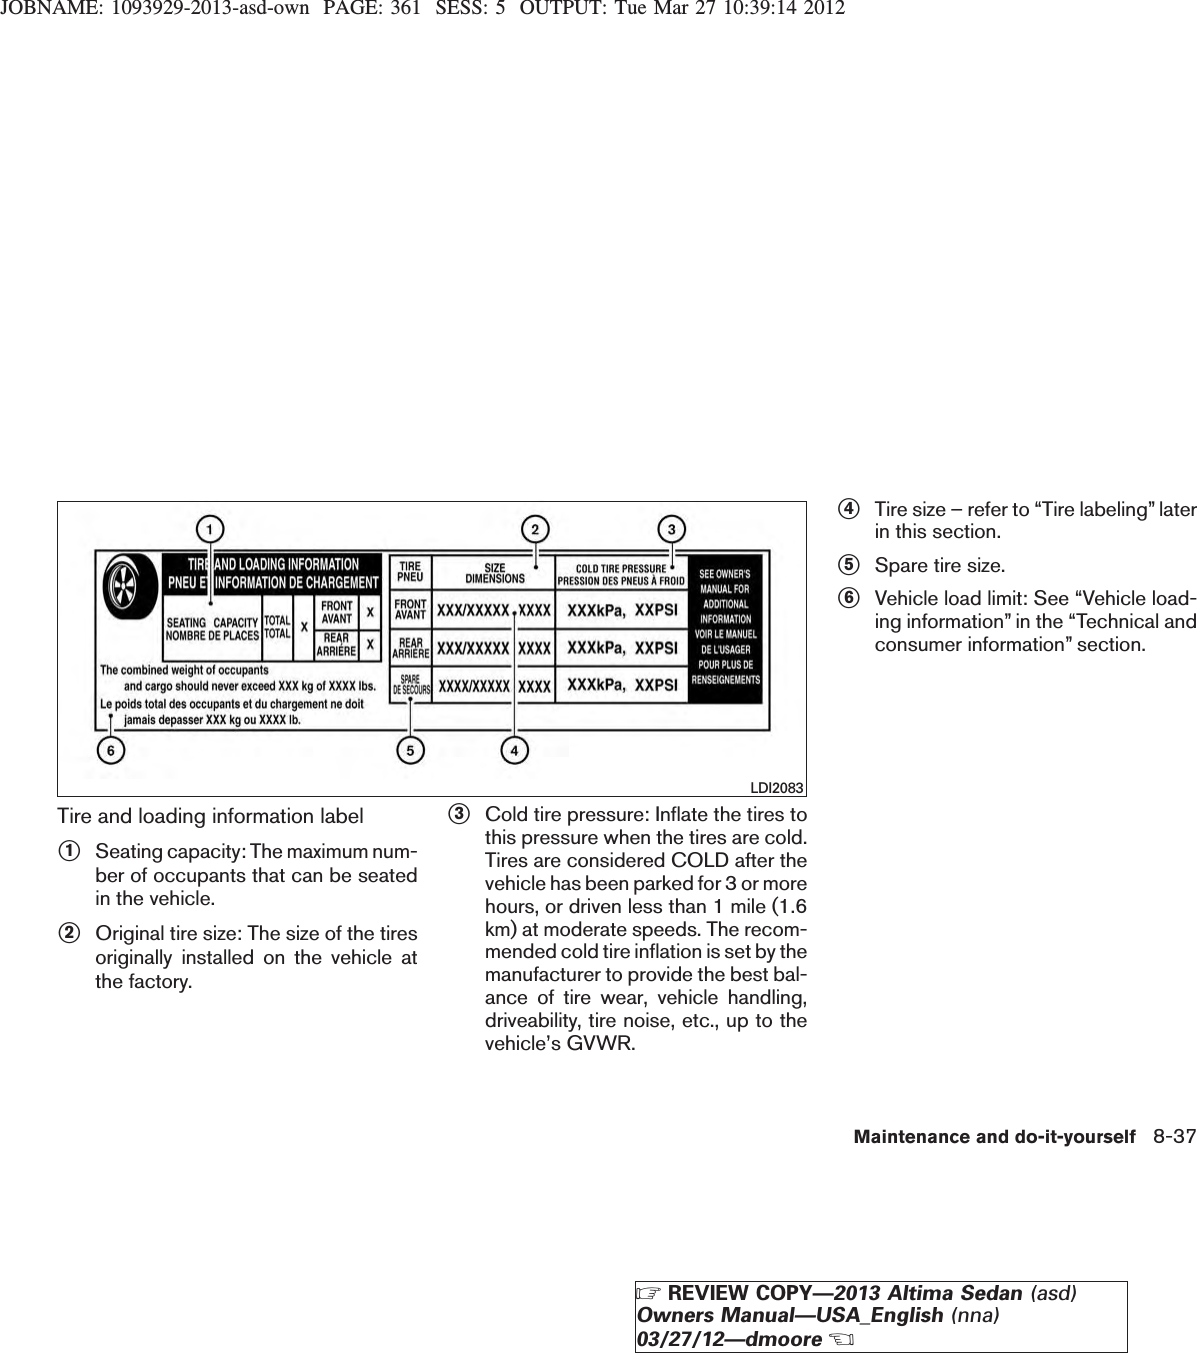
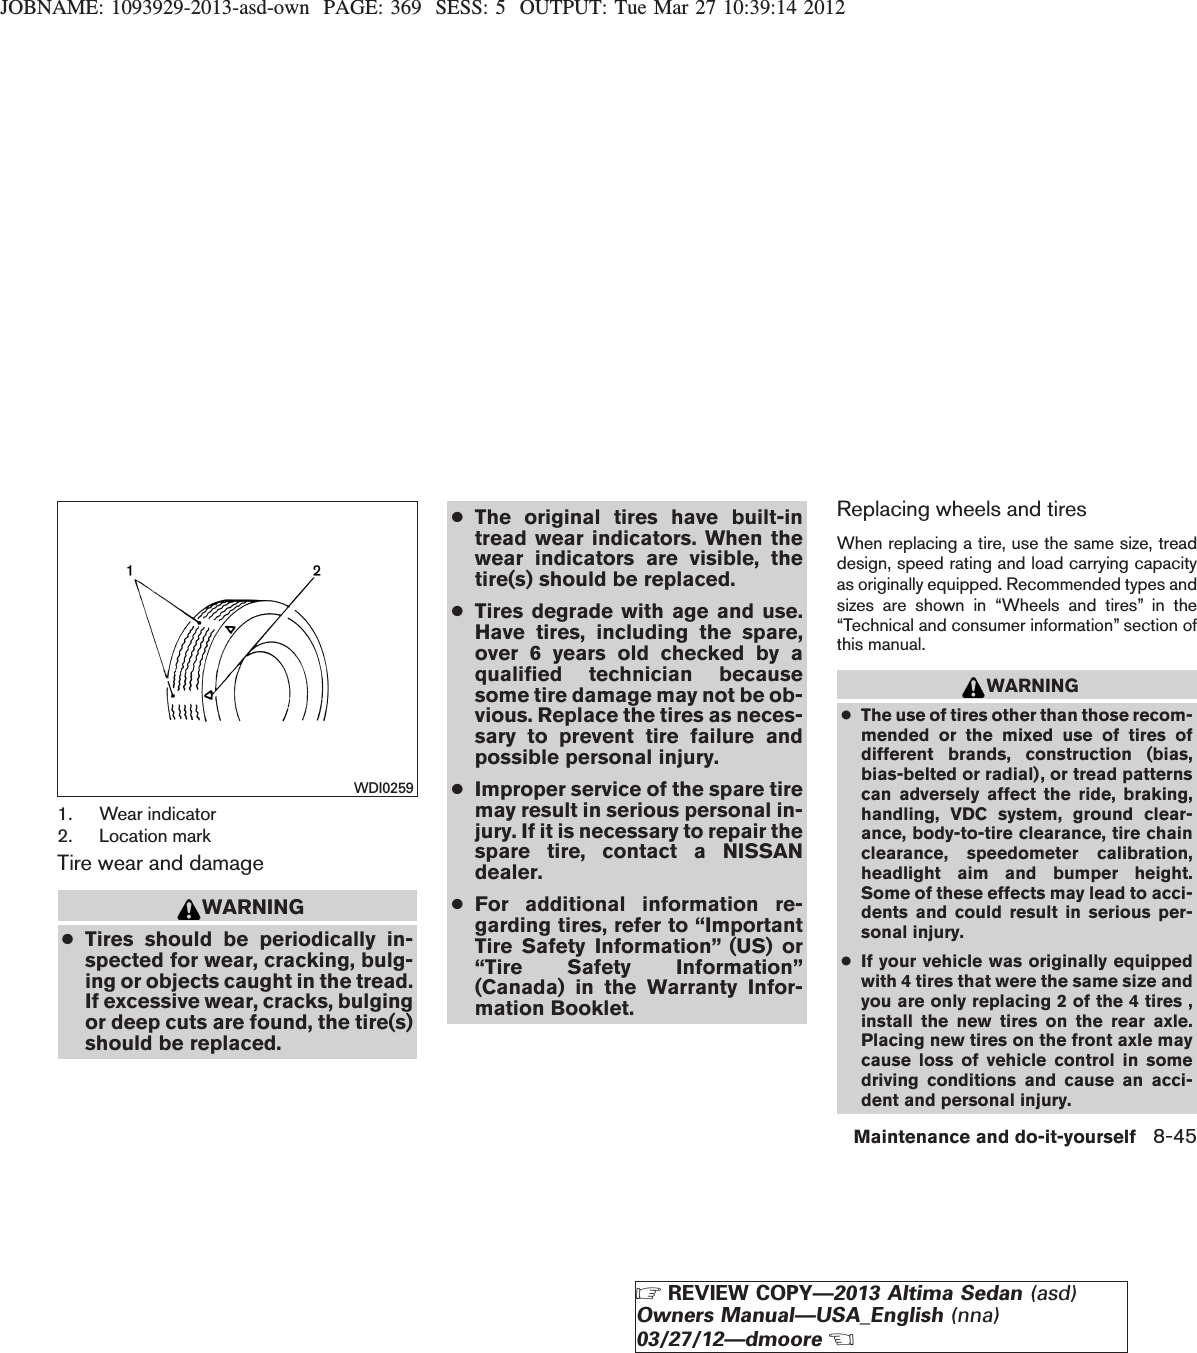
Robert Bosch Car Multimedia LCN20A Radio Navigation System with Bluetooth User Manual 1093929 2013 asd own
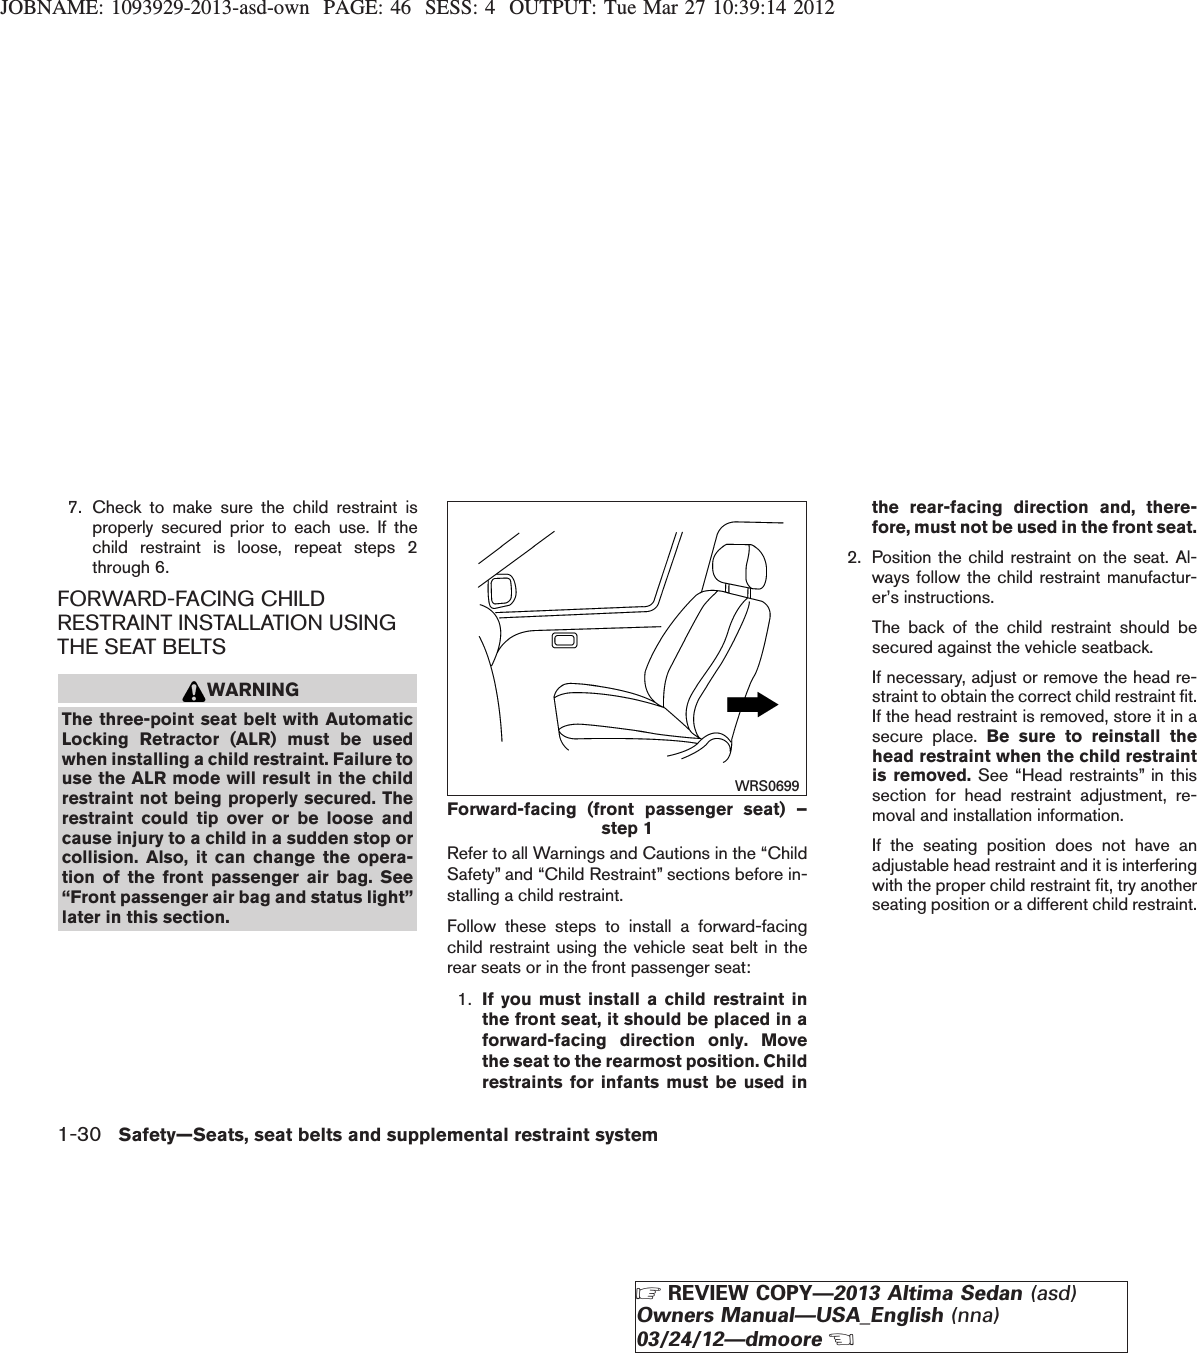
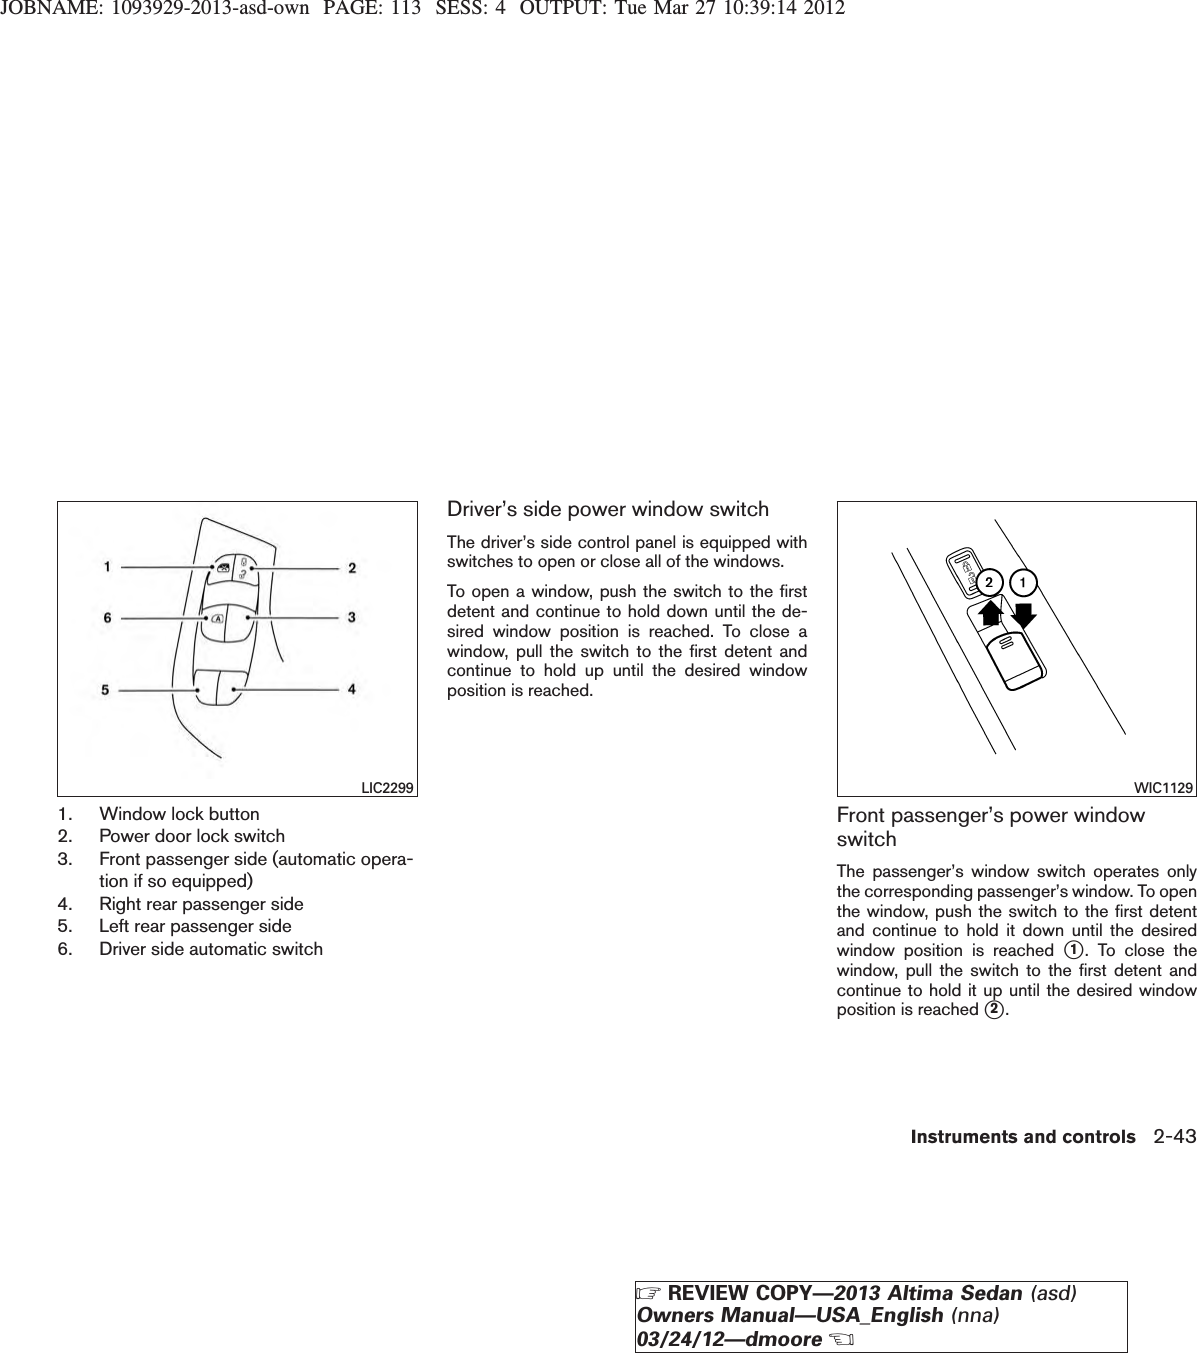
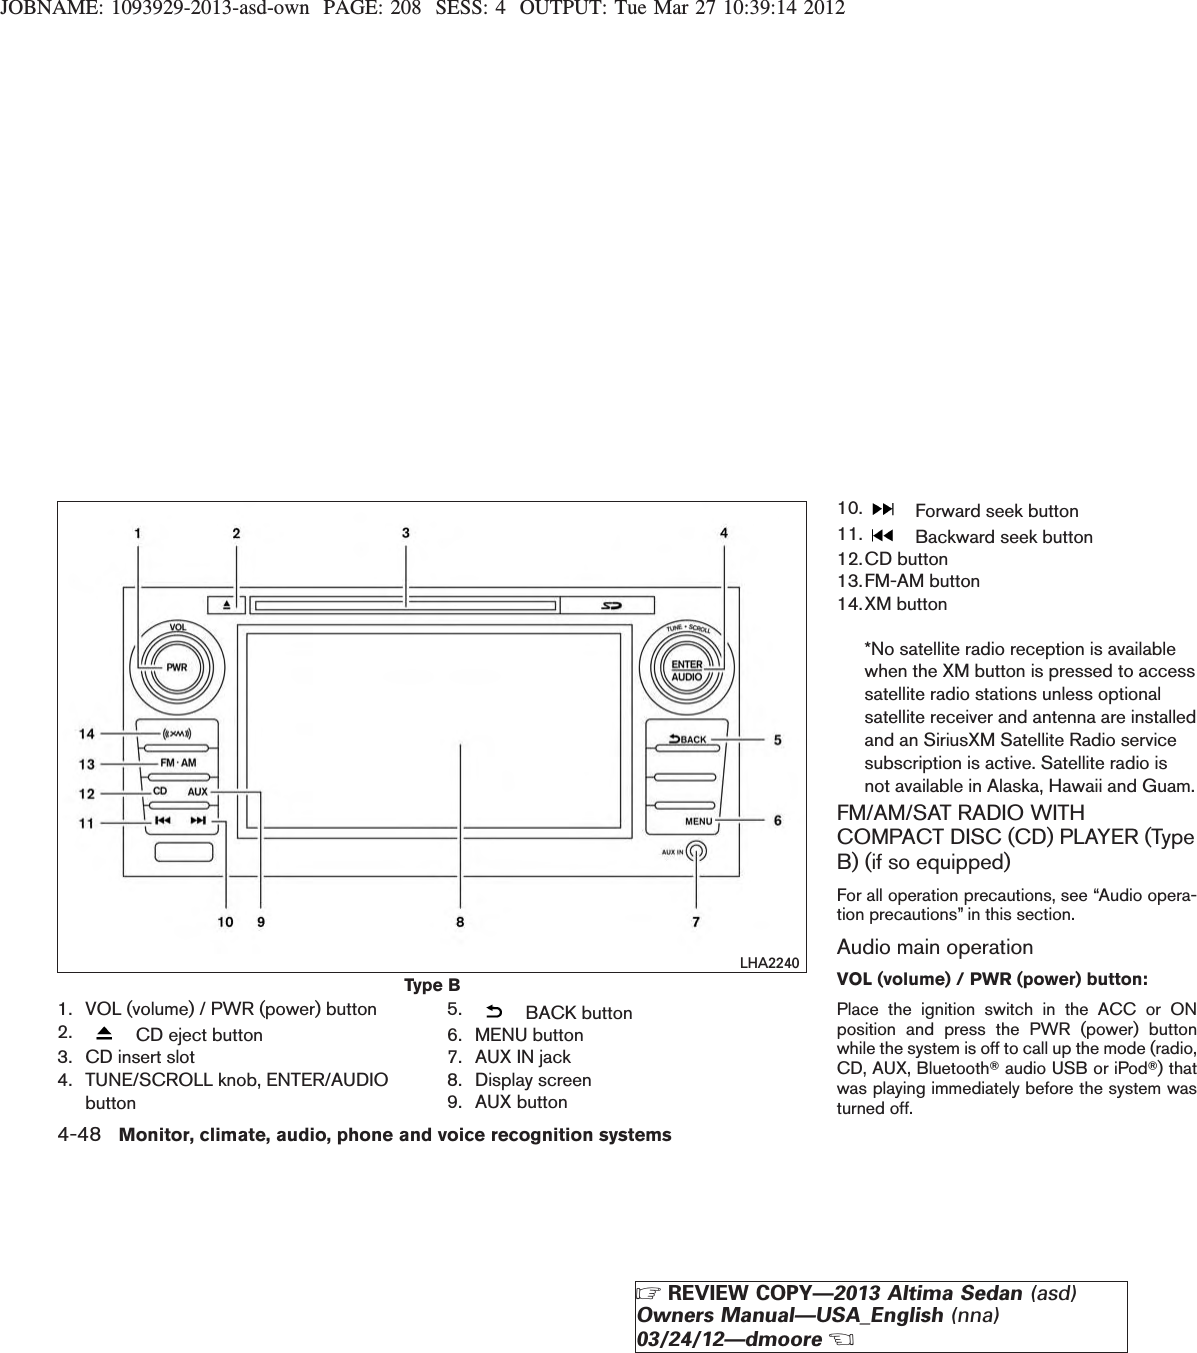
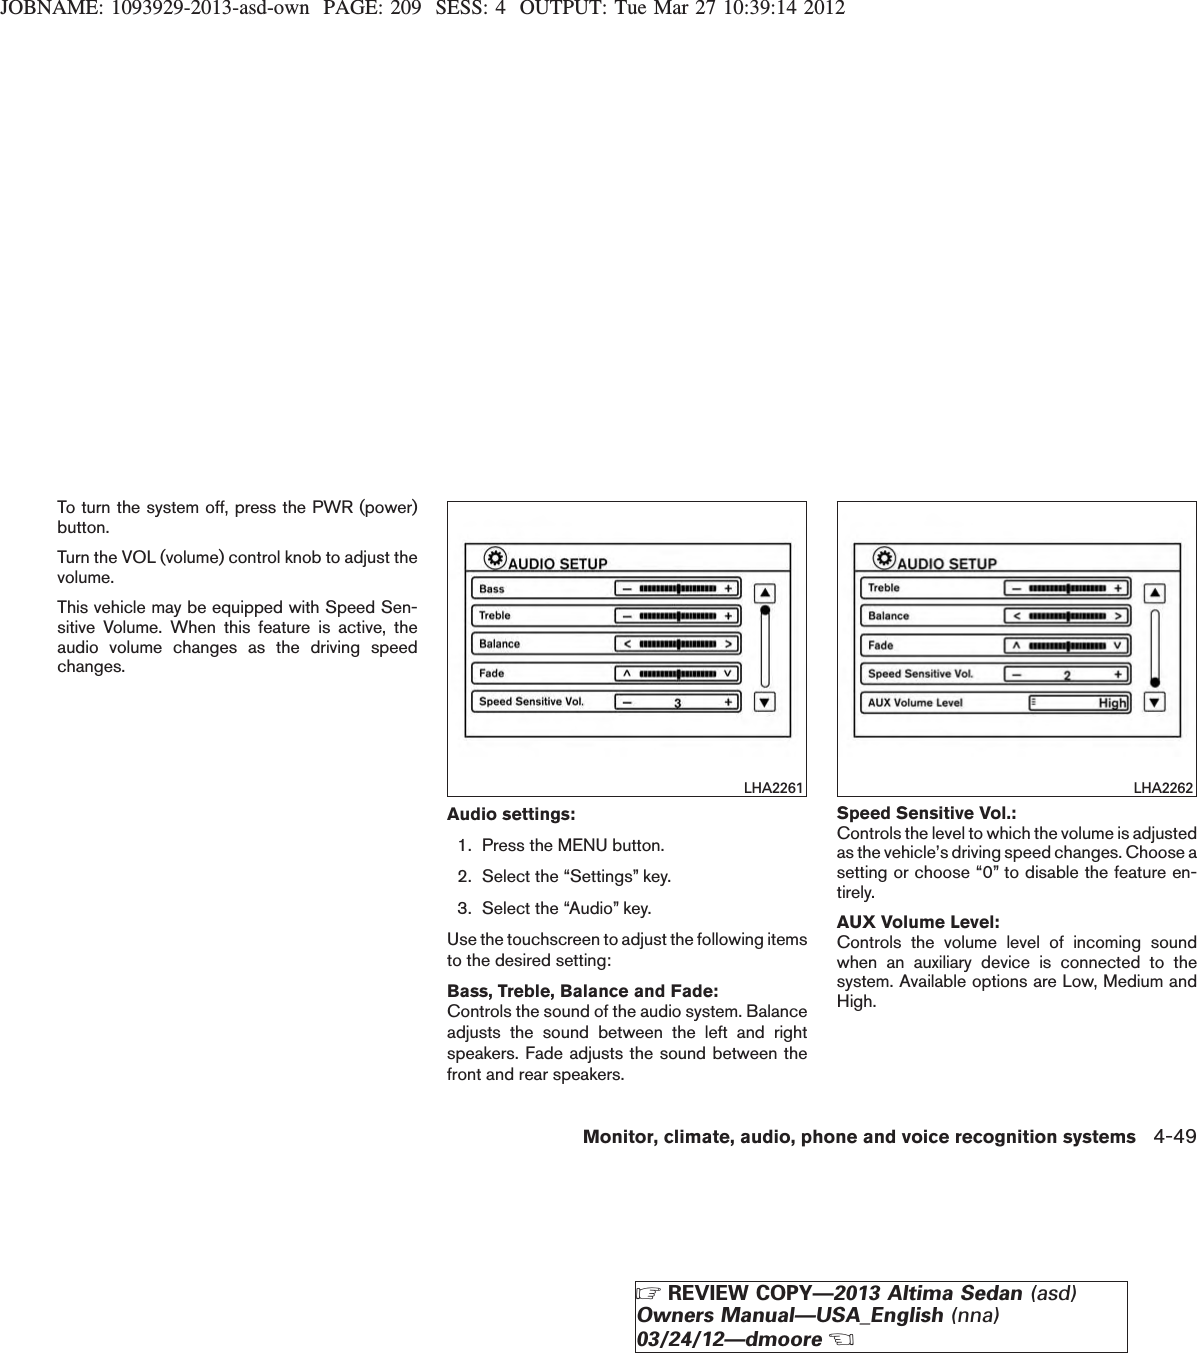
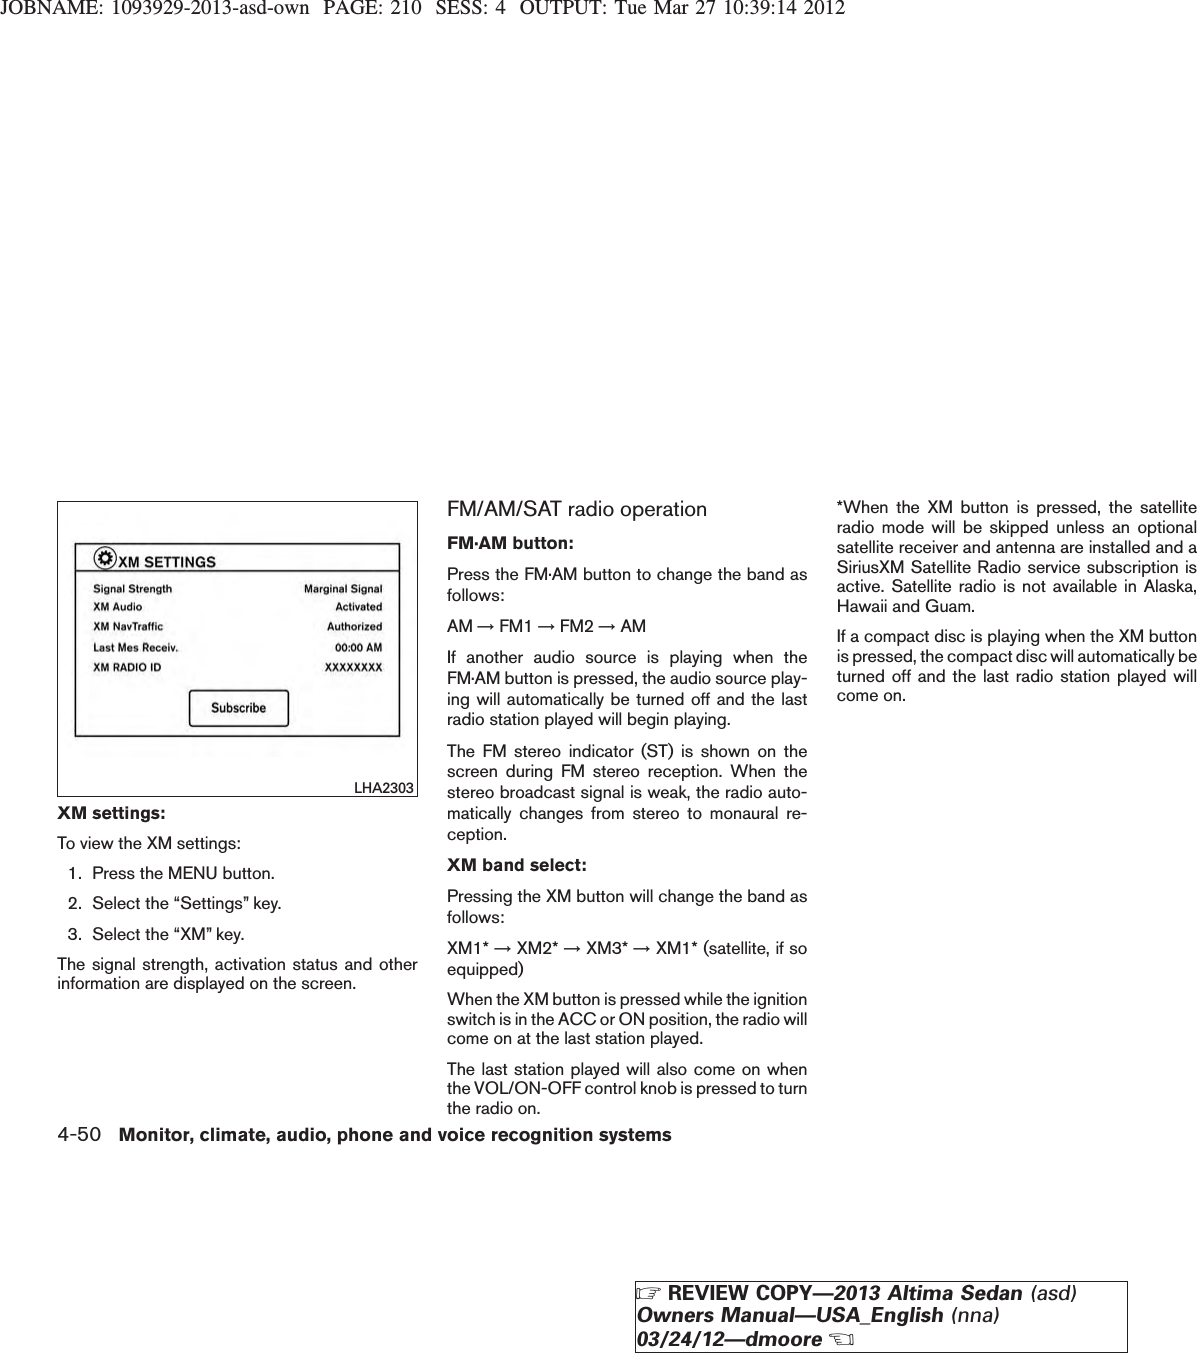
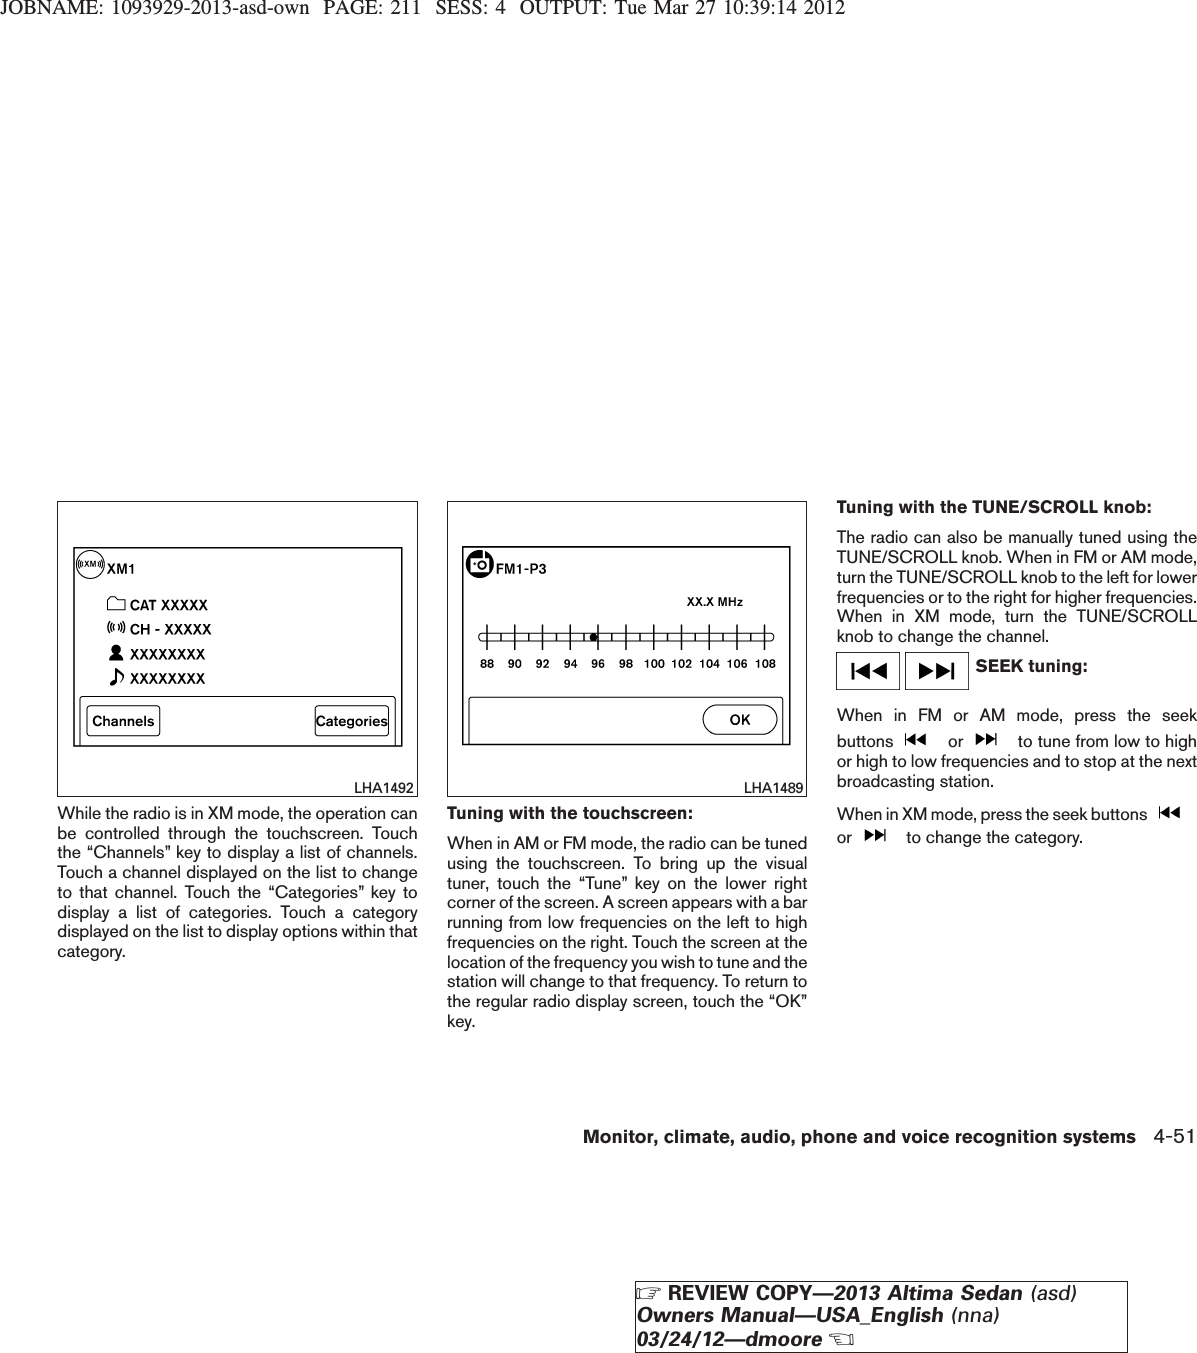
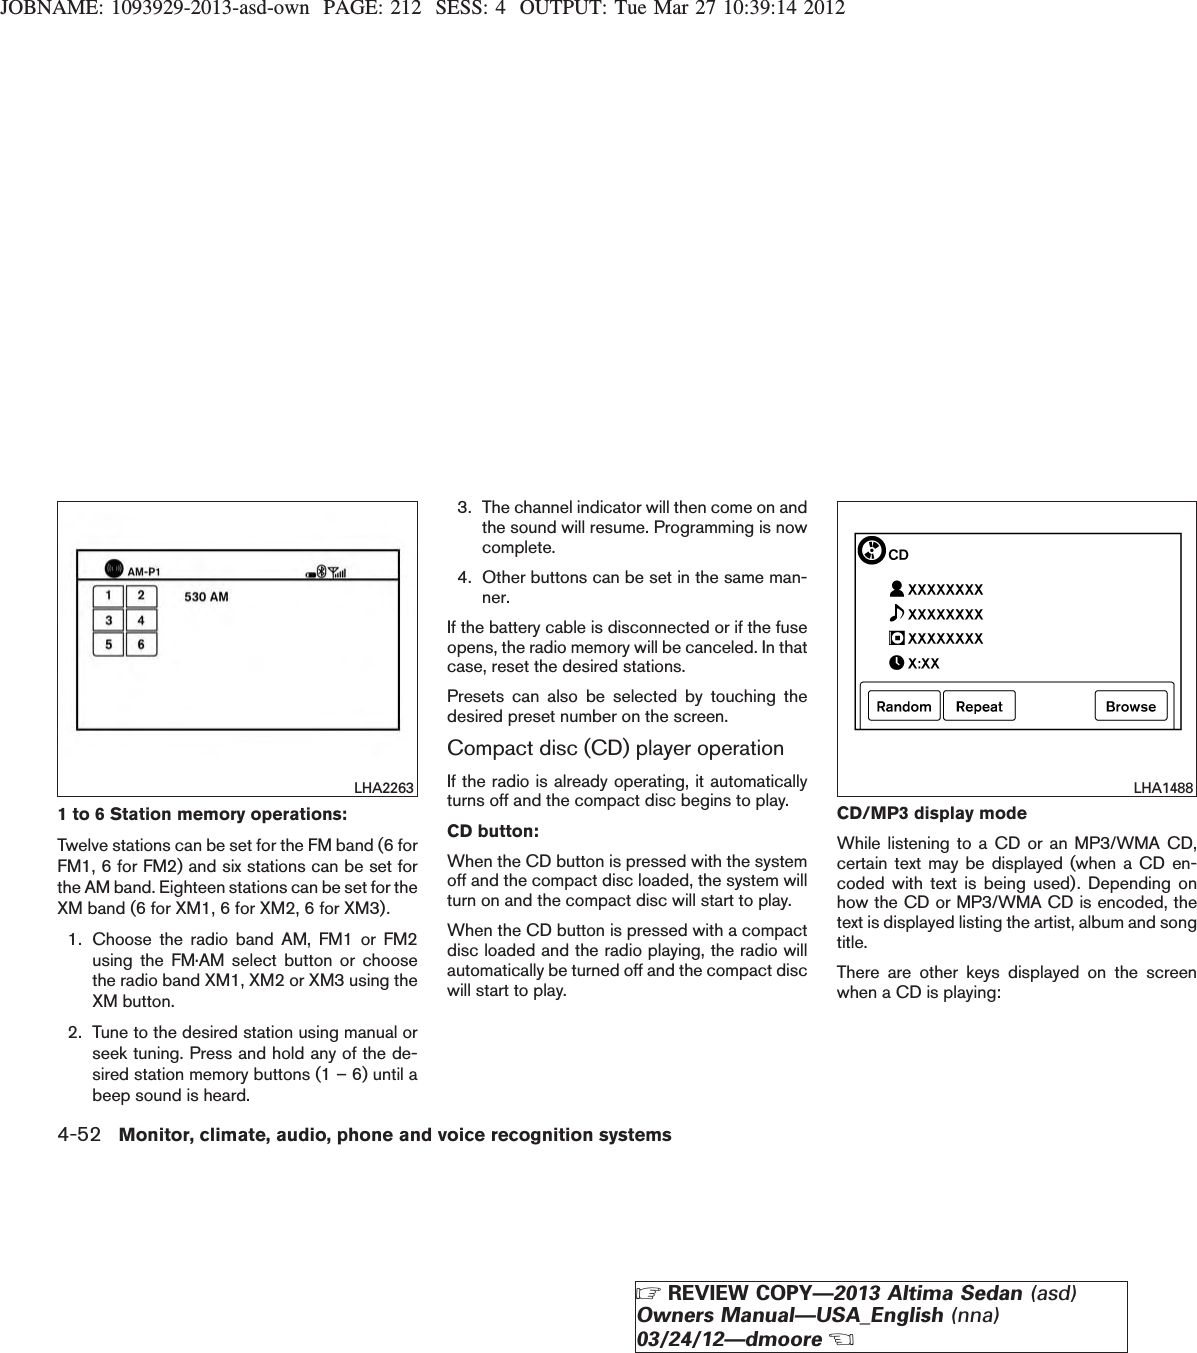
Robert Bosch Car Multimedia GmbH Radio Navigation System with Bluetooth 1093929 2013 asd own
UserManual.wiki
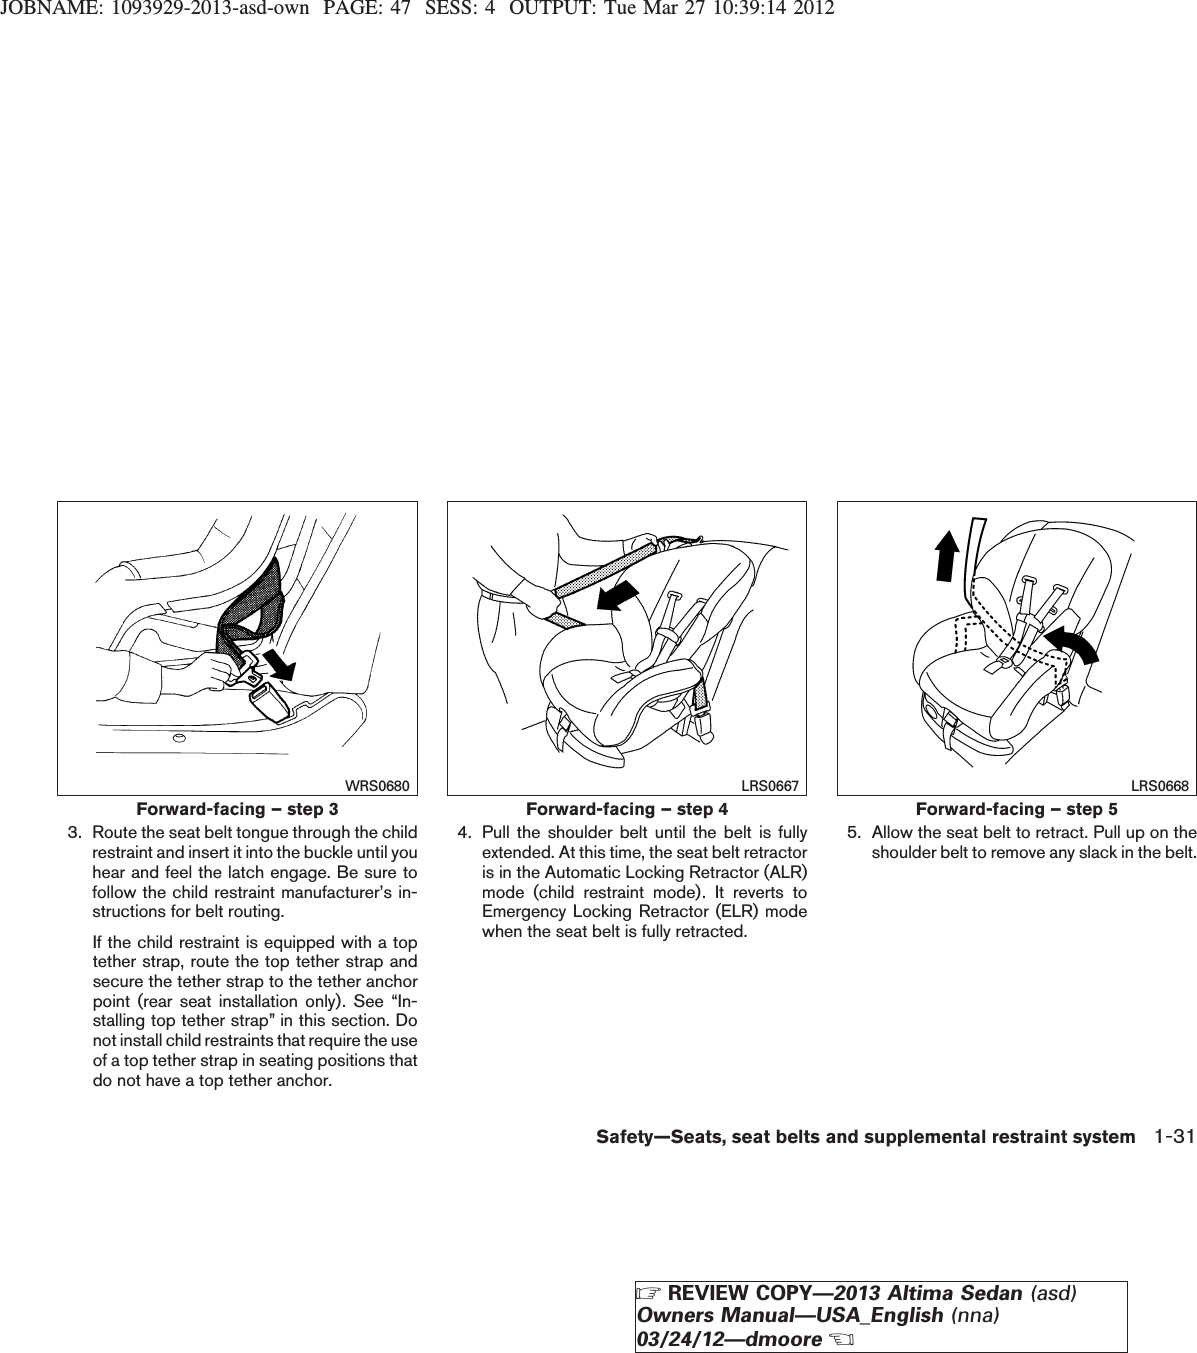
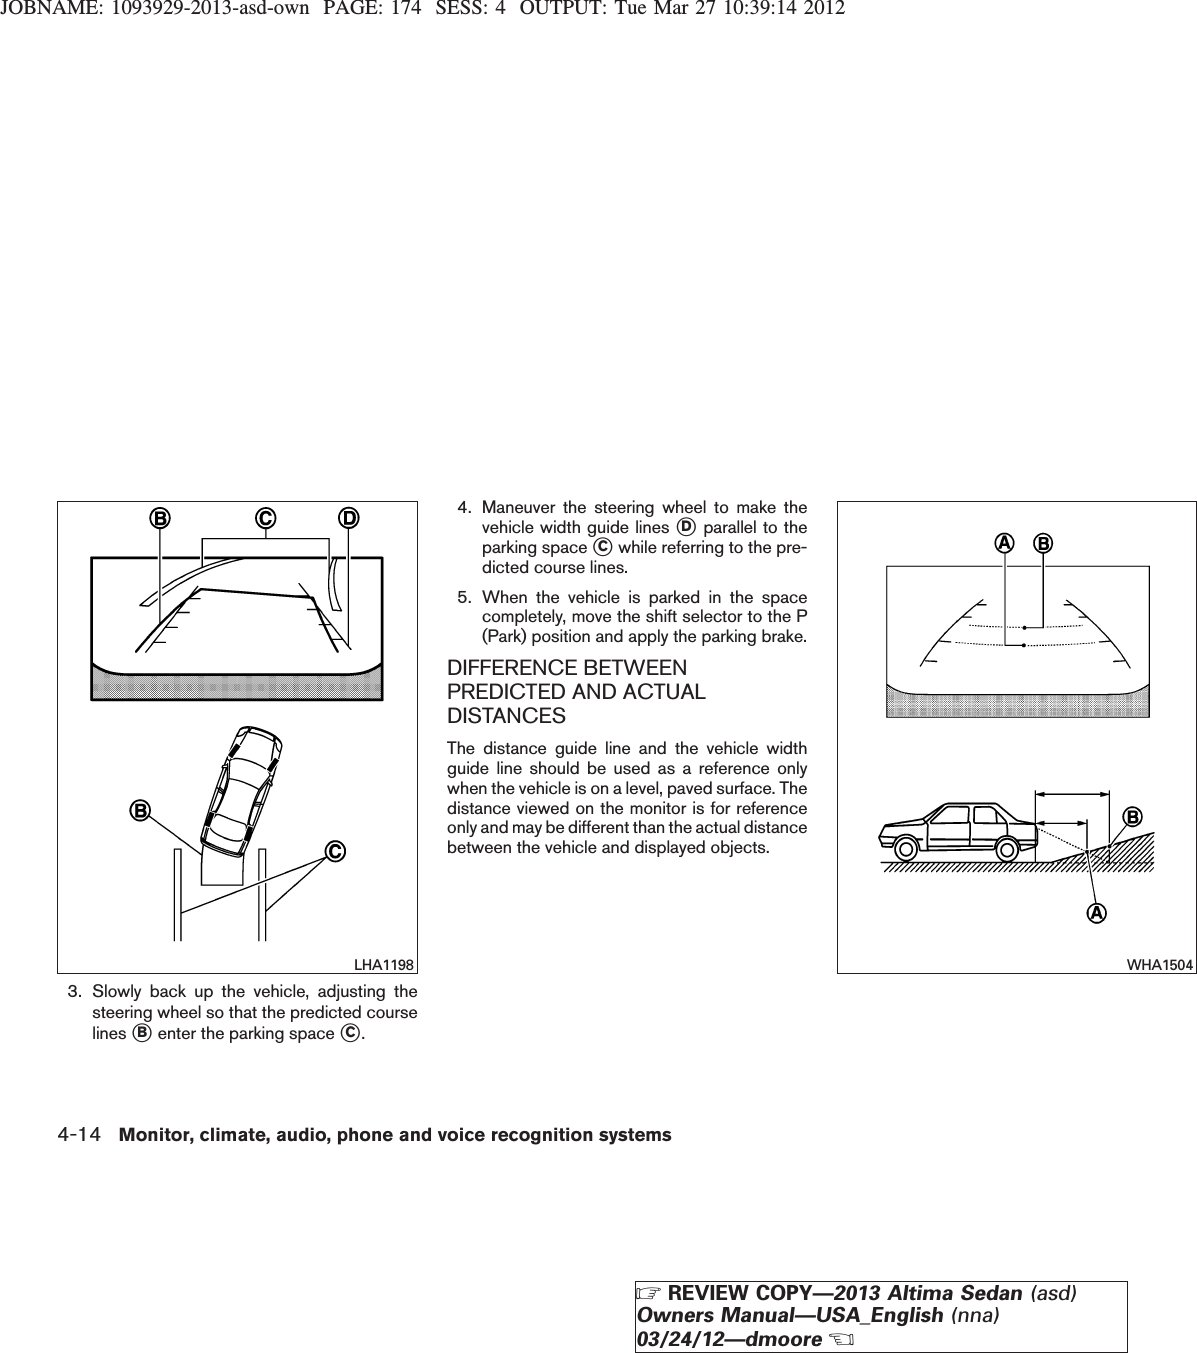
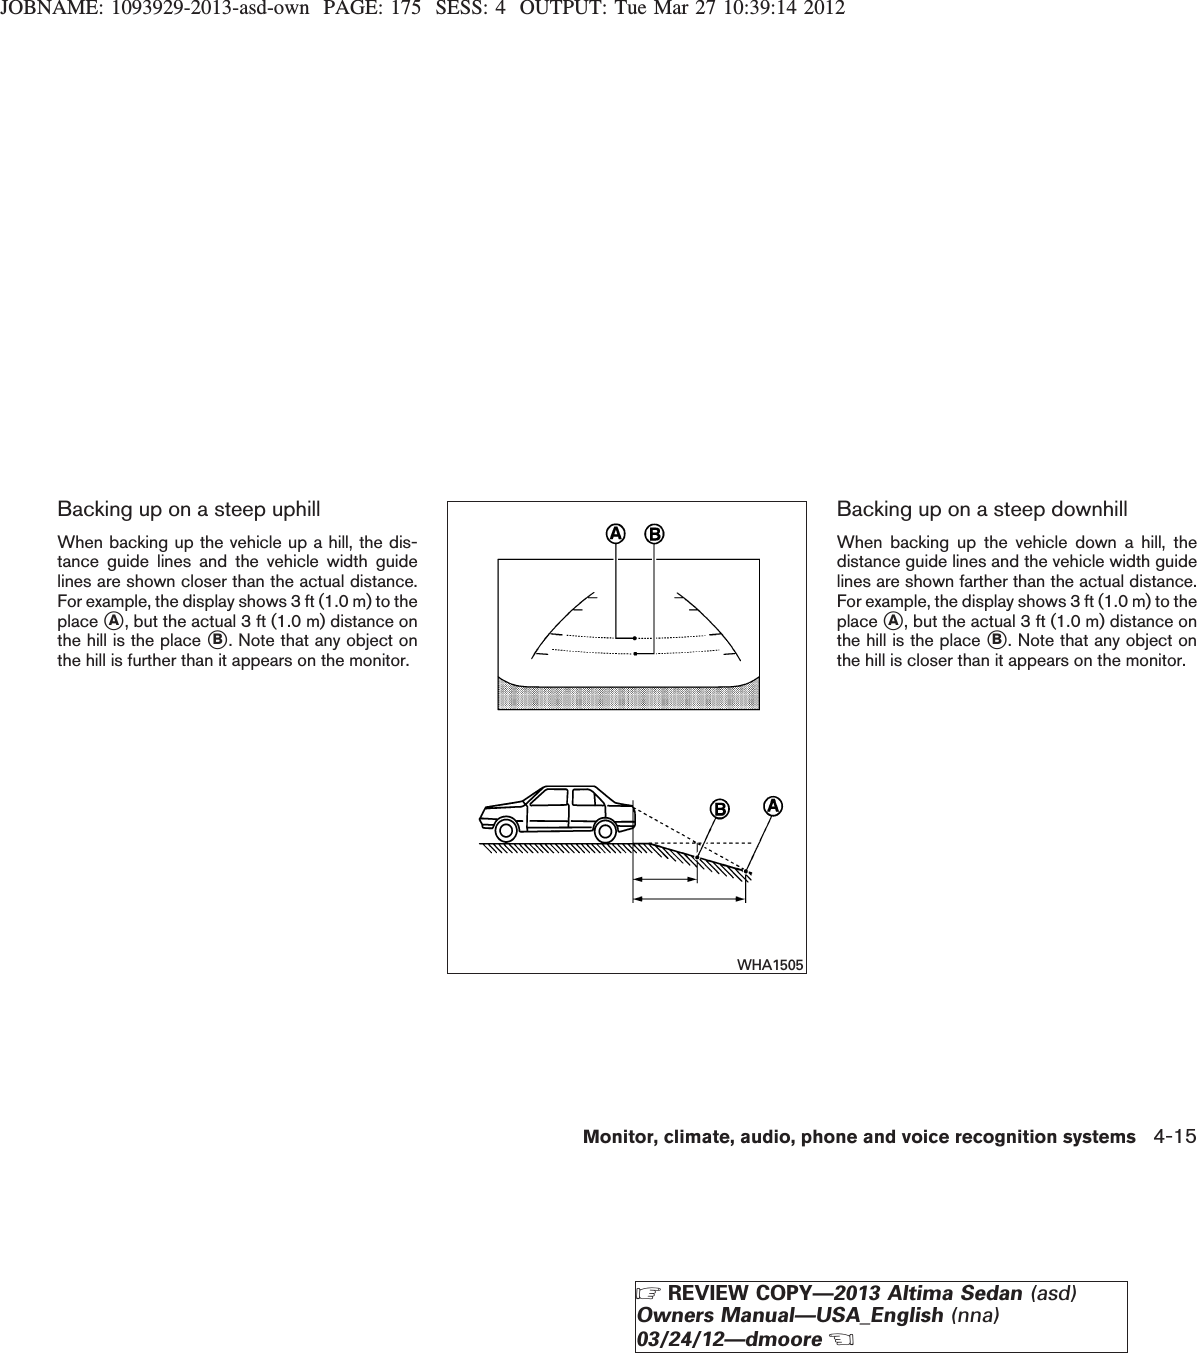
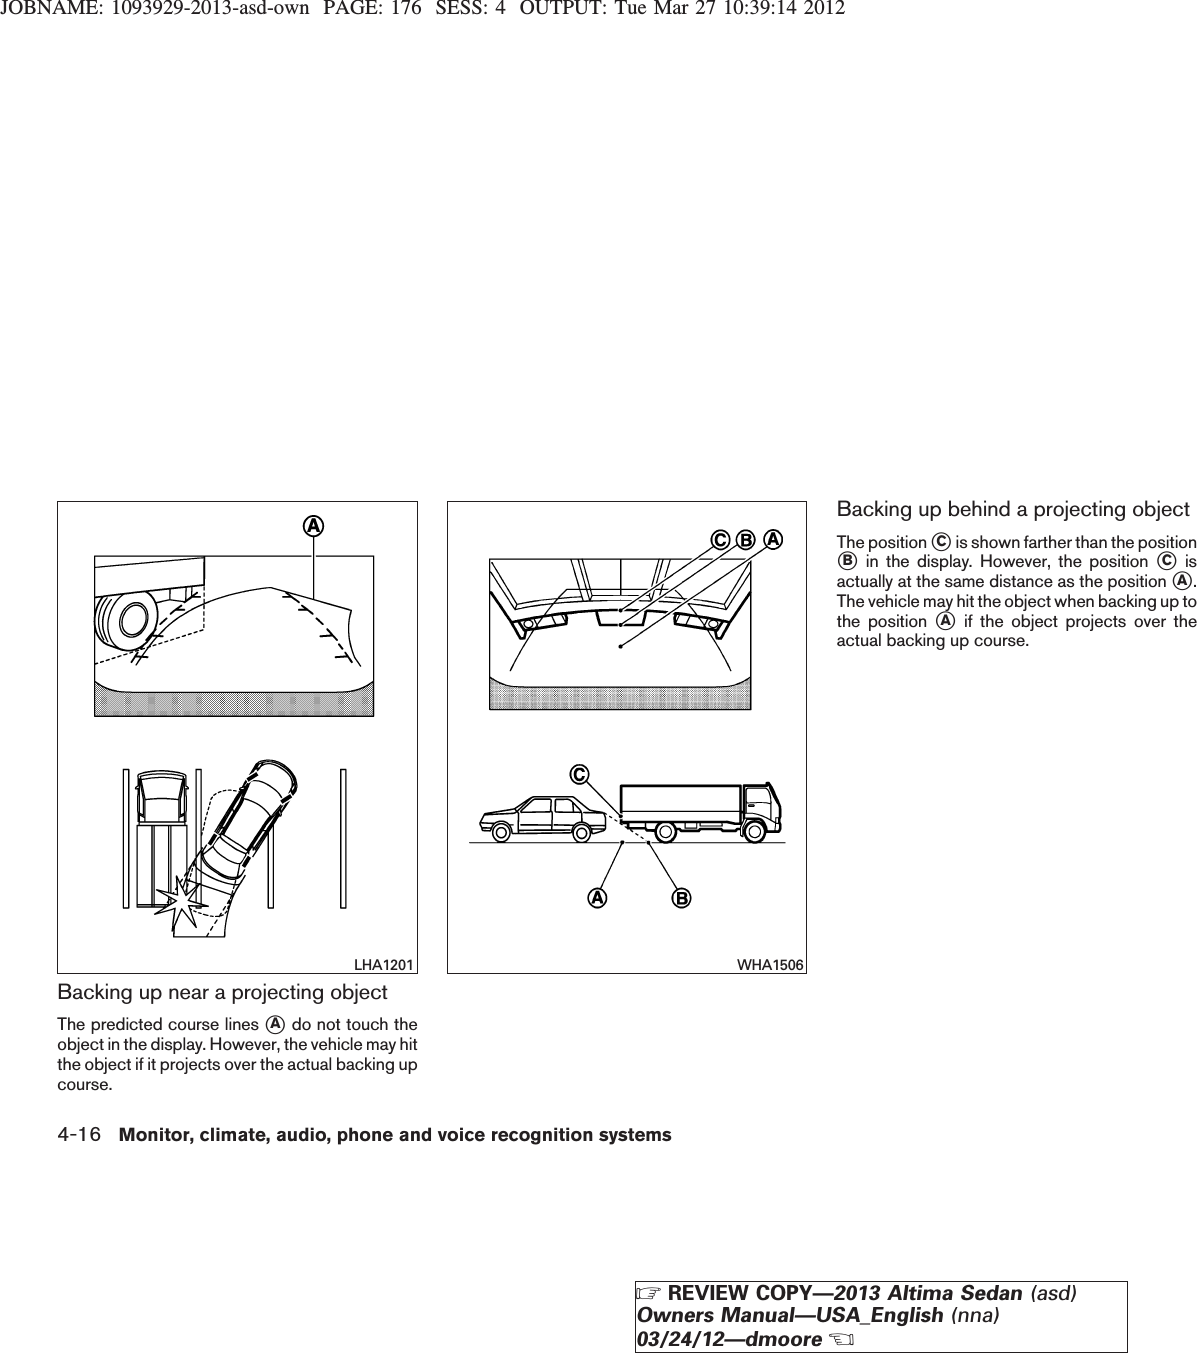
>
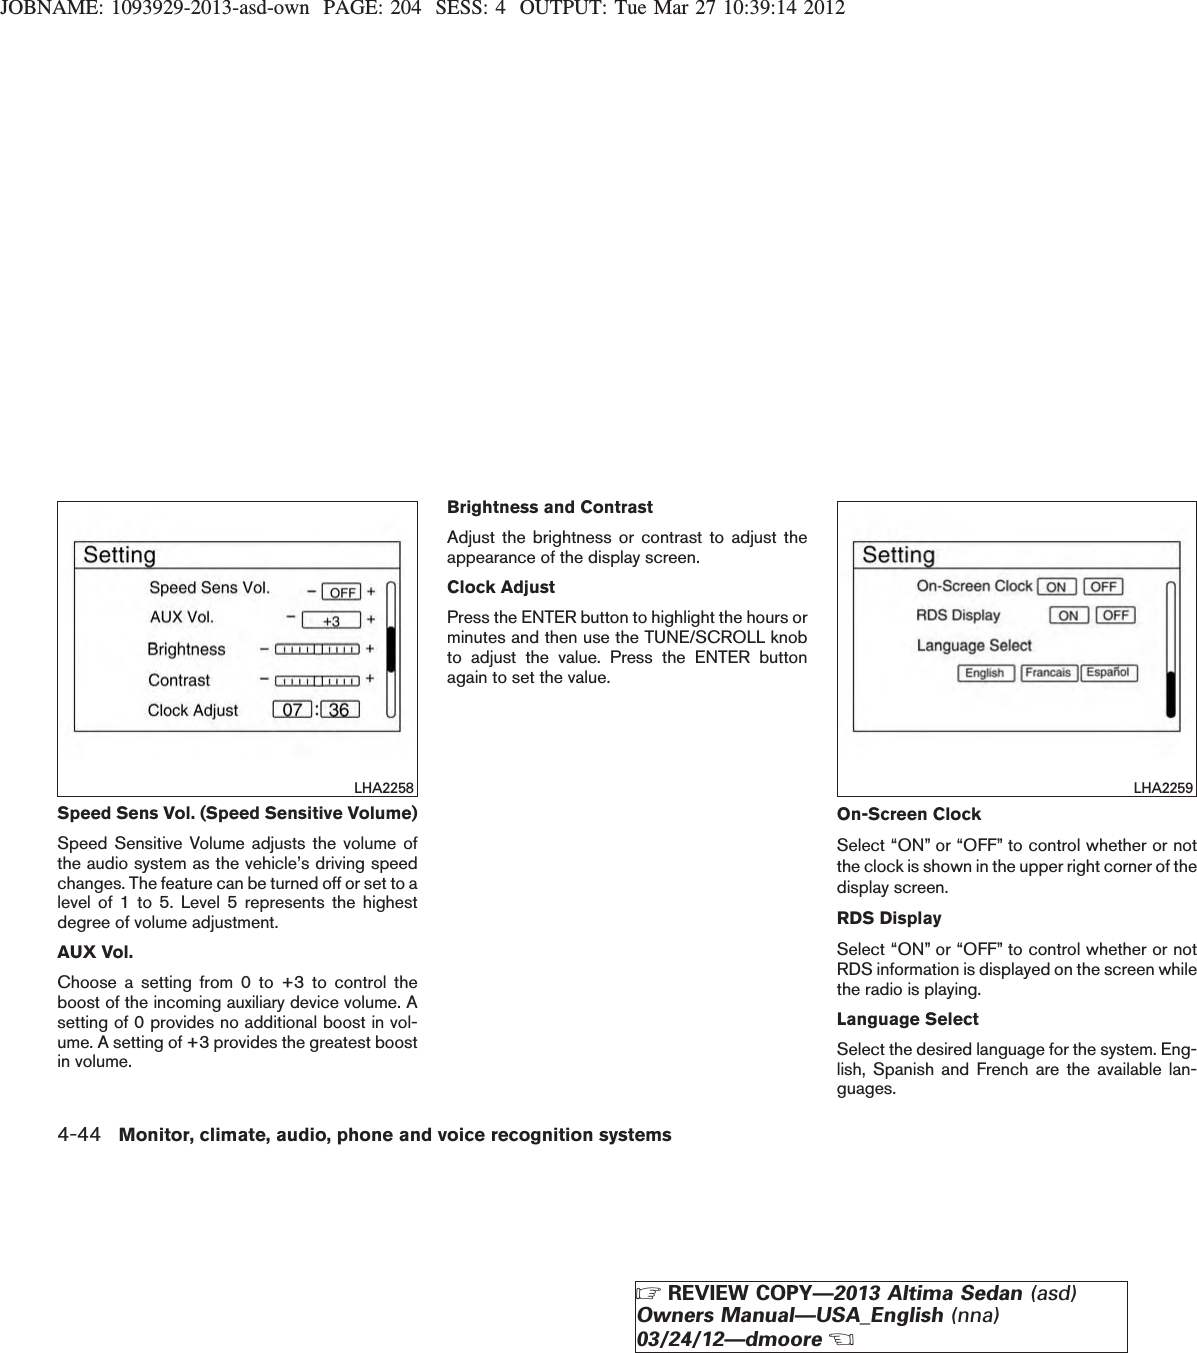
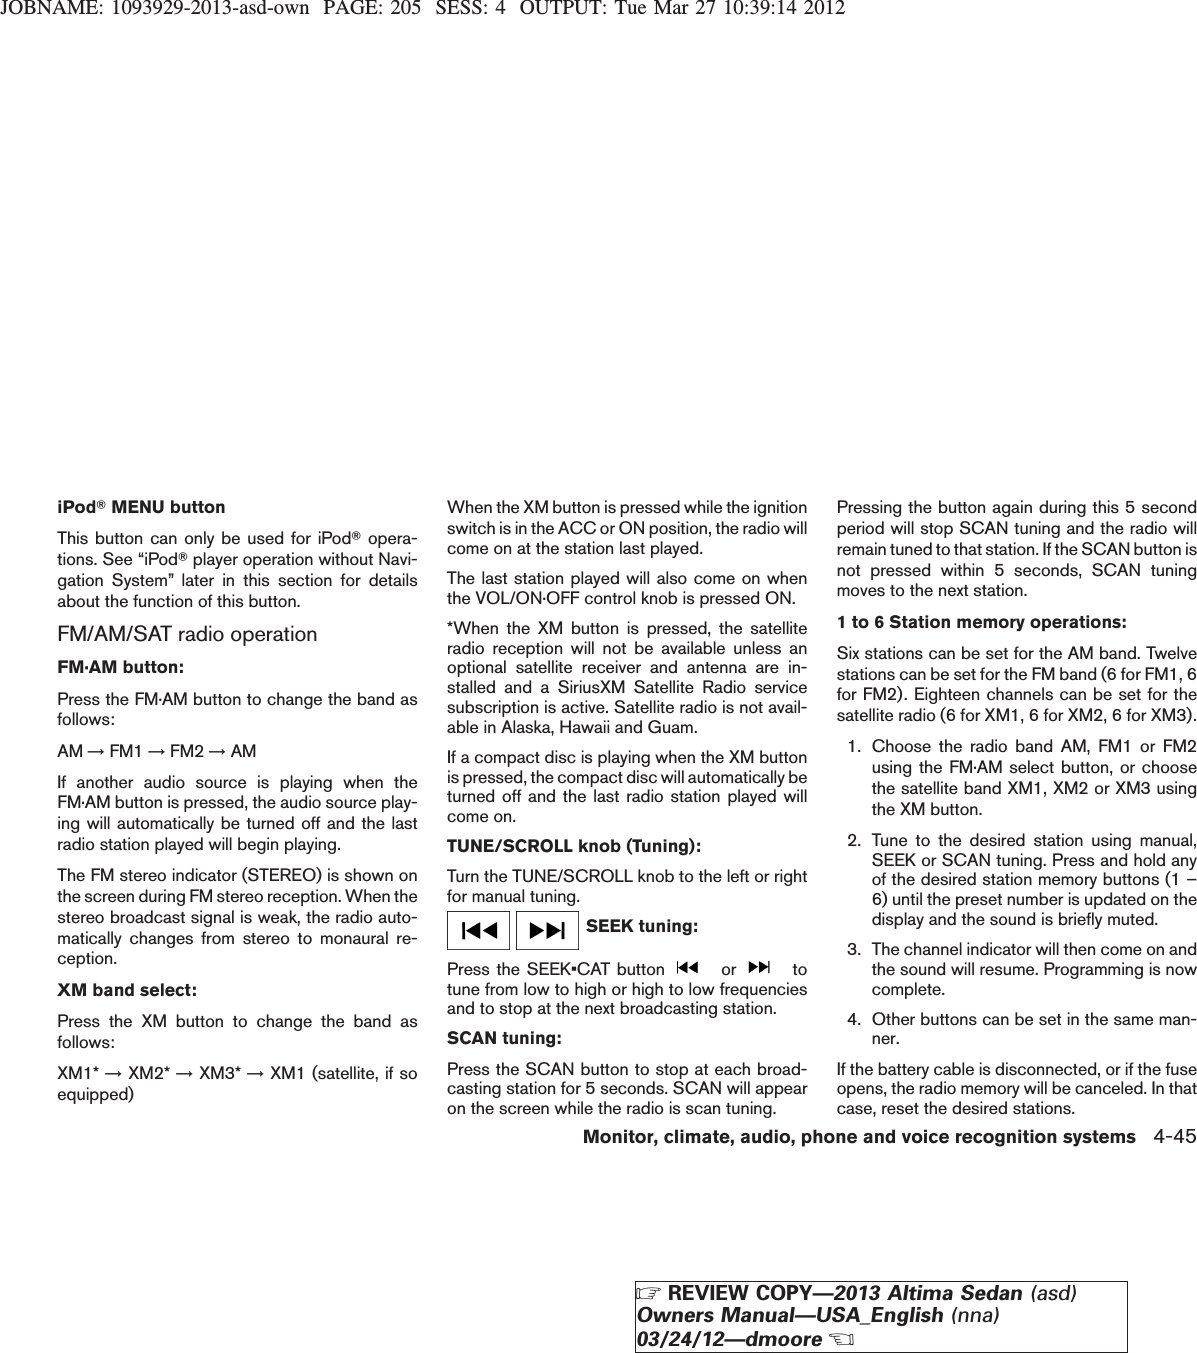
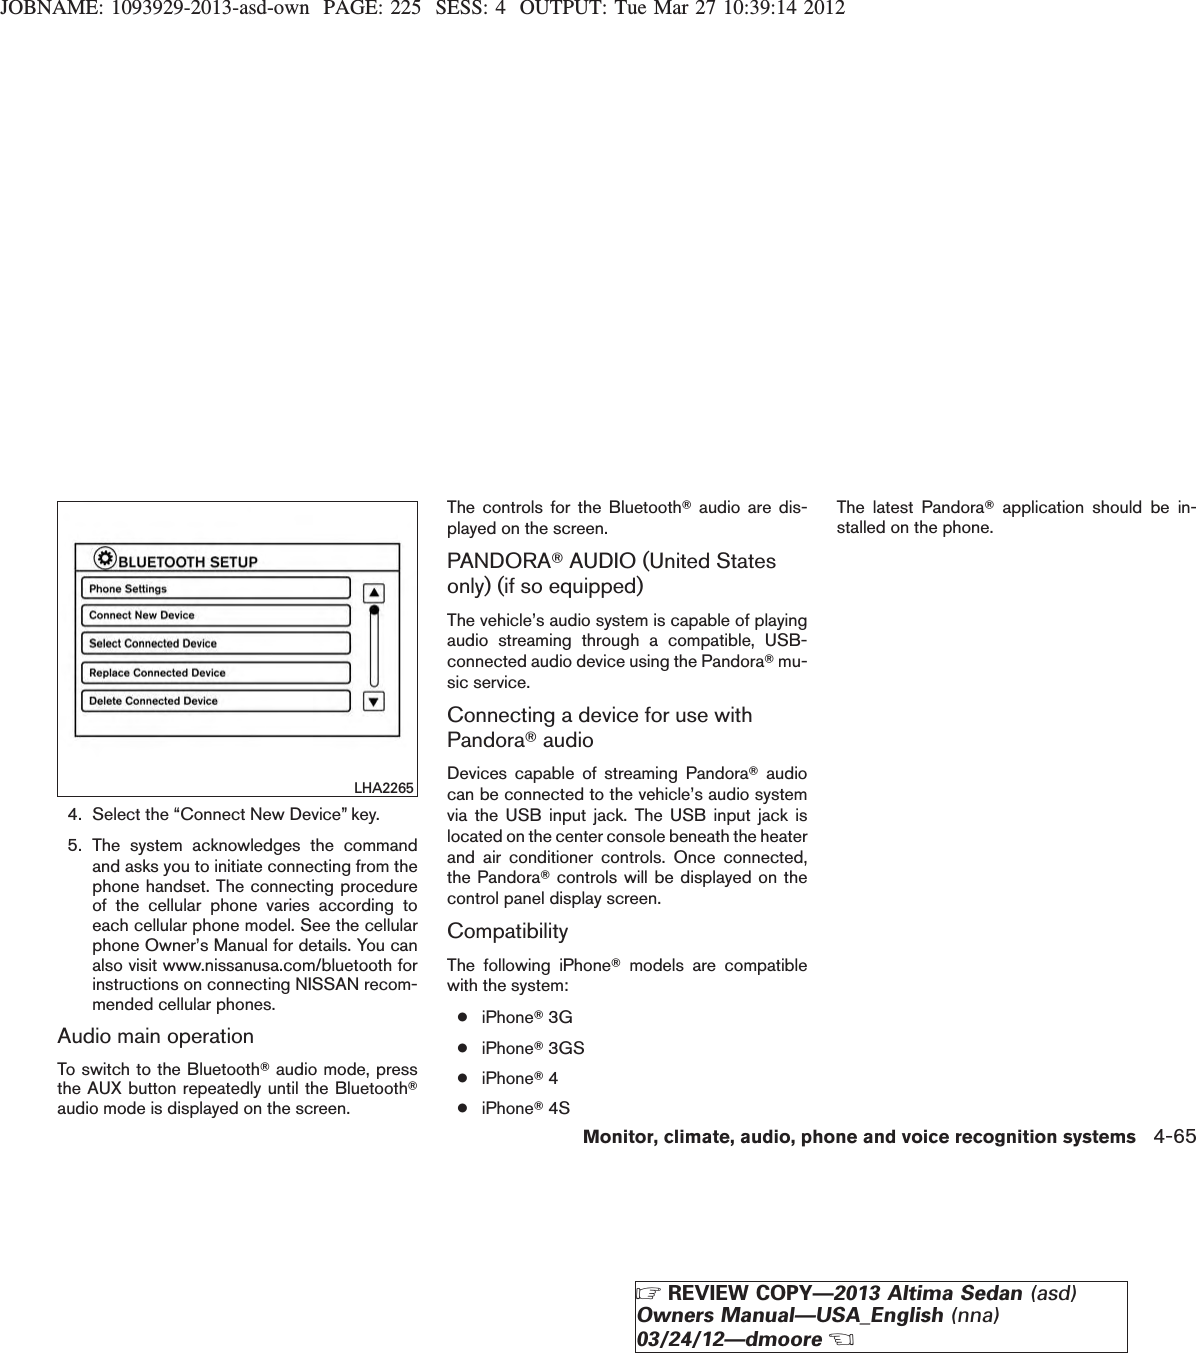
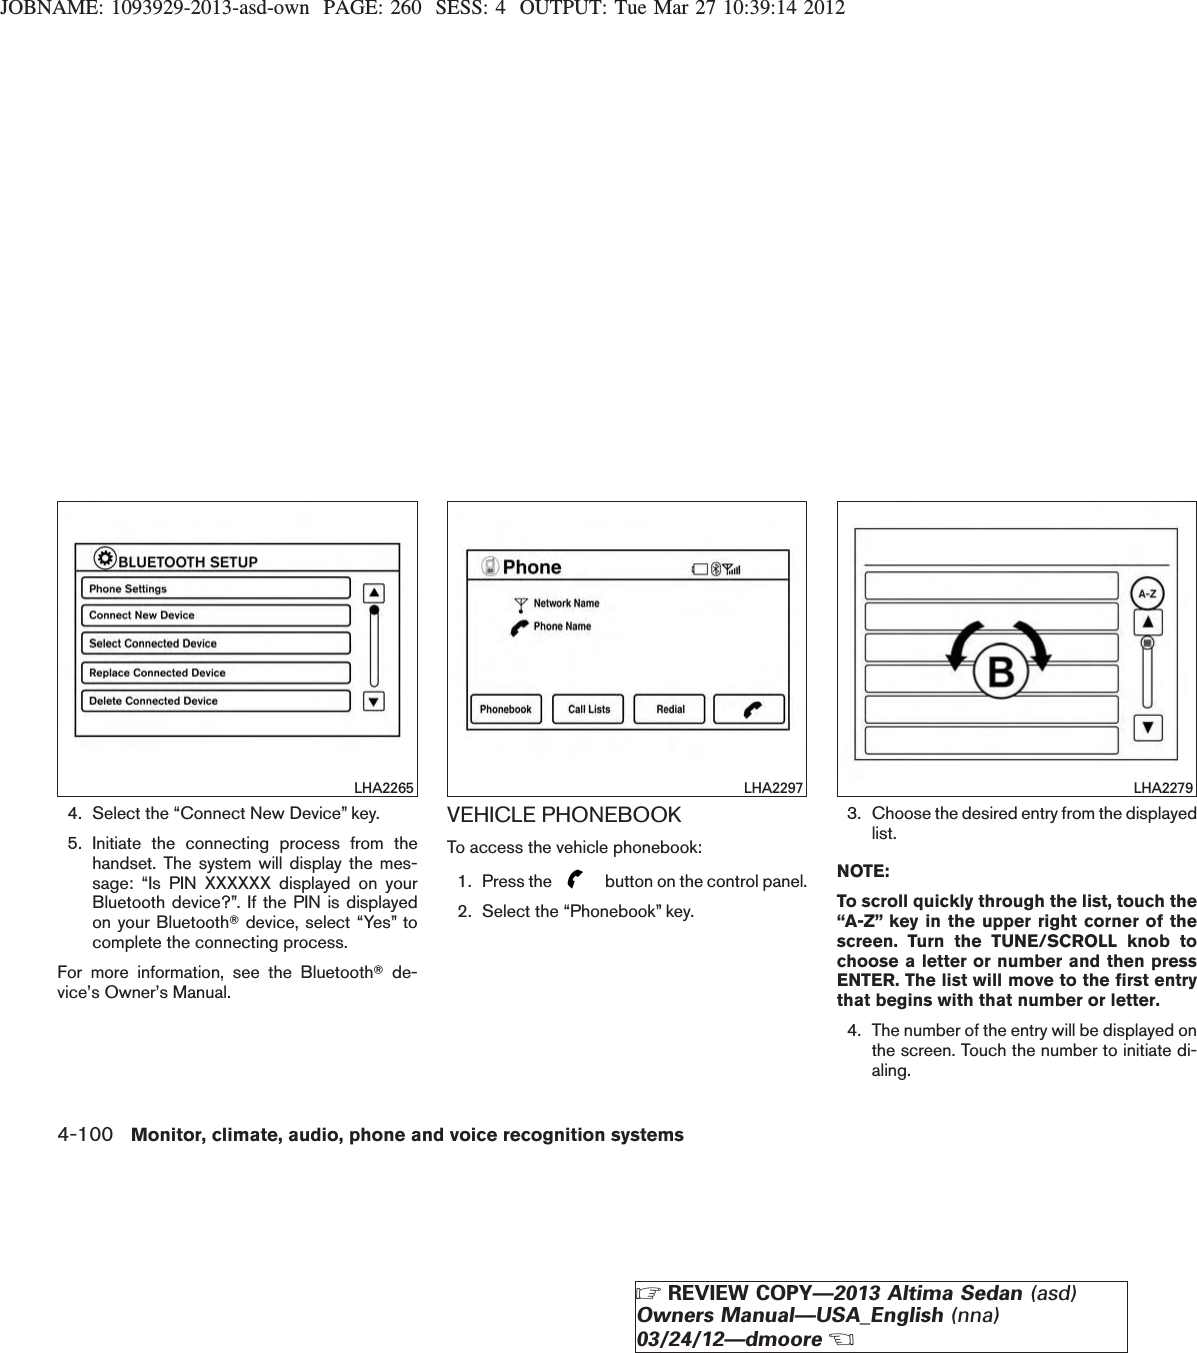
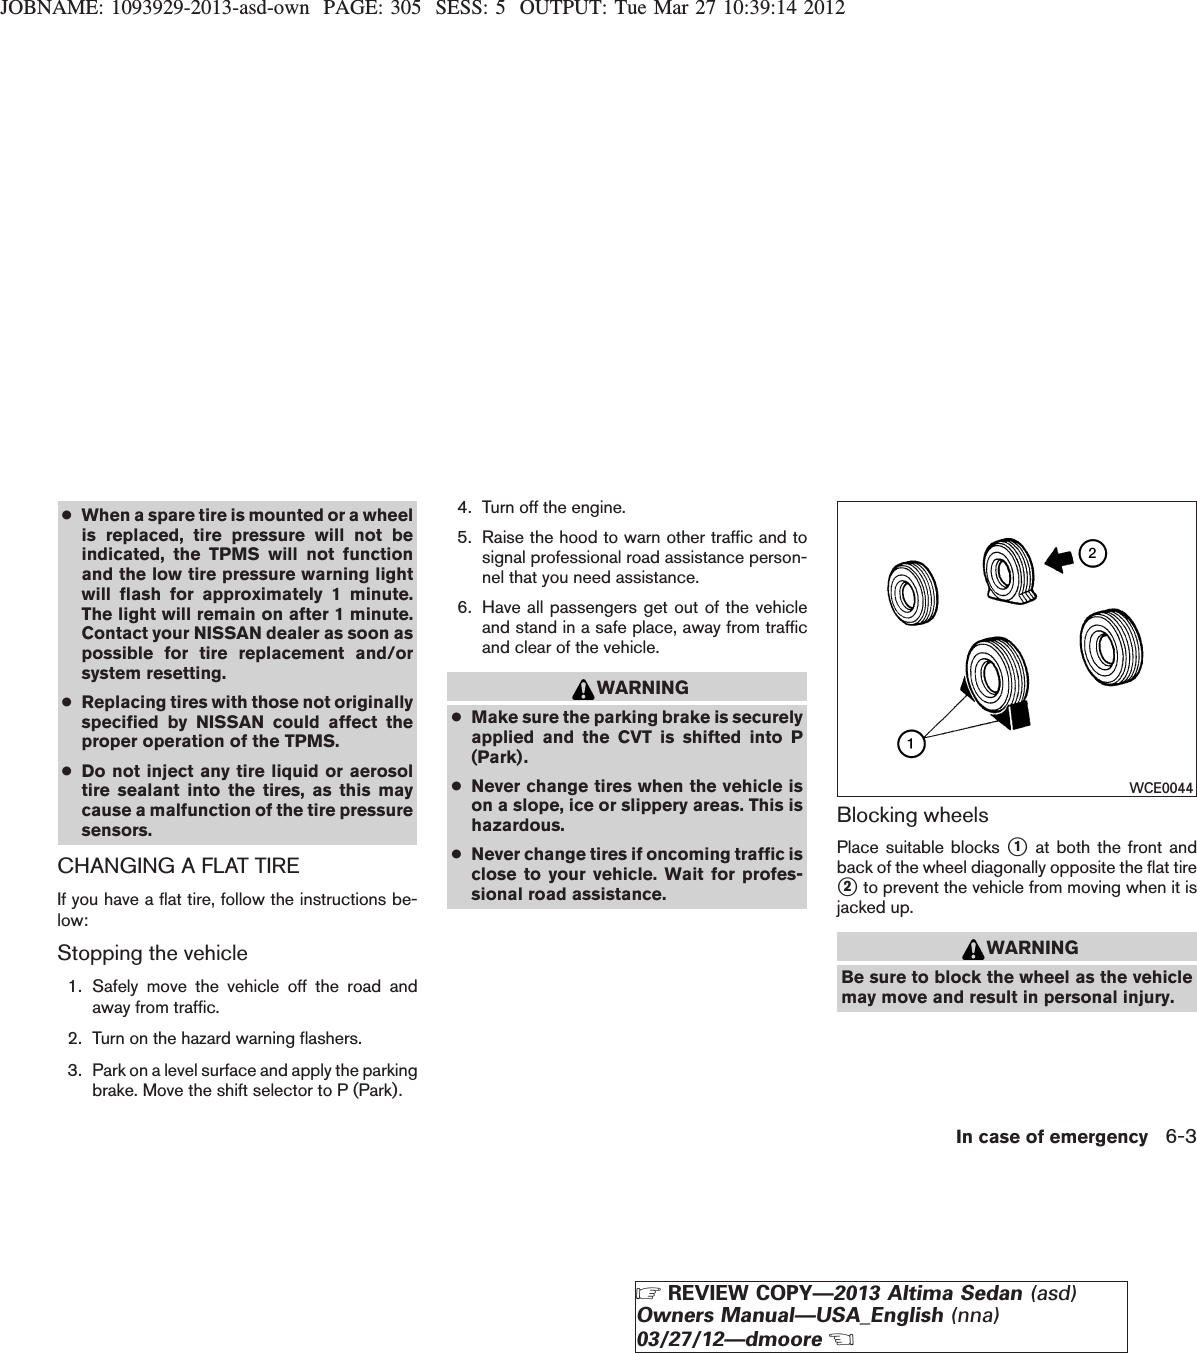
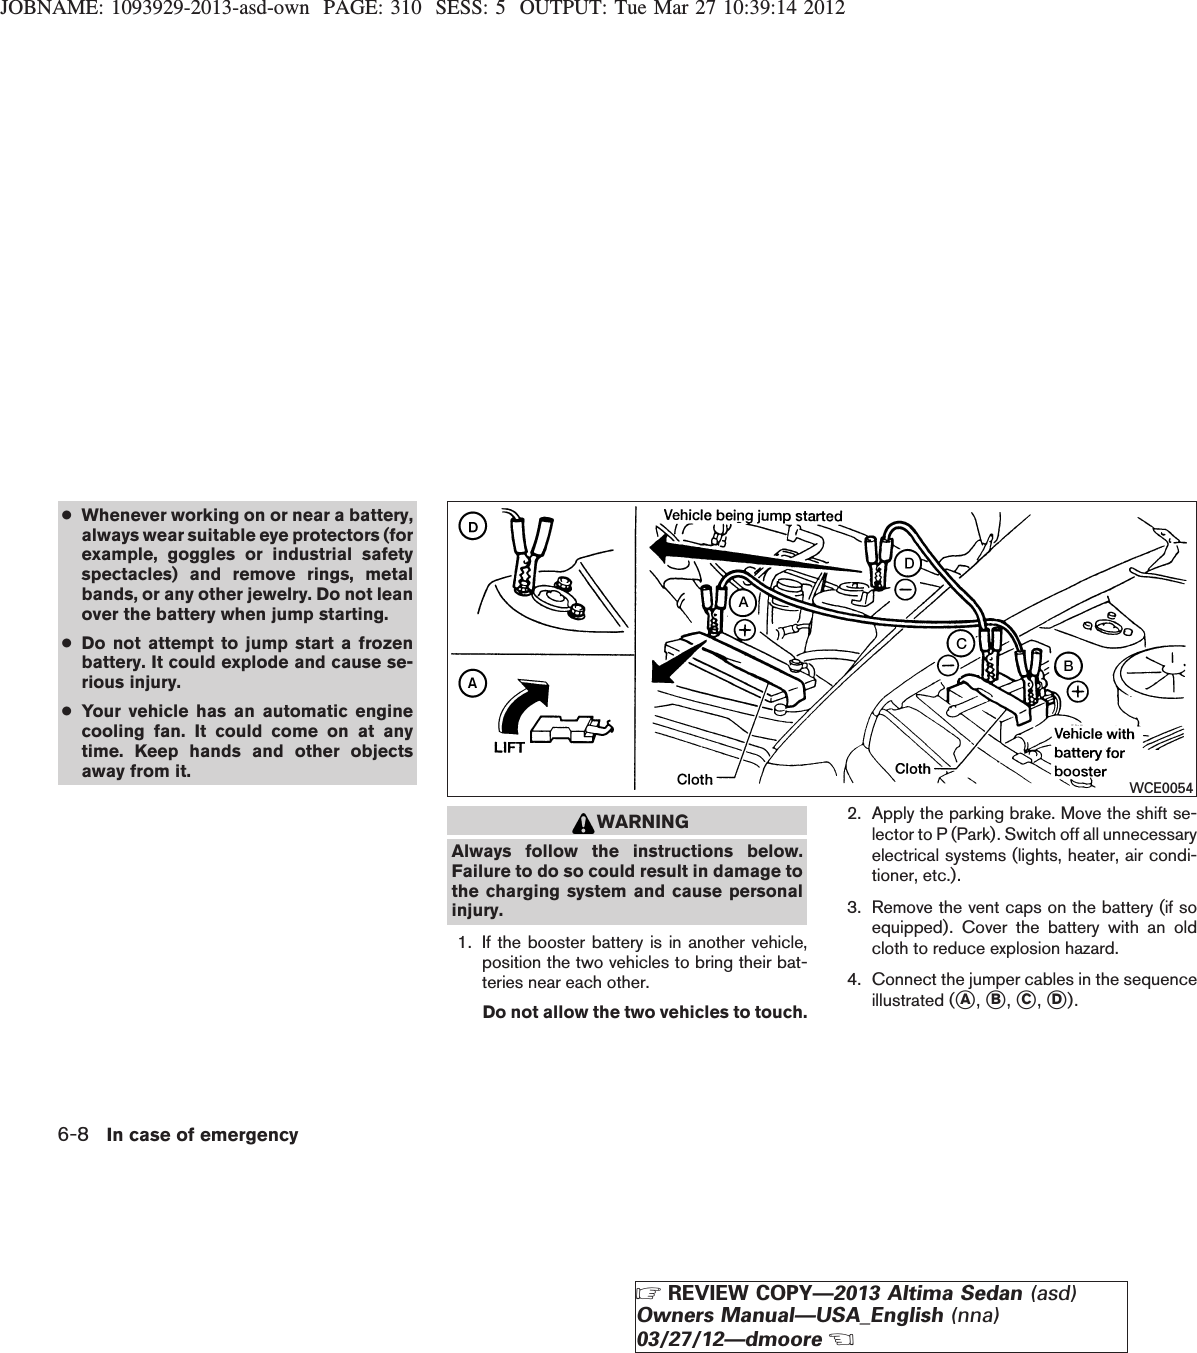
Robert Bosch Car Multimedia
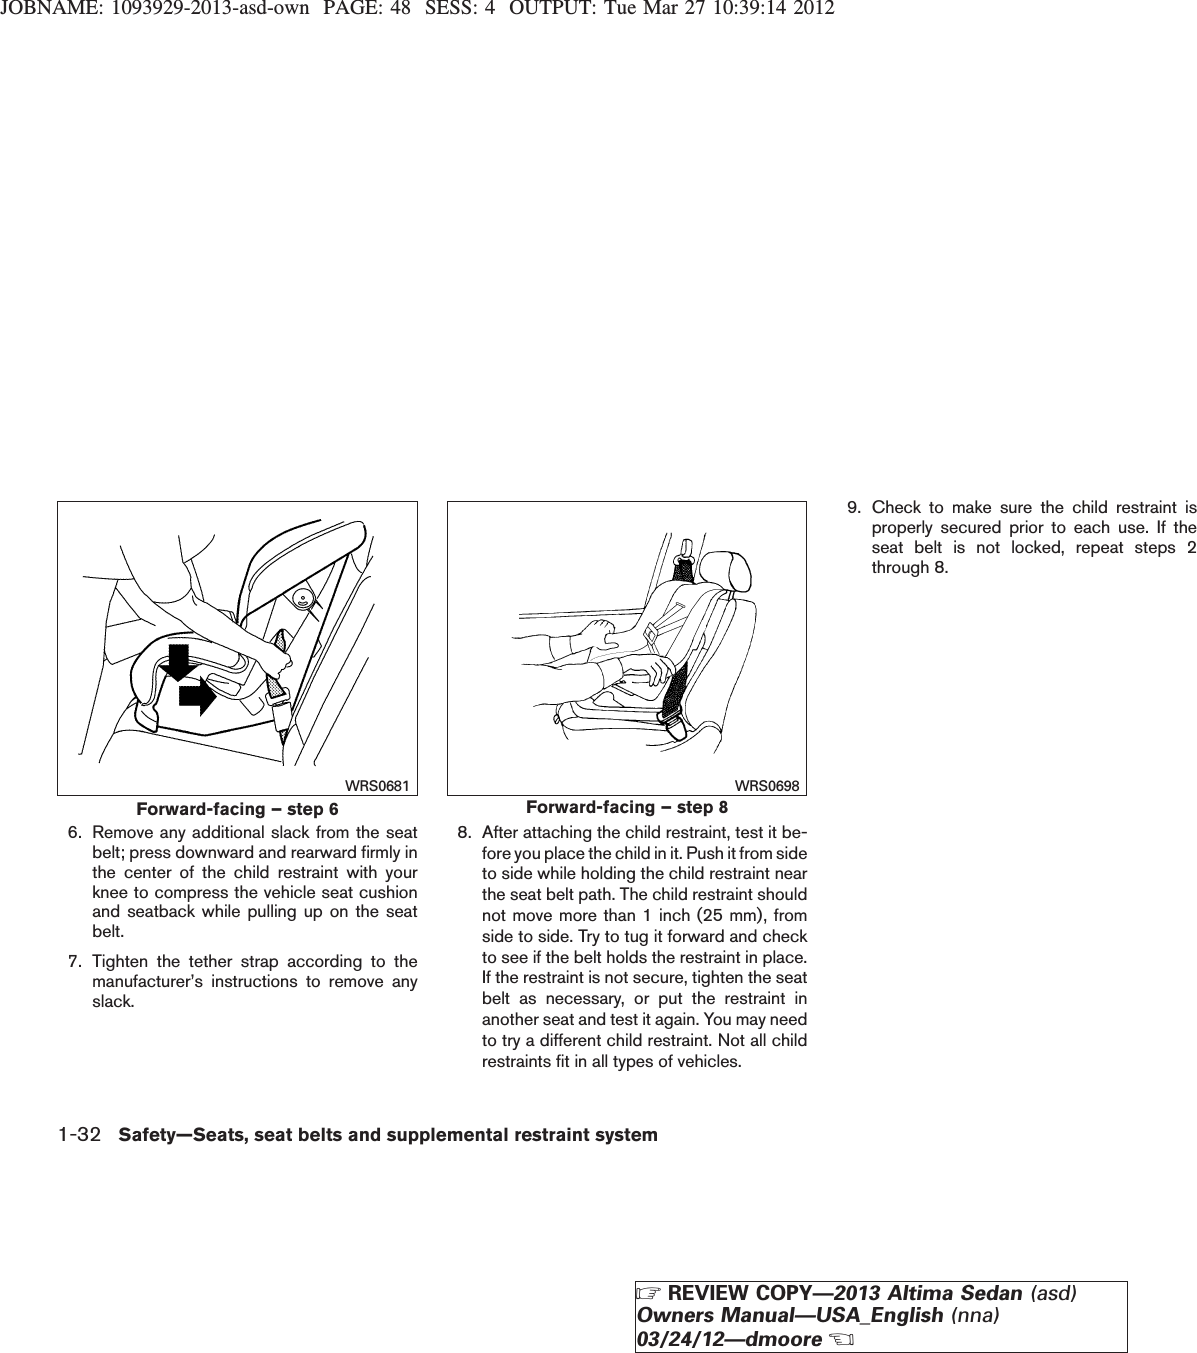
>
LCN20A User Manual
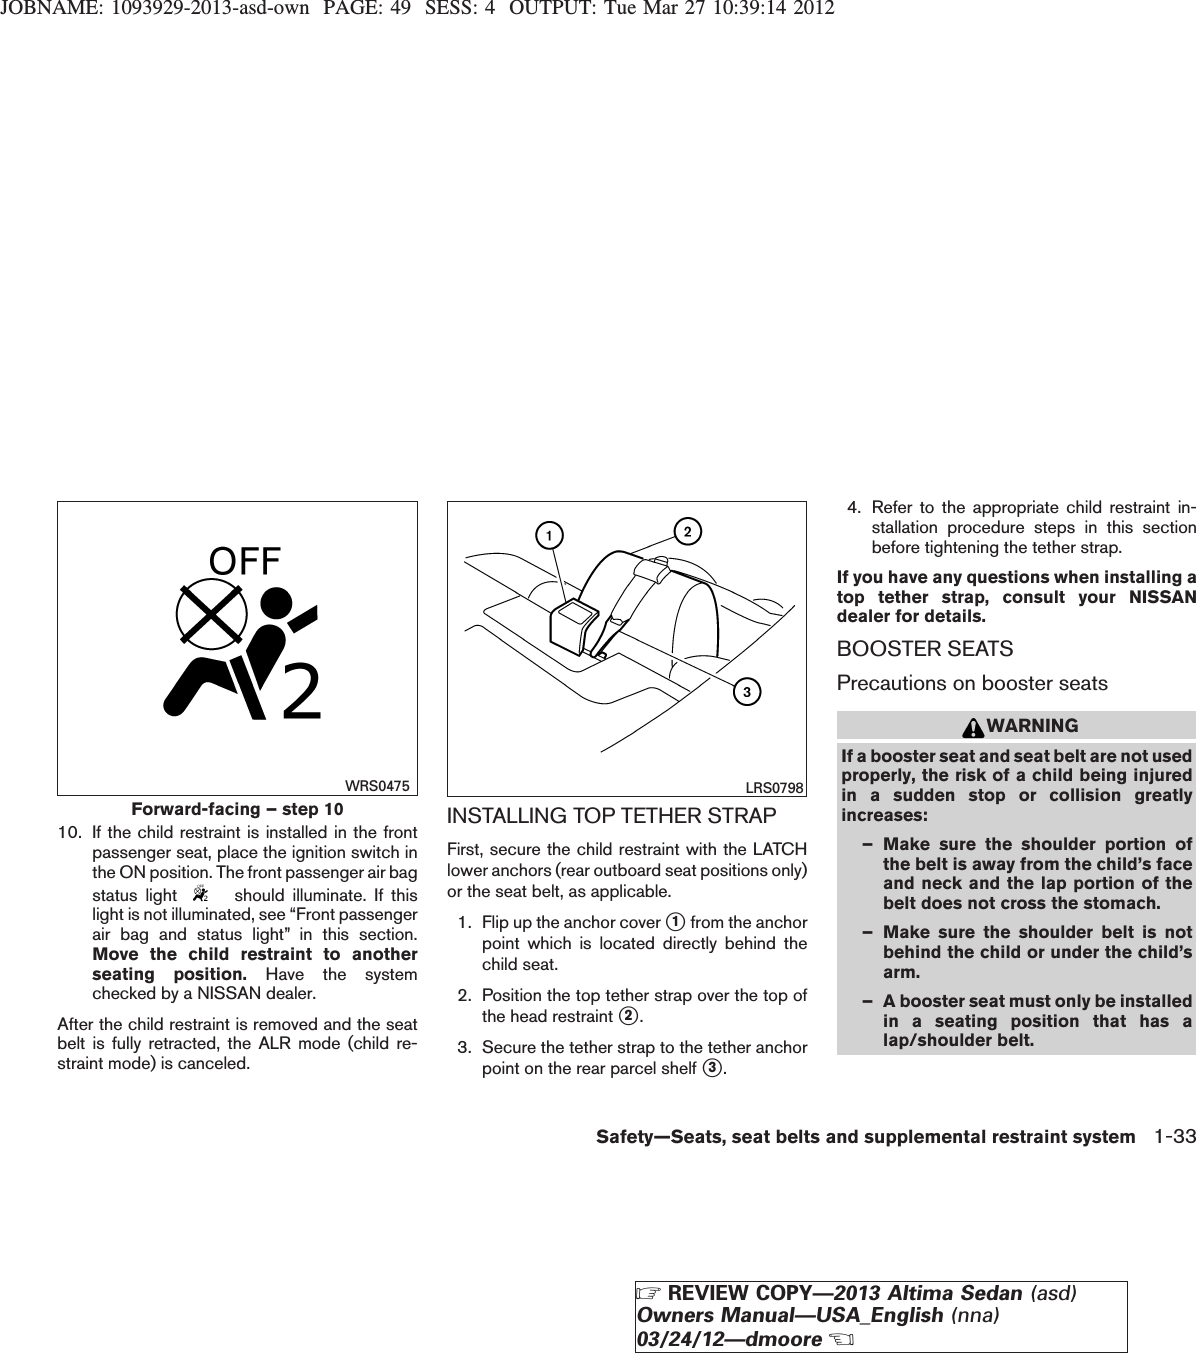
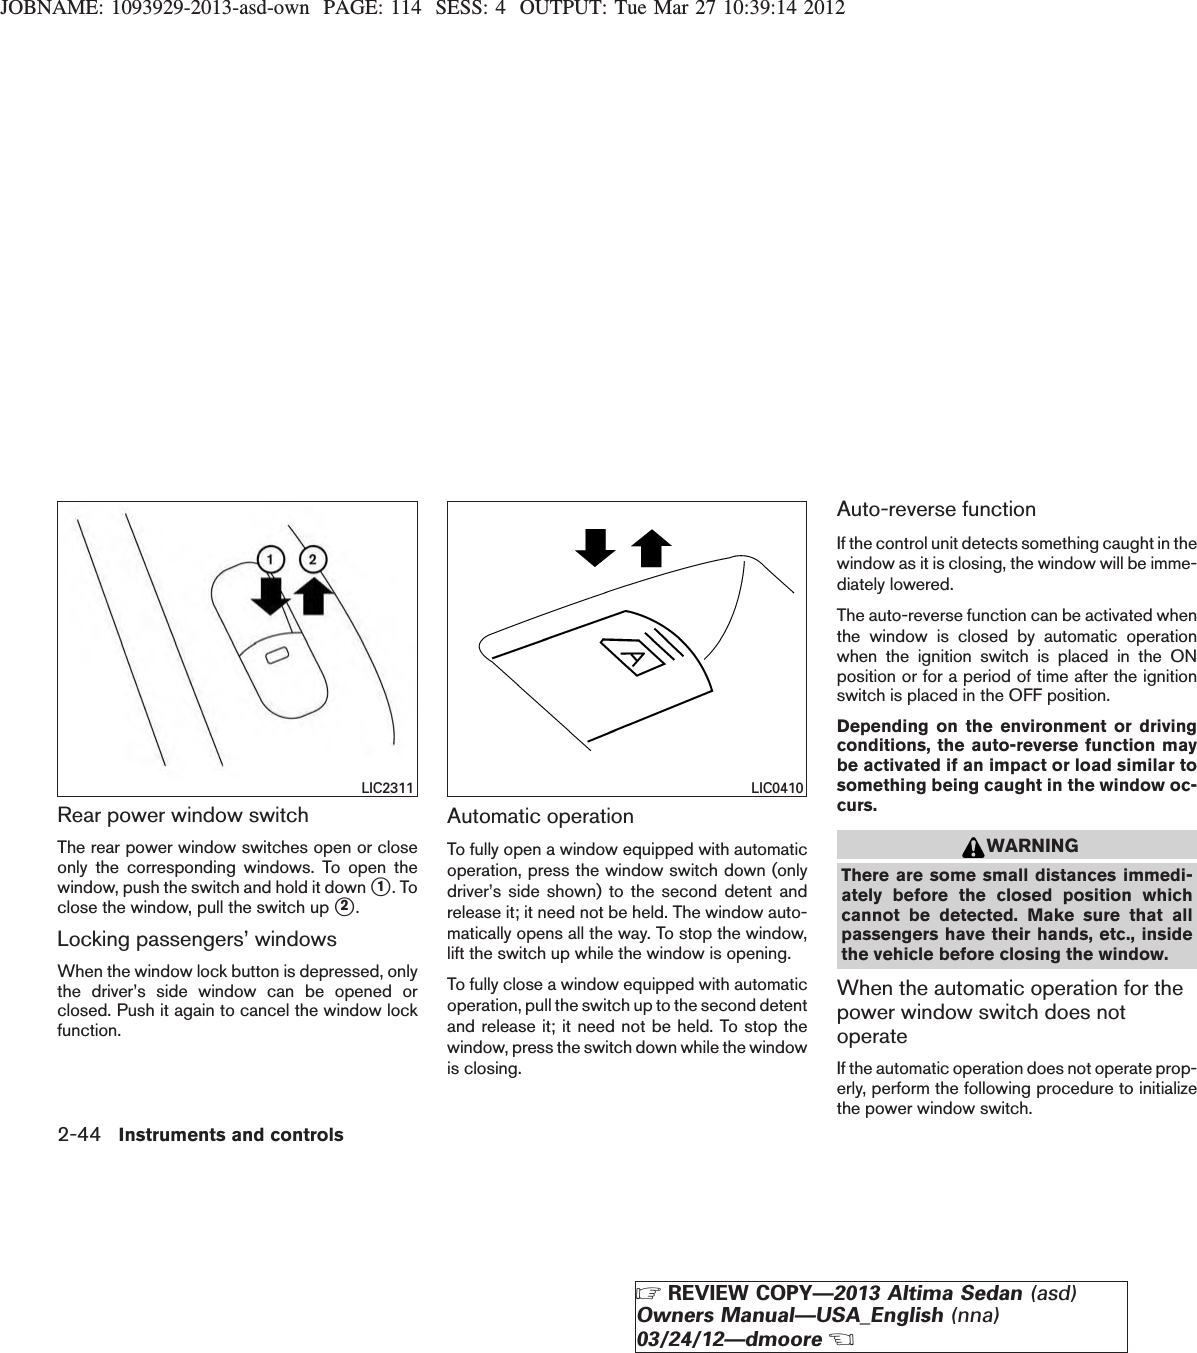
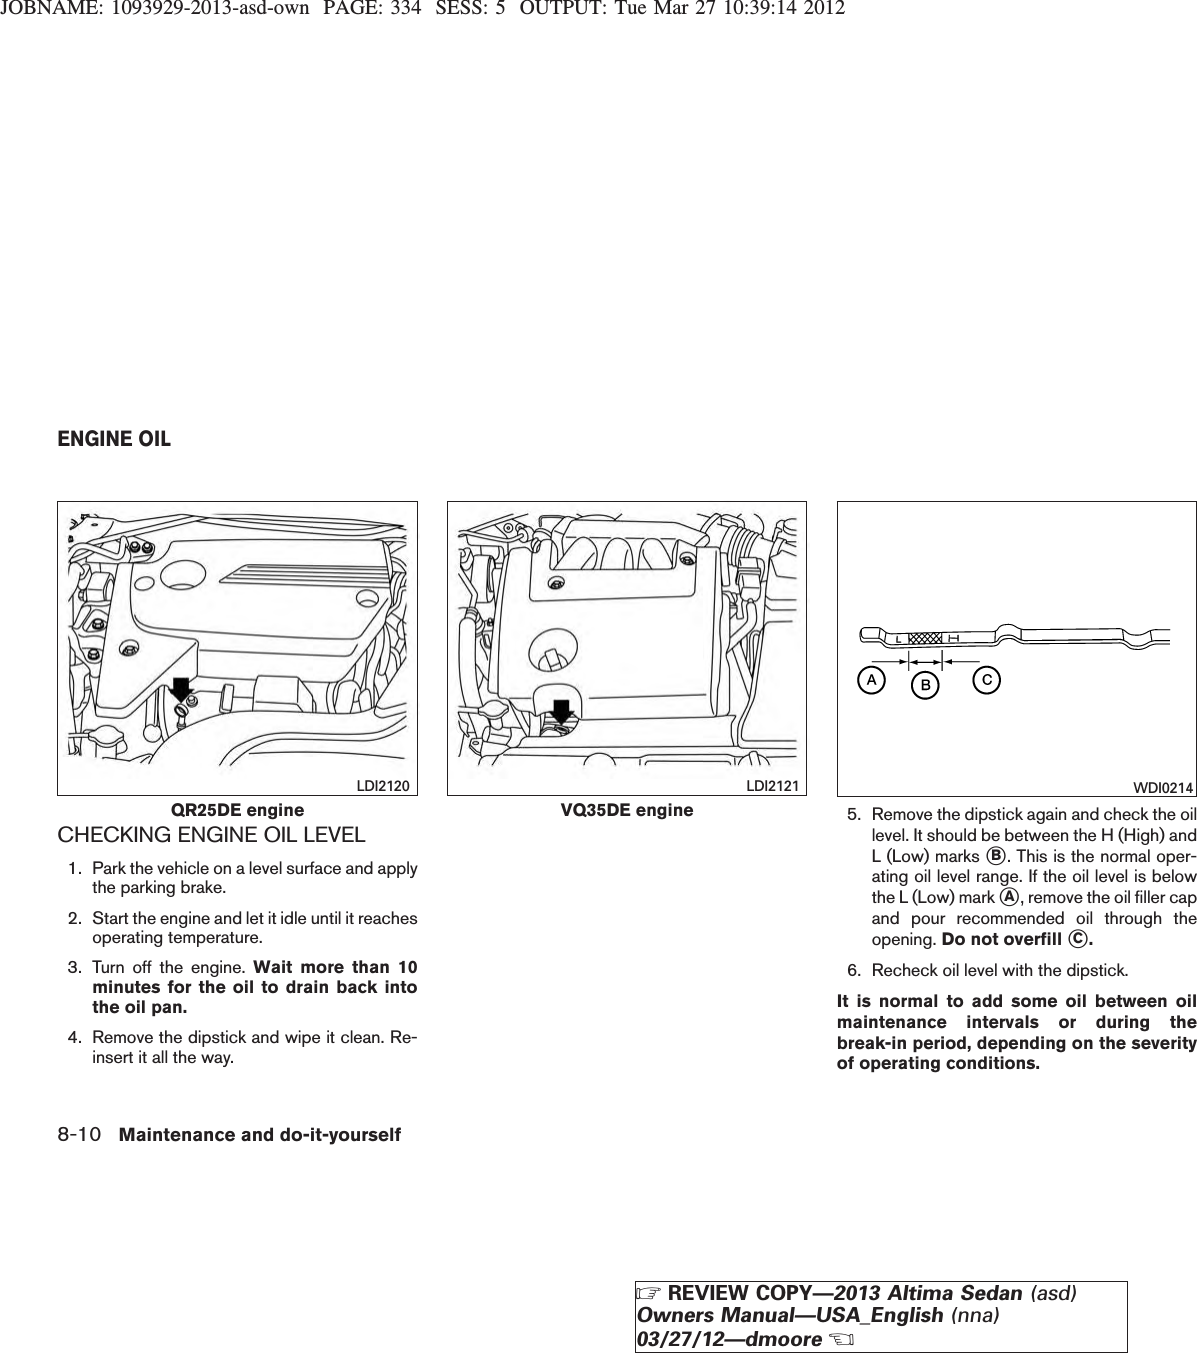
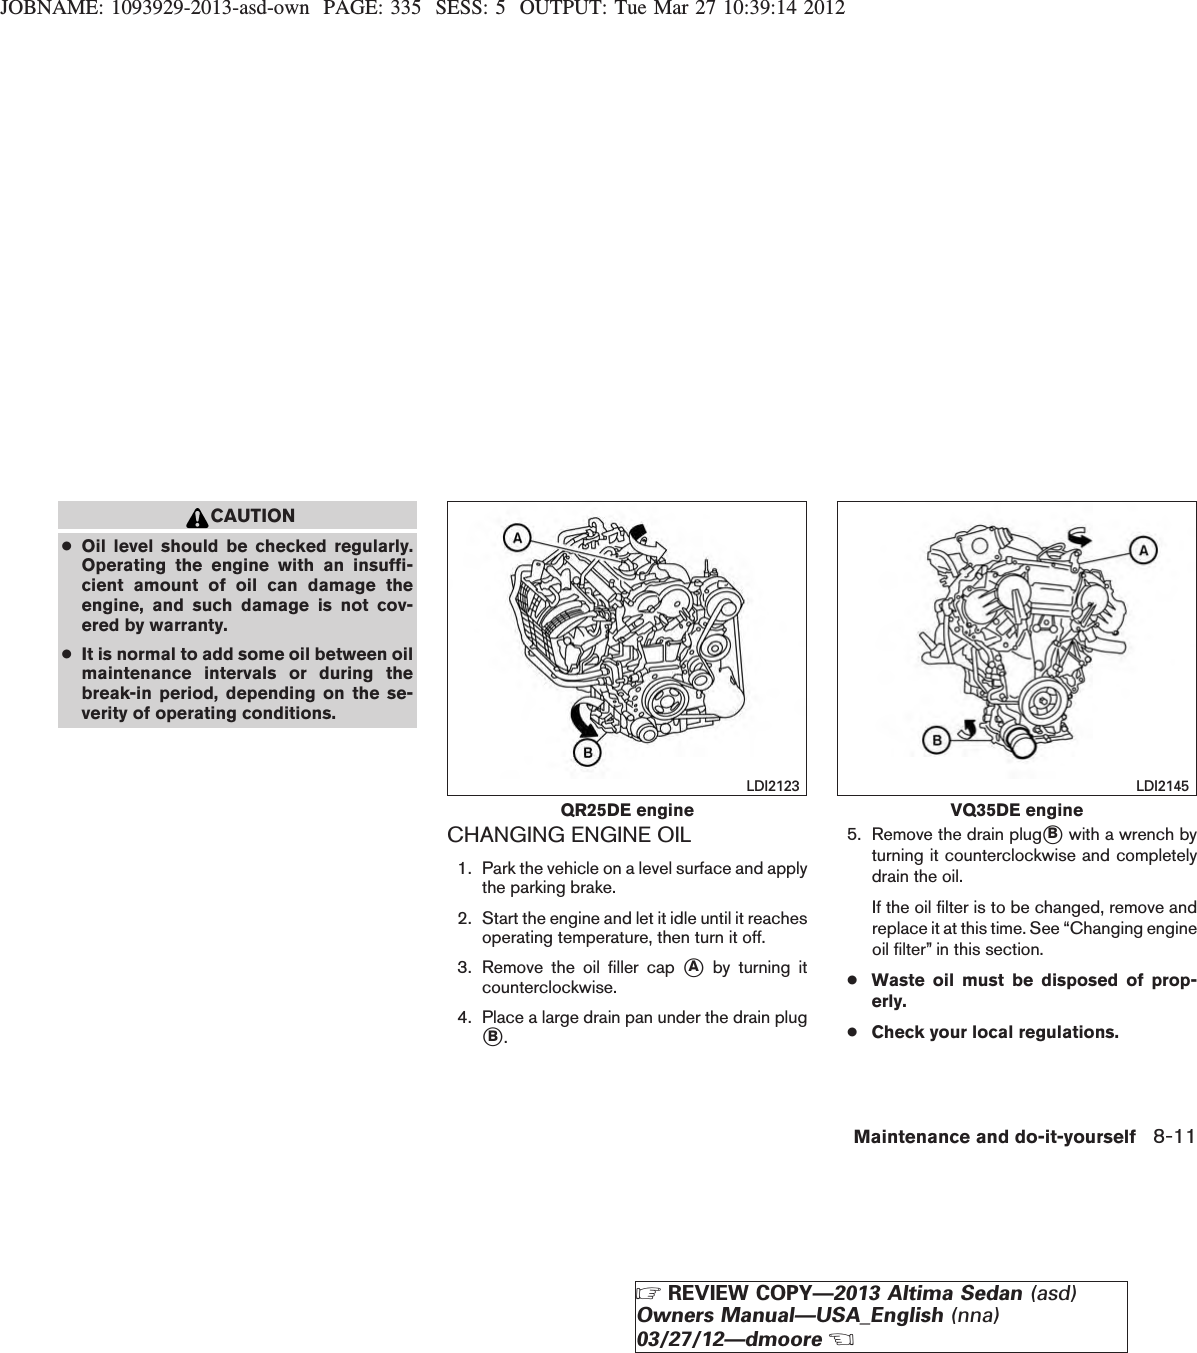
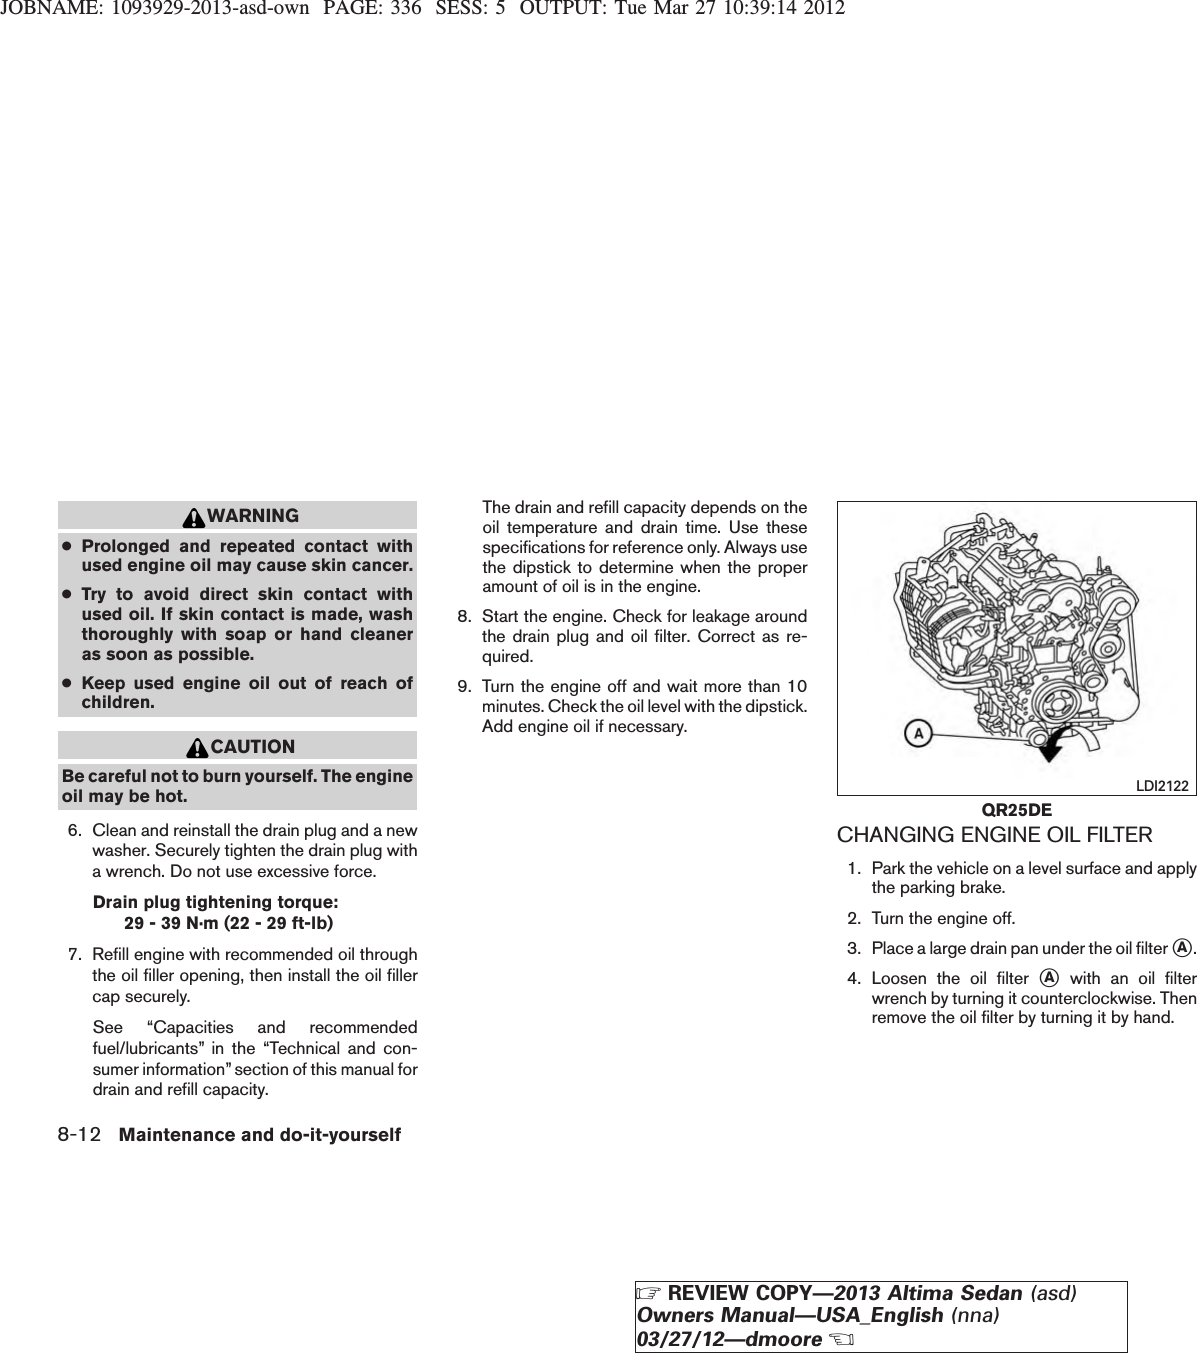
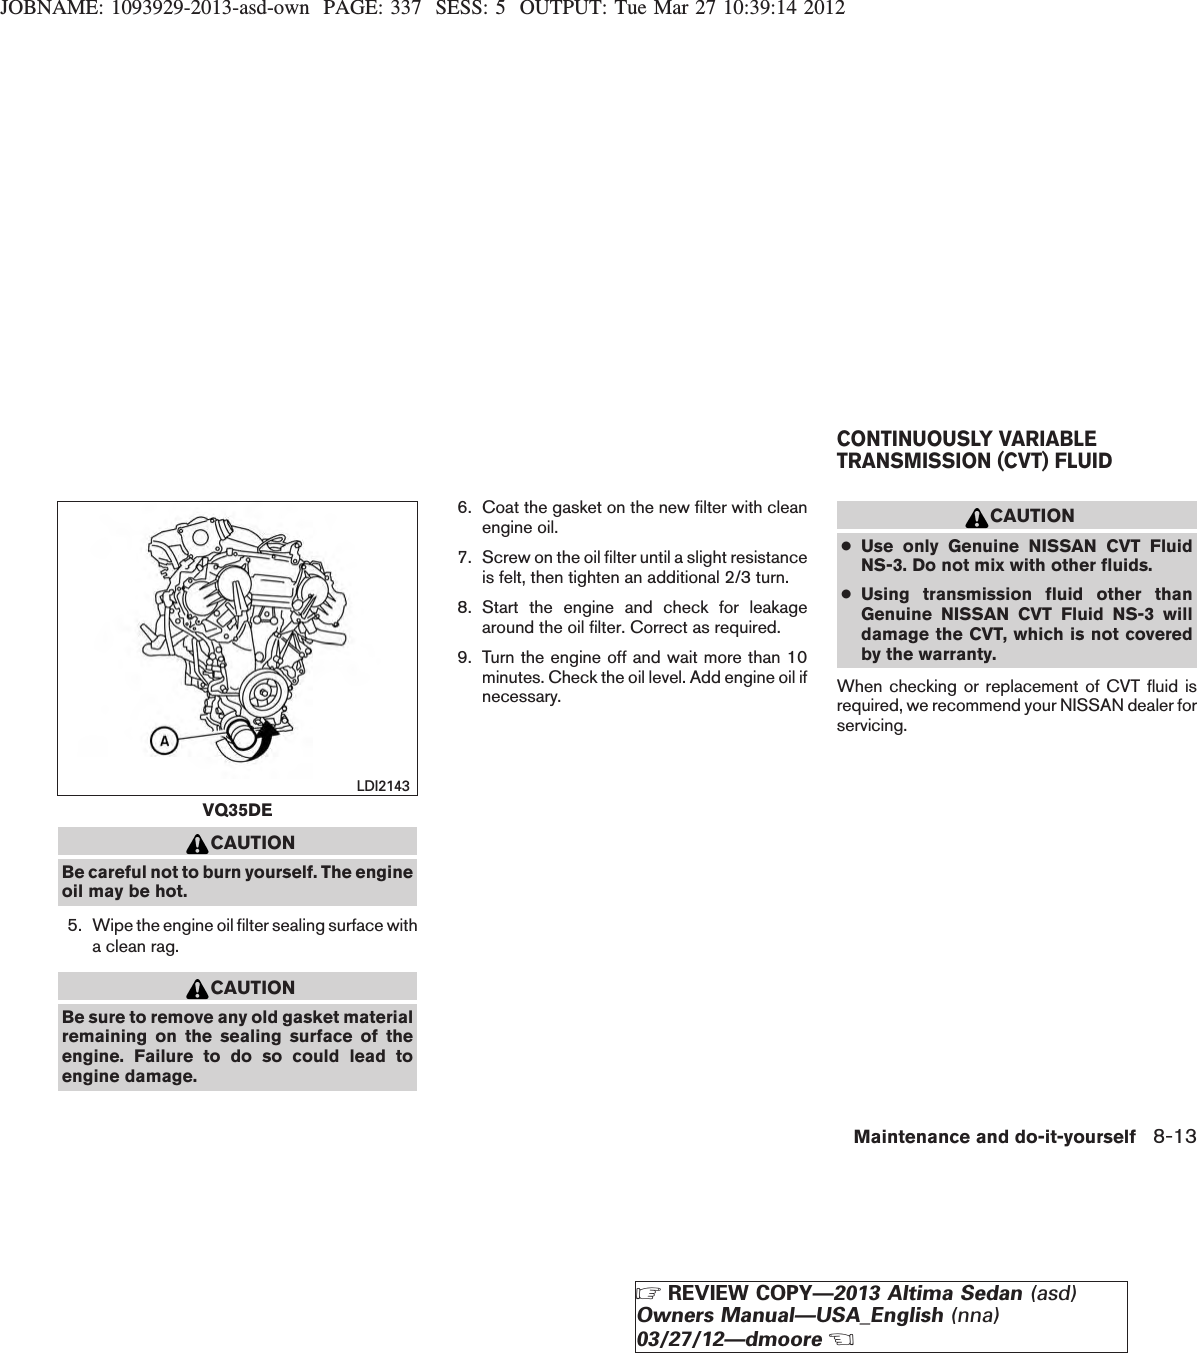
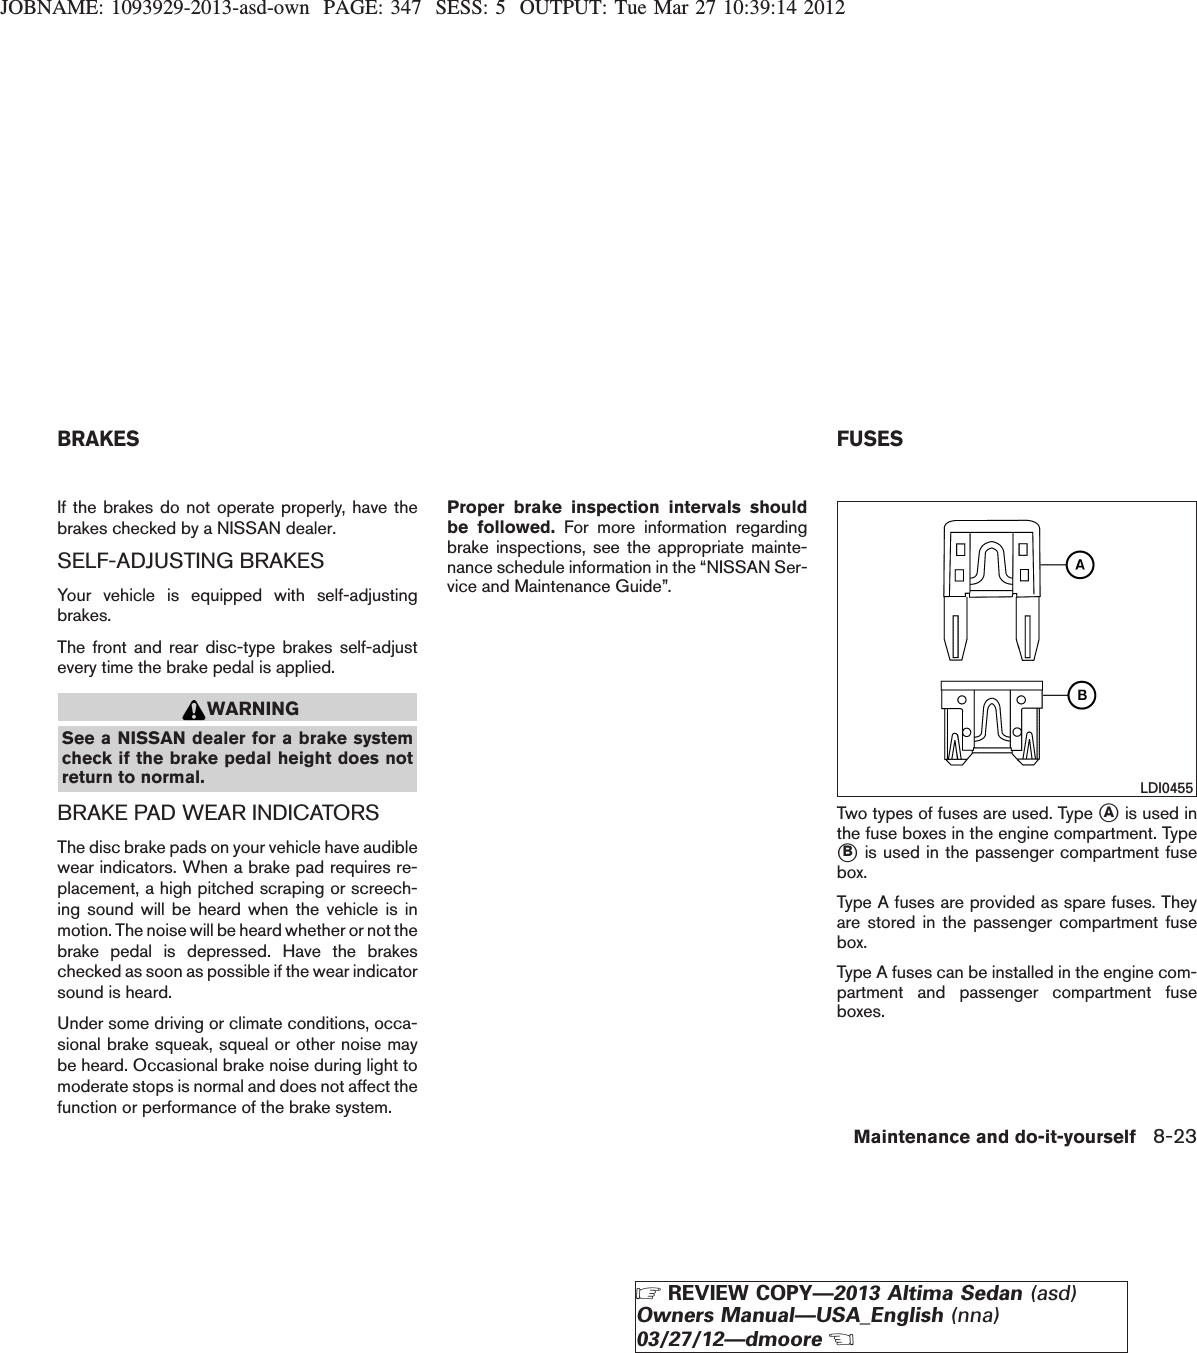
08 user guide
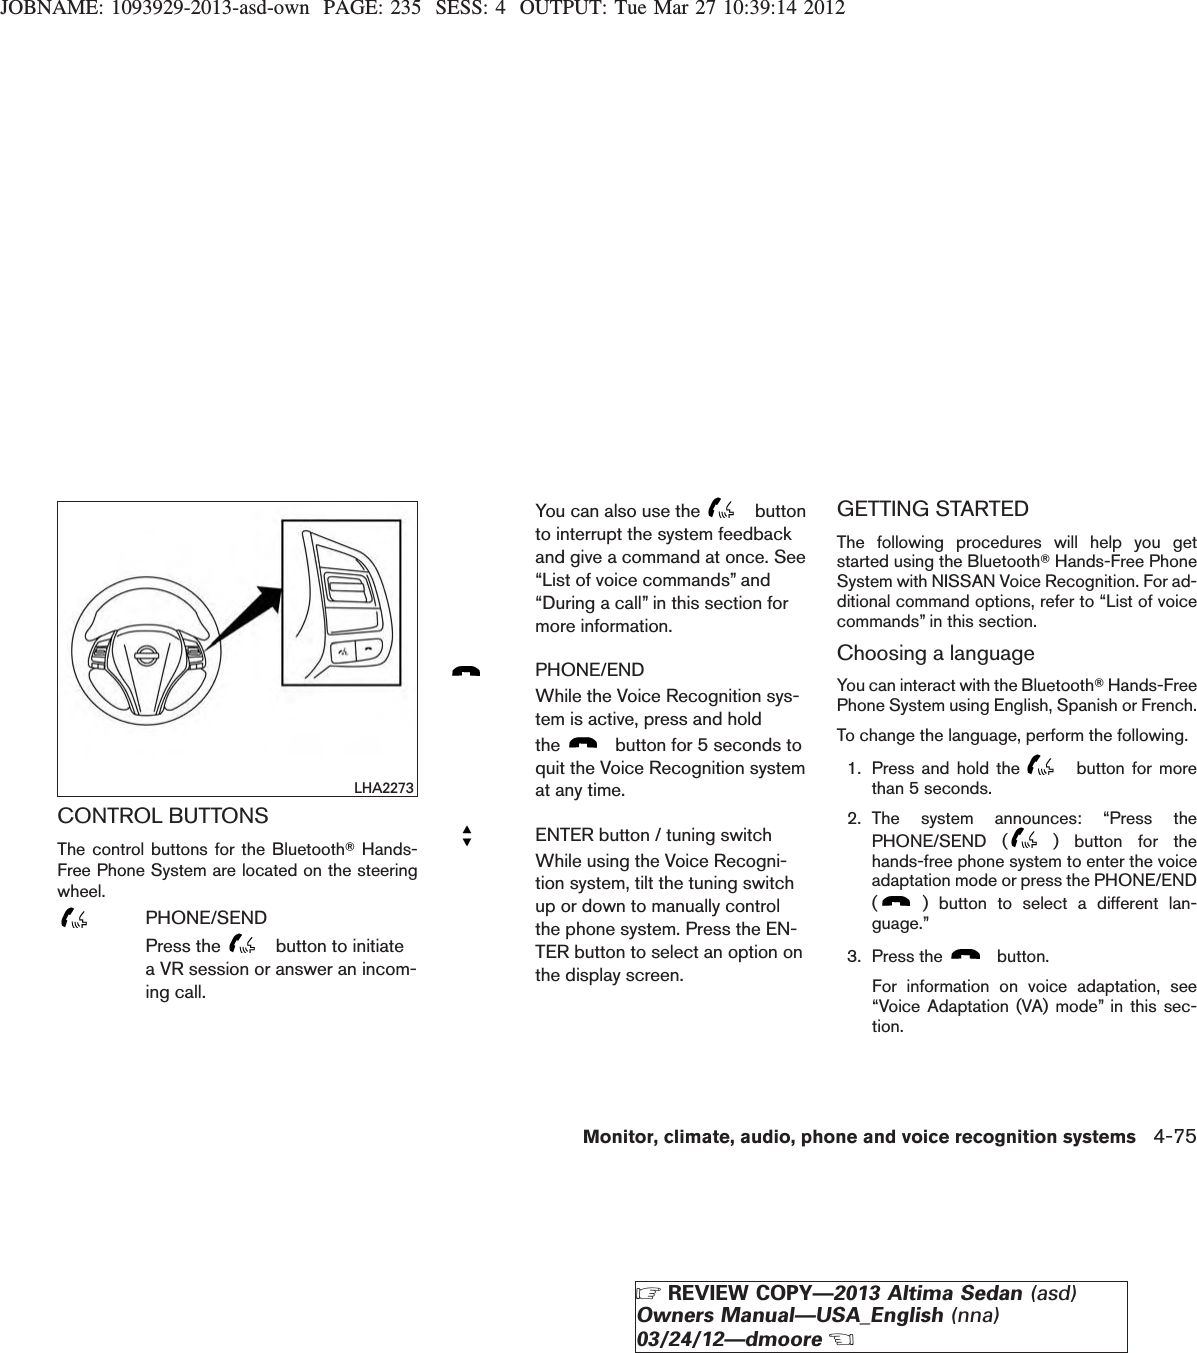
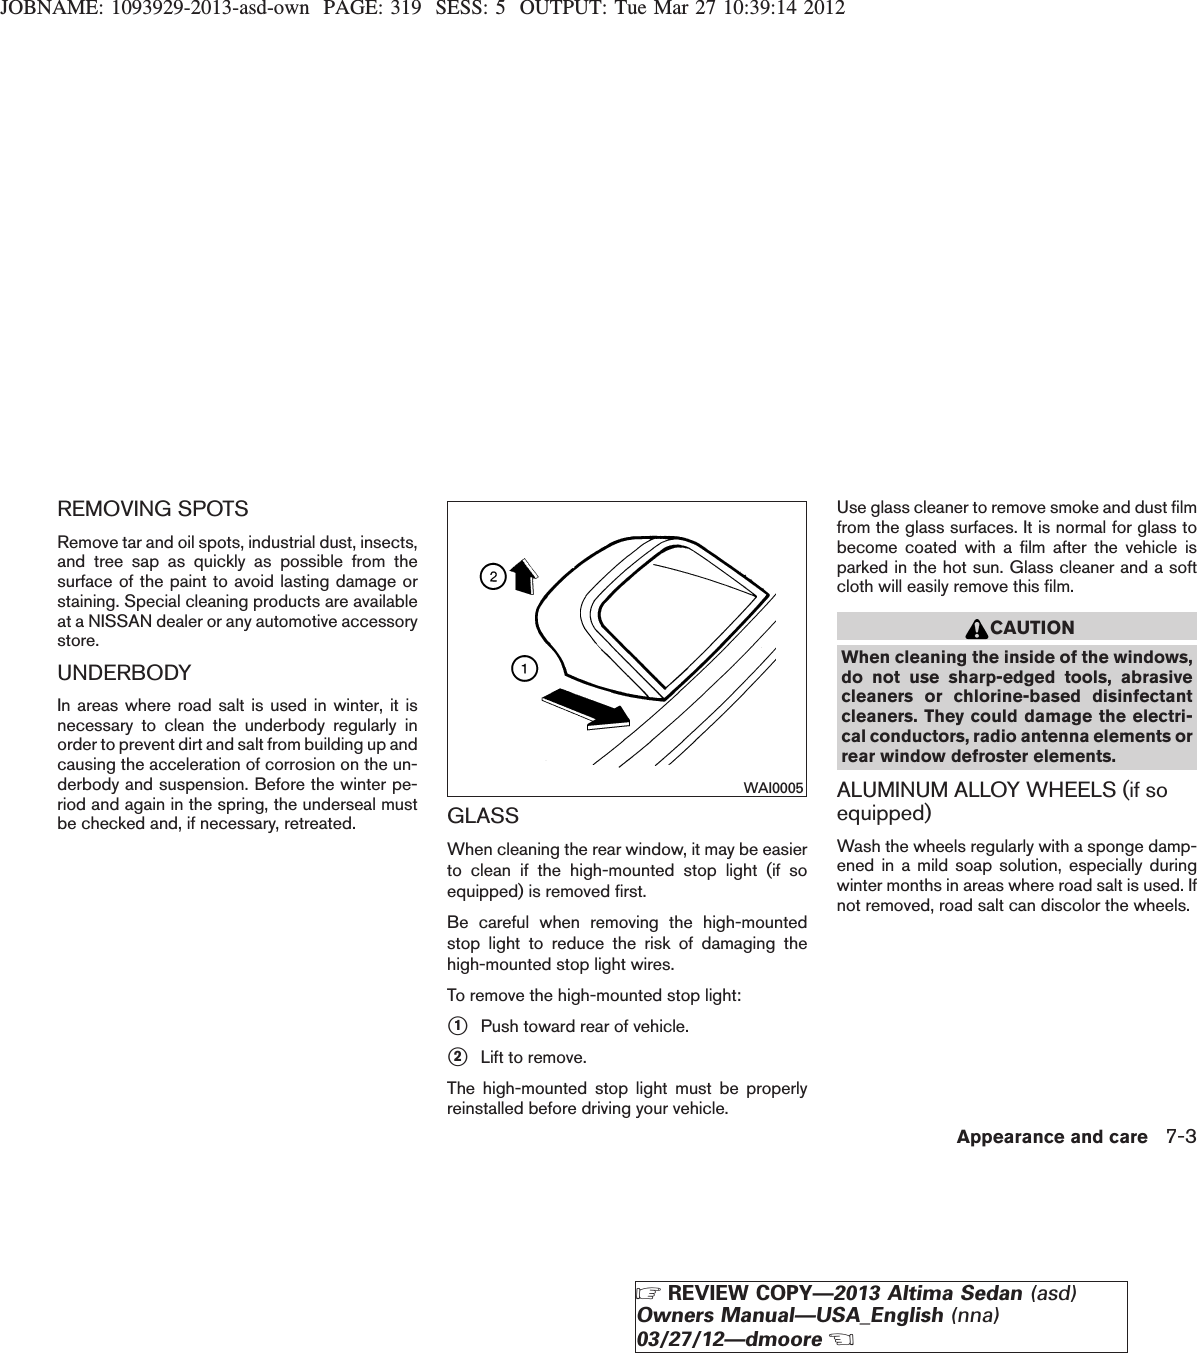
Navigation menu
Upload a User Manual
Namespaces
Wiki Guide
HTML
PDF
Info
Views
User Manual
Discussion / Help
Navigation