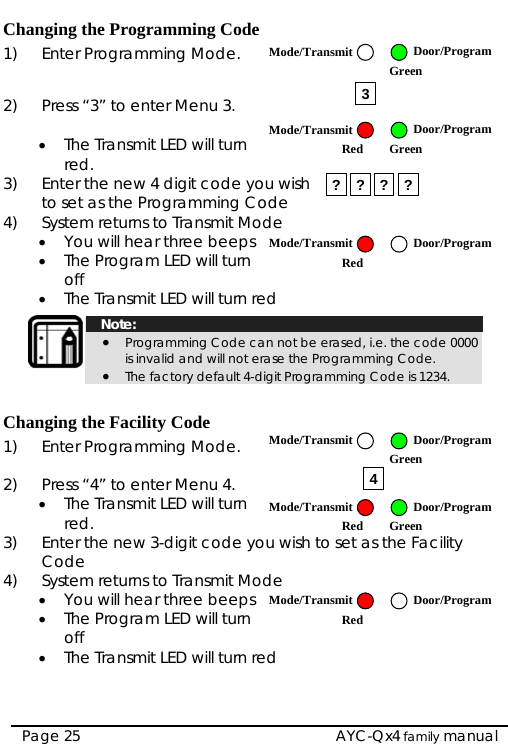
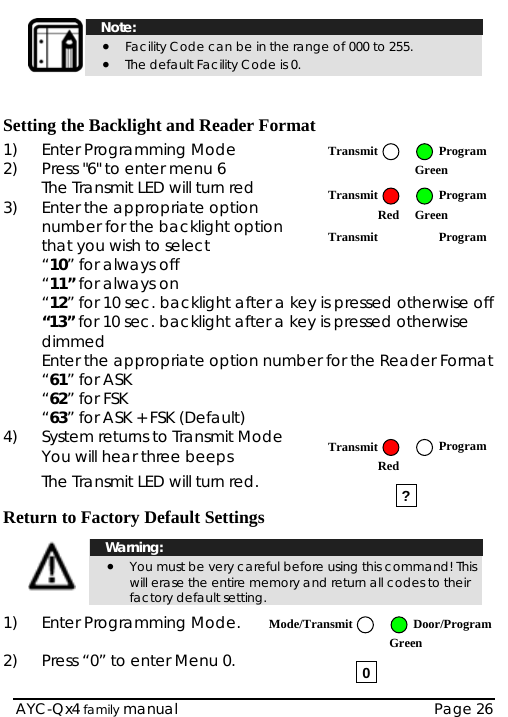
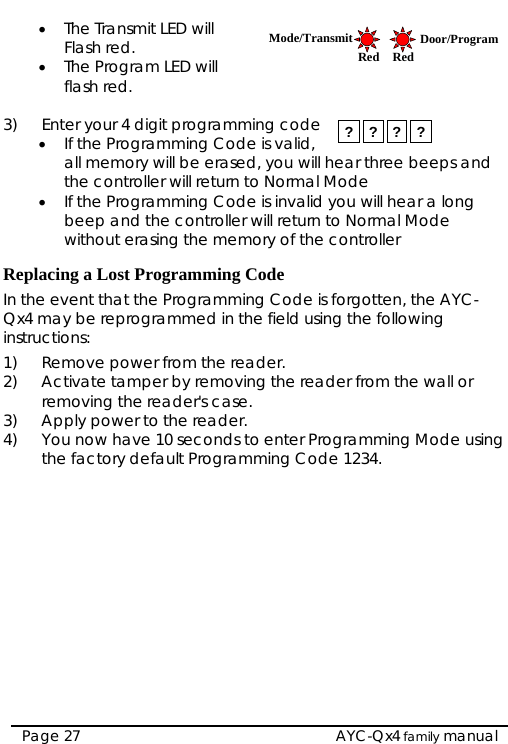
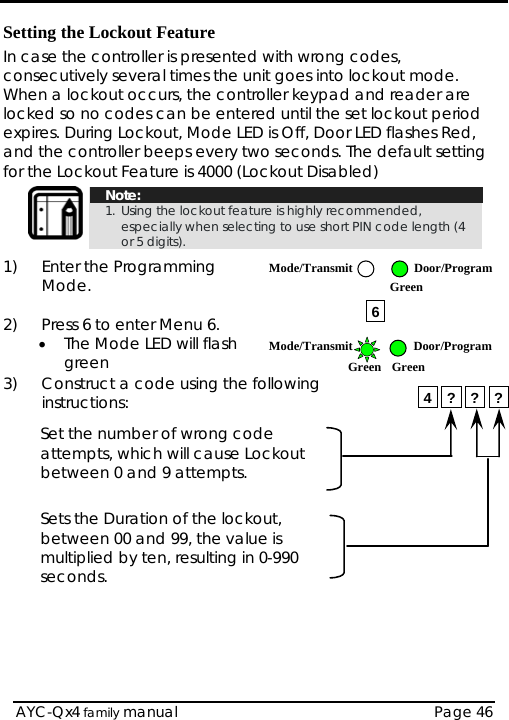
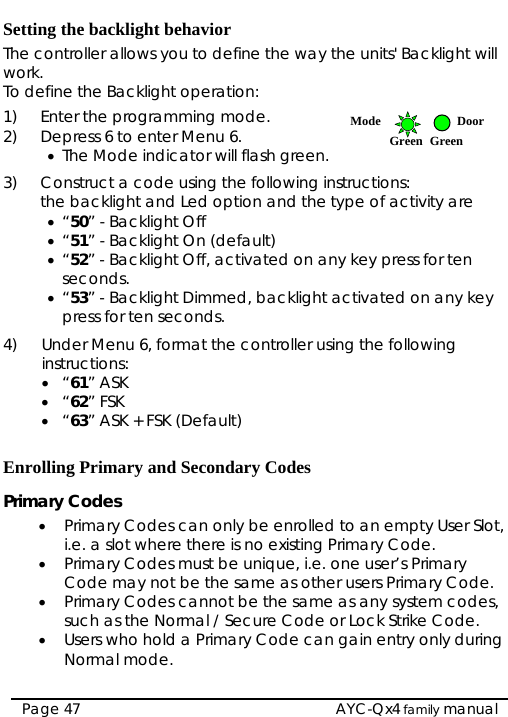
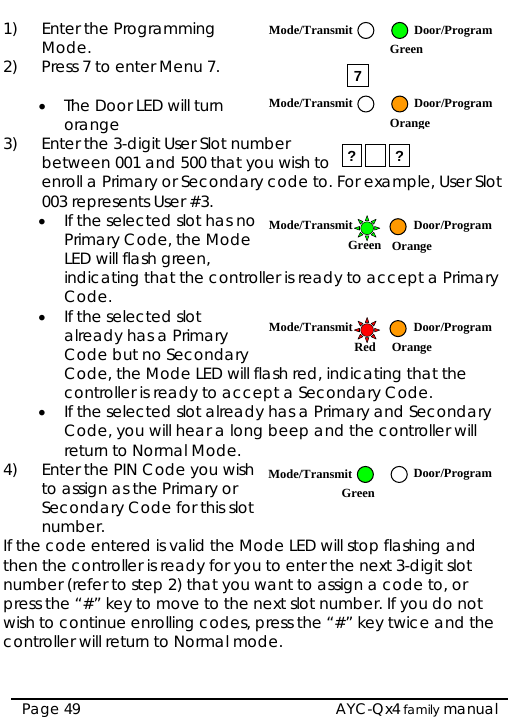
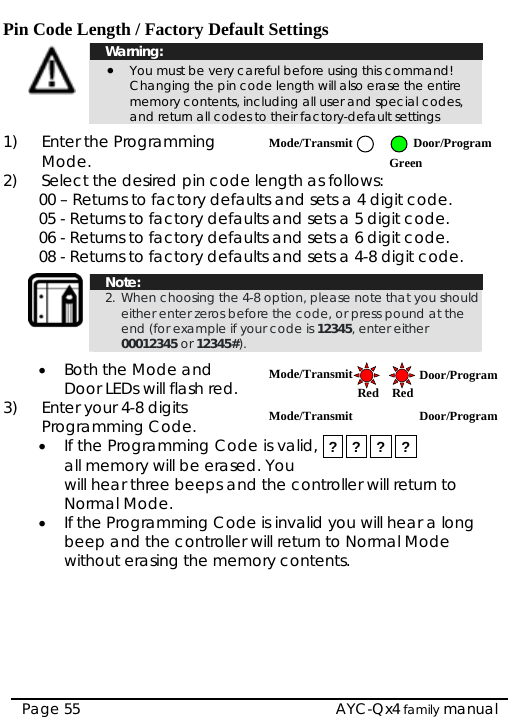
Rosslare AYC-M60 CONVERTIBLE READER AND CONTROLLER User Manual AYC Qx4 family manual
Rosslare Enterprises Ltd CONVERTIBLE READER AND CONTROLLER AYC Qx4 family manual
UserManual.wiki
>
Rosslare
>
AYC M60 User Manual
Users Manual
Navigation menu
Upload a User Manual
Namespaces
Wiki Guide
HTML
PDF
Info
Views
User Manual
Discussion / Help
Navigation

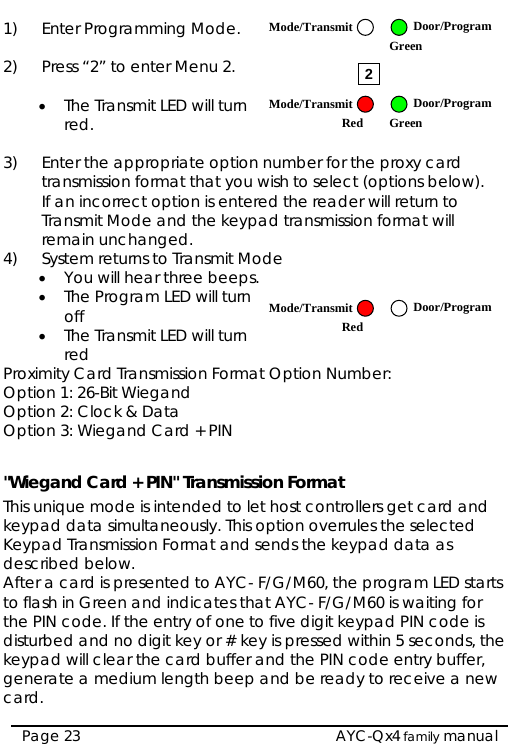
![AYC-Qx4 family manual Page 10 3. Installation 3.1 Mounting the AYC- F/G/M60 Before starting, select the location to mount the AYC- F/G/M60. This location should be at shoulder height. Drill holes into the back of the unit according to how you want to mount the AYC- F/G/M60. For US Gang Box installation, there are two-hole indicators on the back of the metal cover specifically aligned for the US Gang Box (A, in diagram below). For a four screw custom installation, there are four indicators on the back (B in diagram below). [This is Q-box need F/G/M boxes drawings] Figure 1 Drilling mounting holes When the unit is used a reader, route the interface cable from the AYC- F/G/M60 to the Controller. When the unit is used as a secured controller, route the interface cable from the AYC- F/G/M60 to Rosslares’ secure application appurtenance. A linear type power supply is recommended, when using the unit as a controller. Screw the AYC- F/G/M60 back cover to its mounting location. Return the AYC- F/G/M60 front cover to the mounted back plate. Secure the front cover by using the supplied security screw in the controllers Installation Kit. An L-Shaped tool is provided for use when tightening the security screw.](https://usermanual.wiki/Rosslare/AYC-M60/User-Guide-1657199-Page-9.png)