Ruckus Virtual SmartZone Data Plane (vSZ D™) Quick Setup Guide For 3.2.1 V SZ D Smart Zone Vszd 3 2 1 20160129
2016-02-02
User Manual: Ruckus vSZ-D Quick Setup Guide for SmartZone 3.2.1
Open the PDF directly: View PDF ![]() .
.
Page Count: 3
Copyright © 2016 Ruckus Wireless, Inc. Page 1 of 3
Published January 2016, Part Number 800-71087-001 Rev A
Ruckus Wireless™
Virtual SmartZone Data Plane™
Quick Setup Guide for
SmartZone 3.2.1
This Quick Setup Guide provides basic instructions for setting
up the Ruckus Wireless Virtual SmartZone Data Plane (vSZ-D)
on the network. For information on advanced configuration
and management options, see the vSZ-D Command Line
Interface Reference Guide, which is available for download
from the Ruckus Wireless Support website:
https://support.ruckuswireless.com/documents
Before You Begin
Before deploying Ruckus Wireless products, please check for
the latest software and the release documentation.
• Release Notes and other user documentation are available
at http://support.ruckuswireless.com/documents.
• Software upgrades are available at
http://support.ruckuswireless.com/software.
• Open source information is available at
http://opensource.ruckuswireless.com.
• Software license and limited warranty information are
available at http://support.ruckuswireless.com/warranty.
What You Will Need
• A hypervisor on which to install vSZ-D (see Ta ble 1 )
• The vSZ-D distribution package (.OVA file), which is
available for download from the Ruckus Wireless Support
website
•The IP address, netmask, gateway and DNS server
addresses assigned to the vSZ controller —if it has a static
network address (recommended).
• A virtual machine that meets the recommended system
resources for the number of APs and wireless clients that
you plan to manage.
Step 1: Install and Start vSZ-D on the
Hypervisor
Using the .OVA file that you downloaded from the Ruckus
Wireless Support site, install an instance of the vSZ-D on the
hypervisor.
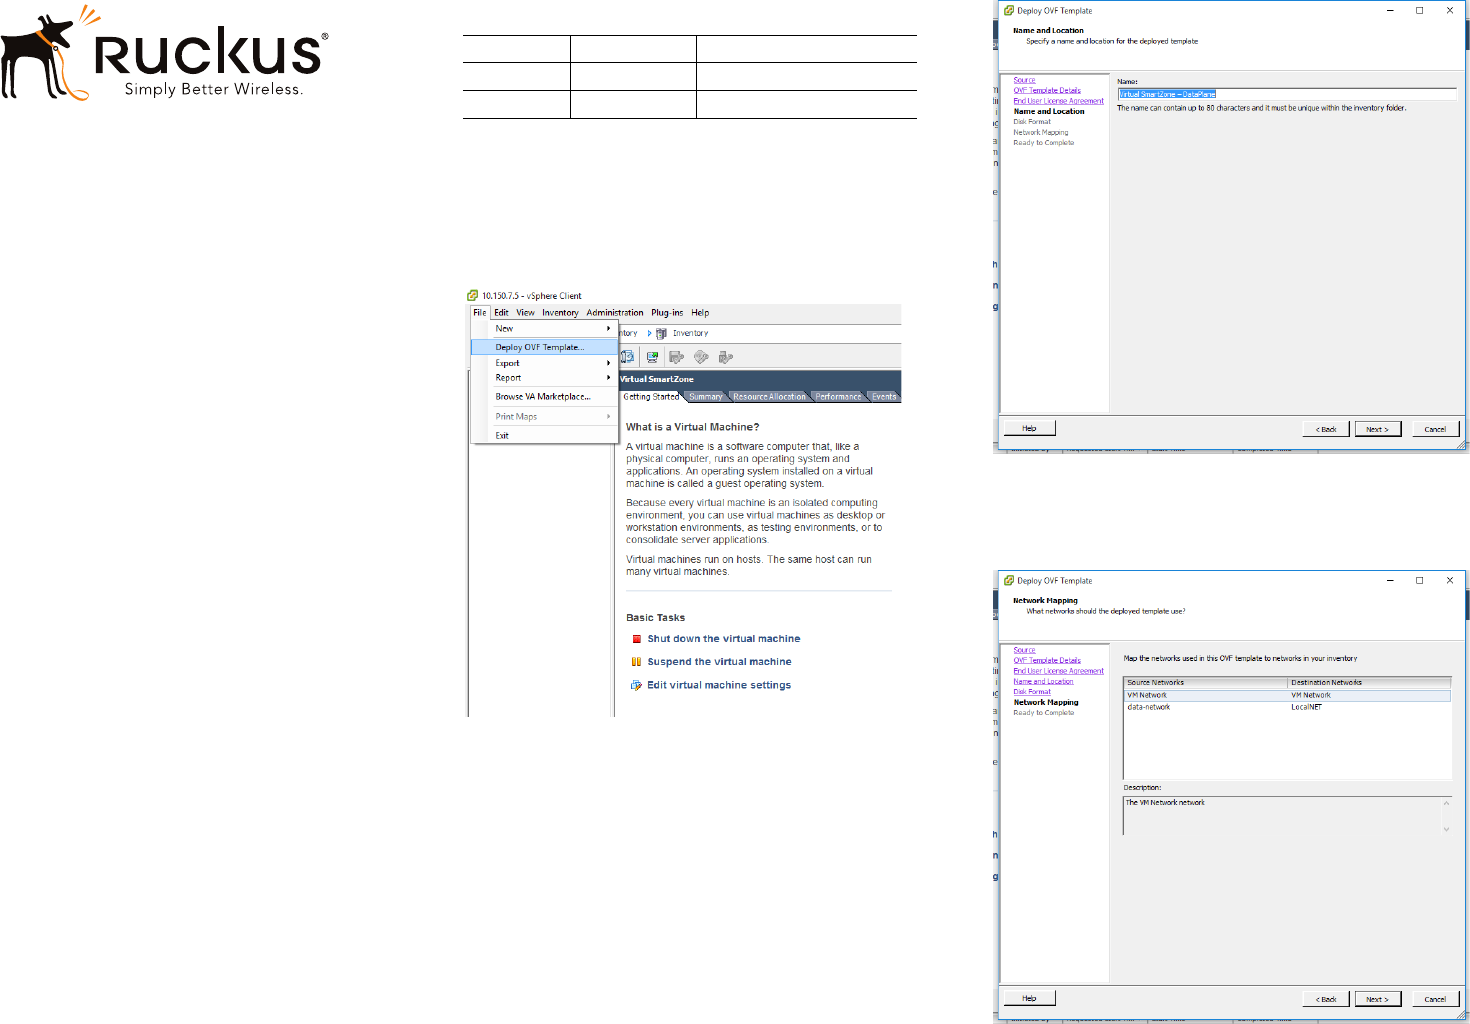
#1 On the vSphere client, click File, > Deploy OVF template.
#2 Select the vSZ-D OVA file that you downloaded from the
Ruckus Wireless Support website, and then click Next.
#3 Review the OVF template details, and then click Next.
#4 Read and accept the end user license agreement, and
then click Next.
#5 Assign a name to this vSZ-D instance that you are
deploying (or accept the default name), and then click
Next.
#6 Select the disk format that you want to use for your
deployment, and then click Next.
#7 Select the network mapping that you want this vSZ-D
instance to use, and then click Next.
#8 Click Finish to start the vSZ-D deployment.
Table 1. Hypervisors that vSZ-D supports
Vendor Hypervisor Version
VMWare ESXi 5.5
KVM Linux CentOS 7.0
Copyright © 2016 Ruckus Wireless, Inc. Page 2 of 3
Published January 2016, Part Number 800-71087-001 Rev A
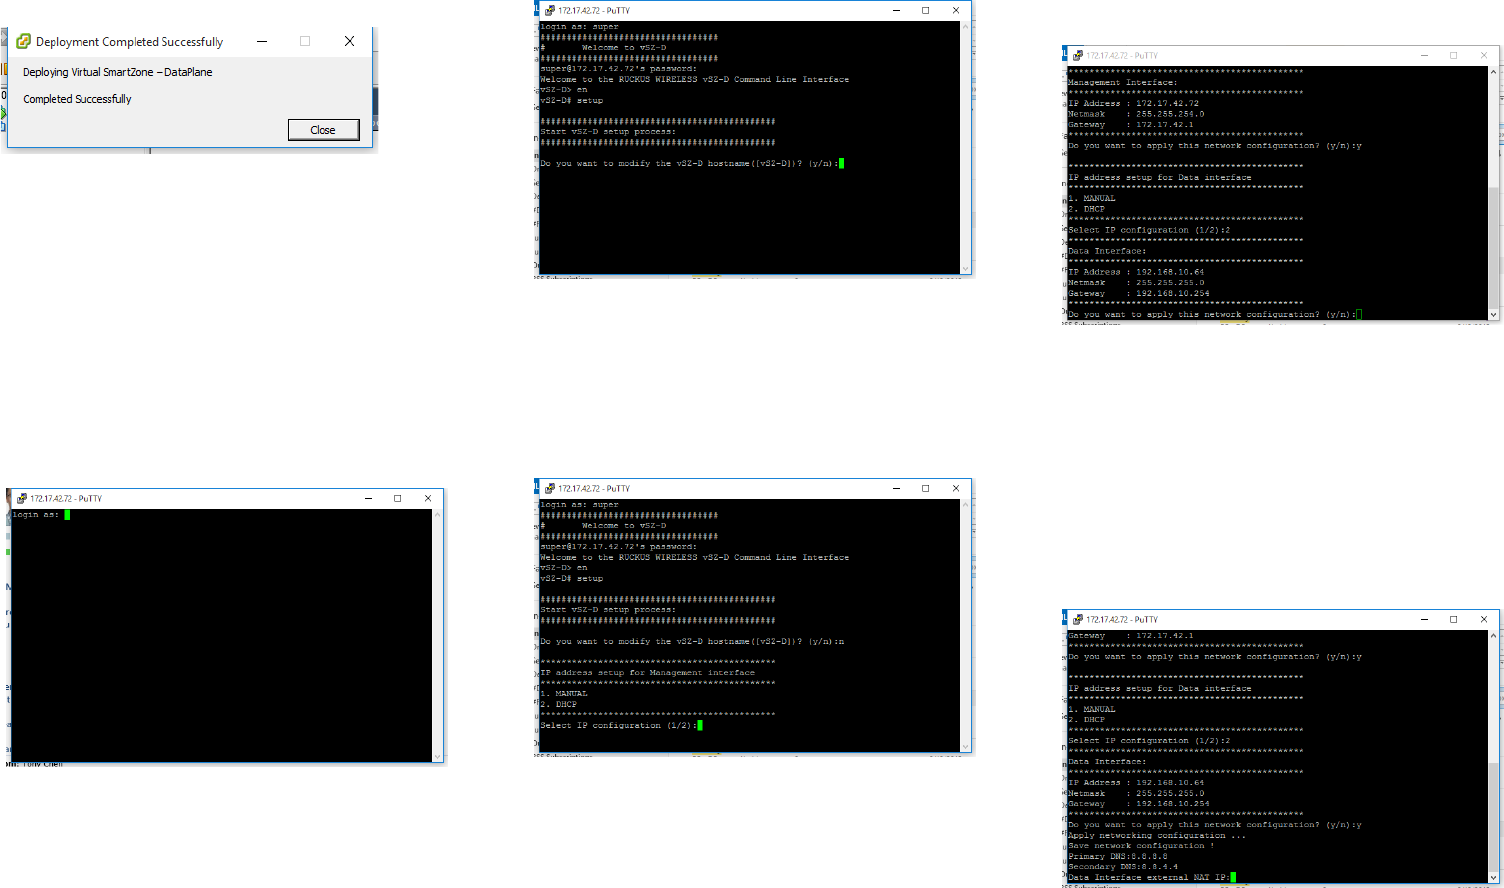
A progress bar appears and displays the vSZ-D installation
status. When the installation process is complete, the fol-
lowing message appears:
Deployment Completed Successfully
#9 Click Close.
#10 On the Getting Started tab of the vSphere client, click
Power on the virtual machine to start the vSZ-D instance
that you installed.
You have completed deploying and starting a vSZ-D instance.
Step 2: Run and Complete the vSZ-D Setup
In this step, you will define the management and data interface
settings that you want vSZ-D to use.
#1 Use an SSH client to connect to the IP address assigned
to the vSZ-D instance. Alternatively, click the Console tab
on the vSphere client to connect to the vSZ-D instance via
SSH.
#2 In login as:, enter admin. The message “Welcome to
vSZ-D” appears.
I
#3 In password: enter admin. The vSZ-D prompt appears.
#4 Enter en to enter the privileged mode. The vSZ-D# prompt
appears.
#5 Enter setup. The message “Start vSZ-D setup process”
appears.
#6 When the prompt “Do you want to modify the vSZ-D
hostname ([vSZ-D])? (y/n),” enter n to keep the default host
name or y to change it.
If you entered y, the next prompt asks you to enter the new
hostname.
#7 The next prompt asks you to choose how you want to set
up the management interface IP address. Enter 1 if you
want to manually assign an IP address to the management
interface or enter 2 to automatically obtain an IP address
from a DHCP server on the network.
If you entered 1 (Manual), the next prompt asks you to
enter the IP address settings that you want to manually
assign.
#8 The next prompt asks you to confirm that you want to
apply the IP address settings that you configured in the
previous prompts. Enter y to confirm and continue.
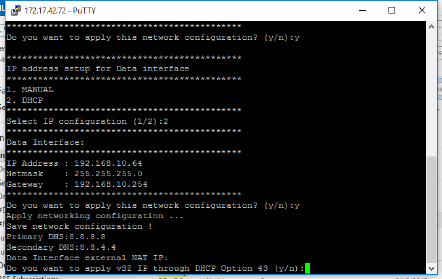
#9 The next prompt asks you to choose how you want to set
up the data interface IP address. Enter 1 if you want to
manually assign an IP address to the data interface or
enter 2 to automatically obtain an IP address from a DHCP
server on the network.
If you entered 1 (Manual), the next prompt asks you to
enter the IP address settings that you want to manually
assign.
#10 The next prompt asks you to confirm that you want to
apply the IP address settings that you configured in the
previous prompts. Enter y to confirm and continue.
The message “Apply networking configuration...” appears.
#11 At the Primary DNS prompt, enter the IP address or host
name of the primary DNS server that you want vSZ-D to
use.
#12 At the Secondary DNS prompt, enter the IP address or
host name of the secondary DNS server that you want
vSZ-D to use.
#13 At the Data Interface external NAT IP prompt,
enter the public IP address of the NAT server (if you have
one) on the network. If you do not have a NAT server on
the network, leave the field blank and simply press
<Enter>.
#14 The next prompt asks you if you want vSZ-D to
automatically discover a vSZ controller on the network
using DHCP Option 43 (if you have configured this on your
DHCP server). Enter y to use DHCP Option 43 or enter n
to manually enter the vSZ controller’s IP address.
Copyright © 2016 Ruckus Wireless, Inc. Page 3 of 3
Published January 2016, Part Number 800-71087-001 Rev A
If you entered n, the next prompt asks you for the IP
address of the vSZ controller with which you want this
vSZ-D instance to join.
#15 At the new password prompt, enter the password that
you want to assign to the vSZ-D management interface.
The message Setup vSZ-D Done !! appears. You have
completed setting up vSZ-D on the network.
Step 3: Approve vSZ-D to Register with the
vSZ Controller
The last step is to approve vSZ-D to allow it to join the vSZ
controller on the network.
#1 Log on to the web interface of the vSZ controller with
which you want vSZ-D to register.
#2 Go to Configuration > System.
#3 On the side menu, click Cluster Planes.
#4 On the Cluster Planes page, scroll down to the Data
Planes section.
#5 Locate the vSZ-D instance that you deployed, and then
click Approve under the Actions column.
You have completed approving vSZ-D to register with vSZ.
Related Documentation
You can configure the vSZ-D from the command line interface
(CLI). For information on how to use the CLI to configure the
vSZ-D, see the vSZ-D Command Line Interface Reference
Guide.
Copyright © 2015 Ruckus Wireless, Inc. All rights reserved. Ruckus, Ruckus
Wireless are trademarks of Ruckus Wireless, Inc. All other company and
product names mentioned in the documentation are held to be trademarked
(and registered) by the primary holders.
