S and O ELECTRONICS HTSB32D SOUND BAR HOME THEATRE SYSTEM User Manual HT SB32D OM USA EN indd
S&O; ELECTRONICS (MALAYSIA) SDN. BHD. SOUND BAR HOME THEATRE SYSTEM HT SB32D OM USA EN indd
UserManual.wiki
>
S and O ELECTRONICS
>
HTSB32D User Manual
User Manual
Navigation menu
Upload a User Manual
Namespaces
Wiki Guide
HTML
PDF
Info
Views
User Manual
Discussion / Help
Navigation
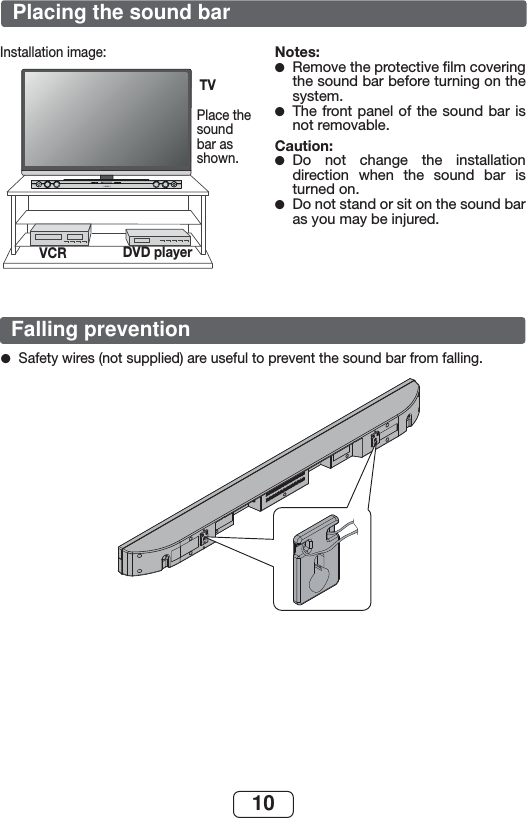
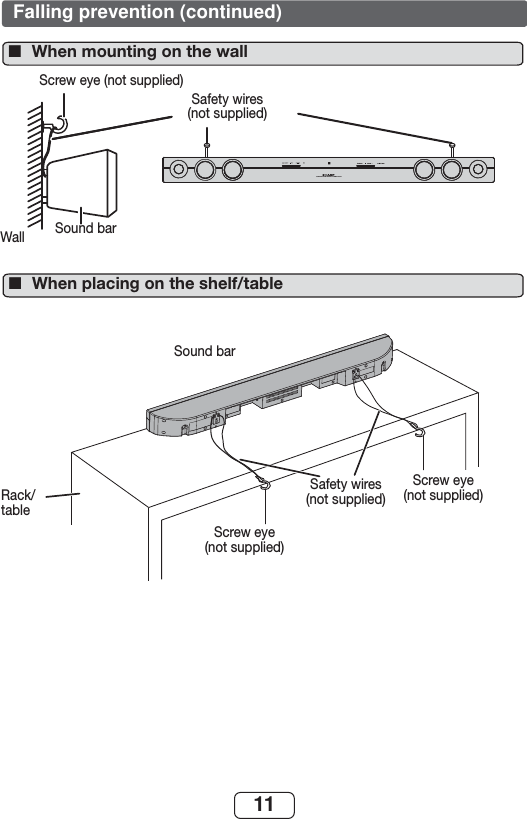
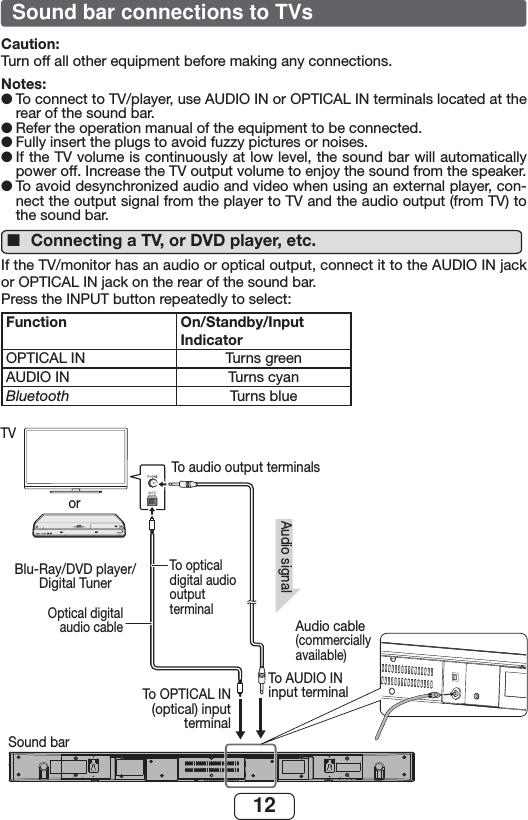
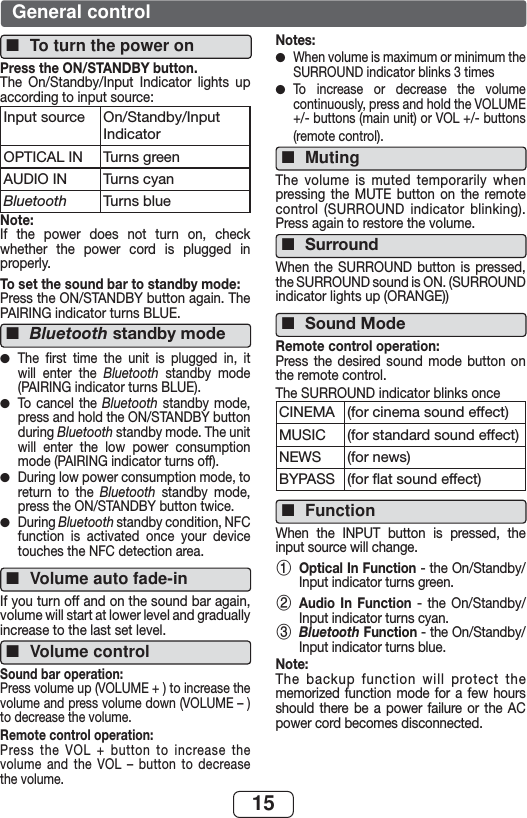
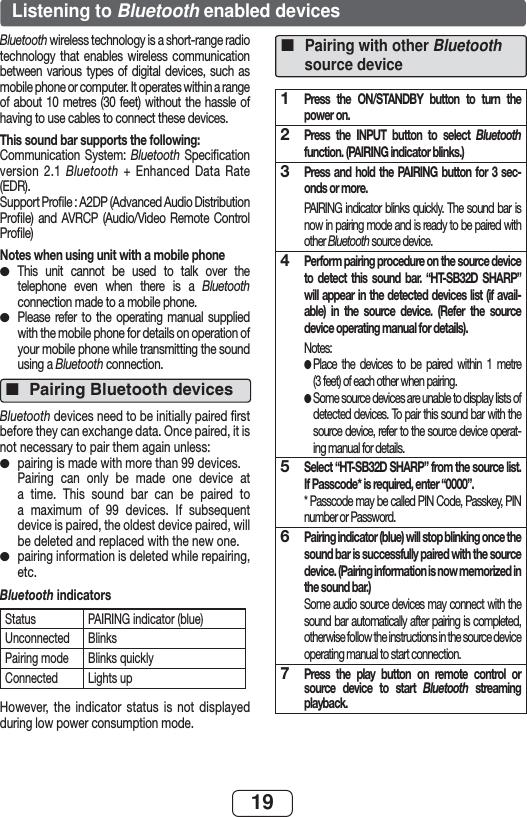
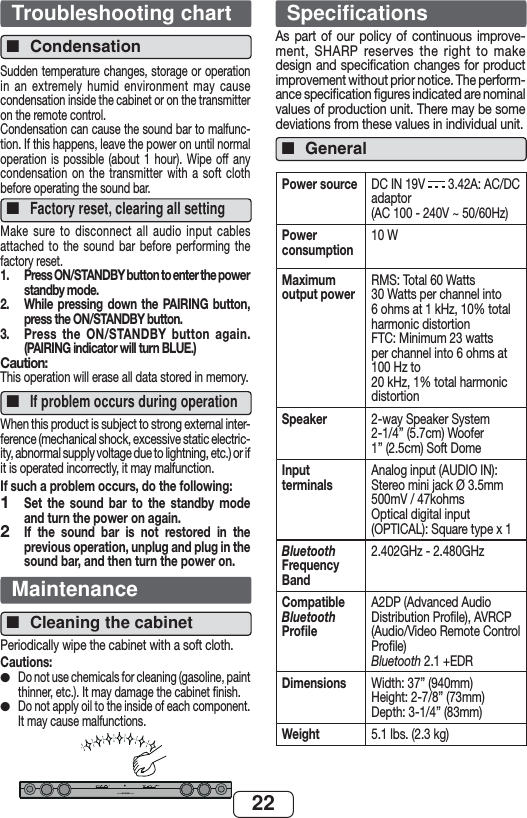
![9Make sure to unplug the AC power cord before installing the sound bar or changing the position.To mount the sound bar on the wallCaution:Be very careful to prevent the sound bar [5.1 lbs. (2.3 kg)] from falling when mounting on the wall.Before mounting, check the wall strength. (Do not put on the veneer plaster or whitewashed wall. The sound bar may fall.) If unsure, consult a qualified service technician.Mounting screws are not supplied. Use appropri-ate ones.Check all wall mount angle screws for looseness.Select a good location. If not, accidents may occur or the sound bar may get damaged.SHARP is not responsible for accidents result-ing from improper installation.Driving screws■SHARP designed the sound bar so you may hang it on the wall. Use proper screws (not supplied). See below for size and type.1/8” (3.2 mm)3/8” (9 mm)Min. 7/8” (22 mm)3/16”(5 mm)Installing the sound bar■Fix the pattern paper to the wall in hori-zontal position as below.44 mm509 mmWall surfacePattern paper(supplied)21-5/8” (548 mm)1●●●●●●Make a hole on the wall following the screw point marks on the pattern paper by using a drill.Wall surface1-1/4” (32 mm)3/8” (8-9 mm)2Fix a wall mount plug into the hole using a hammer, until it is flush with the wall surface.1-1/4” (32 mm)3/8” (8-9 mm)Wall surface3Fasten the screws to the wall as shown below.(Total screw is 2 pieces)Wall surfaceWall surfaceScrew using screwdriver3/16” (4.5 mm - 5 mm)Gap from wall surface4Hang the sound bar onto the screws.5System preparation](https://usermanual.wiki/S-and-O-ELECTRONICS/HTSB32D/User-Guide-2761942-Page-9.png)