SAF Tehnika AS 58F2DMXMR LTE-U Transmitter User Manual
SAF Tehnika A/S LTE-U Transmitter
UserManual.wiki
>
SAF Tehnika AS
>
58F2DMXMR User Manual
User Manual
Navigation menu
Upload a User Manual
Namespaces
Wiki Guide
HTML
PDF
Info
Views
User Manual
Discussion / Help
Navigation

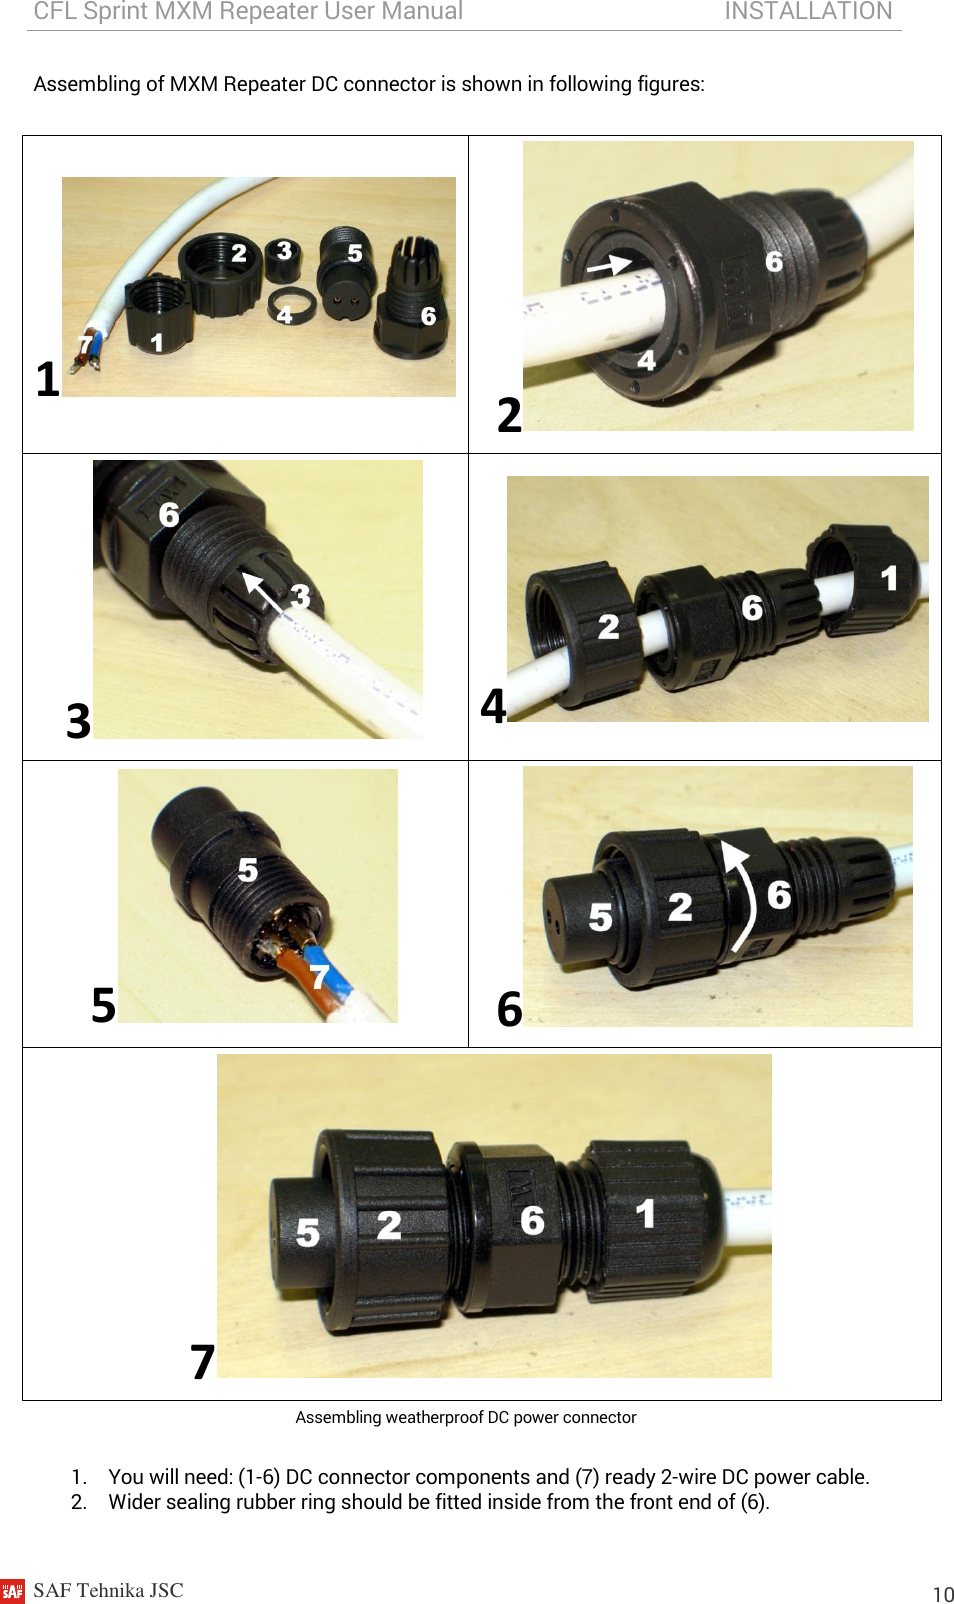

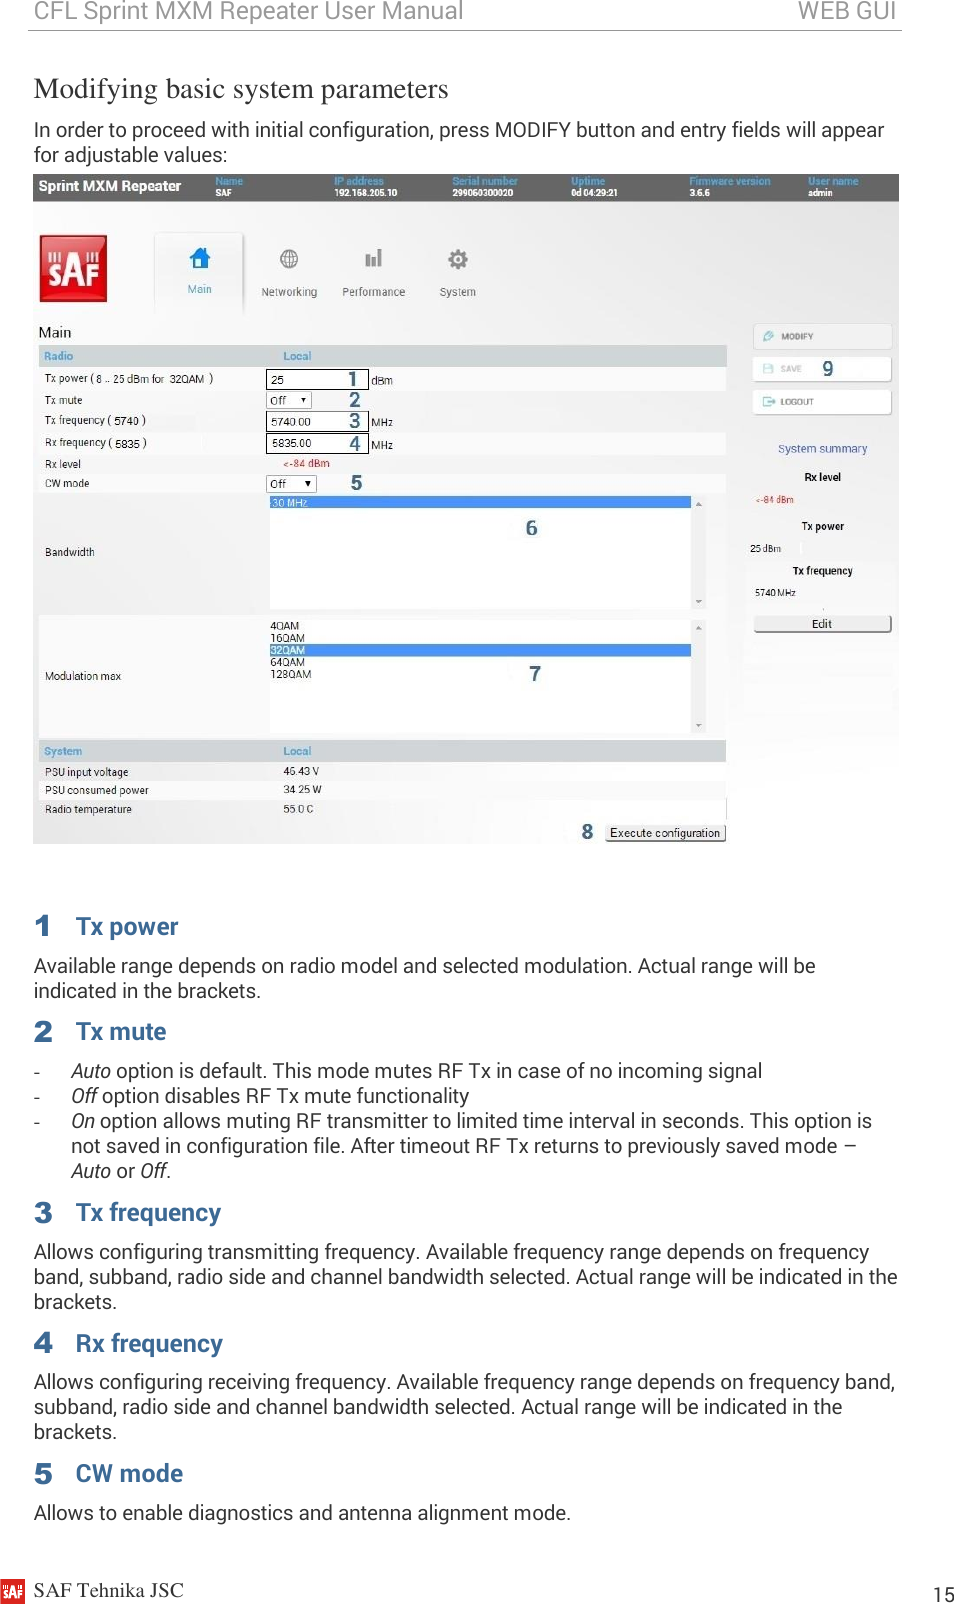
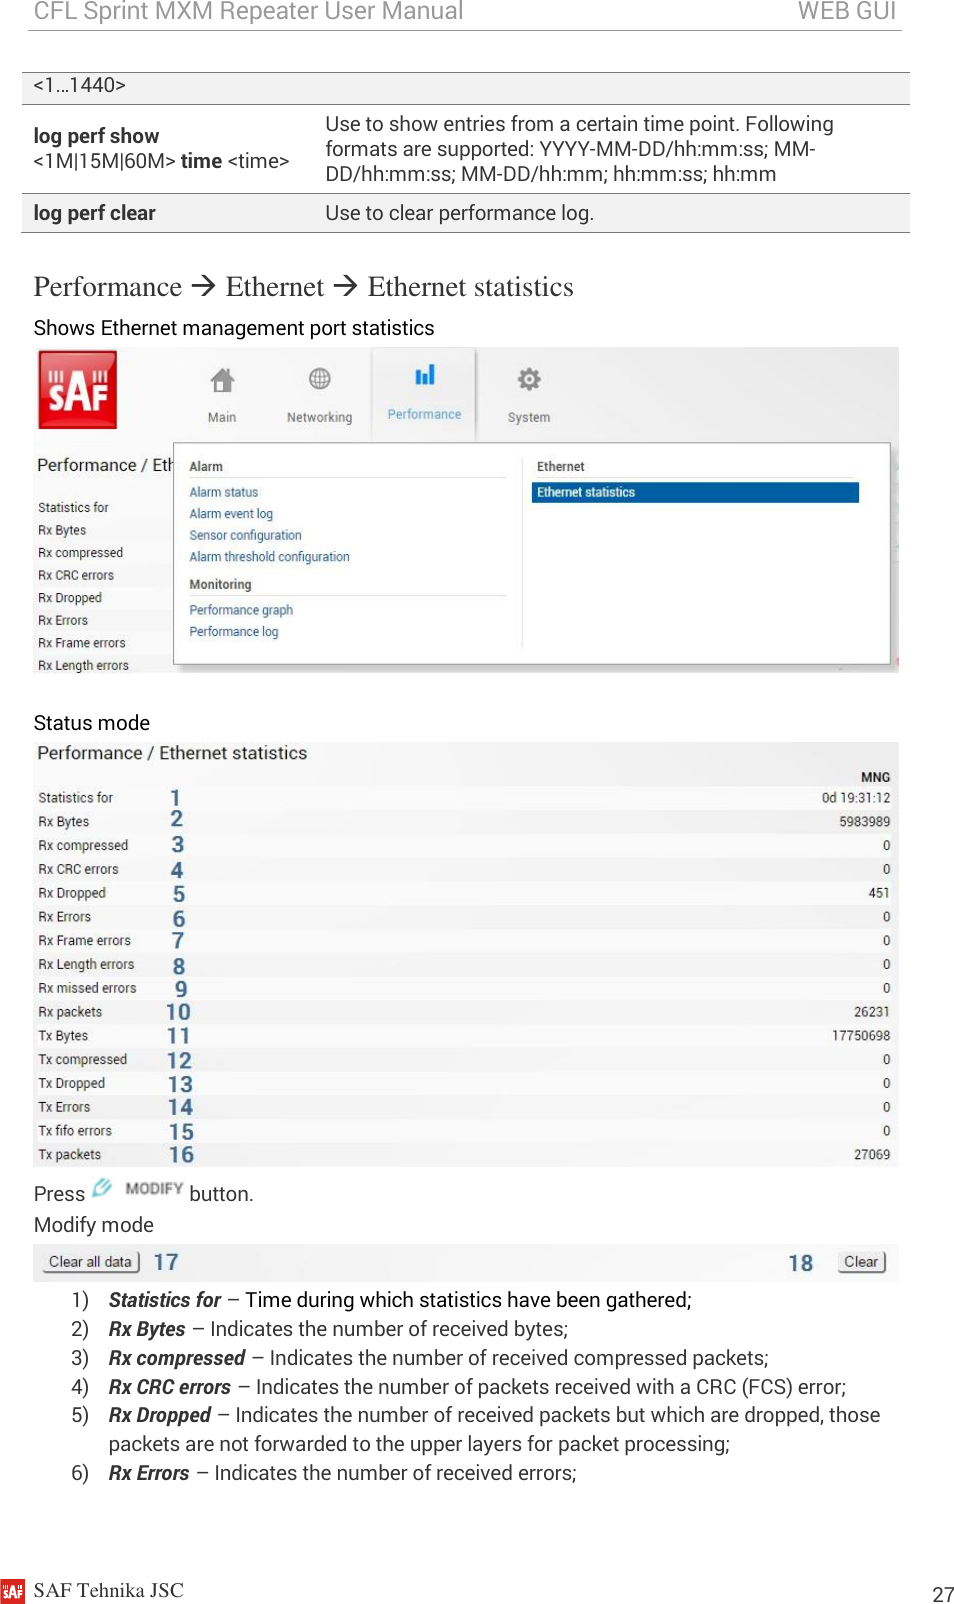
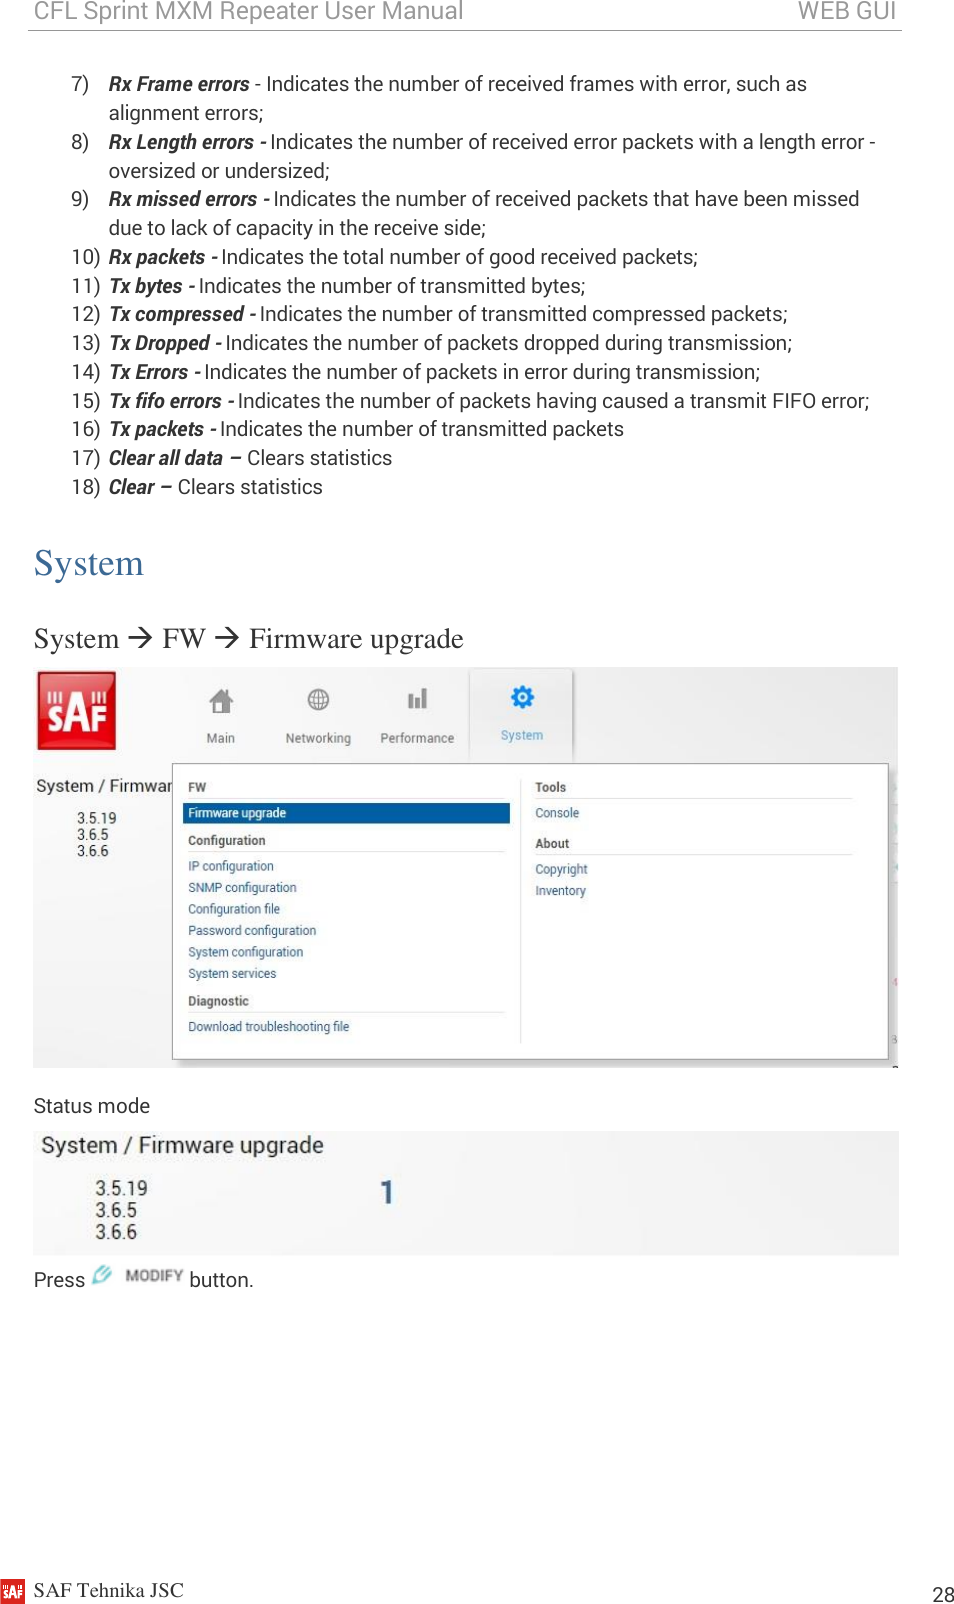
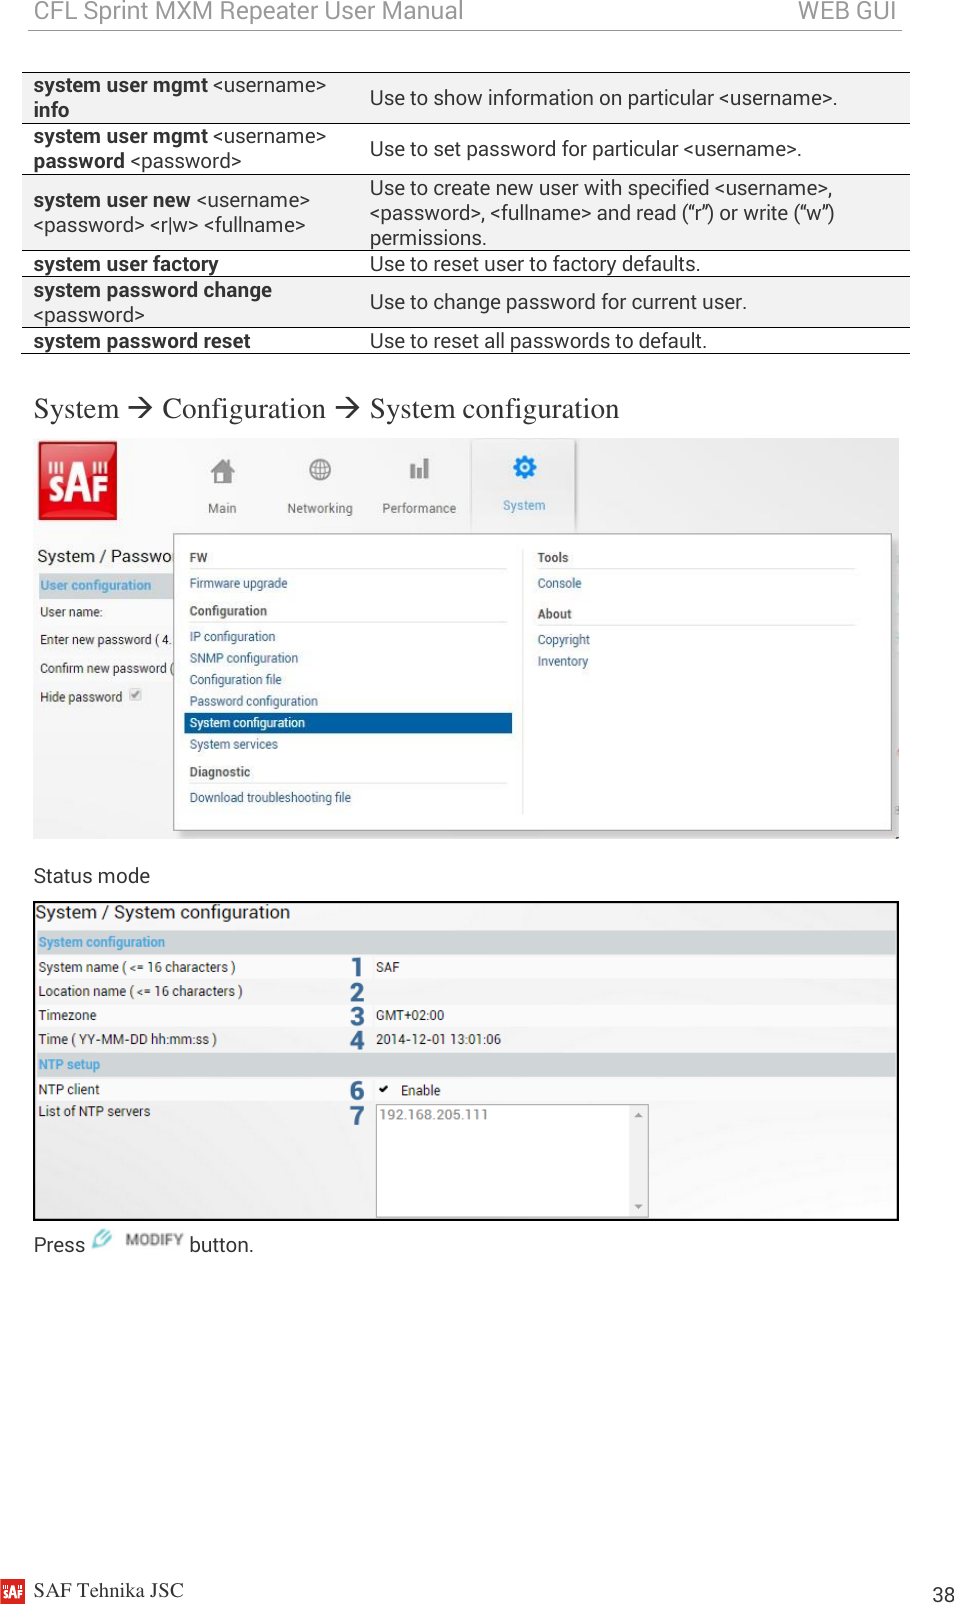
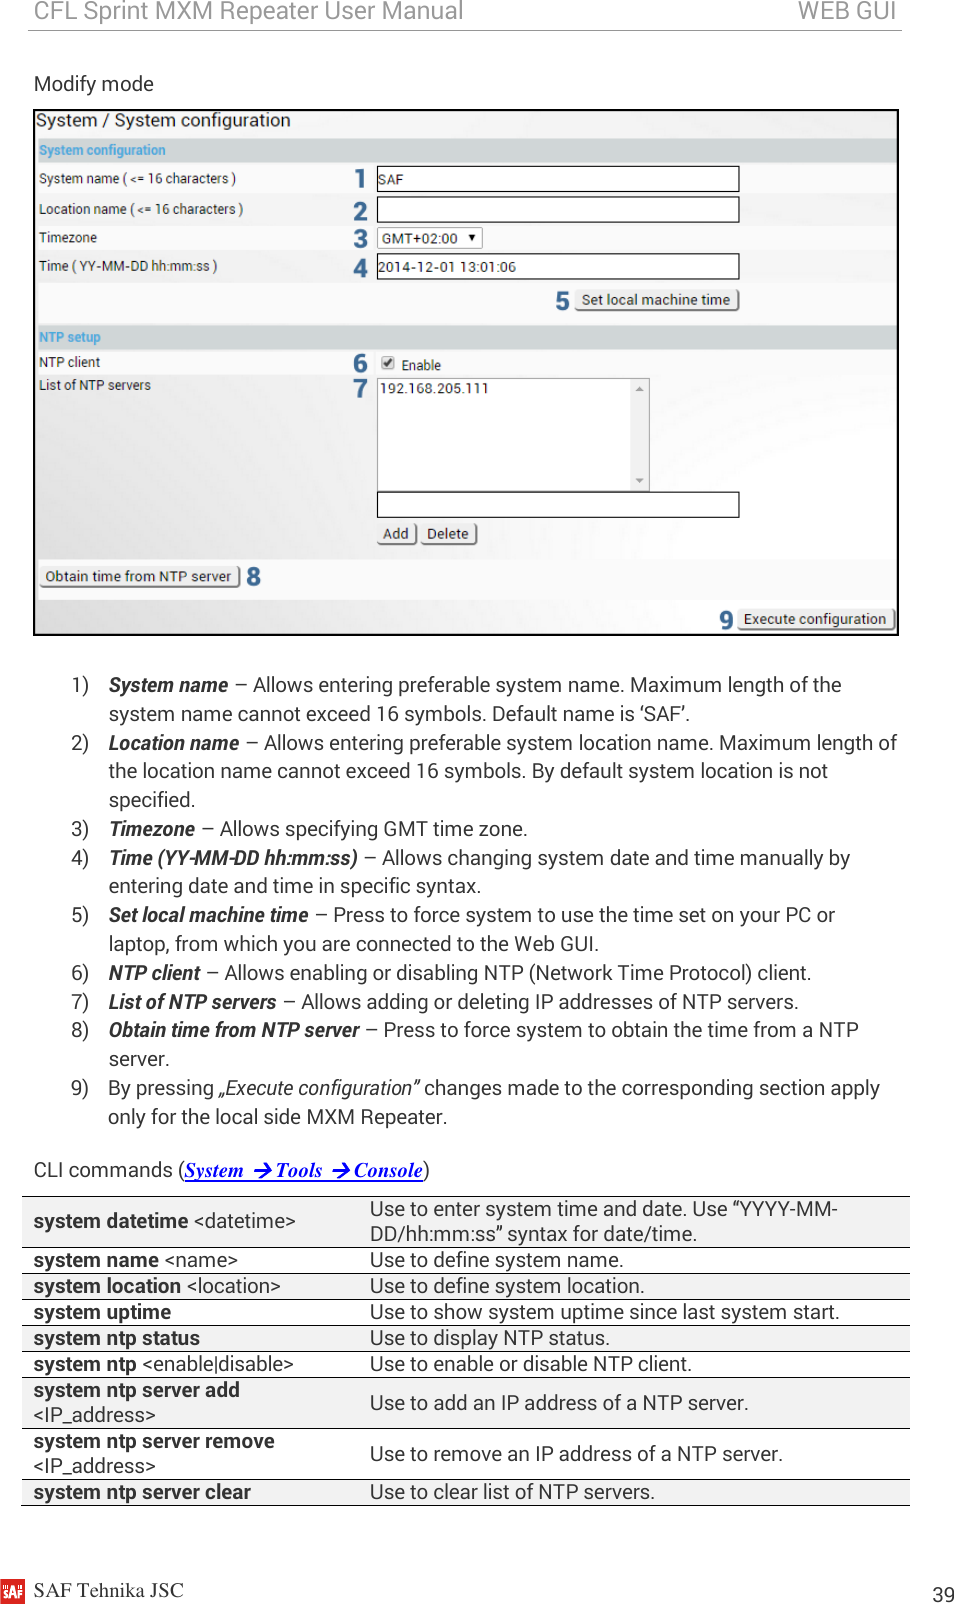
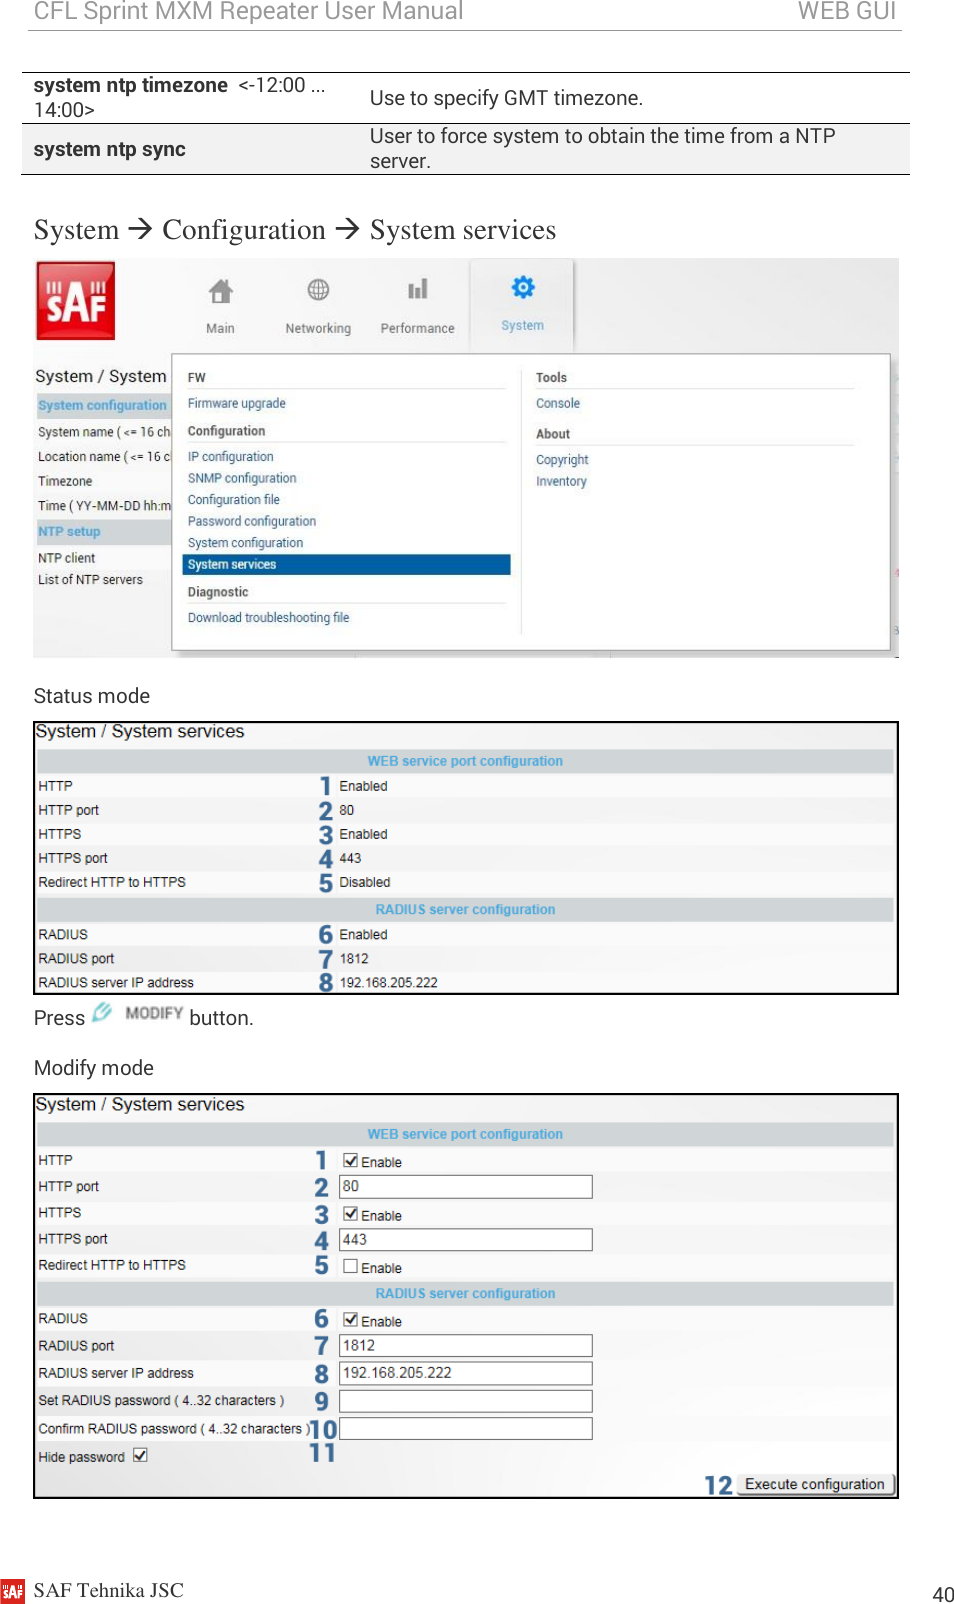
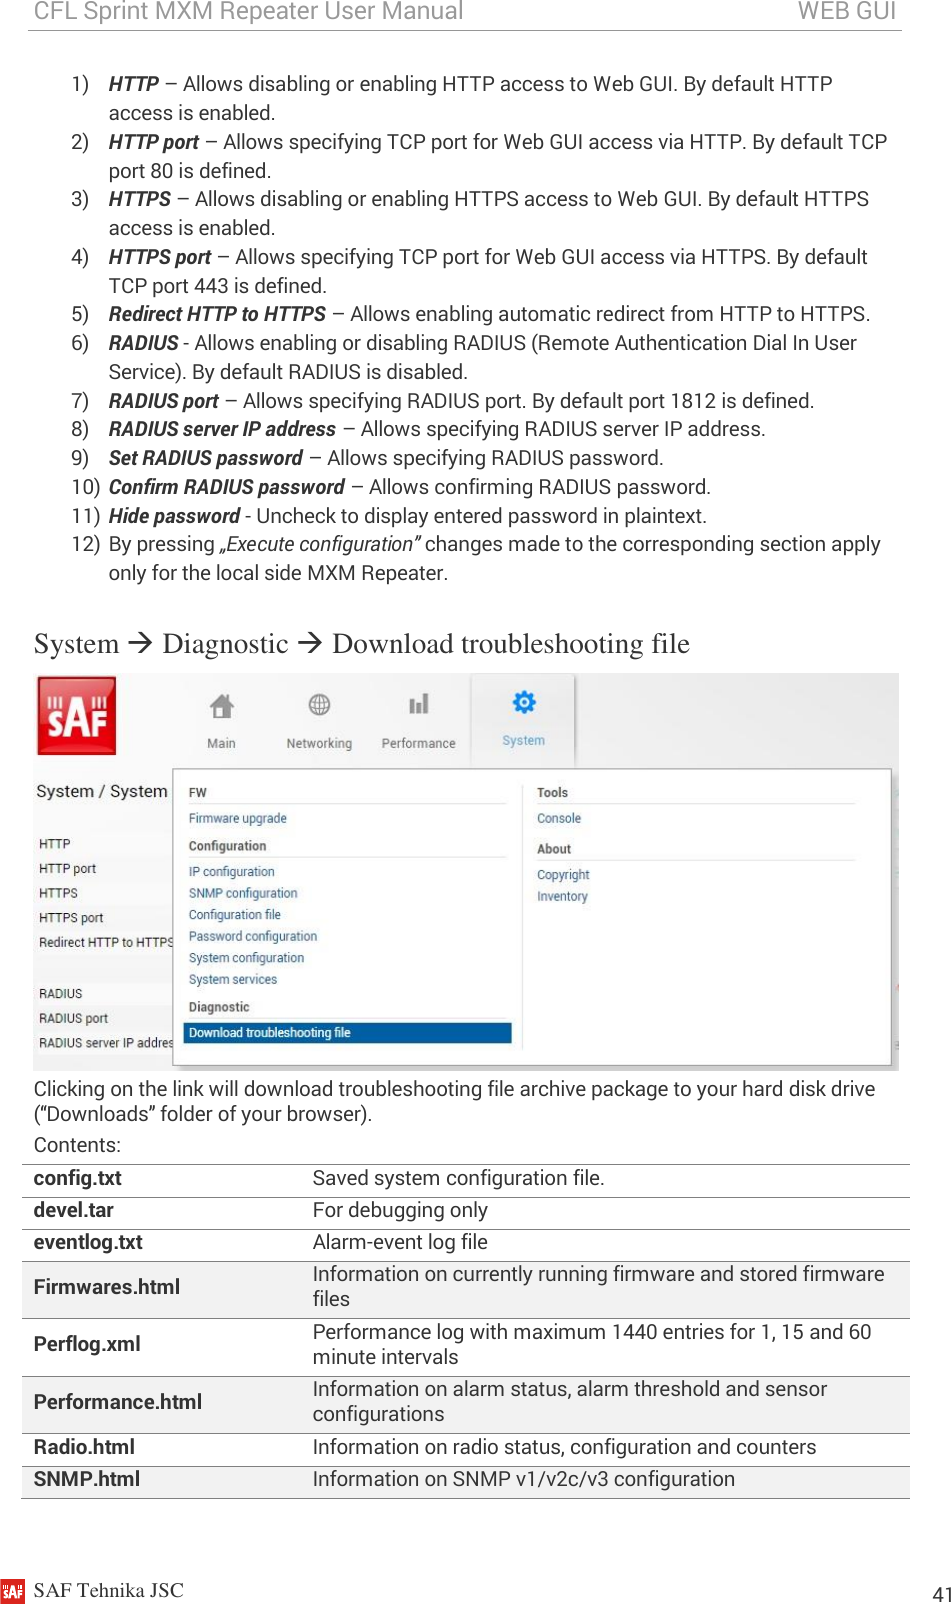
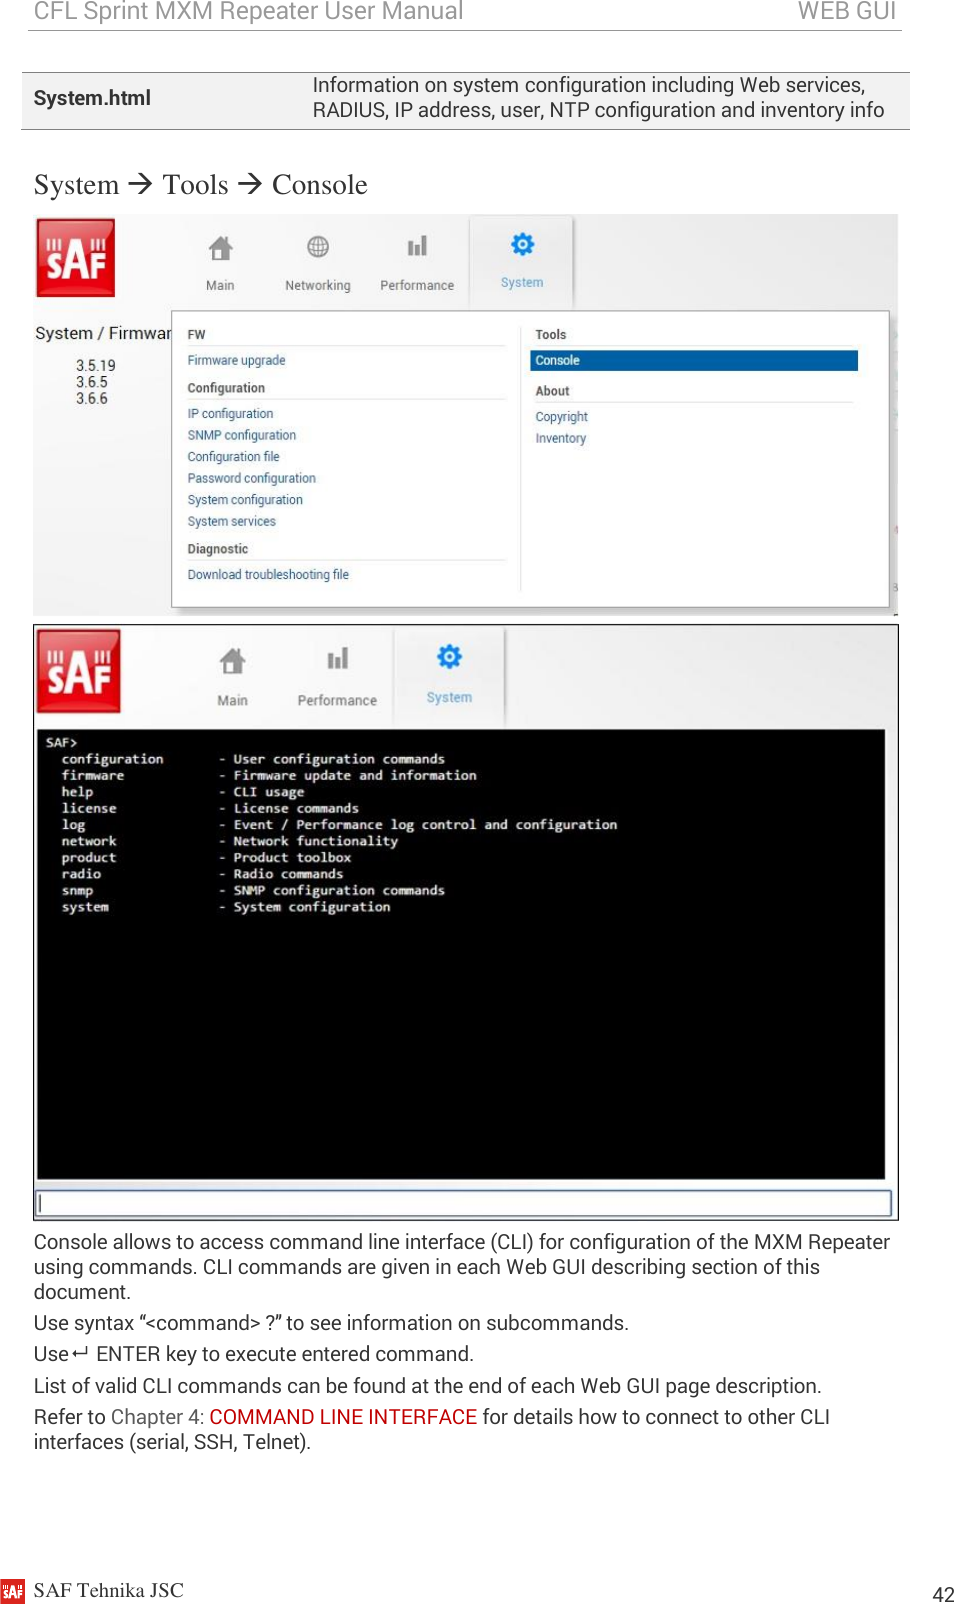
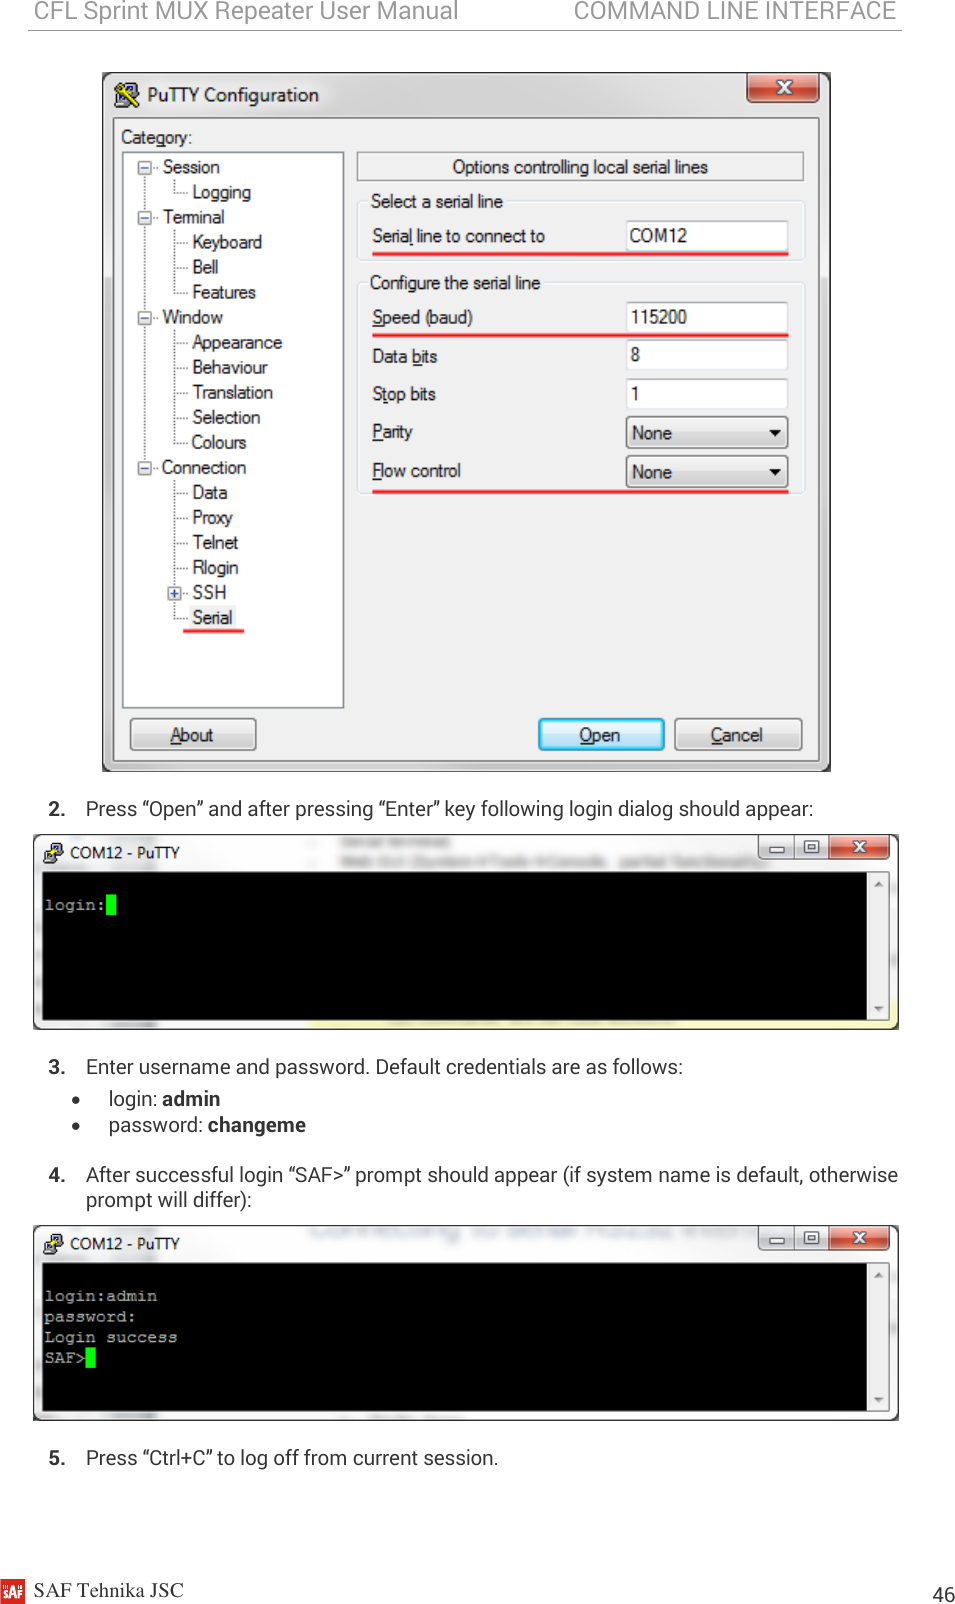
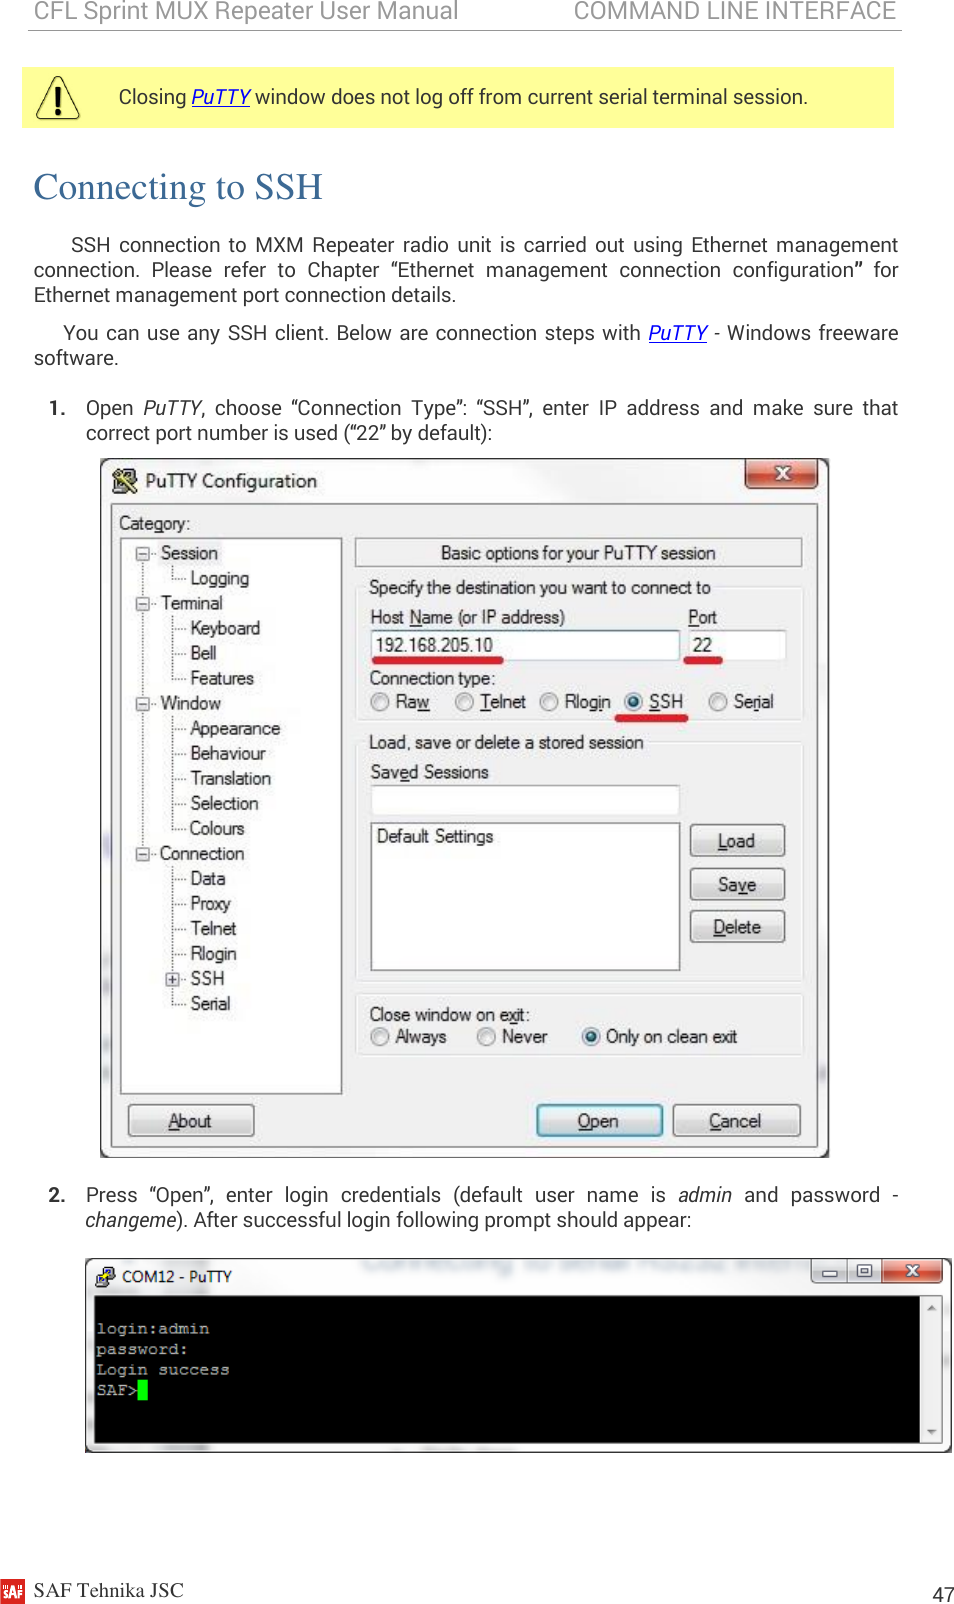
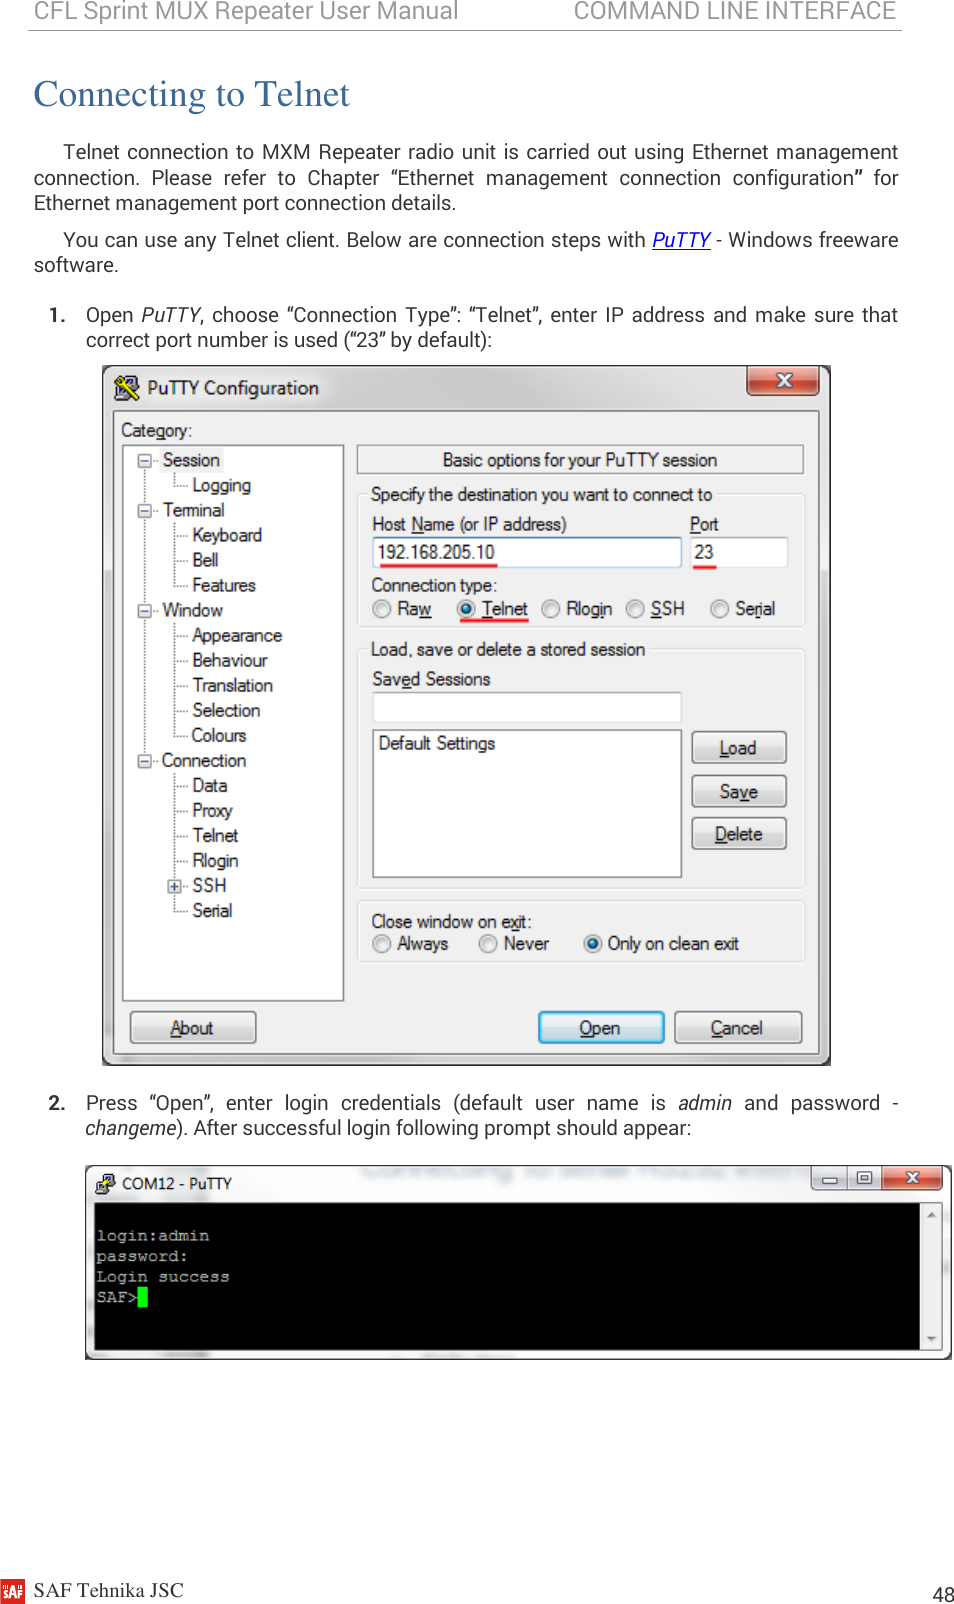
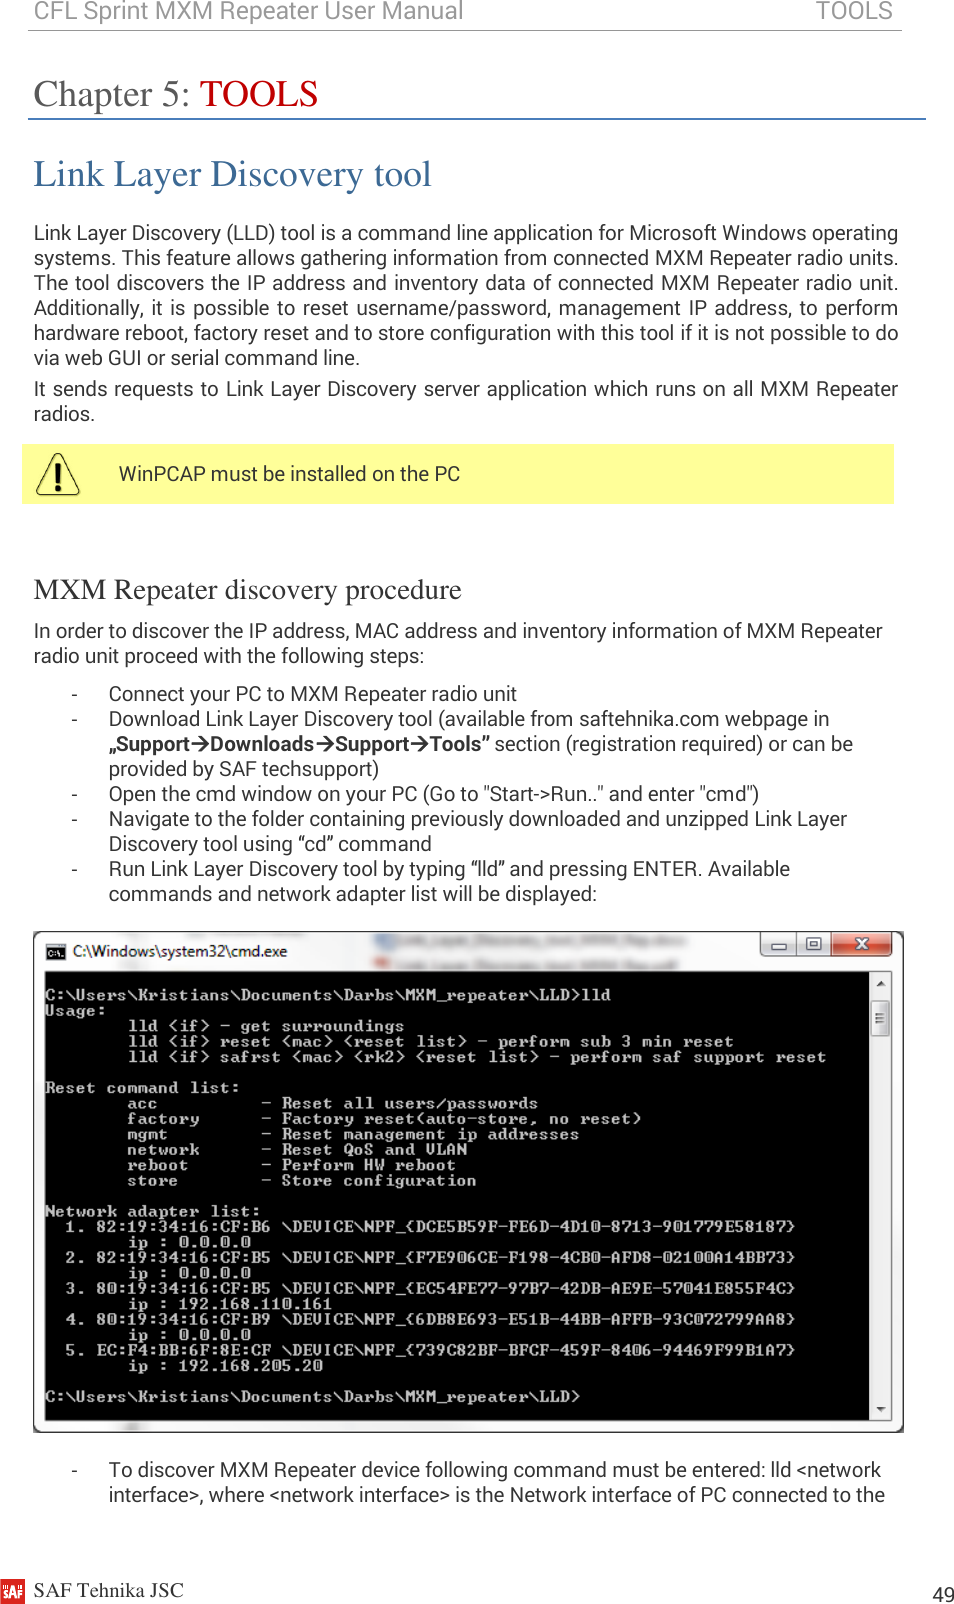
![CFL Sprint MXM Repeater User Manual WEB GUI SAF Tehnika JSC 29 Modify mode 1) Shows list of available firmware files; 2) Upgrade firmware – click on preferred firmware in the list and press “Upgrade firmware” button to initiate firmware upgrade process. 3) Reboot – Reboots management CPU. 4) Delete – Deletes selected firmware file from the list. 5) Choose File – Press to browse for a firmware file on your hard disk drive. 6) Upload – Press to upload a firmware file to MXM Repeater. CLI commands (System Tools Console) firmware info [<version>] Use to show detailed information on current or specific MXM Repeater firmware. firmware install <version> Use to install firmware version uploaded. Note that exact version needs to be entered. Check available firmware versions using command “firmware list”. firmware list Use to list uploaded firmware versions. firmware remove <version> Use to remove firmware version uploaded. Note that exact version needs to be entered. Check available firmware versions using command “firmware list”. firmware remove.list Use to remove all uploaded firmware versions. firmware switch Use to check running firmware bank and bank that will be used at the next boot. firmware switch <fs|fw1|fw2|toggle> Use to define bank that will be used at the next boot. “fw1” and “fw2” subcommands set appropriate bank, “toggle” forces to set other bank than the running one, “fs” is factory defined emergency bank, which is used if both “fw1” and “fw2” fail. System Configuration IP configuration IP address configuration page is available in “System” menu (SystemConfigurationIP configuration).](https://usermanual.wiki/SAF-Tehnika-AS/58F2DMXMR/User-Guide-3630735-Page-29.png)