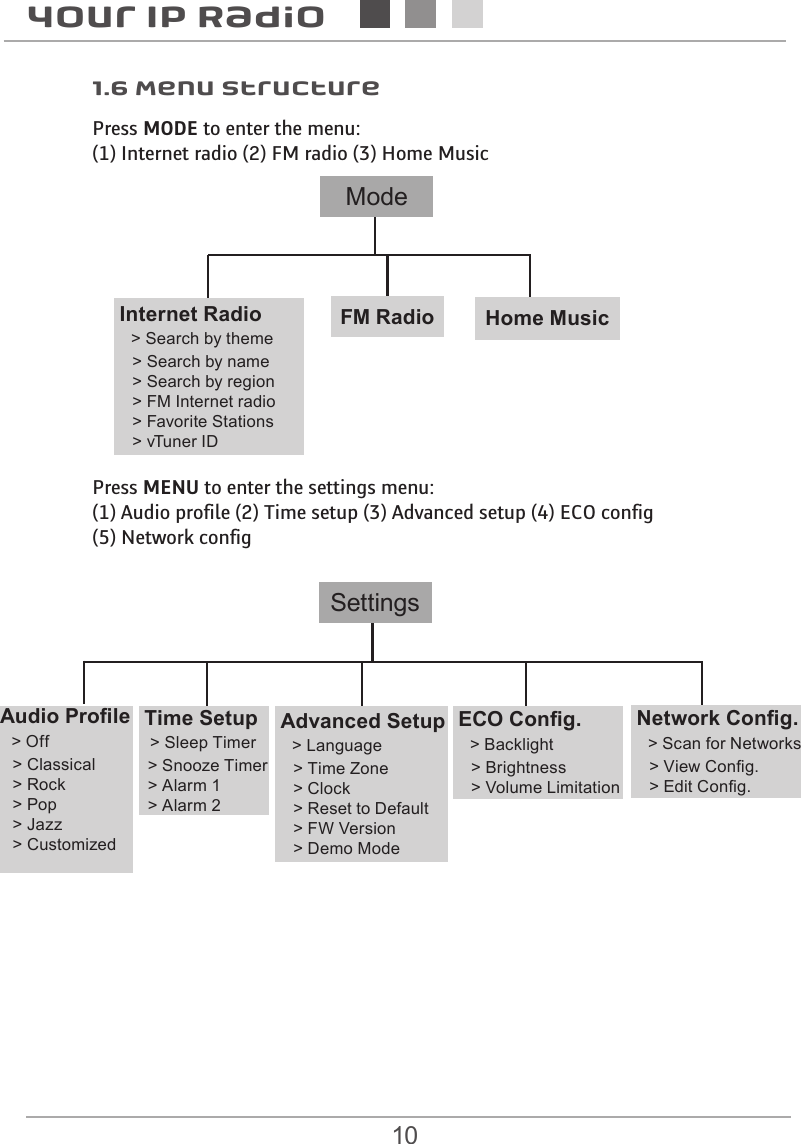
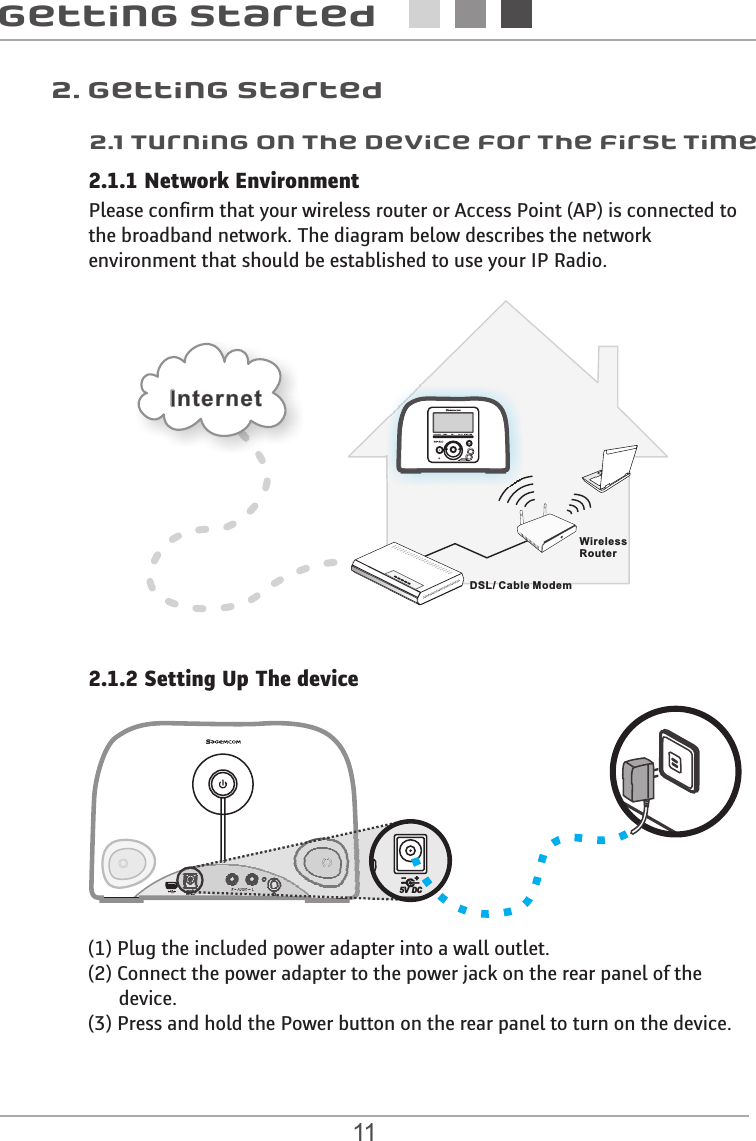
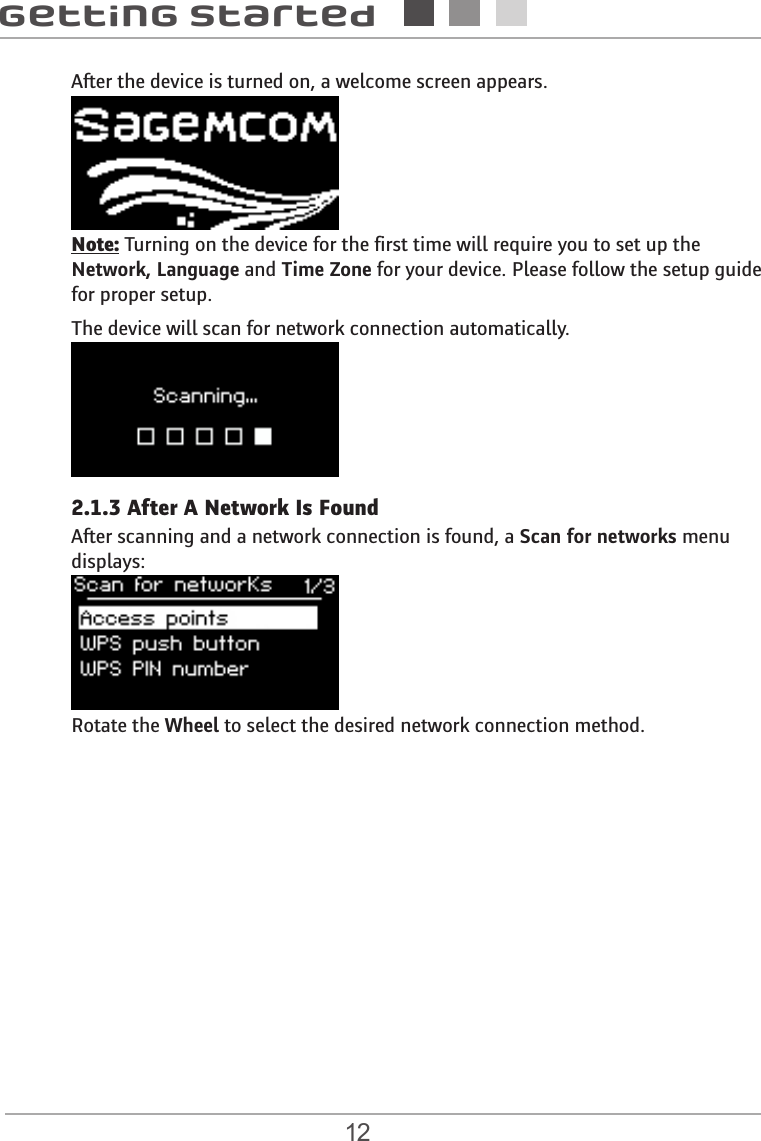
SAGEMCOM BROANDS RM50 IP Radio User Manual
SAGEMCOM SAS IP Radio
UserManual.wiki
>
SAGEMCOM BROANDS
>
RM50 User Manual
user manual
Navigation menu
Upload a User Manual
Namespaces
Wiki Guide
HTML
PDF
Info
Views
User Manual
Discussion / Help
Navigation
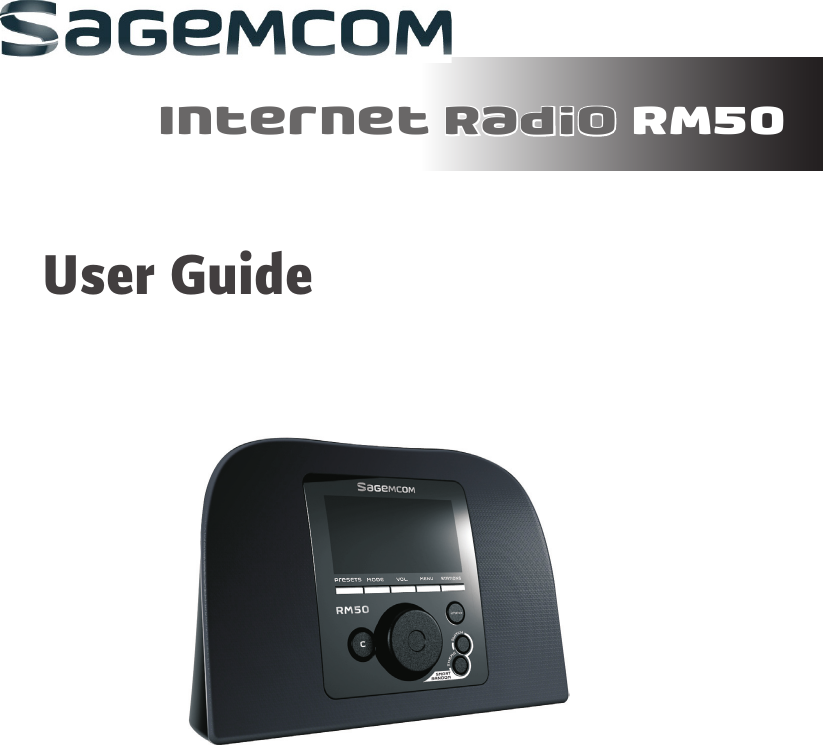

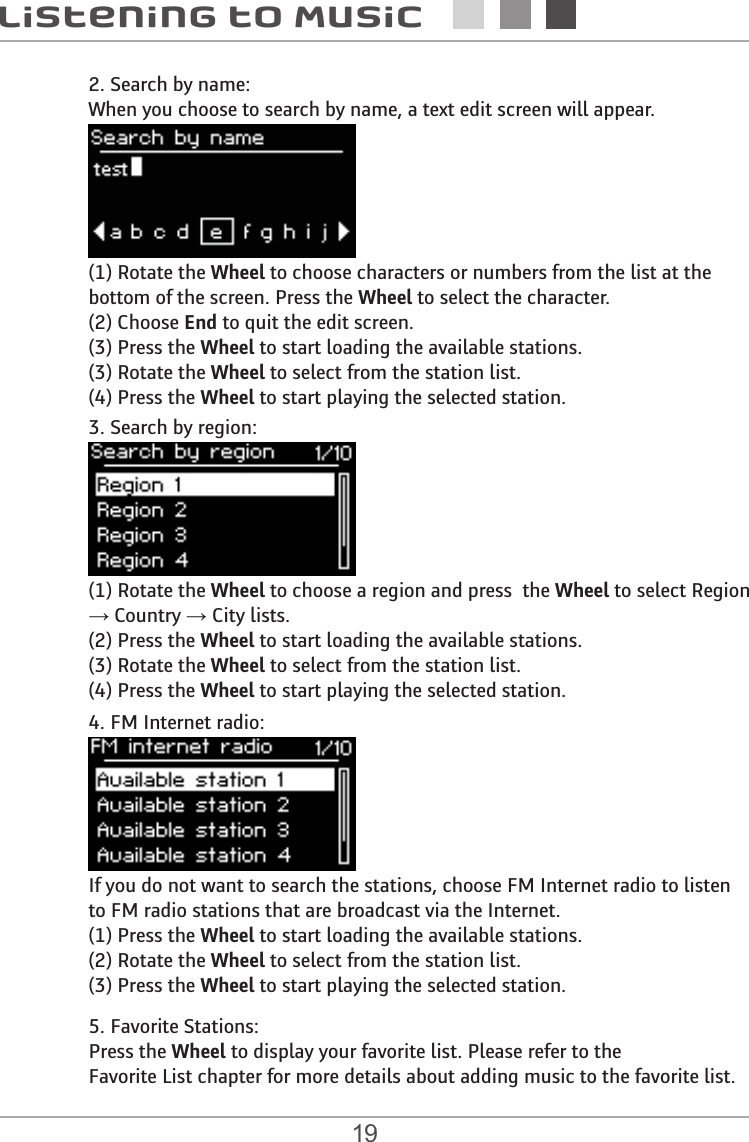
![7Your IP Radio1.3 Front Panel123 4 5679101112 121181. Display Screen Displays contents on the screen.2. PRESETS [1] Press and hold to display a list of available FM stations.[2] Press to activate auto/manual scan.3. MODE Displays the Mode menu.4. VOL. Enables volume control on the Wheel.5. MENU Displays the settings menu.6. STATIONS [1]Press to displays the Favorite List [2] Press and hold to add/remove stations to/from the Favorite List.7. Navigation Wheel [1] In playback screen, rotate to increase/decrease the volume. Press to mute the audio volume.[2] Navigate in the menu list. Press to enter or confirm the highlighted item in the menu list.8. C Act as the BACK button in all display screen.9. INFO While listening to an IP Radio music source, press to display the music data.10. SMART RANDOM SWITCH Switch randomly to a new station.11. SMART RANDOM THEMEDisplays a list of all existing themes defined by Internet Radio. 12. Speakers Provides music sound output.](https://usermanual.wiki/SAGEMCOM-BROANDS/RM50/User-Guide-1326811-Page-7.png)
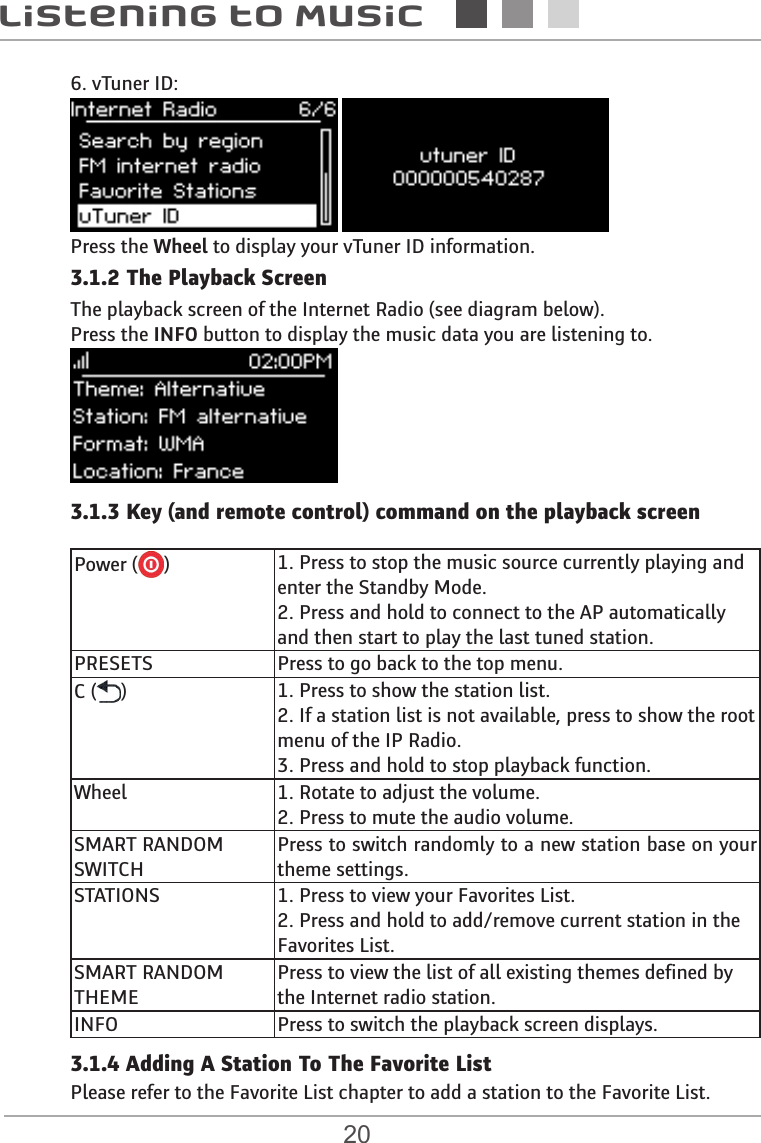
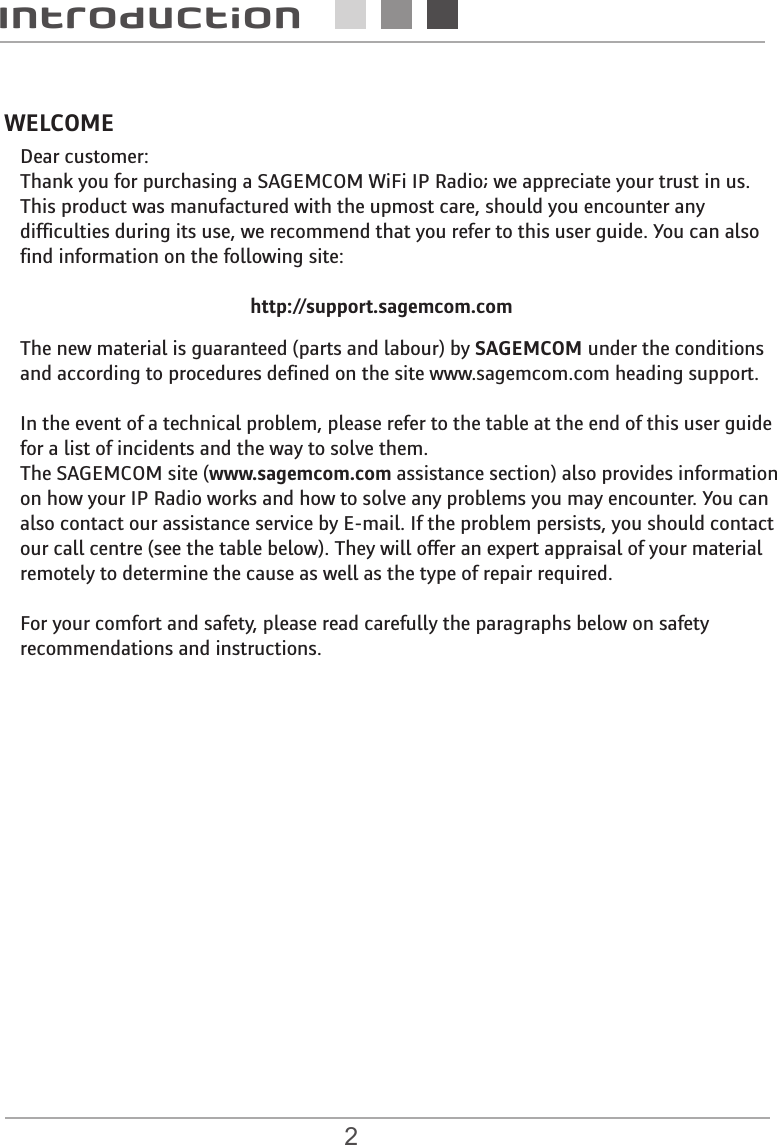
![8Your IP Radio1.4 Rear Panel5V DCRAUDI O L1234561. POWER [1] Press to shut off the music source currently playing and put the device into the Standby mode.[2] Press and hold to put the device in the Power off mode.2. USB Port Connect to USB cable for ffirmware upgrade only.3. 5V DC Power Jack Plug in the power adaptor.4. Audio Line Out Jack Left/Right Plug in external speakers.5. Antenna Cable Reception of radio signals. 6. Headset Jack Plug in an external headset. Speakers do not function while headset is plugged in.1.5 Remote Control1234591067811121315161413](https://usermanual.wiki/SAGEMCOM-BROANDS/RM50/User-Guide-1326811-Page-8.png)
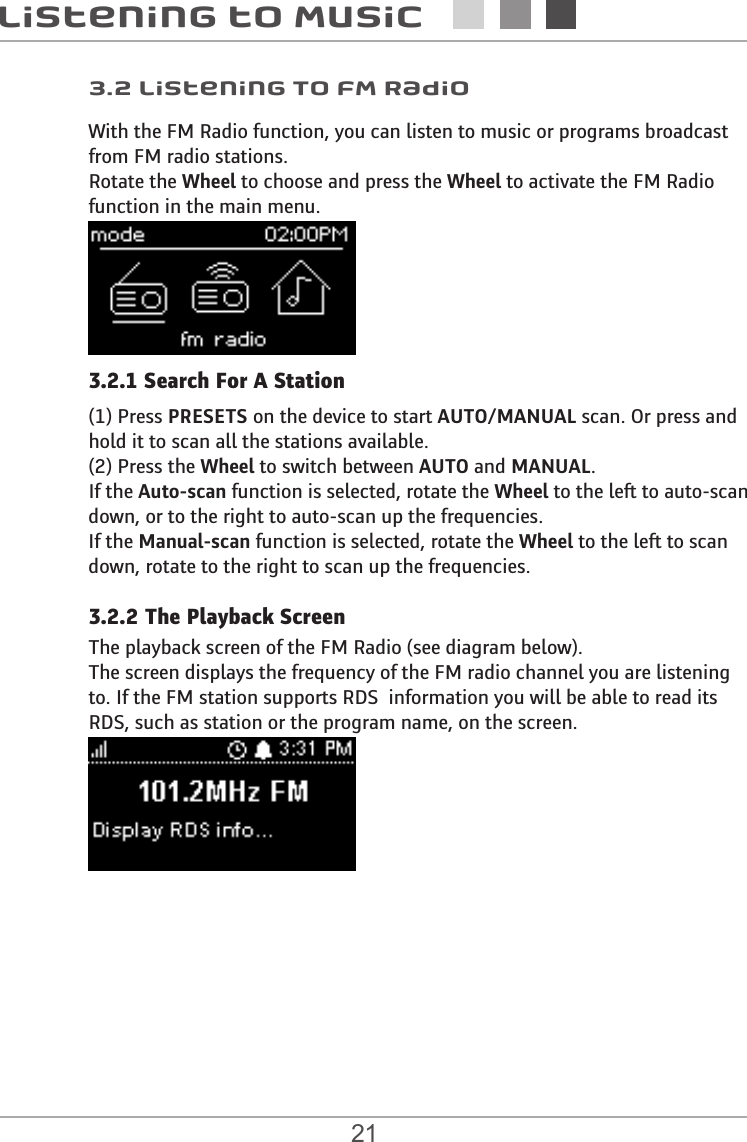
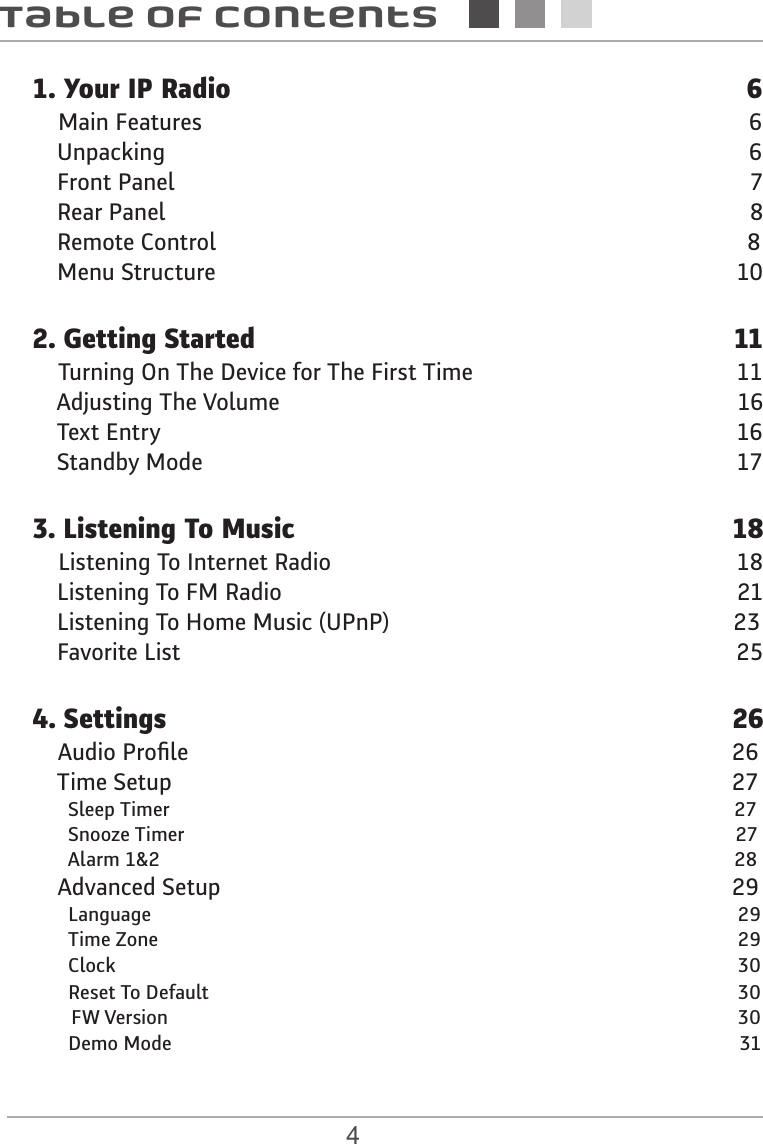
![9Your IP Radio1. Mode Displays the Mode menu.2. Snooze When the alarm is on, press to shut the alarm off and reactivate again later.3. Back Act as the BACK button in all display screen.4. VOL +/VOL - Enables volume control.5. Mute Mute all the sound.6. Presets [1] Press and hold to display a list of available FM stations.[2] Press to activate auto/manual scan.7. Stations [1]Press to displays the Favorite List [2] Press and hold to add/remove stations to/from the Favorite List.8. Menu Displays the settings menu.9. On/Off [1] Press to shut off the music source currently playing and put the device in standby mode.[2] When the alarm goes off, presses this button to turn it off and go to the Standby mode.10. Info While listening to an IP radio music source, press to display music data.11. Smart Random SWITCH Switch randomly to a new station.12. Smart Random THEMEDisplays a list of all existing themes defined by Internet Radio. 13. UP and DOWN Move to the previous/next item.14. Previous Menu list: go to the top of list.15. Next Menu List: go to next list.16. Play/Pause/Select [1] Menu List: confirm or enter the highlighted item.[2] FM Radio: stop music and go back to Mode menu.[3] IP radio/Home Music; Play/ Pause](https://usermanual.wiki/SAGEMCOM-BROANDS/RM50/User-Guide-1326811-Page-9.png)