SAIN3 GD77 DMR Digital Transceiver User Manual radioddity GD 77 FCC 1124
SAIN3 LLC DMR Digital Transceiver radioddity GD 77 FCC 1124
UserManual.wiki
>
SAIN3
>
GD77 User Manual
User Manual
Navigation menu
Upload a User Manual
Namespaces
Wiki Guide
HTML
PDF
Info
Views
User Manual
Discussion / Help
Navigation


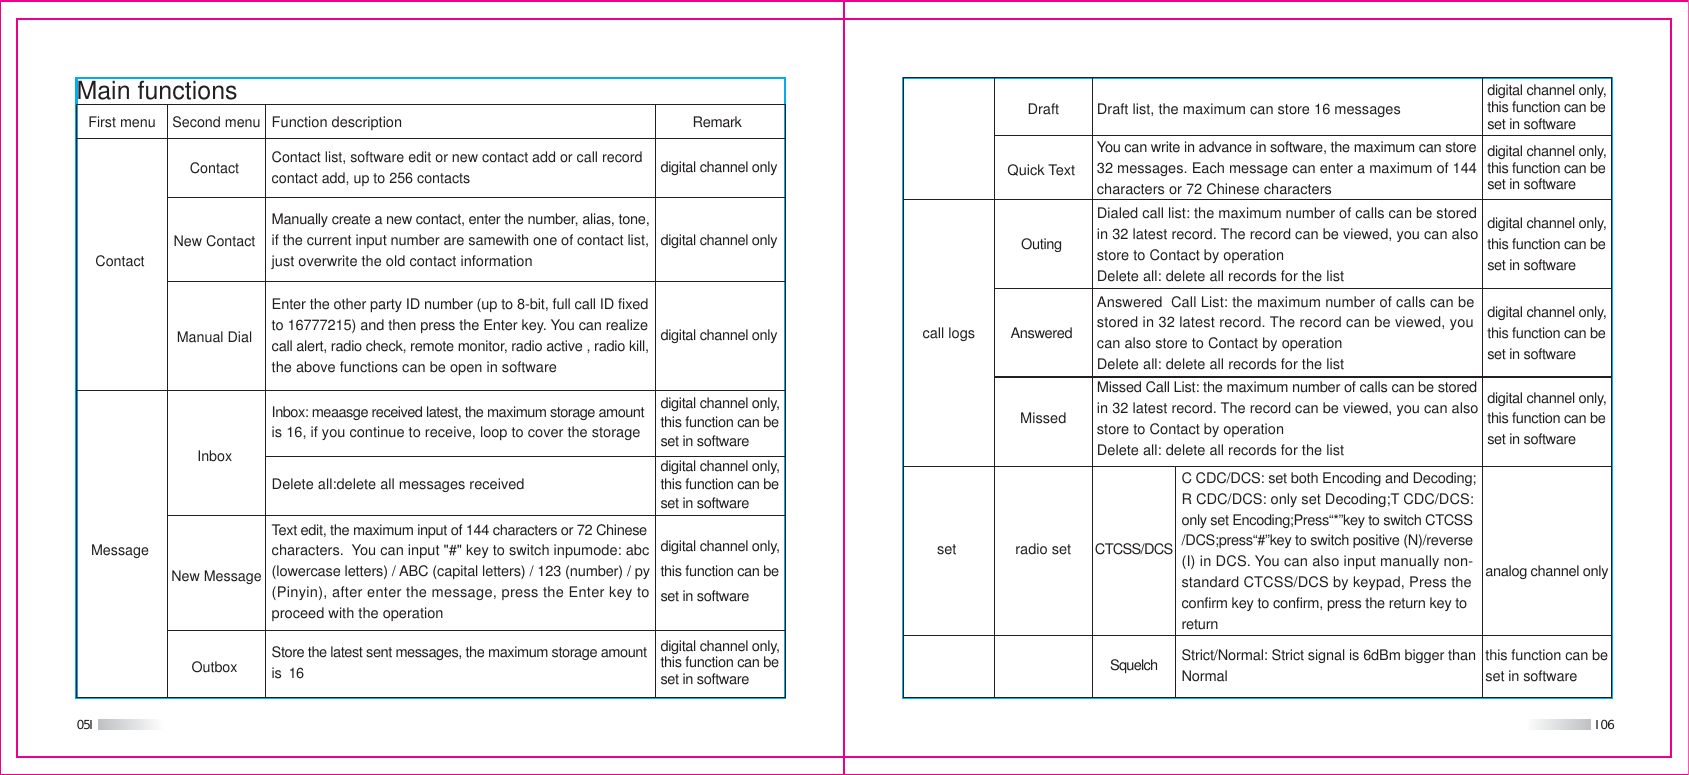
![enter frequency manually in key padDev. InfoRx Freq Tx FreqCh NameColor CodeSlotScan listOn/OfOn / Off, only the current channel is equipped with a scan list toturn on scan function. Side key can be set "scan on / off" in the softwareRadio CfgZoneScanZone Model information, serial number, CPS version, hardware version, firmware version, DSP version, programming timeenter frequency manually in keypadenter channel name manually in keypad,support English/ChineseColor code 0~15 optionalslot 1/2 optionalshow current scan list, can just viewZone list,can support up to 250 zonesthis function canbe set in softwarethis function canbe set in softwaredigital channel only, cannot be set in analog channeldigital channel only, cannot be set in analog channelDouble Wait SwitchPress [ ] button to switch the main channel, points main channel. Double wait can be set Manually.(Flow: Menu - Set - Radio Set-Double Wait (Off/ Double Wait / Single Wait)). When double wait is off,radios works under single band mode. When single wait is selected, radio operates on the main channel, and sub-channel does not receive the signal. When double wait is selected, main channel and sub-channel receiving scan one by one.When scanning effective reception of the signal, radio locked and work.If channel locked is not main channel, points to the temporary working channel, then press PTT, temporary Channel transmit.Timing time is up, icon disappears. No temporary icon, press PTT , point to the main channel transmission.Note: In double wait mode, the power saving function is invalid. At this time, even if the power saving function is turned on, radio is in no power saving state and radio standby time is shortened. Since double wait mode is in the main and sub-channel scanning state, DTMF, Scan, lone worker,ARTS auxiliary function does not work.1009](https://usermanual.wiki/SAIN3/GD77/User-Guide-3672017-Page-11.png)
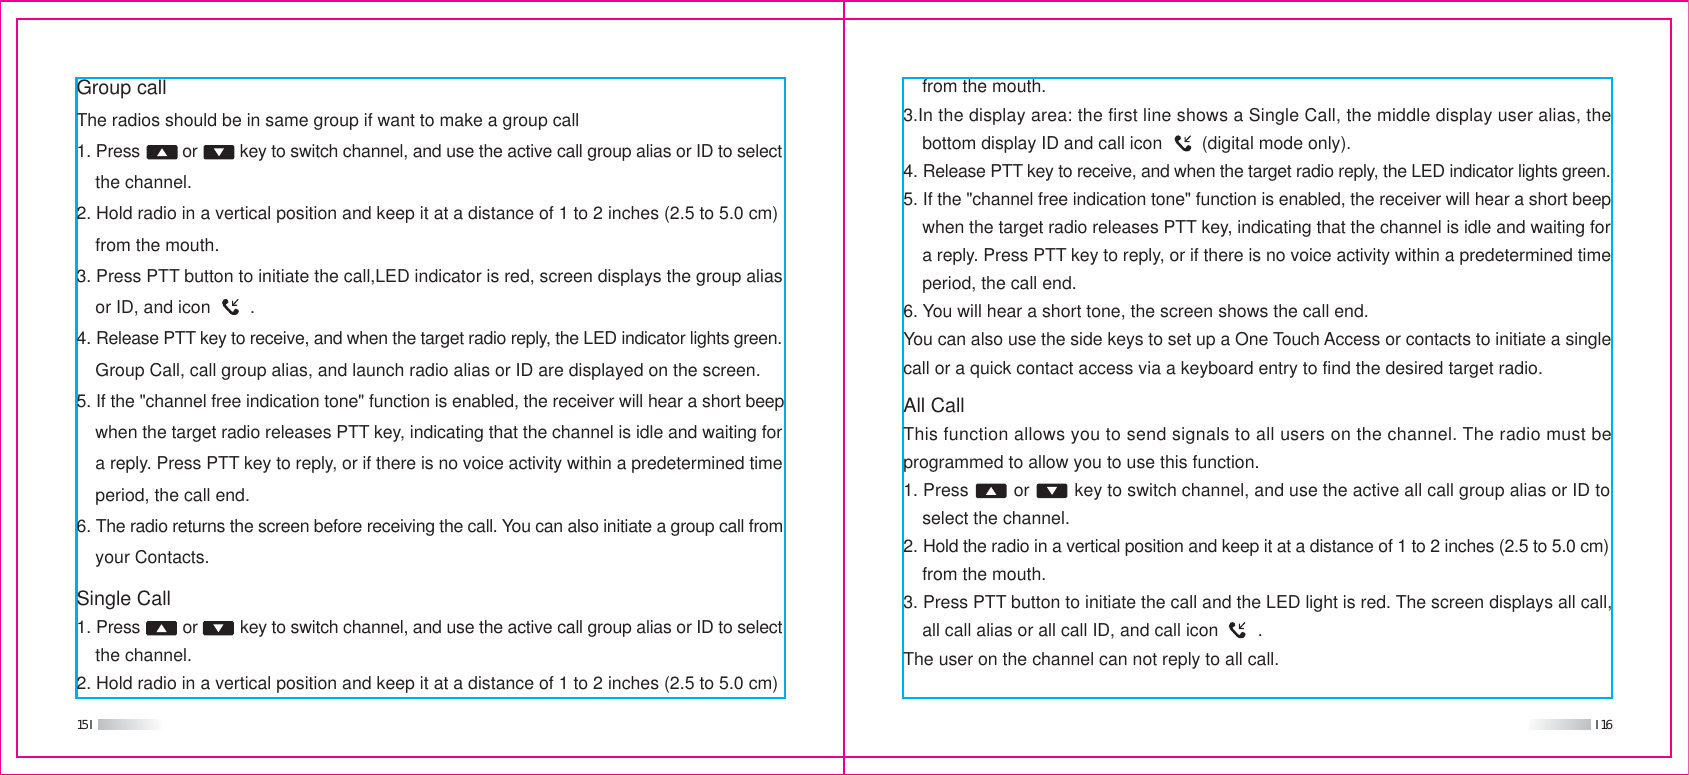
![1. LED indicator is green color.2. Display area: the first line shows "Group Call", the middle shows Call group alias, the bottom shows call ID and call icon (digital mode only).3. Hold radio in a vertical position and keep it at a distance of 1 to 2 inches (2.5 to 5.0 cm) from the mouth.4. Press the [PTT] key to reply to the call and the LED light is red.5. Release the [PTT] key to receive.6. If there is no voice activity within a predetermined time period, the call end.1. LED indicator is green color.2. Display area: the first line shows "Single Call", the middle shows "Single Call", the bottom shows call ID and call icon (digital mode only).3. Hold the radio in a vertical position and keep it at a distance of 1 to 2 inches (2.5 to 5.0 cm) from the mouth. If the "channel free indication tone" function is enabled, the receiver will hear a short beep when the radio transmitting release PTT key, indicating that the channel is idle and waiting for a reply. (Channel idle tone can be set in software-general setting).4. Press PTT key to reply the call, and the LED indicator is red.5. Release PTT key to receive.1. LED indicator becomes green.2. Display area: the first line shows "All Call", the middle shows "All Call", the bottom shows call ID and call icon (digital mode only).3. After all call end, the radio returns to the screen before receiving all call. If "channel free indication tone" function is enabled, the receiver will hear a short beep when PTT button isreleased by radio transmitting, indicating that the channel is in use,can not reply all call.Channel switch1413](https://usermanual.wiki/SAIN3/GD77/User-Guide-3672017-Page-13.png)
![Use a one-touch call to initiate a group call or a single callThe One-Touch Call function allows you to easily to make a group or single call to a predefinedalias or ID. This function can be assigned to short programming or long programming keys.You can assign only one alias or ID to a one-touch call key, and the radio can have multiple programmed one-touch keys.1. Initiate a group call or a single call to a predefined alias or ID by pressing a preprogrammed one-touch call key.2. Hold radio in a vertical position and keep it at a distance of 1 to 2 inches (2.5 to 5.0 cm) from the mouth.3. Press PTT button to initiate the call and the LED light is red. The screen displays the group / user alias or ID, as well as icon. .4. Release PTT key to receive, and when the target radio reply, the LED indicator lights green.5. If the "channel free indication tone" function is enabled, the receiver will hear a short beep when the target radio releases PTT key, indicating that the channel is idle and waiting for a reply. Press PTT key to reply, or if there is no voice activity within a predetermined time period, the call end. Emergency alarm function Emergency alerts are used to indicate an emergency situation.You can initiate an emergencycall at any time or on any screen, even if there is activity on the currentchannel.Note: The emergency function is set in digital emergency alarm system of the signalingsystem in the software and should be in the group call channel.Your radios supports three emergency alerts:(PHUJHQF\DOHUW(PHUJHQF\DOHUWVDQGFDOOV(PHUJHQF\DOHUWDQGYRLFHReceive an emergency alert1. Receive an emergency alert time code, the number of alerts received, and the received alert, which alternates with the sender's alias or ID.2. A beep sounds and the LED flashes red.3. If activated, your radio will automatically acknowledge an emergency alert. When an emergency alert is received by radio, the screen displays a prompt that an emergency alert has been received until an acknowledgment is sent and exit emergency mode. You will not be able to receive any other prompts or display any other calls until you exit the screen that received the emergency alert.Note: Short press the [back] key, then press the preprogrammed alarm off key to clear the prompt for receiving an emergency alert and exit the emergency mode.17 18](https://usermanual.wiki/SAIN3/GD77/User-Guide-3672017-Page-15.png)
![Reply to an emergency alertWhen receiving an emergency alert:1. Press any key to stop all audible alerts that receive an emergency alert.2. Hold the radio in a vertical position and keep it at a distance of 1 to 2 inches (2.5 to 5.0 cm) from the mouth. If the "channel free indication tone" function is enabled, the receiving radio will hear a short beep when radio release PTT button, indicating that the channel is now available.3. Press PTT key to initiate a call with an emergency call. LED indicator light is red. The radio is in emergency call mode.4. Release [PTT] key to receive, and when the emergency call initiates the radio reply, the LED will light green. You will see group call, group ID, and launch radio ID on the screen.5. After the call ends, short press [back] key, then press the preprogrammed alarm off key to clear all prompts that received an emergency call and exit the emergency mode.6. The radio returns to the main screen.Send an emergency alertThis feature allows you to send an emergency alert, which is a non-voice signal that will trigger a prompt on another radio. Only the emergency alarm channel contact is group call number can send an emergency alert.1. Press the preprogrammed alarm on key.2. The screen displays issue an alarm that alternates with the radio ID. The LED indicator light is red and then the emergency call interface is displayed.3. When an emergency alert is received, an emergency call beep is issued. The screen displays an emergency alert that has been received. After all retry times have been exhausted, a beep is issued and then exit the emergency alarm mode.4. The radio exits the emergency alert mode and returns to the main screen. If your radio is set to "all tones off", it will not display any voice or visual prompt in emergency call mode.Send an emergency alert with callThis feature allows you to send an emergency alert to another radio. After confirming, the two radios communicate via a preprogrammed emergency channel.1. Press the preprogrammed alarm on key.2. The screen displays issue an alarm that alternates with the radio ID. The LED indicator light is red and then the emergency call interface is displayed.3. When an emergency alert call is received, an emergency alarm beep is issued and the LED flashes green. The screen display alarm has been received.4. Hold radio in a vertical position and keep it at a distance of 1 to 2 inches (2.5 to 5.0 cm) from the mouth.5. Press [PTT] button to initiate a call, the LED indicator is red, and the call group icon appears on the screen.6. Release the [PTT] button to receive.7. If the "channel free indication tone" function is enabled, the receiving radio will hear a short beep when the target intercom releases the [PTT] key, indicating that the channel is idle and waiting for a reply. Press PTT key to reply,Or press the preprogrammed alarm off key to exit the emergency mode.8. The radio returns to the main screen. If your radio is set to "all tones off", it will not display 2019](https://usermanual.wiki/SAIN3/GD77/User-Guide-3672017-Page-16.png)
![any voice or visual prompts in the emergency call mode and will not receive any response (call) from the target radio until you press [PTT] to initiate the call. If your radio is set to "call permit", it will not display any voice or visual prompts in emergency call mode or when you receive a call from the target radio. A prompt is displayed only when you press [PTT] key to initiate or respond to a call.Send an emergency alert with voice followedThis feature allows you to send an emergency alert to another radio. Your radio microphoneis automatically activated, allowing you to communicate with other radio without pressing the[PTT] key. This activated microphone state is called "emergency microphone". If you press[PTT] during the preprogrammed emergency microphone transmitting, the radio ignores [PTT]and remains in the emergency mode.Note: If you press [PTT] key during an emergency microphone transmitting and continue pressing the key after the end of the emergency microphone, the radio continues to transmituntil you release [PTT] key.1. Press the preprogrammed alarm on key.2. The screen displays issue an alarm, the LED indicator is red and the emergency alarm call interface is displayed.3. After screen display the emergency alarm is successful, speak to the microphone clearly. After the emergency microphone has been activated, the radio automatically transmits the signal without pressing [PTT] key until the emergency microphone time ends.4. At the time of launch, the LED indicator light is red and the alarm call interface is displayed.5. After the end of the emergency microphone time, the radio automatically stops sending the signal. To launch again, press the [PTT] key.If your radio is set to "all tones", it will not display any voice or visual prompts in the emergencycall mode and will not receive any response from the target radio until the preprogrammedemergency microphone time is over and you press [PTT] key. If your intercom is set to "callpermit", it will not display any voice or visual prompts when you use an emergency microphoneto initiate a call in emergency call mode or when the target radio responds after a preprogrammedemergency microphone time. These prompts appear only when you press [PTT] key.There are two situations where this can occur:When the radio channel is changed in the emergency mode, the emergency mode is exited. If an emergency alert is activated on the new channel, the radio restarts the emergency call.In the emergency call start / launch mode, press the preprogrammed alarm on key. This will cause the radio to exit the current state and then restart the emergency call.Exit the emergency modeWhen one of the following occurs, radio exits the emergency mode:7KHPD[LPXPQXPEHURIDWWHPSWVWRVHQGDOHUWVKDVEHHQUHDFKHG3UHVVWKHSUHSURJUDPPHGDODUPRIINH\3UHVV>377@NH\&DQQRWH[LWDODUPPRGHNote: If turn off radio, the radio exits emergency mode. When you turn on radio again, the radio will not restart emergency mode.2221](https://usermanual.wiki/SAIN3/GD77/User-Guide-3672017-Page-17.png)
![Menu function operationCharacter inputYou can use the 3x4 alphanumeric keyboard to access radio functions. When using the keyboard to enter user aliases or text messages, radios contains three modes: 1. Englishalphabet mode, 2. Chinese input method mode, 3. Numbers input mode. When using thekeyboard to enter an ID, Can only use digital mode. English alphabet mode: Users have to press a key several times for getting some characters. The following tableshows the number of times a key needs to be pressed to get the desired character.2L` HIJ()* KLM+,- NOP./0 QRS123 TUV456 WXYZ789: [\];<= ^_`a >?@A :WHJL 7YLZZ[VZ^P[JOPUW\[TVKL '!&eBD#%$tGcFEbd24Menu operationSettings](https://usermanual.wiki/SAIN3/GD77/User-Guide-3672017-Page-18.png)
![Press [ ] button to select the pinyin, press [ or ] key to select the up and down line, the user can press [ or ] key to select the Chinese character, through [ ] key to return to the phonetic selection. Press [ ] key to select the corresponding Chinesecharacters and displayed them in the editing area, at this time the Chinese character input is completed, Pinyin input interface disappears. Press * to display *, press 0 to display the space,and press # to switch the input mode.moveNumbers input mode:Press the numeric keys to display the corresponding digits in the numbers input mode, press * to display *, and press # to switch the input mode.move up or downRadio CheckThis feature applies only to single call user aliases or IDs.Send Radio CheckThis feature applies only to single call user aliases or IDs.Using menu:MoveMoveMove2625](https://usermanual.wiki/SAIN3/GD77/User-Guide-3672017-Page-19.png)
![4. Hold radio in a vertical position and keep it at a distance of 1 to 2 inches (2.5 to 5.0 cm) from the mouth.5. Press [PTT] button to initiate the call and the LED indicator is lit red. The first line shows "single call" user alias or ID, the second line shows single call alias, the third line shows single call number and call icon .6. Release [PTT] key to receive. When the target radio responds, the LED is lit green and the screen displays the ID of the transmitting radio.7. If the "channel free indication tone" function is enabled, the receiver will hear a short beep when the target radio releases [PTT] key, indicating that the channel is idle and waiting for a reply. Press call key (PTT) to reply. If there is no voice activity during preprogrammed single call hang time, the call ends.8. You will hear a short tone, the screen shows the call is terminated.3029MoveMove7. If the "Channel Idle Beep" function is enabled, the receiver will hear a short beep when the target radio releases the [PTT] key, indicating that the channel is idle and waiting for a reply. Press the call key (PTT) to reply. If there is no voice activity during the pre-programmed group call hang time, the call end.MoveMovemovemovesingle call contactsingle call](https://usermanual.wiki/SAIN3/GD77/User-Guide-3672017-Page-21.png)
![Deleting Calling Log’s Record1. Press [ ] button to enter the menu mode.2. Press [ or ] key to call record, and then press [ ] button to select.3. Press the [ or ] key to the desired list, and then press [ ] button to select.5. Press [ or ] key to view the list and press [PTT] key to start a single call with the currently selected alias or ID.3231MoveMovemoveMoveMoveMoveMoveWhenever you miss call, two way radio will display a not answered call, select view or view later.](https://usermanual.wiki/SAIN3/GD77/User-Guide-3672017-Page-22.png)
![Edit and send text messagesUse menu function:1. Press [ ] button to enter menu.2. Press [ or ] key to enter message, and then press the [ ] button to select.3. Press [ or ] to write the message, and then press the [ ] button to select.4. A flashing cursor appears,using keyboard to input messages. Press [ ] key to move left, press [ ] key to move right,when editing area have contents,press [ ] key to delete any useless characters, otherwise return to the previous menu when there is no content. 5. After writing the message, press [ ] button to select Send or Save or Clear.6. During editing, you can switch the input method by pressing [#] key.Receive and confirm call promptsWhen you receive a call prompt, the screen displays a call prompt that alternately displays the alias or ID of the transmitting radio.1. You will hear the tone repeat sound.2. Press and release the [PTT] key to confirm the prompt, or press [ ] key or [ ] to select "Ignore?" to exit the call prompt.4. Press [ or ] key to the desired alias or ID, and then press [ ] button to select.5. Press [ or ] to delete the entry? , And then press [ ] button to select whether delete the entry.6. Select "Yes" to press [ ] button to delete the entry, the screen appears with the entry deleted; or select "No" and press [ ] button to return to the previous screen.When you select a call list but there are no entries, the screen will show that the list is empty, and if the keyboard tone is on, a low tone tone will sound.3433Call prompt operationCall prompt allows you to prompt a specific radio user to call you back at a possible time.This feature is only available for single call user aliases or IDs and can be used through the menu via contacts or manual dialing.MoveMoveMovemoveMessage function Your radio can receive data, such as text messages from another radio, with a maximum length of 144 characters.](https://usermanual.wiki/SAIN3/GD77/User-Guide-3672017-Page-23.png)
![7. During editing, you can switch the input method by pressing [#] key.8. After selecting Send, press [ or ] key to desired alias or ID, and then press [ ] button to select.Or press [ or ] key to manual dial, then press [ ] button to select, enter user IDand press [ ] button.9. The screen displays the message: <user / group alias or ID> to confirm that the message is being sent.10. If the message is sent successfully, a beep will sound and the screen shows message is sent successfully.Or if the message is not sent, a loud tone beeps, and the screen displays a message sendingfailure. If the message is not sent, radio returns to the retransmission selection screen.Send a Quick TextRadio supports up to 32 pre-made SMS messages programmed by the agent:When you have predefined a text message, you can edit each message before sending it.1. Press [ ] button to enter menu.2. Press [ or ] key to enter message, and then press the [ ] button to select.3. Press [ or ] to Quick Text, and then press the [ ] button to select.4. Press [ or ] to required Quick Text, and then press the [ ] button to select.5. A flashing cursor appears,using keyboard to input messages. Press [ ] key to move left, press [ ] key to move right,when editing area have contents,press [ ] key to delete any useless characters, otherwise return to the previous menu when there is no content.6. After writing the message, press [ ] button to select Send or Save or Clear.7. After selecting Send, press [ or ] key to desired alias or ID, and then press [ ] button to select.Or press [ or ] key to manual dial, then press [ ] button to select, enter user ID and press [ ] button.8. The screen displays the message: <user / group alias or ID> to confirm that the message is being sent.9. If the message is sent successfully, a beep will sound and the screen shows message is sent successfully.Or if the message is not sent, a loud tone beeps, and the screen displays a message sendingfailure. If the message is not sent, radio returns to the retransmission selection screen.3635Use a one-touch call key to send quick text1. Send a pre-made SMS to a predefined alias or ID by preprogramming one-touch call key.2. The screen displays message: <user / group name or ID>,confirm that the message is being sent.3. If the message is sent successfully, a beep will sound and the screen shows message is sent.Or if you can not send text messages, screen displays failed to send message. If messagefailed to send, radio returns to the retransmission selection screen.Manage failed text messagesIn the retransmission selection screen, you can choose from the following options:](https://usermanual.wiki/SAIN3/GD77/User-Guide-3672017-Page-24.png)
![1. Press [ or ] key to edit, and then press [ ] button to select.2.A flashing cursor appears,using keyboard to input messages. Press [ ] key to move left, press [ ] key to move right,when editing area have contents,press [ ] key to delete any useless characters, otherwise return to the previous menu when there is no content.3. After writing the message, press [ ] button to select Send or Save.4. During editing, you can switch the input method by pressing [#] key.5. After selecting Send, press [ or ] key to desired alias or ID, and then press [ ] button to select.Or press [ or ] key to manual dial, then press [ ] button to select, enter user ID and press [ ] button.6. The screen displays the message: <user / group alias or ID> to confirm that the message is being sent.7. If the message is sent successfully, a beep will sound and the screen shows message is sent successfully.Or if the message is not sent, a loud tone beeps, and the screen displays failed to sendmessage.Forward text messagesSelect Forward a text message to another user / group name or ID.1. Press [ or ] key to forward, and then press [ ] button to select.2. Press [ or ] key to the desired alias or ID, and then press [ ] button to select.Or press [ or ] key to manual dial, then press [ ] button to select, enter user IDand press [ ] button.3. The screen displays message: <user / group name or ID> to confirm that the message is being sent.4. If the message is sent successfully, a beep will sound, and screen displays the message has been sent or if you can not send the message, a beep will sound,the screen displays failed to send message.38375HVHQG)RUZDUGHGLWResend text messages1. Press [ ] to resend the same message to the same user / group name or ID.2. If the message is sent successfully, a beep will sound, and the screen displays the message has been sent or if you can not send the message, the screen displays failed to send message.Editing messagesSelect Edit to edit a text message before sending a text message.Note: You can not edit the subject line if you have a subject line (a text message receivedfrom an e-mail program).Manage text messages sent Once message is sent to another radio, it will be saved to "Outbox". Messages sent aftersending are always added to the top of the Outbox list. Outbox folder can store up to 16recently sent messages. When the folder is full, the next sent message will automaticallyreplace earlier massages in this folder.](https://usermanual.wiki/SAIN3/GD77/User-Guide-3672017-Page-25.png)
![Note: Pressing [ ] button at any time can return to the previous screen. Note: In addition to pressing [ ], [ or ] key, if you press PTT or side key, it willreturn to exit. When you press [PTT] button to initiate a single call or group call, or respondto group call, radio will exit resend selection screen. If you receive a text message or remotesensing telemetry information, emergency call or alarm, or receive a call prompt, radio willalso exit resend selection screen. If you press [PTT] key to respond to a single call (exceptwhen radio is displaying a missed call screen), or when all call ends, screen display returnsto resend selection screen. Press [ or ] key to enter the Forward, Edit, or Deleteselection screen.6HOHFW)RUZDUGWRVHQGVHOHFWHGPHVVDJHVWRRWKHUJURXSVXVHUDOLDVHVRU,'V6HOHFW(GLWWRHGLWWKHVHOHFWHGPHVVDJHEHIRUHVHQGLQJLW6HOHFW'HOHWHWRGHOHWHWKHVHOHFWHGPHVVDJHUse menu function:1. Press [ ] button to enter menu mode.2. Press [ or ] key to enter message, and then press [ ] button to select.3. Press [ or ] key to Outbox, and then press [ ] button to select.4. Press [ or ] key to delete all, and then press [ ] button to select.5. Press [ ] button to delete message. Select "Yes" to display sent messages is cleared.When message is deleted, press [ or ] to No, and press [ ] to return to previousscreen. When you select "Outbox" but there is no text message, screen will show the list isempty, at this time if keyboard tone is open, it will sound a low tone .Send a sent messageWhen viewing a text message, you can choose from the following options:5HVHQG)RUZDUG(GLW'HOHWH1. While viewing message, press [ ] button again.2. Press [ or ] key to resend, and then press [ ] button to select.3. The screen display sent to: <user / group alias or ID>, confirming that the same message is being sent to same target radio.4. If the message is sent successfully, a beep will sound and screen shows message is sent.Or if message is not sent, a loud tone beeps, and the screen displays failed to send message.If message is not sent, radio returns to the resend screen. Press [ ] to resend message to the same user / group name or ID.View sent text messagesUse menu :1. Press [ ] button to enter menu mode.2. Press [ or ] key to enter message, and then press [ ] button to select.3. Press [ or ] key to Outbox, and then press [ ] button to select.4. Press [ or ] key to the desired message, and then press [ ] button to select. The icon in the upper right corner of the screen indicates the status of the message.4039Receive text messagesWhen your radio receives a text message, the tone sounds, screen displays short message icon.](https://usermanual.wiki/SAIN3/GD77/User-Guide-3672017-Page-26.png)
![View message1. Press [ ] button to enter menu mode, press [ or ] key to message, press [ ] button to select Inbox, and press [ ] key to select Inbox list.2. The selected message in the Inbox opens.3. Press [ ] button to return to Inbox.Or press [ ] to reply, forward or delete message.Press [ or ] to reply or forward or delete selection screen:6HOHFW5HSO\WRUHSO\PHVVDJHVDQGVHOHFW)RUZDUGWRIRUZDUGPHVVDJHV6HOHFW'HOHWHWRGHOHWHUHFHLYHGPHVVDJHVReply messages in your InboxUse menu function:1. Press [ ] button to enter menu mode.2. Press [ or ] key to message, and then press [ ] button to select.3. Press [ or ] key to Inbox, and then press [ ] button to select.4. Press [ or ] key to desired message, and then press [ ] button to select.5. Press [ ] button again to enter the submenu.6. Press [ or ] key to reply, and then press [ ] button to select.7. Press [ or ] key to write message, then press [ ] button to select, the flashing cursor appears, and use your keyboard to edit your message.Or press [ or ] to enter quick text, and then press [ ] button to select. Selectdesired message and press [ ] button, flashing cursor appears. If necessary, use your keyboard to edit your message.8. After writing message, press [ ] button.9. The screen displays message: <user / group name or ID> to confirm that the message is being sent.3. Press [ or ] key to the Inbox, and then press [ ] button to select.4. Press [ or ] key to view message. If message comes from an e-mail program, a subject line will appear.5. Press [ ] button to select current message, and then press [ ] button again to reply, delete or forward the message.Unread messages ;Already read message .Check messages in your inbox1. Press [ ] button to enter menu mode.2. Press [ or ] key to enter message, and then press [ ] button to select.Manage received messagesUse Inbox to manage messages. Inbox can store up to 16 text messages.Radio support the following message options:5HSO\)RUZDUG'HOHWH'HOHWHDOOStore the messages in your inbox in the order you received recently.Note: Pressing [ ] button at any time can return to the previous screen.4241](https://usermanual.wiki/SAIN3/GD77/User-Guide-3672017-Page-27.png)
![5. When radio shows delete all, press [ or ] key to YES, and then press [ ] button to select.6. The screen display Inbox has been cleared.When you select "Inbox" but there is no text message, the screen will show that list is empty.Delete all messages in your inboxUse menu function:1. Press [ ] key to enter the menu mode.2. Press [ or ] to message, and then press [ ] button to select.3. Press [ or ] key to Inbox, and then press [ ] button to select.4. Press [ or ] key to delete all, and then press [ ] button to select.Delete messages in the InboxUse menu function:1. Press [ ] button to enter menu mode.2. Press [ or ] key to message, and then press [ ] button to select.3. Press [ or ] key to Inbox, and then press [ ] button to select.4. Press [ or ] key to desired message, and then press [ ] button to select.5. Press [ ] button again to enter the submenu.6. Press [ or ] key to delete, and then press [ ] button to select.7. When radio shows delete massage, press [ or ] key to "YES", and then press [ ] button to select.8. Screen shows message is delete.9. The screen returns to Inbox.444310. If message is sent successfully, a beep will sound and screen shows message is sent.Or if you can not send text messages, the screen displays failed to send message. If the message is not sent, radio returns to resend selection screen.EncryptionIf this function is enabled, it is helpful to prevent other users on the channel from eavesdroppingby unauthorized use of software encryption. The transmitted signaling and user identificationsections are not encrypted. Your radio must enable encryption on the channel to send encryptedtransmissions, even if it is not necessary to receive this.Basic Encryption Digital channels, radio can only be assigned one of the above encryption type. To decryptan encrypted call or a data transmission, preprogrammed radio and launch radio must havesame "encryption key" (suitable for basic encryption).If your radio receives an encrypted call with a different encryption key or a different key valueand key ID, you will hear a messy sound (basic encryption).Press the preprogrammed encryption key to turn encryption on or off.DTMF Analog channels, Dual Tone Multi-Frequency function allows operate radio in a radio systemwith interference.To initiate a DTMF call](https://usermanual.wiki/SAIN3/GD77/User-Guide-3672017-Page-28.png)
![46451. Press and hold [PTT] button.2. Enter the desired number.Secrecy You can activate or kill any radio in the system. For example, you might want to disable a stolen radio, prevent thieves from using it, and enable it when you get it back.Note: The implementation of radio kill or activation is limited to radio that have open (softwarepreset) this function.Radio Disable(Digital mode)MoveMoveMovemoveRadio Enable(Digital mode)MoveMoveMovemove](https://usermanual.wiki/SAIN3/GD77/User-Guide-3672017-Page-29.png)
![Start and stop scanningPress preprogrammed scan on / off key or enter scan menu function1. Press [ or ] to select a channel with a preprogrammed scan list;2. Press [ ] button to enter menu mode;3. Press [ or ] key to scan, and then press [ ] button to select;4. If scan is disabled, screen displays on or if scan is activated, screen displays off;5. Press [ ] button to select.6. When scan is activated, LED flashes red and scan icon is displayed; or when scan is disabled,LED is off and scan icon is not displayed.Scan listNote: Scanning function should be used when double wait is closed!Create a scan list and assign it to a single channel / group, and your radio can support up to 16 scan lists, up to 16 members per list.Each scan list supports mixing of analog and digital channels. You can add / remove channels or set priorities for channel by editing scan list.View members in scan list1. Press [ or ] to select a channel with a preprogrammed scan list;2. Press [ ] button to enter menu mode;3. Press [ or ] key to scan, and then press [ ] button to select;4. Press [ or ] key to view / edit list, and then press [ ] button to select;5. Use [ or ] key to view members in the list.If priority is set, scan icon distinction display, priority 1 or priority 2 , no priority when scan is on4847Scan instructions and methodsWhen you start scanning, your radio through cycling of pre-programmed scan list to see whether there is voice activity in the current channel. The LED flashes orange and scan iconappears on the screen.During a dual mode scan, if you are on a digital channel and your radio locks an analog channel, it will automatically switch from digital mode to analog mode throughout the durationof the call. vice versa.Two scanning methods:Manual scan: Start scanning according to preprogrammed scan on / off key or menu function, radio will detect all channels / groups in preset scan list when scanning is initiated.$XWR6FDQ:KHQ\RXVHOHFWDFKDQQHOJURXSWKDWKDVDFWLYDWHG$XWR6FDQUDGLRVWDUWV scanning from the channel that activated auto scan.Scan reply Scanning when radio detects an active channel / talk group, radio remains in the channel/ group, which is called "scan hang time" of preprogrammed time limit.Process:1. Hold radio in a vertical position and keep it at a distance of 1 to 2 inches (2.5 to 5.0 cm) from the mouth. If "channel free indication tone" function is enabled, the receiver will hear a short beep when [PTT] button is released by the launch radio, indicating that the channel](https://usermanual.wiki/SAIN3/GD77/User-Guide-3672017-Page-30.png)
![SetSet include the following:Radio Set&7&66'&6$QDORJFKDQQHO6TXHOFK7;3RZHU3URJUDPPDEOHLQVRIWZDUH7DONDURXQG3URJUDPPDEOHLQVRIWZDUH%DQG$QDORJFKDQQHO%XV\/RFN72792;'RXEOH:DLW3URJUDPPDEOHLQVRIWZDUH(QFU\SW'LJLWDOFKDQQHO3URJUDPPDEOHLQVRIWZDUH3RZHU6DYH%HHS3URJUDPPDEOHLQVRIWZDUH%DFNOLJKW3URJUDPPDEOHLQVRIWZDUH.H\SDG/RFN3URJUDPPDEOHLQVRIWZDUH,QGRFDWRU3URJUDPPDEOHLQVRIWZDUHRadio Info5DGLR,''HY,QIRRadio Cfg5;)UHT7[)UHT&K1DPH&RORU&RGH6ORWRadio SetCTCSS/DCSIn analog channels,in order to prevent interference,only match carrier and CTCSS/DCS canopen the speaker.Provide 50 groups standard CTCSS, while supporting non-standard CTCSS(range 60Hz ~ 280Hz); provide 104 groups standard DCS, while supporting non-standardnon-standard(Range 000 ~ 777Hz) a total of 1024 groups. CTCSS/DCS can be set in receivingCTCSS / DCS or transmitting CTCSS/DCS of analog channel in software, or CTCSS/DCS menu in radio.49 50 is idle and waiting for a reply.2. Press [PTT] key during hang time, and LED indicator will be on red.3. Release [PTT] key to receive.4. If you do not respond within hang time, radio continues to scan down.3DVVZG/RFN3URJUDPPDEOHLQVRIWZDUH0RGH3URJUDPPDEOHLQVRIWZDUH6FUHHQ3URJUDPPDEOHLQVRIWZDUH/DQJXDJH](https://usermanual.wiki/SAIN3/GD77/User-Guide-3672017-Page-31.png)
![5251Contents set will be saved permanently, contents after turn off radio is not lost.Set Squelch level You can adjust radio squelch level, filter useless calls with low signal , or channels with background noise higher than normal values. Settings: Normal is default, strict filtering (useless)calls or background noise. However, calls from remote locations may also be filtered out.Press preprogrammed strict / normal squelch key to switch between normal and strict squelch level.Use menu function:1. Press [ ] button to enter menu mode.2. Press [ or ] key to set, then press [ ] button to select radio set.3. Press [ or ]key to squelch, and then press [ ] button to select.4. Press [ or ] key to select Strict or Normal, and then press [ ] button to select.5. Press continuously [ ] to return to main screen.Set Power LevelYou can set radio power level for each channel high or low.Set: high power to achieve relatively far away from radio communication. Low power to achievecommunication with nearest radio.Press preprogrammed high / low power select key to switch transmit power level between high and low.Use menu function:1. Press [ ] button to enter menu mode.D C SCTCSS Use menu function:1. Press [ ] button to enter menu mode.2. Press [ or ] key to "Set", and then press [ ] button to select Radio Set.3. Press [ or ] key to "CTCSS/DCS", then press [ ] button to select "C CDC/DCS" and press [ ] button to select. Press [ or ] key to select standard CTCSS/DCS, press [*] key to switch CTCSS and DCS.Press [#] key to switch positive and negative DCS in DCS, N is positive, I is negative. Press [ ] button to select, but also through keyboard number keys to enter Non-standard CTCSS/DCS, press [ ] button to confirm. Press [ ] button to cancel and return previous menu.If in special circumstances your encoding and decoding requirements are different,you can set separately "R CDC/DCS" and "T CDC/DCS", same way as above.4. Press continuously [ ] to return to the main interface.](https://usermanual.wiki/SAIN3/GD77/User-Guide-3672017-Page-32.png)
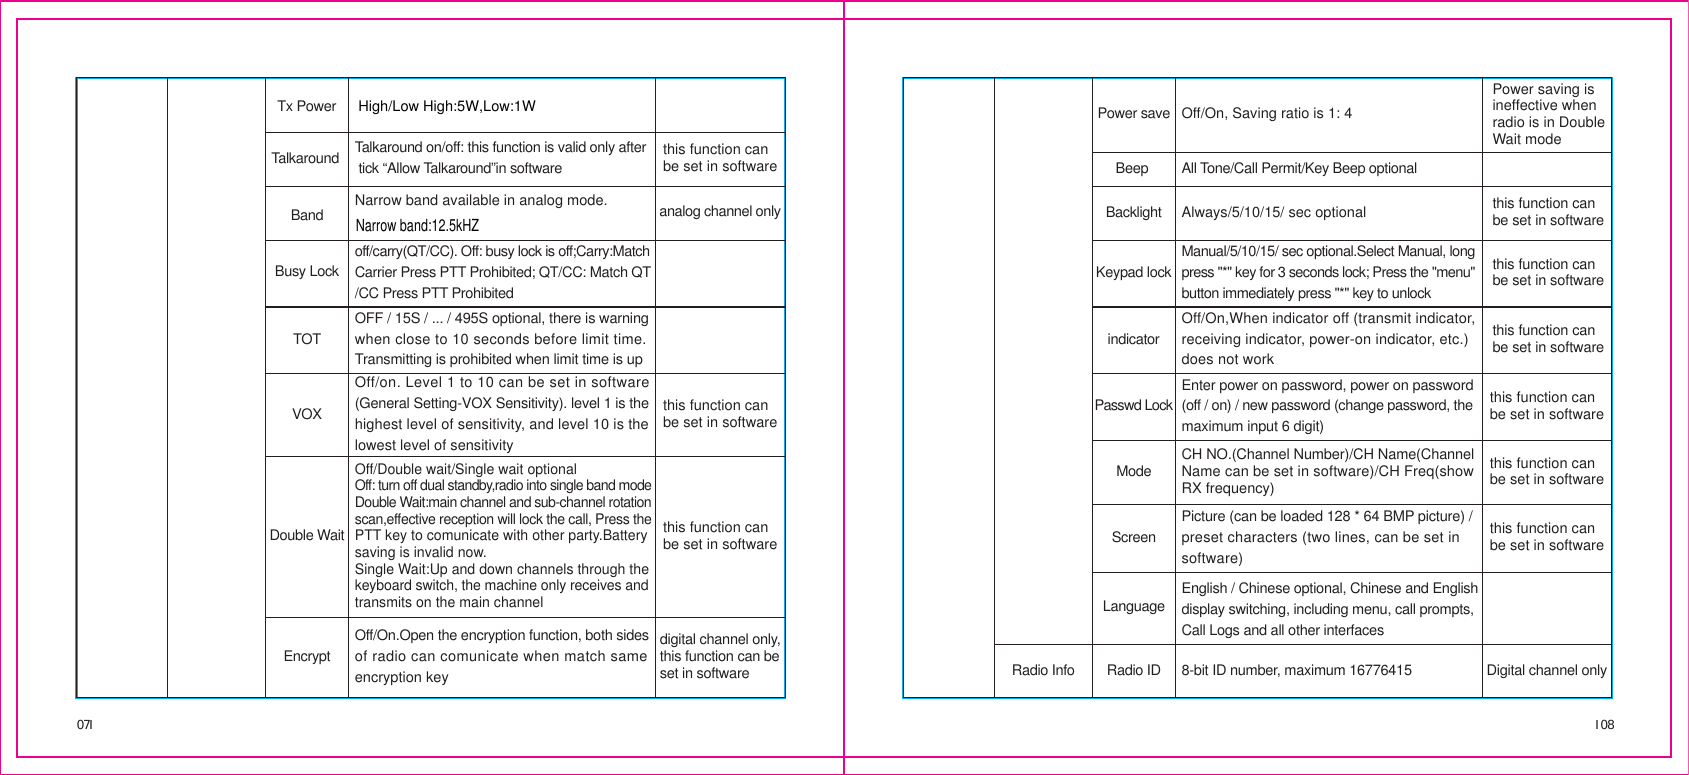
![5453TOT1. Press [ ] button to enter menu mode.2. Press [ or ] key to set, then press [ ] button to select.3. Press [ or ]key to TOT, and then press [ ] button to select.4. The screen shows OFF, 15S, 30S ... 495S and other options (with the increasing amplitudeBusy LockSettings: "Off" / "Carry" / "QT / CC"Select "Carry" when carry is matched and reach to open squelch threshold ,press PTT toprohibit and send busy tone;Select "QT / CC", when carry is matched and reach to open squelch threshold and does not match QT / CC, press PTT to prohibit and send busy tone.1. Press [ ] button to enter menu mode.2. Press [ or ] key to set, then press [ ] button to select.3. Press [ or ]key to Busy Lock, and then press [ ] button to select.4. Press [ or ]key to Off or Carry or QT / CC, and then press [ ] button to select.5. Press continuously [ ] button to return to main interface.Even after shutdown, radio still maintain Busy Lock setting.1. Press [ ] button to enter menu mode.2. Press [ or ] key to set, then press [ ] button to select.3. Press [ or ]key to Band, and then press [ ] button to select.4. Press [ or ]key to Narrow band, and then press [ ] button to select.5. Press continuously [ ] button to return to main interface.Even after shutdown, radio still maintain Narrow band setting.Talkaround You can continue to communicate when repeater does not work or when radio is outsiderange of repeater but is within range of other radios. This is so-called "talkaround". Press preprogrammed repeater / talkaround key to switch between two modes.Use menu function:1. Press [ ] button to enter menu mode.2. Press [ or ] key to set, then press [ ] button to select.3. Press [ or ]key to Radio Set, and then press [ ] button to select.4. Press [ or ]key to Talkaround, and then press [ ] button to select.5. Press continuously [ ] button to return to main interface.Screen displays " " to show talkaround is on.Even after shutdown, radio still maintain talkaround setting.2. Press [ or ] key to set, then press [ ] button to select radio set.3. Press [ or ]key to Power Level, and then press [ ] button to select.4. Follow screen instructions to change current settings.5. Press [ ] button to select new power level.6. Press continuously [ ] to return to the main screen, screen displays power level icon.for transmit and receive frequencies.Use menu function in analog channelsIn analog mode, channel bandwidth set to narrow band (12.5kHz)](https://usermanual.wiki/SAIN3/GD77/User-Guide-3672017-Page-33.png)
![5655 of 15s).Press [ or ] key to corresponding option, and then press [ ] button to select. If "OFF" is selected, TOT is closed. If you select other options, screen displays .. S has been selected.signal during the preprogrammed time period.During operation of radio, pressing [PTT] key disables VOX function. To re enable VOX function, do one of following actions:WXUQRIIDQGUHWXUQRQUDGLRRUFKDQJHFKDQQHOVYLDFKDQQHONQREVRU3HUIRUPWKHIROORZLQJSURFHGXUHNote: Enabling or disabling this feature is limited to the radio that activates these features.Press pre-programmed VOX on/off key to turn this function on or off.Use menu 1. Press [ ] button to enter menu mode.2. Press [ or ] key to set, then press [ ] button to select.3. Press [ or ]key to VOX, and then press [ ] button to select.4. The screen shows on and off.If you select Off, press [ ] button to disable VOX function. If you select On, enable VOX function.Press continuously [ ] to return to main interface. Microphone icon in icon bar indicates that Vox is turned onVOXThis feature allows you to initiate hands-free voice calls on a preprogrammed channel. When microphone on the accessory with VOX function detects the voice, radio automatically launchesDouble WaitDouble wait can be set through radio menu, you can also set in "menu option" in software.Use menu 1. Press [ ] button to enter menu mode.2. Press [ or ] key to set, then press [ ] button to select.3. Press [ or ]key to Double Wait, and then press [ ] button to select.4. Screen shows Off/Double Wait/Single Wait.When choose off,radios works under single band EncryptIn digital mode, communication voice secret switch. When encryption is on, only two-partyradios matching encryption key can communicate.Use menu 1. Press [ ] button to enter menu mode.2. Press [ or ] key to set, then press [ ] button to select.3. Press [ or ]key to Encrypt, and then press [ ] button to select on/off.4. Press [ ] to confirm and press continuously [ ] to return to main interface. mode.When single wait is selected, radio operates on the main channel, and sub-channel does not receive the signal. When double wait is selected, main channel and sub-channel receiving scan one by one.When scanning effective reception of the signal, radio locked and work.If channel locked isnot main channel, points to the temporary working channel, then press PTT, temporaryChannel transmit.Timing time is up, icon disappears. No temporary icon, press PTT , point to the main channel transmission.Press continuously [ ] to return to main interface and display the corresponding status.](https://usermanual.wiki/SAIN3/GD77/User-Guide-3672017-Page-34.png)
![5857Or press [ ] button to select Off, all tones and prompts are turned off and screen showsall tones off. Press continuously [ ] to return to main interface.BacklightYou can turn on or off screen backlight as needed. This setting also affects menu key andkeyboard backlight.Press preprogrammed backlight key to switch backlight setting.Use Menu1. Press [ ] button to enter menu mode.2. Press [ or ] key to set, then press [ ] button to select radio set.3. Press [ or ]key to Backlight, and then press [ ] button to select.4. The screen displays Always On, 5 sec, 10 sec, 15 sec option. Press [ ] button to select Always On, screen backlight will always be lit and will not turn off. Or if you choose 5 sec, 10 sec, 15 sec, screen will be off in the corresponding time after users no operation. Press continuously [ ] to return to main interface.Turn on/off Key BeepUse Menu1. Press [ ] button to enter menu mode.2. Press [ or ] key to set, then press [ ] button to select.3. Press [ or ]key to Beep, and then press [ ] button to select.3. Press [ or ]key to Key Beep, and then press [ ] button to select.5. Press [ ] button to select On to enable key beep.Or press [ ] button to select Off, key beep are turned off. Press continuously [ ] to return to main interface.Beepincluding following$OO7RQH&DOO3HUPLW.H\%HHSAll toneIf desired, you can enable or disable all radio tones and prompts (except for incoming emergency tones).Press preprogrammed beeps on / off key to turn on or off all tones of radio.Use Menu1. Press [ ] button to enter menu mode.2. Press [ or ] key to set, then press [ ] button to select.3. Press [ or ]key to Beep, and then press [ ] button to select.3. Press [ or ]key to All Tone, and then press [ ] button to select.5. Press [ ] button to select On to enable all tones and hints, and screen shows that all tones are on.Power SavePower saving, the default ratio is 1: 4. Radio will open power saving function after 10 secondsbe in stansby mode.1. Press [ ] button to enter menu mode.2. Press [ or ] key to set, then press [ ] button to select.3. Press [ or ]key to Power Save, and then press [ ] button to select on/off.4. Press [ ] to confirm and press continuously [ ] to return to main interface.](https://usermanual.wiki/SAIN3/GD77/User-Guide-3672017-Page-35.png)
![6059IndicatorIf needed, you can turn on/off LED indicator.1. Press [ ] button to enter menu mode.2. Press [ or ] key to set, then press [ ] button to select radio set.3. Press [ or ]key to indicator, and then press [ ] button to select.4. Screen displays on, press [ ] button to enable LDE indicator, screen shows indicator on.Or Screen displays off, press [ ] button to turn off LED indicator, screen shows indicatorKeypad LockYou can lock radio keyboard to prevent accidental key input. Ways Includes manual keyboardlock and automatic keyboard lock, Automatic keyboard lock includes 5 sec, 10 sec, 15 secthree time options.Use Menu1. Press [ ] button to enter menu mode.2. Press [ or ] key to set, then press [ ] button to select.3. Press [ or ]key to Keypad Lock, and then press [ ] button to select.4. Press [ or ] key to Manual,then press [ ] button to select.Screen display Select Manual, you need to long press [*] key to lock the keypad.5. Press [ or ] to select 5 sec, 10 sec, 15 sec, screen displays to select the corresponding time.The within the corresponding time,if users have notany keyboard operation, the screen display lock, return to main screen.7. To unlock keypad, press [ ] button, and then press [*] key. Press continuously [ ] to return to main interface.ModeMode settings are divided into:&+1R'LVSOD\VFKDQQHOQXPEHU&+1DPH'LVSOD\VFKDQQHOQDPH&+)UHTXHQF\'LVSOD\VFKDQQHOIUHTXHQF\1. Press [ ] button to enter menu mode.Passwd Lock1. Press [ ] button to enter menu mode.2. Press [ or ] key to set, then press [ ] button to select radio set.3. Press [ or ] key to Passwd Lock, and then press [ ] button to select.4. Use keypad to enter correct 6-digit password (also cen be preset in software), then press [ ] button.5. If password is incorrect, screen displays Password Error. If password is correct, selection option is displayed.6. If the first line shows "On", press [ ] button to turn on password lock, next time you need to enter correct password to turn on radio. If the first line shows "off", press [ ] button to turn off password lock, next time you turn on the radio directly.7. Press [ or ] key to change Pwd, and then press [ ] button to select.8. Enter new password below 6 digits and press [ ] button to select.9. Screen shows set Succeed. Press continuously [ ] to return to main interface.off. Press continuously [ ] to return to main interface.](https://usermanual.wiki/SAIN3/GD77/User-Guide-3672017-Page-36.png)
![6261ScreenIf necessary, you can enable and disable screen display.1. Press [ ] button to enter menu mode.2. Press [ or ] key to set, then press [ ] button to select radio set.3. Press [ or ] key to Screen, and then press [ ] button to select.4. Press [ ] button to select Picture or Character. When Picture is selected, the picture will be displayed when turn on radio. When the preset characters is selected, two lines of characters preset in software are displayed. Press continuously [ ] to return to main interface.2. Press [ or ] key to set, then press [ ] button to select radio set.3. Press [ or ] key to Mode, and then press [ ] button to select.4. Press [ or ] key to select CH. No.or CH Name or CH Frequency, and then press [ ] button to select the corresponding display mode. Display show corresponding mode is selected.5. The main interface will display CH. No.or CH Name or CH Frequency(reception frequency, PTT display transmission frequency) according to the selected mode. Press continuously [ ] to return to main interface.LanguageRadios supports the following languages:(QJOLVK&KLQHVHRadio Info5DGLR,''HY,QIRNote: Pressing [ ] button at any time can return to previous screen.Radio Info1. Press [ ] button to enter menu mode.2. Press [ or ] key to Radio Info, then press [ ] button to select.3. Press [ or ] key to Radio ID, and then press [ ] button to select.4. The screen displays radio ID and name, which can only be checked and cannot set.1. Press [ ] button to enter menu mode.2. Press [ or ] key to set, then press [ ] button to select radio set.3. Press [ or ] key to Language, and then press [ ] button to select.4. Press [ or ] key to corresponding Language,, and then press [ ] button to select.5. The screen switches and displays the corresponding language.Press continuously [ ] to return to main interface.Dev. Infoincluding following contents:0RGHOLQIRUPDWLRQUDGLRPRGHO1R6HULDOQXPEHUUDGLRLGHQWLW\FRGH&36YHUVLRQVRIWZDUHYHUVLRQ+DUGZDUHYHUVLRQ+DUGZDUHYHUVLRQQXPEHU](https://usermanual.wiki/SAIN3/GD77/User-Guide-3672017-Page-37.png)
![6463Rx Freq1. Press [ ] button to enter menu mode.2. Press [ or ] key to Radio Cfg, then press [ ] button to select.)LUPZDUHYHUVLRQ&38VRIWZDUHYHUVLRQ'63YHUVLRQ'LJLWDOFKLSEDVHEDQGYHUVLRQQXPEHU3URJUDPPLQJWLPHWKHODVWZULWLQJWLPH1. Press [ ] button to enter menu mode.2. Press [ or ] key to Radio Info, then press [ ] button to select.3. Press [ or ] key to Dev. Info, and then press [ ] button to select.4. Press [ or ] key to view model information, serial number, CPS version, hardware version, firmware version, DSP version, and programming time. Press continuously [ ] to return to main interface.Radio CfgRadio configuration is mainly to edit the channel contentEditable channel content includes:5[)UHT7[)HUT&K1DPH&RORUFRGH6ORW'XDOWLPHVORWIRUSRLQWWRSRLQWTx freq1. Press [ ] button to enter menu mode.2. Press [ or ] key to Radio Cfg, then press [ ] button to select.3. Press [ or ] key to Tx Freq, and then press [ ] button to select.4. The screen displays the current channel transmit frequency, and then press [ ] button to select.5. Press [ ] button to delete, press [ ] key to move one digit left, press [ ] to move one digit right, press [*] to delete all, delete all and press [ ] to return to the previous menu. Press number keys to enter the corresponding number.6. After the change is complete, press [ ] button, the screen displays "Tx Freq success".Note: When editing frequency, the frequency will be changed according to the frequency range preset on software. If exceed the frequency range preset on software, show "illegal modification value is invalid" and return.3. Press [ or ] key to Rx Freq, and then press [ ] button to select.4. The screen displays the current channel reception frequency, and then press [ ] button to select.5. Press [ ] button to delete, press [ ] key to move one digit left, press [ ] to move one digit right, press [*] to delete all, delete all and press [ ] to return to the previous menu. Press number keys to enter the corresponding number.6. After the change is complete, press [ ] button, the screen displays "Rx Freq success".Note: When editing frequency, the frequency will be changed according to the frequency rangepreset on software. If exceed the frequency range preset on software, show "illegal modificationvalue is invalid" and return.](https://usermanual.wiki/SAIN3/GD77/User-Guide-3672017-Page-38.png)
![Slot1. Press [ ] button to enter menu mode.2. Press [ or ] key to Radio Cfg, then press [ ] button to select.3. Press [ or ] key to Slot, and then press [ ] button to select.4. Press [ or ] key to select slot value to be set, and then press [ ] button to select. Screen display slot X (selected slot value) has been selected.Note: Dual Capacity Direct Mode(dual time slot for point to point) can be set on or off in digitalchannel of software. This mode supports parallel direct mode transmission of two groups of6665Color CodeColor code can only be set in digital channels.1. Press [ ] button to enter menu mode.2. Press [ or ] key to Radio Cfg, then press [ ] button to select.3. Press [ or ] key to Color Code, and then press [ ] button to select.4. Press [ or ] key to select color code value to be set, and then press [ ] button to select. Screen display color code X (selected color code value) has been selected.Ch Name1. Press [ ] button to enter menu mode.2. Press [ or ] key to Radio Cfg, then press [ ] button to select.3. Press [ or ] key to Ch Name, and then press [ ] button to select,screen displays the current channel name.4. Press [ ] button to delete, press [ ] key to move one digit left, press [ ] to move one digit right, press [*] to delete all, delete all and press [ ] to return to the previous menu. Press number keys to enter the corresponding number.5. After the change is complete, press [ ] button, the screen displays "Ch Name success".Special functionOnline update1. Turn off radio, insert programming cable;2. Hold down side key 1 and side key 2 at the same time to turn on radio, the indicator light green, indicating that radio has entered the upgrade mode;3. Start upgrade software "Update.exe"; select the corresponding serial port;4. Click "Browse" to select the file to be upgraded (provided by the manufacturer), for example: XX_V2.2.1.sgl;Note:Double wait and the main channel to open dual capacity direct mode, the main channel locked after the first 4.5 minutes will send synchronization code, and in the channel stay about 3S-5S to determine whether the other party received the synchronization code.1.After no receiving any signal, after 3S-5S the launch of the synchronization code ,radio re-enter double wait switch 2.Only after 5S current channel has received a signal or actively transmit , radio re-enter the double wait switch3.If the radio sending synchronization code and the call radio are not the same frequency band,It takes 8-10S.radio users.Same group radios must use same timeslot, the group using slot1 will not interfere with the group using slot 2.](https://usermanual.wiki/SAIN3/GD77/User-Guide-3672017-Page-39.png)
![Factory Reset DefaultsTurn off radio and press and hold side key 1 and number key [1] at the same time to turn onradio.Radio displays "Memory Reset?" Press [ ] key to enter the initialization, radio displays "Memory Reset ..." After 10 seconds, initialization is successful and normal boot; press otherkeys to exit initialization interface and normal boot.When initialization,prohibit power off, orotherwise it will cause initialization to fail.6867SpecificationGeneralReceiverFrequency rangeChannelFrequency stabilityOperating temperatureVoltage 4/aWWT«e«=+*Analog sensibility Digital sensibilityAdjacent channel selectivityCo-channel rejectionSpurious responseAudio responseRated audio distortionAudio powerModulation noiseɧ='K):05(+\=),9!¡K)'¢K)¢K)~K)#>¢K)'5. Click "Download" until the download is successful, remember that when updating,prohibit power off, or radio single machine scrapped;6. Unplug programming cable, turn off radio or reboot radiokHzkHz](https://usermanual.wiki/SAIN3/GD77/User-Guide-3672017-Page-40.png)
![69TransmitterPowerTransmit currentStandby currentFM modulation mode4FSK digital modeModulation distortionHum and noiseAdjacent channel powerAudio responseAntenna port spuriousDigital protocol>(UHSVN¡(+PNP[HS¡ ((2-,'2/a+H[HVUS`Ļ2-+R/a+H[HHUK]VPJLĻ2-&#¢K)'¡K)'~K) 2/a./a!¡K)T./a./a!¡K)T,;:0;:kHzkHzkHz](https://usermanual.wiki/SAIN3/GD77/User-Guide-3672017-Page-41.png)