SDI Technologies IP47 iHome Bluetooth Alarm Clock Radio for iPhone/ iPod User Manual iP47 IB 031108

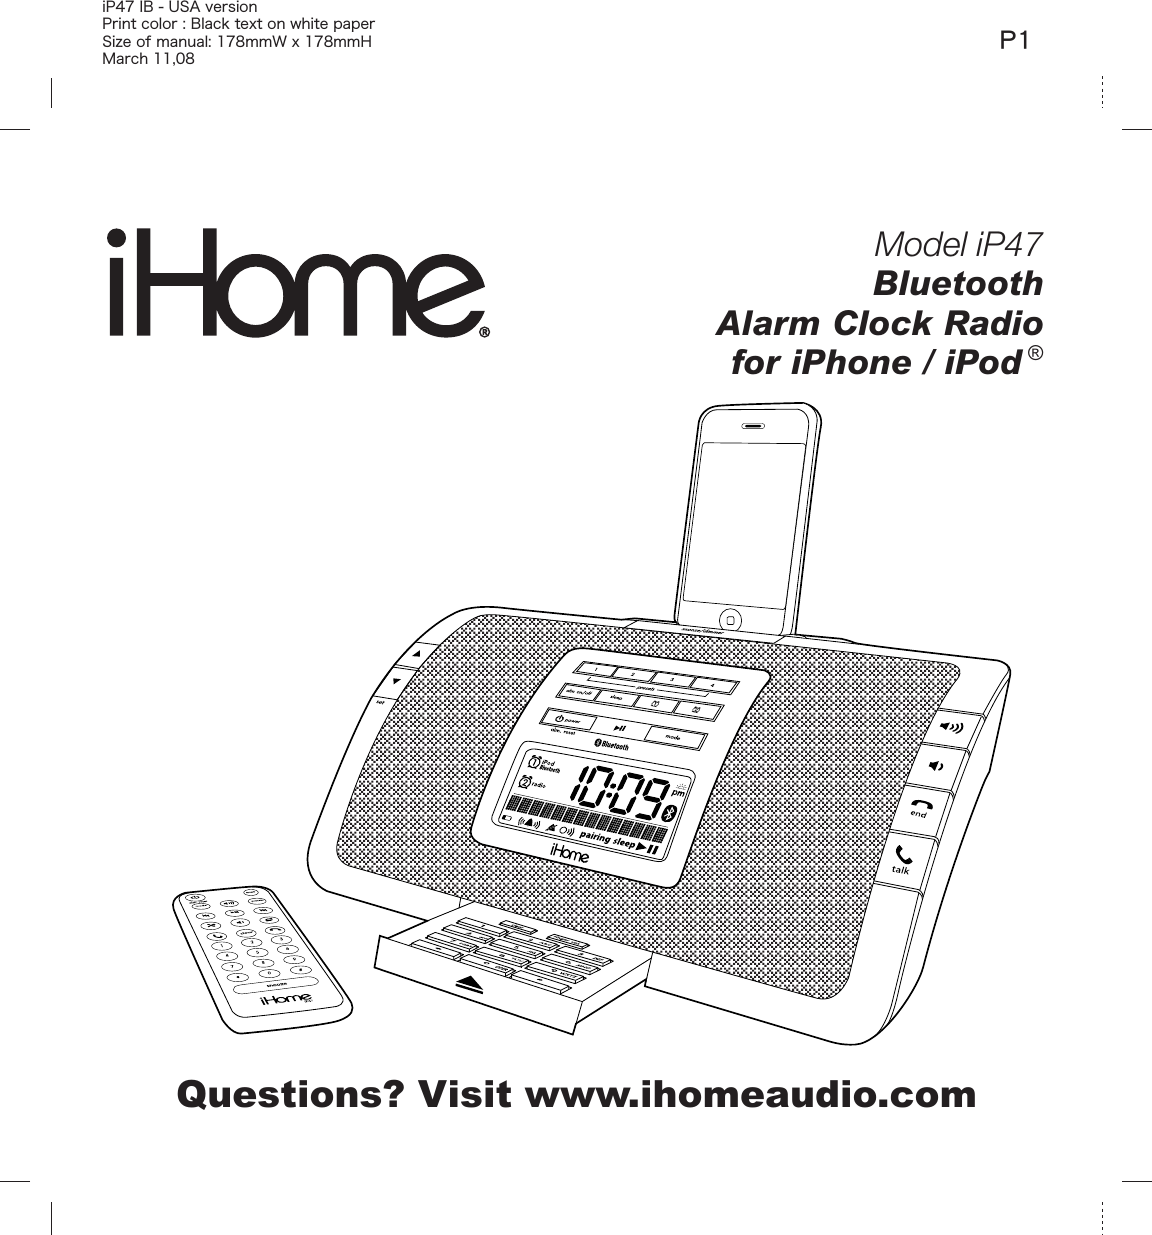
SDI Technologies Inc. iHome Bluetooth Alarm Clock Radio for iPhone/ iPod iP47 IB 031108

User Manual

Model iP47BluetoothAlarm Clock Radiofor iPhone / iPod ®Questions? Visit www.ihomeaudio.comiP47 IB - USA version Print color : Black text on white paperSize of manual: 178mmW x 178mmHMarch 11,08P1
Table of ContentsQuick Start Controls and Indicators iP47 DisplayUsing the iP47Using the AlarmsListening to iPodListening to RadioListening to Bluetooth MusicListening to other portable audio devicesInstall Clock Backup BatteryReplacing the Remote Control BatterySleep OperationDimmer OperationMaking Call with Bluetooth Mobile PhoneRemote ControlA Consumer Guide to Product SafetyTrouble ShootingWarrantyMaintenance•   Place the unit on a level surface away from sources of direct sunlight or excessive heat.•   Protect  your furniture when placing  your unit  on a  natural wood  and lacquered  finish. A cloth  or other      protective material should be placed between it and the furniture.•   Clean your unit with a soft cloth moistened only with mild soap and water. Stronger cleaning agents, such as Benzine, thinner or similar materials can damage the surface of the unit.NOTE : The iP47 is designed for use with Bluetooth wireless devices compatible with the HFP, HSP,  A2DP  and  AVRCP  streaming  audio  profiles.  Refer  to  your  Bluetooth  device’s  user manual or technical support to determine if your Bluetooth device supports these profiles. P21-23345667788999101112-1516
FCC InformationGetting StartedThanks you  for purchasing  the iP47.  Designed specifically  to play  music through  Bluetooth from  your mobile phone or computer (through Bluetooth or line-in cord). This system provides high quality audio performance that brings out the best in your music and lets you wake or sleep to it. Please read this instruction carefully before the appliance is operated and keep it for future reference.P3Warning: Changes or modifications to this unit not expressly approved by the party responsible for compliance could void the user’s authority to operate the equipment.NOTE:  This equipment has been tested and found to comply with the limits for a Class B digital device, pursuant to Part 15 of the FCC Rules. These limits are designed to provide resonable protection against harmful interference in a residential installation. This equipment generates, uses and can radiate radio frequency energy and , if not installed and used in accordance with the instructions, may cause harmful interference to radio communications. However, there is no guarantee that interference will not occur in a particular installation. If this equipment does cause harmful interference to radio or television reception, which can be determined by turning the equipment off and on, the user is encouraged to try to correct the interference by one or more of the following measures:•  Reorient or relocate the receiving antenna.•  Increase the separation between the equipment and receiver.•  Connect the equipment into an outlet on a circuit different from that to which the receiver is connected.•  Consult the dealer or an experienced radio/TV technician for help.This device complies with Part 15 of the FCC Rules. Operation is subject to the following two conditions: (1) This device may not cause harmful interference, and (2) this device must accept any interference received, including interference that may cause undesired operation.
RESETRESETTESTTEST1Quick StartAttach AC adaptor cable to jack on back of the iP47 and plug the other end into a wall socket1: Power 2: Pair Your Bluetooth-enabled Phone With The iP47iPodmode3: Making And    Answering Callshelloooo10:09 OffOnSelect Back10:09ConnectivityInfraredPacket dataData transferBluetoothSelect BackB4: Setting theTime    Zone and ClockPress  the  Mode  button  as needed to select iPod, Bluetooth, FM1, FM2, AM or Line in. Press UP  or  DOWN  button  to  tune  to desired station. Press and hold a preset  button  to  set  current station as a preset.Time is preset to Eastern Standard Time.Press  and  hold  the  Time  Zone  button  until  the display flashes. Press UP or DOWN buttons to set your Time zone. Press  and  hold  the  Time  Zone  button  again  to confirm. To adjust clock, press Clock Adjust button then UP or DOWN button to set.Press and hold for 2 sec.time zone5: Setting Alarms 6: iPod/Bluetooth/    Radio/Line inP4a) Select Bluetooth/discover mode on your phone (see your user manual)b)  Press  and hold  the  Play/Pause  button  on the  iP47.    The  unit will  enter Auto-pairing mode and begin searching for a device to pair with, indicated by flashing Bluetooth and pairing icons.c) When prompted, enter pass code for iP47 on your device: 1234d) A screen (on phone) should confirm successful pairing. AWake to iPod or Bluetooth: Press and hold Alarm 1 Button until the hour flashes. Press UP  or  DOWN  button  to  set  Hour.  Press Alarm 1  again  then press UP  or DOWN to set minutes. Press Alarm 1 again then press Mode  Button  to  select  iPod  or  Bluetooth device to wake to.Wake  to  radio:  Press  and  hold  Alarm  2 Button and adjust as above. endOnce  the  iP47  is  linked  with your phone:a) To dial, open the keypad on front of the unit. Dial the number then press the Talk Button.b) To answer the phone, press the Talk Button. Press the End Button to end the call.NOTE: If you have call waiting, press the Talk Button to answer a second call and place the first on hold.
7: inserts2Quick StartP5NOTE: If the insert for your iPod isn’t listed, please visit an Apple store or www.ihomeaudio.com to purchase the proper insert.iPod Touchthin iPod with video (30 GB)Insert 93rd Gen nano insert  133rd Gen nano iPod with video (60,80 GB)Insert 10thin (30 GB) iPod with videothin (80GB) iPod classicthick (60, 80 GB) iPod with videothick (160 GB) iPod classiciPod Touch insert 14For this iPodUse this insertSelect  the  dock  insert  for  your  iPod model  from the  table below  and  place insert in dock.Never dock an iPod without an insert in place.Please advise update chart for iPhone too
radioiPod3Controls and IndicatorsiP47 Display Time Zone ButtonAlarm 1, Alarm 2 IndicatorsDaylight Saving Time IndicatorBattery Low IndicatorRinger IndicatorSpeaker Phone IndicatorSilence Indicator Pairing Mode IndicatorTime DisplayPM IndicatorBluetooth IndicatorSleep DisplayPlay/Pause IndicatorAlarm On/Off Button Alarm Reset/Power Button  Snooze/Dimmer Button  Mode Button      (iPod, Bluetooth, FM1, FM2, AM  and line in) Alarm 1 Button Microphone  Alarm 2 Button Play/Pause Button (for iPhone, iPod and Bluetooth music)Alpha-Numeric Phone Keypad Volume Up  Volume Down  Sleep Button Radio Preset Button AC Adaptor Jack  DST switch Line in Jack AM ant. Jack FM ant. Wire   Talk Button End ButtonDown / Set Button  Up Button P6Clock Adjust Button Ringer vol. ButtonUniversal dock for iPhone/iPodClear Button for iPhone, iPod and Bluetooth music)".has delete Number and text indicator
Using the iP474P7Connecting the iP47 to Power SourceConnect the AC adaptor cable plug into the jack on the back of the system, then plug the AC cord of the AC adaptor into the wall outlet.Turning the iP47 ON or OFFPress the Power Button on the iP47 or on the remote control at any time to turn the iP47 On or Off. Note that a docked iPhone or iPod will continue to charge when the unit is turned off as long as the AC adaptor is plugged in.Setting Up the iP47The iP47 clock is preset to U.S. Eastern Standard Time. It is simple to adjust the unit for your location.1. Depending on your location and whether or not Daylight Saving Time (DST) is in effect, set the DST Switch located on the back of the unit to +1 to add one hour or to -1 to subtract one hour.2. Press and hold the Time Zone Button located on the back of the unit until Time Zone Indicator at the lower part of the display flashes. Press the UP or DOWN Set Buttons to select your time zone. 3. Press Time Zone Button again. You will hear two beeps confirming your setting and exit the Time Zone Setting mode.4. If the time showing is not correct, please see Setting Time and Calendar below to set the clock.Setting Time and Calendar1. Press and hold the Clock Adj Button located on the back of the unit for 2 seconds until the hour display flashes. Press the UP or DOWN Set Button to adjust the  hour. Hold a set button for a few seconds to advance or reverse rapidly. Remember to set the correct AM or PM hour. An icon in the upper right hand corner of the time display is the PM Indicator; there is no AM indicator.2. Press the Clock Adj Button again. The minute display will flash. Press the UP or DOWN Set Button to adjust the minute setting. Hold a set button for a few seconds to advance or reverse rapidly. 3. Press the Clock Adj Button again. The  year will flash in the lower part of the display.  Press the UP or DOWN Set Button until the current year is displayed.4. Press the Clock Adj Button again. The number of the month will flash. Press the UP or DOWN Set Button until the current month is displayed.5.  Press the Clock Adj Button again. The date will flash. Press the UP or DOWN Set Button until the current date is displayed.6. Press the Clock Adj Button once more. Two beeps will sound to confirm your settings and you will exit Time and Calendar Setting mode.
5Using the AlarmsP8Setting the Alarms1. Press and  hold the Alarm 1 or Alarm 2 Button for 2  seconds until the display flashes.  Press the  or Button to set the alarm time. Hold for a few seconds to advance or reverse rapidly. Remember to set the correct AM or PM wake time. 2. Use Alarm 1 to wake to iPod or Bluetooth device. After setting the Alarm 1 wake time, press the Mode Button to select wake to iPod or Bluetooth device. If your iPod or Bluetooth device has no sound for 20 seconds, the iP47 will switch to buzzer alarm automatically.3. Use Alarm 2 to wake to the radio. After setting the Alarm 2 wake time, press a preset button (P1 to P4) or use the Mode Button and Set Buttons to select a radio station to wake to (see Listening to Radio on page 6 for details on setting radio station and presets).4. Press the Alarm 1 or Alarm 2  Button again or wait for 10 seconds. The alarm is now armed, indicated by the numbered alarm clock icon.NO MENTION OF BUZZER ALARMReviewing, Arming and Disarming Alarm (Turn Alarm Function On and Off)1. Press the  Alarm 1 or Alarm 2 Button once. The unit will show the current alarm time for alarm time review.2. Arming or Disarming Alarm can be done by only press "alm on/off" button on the unit.Resetting the Alarm to Come on the Next Day1. When the alarm is sounding, press the Alarm Reset/Power Button to stop the alarm and reset it to come on the following day at the same time.Snooze1. Press the Snooze/Dimmer Button after the alarm sounds. The alarm will be silenced and come on again 9 minutes later. Snooze can be pressed several times during the 1 hour alarm cycle.Sure AlarmThe iP47 has a sure alarm feature so the buzzer alarm will still sound in the event of a power failure, if backup battery is installed.
Listening to Radio6P9Listening to iPod1. Dock an already playing iPhone or iPod (always use proper insert, see table on page 2). The iP47 will auto-matically turn on and you will hear  the audio  playing from  your iPhone/iPod.  Note: If the audio source volume is too low on the iPhone/iPod, the iP47 may not detect that the iPhone/iPod is in play mode. If so, pressing the Alarm Reset/Power Button on the main unit once should make it play.2. When the iPhone/iPod is docked and in standby mode, press the Play/Pause Button on the main unit or remote to play the iPhone/iPod. If the iP47 is already on, press the Mode Button until “iPod” appears on the lower part of the display, indicating the iP47 is in iPod mode.3. Press the Play/Pause Button on the iP47 or on the remote control remote to pause play; press again to resume play.4. Press the Raise Volume or Lower Volume Button on the iP47 or on the remote control to adjust the system volume.5. Press the Mute Button on the remote to mute the iP47 output. Press the Mute Button again (or a volume  button) to release mute and restore normal sound output.6. Press UP or DOWN Set Button on the iP47 or on the remote control to go to the next or previous track. Press and hold while track is playing for high speed forward or reverse music search of the current track. Setting up the Antennas1. Connect the AM loop antenna plug to the back of the unit; adjust the antenna as needed for best reception. 2. Extend FM wire antenna fully for best reception. Do not strip, alter or attach to other antennas.Tuning and Playing the Radio1. Press the Mode Button until the desired radio band appears:  FM1, FM2 or AM.2. Press  the UP or DOWN Set Button to tune the radio to a desired station. Hold a Set Button briefly to have the radio autoscan/ search for the next clear station.3. To memorize the current station as a preset, press and hold Preset Button 1, 2, 3 or 4. A beep will confirm the setting and the preset number will appear in the display. Repeat steps 1-3 to preset up to 12 stations  (8 FM and 4 AM and). To listen to a preset station at any time, simply press the desired preset button. To change presets, select your radio band, tune to the desired station and press the preset button.4. Press the Raise Volume or Lower Volume Button on the iP47 or on the remote control to adjust the system volume.
Listening to Bluetooth MusicListening to other portable audio devices7P10You need to pair your Bluetooth device with the iP47 before you can play/stream Bluetooth music through the iP47. Pairing creates a permanent “bond” so two devices can always recognize each other. Note: the iPhone does not support the A2DP protocol, so it cannot be used to stream music. See Listening to your iPhone to play your iPhone through the iP47. DO WE NEED TO ADD LINKING INFO?Pairing:1. Press and hold the Play/Pause Button for 4 seconds to begin pairing operation. The Bluetooth and “pairing” icons will flash.2. Activate Bluetooth on your device according to the device’s user manual to link to iP47 . You may need to input the iHome device pass code: “1234”.3. Once connected, the Bluetooth Icon will remain.4. iP47 will auto pair a paired device next time.Playing Bluetooth Music:1. Once your device and the iP47 are paired you can start to play Bluetooth music through iP47.2. Turn on the iP47 and press the Mode button until “Bluetooth” appears in the lower part of the display .3. Press the Play/Pause Button on the main unit or remote control to play your Blueetooth enabled device. The  display  will  show  “Bluetooth”  and  Play  Icon  on  the  button  line  of  the  display.  (Depending  on  the Bluetooth device you are using, you may need to manual go into media player mode on your device to make it work properly).4. Press the Play/Pause Button again to pause play; press again to resume it.5. Using the Raise Volume or Lower Volume on main unit or remote control to adjust the system volume.. 6. Press  or  Button on main unit or remote control to go to the next or previous track. Please remember to turn off Bluetooth device manually.You can play an MP3 player or other portable audio device through the iP47 via the Line in Jack.1. Plug one end of an audio patch cord (available at http//:www.ihomeaudio.com) into the headphone or line-out jack on your device and the other end of the patch cord into the iP47 Line in Jack, located on the back of the unit.2. Turn on iP47 and press Mode button until “LINE IN” appears in  the lower part of display, indicating Line in playing mode.3. Turn on and play your device.4. Press the Raise Volume or Lower Volume Button on the iP47 or on the remote control to adjust the system volume. You may need to adjust your device volume, too.Remember to turn off your device when you are done playing it.
8Replacing the Remote Control BatteryThe remote control battery is already installed at the factory. When the remote control stops operating or its range seems reduces, it is time to replace a new one.1. The battery door is located on the back end of the unit.2. Pull the battery door to release the battery door latch and take out the battery holder.3. Insert a CR2032 battery, checking the + and – ends of the battery is matching to the drawing inside the battery compartment. 4. Replace the battery holder back into the remote control.Note: Make sure you dispose of batteries properly (see your local regulations).For best results, aim remote control towards the remote sensor on the lower center of the unit. Battery DoorInstall Clock Backup BatteryThe iP47 uses 3 x AA backup battery system to provide continuous alarm operation and clock settings in the event of a power failure. If the Backup Battery has been installed and a power failure occurs or the AC cord is accidentally disconnected, the display backlight will not  remain  lit,  but  current  time  and  alarm  time  settings  will  be temporarily  maintained.  Otherwise,  you  must  reset  the  time  and alarm settings.1. Open backup battery compartment door located on the bottom of the unit.2.  Please  make  sure  the AC  adaptor  is  connected.  Otherwise  all settings may be lost during battery replacement.3. Insert 3 AA batteries, checking that the polarity (+ and – ends of the battery) matches the drawing  near the battery compartment. Close the compartment door.Note: Make sure you dispose of batteries properly (see your local regulations).Replace Backup BatteryP11
Sleep OperationDimmer OperationMaking Call with Bluetooth Mobile Phone9P12Sleep mode lets you sleep to iPod, Bluetooth music or the radio, gradually lowering the volume until the unit shuts off at the selected time.1. Press the Sleep Button to enter sleep mode. The Sleep Icon will appear on the display to indicate it is sleep mode. The unit will automatically turn off after the selected time. Sleep mode has a Gentle Sleep feature which gradually lowers the volume.2. You can adjust the sleep timer from 120, 90, 60, 30 or 15 minutes by pressing the button again.3. When the display changes back to show the real time, press the Sleep Button once will show the sleep time remaining. Pressing it again will change sleep time to next lowest increment.4. iP47 has independent volume setting for sleep mode so you can adjust the sleeping volume without affecting the alarm volume. Using the Raise Volume or Lower Volume on main unit or remote control to adjust the system volume. The sleep volume will remain at that level the next time you enter sleep mode until controls are changed.5. To stop listening at any time, press the Alarm Reset/Power On/Off Button on main unit or remote control to turn it off.During normal operation, press the Snooze/Dimmer Button to control the brightness of the LCD display.Before you make a call with the  iP47, you need to pair your Bluetooth device with iP47. Please refer to Pairing procedure on page 7.Answer a Call:1. To answer a call, just simply press the Talk Button once. Then you can use iP47 as a speaker phone2. Speak into the MIC (located below the Snooze/Dimmer Button) and press the Raise Volume or Lower Volume Button on the iP47 or on the remote control to adjust the system volume.3. To end the call, press the End Button.Dial/Re-dial Dialing:1. Once the iP47 is paired to a Bluetooth mobile phone, you can use the integrated keypad or the remote control to enter a phone number.2. Input a phone number in normal operation mode (you do not need to be in Bluetooth mode) then press the Talk Button. Press the Clear Button to cancel the last digit entered or press and hold Clear to cancel all digits. Press the End Button to cancel the call.3. To redial the last dialed number, just press the Talk Button twice (x2).4. Press the Raise Volume or Lower Volume Button on the iP47 or on the remote control to adjust the system volume.5. To end a call, press the End Button.Ring Volume Select:1. To select iP47 ringing volume, press the Ringer Volume Button on the keypad to select to Hi, Mid, Low or Off.No mention of speed dial, caller ID, etc.
Remote Control10P13- Press RAISE VOLUME and LOWER VOLUME to adjust volume level.- Press MUTE in iPod, Radio, Line-in, or Bluetooth Music modes:to toggle the speaker sound on & off.“Mute” will appear on display.  Press MUTE or a VOLUME control to exit mute function.- Pressing MUTE during a phone call (Bluetooth Speakerphone mode):will mute the microphone. “Mic Muted” will appear on display.  Press MUTE or a VOLUME control to exit mute function.- Press FWD/REV to skip to  next or previous track. Hold for high speed    music scan.- Press ‘TALK’ to answer a call or after dialling a number to cnnect a call.Note:  you cannot program presets from the remote.- Press PRESETS button when unit is in either Bluetoothor Radio mode to automatically go to the last accessedPreset Radio Station on last used BAND (FM1, FM2or AM). Pressing PRESETS again while already listening to a station in Preset memory will go to the next Preset station programmed.- Press SNOOZE when alarm is sounding to snooze for 9 minutes, or during normal  operation to adjust the brightness of the display.- Pressing RANDOM or REPEAT will activate/deactivate ‘random’ and ‘repeat’ settings on a docked iPhone/iPod (only).- Press PLAY/PAUSE to play iPhone/iPod and to pause and resume play.- Press MODE to select FM1, FM2, AM, iPod, Line-in nd Bluetooth modes.- Press POWER / alm reset to turn unit on or off and reset alarm to come on   the next day. Mute in Speakerphone moderadio- Press ‘CLEAR’ to delete the last number entered, hold to delete all numbers entered.- Press ‘END’ to cancel a call or end a call.- Press Keypad number buttons to enter a phone number.9Mute in Audio Moderadio
A Consumer Guide to Product SafetyWhen used in the directed manner, this unit has been designed and manufactured to assure your personal safety. However, improper use can result in potential electrical shock or fire hazards.  Please  read all safety and operating  instructions carefully before installation and use. Keep these instructions handy for future reference. Take special note, and adhere to all warnings on the unit and in the instruction and service manual.1.     Water and Moisture - The unit should not be used near water. For example, near a bathtub, washbowl, kitchen sink, laundry tub, in a wet basement, or near a swimming pool, etc.2.     Ventilation - The unit should be situated so that its location or position does not interfere with its proper ventilation.  For example, it should not be situated on a bed, sofa, rug, or similar surface that may block the ventilation openings; or placed in a built-in installation, such as bookcase or cabinet that may impede the flow of air through the ventilation openings.3.     Heat - The unit should be situated away from heat source such as radiators, heat register, stoves, or other appliances (including amplifiers) that produce heat.4.     Power Sources - The unit should be connected to a power supply only of the type described in the operating instructions or as marked on the appliance.5.     Power Cord  Protection – Power supply cord should be routed so that they are not likely to be walked on or pinched by items placed upon or against them. It is always best to have a clear area from where the cord exits the unit to where it is plugged into an AC outlet.6.    Cleaning - The unit should be cleaned only as recommended by the manufacturer.7.     Object and Liquid Entry - Care should be taken so that objects do not fall and liquids are not spilled into the enclosure through openings.8.    Attachments – Do not use attachments not recommended by the product manufacturer.9.    Lightning and Power Surge Protection – Unplug the unit from the wall outlet and disconnect the antenna or cable system during a lightning storm or when it is left unattended and unused for long periods of time. This will prevent damage to the product due to lightning and power-line surges.10.   Overloading – Do not overload wall outlets, extension cords, or integral convenience receptacles as this can result in a risk of fire or electric shock.11.   Damage Requiring Service - The appliance should be serviced by qualified service personnel when:  A.   The power-supply cord or plug has been damaged.  B.   Objects have fallen into or liquid has been spilled into the enclosure.  C.   The unit has been exposed to rain.  D.   The unit has been dropped or the enclosure damaged.  E.   The unit exhibits a marked change in performance or does not operate normally.12.  Antenna – Do not connect an external antenna to the unit (other than that provided).13.   Periods of Nonuse – If the unit is to be left unused for an extended period of time, such as a month or longer, the power cord should be unplugged and take out batteries from the unit to prevent damage or corrosion.14.   Servicing - The user should not attempt to service the unit beyond that described in the user’s operating instructions. All other servicing should be referred to qualified service personnel.Questions? Visit www.ihomeaudio.com11P14
Trouble Shooting12P15Unit doesn’t respond(no power)Can’t play Bluetooth music from cellphone or  other  Bluetooth devicesBluetooth device didn’t charge upSound is distortedBluetooth  music  is broken up Can’t hear caller’s voice Dialing out error message Remote Control doesn’t workiP47  charges  iPhone  and  docking  iPod models only, not other devicesVolume level is set too highSound source is distortedBluetooth device is out of range of iP47Bluetooth device is out of range of iP47Volume on iP47 is too lowBatteries are weak/ deadRemote Control is too far way from main unitMake sure your device is plugged into a working chargerDecrease the volumeIf original sound source is poor quality, distortion and noise are easily noticed with high-power speakers.Try setting EQ to flat on your Bluetooth deviceMove your Bluetooth device within 30 feet of the iP47Move your cell phone closer to iP47Raise volume on iP47Replace with new batteryMove the Remote Control closer to main unitSolutionSymptom Possible ProblemAC adaptor isn’t plugged to a wall outlet or the connector is not plugged into the power supply jack on the back of the unit.Wall outlet is not functioningDevice and iP47 are not paired AND linkedDevice  does  not  support  the  A2DP  and AVRCP Bluetooth profilesPlug the AC adaptor into a wall outlet and plug the connector into the AC jack on the unitPlug another device into the same wall outlet to confirm the outlet is working. If the outlet is controlled by a switch, check that the switch is ON.While you need the A2DP and AVRCP Bluetooth profiles to stream music to the iP47, you can still use the handsfree speaker phone      functionalityMake sure your phone supports the A2DP and AVRCP Bluetooth profiles before linking/pairingPower is off Press the Power button on the iP47My Bluetooth headset won't pair with the iHC5Headsets and other receivers will not pair with the iP47Pair headset directly with phone or other transmitting deviceOthers can't hear my voice/voice isn't clear to listenerYou are too far from iP47 microphoneAudio cord connected to external mic jack, disabling the internal micSome phones do not support dialing out while listening to Bluetooth musicMove within 5 feet of the iP47Make sure any external device is connected to the proper input jackCheck your cell phone owner’s manual or website to see if your phone supports dialing out while listening to Bluetooth music. If it does not, turn off music before attempting to dial
Trouble Shooting13Can't wake to Bluetooth musicSolutionSymptom Possible ProblemDevice is not in play modeDevice is not chargedDevice does not support A2DP and AVRCP Bluetooth profilesMake sure your device is powered and streaming musicMake sure your device is adequately charged to last through the set alarm timeIf your device does not support the A2DP and AVRCP profiles, set your alarm to wake to radio Calls don't sound clearVolume on iP47 is too low Raise volume on the iP47Poor connection or cell phone reception Retry call after moving phone for better reception reception/connectionP16Can’t play my iPhone via Bluetooth iPhone does not support the A2DP protocol  iPhone must be docked in iP47 to listen to music
Solución De Problemas14P17La unidad no funciona (no  circula  corriente eléctrica).No se escucha la música por el teléfono celular vía Bluetooth o desde otro aparato transmisor.El aparato Bluetooth no recibe carga.El sonido sale distorsionado.La música del aparato Bluetooth sale entrecortada.No se escucha la voz de quién ha  llamado.El control remoto no  funciona.El iHC5 no carga otros aparatos.El volumen se encuentra muy alto.La fuente de sonido está distorsionándolo.Su aparato Bluetooth está fuera del rango de alcance del iP47.Su aparato Bluetooth está fuera del rango de alcance del iP47.El volumen del iP47 se encuentra demasiado bajo.Las baterías están gastadas.El control remoto está fuera de rango.Coloque su aparato en un cargador que funcione.Baje el volumen.Si el sonido original era de pobre calidad, las distorsiones y ruidos se harán más notables con los parlantes de alta potencia. Intente modificar los ajustes de EQ a plano en su aparato Bluetooth.                           Mantenga su aparato Bluetooth dentro de los 30 pies de distancia del iP47.Coloque su teléfono más cerca del iP47.Aumente el volumen del iP47.Reemplace las baterías por nuevas.Acerque el control remoto a la unidad.SoluciónSíntoma Causa posibleEl adaptador de AC no está conectado al tomacorriente o el conector no está conectado a la ficha en la parte posterior de la unidad.El tomacorriente no funciona.El aparato  y  su  iHC5  no  están  ligados y trabajando en conjuntoEl aparato no  soporta  tecnología  Bluetooth A2DP  ni AVRCP.Conecte el adaptador de AC  a un tomacorriente  y  el conector a la ficha de salida AC de la unidad. Coloque otro aparato al tomacorriente y confirme su funcionamiento.Si el tomacorriente tuviera un selector de encendido, colóquelo en esa posición.  Para escuchar música a través del iHC5 se requiere tecnología Bluetooth A2DP   o AVRCP, si bien puede seguir  utilizando el altoparlante del teléfono celular.Asegúrese que su teléfono soporte tecnología Bluetooth A2DP  o AVRCP antes de conectarlos.La unidad no está encendida.   Oprima el botón “Power” (encendido) del iP47.Mi  auricular Bluetooth no se conecta con el iHC5Algunos receptores y auriculares no pueden conectarse al iP47.Conecte el auricular directamente a su teléfono u otro aparato transmisor.Mi voz no se escucha con claridad o no se escucha en absoluto.Usted se encuentra muy lejos del micrófono del iP47.El cable de audio conectado a la ficha del micrófono externo impide la salida por el micrófono interno.Manténgase dentro de los 5 pies de distancia del iP47.Asegúrese de que todo aparato externo esté conectado a la ficha de entrada correspondiente.
Solución De Problemas15P18Mensaje de error al discarAlgunos teléfonos no pueden discarllamados mientras está escuchandomúsica via BluetoothVerifique en el manual del usuario o en el sitio de internet de su teléfono celular si su teléfono puede discar mientras está escuchando música via Bluetooth. Si no lo permite, apague la música antes de discar.  La música con Bluetooth no funciona como despertador.SoluciónSíntoma Causa posibleEl aparato no está en modo “Play” (reproducción).El aparato está descargado.El aparato no soporta tecnología Bluetooth A2DP y AVRCP.Asegúrese que el aparato esté conectado y transmitiendo música.Asegúrese que el aparato tenga carga suficiente como para durarle hasta la hora programada.Si su aparato no soporta tecnología Bluetooth A2DP y AVRCP, coloque su despertador para sonar con alarma o con zumbido.Las llamadas no se escuchan con claridad.El volumen del iHC5 está muy bajo. Aumente el volumen de su iP47.Hay mala recepción celular en ese sector. Vuelva a intentar la llamada desde otro sector.
16iHome Products, a division of SDI Technologies Inc. (hereafter referred to as SDI Technologies), warrants this product to be free from defects in workmanship and materials, under normal use and conditions, for a period of 90 days from the date of original purchase.Should this product fail to function in a satisfactory manner, it is best to first return it to the store where it was originally purchased. Should this fail to resolve the matter and service still be required by reason of any defect or malfunction during the warranty period, SDI Technologies will repair or, at its discretion, replace this product without charge (except for a $15.00 charge for handling, packing, return UPS/postage, and insurance). This decision is subject to verification of the defect or malfunction upon delivery of this product to the Factory Service Center listed below. The product must include proof of purchase, including date of purchase. The fee for service without proof of purchase is $40.00.Before returning this product for service, please first replace the batteries (if applicable) with fresh ones, as exhausted or defective batteries are the most common cause of problems encountered.If service is still required:1. Remove the batteries (if applicable) and pack the unit in a well padded, heavy corrugated box.2. Enclose a photocopy of your sales receipt, credit card statement, or other proof of the date of purchase, if within the warranty period.3. Enclose a check or money order payable to the order of SDI Technologies, for the sum of $15.00 ($40.00 without proof of purchase).4. Send the unit prepaid and insured, to the Factory Service Center listed below.Consumer Repair DepartmentSDI Technologies Inc.1330 Goodyear DriveEl Paso, TX 79936-6420Disclaimer of WarrantyNOTE: This warranty is valid only if the product is used for the purpose for which it was designed. It does not cover (i) products which have been damaged by negligence or willful actions, misuse or accident, or which have been modified or repaired by unauthorized persons; (ii) cracked or broken  cabinets, or  units  damaged by  excessive heat;  (iii) damage  to digital  media players,  CD’s  or tape  cassettes (if applicable); (iv) the cost of shipping this product to the Factory Service Center and its return to the owner.This warranty is valid only in the United States of America and does not extend to owners of the product other than to the original purchaser. In no event will SDI Technologies or any of its affiliates, contractors, resellers, their officers, directors, shareholders, members or agents be liable to you or any third party for any consequential or incidental damages, any lost profits, actual, exemplary or punitive damages. (Some states do not allow limitations on implied warranties or exclusion of consequential damages, so these restrictions may not apply to you.) This warranty gives you specific legal rights, and you may also have other rights which vary from state to state.Your acknowledgement and agreement to fully and completely abide by the above mentioned disclaimer of warranty is contractually binding to you upon your transfer of currency (money order, cashier's check, or credit card) for purchase of your SDI Technologies product.© 2008 SDI Technologies, Inc. All rights reservedQuestions? Visit www.ihomeaudio.com or call 1-800-288-2792 Toll FreeIP47-031108-A Printed in ChinaLimited 90-Day Warranty InformationP19

Navigation menu