SEIKAKU TECHNICAL GROUP UPUL-MODAU-HM Wireless Microphone User Manual UL 82DR 8H 8P SHOW FCC
SEIKAKU TECHNICAL GROUP LIMITED Wireless Microphone UL 82DR 8H 8P SHOW FCC
Contents
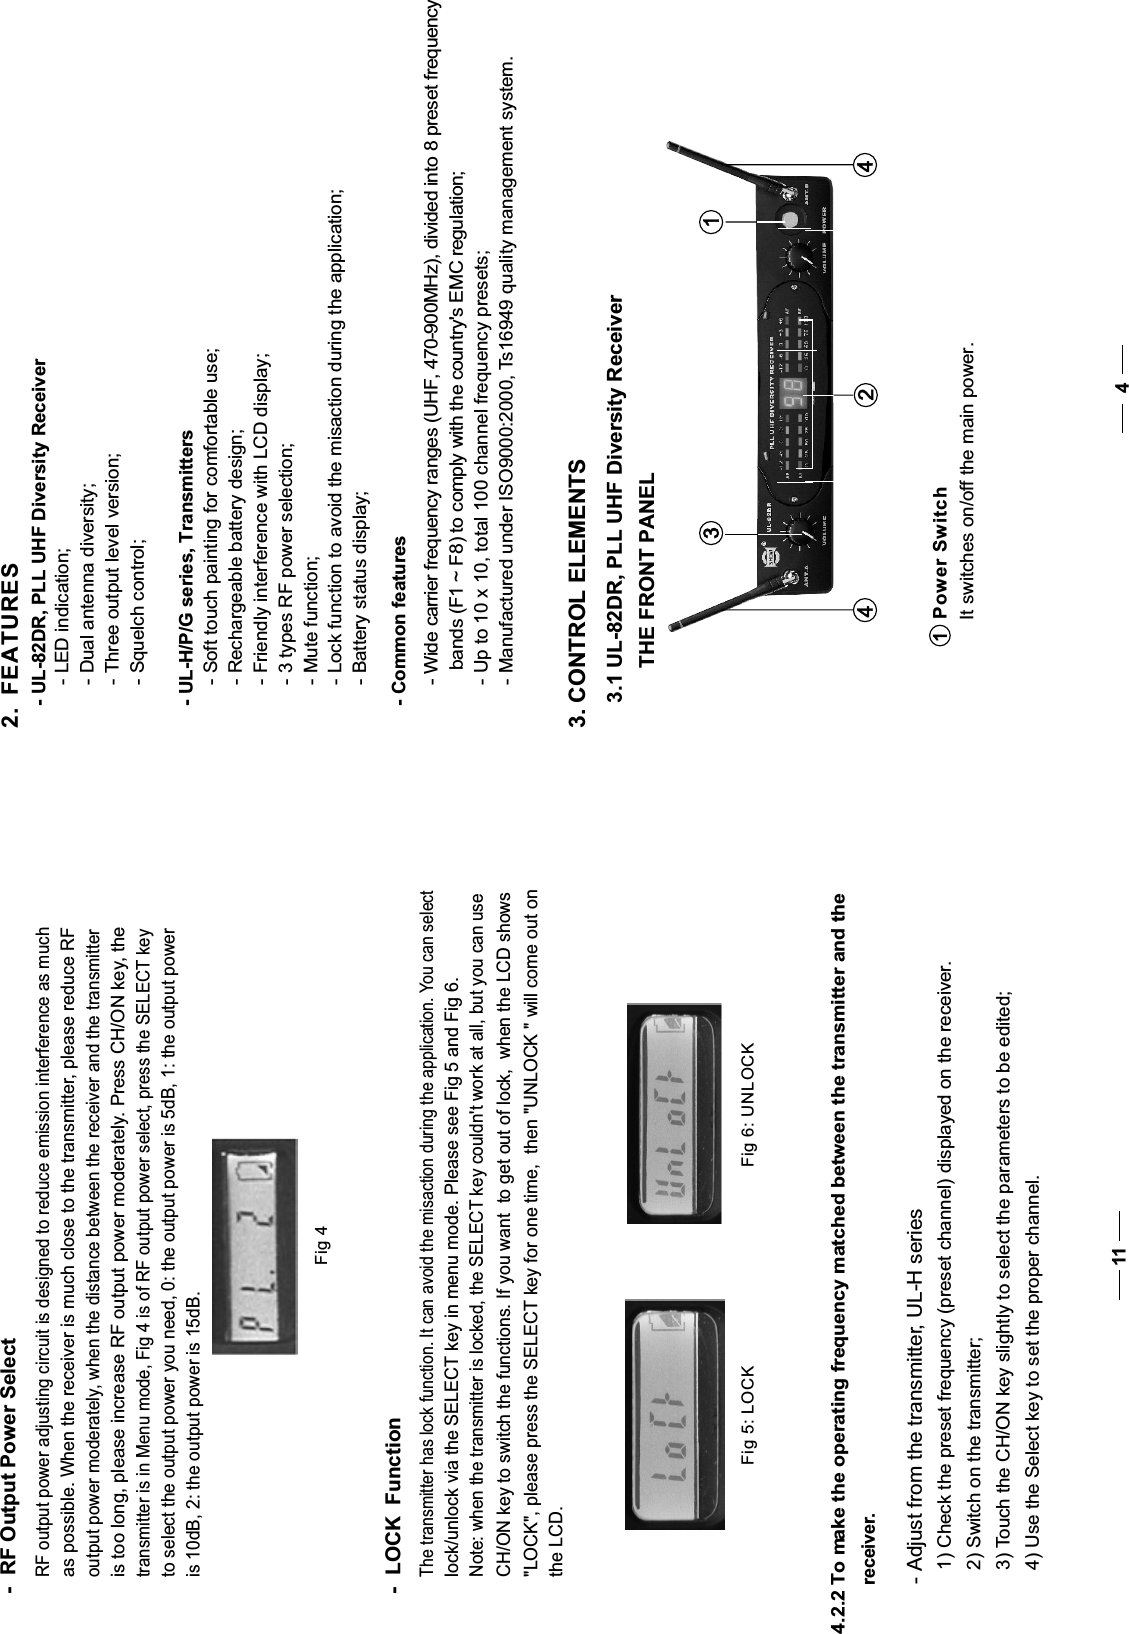
- 1. User Manual I
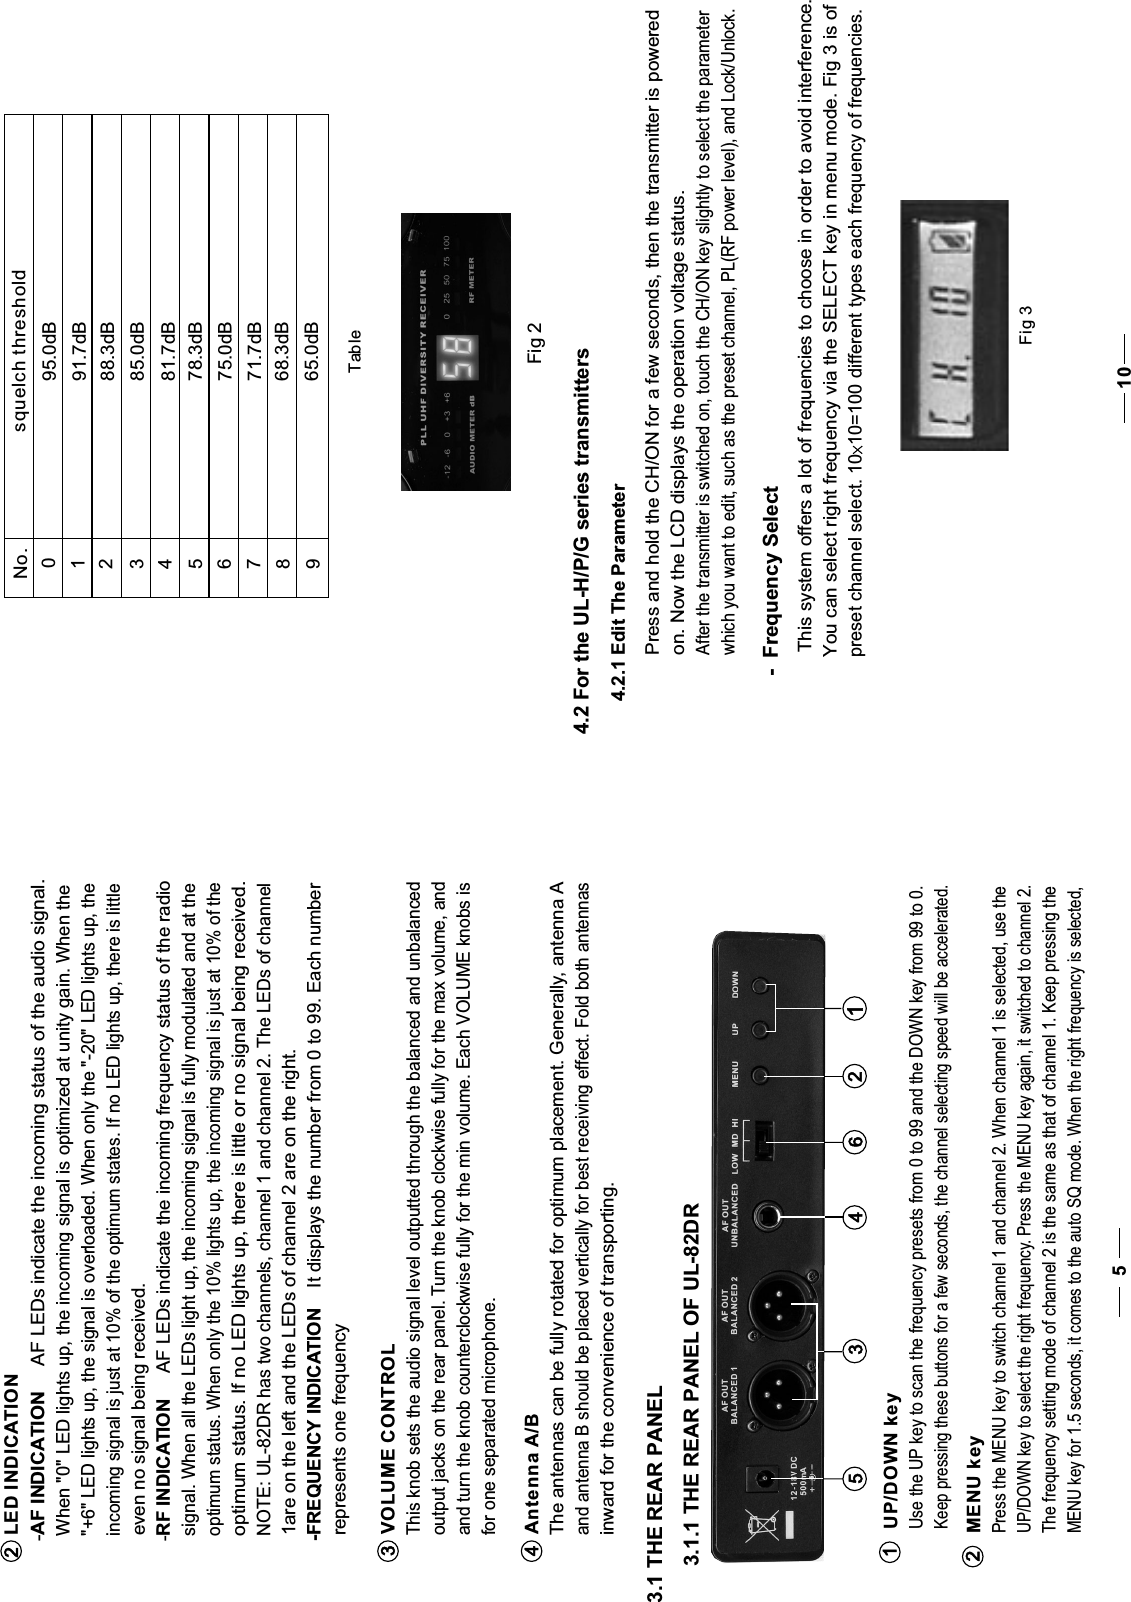
- 2. User Manual II
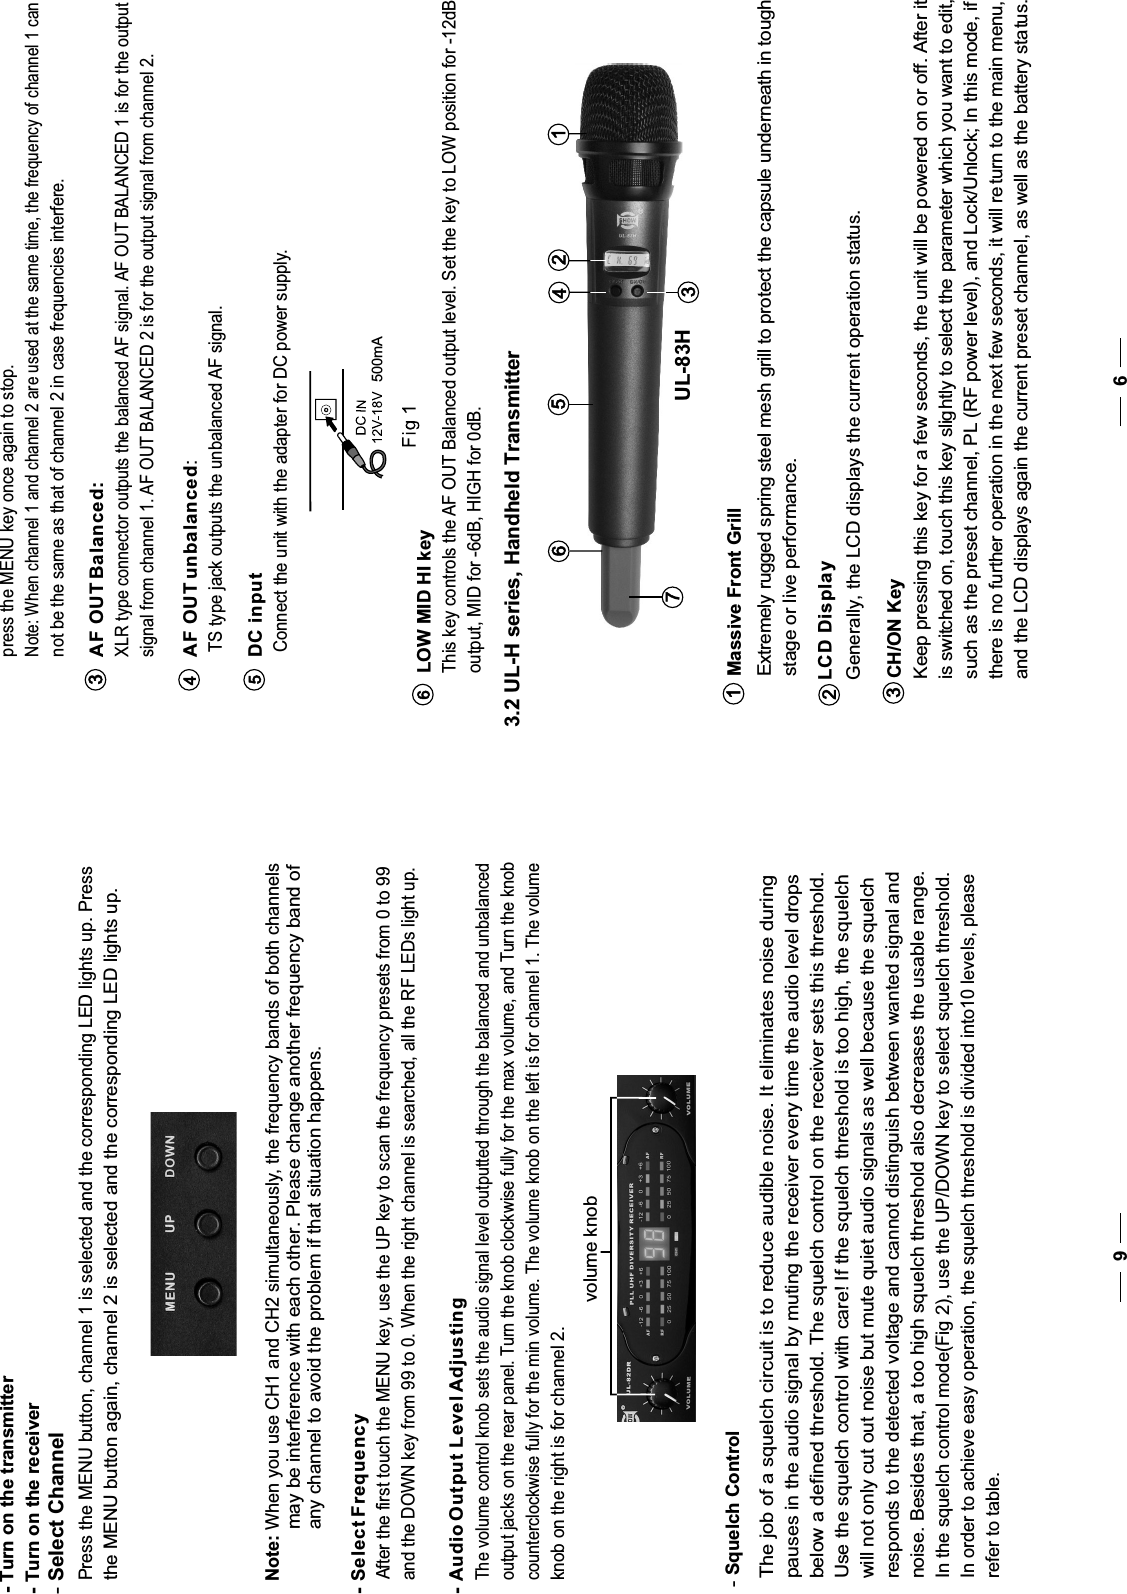
- 3. User Manual III
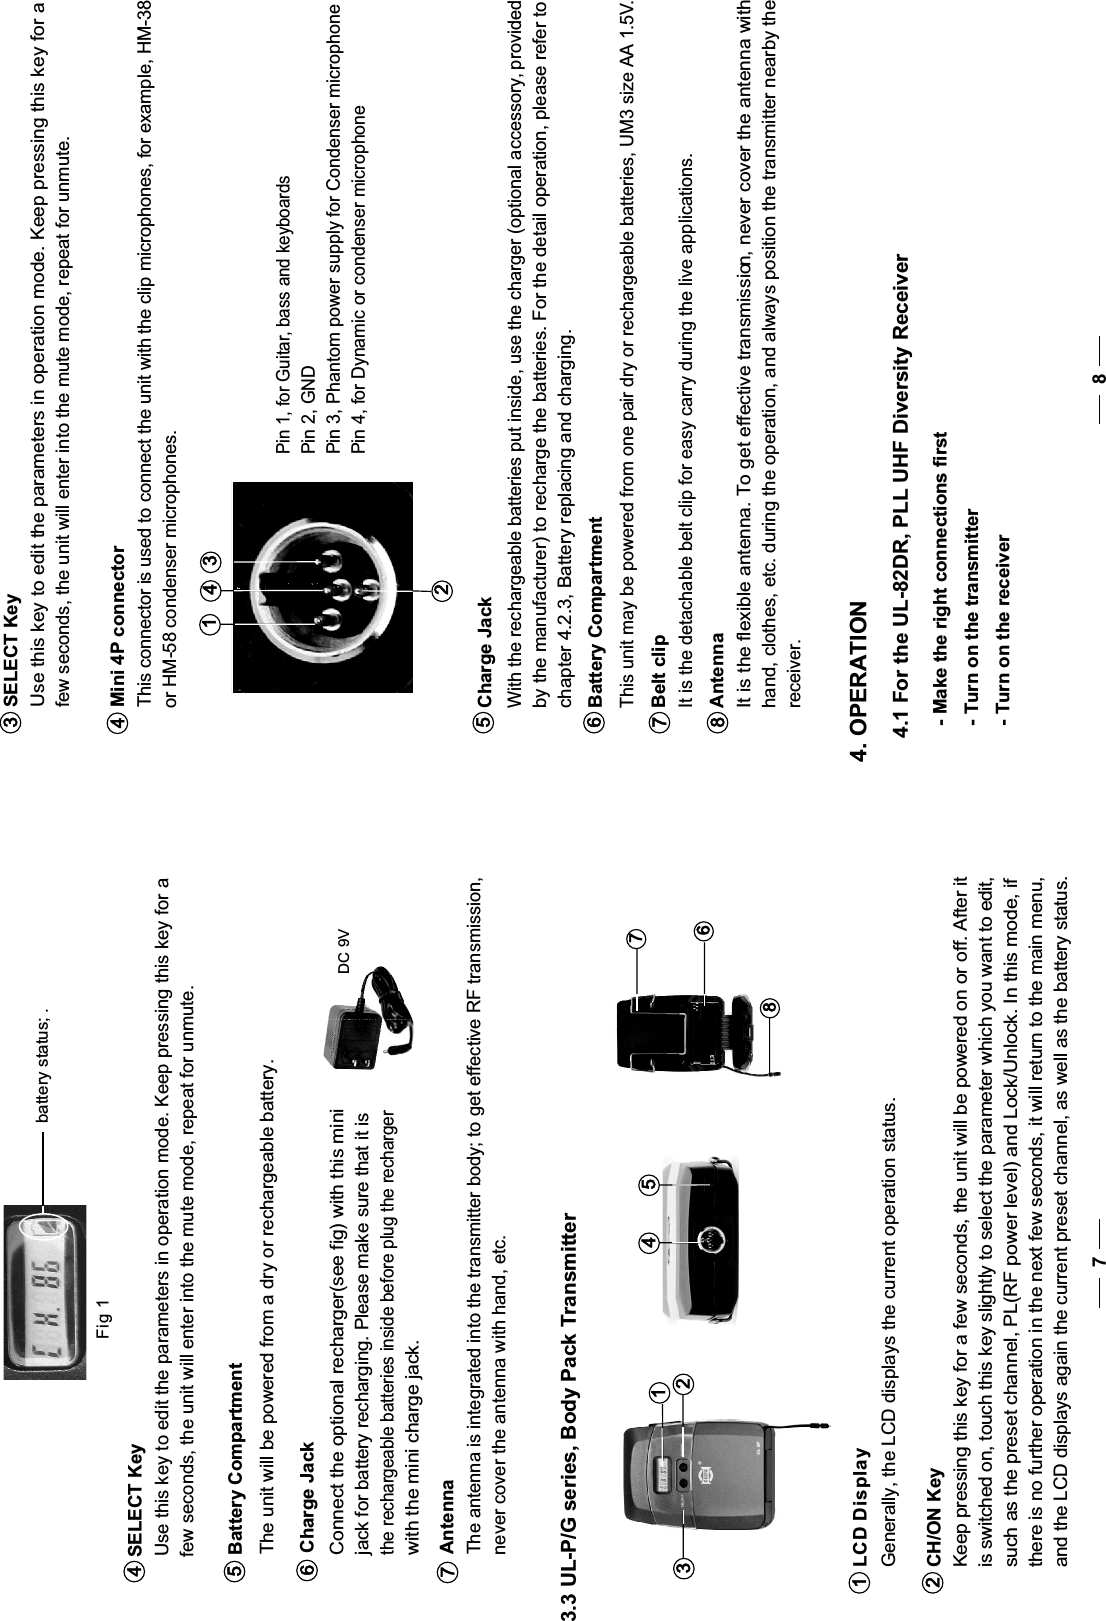
- 4. User Manual IV
- 5. User Manual V
User Manual IV