SENA TECHNOLOGIES SP11 SENA BLUETOOTH PACK TO GOPRO User Manual GP10 Manual eng
Sena Technologies,Inc. SENA BLUETOOTH PACK TO GOPRO GP10 Manual eng
User Manual
User Guide
Sena Bluetooth® Pack for GoPro ®
2
CONTENTS
_Toc366852332
INTRODUCTION ............................................................... 3
PACKAGE CONTENTS .................................................... 4
GETTING STARTED ......................................................... 5
Attaching the GP10 to GoPro HD HERO .................. 5
Removing the GP10 from GoPro HD HERO ............ 6
Powering On/Off ....................................................... 7
Factory Reset ........................................................... 7
OPERATION ..................................................................... 8
Pairing with SENA headsets ..................................... 8
Recording during Intercom Conversation ................. 9
Recording in Mixing Mode ...................................... 10
Checking Battery Status ......................................... 11
3
INTRODUCTION
Thank you for choosing the Sena Bluetooth® Pack for
GoPro ®, you can pair Sena headsets and record intercom
conversation or external sources in mixing mode. If you
are using other Bluetooth headsets it can be also paired
and possible to record your voice.
Please read this user guide carefully before using this
Bluetooth pack. Also visit www.SenaBluetooth.com for the
latest version of the user guide and for additional
information related to Sena Bluetooth products.
Sena Bluetooth® Pack for GoPro ® includes the following features:
GoPro Hero3TM compatible
Up to 3 Sena headset paring available
Other motorcycle Bluetooth headset paring available
Other mono & stereo Bluetooth headset pairing available
4
PACKAGE CONTENTS
(TBD)
* In this manual, the power button is referred as the
Power Switch.
* In this manual, the main button is referred as the
Pairing Button.
* In this manual, the mixing mode button is referred as
the Mic mix Switch.
5
GETTING STARTED
Attaching the Sena Bluetooth pack to GoPro
1. Slide hooked end of the Bluetooth pack into the
groove on the right side of the camera body.
2. Push the Bluetooth pack into the HERO Bus port
on the back of the camera.
3. Connect USB connector between GoPro and Sena
Bluetooth pack.
6
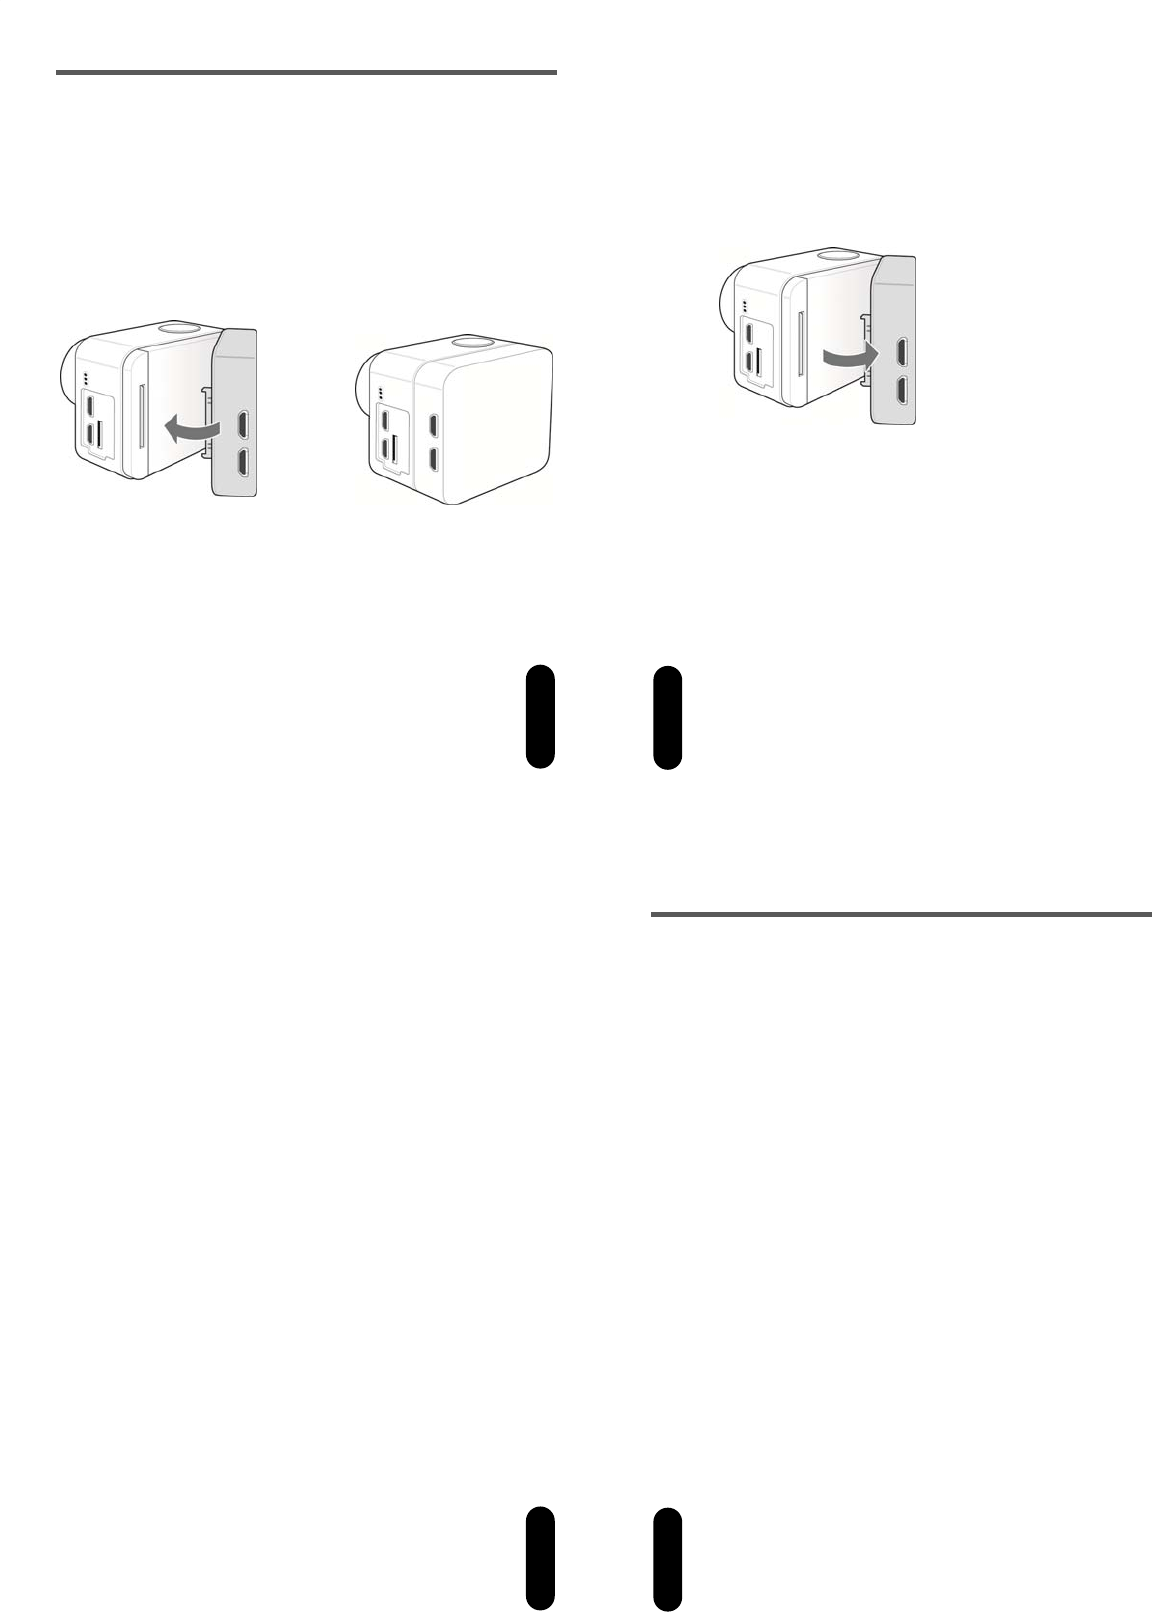
Removing the Bluetooth pack from GoPro HERO
1. Disconnect USB connector
2. Pull back on left side of theBluetooth pack marked
with thearrow to disconnect from the HERO bus
port.
3. Slide hooked end of theBluetooth pack out of
cameragroove.
7
Powering On/Off
1. Push the Power Switch down to power on. Then the
LED flashes blue.
2. Push the Power Switchupward to power off.The LED
flashes blue and you will hear the voice prompt
“Goodbye”.
Factory Reset
When the Bluetooth pack is not working properly
or is in faulty status for any reason, you can reset
the Bluetooth pack.
1. Press and hold the Pairing Button for 10 seconds
to enter the factory reset mode. Then the LED turns
on red.
2. Tap the Pairing Button to reset the Bluetooth pack.
8
OPERATION
Pairing with SENA headsets
1. Pressand hold the Pairing Buttonfor 5 seconds.
2. When hearing high-tone beeps, release thePairing
Button. Then the LED flashes red and blue
alternately.
3. Search for and select the Bluetooth pack on the
SENA headset to pair with it. For details on pairing,
refer to the User Guide of the SENA headset.
4. When the LEDflashes blue twice, the paring is
completed and the Bluetooth pack is ready to use.
9
Recording during Intercom Conversation
1. Turn on and pair the SENA headset with Bluetooth
pack. For details on intercom paring, refer to the
User Guide of the SENA headset.
2. Double tap the Pairing Button to start recording
intercom conversation. The LED flashespurple as
below indicating the recording time.
LED Recording Time
1 flashes 0 to 10 minutes
2 flashes 10 to 20 minutes
6 flashes 50 to 60 minutes
The voice prompt indicating the total time of
recording is outputted every 5 minutes.
3. Single tap the Pairing Button to end recording
intercom conversation.
4. You can enable / disable Side tone by double
tapping Pairing Button. You will also hear a voice
prompt “Side tone enabled / disabled”
10
Recording in Mixing Mode
You can record external source from the Bluetooth
pack internal microphone in mixing mode.
1. Push the Mixing Mode Switch downward to power
on. To power off, push the Mixing Mode Switch
upward to power off.
2. Press and hold the Pairing Button for 1 second.
3. When hearing high-tone beeps, release the
PairingButton. Then the LED flashes purple once
and turned off.
4. Tapthe PairingButton to navigate between mixing
modes. The LED flashes purple for each menu
items below.
Mode LED Status
Mode 1 1 flashes 75% of external source mixed
Mode 2 2 flashes 50% of external source mixed
Mode 3 3 flashes 25% of external source mixed
5. To exit the mixing mode, press and hold the
Pairing Button for 1 second.
11
Checking Battery Status
Press the Pairing Button 3 times. You can check the
battery level in the LED indicator as below.
LED Status
4 flashes High, 70 to 100 % remaining battery
3 flashes Medium, 30 to 70 % remaining battery
2 flashes Low, 0 to 30 % remaining battery
Low Battery Warning
When the remaining battery is below 20%, the blue
blinking LED in stand-by mode turns to red. You will
also hear3middle-tone beeps and a voice prompt
“Bluetooth pack Low battery”.
12
FCC Compliance Statement
This device complies with part 15 of the FCC Rules. Operation is subject to the following two
conditions:
- This device may not cause harmful interference, and
- This device must accept any interference received, including interference that may cause
undesired operation.
This equipment has been tested and found to comply with the limits for a Class B digital
device, pursuant to part 15 of the FCC Rules. These limits are designed to provide
reasonable protection against harmful interference in a residential installation.
This equipment generates, uses and can radiate radio frequency energy and, if not installed
and used in accordance with the instructions, may cause harmful interference to radio
communications. However, there is no guarantee that interference will not occur in a particular
installation. If this equipment does cause harmful interference to radio or television reception,
which can be determined by turning the equipment off and on, the user is encouraged to try to
correct the interference by one or more of the following measures:
- Reorient or relocate the receiving antenna.
- Increase the separation between the equipment and receiver.
- Connect the equipment into an outlet on a circuit different from that to which the receiver
is connected.
- Consult the dealer or an experienced radio/TV technician for help.
FCC RF Exposure Statement
The antenna(s) used for this device must be installed to provide a separation distance of at
least 20 cm from all persons and must not be co-located or operating in conjunction with any
other antenna or transmitter.
FCC Caution
Any changes or modifications to the equipment not expressly approved by the party
responsible for compliance could void user’s authority to operate the equipment.

13
CE Declaration of Conformity
This product is CE marked according to the provisions of the R&TTE Directive (99/5/EC).
Hereby, SENA declares that this product is in compliance with the essential requirements and
other relevant provisions of Directive 1999/5/EC. For further information please consult
http://www.senabluetooth.com. Please note that this product uses radio frequency bands not
harmonized within EU. Within the EU this product is intended to be used in Austria, Belgium,
Denmark, Finland, France, Germany, Greece, Ireland, Italy, Luxembourg, The Netherlands,
Portugal, Spain, Sweden, United Kingdom and within EFTA in Iceland, Norway and
Switzerland.
Industry Canada Statement
This device complies with Industry Canada license-exempt RSS standard(s).
Operation is subject to the following two conditions:
(1) This device may not cause interference, and
(2) This device must accept any interference, including interference that may cause undesired
operation of the device.
Le présent appareil est conforme aux CNR d'Industrie Canada applicables aux
appareils radio exempts de licence. L'exploitation est autorisée aux deux conditions
suivantes : (1) l'appareil ne doit pas produire de brouillage, et (2) l'utilisateur de
l'appareil doit accepter tout brouillage radioélectrique subi, même si le brouillage est
susceptible d'en compromettre le fonctionnement.