SENA TECHNOLOGIES SP17 BLUETOOTH STEREO MOTOROCYCLE HEADSET User Manual SMH3 Manual engx
Sena Technologies,Inc. BLUETOOTH STEREO MOTOROCYCLE HEADSET SMH3 Manual engx
UserManual.wiki
>
SENA TECHNOLOGIES
>
SP17 User Manual
User Manual
Navigation menu
Upload a User Manual
Namespaces
Wiki Guide
HTML
PDF
Info
Views
User Manual
Discussion / Help
Navigation


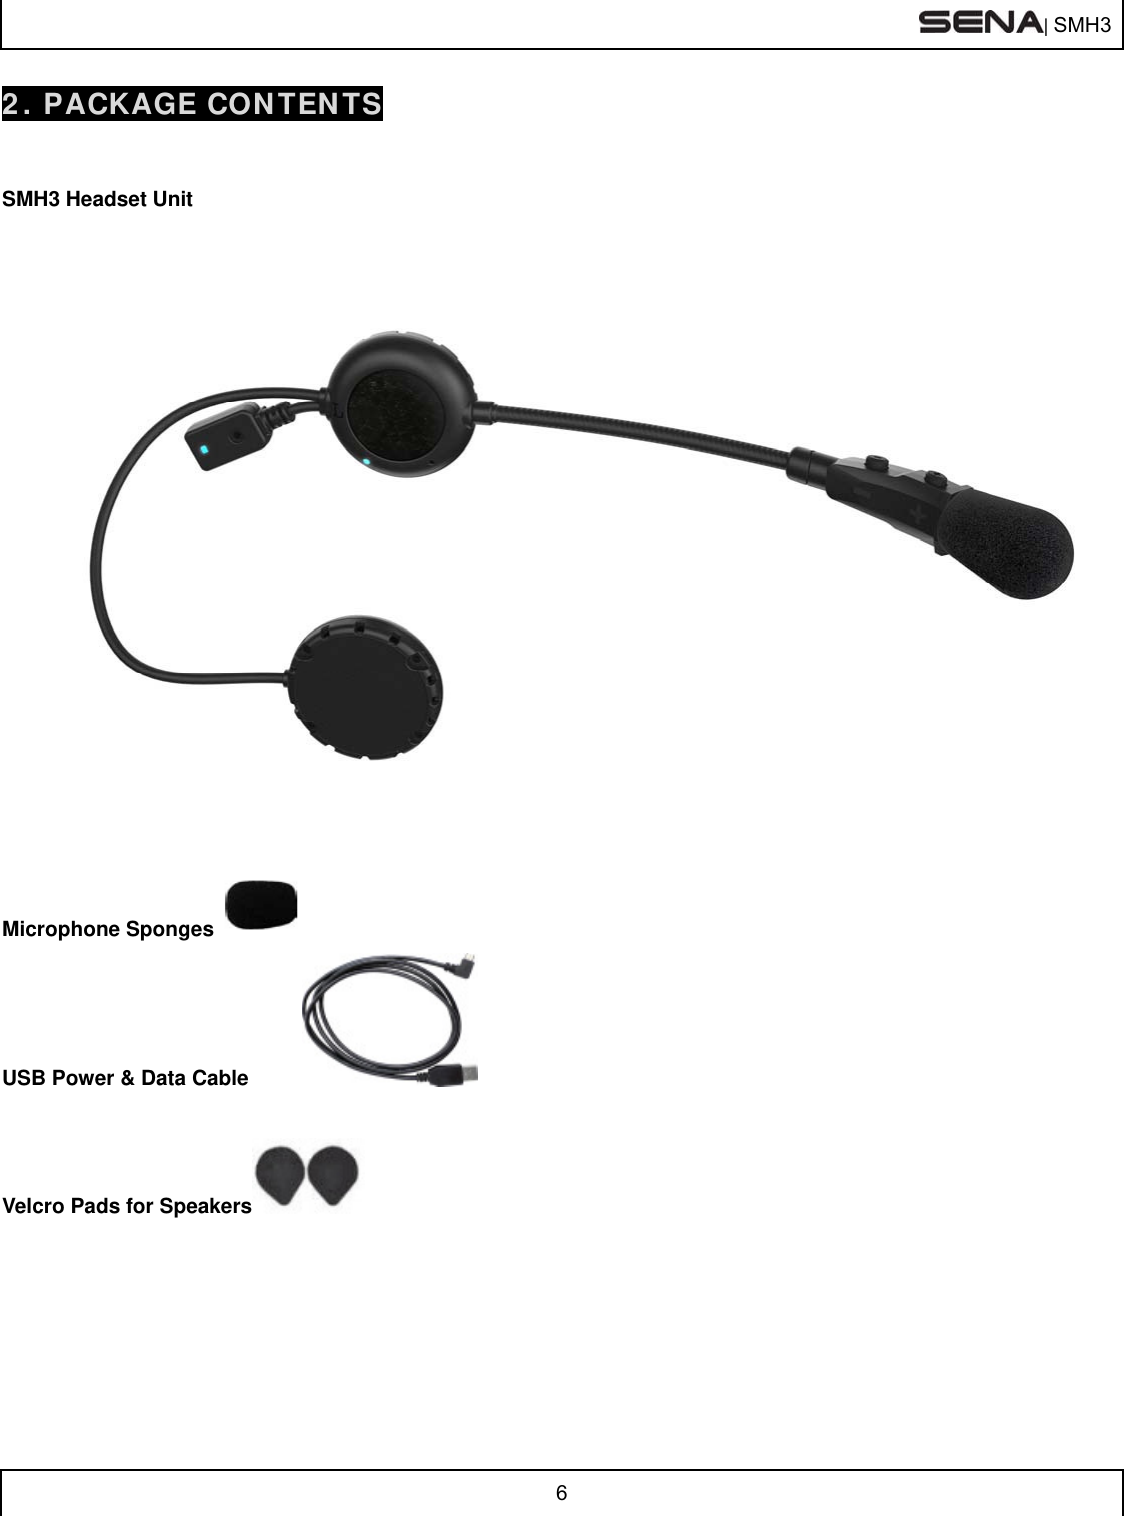
![| SMH3 7 3. INSTALLING THE SMH3 ON YOUR HELMET 1. [picture 3-1] 2. [picture 3-2] 3. [picture 3-3] Remove the left and right side cheekpads from the helmet. Place the speaker-microphone unit along with the velcro pad to the left inside surface of the external shell, centered to your ear. The boom microphone should be positioned to face properly towards your mouth. Please make sure that the microphone is located close to your mouth when you wear the helmet. 4. [picture 3-4] 5. [picture 3-5] 6. [picture 3-6] Place the speaker unit along with the velcro pad to the right inside surface of the external shell, centered to your year in the ear pockets of the helmet Lift up the helmet top padding from the back of the helmet and rout the speaker wires beneath the padding. Replace the cheeckpads in the helmet making sure the speaker wiring is hidden beneath the padding](https://usermanual.wiki/SENA-TECHNOLOGIES/SP17/User-Guide-2378420-Page-7.png)
![| SMH3 13 8. SMH3 CONFIGURATION SETTING You can set the configuration of the SMH3 by the voice menu instruction as below. 1. To enter into voice configuration menu, press and hold the (+) Button for 10 seconds until the LED shows solid blue and you hear high tone double beeps. You will hear a voice prompt saying “Configuration menu”. 2. Tap the (+) Button to navigate between menus. You will hear voice prompts for each menu items as below. 3. You can enable or disable the feature or execute the command by tapping the (-) Button. 4. If any button is not pressed within 10 seconds, the SMH3 will exit the configuration and goes back to standby. 5. If you want to exit the configuration immediately, press the (+) Button until you hear a voice prompt, “Exit configuration”, and tap the (-) Button. The voice prompt for each menu item is as below: (1) VOX phone (2) Voice prompt (3) Delete all pairings (4) Factory reset (5) Exit configuration [picture 10-1] 8.1 Enabling/Disabling Voice Activated Phone Answering Voice Prompt “VOX phone” Factory Default Enable Enable / Disable Tap the (-) Button If this feature is enabled, you can answer incoming calls by simply saying a word loudly enough, unless you are connected to intercom. For example, when you hear a series of beeps for an incoming call, you can answer the phone by saying “Hello” or any other word loudly. However, the phone VOX feature does not work if you are connected to intercom. This is enabled from the factory but you can disable this. If this mode is disabled, you have to tap the (+) Button to answer an incoming call. 8.2 Enabling/Disabling Voice Prompts](https://usermanual.wiki/SENA-TECHNOLOGIES/SP17/User-Guide-2378420-Page-13.png)
![| SMH3 16 9. USING THE SMH3 9.1 Volume Adjustment You can easily adjust the volume by tapping the (+) Button or the (-) Button. You will hear a beep when the volume reaches maximum or minimum level. The volume is set and maintained independently at different levels for each audio source even when you turn off and on the headset. For example, once you set the volume for mobile phone handsfree, it will not change even if you adjust the volume when you hear Bluetooth MP3 music. So you can always maintain the preferred optimum volume level for each audio source. 9.2 Mobile Phone Call Making and Answering 1. When you have an incoming call, simply tap the (+) Button to answer the call. 2. You can also answer the incoming call by loudly speaking any word of your choice if Voice Activated Phone Answering, VOX phone is enabled. (Refer to the next section for details.) 3. To end a call, press the (+) Button for 2 seconds until you hear a mid-tone single beep, or wait for the called person to end the call. 4. To reject a call, press the (+) Button for 2 seconds until you hear a beep while the phone is ringing. 5. There are several ways to make a phone call: - Enter numbers on your mobile phone keypad and make a call. Then the call is automatically transferred to the headset. - Press the (+) Button for 3 seconds in stand-by mode until you hear a high tone single beep to activate the voice dialing of your mobile phone. For this, the voice dialing feature must be available on the mobile phone. Refer to your mobile phone manual for further instruction. - To redial the last number, press the (-) Button for 3 seconds in stand-by mode until you hear a high tone single beep. You will hear a voice prompt saying “Last number redial”. Note: 1. If you are using multipoint mobile phone connection and you have an incoming call from the second phone during the call of the first phone, then you may still receive the call from second phone. In this case, the call from the first phone is on waiting mode. If you end a call, then it will automatically guide you to the first phone call. 2. If you are using multipoint connection of mobile phone and GPS, you may not listen to the GPS voice instruction during the phone call. 9.3 Intercom Conversation 1. You can start an intercom conversation with any of intercom friends by pressing the (-) Button for 1 second. [picture 11-1]](https://usermanual.wiki/SENA-TECHNOLOGIES/SP17/User-Guide-2378420-Page-16.png)
![| SMH3 17 2. To terminate an intercom conversation, press the (-) Button for 1 second again. [picture 11-2] 9.4 Intercom and Mobile Phone Call 1. When you have an incoming mobile phone call during an intercom conversation, you will hear a ring tone. You can choose whether to 1) answer the mobile phone call and stop the intercom conversation, or 2) reject the phone call and stay on the intercom conversation. ● To answer the phone call and stop the intercom conversation, tap the (+) Button. When you hang up the phone call, the intercom will automatically be recovered. ● To reject the phone call and stay on the intercom conversation, press the (+) Button for 2 seconds until you hear a beep. Unlike other motorcycle Bluetooth headsets, this prevents a user from being dropped out of an intercom conversation by an incoming mobile call. 2. When you have an incoming intercom call during a mobile phone call, you will hear 4 high tone beeps, alerting you that there is an incoming intercom call. You will also hear a voice prompt saying “Intercom requested”. In this case, the intercom call does not override the mobile phone call because intercom has lower priority than mobile call. You have to hang up the mobile phone call to make or receive an intercom call. 9.5 Intercom Failure When you try to start an intercom conversation with an intercom friend who is already having a mobile phone call with another person, you will hear a low tone double beep signifying a busy signal. You will also hear a voice prompt saying “Intercom failed, try again later”. In this case, you have to try again later. On the other hand, the intercom friend will hear 4 high tone beeps alerting them that there is an incoming intercom call. 9.6 Intercom Reconnection If your intercom friend goes out of range while having an intercom conversation, you may hear static noise and eventually the intercom will be disconnected. In this case, the SMH3 automatically tries to reconnect the intercom every 8 seconds. You will hear high tone double beeps until the intercom is reestablished. If you don’t want to make a reconnection, tap the (-) Button to stop the attempt. 9.7 Stereo Music You can listen to stereo music by Bluetooth wireless stereo. The Bluetooth audio device must be paired with the SMH3 by following the Bluetooth Stereo Device Pairing instructions described in the previous chapter. The SMH3 supports the Audio/Video Remote Control Profile (AVRCP), so if your Bluetooth audio device also supports the AVRCP, you can use](https://usermanual.wiki/SENA-TECHNOLOGIES/SP17/User-Guide-2378420-Page-17.png)
![| SMH3 18 the SMH3 to remotely control music playback. So, You not only can adjust the volume but also use the functions such as play, pause, next track and previous track. ● To adjust the volume, tap the (+) Button or the (-) Button.. [picture 11-3] ● To play or pause music, press and hold the (+) Button for 1 second until you hear a double beep. [picture 11-4] ● To track forward or track back, press and hold the (+) Button or the (-) Button for 2 seconds until you hear a double beep. [picture 11-5] 9.8 Function Priority The SMH3 operates in the following order of priority: (Highest) Mobile Phone, Intercom, and (Lowest) Bluetooth Stereo Music A lower priority function is always interrupted by a higher priority function. For example, stereo music is interrupted by intercom call, and intercom conversation is interrupted by incoming mobile phone call. 9.9 Fault Reset When the SMH3 is not working properly or is in faulty status for any reason, you may reset by pushing the pin-hole reset button on the left speaker unit. Insert a paper clip into the reset pin-hole and press the reset button for a second with light pressure. The SMH3 will be switched off after which time, you have to turn the system back on and try again. However, this will not restore the headset to factory default settings.](https://usermanual.wiki/SENA-TECHNOLOGIES/SP17/User-Guide-2378420-Page-18.png)