Sena Technologies SP38 Motorcycle Bluetooth Communication System User Manual
Sena Technologies,Inc. Motorcycle Bluetooth Communication System
UserManual.wiki
>
Sena Technologies
>
SP38 User Manual
User Manual
Navigation menu
Upload a User Manual
Namespaces
Wiki Guide
HTML
PDF
Info
Views
User Manual
Discussion / Help
Navigation


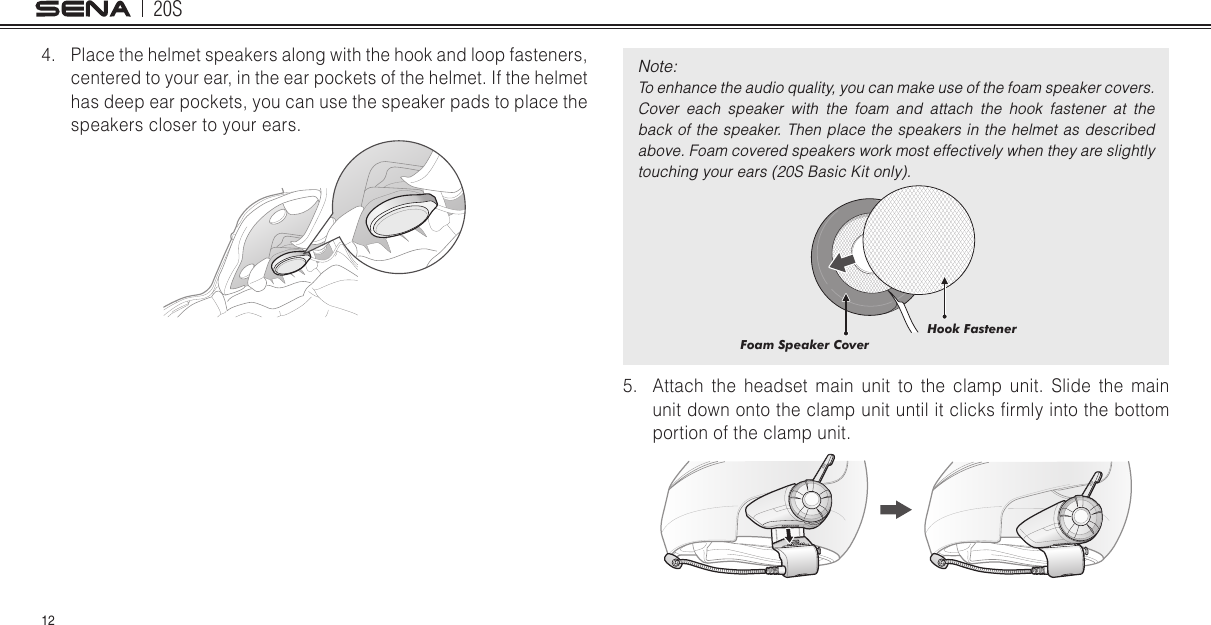


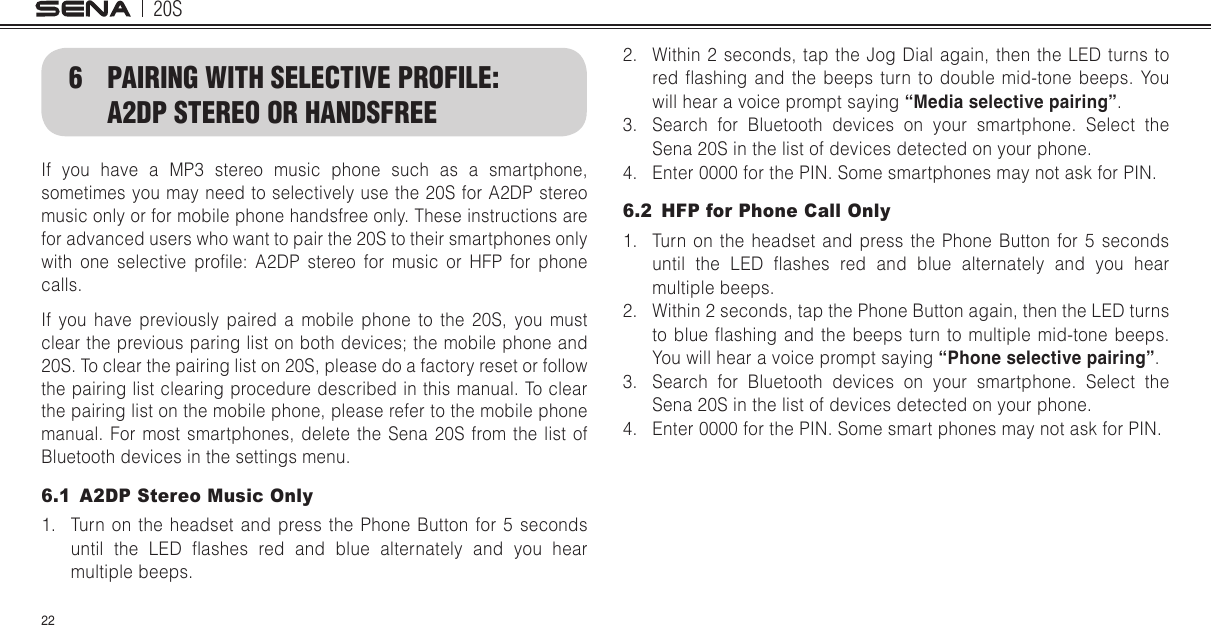
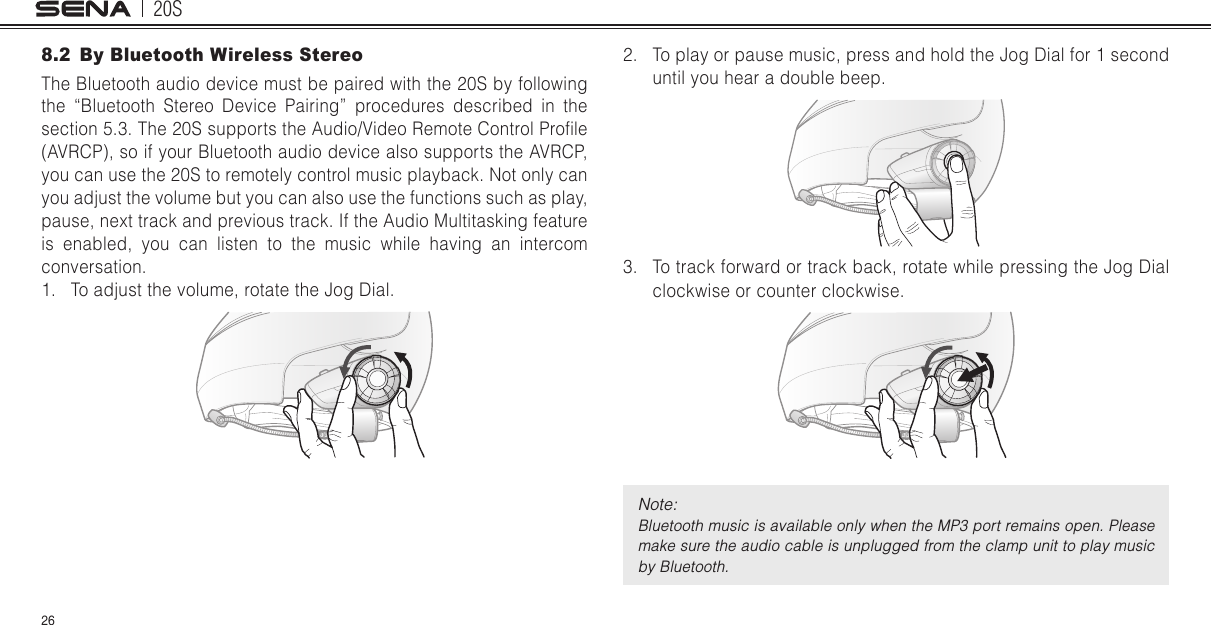

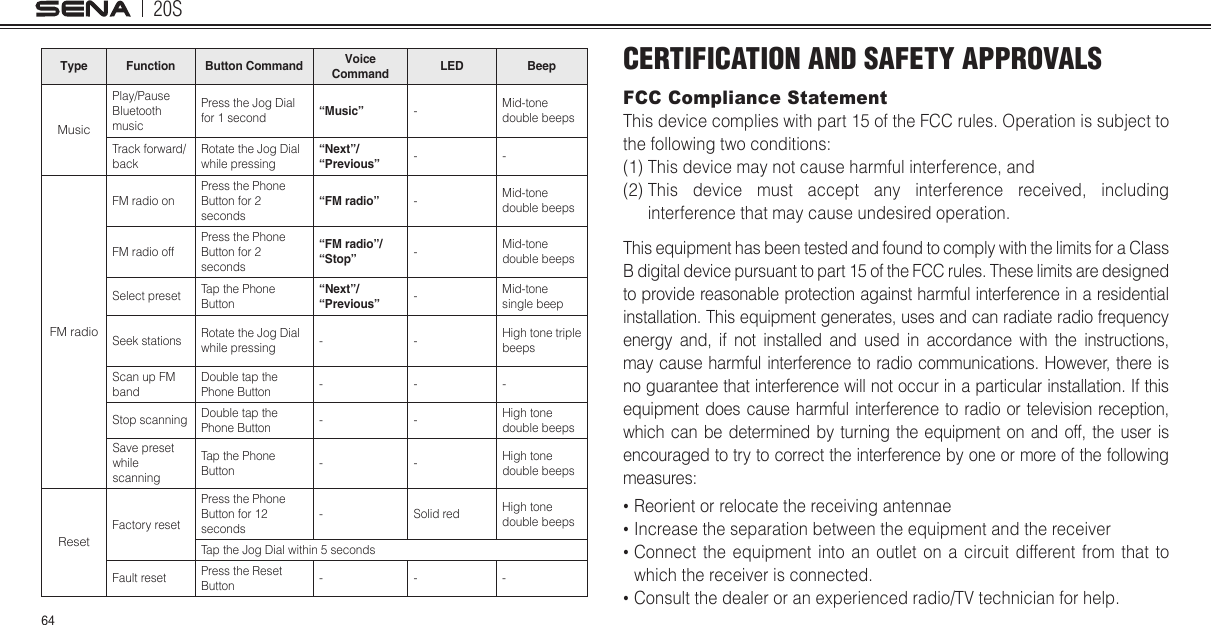
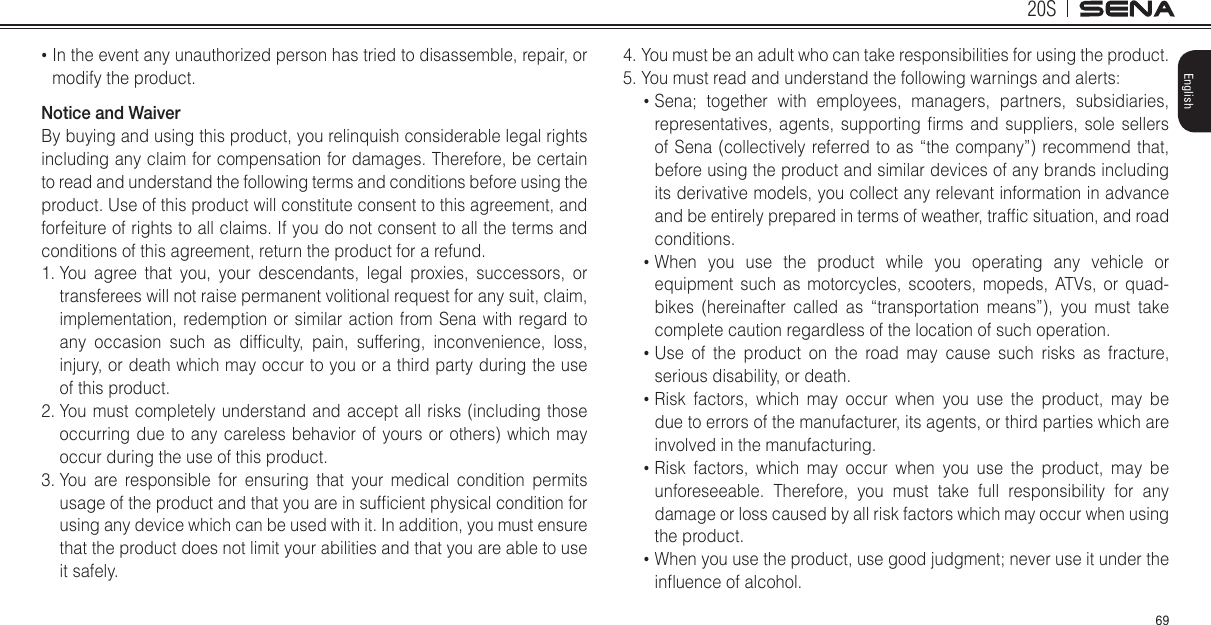
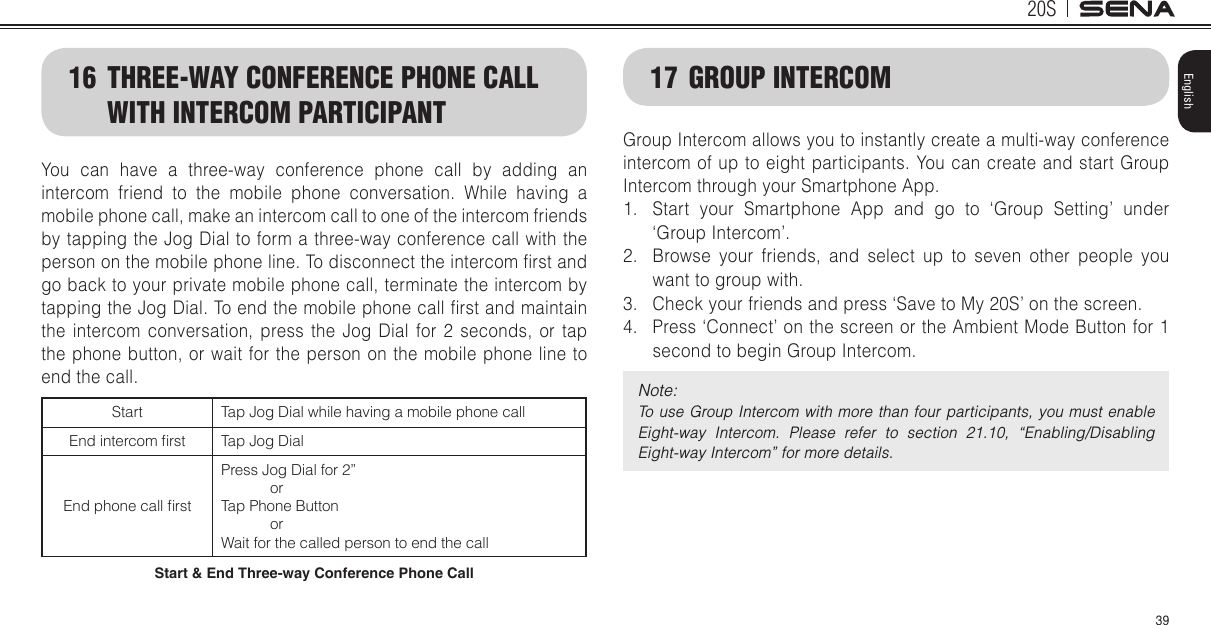
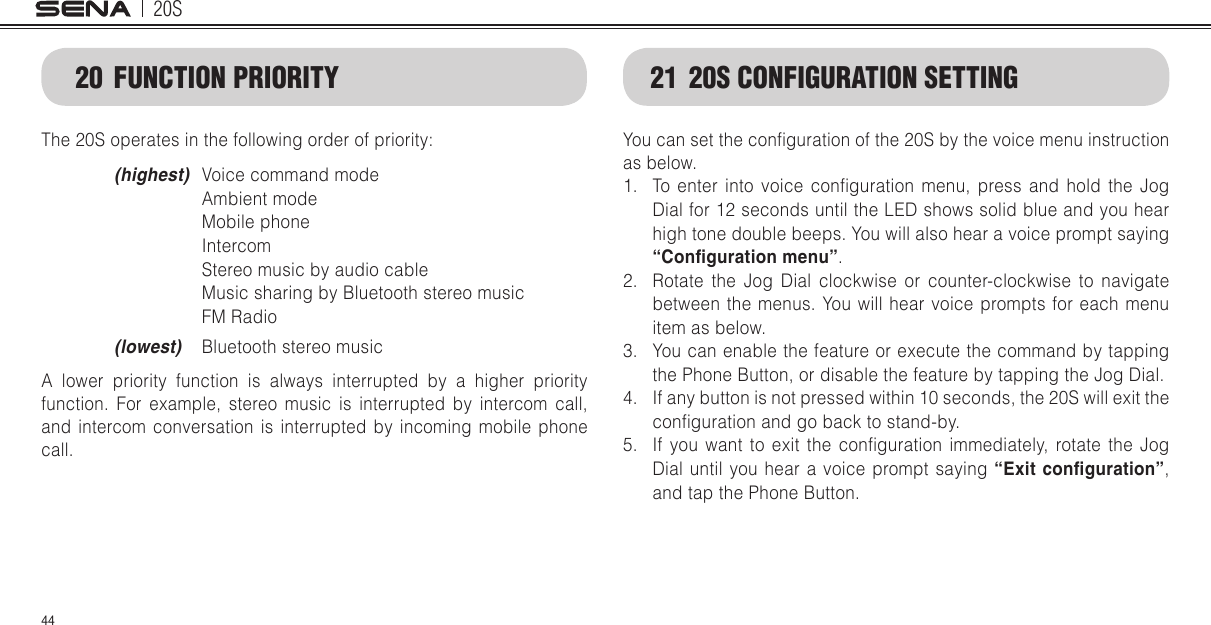
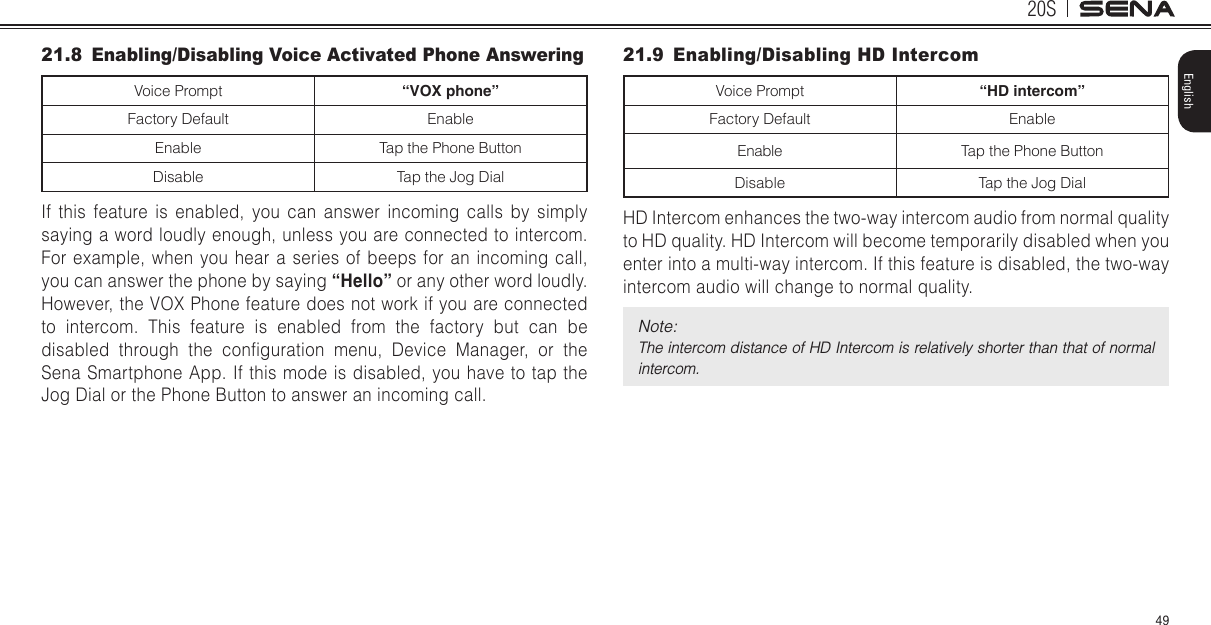
![20S32Mode Status Function Voice CommandStandby / Music / FM Radio / Start/End each Intercom “Intercom [one, two, … , nine]”End all intercoms “End intercom” Call last intercom “Last intercom”Group Intercom “Group intercom”Intercom pairing “Pairing intercom”Cancelling operations “Cancel”StandbyPlay/Pause music “Music” or “Stereo”Turn on/off FM radio “FM radio”Check battery “Check battery”Speed dialing “Speed dial [one, two, three]”Redial the last call “Redial”Voice command help “What can I say?”Check connected devices “Connected devices”Conguration menus “Conguration”Mode Status Function Voice CommandMusic / FM RadioNext track (music) / next preset (FM radio) “Next”Previous track (music) / previous preset (FM radio) “Previous”Stop music / FM Radio “Stop”Note: 1. Voice command performance may vary based on the environmental conditions including riding speed, helmet type and ambient noise. To improve the performance, minimize wind noise on the microphone by using the large microphone sponge and closing the visor.2. To activate the voice command during non-stand-by functions, tap the Ambient Mode Button or double tap the surface of the main unit. 3. If the 20S is in stand-by mode for longer than one minute then the microphone will automatically be disabled and the Voice Command feature cannot be activated by saying “Hello Sena”. The Voice Command feature will need to be activated by tapping the Ambient Mode Button once or double tapping the surface on the 20S.](https://usermanual.wiki/Sena-Technologies/SP38/User-Guide-3326576-Page-31.png)

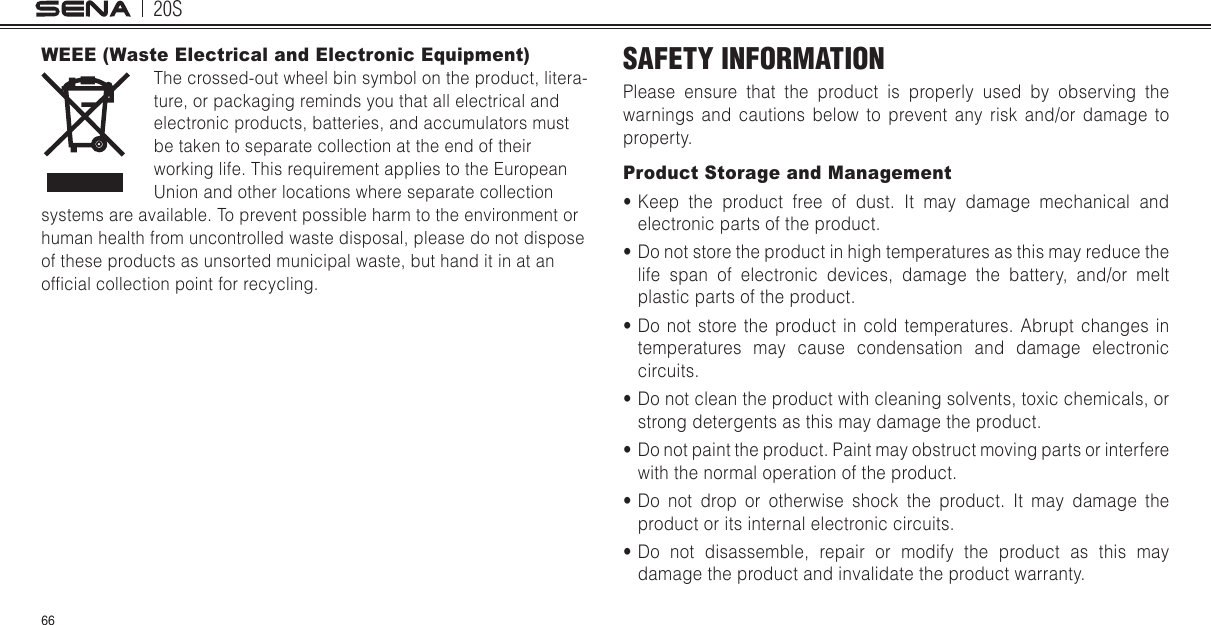
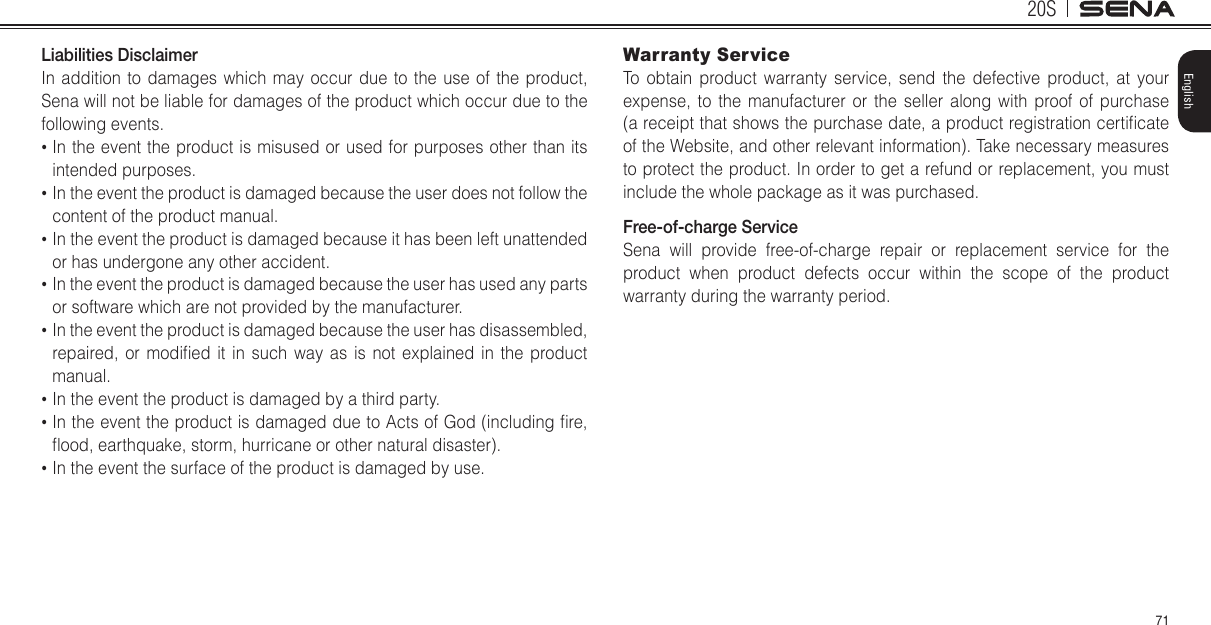
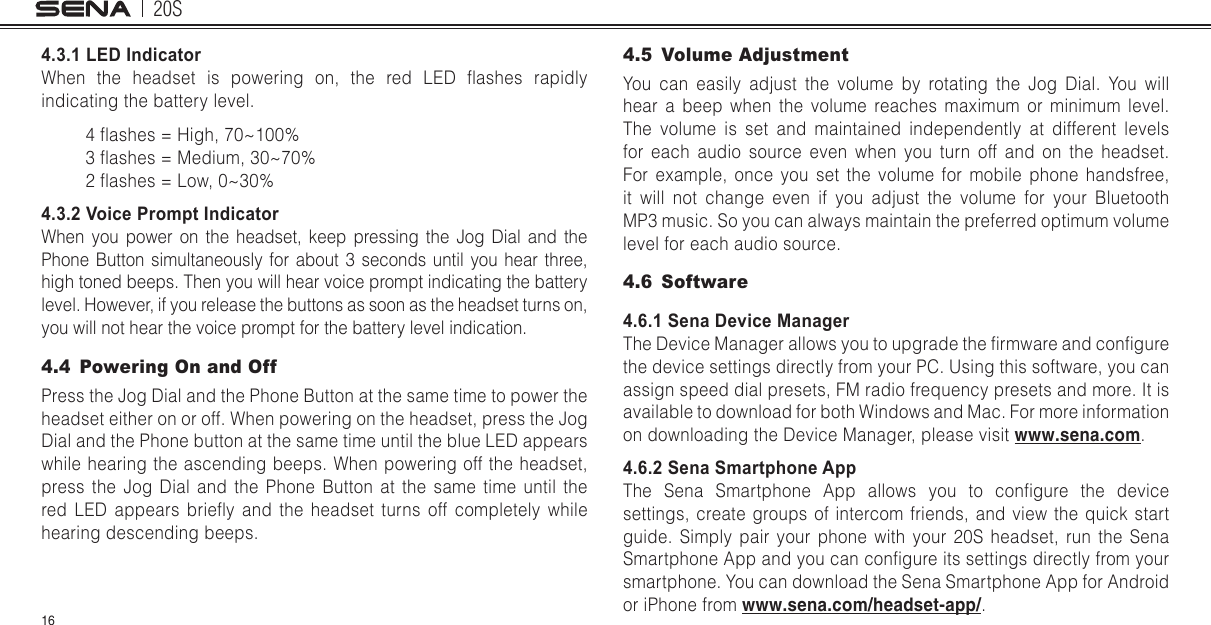
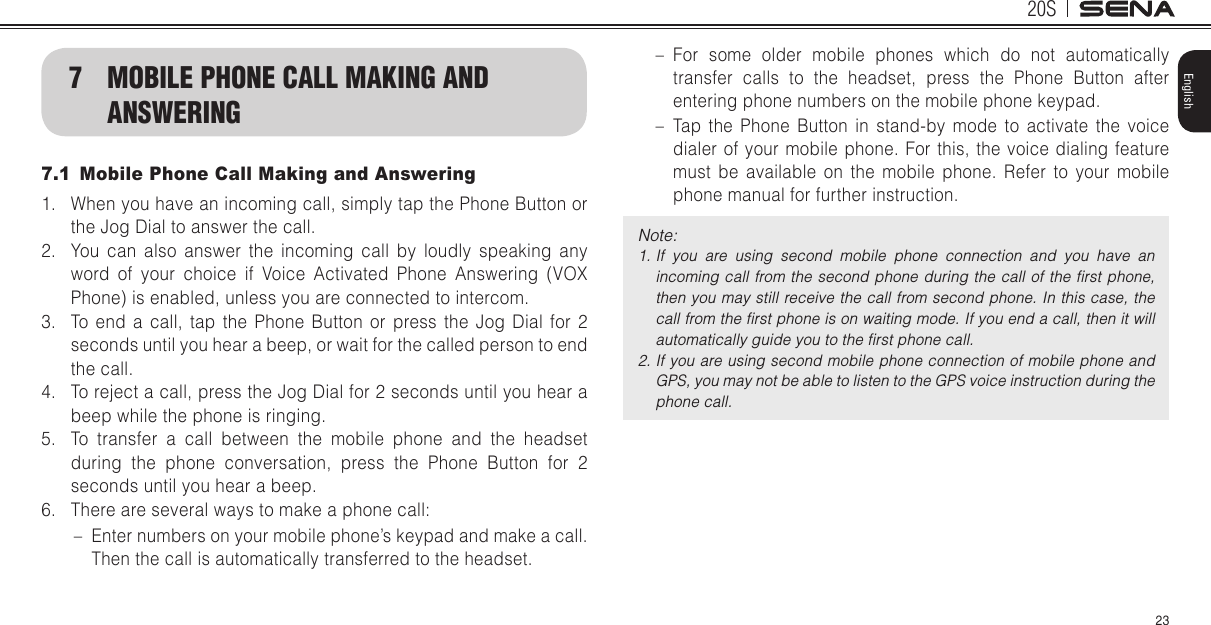
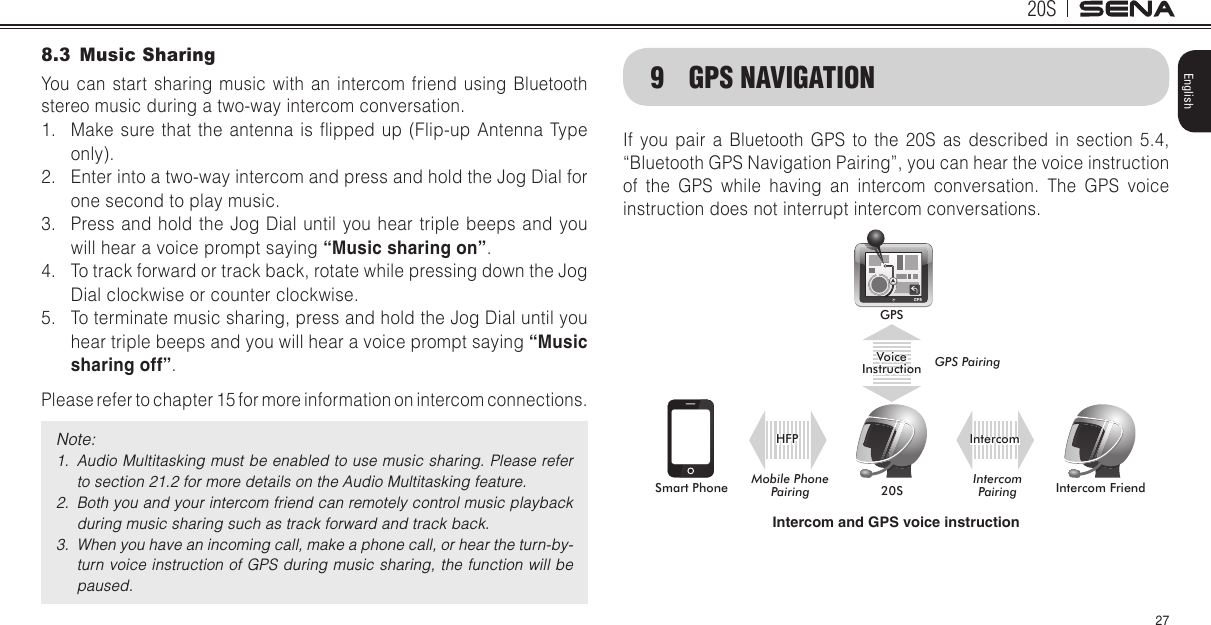
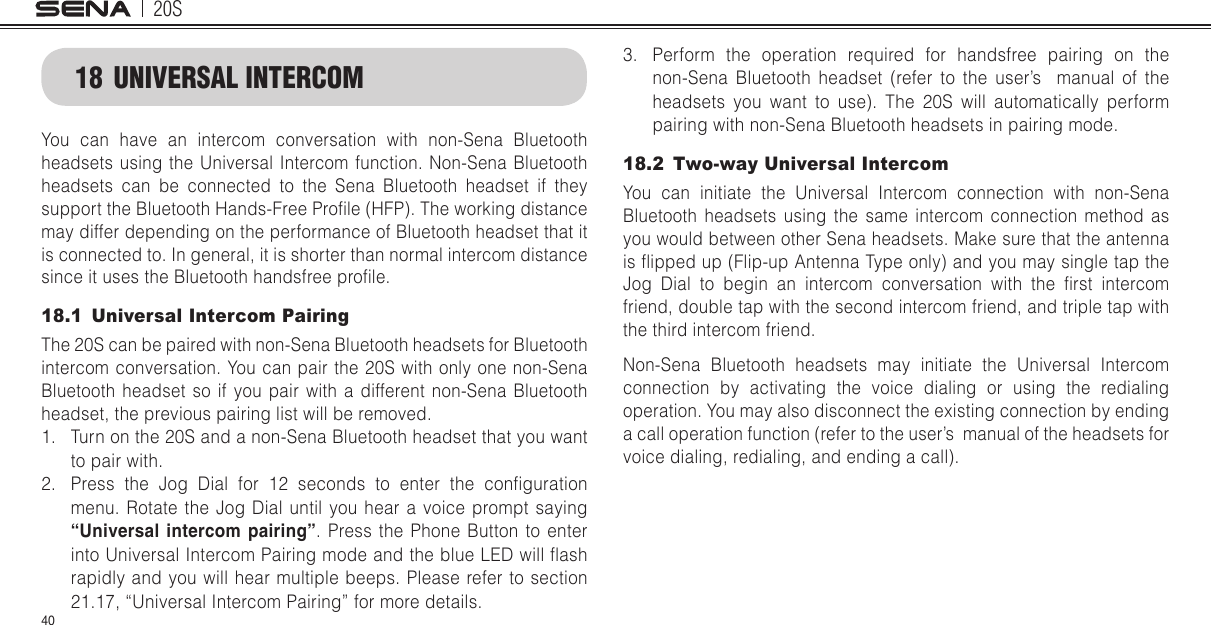
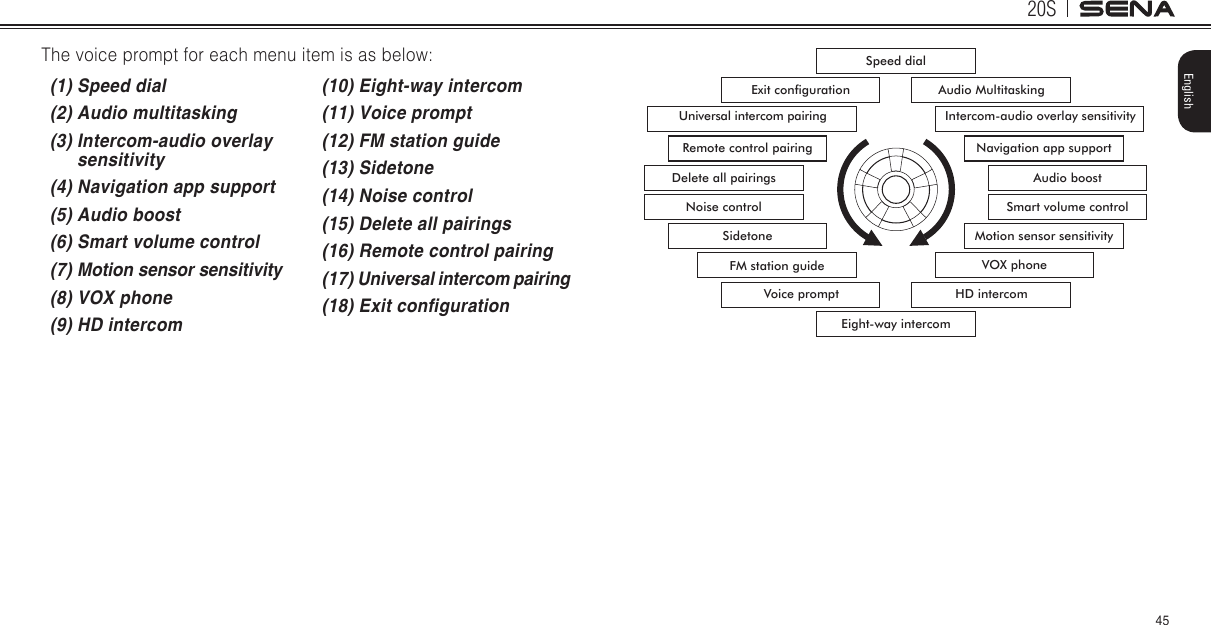
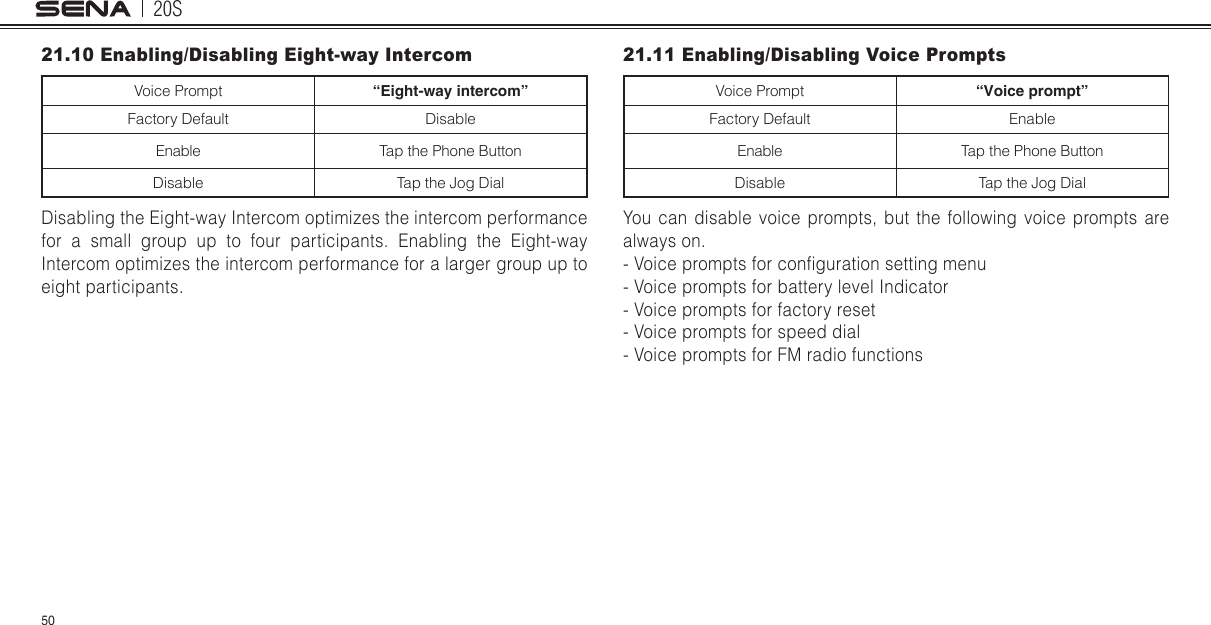
![20S345. The intercom pairing queue is ‘Last-Come, First-Served’. If a headset has multiple paired headsets for intercom conversations, the last paired headset is set as rst intercom friend. The previous intercom friend becomes second intercom friend, and third intercom friend.Note: 1. For example, after the pairing procedures listed above, headset D is the rst intercom friend of headset A. Headset C is the second intercom friend of headset A, and headset B is the third intercom friend of headset A.2. Pairing by shaking works only between 20S devices.3. If you want to cancel pairing, double tap the Jog Dial during pairing mode.14.2 Pairing with Other Sena Headset Models for Intercom ConversationThe 20S can be paired with all other Sena headset models such as the SMH10 and the SMH5 for intercom conversation. Please follow the same procedure as above to pair with these headset models.Note: The SMH5 cannot participate in multi--way intercom with the 20S or the SMH10. The SMH5 has a limited capability of having two-way intercom with each other or with other Sena headsets such as the SMH10 and the SMH5.15 TWO-WAY & MULTI-WAY INTERCOM15.1 Two-way Intercom1. Make sure that the antenna is ipped up before the intercom connection (Flip-up Antenna Type only).2. You can start an intercom conversation with one of any intercom friends by using either the Jog Dial or the voice command. Single tap to start intercom with the rst intercom friend and double tap to start intercom with the second intercom friend. To start intercom with the third intercom friend and above, triple tap to enter into friend selection mode. Rotate the Jog Dial to select a friend and tap once more to initiate the intercom with that friend.3. You can end an intercom conversation by using either the Jog Dial or the voice commands. Press and hold for 2 seconds to end any intercom, or use the voice command, “End Intercom”. Or, you can single tap to end intercom with the rst intercom friend and double tap to end intercom with the second intercom friend. To end intercom with the third intercom friend and above, triple tap to enter into friend selection mode. Rotate the Jog Dial to select a friend and tap once more to end intercom with that friend. Also, use the voice command, “Intercom [one~nine]” to end each intercom.](https://usermanual.wiki/Sena-Technologies/SP38/User-Guide-3326576-Page-33.png)


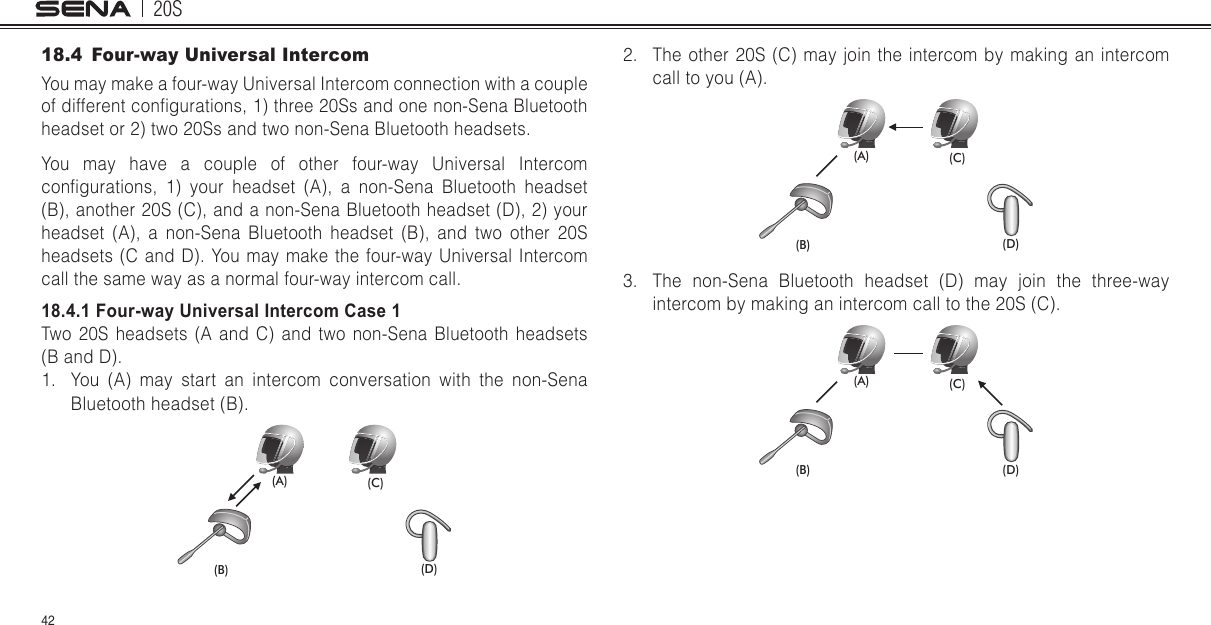
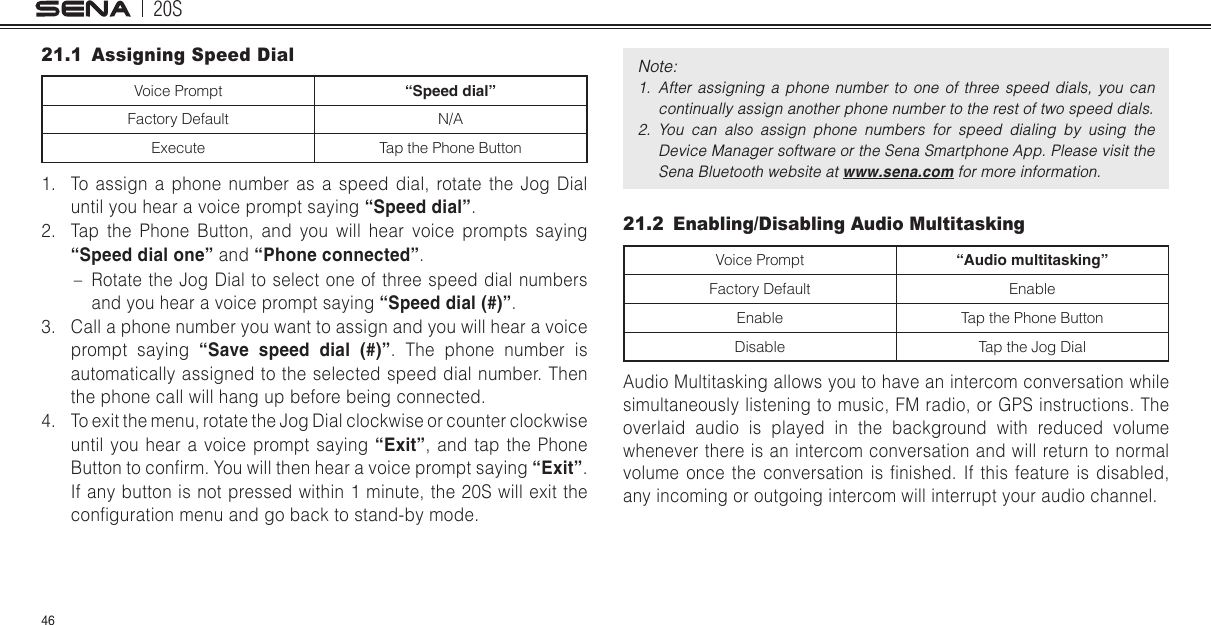


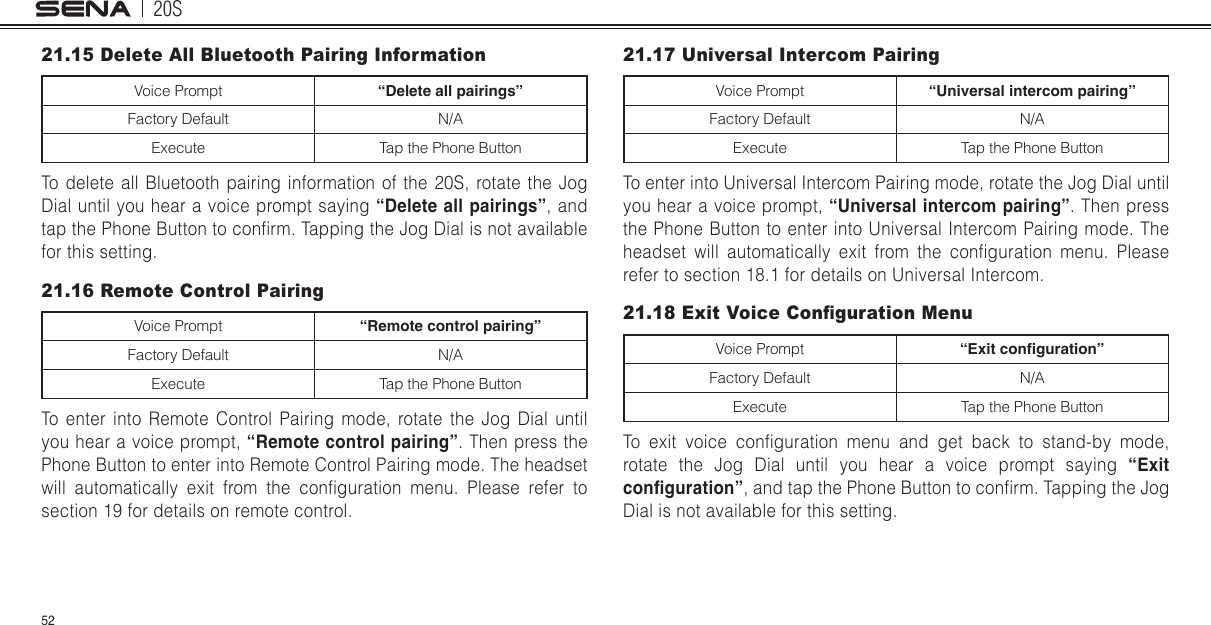


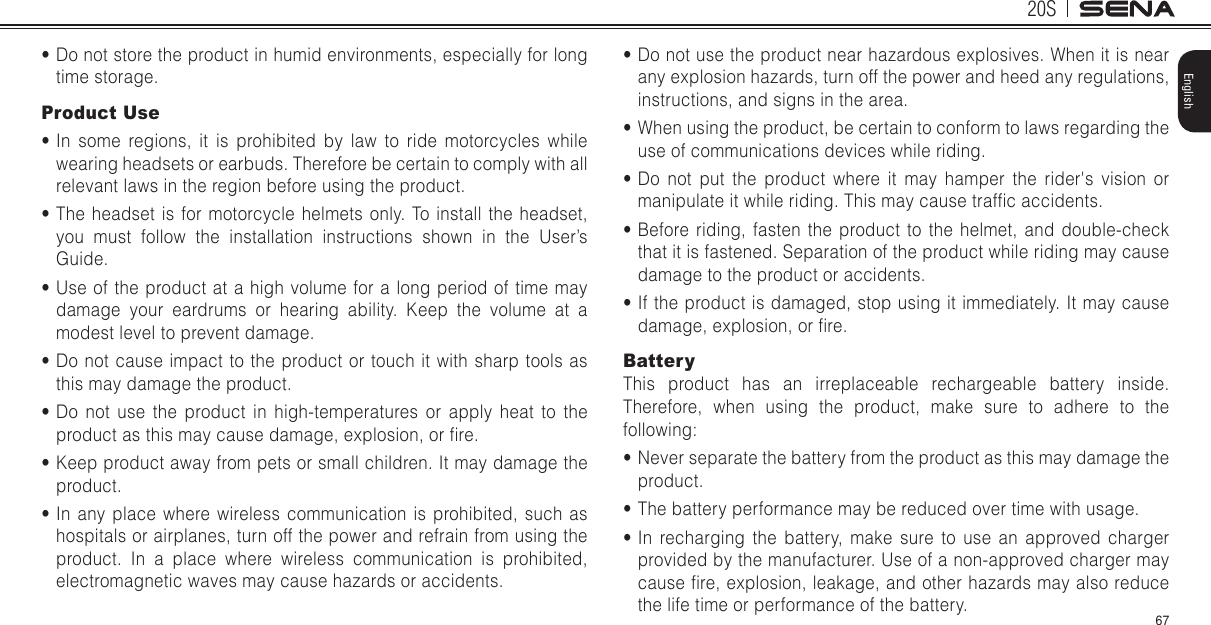
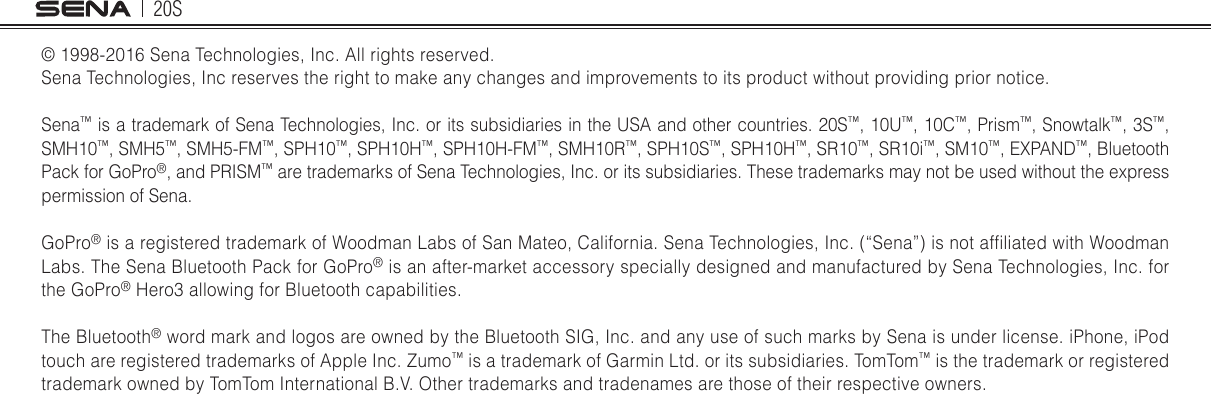
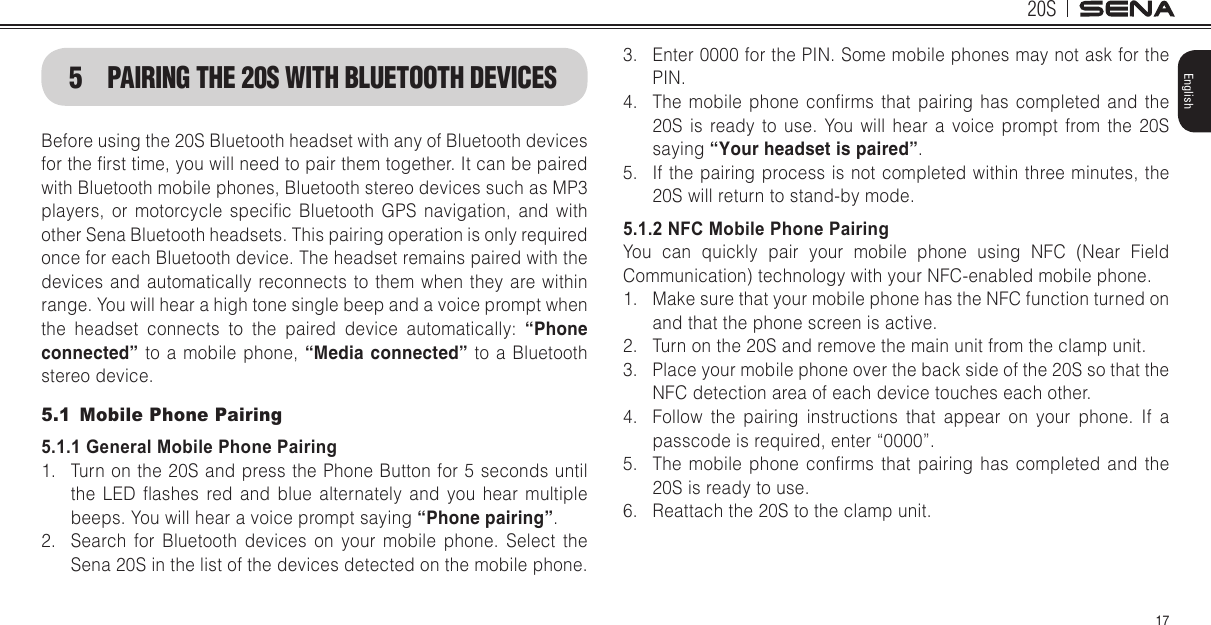
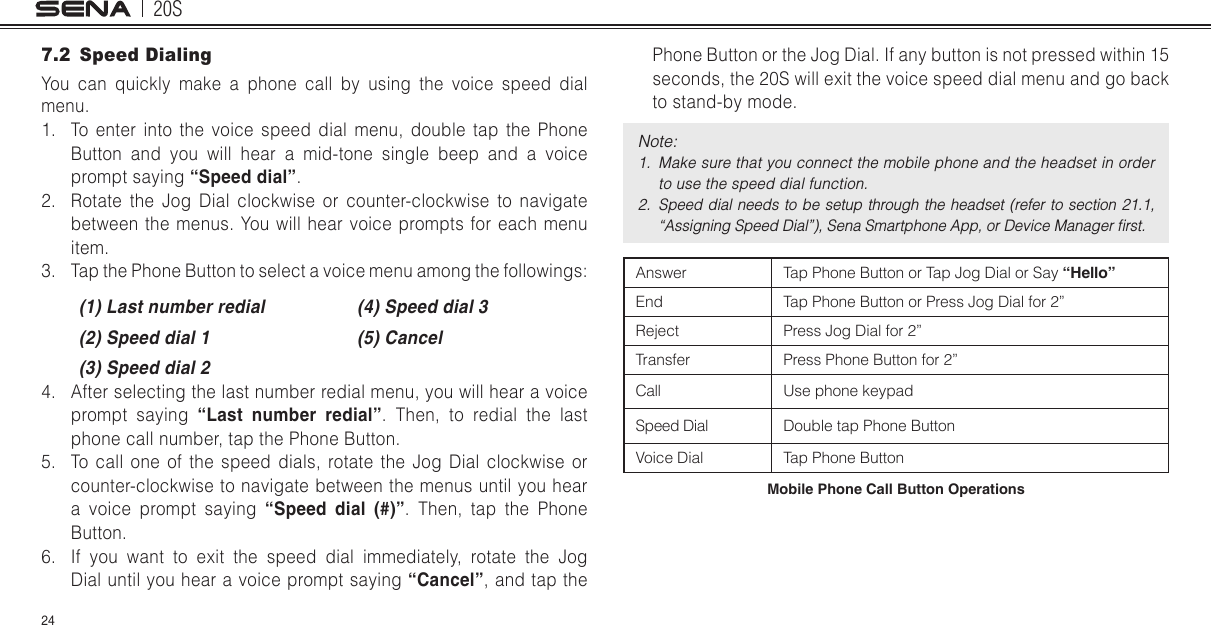
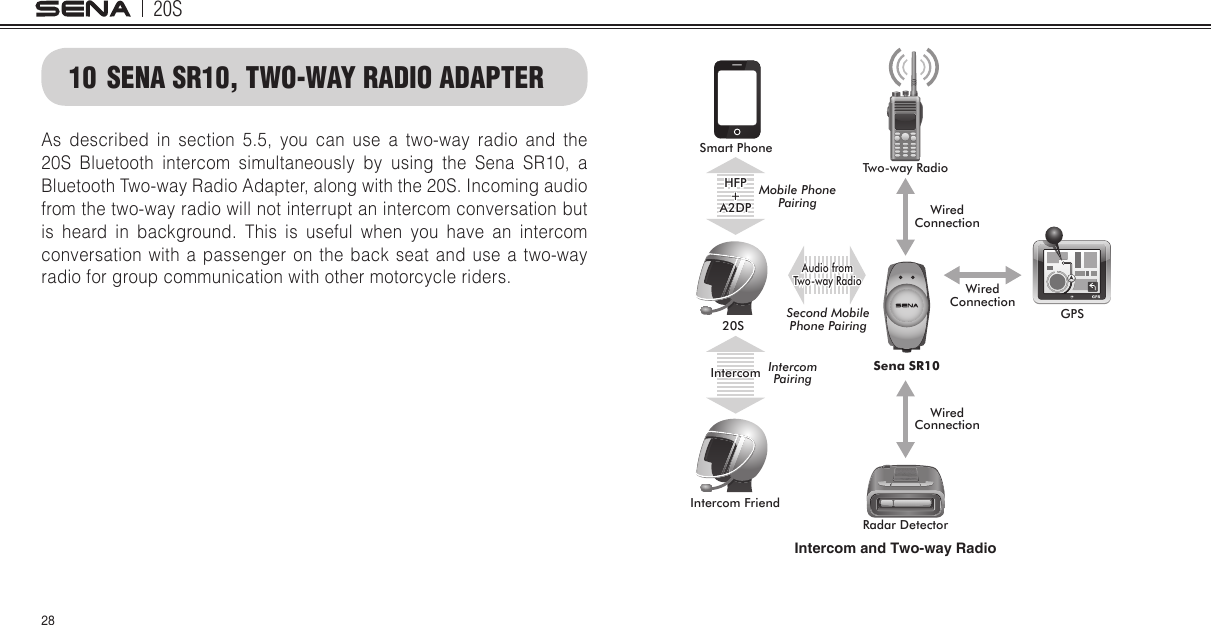
![20S63English26 OPERATION QUICK REFERENCEType Function Button Command Voice Command LED BeepBasic FunctionPower-onPress the Phone Button and the Jog Dial for 1 second-Solid blue Ascending beepsPower-offPress the Phone Button and the Jog Dial-Solid red Descending beepsVolume adjustment Rotate the Jog Dial - - -Voice commandDouble tap the surface of the main unit“Hello Sena!” Green flashing -Ambient ModeDouble tap the Ambient Mode Button-Green flashing -Mobile PhoneMobile phone pairingPress the Phone Button for 5 seconds-Blue & red alternatively flashingHigh tone multiple beepsSecond mobile phone pairingPress the Jog Dial for 6 seconds -Red flashing Multiple beepsTap the Phone Button within 2 secondsGPS pairingPress the Jog Dial for 6 seconds -Red flashing Multiple beepsTap the Phone Button within 2 seconds Tap the Phone Button again within 2 secondsType Function Button Command Voice Command LED BeepMobile PhoneCall transferPress the Phone Button for 2 seconds- - High tone single beepAnswer & endphone callTap the Phone Button - - -Voice dial Tap the Phone Button - - -Speed dial Double Tap the Phone Button“Speed dial [one, two, three]”-Mid-tone single beepReject incoming callPress the Jog Dial for 2 seconds - - -IntercomIntercom pairingPress the Jog Dial for 6 seconds“Pairing intercom” Red flashing Mid-tone single beepTap the Jog Dial of any one of the two headsetsStart/End each intercom Tap the Jog Dial “Intercom [one, two … nine]”- -End all intercomsPress the Jog Dial for 2 seconds“End intercom” Blue flashing Mid-tone double beepsStart Group IntercomPress the Ambient Mode Button for 1 second“Group intercom” Green flashing -](https://usermanual.wiki/Sena-Technologies/SP38/User-Guide-3326576-Page-62.png)