SENWA MEXICO DE C V S750 Smart Phone User Manual
SENWA MEXICO,S.A.DE C.V Smart Phone
User manual

1
S750
User Manual
2
Safety Precautions
Please read the following brief instruction, and carefully
follow these rules to avoid dangerous or violate the law.
Pay attention to traffic safety
Try not to use mobile phones when driving. When the call
is unavoidable, use a personal hands-free kit. Keep the
mobile phone safely on mobile phone holder, do not put it
on the passenger seat or the places where easy to drop
when crashes or emergency brake occur.
Turn off phone in flight
Interference caused by mobile phones may affect flight
safety, it is illegal to use mobile phone in aircraft. Please
turn off your mobile phone by air.
Turn off phone in a blasting area
Abiding by the relevant laws or regulations, turn off your
mobile phone in Blasting areas or in the vicinity of blasting
operations,
Turn off phone near the dangerous goods
Please turn off your mobile phone at the gas station and
close to the places where put dangerous goods like fuel
and chemical agents.
In the hospital
The use of mobile phone must comply with the relevant
provisions or regulations of the hospital. Phone must be
turned off near medical equipment. Operation of any radio
transmitting equipment may cause interference on hearing
aids or implanted medical devices (for example: Cardiac
pacemakers, cochlear implants, etc.).If necessary, consult
3
your medical equipment provider and follow their
instructions.
Interference
The performance of all the mobile phones may be
impacted by radio interference.
Professional Services
Only qualified personnel could install or repair mobile
phones. Self-install or repair mobile phones may bring
great danger, and violation of the warranty provisions.
Accessories and batteries
Only the accessories and batteries approved by
manufacturer can be used.
Rational use
Using a mobile phone in the normal way. Never put your
mobile phone in extreme high temperature environments
(above 60 °C), for example, place it in the window of high
temperature exposed to direct sunlight. Use a damp or
antistatic cloth to wipe your phone. Do not use a dry cloth
or cloth with static electricity to wipe your phone, and do
not bring mobile phone in welding work.
Emergency call
Make sure mobile phone is switched on and in service,
enter the emergency number, such as 112, etc, and press
dial key into calling interface. Then give your location, and
a brief description of what happens, please do not
terminate the call without permission.
Note: As with any mobile phone, its characteristics may

4
not be supported due to network coverage or wireless
signal transmission, some networks do not even support
the 112 emergency call service. Thus, we should not rely
solely on mobile phone for particularly critical
communications (eg medical emergencies). Check and
consult with your local network operator.

CATALOGUE
SAFETY PRECAUTIONS
CATALOGUE ................................................. 0
2.1 YOUR MAIN SCREEN .............................. 10
NOTE: ......................................................... 10
2.2 BACKUP AND RESTORE .......................... 11
2.3BROWSER ............................................... 11
2.4 CALCULATOR ........................................ 12
2.5 CALENDAR ............................................ 12
TO ADD AN EVENT TO YOUR CALENDAR ...... 12
2.6 CAMERA ................................................ 12
2.21 MESSENGER ........................................ 21
2.22 NEWS &WEATHER ............................... 21
2.23 CONTACT ............................................. 22
2.26 PLAY STORE ........................................ 25
2.27SEARCH ................................................ 25
2.33 WHATSAPP .......................................... 30


2
1. Install SIM card and memory card
■ 1.1 First Call
1> Insert the SIM card (turn off the mobile phone first). For
detailed installation instructions, please refer
to "1.2 Installing the SIM card."
2> Charging the battery of mobile phone. Please refer to
"1.4 Battery and Charging."
3> Press and hold the power button a little longer to open
mobile phone.
4> If unlock pattern is requested to input on the screen,
then enter the pattern you set to unlock
5> If PIN code is requested to input on the screen, then
enter your PIN code (PIN code is usually supplied with the
SIM card) and press "OK".
6> If unlock code is requested to input on the screen, then
enter the unlock code and press "Enter".
7> Touch the phone icon on the screen to bring up the dial
pad, input the phone number and press the dial button.
Note: You must first insert a valid SIM card and charge
the battery before using mobile phone.
■ 1.2 Install SIM card
There are a lot of data stored in your SIM card like phone
number, PIN (Personal Identification Number), PIN2, PUK
(PIN Unblocking Key), PUK2 (PIN2 Unblocking Key) and
IMSI (International Mobile Subscriber Identity) number
and network information, contact data, and SMS data.
Note:
· At present, operators do not provide PIN2 and PUK2
code in China. Please note it may not use the function
involved above codes in mobile phone·

3
· Turn off your mobile phone and wait a few seconds, then
remove or insert the SIM card.
· Be careful with SIM card, it is easy to damage SIM card
due to friction or bend.
· Please note that mobile phone and its other small
accessories like SIM card should be well preserved, and
should be placed in the places where children cannot be
reached.
WARNING: Please turn off mobile phone before inserting
or removing the SIM card. Otherwise, it may damage the
SIM card memory.
Steps:
1> Keep the phone switched on, press and hold the power
key a little longer to turn off phone, then open battery
cover and remove the battery.
2> Please note in installation that SIM card should be
inserted in accordance with the battery compartment silk
screen icon, push the SIM card into SIM1/SIM2 slot
carefully and slowly .
■ 1.3 Install memory card
Keep the phone switched on, press and hold the power
button a little longer to turn off the phone, take out battery
cover and remove battery, push T-flashcard in the
direction of the arrows.
■ 1.4 Battery and charging
Battery indicator
1> Your mobile phone can monitor and display information
about the battery.
Under normal circumstances, the remaining battery power
can be showed in the battery meter icon placed in the

4
upper right corner of display.
2> When the battery is charging, the battery power is in a
state of change showed in battery meter icon until fully
charged.
Note: The actual standby time and talk time are related to
mobile phone usage, local network environment, SIM card
and actual settings of phone.
Battery Tips
Do not put the battery of your phone in the places where
the temperature is too high or too low, because it will affect
battery life, and will shorten the battery standby time.
Phone battery life has limited time, if you found a
downward trend in the performance of the battery after
use for some time, we recommend to replace it timely with
the original battery specified by this company.
Use Travel Charger
Travel Charger can charge the battery via mobile phone.
Connect the USB output of travel charger with USB data
cable 1> then connect the USB data cable with I / O port of
mobile phone.
2> Plug the travel charger into a suitable main socket.
3> When the battery is charging, the battery power is in a
state of change showed in battery meter icon until fully
charged.
4> When charging is completed, the battery icon stops
change, then you can pull out the charger plug.
Note:
•If the battery voltage is too low to make the mobile phone
switch on, battery icon will change after loner time
charging.
•Mobile phones can be turned on or off during charging.
Warning:

5
1. Make sure that the standard voltage and power of your
location match with the nominal voltage and power of your
travel charger.
2. please use the phone supporting charger cable, it may
cause unpredictable consequences if you use a
non-matching charger cable.
If you do not meet these requirements for charging, it may
lead to failure and damage on power supply equipment
and mobile phone, even other unpredictable
consequences.
Battery Handling Precautions
1>Turn off your mobile phone before removing the battery.
2> Please be careful to use the battery. It will cause short
circuit if you connect positive (+) and negative (-) pole of
battery with metal objects (coins, clips, etc.), and may
also damage the battery and metal items. Remove the
battery from the phone to your bag should be careful not
to have metal objects (such as keys) which will both touch
the positive and negative pole of battery.
3> Do not put the battery into fire, nor in the places where
temperature is extreme high.
4> Do not disassemble or modify the battery.
5> not put the battery into place where strong mechanical
shock, and do not puncture the battery with hard object.
6> Battery should be stored in a cool and dry place, do not
put it in the high temperature region (over 60 degrees C),
keep it away from direct sunlight.
7> If you find any odor or overheating, you should stop
using the battery.
8> If you find that there are any cracks, deformation, or
other type of damage or electrolyte leakage on the battery,
please stop using the battery immediately.
9> If leaked electrolyte gets on your skin or clothing, wash
with soap and water immediately; if it is splashed into eyes

6
accidentally, rinse thoroughly with fresh water and
immediately contact with the hospital treatment.
10> In order to avoid damage caused by error charging,
only the original battery specified by our company can be
used to charge in mobile phone
11> Do not put lithium battery under very low temperature
at which it cannot achieve the maximum standby / talk
time .
12> Do not use water or organic solvents to clean the
battery, and do not immerse it in water.
13> If the battery won`t be used for a long time, fully
charge it before storage.
14> The proposal to return used batteries to the mobile
phone manufacturer or placed in the designated area of
public waste battery recycling, do not mix them with other
waste or discard.
■ 1.5 Use of personal hands-free kit
With personal hands-free kit, you can make calls without
holding a mobile phone. When you insert the personal
hands-free kit into headset jack, it will play the receiver
and microphone of mobile phone.
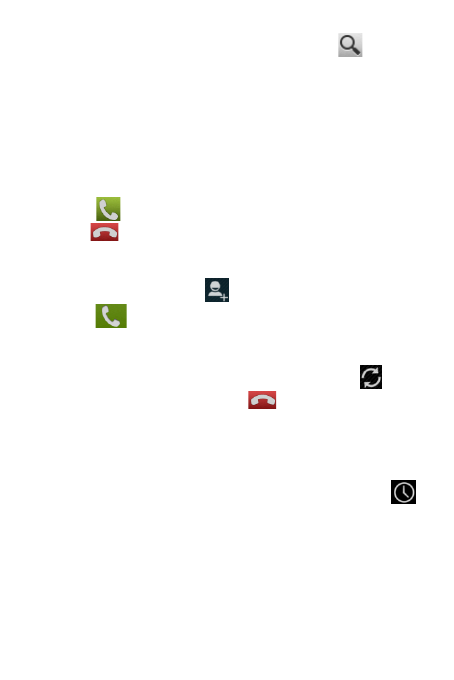
2. Your mobile phone

7
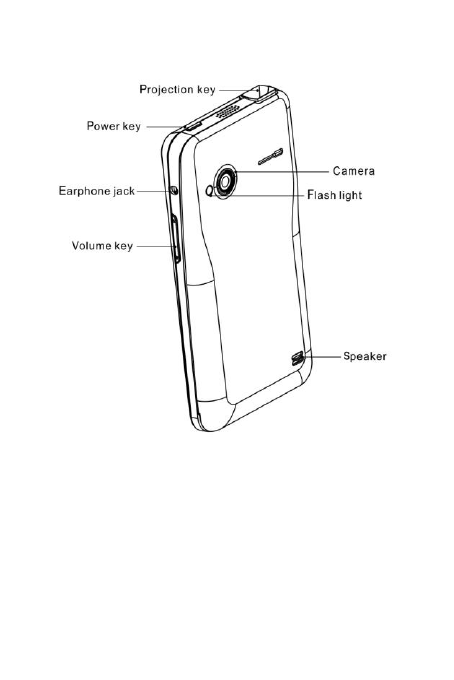
8
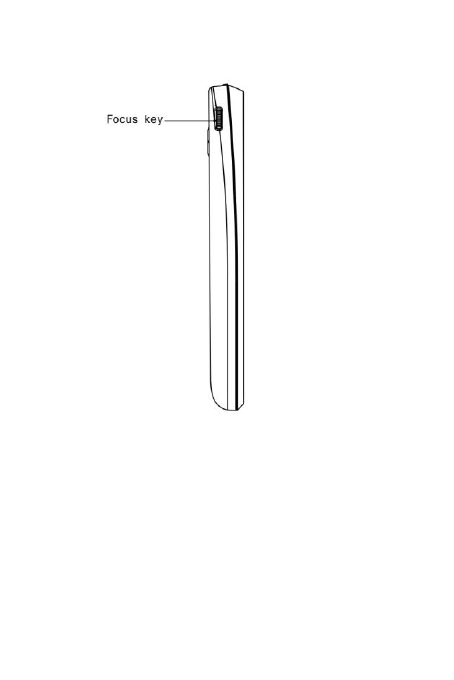
9
Tip!The following features may be required to connect
network and use memory card, please insert the SIM
card and memory card, and consult your network
operator or service provider if the required services
and its charging standard provided.
The small icon in this brochure may be changed because
Of software upgrades, desktop switching and other

10
reasons, please subject to the real figure in the phone.
2.1 Your main screen
Note:
• To select the application, please touch the center of icon.
• Don not to press the touch screen vigorously, it is very
sensitive, you can just touch.
• Use the fingertip touch the required option. Be careful not
to touch the other keys.
Remarks: In some program interface or open files, the
Options menu screen will appear after long press, you
operate accordingly.
Lock your phone
When your phone is not be used, press the power button
to lock the phone. This helps avoid accidental outgoing
calls, while saving. Similarly, if you set up automatic
locking, and cell phone is not be used for a long time, it will
automatically lock to save battery usage.
Unlock screen
The screen is locked, drag the unlock icon to the right
outside the circle.
Toggle Widget function interface
After unlocking into the home page, use your finger to slid
around the pages, you can switch five widget function
interface.
Add on widgets on main screen
You can add shortcuts, widgets, folders for your mian
screen . In order to use your phone more conveniently,
add your favorite widgets on the main screen.
Tip! To add the icon of application program on the main
screen. In the top menu, long press the application

11
program you want.
Tip! To delete an application icon on the main screen,
press and hold the shortcut icon of application you want to
delete, then drag it to quick desktop delete key placed in
the middle top of the screen.
Tip!You cannot delete some applications pre-downloaded.
(its icon only can be removed from the main screen).
View Recent Tasks
Long press the Home button and pop up a window that
lists your recently used applications.
View the status bar
The status bar is at the top of the screen. Such as signal
strength, new information, whether the battery and
Bluetooth activation.
Notifier
Touch the status bar on the screen and drag it down. Then
you can look up missed calls, new messages, and other
notifications, and set the number of shortcut keys.
2.2 Backup and Restore
Backup and restore the system (the role and principles as
the same as a key to chost backup and restore of
computer)
2.3Browser
Browser provides you with a colorful world covering
games, music, news, sports and entertainment, and you
can quickly and directly access via mobile phone.
Note: Connect these services and download content may
incur additional charges. Tariff details, please consult your
network operator.
12
2.4 Calculator
1. Touch on main screen and select [calculator].
2. Touch the numeric keypad to enter numbers.
3 For simple calculations, touch the keys you wanted (+, -,
x or ÷), and then touch =.
4 For more complex calculations, press the menu key,
touch "Advanced Panel", and then choose sin, cos, tan,
log, etc.
2.5 Calendar
To add an event to your calendar
1. Touch on the main screen and select [calendar].。2
2. Touch "New Activity", enter the relevant content. touch
"Done."
3 Touch the menu key, touch "Calendar" to see all the
activities have been added.
Note:
Touch the menu key and select Settings> General
Settings, you can set for the calendar view, reminder
option.
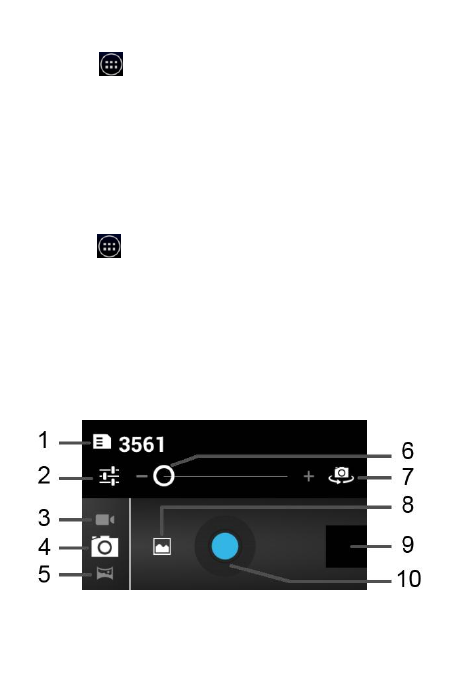
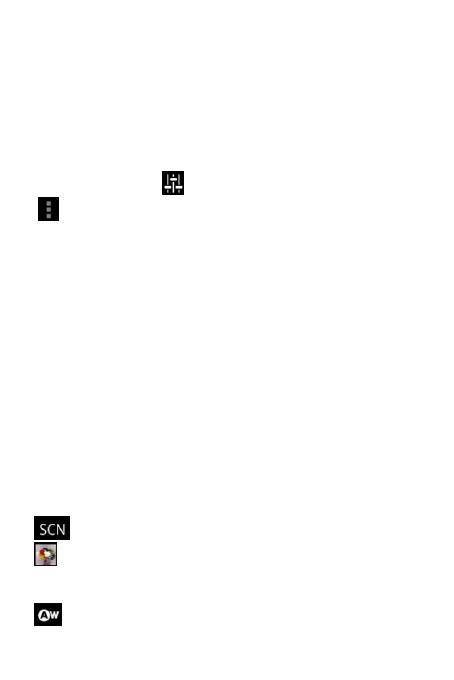
2.6 Camera
1. Shots remaining
2. Camera settings
3. Recording mode
13
4. Camera mode
5. Panorama camera mode
6. focus
7. Toggle front/back camera
8. Set camera mode
9. gallery
10. Camera/video key
Touch "4" into the camera interface, touch "10" to take
pictures, touch "2" , set up for the following options:
Camera settings:
Save Location: Off / On.
Note: After GPS positioning successfully, pictures can be
successfully stored.
Exposure: adjusts the sharpness.
Self-timer: Off, 2 seconds, 10 seconds.
Sharpness: high, low, medium.
Chroma: high, low, medium.
Saturation: High, Low, Medium.
Brightness: high, low, medium.
Contrast: High, Low, Medium.
Photo size: 5 mega pixels, 3 mega pixels, 2 mega pixels
and so on.
ISO Sensitivity: Auto, 100,200,400 and so on.
Metering Mode: Average, Center, Spot
Avoid flicker: Auto, 50 Hz, 60 Hz.
Restore Defaults: Click "OK", the camera settings will
revert to the default values.
Framing modes: automatic, night, sunset, etc.
Color effects:
Camera color effects can be set, if not, monochrome,
sepia, negative and so on.
White Balance: Auto, Incandescent, Daylight,
14
Fluorescent, Cloudy and so on.
Photo size: 5 mega pixels, 3 mega pixels, 2 mega pixels
and so on.
ISO Sensitivity: Auto, 100,200,400 and so on.
Metering Mode: Average, Center, Spot
Avoid flicker: Auto, 50 Hz, 60 Hz.
Restore Defaults: Click "OK", the camera settings will
revert to the default values.
Framing modes: automatic, night, sunset, etc.
Color effects:
Camera color effects can be set, if not, monochrome,
sepia, negative and so on.
White Balance: Auto, Incandescent, Daylight,
Fluorescent, Cloudy and so on.
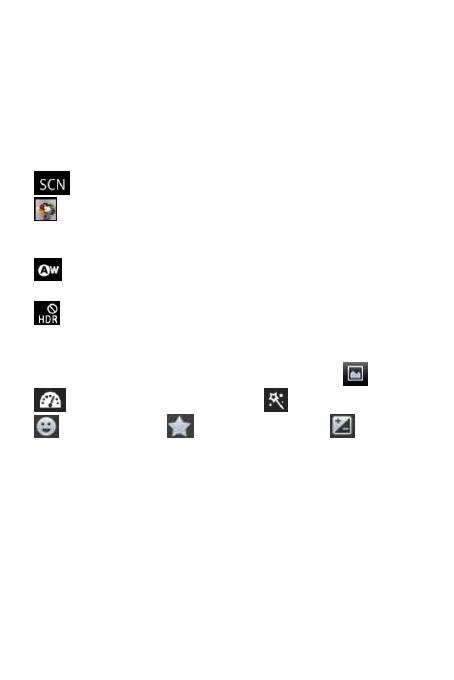
HDR: ON/OFF
Touch "5" switch to panoramic camera mode, touch the
"6" to adjust the focus, touch "7" toggle front / rear camera,
touch "8" set the camera mode, such as normal,
automatic scene detection, face beautification,
smile shutter, the best camera, exposure
compensation, 4, 8, 16. And so on.
Note:
1 panorama camera mode: Press the shutter button to
take the first picture after moving the camera in the same
direction, the focus area will cover the blue box.
2 Automatic scene detection: When selected, adjust the
camera automatically selects the appropriate field.
Quick snap
1 Select [Cameras] application on the main screen,
2 put the phone horizontally, point the lens toward your
15
subject and object, touch camera icon on the screen.
After taking a picture
The photos will be displayed on the screen. Select photos,
touch , then you can choose message, Bluetooth,
email, and other options. Touch to delete photos.
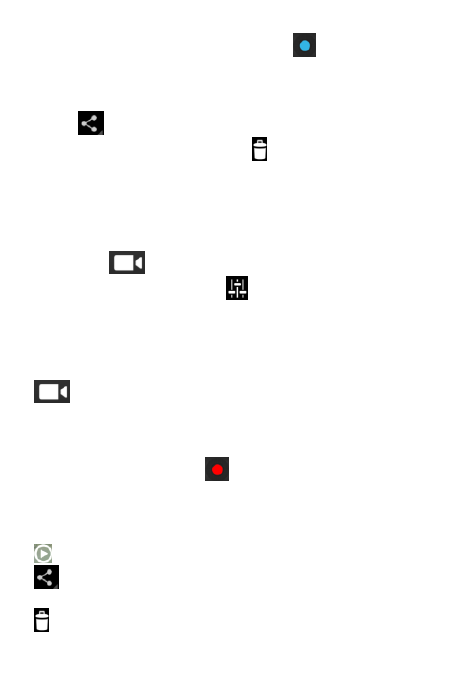
■ 2.7 Camera
■ 2.6.1 Camera mode
Touch "3" to switch to video mode. Touch "3" to
switch to video mode, touch to set up for video quality,
delay interval, color effects, white balance.
■ 2.6.2 Fast Camera
1 Select [Cameras] application on the main screen. Touch
to switch to video mode.
2. camera viewfinder will be displayed on the screen.
3. Put the phone horizontally, point the lens toward your
subject and object.
4 Touch the shoot button once to start recording.
5 The timer at the top of viewfinder display video length.
■ 2.6.3 After shooting video
Play: Touch to play the video.
Share: Sharing your recorded videos via bluetooth and
information.
Delete: Touch to delete the video you just recorded.
16
Tip! If you need to send as "message", please try to select
settings for the low video quality, video size is less than
300K.
Tip! Adjust the volume during video playing, use the
volume keys on the right side of phone.
■ 2.8 Clock
Set the clock
1 Touch on the main screen and select [Clock].
2 If you want to add a new alarm, touch , and touch
"Add alarm."
3 after time setting, S1 will let you know how long it will
ring alarm.
4 Set "Repeat", "ring" or "vibration" and add "tags" for the
alarm name. Touch "Done."
5 Press the Menu key and select Settings, set up the
alarm, alarm volume, snooze interval, automatically stop
the alarm, volume buttons etc on silent mode.
■ 2.9 Currents
The application polymerization major media content,
outputting magazine style articles in user device, then
providing high-quality reading experience.
■ 2.10 Email
Set up email
Send e-mail using the machine, you can always keep in
touch with others.
1 Touch [send email] in main menu
2 Enter the e-mail address, password, touch "Next."
3 Select the account type.
4 Set the receiving server.

17
5 check completed, you can create an account name
displayed on outgoing messages. Touch "Done" to start
using the e-mail function.
Send e-mail using the new account
1 Touch the e-mail, and then press the Menu key to select
[New] to open a new blank message.
2. composing a message, touch Send.
3 or press the Menu key to select other operations.
Retrieve e-mail
You can receive new email account automatically or
manually.
Change e-mail settings
1 Select an e-mail account.
2 Press the Menu key and select Account Settings.
3 You can set the following options: General settings,
Notification settings and server settings.
■ 2.11 Facebook
Facebook is a social networking site where we can have
online chat with friends and share photos.
■ 2.12 File Management
Store and manage documents of mobile phone or memory
card for users, such as multimedia, text and so on.
■ 2.13 Radio
The machine built-in radio, so you can go to your favorite
radio station and listen to radio broadcasts.
Note: You need to plug in your headphones when listening
to the radio, put the headphones into the headphone jack.
18
■ 2.12.1 Search Radio
You can fine-tune the radio manually or automatically.
After searching, they will be saved to a specific channel
numbers, so you do not have to repeat the fine-tuning.
■ 2.12.2 Automatic search
From the main menu, touch [radio] → Touch in the top
right corner and touch "Search."
Note:
1 If you have preset channel, all the preset channels will
be deleted, and start auto scan.
2.You can also use in the radio dial displayed
below the radio frequency to adjust radio manually.
3. If you need to adjust the volume when listening to radio,
press the side up / down keys.
4 To exit radio :Touch stop button or touch in the
top right corner to select "Exit."
Tip! To improve quality of radio reception, the headset
cable should be stretched, which equipped with a radio
antenna.
■ 2.14 Image
Enter the gallery, you can see all the pictures and video
files in this phone.
■ 2.15 Gmail
Gmail is a free webmail service provided by Google, you
can permanently keep your important messages, files and
pictures.
19
■ 2.16 Google
Use the search to find anything you want quickly and
easily.
■ 2.17 Google+
Google+ is a sharing website where users can organize
your contacts in different circles, such as family members,
colleagues, university students, etc., and share photos,
videos, and other information in a small circle.
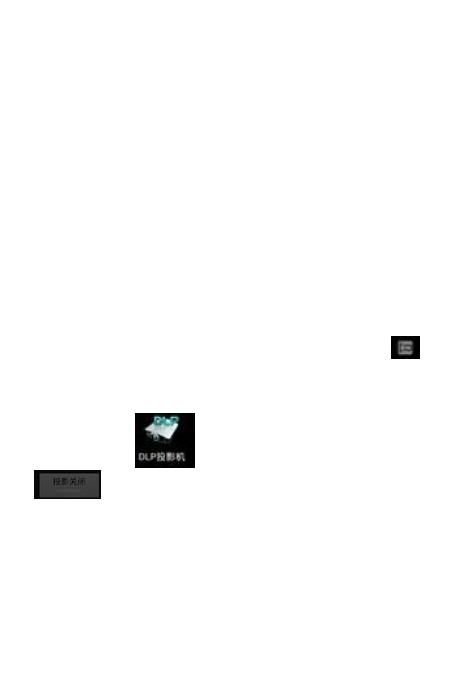
■ 2.18 DLP Projector
2.17.1 Turn on or off DLP projector
1 Long press projection shortcut key to enter projection
mode, enter the projector mode, long press shortcut key to
exit the projector projection mode to return to normal
mode. Turn on the projector, "DLP" is first displayed
before the current menu interface appears, while
appears on the status bar. You can view the content on the
projector screen, it can be achieved by any application on
the phone.
Open icon on the main menu, click
into the projection mode, then you can see the
corresponding contents on the projection screen through
the operation of any menu in phone,
2 Under projection mode, when the battery power is
below the power desired for projection, the phone will
send low battery warning, you can connect the charger to
charge the device, if you do nothing, the phone will
automatically shut down after a period of projection.
3 Under projection mode more than 30 minutes, the left

20
front of phone will heat, this is a normal phenomenon.
Currently all the professional projectors and mini
projectors on the market will heat after a long time use. In
the darkroom projection, there would be a bunch of
unobvious stray light on one side of projected image,
which is a inherent characteristic in micro-projector, it is a
normal phenomenon.
Note: Turn on the projecting function, all the interface can
be projected in addition to camera menu interface.You can
adjust projection focus button in the upper left side of
equipment when projected image is not clear. Device can
project continuely for about 100 minutes when battery is
fully charged.
If the battery power is less than about 30%, it may not turn
on the projector.
■ 2.19 Map
Google Maps is a electronic map services provided by the
Google company, including local detailed satellite photos.
This service can provide the vector maps contained
administrative region, traffic and business information as
well as satellite images of different resolutions, and terrain
view which can be used to display the terrain and contour.
It operates simply and conveniently and applied in
different types of platform.
■ 2.20 Message
Message
The unit combines text and multimedia messages to an
intuitive and easy to use menu.
Send message
1 Touch [Main Menu] , select [message] , and touch

21
to compose a new message.
2 Enter the number of recipient in the "Recipient", you
can add multiple contacts.
NOTE: You will pay for each text message sent to each
recipient.
3 Touch the following "Type Information" box to start
composing your message.
4 Press the Menu key to open the Options menu. Select
from the add subject, discarded, insert frequently used
phrases etc.
5 Touch to send message, select from SIM 1 or SIM
card 2 to send the message.
WARNING: If you add a picture, video or audio files in a
text message,, the SMS will be automatically converted
into multimedia messages, you need to pay appropriate
fees.
Information box
Exchange information with the other part will be displayed
in chronological order, so you can easily check the entire
contents of your conversation.
2.21 Messenger
You can have text chat, voice chat, video conferencing
and other real-time communication by using Messenger
interface is simple and easy to use, it is a great choice to
maintain close contact with relatives, friends, work
partners. You can sign up for free Messenger login
account by using the Email address you already had.
2.22 News &weather
Look up news and weather
22
2.23 Contact
The default iBall contact Customer Service Tel: 180 030
042 255
Search contacts
1 Touch [Main Menu], touch [Contact] to open the contact
list.
2 Touch to search contact, enter the name you want to
call, this time all the contacts met your conditions will be
listed explicitly in the input box at the bottom.
Tip! The machine does not support the special symbol
search, such as "! @ # ¥% & * ()" and so on.
Add a new contact
Touch on the main screen, touch dial icon , enter a
new contact number, touch , select Create a new
contact; enter the relevant settings, touch "Finish" in the
upper left corner to save the contact.
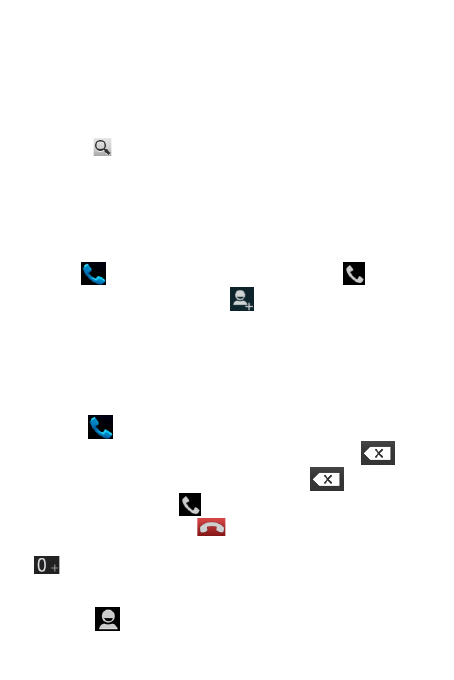
■ 2.24 Dial
Call
1 Touch to open the keypad. Click on the keyboard to
type numbers. To delete a number, please touch . To
delete the entire number, press and hold
2 Touch the call icon to start the call.
3 To end the call, touch .
Tip! To enter "+" to make an international call, long press
Call contact
1 Touch to open the contact list.
23
2 Scroll through the list of contacts, or touch to input
the name you want to call , this time all the contacts met
your conditions will be listed explicitly in the input box at
the bottom.
3 Touch and dial the contact you want to call from the
contacts list.
Answer and reject calls
When screen locks, if there cames a call, please drag the
circle to on the right of screen to answer the call.
Drag to on the left of screen to reject an coming call
Make a second call
1. In the initial call, touch to add call.
2 Touch to connect the call.
3 Two calls are displayed on the screen at this time. The
initial call is on hold, the call party into maintaining state
4 To switch between calls, touch the switch icon .
5 To end the current call, touch .
Note: Need to be supported by the local network, you
need to pay for every call.
View call logs
In the dial-up interface, touch the Call History icon .
Check the complete list contained all outgoing calls,
received calls and missed calls .
Tip!
· Press the Menu key, then touch Clear call log to delete
all call history.
· Touch any single call log to see the call date, time and
24
duration。
Call settings
You can set call setup for your phone provided by operator,
such as call barring, and other special features. For
detailed information, please contact your network
operator.
Touch the [Main Menu] → touch [Dial] → Press
the Menu key, select "Settings" to enter [Call settings]
menu option.
■ 2.25 Music
The machine built-in music player, so you can play your
favorite tracks. To enter the music player, touch the
[music]. Here you can have access to multiple folders:
Broadcast song
Touch on the main screen and select【Music】。
This unit can play standard MP3 encoding format music
files. Please press the side up / down keys to change the
volume when listening to music.
Long touch any song in the list. It will show you "play",
"Add to Playlist", "used as a cell phone ring tones",
"delete" and other options.
Note:
The copyright of music files is protected by international
copyright treaties and national copyright laws. Therefore,
it is necessary to obtain a replica or copy music license or
approval. In some countries, national law prohibits private
copying of copyrighted material. Before downloading or
copying files, check the copyright laws of relevant country
about use of such material protected by copyright

25
2.26 Play Store
App Store, you can download your favorite games and
applications.
2.27Search
You can search on the Internet or on the local search after
entering keywords,
■ 2.28 Settings
■ 2.27.1 Wireless and network
SIM Manager
This phone supports dual SIM card, insert two SIM cards,
enter this menu, click SIM1/SIM2 icon to ensure their
activation status. Meanwhile, you can set the "Voice Call",
"Data Connection" and other functions according to
specific situation.
WLAN
When WLAN is switching on, you can view available
networks.
Bluetooth
When bluetooth is switching on, you can detect the
available devices.
Traffic usage
You can check SIM mobile data traffic usage.
More ...
You can turn on/off flight mode, GPRS data priority mode.
Set VPN, network sharing and portable hotspot, mobile
network options.
■ 2.27.2 Equipment
Profiles
You can select criteria, mute, meetings or outdoor

26
mode. And make personal settings according to your
requirements for every mode, adjust and customize
various tones, operation sound and other options of
phone.
Note: Profiles under main menu, touch , select Reset
to restore the default settings.
Display
1 Brightness: You can set screen backlight brightness.
2.Color Enhancement: You can set the screen color.
3 wallpaper: select phone wallpaper.
4 Auto-rotate screen: After activation, it can automatically
change direction when rotating the phone.
5 Size: Select Phone font size.
Storage
Preferred mounting position: the preferred installation
location when change installing new programs. Check the
phone memory, the total space and available space of SD
card. You can also uninstall the SD card, if necessary, you
can format the SD card.
Note:
1 When you need to remove the memory card, it is
recommended that you touch "Unmount SD card" first,
and then pull out the memory card.
2 Some of your programs may be installed in the memory
card, so when you uninstall / format a memory card, the
programs you installed in the memory card cannot be
used.
Battery
You can check battery usage.
Applications
You can view and manage all the applications, such as

27
downloaded, SD card, running.
■ 2.27.3 Individual
Accounts and Synchronization
Activate background data or automatic synchronization.
Check or add account.
Location services
1. location service of Google: You can activate or
deactivate this function.
2. GPS satellites: You can activate or deactivate this
function.
3. GPS assisted: Using GPS assist data (EPO) to speed
up GPS positioning process.
4. EPO settings: You can modify configuration information.
5. A-GPS: You can activate or deactivate this function.
6. A-GPS settings: You can modify the A-GPS settings.
Security
1 Screen lock: Use pattern, PIN, Face Unlock or password
to lock the screen.
2.Owner Information: Text can be set to display on the lock
screen text.
3 Set up SIM card lock: Lock SIM1/SIM2 card or change
the SIM card PIN code.
4 make the password visible: input the password visible.
5 Device Manager: View or disable the device manager.
6 Unknown Source: When selected, allow to install the
applications retrieved from the electronic market.
7 Trusted certificate: Display trusted CA certificate.
8 Install from SD card: installing encryption certificatefrom
a memory card .
9.Clear Credentials: Clear credential storage of all
contents and reset its password.

28
Language and input method
You can set language, keyboard and input method of this
phone.
Backup and Reset
You can reset DRM and "restore factory settings." Note
that "restore factory settings" will delete all data.
■ 2.27.4 System
Date and Time
You can set date, time, time zone, and formats etc.
Timer switch
Set the automatical startup and shutdown time of phone,
you need to keep the timer switched on before using the
timer switch function. Then set the option on or off, and
finally set the time.
Accessibility
Press the "Power" button to end the call: press the
"Power" during calling will end the call instead of turning
off the screen.
Quick Start: This feature can be turned on or off.
Developer Options
Set options for application development.
About phone
View status messages on the phone, legal information and
model, version, etc..
■ 2.29 Recorder
Use the voice recorder to record audio files.

29
1 Touch the [recorder] on the main menu,.
2 Touch to start recording, touch to end the
recording, you can choose save or discard.
Before saving, you can touch to pre-listen to the
Recording effect.
Note:
1 Recording file is saved in the memory card / phone. Into
the memory card / phone [Recording] directory, you can
view the recording file list. Long touch the audio file, you
can select: copy, cut, delete and other options.
2. Play the saved recordings: select Music> Playlists> My
recordings.
■ 2.30 Talk
Google Talk make free calls with your friends via computer
as well as Google Talk network. Millions of users use the
Google Talk instant messaging service, or other supports
open server-to-server federation to chat with each other
instantly.
■ 2.31 To do
Create a task list and set the alarm to remind yourself
important task.
■ 2.32 Video Player
1 Select the video you want to play, click .
2 Rotate the device to landscape mode.
3 Control playback with the virtual keys.

30
2.33 Whatsapp
WhatsApp Messenger is an instant messaging software,it
has very powerful function, you can always send a
message via cross-platform. You won`t miss a message
with offline messages, it is used like the text messaging
capabilities of mobile phone, it integrates with the contacts
of phone book in mobile phone.
2.34 YouTube
YouTube is the largest video sharing site in the world, it
provide access for users to upload watch and share
videos, now it has become a leader in the same type of
site, and created a number of celebrities and stimulate
online creation, there is no doubt that it has become the
most visited video podcast websites in the world.
3. Appendix
Appendix A:Input method guide
This phone provides English input method, you can use it
when editting the phone book, SMS, alarm clock and other
text editor.
1.Display interface of input method
Enter the edit window, English input method,

31
2. how to switch input methods
In the editing interface, touch screen portion of the status
bar, drag down to select the "Select Input Method" then
you can select input method according to your needs.
APPENDIX B:Take good care of your mobile
phone
1 Care and Maintenance
Your mobile phone has well-design and excellent
technology, it should be protected carefully. The following
suggestions can help secure your mobile phone through
the warranty period and continue to use for many years.
1>Mobile phone and all its parts, accessories should be
put in the places where children can not reach.
2>Keep mobile phones dry. Avoid the substances
contained corrode electronic circuits ,such as rainfall,
humidity and liquids. Do not use and store mobile phone in
dusty areas to avoid damage to its moving parts.
3>Do not put mobile phone in the places of high
32
temperature. High temperature can shorten the life of
electronic circuits, damage batteries and some plastic
parts.
4>Do not put mobile phone in a cold place. When the
mobile phone exposed to heat (to its normal temperature),
the moisture will be formed inside the mobile phone, and it
may damage electronic circuit boards.
5>Do not use corrosive chemicals, cleaning solvents, or
strong detergents to clean the mobile phone. Use a soft
towel lightly moistened with soapy water.
6>If the mobile phone or any accessory is not working
properly, send it to the professional services department.
Service staff will give you help and arrange for the
necessary repairs.
Please take care of our lives, send the waste products
to legitimate processors for proper handling.
2 Troubleshooting
If you feel not normal when operating mobile phone,
please restore the factory settings (Settings> Backup &
reset> restore factory settings), and refer to the following
issues and workarounds. If the problems still cannot be
solved, please contact your dealer or service provider .
Problem
Solution
Failure to
receive or
make calls
·Confirm whether the phone is turned on
·Make sure the battery has power
·Check whether there is sufficient signal
strength
·confirm whether the local phone number
in call setting is a preset system or
sending number
·Confirm whether circuit switching in call
setting is the circuit of system
preferences
·Confirm whether call barring or fixed

33
dialing and other security features are
set
·Confirm whether the call is diverted
·Confirm that suitable SIM card was
inserted correctly
Low voice
Confirm that call volume is not set too
low
Telephone
don’t ring
·Confirm if you have selected the
vibration mode
·Confirm if ring volume is set too low
·Keep away from noisy places
·Confirm if the call is diverted
Memory
card
cannot be
identified
·Confirm that memory card can be used
normally
·Confirm that memory card is installed
correctly
·C onfirm that the memory card is
formatted with FAT system instead of
NTFS system
APPENDIX C: Introduction of optional
accessories
1 Memory card
It can be used to store documents and other files for user
2 Personal Hands-free Kit
Personal hands-free kit with earphone and miniature
microphone for hands-free phone use.
3. USB data cable
Keep phone is turned on, connect it with computer to store
files and download pictures through USB data cable.
When using USB cable, charging function will also be
opened.
4 Travel Charger
For travel charging.

34
Note: Please use standard charger and dedicated
accessories of this model.
APPENDIX D: Legal statement
The built-in third-party applications of phone allow you to
enjoy brilliant games, applications and mobile
value-added services at anytime and anywhere. These
third-party applications are fee-based services, detailed
tariff information please contact your service provider, and
the above contents of services can be enjoyed via GPRS,
before using, check with your operator to confirm that you
have already launched GPRS services.
The built-in third-party applications of mobile phone
developed and provided by third-party software, and
copyright of these applications and /or legitimacy of
other intellectual property rights will be protected by
third-party software companies. In view of this, our
company don not make any express or implied warranty
on these applications (including but not limited to its
functional characteristics, information contained and
operation results), we also don`t take any responsbilities.
APPENDIX E: Statement in this guide
All the contents appearing in this manual are carefully
researched, however, we do not rule out
that few problems may be existed in this manual
like, errors, omissions, or improper expressions due to
negligence, accidents or any other reasons, we don not
take any responsibilities and obligations for this kind of
error, omission or improper expressions. The contents of
this manual may change without notice. The design and
manufacture of this product has been improved to achieve
sustainable developments complied with new
environmental requirements. We are committed to
produce products that meet the requirements of global

35
environment. Please consult your local authorities about
the approaches of disposing such goods. The package of
this product can be recycled.
Note:recycling and reusing
Protect the environment! This product and its package is
prohibited to throw into the dustbin used for recycling
household waste. Please give it to your neighborhood
Waste Treatment Centre for free disposal.
APPENDIX F: Other
1 About how to transfer files between USB cable and
computer
The phone can be used as U disk when Inserting a
memory card,
1 Connect W970 with computer by using a USB data
cable.
2 Touch "Turn on USB storage", and touch OK.
3 You can view the memory card in the computer, and
then transfer files.
4 When you are finished, please touch "Turn off USB
storage device."
Note:
1 You need to insert a memory card first, you cannot use
the USB for mass storage without memory card.
2. When you open a USB storage device, then some
applications you are currently using may stop, and it is
unavailable before turning off procedure of USB storage
device.
3 When you need to apply some functions of Mobile
Assistant in PC via USB cable, you may need to check the
following features: Settings> Developer options, select
"USB Debugging." (mobile phone cannot be used as U
disk after checking )

36
2. About how to view the software version of phone
Need to view software version information of phone, you
can touch Settings> About phone.
3.The related considerations on built-in data of
T-FLASH card
Three-party applications stored in the memory card is the
trial version, please unloaded it consciously after trial. If
you want to use the official version, please download it in
regular software store, or directly contact the software
provider. If any problems are found in the installation, you
can uninstall programs by yourself, or re-download the
latest version on the Internet after uninstalling.
FCC Statement
1. This device complies with Part 15 of the FCC Rules.
Operation is subject to the following two conditions:
(1) This device may not cause harmful interference.
(2) This device must accept any interference received,
including interference that may cause undesired
operation.
2. Changes or modifications not expressly approved by
the party responsible for compliance could void the user's
authority to operate the equipment.
NOTE:
This equipment has been tested and found to comply with
the limits for a Class B digital device, pursuant to Part 15
of the FCC Rules. These limits are designed to provide
reasonable protection against harmful interference in a
residential installation.
This equipment generates uses and can radiate radio
frequency energy and, if not installed and used in
accordance with the instructions, may cause harmful
interference to radio communications. However, there is
no guarantee that interference will not occur in a particular

37
installation. If this equipment does cause harmful
interference to radio or television reception, which can be
determined by turning the equipment off and on, the user
is encouraged to try to correct the interference by one or
more of the following measures:
Reorient or relocate the receiving antenna.
Increase the separation between the equipment and
receiver.
Connect the equipment into an outlet on a circuit different
from that to which the receiver is connected.
Consult the dealer or an experienced radio/TV technician
for help.
SAR Information Statement
Your wireless phone is a radio transmitter and receiver. It
is designed and manufactured not to exceed the emission
limits for exposure to radiofrequency (RF) energy set by
the Federal Communications Commission of the U.S.
Government. These limits are part of comprehensive
guidelines and establish permitted levels of RF energy for
the general population. The guidelines are based on
standards that were developed by independent scientific
organizations through periodic and thorough evaluation of
scientific studies. The standards include a substantial
safety margin designed to assure the safety of all persons,
regardless of age and health. The exposure standard for
wireless mobile phones employs a unit of measurement
known as the Specific Absorption Rate, or SAR. The SAR
limit set by the FCC is 1.6 W/kg. * Tests for SAR are
conducted with the phone transmitting at its highest
certified power level in all tested frequency bands.
Although the SAR is determined at the highest certified
power level, the actual SAR level of the phone while
operating can be well below the maximum value. This is
because the phone is designed to operate at multiple

38
power levels so as to use only the power required to reach
the network. In general, the closer you are to a wireless
base station antenna, the lower the power output. Before a
phone model is available for sale to the public, it must be
tested and certified to the FCC that it does not exceed the
limit established by the government adopted requirement
for safe exposure. The tests are performed in positions
and locations (e.g., at the ear and worn on the body) as
required by the FCC for each model. The highest SAR
value for this model phone when tested for use at the ear
is 0.486W/Kg and when worn on the body, as described in
this user guide, is 1.029 W/Kg(Body-worn measurements
differ among phone models, depending upon available
accessories and FCC requirements). The maximum
scaled SAR in hotspot mode is 1.417 W/KG, While there
may be differences between the SAR levels of various
phones and at various positions, they all meet the
government requirement for safe exposure. The FCC has
granted an Equipment Authorization for this model phone
with all reported SAR levels evaluated as in compliance
with the FCC RFexposure guidelines. SAR information on
this model phone is on file with the FCC and can be found
under the Display Grant section of http://www.fcc.gov/
oet/fccid after searching on
FCC ID: 2AAA6-S750 Additional information on Specific
Absorption Rates (SAR) can be found on the Cellular
Telecommunications Industry Asso-ciation (CTIA) web-site
at http://www.wow-com.com. * In the United States and
Canada, the SAR limit for mobile phones used by the
public is 1.6 watts/kg (W/kg) averaged over one gram of
tissue. The standard incorporates a sub-stantial margin of
safety to give additional protection for the public and to
account for any variations in measurements.
Body-worn Operation

39
This device was tested for typical body-worn operations.
To comply with RF exposure requirements, a minimum
separation distance of 15mm must be maintained between
the user’s body and the handset, including the antenna.
Third-party belt-clips, holsters, and similar accessories
used by this device should not contain any metallic
components. Body-worn accessories that do not meet
these requirements may not comply with RF exposure
requirements and should be avoided. Use only the
supplied or an approved antenna.