SES imagotag EDG1-0270-B digital network transceiver User Manual My
SES-imagotag GmbH digital network transceiver My
UserManual.wiki
>
SES imagotag
>
EDG1-0270-B User Manual
>
Quick start guide
Contents
1.
Quick start guide
2.
Detailed user manual
Quick start guide
Navigation menu
Upload a User Manual
Namespaces
Wiki Guide
HTML
PDF
Info
Views
User Manual
Discussion / Help
Navigation
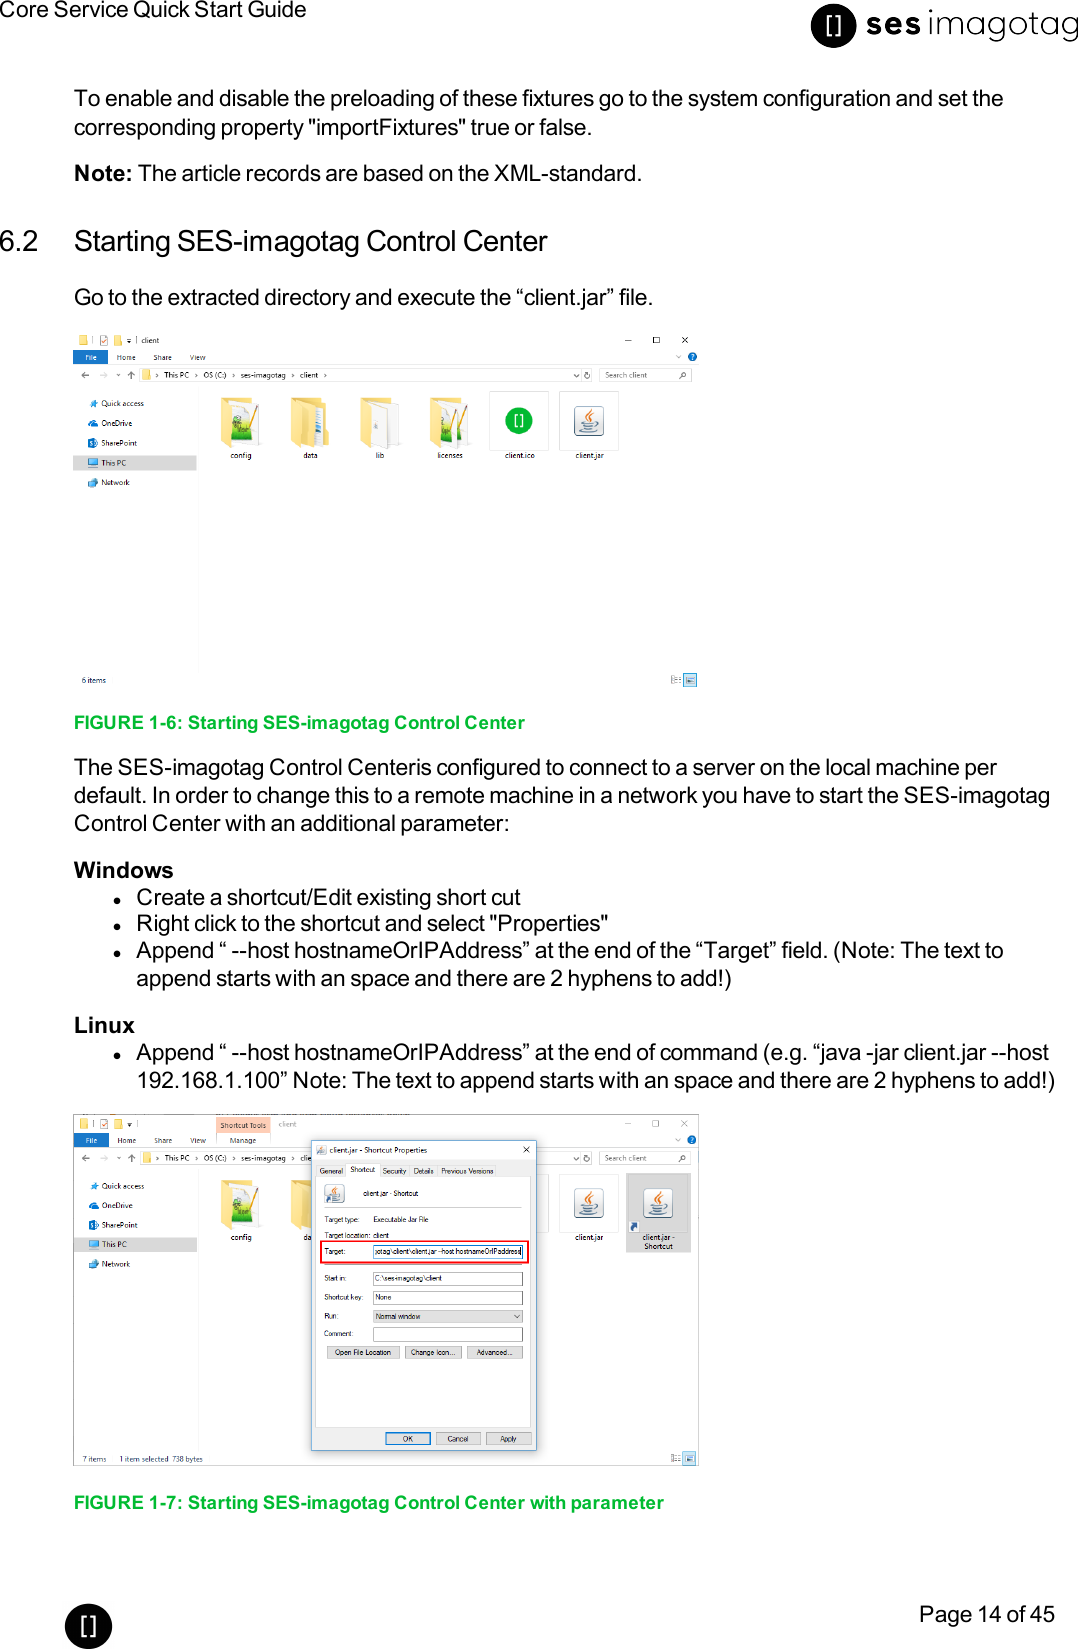
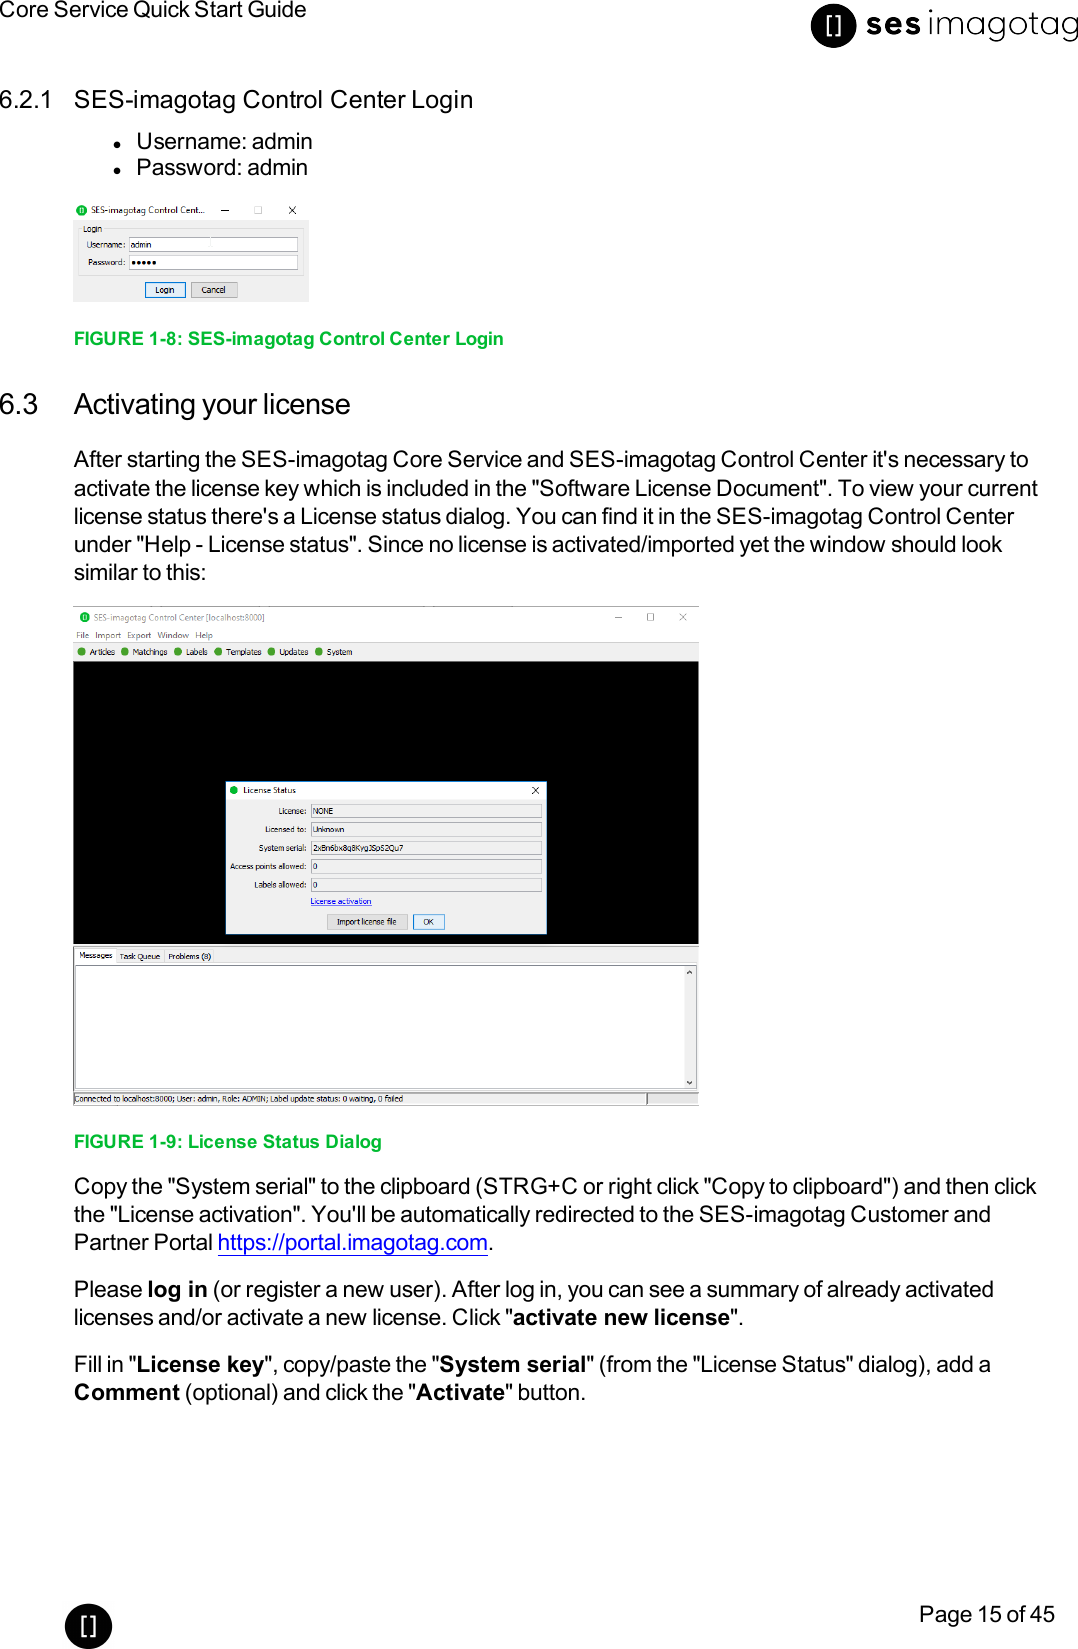
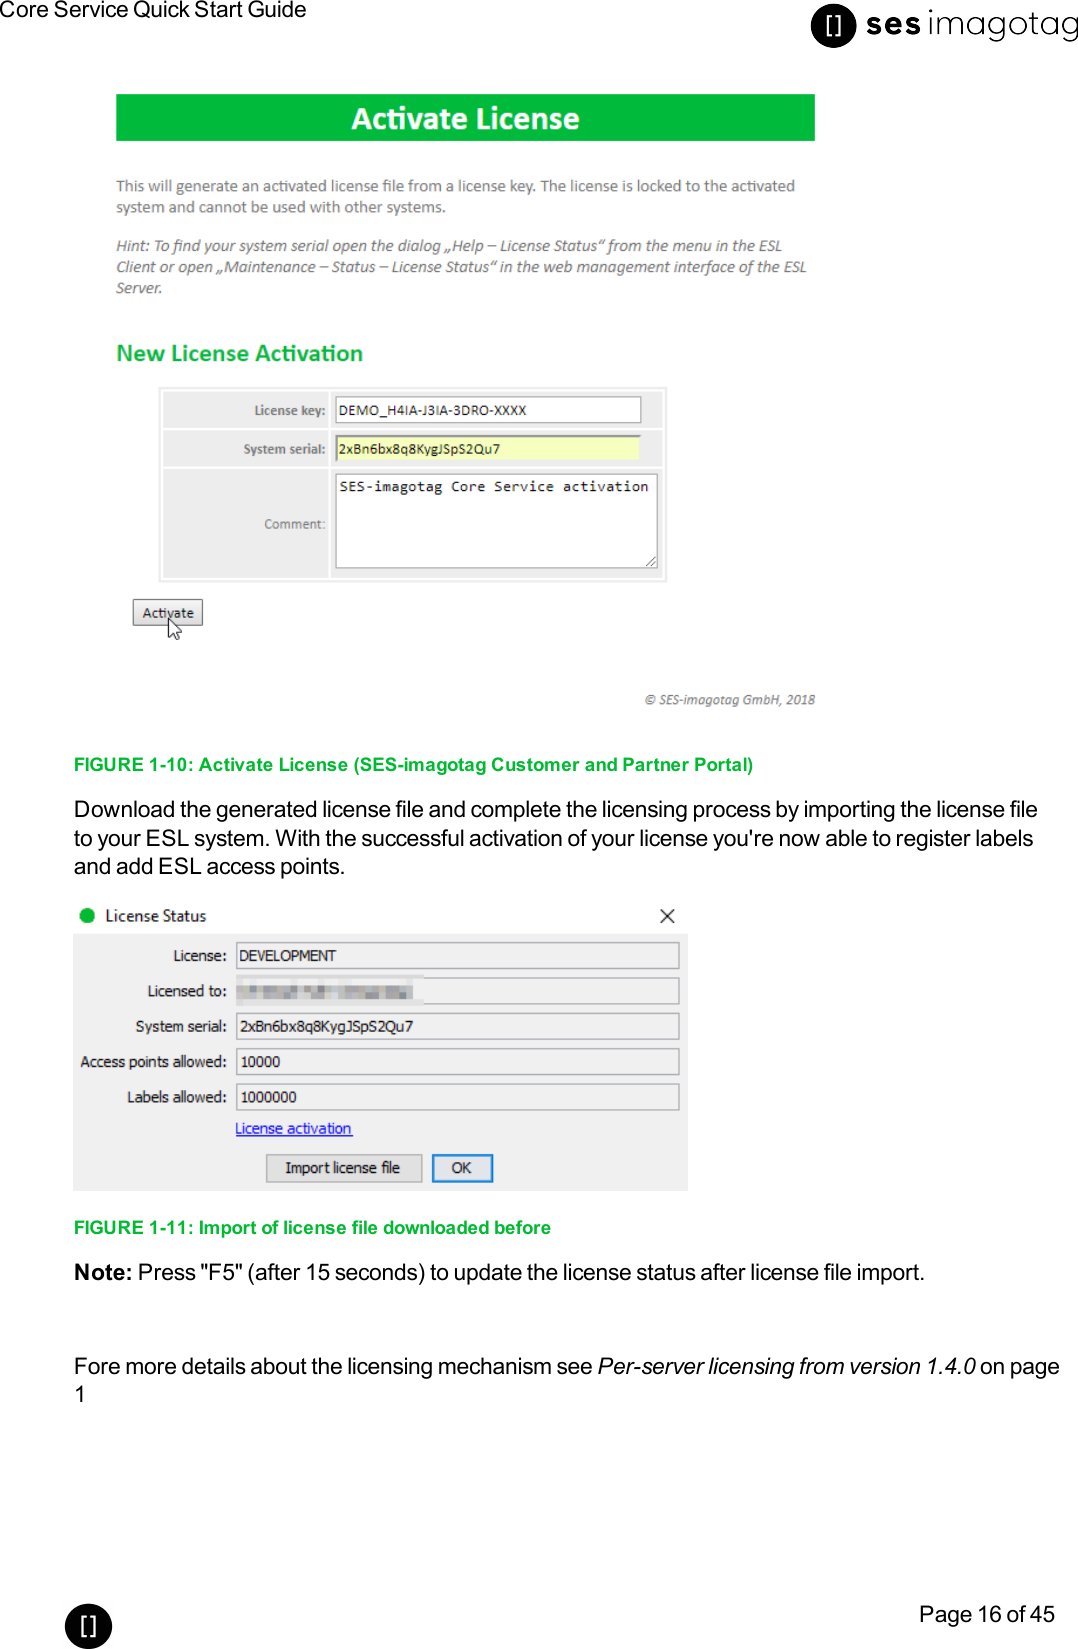
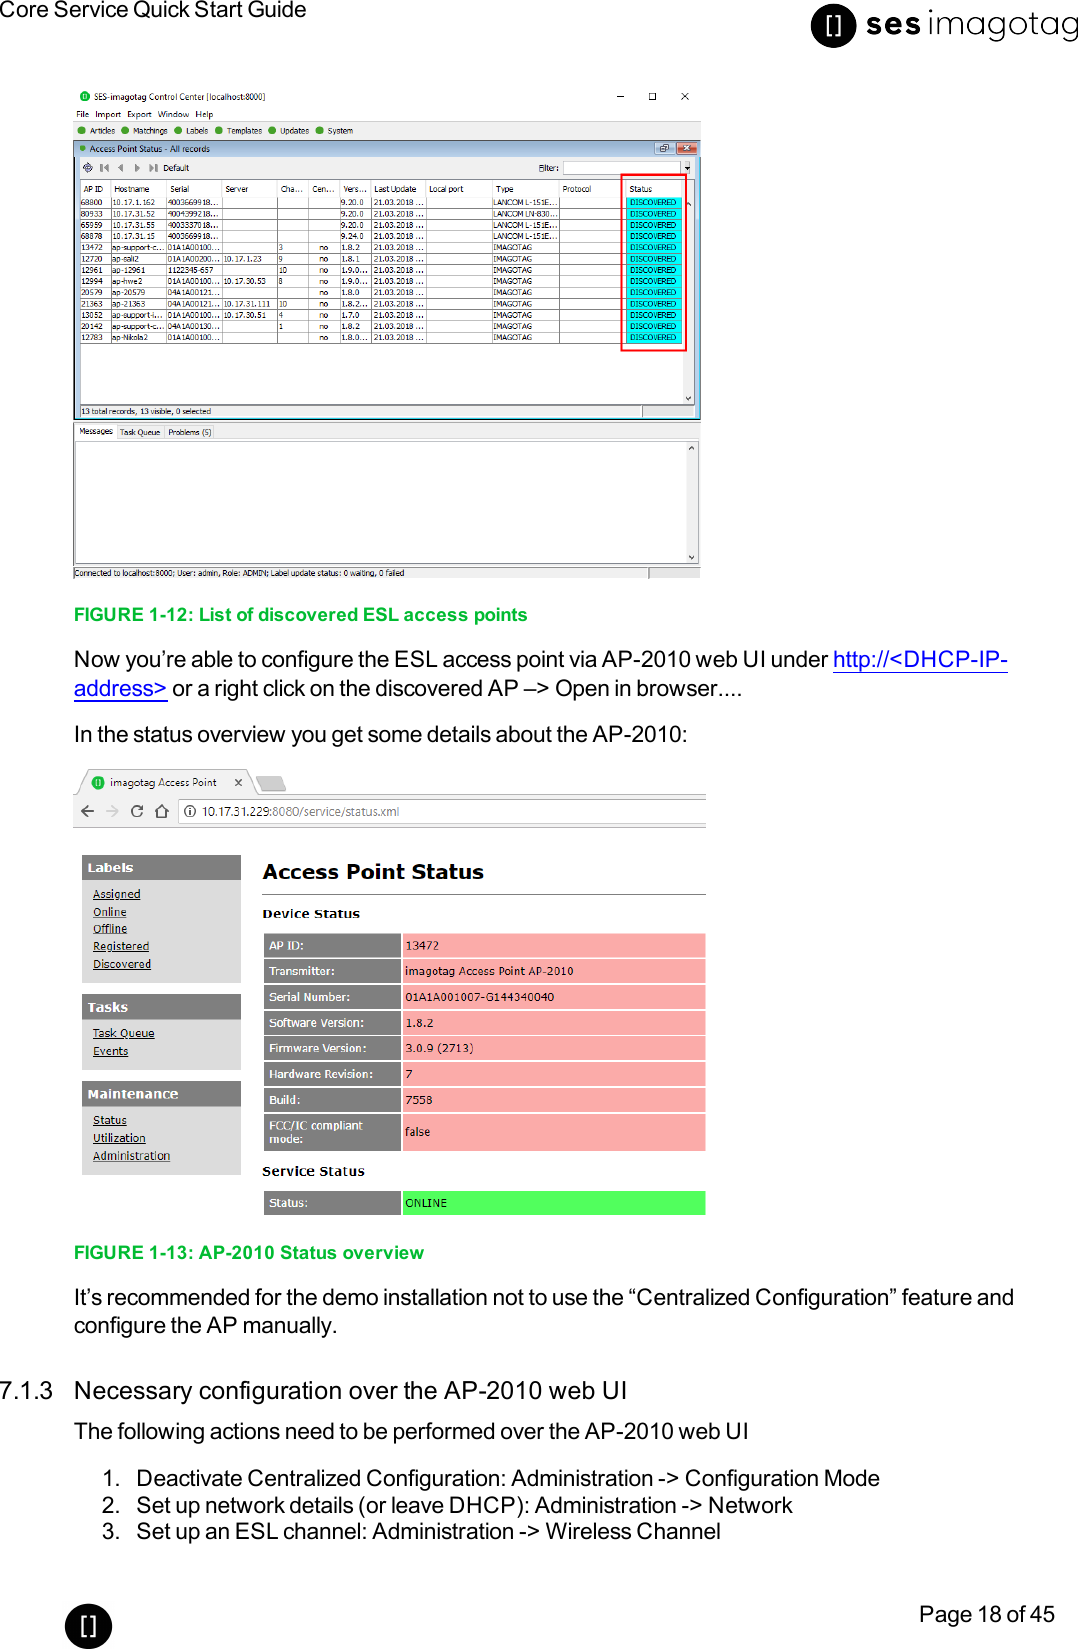
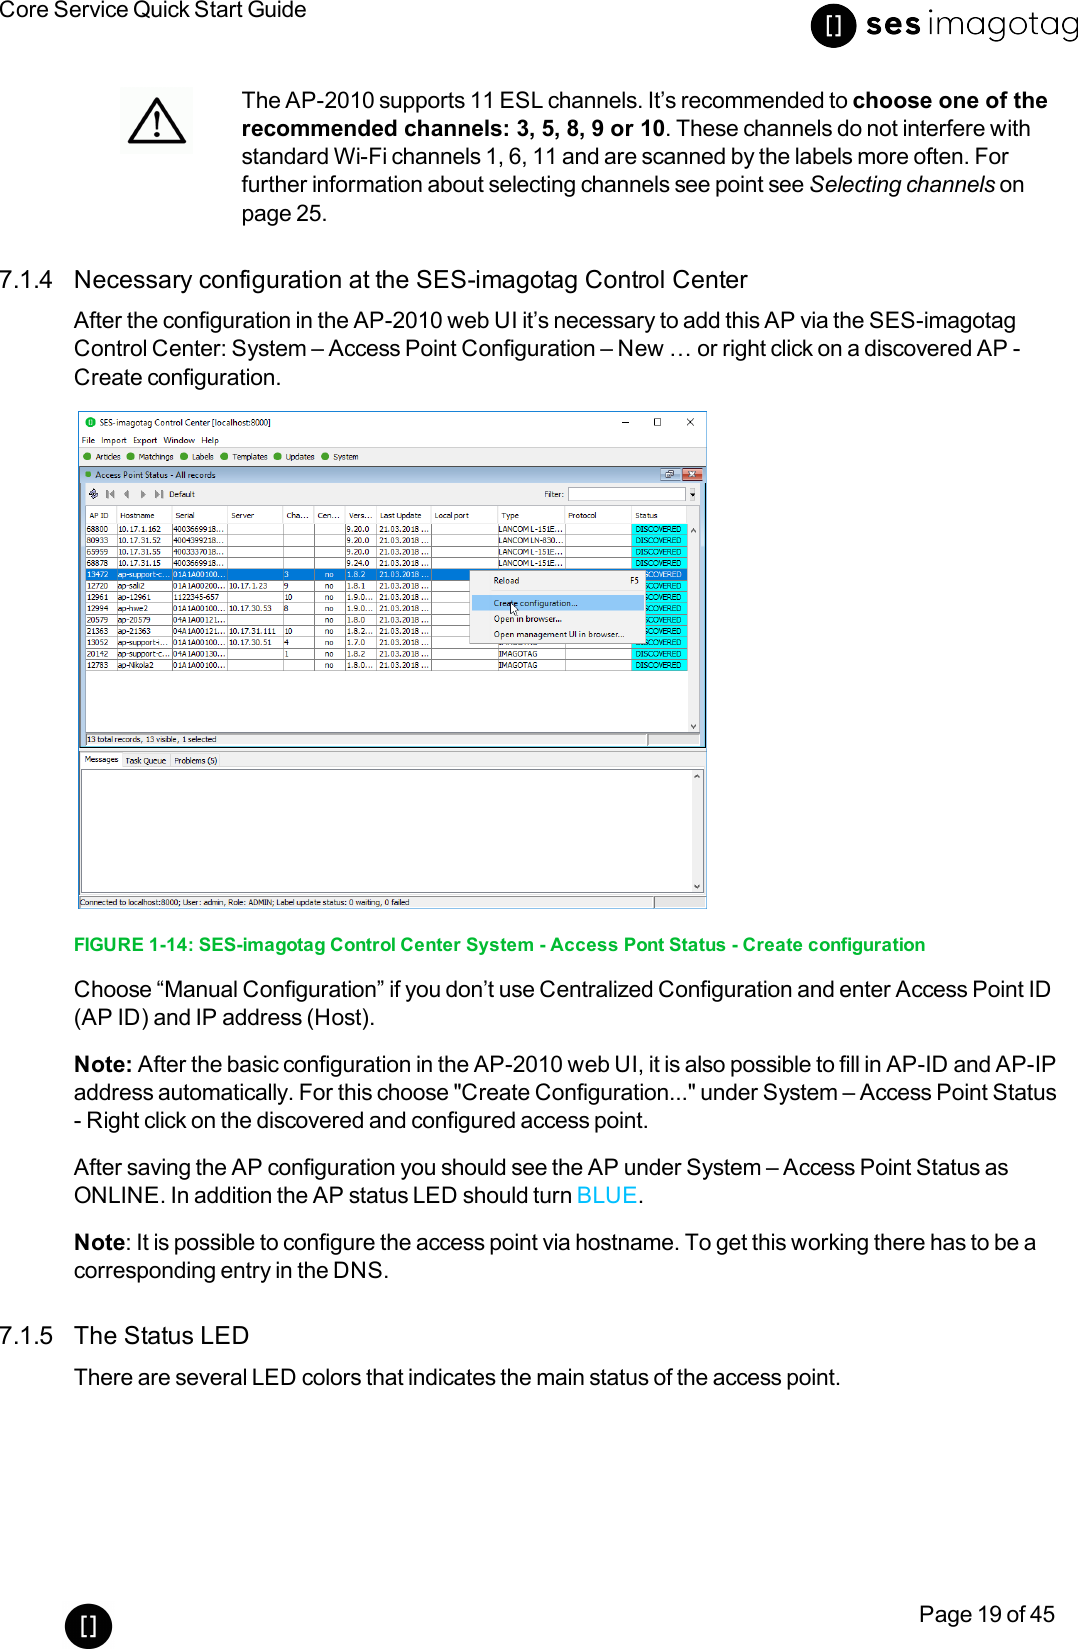
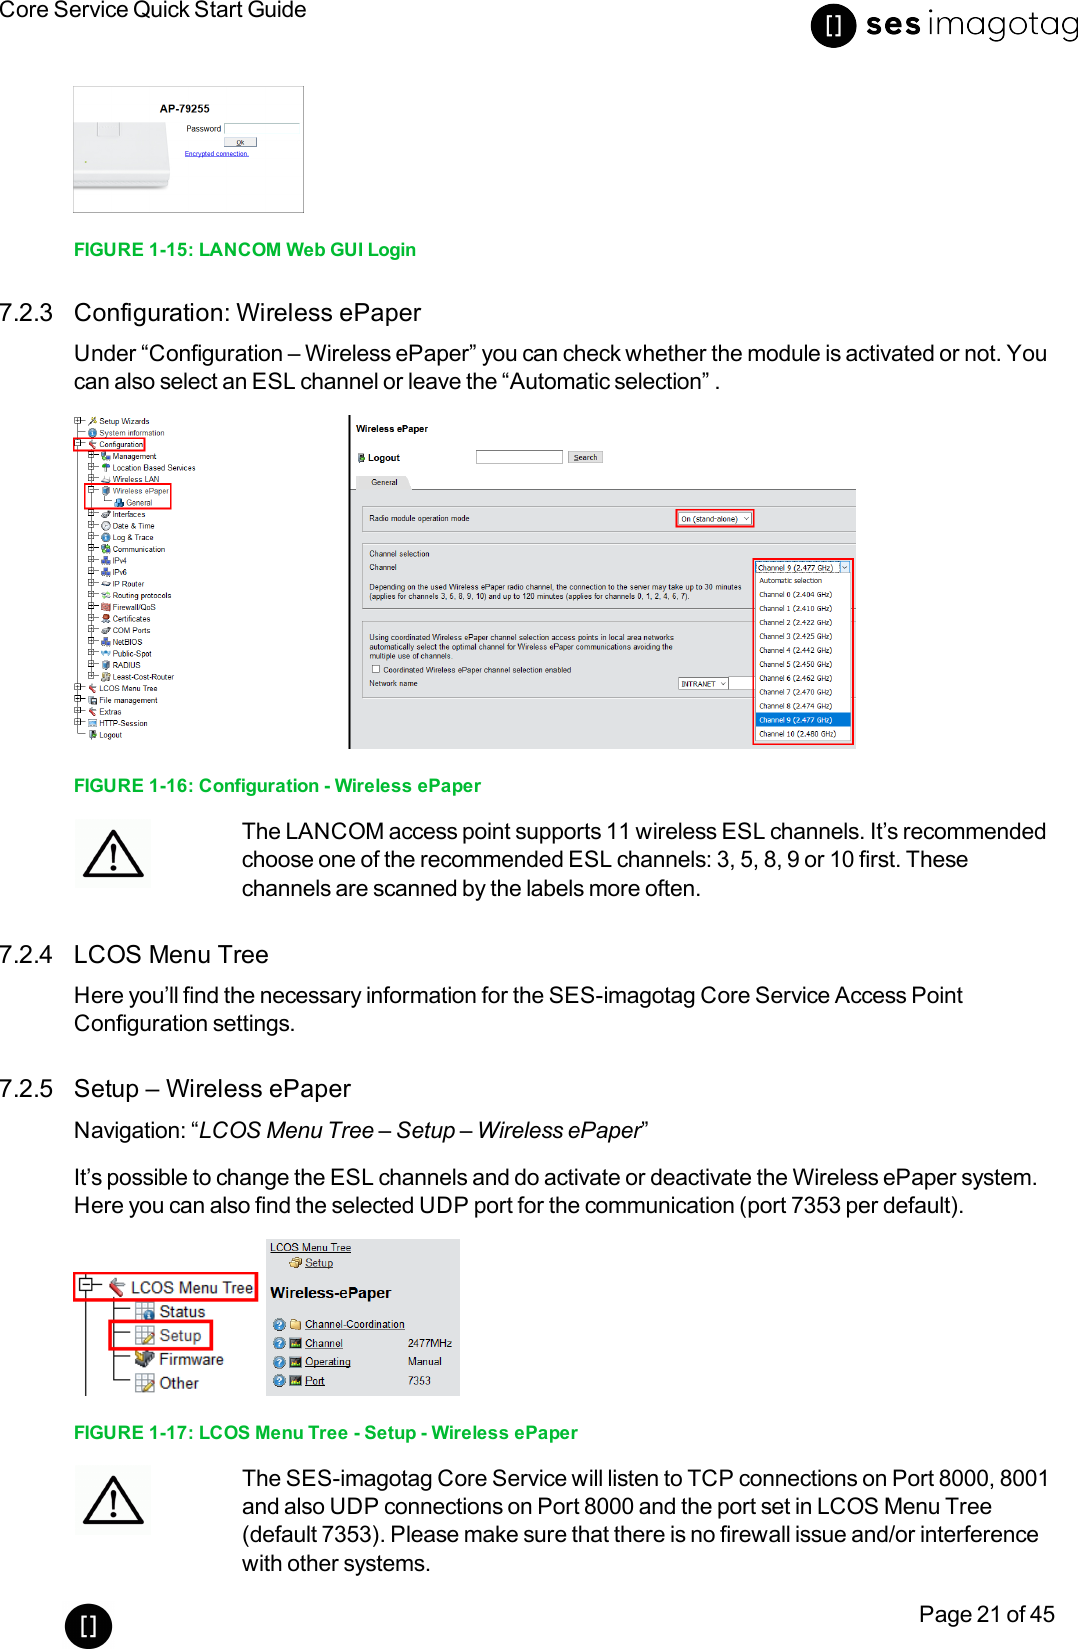
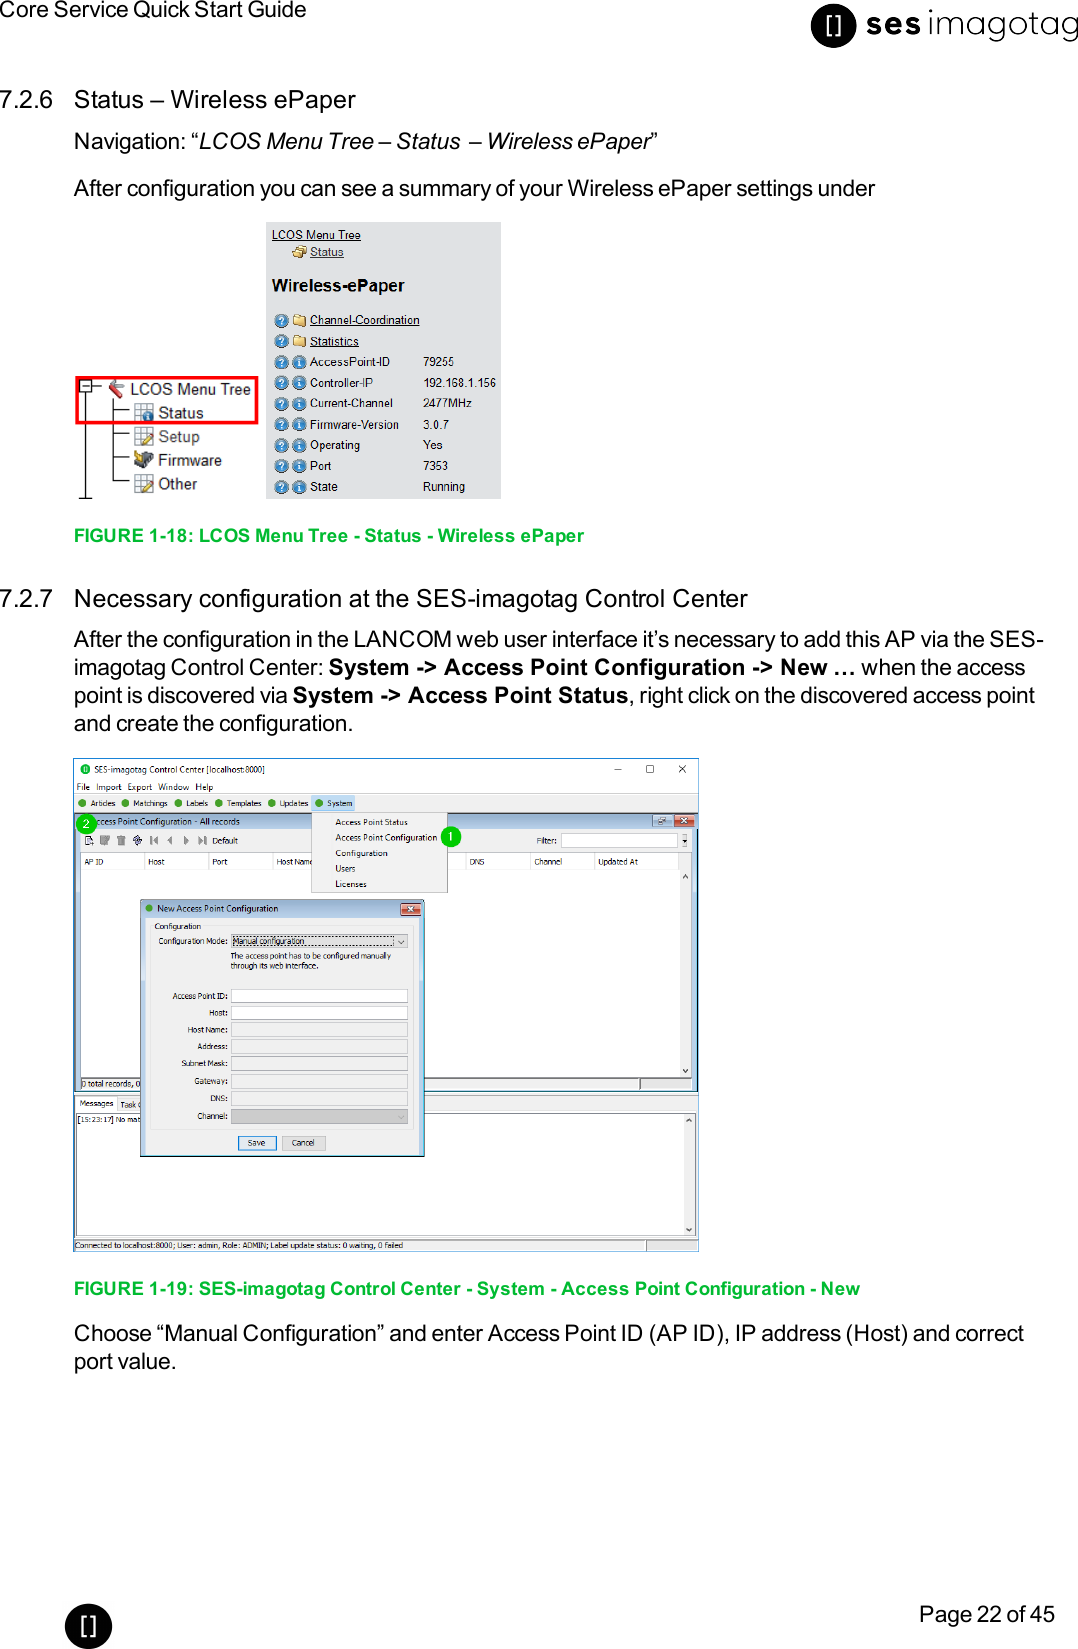
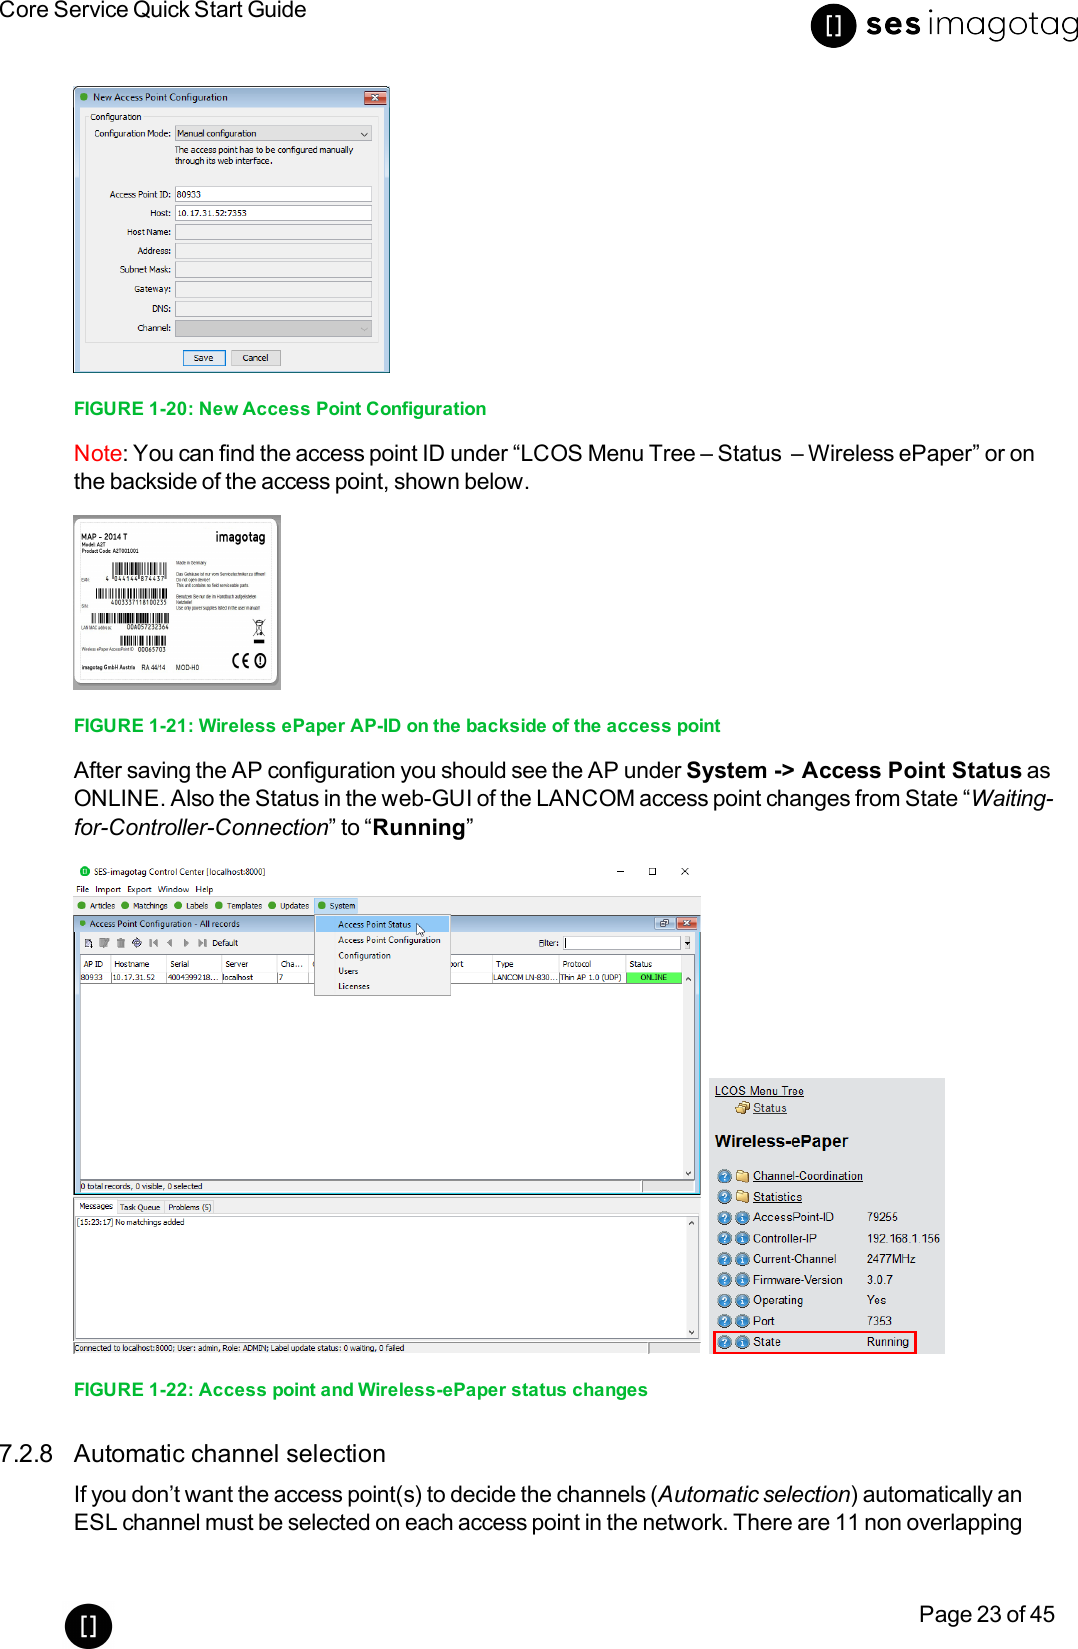
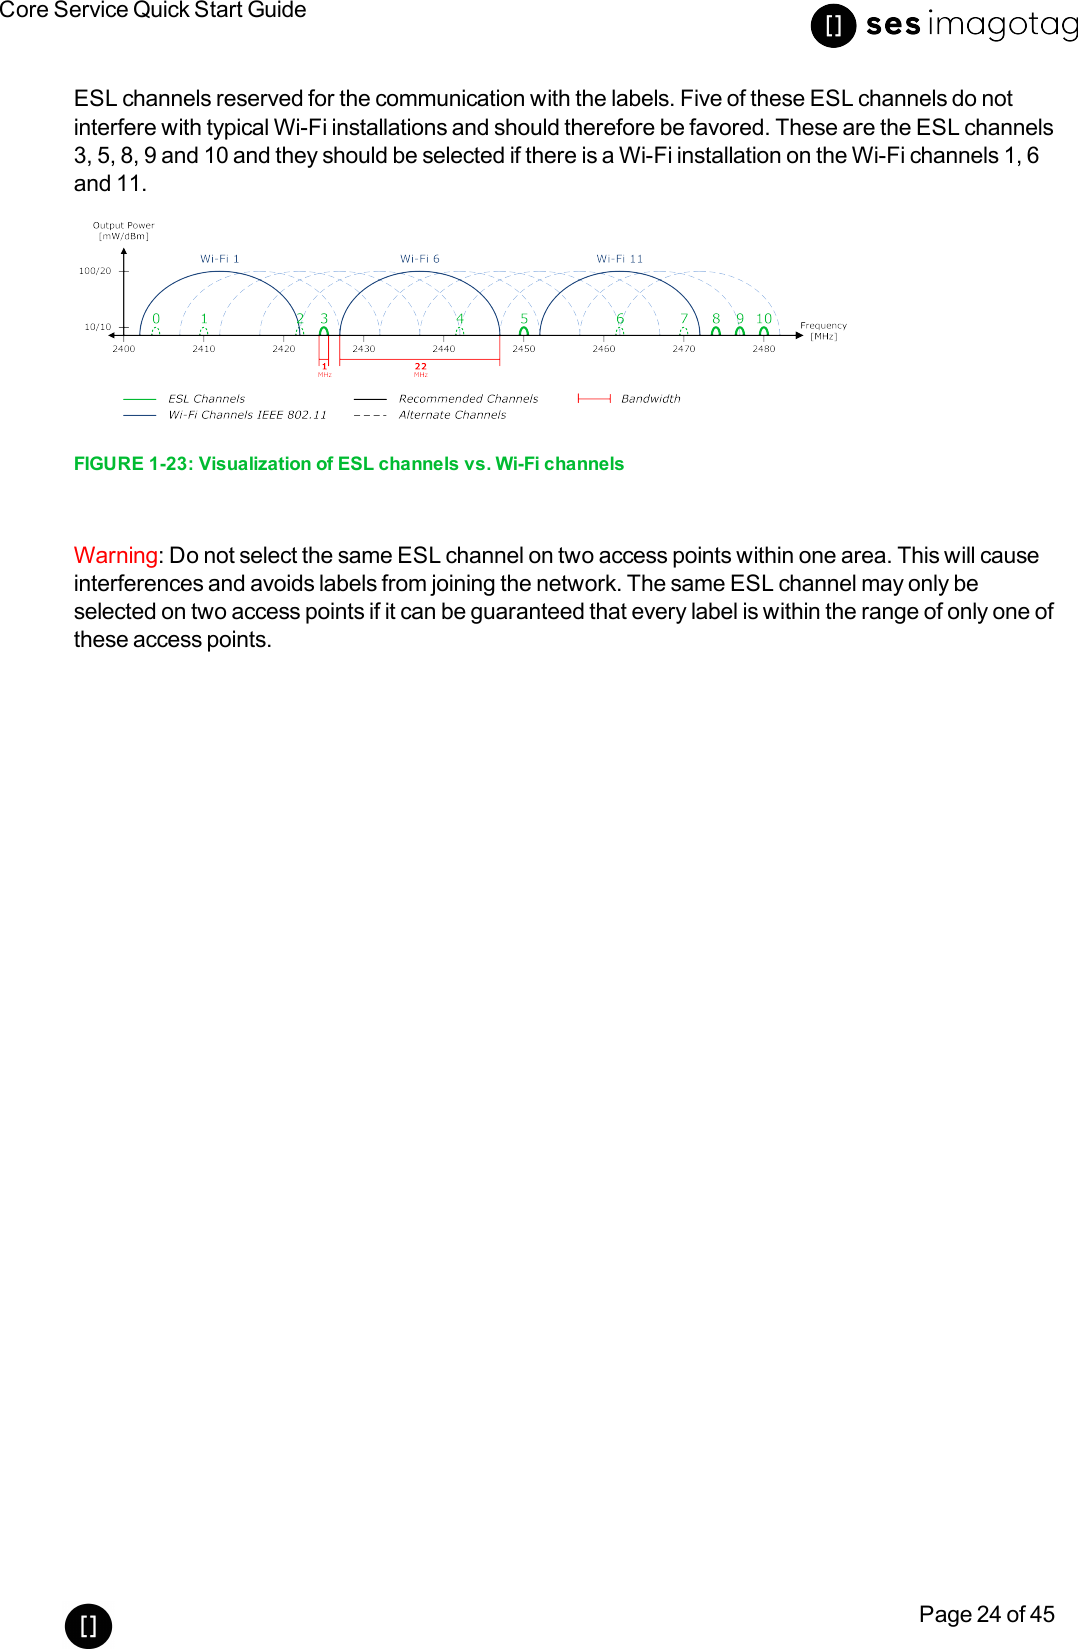
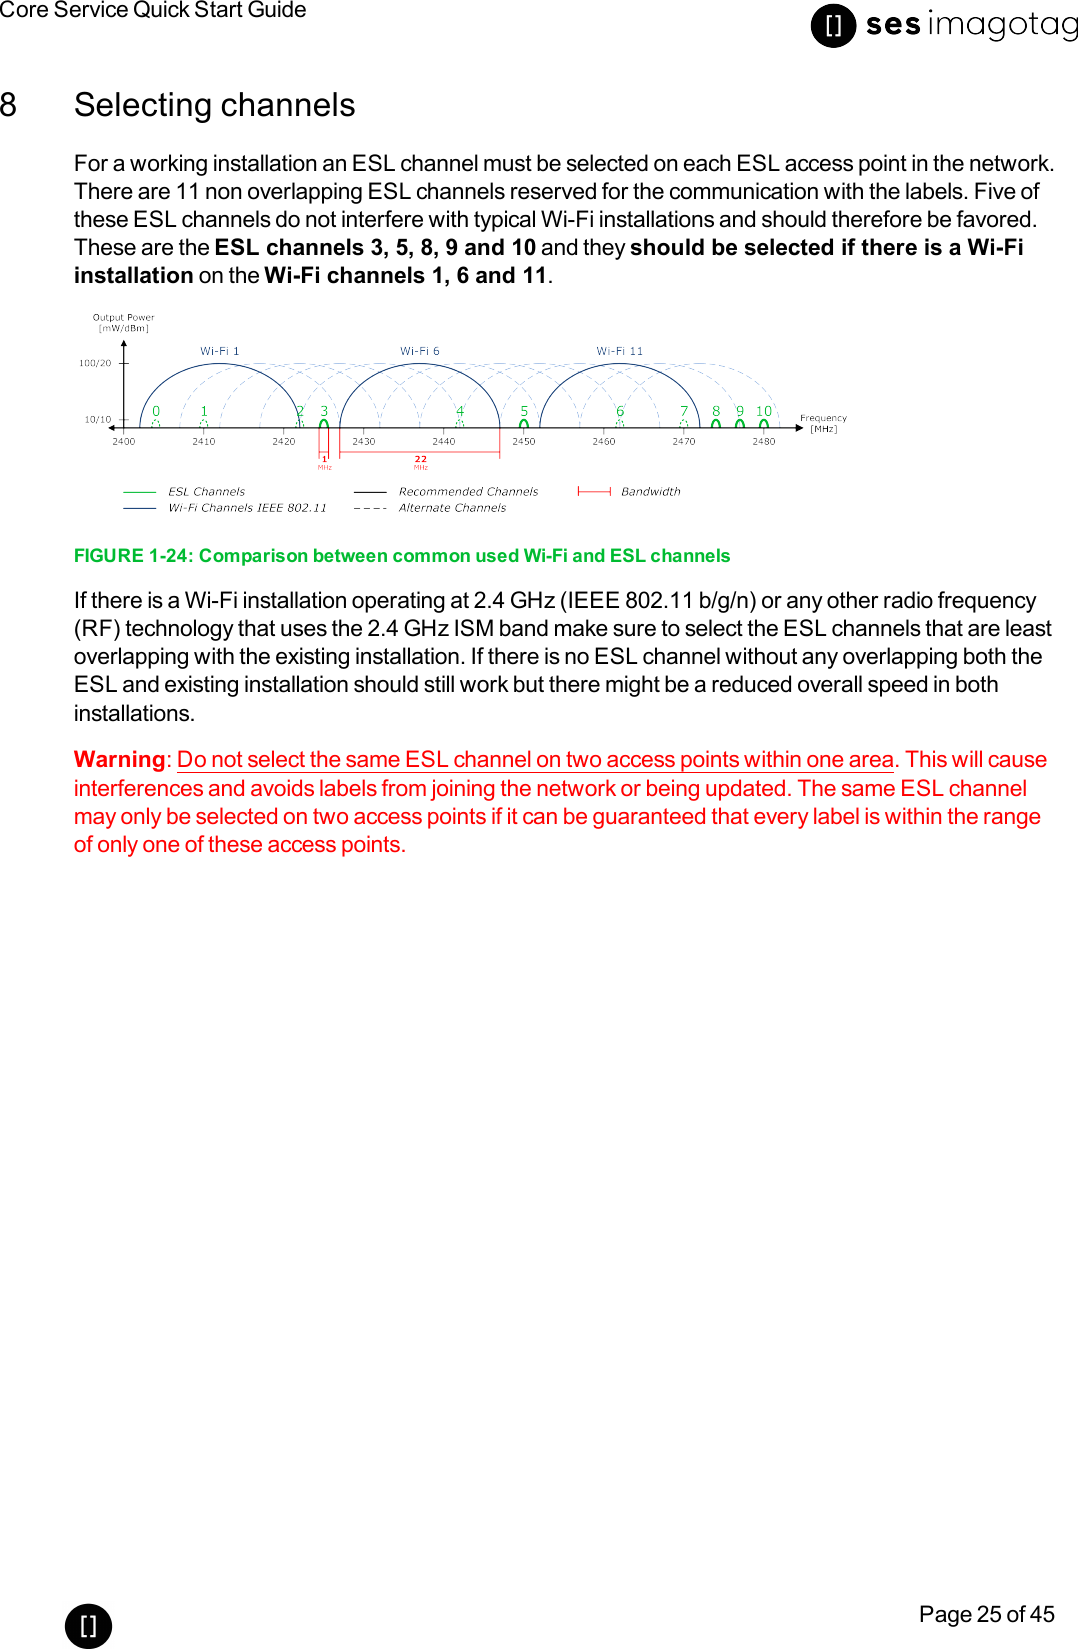
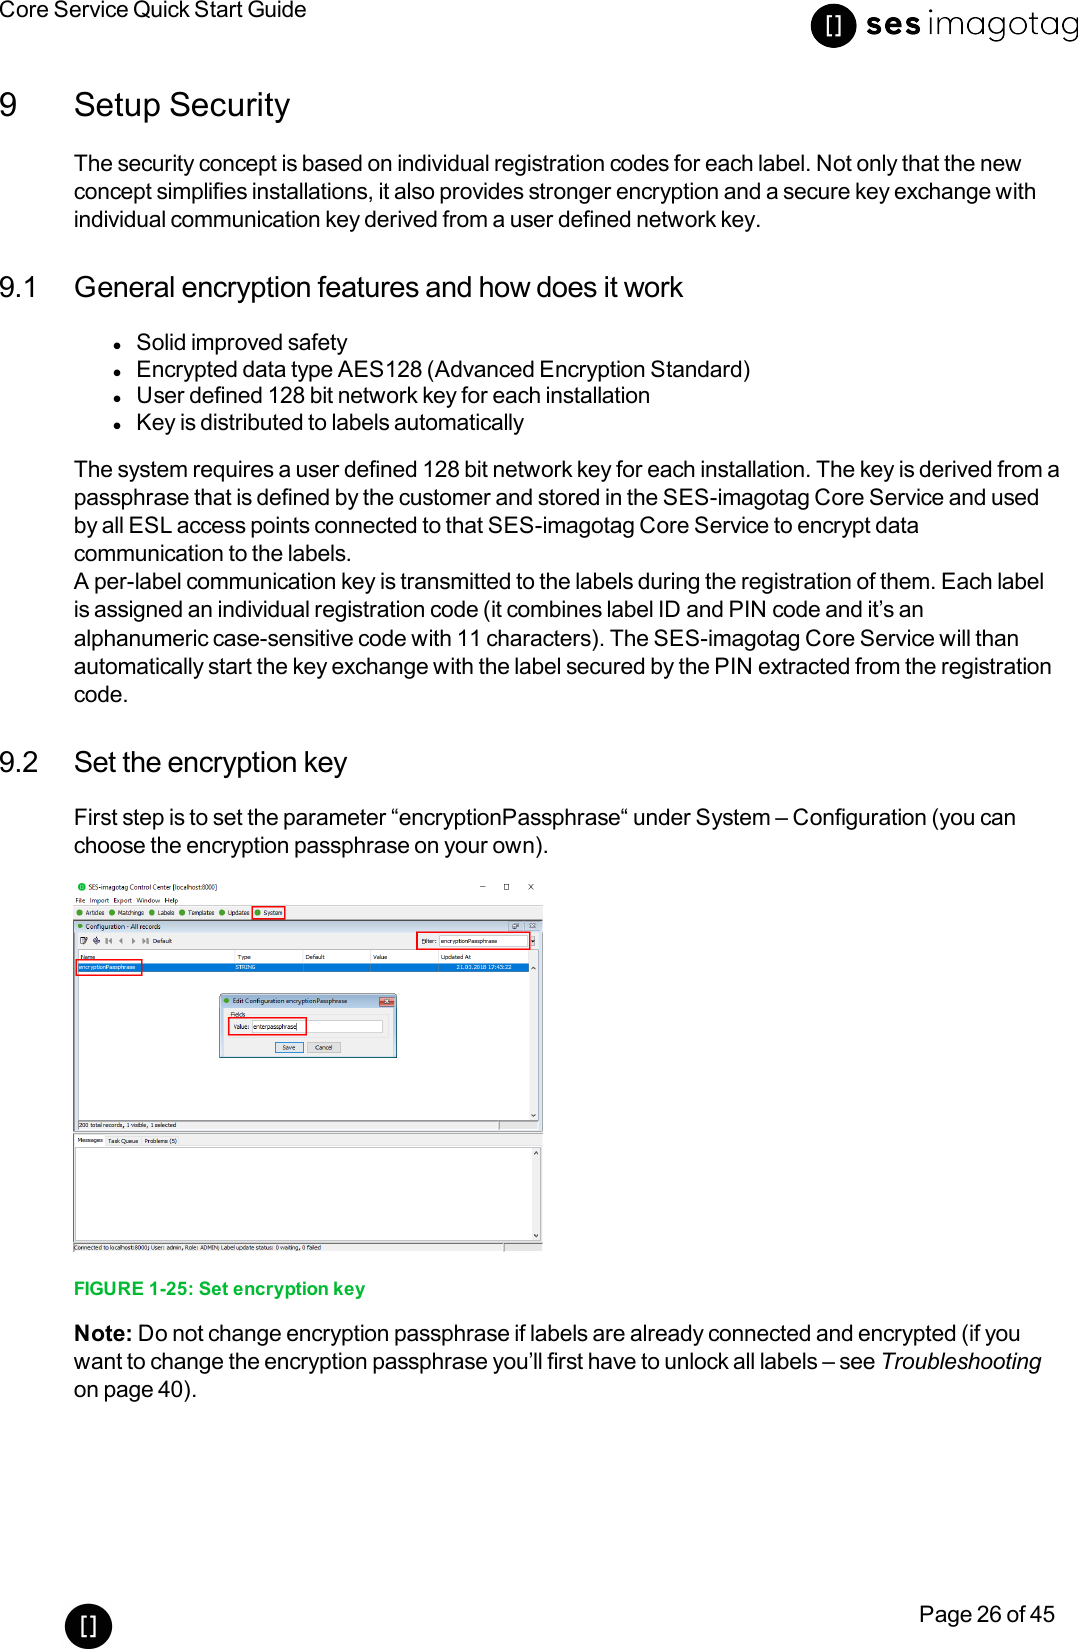
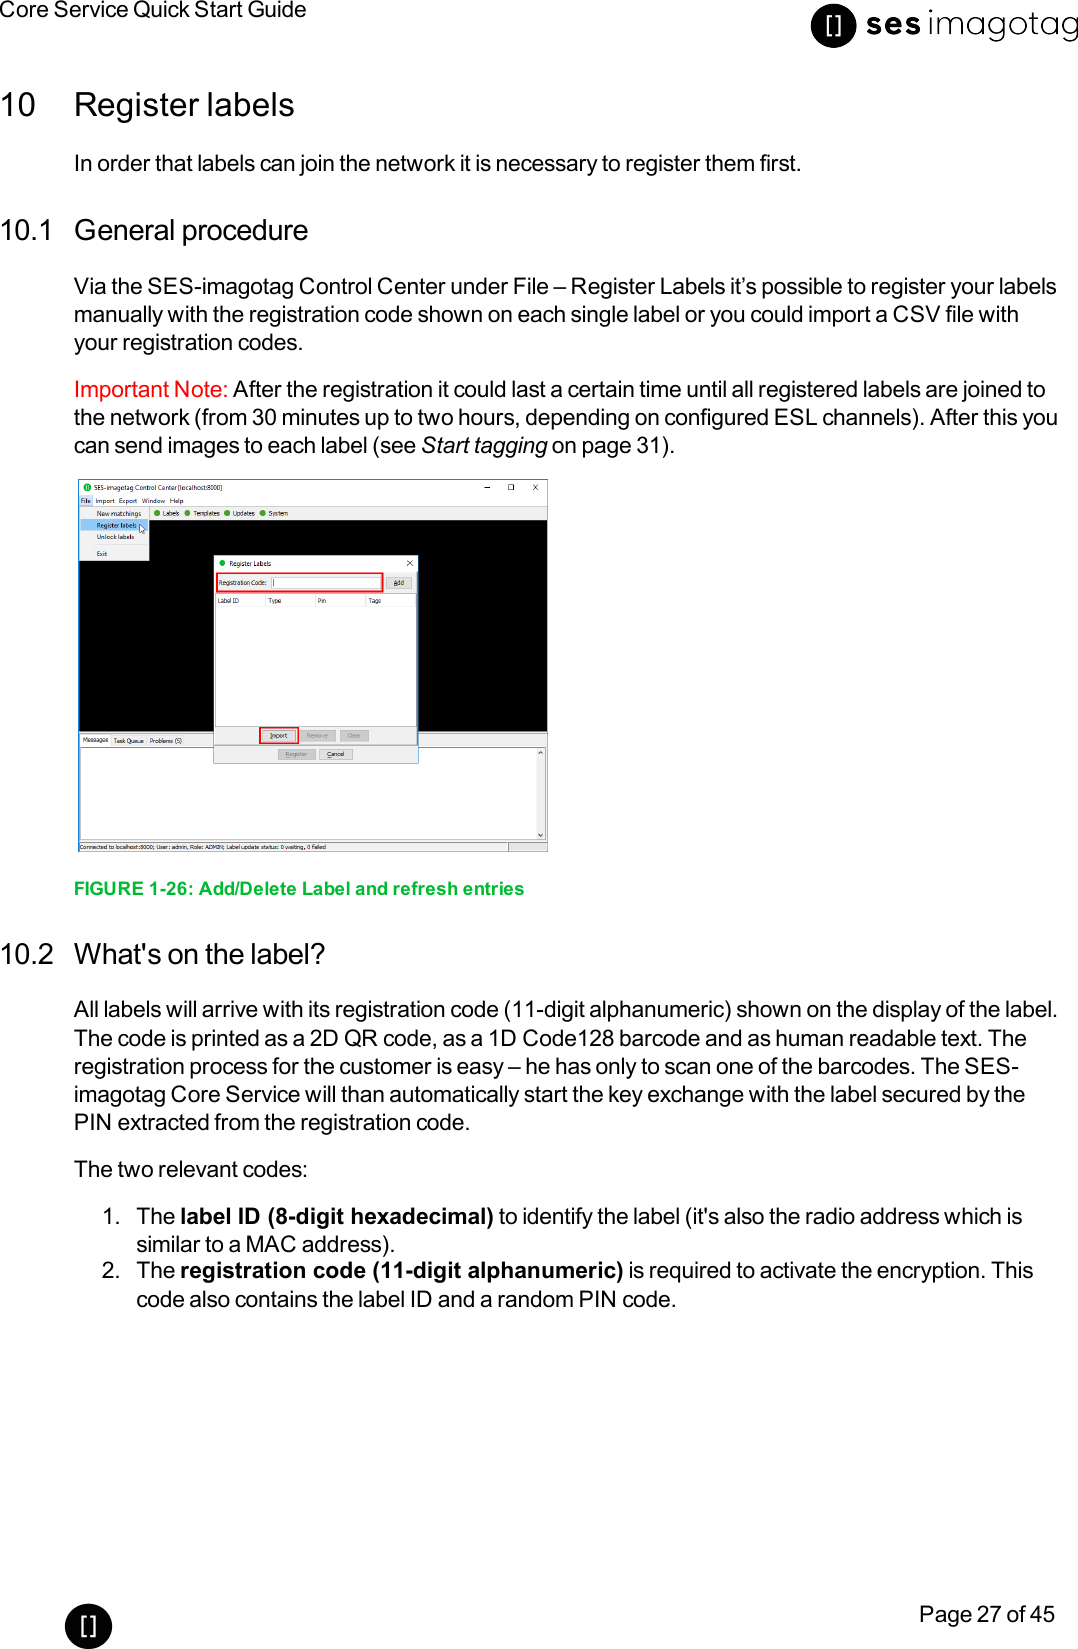
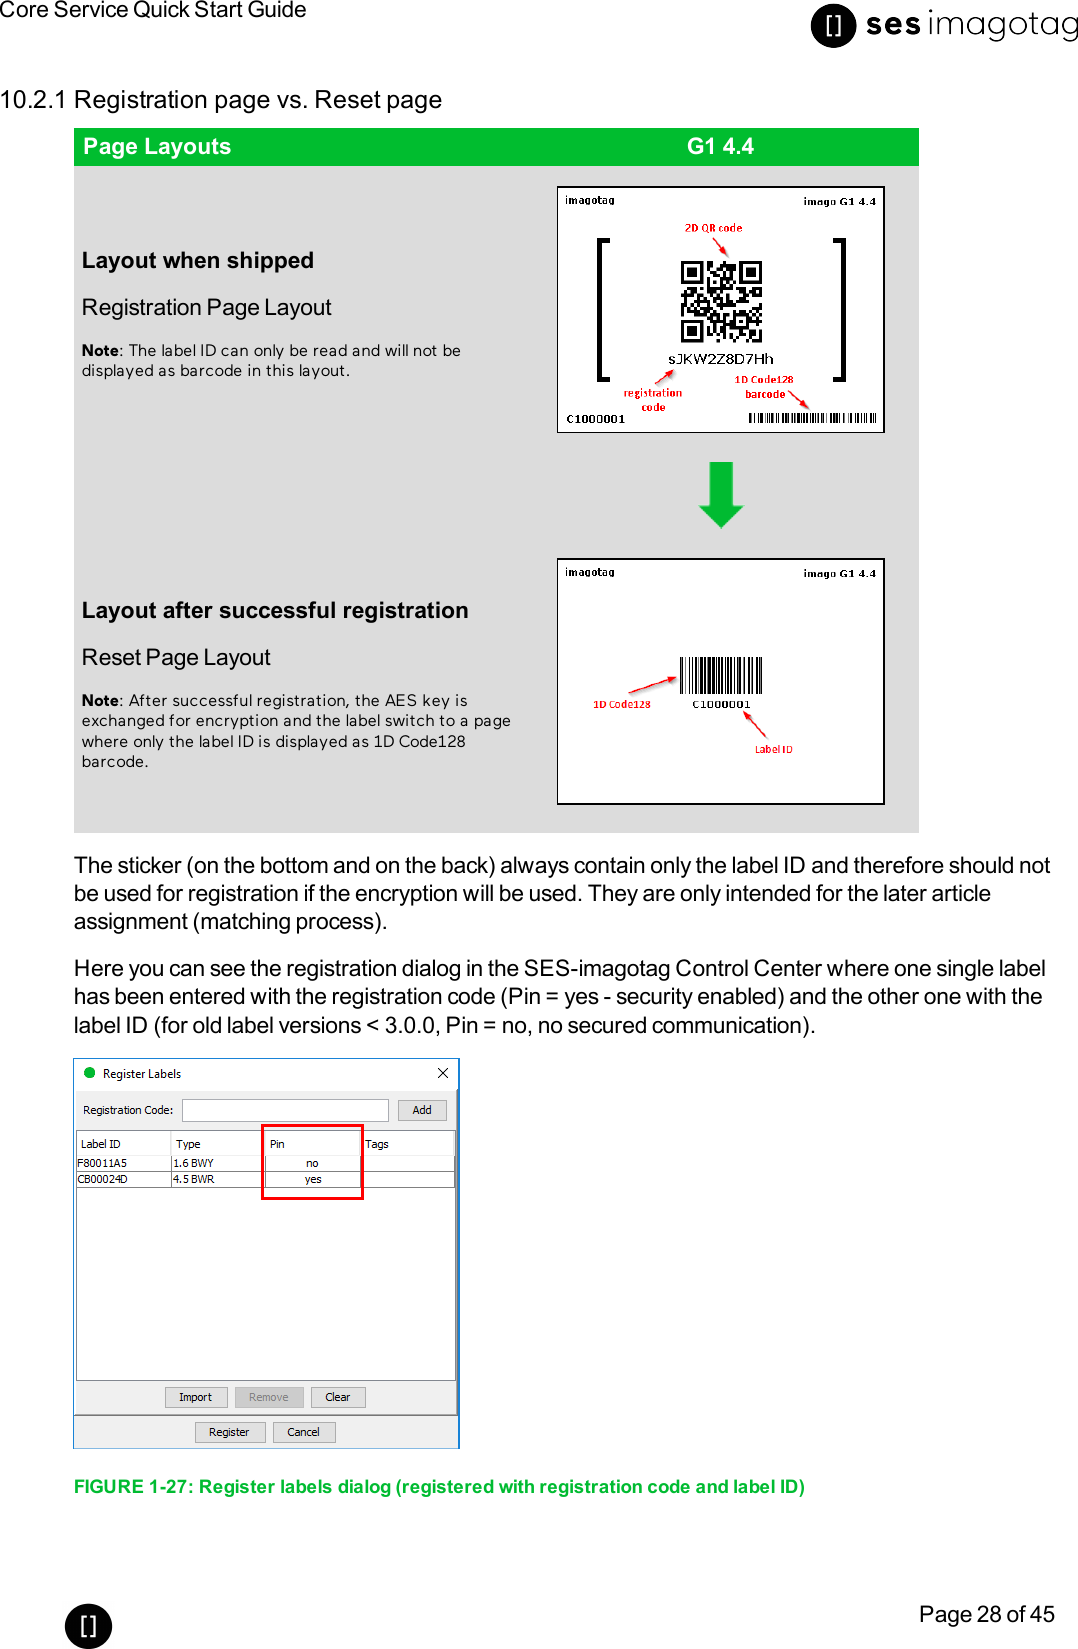
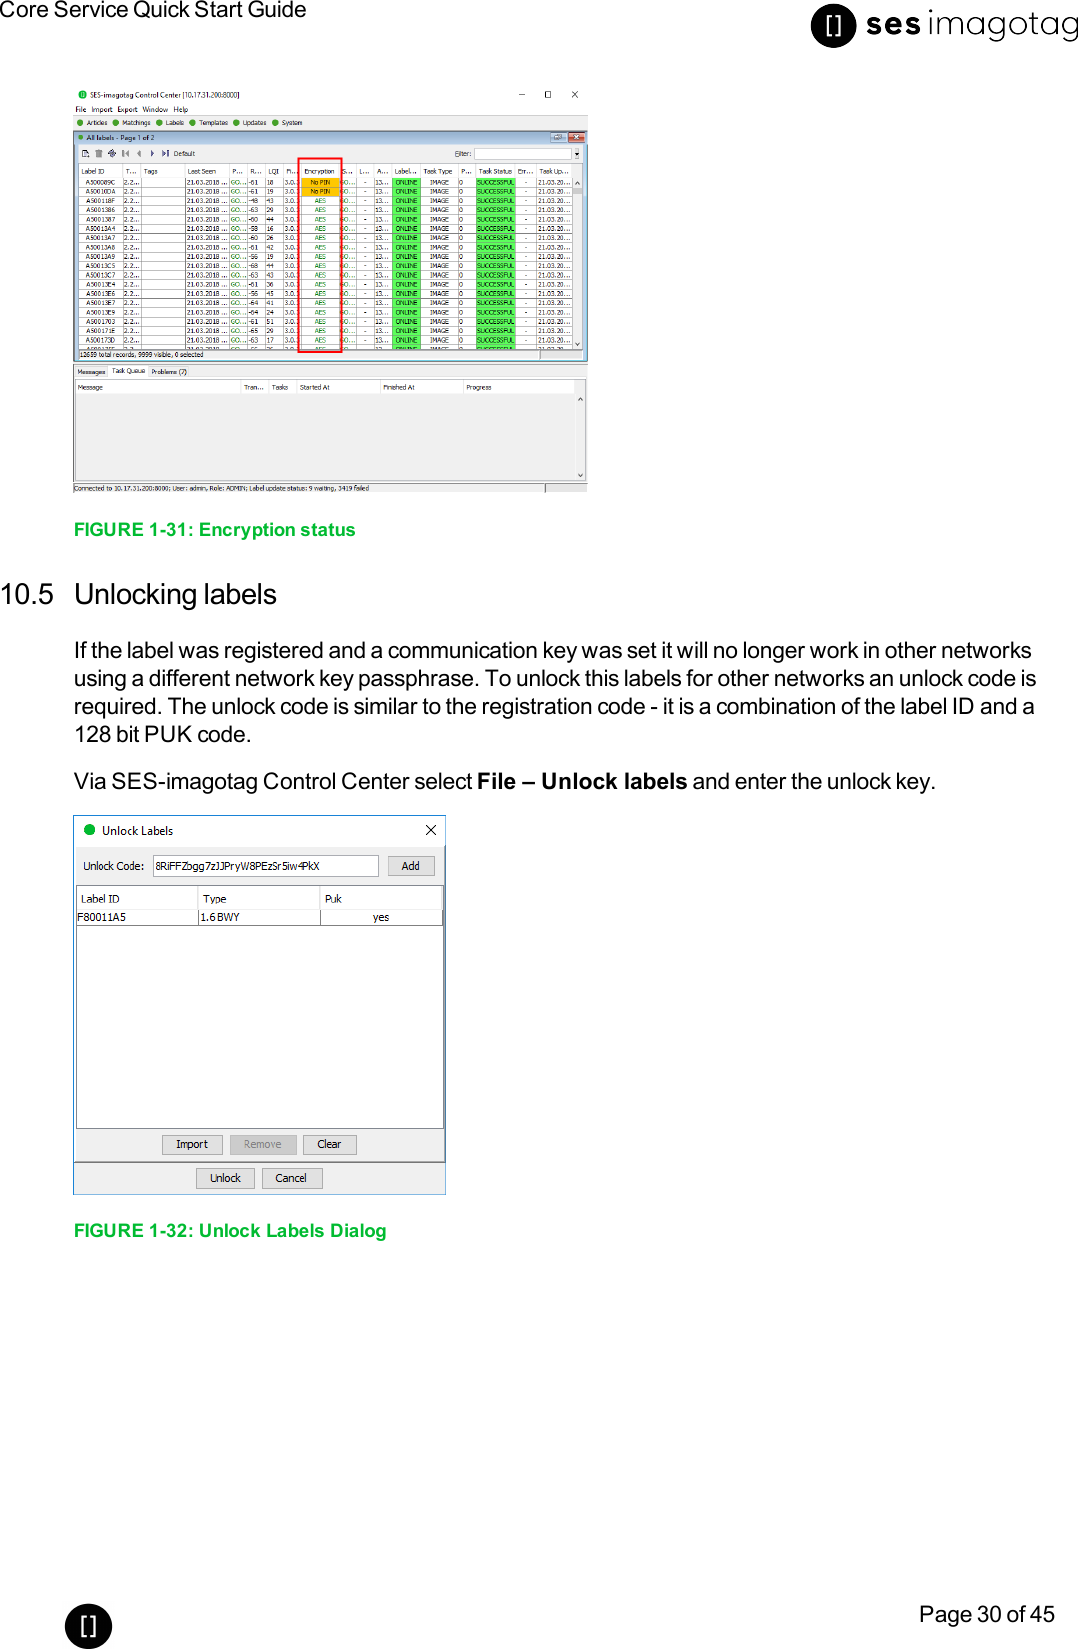
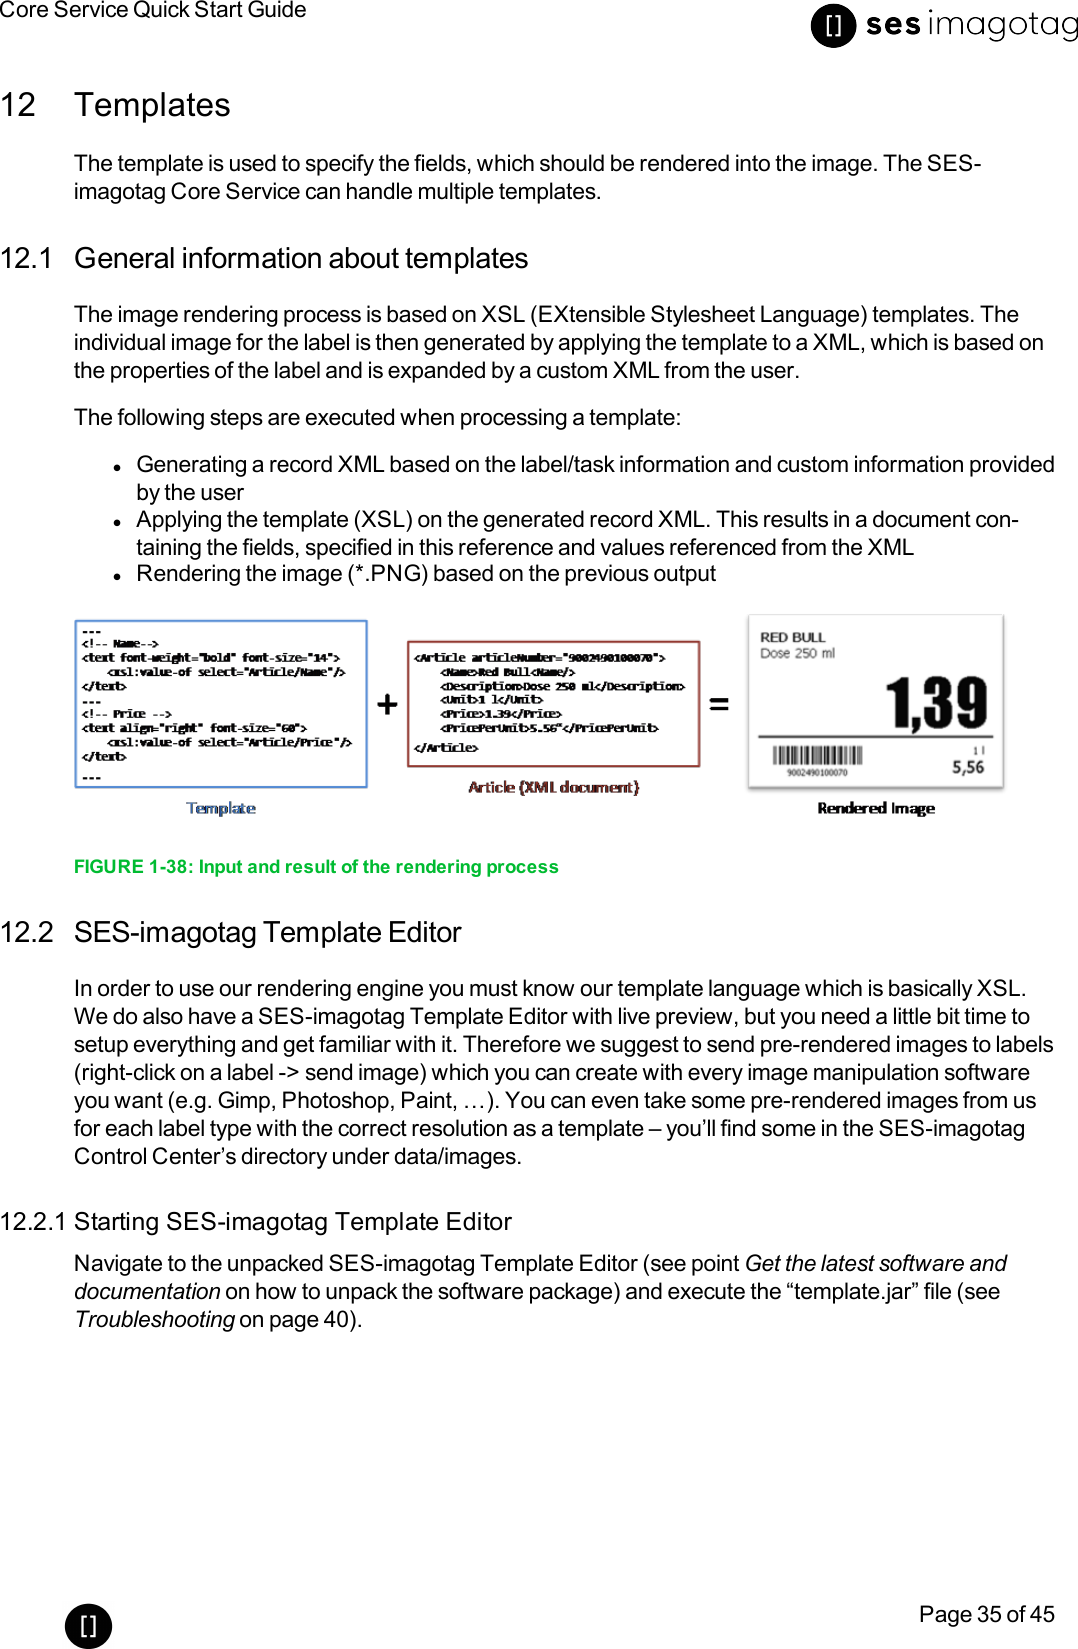
![Core Service Quick Start GuidePage 29 of 45Note: New versions of the SES-imagotag Core Service, SES-imagotag Control Center and AP-2010 (≥ 1.3.0) will also support old labels that do not come with a pre-programmed PIN code. Newlabels (≥ 3.0.0) will also work in old installations together with old labels but the SES-imagotag CoreService will not accept registration codes during the registration process. To register the labels it isrequired to scan the barcode with the label ID from the backside or the bottom edge of the label. Asthe SES-imagotag Core Service will not start the key exchange all data is transmitted unencrypted tothe labels.10.3 Handheld terminals, USB barcode scanner and SES-imagotag Core ServiceiOS-AppIt’s also possible to register labels with a commercial USB barcode scanner (2D/1D). You can alsouse the SES-imagotag Core Service iOS-App (for iPhone and iPod touch [only available onrequest]).Handheld terminals are mobile devices that are used to manage the ESL installation. If the handheldprovides a barcode scanner, it may be used easily to link articles and labels by scanning the articlebarcode (usually EAN, UPC or GTIN) and the unique ID of the label.Here you can see some screenshots of our SES-imagotag Core Service iOS-App:FIGURE 1-28: ESL-App Home-ScreenFIGURE 1-29: ESL-App RegistrationPageFIGURE 1-30: ESL-App MatchingPage10.4 Encryption statusHere are the encryption status a label could have:lAES: Communication with label is encrypted with 128 bit AESlNo PIN: Could not set encryption key as no PIN (registration code) was providedoSolution: Re-register label with registration codelKey unset: Communication is NOT yet encryptedoSolution: Set encryption passphrase and ping the label to start the encryption processlUnsupported: Encryption is not supported by label firmwarelUnknown: Security status is not determined yet](https://usermanual.wiki/SES-imagotag/EDG1-0270-B.Quick-start-guide/User-Guide-4097626-Page-29.png)