SEVEN LIKE BTH01 Wireless Bluetooth Thermometer User Manual Manuel
SEVEN LIKE CO., LIMITED Wireless Bluetooth Thermometer Manuel
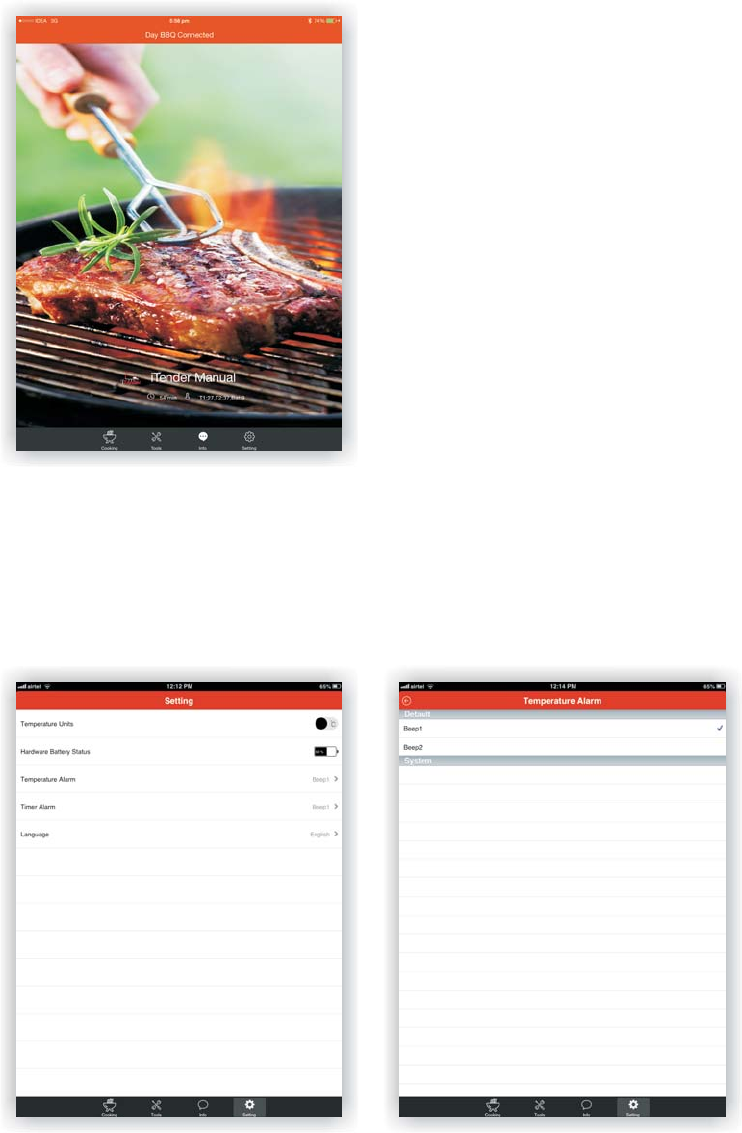
Users Manual

Wireless Bluetooth
Thermometer Manual

Table of Contents
1. Content of box ..............................................................................................................................................................1
1-1 Unit descriptions .....................................................................................................................................................1
1-2 Abbreviations used .............................. ...................................................................................................................1
1-3 LCD indications ........................................................................................................................................................1
2. Quick Menu ............................................................................................................ ....................................................... 2
3. Hardware Instructions ............................................................................................................................................... 2
3-1 Power ........................................................................................................................................................................ 2
3-2 P owering on the device ......................................................................................................................................... 2
3-3 Setting target temperatures ................................................................................................................................. 2
3-4 Setting the timer ................................................................................ ..................................................................... 2
3-5 Metric / Imperial conversion ................................................................................................................................. 3
3-6 Auto Power off ......................................................................................................................................................... 3
3-7 Hardware re set ........................................................................................................................................................ 3
4. Bluetooth 4.0 connection and application functions …...............………………………………......................3
4-1 Connect your smart device ................................................................................................................................... 3
4-2 APP function s ............................................................................................................................................................ 3
4-2-1 Cooking TAB .................................................................................................................................................. 3
4-2-2 Tools TAB .................................................................................... .................................................................... 5
4-2-3 Info TAB .......................................................................................................................................................... 6
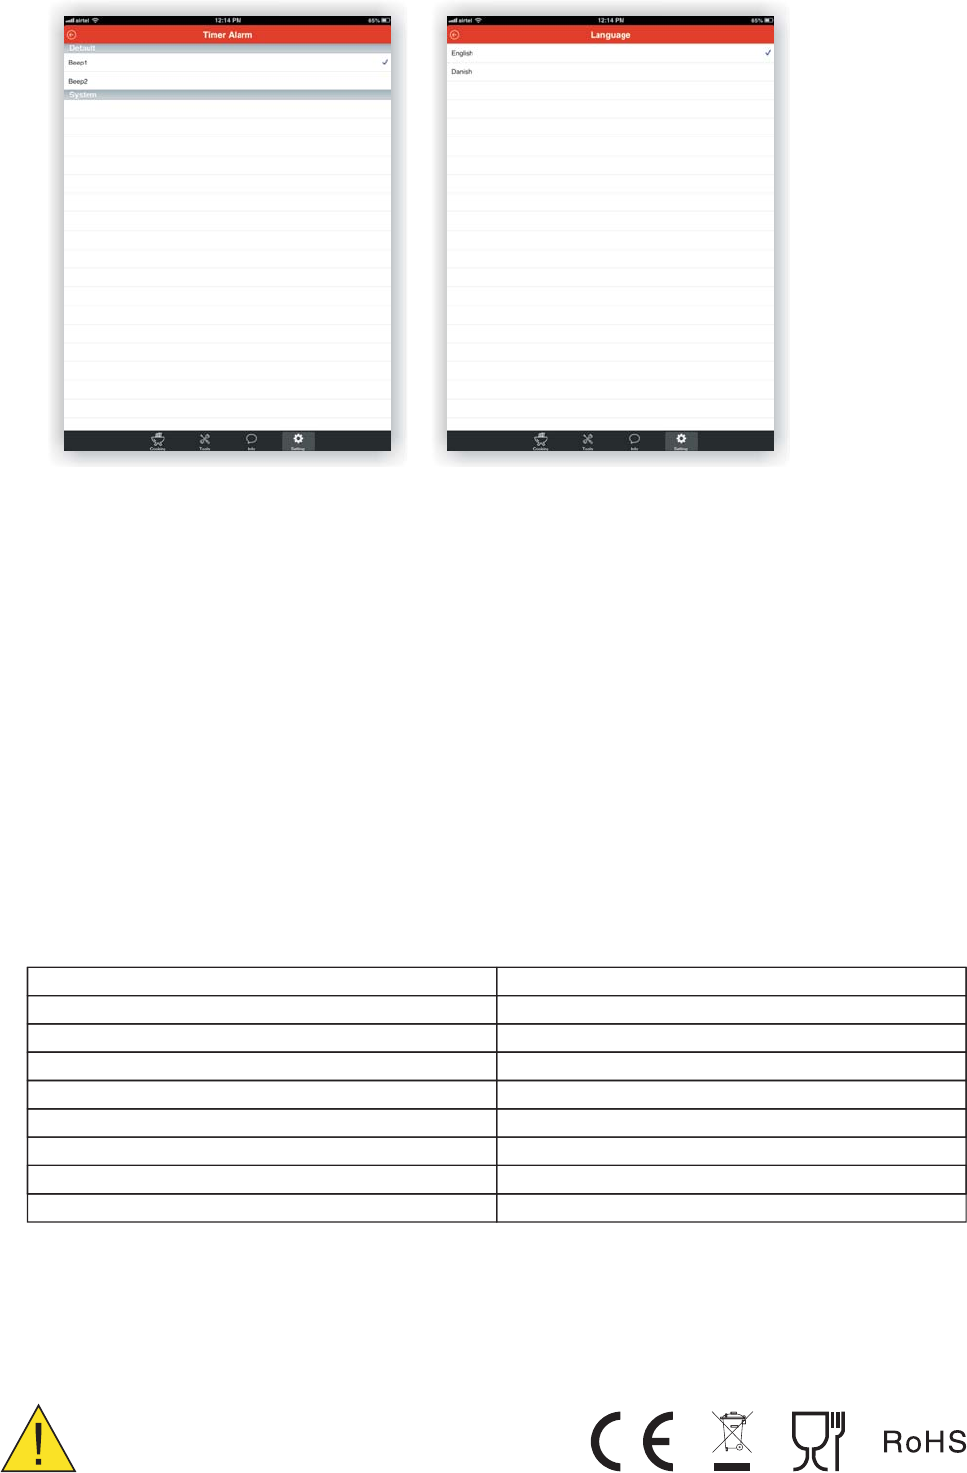
4-2-4 Settings TAB .................................................................................................................................................. 6
5. Discl aimer ..................................................................................................................................................................... 7
6. .......................................................................................................................................................... 7
7.
Hygiene advises
Specifications ........................................... ................................................................................................................... 7
1. Content of the box
- 1 x BluetoothThermometer
- 2 x probes
- 1 x quick instruction manual
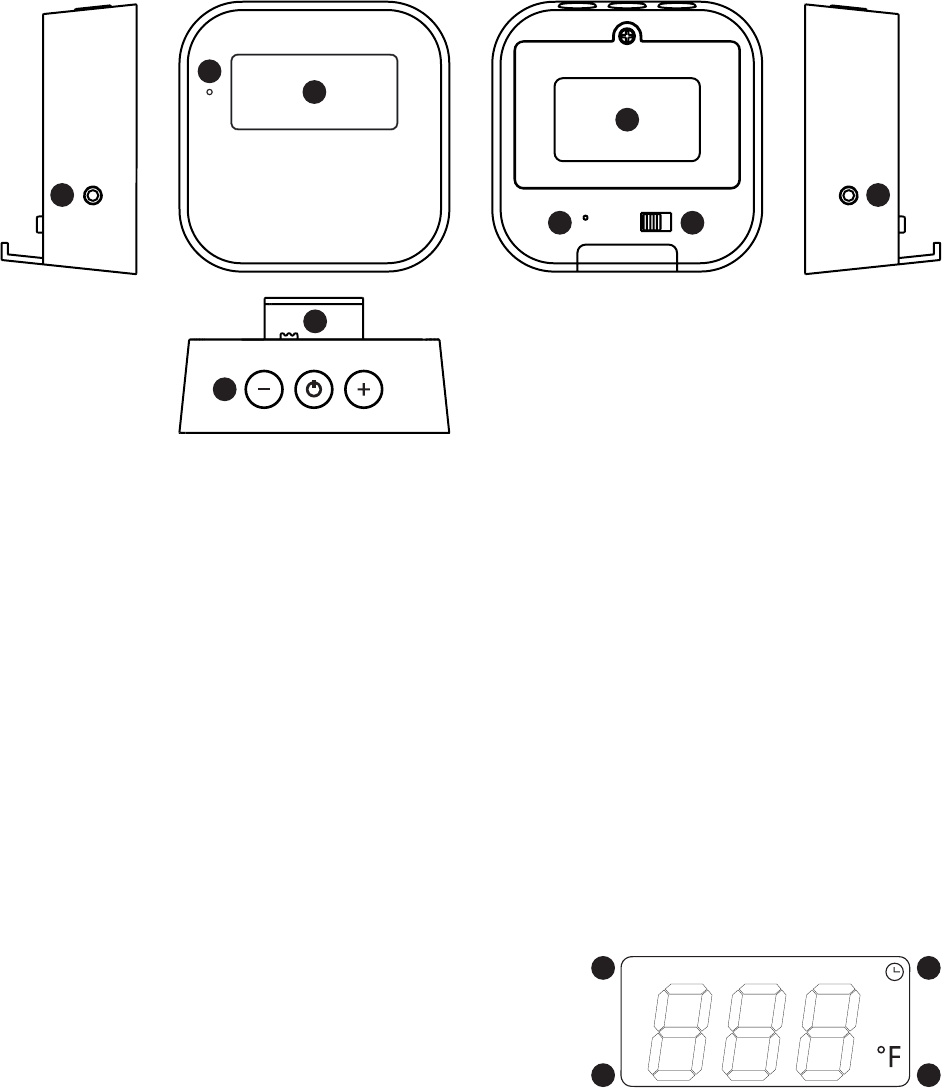
1-1 Unit description:
P1
B
P2
C
D
E
F
GI
A
H
A: Operational buttons
B: P1
C: P2
D: LED light.
E: LCD screen
F: Battery cover
G: Unit conversion switch
H: Table stand
I: Buzzer
1-2 Abbreviations used:
P1 = Probe 1
P2 = Probe 2
Current = Current temperature
Target = Target temperature
1-3 LCD indications:
1: P1 and P2 indicates either the current or
target temperature of Probe 1 or Probe 2
2: Timer symbol
3: Unit indication
Celsius / Fahrenheit
4: Temperature / Time (in minutes)
1
8 8 8 ȭ
Current TargetP1 P2
12
34

2. Quick menu:
A. Loosen the screw and remove the battery cover from the backside of the thermometer and insert
3 x AAA batteries according to polarities indicated inside the casing - fasten the screw again.
B. Now hold and keep the middle button pressed until you first hear 2 beeps and then 3 beeps from the
thermometer.
- LED on thermometer is now flashing blue.
C. Download the Application shown on the Gift box received.
- Plug in 1 or 2 probes into P1 or P2 on the sides of the unit
- Turn on your smart device's Bluetooth connection.
- Open the Application
- Thermometer should now connect automatically with your Smart device.
D. LED on thermometer will switch to constant blue.
E. LCD screen will display the current temperature of either P1 or P2 (if both are inserted it will interval
between them every 10 seconds).
F. Through your Application you can now set what meat is cooking and what desired doneness you want.
G. Insert your probes into the meats. Remember to insert the probes so the tip is in the middle of meat.
H. The Application has full manual on its INFO tab.
3. Hardware Instruction
3-1 Power
- Loosen the screw and remove the battery cover from the backside of
the thermometer.
- Insert 3 x AAA batteries according to the polarities indicated in the
plastic casing
- Retune the battery cover and fasten the screw
Note: Always use same type of batteries. Do not use old and new batteries together.
3-2 Powering on the device
- After having inserted the batteries, press and hold the middle button until you hear 2 beeps and then 3
beeps.
- LED light should change from RED to flashing blue
- Thermometer is now in Bluetooth discoverable mode and operational with a 4.0 Bluetooth enabled
smart device.
- Insert 1 or 2 probes into the side of the device.
3-3 Setting target temperatures
- Insert the probes in either P1 or P2 on the side of thermometer.
- With the Mode button scroll between P1 and P2 (highlighted on the LCD).
- Choose the probe you want to set the temperature for and select your target temperature by pressing
the left (-) or right (+) button on the top of the thermometer.
- Target icon will flash during this operation. Once you have chosen the target temperature the target
icon will stop flashing in 3S and your temperature is set.
- Once the meat has reached the desire temperature an alarm will sound from the thermometer.
- You can repeat the above for both P1 and P2.
3-4 Setting the timer
- With the Mode button scroll to the time icon. (highlighted on the LCD)
- To set the time (in minutes) press the left (-) or right (+) button on the top of the thermometer.
- Timer icon will flash during this operation. Once you have set the time, the timer icon will stop flashing
in 3S, and timer will start the countdown
- Time is set in minutes
- A buzzer will sound the alarm.. 2
3-5 Metric / Imperial conversion
- On the back of the thermometer you can switch between Celsius or Fahrenheit.
- Through the application you will also be able to set this. Both hardware and software will use the
latest selected unit form.
3-6 Auto Power off
- If no probe is inserted into the thermometer, it will automatically switch off after 15min.
- If no timer is set and a probe is inserted the thermometer will automatically switch off after 2 hours of
none use (no buttons pressed)
- If a timer is set, the thermometer will turn off 2 hours after the timer has sounded.
- If the thermometer has an active B luetooth connection the product will not automatically power off.
3-7 Hardware reset
-Should the thermometer for some reason not respond or not connect after several tries, user can hard
reset the thermometer by removing the batteries and re-insert the batteries.
- NOTE:
Keep the cables clear of fire and direct heat. Cables can resist up to 200℃ heat only.
Keep the thermometer dry at all times. If dirty, clean with a wet cloth and dry off.
4. Bluetooth 4.0 connection and application functions
4-1 Connect your smart device
- First download the application on the iOs App store or on the Google Play store.
- When thermometer is switched off, hold and press the on/off button until you first hear 2 beeps and
then 3 beeps.
- LED is now flashing blue.
- Enable Bluetooth on your smart device.
- Open the application on your smart device
- Thermometer and Application should now automatically connect.
1) If the red LED ON (flash), means:
2) If the blue LED restarted flash, means:
4-2 APP functions
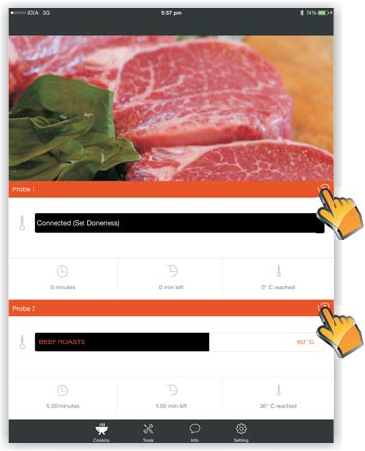
4-2-1 CookingTAB
Select your meat and doneness here for P1 and P2.
3
Choose your meat and doneness here.
- Select your meat by scrolling left or right through the icons.
- You can choose between Gourmet and USDA.
- Doneness of meat should always be determined using
meat thermometer inserted in the thickest part of the
meat and away from the bone.
While USDA (United States Department of Agriculture)
temperature guidelines are valuable for food safety, they
are often be overdone, especially on the grill. Many
restaurants cook to temperatures aligned more with the
"gourmet" column below. This requires close attention
to safe food handl ing guidelines.
- Be sure you do NOT undercook your meat when using the
Gourmet settings.
- Select your desired doneness after having selected
Gourmet or USDA.
- If gourmet is selected the alarm will buzz at the lowest
temperature indicated.
- A custom temperature can also be selected under“My Custom”.
- Confirm with done.
- After you have selected your meat you can see the status of your cook on the cooking tap.
4
2
Time cooked Time left Current temperature
32
2
1
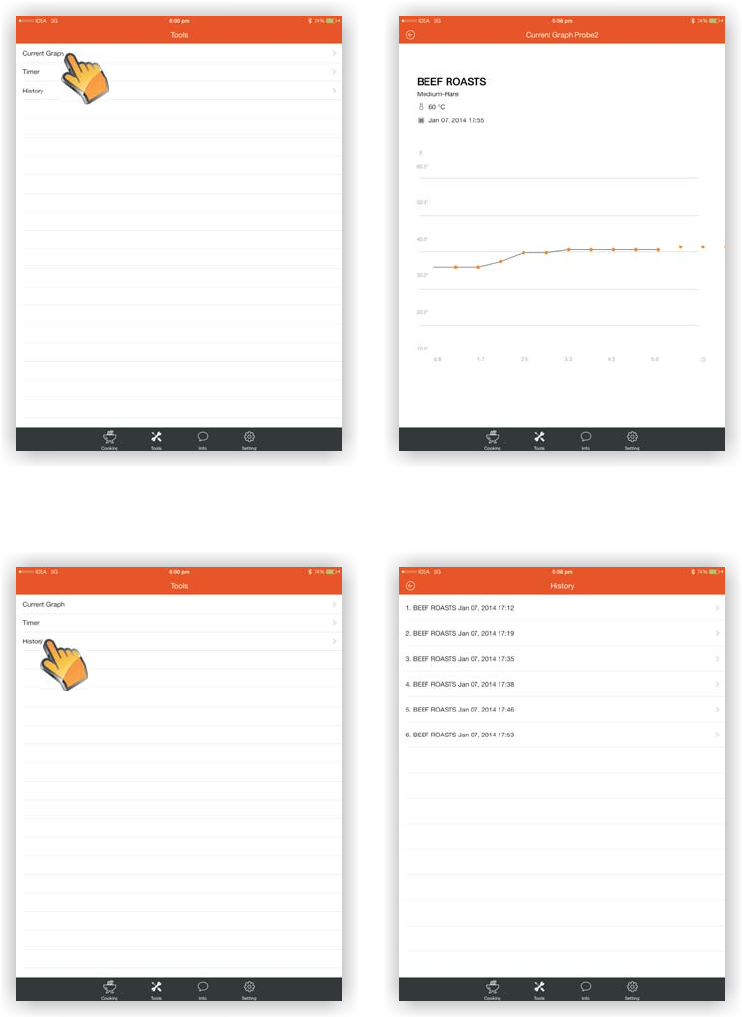
- A history diagram is built in as well. Tools -> History
- Here the information about your last cooks will be displayed.
5
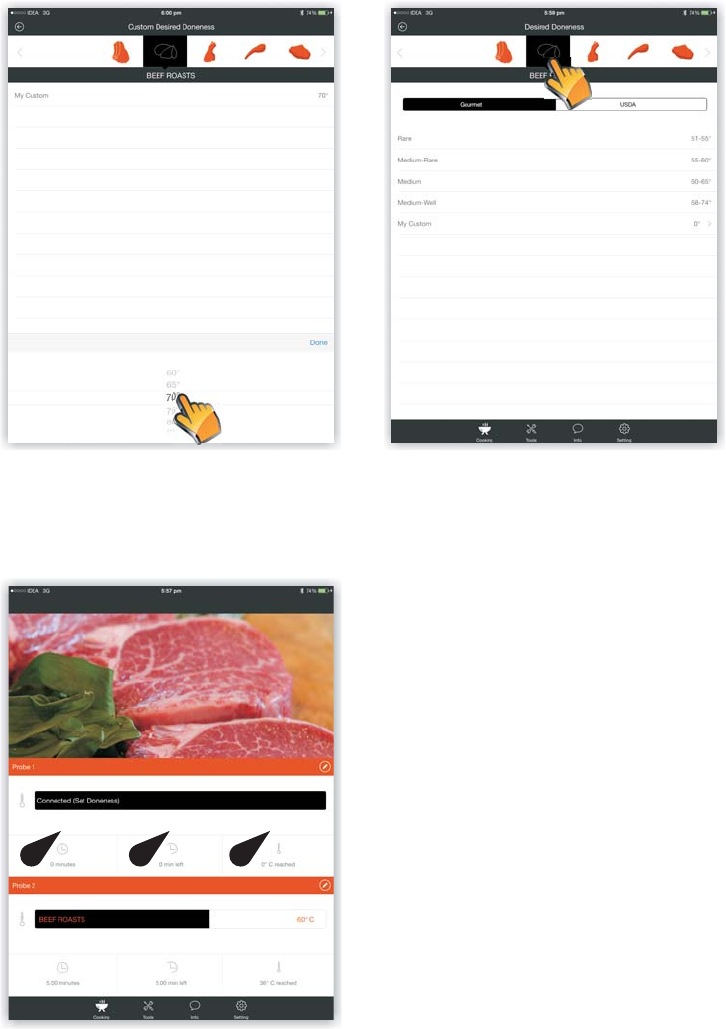
4-2-2 Tools TAB
- A current temperature graph can be seen under Tool -> Graph
- The graph is indicated by temperature (vertical) and time in minutes (horizontal)
4-2-4 Settings TAB
-Temperature Units
- Switch between Celsius to Fahrenheit
- See the thermometers battery status in %
- Choose the temperature alarm sound
- Choose the timer alarm sound
- Set your language.
6
4-2-3 Info Tab
- Displays the:
- Current temperature of Probe 1 / Probe 2
- Battery status of the thermometer
- Next timer's alarm
5. Disclaimer:
The above mentioned product's manufacturer cannot be held responsible for any contamination or
undercooked food leading to illness or harm to any person or animal.
Manufacturer is not responsible for any overcooked or ruined food, due to misreading of temperatures or
failure of product.
6. Hygiene advises:
Bacteria in raw meat juices can contaminate foods that have been cooked safely or raw foods that won't be
cooked, such as salad ingredients. Bacteria also can be present on equipment, hands, and even in the air.
To avoid cross-contamination, keep everything clean. Don't reuse any packaging materials. Don't put
cooked meat on the same platter that held the raw meat unless you wash the platter again (above 65℃
water)
Always clean the probes before and after use. (above 65℃ water)
7. Specifications:
WARNING:
SHARP OBJECT. NOT A TOY.
KEEP AWAY FROM CHILDREN. 7
Size:
Temperature range:
Operating temperature:
Bluetooth:
Batteries:
Probe length:
Cable length:
Waterproofed:
65 X 65 x 25 cm
-20 ~ +200℃
+5 ~ +60℃
4.0
3 x AAA
19 cm
100 cm
NO
Splash proofed:
FCC ID: 2ACD3-BTH01
This device complies with Part 15 of the FCC Rules. Operation is subject to the following two
conditions: (1) this device may not cause harmful interference, and (2) this device must accept any
interference received, including interference that may cause undesired operation.
Changes or modifications not expressly approved by the party responsible for compliance could
void the user's authority to operate the equipment
NOTE: This equipment has been tested and found to comply with the limits for a Class B digital
device, pursuant to Part 15 of the FCC Rules. These limits are designed to provide reasonable
protection against harmful interference in a residential installation. This equipment generates, uses
instructions, may cause harmful interference to radio communications. However, there is no
guarantee that interference will not occur in a particular installation. If this equipment does cause
harmful interference to radio or television reception, which can be determined by turning the
equipment off and on, the user is encouraged to try to correct the interference by one or more of
the following measures:
-- Reorient or relocate the receiving antenna.
-- Increase the separation between the equipment and receiver.
-- Connect the equipment into an outlet on a circuit different from that to which the receiver is
connected.
-- Consult the dealer or an experienced radio/TV technician for help.