SHUOYING DIGITAL SCIENCE and TECHNOLOGY H500 Car DVR User Manual
SHUOYING DIGITAL SCIENCE&TECHNOLOGY;(CHINA)Co.,Ltd Car DVR
User Manual

Preface:
Thank you for choosing this camera. This product features exquisite in industrial design, easy for carrying and
realized a shooting with large-angle.
This product manual describes how to use the product and provides detailed information including use, operation
precautions and technical specifications. Please carefully read through this product manual to achieve a thorough
learning and properly keep it for future reference. We wish this product will satisfy your demand and provide a
long-term service for you.
About the product
This is a new product of multifunctional automobile data recorder integrating with HD, shooting,
light-compensating lamp, audio recording, and external TF storage. By virtue of high performance and high
compression ratio video decoding technology, the product will transmit uncompressed HD video and multi-track
audio data at high quality. It is mainly used for car video recording, and is used to effectively improve evidences
for driving safety. The product is suitable for use in daily life, traveling and outdoor activity, and it will surely
make your life colorful.
Product features:
- Extremely compact in size, class A+ high resolution bugeye lens, suitable for high resolution picture taking
and video recording at various sites;
- Built-in low-light high-definition photosensitive elements enable to shoot super clear video and image in a
dark place;
- Be with superbright light compensation lamp function;
- Built-in lithium battery is capable for recording video while charging;
- Built-in microphone and speaker;
- Support high capacity TF card (Maximally support 32G);
- 4X digital zoom;
- Equipped with AV interface for connecting to TV set to view videos and images;
- G-Sensor
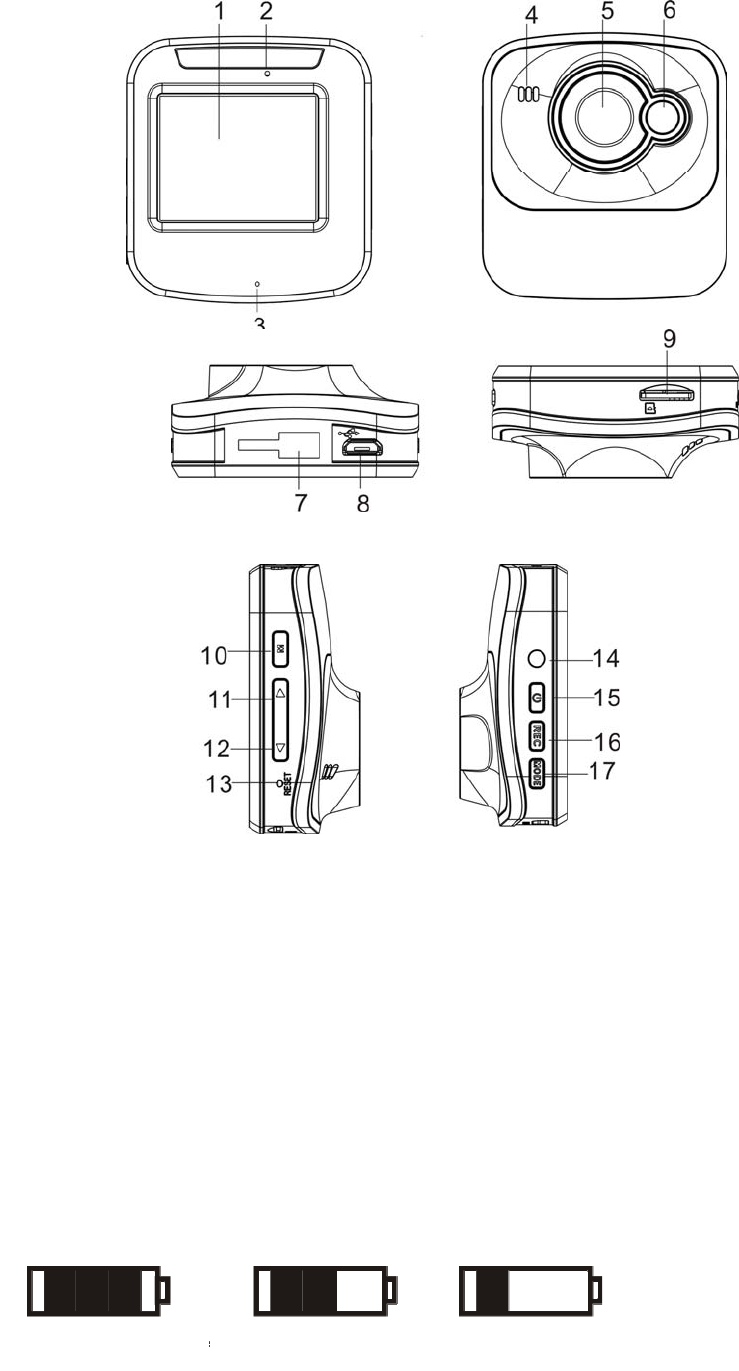
Product structure
1. 1.77” TFT screen; 2. Power indicator/busy indicator; 3.
Microphone jack; 4. Speaker; 5.
Lens; 6. Supplementary lighting; 7. Bracket slot; 8. USB interface; 9. TF card slot; 10 “M”
menu key; 11. Up/Zoom in; 12. Down/Zoom out 13. Reset; 14.AV jack; 15. Power; 16. REC
key; 17. Mode key
Charge the battery
1. Directly connect the card camera to USB interface for charging, and it can also be charged in power-of mode;
2. USB charging: connect the USB cable to the computer, and the other end is connected to the other end of the
camera for charging; it can also be charged in power-of mode;
3. Please refer to the figure for battery level charged.
Battery full Battery low
Battery slightly low
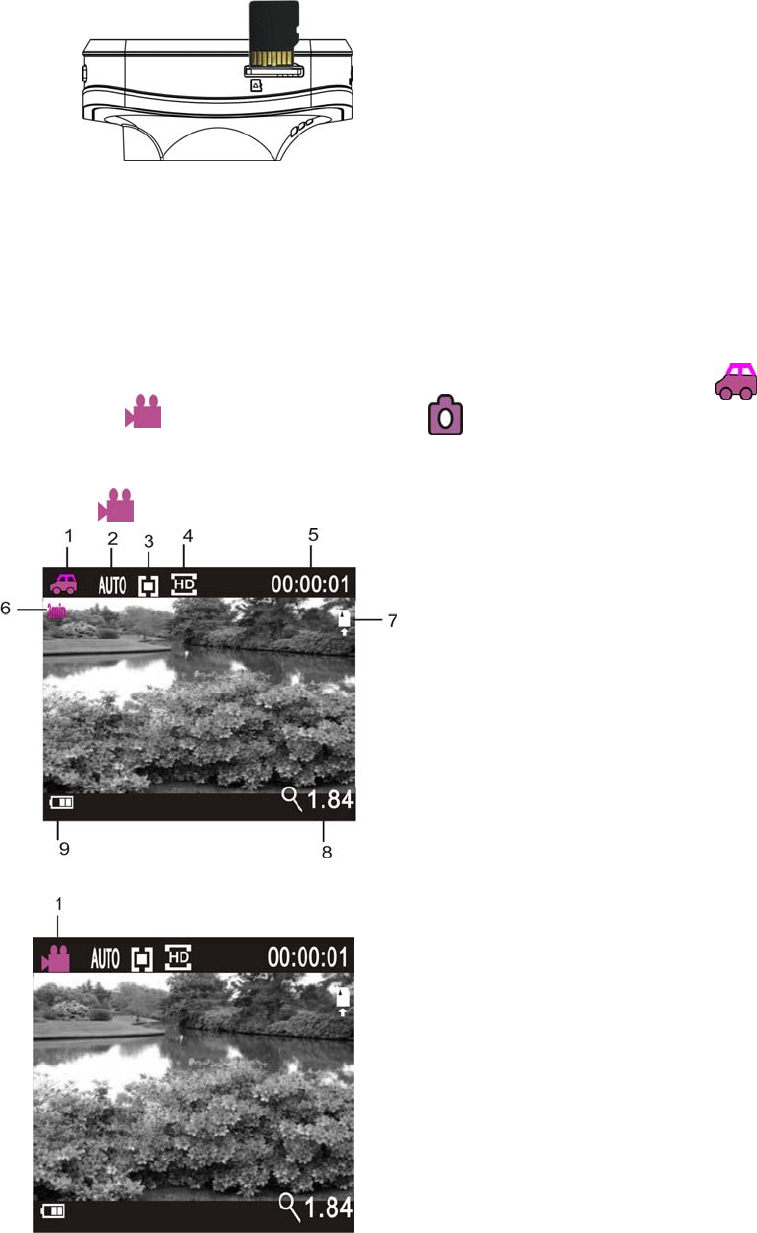
Install and take out the TF card:
1. Place the TF card into the card slot in the direction instructed till the TF card is fixed in the slot;
2. When taking out the TF card, please gently press the TF card till the TF card popped up and take it out;
3. When using the camera, it is needed to format the TF card;
It is recommended to use high-sped card Class 6 or above. When professional is used for video recording, Class10
card is need. When plugging in or of the card, please firstly power of the camera.
Operation instructions
1. Firstly insert the TF card, and then insert the car charger. Press the POWER key to start video recording. If to
plug off the car charger, it will automatically save the video recorded.
2. Press POWER key to power it on. Press MODE key to switch over between video/image/, indicates
driving mode, indicates video recording mode, indicates image mode. Modem icon will be
displayed at left top corner of the screen;
3. Set video recording menu REC Interval to OFF, return to homepage. At this time, the mode is video
recording ; press REC to start direct video recording, press Up/Down key for digital zooming.
Driving mode display
1. Indicates driving mode/video recording mode;
2. Indicates that white balance is automatic;
3. Indicates that spot metering is subject to
multipoint;
4. Indicates current resolution;
5. Indicates current video recording time;
6. Indicates repeated video file is 3 minute in
length;
7. Indicates TF card inserted;
8. Indicates current zoom is 1.84X;
9. Indicates current battery level
Video recording display
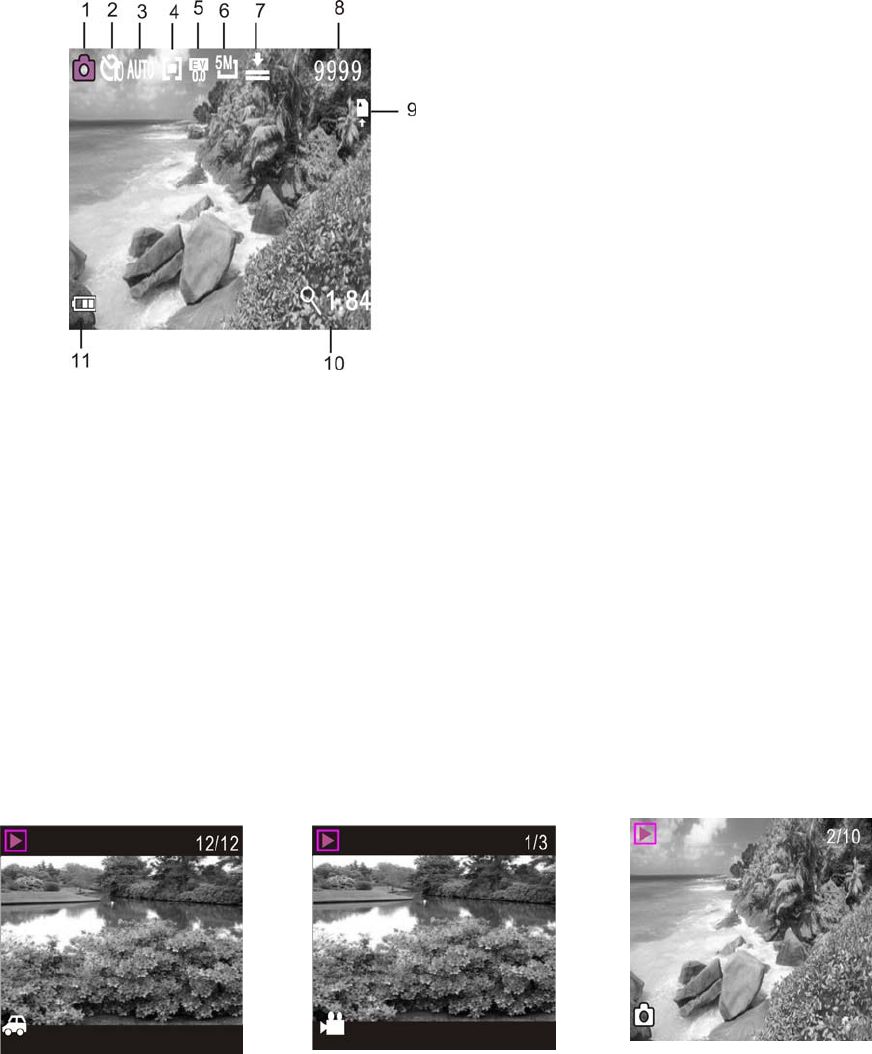
Image mode display
4. If to press MODE key to turn to replay mode, you may browse video/image, and play video recorded with this
device.
Browse image: Pres Up and Down key to select image/video.
Browse video: Pres Up and Down key to select video/image. Click REC key to play video file, press Up key to
stop playing video file, and press REC key once more to stop playing.
Replay mode display
Replay driving video file; Replay video file Replay image file
Note: Press POWER key to swit6ch over the driving video files.
4. Menu operation
1. Indicates image mode;
2. Indicates self-timer delay;
3. Indicates that white balance
currently is automatic;
4. Indicates spot metering is
subject to multipoint;
5. Indicates current exposure
compensation E/V value;
6. Indicates current image size;
7. Indicates current image quality;
8. Indicates quantity of files to
shoot
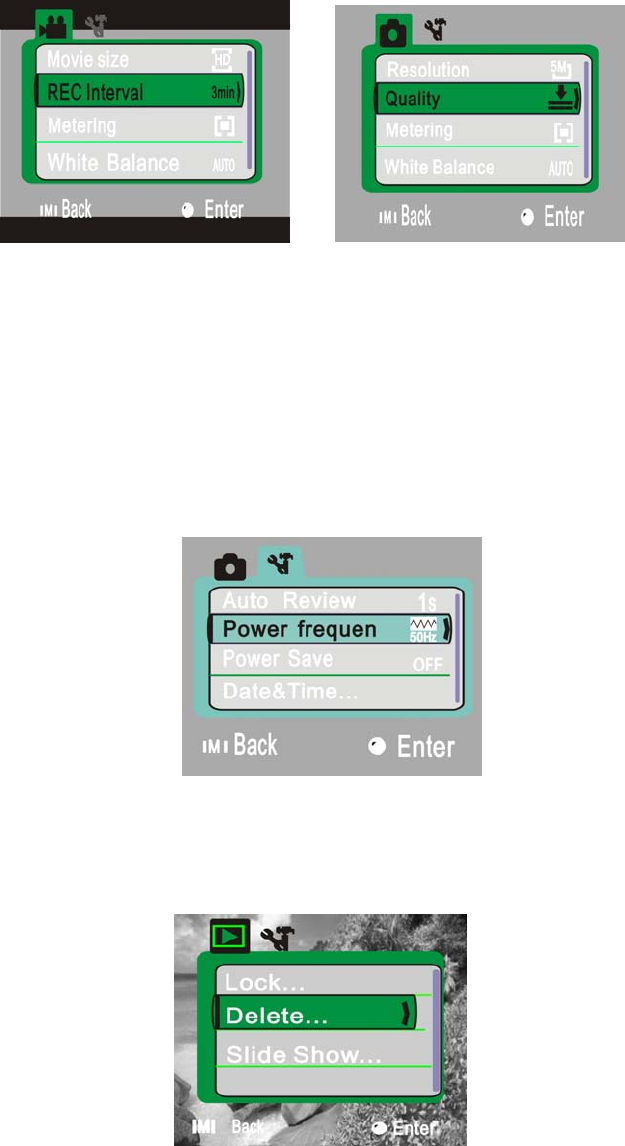
4.1 In video/image, replay mode, press “M” key to open the menu, then press Up and Down key to select item
from the menu, and then press REC key to enter sub-menu, and selected item in the menu will be
displayed with background color; then, press Up and Down key to select secondary menu, press REC key
for conformation; press the Menu key to exist from menu setting.
Video menus Image menu
4.2 In video mode, when recording video with the camera, press Menu key to make the screen off, and press
Menu key again to make the screen on.
5. System menu
After opening the menu by pressing Menu key, press the Menu key again to enter “system menu”, and then press
Up and Down key to select item from the menu, press REC key to enter sub-menu; then, press Up and Down key
to select secondary menu, press REC key for conformation; press the Menu key to exist from menu setting.
6. Replay mode menu
Press the Menu key to open replay main menu, press Up or Down key to select item from the menu, press REC
key to enter sub-menu; then, press Up and Down key to select secondary menu, press REC key for conformation;
press the Menu key to exist from menu setting.
Mode of recording video while charging

Connect the car charger to USB port of the device and it will enter the mode of recording video while charging.
6. Connect to computer to download image/video
When the camera enters the mode of removable disk after connecting to the computer, there will be a new
removable disk shown in the window of “My Computer”. The images shot or video recorded are stored in the
directory “DCIM\100MEDIA” of the removable disk. You may enter this directory to copy file onto hard disk of
youyr computer.
Note: During loading the file, please don’t disconnect USB, and the storage card is prohibited to plug of in
case of USB connected to avoid loss of data.
Note:
1. Computer operating system: WindowXP/Windows7 or above;
2. After plugging USB cable of, the device will automatically shut down.
7. Connect to TV for playing
1. You may use AV cable to connect to the computer for recording video, browsing and playing image
and video file.
Tips:
No drive installation is needed, and it can be used in power-on mode.
Note:
In case of system halt caused due to improper operation, you may restart the device by pressing the reset button,
and the device will return to normal.
Technical specification
Display 1.77”
Lens 120°ultra-wide field
Digit magnification 4x
Video resolution 1080P@15fps, 720P@ 30fps, VGA@ 30fps
Image resolution 5M,3M,1M
File format Image: JPG
Video: AVI
WDR Support
Seamless video recording Support
Breakpoint file saving function Support
YY, MM, DD, H, Min. Support
Carrier media TF card (Maximally support 32GB)
Multiple languages supported 1) English 2) French 3) Spanish

AV port Support
System NTSC/PAL
USB function 1) Storage
2) Camera
Note:
1. A TF card must be inserted if you need to take a photo, record a video, or download files on the terminal;
2. The Wi-Fi indicator will remain on when the terminal is connected to DV.
Warning: Changes or modifications to this unit not expressly approved by the party responsible for compliance could void the
user’s authority to operate the equipment.
NOTE: This equipment has been tested and found to comply with the limits for a Class B digital device, pursuant to Part 15 of the
FCC Rules. These limits are designed to provide reasonable protection against harmful interference in a residential
installation. This equipment generates, uses and can radiate radio frequency energy and, if not installed and used in accordance
with the instructions, may cause harmful interference to radio communications.
However, there is no guarantee that interference will not occur in a particular installation. If this equipment does cause
harmful interference to radio or television reception, which can be determined by turning the equipment off and on, the
user is encouraged to try to correct the interference by one or more of the following measures:
Reorient or relocate the receiving antenna.
Increase the separation between the equipment and receiver.
Connect the equipment into an outlet on a circuit different from that to which the receiver is connected.
Consult the dealer or an experienced radio/TV technician for help.
Shielded cables must be used with this unit to ensure compliance with the Class B FCC limits.
FCC ID:This device complies with Part 15 of the FCC Rules. Operation is subject
to the following two conditions : (1) this device may not cause harmful
interference, and (2) this device must accept any interference received,
including interference that may cause undesired operation.