SHUOYING DIGITAL SCIENCE and TECHNOLOGY PDV3600 Panoramic View Camera User Manual Table of Contents
SHUOYING DIGITAL SCIENCE&TECHNOLOGY;(CHINA)Co.,Ltd Panoramic View Camera Table of Contents
User manual
1
User’s Manual
PDV3600
2
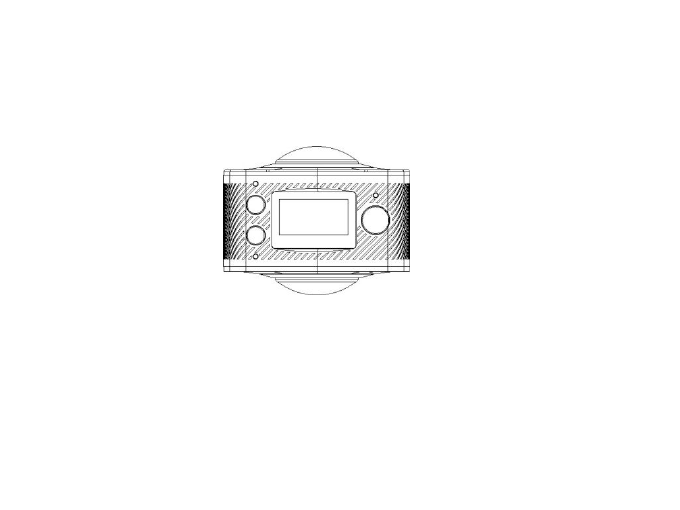
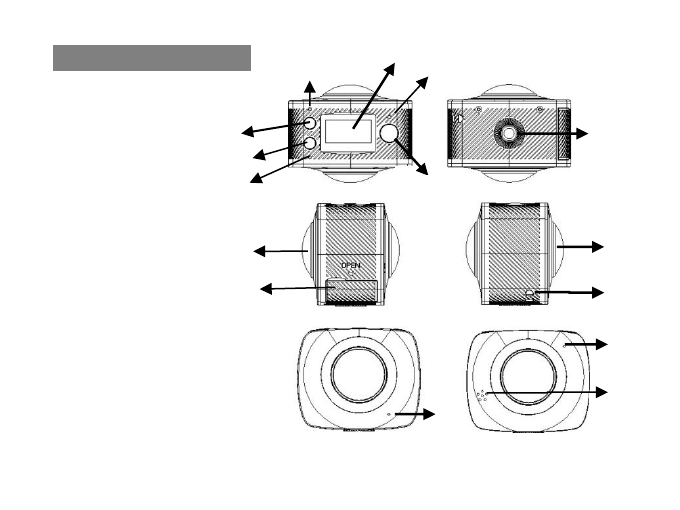
Appearance and buttons
3
2
1
10
1. LCD display screen
2. Power/Mode
3.WIFI Indicator (red)
4. Power indicator/Charging indicator
(Blue)
5.Wifi/Menu
6.Busy (red)
7.Shutter /OK key
8.Camera Lens*2(220°)
9. Triangle nut
10. Access flap(USB, TF)
11.Loudspeaker
12.Microphone
13. Lanyard hole
14. Reset Button
4
8
12
11
5
6
7
13
9
8
14
7
7

3
How to use your Wifi camera?
1. First, insert a micro SD or micro SDHC card; see the picture on the right;
SDHC above Class 6 is recommended. When the professional mode is on for video recording, Class 10 is
recommended for use.
Please close the camera when plug-in or pull-out the card.
2. Turn-on & Turn-off:
Turn-on: Press the on/off button and hold for about 2 seconds. With a sound of “Be-” from the buzzer, LCD
display screen will be on (default mode: video recording). Power indicator in red is normally on.
Power saving mode: When the camera is not under operation for 1 minute (system default), it will be in the

4
power saving mode. The LCD display screen will be off automatically. The camera can be activated when any
button is pressed.
Turn-off: Press the button and hold for about 3 seconds when the camera is not in operation. With a sound
of “Be-” from the buzzer, the camera will be off.
The camera will be automatically off when it is in power saving mode for 3 minutes (system default).
“GOODBYE” will be on the LCD screen when it is off.
3. Charge the camera
Built-in rechargeable lithium battery is used for the camera:
The camera can be charged when it is connected to the computer USB with a USB cable. The power
indicator will be blue when it is charging. It shall take 4 hours because of the limited electric current of the
computer. The blue light will be off when charging is completed.
4. Function mode conversion
The camera has two modes, i.e. video recording and photograph shooting. They can be converted by pressing
5
the button on/off /MODE or through APP.
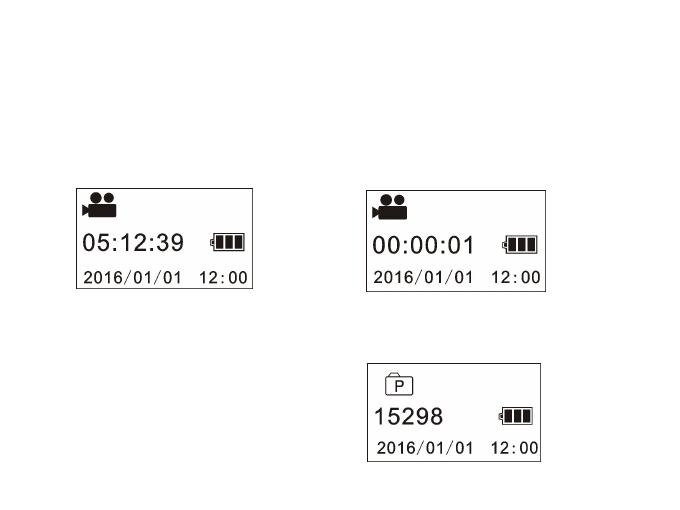
Video recording: (see the following pictures) press the shutter to start shooting and video recording. The
buzzer will send out one sound when it starts; the busy button (red) will be twinkling during the video recording
process. LCD timer starts timing. Press the button again when video recording is over.
Photograph shooting: Short press the take-photo button to shoot photographs after it is switched to the
photo-shooting mode. The buzzer will send out 1 sound and the busy button will be on once when 1 photo is shot.
The counter will countdown the photos accordingly.

6
5. Menu operation:
Press the WIFI button for 2 seconds to activate the menu:
设置模式菜单
Enter the menu, short press the WIFI button to move the cursor for selection; press the shutter button
for confirmation; extended press the WIFI button to cancel the setting or exit.
Power Save: the power saving mode has 4 settings, i.e. OFF/1min/3min/5min. When the setting-time is up,
the camera will enter power saving mode and the screen will be off.
Date & Time: system time setting
Language: language setting, English is by default.
Date Stamp: date stamp setting, OFF/Date/Date & time are optional.
Factory Reset: factory reset, YES/NO are optional
System: check for system information (software version number); check the information on the memory card
(capacity and available space)
Format: formatting the memory card, YES/NO are optional.
7
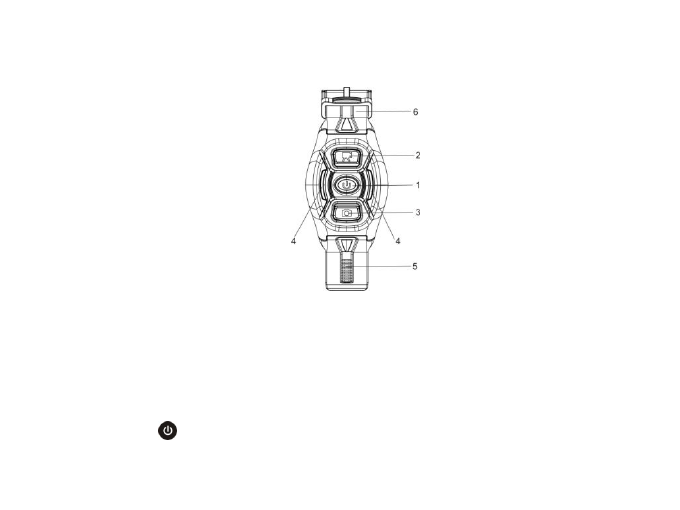
6. Watch Remote Controller:
1. Watch remote controller is shown
in the picture:
1.power
2.video button
3.photo button
4.button indicator(red)
5.watchband
6.watch clasp
2. Instructions:
The camera can be operated for starting up, video recording, photograph shooting and shutting down when
the watch remote controller is used within the distance of 30 meters. Press the related button on the controller for
videos, photos or turning off.
P.S.: the indicator on both sides will be on in red if any button is pressed.
3. Turn-on & turn-off the camera
Turn-on: press button, stop pressing till the indicator is off. The camera is on with a sound sent out by

8
the buzzer.
Turn-off: press button, the camera will be off with a sound sent out by the buzzer.
4. Battery replacement:
Battery should be replaced when the power is low. Open the battery case carefully with a coin to avoid
scrape.
APP (for Android and iOS)
I. How to get the APP Installer?
1. For Android users, please search for “SYVR360” in the Play store and install it according to its
instructions; or scan the 2-dimentional bar code on the graphic carton for installation.
2. For iOS users, please search for “SYVR360”in App Store and install it according to its instructions; or

9
scan the 2-dimentional bar code on the graphic carton for installation.
II. APP Application
1. After installing SYVR360 (provided by the supplier or Internet) on the mobile phone or tablet PC,
the icon will be shown on the screen;
2. Insert a card and turn the video camera on, press the Wi-Fi button to connect Wi-Fi, whose icon will be shown
on the screen;
3. Turn on Wi-Fi on the mobile phone or tablet PC, search for AP with the signal name of PDV3600SA (default),
then connect it till the connection is successful.
4. Click the App icon on the mobile phone or tablet PC and run related operation directly according to the
reminder when the preview pictures transited to the mobile phone or tablet PC.
Notice:
1. Please insert a TF card to the video camera if you need to shoot or download pictures by mobile phone or

10
tablet PC terminal.
2.Wi-Fi indicator will be normally on when the mobile phone or tablet PC terminal is connected to the video
camera.
When applied to the PC: _______
The video camera has the plug and play function. When connected to a PC by the USB cable, it will
automatically switch to the mobile HDD mode.
The removable disc icon will appear on “My Computer”. Your photos are stored in the folder I:\jpg (I is
removable disc for this device) in the removable disc. And your videos are stored in the folder I:\video;
Notice: No need to install drivers to run its mobile HDD function if your operating system is windows 2000 or
above.

11
Technical Parameters
Image sensor 8 million pixel (CMOS) x2
Function Mode Video recording; photograph shooting
Camera lens F2.0 f=1.1mm
Video resolution ratio 1920*1080P (30fps)
Photograph resolution ratio 3008*1504
File format
video H.264(MOV)
photo JPG
Memory Medium TF card(maximum:32GB)
USB port Hi-speed USB 2.0 port
Power Built-in lithium battery 1500 mAh

12
Label Statement:
This device complies with part 15 of the FCC Rules. Operation is subject to the following two conditions: (1)
This device may not cause harmful interference, and (2) this device must accept any interference received,
including interference that may cause undesired operation.
FCC Statement
This equipment has been tested and found to comply with the limits for a Class B digital device, pursuant to part
15 of the FCC rules. These limits are designed to provide reasonable protection against harmful interference in a
residential installation. This equipment generates, uses, and can radiate radio frequency energy and, if not
installed and used in accordance with the instructions,
may cause harmful interference to radio communications. However, there is no guarantee that interference will
not occur in a particular installation.
If this equipment does cause harmful interference to radio or television reception, which can be
determined by turning the equipment off and on, the user is encouraged to try to correct the

13
interference by one or more of the following measures:
• Reorient or relocate the receiving antenna.
• Increase the separation between the equipment and receiver.
• Connect the equipment into an outlet on a circuit different from that to which the receiver
is connected.
• Consult the dealer or an experienced radio/TV technician for help.
WARNING: Changes or modifications not expressly approved by the party responsible for
compliance could void the user's authority to operate the equipment.
The device has been evaluated to meet general RF exposure requirement. The device can
be used in portable condition without restriction.